If you love art that feels honest, cozy, and a little timeworn, primitive painting is such a satisfying lane to explore. Here are my favorite primitive painting ideas—starting with the classic folk icons we all crave and ending with a few unexpected twists you can still keep beautifully primitive.
Big-Shaped Barnyard Animals
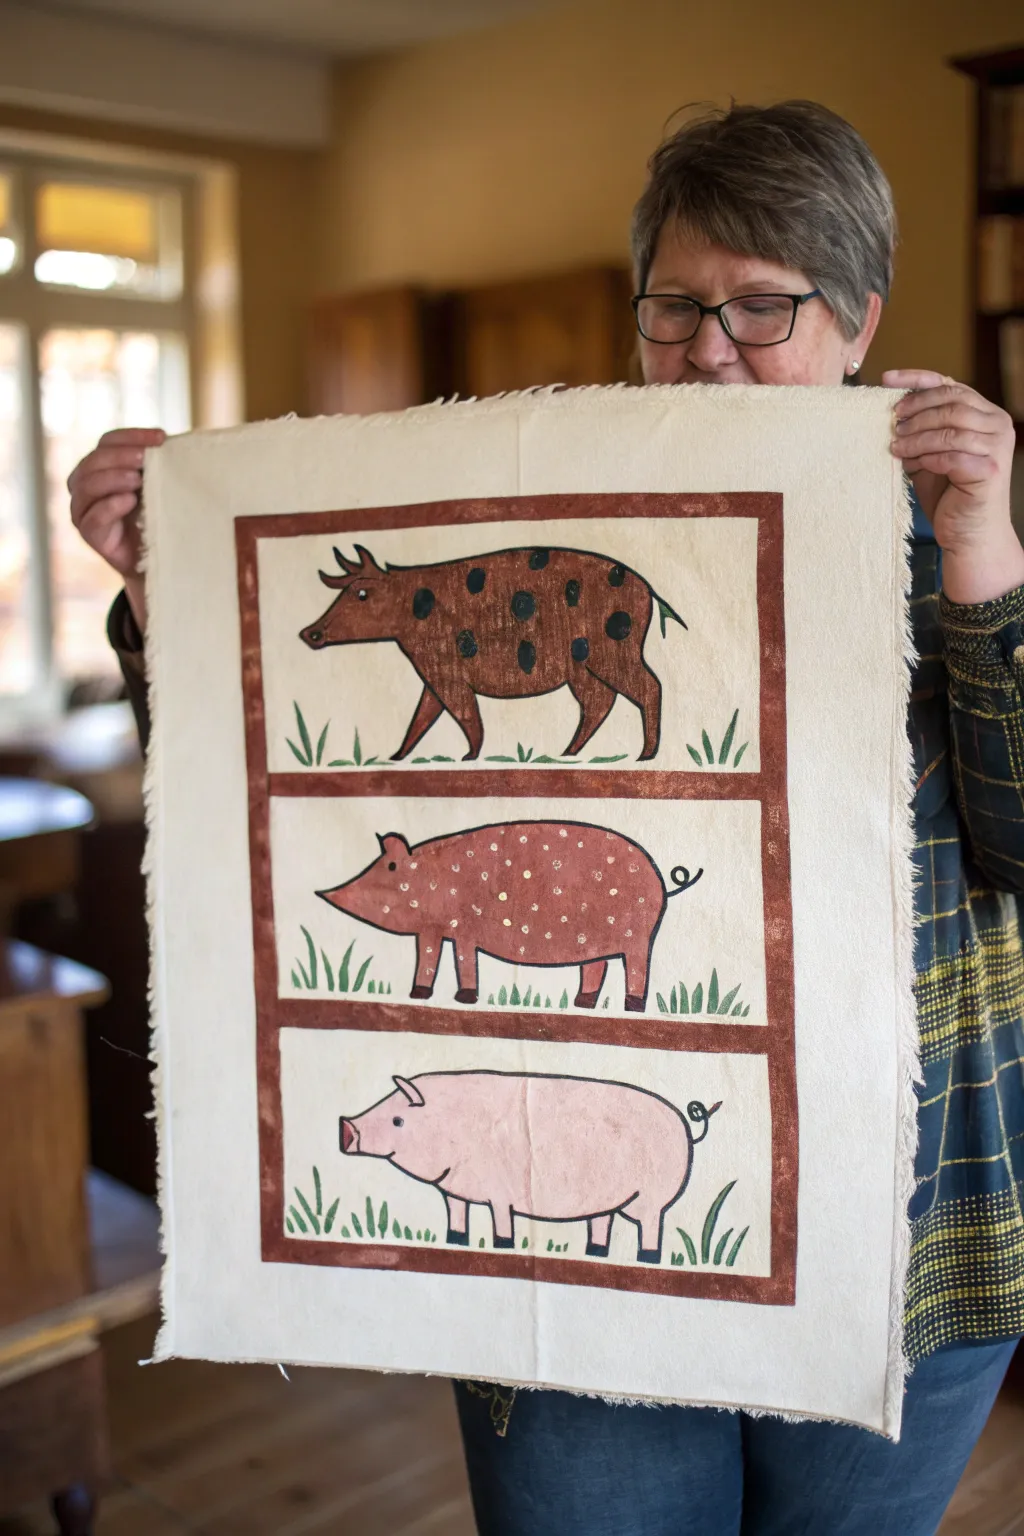
Capture the charm of early American folk art with this delightful fabric panel featuring three stacked barnyard friends. This primitive painting project uses unframed canvas and earthy tones to create a piece that feels both rustic and timeless.
Detailed Instructions
Materials
- Heavyweight cotton canvas or osnaburg fabric (approx. 18″ x 24″)
- Fabric medium
- Acrylic craft paints (burnt sienna, black, cream/off-white, light pink, dark brown)
- Flat shader brushes (1/2″ and 1/4″)
- Fine liner brush (size 0 or 1)
- Painter’s tape or masking tape
- Pencil or chalk transfer paper
- Ruler
- Paper plate or palette
- Iron and ironing board
Step 1: Preparation and Background
-
Prepare the Fabric:
Cut your canvas to the desired size, leaving the edges raw. To create that authentic primitive fringed look, pull a few threads from each side until you have a nice, frayed border about half an inch deep. -
Iron Smooth:
Give the fabric a quick press with an iron to remove any creases, ensuring a completely flat surface for painting. -
Mark the Grid:
Using a ruler and a light pencil touch, draw a large outer rectangle leaving a generous border of unpainted canvas. inside this, divide the space into three equal horizontal sections. -
Tape the Borders:
Apply painter’s tape along the outside etched lines of your main rectangle. This helps keep your painted frames crisp and simulates a printed block look later. -
Paint the Background Panels:
Mix a small amount of fabric medium with your cream or off-white paint. Apply this mixture to fill the three rectangular sections, brushing smoothly to cover the weave. Let this base coat dry completely.
Step 2: Creating the Frames
-
Paint the Dividers:
Once the cream base is dry, use a 1/2-inch flat brush loaded with burnt sienna (mixed with fabric medium) to paint the thick horizontal dividers between the animal panels and the outer border frame. -
Dry and Peel:
Allow the brown frame paint to dry to the touch, then carefully peel away your painter’s tape to reveal the clean outer edge.
Bleeding Lines?
If paint bleeds under the tape, don’t panic. Once dry, touch it up with the cream background color, or embrace the imperfection—primitive art celebrates the handmade look.
Step 3: Painting the Animals
-
Sketch the Outlines:
Lightly sketch the animal shapes into each panel: a cow at the top, a spotted hog in the middle, and a pink pig at the bottom. Keep the shapes simple, rounded, and slightly exaggerated to nail that primitive style. -
Base Color: The Cow:
For the top cow, fill in the body shape with a medium brown tone. Leave the horns and udder area unpainted or paint them a lighter tan for contrast. -
Base Color: The Spotted Hog:
Paint the middle animal with a rust-red or terracotta shade. Ensure good coverage, but don’t worry if the fabric texture shows through slightly; it adds character. -
Base Color: The Pink Pig:
Fill the bottom pig with a soft, pale pink. You may need two coats here if the color is too translucent against the cream background. -
Adding Spots:
Once the base coats are dry, add details. For the top cow, paint large, irregular black spots. For the middle hog, use the handle end of a paintbrush dipped in cream paint to dot small speckles all over its back.
Vintage Patina
To age your artwork instantly, brew a cup of strong coffee and lightly stain the unpainted fabric borders with a sponge. It gives a wonderful antique warmth.
Step 4: Details and Outline
-
Outline Work:
This step brings the primitive look together. Use a fine liner brush and thinned black paint to outline every animal. Keep the line weight slightly inconsistent—a shaky or variable line looks more authentic than a perfect one. -
Facial Features:
Add small black dots for eyes on all three animals. Use a tiny touch of pink or red for the snouts and ears where appropriate. -
The Tails:
Paint the tails using your liner brush. Give the pig tails a distinct curly-bue for personality. -
Adding Grass:
At the bottom of each panel, use a small flat brush or liner brush to flick upward strokes of green paint, creating simple clumps of grass. Vary the height and angle for a natural look. -
Heat Set:
Allow the entire piece to cure for 24 hours. I usually heat set the paint by placing a cloth over the design and ironing it on a medium setting to make the design permanent.
Hang your finished canvas with small clips or frame it simply to enjoy your rustic barnyard trio.
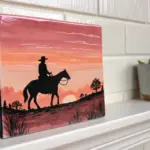
Classic Rooster Profile
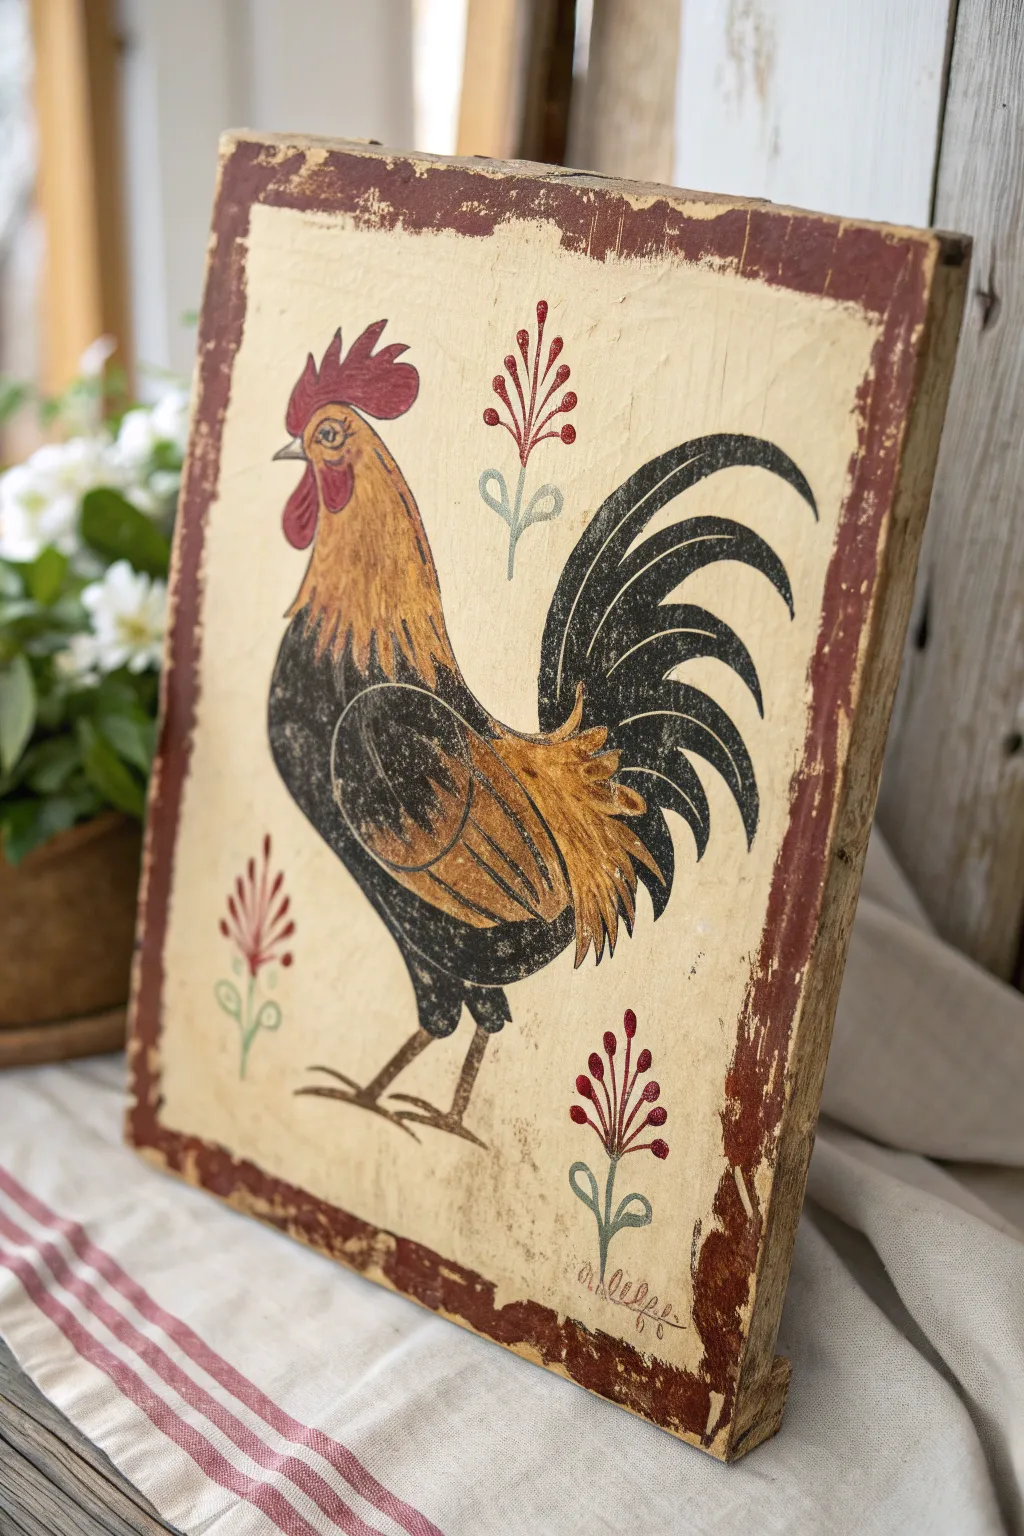
Capture the charm of early American primitives with this distressed rooster painting on wood. The weathered finish and mute color palette give it the authentic look of a centuries-old farmhouse find.
How-To Guide
Materials
- Thick wooden board (approx. 10×12 inches)
- Sandpaper blocks (medium and fine grit)
- Acrylic craft paints: Cream/Antique White, Barn Red, Lamp Black, Mustard Yellow, burnt umber
- Crackle medium or school glue
- Flat paintbrushes (1 inch and 1/2 inch)
- Round detail brushes (size 2 and 4)
- Dark antique wax or glazing medium
- Paper towels or soft rag
- Graphite transfer paper
- Matte spray sealer
Step 1: Board Preparation
-
Sand the surface:
Begin by thoroughly sanding your wooden board. Pay special attention to the corners and edges, rounding them off aggressively to simulate decades of wear. -
Apply base color:
Paint the entire front and sides of the board with a base coat of Barn Red. This underlayer will peek through later to create the distressed effect. -
Seal tightly:
Once the red paint is fully dry, apply a thin coat of clear rubbing wax or run a plain candle stick along the edges and random spots in the center. This acts as a resist for the next layer. -
Add the cream topcoat:
Paint the entire face of the board with your Cream/Antique White acrylic. Apply it somewhat thickly. As it dries, the wax underneath might cause slight separation, which is perfect.
Step 2: Distressing the Background
-
Rough it up:
Wait for the cream paint to cure completely. Take a medium-grit sanding block and sand firmly over the edges and the waxed spots until the Barn Red layer reveals itself significantly. -
Create the border:
Using a 1/2 inch flat brush and Barn Red paint, freehand a rough border about an inch from the edge. Keep the lines purposefully imperfect and slightly shaky to mimic hand-painted folk art.
A Crackled Effect
For more texture, apply a layer of school glue over the red base coat. While the glue is tacky (not dry), brush on the cream topcoat. It will crackle as it dries.
Step 3: Painting the Rooster
-
Transfer the sketch:
Place your graphite transfer paper on the board and lightly trace your rooster profile and floral sprigs. Don’t press too hard, just enough to see faint guidelines. -
Block in the body:
Start with Lamp Black. Paint the main curved shape of the rooster’s lower body and tail feathers. Use long sketching strokes for the tail to suggest movement. -
Add the neck and head:
Switch to Mustard Yellow mixed with a tiny drop of burnt umber. Paint the neck area, blending it slightly into the black body where they meet to create a feathered transition. -
Detail the face:
Using a small round brush, paint the comb and wattle with Barn Red. Add a small beak in a dark gray or diluted black, and paint the eye with a black dot surrounded by a thin white ring. -
Refine the feathers:
Mix a lighter golden-orange tone. Using a fine liner brush, add quick, short dashes over the yellow neck and the wing area to simulate individual feathers. -
Define the wing:
Outline the wing shape in black over the yellow body section, then add interior detail lines to separate the wing feathers. -
Paint the legs:
With a thin brush and watered-down black paint or dark brown, create the simple, stick-like legs and feet. This primitive style doesn’t require anatomical perfection.
Muddy Colors?
If your antiquing glaze makes the painting look too dark or dirty, dampen your rag slightly to lift more pigment off the high points, leaving darkness only in crevices.
Step 4: The Final Touches
-
Add floral accents:
Paint the simple sprigs on either side of the rooster. Use a sage green or gray-green for the stems and leaves, adding small red dots or tear-drop shapes for the stylized blossoms. -
Antique glazing:
Once all painting is bone dry, mix a small amount of burnt umber paint with water (or use antiquing wax). Brush it over the entire piece, working in sections. -
Wipe back:
Immediately wipe off the excess glaze with a lint-free rag. The dark color will settle into the sanded grooves and brushstrokes, instantly aging the piece. -
Seal:
Finish with a coat of matte spray sealer to protect the artwork and unify the sheen of the different paint layers.
Display your rustic rooster on a mantel or kitchen shelf to add instant history to your home


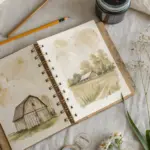
Chunky Sheep in a Meadow
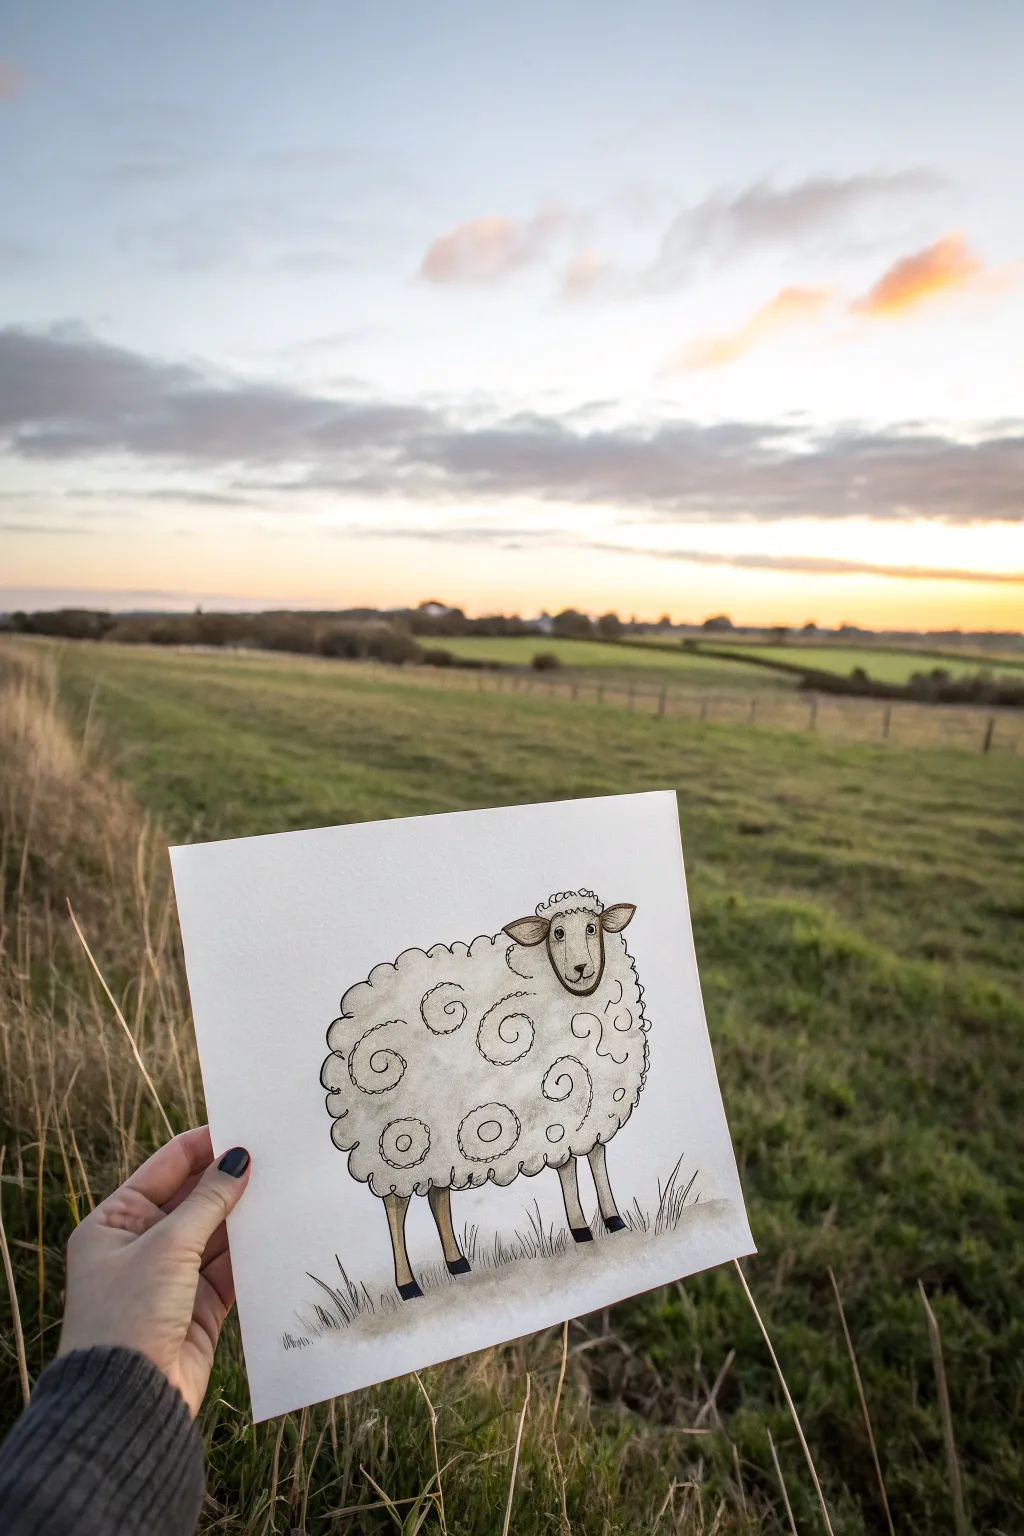
Capture the charm of the countryside with this delightful watercolor and ink illustration featuring a chunky, curly-fleeced sheep. This project combines simple line work with soft washes to create a characterful piece perfect for greeting cards or framed pasture scenes.
Step-by-Step Guide
Materials
- Cold press watercolor paper (square format)
- Pencil (HB or H)
- Kneaded eraser
- Fine liner waterproof pens (black, sizes 0.1 and 0.5)
- Watercolor paints (Yellow Ochre, Burnt Umber, Ivory Black)
- Small round watercolor brush (size 2 or 4)
- Jar of clean water
- Paper towels
Step 1: Sketching the Form
-
Map out the body:
Start lightly with your pencil. Draw a large, slightly flattened oval shape for the sheep’s main woolly body. It should look like a puffy cloud. -
Position the legs:
Add four tapered sticks extending downward for the legs. The front two should be slightly closer together than the back two to give a sense of stance. -
Draft the head:
Sketch a smaller, elongated oval shape overlapping the upper right side of the body for the head. Add two teardrop shapes on either side for the ears. -
Refine the outline:
Go back over your body oval and replace the smooth line with a scalloped, bumpy line to suggest fluffy wool texture all around the perimeter.
Step 2: Inking the Details
-
Ink the wool perimeter:
Using the waterproof 0.5 fine liner, trace over your scalloped pencil lines. Keep the pen moving loosely to create organic, imperfect bumps. -
Draw the face features:
Ink the head shape. Draw two wide-set eyes with small pupils, a ‘Y’ shape for the nose and mouth, and outline the drooping ears. -
Add the legs and hooves:
Outline the legs carefully. At the bottom of each leg, draw a horizontal line to separate the hoof, then color the hooves solid black with your pen. -
Create interior texture:
Switch to your finer 0.1 pen. Inside the woolly body, draw several large, loose spirals. These mimic the curls of the fleece without cluttering the drawing. -
Add scattered curls:
Fill in the empty spaces between the spirals with small ‘c’ shapes and tiny squiggles to make the coat look dense and textured. -
Ground the sheep:
Draw short, vertical tufts of grass around the sheep’s hooves using quick, upward flicks of the pen to show it standing in a meadow. -
Erase pencil guides:
Once the ink is completely dry—give it a minute or two—gently rub your kneaded eraser over the entire drawing to remove the graphite sketch.
Loose Lines
Don’t try to make your spirals perfect circles. Letting the pen wobble and break the line occasionally makes the wool texture look much more organic.
Step 3: Painting with Wash
-
Mix a creamy base:
Dilute a tiny amount of Yellow Ochre with plenty of water. You want a very pale, warm off-white color, not a bright yellow. -
Wash the body:
Paint the entire woolly body with this pale wash. I find it helps to leave a few tiny spots white near the top for highlights. -
Shade the underbelly:
While the body is still slightly damp, drop a watery mix of Burnt Umber along the bottom edge of the sheep to create a shadow that gives the form volume. -
Paint the face and legs:
Mix a stronger concentration of Burnt Umber (light brown). Carefully paint the face, ears, and legs, avoiding the eyes. -
Add tonal depth:
Wait for the face layer to dry, then add a second, darker layer of brown just under the ears and chin to push those areas back. -
Paint the ground:
Mix a watery greyish-brown using your palette scraps. Brush a horizontal wash right across the bottom over the grass lines to ground the figure. -
Add final details:
If desired, use a tiny amount of very watered-down Ivory Black to add subtle shadows inside the spiral curls to make them pop.
Golden Hour Glow
Add a very faint wash of pink or violet to the shadow side of the sheep (the bottom left) to suggest a sunset reflection on the wool.
Now you have a charming little sheep ready to graze on your gallery wall


Friendly Pig With Patchwork Spots
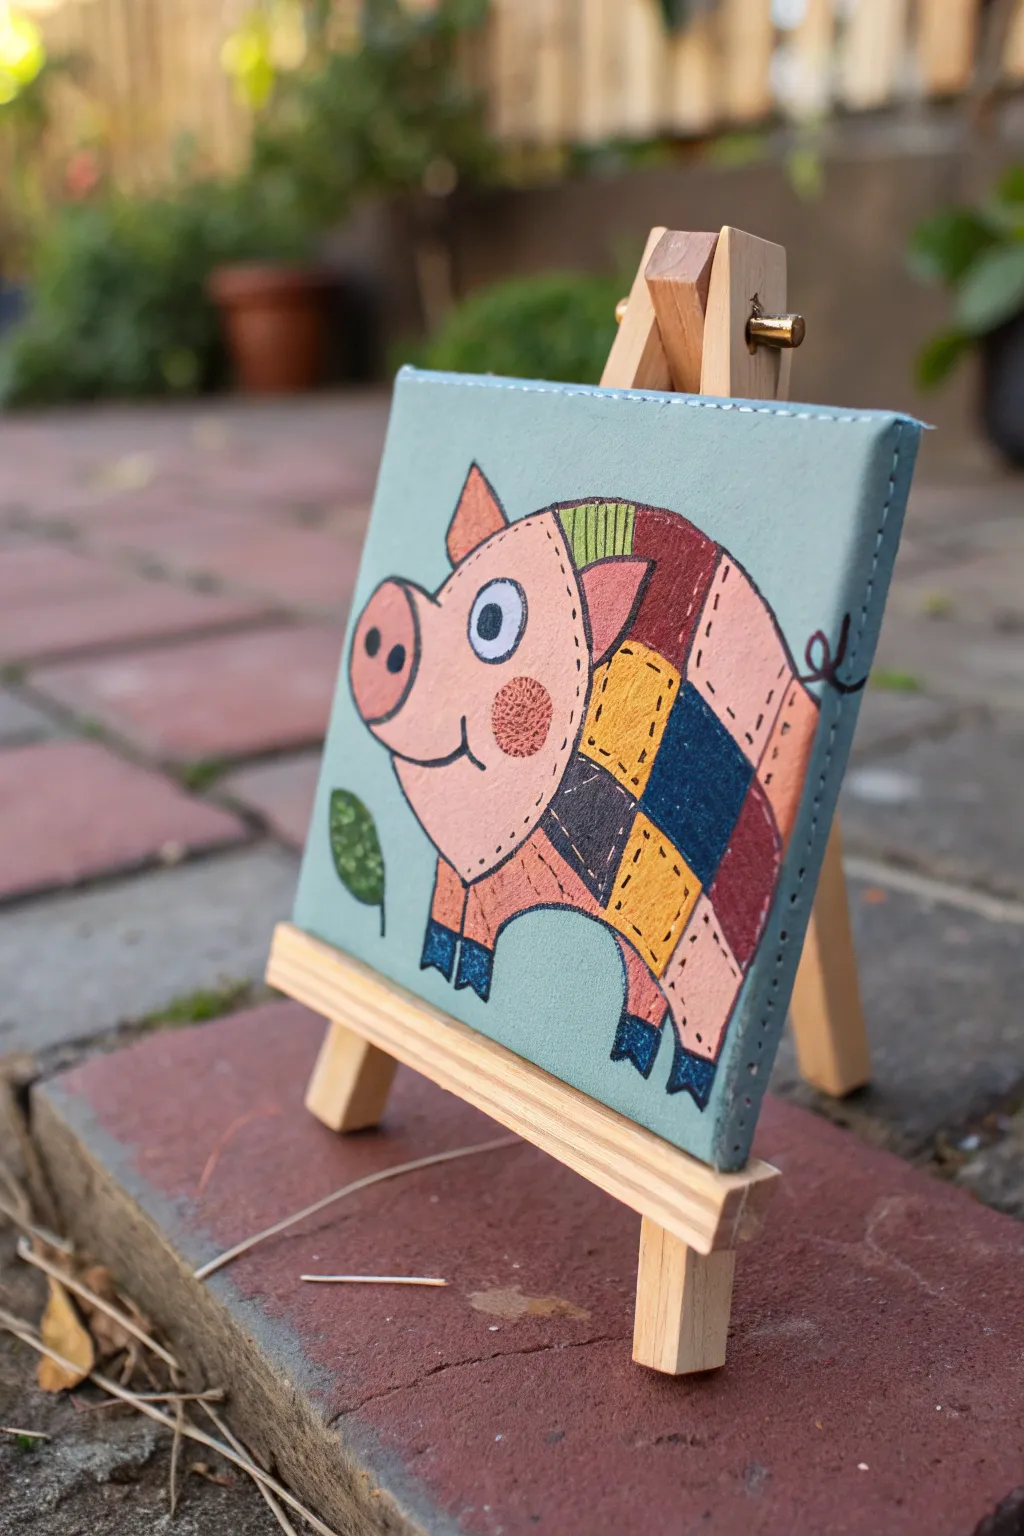
This charming primitive-style project mimics the cozy look of a quilt on a unique faux leather canvas. With its warm patchwork colors and stitching details, this friendly pig makes a delightful miniature masterpiece for a small easel.
Detailed Instructions
Materials
- Small square canvas (approx. 4×4 or 5×5 inches)
- Light blue-green faux leather or vinyl fabric
- Multi-surface acrylic paints (peach, dark brown, rust red, mustard yellow, navy blue, green, white)
- Black fine-point permanent marker or liner pen
- Fabric glue or heavy craft glue
- Fine detail paintbrushes (sizes 0 and 2)
- Pencil for sketching
- Small wooden display easel
Step 1: Preparing the Base
-
Wrap the Canvas:
Cut a piece of light blue-green faux leather approximately 1.5 inches larger than your canvas on all sides. Apply a thin layer of heavy craft glue to the front of the canvas and center the leather, smoothing out any air bubbles. -
Scale and Secure:
Fold the excess leather around the back edges of the canvas frame, pulling it taut but not enough to warp the canvas. Glue the flaps down on the back or staple them for extra security. -
Add Stitched Edges:
Using a fine brush and white paint, carefully paint small, evenly spaced dashes along all four outer edges of the wrapped canvas to simulate a running stitch border. Let this dry completely before starting the main sketch.
Step 2: Sketching and Blocking
-
Outline the Shape:
Lightly sketch the pig’s silhouette using a pencil. Start with a large oval for the body and a smaller circle for the head, connecting them smoothly. Add the snout, triangular ears, and short rectangular legs. -
Draw the Grid:
Divide the pig’s body into a patchwork grid using curved lines that follow the rotund shape of the pig. Create various sections like squares and triangles to serve as the ‘patches’. -
Base the Pig Skin:
Paint the head, snout, legs, and a few body patches in a soft peach color. You may need two coats here to ensure the leather texture is covered smoothly. -
Fill the Patches:
Color in the remaining body patches with alternating warm tones. Use rust red, dark brown, and mustard yellow for a cozy, autumnal palette. Add one distinctive patch in navy blue for contrast.
Paint Adhesion Tip
Work in thin layers. Faux leather is non-porous, so thick blobs of acrylic might peel off later. Several thin coats are more durable.
Step 3: Details and Decoration
-
Add the Snout and Eye:
Paint two dark oval nostrils on the snout. Create a large white circle for the eye with a smaller black pupil inside, adding a tiny white dot for a highlight. -
Cheeky Details:
Mix a slightly darker reddish-pink shade and dab a rough circle on the cheek to create a ‘rosey’ blush effect. Use a stippling motion with your brush for texture. -
Hooves and Tail:
Paint the very tips of the feet in navy blue or black to define the hooves. For the tail, use the black liner pen or very fine brush to draw a squiggly, curly line coming off the pig’s rear. -
Leaf Accent:
In the lower left corner, paint a simple green leaf shape floating near the pig. Add tiny white or light green dots inside it to give it texture.
Go 3D
Instead of painting the stitching, use an actual needle and embroidery floss to stitch through the canvas for real texture.
Step 4: Stitching the Look Together
-
Outline Work:
Once all paint is thoroughly dry, use a black fine-point marker or a liner brush with thinned black paint to outline the entire pig and every individual patchwork section. Keep the lines somewhat loose for a hand-drawn feel. -
Faux Stitching:
Inside the patchwork sections, draw small dashed lines just inside the black outlines. This mimics embroidery thread and reinforces the quilt aesthetic. -
Final Highlights:
Add tiny white scratches or dashes on the darker patches (like the navy and brown squares) to simulate wear or fabric texture. -
Display:
Place your finished mini canvas onto the wooden easel to complete the rustic presentation.
Your little patchwork pig is now ready to add a spot of folk-art cheer to any shelf or desk
BRUSH GUIDE
The Right Brush for Every Stroke
From clean lines to bold texture — master brush choice, stroke control, and essential techniques.
Explore the Full Guide
Prize Cow Portrait With Ribbon
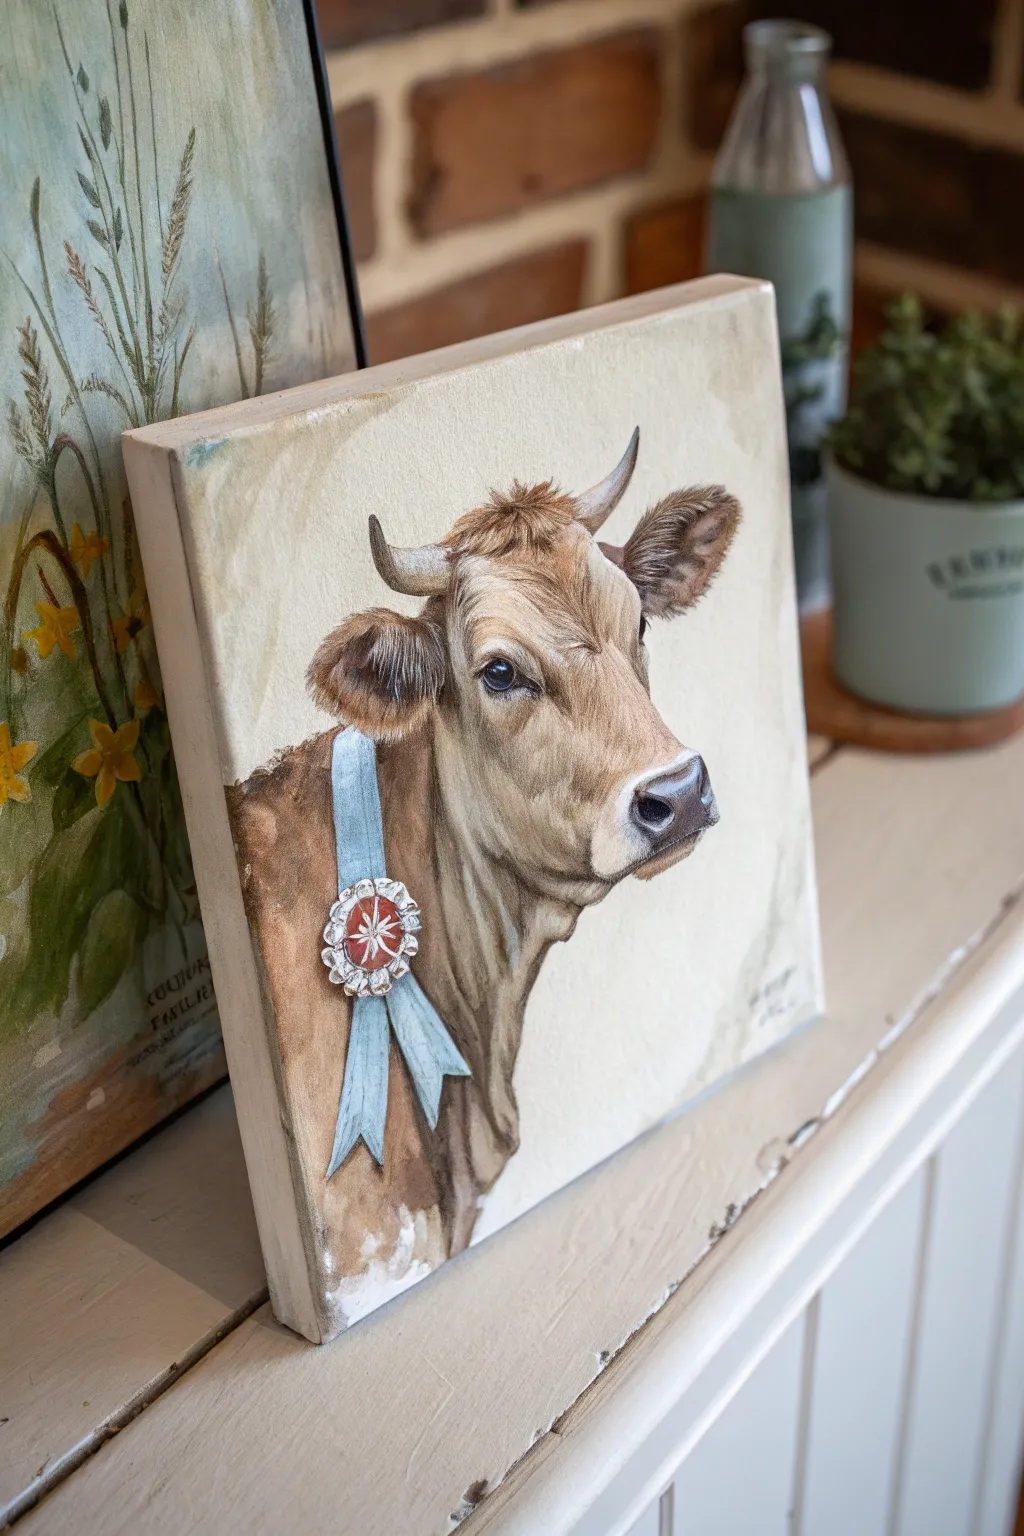
Capture the rustic charm of a country fair with this gentle portrait of a prize-winning cow. Featuring soft earth tones and a distressed background, this primitive-style painting brings a touch of pastoral elegance to any shelf or mantel.
Step-by-Step
Materials
- Square stretched canvas (approx. 8×8 or 10×10 inches)
- Acrylic paints: Burnt Umber, Raw Sienna, Yellow Ochre, Titanium White, Mars Black, Ultramarine Blue, Cadmium Red
- Assorted brushes: 1 inch flat wash, #6 and #8 filbert, #2 round for details
- Slow-drying medium or retarder (optional)
- Clean water and paper towels
- Graphite paper for transferring sketches
Step 1: Preparing the Primitive Background
-
Base Coat:
Mix Titanium White with a tiny drop of Yellow Ochre to create a warm, creamy off-white. Using the 1-inch flat brush, cover the entire canvas, including the sides. Two coats may be necessary for full opacity. -
Aging the Edges:
While your base is dry, take a very small amount of watered-down Burnt Umber on a paper towel or dry brush. Roughly dab and wipe this along the very edges and corners of the canvas to create a dirty, aged patina effect. -
Sketch Transfer:
Lightly sketch the cow’s profile and the ribbon onto the canvas using a pencil. If you aren’t confident in freehand drawing, print a reference photo and use graphite paper to transfer the main outlines.
Step 2: Blocking in the Cow
-
Identifying Shadow Areas:
Mix Burnt Umber with a touch of Mars Black. Using the #8 filbert brush, paint the darkest areas first: inside the ears, the nostrils, the deep crease of the neck, and the pupil of the eye. -
Mid-Tones:
Create a caramel color using Raw Sienna and a little White. Block in the main body of the cow’s face and neck. Use loose strokes that follow the direction of the fur growth—generally moving away from the nose and eyes. -
Lighter Fur:
Mix a lighter beige using White and just a touch of Raw Sienna. Apply this to the snout area, the bridge of the nose, and the highlighted areas around the eyes and ears. Let these base layers dry completely.
Soften the Edges
Don’t make the cow’s outline too sharp. Feather the paint slightly into the background to make the animal look fuzzy and dimensional rather than like a sticker.
Step 3: Building Texture and Details
-
Creating Fur Texture:
Switch to your #6 filbert or a small round brush. Using various mixes of your brown tones, paint short, flicking strokes to simulate hair. Layer lighter strokes over darker ones to create depth, especially along the jawline and neck rolls. -
Refining the Eye:
Add a small, sharp dot of pure Titanium White to the upper part of the black pupil to create a ‘catchlight.’ This instantly brings life to the subject. Outline the eye rim with a dark brown to define the shape. -
Painting the Horns:
Paint the horns with a gradient. Start with a dark grey-brown at the base and blend into a creamy white at the tips. I find blending while the paint is still wet works best here for a smooth transition. -
Nose Details:
Paint the wet nose area with a mix of dark grey and pink (White + tiny dot of Red + Black). Add highlights on the top curves of the nostrils to make the nose look moist.
Muddy Colors?
If fur colors look muddy, let the layer dry completely before adding the next. Wet-on-wet blending is great for gradients, but distinct fur strokes require a dry base.
Step 4: The Prize Ribbon and Finishing Touches
-
Ribbon Base:
Mix Ultramarine Blue with White to get a soft, vintage sky blue. Fill in the ribbon shape. Use a long, fluid stroke for the trailing tails. -
Ribbon Shadows:
Add a tiny bit of Black to your blue mix. Paint thin lines along one side of the ribbon tails and under the rosette to create shadows and dimension. -
The Rosette:
Paint the center of the rosette in a muted red (Cadmium Red + tiny bit of Brown). Add the white ruffled edges with small dabbing motions using the tip of a #2 round brush. -
Integration:
Once the cow is fully painted, take your cream background color and carefully cut back in around the edges of the animal if needed to sharpen the silhouette. -
Final Glaze:
To unite the painting, mix a very watery wash of Raw Sienna. Lightly glaze over the corners of the background again to enhance that antiqued, tea-stained look typical of primitive art.
Now you have a charming piece of countryside art ready to be displayed with pride
Hen and Rooster Couple
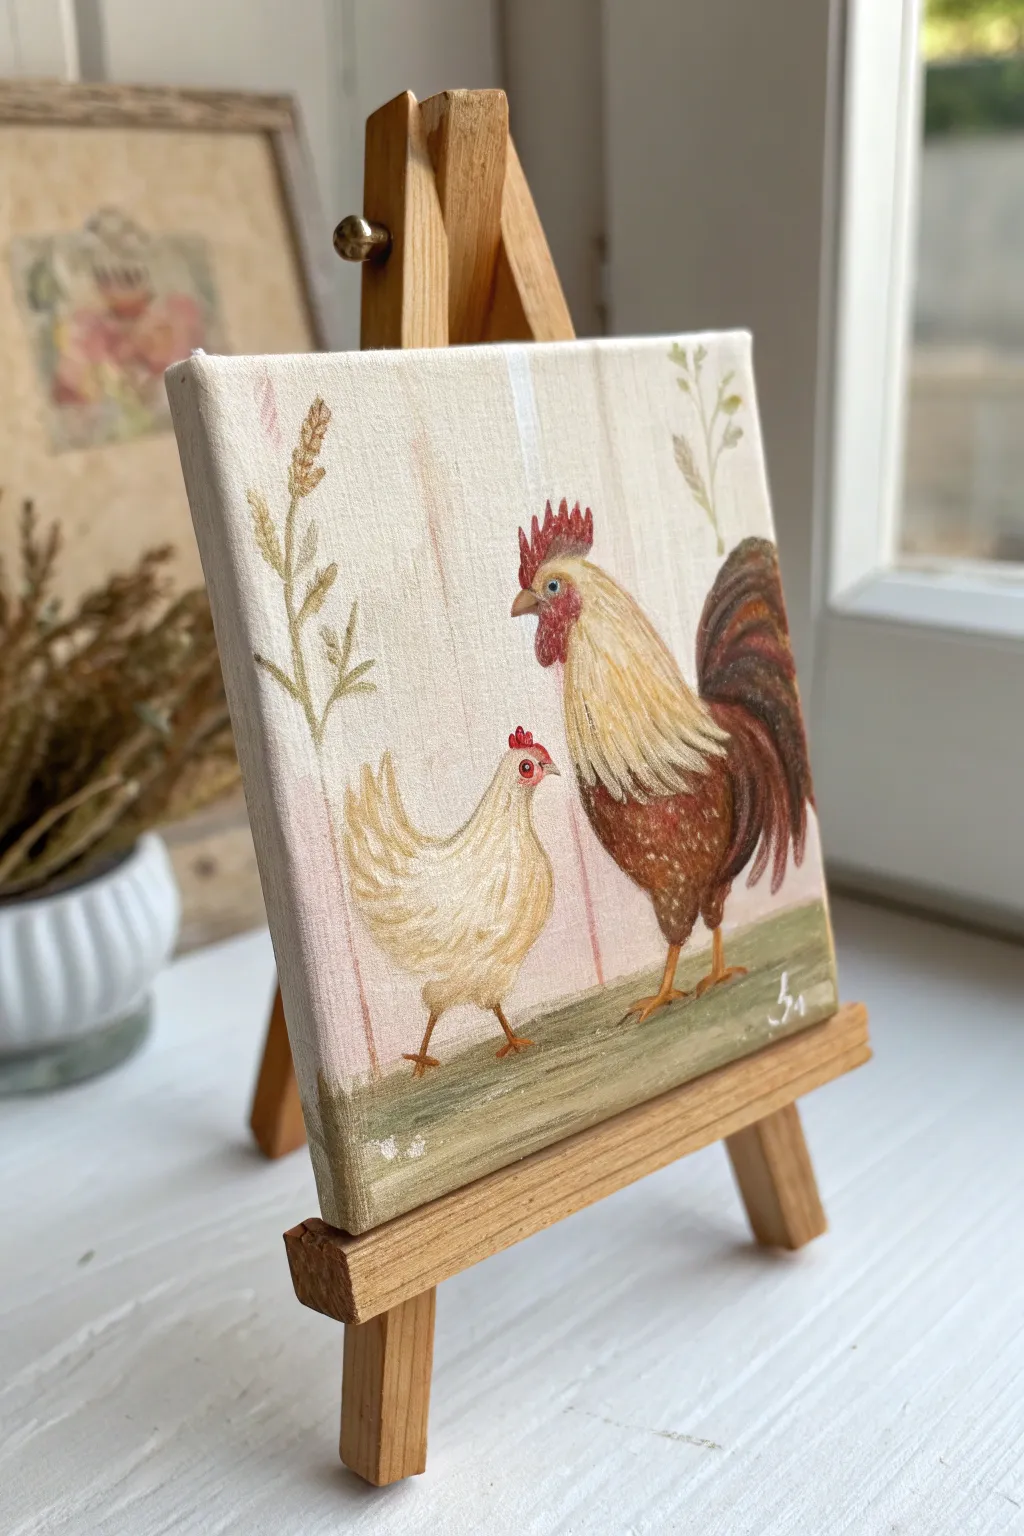
Capture the charm of the countryside with this delightful primitive-style painting of a proud rooster and his companion. Using warm, earthy tones and simple brushwork, you’ll create a cozy accent piece perfect for farmhouse decor or a thoughtful handmade gift.
Detailed Instructions
Materials
- Small square stretched canvas (e.g., 4×4 or 6×6 inch)
- Mini wooden display easel
- Acrylic paints: Cream/Off-white, Burnt Sienna, Raw Umber, Cadmium Red, Olive Green, Yellow Ochre, White
- Flat shader brush (size 6 or 8)
- Small round detail brush (size 0 or 1)
- Pencil for sketching
- Palette or paper plate
- Paper towels and water cup
Step 1: Setting the Scene
-
Prepare the Background:
Mix a large amount of Cream with a tiny touch of Burnt Sienna to create a warm, vintage parchment color. Cover the entire canvas with this base coat using your flat brush, ensuring the sides are painted too. -
Add Subtle Paneling:
Once the base is dry, mix a watery wash of White and a separate wash of very pale pinkish-brown using Burnt Sienna. Paint faint, vertical stripes to suggest painted wood paneling or a fence behind the birds. Keep these extremely sheer and irregular. -
Ground the Composition:
Mix Olive Green with a little Raw Umber. Using horizontal strokes at the bottom quarter of the canvas, paint the grassy ground. Let the brushstrokes look a bit streaky to simulate texture. -
Sketch the Figures:
Using a light pencil, gently outline the shapes of the rooster and hen. Place the larger rooster on the right, looking left, and the smaller hen on the left, looking right. Keep the shapes simple—ovals for bodies and smaller circles for heads.
Primitive Texture Tip
To get that aged, primitive look, lightly sand the edges of the canvas with fine-grit sandpaper after the paint is fully dry. It reveals the weave.
Step 2: Painting the Birds
-
Block in the Hen:
Fill in the hen’s body shape with a solid coat of Cream. Add a tiny drop of Yellow Ochre to warm it up slightly if needed. Don’t worry about feathers yet; just get the solid silhouette. -
Block in the Rooster’s Body:
Paint the rooster’s chest and lower body with Burnt Sienna. For his tail feathers, use a mix of Raw Umber and Burnt Sienna to create a dark, rich brown base. -
Paint the Rooster’s Neck:
Use a mix of Cream and Yellow Ochre to paint the thick neck plumage of the rooster. Overlap this slightly onto the brown body color to create a natural transition. -
Add Combs and Wattles:
Using your small round brush and Cadmium Red, carefully paint the jagged comb on top of the rooster’s head and the wattle under his beak. Do the same for the hen, making hers much smaller and simpler. -
Face Details:
Mix a tiny amount of grey or light brown to paint the beaks. Use a dot of black or dark brown for the eyes, adding a microscopic spec of white as a highlight to bring them to life.
Framing Idea
Glue thin strips of balsa wood around the canvas edges to create a faux frame, then stain them dark walnut to contrast with the light background.
Step 3: Defining Details
-
Texture the Hen:
Using the small round brush and a slightly watered-down Yellow Ochre or light brown, paint curved ‘U’ shapes and small dashes on the hen’s body to suggest feathers. Keep the strokes loose. -
Texture the Rooster:
Layer thin strokes of lighter yellow and white over the rooster’s neck feathers. Use dark brown strokes to define the long, flowing tail feathers, and dab small lighter brown spots on his chest for varied texture. -
Legs and Feet:
Mix Yellow Ochre with a touch of Burnt Sienna. Paint thin, spindly legs and toes for both birds. I find it helps to anchor their feet slightly into the green ground rather than floating on top. -
Botanical Accents:
Mix a muted Olive Green. Paint a tall, wispy stalk on the left side and a shorter one on the top right. Add small, leaf-like dashes along the stems. -
Wheat Accents:
At the tops of your green stems, use Yellow Ochre and Burnt Sienna to dab small, grain-like clusters, resembling wheat or wild grasses. -
Final Touches:
Add a few white highlights to the tail feathers and the wheat stalks. Sign your initials in the bottom right corner with thin white paint.
Place your finished canvas on the mini easel to enjoy a little piece of the farm anywhere in your home

PENCIL GUIDE
Understanding Pencil Grades from H to B
From first sketch to finished drawing — learn pencil grades, line control, and shading techniques.
Explore the Full Guide
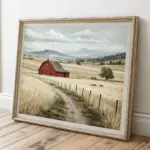
Little Farmhouse and Barn
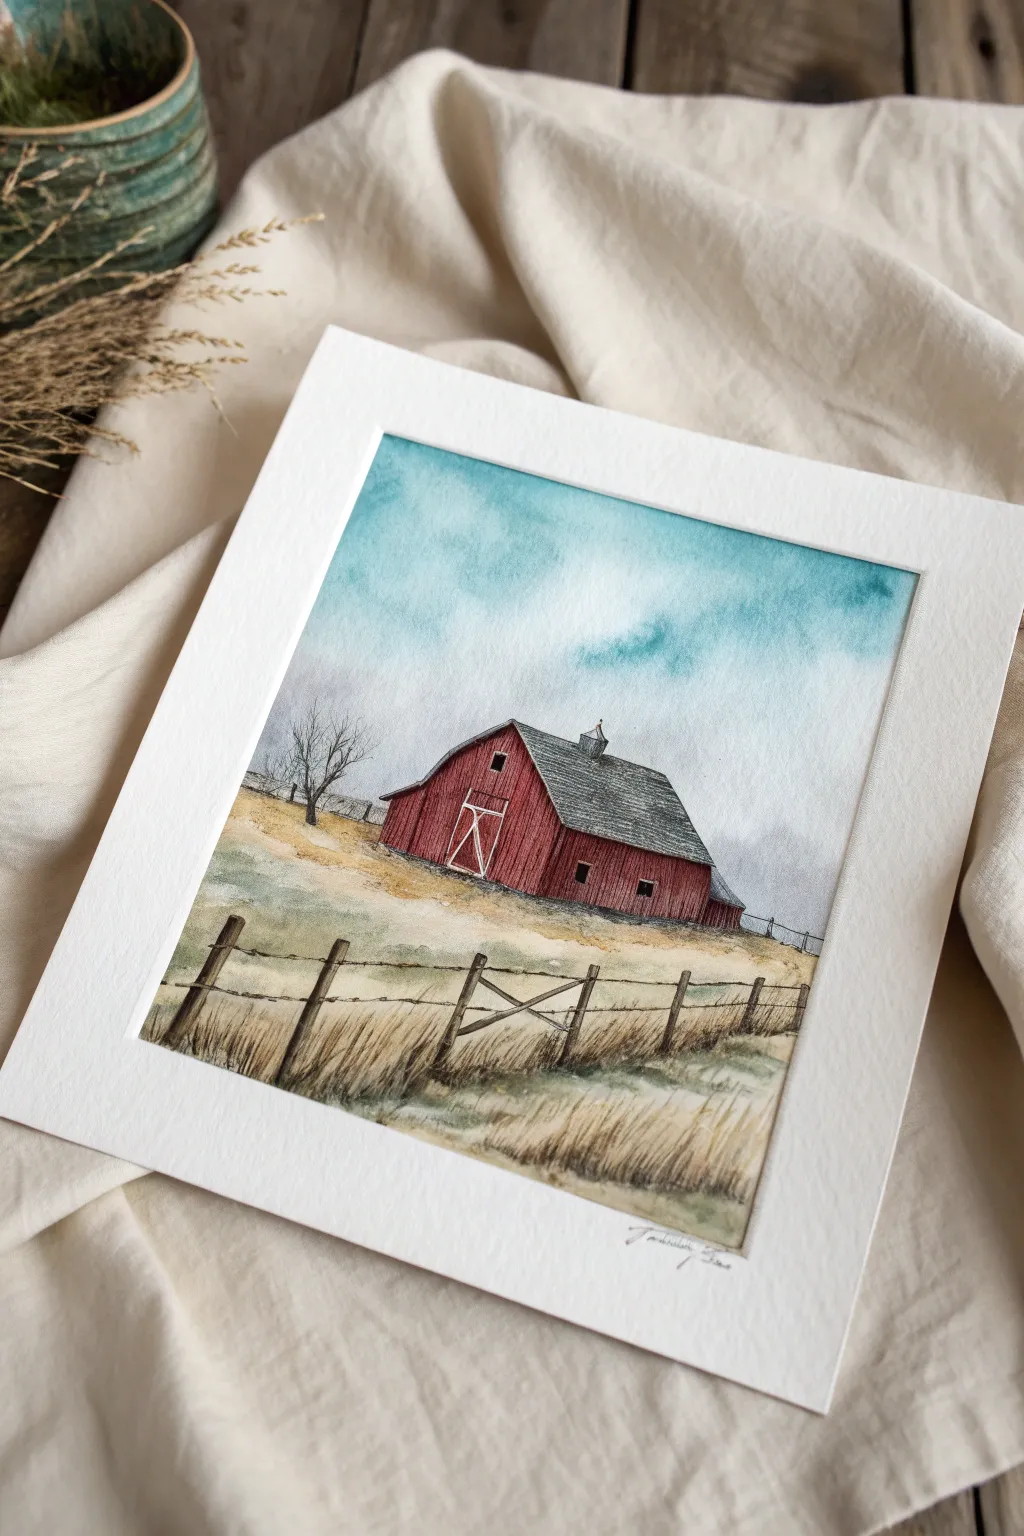
Capture the rustic charm of the countryside with this serene watercolor and ink illustration of a weathered red barn. Using soft washes for the sky and precise pen work for architectural details creates a beautiful balance between primitive style and realistic texture.
Step-by-Step
Materials
- Cold press watercolor paper (140lb/300gsm)
- Watercolor paints (Alizarin Crimson, Burnt Sienna, Yellow Ochre, Ultramarine Blue, Payne’s Gray, Sap Green)
- Black waterproof fine liner pens (sizes 0.1 and 0.3)
- Pencil (HB) and kneaded eraser
- Round watercolor brushes (size 8 for washes, size 4 for details)
- Masking tape
- Drawing board
- Water cups and paper towels
- Ruler
Step 1: Sketching the Scene
-
Secure the paper:
Begin by taping your watercolor paper to a board on all four sides. This creates a clean white border and prevents the paper from buckling when wet. -
Establish the horizon:
Lightly sketch a horizon line about one-third of the way up the paper. It doesn’t need to be perfectly straight; a slight undulation looks more natural for a field. -
Outline the barn:
Center the barn structure on the horizon line. Start with a rectangle for the main face, then add the angled roofline to create a perspective view. Keep your pencil lines faint so they won’t show through the paint later. -
Add foreground details:
Sketch the fence line in the immediate foreground using uneven vertical strokes for the posts and horizontal lines for the wire. Add rough shapes for the bare tree to the left of the barn.
Muddy Colors?
If your field looks muddy, let the yellow layer dry completely before adding green shadows. Wet-on-wet is great, but too much mixing on paper turns brown quickly.
Step 2: Painting the Atmosphere
-
Wet-on-wet sky:
Pre-wet the sky area with clean water using your size 8 brush. While the paper is glistening, drop in a mix of Ultramarine Blue and a touch of Cerulean or Turquoise. -
Create cloud textures:
Let the blue pigment bloom and spread naturally. Lift out some paint with a thirsty brush or paper towel to create soft, white cloud shapes, keeping the color more intense at the top and fading near the horizon. -
Base layer for the field:
Once the sky is dry, wet the field area. Apply a wash of Yellow Ochre mixed with a tiny bit of Burnt Sienna. Keep this layer pale and mottled to suggest dry grass. -
Add grassy shadows:
While the field wash is still damp, drop in diluted Sap Green and Payne’s Gray near the bottom corners and along the fence line to create depth and shadow.
Step 3: The Red Barn
-
First barn wash:
Mix a rich barn red using Alizarin Crimson and Burnt Sienna. Paint the vertical walls of the barn, carefully working around the white ‘X’ shape on the sliding door if you want to leave it white, or lift it out later. -
Roof texture:
Paint the roof with a diluted Payne’s Gray. While it dries, I like to streak in slightly darker lines to suggest the direction of the shingles or metal sheeting. -
Deepening values:
Once the first red layer is bone dry, add a second coat of the red mixture to the side of the barn that would be in shadow (usually the smaller side wall) to give the structure 3D form. -
Painting the windows:
Use a thick mixture of Payne’s Gray or black watercolor to fill in the small window squares and the open areas around the barn door.
Weathered Wood Texture
Use the ‘dry brush’ technique for the roof. Load your brush with gray paint, dab it on a towel, then drag lightly across the paper grain for a textured, old-shingle look.
Step 4: Ink Work and Details
-
Outline the structure:
Wait until the painting is completely dry. Use a 0.1 fine liner pen to outline the barn’s edges, the roof, and the little cupola on top. Keep the lines slightly broken for a weathered look. -
Add wood siding:
Draw vertical lines down the red walls of the barn to mimic wood plank siding. Don’t use a ruler here; hand-drawn lines feel more rustic and primitive. -
Define the fence:
Use the 0.3 pen to ink the fence posts in the foreground. Add scribbly, energetic lines for the barbed wire connecting the posts. -
Inking the tree:
Draw the bare tree to the left with jagged, twisting nervous lines. Ensure the branches taper out to nothing as they reach the sky. -
Grassy textures:
Using the 0.1 pen, flick quick, upward strokes along the bottom of the painting and around the fence posts to simulate tall, dry grasses. -
Final touches:
Add a few horizontal hatch marks on the roof for extra texture and darken any shadows under the eaves with your pen.
Peel off the tape carefully to reveal your crisp white border and enjoy your charming rural landscape
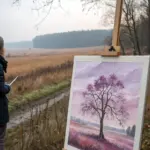
Winter Farm Under Snow

Capture the stillness of a rural winter morning with this serene primitive-style landscape painting. Featuring a weathered barn, a stark foreground tree, and soft snowy textures, this project evokes a sense of nostalgic calm perfect for seasonal decor.
Detailed Instructions
Materials
- 16×20 inch stretched canvas or wood panel
- Gesso (white)
- Acrylic paints: Titanium White, Burnt Umber, Raw Sienna, Payne’s Grey, Barn Red, Yellow Ochre
- Soft charcoal pencil (light grey)
- Flat brushes (1-inch, 1/2-inch)
- Round brushes (size 4, size 0 for details)
- Fan brush
- Sea sponge (natural)
- Palette knife
- Matte varnish
Step 1: Setting the Scene
-
Prime the Surface:
Begin by coating your canvas or board with a layer of white gesso. While the gesso is still slightly tacky, use a stiff brush to dab around the edges to create a rougher, more primitive texture for the border. -
Sketch the Composition:
Using a soft charcoal pencil, lightly sketch your horizon line about one-third up from the bottom. Place the large tree skeleton on the far left, reaching branches across the top, and outline the barn shape on the right mid-ground. -
Paint the Sky:
Mix a large amount of Titanium White with a tiny dot of Raw Sienna covering the entire sky area. While wet, blend in faint streaks of very light Grey near the horizon to suggest distance and atmospheric haze. -
Block in the Snow:
Paint the ground area with pure Titanium White. Allow the brushstrokes to follow the contours of the land—slightly hilly near the barn and flatter in the foreground.
Step 2: Building Structures
-
Base Coat the Barn:
Mix Barn Red with a touch of Burnt Umber to dull it down. Paint the vertical siding of the barn, leaving the roof white. Don’t aim for perfect coverage; let the underpainting show through slightly for an aged look. -
Add Barn Details:
Using a smaller flat brush and a mix of Raw Sienna and White, paint the lower stone foundation of the barn. Add the dark window and door openings using Payne’s Grey mixed with Burnt Umber. -
Weather the Wood:
Dry brush streaks of very pale grey and white vertically over the red siding to simulate weathered, peeling paint. -
Roof and Cupola:
Reassert the snow on the roof with thick Titanium White. Use a size 0 round brush with dark brown paint to carefully outline the cupola and weathervane on the peak.
Muddy Snow?
If your snow looks too grey or dirty, stop blending. Let the dark colors dry completely, then apply a fresh layer of titanium white over the top to regain brightness.
Step 3: Flora and Texture
-
Paint Distant Trees:
Mix a pale, bluish-grey color. Using a tapped motion with a scruffy brush, create the shapes of the distant tree line behind the barn. These should look soft and out of focus. -
Tree Structure:
For the main foreground tree, mix Burnt Umber with Payne’s Grey. Use a round brush to paint the thick trunk, twisting your wrist as you move up to create gnarly, organic branches. -
Branch Details:
Switch to a liner or size 0 brush to pull out fine twigs from the main branches. Ensure they cross over each other and reach well into the sky area. -
Snow Accents on Tree:
Taking a small amount of pure white on a detail brush, paint thin lines of snow resting on the top edges of the main branches and in the crooks of the trunk.
Texture Trick
Mix a pinch of fine sand or sawdust into your white paint for the foreground snow. This adds physical grit that catches the light and mimics the look of crunchy, frozen ground.
Step 4: Foreground and Finishing
-
Create the Road:
Mix a very watery wash of light grey. Paint two sweeping, curved tracks leading from the bottom right toward the barn to suggest a snow-covered dirt road. -
Paint Dry Grasses:
Mix Yellow Ochre and Burnt Umber. Using a fan brush turned vertically or a rigger brush, flick upward strokes in the foreground and along the fence line to create dried winter grasses. -
Install the Fence:
Paint uneven, vertical fence posts along the road using your dark brown mix. Keep them rough and slightly crooked to maintain the primitive aesthetic. -
Wire and Highlights:
Use a very thin wash of grey to suggest wire connecting the posts. Add final highlights of thick white paint to the tops of the fence posts and the tips of the tallest grasses. -
Signature and Varnish:
Add your signature in the bottom left corner using a fine liner brush. Once completely dry (wait at least 24 hours), seal the piece with a coat of matte varnish to protect the paint.
Hang your finished piece in a rustic wood frame to complete the cozy farmhouse mood


One-Room Schoolhouse Scene
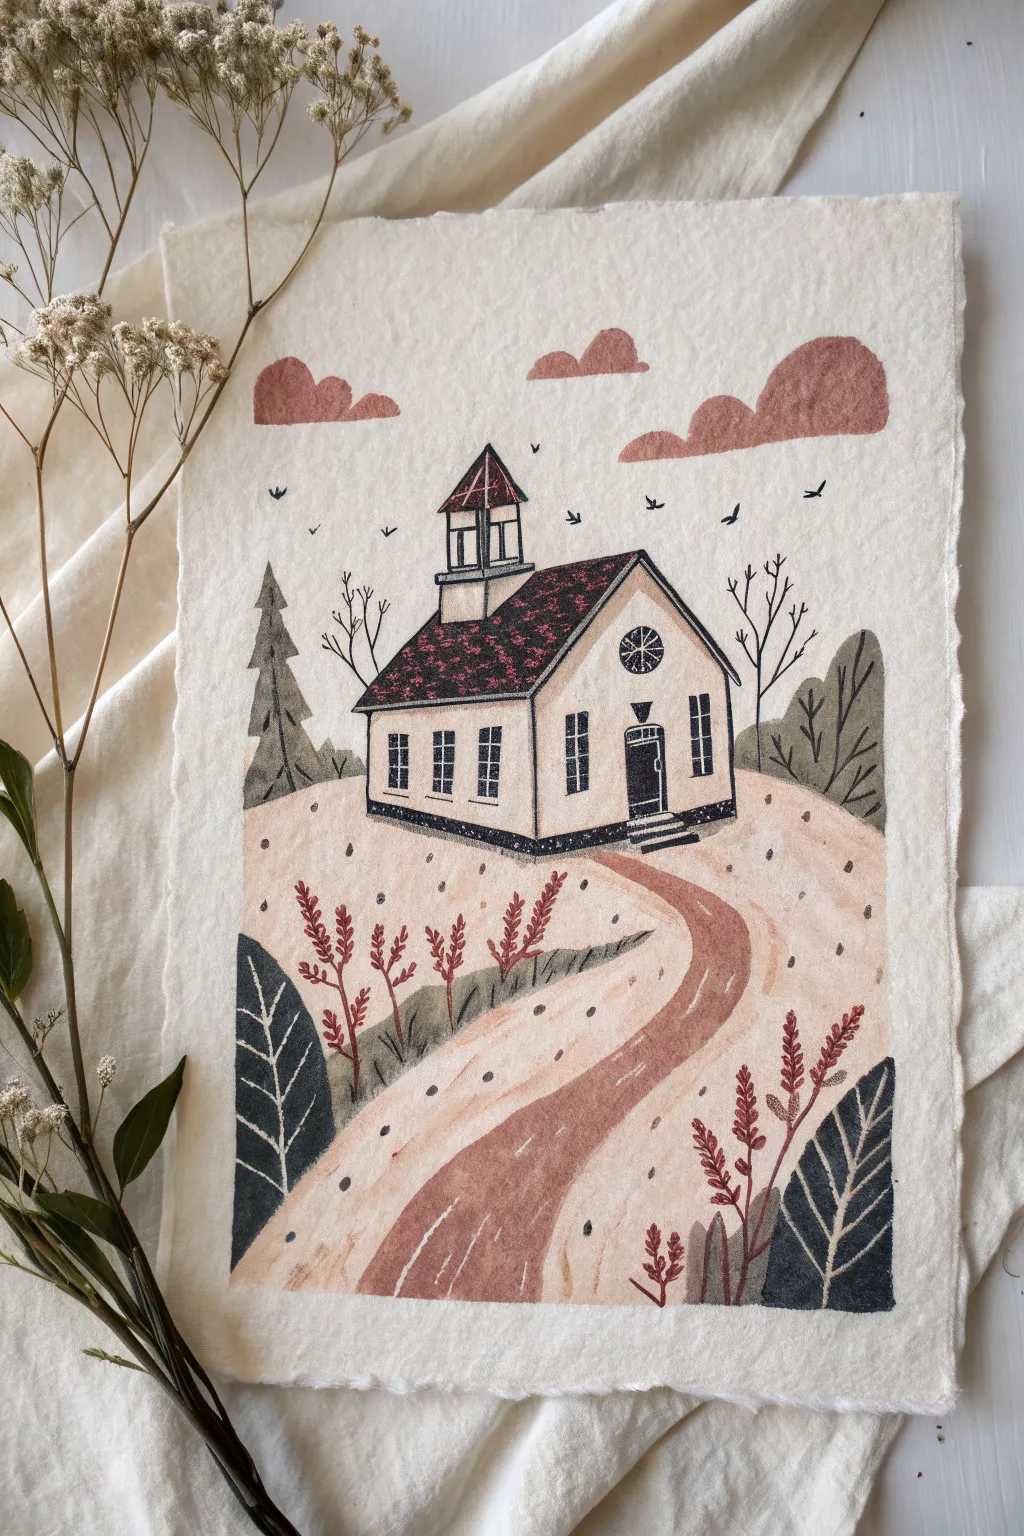
Capture the charm of early American folk art with this quaint one-room schoolhouse painting. Using a limited, earthy color palette on textured paper creates a nostalgic warmth perfect for primitive decor.
How-To Guide
Materials
- Handmade or cold-press watercolor paper (heavy weight)
- Gouache or acrylic matte paints (cream, terracotta, forest green, deep charcoal, white)
- Fine liner brushes (size 0 and 00)
- Flat shader brush (size 4 or 6)
- Pencil and kneaded eraser
- Water container and mixing palette
- Paper towels
Step 1: Sketching the Layout
-
Establish the horizon:
Lightly sketch a curved hill that dominates the bottom two-thirds of the paper. This will be the ground your schoolhouse sits on. -
Outline the building:
Center the schoolhouse on the hill. Draw a simple rectangle with a pitched roof, adding a smaller, narrower rectangle on the side for the facade perspective. -
Add architectural details:
Sketch the bell tower on the roof peak, the front door with stairs, and the rectangular windows along the side wall. -
Map the path:
Draw a winding path starting from the schoolhouse door, curving gently down to the bottom left corner of the page. -
Place nature elements:
Sketch simple, rounded shapes for clouds, large leaf shapes for foreground foliage, and spindly lines for bare trees.
Deckled Edge Effect
To get the torn paper look seen here, fold your paper repeatedly along the cut line, wet the crease with a brush, and gently tear it while damp.
Step 2: Blocking in Colors
-
Paint the background sky:
Leave the paper bare for the sky to utilize its natural texture, or apply a very thin wash of cream if your paper is stark white. -
Fill the ground:
Mix a pale beige or warm cream color and fill in the entire hill area, painting around the path and the building. -
Paint the path:
Use a watered-down terracotta or rust color to fill in the winding road. Keep the edges slightly soft for a worn dirt road look. -
Color the schoolhouse walls:
Paint the building’s walls with a solid, opaque cream or off-white. You may need two coats here to cover any pencil lines. -
Roof and clouds:
Using the terracotta/rust shade, paint the main roof and the three distinctive cloud shapes floating above. -
Dark foliage base:
Use a deep charcoal or very dark forest green to fill in the large, stylized leaf shapes in the bottom corners and the pine tree on the left.
Step 3: Details and Linework
-
Roof texture:
Once the roof is dry, take your fine liner brush with dark charcoal paint and stumble small, irregular specks across the terracotta to simulate aged shingles. -
Defining the windows:
Paint the window panes and the round attic window with the dark charcoal. Leave tiny unpainted dividers, or paint them in later with white for the mullions. -
Outlining the structure:
Carefully outline the entire schoolhouse, including the bell tower and stairs, using your finest brush and the dark charcoal paint. -
Adding vegetation details:
Paint the thin, bare trees flanking the schoolhouse using quick, upward strokes. Add the smaller reddish plants along the path with simple dabbing motions. -
Foreground leaf veins:
On the dark corner leaves, use a cream or slate blue-grey paint to draw thick, simple veins. This adds to the folk-art aesthetic. -
Ground texture:
Dip a toothbrush or stiff brush in diluted dark paint and flick tiny speckles across the beige ground to create the look of dirt and pebbles. -
Final touches:
Paint small ‘v’ shapes in the sky for distant birds. Ensure the path has some lighter streaks to suggest movement and wear.
Uneven Paint Coverage
Primitive art embraces imperfection. Identify patchy areas? Don’t fix them. Let the brushstrokes show; it adds to the authentic, hand-painted charm.
Let your painting dry completely before framing it to preserve the delicate matte finish
River Scene With Flat Trees
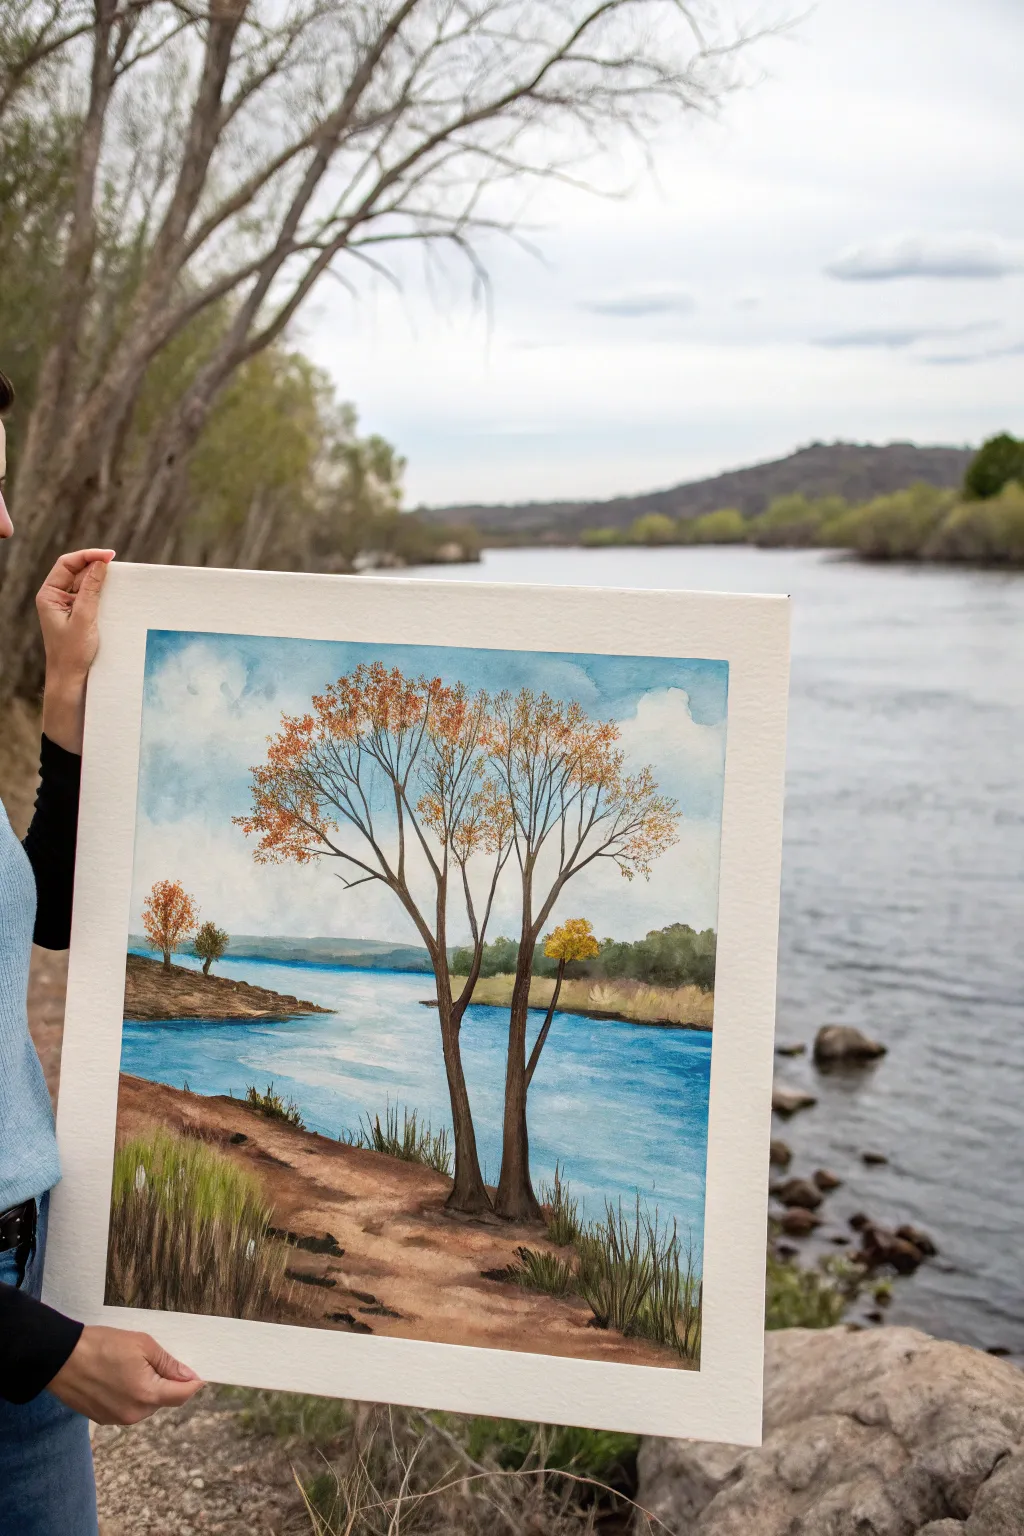
Capture the serene beauty of a quiet riverside with this detailed landscape painting, featuring delicate, leafless trees against a soft blue sky. This project explores primitive techniques to render textures like flowing water, rugged dirt paths, and distant foliage.
Detailed Instructions
Materials
- Cold press watercolor paper (approx. 11×14 inches)
- Watercolor paints (Cerulean Blue, Ultramarine, Burnt Sienna, Yellow Ochre, Sap Green, Burnt Umber, Alizarin Crimson)
- Masking tape
- Painting board
- Flat wash brush (3/4 inch)
- Round brushes (sizes 4, 8, and 1)
- Rigger or liner brush
- Palette
- Water cups
- Paper towels
Step 1: Setting the Scene
-
Secure the paper:
Tape your watercolor paper down firmly to a painting board on all four sides. This prevents buckling and creates a clean white border when finished. -
Establish the horizon:
Using a pencil, lightly sketch the horizon line about one-third of the way up the page. Sketch the far riverbank and the foreground shoreline, leaving plenty of space for the river in the middle. -
Map out the trees:
Lightly draw the main V-shape of the twin foreground trees. Don’t worry about every twig yet; just get the main trunks and primary branches placed slightly off-center for a balanced composition.
Step 2: Sky and Water
-
Paint the sky:
Wet the sky area with clean water. Load your large flat brush with Cerulean Blue and sweep it across the top, fading it out with more water as you approach the horizon to mimic atmospheric perspective. Leave patches of white paper for clouds. -
Cloud softening:
While the sky is damp, use a clean, slightly thirsty brush to lift out soft, fluffy shapes for the clouds, softening any hard edges. -
First water layer:
Mix a diluted wash of Cerulean Blue and a touch of Ultramarine. Paint the river area using horizontal strokes. Keep the color stronger in the foreground and paler near the horizon line. -
Water texture:
While the water is still wet, drop in slightly darker blue horizontal streaks to suggest ripples, particularly near the banks.
Muddy Colors?
If your greens or browns are looking gray and muddy, let the layers dry completely between coats. Wet paint moving into wet paint can over-mix on the paper.
Step 3: Land and Distance
-
Distant hills:
Once the sky fits dry, mix a gray-blue using Ultramarine and a tiny bit of Burnt Sienna. Paint the distant hills along the horizon, keeping the edges soft to push them into the background. -
Far bank foliage:
Using a mix of Sap Green and Burnt Umber, stipple small tree shapes along the far bank. Keep these shapes small and indistinct to maintain the sense of depth. -
Foreground earth base:
Paint the foreground bank with a wash of Yellow Ochre and Burnt Sienna. I find letting the colors mix on the paper creates a natural, earthy look. -
Adding earth texture:
While the ground layer is damp, drop in thicker Burnt Umber to define the path edges and rocky areas.
Boost the Realism
Use a toothbrush to gently spatter tiny dots of brown paint onto the foreground dirt path. This simulates the texture of pebbles and grit effortlessly.
Step 4: Trees and Details
-
Main trunks:
Using a size 8 round brush and a dark mix of Burnt Umber and Ultramarine (to make a near-black), paint the two main tree trunks. Start at the base and lift pressure as you move up to create tapered lines. -
Branch network:
Switch to your rigger or liner brush. Extend thin, spindly branches outward from the main trunks. Remember that tree branches generally grow upward and divide into thinner sections. -
Autumn foliage stippling:
Mix orange using Yellow Ochre and Alizarin Crimson. Using an old, splayed brush or a stippling motion, dab sparse clusters of leaves onto the upper branches. Vary the color by adding more yellow or red in spots. -
Secondary trees:
Add the smaller, distinct trees in the middle distance on the left bank using the same technique but smaller scale. -
Foreground grasses:
Using your liner brush and a mix of Sap Green and Burnt Sienna, flick upward strokes along the bottom edge and the riverbank to create tall grasses. -
Final contrasts:
Add the darkest darks—shadows under the grasses, the dark side of the tree trunks, and deep reflections in the water near the shore—using your darkest brown-blue mix.
Peel off the tape carefully to reveal your crisp edges and enjoy your serene landscape.
Tree of Life With Birds
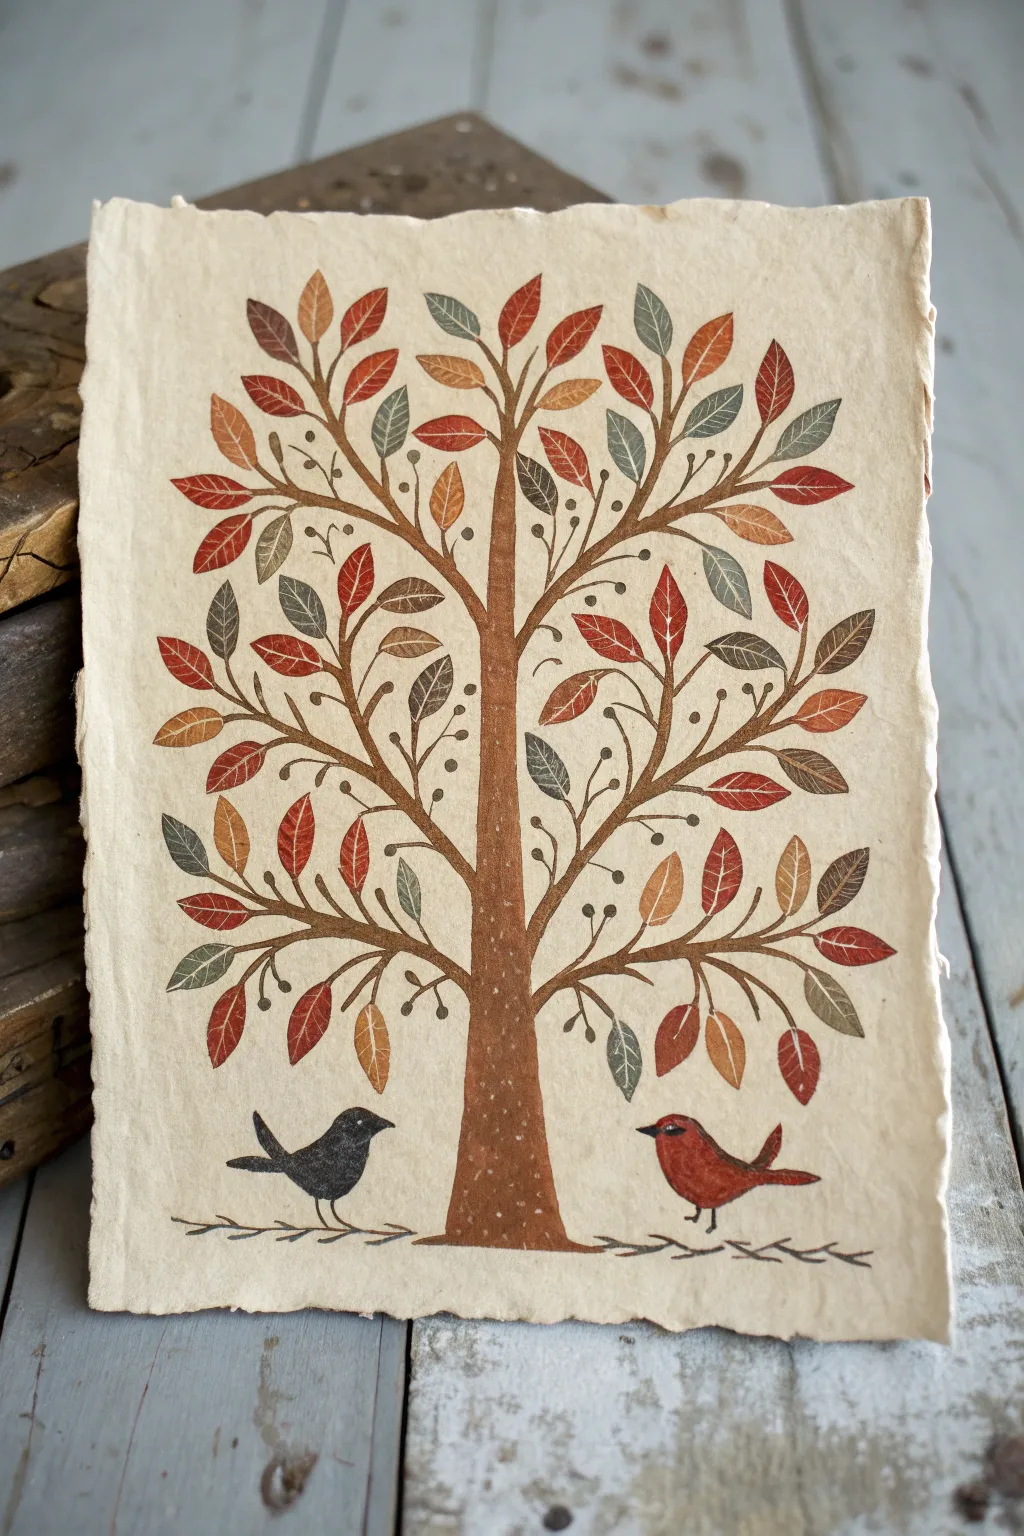
This charming primitive painting captures the rustic spirit of folk art with its warm autumnal palette and delightful symmetry. Using simple shapes and distressed finishes, you’ll create a timeless piece featuring a balanced tree and a pair of companion birds.
Step-by-Step Tutorial
Materials
- Heavyweight textured watercolor paper (deckled edge preferred) or parchment paper
- Acrylic paints: Burnt Sienna, Raw Umber, Deep Red/Crimson, Olive Green, Grey-Blue, Mustard Yellow, Cream/Off-White, Black
- Flat brush (1/2 inch) for background
- Round brushes (sizes 2 and 4) for details
- Fine liner brush (size 0 or 00)
- Pencil and eraser
- Tea bag or diluted coffee (optional for aging paper)
- Matte varnish or sealant
Step 1: Preparation and Sketching
-
Prepare the paper:
If your paper is bright white, give it an aged look first. Brew a strong cup of tea or coffee, let it cool, and brush it over the paper. Allow it to dry completely. For that authentic primitive feel, you want the edges to look torn or deckled. -
Establish the centerline:
Using a pencil very lightly, draw a vertical line down the center of your paper. This guide helps maintain the symmetry characteristic of folk art trees but doesn’t need to be perfectly rigid. -
Sketch the trunk:
Sketch a sturdy trunk centered on your line, wider at the base and tapering slightly as it goes up. I like to split the trunk near the top third into two main directional branches that will guide the canopy’s shape. -
Map the branches:
Draw the primary curved branches extending outward from the trunk. Aim for a flowing, organic look where lower branches droop slightly and upper branches reach upward. Keep them roughly symmetrical. -
Position the birds:
Sketch two simple bird silhouettes at the base on either side of the trunk. They should be facing each other, ground level, with simple oval bodies and small triangular beaks.
Vintage Paper Hack
If you don’t have deckled paper, tear the edges of standard watercolor paper against a ruler, then distress them with a little sandpaper before staining with tea.
Step 2: Painting the Tree Structure
-
Base coat the trunk:
Mix Burnt Sienna with a touch of Raw Umber to get a warm, earthy brown. Paint the main trunk and the thickest parts of the primary branches using a size 4 round brush. -
Extend the branches:
Switch to a size 2 round brush to paint the thinner branches extending outward. Use a confident, sweeping motion to get smooth curves rather than jagged lines. -
Add fine twigs:
With your fine liner brush, add very thin twigs and stems coming off the main branches. These will hold your leaves and berries, filling in the empty spaces to create a full canopy. -
Texture the trunk:
Once the brown paint is dry, use the tip of a small brush to dot tiny specks of a lighter tan or cream color onto the trunk. This mimics the look of bark texture or stippling often found in primitive art.
Paint opacity issues?
If acrylics look too transparent on the stained paper, mix a tiny bit of white paint into your colors. This increases opacity while keeping the tone chalky and primitive.
Step 3: Adding Foliage and Details
-
Paint the red leaves:
Start with your Deep Red or Crimson paint. Paint small, almond-shaped leaves scattered evenly throughout the tree. Vary the angles so some point up and some droop down. -
Add mustard leaves:
Using Mustard Yellow or a muted gold, paint a second set of leaves. Place these in the empty gaps, ensuring they don’t clump too much in one area. -
Incorporate green and blue leaves:
Mix Olive Green for the next set of leaves. Then, use a Grey-Blue (or mix blue with a little grey and green) for the final set of leaves. The variety of muted colors is key to the folk aesthetic. -
Add veining:
Once the leaves are fully dry, use your finest liner brush and thinned-down dark brown paint to draw a tiny central vein down the middle of each leaf. -
Dot the berries:
Using the handle end of a paintbrush dipped in black or dark brown paint, stamp small dots at the ends of the finest twigs to create berries or seeds.
Step 4: Grounding and Finishing
-
Paint the birds:
Fill in the left bird with a dark charcoal or soft black. Paint the right bird with the Deep Red used on the leaves. Let them dry, then add tiny beak details and small dots for eyes. -
Create the ground:
Paint a simple, stylized line beneath the birds and tree to represent the ground. Use a dark brown and make small cross-hatch or chevron marks rather than a solid line to simulate grass or twigs. -
Distress the surface (Optional):
To enhance the antique look, you can lightly dry-brush a tiny amount of cream or watered-down brown ink over the entire painting once it is 100% dry. This unifies the colors. -
Seal the work:
Finish with a coat of matte varnish to protect the painting without adding a glossy, modern sheen.
Display your finished piece in a rustic wooden frame to complete the charming, old-world aesthetic
Partridge and Pears Motif
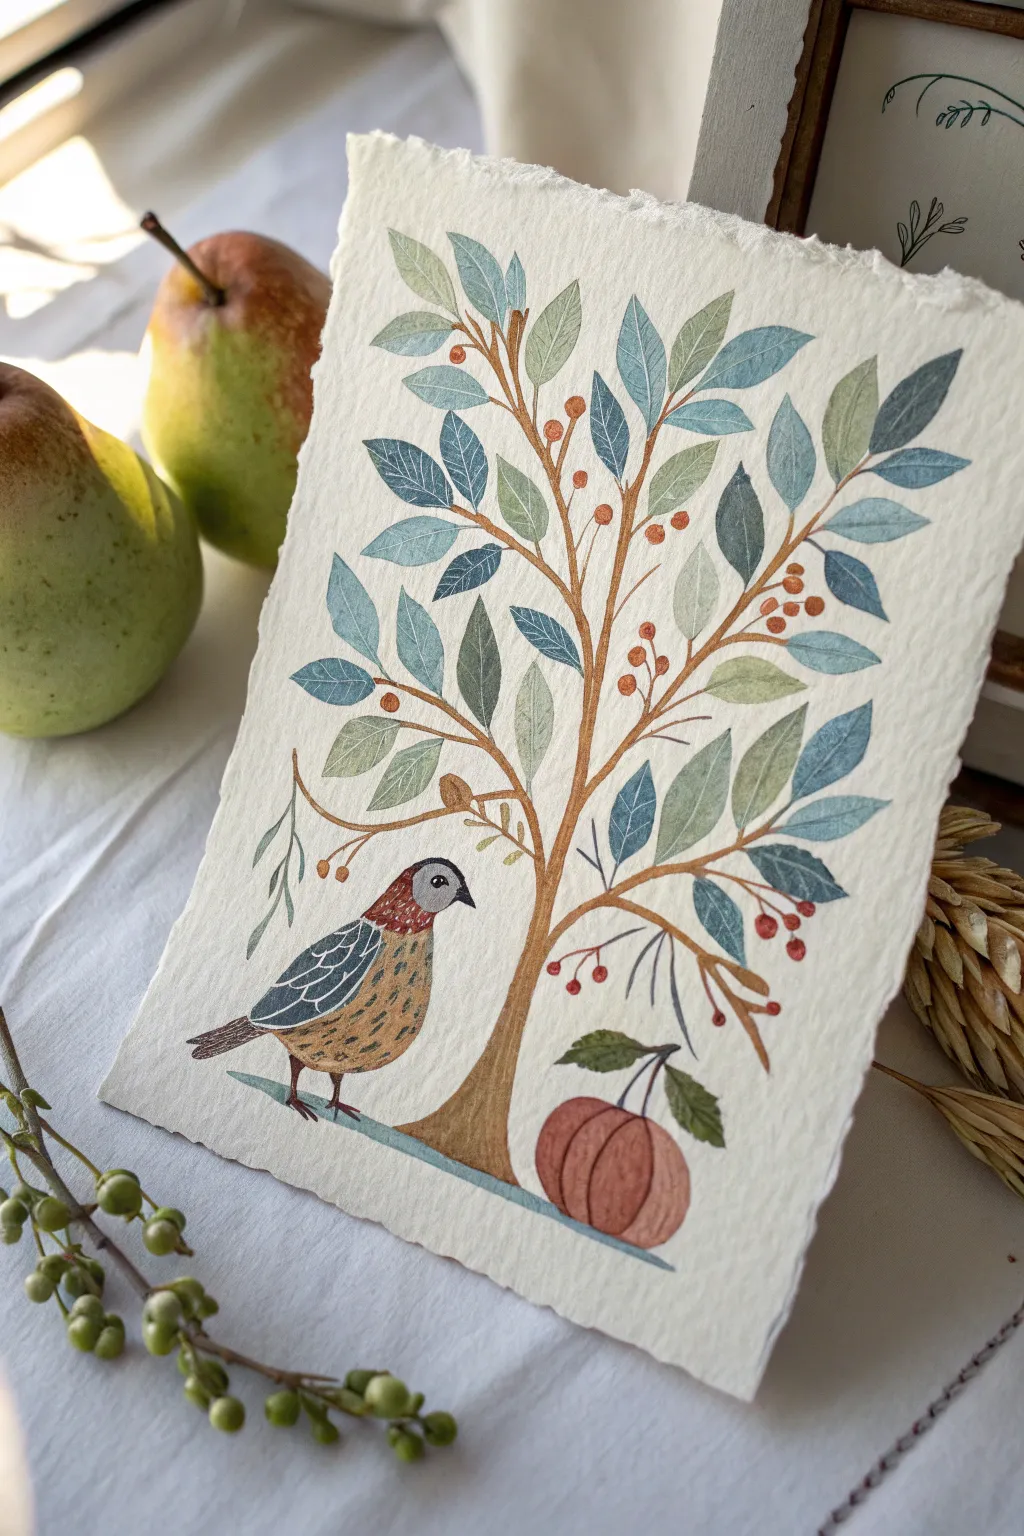
Capture the charm of traditional folk art with this delightful watercolor illustration, featuring a stylized tree, a spotted bird, and a humble pumpkin. The finished piece rests beautifully on handmade deckle-edge paper, adding a rustic and authentic touch to the primitive aesthetic.
How-To Guide
Materials
- Cold press watercolor paper (deckle edge preferred)
- Watercolor or gouache paints (earth tones: olive green, teal blue, burnt sienna, ochre, rust)
- Fine round brushes (sizes 0, 2, and 4)
- Pencil (HB or H)
- Kneaded eraser
- Palette for mixing
- Water container and paper towels
Step 1: Sketching the Composition
-
Paper Preparation:
If your paper doesn’t already have a deckle edge and you want that torn look, carefully tear the edges against a ruler. Tape the paper down to your work surface to prevent buckling. -
Mapping the Trunk:
Lightly sketch a central, curving trunk that splits into two main branches about a third of the way up. Keep the lines organic and slightly wavy to mimic the primitive style. -
Branching Out:
Draw secondary branches radiating from the main stems. Ensure they are evenly spaced and curve gently upward, creating a balanced, fan-like shape. -
Positioning Elements:
Sketch a simple bird silhouette on the lower left branch, facing right. Then, draw a round pumpkin shape at the base of the trunk on the right side. -
Adding Leaves:
Fill the branches with almond-shaped leaves. Vary their direction slightly but keep a uniform size for a patterned, folk-art feel.
Primitive Texture Trick
To get that aged, antique look, wipe your wet brush lightly on a paper towel before painting. This ‘dry brush’ technique leaves scratchy textures perfect for folk art.
Step 2: Painting the Tree & Foliage
-
Base Tree Color:
Mix a warm, light brown (ochre mixed with a touch of burnt sienna). Using a size 4 brush, paint the trunk and main branches. Keep the paint somewhat transparent to let the paper texture show through. -
Branch Details:
Switch to a size 2 brush and use a slightly darker brown to paint the thinner, outer twigs connecting to the leaves. -
First Leaf Tone:
Mix a muted olive green. Paint about half of the leaves scattered throughout the tree, leaving the others blank for now. -
Second Leaf Tone:
Mix a dusty teal or slate blue. Fill in the remaining leaves. This two-tone approach is classic to the primitive style. -
Leaf Veins:
Once the leaves are completely dry, use your smallest brush (size 0) with a darker version of the leaf color (dark green on green leaves, navy on blue leaves) to paint simple central veins. -
Adding Berries:
Using a rust-orange color, dot small berries near the ends of the branches. Vary the clusters—some single berries, some in groups of three.
Coffee Staining
Before painting, lightly brush the entire paper with weak tea or coffee and let it dry. This creates an instant vintage parchment effect that warms up the colors.
Step 3: The Bird & Pumpkin
-
Bird Body:
Paint the bird’s chest and underbelly with a warm ochre-gold. While that is wet, you can drop in a tiny bit of brown for shading, or wait until dry for a flat look. -
Wing and Head:
Paint the wing a slate blue to match the leaves. Use a rust red for the bird’s head and neck area, blending it slightly into the body color. -
Bird Details:
With the size 0 brush and dark brown or black paint, add the beak, the eye, the legs, and the feather details on the wing. Add small dark spots to the chest for texture. -
Pumpkin Base:
Paint the pumpkin using a diluted terracotta or muted orange. Let the paint pool slightly at the bottom for natural darkness. -
Pumpkin Definition:
Once the pumpkin base is dry, use a darker rust color to paint thin vertical curved lines to define the ridges. Add a small green stem and a leaf or two emerging from it. -
Grounding:
Mix a very watery blue-grey. Paint a simple horizontal strip beneath the tree, bird, and pumpkin to ground the scene, rather than having them float.
Step back and admire your charming primitive creation, perfect for framing in reclaimed wood
Black-and-White Stippled Flock
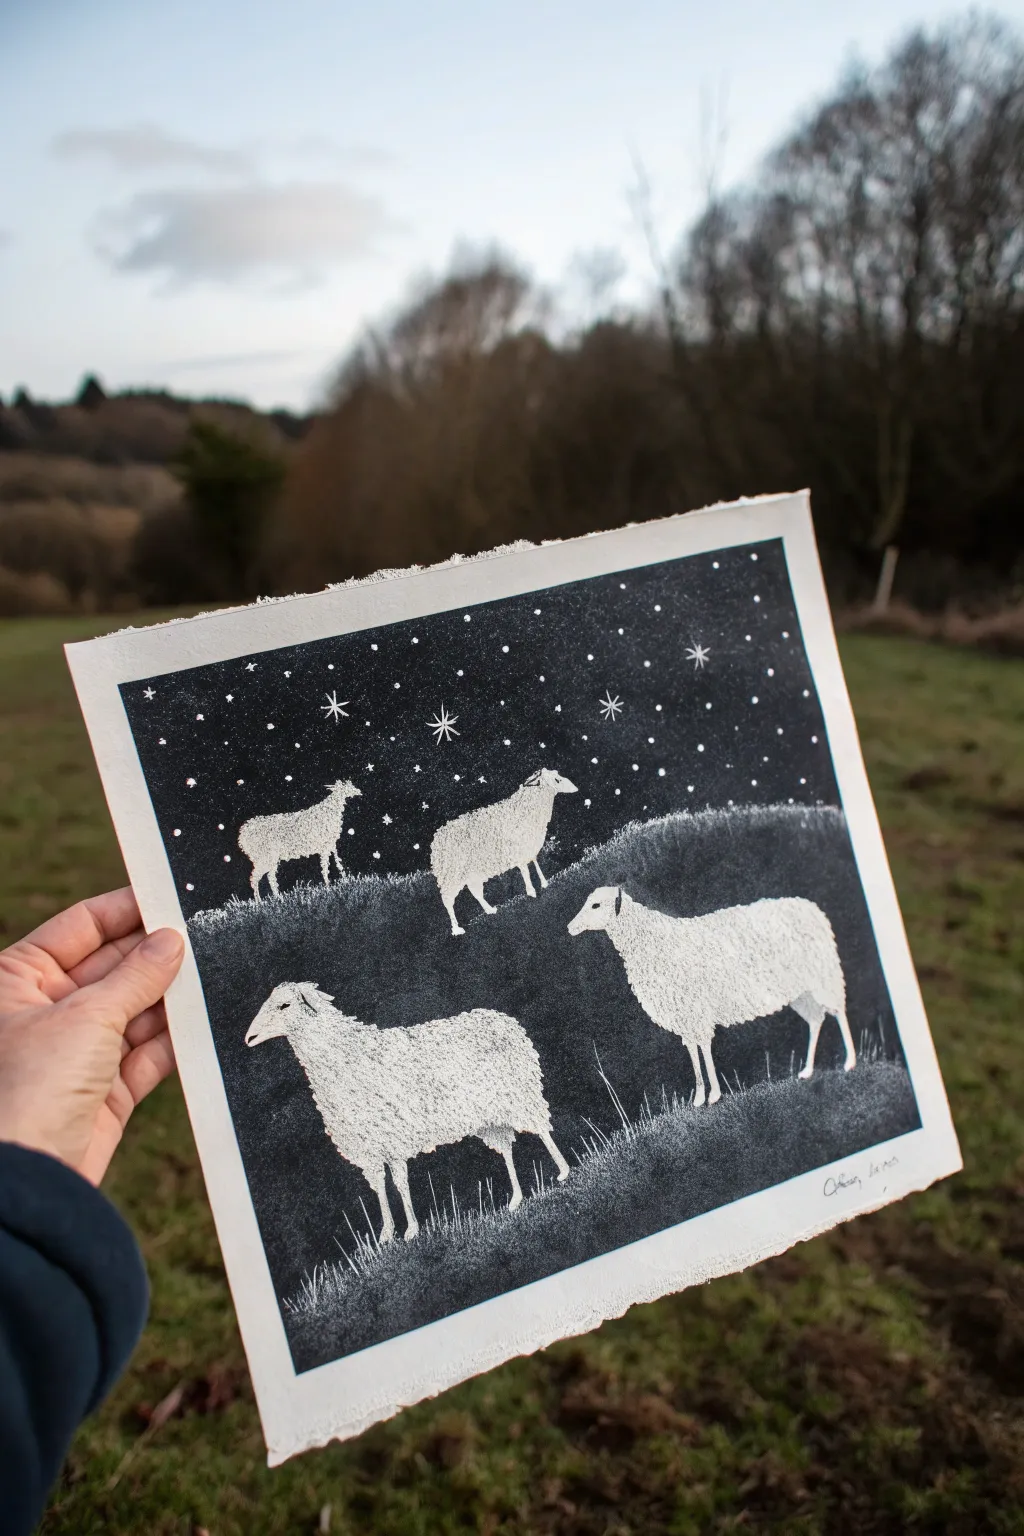
Create a serene nocturnal scene featuring a flock of sheep on rolling hills using only high-contrast black and white. This project uses a reductive stippling or white-on-black technique to capture the soft texture of wool against a stark night sky.
Step-by-Step Guide
Materials
- Heavyweight black paper or cardstock (smooth finish)
- White gel pens (fine point and medium point)
- White acrylic paint or gouache
- Fine liner detail brush (size 00 or 000)
- Graphite pencil (white or light grey suitable for dark paper)
- Ruler
- Painter’s tape
Step 1: Preparation and Sketching
-
Secure the Borders:
Begin by taping down your black paper to a flat work surface using painter’s tape. Create a clean border of about half an inch on all sides; this will give you that crisp, professional white edge when you peel it off later. -
Outline the Hills:
Using a white charcoal pencil or a light grey colored pencil, very faintly sketch two rolling hill lines. Place the horizon line about two-thirds of the way up the paper, leaving plenty of room for the sky. -
Position the Flock:
Sketch the outlines of four sheep. Place two larger sheep in the foreground on the lower hill, and two smaller sheep further back on the upper hill to create depth and perspective. -
Refine the Shapes:
refine the sheep outlines, focusing on their simple, blocky bodies and thin legs. Don’t worry about the fluffiness yet; just get the proportions right.
Step 2: Creating the Wool Texture
-
Base Stippling:
Take your medium-point white gel pen and begin filling in the bodies of the sheep. Instead of coloring solid, use a stippling motion—tapping thousands of tiny dots—to build up density. -
Building Brightness:
Concentrate more dots on the backs and tops of the sheep where the imaginary moonlight would hit. This creates a highlight effect. -
Shadow Areas:
Use fewer dots on the bellies and legs of the sheep. Letting the black paper show through here acts as natural shading without needing any grey ink. -
Head details:
Switch to a fine-point gel pen for the faces. Leave the ears mostly black with a thin white outline, and keep the eye area dark for contrast. -
Leg Definition:
Draw the legs using solid, thin white lines rather than dots. This differentiates the bony legs from the wooly bodies.
Ink Flow Issues
If your gel pen skips on the textured paper, scribble on a scrap piece of smooth plastic or your thumb to get the ball rolling again. Wiping the nib frequently helps keep the flow consistent.
Step 3: Ground and Sky
-
Grassy Texture:
Using a very fine brush and slightly watered-down white acrylic paint (or the fine pen), flick short, upward strokes along the hill lines. This mimics blades of grass silhouetted against the dark ground. -
Grounding the Sheep:
Add extra grass tufts around the hooves of the foreground sheep. This makes them look like they are standing in a pasture rather than floating on the paper. -
Starry Background:
Dip a toothbrush or stiff brush into white acrylic paint. Run your thumb over the bristles to splatter a fine mist of ‘stars’ across the sky portion of the paper. -
Major Stars:
Use a white gel pen to draw a few larger, distinct stars. I like to draw simple six-pointed asterisks or small crosses to make them twinkle. -
Final Contrast Check:
Step back and assess the image. If the sheep don’t pop enough against the hills, add another layer of dense stippling to their brightest points. -
The Reveal:
Wait for all ink and paint to be completely dry. Carefully peel away the painter’s tape at a 45-degree angle to reveal the sharp, clean frame around your artwork.
Metallic Magic
Swap standard white ink for a silver metallic pen for the stars and highlights on the wool. It gives the piece a subtle shimmer that changes beautifully when viewed from different angles.
Frame your stippled masterpiece in a simple black frame to really let the high-contrast elements shine
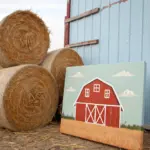
Limited-Palette Primitive Color Blocks
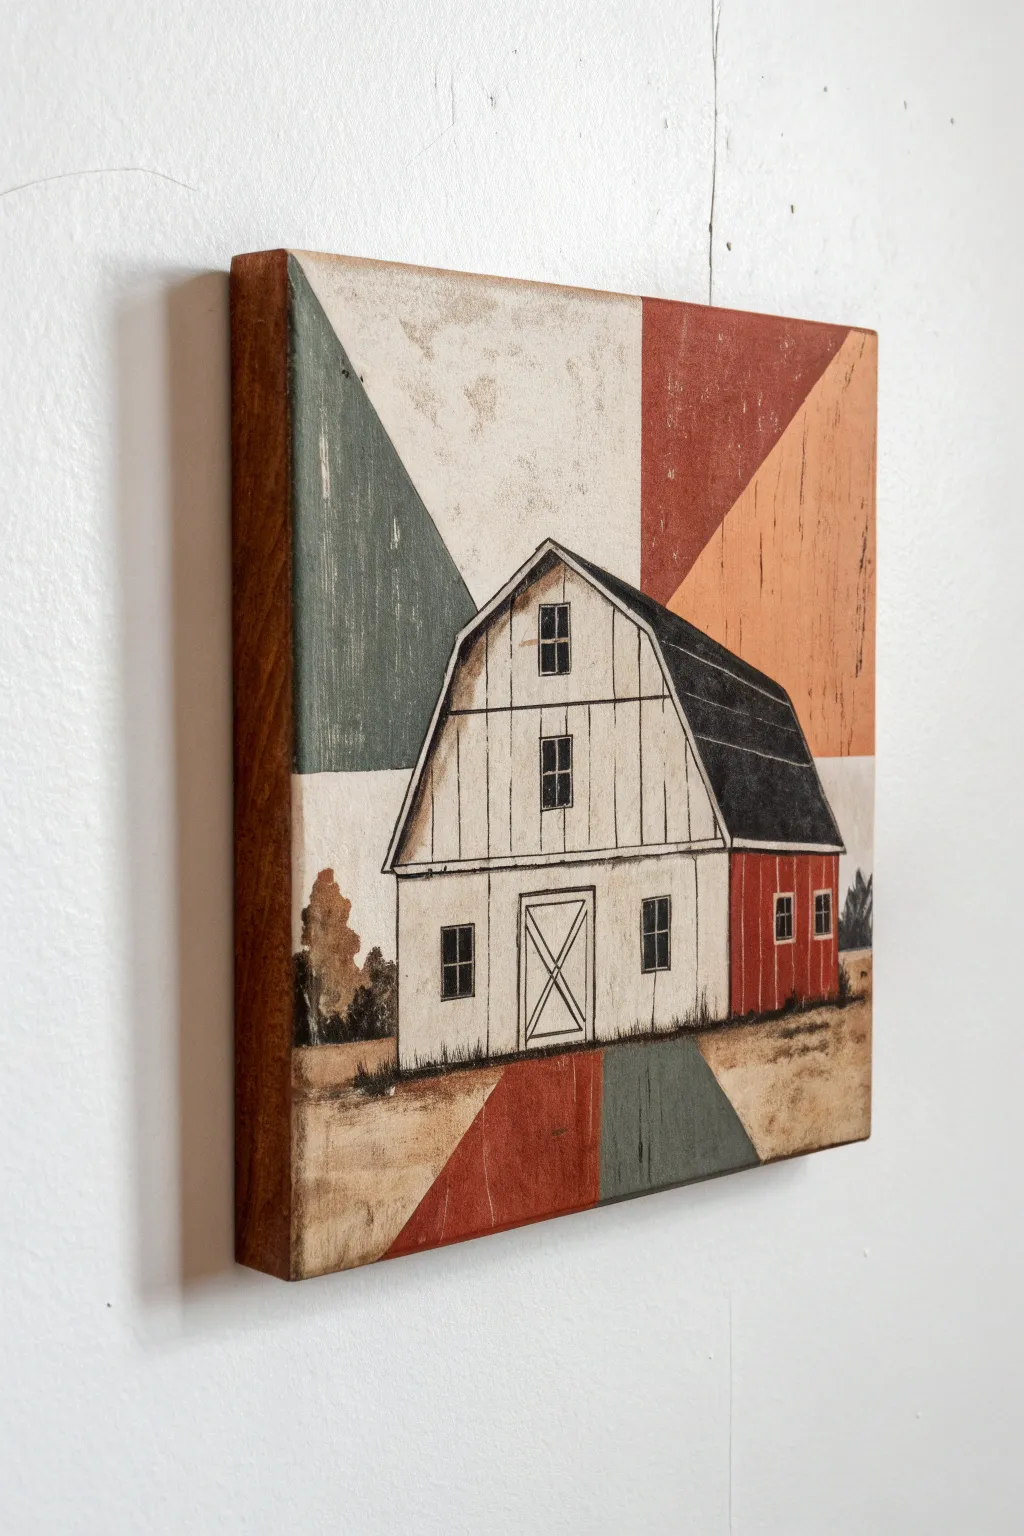
Capture the charm of rural folk art with this distinctive wood block painting, blending a classic barn illustration with a modern geometric quilt pattern. The distressed finish and muted, earthy palette give it that authentic, time-worn primitive appeal.
How-To Guide
Materials
- Square wood canvas (approx. 8×8 or 10×10 inches, 1.5 inch depth)
- Acrylic paints: Cream, Sage Green, Burnt Red, Tan/Ochre, Charcoal Black, Dark Brown
- Pencil and ruler
- Painter’s tape (low tack)
- Flat shader brushes (medium and large)
- Fine liner brush for details
- Medium-grit sandpaper
- Matte varnish or sealer
- Dark antique glazing medium or watered-down brown paint
- Paper towel or rag
Step 1: Preparing the Geometric Base
-
Base coating:
Begin by painting the entire front surface of your wood block with a solid coat of cream acrylic paint. Don’t worry about perfect coverage, as a little texture fits the primitive style. -
Marking the center:
Find the approximate center point of your canvas. Using a ruler and pencil, lightly draw lines radiating from this center point out to the edges to create large triangular sections, similar to a pinwheel or sunburst pattern. -
Taping the sections:
Apply painter’s tape along the pencil lines to mask off specific triangles. You will need to paint in stages, taping off non-adjacent sections first to prevent colors from bleeding into each other. -
Color blocking:
Fill in the masked triangles with your sage green, burnt red, and tan colors. Keep the top-center section cream (the base coat). Allow these to dry completely before moving the tape to paint the remaining adjacent sections. -
Painting the sides:
Paint the deep sides of the wood canvas with a dark brown or wood-stain color to frame the artwork. I find this gives the piece a finished, gallery-worthy look without needing an actual frame.
Primitive Texture Tip
For a crackled, aged look, apply a layer of school glue over the base coat before painting the top colors. Paint while the glue is tacky for instant cracks.
Step 2: Sketching and Blocking the Barn
-
Sketching the outline:
Once the color blocks are fully dry, lightly sketch the outline of a gambrel-roof barn in the lower center of the canvas. The barn should overlap the intersection of your geometric triangles. -
Painting the barn face:
Paint the front face of the barn with the cream color. Paint the side of the barn (the shadowed side) with the burnt red tone. -
Roof base:
Fill in the roof shape with charcoal black. If the paint feels too stark, mix in a tiny drop of cream to soften it to a dark slate grey. -
Grounding the scene:
Paint a simple horizon line behind the barn using varying shades of tan and brown to suggest dry grass or dirt, anchoring the building so it doesn’t look like it’s floating.
Step 3: Detailing and Distressing
-
Adding architectural lines:
Using your fine liner brush and thinned black paint, carefully draw vertical lines on the white barn face to simulate siding boards. Add the roof outline and the X-braced barn door. -
Windows and trim:
Paint small black rectangles for the windows, adding tiny white or cream cross-bars once the black is dry. Add a few simple trees on the horizon line using stippling motions with a dark grey or green. -
Sanding for age:
Once the painting is bonedry, take your medium-grit sandpaper and gently sand over the entire surface. Focus on the edges and corners where paint would naturally wear off to reveal the wood or underlayers. -
Antiquing wash:
Mix a small amount of dark brown paint with water (or use glazing medium). Brush this translucent wash over the entire painting, then immediately wipe it back with a rag. The dark pigment will settle into the sanding grooves and brushstrokes. -
Final seal:
Protect your primitive masterpiece with a coat of matte varnish to preserve the finish without adding unwanted shine.
Uneven Lines?
Don’t fix them! In folk art, slightly wobbly lines or imperfect symmetry add to the handmade charm. Perfect straight lines can actually look too modern.
Display your new artwork on a mantel or hang it on a gallery wall to add a cozy, rustic touch to your home
Story Panels in Folk Style
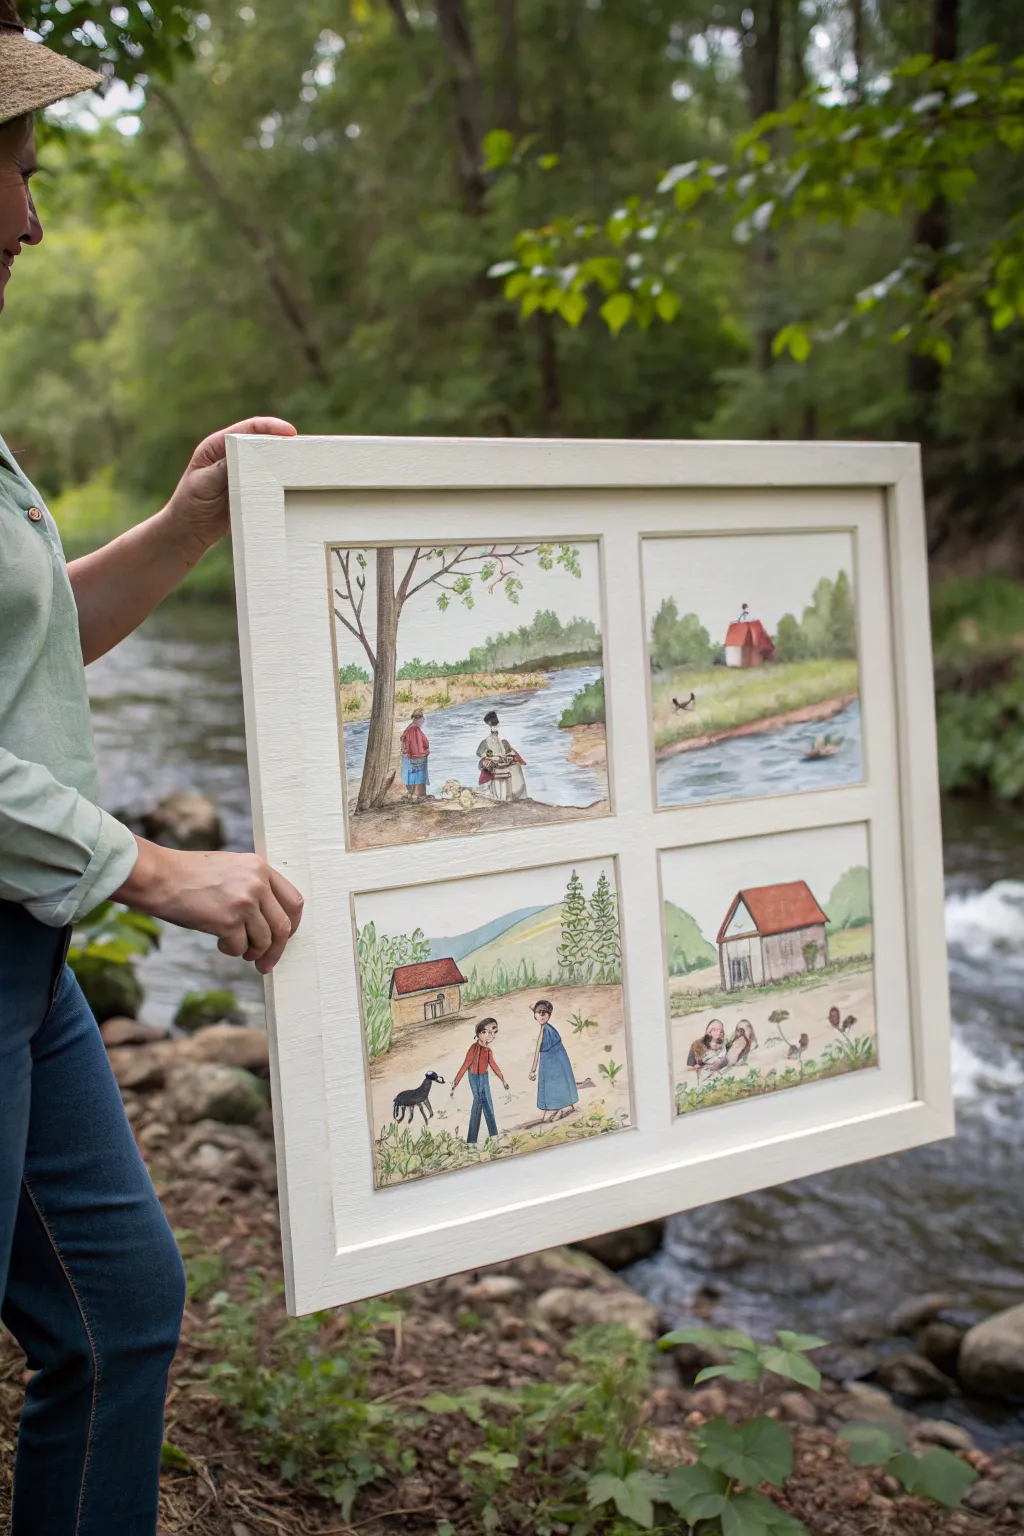
Capture the charm of simpler times with this four-paneled primitive folk art piece. Using an repurposed window frame or custom joined molding, this project combines storytelling with a soft, illustrative painting style perfect for cottage decor.
Detailed Instructions
Materials
- Four-pane window frame (vintage or reproduction)
- Four sheets of heavy watercolor paper (hot press for smoothness) or illustration board
- Watercolor or gouache paints
- Pencils (HB for sketching)
- Fine liner pens (sepia or dark brown, archival ink)
- Round brushes (sizes 2, 4, and 8)
- Masking tape
- Flat warm white acrylic paint (for the frame)
- Sandpaper (medium grit)
- Mounting points or glazier’s points
- Ruler
Step 1: Preparing the Frame and Surface
-
Frame Prep:
If using an old window, remove any existing glass carefully. Sand the wooden surface to remove rough splinters and old varnish. If building from scratch, assemble your four-panel grid using 1×2 lumber. -
Priming:
Apply two coats of flat warm white or parchment-colored acrylic paint to the frame. Let the first coat dry completely before adding the second to ensure solid coverage. Sand lightly between coats for a distressed feel if desired. -
Sizing the Paper:
Measure the openings of your frame pane precisely. Cut your watercolor paper or illustration board to be about 1/4 inch larger than the opening on all sides so it can be mounted from the back. -
Securing the Paper:
Tape your four sheets of paper down to a hard working surface using masking tape on all four edges. This prevents buckling when you apply watercolor washes later.
Step 2: Sketching the Scenes
-
Planning the Narrative:
Decide on four distinct but related scenes. The top left pane features figures by a river; top right shows a house on a hill; bottom left depicts figures with an animal; bottom right shows farm buildings. Keep the perspective flat and naive. -
Penciling:
Lightly sketch the horizon lines first to keep them consistent across adjacent panels. Draw the main elements—trees, houses, and figures—using simple geometric shapes. Don’t worry about perfect anatomy; the primitive style benefits from slight elongation or stiffness. -
Inking the Outlines:
Trace over your pencil lines with a sepia or dark brown fine liner. Use a slightly shaky or broken line to mimic the look of aged etching or ink drawings. Erase the pencil marks once the ink is fully dry.
Uneven Washes?
If your sky looks too blotchy, wet the entire sky area with clean water first, then drop the blue paint in. This ‘wet-on-wet’ technique helps color spread smoother.
Step 3: Painting the Folk Scenes
-
Sky and Water Washes:
Dilute a pale blue watercolor to a very thin consistency. Apply a wash for the sky in all four panels, leaving some white paper showing for clouds. Use a slightly darker blue-grey for the river sections. -
Background Greens:
Paint the rolling hills and grass areas with a mix of sap green and yellow ochre. Apply the paint somewhat unevenly to create texture. I find that dabbing the brush rather than stroking helps achieve that grassy look. -
Building Blocks:
Fill in the houses and barns. Use terra cotta or burnt sienna for the roofs and creamy whites or earthy beiges for the walls. Keep the colors relatively flat within the inked outlines. -
Addressing the Trees:
Paint tree trunks with a watery brown/grey. For the leaves, stipple various shades of green to suggest foliage without painting individual leaves, keeping the feel airy and light. -
Figures and Details:
Paint the clothing of the figures using muted primary colors—faded reds, blues, and browns. Use a size 2 brush for these small areas. Don’t forget small details like the black dog or the chickens pecking near the barn. -
Adding Depth:
Once base layers are dry, add diluted shadows under the trees, buildings, and figures using a purple-grey mix. This grounds the objects so they don’t look like they are floating.
Add Vintage Patina
Make the finished art look antique by lightly brushing a very diluted tea stain or weak burnt umber wash over the entire dried painting before framing.
Step 4: Assembly
-
Removing Tact:
Carefully peel the masking tape away from your paintings. Pull the tape away from the paper at a 45-degree angle to avoid tearing the surface. -
Mounting:
Place the frame face down. Position each painting face down into its corresponding pane opening. The artwork should overlap the wood rabbet (the groove) on the back. -
Securing the Art:
Use glazier’s points or small framing nails to secure the backing board or the sturdy watercolor paper directly into the wooden frame. If your paper is flimsy, back it with a piece of cardboard first. -
Final Touch:
Double-check that all panels are right-side up and in the correct narrative order before hanging.
Now you have a charming storybook window that brings a peaceful, pastoral narrative into your home
Masked Animal Procession Scene
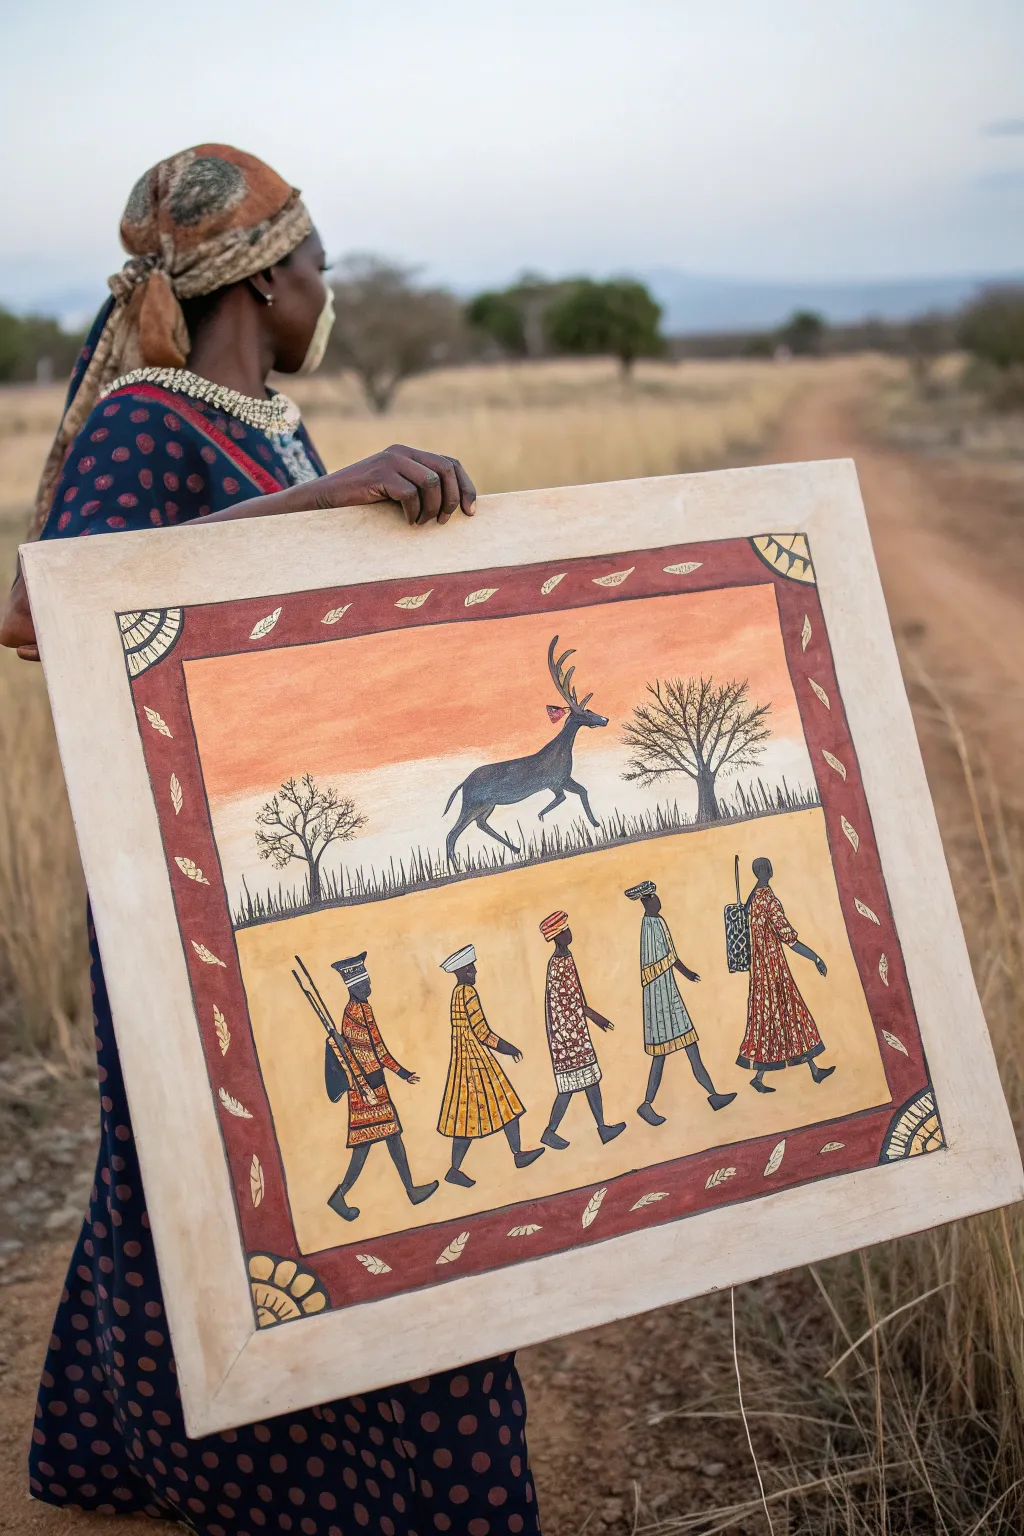
Capture the spirit of storytelling with this vibrant two-tiered primitive painting that contrasts the wild movement of nature with a structured human procession. Using warm earth tones and bold silhouettes, you’ll create a piece that feels both timeless and deeply rooted in tradition.
How-To Guide
Materials
- Large rectangular canvas or prepared wooden art board (approx. 24×30 inches)
- Acrylic paints: Burnt sienna, yellow ochre, cadmium orange, titanium white, mars black, burnt umber, crimson red
- Gesso (if canvas isn’t pre-primed)
- Flat brushes (1-inch and 1/2-inch)
- Detail round brushes (size 0 and 2)
- Ruler or straight edge
- Pencil for sketching
- Painter’s tape (optional)
- Palette for mixing
Step 1: Setting the Scene
-
Preparing the surface:
Begin by ensuring your canvas or board is clean and primed. If you are using raw wood or unprimed canvas, apply a coat of gesso and let it dry completely to create a smooth, gripping surface for your paint. -
Drafting the borders:
Use a ruler and pencil to lightly map out the composition. Draw a large outer rectangle to serve as the decorative border, leaving about 2-3 inches of width around the edge. Inside this, divide the central space horizontally into two sections: the top sky section (roughly 40% of the height) and the bottom ground section (60%). -
Blocking the background colors:
For the bottom panel, paint a flat, solid coat of yellow ochre mixed with a touch of white to create a dusty sand color. Let this dry. For the top panel, start with a gradient sky. Paint the top half a warm orange-red, blending it downward into a pale, creamy white near the horizon line to simulate a sunset glow.
Silhouette Fix
If your black silhouettes look patchy or translucent, don’t keep layering wet paint. Let the first coat dry completely, then apply a second layer for a true, opaque ‘void’ effect.
Step 2: The Upper Tier: Nature in Motion
-
Painting the horizon grass:
Once the sky gradient is dry, use a small flat brush with black paint to create the horizon line. Flick the brush upward in short, uneven strokes to create the silhouette of tall, savanna grass separating the sky from the ground. -
Adding the trees:
With a size 2 round brush and thinned black paint, sketch the skeletal trees on either side of the panel. Focus on creating jagged, branching limbs that reach upward, keeping the trunks relatively thin to match the primitive style. -
Drafting the animal:
Lightly sketch the outline of the running deer or antelope in the center. The pose is dynamic—front legs raised, back legs pushing off. Fill in the shape with solid black paint, ensuring the antlers are defined and sharp. -
Highlighting the animal:
Add a tiny touch of red embellishment near the animal’s ear or neck if desired, contrasting against the dark silhouette.
Step 3: The Lower Tier: The Procession
-
Sketching the figures:
In the lower yellow ochre section, use a pencil to lightly outline five figures walking in profile from left to right. Space them evenly. Keep their forms stylized: simple oval heads, elongated torsos, and legs in mid-stride. -
Painting skin tones:
Mix a deep dark brown or use mars black to fill in the skin areas—the faces, arms, and legs. Pay attention to the silhouettes of the feet and the profiles of the faces. -
Base coating the clothing:
Select different base colors for each figure’s tunic or robe. Use burnt sienna, yellow ochre, and muted grey-blue. Paint the main shape of their garments, leaving the fabric flat and unpatterned for now. -
Detailed patterning:
This is where the character comes alive. Using your smallest round brush (size 0), paint intricate patterns on the clothing. I often switch between stripes, cross-hatching, and jagged lines using contrasting colors—dark red on yellow, white on blue, etc. Let the brush dance to create that textured, woven look. -
Adding accessories:
Paint the accessories carried by the figures. Add the long staff or rifle held by the first figure, and the basket or bag carried on the back of the fourth figure. Use black lines to define these objects clearly. -
Headwear details:
Paint the hats and head wraps. Use stripes of red, white, and yellow to distinguish the different styles, from the fez-like cap on the leader to the wrapped turbans on the followers.
Brush Control
For the tiny patterns on the clothing, thin your acrylic paint slightly with water or a flow medium. This helps the paint glide off a liner brush for crisp stripes and dots.
Step 4: The Decorative Border
-
Painting the border base:
paint the wide border frame in a deep, reddish-brown (burnt sienna mixed with a little crimson). Apply two coats if necessary to get a rich, solid opacity. -
Corner motifs:
In the four corners, paint quarter-circle shapes in black. Inside these black corners, paint radiating yellow petals or geometric pie-slice shapes to create a sunburst effect. -
Adding the leaf pattern:
Along the straight sections of the red border, paint small, floating leaf shapes using a light tan or cream color. Orient them so they seem to flow around the frame in a clockwise or counter-clockwise direction. -
Final outlines:
Using a very steady hand or a ruler, paint thin black lines separating the main image area from the border, and the border from the outer edge of the canvas. This crisply frames the entire narrative.
Allow your work to dry fully before hanging it to bring a touch of rhythmic storytelling to your wall.
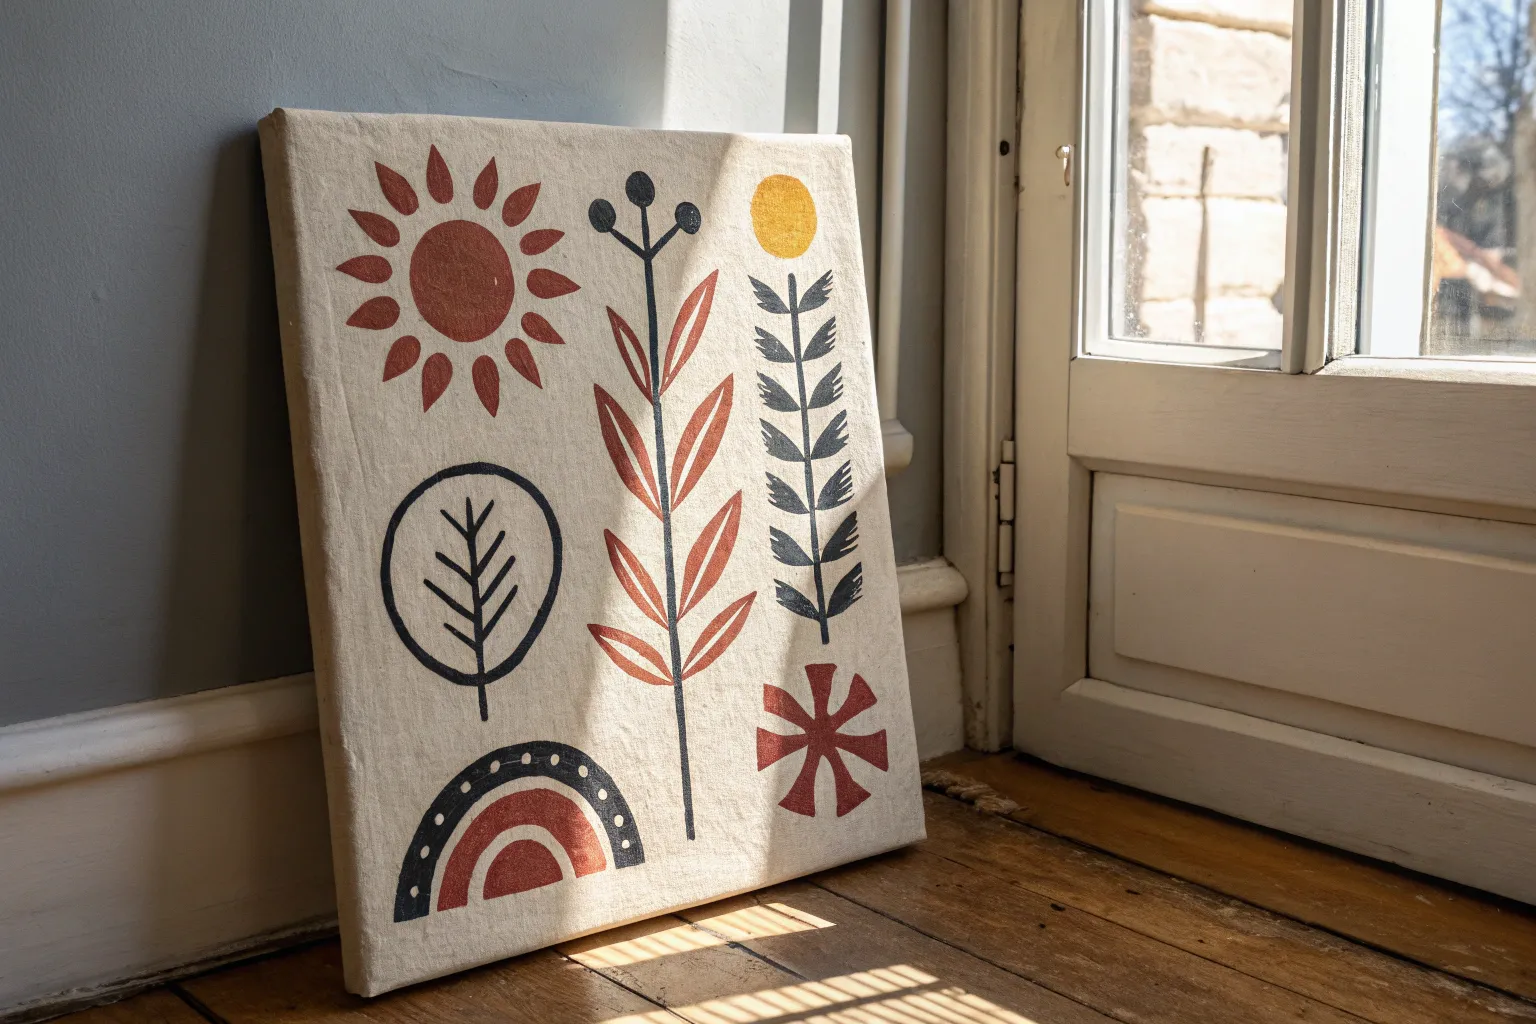
Carved-Pattern Look Backgrounds

Achieve a timeless, rustic aesthetic with this hand-painted wooden sign featuring bold geometric patterns and a classic primitive heart design. The combination of warm burnt sienna tones and stark black details on natural wood creates a charming, carved-pattern look without using any carving tools.
Detailed Instructions
Materials
- Rectangular wood board (pine or reclaimed wood)
- Sandpaper (120 and 220 grit)
- Wood stain (light oak or antique pine)
- Acrylic craft paint (Black, Burnt Sienna/Rust, Cream)
- Flat paintbrushes (1-inch and 1/2-inch)
- Fine detail liner brush
- Ruler or straight edge
- Pencil
- Graphite transfer paper (optional)
- Painter’s tape
- Matte spray sealer or wax
Step 1: Preparation & Base
-
Prepare the surface:
Begin by sanding your wooden board thoroughly. Start with 120 grit to remove rough spots and finish with 220 grit for a smooth painting surface. Wipe away all dust with a tack cloth. -
Stain the wood:
Apply a coat of your chosen wood stain to the entire board, including the edges. Wipe off excess stain with a rag to let the wood grain show through, as this natural texture is crucial for the primitive look. Allow it to dry completely. -
Mark the sections:
Using a ruler and a light pencil touch, divide your board horizontally. Create a 2-inch band at the very top and bottom. Then, measure in about 1.5 inches from those edges to create the inner decorative bands.
Steady Hands
Support your painting hand with your pinky finger resting on a dry part of the board. This acts as a stabilizer when painting fine straight lines without a ruler.
Step 2: Painting the Geometric Borders
-
Paint the end caps:
Using painter’s tape for crisp lines, paint the top and bottom 2-inch sections with Burnt Sienna acrylic paint. Let this dry before removing the tape. -
Add the cream zigzags:
On top of the dried Burnt Sienna sections, lightly sketch a zigzag pattern. Using a fine liner brush and cream paint (thinned slightly with water for better flow), carefully paint these chevron lines. -
Create the inner double lines:
Moving inward towards the center, use a straight edge to paint two parallel horizontal black lines across the board’s width. Space them about an inch apart. Repeat this on the bottom half of the board. -
Add the black zigzags:
Inside the parallel black lines you just created, paint a continuous black zigzag pattern. A liner brush works best here to keep the contrasting points sharp. -
Paint the decorative diamonds:
Just above the top black banding and below the bottom banding, paint a row of small black diamond shapes. Keeping the spacing consistent is key, but slight irregularities add to the primitive charm. -
Dot the details:
Dip the handle end of a paintbrush into black paint to create uniform dots. Place these dots along the inner edges of your parallel lines to frame the zigzag section.
Try Texture
Before painting, drag a wire brush vertically along the wood grain. This opens the pores and makes the final sanding stage reveal more dramatic, aged texture.
Step 3: Centerpiece & Finishing
-
Outline the heart:
In the large central open space, lightly sketch a tall, primitive-style heart. Ensure the bottom point is somewhat elongated to match the vertical orientation of the board. -
Paint the heart:
Fill in your heart sketch with black acrylic paint. Use a flat brush for the center and switch to a smaller round brush to get smooth, clean edges on the curves. -
Distress the paint:
Once all paint is bone dry, lightly sand over the painted design—especially on the heart and the black zigzags—using 220-grit sandpaper. This simulates wear and softens the stark black against the wood. -
Apply an antique wash (Optional):
If the design looks too new, mix a small drop of Burnt Sienna with plenty of water. Brush this wash over the cream zigzags and the heart, then immediately wipe it back to ‘dirty’ the bright colors. -
Seal the piece:
Protect your primitive masterpiece with a coat of matte spray sealer or rub on a clear paste wax. Buff gently after drying for an authentic, hand-rubbed sheen.
Hang your new sign in a cozy corner to add immediate warmth and traditional character to your home.
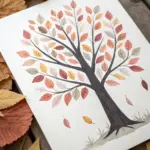
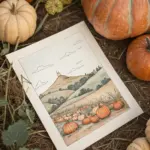


Have a question or want to share your own experience? I'd love to hear from you in the comments below!