If you’ve never tried painting with vegetable stamps, you’re in for the most satisfying kind of messy magic. I love how a simple slice of produce can turn into bold patterns, quick florals, and textures that look way more complicated than they actually are.
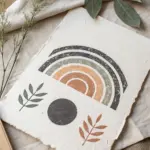
Potato Block-Print Repeat Patterns
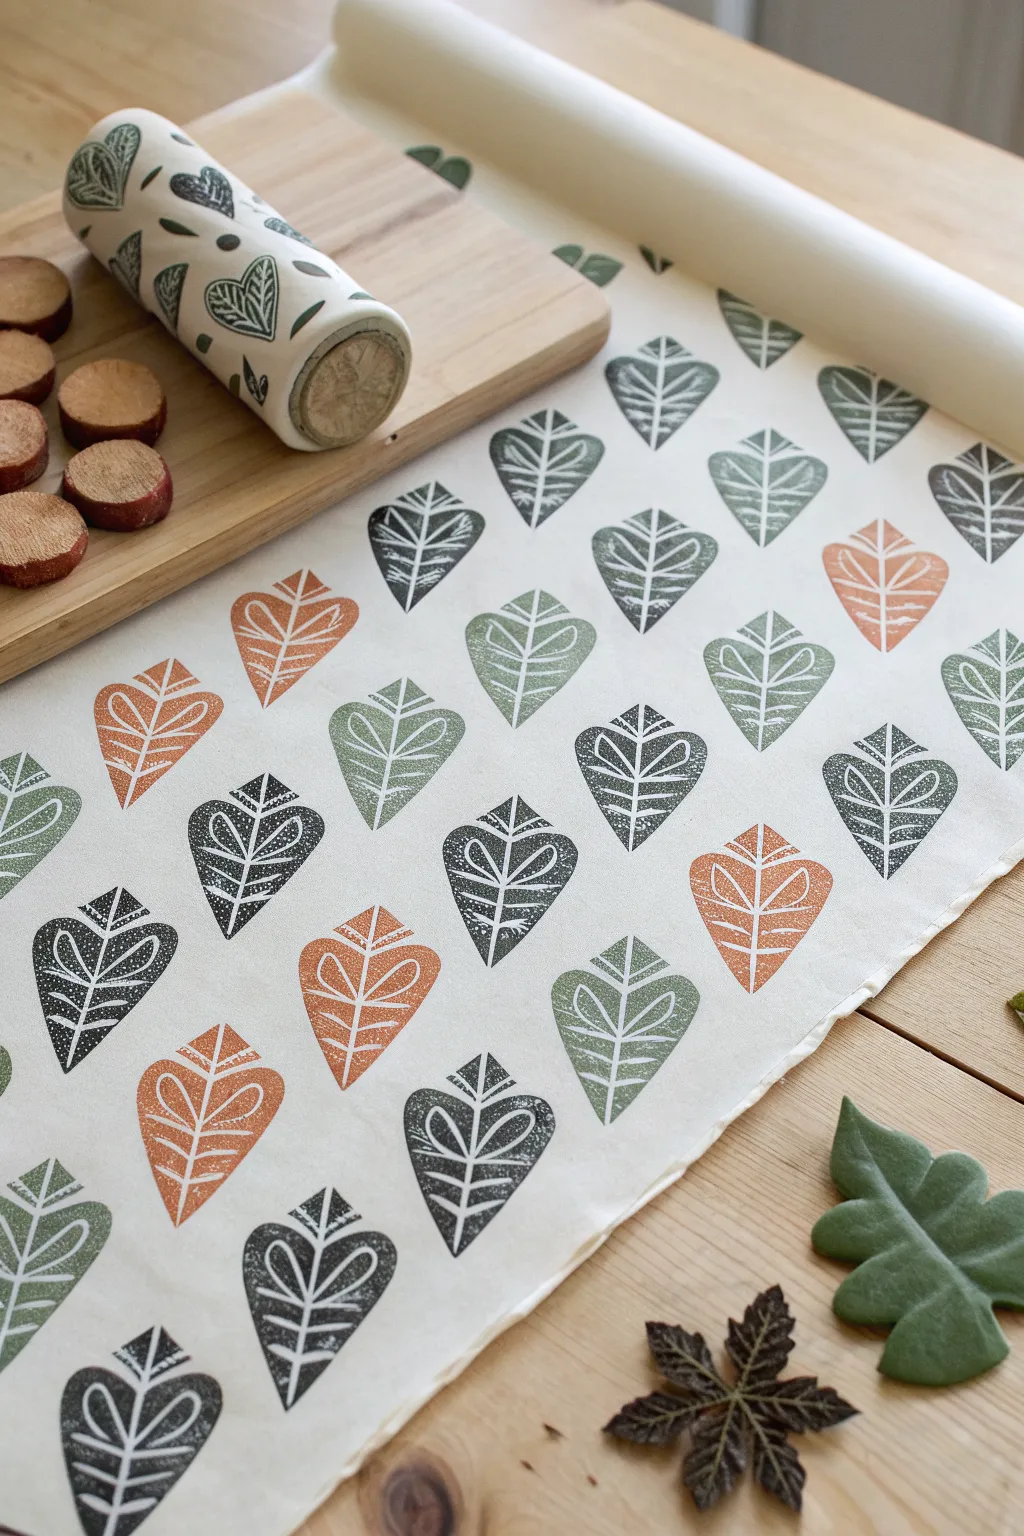
Transform humble potatoes into elegant printing blocks with this stunning geometric leaf pattern. The result is a clean, mid-century modern inspired design featuring alternating rows of charcoal, sage, and terracotta leaf motifs.
Detailed Instructions
Materials
- Large, firm baking potatoes
- Sharp paring knife or linoleum cutter
- Fabric runner or heavy art paper
- Fabric block printing ink or acrylic paint mixed with textile medium
- Colors: Charcoal Grey, Sage Green, Terracotta/Rust
- Paintbrush or small foam roller
- Paper towels for blotting
- Ruler and pencil (optional for grid)
- Scrap paper for testing
Step 1: Preparing the Potato Stamp
-
Select and cut:
Choose a potato that is slightly wider than your desired leaf size. Cut it comfortably in half to create a flat, smooth surface. Blot this surface firmly with paper towels to remove excess moisture, which is crucial for a crisp print. -
Outline the shape:
Using a fine-tip marker or a pencil, gently draw a spade-like leaf shape directly onto the cut face of the potato. Aim for a symmetrical shape that tapers to a point at the top and rounds at the bottom. -
Carve the negative space:
Carefully cut away the potato flesh around your drawn outline. You want the leaf shape to be raised about 1/4 inch from the rest of the potato surface. Slice horizontally from the side to meet your vertical cuts for easier removal. -
Detail the veins:
Once the main silhouette is established, use your knife or a linoleum cutter to carve out the internal details. Create a central vertical line first, then carve two curved loops on either side of the stem to form the distinctive geometric vein pattern shown in the image.
Step 2: Planning and Testing
-
Mix your colors:
Prepare your palette. Mix a deep charcoal grey, a soft sage green, and a warm terracotta orange. Ensure the consistency is creamy but not too watery to prevent bleeding. -
Do a test stamp:
Apply paint to your potato stamp using a brush or foam roller. Press it firmly onto scrap paper to check the design. If the veins aren’t showing clearly, carve them a little deeper or wipe off excess paint. -
Mark your guides:
If you want a perfectly aligned pattern like the example, lightly mark a grid on your fabric or paper using a ruler and pencil. Alternatively, you can eyeball the spacing for a more organic feel.
Uneven Print?
If your stamp isn’t printing fully in the center, the potato surface might not be perfectly flat. Rub it gently against fine-grit sandpaper to level it out.
Step 3: Printing the Pattern
-
Start the first row:
Begin with the charcoal color. Apply an even layer of paint to the stamp. Press straight down onto your surface, hold for a second, and lift straight up. I find that rocking the potato slightly helps transfer the ink fully, but be careful not to smudge. -
Complete the first color:
Continue stamping the charcoal leaves in scattered positions across your surface, leaving plenty of empty space for the other two colors. Clean your stamp thoroughly or use separate potato halves for each color. -
Add the sage green:
Load a clean stamp with the sage green paint. Stamp these leaves in the spaces between the charcoal ones, varying the orientation slightly if desires, though the example keeps them all pointing upward. -
Fill with terracotta:
Finally, use the terracotta paint to fill in the remaining gaps. This warm accent color really brings the pattern to life. -
Touch ups:
If any prints look a bit faint, you can use a small brush to carefully touch up the solid areas, but embracing the texture of the block print adds character.
Add Texture
Use a dry brush technique when loading the paint onto the potato. A thinner layer allows the natural starchy texture of the potato to show through for a rustic look.
Step 4: Finishing
-
Dry properly:
Allow the project to dry completely flat. If you used fabric paint, check the manufacturer’s instructions for setting the ink—usually this simply involves ironing the reverse side. -
Clean up:
Discard the used potatoes (do not eat them if they have paint on them) and wash your brushes immediately.
Enjoy your custom hand-printed textile that brings a touch of nature indoors


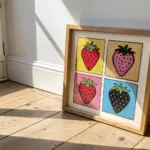
Bell Pepper Ring Flower Shapes
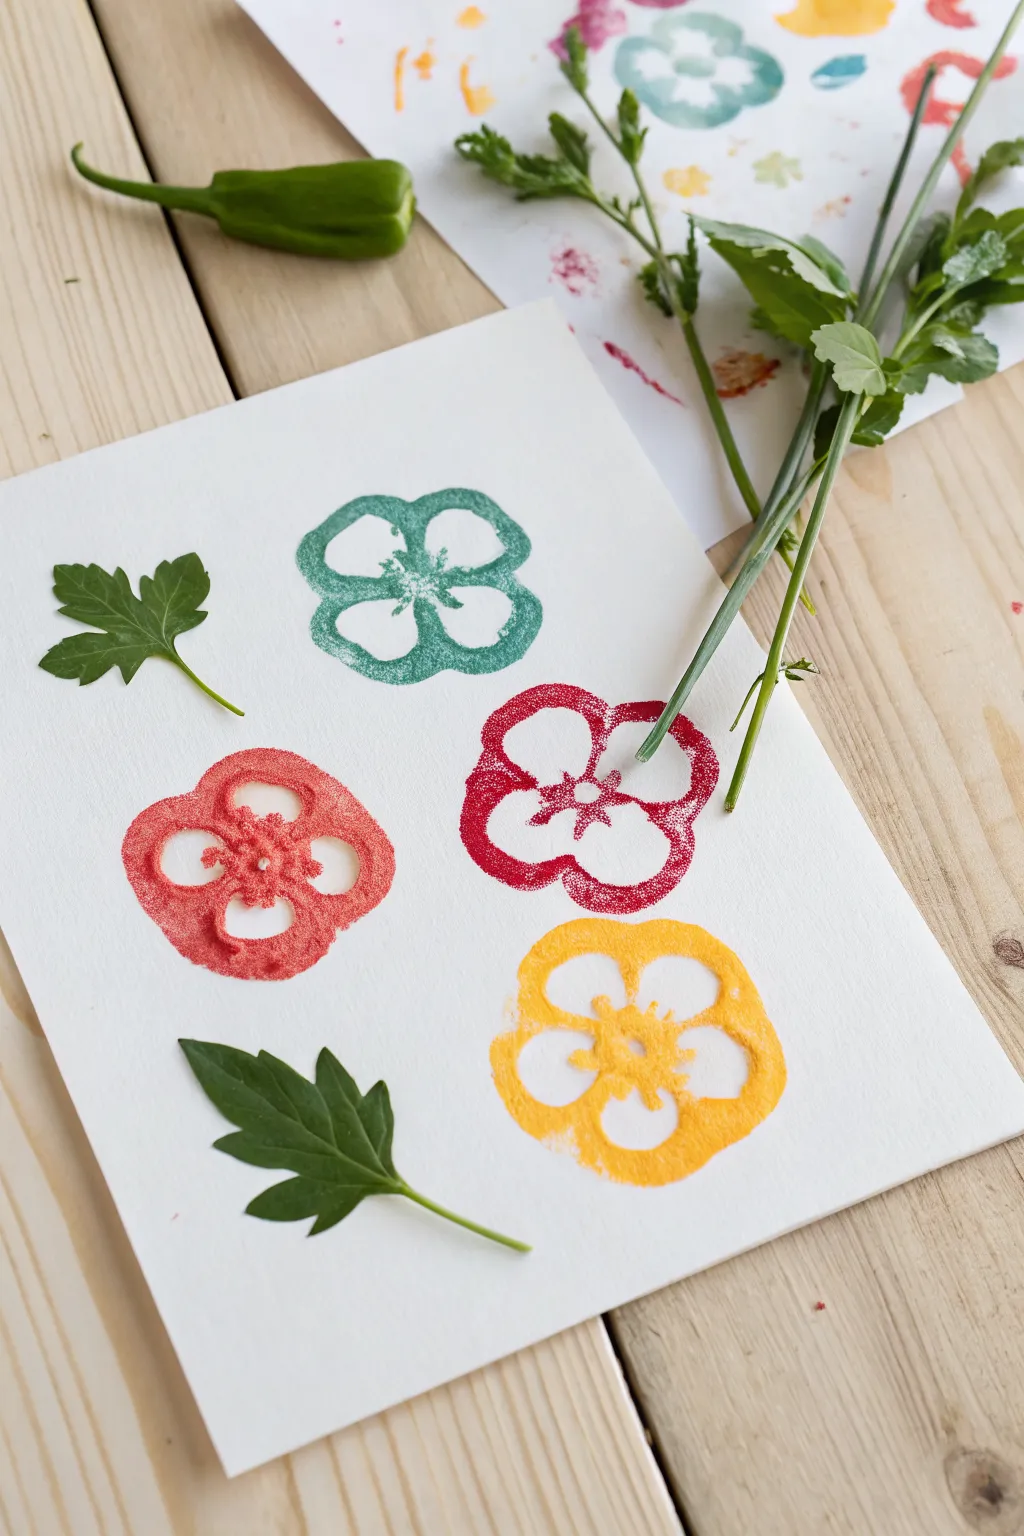
Transform ordinary kitchen scraps into a stunning botanical study with the natural shapes hidden inside bell peppers. This simple project uses vegetable cross-sections as stamps to create colorful, flower-like impressions paired with fresh greenery for a mixed-media finish.
How-To Guide
Materials
- Bell peppers (variety of sizes/maturity)
- Acrylic or tempera paints (green, red, pink, yellow)
- Heavyweight white cardstock or watercolor paper
- Flat paintbrushes or foam brushes
- Paper towels
- Small kitchen knife
- Fresh flat-leaf parsley or cilantro sprigs
- Craft glue or glue stick
Step 1: Preparing the Stamps
-
Select your peppers:
Choose bell peppers that feel firm to the touch. Older, wrinkly peppers won’t hold their shape well when pressed against the paper. -
Slice the vegetables:
Using a sharp knife, cut across the width of the pepper near the bottom third. This cross-section reveals the most interesting “flower” shape with multiple internal chambers. -
Dry the surface:
Vegetables are naturally wet, which repels paint. Press the cut side of your pepper stamp onto a paper towel firmly to absorb excess moisture. -
Remove seeds:
Gently pick out any loose seeds from the cut surface, as these can create unwanted bumps in your stamped image.
Smudged Prints?
Smudging usually happens if the paint is too thick or slick. Blot the vegetable on a paper towel again and apply a thinner layer of paint with a sponge brush.
Step 2: Stamping the Flowers
-
Prepare your palette:
Squeeze out small amounts of green, red, pink, and yellow acrylic paint onto a disposable plate or palette. -
Apply the first color:
Instead of dipping the pepper, use a brush to apply a thin, even layer of green paint directly to the cut rim and the internal ribs of the pepper slice. -
Test print:
Make a test stamp on a scrap piece of paper to gauge how much pressure you need. I like to do this once or twice to ensure I’m not using too much paint, which causes globs. -
Stamp the green flower:
Press the painted pepper onto the upper center area of your cardstock. Apply even pressure without wiggling it, then lift straight up. -
Clean or switch:
Wipe the pepper clean with a damp cloth if reusing it, or switch to a different pepper slice for the next color to avoid muddying the hues. -
Stamp the red flower:
Apply red paint to a pepper slice and stamp it below the green one, slightly to the right. -
Stamp the pink variant:
Mix a little white into your red paint if needed to get a softer pink, or use a coral shade. Stamp this to the left of the red flower. -
Stamp the yellow flower:
Finish the cluster by stamping a bright yellow pepper print near the bottom, completing a loose diamond or square arrangement. -
Dry completely:
Let the stamped paint dry fully before proceeding. This usually takes about 10–15 minutes depending on how thick the paint application was.
Textural Tip
Don’t aim for solid coverage. The charm of this project is the spotty, textured look of the print where the paper shows through, mimicking organic petals.
Step 3: Adding Greenery
-
Select leaves:
On your parsley or cilantro sprigs, look for flat, well-formed leaves that mimic the look of rose or flower leaves. -
Trimming:
Snip the leaves off the main stem, keeping a tiny bit of the petiole (leaf stem) attached for a realistic look. -
Visualize placement:
Arrange the fresh leaves on the dry paper without glue first. Try placing one near the green stamp and one near the bottom yellow stamp to balance the composition. -
Glue the leaves:
Apply a small dab of craft glue to the back of each leaf. Press them gently onto the paper, holding them down for a few seconds to ensure they adhere flat.
Frame your veggie garden print immediately or press it under a heavy book once dry to keep the real leaves flat


Cabbage Spiral Mandala Layers
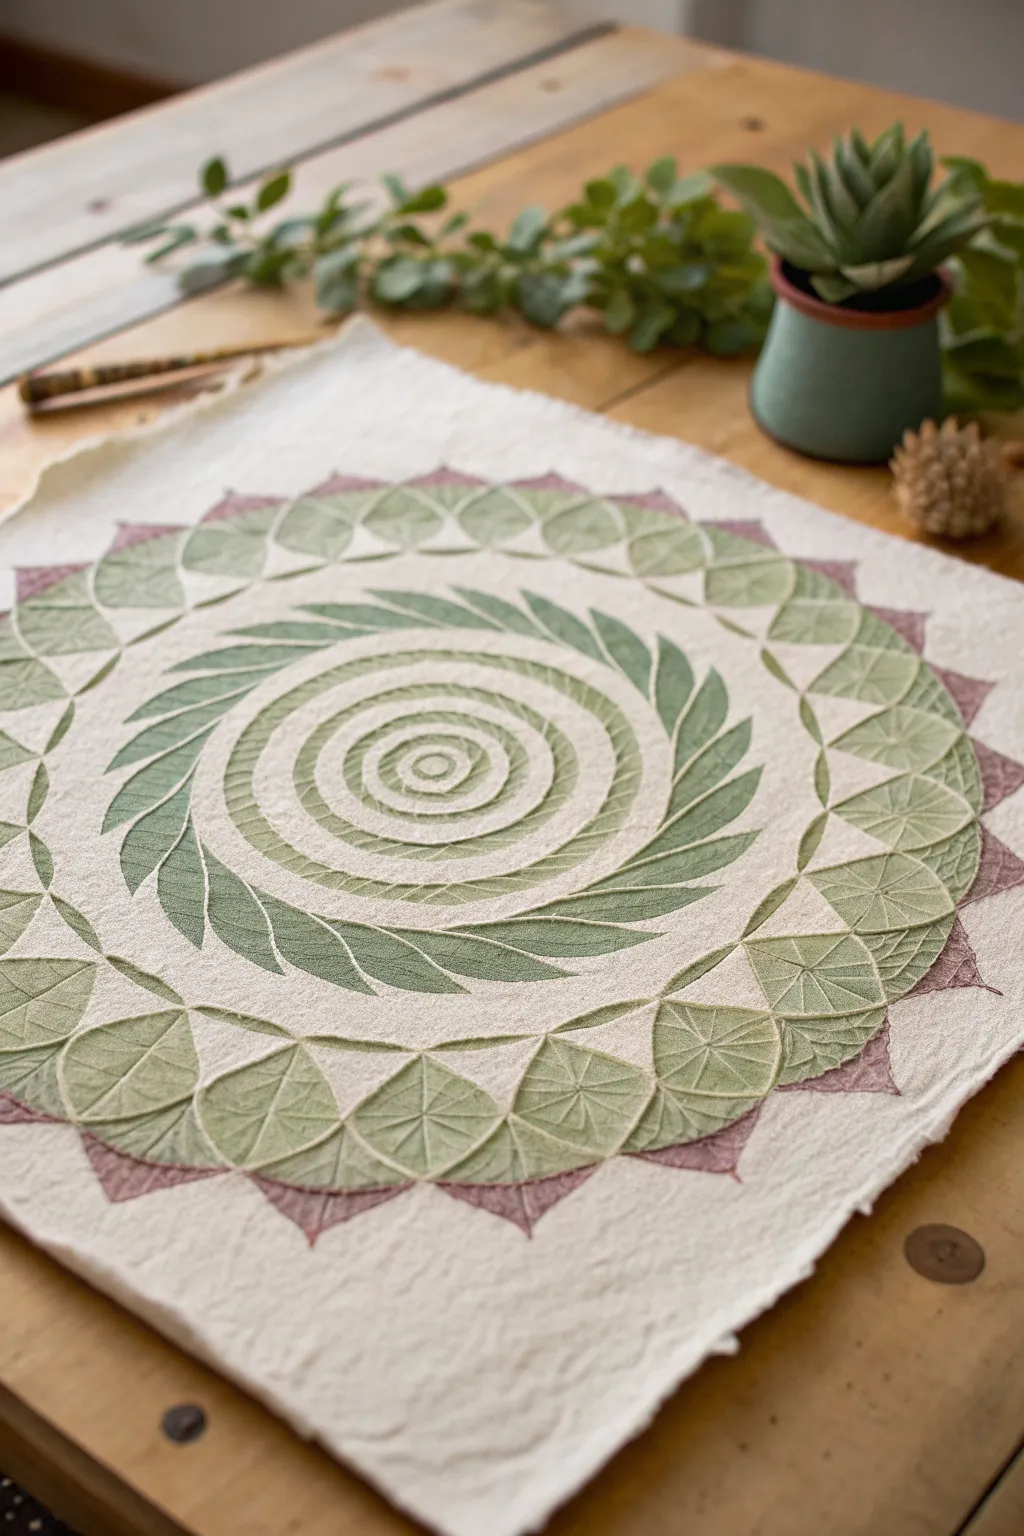
This project transforms the humble texture of cabbage leaves into a sophisticated, hypnotic mandala design on fabric. Using natural green and soft mauve fabric paints, you will create a layered, rhythmic pattern that celebrates organic geometry.
Step-by-Step Tutorial
Materials
- Square of unbleached cotton or linen fabric (approx. 18×18 inches)
- Fabric medium
- Acrylic paints (Forest Green, Sage Green, Pale Leaf Green, Muted Mauve)
- Savoy cabbage (for textured leaves)
- Red cabbage (for tighter, smoother leaves)
- Cardboard or foam board (for mounting the fabric)
- Masking tape
- Compass and pencil
- Soft brayer or sponge brushes
- Palette or paper plate
- Iron (for heat setting)
Step 1: Preparation & Layout
-
Prepare the Fabric:
Wash and dry your fabric to remove any sizing. Iron it completely flat. Tape the fabric tautly onto a piece of cardboard or foam board to prevent it from shifting while you print. -
Mark the Center:
Find the exact center of your fabric square. Use your compass to draw a faint pencil dot. This point is crucial for the spiral effect. -
Draw Guidelines:
Using your compass, draw five faint concentric circles radiating from the center. These will serve as boundaries for your different leaf layers—the central spiral, the wreath layer, and the outer petals. -
Prepare the Vegetables:
Carefully peel differing sizes of leaves from your cabbages. Look for leaves with prominent veins. For the central spiral particularly, you want flexible, thin strips, so you may need to cut a large leaf into curved segments.
Step 2: Painting the Central Spiral
-
Mix the Base Green:
Mix your Pale Leaf Green acrylic with fabric medium. The consistency should be creamy but not runny. Apply a thin, even coat to the veined side of a long, curved cabbage leaf strip using a sponge brush. -
Plan the Spiral:
Before pressing, hover the leaf over the center. You want to create a tightness in the middle that unfurls outward. I like to do a test print on scrap paper first to check the curve. -
Print the Core:
Press the painted leaf strip down, starting at the very center dot and curving outward. Use a brayer or your fingers to press firmly on the veins to ensure the texture transfers. -
Expand the Coil:
Continue adding curved strips, connecting them end-to-end to create a continuous spiral effect. As the spiral grows outward, switch to slightly wider leaf segments to mimic natural growth.
Choosing Your Leaves
Savoy cabbage offers deep, crinkled textures perfect for the outer geometric shapes, while standard green cabbage provides smoother curves for the spiral.
Step 3: The Middle Wreath Layer
-
Select Wreath Leaves:
Choose medium-sized, elongated leaves for the next ring (the darker green layer in the image). These should have a slight curve to them. -
Apply Darker Paint:
Mix the Forest Green with a touch of Sage and fabric medium. Coat the leaves thoroughly, ensuring the paint doesn’t pool in the vein crevices. -
Create the Flow:
Stamp these leaves in a ring around your central spiral. Angle each leaf significantly so they look like they are spinning or chasing each other counter-clockwise, rather than pointing straight out. -
Check Consistency:
Ensure the tips of this ‘wreath’ layer touch or slightly overlap the previous spiral layer to maintain visual continuity.
Smudged Prints?
If paint squeezes out the sides, you’re using too much paint or pressing too hard. Blot your leaf on a paper towel once before stamping correctly.
Step 4: Outer Petals & Details
-
Prepare Outer Petals:
For the geometric outer ring, cut Savoy cabbage leaves into uniform triangle or diamond shapes. The crinkled texture of Savoy is perfect here. -
Stamp the Green Border:
Using the Sage Green, stamp these triangular shapes along your outer guideline. Orient them so the points face inward toward the center. -
Add Vein Accents:
Once the green shapes are dry, use a fine liner brush with slightly diluted dark green paint to enhance the ‘starburst’ vein lines inside these outer shapes if the print is too faint. -
The Final Mauve Layer:
Cut smaller, sharper triangles from the smooth red cabbage leaves. Coat them with the Muted Mauve paint mix. Carefully stamp these in the gaps between the green outer petals, creating a jagged, crown-like border.
Step 5: Finishing Touches
-
Dry Completely:
Allow the entire piece to dry for at least 24 hours. Don’t rush this, or the paint might smudge. -
Heat Set:
Once dry, place a thin pressing cloth or parchment paper over the design. Iron on a high, dry heat setting for 3-5 minutes to permanently set the fabric paint.
Your finished mandala is now a durable piece of textile art, ready to be framed or sewn into a unique pillow cover.

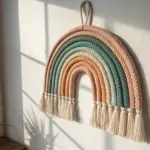


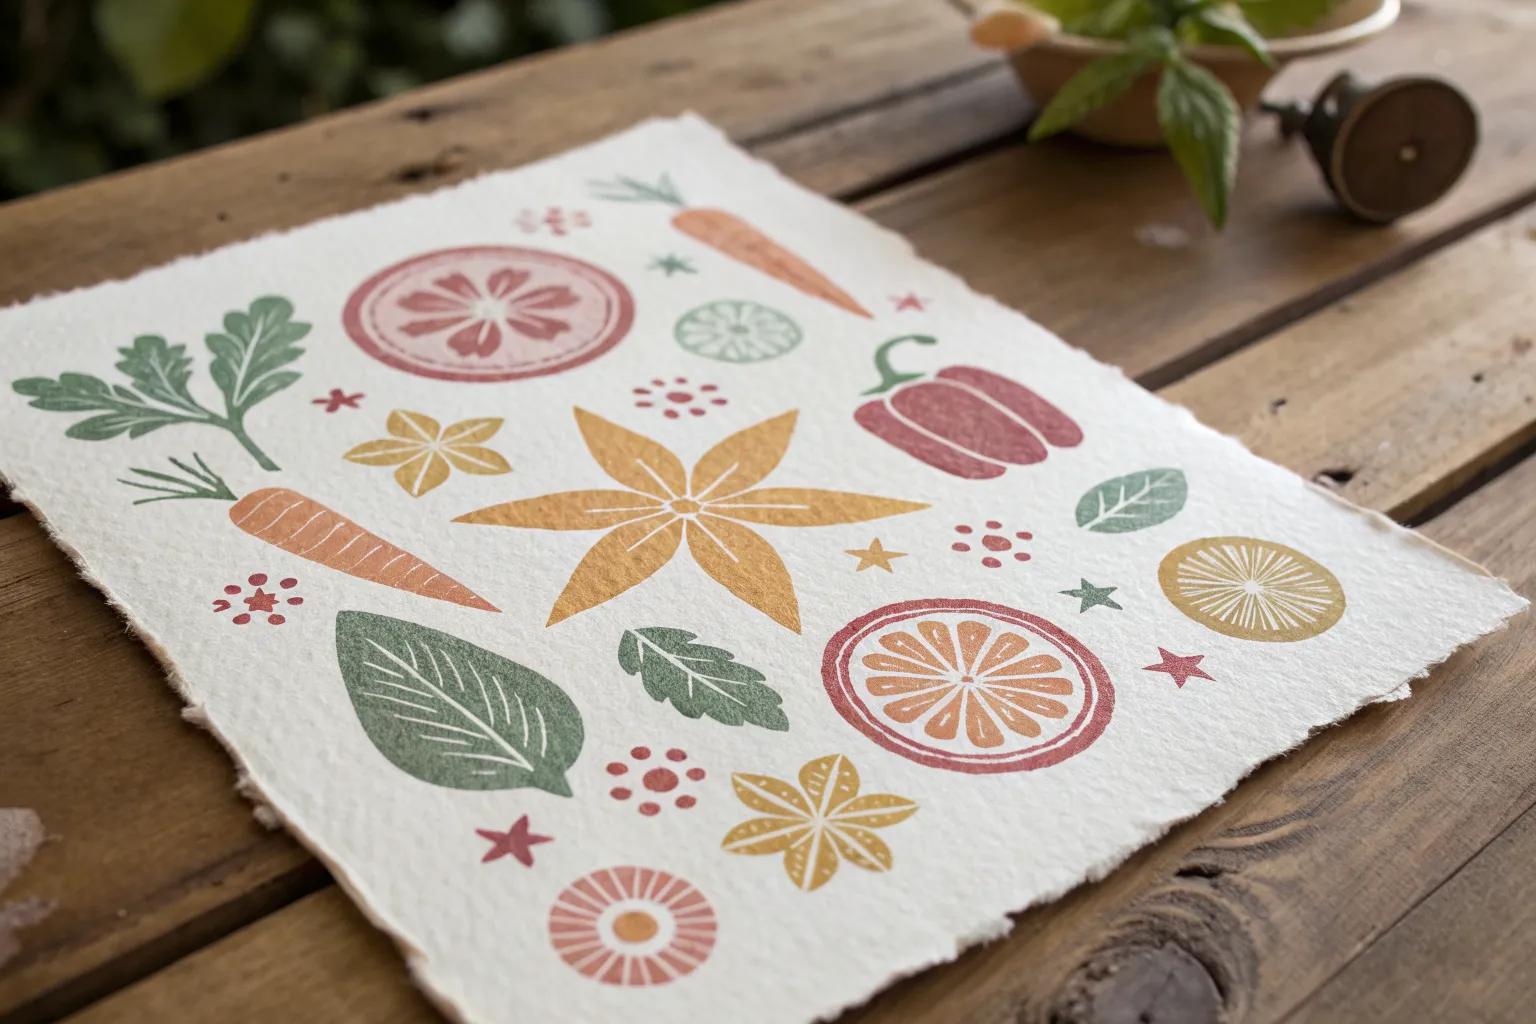
Layered Ombre Vegetable Stamp Fields
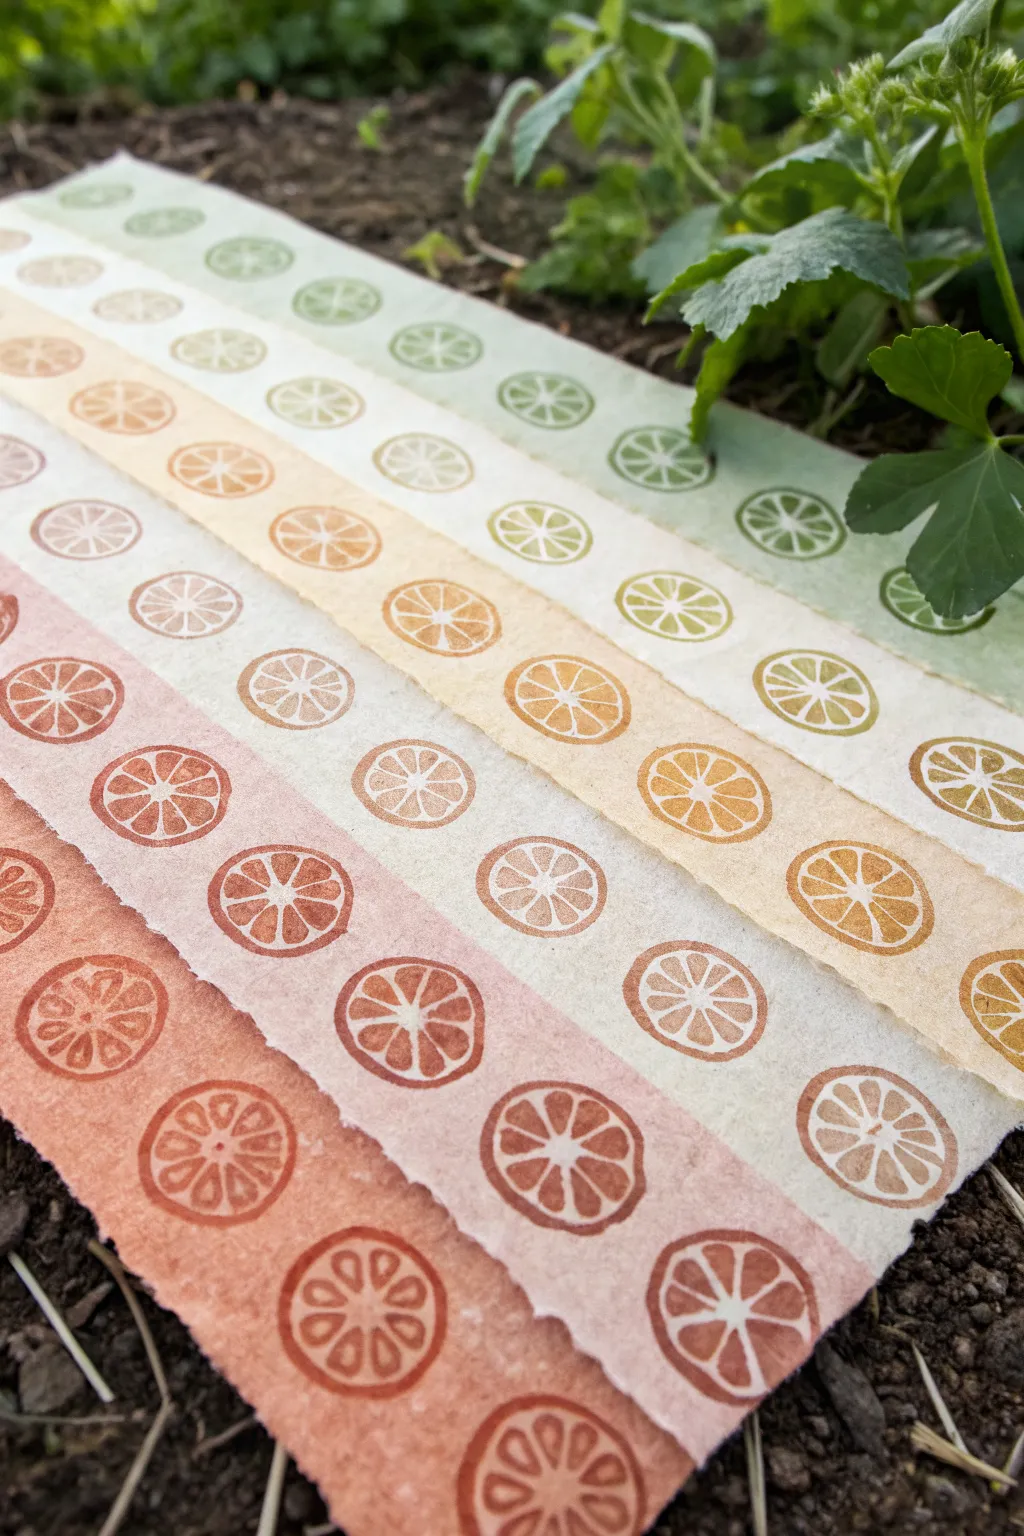
Transform humble produce into stunning graphic art with this vegetable printing project. Using strips of textured handmade paper and simple citrus halves, you can build a beautiful gradient of stamped patterns that looks fresh from the garden.
How-To Guide
Materials
- 4 strips of textured handmade paper or heavy watercolor paper (approx. 3-4 inches wide)
- Lemons or limes (firm)
- Acrylic paints (Red, Orange, Yellow, Light Green, Dark Green)
- White acrylic paint (for mixing tints)
- Small foam rollers or sponge brushes
- Paper plate or palette
- Paper towels
- Sharp knife
- Scrap paper for testing
Step 1: Preparing the Citrus Stamps
-
Select your fruit:
Choose lemons or limes that are firm to the touch. A squishy fruit will distort when you press down, losing the clean lines of the segments. -
Create a clean cut:
Slice your citrus fruit exactly in half through the equator (the widest part). Ensure the cut is perfectly flat and straight; a slanted cut will result in uneven prints. -
Dry the surface:
This is crucial: Press the cut side of the fruit firmly onto a absorbent paper towel. Repeat this multiple times until the surface feels dry to the touch. Excess juice ruins the paint consistency and blurs the print details.
Uneven Prints?
If you are getting ‘bald’ spots in your stamp, your table might be uneven. Place a folded towel or a foam mat under your paper to provide a little give, which helps catch the full impression.
Step 2: Mixing the Color Palette
-
Set up your palette:
Squeeze out your base colors onto a paper plate. You want to create four distinct hues that transition naturally: effortless pink-red, soft orange, pale yellow-green, and a deeper sage green. -
Mix the red shade:
For the bottom strip, mix red with a touch of orange and a tiny bit of white to soften it into a terracotta or coral shade. -
Mix the orange shade:
For the second strip, use pure orange with a generous amount of white to create a creamy, sherbet tone. -
Mix the transition shade:
The third strip needs a yellowish-green. Mix yellow with a very small dot of light green and white. -
Mix the green shade:
Finally, for the top strip, mix your dark green with a little white and perhaps a touch of yellow to keep it warm and earthy.
Seed Paper Variation
Use plantable seed paper for your base. Once the recipient enjoys the art, they can bury the strips in the garden to grow actual wildflowers or herbs.
Step 3: Printing the Layers
-
Apply paint to the fruit:
Instead of dipping the fruit directly into the paint, use a foam roller or sponge brush to dab a thin, even layer of the red mixture onto the cut face of the lemon. Ensure the rind and the segment walls are covered, but don’t let paint pool in the gaps. -
Test your pressure:
Do a test stamp on scrap paper first. Press firmly and lift straight up. If it’s too blotchy, use less paint; if it’s too faint, press harder. Once you have the feel for it, you are ready for the final paper. -
Stamp the red strip:
Take your first strip of paper. Start at the bottom left edge and stamp your red citrus. Re-apply paint between every single stamp to ensure consistent color density. Continue stamping in a diagonal or staggered line up the strip. -
Clean and switch colors:
Wipe your lemon stamp completely clean with a damp paper towel, or use a new half if you have plenty. Dry it thoroughly again. -
Stamp the orange strip:
Using the creamy orange mix, repeat the process on the second strip of paper. Try to angle the fruit slightly differently with each press to make the pattern look organic and tumbling. -
Stamp the yellow-green strip:
Move to the third strip using your pale yellow-green mix. I find it helpful to place the previous strips next to the current one while working to ensure the color progression looks harmonious. -
Stamp the dark green strip:
Complete the final top strip with the sage green paint. Be mindful of the paper edges, occasionally letting a stamp go partially off the edge for a continuous pattern feel. -
Dry flat:
Lay all four strips on a flat surface to dry completely. The textured paper may absorb moisture, so give it at least an hour before handling.
Once dry, arrange your gradient strips together to create a cohesive and refreshing piece of wall art


Have a question or want to share your own experience? I'd love to hear from you in the comments below!