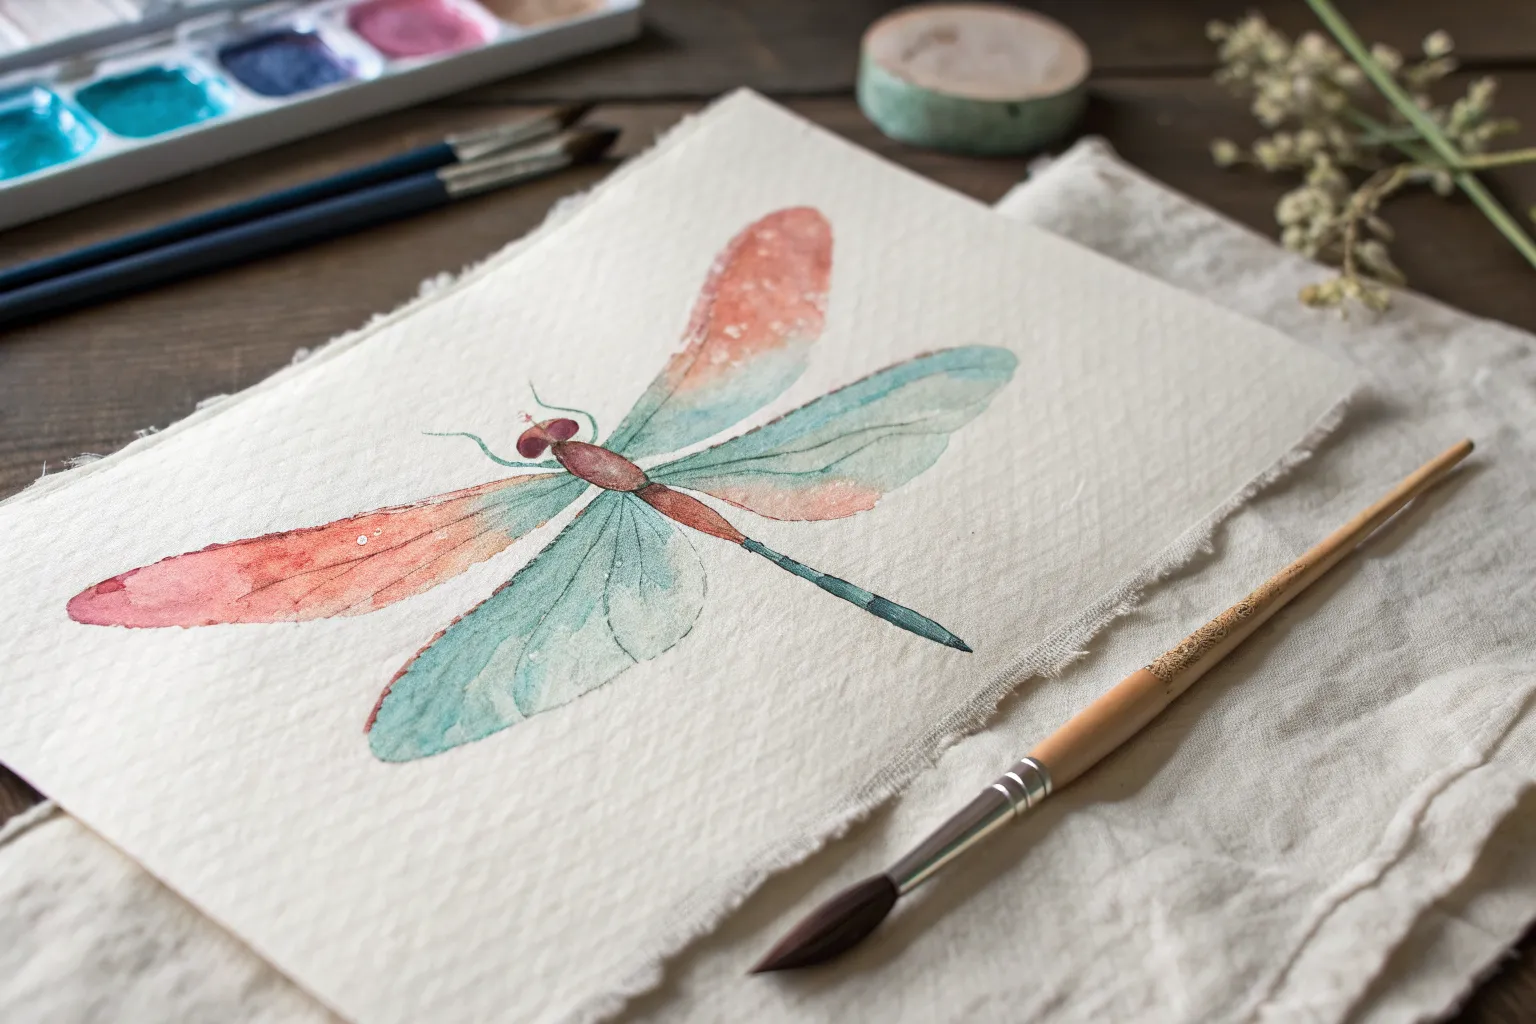
Dragonflies are one of my favorite subjects because they look instantly magical, but you can build them from super simple shapes. Below are easy dragonfly painting ideas I use in my own classes when you want quick wins, pretty results, and lots of room to play.
Classic Top-Down Dragonfly Symmetry
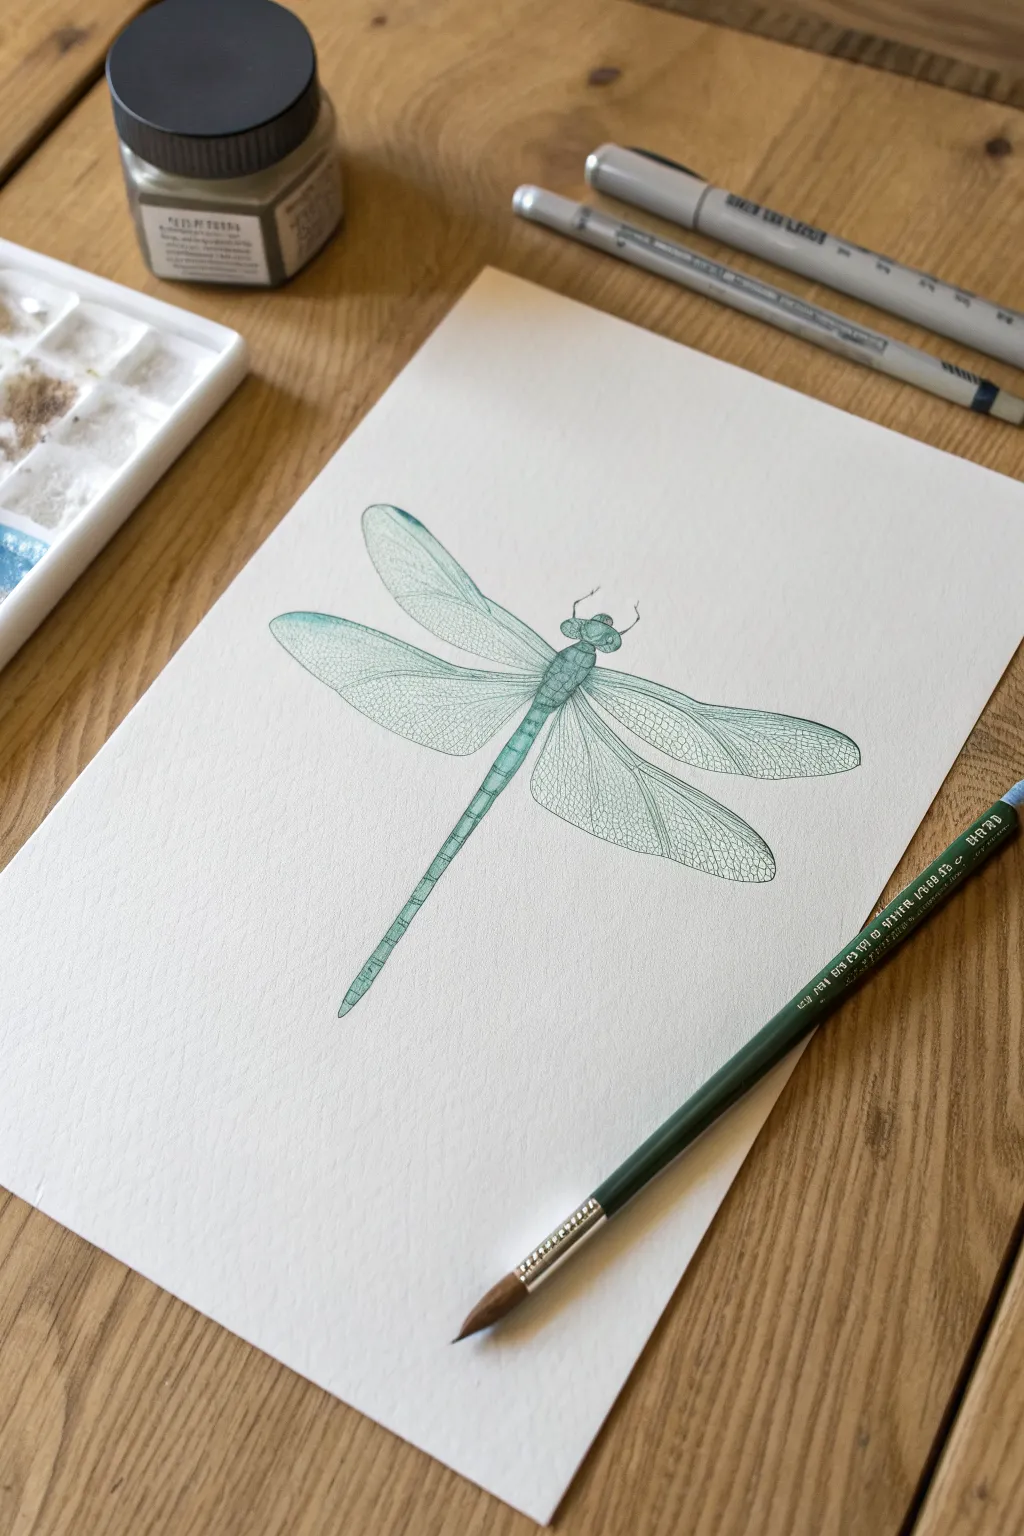
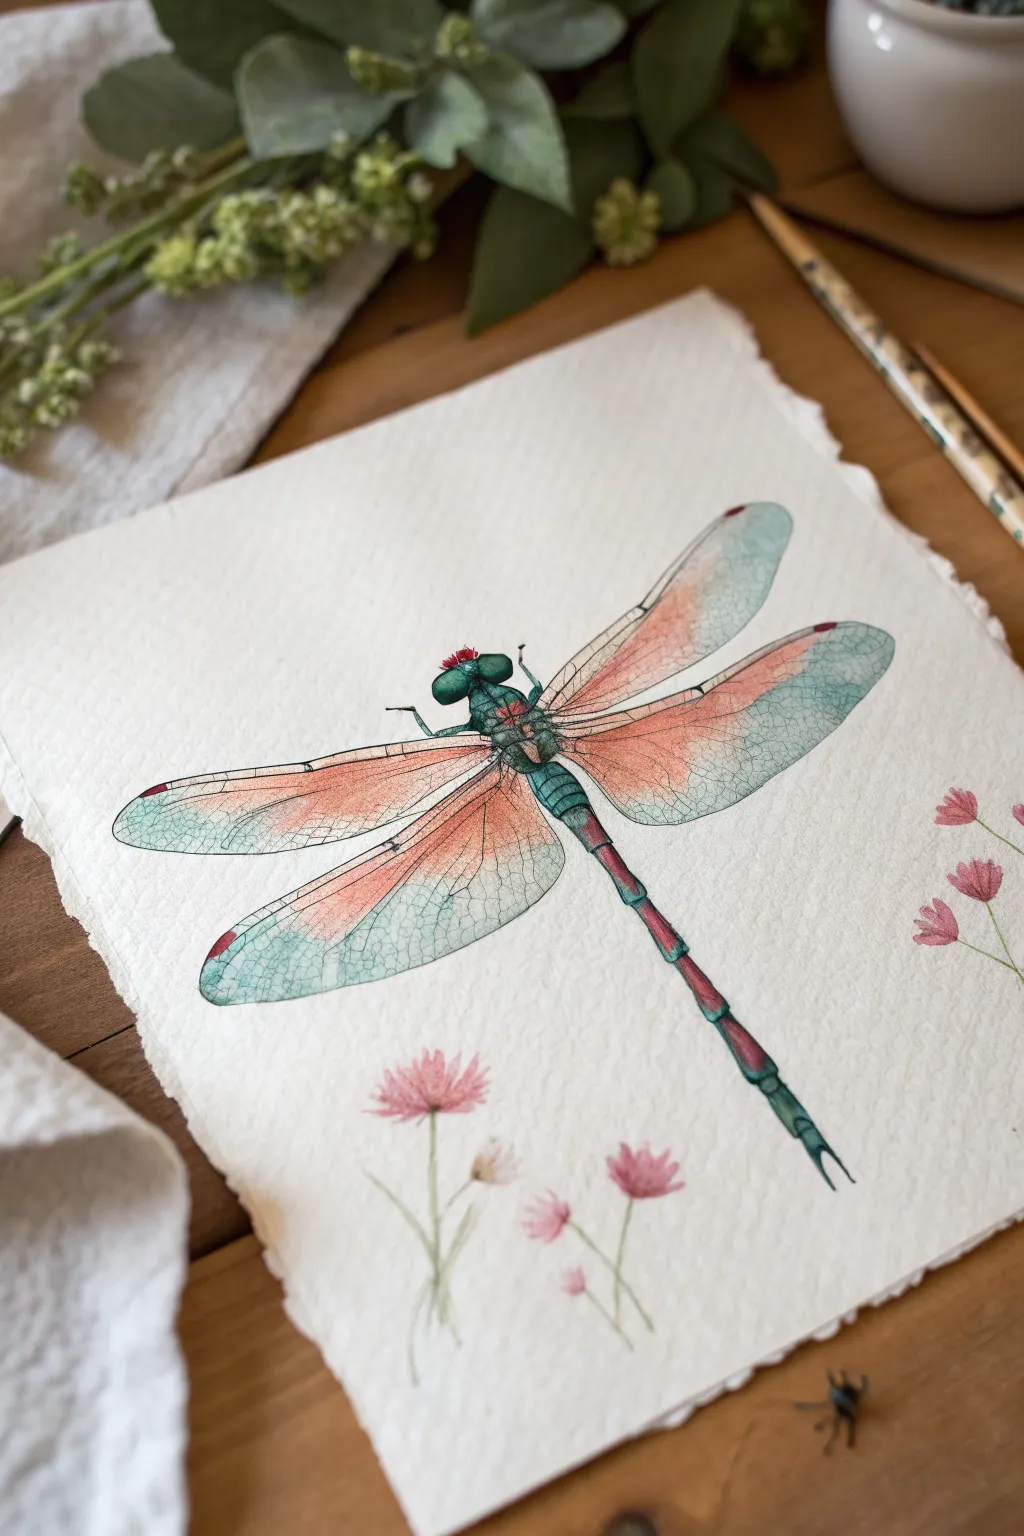
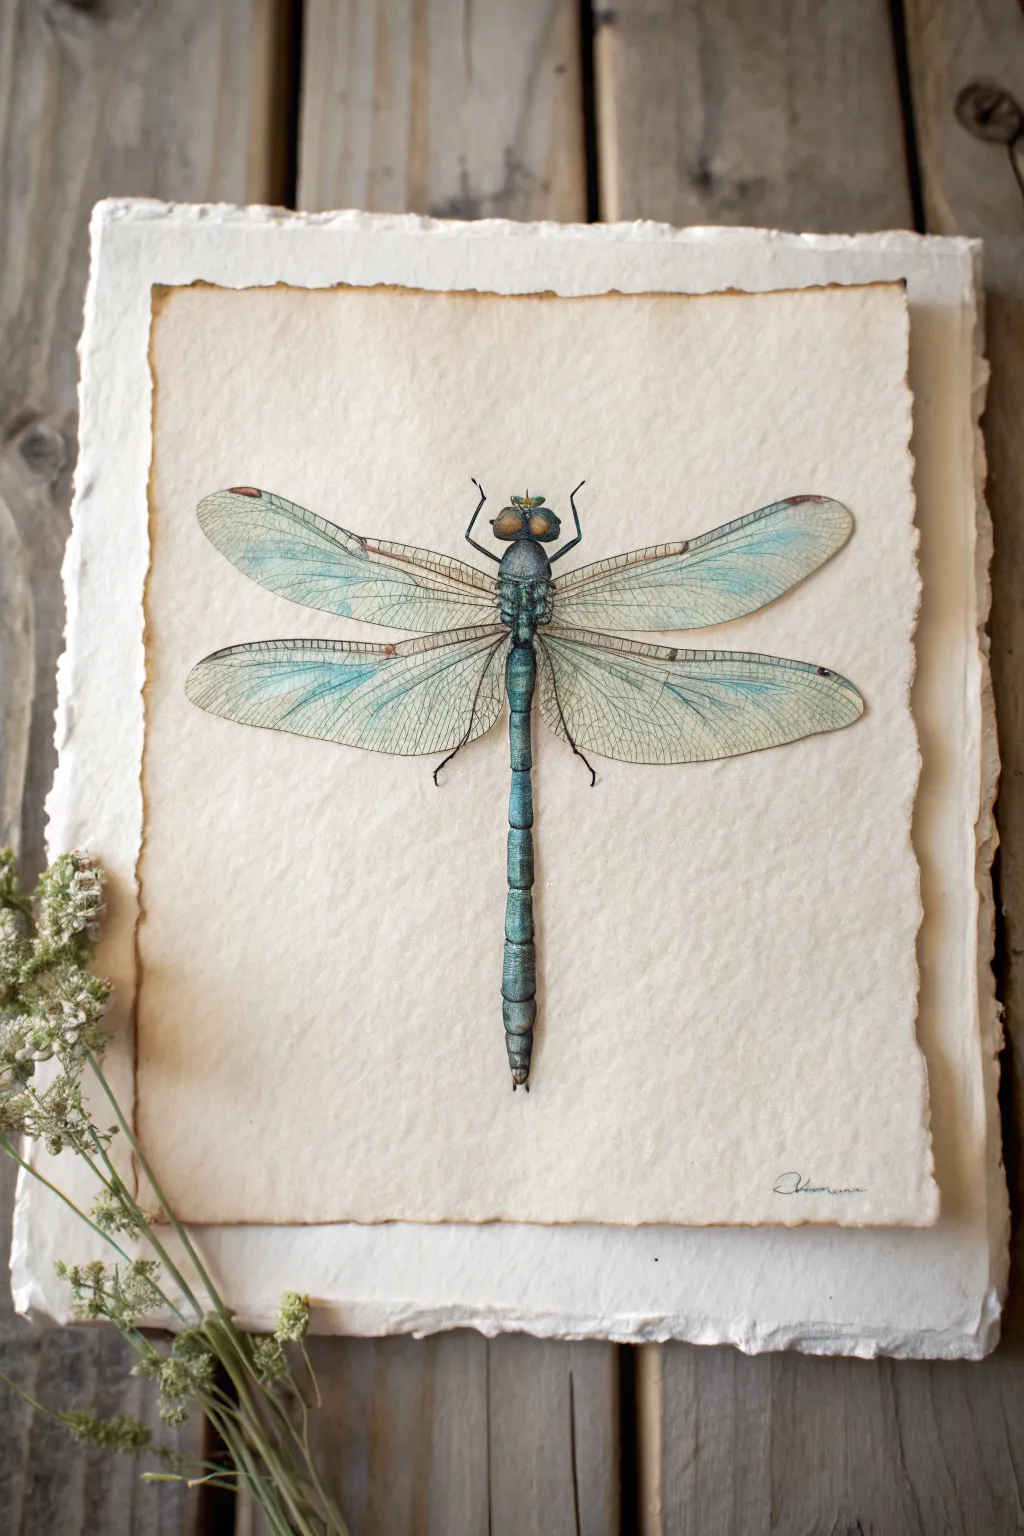
Capture the delicate beauty of a dragonfly with this minimalist watercolor study. By focusing on monochromatic teal tones and intricate wing venation, you will create a piece that feels both scientific and artistic.
Detailed Instructions
Materials
- Hot-pressed watercolor paper (smooth texture is crucial)
- Watercolor paints (Phthalo Green and a touch of Burnt Umber)
- Fine liner brush (size 00 or 0)
- Drawing pencil (H or HB)
- Kneaded eraser
- Fine-point pigment liner pen (0.05mm, grey or sepia)
- Clean water jar
- Paper towel
Step 1: Sketching the Anatomy
-
Mark the centerline:
Begin by lightly drawing a vertical centerline down the middle of your paper. This invisible guide is essential for keeping the wings symmetrical. -
Draft the body segments:
Sketch a small oval for the head at the top of your line. Below it, draw a slightly larger, rectangular thorax, followed by a long, slender abdomen extending downwards. The abdomen should taper gently toward the tail. -
Map the wing shapes:
Draw the upper wings first, extending them horizontally from the thorax with a slight upward curve at the tips. Draw the lower wings slightly wider and angled downwards. Ensure the left and right sides mirror each other. -
Refine the outline:
Go over your sketch to smooth out the curves. Once you are happy with the shape, use your kneaded eraser to lift the graphite until the lines are barely visible phantom guides.
Smooth Paper is Key
Use hot-pressed watercolor paper for this project. Its smooth, non-textured surface prevents your pen nib from snagging when drawing the tiny wing veins.
Step 2: The Watercolor Wash
-
Mix your base color:
Create a watery mix of Phthalo Green. I like to dull the brightness slightly with a tiny speck of Burnt Umber or grey to make it look more organic and less synthetic. -
Paint the body:
Using your fine brush, fill in the head, thorax, and abdomen with a light wash of your green mix. Keep the edges crisp. -
Add body dimension:
While the paint is still damp, drop a slightly more concentrated green pigment onto the left side of the abdomen and thorax segments. This suggests a light source coming from the right. -
Wash the wings:
Paint the wings with an extremely pale, diluted version of your green mix. You want this to be a ghostly tint rather than a solid block of color. -
Dry completely:
Let the paper dry fully before moving on. The paper must be bone-dry to prevent the fine lines in the next phase from bleeding.
Step 3: Inking the Details
-
Select your tool:
For the intricate veins, switch to a very fine pigment liner pen (0.05mm) or use your brush with concentrated paint if you have a steady hand. A warm grey or sepia tone looks softer than harsh black. -
Define the main veins:
Draw the ‘leading edge’ (the thick vein at the front) of each wing first. Then, draw the primary veins that radiate from the thorax out toward the wing tips. -
Create the cellular network:
Begin filling the spaces between the main veins with an irregular, net-like pattern. These cells should be smaller near the wing edges and larger toward the body. -
Detail the abdomen:
Draw horizontal lines across the abdomen to define the separate segments. You can add tiny vertical hatch marks along the shadowed side to enhance the cylindrical form. -
Head and eyes:
Outline the large compound eyes on the head. Add two tiny, hair-thin antennae extending from the front of the face.
Add Metallic Flair
Mix iridescent medium into your wing wash or use metallic watercolor for the body highlights to give the dragonfly a true-to-life shimmering effect.
Step 4: Final Touches
-
Deepen shadows:
Mix a darker, more saturated version of your original teal. Carefully paint over the joints where the wings meet the body to anchor the limbs. -
Add subtle variation:
Glaze a tiny bit of darker blue-green onto the tips of the wings. This creates a gentle gradient that draws the eye outward. -
Clean up:
Once everything is completely dry, use your eraser to remove any remaining pencil marks that might be peeking through the lighter washes.
Step back and admire the delicate symmetry of your finished insect study
Watercolor Wash Dragonfly Background
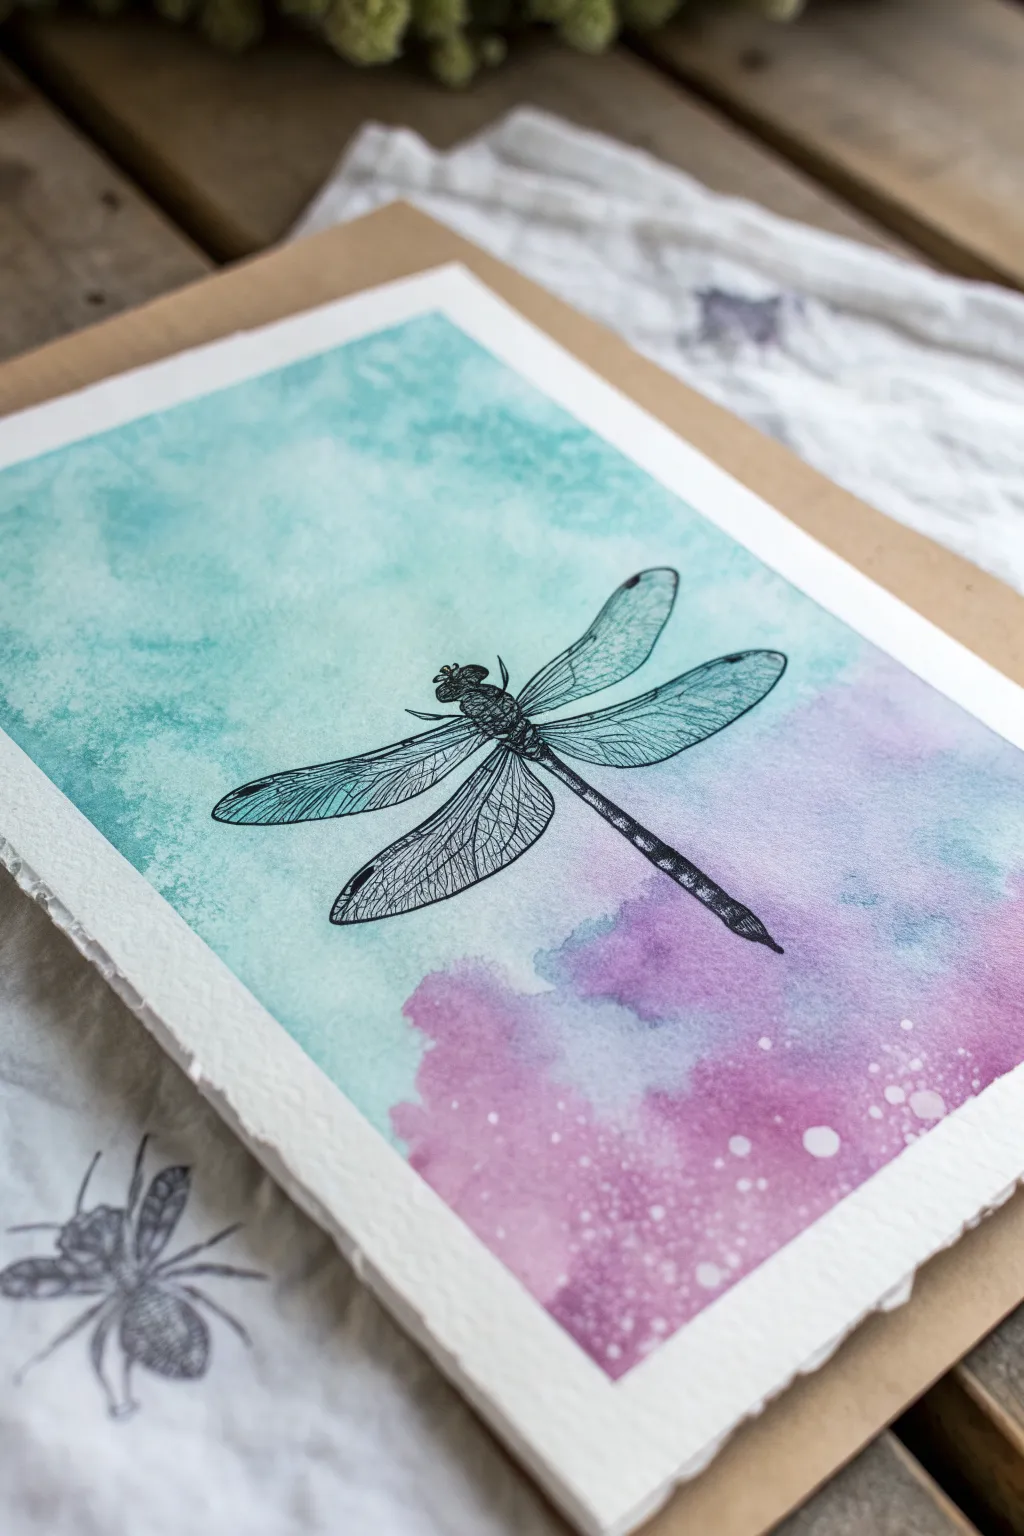
This project combines the fluid, dreamy nature of watercolor with the sharp precision of ink illustration. The result is a striking contrast where intricate black lines float effortlessly over a serene teal and purple gradient wash.
Step-by-Step Tutorial
Materials
- Cold press watercolor paper (300 gsm or 140 lb recommended)
- Watercolor paints (teal, turquoise, purple, magenta)
- Large flat brush or wash brush
- Jar of clean water
- Paper towels
- Table salt or rough sea salt
- Fine liner pens (sizes 005, 01, and 03, waterproof)
- Pencil and eraser
- Masking tape
Step 1: Creating the Background Wash
-
Secure Your Paper:
Begin by taping down all four edges of your watercolor paper to a hard board or table. This prevents buckling when the paper gets wet and creates a clean white border around your final piece. -
Wet the Surface:
Using your large wash brush, apply a layer of clean water over the entire paper surface. You want it glistening and evenly damp, but not forming puddles. -
Apply the Teal:
Load your brush with a watery mix of teal or light turquoise paint. Start at the top of the paper and gently sweep the color downwards, letting it naturally diffuse into the wet paper. -
Fade the Color:
As you move past the halfway point, clean your brush slightly and pull the teal down so it fades into transparency, leaving the bottom third mostly clear for the next color. -
Add the Purple Base:
While the paper is still damp, pick up your purple or magenta paint. Apply this to the bottom section of the paper, brushing upwards to meet the fading teal. -
Create the Blend:
Where the teal and purple meet, gently nudge the colors together. Allow them to bleed into one another naturally to create a soft transition rather than a hard line. -
Texturize with Salt:
While the purple section is still wet and shiny, sprinkle a pinch of salt onto the pigment. The salt will absorb the water and push the pigment away, creating the starry, speckled texture seen in the reference. -
Adding Splatters:
I also like to flick a tiny bit of clean water from a brush onto the drying wash for additional bloom effects, soft speckles that complement the salt texture. -
Dry Completely:
Wait for the paint to dry completely. This is crucial—if the paper is damp, your ink lines will bleed. Once bone dry, brush off the salt crystals gently.
Salt Timing
Add salt when the paper is shiny-wet but not swimming. If it’s too dry, nothing happens; too wet, the salt dissolves completely.
Step 2: Inking the Dragonfly
-
Sketch Outline:
Lightly sketch the basic shape of the dragonfly with a pencil. Focus on the long, thin abdomen, the thorax, and the four long wings extending outwards. -
Outline the Body:
Switch to your 03 pen (a slightly thicker nib). Trace the outline of the head, thorax, and segmented abdomen. Use broken or slightly rough lines on the abdomen to suggest texture. -
Outline the Wings:
Use the 01 pen to draw the main outline of the wings. Keep your hand loose; dragonfly wings have a delicate, organic curve to them. -
Draw Wing Veins:
Switch to your finest 005 pen for the interior details. Draw the primary veins running lengthwise through the wings first. -
Detail the Cells:
Fill in the intricate network of smaller veins (cells) within the wings. These jagged, irregular shapes give the wings their characteristic lacy look. -
Darken the Body:
Return to the body with the 03 pen. Add shading to the sides of the thorax and abdomen to give it volume, leaving the center slightly lighter to simulate a highlight. -
Enhance Contrast:
Add small stippling dots or hatching where the wings attach to the body to add depth and make the insect pop against the background. -
Final Cleanup:
Once the ink is fully dry, gently erase any visible pencil marks. Peel off the masking tape slowly at a 45-degree angle to reveal your crisp white border.
Metallic Touch
Use a metallic gold or silver gel pen to trace a few of the main wing veins for a shimmering, magical finish when the light hits it.
Frame your delicate insect illustration to highlight the beautiful collision of precise lines and fluid color


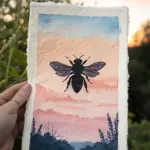
Moonlit Night Sky Dragonfly Silhouette
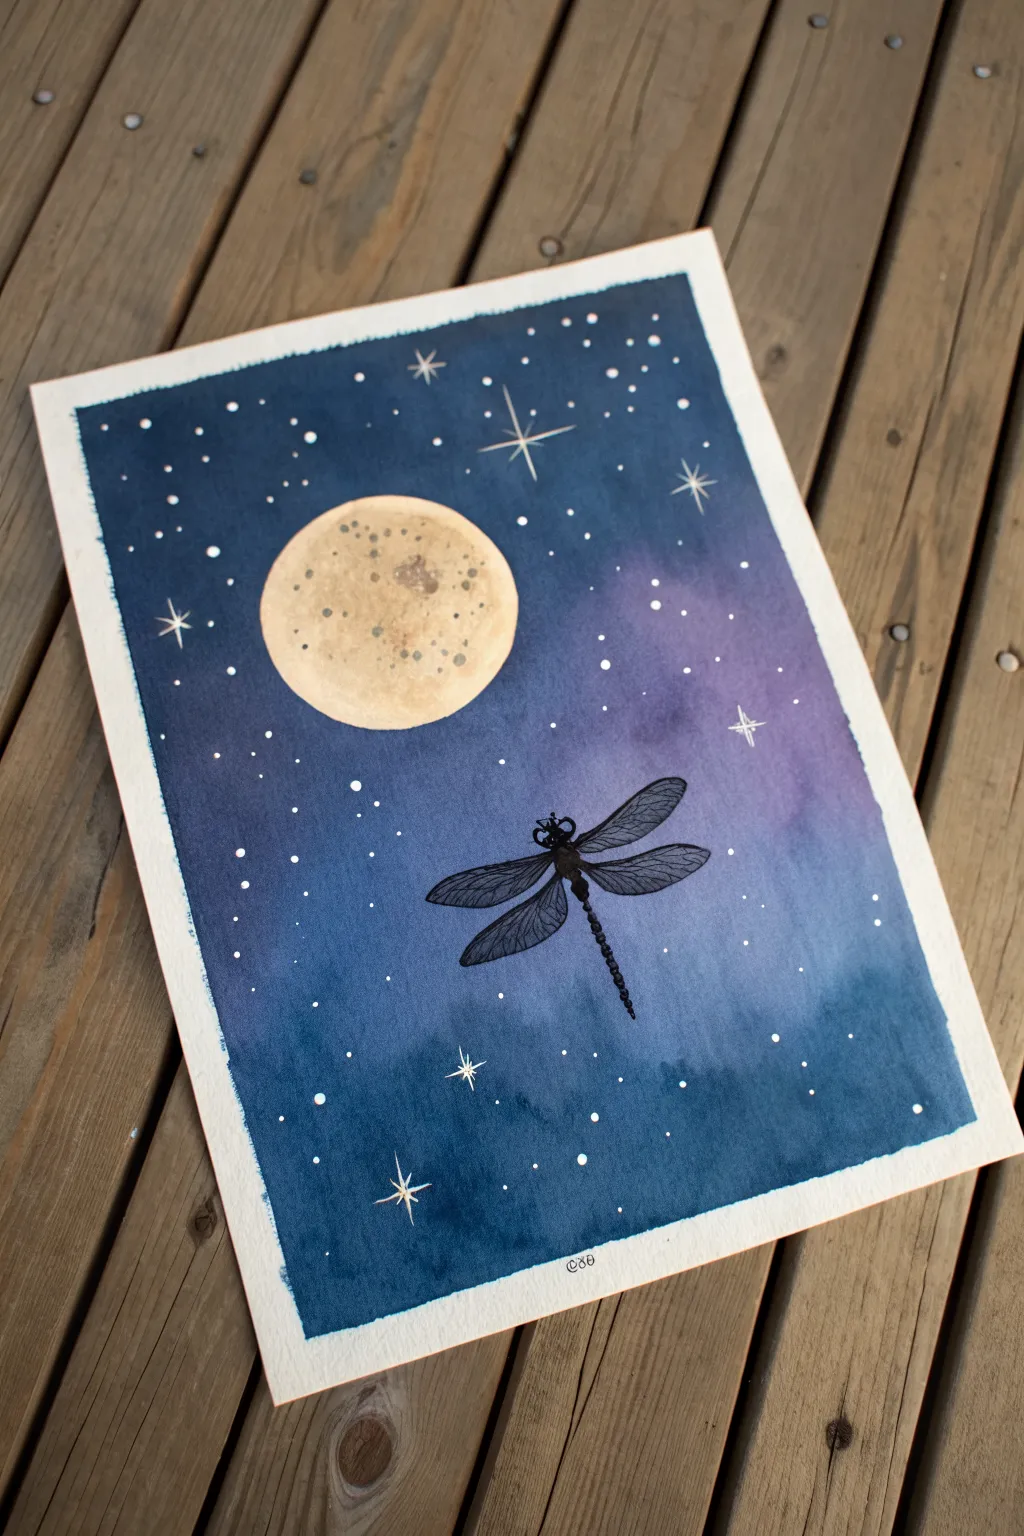
Capture the serene beauty of a quiet evening with this watercolor project, featuring a glowing moon and a delicate dragonfly silhouette against a deep, starry sky. The blend of indigo and violet creates a dreamy atmosphere perfect for beginners looking to practice wet-on-wet techniques.
How-To Guide
Materials
- Cold press watercolor paper (taped down)
- Watercolor paints (Indigo, Payne’s Gray, Purple/Violet, Yellow Ochre, Burnt Sienna)
- White gouache or white gel pen
- Black fine liner pen or black acrylic ink
- Round watercolor brushes (size 8 and size 2)
- Masking tape or painter’s tape
- Jar or cup for tracing the circle
- Pencil and eraser
- Clean water
Step 1: Setting the Scene
-
Prepare your paper:
Start by taping down all four edges of your watercolor paper to a board or table. This creates that clean, crisp white border you see in the final image and prevents the paper from buckling when wet. -
Trace the moon:
Place a small jar or circular object in the upper-left quadrant of your paper. Lightly trace around it with a pencil to define the moon’s shape. -
Mask the moon:
To keep the moon bright, carefully wet only the starry sky area around the circle with clean water. Avoid getting water inside the moon circle for now. If you have masking fluid, you can apply it over the moon, but careful painting works just as well.
Paint Consistency Pro Tip
For the starry splatter, make your white paint the consistency of milk. If it’s too thick, it won’t splatter; too thin, and the stars will be transparent.
Step 2: Painting the Galaxy Sky
-
Apply the first wash:
While the paper is damp, drop in a deep indigo or navy blue at the very top and bottom edges. Let the color flow freely. -
Add violet tones:
Introduce a purple or violet shade into the middle section, specifically around the right side where the dragonfly will go. Let this purple bleed naturally into the blue areas. -
Darken the edges:
While the paint is still wet, charge your brush with concentrated indigo or Payne’s gray. Dab this pigment into the corners and outer edges to create depth and focus the viewer’s eye toward the center. -
Blend the moon’s halo:
Carefully paint up to the pencil line of your moon. Soften the paint slightly as it nears the circle so there isn’t a harsh, thick ridge of paint. -
Let it dry completely:
If you try to paint the moon too soon, the blue sky will bleed into it. Wait until the background is bone-dry to the touch.
Add Metallic Magic
Use metallic gold watercolor for the moon craters or silver ink for the wing veins to make the piece shimmer when it catches the light.
Step 3: Painting the Glowing Moon
-
Base layer for the moon:
Wet the inside of the moon circle with clean water. Drop in a very watered-down mix of yellow ochre, keeping it pale and creamy. -
Add texture:
While the yellow is damp, touch in tiny spots of Burnt Sienna or light brown to mimic craters. Let the paint bloom slightly to create soft, organic textures. -
Enhance the craters:
Once the moon layer is semi-dry, use a smaller brush to add a few sharper, darker speckles of brown for detailed surface texture.
Step 4: Stars and Silhouette
-
Splatter the stars:
Cover your painted moon with a scrap of paper to protect it. Dilute white gouache with a little water, load your brush, and tap the handle against another brush to splatter tiny white stars across the blue and purple sky. -
Draw highlight stars:
Using a white gel pen or a fine brush with white gouache, manually draw a few larger, four-pointed stars. Place them strategically around the moon and in the darker corners. -
Sketch the dragonfly:
Once everything is perfectly dry, lightly sketch the dragonfly shape in the violet section of the sky. Draw a long, thin abdomen and four distinct wings. -
Fill the silhouette:
Using a black fine liner pen or a small brush with black ink, carefully fill in the dragonfly’s body. Make the abdomen segmented, looking like small beads strung together. -
Detail the wings:
Outline the wings with black ink. Instead of filling them in solid, draw delicate vein patterns inside the wings to keep them looking transparent and airy. -
Remove the tape:
Wait until the black ink is fully set. Then, peel your masking tape away slowly at a 45-degree angle to reveal the crisp white border.
Frame your new celestial artwork to bring a touch of nighttime magic into your home


Dragonfly Skimming a Simple Pond
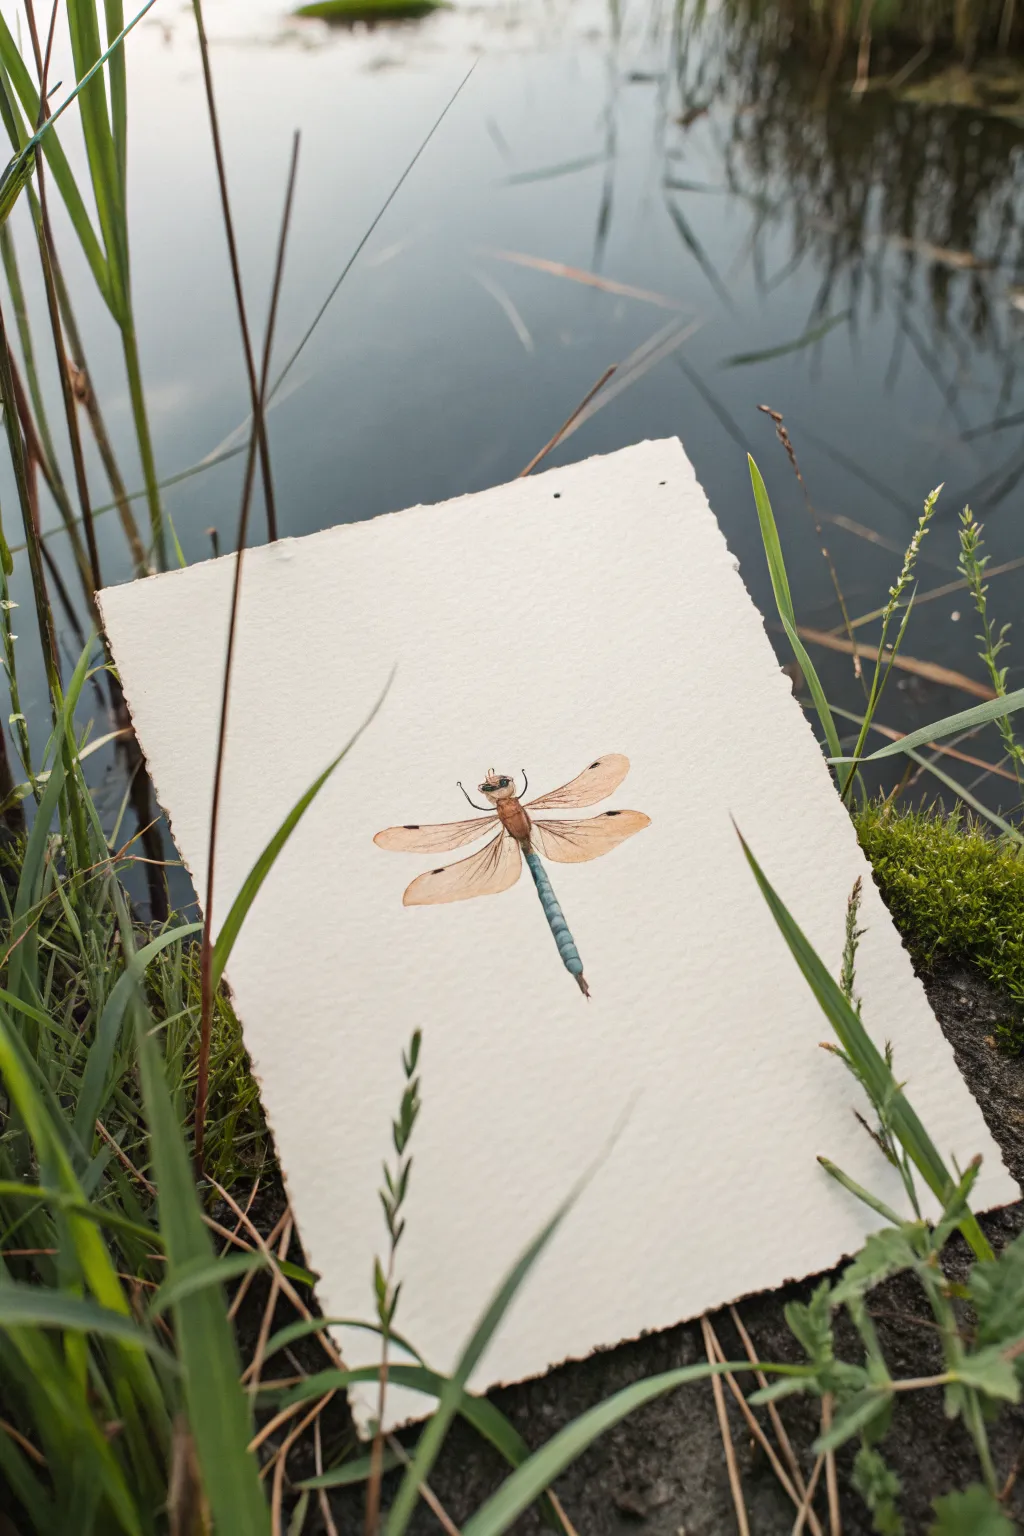
Capture the delicate details of nature with this serene watercolor study of a resting dragonfly. The combination of translucent, warm-toned wings and a cool blue body creates a striking yet harmonious focal point on textured paper.
Detailed Instructions
Materials
- Cold press watercolor paper (rough edge optional)
- Watercolor paints (Burnt Sienna, Yellow Ochre, Cerulean Blue, Prussian Blue, Burnt Umber)
- Round watercolor brushes (sizes 2, 4, and 0 for details)
- Pencil (HB or H)
- Kneaded eraser
- Clean water jar
- Paper towels
Step 1: Sketching the Skeleton
-
Lay the groundwork:
Begin by lightly sketching a simple centerline on your paper to determine the dragonfly’s angle and size. -
Shape the body:
Draw three main sections along your centerline: a small oval for the head, a slightly larger and thicker oval for the thorax, and a long, slender, segmented tail. -
Outline the wings:
Sketch two pairs of elongated wings extending from the thorax. Make the top pair slightly longer and curved upward, while the bottom pair angles slightly downward. -
Refine the lines:
Gently erase any heavy pencil marks with a kneaded eraser until only a faint ghost of the image remains, so the graphite won’t dirty your watercolors.
Muddy colors?
If your transparent wings look dirty, ensure your brush water is perfectly clean before mixing the pale ochre wash. Dirty water ruins transparency.
Step 2: Painting the Wings
-
First wing wash:
Mix a very watery wash of Yellow Ochre with a tiny touch of Burnt Sienna. Apply this sheer glaze to all four wings. -
Adding warmth:
While the wings are still slightly damp, drop a slightly more concentrated mix of the same color near the base where the wings meet the body. -
Wing tips:
Use a small brush to dab a tiny spot of Burnt Umber on the outer leading edge of each wing, creating the distinctive pterostigma (wing spot). -
Let it dry:
Allow the wing sections to dry completely before moving on to avoid the colors bleeding into the body.
Step 3: Bringing the Body to Life
-
Head and thorax base:
Paint the head and the thick thorax section using a mix of Burnt Sienna and Burnt Umber. Keep the top slightly lighter to suggest sunlight hitting it. -
Adding the blue tail:
Load your size 4 brush with Cerulean Blue. Paint the long tail section, leaving tiny white gaps between segments if possible to show texture. -
Shadowing the tail:
While the blue is still wet, drop a small amount of darker Prussian Blue on the underside (right side) of the tail to create a cylindrical 3D effect. -
Defining the segments:
Once the tail is dry, mix a dark grey-blue and use your smallest brush to paint thin, crisp lines separating the tail segments.
Deckle Edge Effect
To mimic the rustic paper look in the photo, tear your watercolor paper against a ruler edge instead of cutting it with scissors.
Step 4: Final Details
-
Wing veins:
Mix a very dilute, watery grey-brown. Using your size 0 brush, carefully paint thin, sweeping lines for the main veins running the length of the wings. -
Legs and feelers:
Using a dark brown mix (almost black), paint fine, curved lines for the legs extending from the thorax, and two tiny antennae on the head. -
Eye details:
Add definition to the large compound eyes with a dark brown wash, leaving a tiny spec of white paper for a highlight if you can manage it. -
Clean up edges:
If any paint bled outside your lines, use a clean, damp brush to gently lift the excess pigment.
Once dry, your delicate dragonfly is ready to be framed or gifted to a nature lover
BRUSH GUIDE
The Right Brush for Every Stroke
From clean lines to bold texture — master brush choice, stroke control, and essential techniques.
Explore the Full Guide
Lily Pads and Cattails Dragonfly Scene
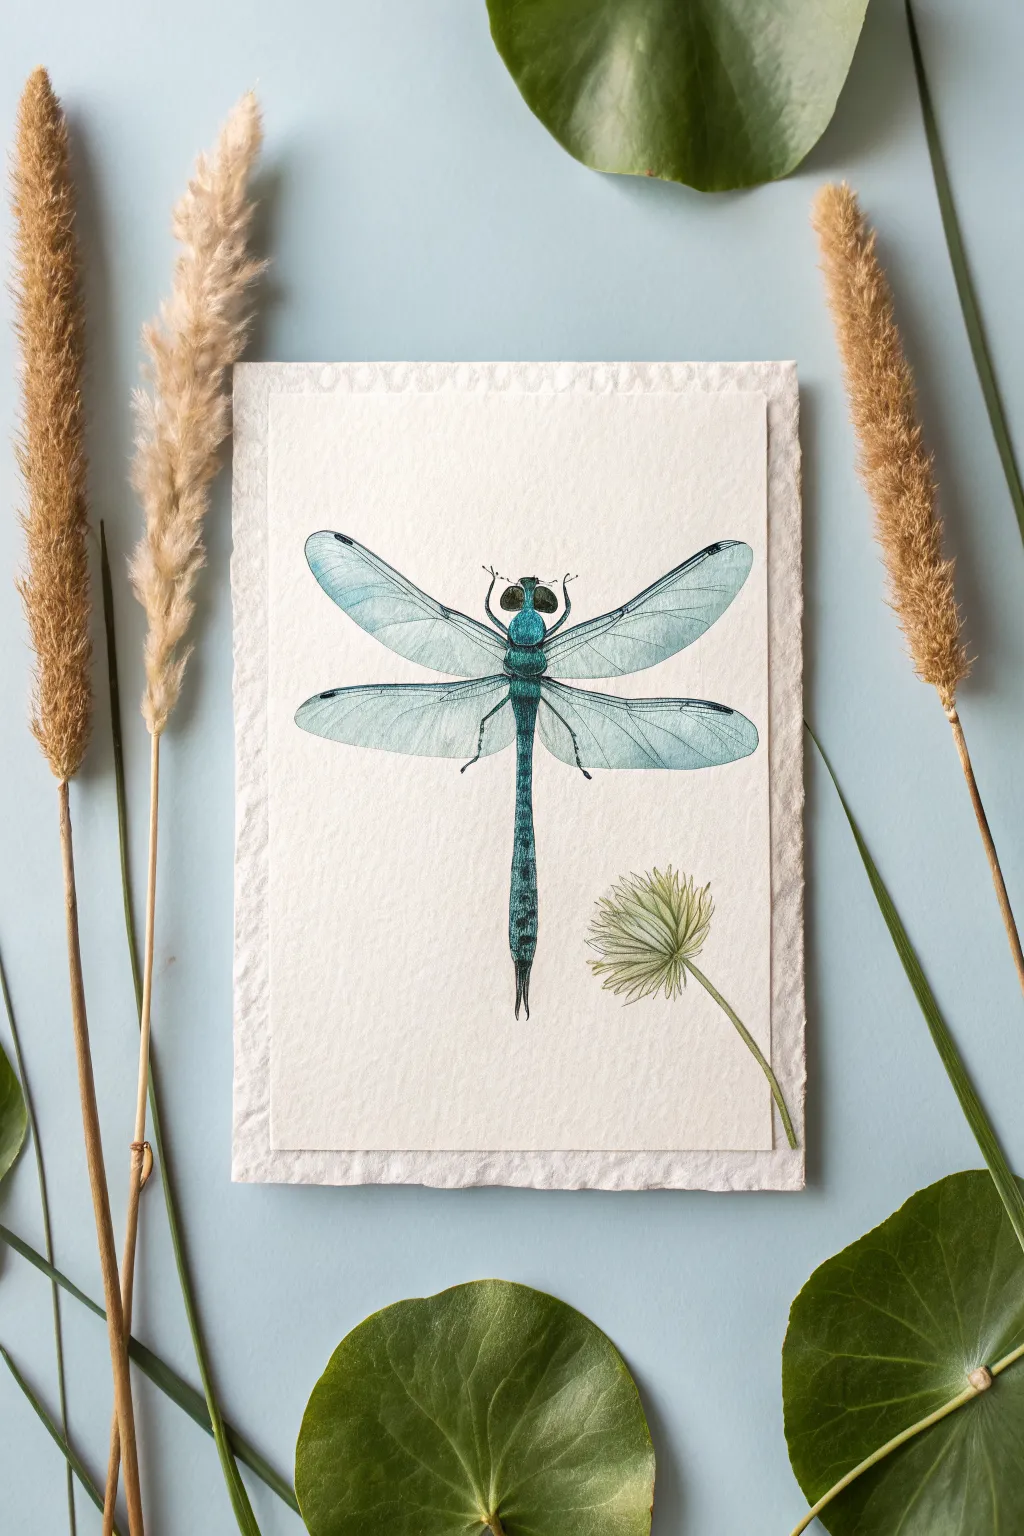
Capture the delicate transparency of dragonfly wings with this detailed watercolor illustration. The cool blue and teal tones create a serene artwork that looks beautiful framed by natural elements like dried grass and lily pads.
Step-by-Step Guide
Materials
- Cold press watercolor paper (fine grain)
- Handmade deckled edge paper (optional, for mounting)
- Watercolor paints (Cerulean Blue, Prussian Blue, Payne’s Grey, Sap Green)
- Fine liner brush (size 00 or 000)
- Round watercolor brush (size 2)
- HB Pencil
- Kneaded eraser
- Water cups
- Paper towels
- Dried pampas grass or cattails (for styling)
- Fresh lily pads or round leaves (for styling)
Step 1: Sketching the Framework
-
Mark the center:
Begin by lightly finding the center of your watercolor paper. Draw a very faint vertical line to act as the spine of the dragonfly, ensuring the finished piece will be symmetrical. -
Draft the body segments:
Sketch a small oval for the head at the top of your line. Below that, draw a slightly larger, structured oval for the thorax (chest), followed by a long, slender tail segment that tapers to a point. -
Outline the wings:
Draw the leading edge of the top wings first, extending them diagonally upwards from the thorax. Then, add the lower wings, which should sit slightly behind the top ones and angle more horizontally. -
Refine the shapes:
Curve the bottom edges of the wings to meet the body. Use your kneaded eraser to lighten these pencil lines until they are barely visible guides for your paint.
Bleeding Wings?
If wing veins blur into the blue wash, your base layer wasn’t dry enough. Wait until the paper is bone dry and warm to the touch before adding fine lines.
Step 2: Painting the Body
-
Base coat for the body:
Mix a light wash of Cerulean Blue and Sap Green to get a teal hue. Using your size 2 brush, gently fill in the head, thorax, and tail with this base color. -
Add depth to the thorax:
While the base is still slightly damp, drop in a more concentrated Prussian Blue near the edges of the thorax to create a 3D rounded effect. -
Detailing the tail:
Switch to your smaller brush. Mix Prussian Blue with a touch of Payne’s Grey for a darker tone. Paint small horizontal segments along the tail, leaving tiny gaps or lighter areas to suggest the segmented exoskeleton. -
Adding the eyes:
Use a dark mix of Sap Green and Payne’s Grey to paint the large, compound eyes on the head. Leave tiny white specks unpainted to act as highlights, making them look glossy.
Step 3: Rendering the Wings
-
Plan the wing wash:
The wings need to look transparent. Prepare a very watery, pale blue wash. I like to test the opacity on a scrap piece of paper first to ensure it’s subtle enough. -
Wash the wings:
Fill in the wing shapes with your pale wash. Work quickly to avoid hard drying lines. The color should be lightest near the center and slightly more saturated at the outer tips. -
Paint the leading veins:
Once the wash is completely dry, use your fine liner brush and the dark teal mix to paint the thick ‘arm’ bone along the top edge of each wing. -
Add delicate veins:
With the finest brush tip and very light pressure, draw the intricate network of veins inside the wings. These lines should be gossamer-thin, branching out like a map. -
Hint at the stigmas:
Add the small rectangular spots (stigmas) near the tips of the wings using a darker blue-black tone.
Metallic Magic
Mix a tiny amount of iridescent medium or pearlescent watercolor into your wing wash to make them shimmer like real insect wings when they catch the light.
Step 4: Finishing Touches
-
Add the legs:
Using your darkest grey-blue mix and the fine liner, carefully paint the six thin legs extending from the thorax. Keep the lines crisp and jointed. -
Draw the resting flower:
Sketch a simple, globe-like seed head or flower below the wing. Paint it with very faint washes of green and brown, using loose strokes so it doesn’t distract from the main subject. -
Mount the artwork:
Once fully dry, trim your watercolor paper or center it on a larger sheet of handmade deckled paper for a textured, gallery-style look. -
Style the scene:
Arrange dried grass stems vertically on either side of the paper and place large round leaves at the corners to recreate the natural, pond-side aesthetic.
Now you have a serene piece of nature art ready to display on your wall
Sunset Circle Gradient With Dragonfly
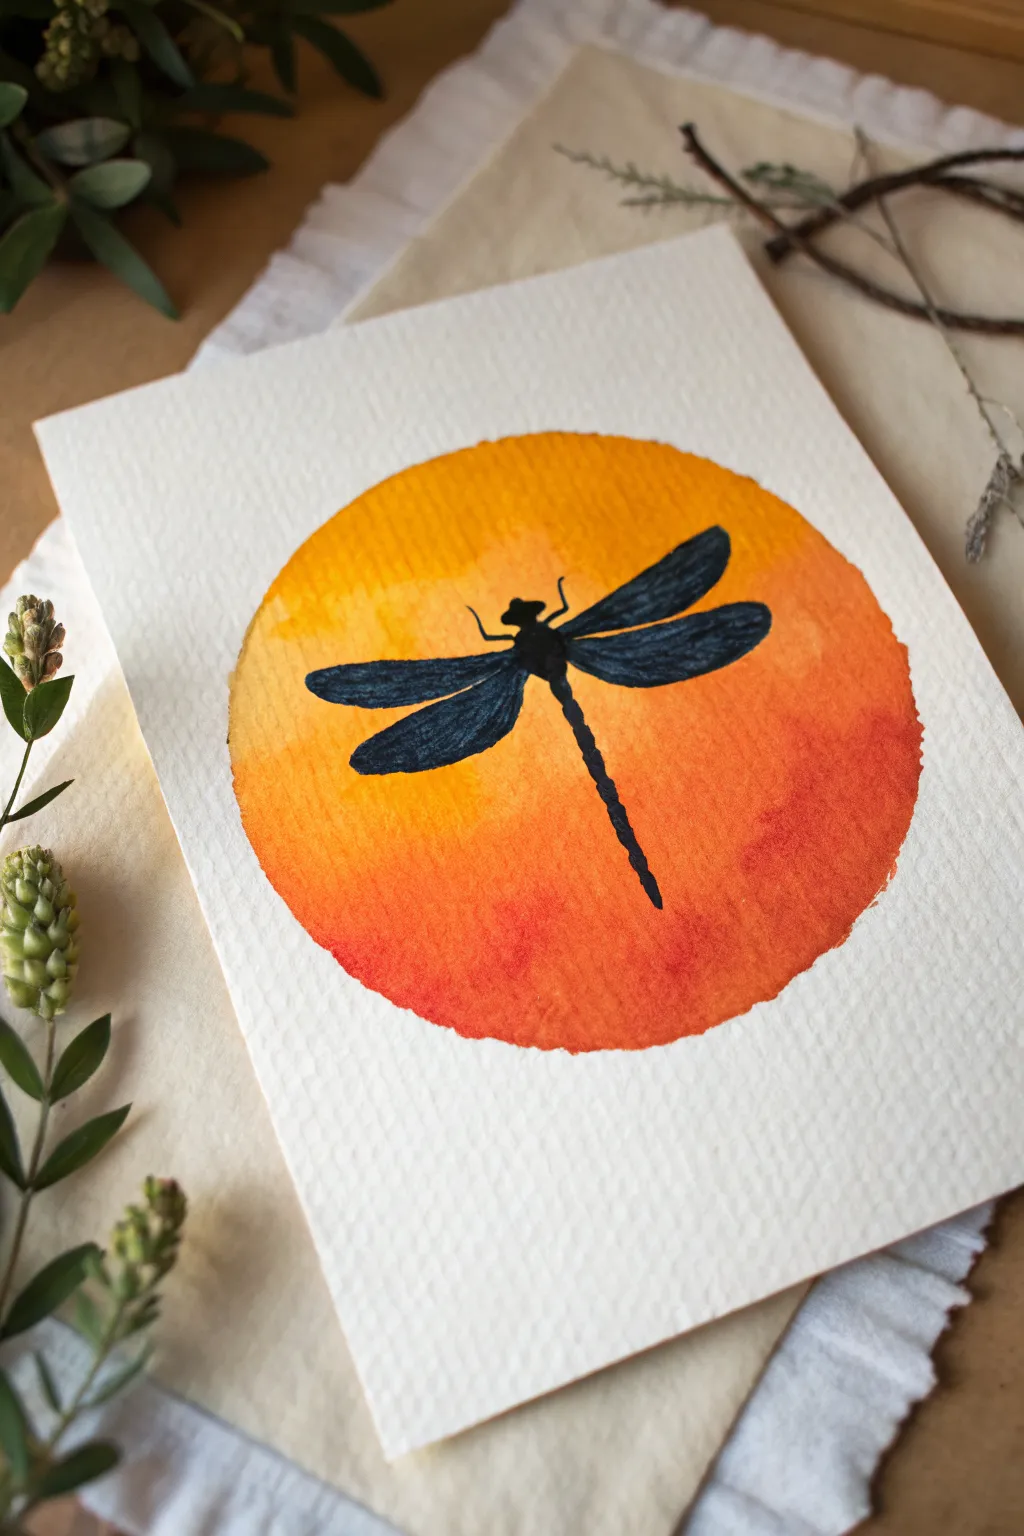
Capture the warmth of a setting sun with this vibrant watercolor project featuring a crisp dragonfly silhouette. The circular masking technique creates a clean, modern focal point that makes the black silhouette pop beautifully against the fiery orange and yellow background.
Step-by-Step Tutorial
Materials
- Cold press watercolor paper (approx. 5×7 inches)
- Masking fluid or geometric circle template/compass
- Watercolor paints (Cadmium Yellow, Cadmium Orange, Alizarin Crimson)
- Black gouache or waterproof black ink
- Flat wash brush (1/2 inch)
- Round detail brush (size 0 or 1)
- Pencil and eraser
- Water cups and paper towels
- Painter’s tape or low-tack masking tape
Step 1: Preparing the Sun
-
Outline the circle:
Center a circle on your watercolor paper using a compass or by lightly tracing a round object like a jar lid or roll of tape. Keep the pencil line very faint so it doesn’t show through the lighter yellow paint later. -
Mask the edges (optional method):
If you struggle to paint inside the lines, you can apply masking fluid around the outside of your circle boundary. Wait for it to become completely transparent and rubbery before painting. -
Prepare the wash:
Pre-wet the paper inside the circle with clean water using your flat brush. The paper should be glisten with moisture but not have puddles; this ‘wet-on-wet’ technique helps the colors blend seamlessly. -
Apply the yellow:
Load your brush with Cadmium Yellow and apply it to the top third of the wet circle. Let the pigment flow naturally down slightly into the damp paper. -
Blend in orange:
Pick up Cadmium Orange and paint the middle section of the circle. Gently touch the edge where it meets the yellow, allowing the two colors to bleed together softly without overworking the paper. -
Deepen the base:
Mix a little Alizarin Crimson into your orange to create a reddish-orange hue. Apply this to the bottom third of the circle to ground the sunset gradient. -
Wait for complete drying:
This is the most crucial step. Let the watercolor circle dry completely. It must be bone dry before you attempt the silhouette, otherwise the black ink will bleed into the background like a spiderweb.
Bleeding Black Ink?
If your black silhouette starts feathering into the orange, stop immediately. The base isn’t dry. Use a hair dryer on low heat to fully set the background before continuing.
Step 2: Painting the Silhouette
-
Sketch the dragonfly:
Using a light pencil again, sketch the basic T-shape of the dragonfly directly over the dry sunset. Draw a small oval for the head, a slightly larger section for the thorax, and a long, thin tail extending downward. -
Add the wing shape:
Sketch two pairs of long, paddle-like wings extending from the thorax. They should stretch almost to the edges of your painted circle. -
Outline closely:
Switch to your size 0 round brush and black gouache (or ink). Very carefully outline the wings and body first. Gouache is ideal here because it is opaque and matte, giving that solid silhouette look. -
Fill the wings:
Fill in the wing shapes. To define the texture, you can leave extremely thin, hairline gaps of the background color showing through within the wings to suggest veins, though solid black also looks striking. -
Define the body:
Fill in the head and thorax. When painting the long tail, use the very tip of your brush and light pressure to create the segmented look. I like to add tiny bumps along the tail edges to mimic the insect’s anatomy. -
Add gentle legs:
Paint four tiny, delicate front legs curving out from the thorax near the head. Keep these strokes incredibly thin and quick for a natural appearance. -
Refine the edges:
Look over your silhouette for any rough patches. Because the background is textured paper, you may need to dab a little extra black paint into the ‘valleys’ of the paper grain to ensure the edges look sharp. -
Clean up borders:
If you painted freehand and went slightly outside the circle, or if your masking material left a rough edge, use a damp, clean brush or a white gel pen to tidy up the perimeter if needed.
Golden Details
Once the black ink is 100% dry, outline just the tops of the wings with a metallic gold gel pen. It adds a subtle shimmer that catches the light like sun rays.
Place your finished piece in a simple frame to highlight the stunning contrast of the silhouette against the sun

PENCIL GUIDE
Understanding Pencil Grades from H to B
From first sketch to finished drawing — learn pencil grades, line control, and shading techniques.
Explore the Full Guide
Beaded Body Dot-Painting Dragonfly
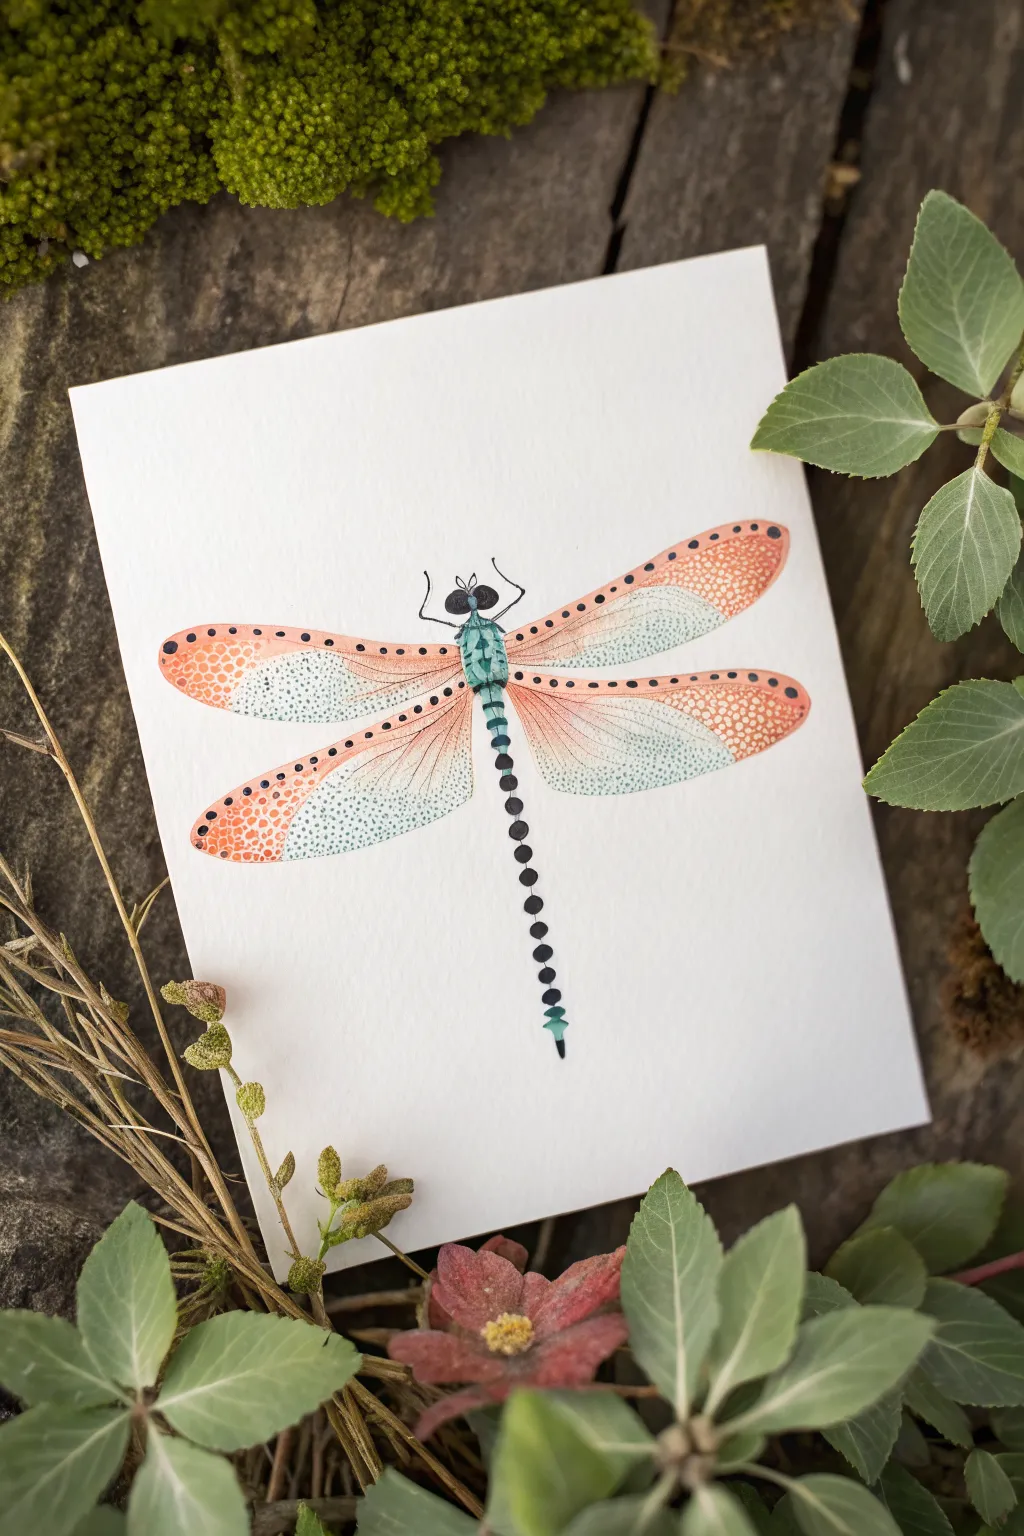
This charming project combines the soft flow of watercolors with the precision of pen work to create a unique, stylized dragonfly. The body looks almost like a strand of beads, while the wings feature a lovely gradient and delicate dotted texture.
Detailed Instructions
Materials
- Cold press watercolor paper (cut to desired size)
- Watercolor paints (Coral/Salmon, Teal/Turquoise, Black)
- Fine round paintbrush (size 0 or 2)
- Micron pen or fine liner (0.3 or 0.5mm, black)
- Pencil and eraser
- Water jar
- Paper towel
Step 1: Sketching the Skeleton
-
Center Line:
Begin by lightly sketching a vertical line down the center of your paper to act as a guide for symmetry. -
Thorax Placement:
Near the top third of the line, draw a small, elongated oval for the thorax (the chest area where wings attach). -
Wing Spans:
Sketch two gently curved lines extending out from each side of the thorax for the upper wings, and two slightly shorter curves below them for the lower wings. -
Wing Outlines:
Connect the wing curves back to the body with rounded, paddle-like shapes. Keep the tips soft rather than sharp.
Clean Circles
For perfectly round body segments without a steady hand, dip the flat end of a brush handle into black paint and stamp it onto the paper.
Step 2: Painting the Base Layers
-
Thorax Color:
Load your brush with a diluted teal or turquoise paint and fill in the thorax oval. Let the color pool slightly for texture. -
Wing Borders:
Mix a watery coral or salmon color. Carefully paint just the outer edges of the wings, creating a band of color about a quarter-inch thick. -
Wing Wash:
While the coral edge is still damp, rinse your brush and pick up a very pale, watery teal. Paint the inner part of the wing, letting it touch and bleed slightly into the coral border. -
Drying Time:
Allow the paint to dry completely. This is crucial because the next steps involve fine details that will bleed if the paper is wet.
Metallic Magic
Swap the inner wing color for a shimmery pearlescent watercolor or dilute gold ink to make the dragonfly wings catch the light.
Step 3: Adding the ‘Beads’ and Details
-
Head and Eyes:
Using black paint or a black fine liner, draw two small, connected ovals at the top of the thorax for the large eyes. Fill them in solid black. -
Beaded Body:
Starting directly below the teal thorax, paint or draw a vertical line of small, solid black circles. Make them gradually smaller as you move down the tail. -
Tail Tip:
At the very end of your bead chain, paint a tiny teal diamond or triangle shape to finish the tail. -
Wing Dots – Outer:
Dip a fine brush or the tip of a toothpick into slightly thicker coral paint. Dot the outer coral sections of the wings to create a stippled texture. -
Wing Dots – Inner:
Repeat the stippling process on the inner teal sections using a slightly darker teal paint mixture for contrast.
Step 4: Line Work and Definition
-
Wing Veins:
Use your fine liner pen to draw very delicate lines radiating from the body through the wings, following the curve of the shape. -
Leading Edge Dots:
Along the very top edge of the upper wings and the leading edge of the lower wings, add a row of evenly spaced black dots with your pen. -
Thorax Details:
Add tiny black definition marks or small dots onto the dry teal thorax to suggest segmentation. -
Legs:
Draw four tiny, spindly legs extending from the thorax near the head—two curving forward and two slightly back. -
Antennae:
Finish by drawing two short, delicate antennae between the eyes. -
Clean Up:
Once you are absolutely certain all ink and paint is dry, gently erase any visible pencil guide lines.
Now you have a whimsical insect illustration perfect for a greeting card or framed miniature art
Translucent Wings With Thin Linework
Capture the delicate beauty of a dragonfly with this tutorial focusing on crystalline, translucent wings. By layering soft washes of teal and coral with ultra-fine linework, you’ll create a piece that feels both grounded and ready to take flight.
Step-by-Step
Materials
- Cold press watercolor paper (heavy texture, roughly 300gsm)
- Watercolor paints (Teal/Emerald Green, Coral/Salmon Pink, Burnt Umber)
- Fine liner pen (waterproof, black or dark grey, size 005 or 01)
- Round watercolor brushes (size 4 for washes, size 0 for details)
- HB Pencil
- Kneaded eraser
- Clean water and paper towels
Step 1: Sketching the Framework
-
Mark the center line:
Begin by lightly drawing a vertical line down the center of your paper. This will serve as the spine of your dragonfly, helping you keep the wings symmetrical and the body straight. -
Map the body segments:
Sketch a small oval for the head at the top, followed by a slightly larger thorax. Draw a long, thin, segmented tail extending downwards. Notice how the tail widens slightly at certain joints before tapering at the tip. -
Outline the wings:
Draw the four wings extending from the thorax. The top pair should angle slightly upwards and outwards, while the bottom pair angles downwards. Use long, sweeping curves to capture their elongated, paddle-like shape.
Keep it flowing
To get that ‘stained glass’ look on the wings, keep your colored washes very wet. If the paint dries too fast, you’ll get hard edges instead of soft, dreamy gradients.
Step 2: Painting the Body
-
Base coat for the body:
Mix a diluted wash of emerald green or teal. Paint the entire body, from head to tail. Keep this layer wet and fairly light to establish the underlying tone. -
Add depth and definition:
While the green is still damp but not dripping, drop in concentrated teal pigment along the edges of the thorax and the joints of the tail segments. This creates a natural 3D rounding effect. -
Introduce the coral accents:
While the tail is drying (but not fully dry), touch a small amount of coral or salmon pink paint to the joints where the tail segments meet. Let the colors bleed slightly for an organic transition.
Make it sparkle
Once the artwork is fully dry, mix a tiny pinch of iridescent medium or pearl watercolor into your top glaze for wings that shimmer beautifully when they catch the light.
Step 3: Creating Translucent Wings
-
First wing wash – Teal:
Clean your brush thoroughly. Prepare a very watery wash of teal. Apply this to the outer tips and the bottom edges of all four wings, fading it out to clear water as you move toward the center of the wing. -
Second wing wash – Coral:
Before the teal dries completely, load your brush with a watery coral mix. Paint the inner section of the wings (closest to the body), letting it touch and blend softly with the teal wash. The center of the wing should remain the lightest area. -
Define the wing shapes:
Once the initial washes are dry, use a slightly darker mix of teal to paint a thin line along the very top edge of each wing (the leading edge). This adds necessary structure. -
Adding the wing spots:
Paint the small, distinct rectangular spots (pterostigma) near the tips of the wings using a darker red or reddish-brown tone.
Step 4: Detailing and Veining
-
Draw the main veins:
Wait until the painting is completely bone-dry. Take your ultra-fine waterproof pen (size 005 is best here) and trace the main structural veins that run lengthwise down each wing. -
Create the intricate webbing:
Now, fill in the spaces between the main veins with a delicate, crackle-like pattern. Don’t try to be geometrically perfect; irregular polygons look more natural. Keep your hand loose and light. -
Detail the body:
Use the fine liner to add definition to the head, eyes, and thorax. Outline the segments of the tail, emphasizing the joints where you added the coral paint earlier.
Step 5: Finishing Touches
-
Paint the wildflowers:
In the negative space around the tail, loosely paint small, simple flower shapes using a sheer wash of pink. Add thin green stems with a quick flick of your fine brush. -
Soften the florals:
Tap the center of the wet flowers with a dry paper towel to lift a little pigment, giving them a soft, out-of-focus look compared to the sharp dragonfly. -
Final inspection:
Step back and look at the overall balance. If the wing veins look too stark, I sometimes glaze a very thin layer of clear water or pale yellow over them to unify the linework with the color beneath.
Frame your delicate insect illustration to preserve the fine details and enjoy the serene mood it brings to your space


Bold Outlined Cartoon Dragonfly
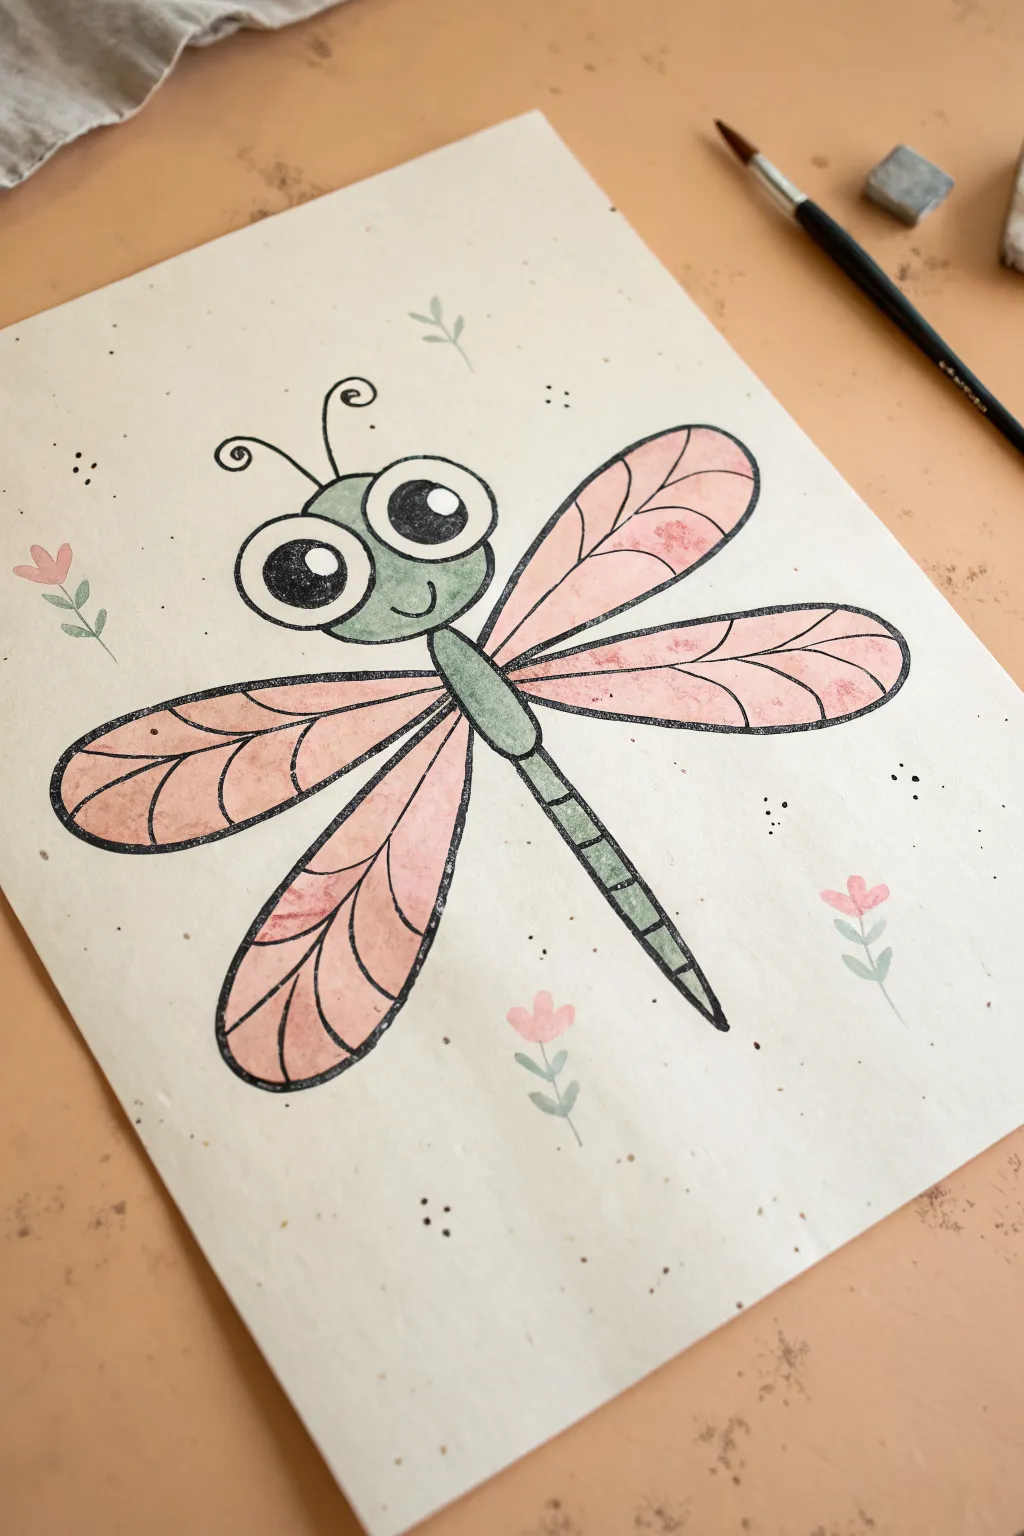
This cheerful dragonfly combines soft watercolor washes with bold, defined outlines for a look that pops right off the page. The sweet floral accents and speckled texture give it a charming, sketchbook-style quality that’s perfect for beginners.
Step-by-Step Tutorial
Materials
- Heavyweight mixed media or watercolor paper (cream or off-white recommended)
- Watercolor paints (Sage Green, dusty Rose Pink)
- Round paintbrush (size 4 or 6)
- Fine liner pen or black ink marker (0.5mm or 0.8mm)
- Pencil and eraser
- Water cup and paper towels
Step 1: Sketching the Shape
-
Draw the eyes:
Start by drawing two large, connected circles near the top left center of your page. Make the left circle slightly smaller than the right one to create a playful perspective. -
Add the head:
Sketch a rounded ‘U’ shape underneath the eyes to form the dragonfly’s face, connecting it smoothly to the bottom curves of the eye circles. -
Outline the body:
Draw the thorax (upper body) as an oval shape extending down from the head. Continue this line into a long, thin tail that tapers to a point, creating a slight curve. -
Wing placement:
Lightly sketch four long, paddle-shaped wings extending from the thorax. Place two on the right side and two on the left, making the upper wings slightly larger than the lower ones. -
Add details:
Draw two scrolling antennae springing from the top of the head. Then, sketch the pupils inside the eyes—large black circles with small white highlights for a cute expression. -
Floral accents:
Scatter a few tiny, simple flowers around the dragonfly. Use simple shapes: a small oval for the bloom and a curved line with two leaves for the stem.
Ink Confidence
Don’t try to make perfect, continuous lines. Purposefully rough or ‘sketchy’ ink lines add character and make the cartoon style more authentic.
Step 2: Applying Color
-
Paint the body:
Mix a watery sage green color. Carefully fill in the face, thorax, and tail section. Don’t worry if the color isn’t perfectly even; a little texture looks nice here. -
Fill the wings:
Switch to a diluted rose pink. Paint all four wings, keeping the wash fairly transparent so the paper shows through slightly. -
Color the flowers:
Use the same pink for the flower blooms and the green for the stems and leaves. I like to keep these quite loose and simple. -
Decorate the background:
Add tiny sprigs of leaves floating in the background using the tip of your brush and the green paint. -
Let it dry completely:
Wait until the paint is bone dry before moving to the next step. If the paper is damp, your ink lines will bleed.
Add Sparkle
Use a white gel pen to add extra highlights on top of the dried pink wings or green body to make the dragonfly look shiny and magical.
Step 3: Inking and Details
-
Outline the main shapes:
Using your black fine liner or marker, go over your pencil lines with a confident, steady hand. A slightly thicker line weight works best for this cartoon style. -
Fill the eyes:
Color in the pupils with solid black ink, being very careful to leave the small circular highlights white. -
Add wing veins:
Draw simple vein lines inside the wings. Start with a central line down the length of the wing, then add curved lines branching off toward the edges. -
Detail the tail:
Draw small horizontal stripes across the tail section to give the dragonfly its segmented look. -
Add a smile:
Draw a tiny, curved smile on the green face area creates the character’s sweet expression. -
Erase pencil marks:
Once the ink is fully dry, gently erase any visible pencil sketch lines to clean up the artwork. -
Final speckles:
For a finished look, use your pen to add tiny clusters of dots (stippling) around the dragonfly and flowers to fill the empty space.
Now you have a charming little character ready to brighten up a greeting card or sketchbook page
Shimmery Metallic Dragonfly Accents
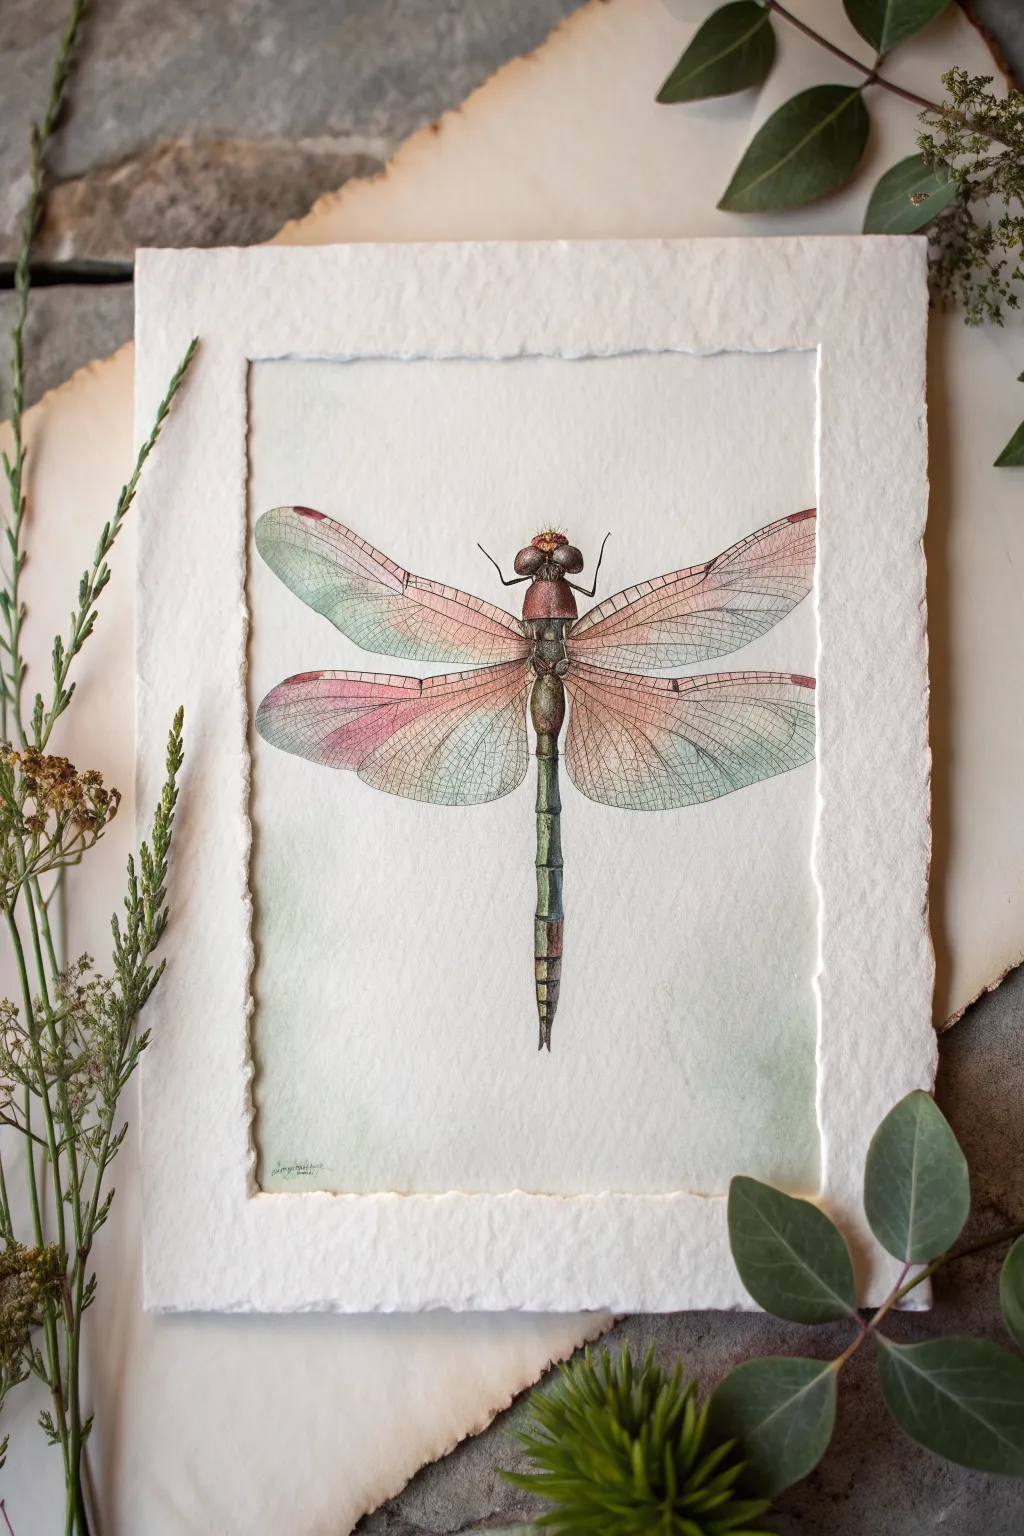
Capture the delicate shimmer of dragonfly wings using a blend of metallic accents and soft watercolor washes. This project features a detailed insect specimen painted on beautiful, textured deckle-edge paper for an elegant, vintage scientific feel.
How-To Guide
Materials
- Heavyweight cold-press watercolor paper with deckle edge
- Watercolor paints (Payne’s Grey, Burnt Sienna, Sap Green, Quinacridone Rose, Turquoise)
- Iridescent medium or metallic watercolor set (silver/champagne)
- Fine liner brushes (size 00 and 1)
- Round watercolor brush (size 4)
- Pencil (HB) and kneadable eraser
- Micron pen or very fine waterproof black ink pen (optional)
- Sheet of parchment or backing paper for mounting
Step 1: Sketching and Body Structure
-
Basic Shapes:
Begin by lightly sketching the dragonfly’s central axis on your deckle-edge paper. Draw a small oval for the head, a slightly larger oval for the thorax, and a long, segmented tail extending downwards. -
Wing Outline:
Sketch the four wings extending from the thorax. The top pair should be slightly longer and angled upward, while the bottom pair is broader and extends horizontally. Keep your pencil lines very faint so they don’t show through the transparent wings later. -
Base Layer for Body:
Mix a watery wash of Burnt Sienna and Sap Green. Using your size 4 brush, paint the thorax and the tail segments. While the paint is still damp, drop in tiny touches of Payne’s Grey at the segment joints to create immediate shadow and volume. -
Detailing the Head:
Switch to your size 1 brush. Paint the large compound eyes using a mix of Burnt Sienna and a touch of red. Leave tiny speckles of white paper showing on the top of the eyes to represent highlights. -
Defining Segments:
Once the base layer is dry, use a more concentrated mix of Payne’s Grey and Green to define the edges of the tail segments, giving the body a rigid, armored look.
Steady Hands Pro-Tip
For the tiny wing veins, hold your breath slightly while drawing the longest lines, or rest your pinky finger on a clean piece of scrap paper over your art.
Step 2: Painting the Iridescent Wings
-
Preparing the Wash:
For the wings, you want a very transparent, ethereal look. Create two puddles of very diluted paint: one with Quinacridone Rose (pink) and one with Turquoise or Green. -
Wet-on-Dry Application:
Dip your clean brush into the pink wash and paint a stripe across the middle of the wings. Clean your brush, pick up the turquoise wash, and paint the tips and base of the wings, letting the colors gently touch and bleed into each other slightly. -
Adding Shimmer:
While the wing wash is still tacky (semi-dry), glaze over small sections with your iridescent medium or metallic watercolor mixed with plenty of water. This creates that subtle sheen that catches the light without overpowering the color. -
Drying Time:
Allow the wings to dry completely. This is crucial because the next step involves fine lines that will blur if the paper is even slightly damp. I usually wait about 15-20 minutes here.
Step 3: Veining and Final Details
-
Main Wing Structure:
Using your finest brush (00) and a dark mix of Payne’s Grey (or a waterproof ink pen), draw the leading edge of the wings—the thick vein that runs along the top borders. -
Intricate Veining:
Now for the patience part. Carefully draw the delicate network of cells inside the wings. Start with the larger structural veins, then fill in the smaller, cellular webbing. Keep your hand light; these lines should be whisper-thin. -
Connecting to Body:
Ensure the wings look attached by darkening the point where they meet the thorax. Add tiny legs extending from the thorax area, just barely visible. -
Final Highlights:
If you lost any highlights on the body during painting, you can use a tiny dot of white gouache or a gel pen on the highest point of the thorax or eyes to make them pop.
Level Up: Vintage Style
Tea-stain your paper before painting to give it an aged, parchment look. This warmth contrasts beautifully with the cool metallic blues of the wings.
Step 4: Mounting and Presentation
-
Shadow Effect:
To enhance the realism, paint a very faint, watery grey shadow underneath the tail on the right side, softening the edge with clean water so it fades into the paper. -
Creating the Mat:
Take a larger sheet of textured paper and gently tear a rectangular hole in the center, creating a faux-mat with rough, torn edges that mimics the deckle paper. -
Assembly:
Place your painting behind this torn opening or simply center your painted deckle paper onto a larger backing sheet for a layered, gallery-style presentation.
Step back and admire how the metallic accents shift in the light, bringing your delicate insect study to life
Splatter Halo Around a Dragonfly
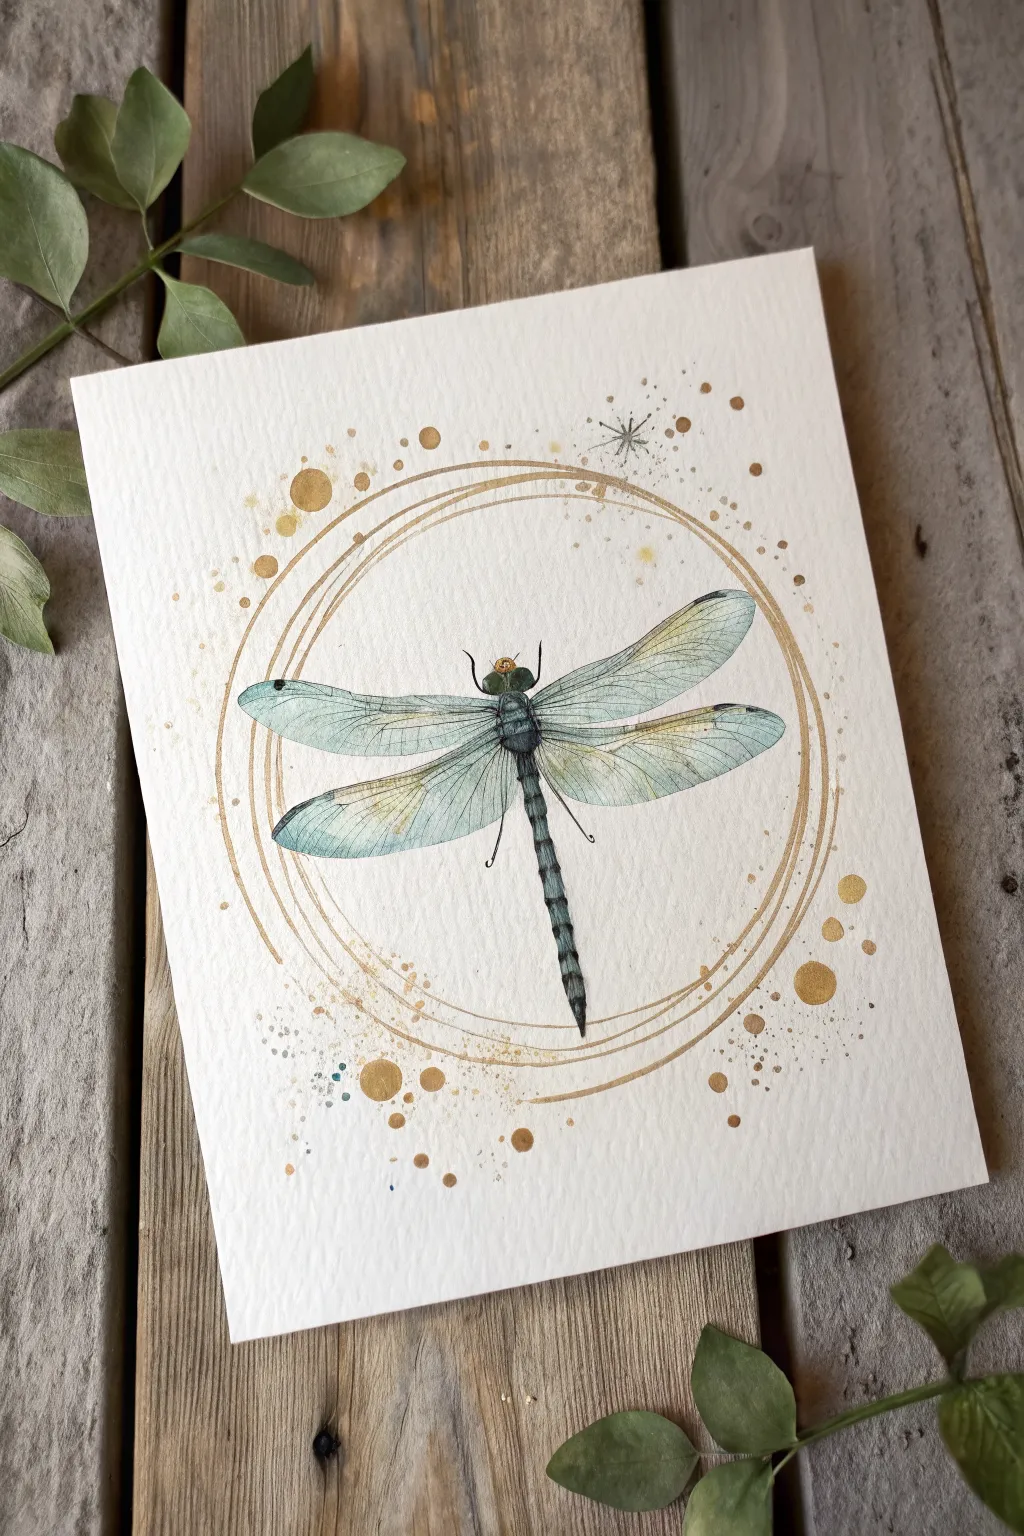
This project combines delicate watercolor techniques with metallic accents to create a whimsical dragonfly illustration. The resulting artwork features a lifelike insect surrounded by a magical golden halo and playful splatters.
Step-by-Step Guide
Materials
- Cold press watercolor paper (300 gsm)
- Watercolor paints (Payne’s Gray, Cerulean Blue, Sap Green, Burnt Sienna)
- Metallic gold watercolor or gouache
- Round brushes (sizes 2, 4, and 0 for details)
- Pencil (HB or H)
- Kneaded eraser
- Compass or circular object for tracing
- Paper towel
- Two jars of water
Step 1: Sketching the Foundation
-
Draw the body:
Begin by lightly sketching the dragonfly’s body in the center of your paper. Draw a small oval for the head, a slightly larger thorax, and a long, thin, segmented tail extending downwards. -
Map the wings:
add two long wings on each side attached to the thorax. The top pair should angle slightly upwards, while the bottom pair extends more horizontally. Keep your pencil lines very faint so they don’t show through the paint. -
Sketch the halo:
Using a compass or a circular object, lightly pencil a rough guide for your halo circle around the dragonfly. This doesn’t need to be a perfect single line; it serves as a boundary for your gold brushstrokes later.
Gold Flow Troubles?
If your gold paint isn’t flowing smoothly for the long circular strokes, add a tiny drop of ox gall or more water to improve fluidity without losing opacity.
Step 2: Painting the Dragonfly
-
Base wash on wings:
Mix a very watery wash of Cerulean Blue with a touch of Sap Green. Apply this transparently to the wings, leaving small white gaps for highlights. -
Add warmth to wings:
While the wing wash is still damp, drop in tiny hints of watered-down Burnt Sienna near the base of the wings where they join the body to create an iridescent effect. -
Paint the body segments:
Load a size 2 brush with a mix of Payne’s Gray and Cerulean Blue. Paint the head and thorax, dabbing in darker pigment on the shadowed sides. -
Detail the tail:
Paint the long tail segments, leaving tiny gaps between segments to suggest the anatomy. Let the paint be darker at the joints and lighter in the center of each segment. -
Refine wing veins:
Once the base wing wash is completely dry, mix a thin, dark grey. Using your size 0 brush, carefully paint delicate vein lines extending from the wing base to the tips. -
Add legs:
With the same dark mixture and fine brush, paint delicate, thin legs originating from the thorax. Keep these strokes minimal and sharp.
Step 3: Creating the Golden Halo
-
Prepare the gold:
Activate your metallic gold paint with a few drops of water until it reaches a creamy, ink-like consistency. -
Paint the loose circles:
Using a size 4 brush loaded with gold, paint sweeping, gestural circular lines following your pencil guide. I like to hold the brush loosely at the end of the handle to keep the lines organic and uneven. -
Vary the line weight:
Make some parts of the gold circle thick and others hair-thin. You can paint multiple concentric swooshes that overlap slightly. -
Add larger gold dots:
While the circles dry, paint several solid gold circles of varying sizes (some like peas, some like pinheads) scattered around the halo and near the dragonfly’s tail.
Wing Transparency Trick
To make wings look truly gossamer, gently lift off a little pigment from the center of the wing panels with a damp, clean brush or paper towel while the paint is still wet.
Step 4: Splatter and Finishing Touches
-
Protect the subject:
Cover the painted dragonfly body with a small scrap of paper or your hand to protect it from stray splatters. -
Create fine splatter:
Load a wet brush with gold paint and tap the handle against another brush over the paper to create a spray of fine metallic mist. -
Add color splatters:
Repeat the splatter technique with a very small amount of watered-down blue or teal paint to tie the background to the dragonfly’s color palette. -
Draw magic stars:
Use your finest brush or a metallic gel pen to draw a few tiny twinkling stars or asterisks near the gold circles for extra sparkle. -
Final dry:
Allow the entire piece to dry flat for at least an hour to ensure the metallic paint sets completely before erasing any visible pencil marks.
Frame this piece in a simple wood frame to let the metallic shimmer take center stage
One-Stroke Wings Dragonfly Practice
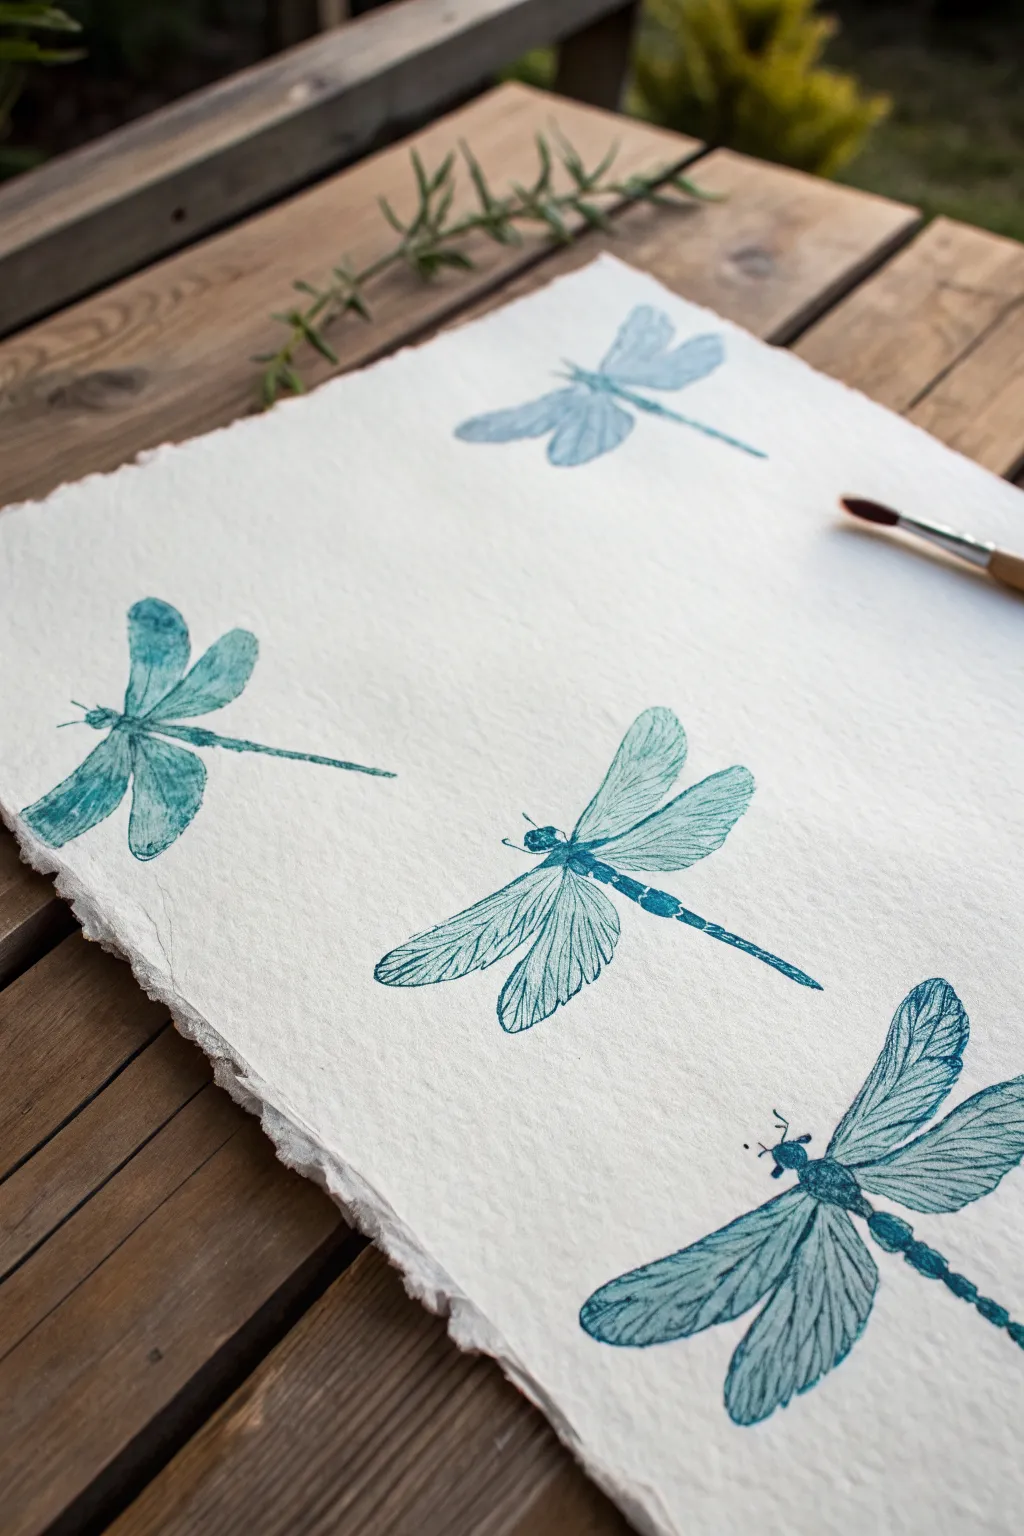
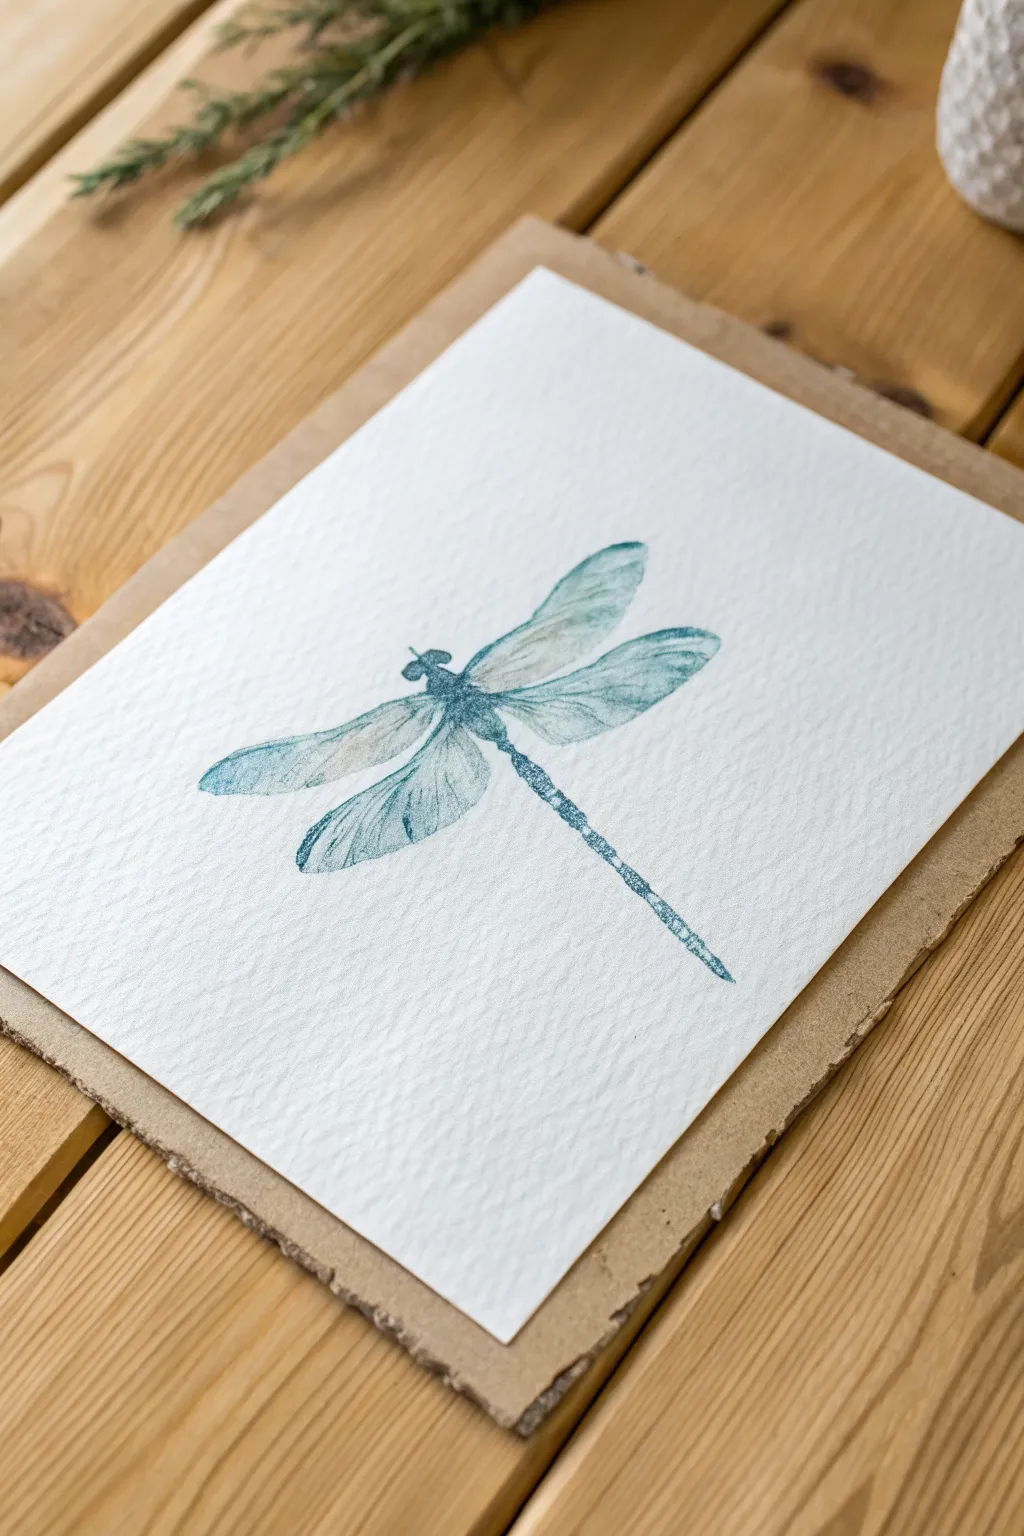
Capture the delicate transparency of dragonfly wings with this serene watercolor study on textured paper. Using a simple one-stroke technique, you will learn to build up forms that look both structured and airy.
How-To Guide
Materials
- Cold-pressed watercolor paper with deckle edge (heavyweight)
- Teal or turquoise watercolor paint
- Payne’s Gray or Indigo watercolor paint
- Round watercolor brush (size 6 or 8)
- Fine liner brush (size 0 or 1)
- Pencil (HB or H)
- Cup of water
- Paper towel
Step 1: Planning the Composition
-
Paper preparation:
Begin with a sheet of high-quality, textured watercolor paper. If your paper doesn’t have a natural deckle edge, you can carefully tear the edges against a ruler to create that rustic, handcrafted look shown in the example. -
Light sketching:
Using an H or HB pencil, very lightly mark the positions for four dragonflies. Place one near the top right, one middle left, one center, and one bottom right to create a flowing, diagonal composition. -
Mapping the bodies:
Draw single thin lines to indicate the angle of the long tails (abdomens) for each insect. Vary the angles slightly so they aren’t all flying in perfect unison, making the composition feel more organic.
Pro Tip: Wing Transparency
Don’t overlap the wings with the body paint. Leave a tiny sliver of white space between the wings and the thorax to keep the painting looking airy and light.
Step 2: Painting the Wings
-
Mixing the wing color:
Dilute your teal or turquoise paint with plenty of water. You want a very transparent, watery wash for the initial wing shapes, not heavy opaque color. -
The upper wing stroke:
Starting with the top right dragonfly, press the belly of your round brush down near the thorax and sweep outward and slightly up. Lift the brush gradually as you reach the tip to create a tapered wing shape. -
The lower wing stroke:
Reload your brush slightly if needed. Place the brush just below the first wing and execute a similar sweep, but angle this one slightly downward. Repeat these two steps for the left side wings. -
Continuing the flock:
Move to the other three dragonfly sketches. Repeat the wing process for each, keeping the wash light. I find it helpful to rotate the paper physically if the angle feels awkward for your wrist. -
Drying time:
Allow the base wing layers to dry completely. The paper should feel room temperature to the touch, not cool.
Level Up: Metallic Sheen
Once the painting is totally dry, glaze a tiny amount of iridescent mixing medium or gold watercolor over the wingtips to mimic the shimmer of real insect wings.
Step 3: Adding the Bodies
-
Mixing the body color:
Mix a stronger, less diluted version of your teal paint. You can add a tiny touch of Payne’s Gray or Indigo to deepen it slightly for contrast against the wings. -
Painting the thorax:
Using the tip of your round brush, dab a small, oval shape where the four wings meet. -
Extending the abdomen:
Switch to your fine liner brush or use the very point of your round brush. Paint the long, segmented tail extending from the thorax along your pencil guideline. It should be segmented, looking like small connected beads or dashes. -
Adding the head:
Paint a small, rounded shape at the top of the thorax for the head. Add two tiny antennae flicking outward.
Step 4: Detailing the Veins
-
Preparing the liner brush:
Load your fine liner brush with the darker teal mix. Ensure the consistency is inky but flowing smooth so lines don’t break. -
Outlining the wings:
Very delicately outline the edges of the dry watercolor wings. Keep your hand loose; a shaky line actually adds to the natural, insect-like texture here. -
Drawing the main veins:
Draw one or two distinct lines running through the length of each wing, originating from the body. -
Adding fine texture:
Fill the rest of the wing space with tiny, intricate webbing patterns. Use extremely light pressure. You don’t need to draw every single cell; just suggest the texture with erratic, fine lines. -
Final touches:
Check for any areas that need more definition, perhaps darkening the point where the wings attach to the body for added depth.
Now you have a stunning nature study that highlights the fragile beauty of dragonflies
Minimalist Dragonfly With Lots of White Space
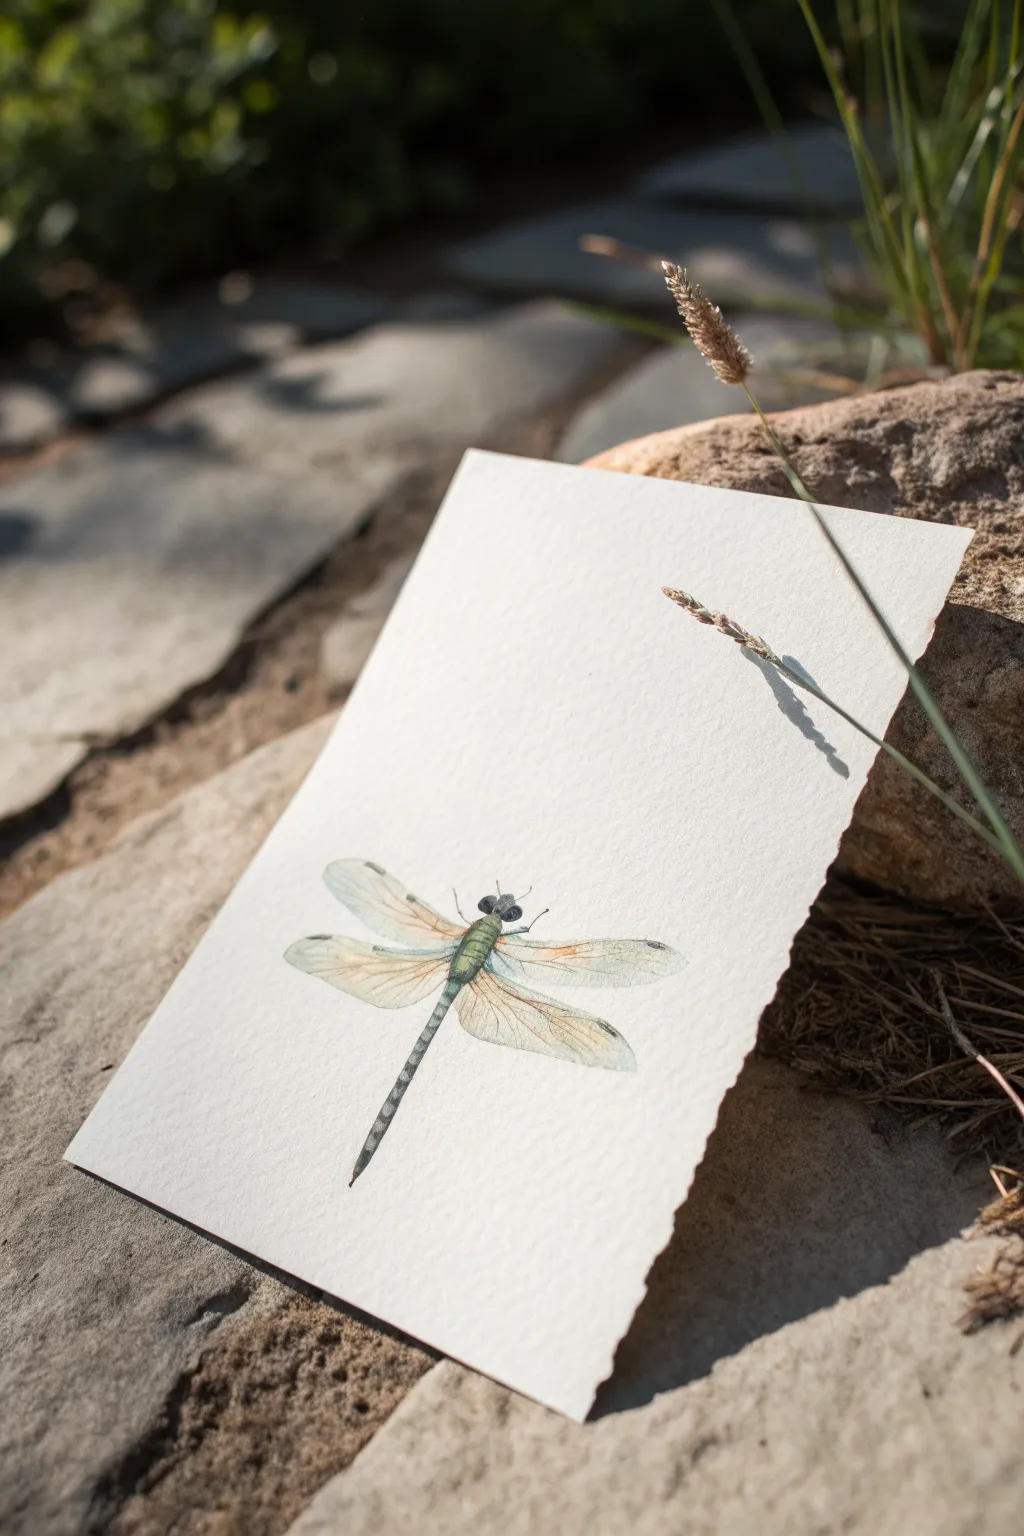
Embrace the beauty of negative space with this delicate watercolor study, where a single, finely detailed dragonfly rests against a stark white background. The soft washes of green and amber create translucent wings that seem ready to flutter off the textured paper.
Step-by-Step Tutorial
Materials
- Cold press watercolor paper (300 gsm)
- Watercolor paints (Sap Green, Burnt Sienna, Indigo, Yellow Ochre)
- Round watercolor brushes (size 4 for body, size 0 or 00 for details)
- Pencil (HB or H)
- Kneaded eraser
- Clean water jar
- Paper towels
Step 1: Sketching the Framework
-
Draft the center line:
Begin by lightly drawing a diagonal guideline where the dragonfly’s body will rest. This helps ensure the posture looks natural rather than stiffly horizontal or vertical. -
Outline the body segments:
Sketch the head as a small oval, followed by the slightly thicker thorax. Extend the abdomen down your guideline as a long, slender tail that tapers gently at the end. -
Map the wings:
Draw the four wings extending from the thorax. The top pair should reach slightly forward, while the bottom pair angles backward. Keep your pencil lines extremely faint so they disappear under the paint later. -
Add connecting details:
Lightly indicate the separation between the wing segments. You don’t need every vein yet, just the major structural lines that give the wings their shape.
Step 2: Painting the Body
-
First wash on the thorax:
Mix a watery Sap Green with a touch of Yellow Ochre. Apply this to the thorax area, letting the color pool slightly in the center for natural shading. -
Paint the abdomen base:
Using a diluted mix of Indigo and Sap Green, paint the long tail section. While the paint is still damp, lift out tiny highlights along the center using the tip of a clean, thirsty brush. -
Define the head:
Use a darker concentration of Indigo to paint the large eyes on the head. Leave tiny specks of white paper unpainted to represent the reflection of light in the insect’s eyes. -
Deepen the segments:
Once the initial green layer is dry, mix a darker green-black. Using your smallest brush, paint horizontal bands across the abdomen to create the segmented look characteristic of dragonflies.
Muddy colors?
If the wings look muddy, you likely overworked the wash. Lay down the initial pale color once and don’t touch it again until it is completely dry.
Step 3: Creating Translucent Wings
-
Prepare the wing wash:
Dilute Burnt Sienna and a tiny bit of Sap Green with plenty of water. You want a very pale, tea-colored wash that barely tints the paper. -
Paint the upper wings:
Apply the wash to the top wings. While wet, drop incredibly small amounts of blue or green near the body connection point, letting the colors bleed outward softly. -
Paint the lower wings:
Repeat the process for the lower wings, perhaps adding a touch more Burnt Sienna near the edges to suggest age or light refraction. -
Let it dry completely:
It is crucial to wait until the wing washes are bone dry before proceeding to the fine details, otherwise your lines will blur.
Add some sparkle
For a magical touch, mix a tiny amount of iridescent medium or pearl watercolor into the final glaze on the wings to mimic sunlight catching typically glassy textures.
Step 4: Fine Details and Finishing
-
Draw the veins:
Load your size 00 brush with a watery grey-green mix. Holding the brush perpendicular to the paper, paint the delicate network of veins on the wings using quick, confident strokes. -
Add wing spots:
Near the outer tip of each wing, paint the ‘pterostigma’—that small, darker rectangular spot—using a mix of Indigo and Burnt Sienna. -
Detail the legs:
With your finest brush and dark Indigo paint, add the tiny legs tucked near the head. Keep them thin and angular. -
Refine the shadows:
I like to add a final, very faint glaze of blue-grey under the wings where they overlap slightly, enhancing the sense of transparency. -
Clean up:
Once absolutely everything is dry, gently erase any visible pencil marks with your kneaded eraser to reveal the pristine white space around your subject.
Step back and admire how the stillness of the white paper amplifies the delicate life of your painted insect
Dragonfly on a Floating Leaf Close-Up
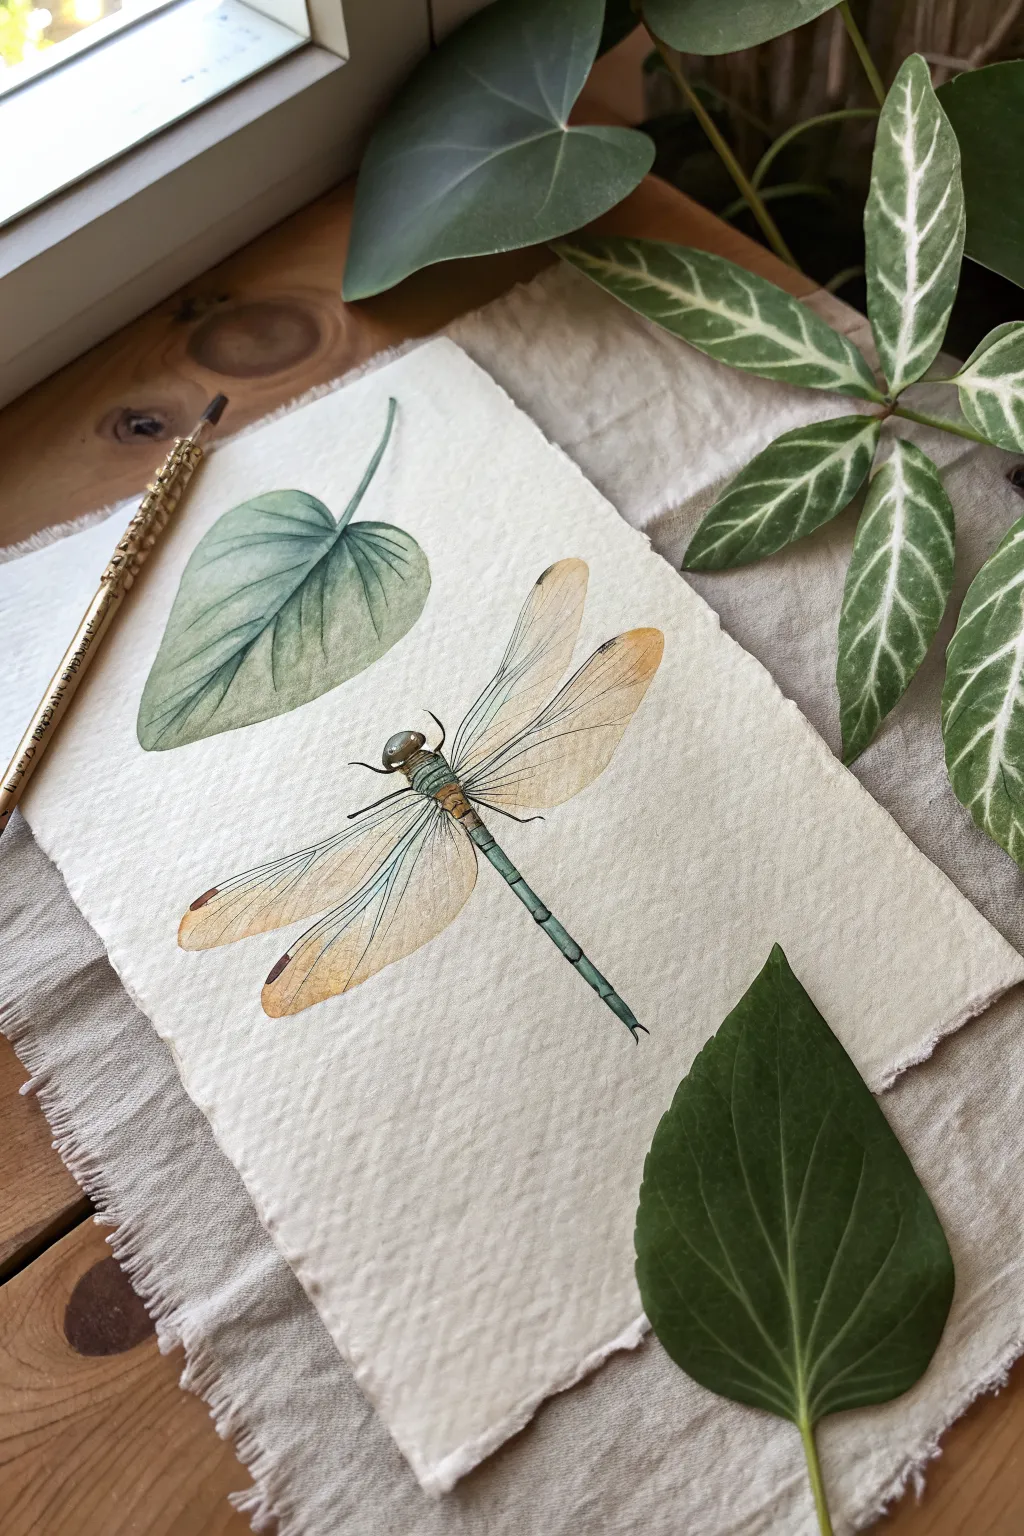
Capture the delicate transparency of dragonfly wings and the subtle veins of a green leaf in this botanical-style watercolor study. Using textured paper adds an organic feel that perfectly complements the natural subject matter.
Step-by-Step Guide
Materials
- Heavyweight watercolor paper (rough or cold-press with deckled edge)
- Watercolor paints (Sap Green, Hooker’s Green, Burnt Sienna, Yellow Ochre, Paynes Gray, Indigo)
- Round watercolor brushes (sizes 2, 4, and 0 for details)
- Pencil (HB or H) for light sketching
- Kneaded eraser
- Two jars of water
- Paper towels
- Palette for mixing
Step 1: Planning and Sketching
-
Prepare your paper:
Start with a piece of high-quality, textured watercolor paper. If yours doesn’t have deckled edges, you can carefully tear the edges against a ruler to create that soft, handmade look shown in the reference. -
Outline the composition:
Using a hard pencil like an H lead, very lightly sketch the placement of the leaf in the upper left and the dragonfly diagonally below it. Keep your lines faint so they won’t show through the transparent wing washes later. -
Detail the dragonfly structure:
Refine the dragonfly sketch, marking out the long, segmented abdomen, the thorax, the head with large eyes, and the four distinct wings. Pay attention to the curve of the wings; they should look delicate and slightly bowed. -
Sketch the leaf:
Draw the heart-shaped leaf. Add the central vein line and a few major branching veins curving toward the edges. This guide will be crucial for the glazing steps.
Muddy Wings?
If your wing veins look too thick or messy, wait for the paint to dry fully. Then, use a white gel pen to re-draw over the thick lines, or carefully lift paint with a damp, stiff brush.
Step 2: Painting the Leaf
-
First leaf wash:
Mix a watery wash of Sap Green with a touch of Paynes Gray to de-saturate it. Apply a wet-on-dry wash over the entire leaf shape, keeping the color fairly pale and even. -
Building leaf depth:
While the first layer is damp (but not swimming), drop in slightly more concentrated green near the central vein and the base of the leaf stem. This wet-in-wet technique creates soft shadows. -
Defining leaf veins:
Once the base layer is fully dry, use a size 2 brush to paint negative space around the veins. I like to darken the areas *between* the veins with a mix of Hooker’s Green and Indigo, leaving the vein lines themselves lighter.
Step 3: Painting the Dragonfly Body
-
Base coat for the body:
Mix a cool teal or blue-green color. A mix of Hooker’s Green and a tiny bit of white gouache or diluted Indigo works well. Paint the thorax and abdomen with a light wash. -
Adding segments:
Once the body wash is dry, use a size 0 brush and a darker mix of Indigo and Green to paint the segment lines across the abdomen. Add small shadow lines on the underside of the tail to give it roundness. -
Painting the head and eyes:
Paint the eyes with a murky, brownish-green mix. Leave a tiny speck of white paper unpainted on the top of the eye for a highlight, or add it later with white gouache.
Try Metallic Accents
For a magical touch, use iridescent watercolor medium or metallic gold paint for the wing veins. It catches the light beautifully when viewing the painting from an angle.
Step 4: Creating Translucent Wings
-
Wing base wash:
This is the most delicate part. Mix a very watery, pale wash of Yellow Ochre with a tiny hint of Burnt Sienna. Paint the wings, ensuring the wash is transparent enough to see the paper texture. -
Adding wing variation:
While the wing wash is still wet, touch the outer tips with a slightly stronger concentration of Burnt Sienna or warm brown. Let this bleed softly toward the body. -
Drawing the venation:
Wait for the wings to act completely dry. Using your smallest brush (size 0 or 00) and a mix of Paynes Gray and Burnt Sienna (to make a soft black), paint the rigid leading edge of each wing. Then, with an extremely light hand, paint the delicate network of veins inside the wings. -
Wing markings:
Add the small, dark rectangular spots (pterostigma) near the tips of the wings using a reddish-brown mix. These distinct marks anchor the delicate linework.
Step 5: Final Touches
-
Refining legs and antennae:
Use your fine liner brush and dark black-brown paint to draw the tiny, hair-thin legs extending from the thorax and the small antennae on the head. -
Highlighting:
Mix a tiny amount of opaque white gouache or ink. Add crisp highlights to the dragonfly’s body segments and the shiny part of the eyes to make them look wet and glossy. -
Review and balance:
Step back and assess your painting. If the leaf looks too flat, add another glaze of dark green to the shadowed side. Ensure the dragonfly’s tail looks grounded.
Once dry, frame your artwork or display it flat to admire the translucent layers you have built
Geometric Shapes Dragonfly Design
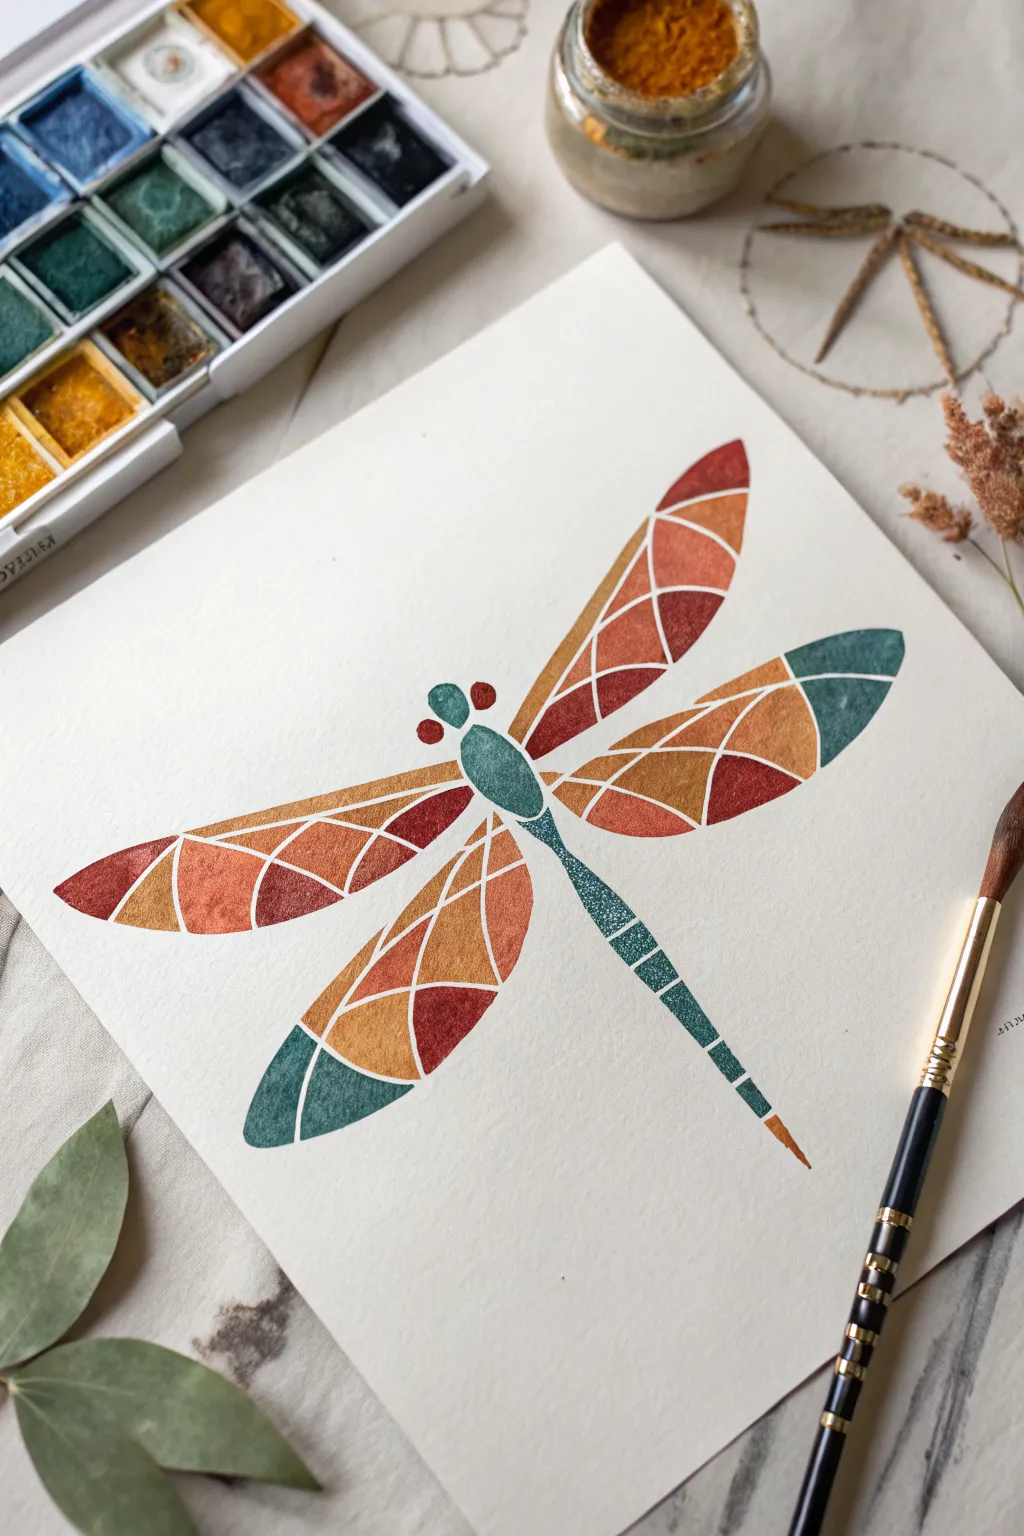
Capture the elegance of insect wings using a modern, segmented approach that mimics the look of stained glass. This watercolor project uses masking or careful negative space to create crisp white lines between vibrant, earthy geometric shapes.
Step-by-Step Tutorial
Materials
- High-quality watercolor paper (cold press creates nice texture)
- Watercolor paints (pans or tubes in teal, burnt orange, rust red, and ochre yellow)
- Small round brush (size 2 or 4)
- Fine liner brush (size 0 or 00)
- Pencil (HB or lighter)
- Ruler
- Eraser
- Drawing gum / masking fluid (optional but recommended)
- Jar of water and paper towels
Step 1: Planning the Structure
-
Establish the centerline:
Begin by lightly sketching a diagonal guide line across your paper where you want the dragonfly body to rest. This ensures visual balance. -
Sketch the body segments:
Draw the main body parts along your guide line: a small round head, a thicker thorax (mid-section), and a long, tapering tail. Don’t worry about details yet, just the basic silhouette. -
Outline the wings:
Draft the four large wing shapes extending from the thorax. The top wings should be slightly longer and angle upward, while the bottom wings angle downward. Keep the edges smooth and curved. -
Create the geometric mosaic:
Inside each wing outline, lightly draw intersecting lines to break the large shape into smaller polygons—triangles and irregular quadrilaterals. These will be your color blocks. -
Define the tail segments:
Divide the long tail into small, rectangular segments, leaving tiny gaps between them in your sketch to represent the white space later.
Step 2: Painting the Mosaic
-
Prepare your palette:
Mix your four main colors: a deep teal, a warm ochre yellow, a rust red, and a burnt orange. I like to test these on a scrap paper first to ensure they harmonize well. -
Protecting the white lines (Option A):
If you have a steady hand, you can paint directly. If not, carefully apply thin lines of masking fluid over your pencil lines to preserve them white. Let this dry completely before painting. -
Start with the thorax:
Load your brush with teal paint and fill in the central thorax shape. Use just enough water to let the pigment flow but not pool. -
Painting the wing segments:
Begin filling in the geometric shapes on the wings. Alternate your colors randomly—place a rust red section next to an ochre one, trying not to put two identical colors side-by-side. -
Mind the gap:
If you didn’t use masking fluid, paint very carefully up to your pencil lines but stop just short, leaving a thin river of white paper between every colored shape. -
Balancing the color distribution:
As you work across the wings, step back occasionally to see if one color is overpowering the others. Aim for an even ‘confetti’ spread of your warm and cool tones. -
Detailing the wing tips:
For the tips of the wings, consider using your darkest teal or rust color to “anchor” the design visually at its furthest points.
Clean Lines Hack
Can’t paint straight lines? Use a white gel pen after the paint dries to redraw the grid lines over messy edges. It cleans up the image instantly.
Step 3: Final Details
-
Painting the tail:
Switch to your fine liner brush. Paint the segments of the tail using teal, gradually transitioning to smaller blocks as the tail tapers. -
Adding tail accents:
For a bit of visual interest, I sometimes paint the very last segment of the tail in a contrasting color, like the rust orange shown here. -
The head and eyes:
Paint the small head circle. Add two tiny dots or smaller circles above it for the eyes—you can use contrasting colors here, like red eyes on a green head. -
Removing the mask:
If you used masking fluid, ensure the paint is 100% dry. Gently rub the masking fluid away with your finger or a rubber cement pickup to reveal the crisp white lines underneath. -
Erase guidelines:
Once completely dry, gently erase any visible pencil sketch lines that are sitting in the white gaps, leaving only clean white paper.
Gold Leaf Accents
Replace one specific recurring color, like the ochre yellow, with gold watercolor paint or actual gold leaf for a shimmering, luxurious finish.
Frame this piece with a wide white mat to emphasize the clean, modern geometry and let the colors truly pop
Collage Wings Mixed-Media Dragonfly
Capture the delicate beauty of a dragonfly using layers, transparency, and texture in this sophisticated mixed-media project. By combining watercolor techniques with careful cutting and layering on deckled-edge paper, you’ll create a piece that feels like a treasured scientific specimen found in an old journal.
Step-by-Step Guide
Materials
- Heavyweight watercolor paper (smooth or hot press)
- Handmade deckled-edge paper (cream or beige)
- Tracing paper or vellum
- Watercolors (Teal, Prussian Blue, Payne’s Grey, Burnt Sienna, Iridescent/Metallic Blue)
- Fine liner pens (Black, 0.05mm and 0.1mm)
- White gel pen or gouache
- Craft knife and cutting mat
- Small sharp scissors
- PVA glue or matte medium
- Small round paintbrushes (Size 0 and 2)
- Pencil (HB)
Step 1: Creating the Body
-
Sketch the form:
Begin by lightly sketching the dragonfly’s segmented body on a piece of smooth watercolor paper. Focus on the distinct head, thorax, and the long, segmented abdomen. -
Base layer of color:
Apply a wash of teal mixed with a touch of grey to the body segments. Keep the center of each segment lighter to create a rounded, 3D effect. -
Deepening shadows:
Once the base is dry, use a smaller brush to add Prussian Blue and Payne’s Grey to the edges of the segments and the joints. This creates depth and makes the body look cylindrical. -
Adding texture:
Stipple tiny dots of darker blue and brown near the thorax to mimic the fuzzy texture often found on real dragonflies. -
The eyes:
Paint the large compound eyes using a mix of Burnt Sienna and gold or yellow ochre. Add tiny grid lines with a fine liner once dry to suggest the compound lens structure. -
Metallic highlights:
Glaze a thin layer of iridescent blue over the teal sections of the body. This gives it that characteristic insect shimmer without overpowering the color. -
Cutting out the body:
Carefully cut out the finished body using your craft knife. Leave no white border; you want a precise edge to make the collage look realistic.
Step 2: Crafting the Wings
-
Tracing the shape:
Place your tracing paper or vellum over a sketch of the wings (or a reference photo) and trace the outline with a very light pencil stroke. -
Drawing the veins:
Using your 0.05mm fine liner, meticulously draw the intricate network of veins. The lines should be darker near the top edge of the wing and fade slightly toward the tips. -
Adding translucent color:
Flip the vellum over and paint on the *back* side. Apply very faint washes of teal and blue near the wing base and tips, leaving the middle mostly transparent. Painting the back keeps the ink lines on the front crisp. -
Weathering the wings:
Add tiny touches of Burnt Sienna near the ‘nodes’ on the wings to give them an organic, slightly aged look. -
Cutting the wings:
Cut out the four wing sections with sharp scissors. Handle them gently as the vellum can be delicate.
Uneven Wings?
If vellum curls after painting, press it under a heavy book overnight before cutting. This ensures wings lay flat and transparent.
Step 3: Assembly and Background
-
Preparing the substrate:
Center your piece of handmade beige paper on top of a larger, thicker sheet of watercolor paper. The deckled edges should be visible. -
Mounting the wings:
Arrange the wings on the beige paper first. Apply a tiny dot of glue only at the very base of each wing where it will attach to the body. This allows the tips to lift slightly off the paper, creating real shadows. -
Attaching the body:
Apply glue to the back of your painted dragonfly body. Carefully place it over the junction of the wings, pressing down firmly to secure the entire assembly. -
Drawing the legs:
Instead of cutting out tiny paper legs, draw them directly onto the background paper using your fine liner. Start from the thorax and extend them naturally. -
Final highlights:
Use a white gel pen or a tiny dot of white gouache to add a specular highlight to the eyes and the highest point of the thorax. -
Shadow play:
If I find the artwork needs more grounding, I take a very dilute grey wash and paint a subtle shadow on the paper directly underneath the abdomen and wing tips. -
Signature touch:
Sign your work lightly in pencil or fine ink in the bottom corner of the textured paper to complete the scientific study aesthetic.
Antique Finish
Lightly burn the edges of your handmade paper with a lighter or brush with strong tea to enhance the vintage specimen look.
Now you have a stunning, three-dimensional dragonfly specimen that looks ready for a museum display.
String-Pull Dragonfly Body Trick
This elegant dragonfly silhouette is created using a simple yet magical string-pulling technique that mimics the segmented look of the insect’s body with surprising realism. The result is a delicate, textured print in calming teal tones that looks far more complex than it actually is.
Step-by-Step Guide
Materials
- A piece of string, yarn, or twine (about 8-10 inches long)
- Teal or blue-green acrylic paint (liquid consistency is best)
- Cold press watercolor paper (for texture)
- A small flat brush or palette knife
- A piece of scrap paper or cardboard
- Paper towels
- A scrap piece of paper (acting as a mask)
- Pencil (optional)
Step 1: Preparing the String
-
Cut the string:
Cut a piece of string or yarn to approximately 8 to 10 inches long. A slightly rougher twine works beautifully here because the tiny fibers help create that organic, insect-like texture. -
Prepare the paint:
Squeeze a generous amount of teal acrylic paint onto your palette or a disposable plate. If the paint is very heavy body, mix in a drop or two of water to make it flow more easily. -
Dip the string:
Dip almost the entire length of the string into the paint, leaving about two inches clean at one end to use as a handle. Use a craft stick or your fingers to ensure the string is thoroughly saturated but not dripping excessively.
Smudged the Pull?
If the string moved sideways during the pull, don’t worry. Turn the smudge into a thicker body segment or add more ‘legs’ to hide the blur.
Step 2: Creating the Body
-
Position the string:
Lay your watercolor paper on a flat surface. Take your paint-saturated string and arrange it in a straight line down the center bottom of your paper where you want the dragonfly’s tail to be. -
Add the curve:
Manipulate the top inch of the painted string into a small loop or slight bulge to represent the thorax (the upper body part) of the dragonfly. -
The pull technique:
Place a scrap piece of paper gently over the string. Press down lightly with one hand on the scrap paper, and with the other hand, slowly but steadily pull the clean end of the string straight down and out from under the paper. This dragging motion creates the segmented tail effect. -
Reveal the body:
Lift the scrap paper carefully to reveal your dragonfly body. If the head area looks too thin, you can dab a tiny bit of paint there with the tip of your pinky finger to widen it.
Step 3: Painting the Wings
-
Outline the wings:
While the body dries slightly, mix a very watered-down version of your teal paint. Using a fine brush, lightly sketch the outline of two long wings on the right side and two on the left, stemming from the thorax area. -
Initial wash:
Fill in these wing shapes with your watery paint mixture. You want this layer to be extremely translucent, almost like a watercolor wash, to capture the delicate nature of insect wings. -
Add texture:
Before the wash dries completely, dab your paper towel lightly over the wings to lift some pigment. This creates uneven patches of light and dark that mimic iridescence. -
Defining the veins:
Load your small brush with slightly thicker, darker paint (less water this time). Very gently paint thin veins running lengthwise through the wings. -
Detailing the edges:
Use the edge of a flat brush or the very tip of a round brush to darken the outer leading edges of the wings slightly, giving them structure.
Wing Transparency
Work wet-on-dry when painting the wings. Keep your brush damp but not dripping to maintain the sharp outer edge while keeping the inside transparent.
Step 4: Finishing Touches
-
Enhance the head:
Go back to the head section with your small brush and solid paint. Defines two small, rounded bulging shapes on either side for the eyes. -
Connect the parts:
Check the connection point where the wings meet the body. Use a tiny dot of darker paint to anchor them visually so they look attached rather than floating. -
Final assessment:
Stand back and look at the composition. If the tail looks too faint in places, don’t repaint it completely; just touch it lightly with a dry brush and a speck of paint to suggest continuity without ruining the texture. -
Let it dry:
Allow the entire piece to dry completely. The acrylic will dry faster than watercolor would, but give it at least 20 minutes before framing or handling to prevent smudging.
Once framed, the delicate texture of the pulled string makes a wonderful conversation piece that brings a bit of nature indoors


Have a question or want to share your own experience? I'd love to hear from you in the comments below!