
Dragonflies are basically nature’s tiny flying jewels, and they’re ridiculously fun to turn into art. Here are my favorite dragonfly artwork ideas—from classic, beginner-friendly approaches to a few playful twists that’ll make your sketchbook feel magical.
Watercolor Dragonfly Wings With Soft Washes
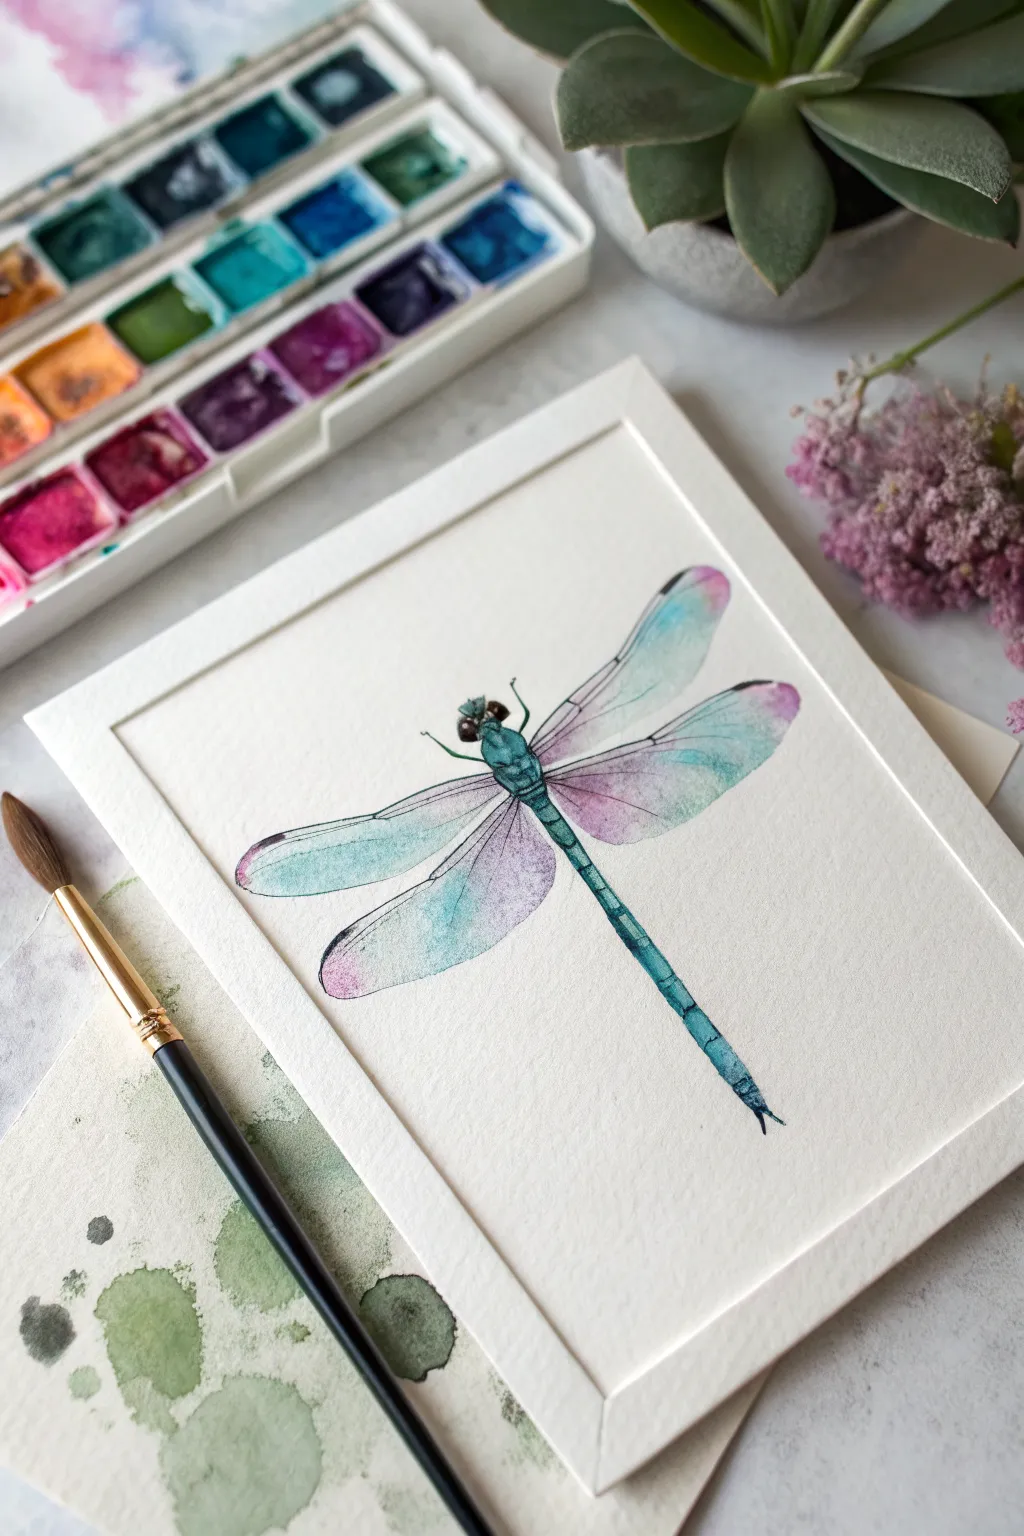
This delicate watercolor project captures the iridescent beauty of a dragonfly using a wet-in-wet technique that blends turquoise, violet, and transparent washes. The result is a stunningly airy specimen that looks like it has just landed on your textured paper.
Step-by-Step Guide
Materials
- Cold-press watercolor paper (300 gsm recommended for texture)
- Watercolor paints (Turquoise, Phthalo Blue, Violet/Purple, Payne’s Gray, Black)
- Round watercolor brushes (Size 4 for washes, Size 0 or 00 for details)
- Pencil (HB or H for light lines)
- Kneadable eraser
- Clean water jar
- Paper towels
- Mixing palette
Step 1: Planning and Sketching
-
Prepare your paper:
Start with a clean sheet of cold-press watercolor paper. The heavy texture is key to achieving the granulated look seen in the example, so tape your paper down to a board to prevent buckling. -
Map the body:
Lightly sketch a central vertical line to ensure symmetry. Draw a small oval for the head, a slightly larger section for the thorax, and a long, segmented tail extending downwards. -
Outline the wings:
Sketch the four wings extending from the thorax. The top wings should angle slightly upwards and outwards, while the bottom wings extend more horizontally. Keep these pencil lines incredibly faint, as watercolor is transparent. -
Refine the shapes:
Use a kneadable eraser to lift up any graphite that is too dark, leaving only a ‘ghost’ of the image to guide your brush.
Fixing “Cauliflowers”
If uneven water drying creates jagged edges (blooms) in your smooth wing wash, dampen a stiff brush and gently scrub the edge to soften it, then blot with a tissue.
Step 2: Painting the Body
-
Base layer for the body:
Mix a watery solution of Teal or Turquoise. Using your size 4 brush, paint the thorax and the long tail, leaving tiny slivers of white paper between the tail segments to create natural highlights. -
Deepen the shadows:
While the paint is still damp but not soaking, drop in a slightly concentrated Phthalo Blue or Payne’s Gray along the right side of the tail and thorax to give the body a cylindrical form. -
Head details:
Paint the large eyes using a mix of dark violet and black. Leave two tiny white dots unpainted on the eyes to represent light catching the glossy surface. -
Define segments:
Once the base layer is dry, switch to your size 0 brush. Use a dark teal or Payne’s Gray to paint precise lines separating the segments of the tail and adding texture to the thorax.
Step 3: Creating the Wings
-
First wing wash – top:
We will tackle one wing at a time. Wet the area of the top left wing with clean water. Drop a very pale wash of Turquoise near the body, letting it bloom outward. -
Adding gradients:
While the wing is still wet, touch the outer tip with a very dilute violet or pink. Let the blue and pink merge naturally on the wet paper—don’t overwork it with the brush. -
Repeat for all wings:
Continue this wet-on-wet process for the remaining three wings. Vary the color placement slightly; for instance, add more violet to the inner part of the lower wings for visual interest. -
Wing tips:
Look closely at the reference: the very tips of the wings have a slightly darker, concentrated spot of pigment (pterostigma). Add a small dash of pink or dark violet here while the wings are drying. -
Let it dry completely:
Pause here. The paper must be bone dry before adding the veins, or your fine lines will blur into a fuzzy mess.
Pro Tip: Transparency
To get that glassy wing look, ensure your paint puddle is 80% water and 20% pigment. Test the transparency on a scrap paper; create faint veining by partially lifting color with a dry brush.
Step 4: Fine Details
-
Outline the structure:
Using your smallest brush (size 0 or 00) and a mix of charcoal grey or diluted black, trace the main structural veins along the leading edge of each wing. -
Inner veining:
Draw incredibly delicate, faint lines branching through the wings. Keep your hand loose and ensure the paint is watery so lines don’t look too heavy or ‘stamped’ on. -
Connect to the body:
Strengthen the connection points where the wings meet the thorax with a slightly darker stroke of teal or grey to show attachment. -
Final body contrast:
Revisit the tail segments. If the color faded too much upon drying, glaze a thin layer of turquoise over the darkened shadows to unify the color. -
Legs:
Use the very tip of your detail brush to flick shallow, thin lines near the head for the tiny legs. Keep them minimal; suggestion is better than heavy detail here.
Step back and admire the delicate translucency of your finished dragonfly.
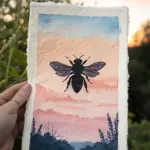

Glowing Dragonfly Silhouette Against a Sunset
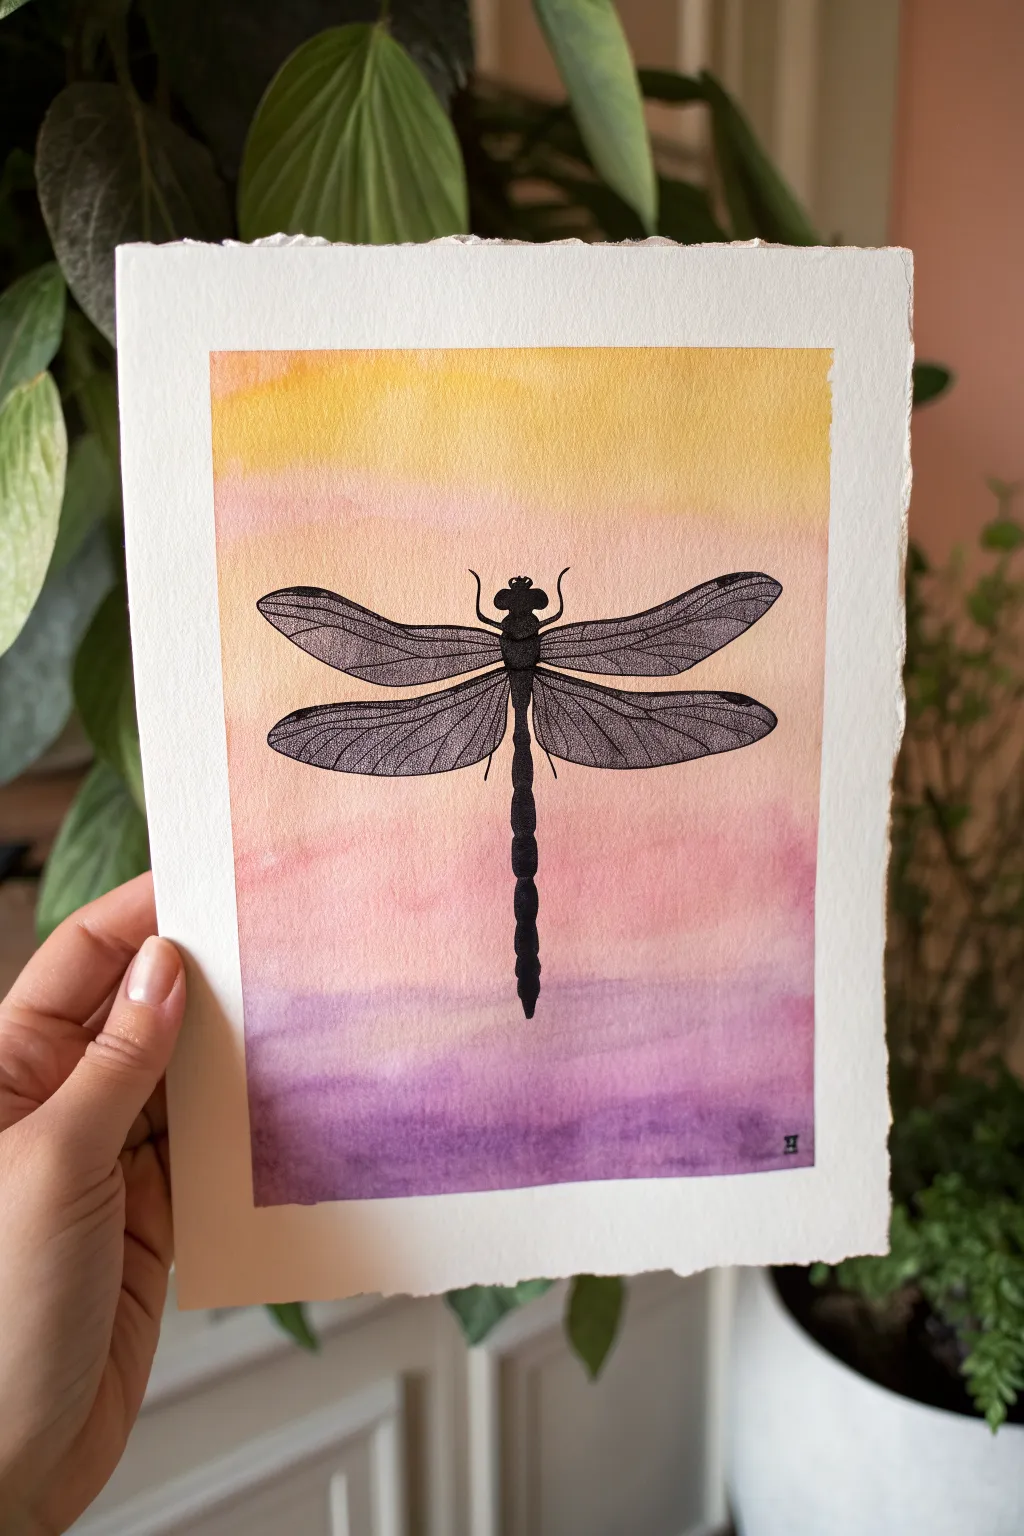
Capture the magic of twilight with this mixed-media piece that combines a soft, blending watercolor wash with the crisp precision of ink stippling. The contrast between the dreamy, nebulous background and the sharp, geometric details of the dragonfly creates a striking visual balance perfect for any nature lover’s wall.
Detailed Instructions
Materials
- Cold press watercolor paper (300 gsm)
- Masking tape (painters tape)
- Watercolor paints (Yellow ochre or warm yellow, coral pink, violet/purple)
- Flat wash brush (3/4 inch or similar)
- Fine liner pens (Black, sizes 01 and 05)
- Pencil and eraser
- Ruler
- Clean water
Step 1: Setting the Sky
-
Prepare the workspace:
Begin by taping down all four edges of your watercolor paper to a board or table. This creates that crisp white border seen in the original and keeps the paper flat while it’s wet. -
Pre-wet the paper:
Using your flat brush and clean water, gently wet the rectangular area inside the tape. You want the paper to be glistening but not forming puddles. -
Apply the warm horizon:
Load your brush with a watery yellow ochre. Start at the very top of the paper and paint horizontal strokes about one-third of the way down. -
Transition to coral:
Rinse your brush slightly and pick up coral pink. Brush directly below the yellow while the paint is still wet, allowing the colors to bleed into each other naturally. -
Deepen the base:
Finally, load a rich violet or purple. Paint the bottom third of the paper, blending it upward into the pink to create a seamless gradient from day to night. -
Let it cure completely:
This step is crucial: walk away and let the paint dry 100%. The paper must be bone dry before you add ink, or the pens will bleed and ruin the silhouette effect.
Tape Tactics
To prevent the tape from tearing your paper upon removal, stick the tape to your clothes or a blanket once before applying it to the paper to reduce its tackiness.
Step 2: Designing the Dragonfly
-
Sketch the symmetry:
Using a ruler, very lightly draw a vertical centerline down the middle of your dried painting. This guide helps keep the dragonfly perfectly straight. -
Outline the body:
Sketch the dragonfly’s head, thorax, and long, segmented tail along the centerline. Keep the pencil pressure extremely light so it’s easy to erase later. -
Draft the wings:
Draw the main shapes of the upper and lower wings. The upper wings should angle slightly upward, while the lower wings extend more horizontally. -
Ink the main outline:
Take your 05 size pen and carefully trace over your pencil sketch for the main body and the outer perimeter of the wings. -
Fill the body:
Color in the head, thorax, and tail completely solid black. Leave the wings empty for now. -
Construct wing veins:
Switch to a thinner 01 pen. Draw the primary veins running through each wing, creating the large sections or cells.
Step 3: Details & Final Touches
-
Begin stippling:
This is where patience pays off. Instead of coloring the wings solid, fill the wing sections with tiny dots using the 01 pen. I prefer to cluster dots near the veins for shading. -
Create gradients with dots:
Make the dots dense near the body and wing edges, and sparser toward the center of the wing panels. This creates a translucent, shimmering effect. -
Refine the edges:
Go back over the main outline of the wings with the 05 pen to make the silhouette pop against the background. -
Add antennas and legs:
Draw two delicate, curved antennas and tiny legs extending from the thorax using the finest pen tip. -
Clean up:
Once the ink is fully dry, gently erase any visible pencil marks, being careful not to smudge the stippling. -
The big reveal:
Ideally, peel the masking tape away from the paper at a 45-degree angle to reveal those clean, professional edges.
Golden Hour Glow
For a magical touch, use a metallic gold gel pen to add a few highlights on the dragonfly’s wings or body after the black ink is dry.
Enjoy the peaceful vibe your new artwork brings to the room

Loose Dragonfly Gesture Painting In Mid-Flight
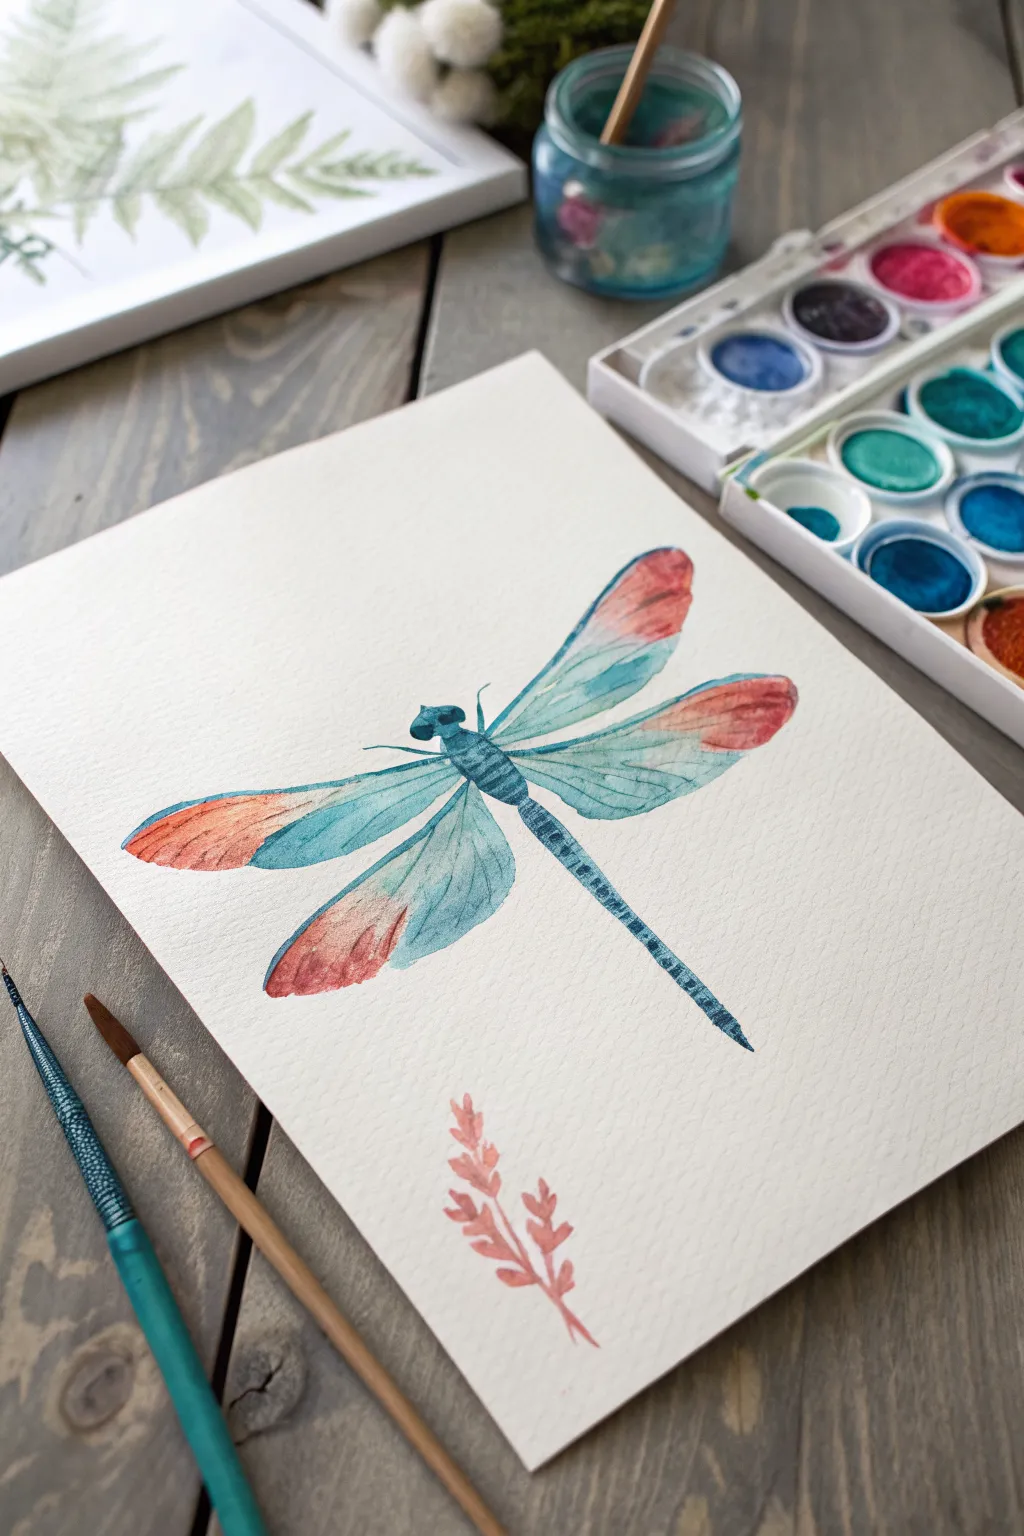
Capture the delicate beauty of a dragonfly in flight with this ethereal watercolor project. Featuring a harmonious blend of teal and coral hues on textured paper, this piece artfully balances transparency and detail for a stunning natural study.
Step-by-Step Guide
Materials
- Cold press watercolor paper (300 gsm)
- Watercolor paints (Turquoise/Teal, Coral/Salmon, Indigo/Payne’s Grey)
- Round watercolor brushes (size 6 for washes, size 2 or 0 for details)
- Pencil (HB) and kneaded eraser
- Jar of clean water
- Paper towels or cloth
- Palette for mixing
Step 1: Planning the Composition
-
Lightly sketch the structure:
Begin by lightly sketching the dragonfly’s basic geometry in the center of your paper. Draw a slender, segmented line for the body and four long, paddle-shaped ovals for the wings. Keep your pencil pressure very light so the graphite won’t show through the transparent paint later. -
Refine the wing shapes:
Refine the wing outlines, ensuring the top pair is slightly longer and flatter than the bottom pair. Add a small, rounded shape for the head and a slightly thicker thorax area where the wings attach to the body. -
Add the botanical accent:
Near the bottom of the page, sketch a small, simple sprig with leaf-like shapes. This acts as a visual anchor and balances the composition, mirroring the coral tones we will use in the wings.
Step 2: Painting the Wings
-
Mix the teal wash:
On your palette, dilute a turquoise or teal pigment with plenty of water. You want a very transparent, watery consistency for the initial wing layers. -
Apply the first wing layer:
Using your size 6 brush, paint the inner two-thirds of each wing (the part closest to the body) with the teal wash. Use the tip of the brush to carefully follow the curved edges, but work quickly to keep the edges wet. -
Introduce the coral gradient:
While the teal paint is still damp but not soaking wet, load your brush with a watery coral or salmon color. Touch it to the outer tips of the wings. Allow the coral to bleed naturally back into the teal, creating a soft transition where they meet. -
Refine the wing edges:
Once the initial wash is tacky, use a slightly more concentrated teal mix to define the very top ridge of the upper wings. This ‘vein’ adds structure to the otherwise soft shapes. -
Add texture to the lower wings:
For the bottom wings, use a mostly dry brush to pull a little color from the wet area outward, creating faint streaks that mimic the delicate ribbing of insect wings.
Pro Tip: Controlling the Bleed
If the coral color rushes too fast into the teal, your paper is too wet. Dab your brush on a paper towel before applying the second color to slow the flow.
Step 3: Defining the Body
-
Paint the head and thorax:
Switch to a smaller brush and a mix of teal with a touch of indigo or Payne’s grey for a darker value. Paint the head and thorax, leaving a tiny sliver of white paper unpainted to represent a highlight on the eye. -
Detail the abdomen:
Move down the long tail section (abdomen). Instead of drawing a solid line, paint small, connected segments. Make the spaces between segments slightly lighter or leave hairline gaps to show the segmented exoskeletal structure. -
Darken the joints:
Drop a tiny amount of concentrated indigo into the wet paint at the joints between body segments. This adds volume and roundness to the narrow body form without outlining it.
Level Up: Metallic Magic
Mix a tiny amount of iridescent medium or metallic watercolor into your final wing vein details to make the wings shimmer realistically in the light.
Step 4: Finishing Touches
-
Paint the wing veins:
Wait until the wings are fully dry—this is crucial. Using your smallest detail brush (size 0 or 2) and a thin mix of teal, paint delicate lines radiating from the body outward across the wings. Keep these lines jagged and organic, not perfectly straight. -
Paint the botanical sprig:
Using the same coral shade from the wing tips, paint the small plant sprig at the bottom. Use a single brushstroke for each small leaf to keep the look loose and gestural. -
Add final contrast:
Evaluate your drying painting. If the body looks too flat, add a crisp line of dark teal along one side of the tail and thorax to suggest a shadow side. -
Erase stray lines:
Once the entire artwork is bone dry, gently use a kneaded eraser to lift any visible pencil marks, especially around the light-colored wing tips.
Now you have a serene, nature-inspired study ready to frame or gift


Symmetry Dragonfly Squish Art Prints
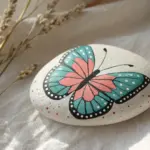
Capture the delicate beauty and perfect symmetry of a dragonfly with this engaging ‘squish art’ technique. By painting half the insect and folding the paper, you’ll create a stunningly mirrored creature with organic textures and vibrant, blended colors.
Detailed Instructions
Materials
- Large, heavy-weight drawing paper or mixed media paper
- Water-based paints (gouache, acrylics, or liquid watercolors)
- Fine-liner pens (black waterproof ink)
- Small round paintbrushes
- Sponge or paper towel
- Pencil and eraser
- Palette for mixing
Step 1: Planning and Folding
-
Prepare the center line:
Begin with a large sheet of high-quality paper. Fold it precisely in half vertically to establish a crisp crease, then open it back up flat. -
Sketch the framework:
Lightly sketch the body of the dragonfly right along the center crease. A dragonfly has a small head, a thorax (chest), and a very long, thin segmented abdomen. Only half the body needs to be detailed if you plan to transfer everything, but sketching the full central line helps with placement. -
Outline the wings:
Draw the two large wings on just the *right* side of the fold. The top wing (forewing) should angle slightly forward, and the bottom wing should be slightly wider near the base. Keep your pencil lines light.
Wetness is Key
If your paint dries too fast, the transfer will be faint. Add a tiny drop of retarding medium or extra water to keep acrylics workable longer.
Step 2: The Squish Technique
-
Apply wet paint:
Mix a vibrant teal or blue paint. Working quickly so it doesn’t dry, paint the wings on the right side. You want the paint to be wet and generous, perhaps dabbing in some purple or green accents while it’s still pooling. -
Fold and press:
Immediately fold the left side of the paper over onto the wet paint. Press firmly across the back of the paper with your hand, smoothing from the center crease outwards to ensure the paint transfers. -
Reveal the symmetry:
Carefully peel the paper open. You should now have a symmetrical imprint of the wings on the left side. The texture will look organic and slightly mottled, which is perfect for insect wings. -
Repeat for the body:
Paint the long abdomen and thorax on the right side using a darker blue or teal. Again, ensure the paint is wet and generous before folding and pressing once more to transfer the body shape.
Metallic Magic
Once dry, brush a little gold or iridescent pearl watercolor over the wings. It creates a shimmer that mimics real insect wings.
Step 3: Refining and Detailing
-
Let it dry completely:
Before adding ink, the paint must be bone dry. I usually give this about 20-30 minutes, or you can use a hairdryer on a low setting to speed things up. -
Outline the body:
Using a waterproof fine-liner pen, trace the outline of the dragonfly’s body. Add little segments to the long tail and intricate details to the thorax area. -
Define the wing structure:
Trace the outer edge of all four wings with your pen. Don’t worry if the original paint went outside the lines; the ink defines the final shape. -
Add veining:
Draw the delicate network of veins inside the wings. Start with the main structural veins that run lengthwise, then fill in the smaller, cellular patterns between them. This disguises any blotchiness from the print. -
Enhance with color:
If the transfer looks too pale in spots, go back in with a slightly damp brush and add washes of transparent color (like yellows or pinks) over the dried ink to create iridescence. -
Final touches:
Add small details like legs coming from the thorax and the large eyes on the head. You can also thicken line weights in shadow areas to give the insect more depth.
Display your symmetrical masterpiece open flat to show off the perfect mirror image you’ve created
BRUSH GUIDE
The Right Brush for Every Stroke
From clean lines to bold texture — master brush choice, stroke control, and essential techniques.
Explore the Full Guide
Cut-Paper Dragonfly Collage With Layered Wings
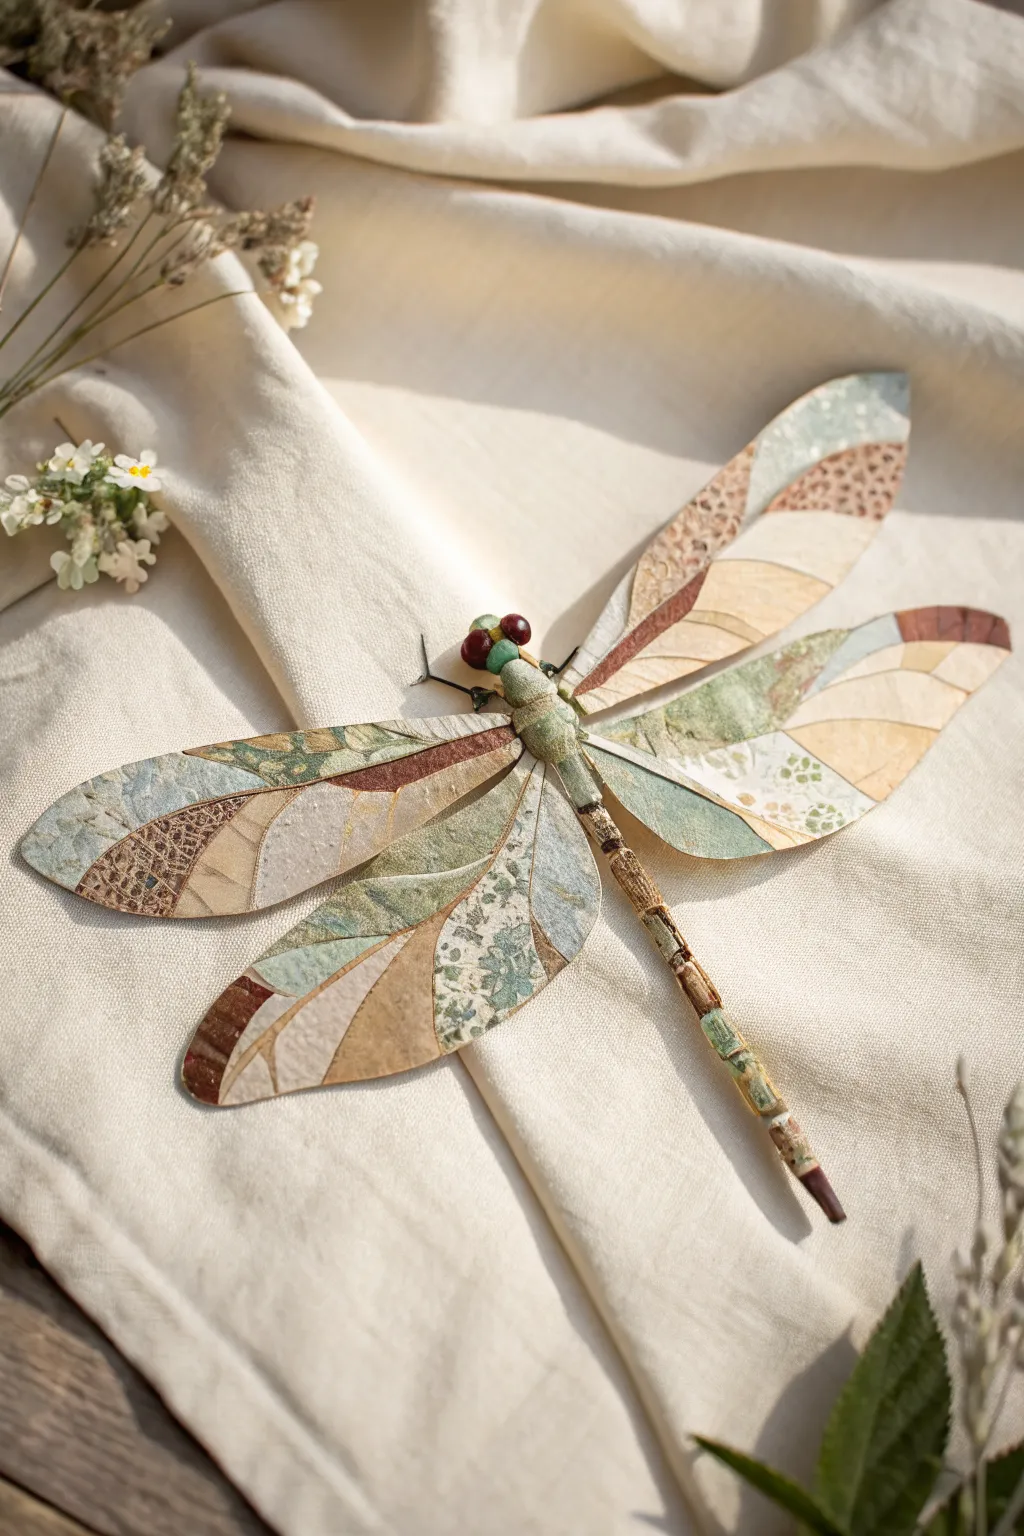
Capture the delicate beauty of nature with this intricate dragonfly collage, which utilizes scraps of textured and patterned papers to mimic the iridescence of stained glass. The finished piece has a lovely, dimensional quality that looks stunning resting on a bookshelf or framed in a shadowbox.
Step-by-Step Guide
Materials
- Assorted patterned papers (scrapbook paper, old maps, textured mulberry paper, or painted watercolor paper)
- Heavyweight cardstock or thin cardboard (for the base)
- Wooden dowel, thin twig, or rolled paper tube (for the body core)
- Mod Podge or white craft glue
- Small paintbrush (for glue application)
- Precision craft knife (X-Acto)
- Sharp detail scissors
- Two small reddish beads (approximately 4-6mm)
- Green floral tape or washi tape
- Acrylic paints (browns, greens, iridescent medium)
- Fine-grit sandpaper
- Pencil
Step 1: Constructing the Body
-
Prepare the core:
Cut your wooden dowel or twig to approximately 5-6 inches long. If you want a tapered look like the photo, you can wrap masking tape around the top third to build up bulk for the thorax, tapering off as you go down the tail. -
Apply the base textures:
Tear small strips of brownish-green patterned paper. Coat the body armature with a thin layer of glue and wrap these strips around it, overlapping them slightly to hide the wood completely. -
Create segments:
To mimic the dragonfly’s segmented tail, cut very narrow strips of a darker brown paper or cardstock. Glue these rings around the tail at regular intervals, roughly every quarter inch. -
Build the thorax:
For the upper body section where the wings will attach, wrap a slightly thicker strip of light green or textured paper to create a distinct, bulbous area. I find that using a paper with a slight fabric texture here adds great realism. -
Add the head and eyes:
Glue a small bead of rolled paper or a crafted clay ball to the top of the thorax for the head. Firmly attach the two reddish beads on either side of this head piece to serve as the large compound eyes.
Paper Selection Tip
Use old book pages or sheet music as one of your ‘colors.’ The text acts as a pattern and adds incredible visual interest without overpowering the natural aesthetic.
Step 2: Designing the Wings
-
Draft the wing shape:
On a piece of stiff cardstock, sketch the outline of four long, slender wings. Two should be slightly longer (forewings) and two slightly shorter and wider (hindwings). -
Cut the base:
Cut these cardstock wing shapes out carefully. These will serve as the sturdy backing for your paper collage work. -
Plan the mosaic pattern:
Using a pencil, lightly draw curved internal veins on your cardstock wings. These lines will guide where your different paper patterns will shift. -
Select your palette:
Gather scraps of paper in earth tones—sage greens, soft browns, creams, and pale blues. Look for papers with small prints involving leaves, maps, or marble textures. -
Cut paper segments:
Using your craft knife, cut the patterned papers into shapes that correspond to the sections you drew on the wings. It’s okay if they are slightly larger than the section; you can trim them later. -
Adhere the layers:
Working one section at a time, apply glue to the cardstock wing and press the cut paper shape onto it. Smooth it down to ensure there are no air bubbles. -
Refine the edges:
Once the glue is fully dry, flip the wing over and use your precision scissors to trim any excess patterned paper that hangs over the edge of the cardstock base.
Glue Control
If your paper starts to wrinkle or buckle from the glue, you are likely using too much moisture. Switch to a glue stick for thinner papers or apply a very thin, spread-out layer of white glue.
Step 3: Assembly and Detailing
-
Attach wings to body:
Apply a strong dab of craft glue or a low-temp hot glue to the underside of the thorax. Press the wings into place—forewings first, then hindwings slightly overlapping underneath them. -
Reinforce the joint:
Cut a small strip of green paper or use a bit of floral tape to wrap over the point where the wings meet the body. This covers the messy join and secures the wings further. -
Add leg details:
Cut very thin slices of black or dark brown cardstock (or use thin wire). Glue these to the underside of the thorax to create delicate legs protruding slightly forward. -
Vintage aging:
Dilute a tiny amount of brown acrylic paint with water. Lightly brush this wash over the edges of the wings and the segments of the tail to give it an antique, weathered look. -
Final texture check:
If any paper edges have lifted, dab a little glue under them. You can also lightly sand the edges of the body with fine-grit sandpaper to distress the paper and make it look more organic.
Now find the perfect spot of sunlight to display your unique paper insect sculpture
Faux Stained Glass Dragonfly With Bold Outlines
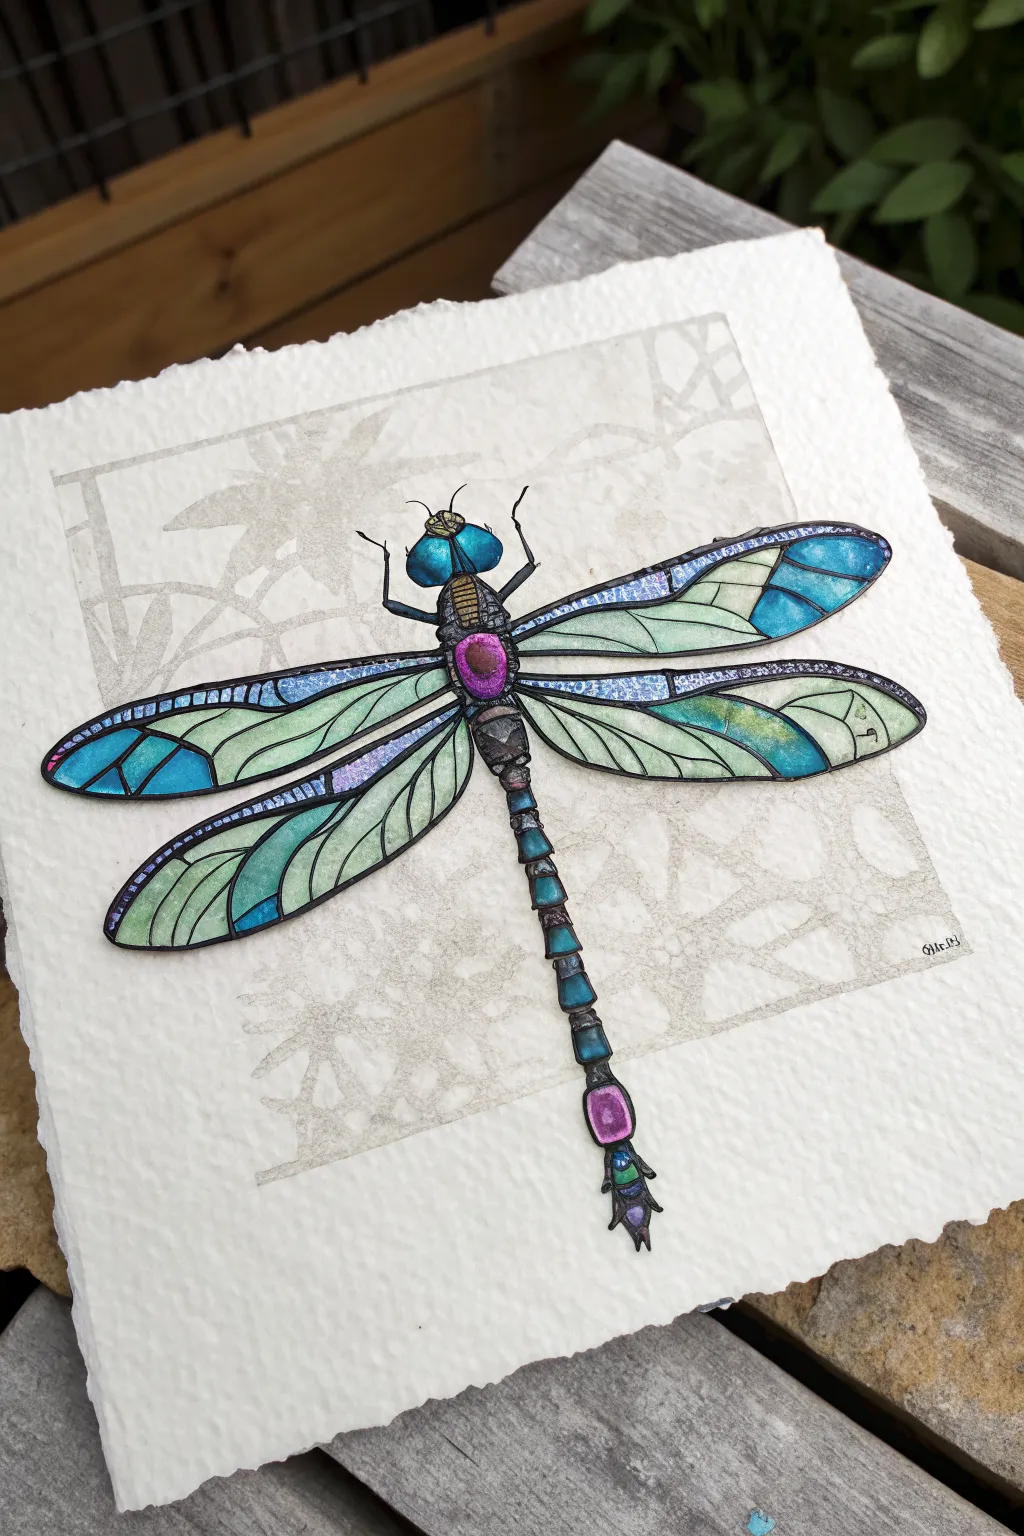
Capture the magic of stained glass on paper with this striking dragonfly project. Using bold outlines and vibrant, layered colors, you’ll create a piece that mimics the luminosity and structure of leaded glass art.
How-To Guide
Materials
- Heavyweight textured watercolor paper (deckle edge optional)
- Black waterproof fine liner pen (01 or 03 size)
- Black brush pen or broad marker for thick outlines
- Watercolor paints or alcohol ink markers (teal, purple, green)
- Metallic gel pens or paints (gold, silver, iridescent)
- Pencil and eraser
- White gel pen for highlights
- Ruler
Step 1: Drafting the Design
-
Establish the background grid:
Begin by lightly sketching a faint, rectangular box or grid in the center of your paper. Inside this faint grid, sketch a very subtle, abstract organic pattern—think leaf veins or cracked ice—to serve as a background texture later. -
Sketch the dragonfly structure:
Draw a long, thin vertical line down the center to act as the spine. Sketch the thorax (the middle section) as an oval, followed by a smaller head at the top and a long, segmented tail extending downward. -
Map out the wings:
From the thorax, sketch two pairs of long, slender wings extending horizontally. The top pair should be slightly longer and angled upward, while the bottom pair angles slightly downward. Focus on getting the symmetry right before adding details. -
Add internal wing segments:
Inside the wing outlines, draw the ‘glass pane’ divisions. Focus on creating large, sweeping curves that mimic the veins of a dragonfly wing but keep them simple enough to color like stained glass shards.
Bleed Control
If your black outlines bleed into the color, ensure your ink is labeled ‘waterproof’ or ‘archival.’ If using alcohol markers, do the linework *after* coloring to prevent smearing.
Step 2: Inking the ‘Lead’ Lines
-
Outline the main body:
Using your thicker black brush pen or marker, trace over the main exterior lines of the dragonfly body and the outer edges of the wings. The line should be bold and consistent, resembling the lead came used in stained glass windows. -
Detail the inner segments:
Switch to a slightly thinner black pen to trace the internal veins of the wings. While these lines should still be dark, making them slightly lighter than the outer border adds depth and realism to the structure. -
Add texture to the body:
Ink the segments of the tail. Instead of solid black, draw small, tight horizontal lines or stippling within the dark sections of the spine to suggest a metallic, textured surface. -
Suggest the background:
Go back to your background grid. Using a very light grey fine liner or a diluted pencil sketch, trace the abstract pattern behind the dragonfly. This should remain incredibly subtle so it doesn’t compete with the bold insect.
Glossy Effect
Make the wings pop by applying a layer of clear dimensional glaze (like Glossy Accents) over the colored wing sections. This creates a true raised glass texture.
Step 3: Adding Luminous Color
-
Base layer for the wings:
Select a pale teal or mint green watercolor or marker. Fill in the majority of the wing segments. Apply the color lightly at first, ensuring you stay neatly within the black lines. -
Deepen the wing tips:
Using a saturated blue or turquoise, paint the outer tips of the wings and the segments closest to the body. Blend this darker color into the pale center sections to create a gradient effect. -
Color the body gems:
Treat the main thorax segments and the tip of the tail like jewels. Use a vibrant magenta or purple here. I find that layering the color twice gives it a rich, gem-like intensity. -
Paint the eyes and spine:
Use a bright, solid blue for the large compound eyes. For the long tail segments, alternate between turquoise and dark grey, leaving small white gaps or using lighter washes to suggest roundness.
Step 4: Finishing Touches
-
Apply metallic accents:
Once the base color is dry, use a gold or silver metallic pen to add small details on the thorax and the joints of the legs. This subtle shimmer mimics the iridescence of real insect bodies. -
Enhance the ‘glass’ effect:
With a fine darker blue or purple marker, add stippling or tiny dots along the edges of the colored wing segments. This creates a shadow effect, making the ‘glass’ pieces look slightly domed or three-dimensional. -
Add white highlights:
Using a white gel pen, add crisp, curved lines on the eyes, the purple thorax ‘gem,’ and the upper edges of the wing segments. This simulates light reflecting off a glossy surface. -
Strengthen the shadows:
Run your thickest black marker along the underside of the main wing veins one final time to create a distinct drop shadow effect, lifting the wings visually off the paper.
Now your dragonfly looks ready to take flight with its shimmering, stained-glass wings

PENCIL GUIDE
Understanding Pencil Grades from H to B
From first sketch to finished drawing — learn pencil grades, line control, and shading techniques.
Explore the Full Guide
Metallic Iridescent Dragonfly Highlights
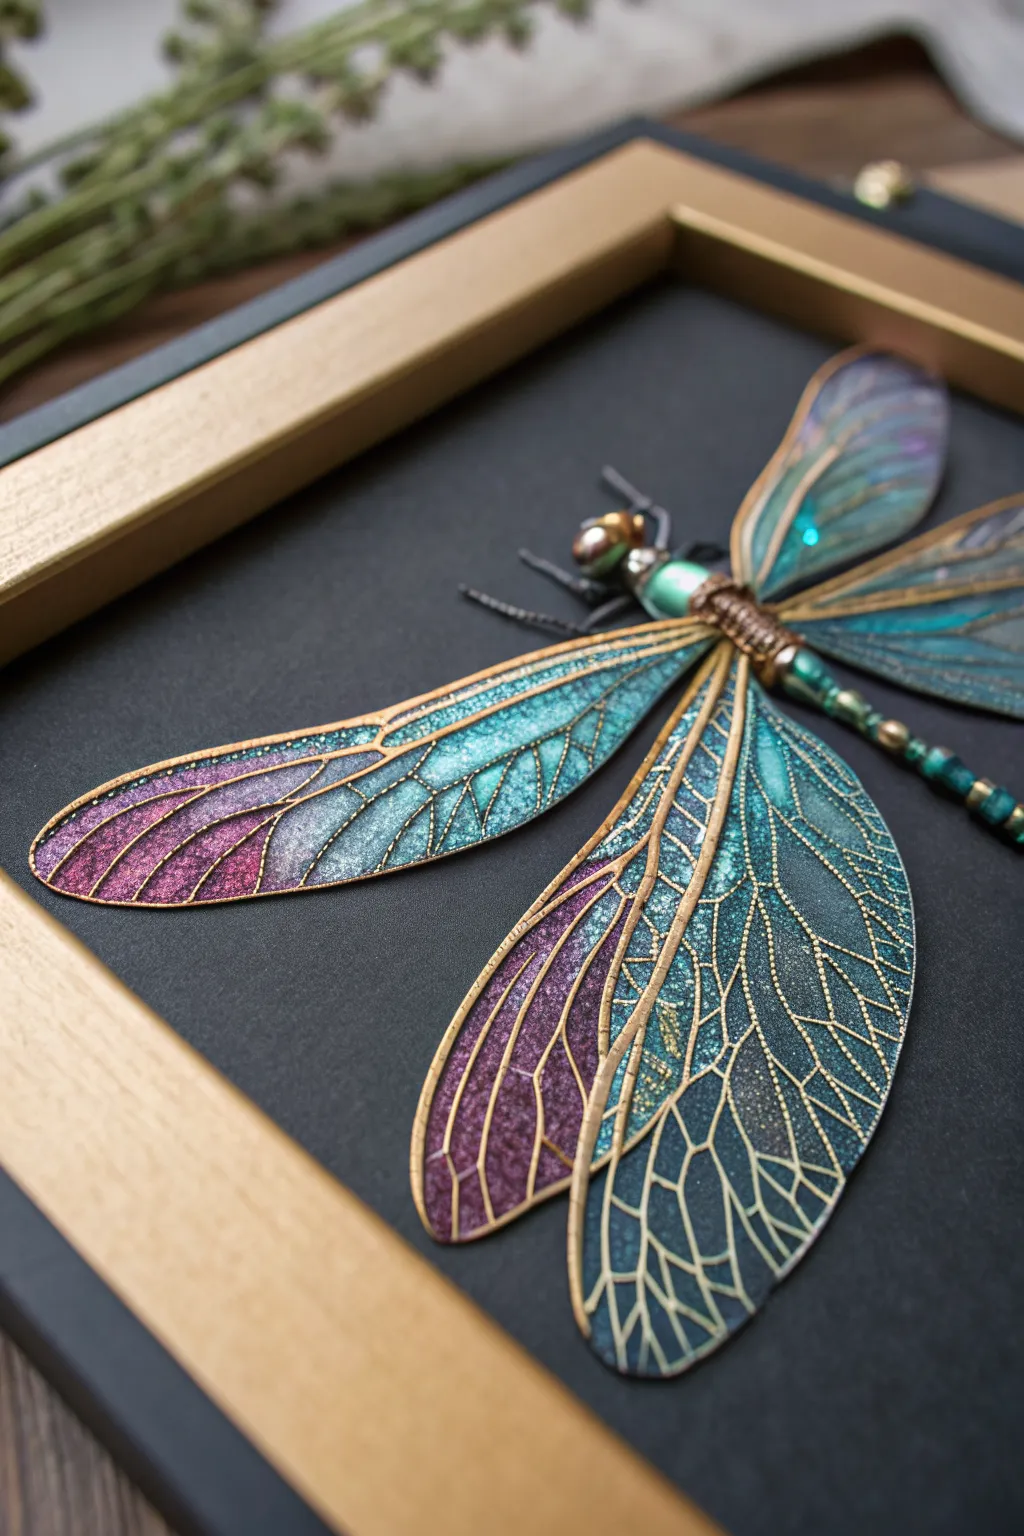
Capture the magic of nature with this stunning mixed-media dragonfly, featuring iridescent resin wings encased in delicate gold wire. Mounted against a deep charcoal background, the interplay of teal, violet, and gold creates a sophisticated piece of dimensional insect art.
Step-by-Step
Materials
- 1mm or 2mm gold-colored crafting wire (soft enough to shape)
- UV resin (hard type)
- Resin tints (translucent teal, violet, blue)
- Fine iridescent glitter powder
- UV lamp
- Jewelry pliers (round nose and flat nose)
- Assorted beads (faceted teal glass, metallic spacers, pearl for head)
- Thin sewing needle or wire for body assembly
- Super glue or E6000
- Shadow box frame (black and gold/wood tone)
- Black cardstock or matte board
- Gold acrylic paint or paint pen (extra fine tip)
- Packing tape or a silicone mat
Step 1: Shaping the Skeleton
-
Sketch the template:
Begin by drawing your dragonfly wing pattern on a piece of paper to use as a guide. You’ll need two large upper wings and two slightly smaller lower wings, focusing on elongated oval shapes. -
Wire forming:
Using your gold crafting wire and round nose pliers, carefully trace your drawn pattern. Bend the wire to form the outer perimeter of each wing, twisting the ends together at the ‘shoulder’ where the wing will attach to the body. -
Creating veins:
For the intricate inner veins, use the same wire but cut shorter lengths. Gently curve them to fit inside your wing frames and glue them in place with tiny drops of UV resin, or solder them if you have the equipment. I find tacking them with resin is much faster for this style. -
Secure the base:
Place your four finished wire wing frames flat onto a strip of wide packing tape (sticky side up) or a smooth silicone mat. Press down firmly so there are no gaps between the wire and the surface.
Bleeding Colors?
If resin seeps under the wire, your wire isn’t flat enough. Sand the wire frame on a flat surface before taping, or thicken the resin by letting it sit for a minute before pouring.
Step 2: Resin & Color
-
Mix the colors:
Prepare small cups of UV resin. Mix one with a drop of teal tint, one with violet, and one with blue. Add a pinch of fine iridescent glitter to each cup for that shimmery effect. -
Fill the cells:
Carefully drip the colored resin into the open spaces of your wire wings. Use a toothpick to drag the resin into the corners and up to the wire edges. -
Create the gradient:
To mimic the image, place violet resin near the wing tips and blend it into teal and blue as you move toward the center. Use a toothpick to swirl the boundary where colors meet for a soft transition. -
Curing:
Once filled, shine your UV lamp over the wings for 2-3 minutes or until rigid. Peel them off the tape or mat. If the back feels tacky, cure that side for another minute. -
Adding texture:
For the granular texture seen on the wing veins, lightly dab gold acrylic paint over the wire lines. While wet, you can sprinkle a tiny bit of ultra-fine gold glitter or embossing powder.
Vein Definition
Use a gold paint marker to trace over the wire ‘veins’ after the resin cures. This crisps up lines that got covered by resin and makes the pop against the dark background.
Step 3: Assembly & Framing
-
Beaded body:
Thread a sturdy piece of wire or stiff monofilament. Start with a large pearl or gold bead for the head, followed by faceted teal beads and metallic spacers for the thorax and long tail. -
Legs:
Cut six short pieces of thin black or dark silver wire. Twist them around the ‘thorax’ section of your bead strand before tightening the body assembly. -
Uniting the parts:
Glue the four resin wings to the side of the beaded thorax using strong adhesive or additional UV resin. Ensure the upper wings overlap the lower ones slightly. -
Final touches:
Wrap a small coil of copper or gold wire around the junction where the wings meet the body to hide any glue marks and add an industrial touch. -
Mounting:
Cut a piece of black matte board to fit your shadow box. Glue the finished dragonfly to the center, slightly bending the legs so the body floats just off the surface.
Hang your shadow box near a light source to watch the resin wings catch the sun throughout the day
Drip-and-Flow Dragonfly Ink Effects
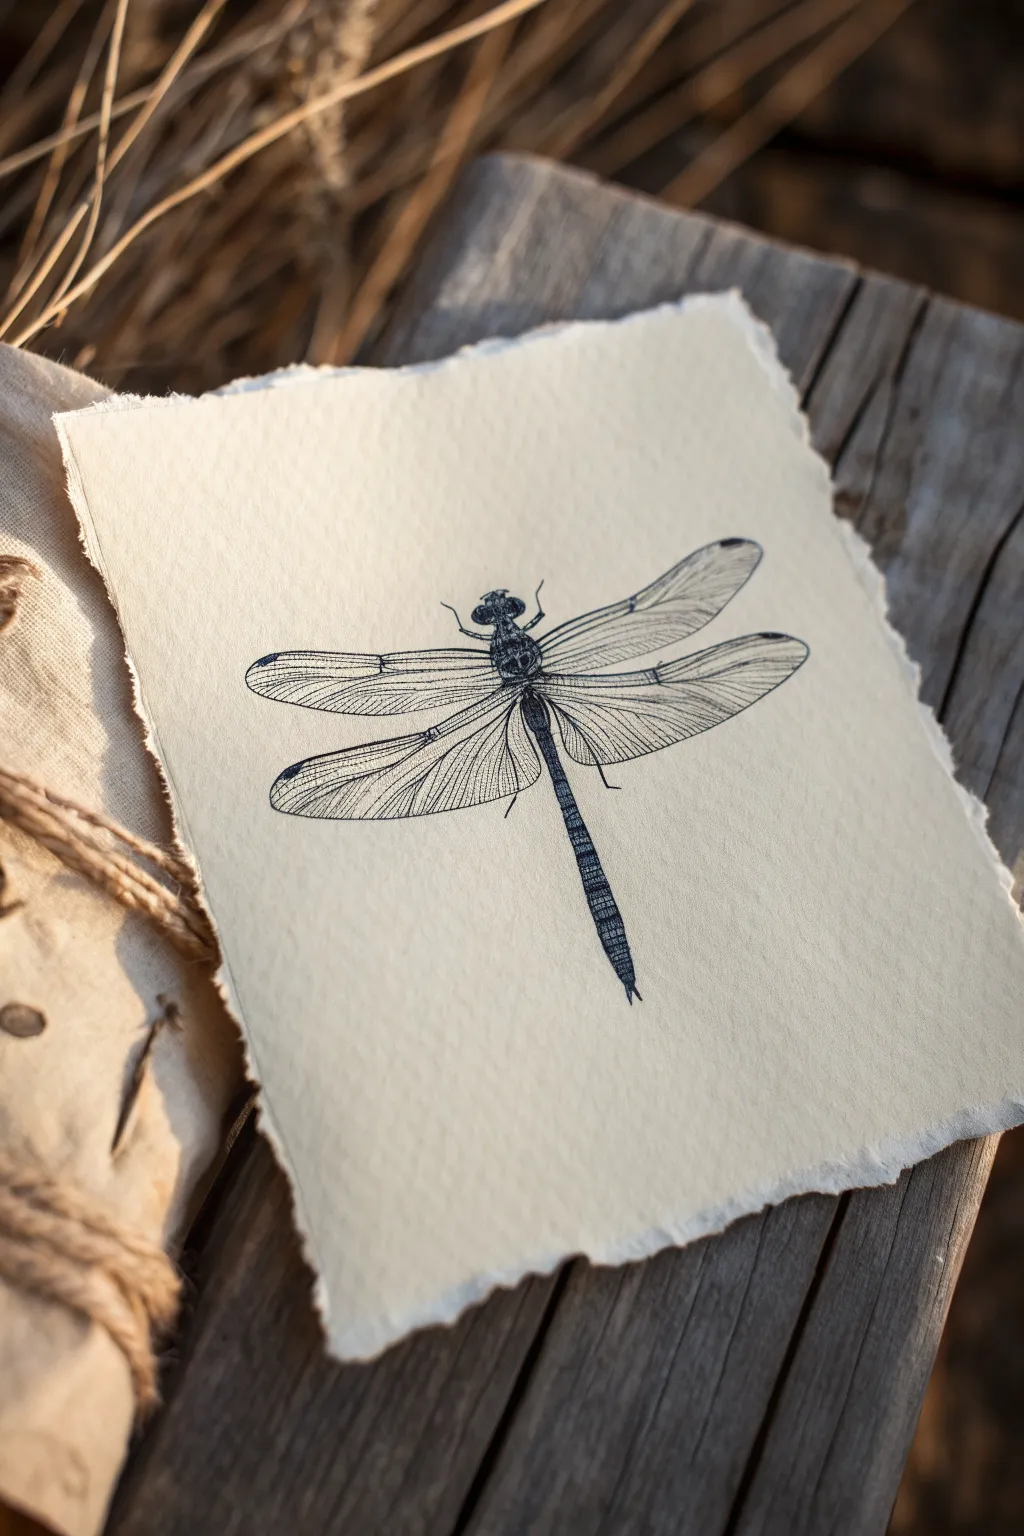
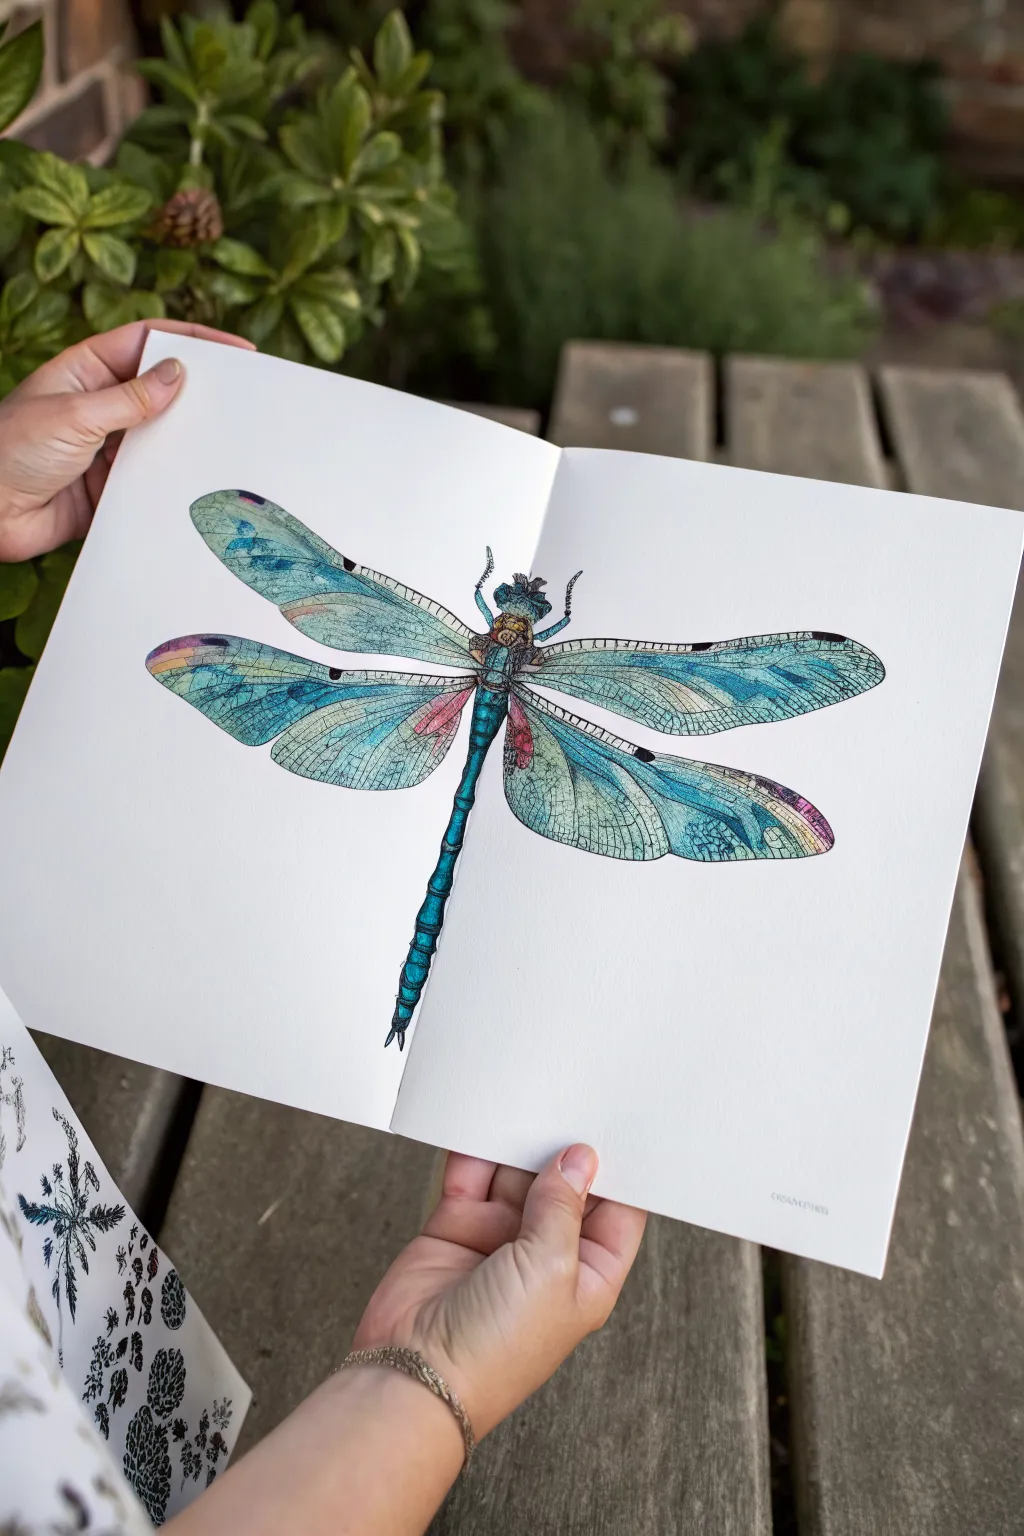
Capture the precise beauty of a scientific illustration with this elegant ink project. Using specialized paper and fine-liners, you’ll create a timeless piece that mimics the delicate look of a vintage copperplate etching.
Detailed Instructions
Materials
- heavyweight cotton rag paper with deckle edge (cream/off-white)
- 0.05mm archival ink pen (black)
- 0.1mm archival ink pen (black)
- 0.3mm archival ink pen (black)
- 2H graphite pencil
- kneaded eraser
- ruler
- tracing paper (optional)
- workable fixative (optional)
Step 1: Preparation and Sketching
-
Paper Selection:
Begin by selecting a high-quality, heavyweight cotton rag paper. The key to this project’s aesthetic is the rough, deckle edge, so ensure your sheet has that characteristic hand-torn look on all sides. -
Center Line:
Using your ruler and the 2H pencil, lightly draw a vertical line down the exact center of the paper. This will serve as the axis for the dragonfly’s body and ensure symmetrical wings. -
Basic Shapes:
Sketch a small oval at the top for the head, a slightly larger rectangle for the thorax below it, and a long, thin tapering cylinder for the abdomen extending downwards. -
Wing Structure:
Mark the attachment points for the wings on the thorax. Sketch two long ovals extending horizontally (slightly angled up) for the forewings, and two slightly wider ovals below them for the hindwings. -
Refining the Sketch:
Lightly refine the outline of the dragonfly. Create the jagged edges of the leg joints and the specific curvature of the wing tips. Keep pencil marks faint to avoid damaging the paper surface.
Steady Hand Trick
Rest your wrist on a clean sheet of scrap paper while drawing. This prevents skin oils from transferring to the rag paper and keeps your hand from smudging wet ink.
Step 2: Inking the Body
-
Head and Thorax Outline:
Switch to the 0.3mm pen. Carefully outline the head (with its large compound eyes) and the thorax. Use short, broken lines to suggest texture rather than a solid cartoon-like outline. -
Abdomen Segmentation:
Draw the segments of the long tail (abdomen). I find it helpful to ink the outer edges first, then add the horizontal segment lines, keeping them slightly curved to show volume. -
Darkening the Body:
Using the 0.1mm pen, fill in the darker areas of the thorax and head. Use a technique called stippling (lots of tiny dots) or cross-hatching to build up deep blacks while leaving small highlights for a shiny exoskeleton effect. -
Body Texture:
Add texture to the abdomen segments using vertical hatching lines with the 0.05mm pen. Make the lines denser on the sides and nonexistent in the center to create a cylindrical 3D form.
Step 3: Inking the Wings
-
Main Veins:
With the 0.1mm pen, draw the thick, primary veins that run along the leading edge of each wing. These provide the main structure. -
Wing Outlines:
Trace the delicate outer curve of the wings with the 0.05mm pen. Your hand needs to be steady but light here; a slightly wavering line actually adds to the organic feel. -
Nodal Points:
Add the ‘nodus’ (the small notch/joint halfway down the leading edge of the wing) and the ‘pterostigma’ (the dark colored spot near the tip of the wing). Fill the pterostigma in solid black. -
Cellular Structure:
This is the most time-consuming part. Using the 0.05mm pen, begin drawing the intricate web of veins inside the wings. Start with the larger cells near the body and work outward. -
Finer Details:
Fill in the rest of the wing mesh. The cells should get smaller and more elongated as they reach the wing tips. Avoid perfectly straight lines; let them curve naturally like a net. -
Wing Shading:
To make the wings look transparent yet solid, add tiny hatching lines just inside the vein structures near the body using your finest pen.
Ink Bleeding?
Rag paper is absorbent. If lines look fuzzy, switch to a harder nib or move your hand faster. Slow strokes allow too much ink to soak into the fibers.
Step 4: Finishing Touches
-
Legs and Antennae:
Add the small, delicate legs extending from the thorax using the 0.1mm pen. Remember that dragonflies hold their legs in a basket shape. Add tiny antennae if visible. -
Contrast Check:
Step back and look at the drawing. Darken the connection point where the wings meet the body to ground the illustration visually. -
Erasing:
Allow the ink to dry completely—wait at least 15 minutes to be safe. Gently roll the kneaded eraser over the pencil lines to lift them without scuffing the textured paper.
Frame this delicate study in a floating frame to show off those beautiful deckle edges.


3D Paper Dragonfly Craft With Lifted Wings
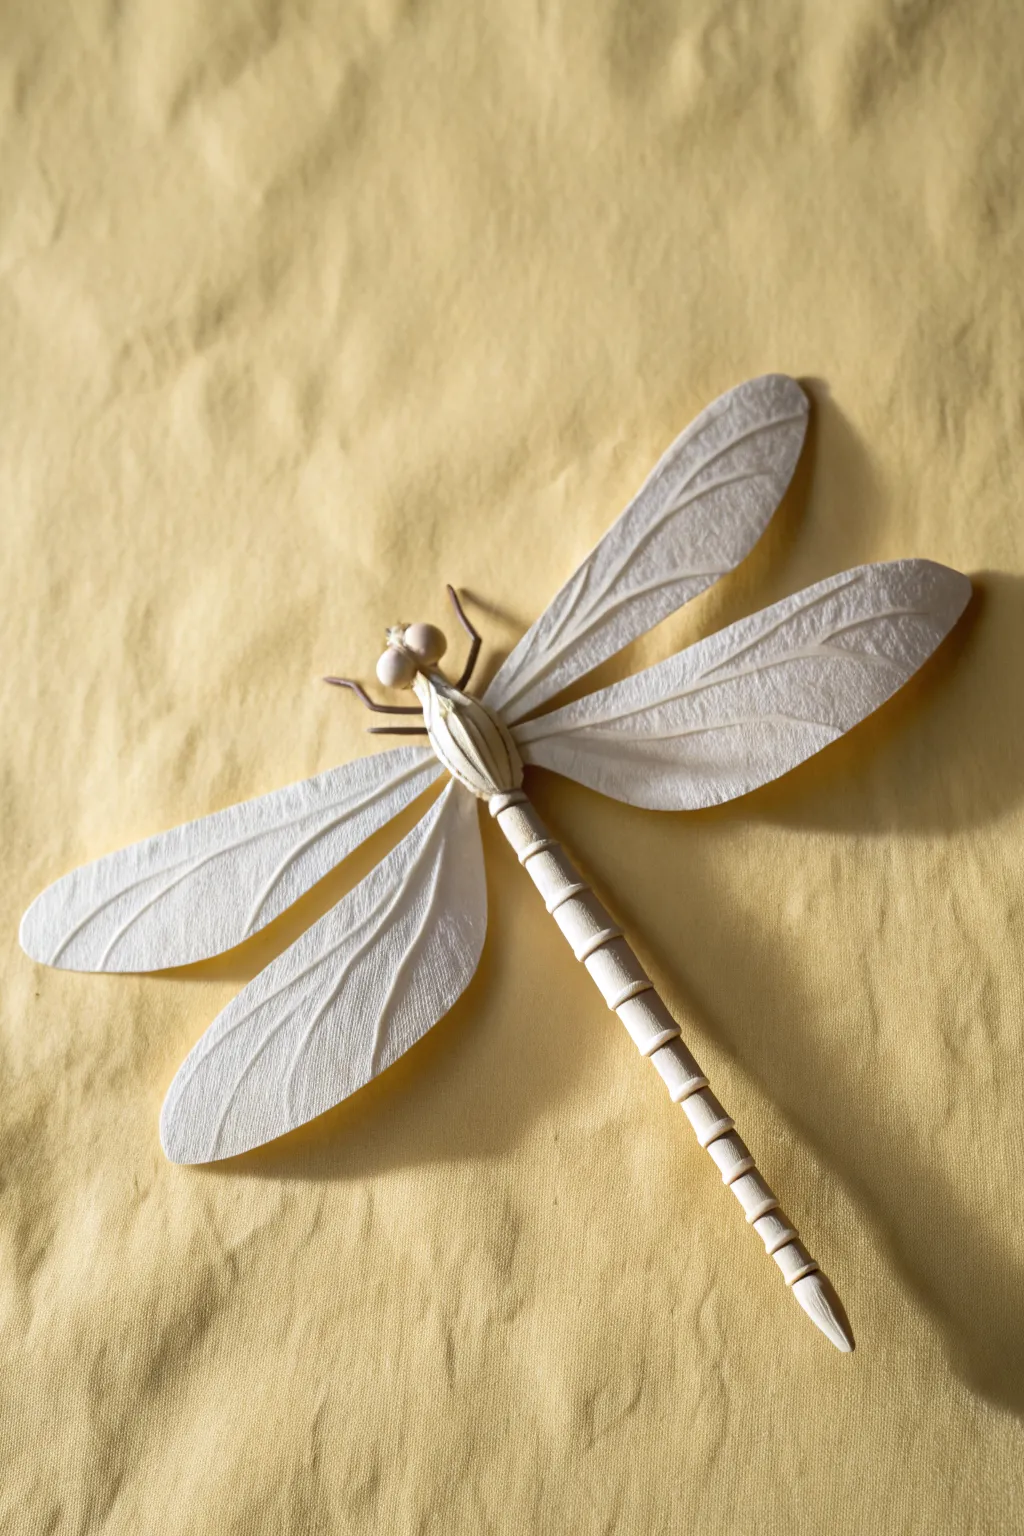
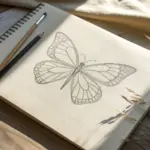
Capture the delicate beauty of nature with this sophisticated 3D paper craft project. Using textured paper and simple sculpting techniques, you will create a stunning, monochromatic dragonfly with lifelike segmented details and graceful lifted wings.
Step-by-Step Tutorial
Materials
- High-quality white textured cardstock or watercolor paper
- Pencil for sketching
- Fine-point scissors or precision craft knife
- Embossing stylus or empty ballpoint pen
- White floral wire or thin paper-wrapped wire (for legs)
- Craft glue or tacky glue
- Small wooden beads or tight paper coils (for eyes)
- Small dowel or round stick (for shaping)
Step 1: Creating the Body
-
Prepare the core:
Cut a long, thin strip of your white textured paper, roughly 1/2 inch wide and 4 inches long. Tightly roll this strip into a solid cylinder to form the core of the dragonfly’s tail. -
Form the segments:
Cut several small, identical rectangular strips of the textured paper. These will become the visible outer segments of the tail. -
Layer the tail:
Wrap the first small strip around the bottom tip of your core cylinder and glue it in place. Proceed upwards, slightly overlapping each new strip over the previous one to create a segmented, telescoping effect. -
Taper the end:
For the very tip of the tail, I prefer to pinch the paper while the glue is wet or trim the last segment into a gentle point for a realistic finish. -
Sculpt the thorax:
Cut a slightly wider strip of paper for the thorax (the middle section). Roll and glue it just above your segmented tail section, building it up so it is thicker than the tail, creating a strong anchor point for the wings later. -
Add texture:
Use your embossing tool to vertically score the thorax, mimicking the lined texture seen in the reference photo.
Pro Tip: Hidden Strength
Insert a piece of floral wire into the core of the body while rolling it. This allows you to bend and pose the tail later for a more dynamic, lifelike curve.
Step 2: Crafting the Delicate Wings
-
Sketch the outline:
On your textured cardstock, lightly sketch four wing shapes—two longer upper wings and two slightly shorter, wider lower wings. -
Cut carefully:
Use your precision scissors to cut out the wing shapes. Ensure the edges are smooth and clean, as any jagged cuts will distract from the elegance. -
Emboss the veins:
Place the wings on a soft surface (like a mousepad). Use your embossing stylus to press firm lines into the paper, drawing the vein patterns. Start with a central vein and branch out towards the edges. -
Shape the curvature:
Gently curl the edges of the wings around a pencil or dowel. You want them to have a subtle 3D scoop, rather than laying completely flat.
Troubleshooting: Flat Wings
If wings lose their curve after gluing, re-curl them gently around a pen barrel. You can hold them in place with low-tack tape or clips while the paper ‘remembers’ the shape.
Step 3: Assembly and Details
-
Prepare the head:
Glue two small white wooden beads together, or tightly roll two tiny strips of paper into balls to create the large compound eyes. -
Attach the head:
Glue the eye assembly to the top of the thorax section. Ensure the connection is secure. -
Create the legs:
Cut six small lengths of thin wire. If using plain wire, wrap them in thin white tissue paper or paint them brown/white to match the aesthetic. -
Install the legs:
Glue the legs to the underside of the thorax. Bend them at realistic angles—forward near the head and backward near the tail—so the dragonfly stands naturally. -
Attach the wings:
Apply a strong dot of tacky glue to the base of each wing. Attach the upper wings first to the top of the thorax, angling them slightly backwards. -
Lower wings:
Attach the lower wings just below the upper ones. Angle them slightly differently to create separation and visual interest. -
Final shaping:
Once the glue is fully dry, gently bend the wings upward from the base to give the dragonfly its ‘lifted’ flight-ready posture.
Now you have a serene, handcrafted insect sculpture ready to adorn a wall or shadow box


Have a question or want to share your own experience? I'd love to hear from you in the comments below!