
If you’re craving beginner Mexican painting projects that feel bold, joyful, and totally doable, you’re in the right headspace. I’m sharing my favorite easy Mexican painting ideas that use simple shapes, flat color, and playful folk-art details—so you can relax and just paint.
Classic Cactus Silhouette at Sunset
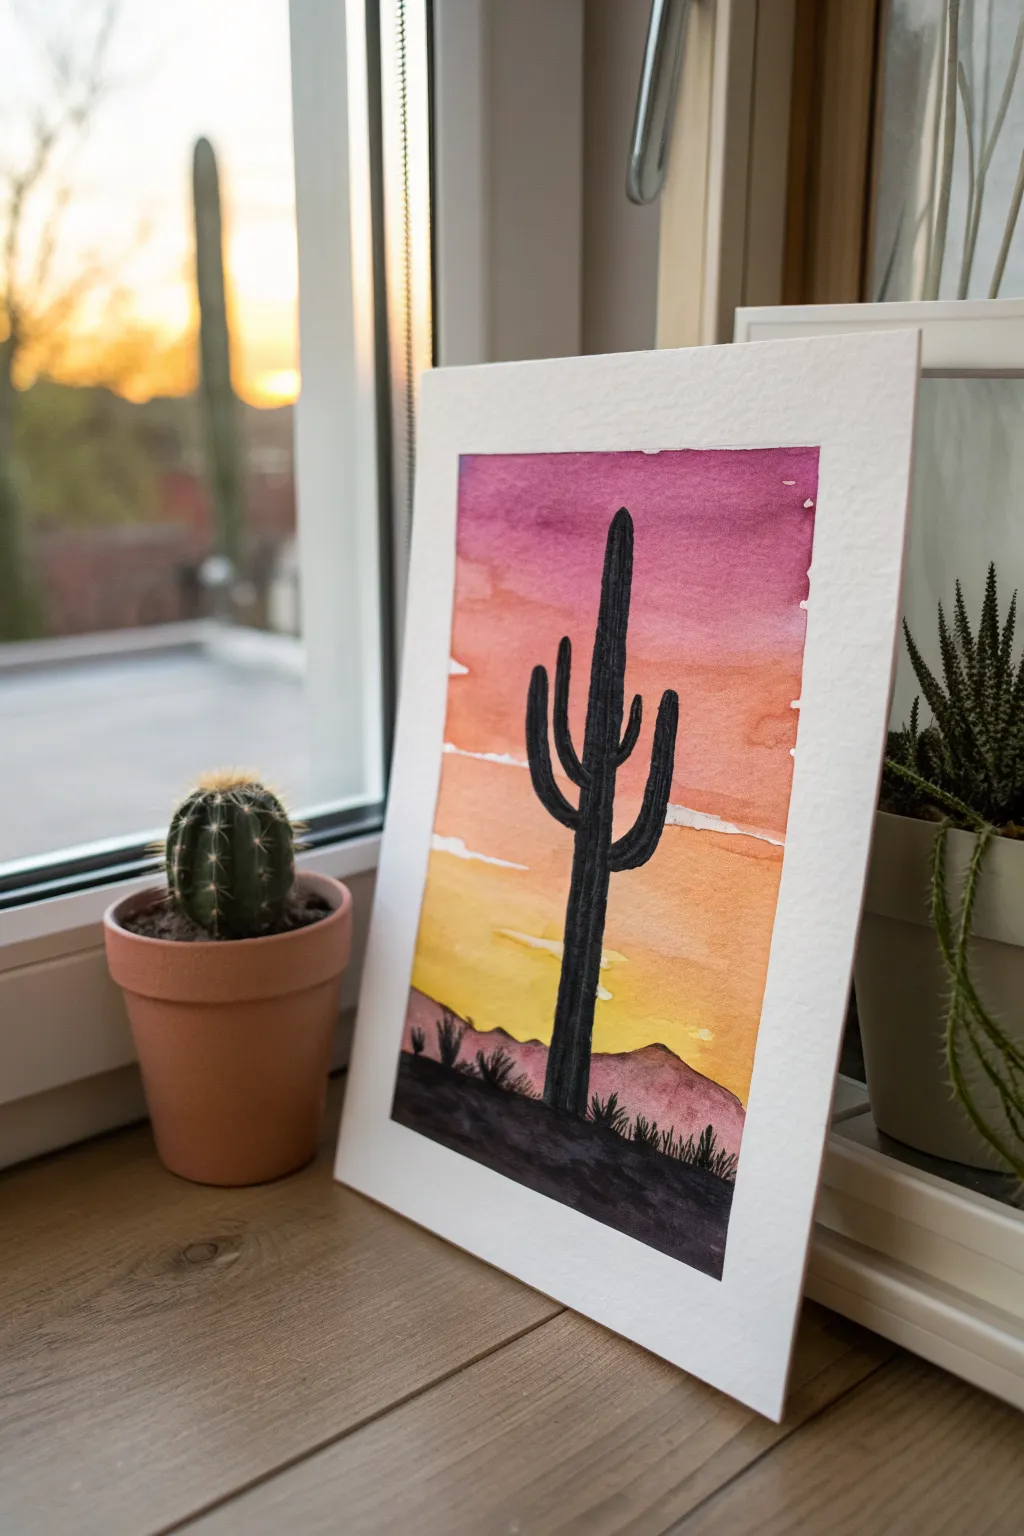
Capture the warmth of a desert evening with this striking watercolor painting. You’ll create a seamless gradient sky that fades from deep twilight purple to golden yellow, providing the perfect glowing backdrop for a bold cactus silhouette.
How-To Guide
Materials
- Cold press watercolor paper (approx. 140lb/300gsm)
- Painter’s tape or masking tape
- Watercolor paints (purple/magenta, red/orange, yellow, black)
- Flat wash brush (large)
- Round brush (medium size, approx. size 6 or 8)
- Small liner brush (size 0 or 1)
- Two water jars
- Paper towels
- Pencil and eraser
Step 1: Painting the Gradient Sky
-
Prepare your surface:
Tape down all four edges of your watercolor paper to a board or table. This creates that clean, professional white border seen in the example and prevents the paper from buckling while wet. -
Outline the horizon:
Using a pencil very lightly, draw a low, uneven line near the bottom of the paper for the ground. Add a slightly higher, jagged line above it for distant mountains. -
Pre-wet the sky:
With a clean flat brush and clear water, wet the entire sky area from the top edge down to the mountain line. The paper should glisten but not have standing puddles. -
Start with purple:
Load your flat brush with a rich purple or magenta watercolor. Apply horizontal strokes across the top third of the paper, letting the wet paper help diffuse the edges. -
Transition to orange:
Clean your brush slightly and pick up an orange or red-orange hue. Paint the middle section, slightly overlapping the bottom of the purple area to encourage them to blend naturally. -
Finish with yellow:
Rinse your brush well and load it with yellow paint. Fill the remaining sky area down to the mountain line, blending it upward into the orange layer for a smooth transition. -
Lift out clouds:
While the paint is still damp but losing its sheen, use a crumpled paper towel or a clean, thirsty brush to gently lift a few horizontal streaks of paint, creating subtle cloud formations. -
Let it dry completely:
Stop working on the sky now. It requires full dryness before you can paint over it without bleeding, so wait until the paper is cool to the touch and flat.
Uneven Blending?
If your sky colors aren’t merging smoothly, tilt the paper board back and forth while the paint is still wet. Gravity helps the colors run into each other naturally.
Step 2: Adding the Foreground and Cactus
-
Paint the distant mountains:
Mix a watery, pale purple or maroon color. Paint the space between the ground line and your mountain sketch line. This should be lighter and more transparent than the foreground to show atmospheric depth. -
Block in the ground:
Once the mountains are dry, switch to black paint (or a very dark mix of blue and brown). Fill in the entire bottom ground area completely solid. -
Sketch the cactus:
Using your pencil lightly, sketch the vertical line of the main cactus trunk. Add two distinct arms curving upward on either side to get the classic saguaro shape. -
Paint the main trunk:
Using your medium round brush and solid black paint, carefully fill in the main trunk. I like to keep the paint consistency creamy, like melted butter, for opaque coverage. -
Add the arms:
Paint the arms of the cactus. Ensure the connection points to the trunk are slightly rounded and organic, not sharp right angles. -
Refine the edges:
While looking closely at the silhouette, use the tip of your brush to smooth out any shaky edges on the cactus, keeping the width consistent. -
Paint small foreground details:
Switch to your small liner brush. Along the black ground horizon, paint tiny, vertical flicks to represent desert grass and small shrubs. -
Add mini cacti:
Using the liner brush, add a few tiny silhouette shapes in the foreground that look like smaller cacti or agave plants to add variety to the landscape. -
Final reveal:
Wait for every drop of paint to be bone dry. Carefully peel away the painter’s tape at a 45-degree angle to reveal your crisp, clean white border.
Starry Night
For a nighttime twist, use dark indigo at the top instead of purple. Once dry, splatter white gouache or acrylic ink over the top section to create a field of stars.
Now you have a serene desert landscape ready to display near a sunny window

Prickly Pear Cactus With Bright Pads
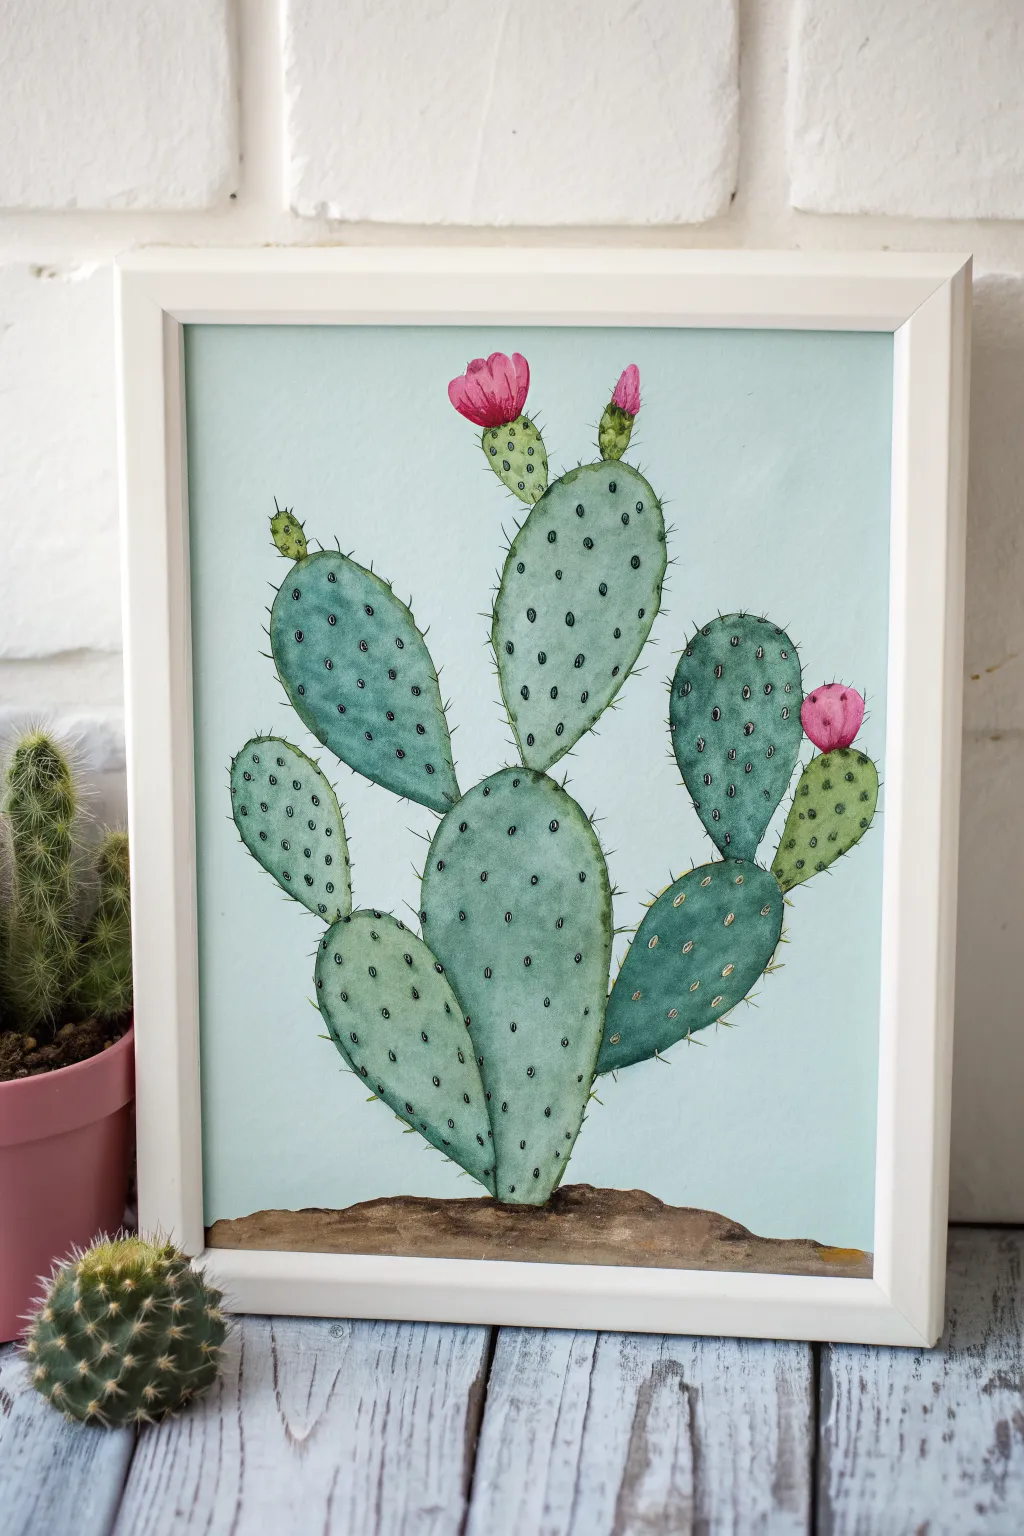
Capture the charm of the desert with this whimsical prickly pear cactus painting. Using a combination of ink outlining and watercolor washes gives this piece a delightful illustrative quality perfect for cheering up any room.
Step-by-Step Guide
Materials
- Cold press watercolor paper (A4 or 8×10 size)
- Pencil (HB or lighter) and eraser
- Waterproof fine liner pen (black, 0.3mm or 0.5mm)
- Watercolor paints (Sap Green, Hooker’s Green, Burnt Umber, Alizarin Crimson)
- Round watercolor brushes (Size 4 and Size 8)
- Jar of water and paper towels
- White or light wood frame (optional)
Step 1: Sketching the Composition
-
Establish the ground:
Begin by lightly sketching a low, uneven mound at the very bottom of your paper to represent the soil. Keep this line organic and slightly wavy rather than perfectly straight. -
Draw the central pad:
Rising from the center of your soil mound, draw a large, oval-shaped cactus pad. It should be slightly narrower at the base where it connects to the dirt. -
Add lower side pads:
Sketch two medium-sized pads branching off the bottom central pad. Place one on the left, angled outward, and one on the right, also angling away from the center. -
Build the upper structure:
Add a second tier of pads. Draw a prominent pad growing straight up from the top of your central base pad. Add another pad growing off the top of the right-side pad. -
Place the fruit and flowers:
At the very tops of the highest pads, sketch small, bulbous shapes for the cactus fruit (tunas). Add small, crinkled shapes on top of the fruit to represent the blooming flowers.
Uneven Wash?
Don’t panic! In watercolor, ‘blooms’ or uneven drying lines often add artistic character. Let it dry completely; trying to fix it while wet usually makes it worse.
Step 2: Inking the Outline
-
Trace the main shapes:
Using your waterproof fine liner pen, carefully trace over your pencil lines. Give the lines a slightly jittery or broken quality to mimic the natural texture of a cactus, rather than making them machine-perfect. -
Add the spines:
Draw small clusters of spines across all the green pads. These should look like tiny dots or short dashes scattered randomly but with consistent spacing. -
Detail the edges:
Along the outer edges of the pads, draw small, sharp spikes protruding outward. These represent the glochids and give the cactus its iconic prickly silhouette. -
Erase pencil guides:
Once the ink is completely dry—wait at least five minutes to be safe—gently erase all the underlying pencil sketches so the paper is clean.
Level Up: Salt Texture
While the green paint on the pads be still wet, sprinkle a tiny pinch of table salt on them. When dry, brush it off for a cool, speckled texture that looks just like cactus skin.
Step 3: Painting the Cactus
-
Mix your greens:
Prepare a watery mix of Sap Green with a touch of blue or teal to achieve that cool, blue-green cactus tone. I like to keep this mixture quite diluted for the first layer. -
Paint the first wash:
Fill in all the cactus pads with your green mix. Don’t worry about perfect evenness; slight variations in water saturation add beautiful texture. -
Add shadows:
While the paint is still damp or just after it dries, mix a slightly darker, more concentrated green. Dab this along the bottom edges of the pads and where pads overlap to create depth. -
Paint the background:
Prepare a very pale, watery wash of light blue (like diluted Cerulean). Carefully paint the background space around the cactus, leaving the cactus itself dry. This makes the green pop.
Step 4: Adding Details
-
Paint the soil:
Use Burnt Umber to paint the soil mound at the bottom. Vary the intensity, making the bottom edge slightly darker to ground the painting. -
Color the flowers:
Use a bright pink or Alizarin Crimson for the flowers and fruit buds on top. These should be vibrant accents against the cool greens. -
Enhance the spines:
Once the green paint is fully dry, you scan use a very small brush with dark green paint, or go back in with your pen, to darken the spine clusters if they got lost under the wash. -
Final touches:
Add tiny hints of yellow or light green to the tops of the pads where the sun would hit, creating a subtle highlight effect. -
Frame your work:
Allow the painting to dry completely flat. Once dry, place it into a sleek white frame to complement the clean, modern aesthetic.
Hang your new desert-inspired artwork in a sunny spot to enjoy its vibrant colors year-round

Sugar Skull With Simple Floral Patterns
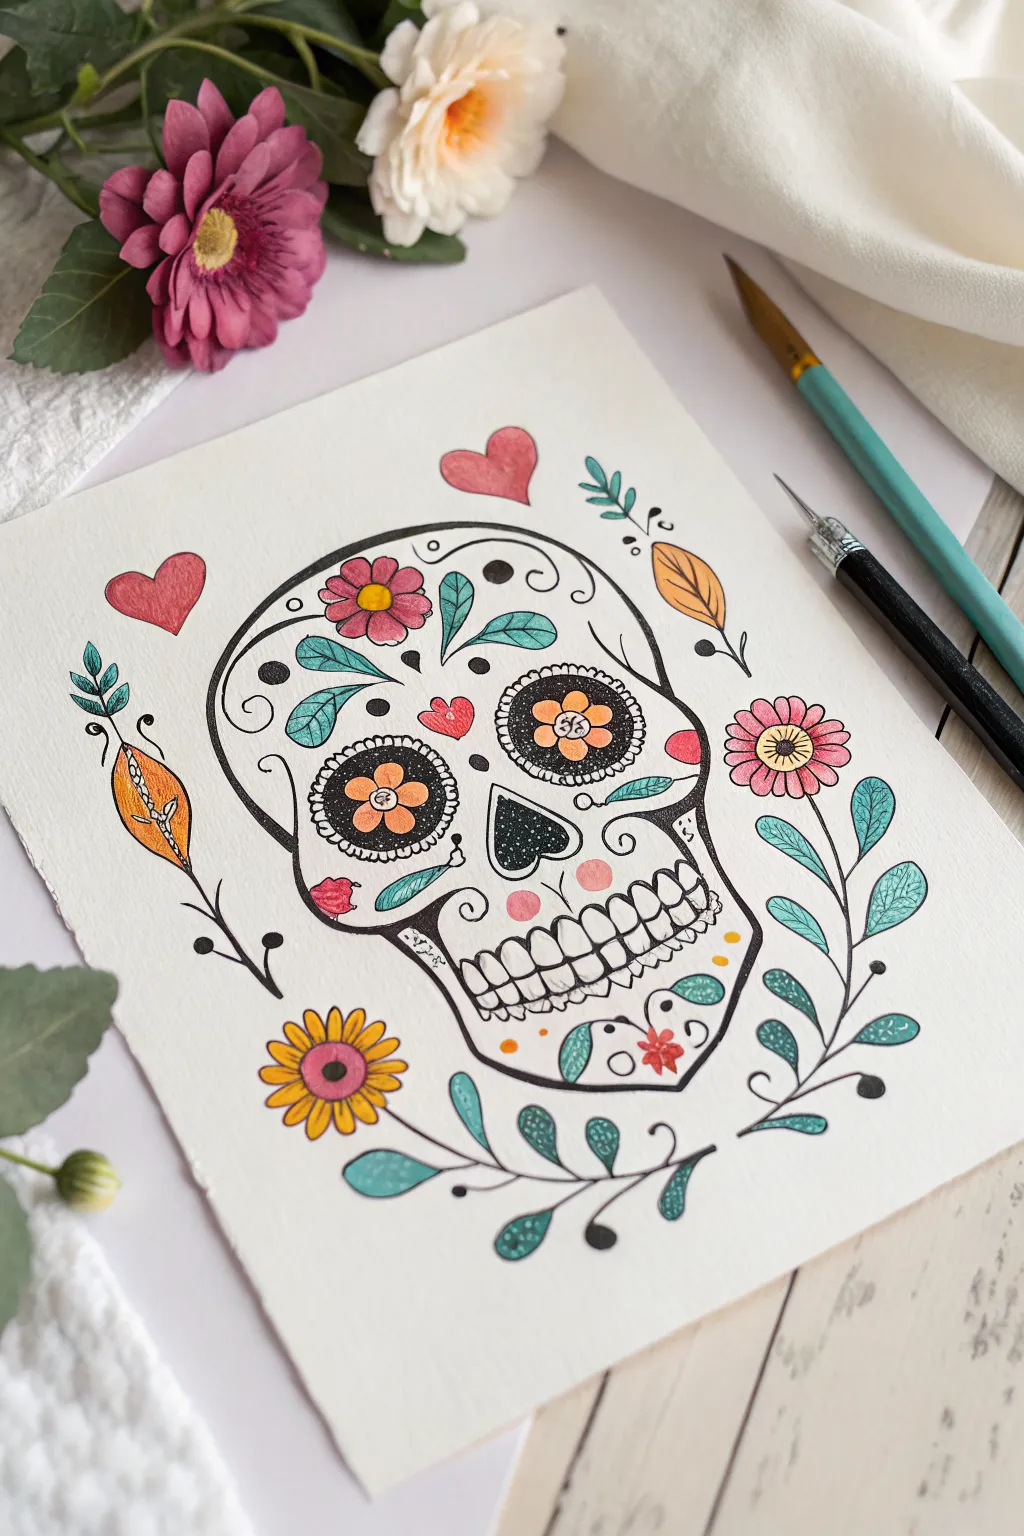
This charming project captures the festive spirit of Día de los Muertos with a delicately decorated sugar skull surrounded by vibrant flora. You will combine clean linework with soft watercolor or marker shading to create a piece that feels both traditional and uniquely artistic.
How-To Guide
Materials
- Heavyweight drawing paper or watercolor paper (cold press)
- Pencil (HB or H)
- Eraser
- Fine liner pens (black, sizes 0.3mm and 0.5mm)
- Colored pencils or water-based markers (teal, pink, orange, yellow)
- Small round paintbrush (size 2 or 4)
- Clean water cup and paper towels
Step 1: Planning the Structure
-
Establish the rough shape:
Start by drawing a large, slightly rounded cranium shape in the center of your paper. Taper it inwards as you go down to form the cheekbones and the jawline. -
Sketch the facial features:
Lightly pencil in two large circles for the eye sockets. Below these, draw an upside-down heart shape for the nose cavity. -
Outline the mouth:
Sketch a horizontal line for the mouth, curving it up slightly at the ends, and draw vertical capsule shapes across it to represent the teeth. -
Add internal decorative elements:
Inside each eye socket, draw a smaller circle for the flower center and surround it with petals. Draw a flower on the forehead, swooping leaf shapes on the temples, and small hearts on the cheeks. -
Plan the exterior flora:
Sketch branches curving upwards from the bottom and sides. Add simple five-petal flowers and heart shapes floating around the skull to fill the negative space.
Keep it Steady
Rest your wrist on a clean sheet of scrap paper while drawing. This prevents your hand from smudging fresh ink or transferring oils to the final artwork.
Step 2: Inking the Design
-
Trace main outlines:
Using your thicker fine liner (0.5mm), carefully trace over the main outline of the skull, the eye sockets, and the nose cavity. -
Refine the details:
Switch to the thinner pen (0.3mm) to ink the teeth, the flower petals inside the eyes, and the decorative swirls on the skull. Keep your hand steady and pull the pen towards you for smoother curves. -
Ink the surrounding plants:
Go over your pencil sketches for the exterior leaves and flowers. Don’t worry if lines aren’t perfectly uniform; a little variation adds character. -
Add texture marks:
Add small dots or stippling inside the flower centers and small curved lines on the petals to suggest veins or texture. -
Clean up:
Once you are certain the ink is completely dry, gently erase all underlying pencil marks to reveal a clean, crisp illustration.
Step 3: Adding Color
-
Color the eyes:
Using an orange pencil or marker, color the flower centers within the eye sockets. I like to leave a tiny white spot in the middle for a highlight. -
Fill the forehead details:
Color the central flower on the forehead pink with a yellow center. Use teal for the leaf shapes curving near the temples. -
Brighten the cheeks:
Add a soft pink circle on each cheekbone to simulate a blush effect, and color any small heart details red or deep pink. -
Decorate the chin:
Fill in the floral shapes on the chin using teal for leaves and red for the tiny flower bud. -
Color the side flowers:
For the flowers floating outside the skull, use pink for the petals and yellow for the centers. Try to keep the coloring light to maintain a soft look. -
Paint the foliage:
Color the leaves on the surrounding branches with teal. If using pencils, vary your pressure to make the tips of the leaves slightly darker than the base. -
Add warm accents:
Use orange to fill in the leaf shape on the upper right and the patterned shape on the left side of the skull. -
Final touch ups:
Look over your piece. If you want more depth, go back in with your fine liner and add tiny dots inside the colored areas, like the eye sockets, to create shading.
Make it Shine
Once the colors are dry, use a white gel pen to add tiny highlights on the blackest parts of the eyes or the colored petals for extra dimension.
Step back and admire your vibrant, culturally inspired illustration knowing you created it from scratch

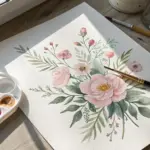
Marigold Cluster in Folk Art Style
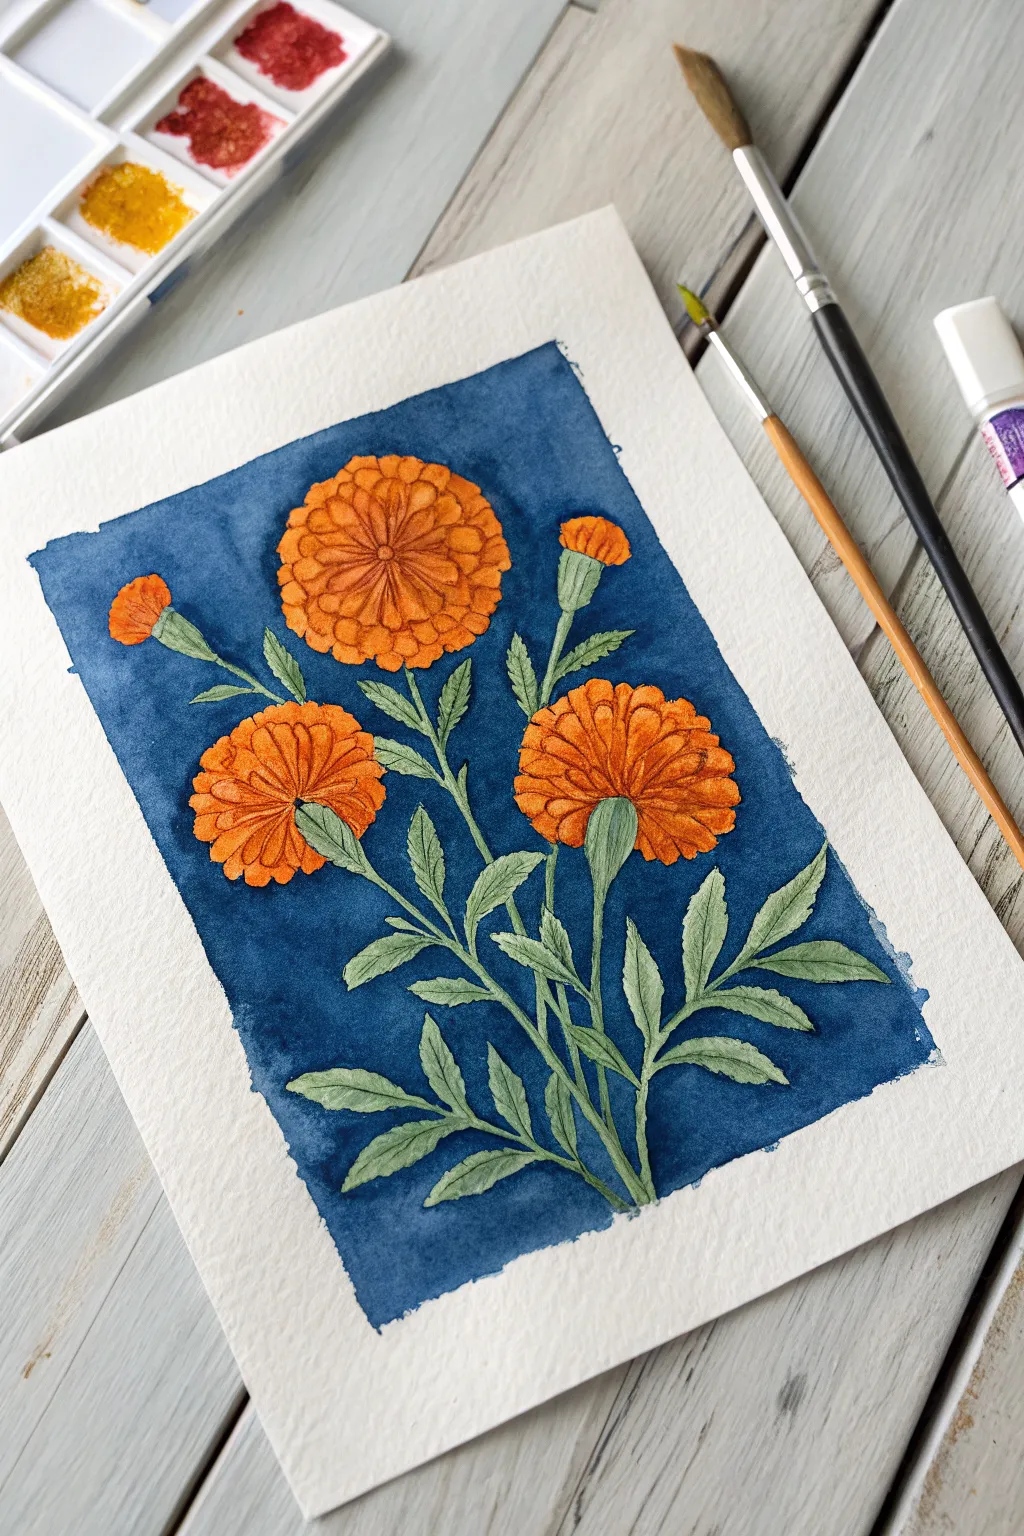
Capture the vibrant spirit of Mexican folk art with this striking watercolor study of Cempasúchil, or marigolds. Using a rich indigo background to make the orange blooms pop, you’ll learn to create depth through simple layering and bold, clean lines.
Step-by-Step Guide
Materials
- Cold press watercolor paper (300 gsm)
- Watercolor paints (Cadmium Orange, Yellow Ochre, Deep Blue/Indigo, Sap Green)
- Round watercolor brushes (Size 4 and Size 8)
- Fine liner or detail brush (Size 0 or 00)
- Masking fluid (optional)
- Pencil and eraser
- Paper towels and two water jars
- Painter’s tape
Step 1: Sketching and Preparation
-
Tape your edges:
Begin by taping down all four sides of your watercolor paper to a board or table. This creates that crisp, clean white border seen in the final piece and prevents the paper from buckling under heavy washes. -
Map out the composition:
Lightly sketch the flower placement using a hard pencil (H or HB). Draw three large, circular main blooms and two smaller buds. Add long, flowing stems that connect them at the bottom center. -
Refine the petals and leaves:
Add detail to your sketch by defining the ruffled edges of the marigold petals. Sketch the leaves with serrated edges, typical of marigolds, ensuring they branch out symmetrically from the main stems.
Clean Edges Secret
Work from the flower outward when painting the blue background. It’s easier to control the brush tip against the pencil line than trying to sweep paint into tight corners.
Step 2: Painting the Background
-
Protect the flowers:
You can either paint carefully around your sketch lines or apply masking fluid to the flowers and leaves. If painting around them, take a deep breath and work slowly to preserve the white paper for your bright colors. -
Mix a deep indigo:
Create a saturated, dark blue wash. I like to mix Indigo with a touch of Prussian Blue to get that deep night-sky look. You want the paint to be heavy on pigment and lighter on water for opacity. -
Apply the background wash:
Using your Size 8 brush, fill in the negative space around the flowers. Work wet-on-dry to keep hard edges against the flower sketches. Don’t worry if the blue isn’t perfectly even; the slight texture adds to the folk art charm. -
Define the outer edges:
Let the blue paint create a ragged, organic natural edge inside your taped border, rather than painting all the way to the tape. This creates the ‘floating’ effect seen in the reference image. -
Let it dry completely:
Wait until the blue background is bone dry before proceeding. If you used masking fluid, gently rub it off now to reveal the crisp white paper underneath.
Step 3: Painting the Marigolds
-
Base layer for blooms:
Mix a bright Cadmium Orange with plenty of water. Paint a flat wash over the three large flower heads and the orange tips of the buds. Keep this layer light and transparent. -
Base layer for greens:
While the orange dries, mix Sap Green with a tiny touch of the blue used for the background to harmonize the colors. Paint the stems and leaves with a flat, even wash. -
Add petal depth:
Once the orange base is dry, mix a thicker, darker orange (add a little Red or Burnt Sienna). Use your Size 4 brush to paint stripes or ‘scallops’ inside the petals to simulate distinct layers of bloom. -
Darken the centers:
Drop darker, reddish-orange pigment into the very center of each flower and in the crevices between petal layers. This creates the 3D pom-pom effect characteristic of marigolds. -
Detail the greenery:
Using a slightly darker green mix, paint a central vein down each leaf. Keep the edges of these shadows soft if you can, or use distinct lines for a more graphic illustrative look.
Make It Pop
For a true Mexican folk art vibe, try using metallic gold paint for the tiny details in the flower centers or fine veins on the leaves.
Step 4: Folk Art Finishing Touches
-
Outline the petals:
Switch to your smallest detail brush (Size 0). Mix a very concentrated orange-brown. Carefully outline the individual petals to make them stand out against each other. -
Outline the leaves:
Similarly, use a concentrated dark green to outline the leaves and stems. This ‘outlined’ look is crucial for mimicking the specific folk art style shown in the example. -
Enhance texturing:
Add tiny lines radiating from the center of the flowers outward. These fine lines mimic the texture of the hundreds of tiny petals found in a real marigold. -
Final assessment:
Step back and check contrast. If the background dried too light, you can carefully glaze a second layer of blue, being cautious not to disturb the orange edges. -
The reveal:
Once the painting is 100% dry to the touch, slowly peel away the painter’s tape at a 45-degree angle to reveal your clean white border.
Frame your vibrant marigolds in simplistic wood to contrast nicely with that deep indigo background
BRUSH GUIDE
The Right Brush for Every Stroke
From clean lines to bold texture — master brush choice, stroke control, and essential techniques.
Explore the Full Guide
Sacred Heart With Flames and Flowers
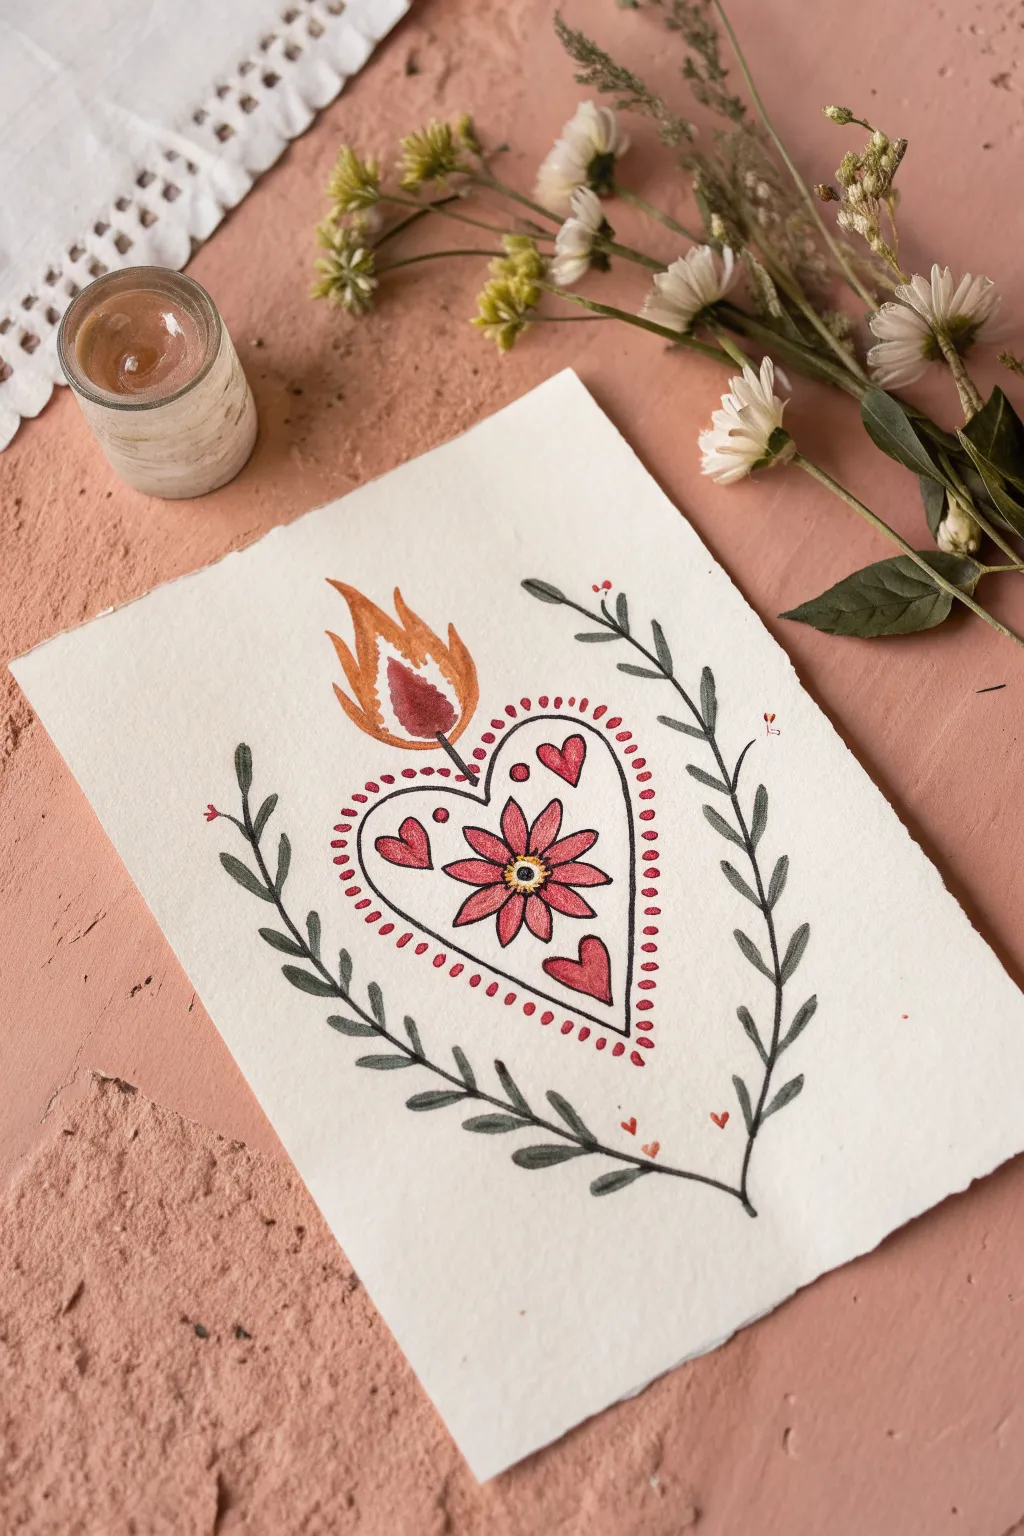
This delicate watercolor illustration captures the warmth of traditional Mexican folk art with a stylized sacred heart surrounded by nature. The project features soft washes of red and green on textured paper, perfect for a greeting card or framed miniature.
Step-by-Step Guide
Materials
- Heavyweight textured watercolor paper (deckle edge optional)
- Watercolor paints (Alizarin Crimson, Sap Green, Yellow Ochre, Burnt Sienna)
- Fine liner brush (size 0 or 00)
- Round brush (size 2 or 4)
- pencil
- eraser
- Water jar and palette
- Paper towel
Step 1: Sketching the Layout
-
Center the heart:
Begin by lightly sketching a large heart shape in the center of your paper using a pencil. Keep the lines very faint so they don’t show through the paint later. -
Add the flame:
Draw a flame shape emerging from the cleft at the top of the heart. Sketch a smaller inner teardrop shape inside the flame for the core. -
Draft the flower:
Find the center of the heart and sketch a simple daisy-like flower. Draw a small circle for the center and arrange eight petals radiating outward. -
Place interior details:
Sketch three small hearts inside the main heart outline: one floating in the top right, one in the bottom right, and one on the left side. -
Outline the wreath:
Draw two long, curved stems framing the heart like parentheses. They should start below the heart and curve upwards, leaving space for leaves.
Step 2: Painting the Heart
-
Paint the flower petals:
Using your round brush and a watered-down crimson or pink mixture, carefully fill in the petals of the central flower. -
Fill the inner hearts:
Use the same pinkish-red tone to fill in the three small floating hearts inside the main heart shape. -
Paint the flame core:
Mix a slightly darker, more saturated red and paint the inner teardrop shape of the flame. -
Color the flame body:
Mix a warm yellow-orange using Yellow Ochre and a touch of Burnt Sienna. Paint the outer part of the flame, carefully working around the still-wet red core. I like to let them touch slightly for a natural bleed. -
Add the flower center:
Once the petals are dry, paint the small center circle of the flower with a mix of yellow and brown.
Paper Choice Matters
Use handmade cotton rag paper or ‘khadi’ paper to get that beautiful, fuzzy deckled edge and authentic texture seen in the photo.
Step 3: Adding the Foilage
-
Paint the stems:
Switch to your fine liner brush. Load it with a watery Sap Green or dark olive color and trace over your curved stem lines on the left and right. -
Add the leaves:
Using the same green, paint small, simple leaves branching off the main stems. Use a ‘press and lift’ motion with the brush to create the tapered leaf shape. -
Paint tiny floating hearts:
At the very bottom where the stems meet, and near the top tips of the branches, paint tiny red hearts or dots as accents.
Gold Accents
For a truly sacred look, use metallic gold watercolor paint for the flame’s outer halo or for the dots surrounding the heart.
Step 4: Inking and Details
-
Outline the main heart:
Mix a very dark grey or brownish-black watercolor (or use ink). With a steady hand and your finest brush, trace the main outline of the heart. -
Outline the inner bloom:
Outline the central flower’s petals and center. Add small dots around the yellow center to mimic pollen or seeds. -
Outline the inner hearts:
Carefully outline the three small pink hearts. This defines their shape against the white background. -
Connect the flame:
Draw a thin vertical line connecting the top cleft of the heart directly to the base of the flame. -
Add the decorative dots:
Using a reddish-pink paint, add a border of small dots all around the outside of the main heart. Keep nearly even spacing between them for a polished look. -
Final touches:
If your leaves look too flat, add a very thin dark line down the center of a few leaves for a vein effect.
Allow your painting to dry completely before erasing any remaining visible pencil marks
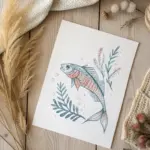
Easy Hummingbird With Decorative Dots
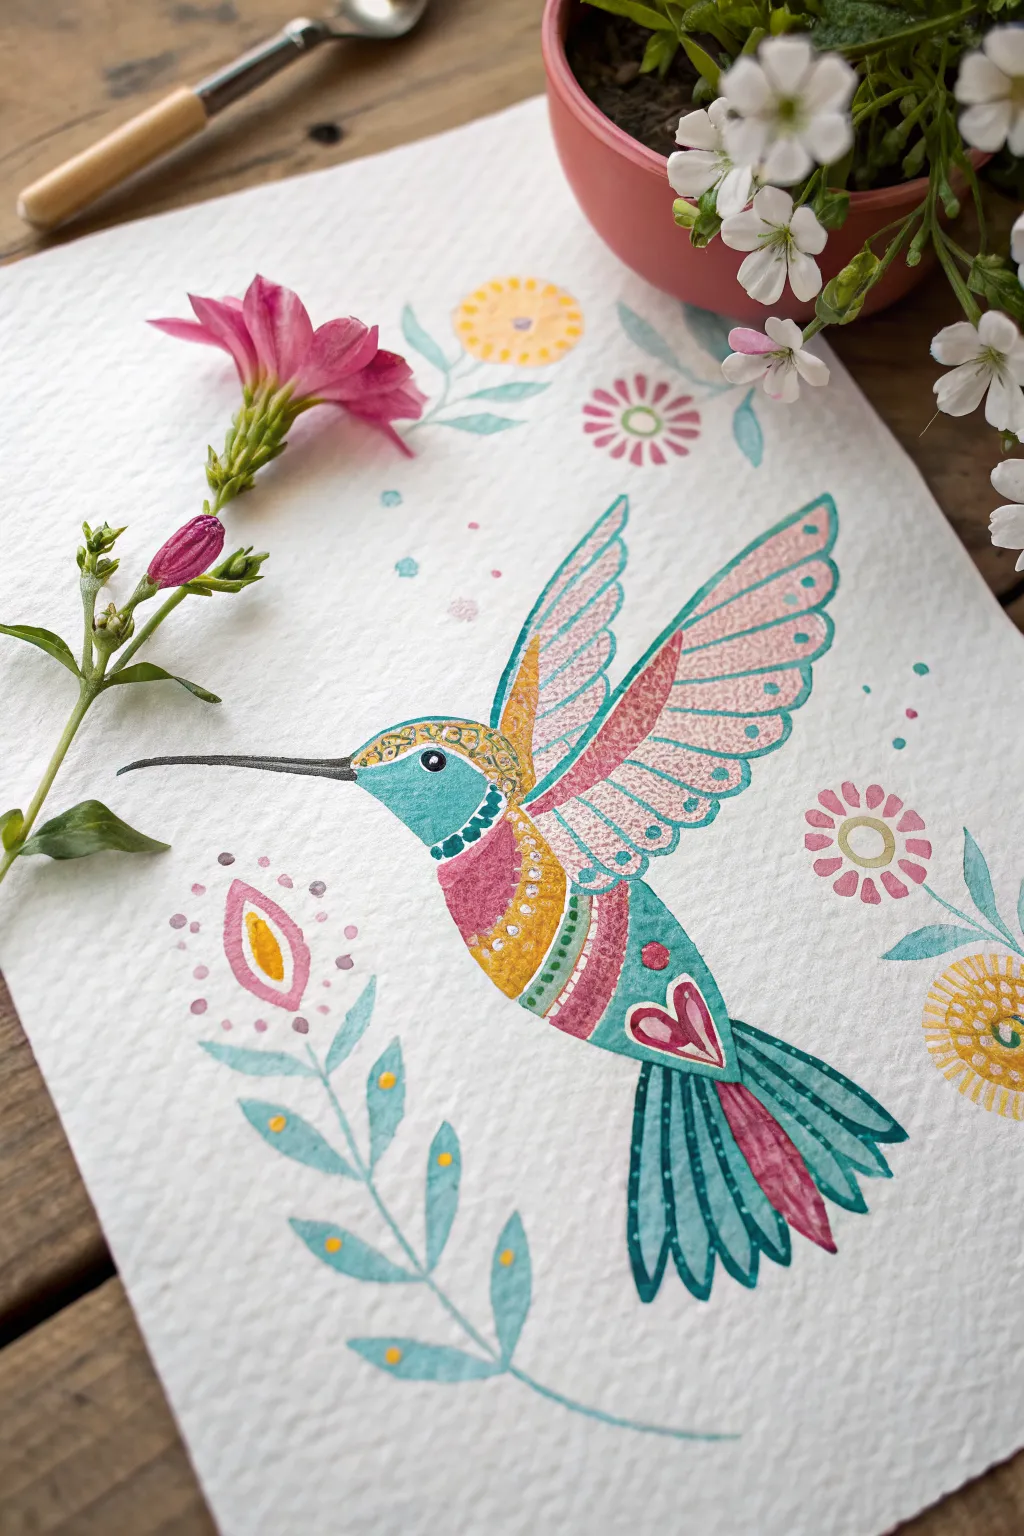
Capture the vibrant spirit of Mexican folk art with this charming hummingbird watercolor painting. Featuring a playful mix of geometric patterns, delicate dots, and soft floral accents, this piece is both approachable for beginners and visually stunning.
Step-by-Step
Materials
- Cold press watercolor paper (300 gsm)
- Watercolor paints (turquoise, magenta, golden yellow, blush pink)
- Small round brushes (size 2 and size 00 for details)
- White gouache or white gel pen
- HB pencil and eraser
- Palette for mixing
- Two jars of water
- Paper towels
Step 1: Sketching the Folk Art Forms
-
Outline the body:
Start with a light pencil sketch. Draw a sleek, teardrop shape for the hummingbird’s body, angling it upwards. Add a small rounded head and a long, needle-like beak extending to the left. -
Add the wing structure:
Project the wings upward and slightly back. Instead of realistic feathers, sketch two elongated oval shapes that divide into distinct panels or segments—this segmentation is key for the decorative style later. -
Sketch the tail:
Draw the tail fanning out downwards, resembling a layered skirt. Divide it into vertical sections which will eventually hold different colors and patterns. -
Place floral elements:
Lightly sketch the surrounding botanical elements. Draw a long, curving stem with simple leaf pairs below the bird, and scatter a few stylized circular flowers around the composition for balance.
Step 2: Applying Fundamental Colors
-
Paint the head:
Mix a bright turquoise blue. Carefully fill in the head area, stopping at the neck line where the ‘collar’ pattern will begin. -
Color the upper wings:
Using a diluted blush pink or light coral, paint the interior segments of the wings. Keep the paint fluid but controlled within the pencil lines. -
Define the flight feathers:
Load your brush with turquoise again and paint the outer edges and tips of the wings. I find that lifting the brush slightly at the end of the stroke creates a nice tapered point. -
Fill the body sections:
Paint the chest area in a deep magenta. Transition to golden yellow for the belly section, and finish the lower body with turquoise, creating a color-blocked effect. -
Paint the tail feathers:
Alternate colors on the tail feathers. Paint the outer feathers turquoise and the inner section magenta, mimicking the pattern used on the body. -
Paint surrounding flora:
Use a watery turquoise for the leaves and stems below the bird. Paint the circular flowers with alternating rings of pink and yellow wash.
Dot Precision Tip
If your brush tip isn’t fine enough for perfect dots, flip it over! Dip the hard wooden end of the brush handle into paint or gouache and stamp it for uniform circles.
Step 3: Adding Decorative Details
-
Create the eye:
Once the head is completely dry, paint a small black circle for the eye. Leave a tiny speck of white paper (or add a dot of white paint later) for a highlight. -
Add wing patterns:
Using your smallest brush (size 00) and a darker pink or red, paint thin lines and small scallops inside the pink sections of the wing to suggest texture. -
Detail the collar:
Between the blue head and magenta chest, paint a band of small, distinct dots or dashes. This ‘necklace’ effect is a classic element of this folk art style. -
Incorporate white dots:
Using white gouache or a gel pen, add rows of tiny dots over the dried paint. Place them along the edges of the wings, on the yellow belly section, and outlining the tail feathers. -
Paint the heart motif:
On the turquoise lower body, paint a simple magenta heart or teardrop shape. Surround it with white detailing to make it pop against the blue background. -
Define the beak:
Carefully paint the long beak with black or very dark grey. Keep the line extremely thin and sharp. -
Embellish the background:
Add final touches to the surrounding flowers by painting small dots or rings in their centers. You can also splash a few very faint dots of color in the empty white space for a magical feel.
Metallic Accent
Mix a tiny amount of gold watercolor or use a gold paint pen to trace the outlines of the wings or the central heart. It adds a beautiful shimmer when the light hits art.
Let your painting dry completely before framing your colorful little messenger

PENCIL GUIDE
Understanding Pencil Grades from H to B
From first sketch to finished drawing — learn pencil grades, line control, and shading techniques.
Explore the Full Guide
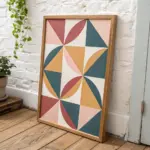
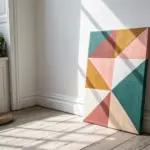
Color-Block Serape Stripe Pattern
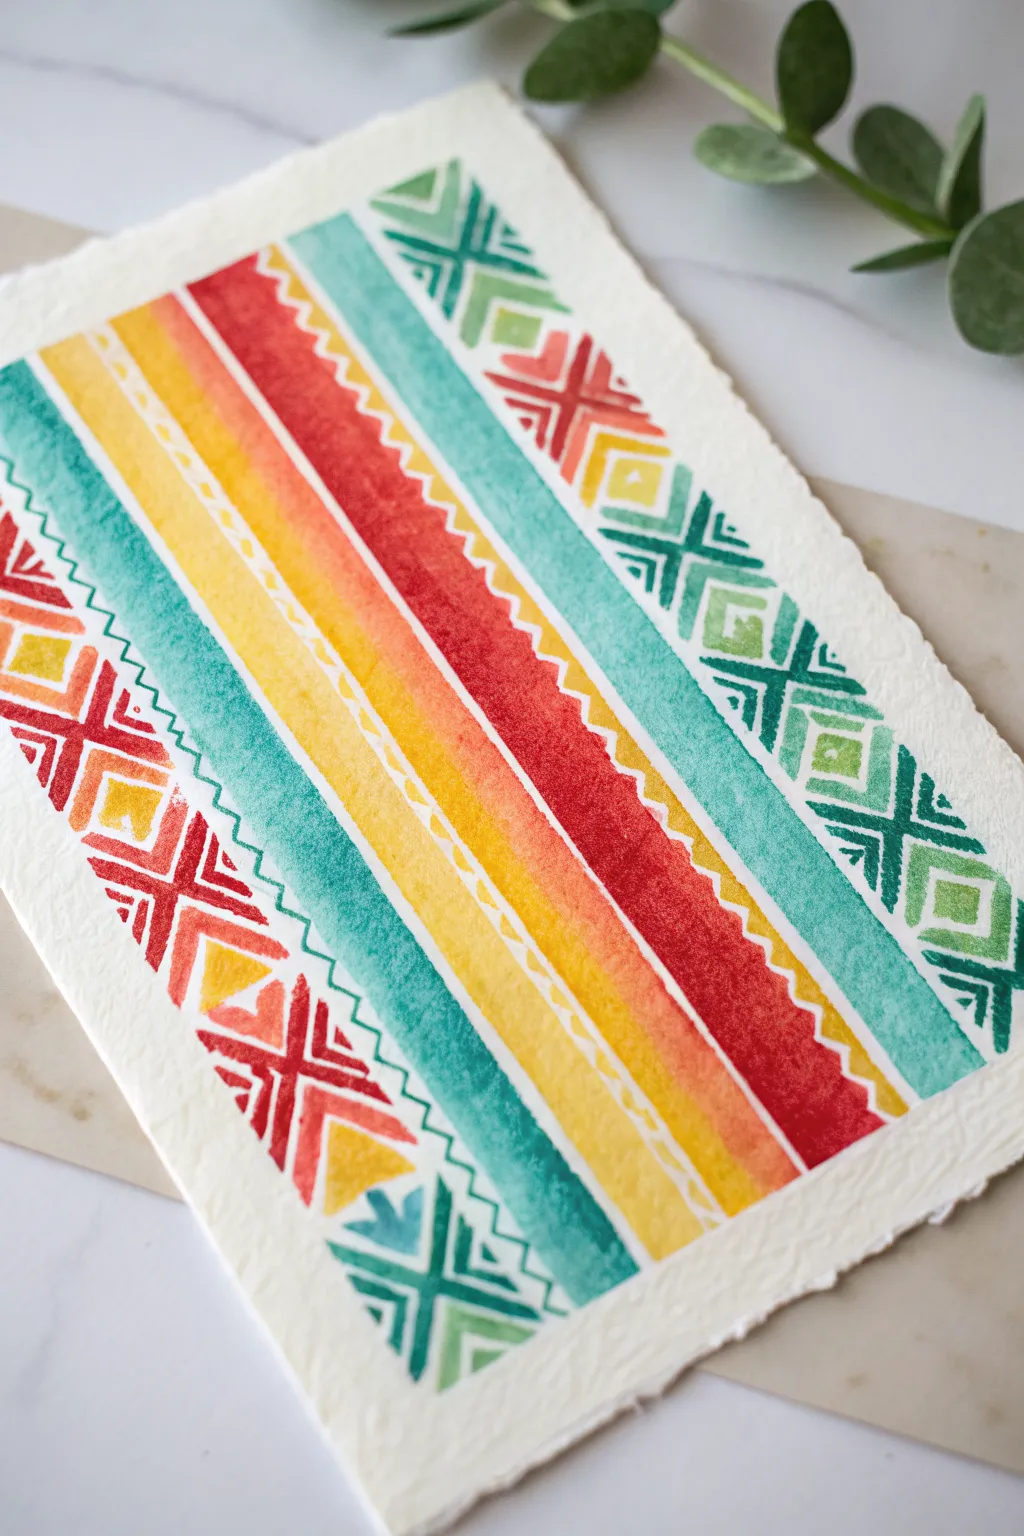
Capture the vibrant energy of traditional Mexican textiles with this beginner-friendly watercolor project. By breaking the seemingly complex pattern into simple geometric shapes and bold color blocks, you’ll create a festive piece perfect for brightening any corner.
Step-by-Step Guide
Materials
- Heavyweight watercolor paper (300gsm, cold press with deckle edge preferred)
- Watercolor paints (Turquoise, Yellow Ochre/Golden Yellow, Crimson Red, Vermilion)
- White gel pen or bleed-proof white gouache
- Flat watercolor brush (approx. 1/2 inch or 3/4 inch)
- Small round detail brush (size 2 or 4)
- Pencil and eraser
- Ruler
- Two jars of water
- Paper towels
Step 1: Planning the Layout
-
Measure the midpoint:
Begin by finding the vertical center of your paper. Using a ruler and a very light pencil touch, draw a straight line down the middle to serve as your guide. -
Mark stripe widths:
Decide on the width of your central red stripe first. Mark about an inch on either side of the center line, creating a 2-inch wide central channel. -
Draft the outer bands:
Moving outward from the center, mark narrower channels for the yellow stripes, then the teal stripes on the far edges. You don’t need to draw every detail, just the main vertical boundaries.
Step 2: Painting the Base Stripes
-
Mix your colors:
Prepare puddles of your four main colors: a deep crimson, a sunny golden yellow, a rich turquoise, and a lighter watery green. Keep the consistency relatively fluid but saturated. -
Paint the central stripe:
Using your flat brush, paint the broad central red stripe. Work from top to bottom in smooth strokes. Don’t worry if the edges bleed slightly; it adds to the woven fabric look. -
Add the yellow bands:
Rinse your brush thoroughly. Leave a tiny sliver of white space (about 1-2mm) next to the red stripe, then paint the yellow stripes on either side. -
Create the teal borders:
Leave another small gap of white paper next to the yellow, then paint the wide turquoise bands on the far left and right. Let this layer dry completely before moving on.
Uneven Edges?
If your hand is shaky, don’t stress! Genuine woven blankets rarely have perfect machine-straight lines. That slight wobble adds authentic handmade charm.
Step 3: Adding Geometric Details
-
Start the geometric diamonds:
Switch to your smaller round brush. In the white space remaining on the far edges (outside the main teal stripes), paint a series of connected X-shapes or diamonds. -
Blend colors in the diamonds:
I like to alternate colors within these geometric shapes—using red for the top segments and switching to teal or yellow for the bottom segments to create a variegated look. -
Enhance the pattern density:
Add smaller triangle details between the main X-shapes using a contrasting color. For example, if the X is red, place a small teal triangle in the negative space. -
Paint secondary stripes:
Use a diluted green or teal to paint a very thin stripe right down the center of your yellow bands, if they are wide enough, or just along the outer edge. -
Let it dry completely:
This is crucial. Before adding the final white details, the underlying paint must be bone dry to prevent smudging or pinkish bleeds.
Pro Tip
For the brightest white details, use bleed-proof white ink or gouache instead of watercolor white. It sits opaquely on top of dark colors without fading.
Step 4: Final White Texture
-
Draw the zigzags:
Using a white gel pen or a fine brush with white gouache, draw a zigzag line over the boundary where the red and yellow stripes meet. -
Add stitched details:
Draw small white dash marks or ‘stitches’ down the center of the yellow stripes. This simulates the embroidery found on real serapes. -
Highlight the geometry:
Outline parts of your outer geometric diamond patterns with thin white lines to make the shapes pop against the white paper background. -
Refine the edges:
If you want a cleaner look, add a straight white line borders between the major color blocks to hide any uneven brushwork.
Step back and admire how simple stripes and thoughtful details have transformed into a vibrant textile illusion
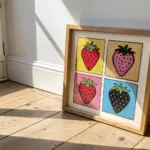
Fruit Still Life With Watermelon Slices
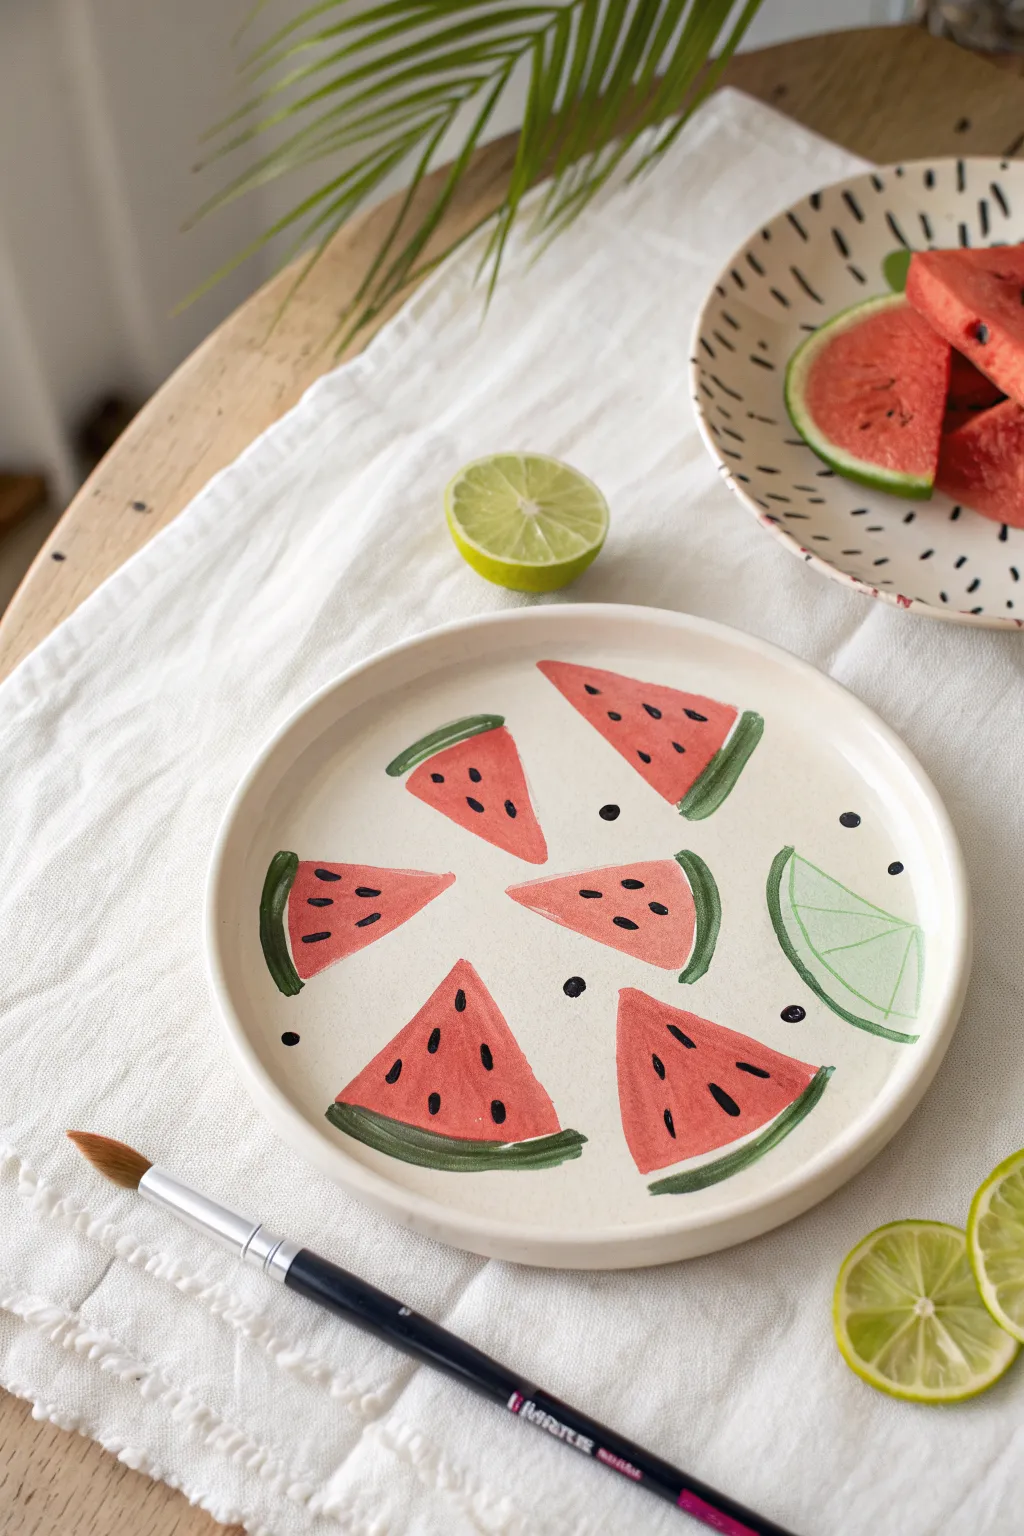
Transform a plain ceramic dish into a vibrant summer centerpiece with this playful watermelon motif. The simple, geometric shapes and bright colors make it an ideal project for beginners looking to add a touch of handmade charm to their table.
Step-by-Step Guide
Materials
- Bisque ceramic plate (unglazed) or a white glazed plate (if using bake-on ceramic paints)
- Ceramic underglazes or bake-on ceramic paints (Red, Dark Green, Black, Light Green)
- Round paintbrush (medium size, around #6 or #8)
- Fine detail brush (around #0 or #1)
- Water container
- Pencil (light graphite)
- Paper towel
- Clear dipping glaze (if using bisque/underglaze method)
Step 1: Planning and Sketching
-
Clean surface:
Begin by ensuring your plate is completely clean and dry. If using bisque ware, wipe it gently with a damp sponge to remove any dust. If using a glazed plate, clean it with rubbing alcohol to remove oils. -
Plan layout:
Visualize the placement of your slices. The image shows about six watermelon wedges radiating somewhat loosely around the center, plus one lime wedge. -
Light sketch:
Using a pencil, very lightly sketch triangles for the watermelon flesh. Don’t worry about being perfectly geometric; a slightly organic shape adds to the hand-painted appeal. Draw curved rinds at the bottom of each triangle. -
Lime outline:
Draw a semi-circle shape for the lime wedge near the edge of the plate, adding the inner segment lines.
Loose Brushwork
Don’t overwork the paint. Single, confident strokes for the rinds create a fresher, more artistic look than filling them in perfectly.
Step 2: Painting the Fruit
-
Red base:
Load your medium round brush with red ceramic paint. Fill in the triangular shapes of the watermelon flesh. -
Transparency is okay:
I prefer to apply the red paint somewhat loosely here. It doesn’t need to be fully opaque; seeing some brushstrokes adds texture. -
Green rind (Lime):
Clean your brush thoroughly. Mix a very watery light green wash. Paint the interior segments of the lime wedge with this translucent wash. -
Dark green rind (Melon):
Using the dark green paint, create the curved rinds at the base of each red triangle. Start with a firm stroke at one corner and sweep across the bottom. -
Rind details:
If you want a thicker rind, add a second stroke right next to the first dark green line. Allow a tiny gap of white space between the red fruit and green rind if you can, as shown in the example. -
Lime wedge detail:
Switch to your fine liner brush and the dark green paint. Outline the lime wedge and draw the thin lines separating the segments.
Fuzzy Edges?
If your paint is bleeding, your brush might be too wet. Blot it on a paper towel before picking up paint to keep lines crisp.
Step 3: Adding Details
-
Drying time:
Allow the red and green base layers to dry until they are no longer shiny. This prevents the black seeds from bleeding into the wet paint. -
Painting seeds:
Dip the tip of your fine detail brush into black paint. Paint small teardrop instructions scattered across the red triangles. -
Seed variation:
Keep the point of the teardrop facing inwards toward the center of the fruit slice. Vary the number of seeds per slice—usually three to five looks best. -
Stray seeds:
For a playful touch, add a few black dots or ‘seeds’ floating in the empty white space between the slices. -
Cleanup:
If you made any stray marks, now is the time to gently scratch them off with a toothpick or wipe them with a damp cotton swab.
Step 4: Finishing
-
Final dry:
Let the entire piece dry completely according to your paint manufacturer’s instructions. -
Glaze or Bake:
If using bisque and underglaze, dip the plate in clear glaze and fire it in a kiln. If using bake-on homeware paints, place the plate in a cool oven, heat to the recommended temperature to cure, and let it cool down inside the oven.
Once fired or cured, your plate is ready to serve up summer vibes at your next gathering


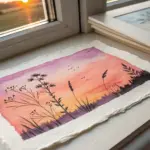
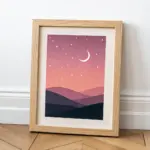
Mayan Temple Shapes in Sunset Colors
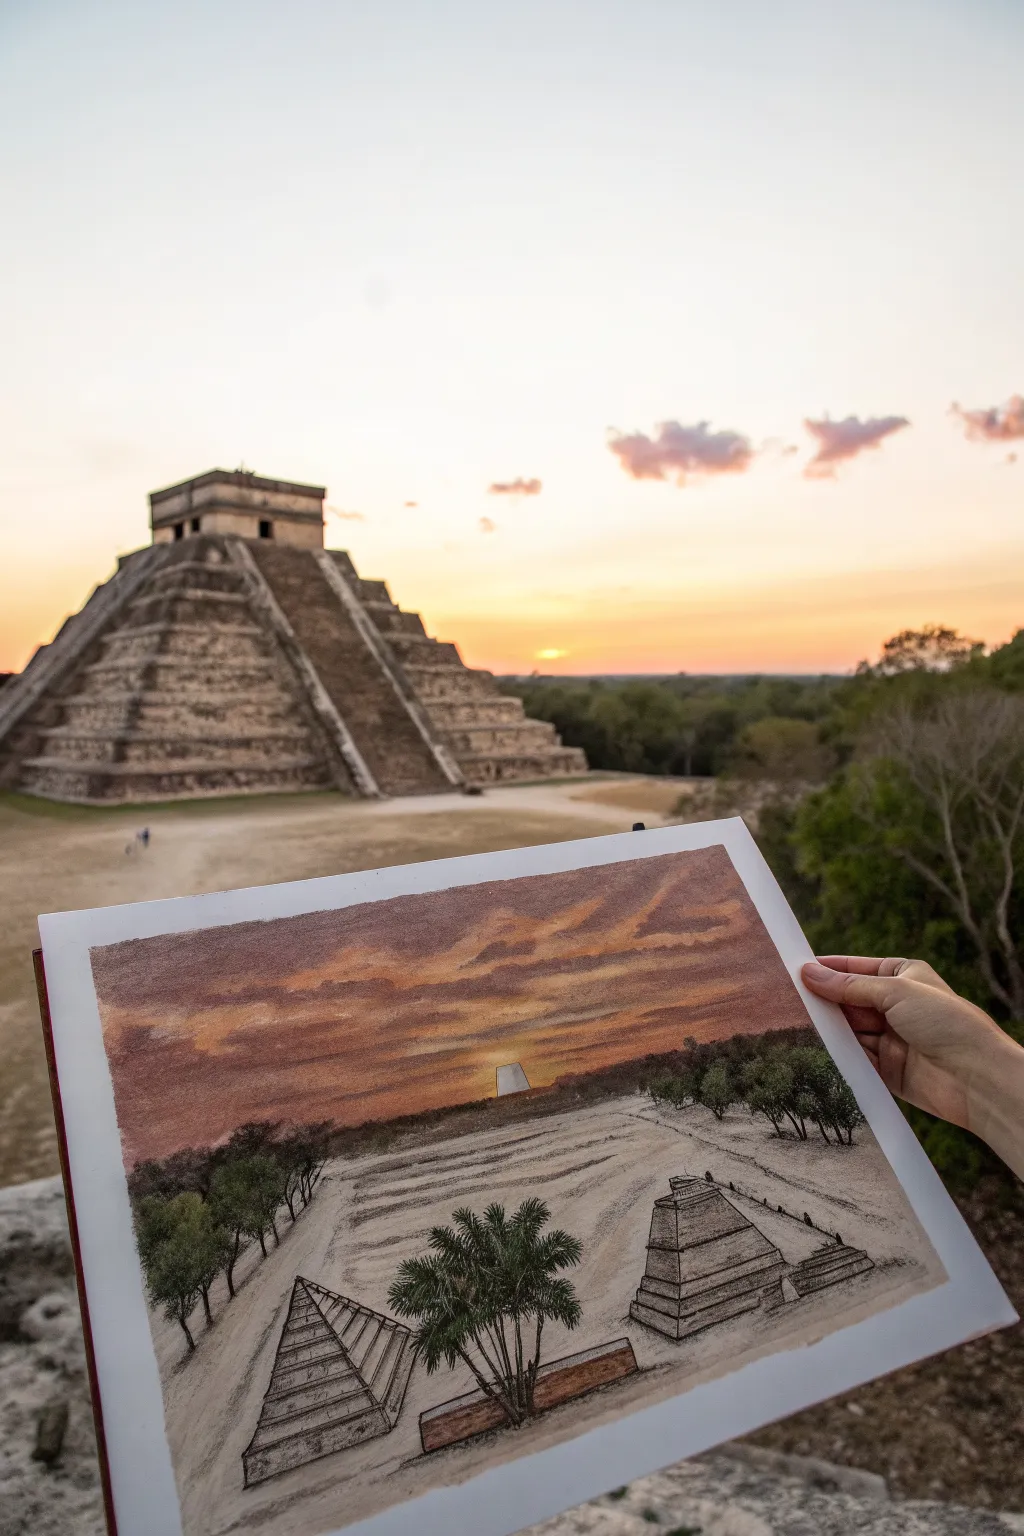
Capture the magic of the golden hour with this mixed-media sketch that combines the precise geometry of Mayan architecture with the soft, blending colors of a tropical sunset. This project uses a combination of watercolor or ink wash for the sky and fine-liner pens for the textured stonework.
Step-by-Step Guide
Materials
- Heavyweight mixed-media or watercolor paper (sketchbook format)
- Pencil (HB or 2B) and eraser
- Watercolors or water-soluble markers (orange, ochre, burnt sienna, dark purple/grey)
- Fine-liner pen (black, 0.3mm or 0.5mm)
- Small round brush (size 4 or 6)
- Ruler (optional, for straight pyramid lines)
- Paper towel
Step 1: Sketching the Layout
-
Establish the horizon:
Lightly draw a horizon line about one-third of the way up from the bottom of your page. This leaves plenty of room for that dramatic sky, which is the star of this piece. -
Block in the pyramids:
Sketch two main pyramid shapes in the foreground. Use simple triangles first, then cut off the tops to create the trapezoidal shape typical of Mayan temples. Add a smaller, rectangular wall structure between them. -
Add the central focus:
In the distance, right on the horizon line and centered, draw a tiny silhouette of a main temple or sun stone to serve as a focal point for the setting sun. -
Outline the tiered steps:
Using your ruler or a steady hand, lightly sketch horizontal bands across the pyramid faces to represent the stone tiers. Add the angled staircases crawling up the center of the structures. -
Place the vegetation:
Sketch rounded, organic shapes along the horizon line for distant trees and add a specific palm tree shape in the foreground near the pyramids to create depth.
Muddy Sky Fix
If your sunset colors turn brown or muddy, stop brushing! Let the layer dry completely, then apply a fresh glaze of pure orange or yellow over the top to bring back the vibrance.
Step 2: Painting the Sunset Sky
-
Wet the sky area:
Take your clean brush and apply a thin layer of clean water to the entire sky area, stopping just at the horizon line. -
Apply the golden glow:
While the paper is damp, drop in yellow ochre and bright orange right at the horizon line where the sun is setting. Let the colors bleed upward slightly. -
Deepen the upper sky:
Mix a warm brown or burnt sienna and apply it to the middle section of the sky. Blend this into a darker purple-grey near the very top of the page to mimic the fading daylight. -
Create cloud textures:
While the paint is still wet, lift out a few horizontal streaks using a crumpled paper towel to create soft, wispy clouds. Alternatively, dab darker pigment in horizontal strokes for shadow clouds. -
Let it dry completely:
I usually take a break here because the paper must be bone-dry before we start ink work. If you rush, the ink will bleed into the damp paper.
Step 3: Inking and Detailing
-
Ink the pyramid outlines:
Go over your pencil lines for the pyramids with the black fine-liner. Use slightly broken or jittery lines for the stone edges to make them look ancient and weathered rather than perfect factory-made blocks. -
Texture the stonework:
Fill the horizontal bands of the pyramids with small vertical ticks and stippling dots. This simulates the texture of thousands of individual limestone bricks. -
Draw the trees:
Ink the distant tree line with small, scribbly loops to suggest dense foliage. For the foreground palm, use sharp, jagged strokes starting from the center of the frond and flicking outward. -
Ground the structures:
Add light, horizontal hatching strokes on the ground around the base of the pyramids to show the sandy, grassy plaza floor. -
Shadows and Contrast:
Identify where the light is coming from (the sunset in the back). Add heavier hatching on the front faces of the pyramids, leaving the sides facing the sunset slightly lighter for contrast.
Level Up: White Gel Pen
Use a white gel pen to add tiny highlights on the edges of the pyramid steps or the tips of the palm leaves. This makes the drawing pop against the darker inked areas.
Now you have a timeless architectural landscape that captures the warmth of Mexico’s evening light.
Alebrije-Style Lizard With Pattern Fill
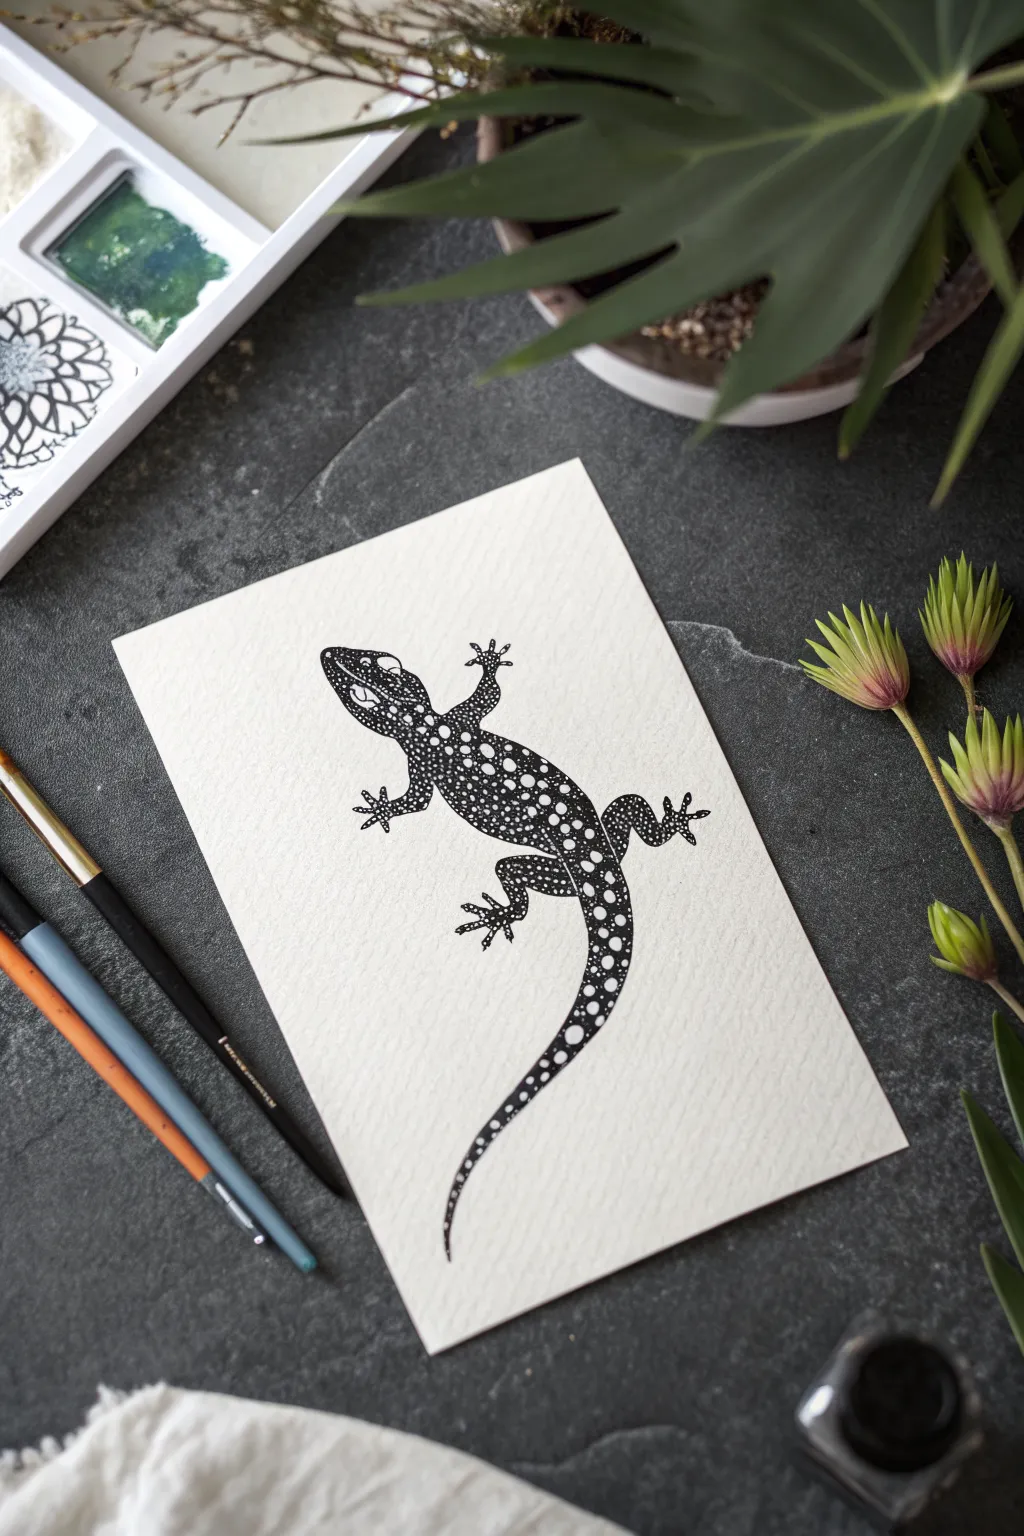
Capture the spirit of Mexican folk art with this striking monochrome lizard illustration. Using simple black ink and negative space, you’ll create a bold, patterned design that pops against textured paper.
Step-by-Step
Materials
- Cold press watercolor paper (A5 or similar size)
- Pencil (HB or similar for sketching)
- Kneadable eraser
- Waterproof fine liner pen (01 or 03 size)
- Black India ink or black gouache
- Small round brush (size 2 or 4)
- White gel pen (optional, for corrections)
Step 1: Sketching the Form
-
Establish the curve:
Begin by lightly drawing a gentle ‘S’ curve or an arc in the center of your paper. This will serve as the spine of the lizard and guide the flow of the tail. -
Block in the body:
Sketch an oval shape for the main torso along the upper part of your guide line. Add a smaller, slightly triangular shape for the head at the top end. -
Add the limbs:
Draw four bent legs extending from the torso. Alebrijes often have whimsical proportions, so don’t worry about perfect anatomy. Make the knees distinct and angular. -
Refine the tail:
Thicken the bottom part of your initial guide line to create a tapering tail that curves elegantly toward the bottom of the page. -
Detail the toes:
Add five small toes to the end of each foot. Splaying them out wide adds to the energetic character of the creature. -
Define the face:
Sketch a large, prominent eye on the head and a simple line for the mouth. Lightly map out a few large circles on the back where you want your biggest spots to be.
Ink Smudges?
If you smudge wet ink, don’t wipe it! Let it dry completely, then paint over the smudge with thick white gouache or a white paint marker to mask it.
Step 2: Inking the Outline
-
Trace the silhouette:
Using your fine liner pen, carefully go over the pencil lines of the lizard’s outer shape. Keep your hand steady to create a smooth, continuous line. -
Refine the edges:
Pay special attention to the toes and the tip of the tail. These small details need sharp, crisp lines to look their best. -
Erase pencil marks:
Once the ink is completely dry—give it a minute or two—gently use your kneadable eraser to lift away the graphite sketch underneath.
Add Color
For a true Alebrije look, swap the white paper spots for vibrant colors. After the black ink dries, use neon gel pens or bright markers to fill in the white circles.
Step 3: Creating the Pattern
-
Map the main spots:
Inside the body, draw the outlines of your largest circles (spots) using the fine liner. Place a few large ones down the spine and on the upper legs. -
Add medium clusters:
Surround the large spots with medium-sized circles. I like to cluster these somewhat tightly to create an organic, pebbled texture. -
Fill the gaps:
In the remaining spaces between circles, draw tiny dots or very small circles. The goal is to leave very little empty ‘background’ space inside the lizard’s body outline. -
Detail the eye:
Draw the pupil inside the eye, leaving a small white highlight to make it look alive.
Step 4: Filling the Darks
-
Prepare your ink:
If using bottled India ink or gouache, pour a small amount into a palette or dish. Ensure your brush is clean and damp but not dripping. -
Fill the negative space:
This is the most crucial step. Carefully paint the black ink into the spaces *between* the circles you drew. The paper inside the circles stays white. -
Work in sections:
Start from the head and work your way down to avoid smudging wet ink with your hand. Use the very tip of the brush for the tight corners between spots. -
Darken the limbs:
Continue the fill technique onto the legs and feet. Since the toes are small, you might want to switch back to your fine liner pen to color the background areas there. -
Finish the tail:
As the tail tapers, the spots will get smaller. Carefully fill the black around them until you reach the very tip. -
Final touches:
Check for any uneven black areas and apply a second coat if needed for a solid, opaque look. If you accidentally filled a spot, a dot of white gel pen can fix it.
Now you have a striking, high-contrast piece of amphibian art inspired by Mexican tradition.
Folk Cat With Floral Whisker Details
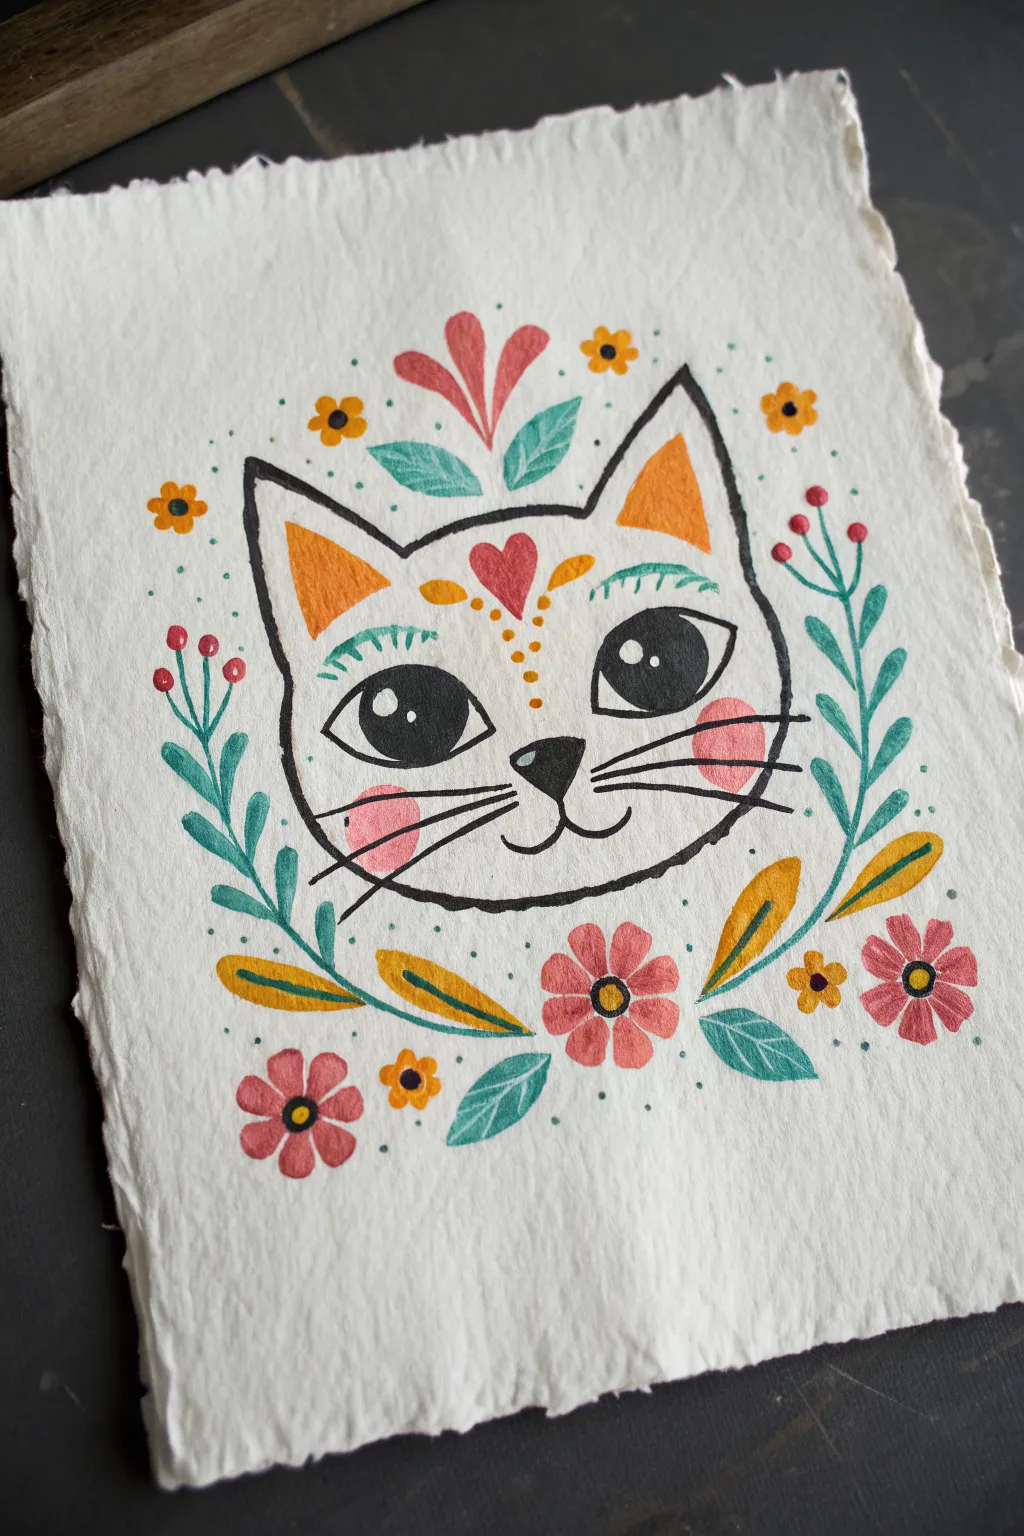
Capture the charm of traditional Mexican folk art with this sweet, wide-eyed cat illustration. Using a vibrant palette and simple shapes, you’ll create a lively piece surrounded by playful floral motifs on beautiful deckle-edge paper.
How-To Guide
Materials
- Handmade cotton rag paper (deckle edge)
- Black waterproof ink pen (fine liner and brush pen)
- Gouache or acrylic paints (Orange, Pink, Teal, Yellow)
- Small round paintbrushes (sizes 0, 2, and 4)
- Pencil and eraser
- Water cup and palette
Step 1: Sketching the Foundations
-
Outline the head:
Begin by lightly sketching the cat’s face with a pencil. Draw a wide, slightly flattened oval shape for the head, keeping the bottom curve gentle. -
Add the ears:
Sketch two large, triangular ears on top of the head. Make them slightly tall and pointed to give the cat an alert expression. -
Place features:
Lightly mark the positions for two large oval eyes, a small triangular nose, and the mouth curves. Add the rosy cheek circles lightly as well.
Step 2: Adding the Bold Lines
-
Ink the main outline:
Using a brush pen or a thicker fineliner, trace over your pencil lines for the cat’s head and ears. The line should have a bit of varied thickness to mimic a hand-painted look. -
Define the eyes:
Draw the heavy black outlines of the eyes. Fill in the pupils with solid black ink, leaving two distinct white circles in each eye for bright, reflective highlights. -
Draw the nose and mouth:
Ink the small triangular nose and the ‘W’ shape for the mouth. Add the long, sweeping whiskers—three specific strokes on each side extending outward. -
Erase pencil marks:
Wait for the ink to dry completely, then gently erase your initial pencil guides to clean up the drawing.
Use Textured Paper
For that authentic, rustic look, use handmade cotton rag paper. The rough texture absorbs gouache beautifully and adds vintage character.
Step 3: Painting the Cat
-
Color the ears:
Mix a warm orange hue and fill in the inner triangles of the ears. leave a small white gap between the color and the black outline for a stylized folk feel. -
Paint the cheeks:
Dilute a soft pink paint slightly and paint the round rosette cheeks on either side of the whiskers. Using a thinner wash here keeps the black whiskers visible underneath. -
Add decorative details:
Paint a small red heart in the center of the forehead. Add small orange strokes or dots above the eyes to create stylized eyebrows. -
Eye embellishments:
Using a teal or light green, paint a small scalloped line or series of dashes above each eye to frame them.
Fixing Wobbly Lines
If your ink lines aren’t perfect, don’t worry! Folk art embraces imperfection. Simply thicken the line slightly to smooth out any jitters.
Step 4: Floral Surroundings
-
Establish the vines:
With teal paint, create two main curved vines that frame the cat’s face from the bottom up, like a wreath. Paint the stems first, then add teardrop-shaped leaves along sides. -
Paint main flowers:
Using a reddish-pink shade, paint the large five-petaled flowers at the bottom center. Add smaller pink blossoms near the top corners of the paper. -
Add accent leaves:
Intersperse yellow-orange leaves among the teal vines. I like to place these near the corners to balance the color composition. -
Detail the flowers:
Once the pink flowers are dry, add a small dark center (black or dark purple) and a ring of yellow dots around it. -
Top decoration:
Above the cat’s head, paint a central stylized plant with a red heart-like bloom and teal leaves fanning out. -
Final filler:
Fill any empty negative space with tiny yellow flower bursts and small blue or green framing dots to complete the festive look.
Step back and admire the cheerful personality of your new folk art creation
Playful Avocado Mariachi Character
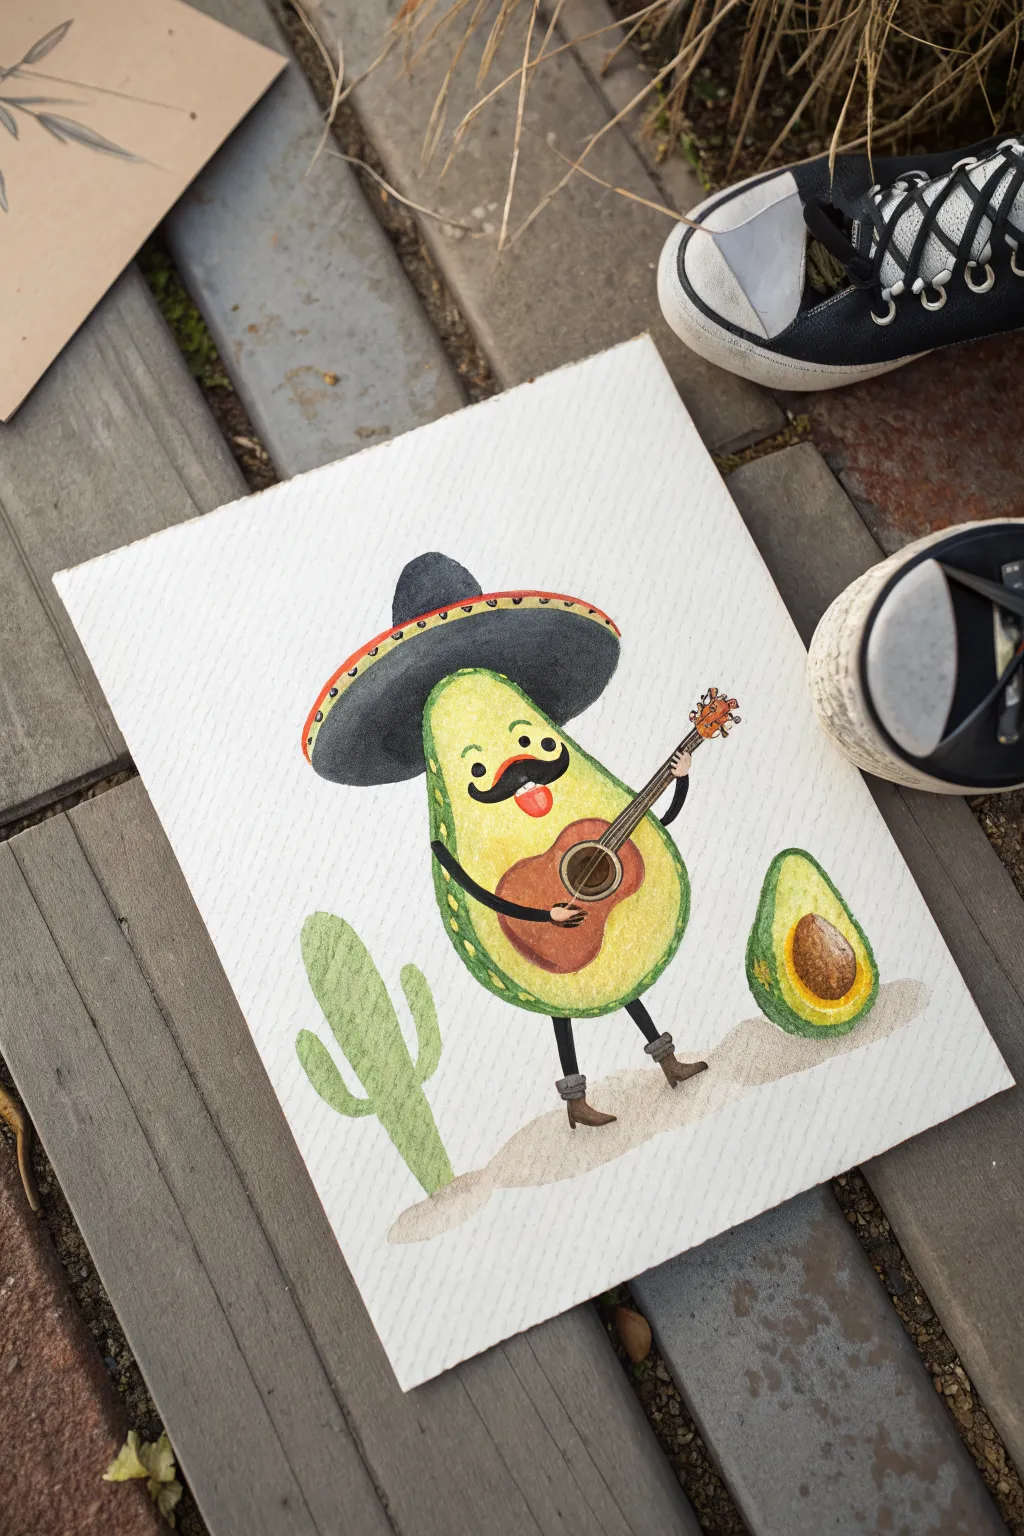
This whimsical watercolor painting features a cheerful avocado mariachi complete with a sombrero and guitar, serenading a small cactus and his avocado sidekick. The textured watercolor paper adds charm to this playful character, making it a perfect beginner-friendly project full of personality.
Detailed Instructions
Materials
- Cold press watercolor paper (A4 or 9×12 inch)
- Watercolor paints (shades of green, yellow-green, brown, black, grey, red)
- Pencil (HB) and eraser
- Round watercolor brushes (size 6 for washes, size 2 or 0 for details)
- Masking fluid (optional, for highlights)
- Jar of water and paper towels
Step 1: Sketching the Composition
-
Outline the avocado body:
Start by drawing a large pear shape in the center of your paper for the main avocado body. Keep your pencil lines extremely light so they don’t show through the paint later. -
Add the sombrero and face:
Position a wide-brimmed sombrero on top of the avocado’s head. Draw the brim curving slightly upward. Inside the body shape, sketch two small eyes, a prominent curvy mustache, and a small tongue sticking out. -
Sketch the accessories:
Draw the guitar overlapping the avocado’s belly, angling the neck upwards to the right. Add thin stick-lines for the arms and legs, finishing the feet with pointed boots. -
Draw the background elements:
To the left of the main character, sketch a simple saguaro cactus. To the right, draw a smaller avocado cut in half to show the pit.
Stay Bumpy!
For the avocado skin, don’t just paint a flat line. Dab the brush tip repeatedly along the edge to create that realistic bumpy Haas avocado texture.
Step 2: Painting the Main Body
-
Base wash for the avocado:
Mix a light, yellowish-green. Wet the inside of the avocado body shape with clean water first (wet-on-wet technique), then drop in your pale green, keeping the center lighter to make it look round. -
Add skin texture:
While the inner green is still damp, mix a darker, truer green. Apply this along the outer edges of the avocado to create the skin, letting it bleed naturally into the lighter center. -
Paint the sombrero:
Using a dark grey or diluted black, fill in the sombrero. Leave a tiny sliver of white paper or lighter grey on the top dome to represent a highlight. Let this dry completely before adding the decorative red stripe on the brim. -
Color the cactus:
Paint the cactus using a mid-tone green. I like to add vertical strokes of slightly darker green while it’s wet to suggest the ridges of the cactus. -
Paint the avocado half:
Paint the small avocado half on the right using the same greens as the main body. For the pit, use a rich brown, leaving a small white highlight near the top to make it look shiny.
Step 3: Adding Details and Character
-
Paint the guitar:
Use a warm, reddish-brown for the body of the guitar. Use a darker brown for the sound hole circle. Once dry, use your smallest brush to paint the neck and headstock. -
Fill in the face:
With a steady hand and a small brush (size 2), paint the mustache solid black. Use a dab of pink or red for the tongue. Add simple black dots for the eyes. -
Paint limbs and boots:
Use black paint for the stick arms and legs. For the boots, use a brown shade, perhaps slightly different from the guitar to create contrast. -
Add sombrero details:
Now that the hat is dry, paint the small red patterns or stitching along the rim of the sombrero using a fine brush. -
Add texture dots:
Mix a dark green and use the very tip of your brush to tap tiny stippling dots along the dark green skin of the main avocado. This mimics the bumpy texture of avocado skin.
Fiesta Vibes
Make it a party by painting tiny musical notes floating in the air around the guitar using black ink or paint to show he is playing a song.
Step 4: Ground and Final Touches
-
Paint the sandy ground:
Mix a very watery beige or pale brown. Paint a loose, organic shape under the characters’ feet to ground them so they aren’t floating in space. -
Add guitar strings:
This requires precision: use a white gel pen or very opaque white paint with a liner brush to draw thin strings stretching up the guitar neck. -
Refine outlines:
If any edges feel too soft, you can go back with a slightly darker version of the base color to gently outline specific areas like the cactus arms or the sombrero brim.
Once dry, your musical avocado is ready to bring a touch of humor to your wall


Have a question or want to share your own experience? I'd love to hear from you in the comments below!