I’m always amazed at how a faux paint finish can turn a plain wall into something that feels textured, layered, and totally custom. If you’re craving more depth than flat color, these ideas will give you that satisfying “did you really paint that?” look.
Sponging for Soft Mottling
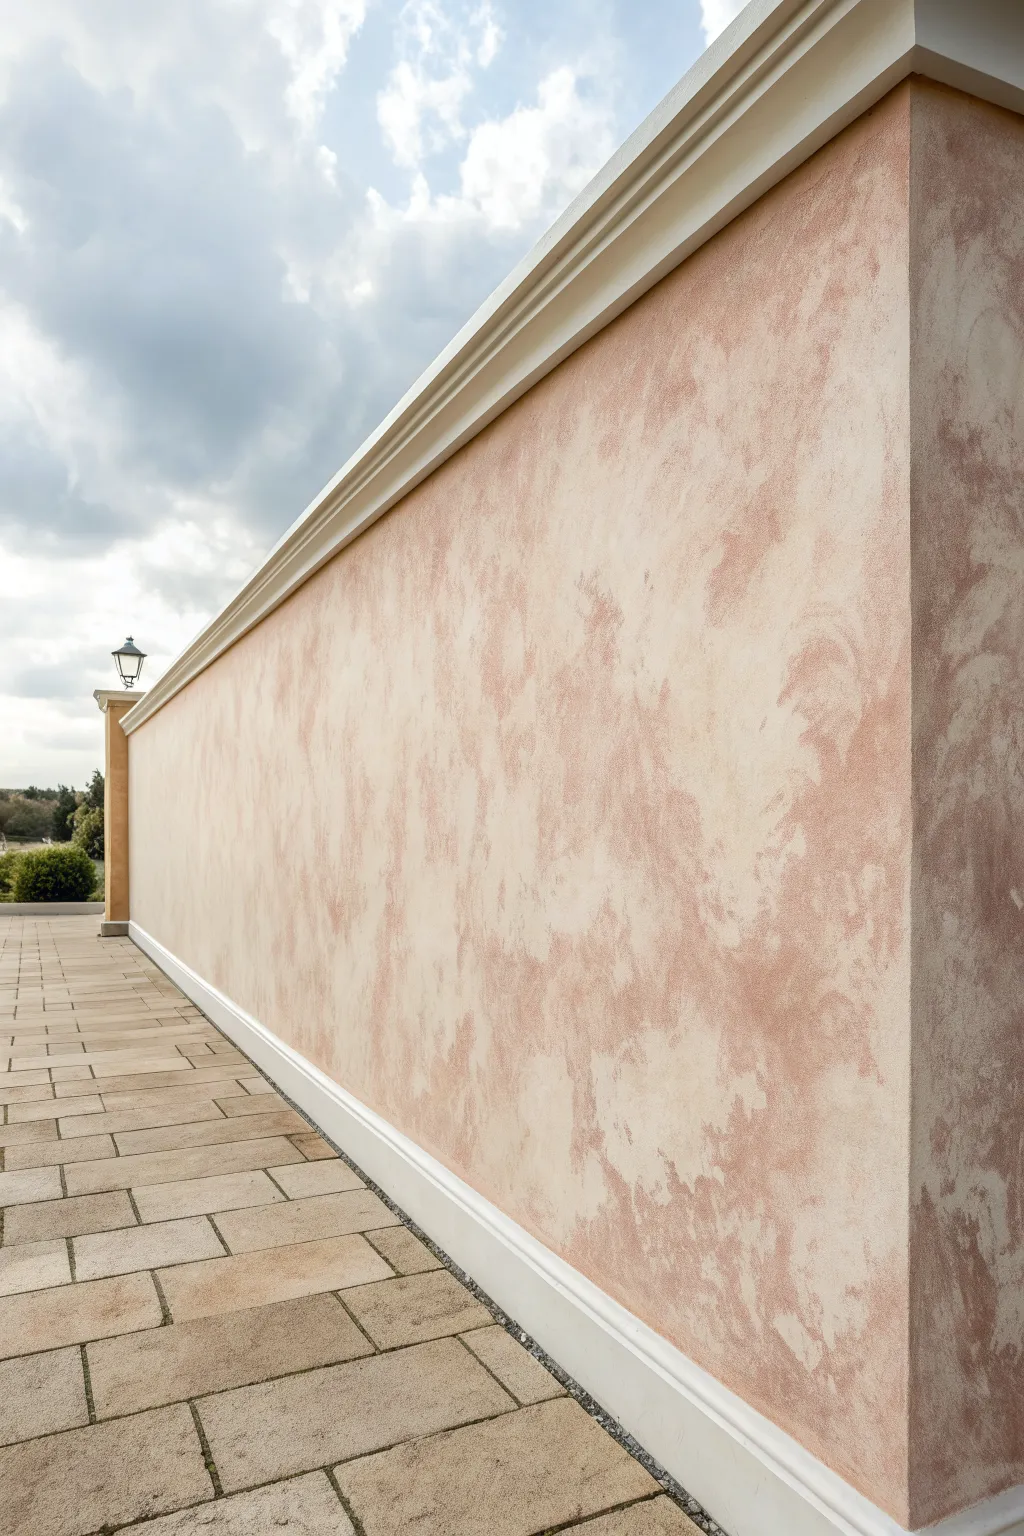
Transform a plain exterior wall into a Mediterranean masterpiece with this soft mottling technique. By layering warm terracotta and cream glazes, you create a weathered, sun-baked stucco effect that adds depth and history to any smooth surface.
How-To Guide
Materials
- High-quality exterior primer
- Exterior latex paint (Base coat: creamy off-white)
- Exterior latex paint (Glaze color 1: soft peach/terracotta)
- Exterior latex paint (Glaze color 2: darker earthy sienna)
- Acrylic glaze medium (exterior grade)
- Natural sea sponges (large size)
- Painter’s tape
- Drop cloths
- Paint tray and liners
- Cardboard (for testing)
- Bucket for rinsing sponges
- Lint-free rags
Step 1: Preparation & Base Coat
-
Protect the perimeter:
Begin by masking off the molding, trim, and ground pavers with painter’s tape and drop cloths. This technique can get messy, and glaze splatter is hard to remove from porous stone once dry. -
Prime the surface:
Apply a coat of high-quality exterior primer to ensure good adhesion, especially if the wall has weathered areas. Let this dry completely according to the manufacturer’s instructions. -
Apply the base coat:
Roll on two coats of your creamy off-white exterior latex paint. This light background is essential because the translucent glazes will sit on top of it; a solid, even base ensures the final mottling looks intentional, not patchy. -
Prepare the sea sponge:
While the base coat cures, soak your natural sea sponge in water to soften it, then wring it out thoroughly until it is just damp. A dry sponge absorbs too much paint and creates harsh, heavy marks.
Pro Tip: Working Wet Edge
Work in 4-foot sections and keep a ‘wet edge’ by fading out the paint as you move to the next area. This prevents overlapping lines where dried glaze meets fresh glaze.
Step 2: Applying the First Glaze
-
Mix the peach glaze:
In a bucket or tray liner, mix 1 part of your soft peach latex paint with 4 parts acrylic glaze medium. I like to keep the mixture fairly thin to keep the look airy. -
Test the impression:
Dip the damp sponge into the glaze and blot the excess onto a piece of cardboard. Practice your technique here first; you want a soft, cloud-like impression, not a solid blob. -
Begin sponging on the wall:
Start applying the peach glaze to the wall using a light pouncing motion. Work in irregular clusters rather than straight lines to avoid creating a grid pattern. -
Rotate the sponge:
Constantly turn the sponge in your hand as you work. This varies the texture and ensures you don’t repeat the exact same shape over and over. -
Reload and blot:
Reload the sponge frequently, always blotting on the tray’s ribbed section or a rag before touching the wall. You want layers of translucency, not heavy opacity. -
Let the first layer dry:
Allow this first layer of peach mottling to dry completely. The darker areas create shadow and depth, while the open spaces let the cream base shine through.
Troubleshooting: Too Heavy
If you apply a blotch that is too dark or opaque, immediately dab it with a clean, wet rag to lift the color. Then, softly pat the area with a dry sponge.
Step 3: Adding Depth & Blending
-
Mix the darker glaze:
Create your second glaze mixture using the darker earthy sienna paint and the glaze medium, keeping the same 1:4 ratio. -
Apply the accent color:
Using a clean, damp sea sponge, apply this darker color sparsely over the peach layer. Focus on filling in some of the larger gaps, but leave plenty of the first color visible. -
Soften with a clean sponge:
While the glaze is still wet, take a clean, slightly damp sponge (with no paint on it) and gently pat over areas that look too heavy or distinct. This blends the edges for that weathered stucco look. -
Stand back and assess:
Frequently step back 10 to 15 feet to view the whole wall. Up close, it looks like dots; from a distance, it should look like drifting clouds of color. Fill in any bald spots as needed. -
Clean adjacent areas:
Remove the painter’s tape while the final glaze is still tacky to prevent peeling the paint. Wipe any accidental drips on unauthorized surfaces immediately. -
Final cure:
Allow the entire wall to cure for at least 24-48 hours before exposing it to heavy water or scrubbing, ensuring weather resistance.
Enjoy the warmth and character your new wall brings to the outdoor space


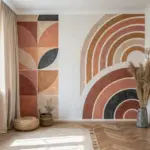
Color Wash for Old-World Patina
Achieve the rustic, sun-baked elegance of an Italian villa with this layered color wash technique. By blending warm terracotta and ochre glazes over a textured base, you’ll create a finish that feels centuries old, soft, and full of depth.
Step-by-Step Tutorial
Materials
- Base coat paint (creamy off-white/beige, satin or eggshell)
- Latex glaze medium
- Latex paint (Terracotta/Burnt Orange)
- Latex paint (Raw Sienna/Gold Ochre)
- Latex paint (Raw Umber for depth)
- Large 4-6 inch mottler brush or block brush (natural bristle preferred)
- Clean, lint-free cotton rags
- Painter’s tape
- Drop cloths
- Mixing buckets
- Water spray bottle
- Sea sponge (optional for texture)
Step 1: Preparation and Base
-
Prep the space:
Begin by clearing the wall area and laying down drop cloths. Use painter’s tape to mask off baseboards, ceiling edges, and any adjacent walls you don’t intend to paint. -
Apply the base coat:
Roll on two coats of your creamy off-white or beige base paint. This neutral ground is crucial because bits of it will peek through the translucent glaze layers, giving that authentic aged plaster look. -
Check for coverage:
Ensure the base coat is opaque and fully dry before moving on. I usually let this cure overnight to ensure the glaze doesn’t lift the base paint during the manipulation phase.
Step 2: Mixing the Glazes
-
Mix the Terracotta glaze:
In a bucket, mix one part Terracotta paint with four parts glaze medium. If the mixture feels too thick, splash in a little water to loosen it up. -
Mix the Sienna glaze:
Repeat the process in a separate bucket for the Raw Sienna/Gold Ochre color, keeping the same 1:4 paint-to-glaze ratio. -
Create a shadow tone:
Mix a very small amount of your Raw Umber glaze. This darker tone will be used sparingly to create areas of deeper patina, simulating years of weathering.
Natural Bristle Magic
Use natural bristle brushes rather than synthetic. The coarser natural bristles leave subtle track marks that mimic the texture of old plaster application much better.
Step 3: Application Technique
-
Pre-wet the wall:
Working in a manageable section (about 3×3 feet), lightly mist the wall with water. This extends the drying time and helps the glazes slip and slide for better blending. -
Apply the first color:
Dip your large block brush into the Terracotta glaze. Apply it to the wall using random, crisscrossing strokes (X-pattern). Don’t aim for solid coverage; leave gaps where the base coat shows. -
Integrate the second color:
Immediately dip a separate brush (or the same one if you want muddy blending) into the Sienna glaze. Apply it into the gaps and overlapping the Terracotta strokes while everything is still wet. -
Introduce depth:
While wet, add tiny accents of the Raw Umber glaze in corners or lower sections where dirt would naturally accumulate over time. -
Soften with the brush:
Take a clean, dry mottler brush and sweep it over the wet glazes. Use light, feathery strokes in all directions to melt the harsh brush marks into soft clouds of color. -
Ragging for texture:
Crumple a damp cotton rag into a loose ball. Lightly blot areas that look too heavy with paint to lift some color off, revealing the texture and base coat underneath.
Lap Lines Appearing?
If you see hard lines where sections meet, your edges dried too fast. Keep a spray bottle handy to re-wet the edges of your work zone so the next section blends invisibly.
Step 4: Refining the Finish
-
Move to the next section:
Proceed to the adjacent 3×3 foot area. Always maintain a ‘wet edge’—blending the fresh glaze into the previous section while it’s still damp to avoid visible seam lines. -
Build layers if needed:
Step back and assess your work. If the color feels too sheer, let the first pass dry completely, then apply a second, lighter pass of glaze to intensify the richness. -
Create the sun-bleached look:
To mimic the uneven fading shown in the image, intentionally leave some upper areas lighter or dilute your glaze further with water for sections that would receive direct sunlight. -
Dry brush highlights:
Once the wall is fully dry, take a brush with a tiny amount of the original base coat paint. Lightly skim it over the most textured areas to highlight the ‘peaks’ of the wall surface. -
Final inspection:
Remove the painter’s tape carefully. Check edges for any bleed-through and touch up with a small artist’s brush if necessary.
Enjoy the warmth and character your new old-world walls bring to the room
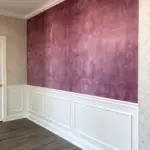

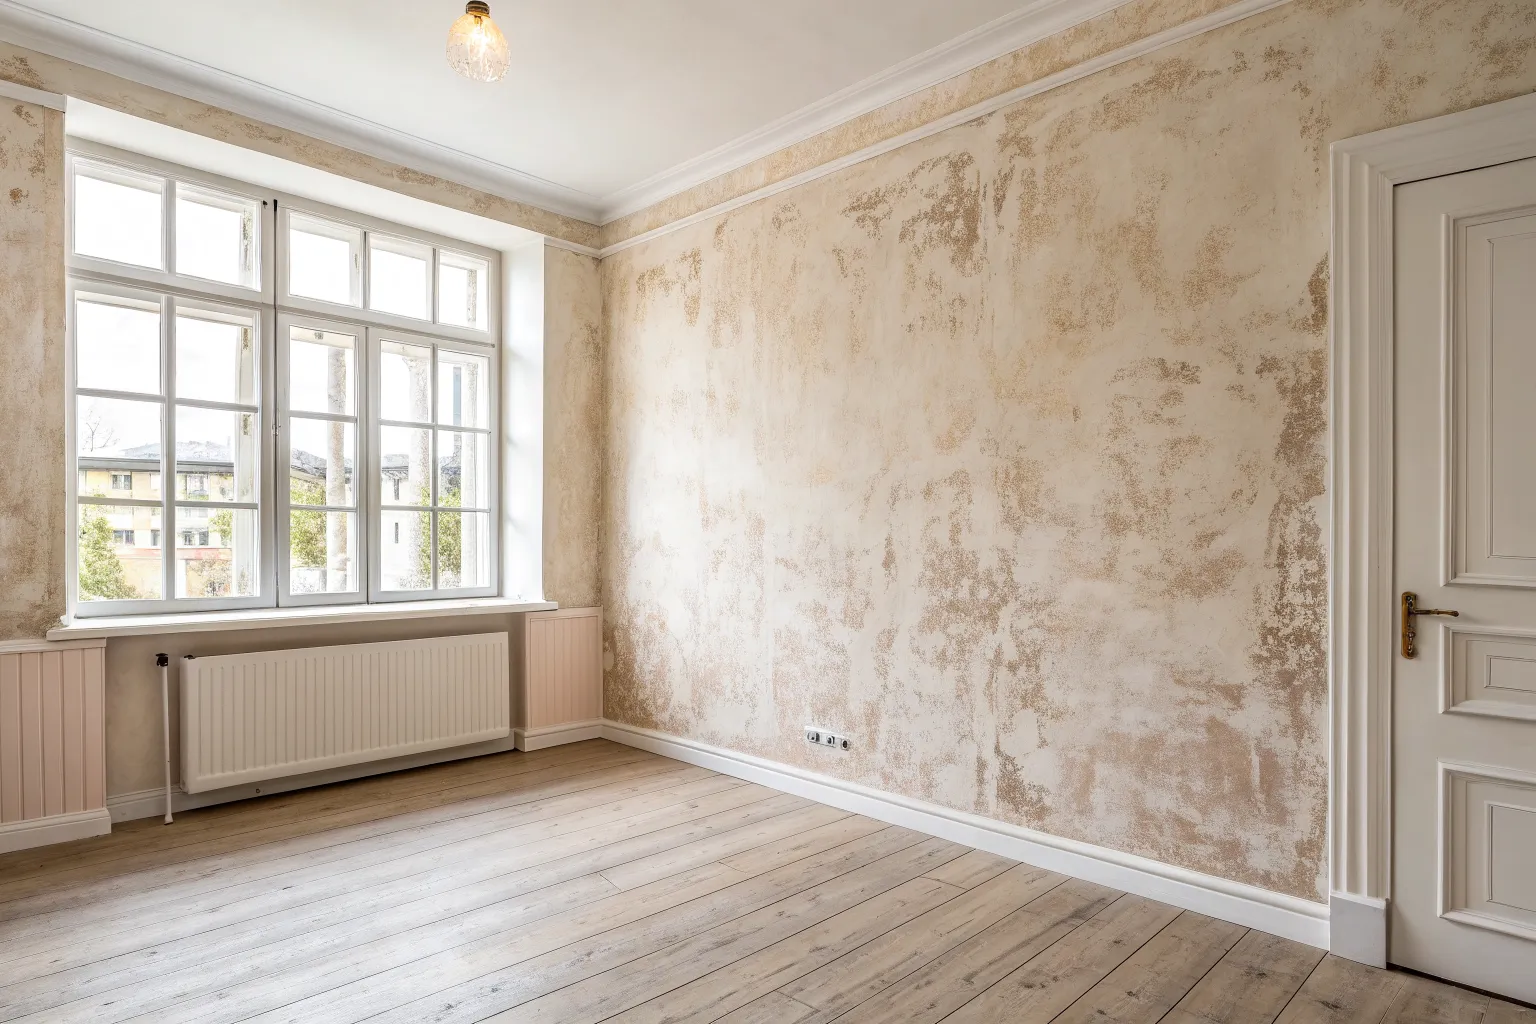
Limewash Look With Chalky Depth
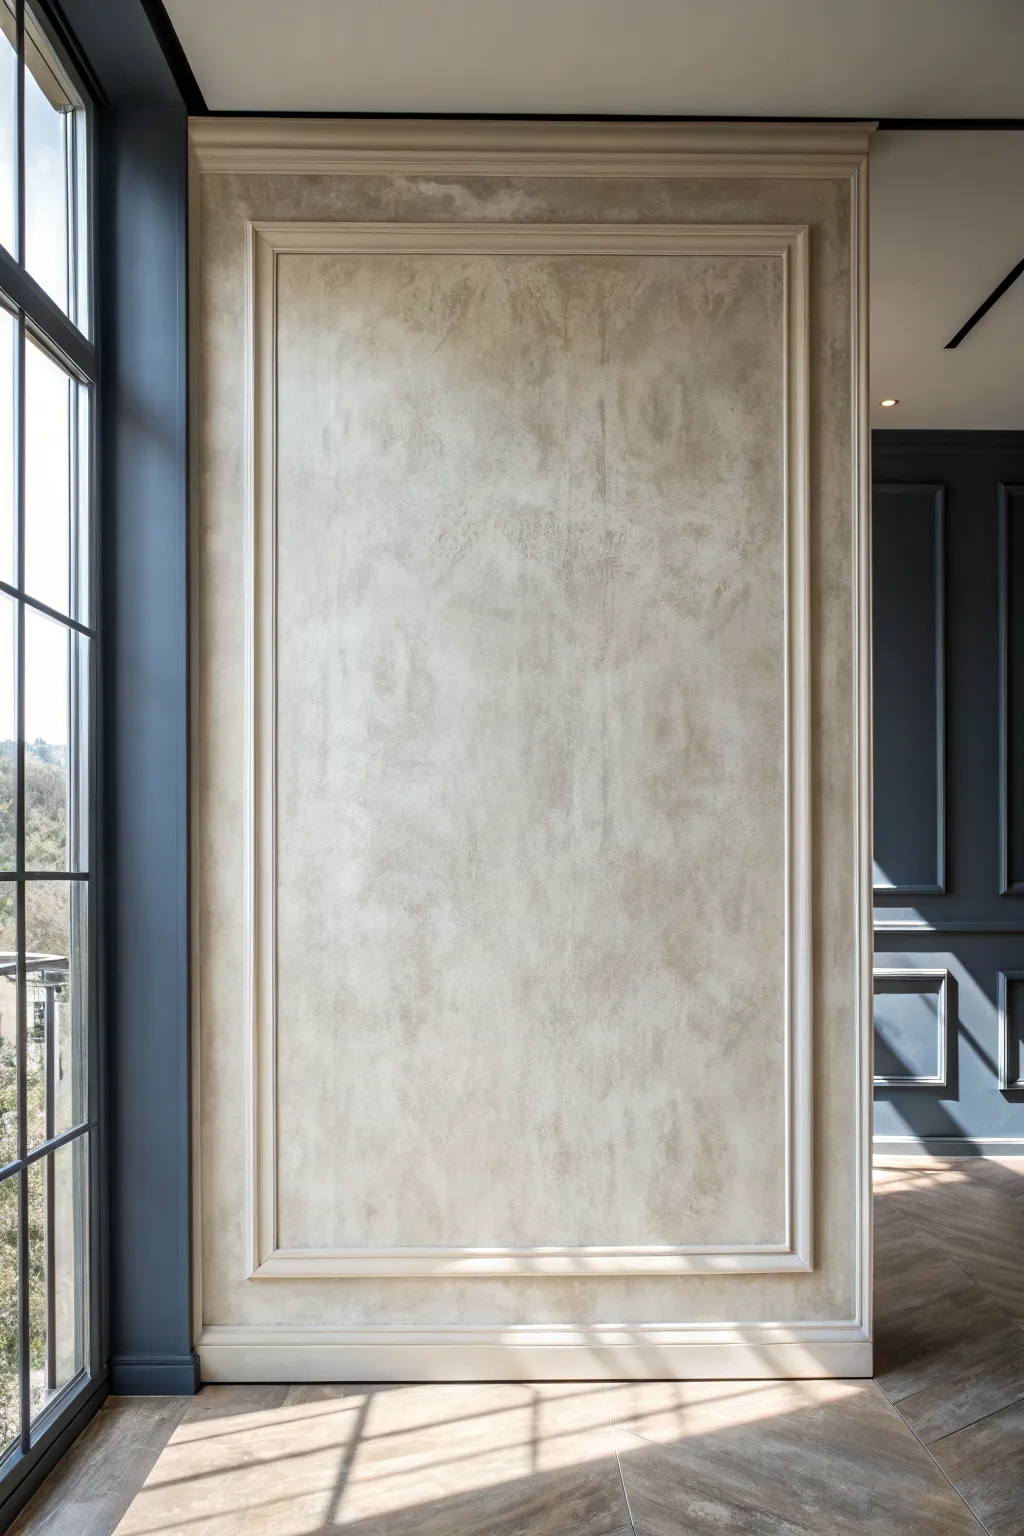
Achieve the romantic, old-world charm of authentic limewash using modern acrylic paints and glaze. This technique creates a soft, cloudy depth with subtle variations of beige and taupe, perfect for adding architectural interest to a framed wall panel.
Detailed Instructions
Materials
- High-quality interior latex paint (base coat, eggshell finish, warm beige)
- Latex paint (darker accent color, satin finish, taupe/greige)
- Faux finish glaze medium (clear)
- Large block brush or block staining brush (4-5 inch)
- Clean, lint-free rags
- Painter’s tape
- Drop cloths
- Mixing bucket or tray
- Water spray bottle (mister)
- Stir sticks
Step 1: Preparation and Base
-
Protect the perimeter:
Begin by taping off the surrounding molding or ceiling edges using high-quality painter’s tape. Since this technique involves vigorous brushing, ensure the tape is pressed down firmly to prevent bleed-through. -
Clear the area:
Lay down drop cloths to protect your beautiful floors, as the glaze mixture can sometimes splatter during application. -
Apply the base coat:
Roll on two coats of your base warm beige latex paint. This provides the foundational warmth and ensures the wall is fully sealed. Let this dry completely, preferably overnight.
Keep It Random
Avoid ‘soldiering,’ which is creating consistent rows or columns of texture. Vary your cloud sizes and directions constantly for a natural, organic look.
Step 2: Mixing and Application
-
Create the glaze mixture:
In your mixing bucket, combine 1 part of the darker taupe paint with 4 parts of the clear glaze medium. This translucency is crucial; do not skip the glaze, or the paint will be too opaque. -
Add a splash of water:
Stir in a very small amount of water to the mixture—just enough to make it flow smoothly off the stick like heavy cream. -
Load the block brush:
Dip just the tips of your large block brush into the glaze mixture. You want the brush damp with product, but not dripping wet. -
Start with X-strokes:
Working in a roughly 3×3 foot section, apply the glaze to the wall using large, random ‘X’ motions. Keep your wrist loose and avoid creating uniform patterns. -
Feather the edges:
As you near the edge of your working section, use less pressure to feather the paint out. This uneven edge will help blend the next section seamlessly.
Drying Too Fast?
If the glaze is becoming tacky before you can blend it, your room might be too warm. Add a retarder or ‘extender’ additive to your glaze mix to increase open time.
Step 3: Creating the Texture
-
Cross-hatch blending:
While the glaze is still wet, go back over the applied area with the same brush (without adding more paint). Use chaotic cross-hatch strokes to soften brush marks and blur the X shapes. -
Ragging for softness:
Take a clean, dry rag and bunch it up loosely in your hand. Gently tap or pat areas that look too heavy or where brush strokes are too defined. This lifts pigment and reveals the base coat. -
Move to the next section:
Load your brush again and move to an adjacent patch of wall, overlapping the wet edges of the previous section. Keep a wet edge at all times to avoid lap marks. -
Continue across the wall:
Repeat the application, blending, and ragging process until the entire panel is covered. Stand back occasionally to ensure the mottling is balanced.
Step 4: Refining the Depth
-
Assess the cloudiness:
Once the first layer of glaze is dry to the touch, step back and look for areas that feel too flat. -
Apply spot layers:
I like to go back into random areas with a second, very light layer of the same glaze mixture. Focus on the ‘negative space’ between the first clouds. -
Misting for movement:
Lightly mist these new spots with your water spray bottle immediately after application. This causes the pigment to separate slightly, mimicking the calcified look of real lime. -
Final dry blending:
Use a clean, dry block brush to swiftly whisk over the damp spots, softening them into the background layer. -
Remove tape:
Carefully score the edge of the painter’s tape with a utility knife before pulling it away to ensure you don’t peel off any dried glaze.
Step back and admire the soft, timeless atmosphere you have added to your room with just paint and patience


Faux Suede for Velvety Softness
Bring the luxurious texture and soft, variegated depth of suede to your walls with this sophisticated faux painting technique. The result is a warm, mottled finish that catches the light beautifully, adding an elegant, tactile feel to any room.
Step-by-Step Guide
Materials
- Latex satin base coat paint (color matched to suede tone)
- Faux suede paint (specialty texture paint)
- 3-inch angled sash brush
- 9-inch roller frame and microfiber roller cover
- Paint tray and liners
- Painter’s tape
- Drop cloths
- Lint-free rags
- Extension pole (optional for high walls)
Step 1: Preparation and Base Coat
-
Clear and Protect:
Remove furniture from the area and lay down drop cloths to protect your flooring. This technique can be a bit messy with the texture brushwork, so ensure full coverage. -
Tape Edges:
Apply painter’s tape to baseboards, ceiling edges, and adjacent walls. Press the edges of the tape down firmly with a putty knife or fingernail to prevent bleed-through. -
Clean Walls:
Wipe down the wall surface with a damp cloth to remove dust and grime. Let the wall dry completely before starting any painting to ensure adhesion. -
Cut In Base Coat:
Using your sash brush and the satin base coat paint, cut in a 3-inch border around the perimeter of the wall, corners, and around any outlets. -
Roll Base Coat:
Fill the large areas of the wall with the base coat using the roller. I like to work in ‘W’ patterns to ensure even coverage. -
Dry Time:
Allow the base coat to dry for at least 4 hours, or overnight if possible. This solid background color ensures no white wall shows through the textured layers.
Fixing “Heavy” Spots
If you apply too much paint in one spot and lose the texture, dab it with a lint-free rag while wet to lift excess material, then lightly re-brush with X-strokes.
Step 2: Applying the Suede Texture
-
Cut In Suede Paint:
Start with the specialty suede paint. Cut in a small section (about 3 feet square) along the edge. Do not stick to straight lines; keep the wet edge irregular. -
Apply First Texture Layer:
Using a roller, apply the suede paint to that 3-foot section. Don’t aim for perfect opacity; just get the material onto the wall surface quickly. -
Create X-strokes:
Immediately while the paint is wet, use a clean 3-inch brush to work over the rolled area. Use a crisscross ‘X’ pattern, brushing randomly in all directions. -
Blend the Texture:
Continue the ‘X’ strokes until the roller marks disappear and you see a mottled, cloudy texture emerging. Vary the size and pressure of your strokes. -
Move to Next Section:
Roll the next adjacent 3-foot section. Overlap slightly with the wet edge of your previous section to avoid visible seams or ‘banding’ lines. -
Repeat Crisscross Technique:
Brush out the new section with the ‘X’ motion, blending aggressively back into the previous section so the transition is seamless. -
Finish First Coat:
Continue this roll-and-brush method across the entire wall. Let this first texture coat dry for at least 4 to 6 hours.
Pro Tip: Stir Often
Suede paints contain micro-beads or texture granules that settle quickly. Stir your can every 10–15 minutes to ensure the texture stays consistent across the wall.
Step 3: Creating Depth and Detail
-
Apply Second Texturing Coat:
The magic happens in the second coat. Working in slightly smaller 2-foot patches, brush the suede paint directly onto the wall using the ‘X’ pattern (skip the roller this time). -
Layering Stroke Directions:
Apply this coat sparingly. Focus on creating random overlap. The goal is to build up the ‘grain’ of the suede, not to cover the wall in solid color. -
Visual Check:
Step back frequently to look for repetitive patterns. If you spot a distinct grid or line, go back and break it up with a few random curved strokes. -
Final Buffing (Optional):
Once the paint is tacky but almost dry, lightly drag a dry brush over the surface to soften any sharp ridges, enhancing the velvety illusion. -
Clean Up:
Remove the painter’s tape carefully while the paint is still slightly pliable to avoid pulling up any dried film.
Step back and admire the sophisticated, cozy atmosphere your new suede-finish wall brings to the room.
BRUSH GUIDE
The Right Brush for Every Stroke
From clean lines to bold texture — master brush choice, stroke control, and essential techniques.
Explore the Full Guide
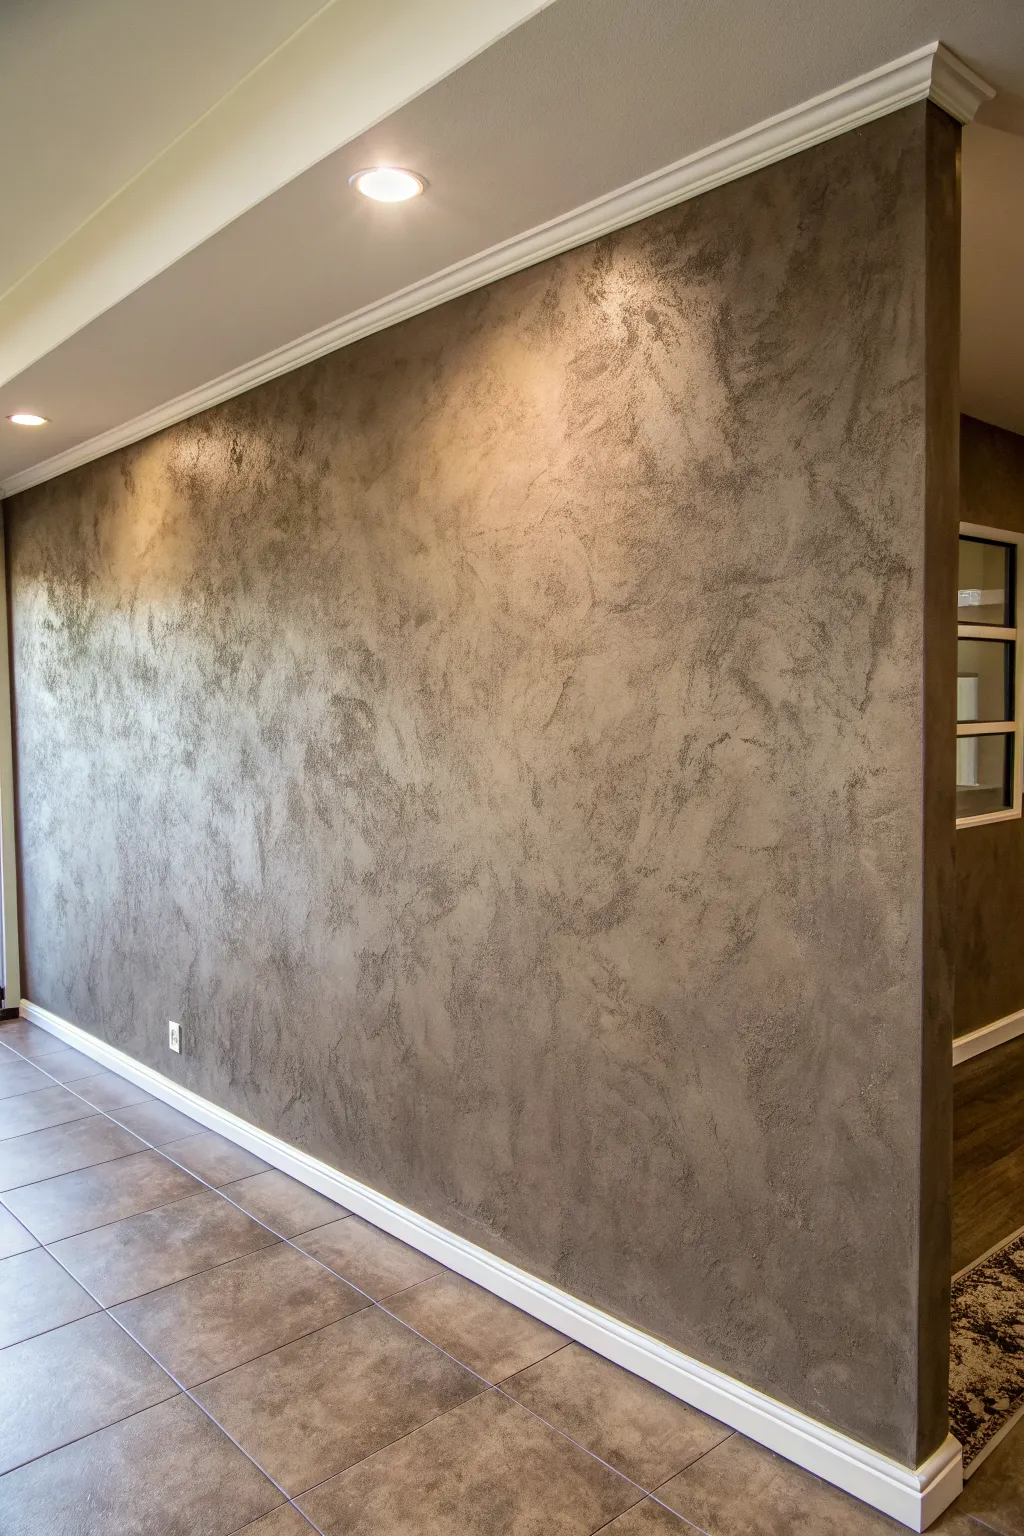
Faux Concrete for Industrial Calm
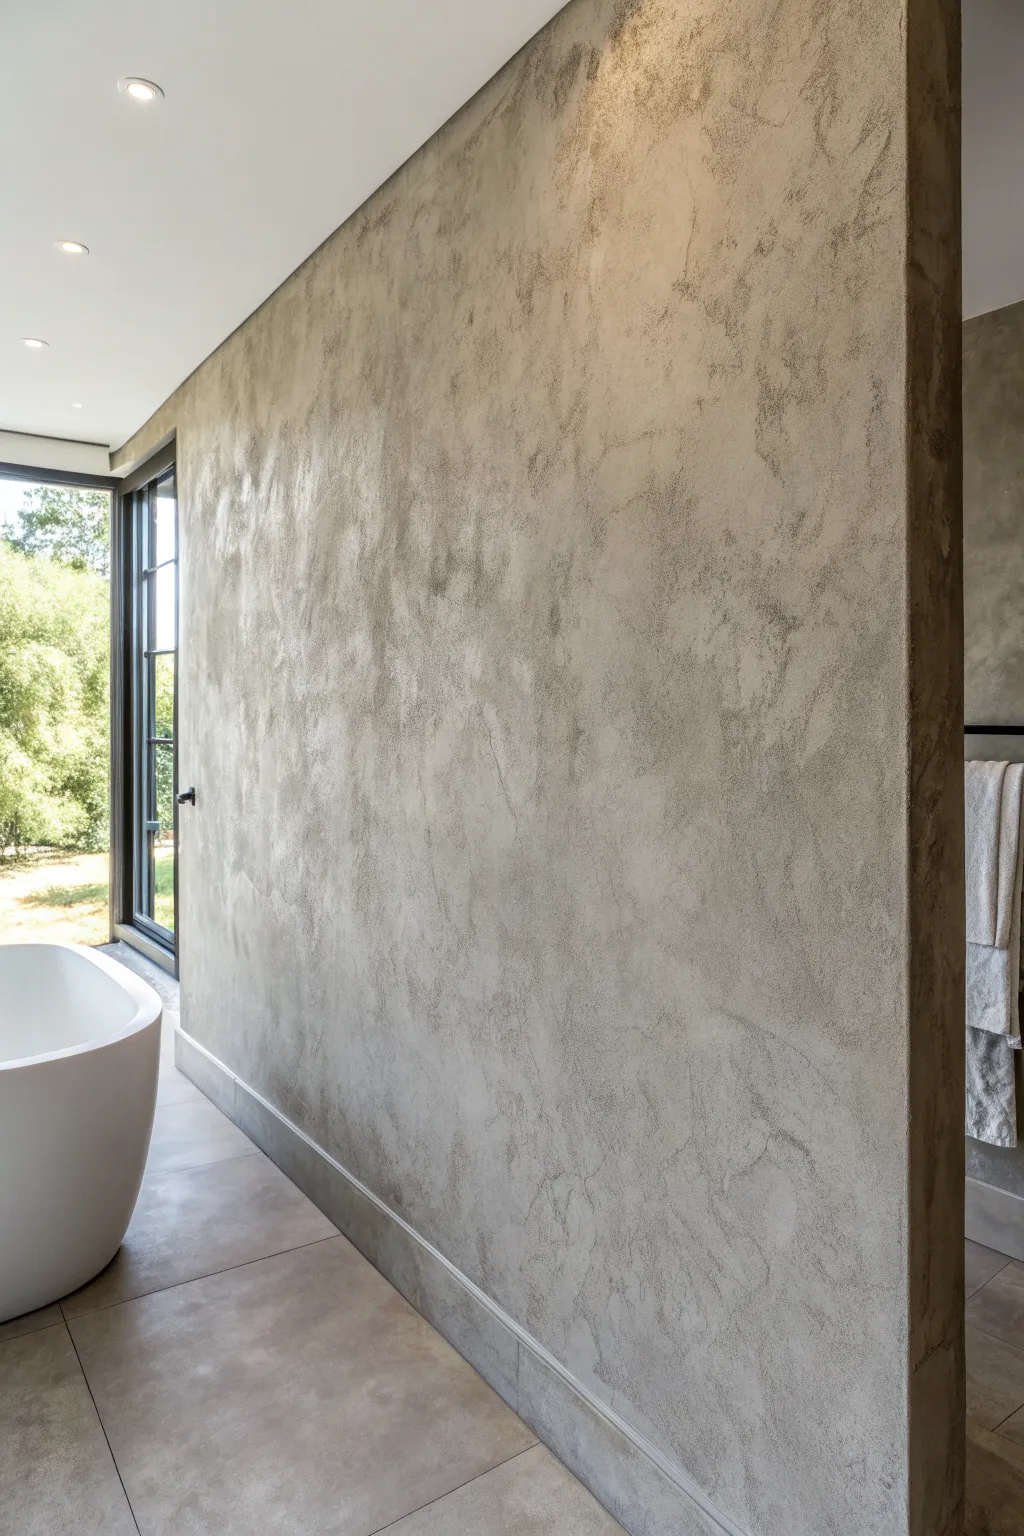
Achieve the sophisticated, raw aesthetic of poured concrete without the structural overhaul. This faux finish uses lime-based plaster and careful troweling to create soft, cloudy movement and a tactile, suede-like surface perfect for a modern sanctuary.
How-To Guide
Materials
- High-quality primer (designed for plaster adhesion)
- Venetian plaster or lime wash paint (in ‘Greige’ or warm concrete gray)
- Darker pigment or glaze (optional, for aging effect)
- Stainless steel trowel (Japanese trowel recommended)
- Hawk (to hold plaster)
- Paint roller and tray
- Drop cloths and painter’s tape
- Fine-grit sandpaper (400 to 600 grit)
- Sealer or protective wax (matte finish)
Step 1: Preparation & Base
-
Protect the perimeter:
Begin by taping off all adjacent surfaces, especially the ceiling line, floor trim, and any window frames like the dark metal ones in the inspiration image. Lay down drop cloths to catch plaster splatter. -
Assess the wall surface:
Ensure your wall is completely smooth. Fill any nail holes or cracks with spackle and sand them flush. The faux concrete look relies on the texture you add, not existing imperfections. -
Prime the surface:
Apply a coat of high-quality primer using a roller. If your plaster manufacturer suggests a specific grit primer (often called quartz primer) to help the material adhere, use that specifically. Let it dry completely.
Keep It Clean
Clean your trowel blade with a damp rag every 5-10 minutes. Dried bits of plaster on the edge will drag through your fresh wet layer, creating deep, unwanted scratches.
Step 2: First Plaster Application
-
Load the hawk:
Scoop a manageable amount of your lime-based plaster onto your hawk. You want the consistency to be like thick cake frosting. -
Apply the base layer:
Using your steel trowel, apply the plaster to the wall in thin, sweeping arcs. Hold the trowel at a low angle (about 15 to 20 degrees) to slide the material on smoothly. -
Maintain a thin coverage:
Don’t worry about perfect opacity yet. The goal here is getting a consistent ‘tooth’ on the wall. Cover 100% of the primed surface, but keep the layer thin to prevent cracking. -
Knock down ridges:
As you go, lightly drag the clean trowel over any high ridges or clumps to flatten them out. Let this first coat dry for at least 4 to 6 hours, or until it looks matte and lighter in color.
Add Industrial Grit
For a grittier, aged concrete look, mix a pinch of fine sand or mica flakes into your second coat of plaster. It adds sparkle and authentic tactile roughness.
Step 3: Creating Texture & Depth
-
Apply the second coat:
This is where the magic happens. Apply the second layer of plaster using shorter, more random strokes. Vary the direction of your wrist—left, right, up, down—to create that organic ‘cloudy’ look. -
Leave negative space:
Unlike the first coat, you don’t need to be perfectly uniform. Applying slightly thicker patches next to thinner areas creates the subtle high-low variation seen in real concrete. -
Skip-trowel technique:
I like to occasionally lift the trowel slightly mid-stroke or press a bit harder on the edge to create ‘chatter’ marks or pores, mimicking the imperfections of industrial cement. -
Compress the material:
As the plaster begins to set (it will lose its wet sheen but still feel cool/damp), run your clean trowel over the surface with firm pressure. This burnishes the plaster, compacting it and bringing out the natural variations in tone.
Step 4: Refining & Finishing
-
Sand for softness:
Once fully dry, lightly sand the entire wall with fine-grit sandpaper (400-600). This removes any sharp burrs and gives the wall that velvety, touchable quality. -
Remove dust:
Wipe the wall down thoroughly with a slightly damp microfiber cloth or a tack cloth. Dust residue will interfere with the sealer. -
Optional patina wash:
If you want more depth, mix a tiny amount of darker gray glaze with water (1 part glaze to 4 parts water). Sponge it lightly into the recessed areas and immediately rag it off to create shadowy depth. -
Seal the surface:
Using a fresh trowel or a lint-free rag, apply a matte sealer or wax. This is crucial for a bathroom setting as it protects the plaster from humidity and splashes. -
Final buffing:
After the wax hazes over, buff it gently with a soft cotton cloth. This won’t make it high-gloss, but it will deepen the color and provide a subtle, stone-like luster.
Step back and admire how the light plays across the subtle ridges of your new sanctuary wall
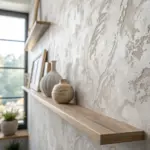
Faux Grasscloth Crosshatch Texture
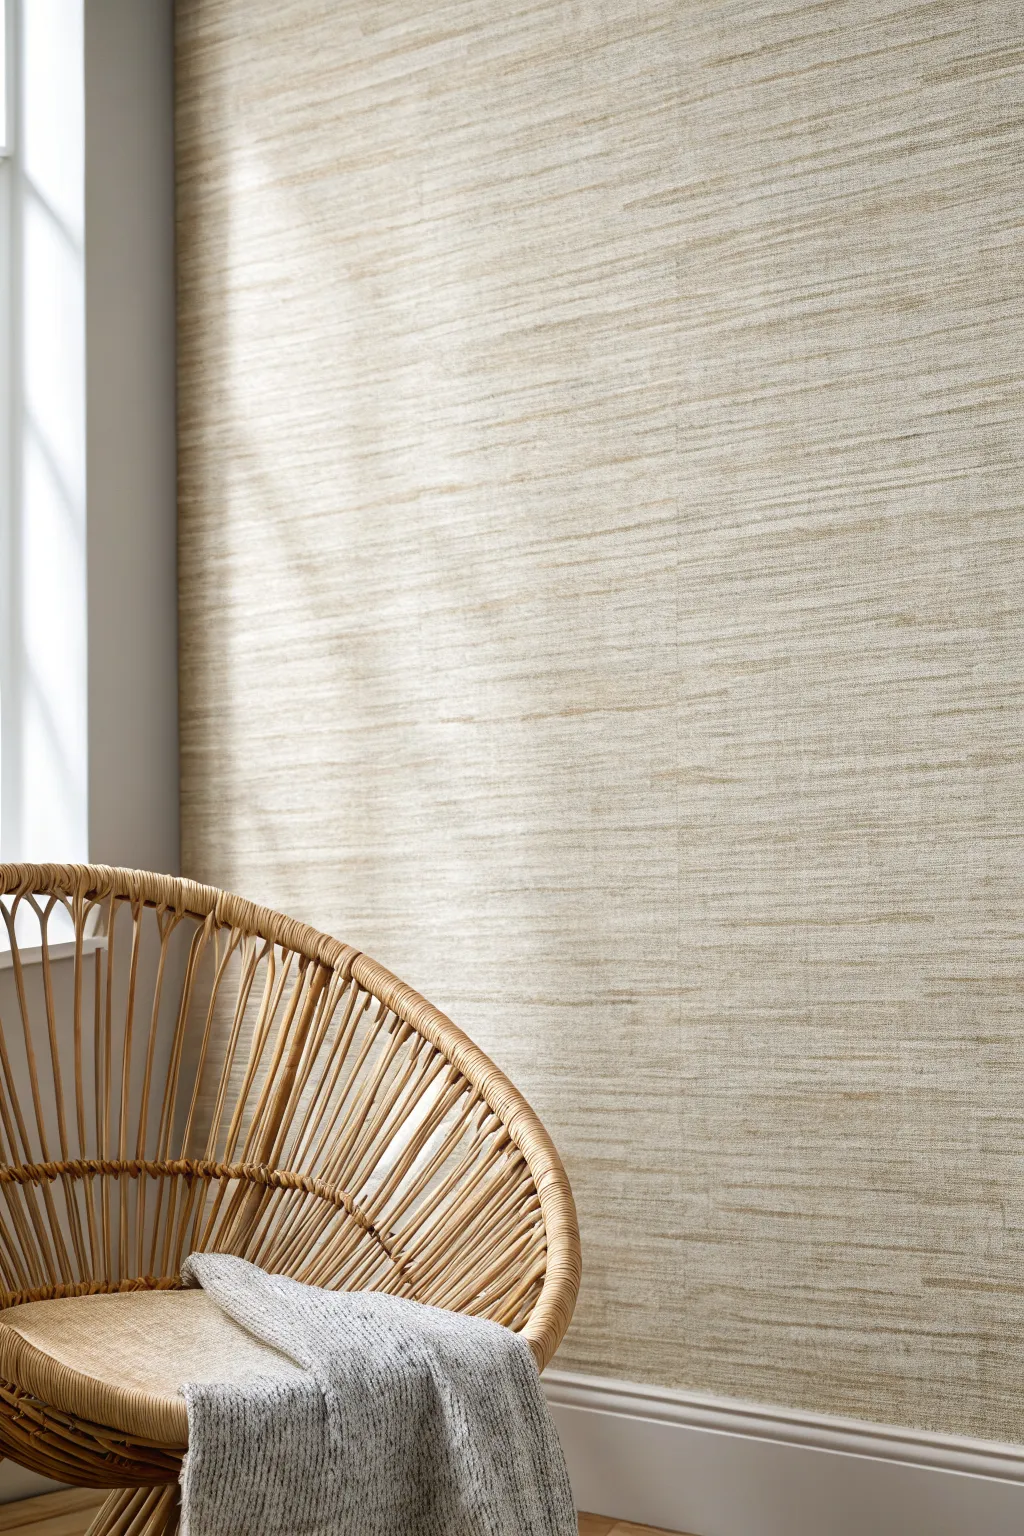
Achieve the sophisticated, woven appearance of natural grasscloth wallpaper using nothing but paint and simple tools. This technique layers subtle glazes and directional brushwork to mimic organic fibers, adding incredible warmth and texture to your walls.
Detailed Instructions
Materials
- Latex satin base paint (creamy beige or off-white)
- Latex satin top coat paint (tan or light khaki)
- Clear acrylic glazing liquid
- Painter’s tape
- Drop cloths
- Paint tray and liners
- 4-inch paint brush (natural bristle preferred)
- Weenie roller (mini roller) and handle
- Clean, lint-free rags
- Smoothing brush or wallpaper brush (optional)
- Wide-toothed texture comb or stiff brush
Step 1: Preparation & Base Coat
-
Prepare the workspace:
Begin by clearing the room and covering the floors with drop cloths. Use painter’s tape to mask off baseboards, trim, and ceilings to ensure crisp edges. -
Roll the base coat:
Apply your satin base paint color (the lighter, creamy beige tone) to the entire wall using a standard roller. Aim for full, opaque coverage. -
Dry completely:
Allow the base coat to dry for at least 4 to 6 hours, or overnight if possible. A fully cured base is crucial so the glaze doesn’t lift it later.
Uneven Stripes?
If your drag lines look too uniform or ‘perfect,’ wiggle the brush very slightly or start and stop your stroke mid-wall to mimic natural fiber breaks.
Step 2: Creating the Glaze Mixture
-
Mix the glaze:
In a paint bucket or tray liner, combine 1 part of your darker tan paint with 4 parts clear glazing liquid. I like to add a splash of water to extend the ‘open time’ of the glaze. -
Test the transparency:
Brush a small amount of the mixture onto a piece of scrap cardboard or an inconspicuous corner. The glaze should be translucent, allowing the base color to glow through slightly.
Fabric Effect
For a linen look instead of grasscloth, use a fine-bristle softening brush instead of a stiff one. This softens the lines for a delicate fabric appearance.
Step 3: Applying the Horizontal Weave
-
Work in small sections:
Start at a top corner of the wall. Use the mini roller or a brush to apply the glaze mixture to a vertical section about 2–3 feet wide from ceiling to floor. -
Create horizontal striations:
While the glaze is wet, drag a wide, stiff-bristled brush or a texture comb horizontally across the section. Keep your hand steady to create long, distinct lines. -
Wipe the brush:
Periodically wipe excess glaze off your dragging tool onto a lint-free rag. This prevents buildup and keeps the lines sharp. -
Continue across the wall:
Move to the next 2-foot section, repeating the application and horizontal dragging. Slightly overlap the edges of the previous section to blend the lines seamlessly. -
Dry the first layer:
Let this horizontal layer dry completely. It usually takes about 2–4 hours depending on humidity, but it must be dry to the touch before proceeding.
Step 4: Adding the Vertical Weave
-
Apply second glaze layer:
Once the horizontal layer is dry, roll a fresh, thin coat of the same glaze mixture over a workable section of the wall. -
Drag vertically:
Use your stiff brush or comb to drag vertically through the wet glaze from ceiling to floor. This creates the crosshatch ‘woven’ effect. -
Vary the pressure:
For a natural look, vary your pressure slightly as you drag. Real grasscloth has imperfections, so minor inconsistencies add realism. -
Check for pooling:
Watch out for glaze pooling at the bottom near the baseboards. Use a dry brush to gently feather out any drips before they set. -
Complete the room:
Continue this process until the entire wall is covered in the vertical texture. Step back occasionally to ensure the density of the weave looks consistent. -
Final dry:
Allow the finished faux finish to cure for at least 24 hours before removing tape or moving furniture back against the wall.
Now you have a timeless, textured wall that brings organic warmth to your space without the hassle of pasting paper.


Have a question or want to share your own experience? I'd love to hear from you in the comments below!