If you’re in the mood to draw something festive without taking it too seriously, funny Christmas drawings are the best kind of creative chaos. I love how a tiny facial expression or one silly twist can turn a classic Christmas icon into something that makes you giggle while you’re sketching.
Santa Stuck in the Chimney
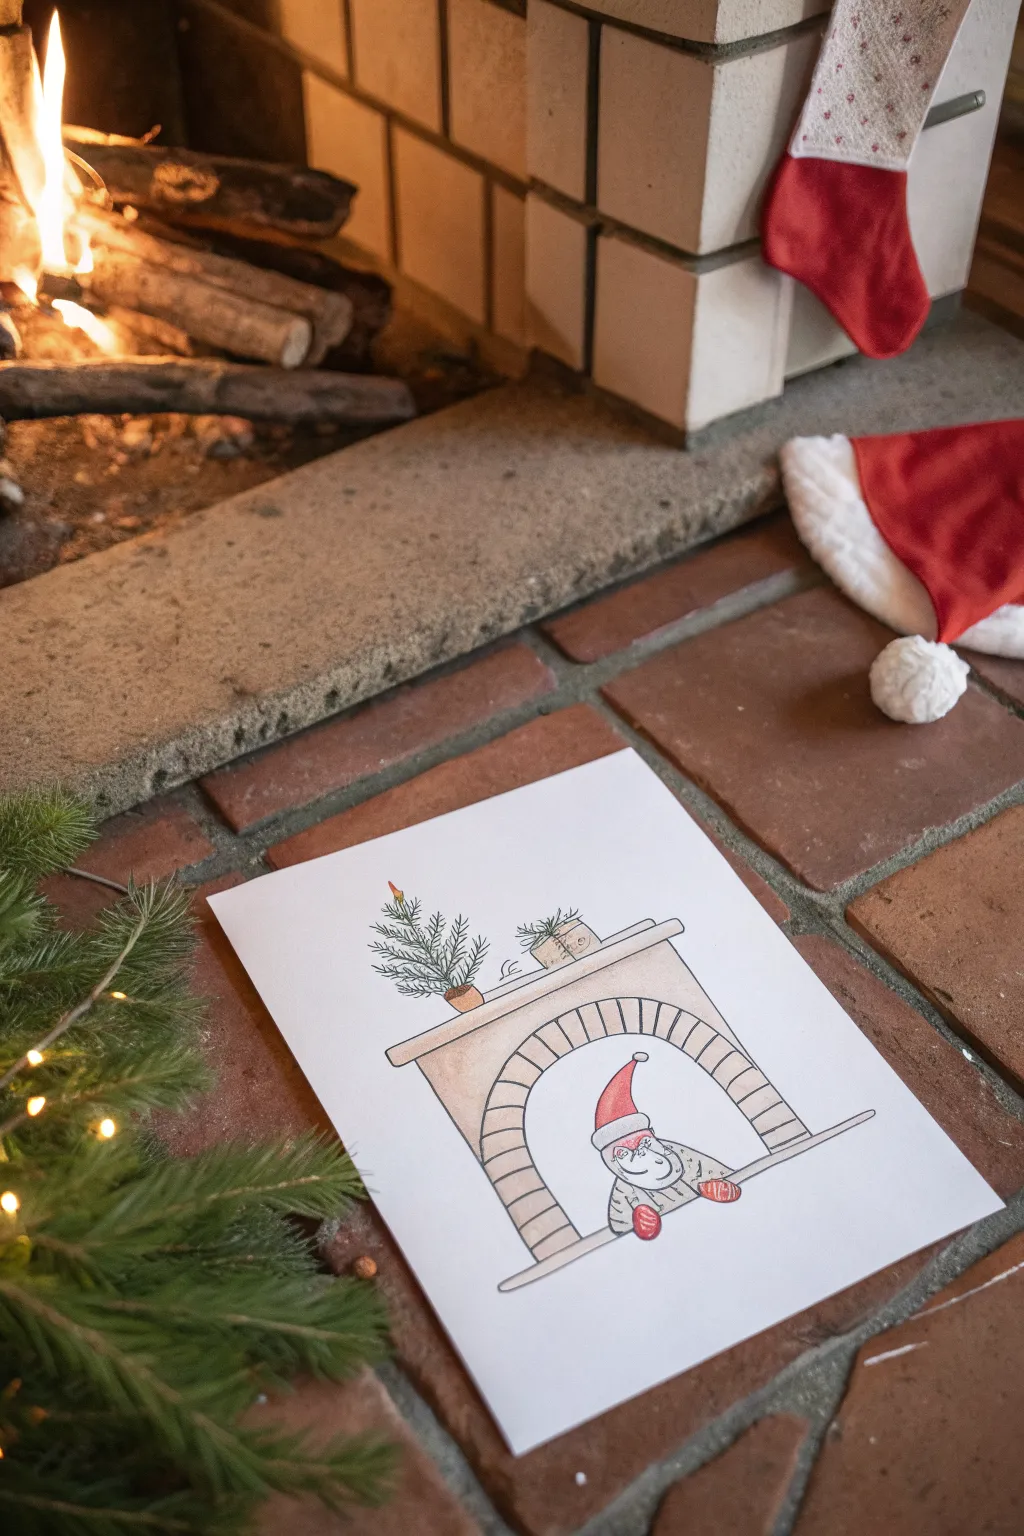
Capture the humorous side of the holidays with this playful illustration of Santa peeking out from an empty fireplace. Using simple lines and soft coloring, this charming drawing creates a clean, whimsical greeting card or decoration.
Detailed Instructions
Materials
- High-quality white drawing paper or cardstock (A4 or letter size)
- Fine-point black ink pen (archival quality preferred)
- Pencil (HB or H for sketching)
- Eraser
- Colored pencils or watercolor markers (beige/tan, red, grey, green, brown)
- Ruler or straight edge
Step 1: Sketching the Fireplace Structure
-
Set the foundation:
Begin by lightly sketching a horizontal rectangle near the bottom center of your paper to serve as the hearthstone or base of the fireplace. Keep your pencil pressure very light so these lines are easy to erase later. -
Draw the mantel:
Parallel to your base, draw a longer, slightly wider horizontal rectangle further up the page for the mantelpiece. Leave plenty of space between the base and mantel for the firebox opening. -
Connect the sides:
Use your ruler to draw vertical lines connecting the outer edges of the mantel to the base, creating the main body of the fireplace. -
Create the arch:
Sketch a large, centered archway inside the main body. This will be the opening where our character appears. Draw a second, slightly smaller arch inside the first one to create a defined border for the brickwork. -
Add the brick details:
In the space between your two drawn arches, sketch small radial lines to create the look of individual bricks or stones forming the archway.
Smudge Prevention
If your black ink smears when you erase, switch to a pigment liner or Micron pen, which dry instantly. Alternatively, wait at least 30 minutes before erasing.
Step 2: Adding the Character
-
Position Santa:
Inside the arch opening, sketch a rounded shape for Santa’s body emerging from the floor. He should look like he’s just popping up. -
Detail the face:
Draw an oval for the face, adding two small eyes, a nose, and a wide, friendly smile. Sketch a classic Santa hat flopping over onto his head. -
Give him hands:
Since he is pulling himself up, draw two mitten-clad hands resting on the bottom ledge of the fireplace opening.
Add Dimension
Use a darker shade of tan to add a small shadow line directly under the mantel shelf and inside the archway to give the fireplace 3D depth.
Step 3: Decorating the Mantel
-
Plant a tree:
On the left side of the mantel, sketch a small potted pine tree. Use jagged, energetic lines to suggest pine needles and texture. -
Add a gift:
To the right of the tree, draw a small cube shape to represent a wrapped gift. Add a simple bow on top. -
Include the candle:
Draw a tiny, thin candle perched on the very top branch of your pine tree.
Step 4: Inking and Coloring
-
Ink the outlines:
Trace over your pencil lines with the fine-point black pen. Use a steady hand, but don’t worry if lines aren’t perfectly straight—a little wobble adds character. -
Clean up:
Once the ink is completely dry, use your eraser to gently remove all the underlying pencil sketches. -
Color the structure:
Using a beige or light tan colored pencil, lightly shade the body of the fireplace. I like to keep the shading uneven to mimic the texture of plaster or stone. -
Define the bricks:
Color the individual bricks in the arch with a slightly darker tan or grey to make them stand out from the rest of the fireplace. -
Warm up the scene:
Use red for Santa’s hat and mittens. Press harder on the mittens to make them pop, and leave the trim of the hat white. -
Shade the character:
Lightly color Santa’s coat or sweater with a soft grey or patterned texture. -
Finish the greenery:
Color the pine tree on the mantel with a natural green, and add a small pop of orange or yellow for the candle flame.
Now you have a whimsical holiday drawing ready to frame or give to a friend
Reindeer Tangled in Christmas Lights
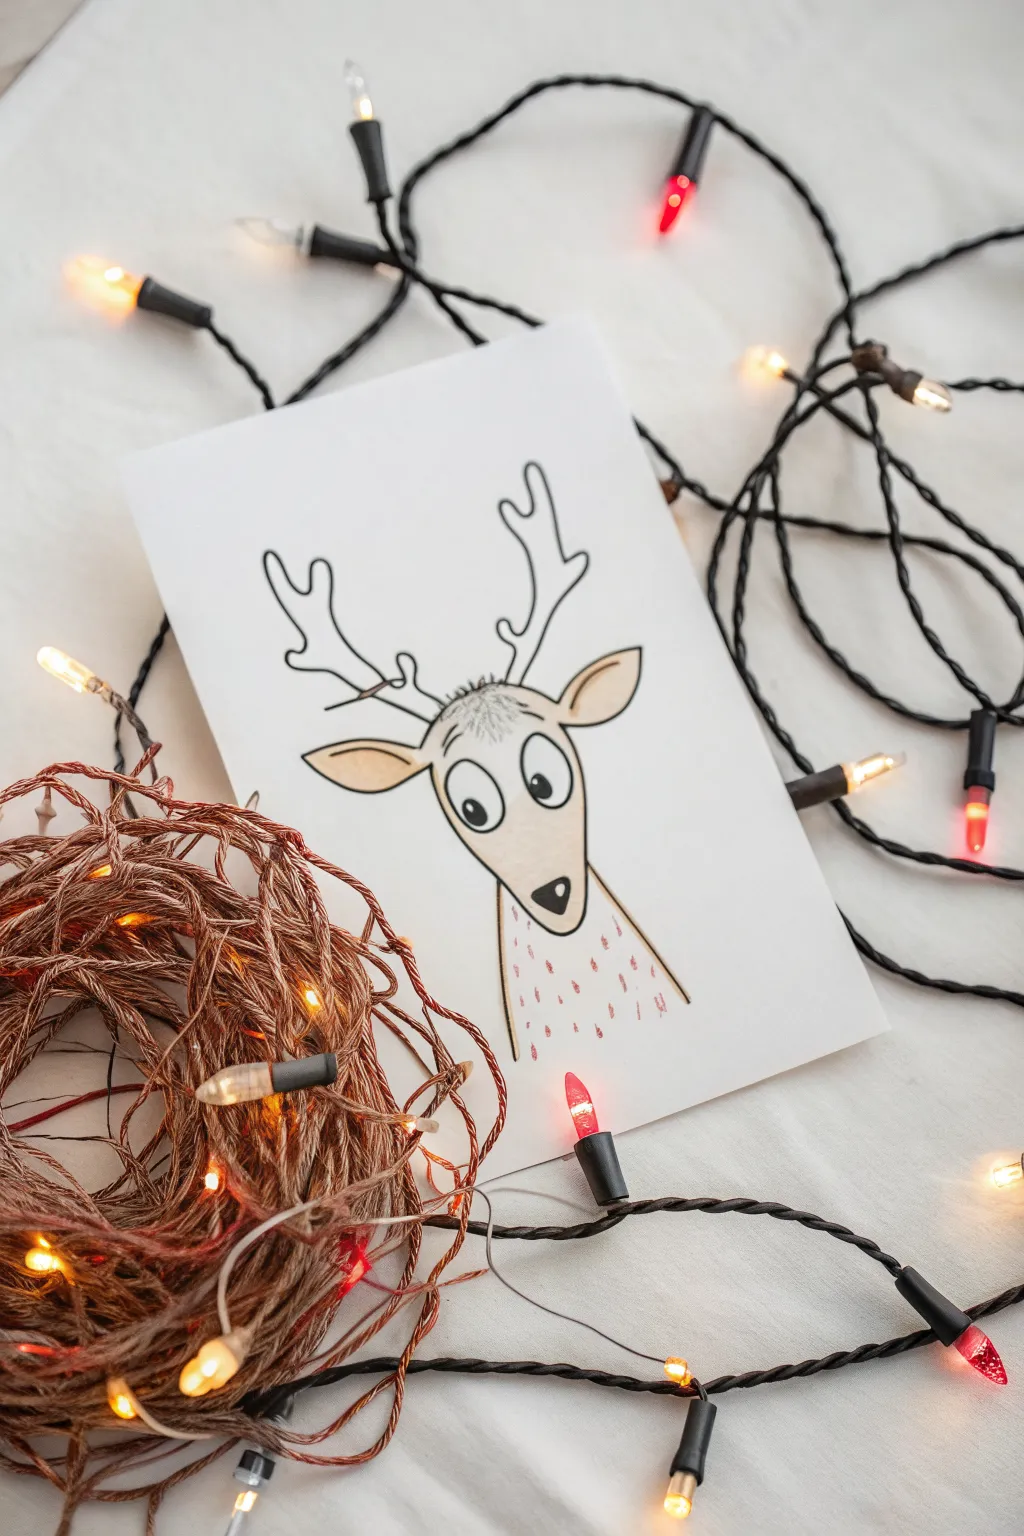
Capture the holidays with this charmingly simple card featuring a surprised-looking reindeer. Its minimalist ink lines and soft touches of color make for a delightful greeting card illustration that anyone can master.
Step-by-Step Tutorial
Materials
- White cardstock or heavy drawing paper (5×7 inches)
- Black fine liner pen (01 or 03 nib)
- Black brush pen or slightly thicker marker (05)
- Light brown/tan watercolor pencil or marker
- Pink colored pencil or fine marker
- Pencil (HB or 2B)
- Eraser
Step 1: Sketching the Basics
-
Map the head shape:
Start by lightly sketching a simple, elongated U-shape for the reindeer’s face. Keep the bottom slightly narrower than the top to create a gentle snout. -
Position the eyes:
Drawing fairly large ovals for the eyes is key to the expression. Place them near the center of the head, close together but not touching, ensuring the left one is slightly higher to give a quirky look. -
Add the ears:
Sketch two leaf-like shapes extending horizontally from the sides of the head, just below the top edge of the skull line. -
Draft the antlers:
Draw wavy, branch-like lines rising from the top of the head. Keep the shapes organic and deliberately asymmetrical to maintain the whimsical style. -
Define the neck:
Extend two lines downward from the jawline to form a neck that widens slightly at the bottom, creating a robust base for the portrait.
Step 2: Inking the Outline
-
Ink the main face:
Using your fine liner, trace over your pencil lines for the face and neck. Use a smooth, continuous motion to keep the lines clean. -
Detail the fur:
At the top of the head between the antlers, draw small, jagged zig-zag lines to suggest a tuft of messy fur. -
Outline the antlers and ears:
Carefully ink the antlers and ear shapes. For the inner ear, draw a smaller curve inside the main ear outline to create depth. -
Draw the pupils:
Inside the eye ovals, draw small black circles for pupils. Place them slightly off-center or looking in different directions to heighten the ‘startled’ expression. -
Add the nose:
Draw a rounded triangle or heart shape at the bottom of the face for the nose. Fill it in solid black, leaving a tiny white speck for a highlight if you wish. -
Erase pencil marks:
Wait for the ink to dry completely to avoid smudging, then gently erase all visible pencil guidelines.
Uneven Ink Lines?
Don’t worry about wobbles! Retrace the line once more to thicken it slightly. This deliberate variation adds to the hand-drawn charm.
Step 3: Adding Color & Texture
-
Color the face base:
Using a light brown or tan watercolor pencil or marker, gently fill in the main face area. Keep the pressure light to maintain a pale, soft tone. -
Shade the ears:
Apply the same tan color to the inside of the ears, pressing just a little harder near the base to suggest shadow. -
Whiten the eyes:
Leave the eye ovals strictly white. If you accidentally colored into them, you can use a white gel pen to reclaim the brightness. -
Create neck texture:
Instead of coloring the neck solid, use your pink fine marker or pencil to make small vertical dashes and dots. This suggests fur texture without overpowering the drawing. -
Detail the forehead:
Add a few faint texture lines or small dots on the forehead area with your fine liner to add character to the fur.
Make It Festive
Draw a tangled string of Christmas lights wrapped around the antlers using bright marker colors to match the article theme.
Your quirky reindeer is now ready to spread some holiday cheer


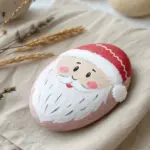
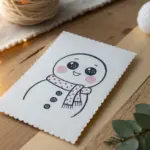
Snowman With a Totally Wrong Build
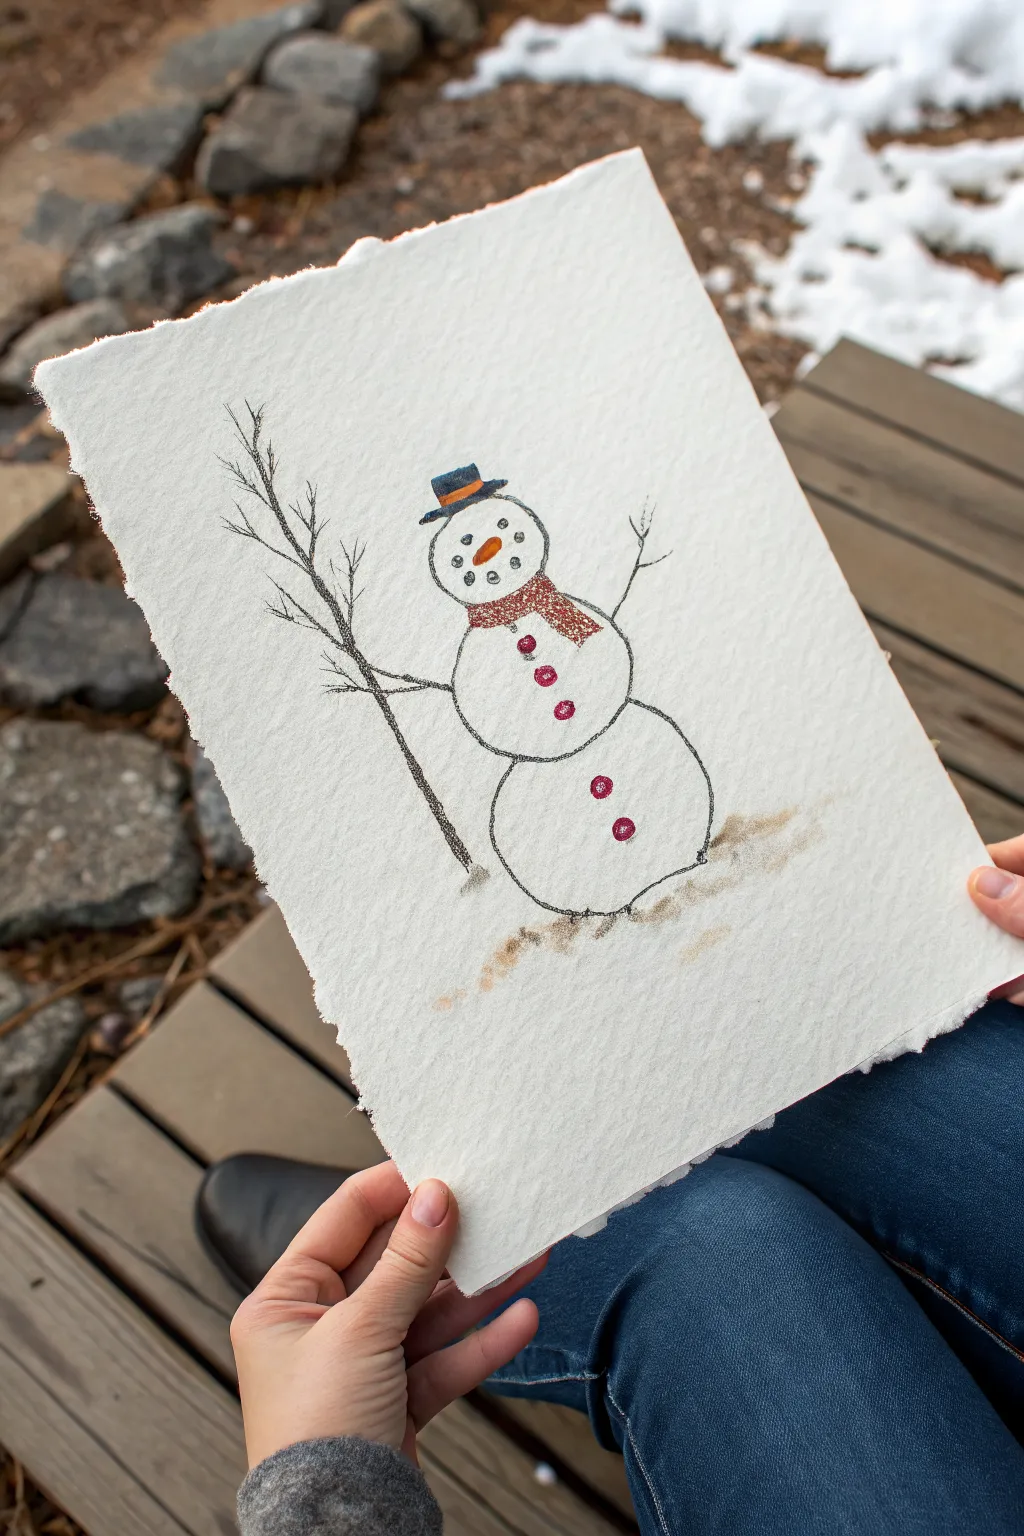
Capture the charm of winter with this delightful sketch of a snowman holding a tall branch staff. Using textured paper and simple drawing materials, you’ll create a piece that feels both rustic and full of personality.
Step-by-Step Guide
Materials
- Heavyweight textured paper (cold press or handmade cotton paper with deckled edges)
- Charcoal pencil or soft graphite pencil (dark grey/black)
- Colored pencils (orange, red/burgundy, blue, brown)
- Kneaded eraser
- Workable fixative spray (optional)
Step 1: Planning the Structure
-
Paper Selection:
Choose a sheet of heavy, textured paper. The rough surface is crucial for achieving that granular, snowy look in the lines. If your paper doesn’t have deckled edges, you can gently tear the edges against a ruler to create that organic, torn finish. -
Light Sketching:
Using very light pressure with your charcoal or graphite pencil, outline the three main snowball circles. Make the bottom one the largest and slightly flattened, the middle one medium-sized, and the head the smallest. -
refine the Shape:
Go back over your circles with a slightly looser, sketchier hand. Allow the lines to be imperfect and a bit wobbly to mimic the uneven surface of packed snow.
Step 2: Adding Character Details
-
Drawing the Hat:
Perch a small top hat on the snowman’s head. Draw a narrow brim and a short, cylindrical top using your dark pencil. -
The Carrot Nose:
Switch to your orange colored pencil. Draw a distinct carrot shape pointing to the left. Press firmly to get a nice pop of color against the white paper. -
Coal Features:
With the dark charcoal pencil, dab in small, irregular circles for the eyes and the mouth. I like to vary the size slightly so they look like real lumps of coal. -
The Scarf Outline:
Sketch the scarf draped around the neck area. Draw one section wrapping around, and let a tail hang down over the right side of the chest. -
Coloring the Accessories:
Fill in the scarf with a deep red or burgundy colored pencil. Use a scribbling motion to let the paper’s tooth show through, giving it a woven texture. Add a stripe of blue or orange to the hat band.
Smudge Alert
If you are right-handed, work from left to right (and vice versa) to avoid dragging your hand through the charcoal lines and muddying the white paper.
Step 3: The Branch and Finishing Touches
-
Button Details:
Draw three round buttons down the front of the snowman—two on the middle section and one on the bottom—using the same red or burgundy tone as the scarf. -
Right Arm:
On the right side, draw a simple, thin twig arm reaching upward with a couple of small forked fingers. -
Left Arm and Staff:
For the left arm, draw a line extending outward to hold a large branch. Draw a tall, vertical branch that acts as a walking stick or staff. Make this line darker and more jagged to resemble bark. -
Branch Details:
Add smaller twigs branching off the main staff, reaching upwards. Vary the thickness of these lines to make the wood look natural. -
Grounding the Figure:
Using a light brown or tan pencil, lightly shade the area directly under the snowman. Use horizontal strokes to suggest the ground and cast a soft shadow. -
Defining the Base:
Add a few darker specks of brown or charcoal near the base of the bottom snowball to show where the snow meets the dirt. -
Final Outline:
Review your main charcoal outlines. If any have faded, re-trace them with firm pressure to ensure the snowman stands out clearly. -
Protecting the Work:
If you used soft charcoal that smudges easily, give the drawing a light mist of workable fixative in a well-ventilated area.
Pro Tip: Paper Texture
Don’t fight the paper’s grain. Let the pencil skip over the ‘valleys’ of the texture. This naturally creates the look of porous snow without extra shading.
Now you have a charming winter character ready to display or gift to a friend


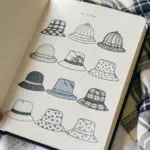
Elf Gift-Wrapping Disaster

Capture the playful spirit of the holidays with this charming sketch of a patterned elf hat. Using vibrant markers and fine liners, you’ll create a festive illustration that pops right off the page.
Step-by-Step Tutorial
Materials
- Spiral-bound sketchbook or heavy drawing paper
- Pencil (HB or 2B)
- Eraser
- Fine liner pen (black, 0.3mm or 0.5mm)
- Red marker or felt-tip pen
- Green marker or felt-tip pen (medium shade)
- White gel pen (optional, for highlights)
Step 1: Drafting the Shape
-
Outline the base:
Start by lightly sketching a wide, slightly curved oval near the bottom of your page to form the fluffy brim of the hat. -
Draw the curve:
From the top left of the brim, draw a long, sweeping line that curves upward and then droops heavily to the left, creating that classic ‘slouchy’ look. -
Connect the shape:
Draw a second curved line from the right side of the brim, following the first line but tapering inward as you go up, meeting at a pointed tip. -
Add the pom-pom:
Sketch a simple circle attached to the very tip of the hat where your two main lines meet. -
Section the hat:
Lightly draw curved diagonal lines across the body of the hat to separate it into wide stripes. These lines should follow the contour of the hat’s bend.
Keep it Loose
Don’t strive for perfect symmetry. The charm of this drawing comes from the wobbly, hand-sketched lines that make the hat look soft and crumpled.
Step 2: Inking and Coloring
-
Ink the main lines:
Take your black fine liner and carefully trace over your pencil outline for the hat body and the pom-pom. -
Detail the brim:
Ink the brim shape, but keep the line slightly softer or broken in places if you want to suggest a fuzzy texture. -
Erase pencil marks:
Wait a moment for the ink to set, then gently erase all visible pencil guidelines to leave a clean black-and-white shape. -
Color the red stripes:
Select every other stripe section and fill them in with vertical red hatching lines. Don’t color them solid; leave small white gaps between strokes for a textured, sketched look. -
Color the distinct green stripes:
For the remaining alternating stripes, color them in solid green. I find that using a solid fill here contrasts nicely with the scratchy red texture. -
Color the pom-pom:
Fill in the circular pom-pom at the tip with solid red ink.
Step 3: Adding Patterns & Details
-
Draw internal stripes:
Go back to your red hatched sections. Use your fine liner to draw thin, vertical black lines over the red, following the curve of the hat. -
Add horizontal accents:
Between the vertical black lines in the red sections, add tiny horizontal dashes to create a loose ‘ladder’ or plaid effect. -
Detail the green sections:
If you have a white gel pen, add small dots or starbursts onto the solid green stripes to mimic snowflakes or fabric texture. If not, you can leave these plain. -
Shadow the brim:
Add a very light wash of gray or soft pencil shading to the bottom and sides of the white brim to give it dimension. -
Final outline check:
Go over the outer perimeter of the hat one last time with your black pen to make the silhouette distinct and crisp.
Glitter Upgrade
Once the ink is dry, apply thin lines of clear glitter glue over the red stripes or on the pom-pom for a festive sparkle that catches the light.
Now you have a festive little elf accessory ready to decorate your holiday journal pages

PENCIL GUIDE
Understanding Pencil Grades from H to B
From first sketch to finished drawing — learn pencil grades, line control, and shading techniques.
Explore the Full Guide
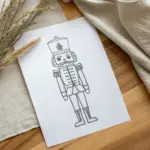
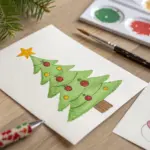
Christmas Tree Having a Bad Hair Day
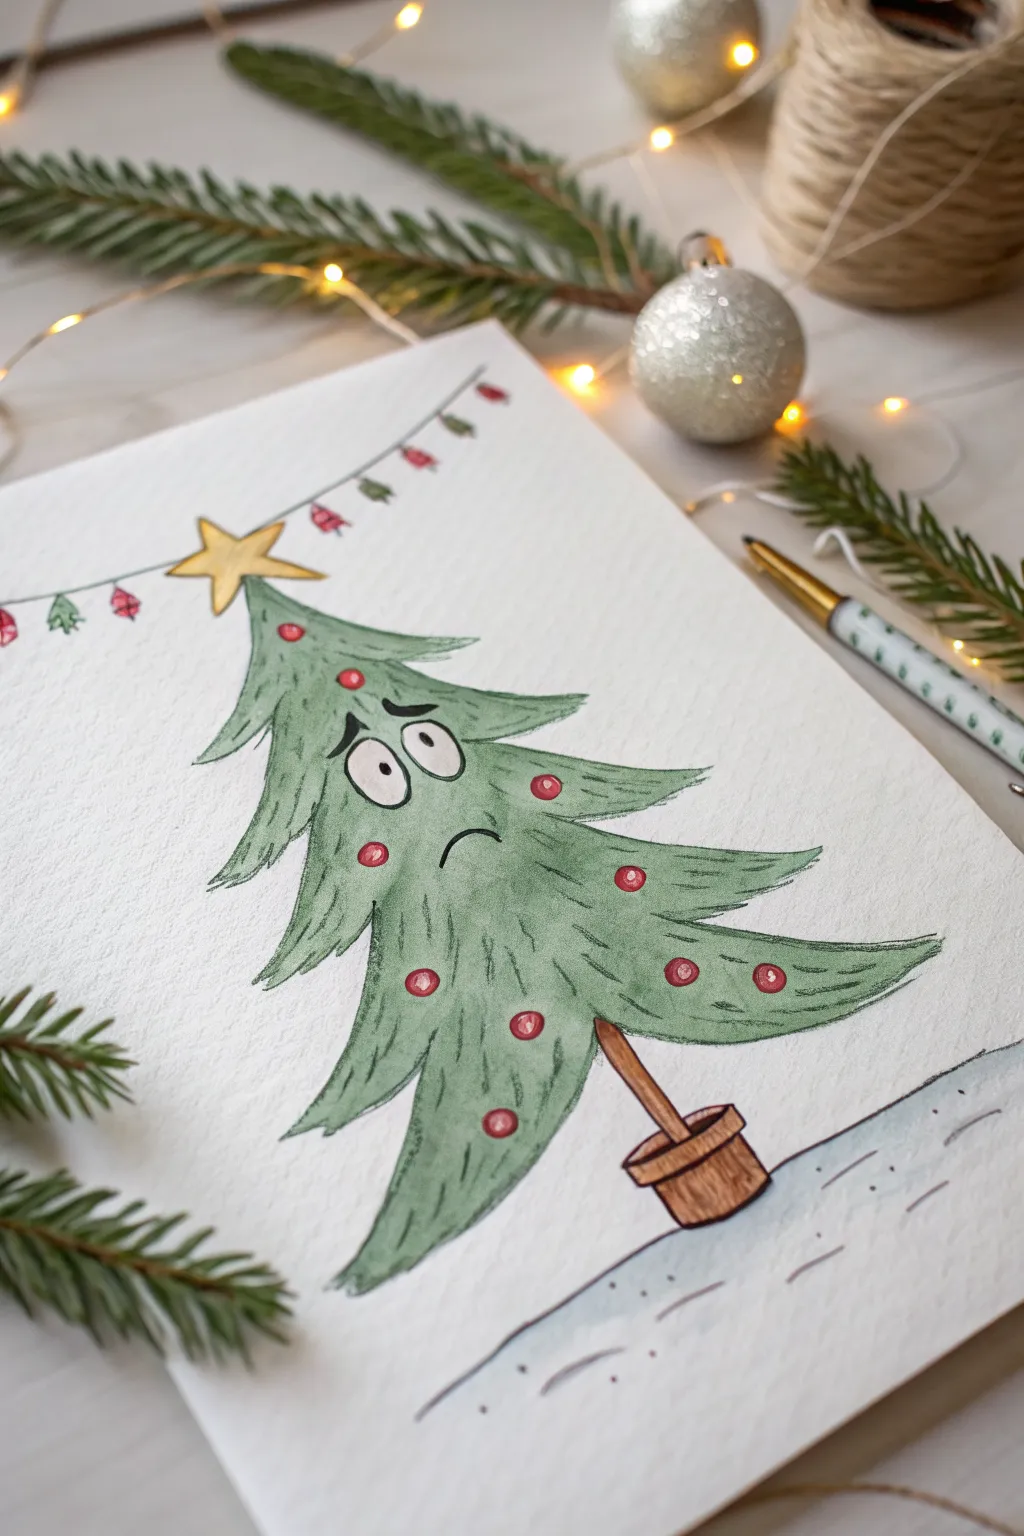
Capture the whimsy of the holiday season with this hilariously relatable illustration of a Christmas tree that’s just not feeling the festive spirit. Using watercolor and ink, you’ll create a droopy, expressive character with disheveled branches and a wonderfully mournful face.
Step-by-Step
Materials
- Cold press watercolor paper (A5 size recommended)
- Pencil and eraser
- Waterproof fineliner pen (0.3mm or 0.5mm, black)
- Watercolor paints (Sap Green, Phthalo Green, Burnt Sienna, Cadmium Red, Yellow Ochre)
- Small round brushes (size 2 and 4)
- Jar of water and paper towels
Step 1: Sketching the Character
-
Outline the trunk posture:
Start with a light pencil sketch of the tree’s main axis. Instead of a straight vertical line, draw a gentle curve leaning towards the right to establish that tired, slumping posture. -
Draft the triangle shape:
Lightly sketch a rough triangle for the body of the tree. The bottom corners shouldn’t be symmetrical; pull the right corner out further and droop it lower to exaggerate the leaning effect. -
Add the star and pot:
Sketch a simple five-pointed star at the very top, tilting it slightly left so it looks like it’s barely hanging on. At the base, draw a small, tapered rectangle for the trunk and a simple pot shape below it. -
Define the branches:
Creating the ‘bad hair’ look is key here. Sketch the jagged edges of the branches, making the ones on the right side look extra long and windswept, while the left side is a bit scruffier. -
Draw the face:
Place two large oval eyes near the top third of the tree. Add slanted eyebrows immediately above them to create a worried expression, and a small, downward-curved mouth below.
Step 2: Inking the Lines
-
Trace the main outlines:
Using your waterproof fineliner, go over your pencil lines. Use a slightly shaky or broken line for the pine needles to give them texture, rather than a smooth, perfect stroke. -
Detail the needles:
Add small, dashed lines inside the body of the tree to suggest individual pine needles and volume. Keep these loose and sparse. -
Ink the ornaments:
Draw small circles scattered randomly across the branches. Don’t make them perfectly round; a little wobble adds character. Don’t forget the string of lights or bunting at the top left. -
Erase pencil marks:
Wait a moment for the ink to fully set, then gently erase all visible graphite lines to clean up your drawing surface.
Sad Tree Secret
Make the pupils tiny dots instead of large circles. Small pupils floating in white space instantly make a character look more stunned or stressed.
Step 3: Watercolor Wash
-
Base green layer:
Mix a watery wash of Sap Green. Paint the entire tree body, avoiding the eyes and the ornaments. Let the color pool naturally at the bottom of the branches. -
Add shadows:
While the green is still slightly damp (or after drying for sharp edges), mix a darker green using Phthalo Green and a touch of brown. Apply this under the branch layers and on the shadowed side (the left side) of the tree. -
Paint the pot and trunk:
Use Burnt Sienna for the trunk and the pot. I like to keep the trunk slightly lighter and darken the edges of the pot to make it look round. -
Color the star:
Paint the star with a bright Yellow Ochre or warm yellow. Leave a tiny sliver of white paper in the center for a highlight if you can. -
Fill the ornaments:
Using a small brush (size 2), carefully dab Cadmium Red into the ornament circles. A flat, solid fill works best here to make them pop against the green texture. -
Add the ground:
Mix a very faint grey-blue wash. Paint a simple, curved horizon line behind the pot to ground the figure, suggesting a snowy surface.
Level Up: Sparkle
Once the watercolor is dry, use a white gel pen to add a tiny ‘shine’ dot to each red ornament and the star for a glossy glass effect.
Step 4: Final Touches
-
Highlighting the eyes:
The eyes should remain paper-white. Use your black pen to fill in two small pupils. Place them slightly cross-eyed or looking up to enhance the goofy, sad expression. -
Deepen the contrast:
Once the paint is bone dry, use your pen to re-emphasize any lines that got lost under the paint, particularly the eyebrows and the frown. -
Texture the snow:
Add a few tiny dots and dashes ink marks on the ground area to simulate pebbles or texture in the snow without adding more paint.
Now you have a wonderfully woeful tree that adds a touch of humor to your holiday collection
Christmas Wreath Doing Yoga
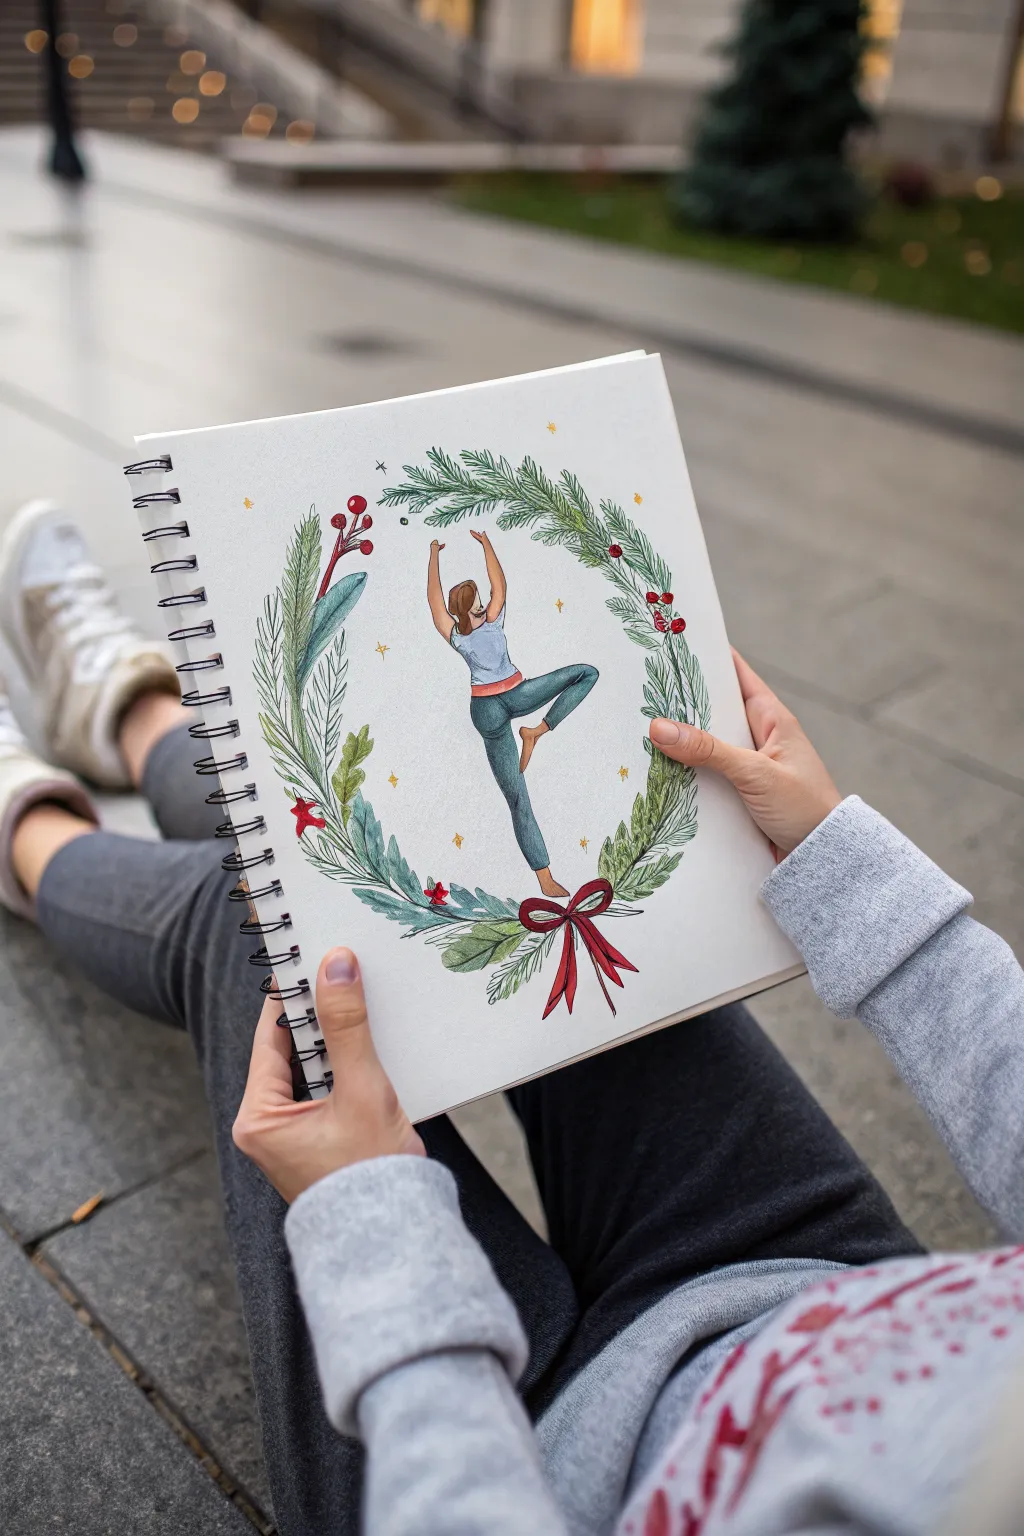
This whimsical holiday illustration features a serene yoga pose framed perfectly by a lush, festive wreath. The combination of delicate pine needles and a strong central figure creates a balanced, cheerful piece of art perfect for handmade cards or a creative sketchbook page.
How-To Guide
Materials
- Heavyweight sketchbook paper (mixed media or bristol)
- Pencil (HB for sketching)
- Fine liner pens (black, sizes 01 and 03)
- Colored pencils or alcohol markers (greens, reds, blues, brown)
- White gel pen
- Eraser
- Compass or round object to trace
Step 1: Sketching the Framework
-
Create the circle:
Begin by lightly drawing a large circle in the center of your page using a compass or by tracing a circular object like a bowl. This will be the guide for your wreath. -
Position the figure:
Inside the circle, sketch the basic stick-figure gesture of the yoga pose. The figure should be centered, with one leg drawn up to the inner thigh (Tree Pose) and arms raised above the head. -
Flesh out the body:
Add volume to your stick figure. Sketch the curves of the legs (wearing leggings) and the torso (wearing a tank top). Keep the lines loose as you define the hands reaching upward and the standing foot grounded at the bottom of the circle. -
Plan the foliage:
Lightly sketch the main flow of the wreath branches. Instead of a single continuous line, draw sweeping curves that overlap slightly, indicating where pine boughs and eucalyptus leaves will sit. -
Add decorative elements:
Mark the placements for the red bow at the bottom center, clusters of berries, and a few small stars scattered in the negative space around the figure.
Uneven Wreath Shape?
Don’t stress about a perfect circle. If one side looks thinner, just add extra pine sprigs or a few floating berries to balance the visual weight without redrawing.
Step 2: Inking the Outlines
-
Outline the yogi:
Using a 01 fine liner, carefully trace the outline of the yoga figure. Use smooth, continuous lines for the leggings and shirt to suggest fabric tension. -
Draw the pine needles:
Switch to a slightly thicker pen (03) or press firmly with the 01. Draw the pine needles using quick, short flicks moving outward from the branch stems. Vary the direction slightly to make it look natural and fluffy. -
Detail the broad leaves:
Outline the wider, eucalyptus-style leaves and the holly berries. Add a central vein line to the leaves for a touch of realism. -
Ink the bow:
Draw the ribbon at the bottom with flowing lines. Make sure the tails of the ribbon drape downwards naturally, following gravity. -
Erase pencil marks:
Once the ink is completely dry—I usually wait at least five minutes to be safe—gently erase all your pencil guidelines to reveal a clean black and white drawing.
Pro Tip: Texture
When drawing pine needles, always pull your pen stroke from the branch *outward*. Lifting the pen at the end of the stroke creates a tapered, sharp point.
Step 3: Adding Color
-
Color the skin and hair:
Using colored pencils or markers, fill in the skin tone and hair color. Use light circular motions to keep the texture smooth. -
Dress the figure:
Color the leggings in a muted teal or blue, and the top in a light grey or white with shading. Add a pop of red for the waistband to tie it into the holiday theme. -
Base greens for the wreath:
Start with a light olive green for the broad leaves and a brighter green for the pine needles. Lay down a solid base layer of color. -
Layering darker greens:
Take a darker forest green pencil and add depth to the pine needles, focusing on the areas closest to the central stem where shadows would naturally fall. -
Coloring the accents:
Fill in the berries and the bottom bow with a vibrant red. You can leave tiny slivers of white on the berries to act as highlights. -
Adding atmospheric stars:
Color the small hanging stars in yellow or gold. Add tiny dots of yellow around the wreath to simulate magical sparkles or fireflies.
Step 4: Final Highlights
-
Deepen the shadows:
Use a dark blue or grey pencil to add subtle shading on the leggings (under the glutes and behind the knee) and under the armpits of the shirt. -
Add white accents:
With a white gel pen, add tiny highlights to the red berries, the tension points on the leggings, and the center of the red bow to make them pop. -
Refine the texture:
If the pine needles look too uniform, go back in with a very sharp green pencil and add a few stray needles sticking out at odd angles for extra texture.
Step back and admire how the peaceful energy of the pose complements the festive cheer of your drawing
BRUSH GUIDE
The Right Brush for Every Stroke
From clean lines to bold texture — master brush choice, stroke control, and essential techniques.
Explore the Full Guide
Ugly Christmas Sweater Pattern Doodles
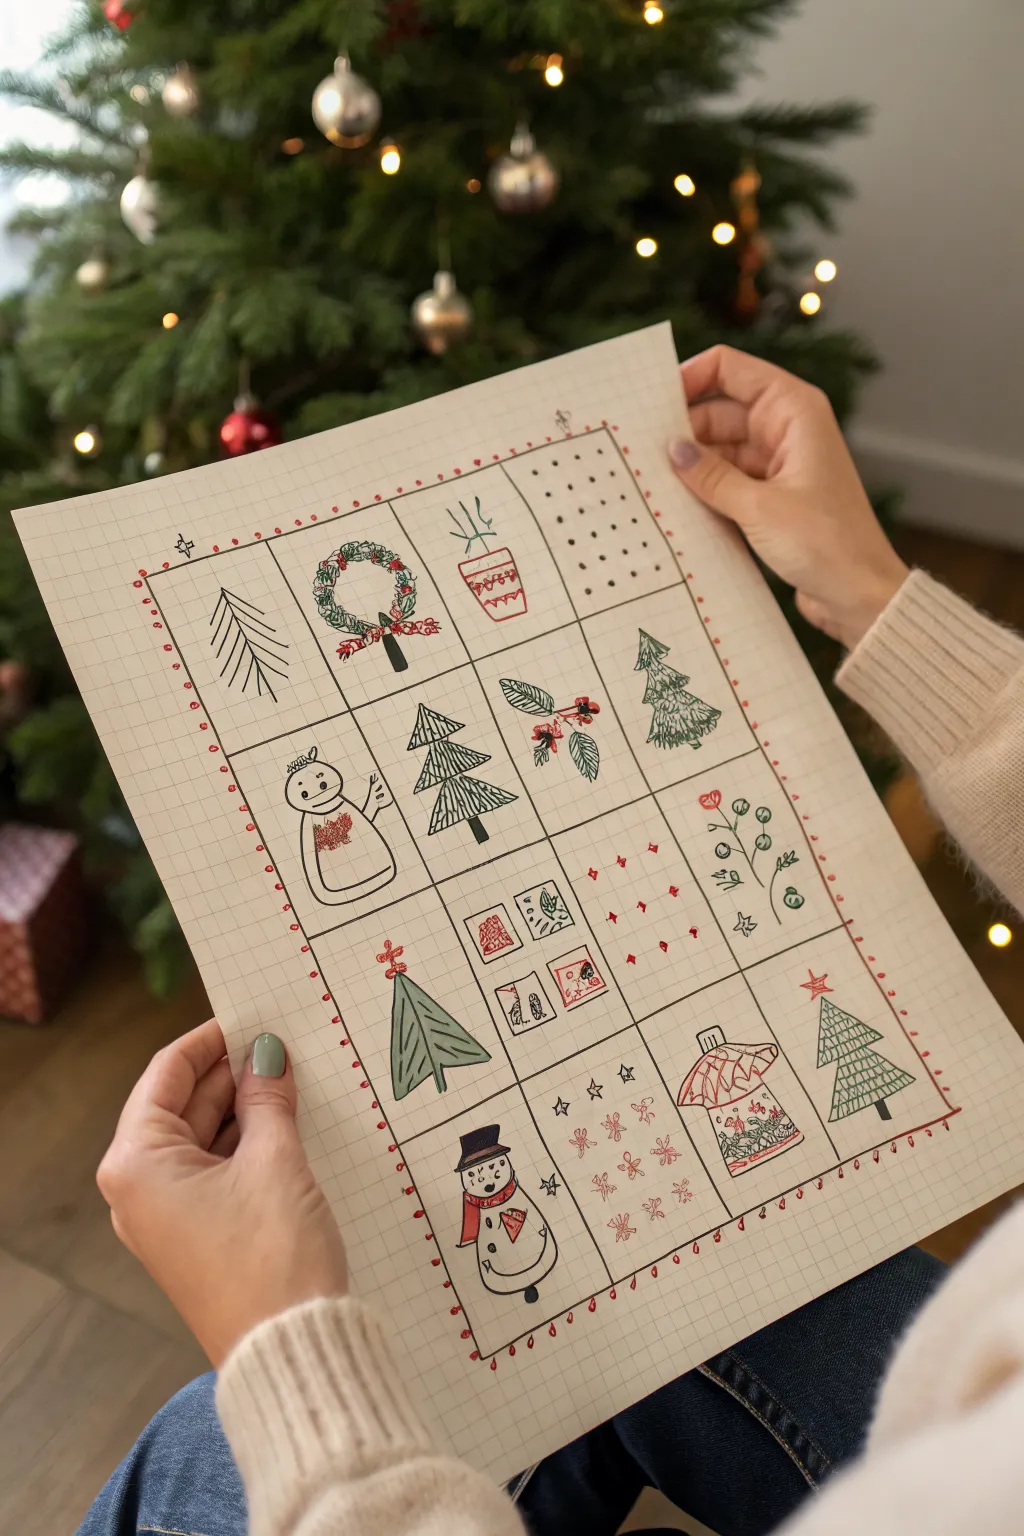
This charming project breaks down holiday cheer into bite-sized sketches on a single sheet of graph paper. It captures the cozy, folk-art aesthetic of ugly sweater patterns through simple line work and limited colors.
Detailed Instructions
Materials
- A4 or Letter-sized grid paper (graph paper)
- Black fine-liner pen (0.5mm or similar)
- Red gel pen or fine marker
- Green felt-tip pen or fine marker
- Ruler
Step 1: Setting up the Grid
-
Define the perimeter:
Using your ruler and black fine-liner, draw a large rectangle on your grid paper. Leave a generous margin of white space around the edges to frame your artwork nicely. -
Create the interior grid:
Divide your large rectangle into smaller, equal-sized squares. Aim for a 4×4 layout, giving you sixteen boxes total to fill with festive designs. -
Add a decorative border:
Draw tiny red dots along the perimeter line you created in step 1. Space them evenly, roughly every two grid squares, to mimic a stitched fabric edge.
Keep it Loose
Don’t use a ruler for the doodles themselves. Wobbly, imperfect hand-drawn lines add to the authentic ‘stitched sweater’ charm.
Step 2: Drawing the Trees
-
Sketch the minimalist tree:
In the top-left square, draw a simple vertical line for the trunk. Add angled lines branching downward from the top to create a bare, stick-figure fir tree. -
Create the classic pine:
In another square, draw three stacked triangles getting progressively wider at the bottom. Add diagonal hatching lines inside the triangles for texture and a small rectangular trunk at the base. -
Draw the detailed spruce:
For a more realistic tree, outline a jagged, leafy silhouette. Fill the interior with squiggly, organic lines to suggest dense pine needles. -
Add the stylized modern tree:
Near the bottom, draw a smooth, curved triangle shape. Draw a vertical line down the center and add curved veins branching out, making it look almost like a large leaf. -
Finish with a geometric tree:
Draw a tree composed of horizontal stripes within a triangular shape. Alternate filling the stripes with green squiggles and cross-hatching to create variety.
Make it a Card
Scan your finished grid, shrink it down digitally, and print it onto cardstock to create custom holiday greeting cards for friends.
Step 3: Adding Characters and Objects
-
Doodle the snowman:
Draw two stacked circles for a snowman’s body. Add stick arms waving upwards and a squarish hat. Use red ink to draw a textured, scribbled patch on his belly, mimicking sweater fabric. -
Draw the holiday wreath:
Sketch a circle using loose, scribbly green loops. Add a red bow at the bottom and a few red dots scattered around the circle as holly berries. -
Create the potted plant:
Draw a trapezoid pot with geometric red zigzag patterns. Add simple vertical green lines emerging from it to represent a small indoor plant or poinsettia. -
Sketch the mistletoe:
Draw three or four oval-shaped leaves meeting at a center point. Use red ink to add tiny cluster berries where the stems join, and hatch the leaves with green lines. -
Design the gift box grid:
In one square, draw four smaller squares packed together. Draw tiny icons inside each, like a present, a candy cane, or a bell, creating a ‘window pane’ effect. -
Draw the snow globe:
Outline a dome shape on a flat base. Inside, sketch a tiny house and a tree. Add small dots floating in the empty space to represent falling snow.
Step 4: Filling Steps and Details
-
Create pattern blocks:
Dedicate a couple of squares to pure pattern. In one, draw a grid of small black dots. In another, draw a repeating pattern of small red watercolor-style diamonds. -
Add the botanical sprig:
Draw a long, curved stem with small leaves branching off alternately. Add a single red flower bud at the tip for a splash of color. -
Sketch the final snowman:
Draw a second snowman, this time with a top hat and a long red scarf blowing to the side. Give him a carrot nose and a few buttons down the front. -
Incorporate snowflakes:
Fill the remaining square with various snowflake designs. Mix simple stars with six-pointed intricate flakes, using red ink for some to balance the color palette. -
Final touches:
Scan your grid for empty spots. Add tiny stars, sparkles, or extra red dots to fill negative space and make the sheet feel busy and festive.
Now you have a cozy sheet of holiday doodles ready to display or digitize for your seasonal projects
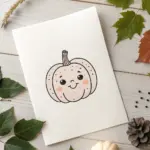
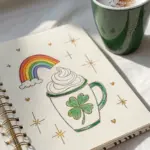
Christmas Cocoa and Treats as Characters
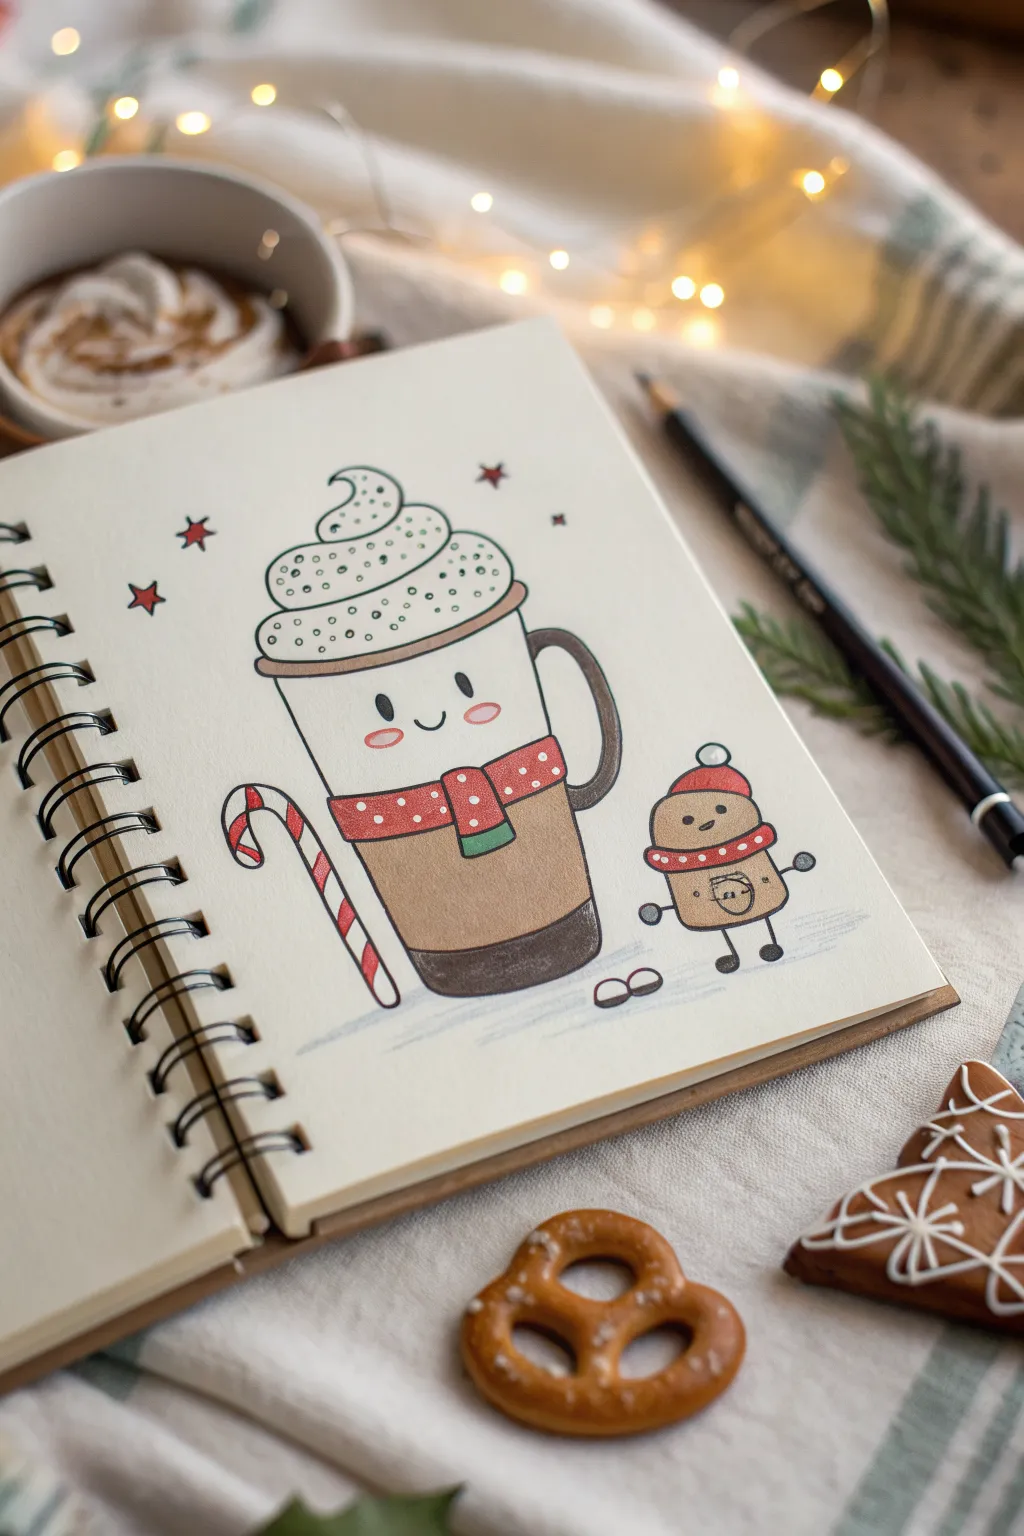
This adorable sketchbook doodle brings a warm cup of cocoa to life with a sweet smile and a tiny gingerbread friend. It’s a charming winter character study that uses simple shapes and clean lines to create a festive mood.
How-To Guide
Materials
- Spiral-bound sketchbook or drawing paper
- Fine liner pen (black, 0.3mm or 0.5mm)
- Pencil and eraser
- Colored pencils (brown, tan, red, green, grey)
- White gel pen
Step 1: Sketching the Cocoa Character
-
Base Outline:
Start by lightly sketching a tall, slightly tapered cylinder for the main mug shape. Leave the top open for now. -
Add the Handle:
Draw a ‘C’ shaped handle on the right side of the mug, giving it some thickness so it looks sturdy. -
Cream Topping:
On top of the cylinder, draw a fluffy cloud shape that spirals upward to a peak. This will be the generous helping of whipped cream. -
Scarf Accessory:
About midway down the mug, sketch two parallel curved lines wrapping around the body. Add a small rectangle hanging down slightly off-center to create a cozy scarf. -
Cute Face:
Within the upper half of the mug (above the scarf), draw two small ovals for eyes and a tiny ‘u’ shape for a smile. Add oval blush marks under the eyes.
Uneven Ink Lines?
If your fine liner wavers on the long mug lines, just thicken the line weight slightly for a bold, illustrative style.
Step 2: Adding Friends and Details
-
Candy Cane Prop:
On the left side of the mug, sketch a candy cane leaning against it. Draw diagonal stripes running down its length. -
Gingerbread Buddy:
To the right of the mug, draw a small, rounded rectangular shape for the gingerbread man’s body. I like to give him a tiny beanie hat on top. -
Gingerbread Details:
Give the little buddy stick arms and legs with small circles for hands and feet. Draw a matching mini-scarf and a happy face. -
Background Elements:
Scatter a few small five-pointed stars around the top of the cocoa mug to fill the empty space.
Step 3: Inking and Coloring
-
Clean Lines:
Go over your pencil sketches with a black fine liner pen. Keep your hand steady for the long vertical lines of the mug. -
Erase Sketches:
Once the ink is completely dry, gently erase all the underlying pencil marks to clear up the page. -
Color the Mug:
Use a tan or light brown pencil to color the main body of the mug. For the bottom rim, use a dark brown or black to create a heavy base. -
Festive Reds:
Color the scarves and the candy cane stripes with a bright red pencil. Leave the alternating candy cane stripes white. -
Green Accents:
Use a green pencil to add a stripe to the mug’s scarf and color the main section of the gingerbread man’s scarf. -
Gingerbread Body:
Color the small friend with a medium brown pencil, pressing lightly to keep the texture soft. -
Shadows:
Use a light grey pencil to add a subtle shadow on the ground beneath both characters to ground them. -
Final Touches:
Using a white gel pen or just the tip of a green pencil, add tiny dots or sprinkles onto the whipped cream for texture.
Add Sparkle
Use a glitter gel pen for the stars and the red stripes on the candy cane to make the drawing pop under holiday lights.
Now you have a cozy winter duo ready to warm up your sketchbook pages


Santa’s Sleigh With a Flat Tire Moment
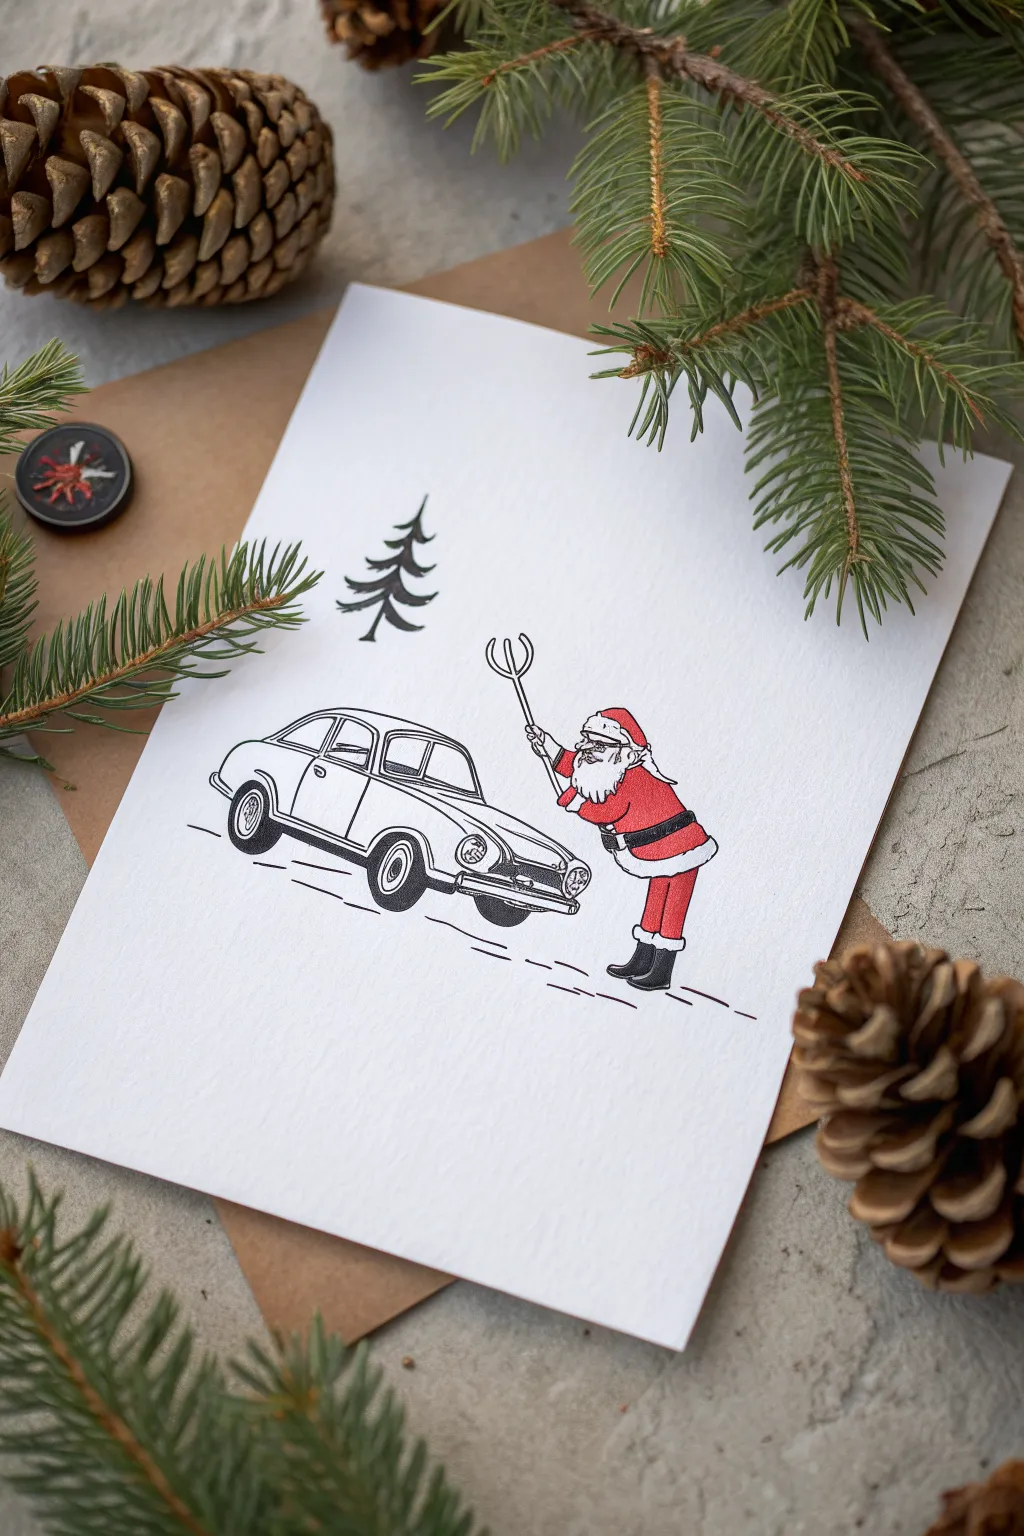
This whimsical card design swaps the traditional sleigh for a vintage classic, capturing a comedic moment where Santa tackles car trouble instead of chimney climbing. The clean lines and selective color palette give it a charming, almost retro illustration style perfect for holiday greetings.
Detailed Instructions
Materials
- Heavyweight white cardstock (folded)
- Black fineliner pens (0.1mm, 0.3mm, and 0.5mm)
- Alcohol-based markers (scarlet red, dark grey, light grey)
- Pencil (HB or 2H for sketching)
- Kneaded eraser
- Ruler
- Optional: Kraft envelope for presentation
Step 1: Planning the Scene
-
Paper preparation:
Begin with a folded piece of bright white cardstock. Ensure the front surface is smooth to prevent your ink lines from bleeding or feathering. -
Establish the horizon:
Lightly pencil a minimal ground line about one-third up from the bottom of the page. This doesn’t need to be straight; a few broken lines suggest a snowy road surface. -
Sketch the car body:
Using your pencil, draft the outline of a vintage car (resembling a Karmann Ghia or similar curvy classic) on the left side. Focus on the rounded roofline, the distinct front headlights, and the bumper shape. -
Position Santa:
Sketch Santa’s figure standing near the front bumper on the right side. He should be leaning slightly forward, holding a large tool—resembling a tuning fork or mechanic’s rod—towards the car’s hood.
Crisp Lines Only
Keep your wrist loose when drawing the long curve of the car roof. If you hesitate, the line gets shaky. Rotate the paper securely to find the most comfortable angle for your hand.
Step 2: Inking the Outlines
-
Outline the vehicle:
Switch to a 0.5mm black fineliner. Carefully trace the main body of the car. Use confident, continuous strokes for the long curves of the roof and hood to keep the look clean. -
Detail the car parts:
Use a finer 0.1mm pen for the intricate details like the car vents, door handle, and the interior lines of the headlights. Draw the wheels with the 0.3mm pen, ensuring the tires look properly seated on the ground. -
Ink Santa’s figure:
Outline Santa with the 0.3mm pen. Keep the lines around his beard fluffy and irregular, while the lines for his belt and boots should be smoother and more defined. -
Add the background tree:
Above the car’s roof, draw a stylized pine tree using the 0.5mm pen. Create the branches with jagged, downward-sweeping strokes that get wider toward the bottom base. -
Erase guidelines:
Once the ink is completely dry—give it a few minutes to be safe—gently sweep your kneaded eraser over the entire drawing to remove the pencil sketches.
Step 3: Adding Color and Depth
-
Color the suit:
Use a scarlet red alcohol marker to fill in Santa’s jacket, trousers, and hat. Leave the fur trim, beard, and glove cuffs strictly white for contrast. -
Detail the belt and boots:
Fill in Santa’s belt and boots with a dark grey or black marker. If using black, leave a tiny sliver of white paper on the boot curve to act as a structured highlight. -
Shadow the car:
I like to use a very light grey marker to add subtle shading to the car rather than coloring it fully. Add swift strokes under the wheel wells and along the bottom chassis to ground the vehicle. -
Darken the tires:
Fill the tires with dark grey, leaving the hubcaps white. This separation is crucial so the wheels don’t look like black blobs. -
Shade the beard:
With your lightest grey marker, add just two or three tiny strokes under Santa’s mustache and at the bottom of the beard to give it volume without making it look dirty. -
Grounding shadows:
Add a few horizontal hatch marks under the car tires and Santa’s feet using the 0.1mm pen. This integrates the figures with the ‘road’ beneath them. -
Final touches:
Check for any gaps in the red ink and fill them. If the tree feels too light, go back over the thickest parts of the trunk with the 0.5mm pen to add visual weight.
Make It shine
Use a white gel pen to add tiny reflection dots on the car’s headlights and bumper chrome after the black ink dries. It instantly makes the vehicle look polished and metallic.
Now you have a clever, handcrafted card ready to bring a smile to any classic car enthusiast’s face this holiday season
Christmas Lights as Spaghetti Chaos
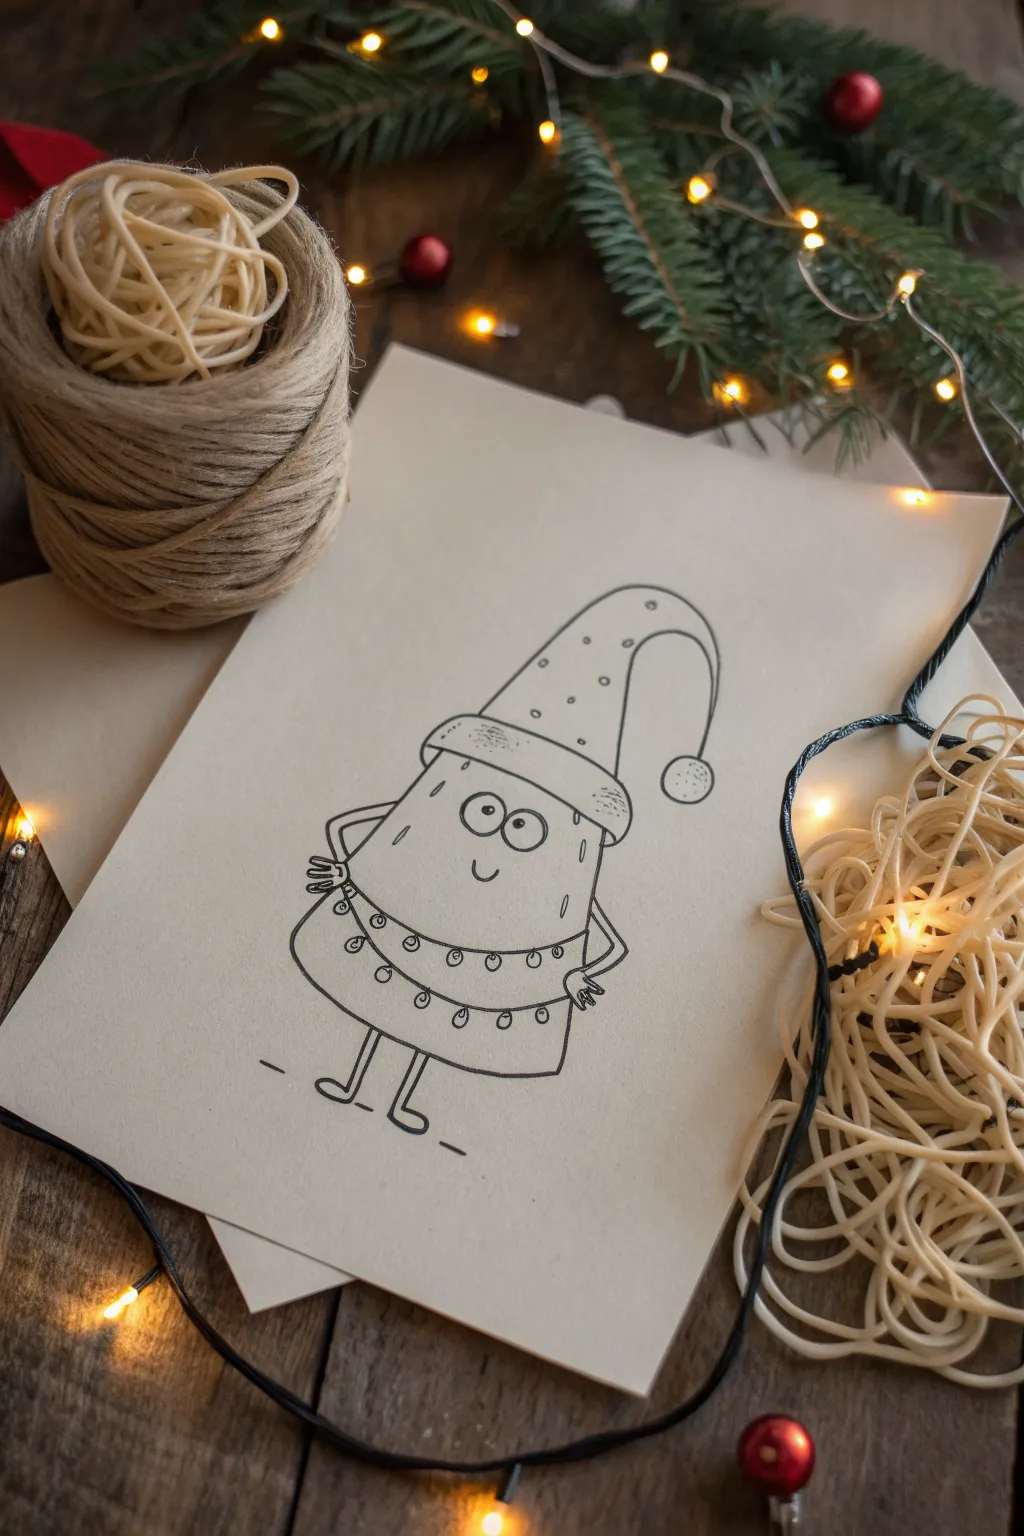
Capture the holiday humor of untangling Christmas lights with this playful mixed-media concept. This simple line drawing features a whimsical character wrapped in a string of lights, perfectly paired with a chaotic pile of pasta to mimic the real-life struggle.
Step-by-Step Guide
Materials
- Heavyweight cream or off-white cardstock
- Fine liner pen (black, 0.5mm or 0.8mm)
- Pencil (HB)
- Eraser
- Dried spaghetti or thick yarn (for styling)
- Fairly lights (for styling photo)
Step 1: Planning and Sketching
-
Paper Selection:
Begin by selecting a sturdy, cream-colored cardstock. The slightly warm tone gives the drawing a cozy, vintage feel compared to stark white printer paper. -
Basic Body Shape:
Using your pencil lightly, sketch the main body shape. Think of it as a tall, rounded gumdrop or an elongated arch. Keep the bottom edge slightly curved to give it volume. -
Hat Placement:
Draw the brim of the hat about two-thirds of the way up the body. It should act as a curved band wrapping around the ‘head’. Above this band, sketch a tall, floppy triangle that curves downward to the right, ending in a circle for the pom-pom. -
Facial Features:
Position two large, circular eyes right in the middle of the upper body section. Add small pupils looking sideways for a confused expression. A simple ‘U’ shape serves as the smile just below the eyes. -
Arms and Legs:
Sketch thin, angled arms coming from the sides, hands resting on ‘hips’ to show a bit of attitude. At the very bottom, draw two stick legs ending in simple, looped feet.
Steady Hand Trick
When inking long curves like the hat or body, create the line by moving your entire arm from the shoulder, not just your wrist. This prevents shaky, jagged lines.
Step 2: Inking the Character
-
Outline the Hat:
Switch to your black fine liner. Carefull trace the hat, adding small dots or circles on the main part of the hat for texture. Ink the pom-pom with a slightly fuzzy or stippled line to suggest softness. -
Define the Body:
Go over your pencil lines for the main body shape. I find it helpful to rotate the paper as I draw long curves to keep my hand steady and the line smooth. -
Inking the Face:
Trace the eyes and mouth carefully. Fill in the pupils solid black, leaving a tiny white speck if you want a highlight, though a flat black look works well for this cartoon style. -
Extremities:
Ink the thin arms and stick legs. Keep these lines fairly uniform in thickness to maintain the minimal doodle aesthetic.
Step 3: Adding the ‘Lights’
-
Drawing the Cord:
Draw two distinct swooping lines across the character’s body to represent the light string. It should look like it’s draped loosely around him. -
Adding Bulbs:
along the cord lines, draw small, evenly spaced ovals hanging downwards. These are your Christmas light bulbs. -
Connecting the Bulbs:
Add a tiny square or rectangle at the top of each bulb where it connects to the wire. This small detail makes them instantly recognizable as holiday lights. -
Grounding Shadows:
Add two small horizontal dashes on either side of the feet to ground the character, and a small shadow line underneath. -
Cleanup:
Once the ink is completely dry—give it a full minute—erase all underlying pencil marks gently to leave a crisp, clean illustration.
Make it Pop
Use a white gel pen to add tiny reflection highlights on the drawn light bulbs after the black ink dries. It makes the simplistic drawing feel more ‘lit’ up.
Step 4: Styling the Scene
-
Prepare the Chaos:
Take a handful of cooked (and cooled) spaghetti or raw thick yarn that resembles noodles. Bunch it up into a messy, tangled nest. -
Arrangement:
Place your drawing on a wooden surface. Arrange the pasta tangle to the right side of the paper, letting some strands spill over onto the corner of the sheet. -
Lighting Integration:
Weave a string of real fairy lights through the pasta / yarn pile. This connects the drawing’s theme (lights) with the visual pun (spaghetti wires). -
Prop Placement:
Place a ball of twine or rustic string on the opposite corner to balance the composition, reinforcing the ‘crafty’ vibe.
Now you have a charmingly frustrated holiday character that perfectly empathizes with your decorating struggles
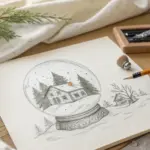
Snow Globe With Tiny Drama Inside
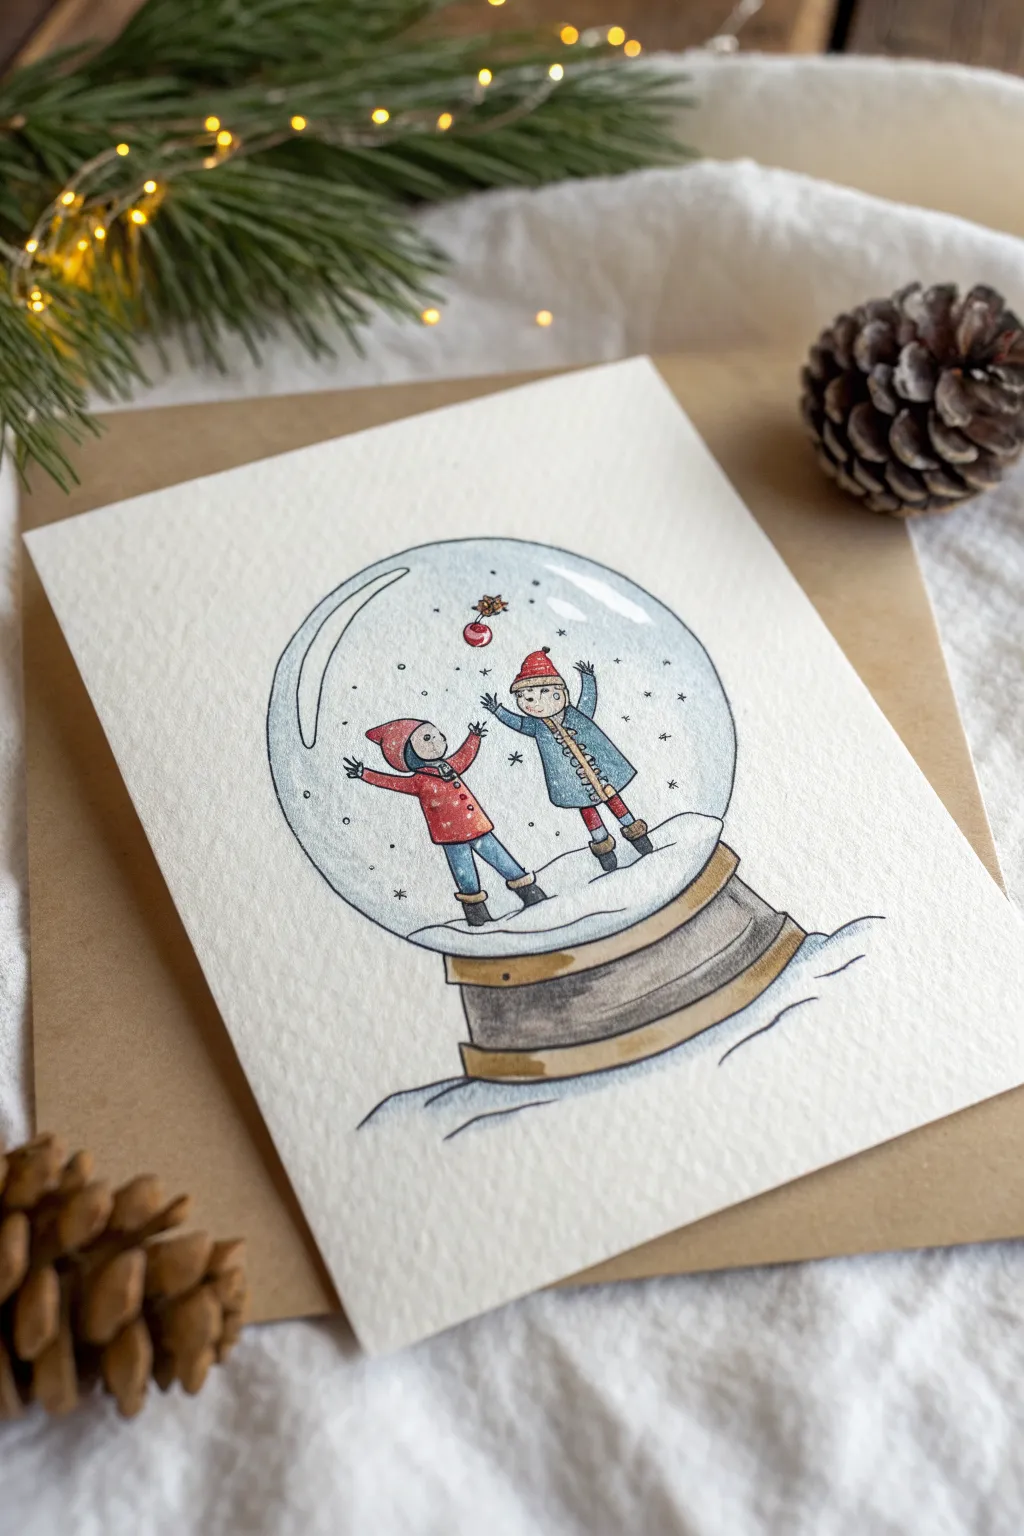
Capture the playful spirit of winter with this charming illustration of two children caught inside a magical snow globe. Using watercolor and ink on textured paper, you’ll create a cozy, nostalgic holiday card that feels both handcrafted and professional.
Detailed Instructions
Materials
- Cold press watercolor paper (A5 or 5×7 inches)
- Waterproof fine liner pen (black, 0.3mm and 0.1mm)
- Watercolor paints (Pan set or tubes is fine)
- Small round brushes (Size 2 and 4)
- Pencil (HB) and eraser
- Circular object for tracing (like a jar lid or compass)
- Ruler
- Jar of water and paper towels
Step 1: Sketching the Outline
-
Create the globe shape:
Begin by lightly tracing a perfect circle in the center of your paper using a jar lid or compass. This defines the main boundaries of your snow globe. -
Draft the base:
Below the circle, draw a slightly curved rectangle for the base. Add a second, slightly wider tier at the bottom to give the stand some weight and dimension. -
Add the snow mound:
Inside the bottom of the circle, sketch a gentle, uneven hill. This will be the snowy ground your characters stand on. -
Sketch the figures:
Draw two small figures standing on the snow. Keep them simple and stylized with round faces and pointy hats. Position one figure on the left reaching out, and the other on the right reaching up, as if tossing a small bauble between them. -
Detail the clothing:
Add coats, scarves, and boots to your figures. Give the left figure a shorter jacket and the right figure a longer coat with prominent buttons. -
Refine the background elements:
Draw small floating specks and stars inside the globe to represent falling snow. Add a small bauble suspended in the air between their hands.
Step 2: Inking the Drawing
-
Ink the main outlines:
Using your 0.3mm waterproof pen, carefully go over your pencil lines. Use a steady hand for the circle, but don’t worry if it’s not machine-perfect; a little wobble adds charm. -
Create texture details:
Switch to a finer 0.1mm pen to add details like the buttons on the coats, the stripes on the socks, and the tiny facial features. A simple dot for eyes and a curved line for mouths work best here. -
Add shading lines:
Use small hatching lines on the wooden base to suggest roundedness. Add a few curved horizon lines outside the base to ground the object on a surface. -
Clean up the sketch:
Wait specifically for the ink to dry completely to avoid smudging. Then, gently erase all visible pencil marks.
Glass Effect Pro Tip
Leave the center of the globe completely unpainted white paper. Concentrating color only near the edges enhances the illusion of a spherical glass object.
Step 3: Watercolor Washes
-
Paint the glass tint:
Mix a very diluted, watery blue-grey. Paint a crescent moon shape along the left inner curve and top right inner curve of the globe to suggest reflections on glass. -
Color the outfits:
Paint the left figure’s coat in a warm red. For the right figure, use a muted teal or slate blue. Keep the paint somewhat transparent to let the paper texture show through. -
Add warmth to faces:
Mix a tiny amount of pale orange or pink ochre for the skin tones. Apply this carefully to the faces, leaving the eyes clear. -
Paint the wooden base:
Use a light brown or sepia wash for the base. Once the first layer is damp-dry, add a slightly darker stripe of brown along the bottom edge for shadow. -
Ground the object:
Paint a very light, cool grey wash under the base, feathering it outwards to create a soft shadow on the ‘table’ surface.
Paint Bleeding?
If colors are bleeding into each other, you are working too wet. Let one color area dry completely before painting an adjacent area.
Step 4: Final Touches
-
Deepen the shadows:
Once your first layers are dry, mix a darker version of your blue and red. Add small shadows under the armpits, beneath the coats, and on the boots to give the figures volume. -
Highlight the reflection:
If you lost the bright white highlight on the glass curve during painting, you can use a tiny dab of opaque white gouache or a white gel pen to restore that crisp reflection. -
Enhance the snow:
Use your white gel pen to add extra crisp snowflakes over the dried blue glass wash, making the scene look active and snowy.
Now you have a delightful winter scene that captures a moment of joy frozen in time
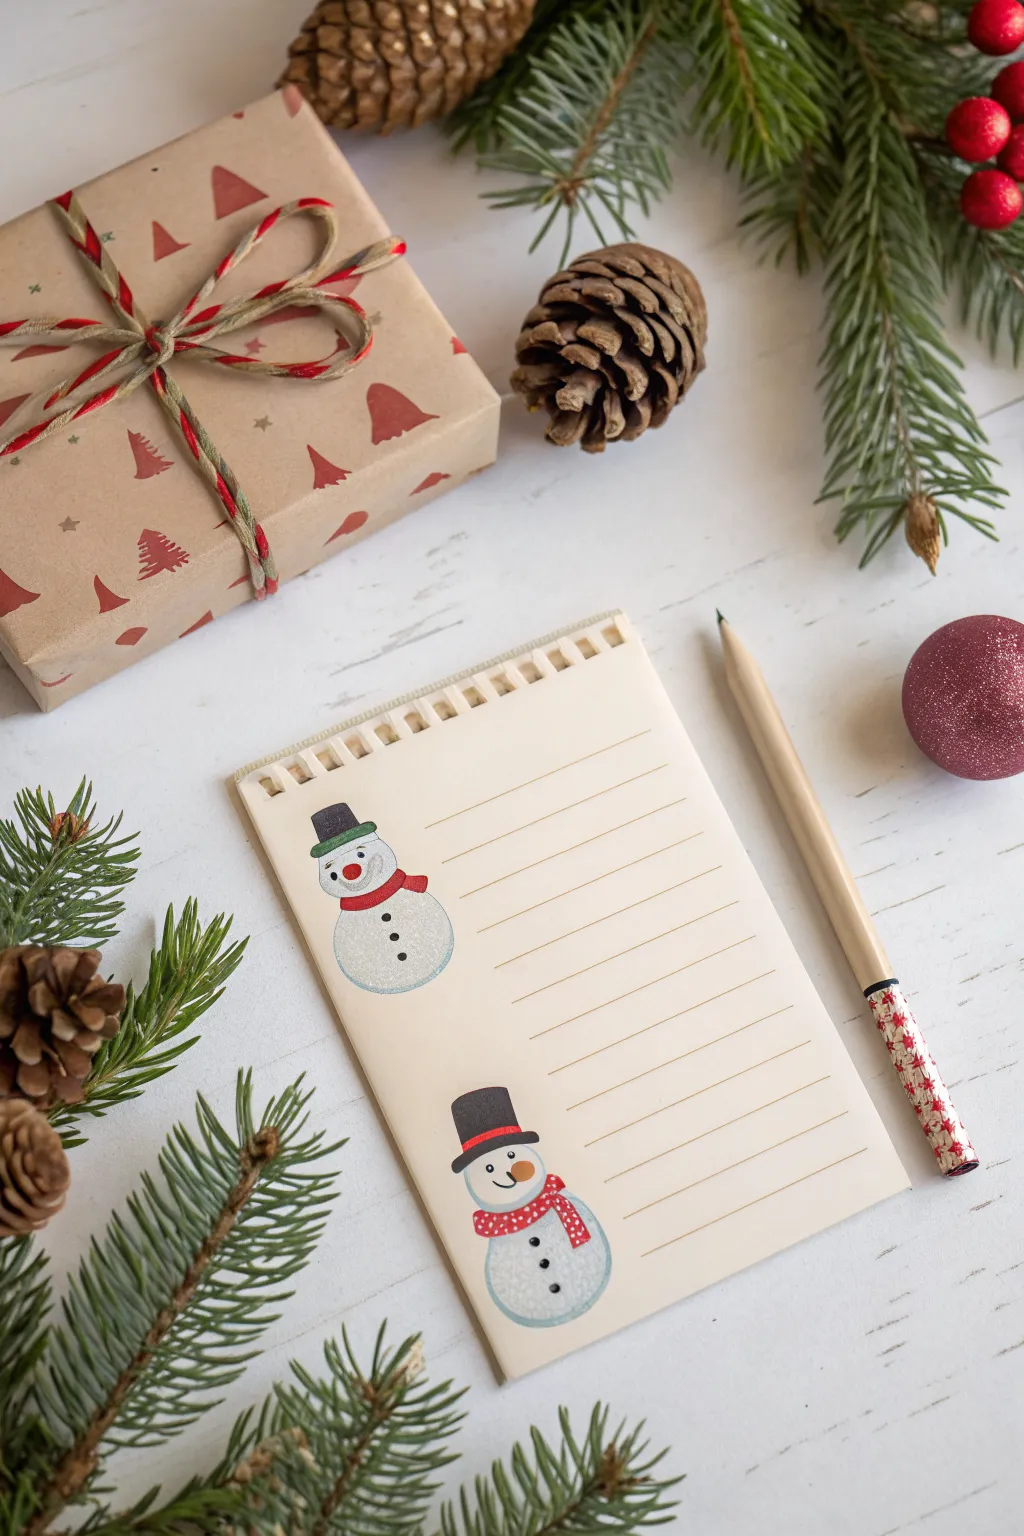
Retro Christmas Mascots With Goofy Faces

Transform a plain spiral notepad into a festive keepsake featuring two charmingly retro snowmen with goofy grins. This project combines simple colored pencil techniques with pen detailing to create custom holiday stationery perfect for gift lists or thank-you notes.
Detailed Instructions
Materials
- Small spiral-bound lined notebook (cream or off-white paper preferred)
- Graphite pencil (HB) and eraser
- Colored pencils (Light blue, cool grey, red, orange, black, green)
- Fine-liner pen (black, waterproof)
- White gel pen (optional for highlights)
- Ruler (optional)
Step 1: Planning and Sketching
-
Positioning:
Open your notepad to a fresh page. Visualize where your two snowmen will go on the left-hand margin. The top snowman should sit about a third of the way down, and the bottom one near the lower third, leaving space in between. -
Basic Shapes:
Using your graphite pencil very lightly, sketch the head of the top snowman as a slightly flattened circle. Directly below it, draw a larger, rounder shape for the body. -
Second Sketch:
Repeat this process for the bottom snowman. Try making his head shape slightly more oval or tilted to give him a unique, goofy personality compared to the first one. -
Adding Hats:
Sketch a small, flat rectangle on top of each head for the hat brim. Draw a taller rectangle or a slightly tapered cylinder rising from the brim to form the stovepipe hat. -
Accessorizing:
Draw the scarves. For the top snowman, sketch a simple band around the neck. For the bottom one, add a knot and a tail that drapes down over the body. -
Facial Features:
Lightly mark the positions for the eyes, carrot noses, and smiling mouths. Keep the expressions simple and slightly asymmetrical for that retro ‘goofy’ look.
Smudge Prevention
Place a scrap piece of paper under your drawing hand while coloring. This prevents oils from your skin transferring to the page and stops you from accidentally smearing the pencil work.
Step 2: Coloring and Shading
-
Snowy Texture:
Take your light blue colored pencil. Gently shade the interior of the white snow bodies, concentrating the pigment around the edges to create a sense of roundness. -
Blending White:
If you have a white colored pencil, blend over the blue shading into the center of the body to soften the transition and make the paper look frostier. -
Hats and Coal:
Color the top hats with the black pencil or a very dark cool grey. Leave a tiny sliver of uncolored paper on the top edge or side to act as a highlight. -
Hat Details:
Add a small stripe of green or red just above the brim of the top hat for a band. -
Carrot Noses:
Fill in the carrot noses with bright orange. Press harder at the base of the nose and lighten your pressure toward the tip. -
Scarves:
Color the scarves red. For the bottom snowman’s scarf, you can add small white polka dots by carefully coloring around tiny circles, or add them later with a gel pen. -
Buttons:
Use the black pencil to draw three solid dots down the center of each body for the coal buttons.
Glitter Upgrade
Add a thin line of clear glitter glue or a glitter gel pen along the top of the snowmen’s hat brims and the edges of their bodies to give them a frosty, sparkling finish.
Step 3: Inking and Final Touches
-
Outlining:
Once you are happy with the color, go over your pencil lines with a fine-liner black pen. Keep the line weight consistent but light. -
Defining the Faces:
Ink the eyes as solid black dots. Draw the mouth as a simple curved line. Add eyebrows solely as little dashes if you want extra expression. -
Scarf Patterns:
If you left the bottom scarf plain red, use your white gel pen now to add the polka dots. This sits beautifully on top of the red pencil. -
Cheeky Details:
Add a tiny smudge of pink or light red on the cheeks for a rosy, cold-weather flush. -
Clean Up:
Wait at least five minutes for the ink to dry completely, then gently erase any visible graphite sketch lines from underneath the color.
Now your notepad is ready to capture all your festive thoughts and holiday checklists

Have a question or want to share your own experience? I'd love to hear from you in the comments below!