
Whenever I’m stuck, I grab a scrap of cardboard and let its warm brown tone, dents, and edges do half the storytelling for me. These cardboard drawing ideas lean into texture, layering, and bold contrast so your art feels instantly intentional—even on packing scraps.
High-Contrast Silhouette Scene on Cardboard
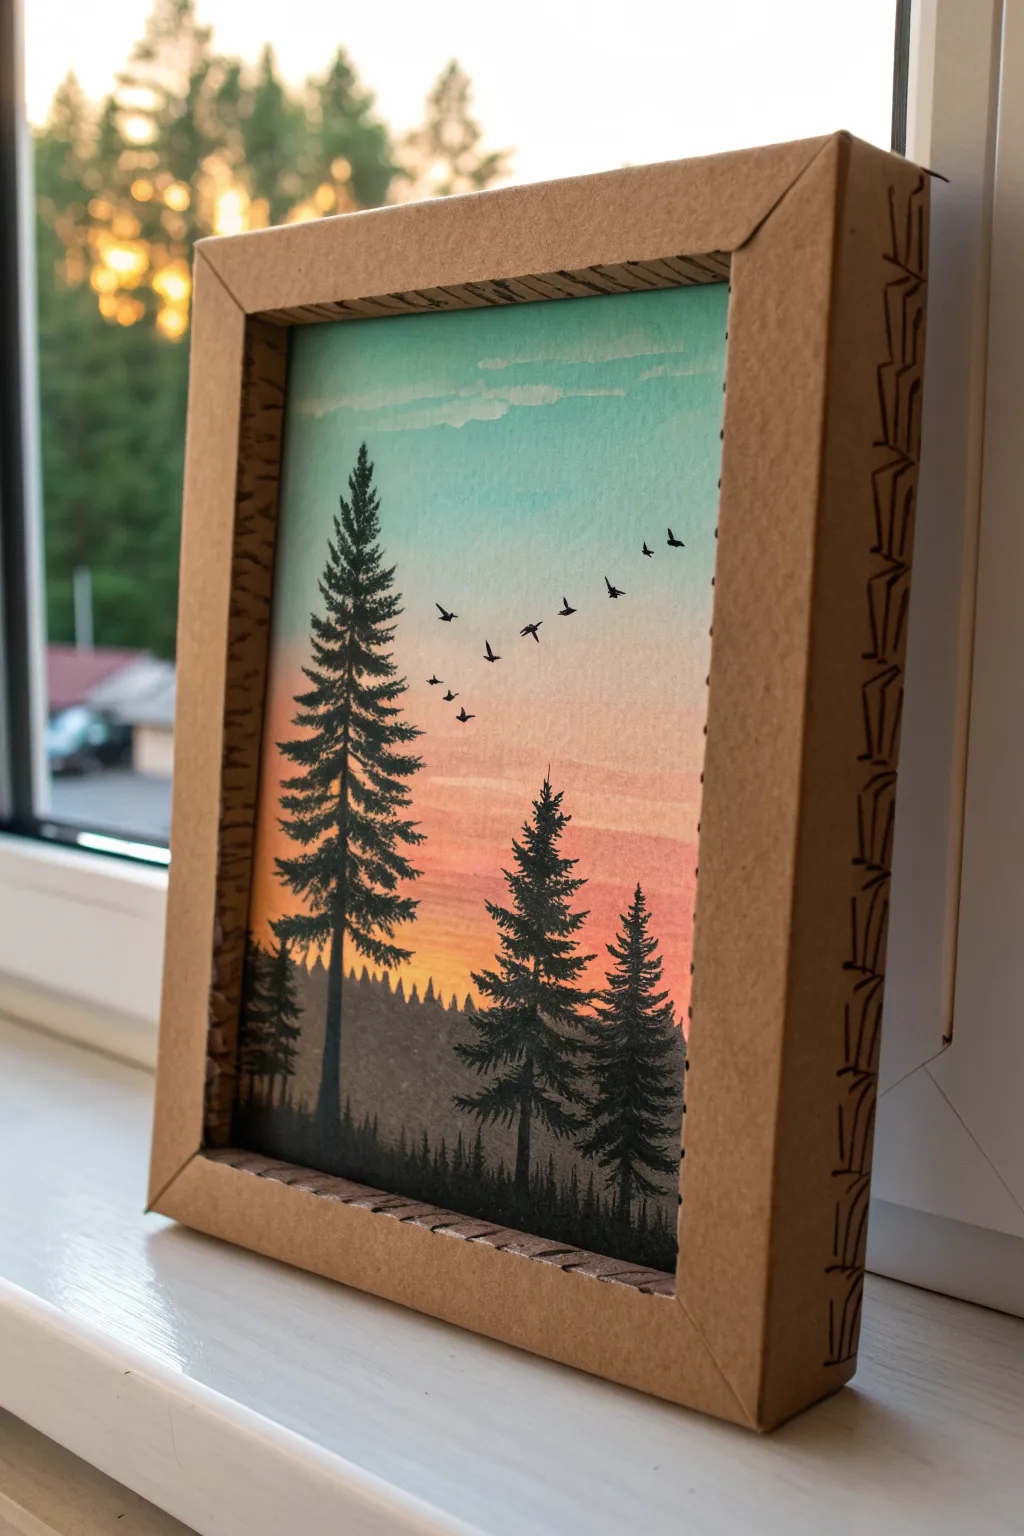
Transform humble cardboard into a stunning framed art piece with this high-contrast silhouette project. A vibrant sunset gradient serves as the perfect backdrop for stark black pine trees, all housed within a custom-built, eco-friendly shadow box.
Step-by-Step
Materials
- Corrugated cardboard sheet (clean, unbent)
- Watercolor paper or mixed media paper (heavyweight)
- Watercolor paints or acrylics (teal, sky blue, light orange, deep orange/red)
- Black acrylic paint or black gouache
- Fine liner pen (black, waterproof)
- Craft knife or box cutter
- Ruler and pencil
- Hot glue gun or strong craft glue
- Flat paintbrushes and fine detail brushes
- Masking tape
Step 1: Painting the Sunset Background
-
Prepare your canvas:
Cut a piece of watercolor paper to your desired size, roughly 5×7 inches. Tape the edges down to a flat surface with masking tape to create a clean border and prevent buckling. -
Mix the sky colors:
Prepare your palette with a gradient in mind: teal at the top, fading into a lighter blue, then a soft peach, and finally a vibrant orange-red at the bottom. -
Apply the first wash:
Using a wide flat brush, dampen the paper slightly with clean water. Start at the top with your teal paint, brushing horizontally across the paper. -
Blend the gradient:
While the paint is still wet, introduce the lighter blue below the teal, blending the meeting point gently. Clean your brush and switch to the peach tone, blending it up into the blue. -
Intensify the horizon:
Finish the bottom section with the deep orange/red hue. I find that going back over the transitions with a slightly damp, clean brush helps smooth out any hard lines. -
Create distinct clouds:
While the teal section is drying but still slightly damp, lift out a little pigment with a clean, dry tissue to suggest faint clouds, or dab on a tiny amount of white paint for wispy cirrus clouds. -
Let it dry COMPLETELY:
This is crucial. The background must be bone-dry before you add the silhouettes, or the black paint will bleed into the sky.
Clean Edges Pro-Tip
When painting the pine trees, use a ‘dry brush’ technique (very little paint) for the outer tips of the branches to mimic the texture of needles.
Step 2: Drafting the Silhouettes
-
Paint the background treeline:
Mix a dark grey (or use watered-down black). Paint a low, uneven hills of jagged tree shapes along the very bottom horizon. This creates depth behind your main trees. -
Establish the main trunks:
Using pure black acrylic and a thin brush, paint a few vertical lines for your foreground pine trees. Vary their heights and thicknesses to make the composition interesting. -
Detail the branches:
Start from the top of a trunk and use a stippling or dabbing motion to create pine branches. Keep the top narrow and widen the tree as you move down, leaving small gaps so the sunset peeks through. -
Add the flock of birds:
With your finest brush or a waterproof pen, draw a V-formation of birds in the upper right quadrant. Keep the shapes simple—just small ‘m’ or ‘v’ shapes with varied wing angles.
Step 3: Constructing the Cardboard Frame
-
Measure the frame housing:
On a sheet of corrugated cardboard, measure a rectangle slightly larger than your painting. This will act as the backing plate. -
Cut the frame strips:
Cut four strips of cardboard. Because this is a shadow box style, make them wide (about 1.5 to 2 inches) to create depth. You’ll need two for the vertical sides and two for the top and bottom. -
Create the angled corners:
For a polished look, miter the corners of your cardboard strips at 45-degree angles, or simply overlap them neatly. Make sure the inner opening matches the size of your painting. -
Assemble the box:
Glue the painting centered onto the backing plate. Then, glue the side strips upright around the painting, creating deep walls. -
Add the front bezel:
Cut a final frame shape (rectangular window) from cardboard and glue it onto the top edges of your wall strips to enclose the artwork. -
Detail the frame edges:
Using a black fine liner, draw small, repeating geometric patterns or squiggles along the raw corrugated edges of the cardboard. This decorative touch hides the rough texture and mimics a custom wood carving.
Level Up: 3D Depth
Cut out the foreground trees from black cardstock instead of painting them. Glue them to the inside of the frame glass (or front edge) for a true shadowbox effect.
Hang your lightweight masterpiece on the wall or let it stand on a windowsill to catch the light
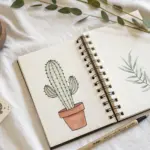
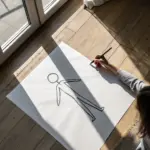
Clean Line Doodles on Brown Cardboard
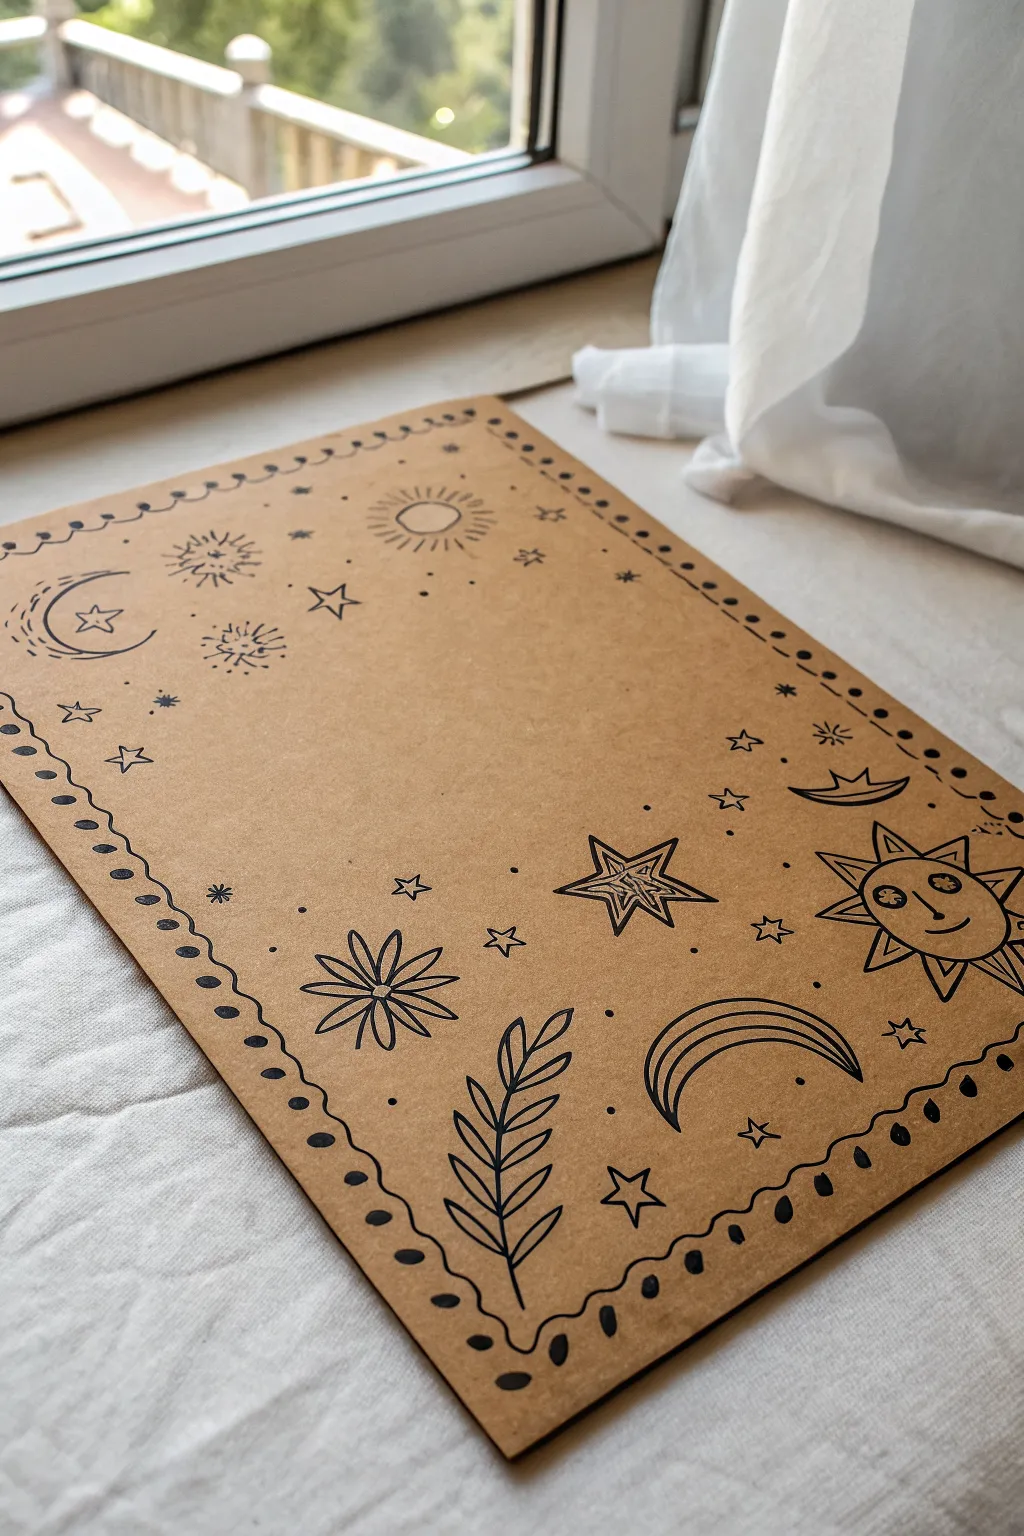
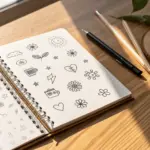
Transform a simple piece of brown cardboard into a mystical artwork using nothing but fine-tip pens and some celestial inspiration. This project combines repetitive patterns with whimsical icons for a relaxing, low-pressure sketching session that looks surprisingly polished.
Step-by-Step Tutorial
Materials
- A4 or Letter-sized sheet of smooth brown cardboard or heavy kraft paper
- Fine-tip black gel pen or archival ink pigment liner (0.3mm or 0.5mm)
- Thicker black marker (0.8mm or 1.0mm) for bold lines
- Pencil (HB or H)
- Eraser
- Ruler (optional)
Step 1: Planning and Border
-
Prepare your canvas:
Start with a clean sheet of brown cardboard. If you are cutting it from a larger box, ensure the edges are trimmed neatly. Wipe away any dust so your pens will glide smoothly. -
Pencil in the border:
Using a light pencil, sketch a fluid, wavy line around the entire perimeter of the page. It doesn’t need to be perfectly symmetrical; organic curves look better here. -
Ink the main wave:
Trace over your pencil wave with your thicker black marker. Keep your hand loose and confident to avoid shaky lines. -
Add detail to the top left:
On the top and left sides of the border, draw small, simple swirls or loops along the outer edge of the wave line to create a lacy effect. -
Add detail to the bottom right:
For the bottom and right edges, switch the pattern. Draw solid black teardrop shapes or semi-circles nestled into the inward curves of your wave line to add visual weight to the bottom corner.
Ink Smudge SOS
If you accidentally smudge wet ink, turn it into a tiny planet or a dark storm cloud doodle. Mistakes are just unplanned stars in this galaxy.
Step 2: Drawing the Main Icons
-
Position the corner sun:
In the bottom right corner, pencil in a large circle for the sun. Give it a friendly face using simple shapes—two dots for eyes and a small curved smile. -
Add sun rays:
Ink the sun’s circle and draw triangular rays extending outward. To make it pop, double-line the triangles, adding a smaller triangle inside each ray. -
Draw the star cluster:
Move slightly inward from the sun. Draw a large five-pointed star. Give it an internal geometric look by drawing lines from the center point to the inner corners, then fill those sections with varied parallel lines. -
Create the crescent moon:
In the upper left area, draw a crescent moon profile facing right. Fill the inside with a smaller crescent shape and add a small star nearby. -
Sketch the botanical element:
Near the bottom center, draw a long, curved stem rising upward with simplified, pointed leaves branching off on both sides. -
Add a geometric flower:
To the left of the leaf stem, draw a flower using a small circle for the center and long, thin oval petals. Draw a line down the center of each petal for detail. -
Draw the stylized rainbow:
Near the bottom right quadrant, add an abstract rainbow or arch shape using three concentric curved lines.
Make it Shine
Use a white gel pen to add highlights inside the sun’s eyes, on the black teardrop border, or to create white stars for high contrast.
Step 3: Fillers and Final Touches
-
Scatter small stars:
Using your finer pen, sprinkle small five-pointed stars randomly across the empty spaces. Keep them open (unfilled) for a lighter look. -
Add starbursts:
Draw small ‘burst’ shapes—simple dots with tiny lines radiating outward—in the gaps between larger drawings. -
Incorporate tiny dots:
To make the cosmos feel dense, dot the paper with single points of ink. I like to group them in threes occasionally for a constellation effect. -
Erase pencil lines:
Wait at least 15 minutes to ensure the ink is completely dry. Gently erase all visible pencil marks, being careful not to smudge the heavy black areas. -
Review contrast:
Step back and look at the composition. If any area looks too empty, add a tiny star. If a line looks too thin, re-trace it with the thicker marker to bold it up.
Your cosmic cardboard art is now ready to be framed or used as a unique cover for a notebook.


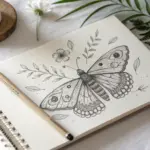
White Pen Botanicals on Cardboard
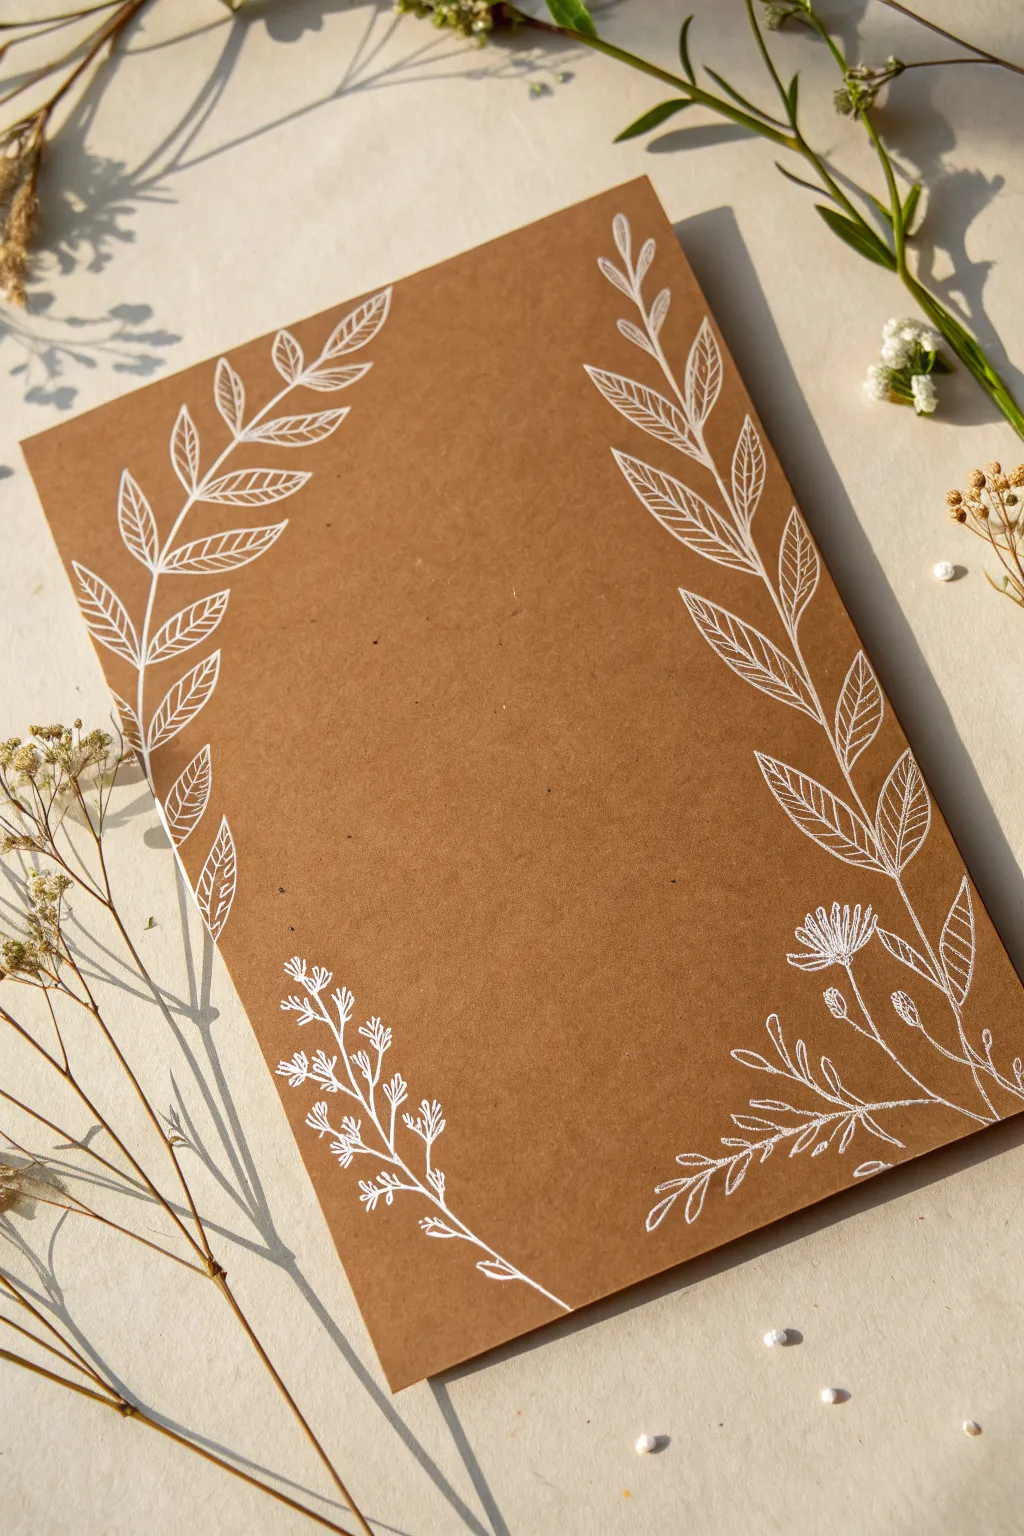
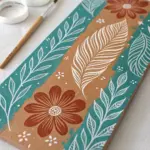
Transform a simple piece of brown cardboard or kraft paper into elegant stationery with nothing but a white gel pen. This project features delicate leaf tendrils and wildflower sprigs that border the page, creating a beautiful natural frame perfect for handwritten notes or menus.
Step-by-Step Guide
Materials
- Heavyweight brown kraft paper or smooth cardboard sheet (A5 size recommended)
- White gel pen (size 08 or 10 for bold lines)
- Fine tip white gel pen (size 05 for details)
- Pencil (HB or lighter)
- Soft eraser
- Ruler (optional)
Step 1: Planning the Layout
-
Prepare your canvas:
Cut your cardboard or kraft paper to your desired size. An A5 size (roughly 5.8 x 8.3 inches) works beautifully for this design as it leaves enough room for writing while keeping the borders intimate. -
Mark the boundaries:
Using a very light touch with your pencil, sketch a faint rectangular guideline about an inch inward from the edge. This isn’t a hard border to draw on, but a general zone to keep your botanical illustrations contained so the center remains open. -
Sketch the primary stems:
Lightly draw the main sweeping curves for the large leafy vines first. Position one starting from the top left corner curving down, and another mirroring it from the top right curving down. These define the main flow of the composition. -
Place secondary elements:
Sketch the placement for the smaller wildflower sprigs at the bottom corners. Don’t draw every petal yet; just mark the direction of the stems to ensure they balance the larger upper vines.
Ink Flow Fix
If your gel pen skips on textured cardboard, try rolling the tip on a scrap piece of smooth plastic or your thumbnail to get the ball rolling again before returning to the paper.
Step 2: Drawing the Upper Vines
-
Ink the main stems:
Take your thicker white gel pen (08 or 10) and trace over your pencil lines for the two main upper stems. Use a confident, smooth stroke to avoid shaky lines. If the ink skips, lift the pen and restart the stroke gently. -
Add leaf outlines:
Starting from the base of the left stem, draw simple, pointed oval shapes for the leaves. Angle them upward and outward. I find it easiest to draw one side of the leaf curve, then the other, meeting at a sharp tip. -
Detail the leaf veins:
Switch to your finer tip pen (05) if you have one, or use a very light touch with your standard pen. Draw a central vein down the middle of each leaf, then add tiny diagonal hatching lines for the side veins. Keep these consistent and evenly spaced. -
Repeat on the right:
Methodically replicate this leaf pattern on the right-side stem. Try to keep the leaf sizes relatively symmetrical to the left side, but remember that nature isn’t perfect, so slight variations add charm. -
Add lower left leaves:
Extend the leaf pattern down the left side, allowing the vine to taper off naturally about halfway down the page. The bottom-most leaves should be slightly smaller than the ones at the top.
Step 3: Creating the Lower Florals
-
Draw the bottom right flower:
Focus on the bottom right corner now. Draw a small, daisy-like flower head with a cross-hatch or solid center. Keep the petals thin and distinct. -
Extend the stems:
Draw a long, curving stem connecting to your flower, reaching inward from the bottom right edge. Add two or three branching stems coming off the main line. -
Add buds and small leaves:
On the branching stems, draw small, closed buds (small ovals with a line down the center) and simple, un-detailed leaves. This contrasts nicely with the detailed veined leaves above. -
Create the bottom left sprig:
In the bottom left corner, draw a fern-like or lavender-style sprig. Create a central stem and draw tiny clusters of three distinct lines branching off both sides. This texture mimics small buds or pine needles. -
Connect the composition:
Add a final wandering branch or two near the bottom right flower that reaches toward the center, helping to bridge the gap between the detailed corner and the empty writing space.
Layering White
To make leaves really bright opaque white, wait for the first outline layer to dry completely, then trace it again. This doubles the opacity without smudging the first wet layer.
Step 4: Finishing Touches
-
Let it dry completely:
White gel ink sits on top of the paper fibers and takes longer to dry than ballpoint ink. Wait at least 15 minutes before touching anything to avoid smearing your hard work. -
Erase pencil marks:
Once you are absolutely certain the ink is dry, gently run your soft eraser over the entire design to remove the pencil guidelines. Hold the paper taut with one hand so it doesn’t buckle. -
Strengthen highlights:
Inspect your lines. If the cardboard absorbed too much ink and some lines look faded, go over them a second time to make the white pop against the brown background.
You now have a handmade, nature-inspired stationery piece ready for your thoughtful words


Animal Drawing That Uses Cardboard Grain
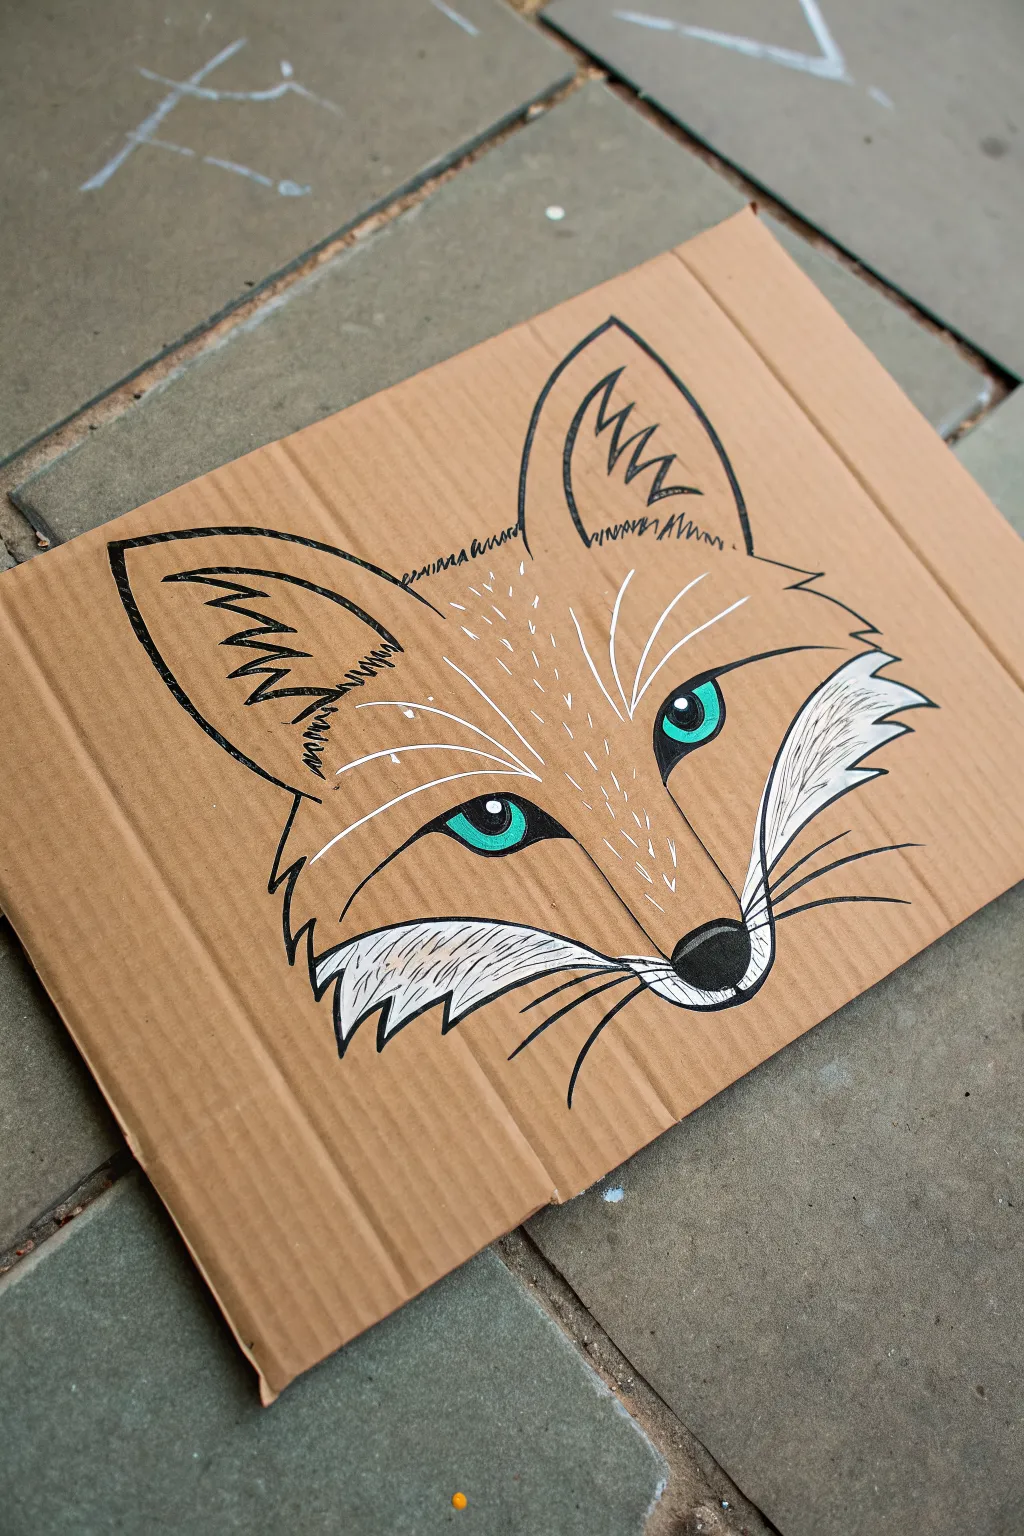
Embrace the natural texture of recycled materials with this striking fox illustration that uses corrugated cardboard as a warm, rustic mid-tone. The design balances bold black linework with bright white highlights and piercing teal eyes for a pop of modern color.
Detailed Instructions
Materials
- Clean piece of corrugated cardboard
- Black permanent marker or paint pen (medium tip)
- Black permanent marker or paint pen (fine tip)
- White paint pen (opaque, acrylic-based)
- Teal or turquoise paint pen (or acrylic paint)
- Pencil
- Eraser
Step 1: Planning the Layout
-
Prepare your canvas:
Find a clean piece of cardboard without major creases or stains. Orient the corrugation ridges vertically, as this mimics the verticality of fur growth and adds to the aesthetic. -
Sketch the basic shape:
Lightly sketch the outline of the fox’s head with a pencil. Start with a wide triangle for the face and add two large, pointed triangles for the ears. -
Define the features:
Sketch the internal details, marking the large curve of the cheeks, the almond-shaped eyes, the triangular nose, and the inner ear tufts. Keep your pencil pressure light so you don’t dent the cardboard.
Use the Ridges
Let your pen “skip” over the cardboard ridges when drawing straight fur lines. This creates a natural, broken line effect that looks great for texture.
Step 2: Inking the Outline
-
Outline the main ears:
Using your medium-tip black marker, trace the outer edges of the ears. Notice how the lines aren’t perfectly smooth; adding small jagged points suggests tufts of fur. -
Draw the head shape:
Continue with the medium marker to outline the sides of the face and the chin area. Again, use jagged, saw-tooth strokes near the cheeks to simulate fur texture. -
Define the eyes:
Carefully draw the thick black outlines of the eyes. This ‘eyeliner’ shape should be bold, tapering to sharp points at the corners. -
Fill the nose:
Draw the nose shape at the bottom point of the face and fill it in completely with solid black ink. Leave a tiny sliver of cardboard visible at the top for a highlight if you wish, or we can add white later. -
Inner ear details:
Switch to a finer tip marker if preferred, and draw the zig-zag patterns inside the ears to create depth and shadow.
Step 3: Adding Color and Highlights
-
Color the irises:
Use a teal or turquoise paint pen to fill in the iris of the eyes. You may need two coats to ensure the cardboard color doesn’t show through. -
Add the pupils:
Once the teal paint is dry, use your black marker to draw the vertical, slit-like pupils in the center of the eyes. -
Base layer of white fur:
Take your white paint pen and fill in the cheek areas and the inner ear tufts. Apply the white in strokes that follow the direction of the fur. -
Refining the white areas:
Go over the white sections again if they look transparent. The goal is a solid, opaque white that contrasts sharply with the brown cardboard. -
Adding texture lines:
I find that adding delicate white dashed lines on the forehead and nose bridge really helps define the snout’s shape without needing a heavy outline. -
Face details:
Add thin white whiskers curving out from the nose area. Use quick, confident flicks of the wrist for the smoothest lines.
Ink Bleeding?
If using a permanent marker and it bleeds into the fibers, switch to an acrylic paint pen. Paint sits on top of the surface rather than soaking in.
Step 4: Final Touches
-
Enhance texturing:
Use your fine black pen to add small tick marks or hatching inside the white cheek patches to create a fur effect. -
Add final whiskers:
Draw long, sweeping black whiskers extending from the muzzle, overlapping the white cheek patches for contrast. -
Eye highlights:
Place a tiny white dot overlapping the pupil and iris in each eye. This ‘catchlight’ brings the fox to life immediately. -
Clean up:
Gently erase any visible pencil sketch marks, being careful not to smudge the ink or paint.
Display your woodland creation on a shelf or frame it without glass to keep that lovely texture visible
BRUSH GUIDE
The Right Brush for Every Stroke
From clean lines to bold texture — master brush choice, stroke control, and essential techniques.
Explore the Full Guide
Still Life With Torn-Edge Cardboard Shading
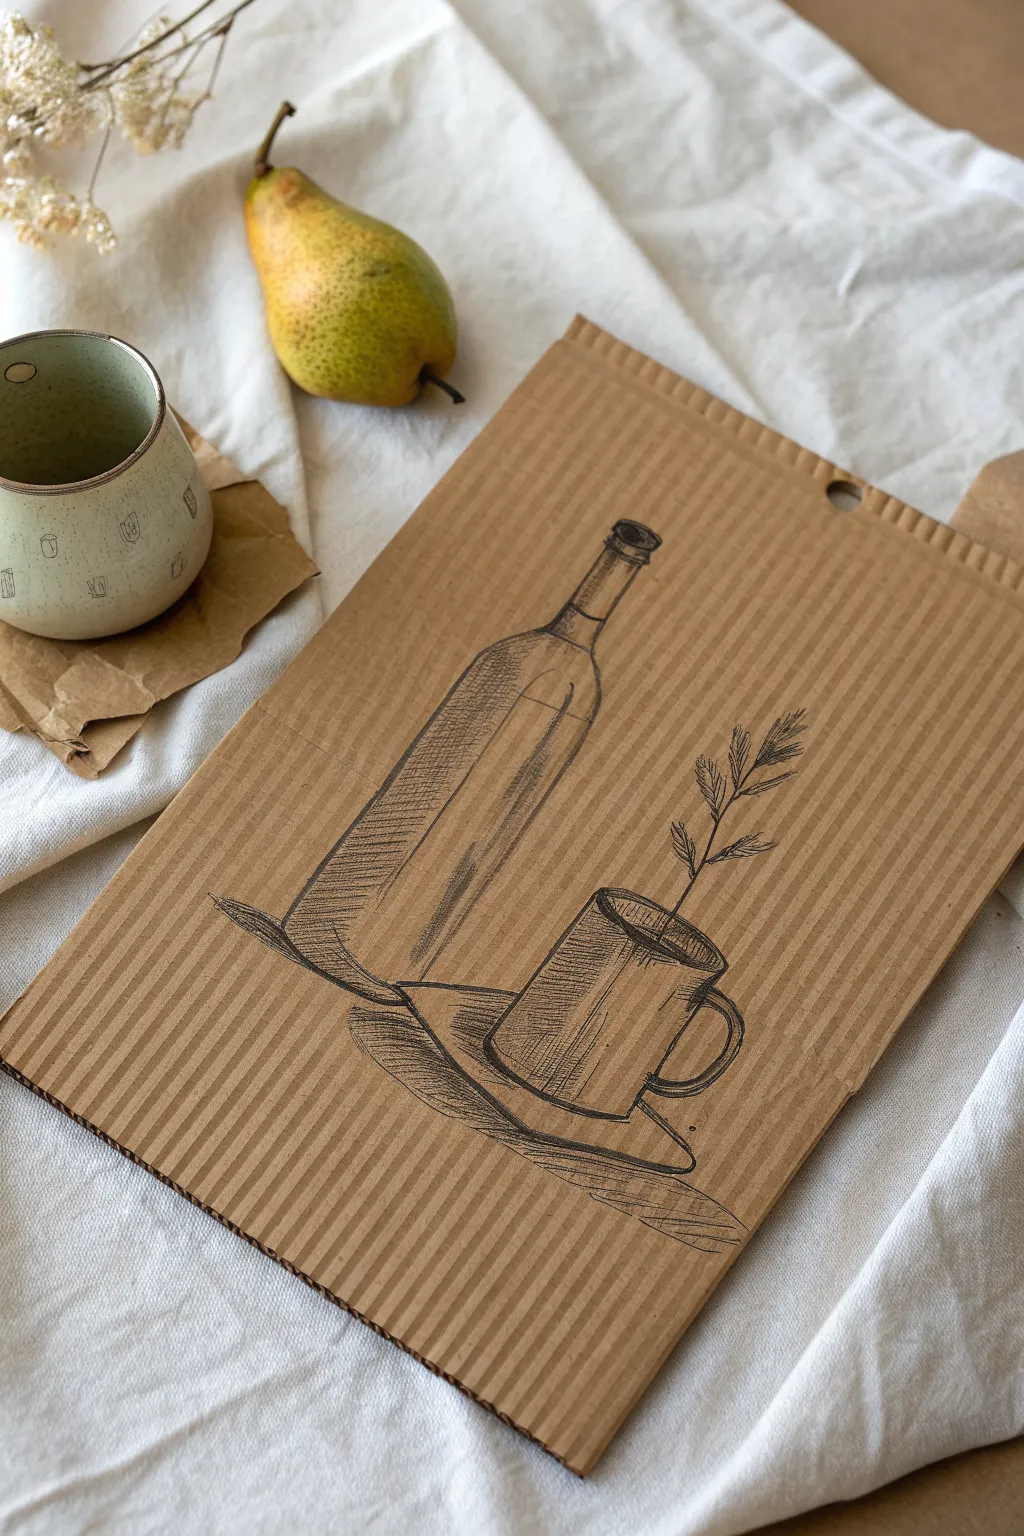
This rustic still life project transforms humble packaging material into a textured canvas for fine ink work. By utilizing the natural ridges of corrugated cardboard, you’ll create a striking bottle and mug composition that plays with light, shadow, and organic lines.
Step-by-Step Tutorial
Materials
- A sturdy piece of corrugated cardboard (approx. A4 or letter size)
- Fine liner pens (sizes 0.1, 0.3, and 0.5)
- Black brush pen or broad marker
- HB pencil
- Soft eraser
- Ruler (optional)
Step 1: Preparation & Sketching
-
Select your canvas:
Find a clean piece of corrugated cardboard with prominent vertical ridges. Cut or tear it to a rectangular shape; leaving the top edge slightly rough or perforated adds character to the final piece. -
Rough placement:
Using your HB pencil, lightly mark the baseline for your objects about one-third of the way up from the bottom edge. This ensures your composition feels grounded on the surface. -
Outline the bottle:
Sketch a tall, slender cylinder on the left side. Add a long neck that tapers gently toward the opening. Keep your pencil pressure very light so you don’t dent the cardboard surface. -
Add the mug:
Draw a shorter cylinder to the right of the bottle, slightly overlapping the space. Add a simple C-shaped handle on the right side and an oval for the saucer beneath it. -
Sketch the greenery:
Draw a thin, slightly curved line rising from the mug. Add small, leaf-like dashes along this stem to represent a sprig of rosemary or pine.
Step 2: Inking the Outlines
-
Trace the main forms:
Switch to your 0.5 fine liner. Carefully go over the pencil outlines of the bottle and mug. Don’t worry if the pen bumps over the cardboard ridges—that jittery line quality is part of the charm. -
Define the bottle neck:
Draw the detailed rings at the top of the bottle neck and the ‘cork’ area. Use confident, slightly broken lines to suggest glass reflectivity. -
Detail the mug rim:
clearly define the rim of the mug with a double line to show thickness. Ink the handle, ensuring it connects logically to the body of the mug. -
Ink the plant stem:
Use a 0.3 pen for the plant. Use quick, flicking motions to ink the leaves, making them darker at the stem and tapering out to sharp points.
Ride the Ridges
Don’t fight the corrugated bumps! Let your pen skip slightly over the valleys. This creates natural, broken lines that make the drawing look beautifully vintage and textured.
Step 3: Shading & Texture
-
Establish light source:
Decide on a light source coming from the right. This means your shadows will fall on the left side of the objects. -
Hatch the bottle:
Using the 0.1 pen, start hatching (drawing parallel diagonal lines) on the left side of the bottle. Create a vertical strip of shading to simulate the cylindrical form. -
Deepen the glass shadows:
Add a second layer of hatching in the opposite direction (cross-hatching) on the darkest parts of the bottle to create depth. Leave a vertical strip completely blank on the right side for the highlight. -
Shade the mug:
Apply horizontal hatching lines across the body of the mug. Curve these lines slightly to follow the rounded form of the cup. Darken the inside of the handle. -
Create the cast shadow:
Underneath the bottle and lifting slightly onto the saucer, draw dense, dark horizontal lines. This grounds the objects so they don’t look like they are floating. -
Enhance the coaster:
Shade the saucer or coaster beneath the mug with wider, looser strokes. I like to make the shadow on the left side of the saucer quite heavy to balance the tall bottle.
Ink Bleeding Issues?
Cardboard is very absorbent. If your ink is spreading too much (feathering), switch to a pigment liner or a ballpoint pen instead of a liquid ink or felt-tipped marker.
Step 4: Final Touches
-
Refine the edges:
Take your 0.5 pen again and thicken the outer silhouette lines on the shadow side (the left) of both objects. This adds weight and dimension. -
Add reflection details:
Draw faint vertical lines inside the bottle shape to suggest liquid or internal reflections. Keep these sparse to maintain the transparency effect. -
Clean up:
Wait at least five minutes for the ink to fully set on the porous cardboard. Gently erase any visible pencil marks. -
Mock-up punch hole (optional):
Draw a small circle at the top center or create a real hole punch if you plan to hang it, mimicing a tag or clipboard look.
Prop your finished cardboard art on a shelf or hang it with twine for an effortless rustic vignette
Cardboard Stencil Drawing for Crisp Shapes
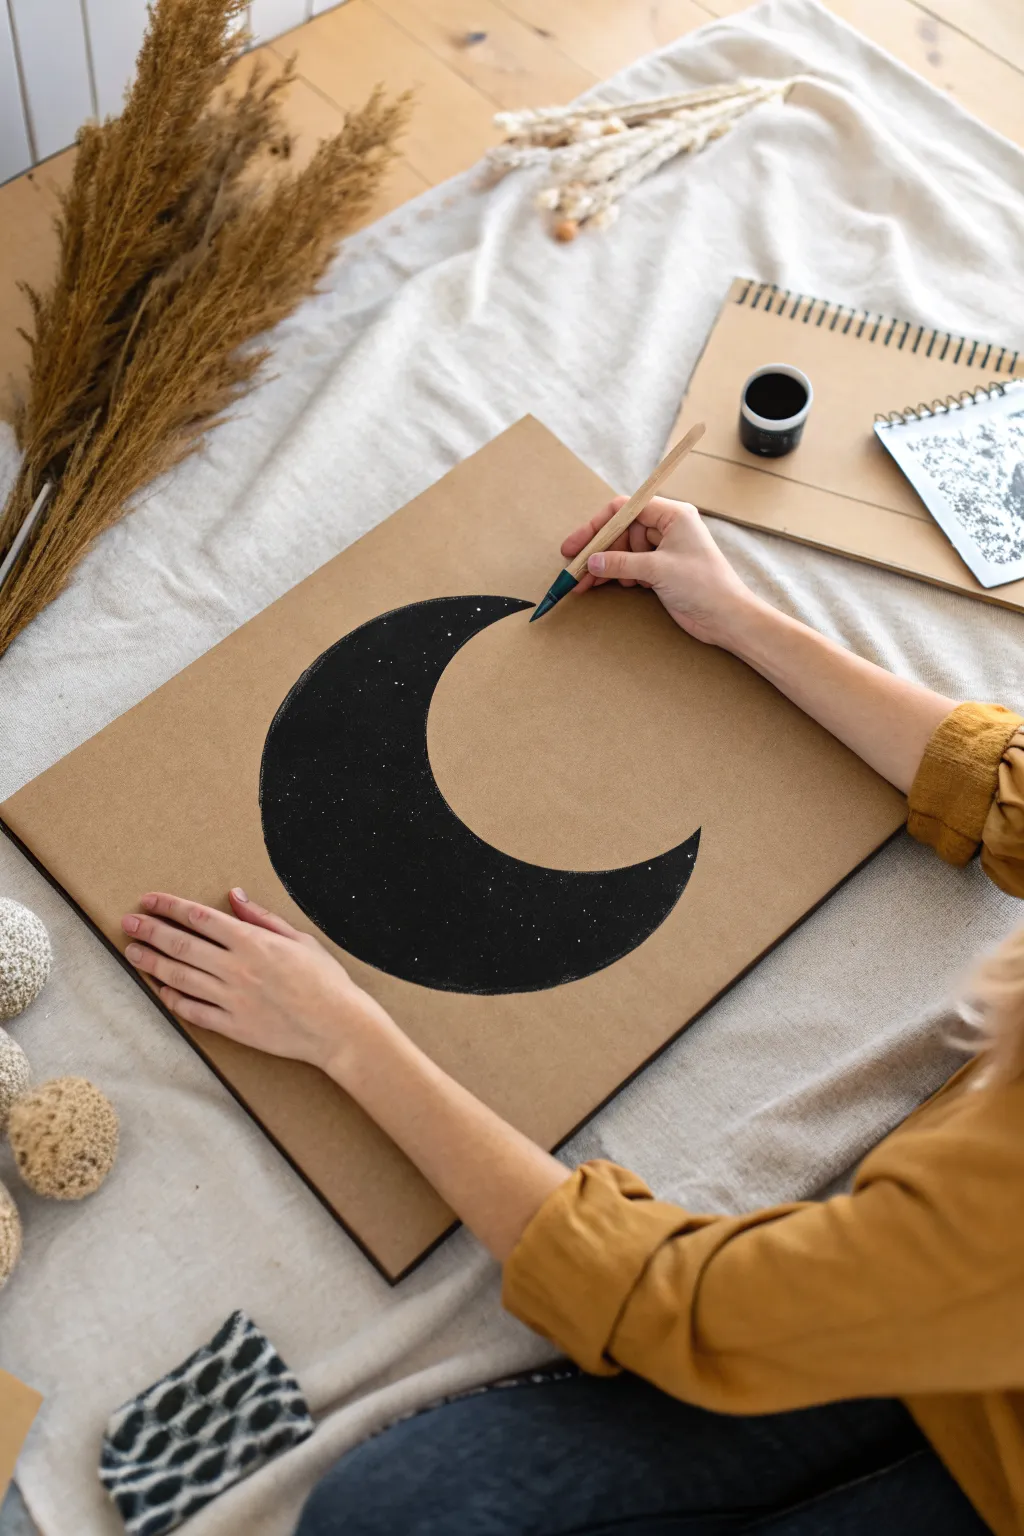
Transform a simple piece of cardboard into a stunning piece of night-sky art with this high-contrast crescent moon design. Looking like a window into the cosmos, this project uses negative space and stenciling to achieve perfectly crisp edges on a rustic background.
Step-by-Step
Materials
- Large, sturdy piece of cardboard (smooth uncorrugated preferred, or thick kraft board)
- Black acrylic paint or black gouache (matte finish)
- White acrylic paint or white ink
- Pencil
- Large compass or two round objects of different sizes (plates/bowls)
- Medium flat brush for filling
- Small liner brush for edges
- Old toothbrush or stiff bristle brush (for splattering)
- X-Acto knife or scissors
- Paper or cardstock for stencil making
Step 1: Creating the Stencil Shape
-
Draft the outer circle:
Start by deciding the size of your moon on a separate piece of scrap paper or cardstock that will serve as your stencil. Use a large compass or trace a dinner plate to draw a perfect circle. -
Define the inner curve:
To create the crescent shape, place a slightly smaller round object (or adjust your compass) inside the first circle, offsetting it to one side. Shift it until you have a crescent thickness you like. -
Trace the crescent:
Draw the inner curve. You should now have a distinct crescent moon shape drafted on your paper. -
Cut out the template:
Carefully cut out the crescent shape using scissors or an X-Acto knife. For this project, you want the negative space—the hole in the paper—to use as a stencil, though you can also cut out the moon itself to trace around it.
Step 2: Preparing the Surface
-
Select your cardboard:
Choose a clean sheet of cardboard. I prefer using smoother backing board or heavy kraft board so the ridges of corrugated cardboard don’t interfere with the paint texture. -
Position the design:
Lay your stencil or cut-out moon onto the center of the cardboard. Tape it down lightly with masking tape or hold it firmly to prevent slipping. -
Trace the outline:
Using a sharp pencil, trace the outline of the crescent moon onto the cardboard very lightly. You want the line to be just visible enough to guide your painting, but not so dark that it shows through later.
Clean Edge Secret
If you struggle with steady hands, use painter’s tape to mask the outside of the crescent shape. Paint over the edge of the tape, then peel it away while wet for a razor-sharp line.
Step 3: Painting the Night Sky
-
Prepare the black paint:
Squeeze out some black acrylic or gouache. A matte finish looks best for this graphic style. -
Outline the edges:
Dip a small liner brush or a fine-point round brush into the black paint. Carefully paint along the pencil line first to establish a crisp, sharp edge. -
Tidy the points:
Pay special attention to the two tips of the crescent. Use the very tip of your brush to make them sharp and tapered rather than blunt. -
Fill the center:
Switch to a medium flat brush to fill in the large body of the moon. Apply the paint in smooth, even strokes to avoid heavy texture buildup. -
Check opacity:
Let the first layer dry for about 10 minutes. If the brown cardboard is showing through, apply a second coat of black for a deep, solid void effect.
Go 3D
Instead of painting directly on the board, cut the crescent shape out of a separate piece of black cardstock, splatter it, and glue it onto the cardboard with foam spacers for a shadow effect.
Step 4: Adding the Stars
-
Mix the stars:
Dilute a small drop of white acrylic paint with a tiny bit of water. You want a consistency similar to heavy cream—fluid enough to flick, but thick enough to be opaque. -
Protect the background:
Place scrap paper over the brown cardboard background, leaving only the black moon exposed. This ensures stars only appear ‘inside’ the moon. -
Splatter technique:
Dip an old toothbrush or stiff brush into the white paint. Run your thumb across the bristles to flick tiny specks of white onto the black area creates a distant galaxy look. -
Hand-paint details:
For a few brighter, closer stars, use your finest liner brush or a white gel pen to place specific dots by hand among the splatter. -
Final dry:
Remove the protective paper carefully and allow the entire artwork to dry completely before moving or framing it.
Now you have a serene piece of celestial decor that looks beautiful leaned against a wall or framed

PENCIL GUIDE
Understanding Pencil Grades from H to B
From first sketch to finished drawing — learn pencil grades, line control, and shading techniques.
Explore the Full Guide
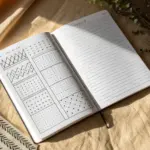
Geometric Mandala Drawing on Cardboard

Transform a simple piece of cardboard into a stunning piece of geometric art using just a pen and some basic drafting tools. This project features layers of intricate petals and angular details that pop beautifully against the natural brown background.
Step-by-Step Guide
Materials
- Square piece of cardboard or heavy kraft paper
- Compass with a sharp pencil lead
- Ruler or straight edge
- Pencil (HB or lighter)
- Eraser
- Fine liner pen (black, approx. 0.5mm)
- Ultra-fine liner pen (black, approx. 0.1mm – 0.3mm)
Step 1: Setting the Foundation
-
Find the center:
Begin by finding the exact center of your cardboard square. Use a ruler to lightly draw diagonal lines from corner to corner; the point where they cross is your center anchor. -
Draw the main concentric circles:
Using your compass, place the needle on the center point. Draw four concentric circles lightly in pencil. Start with a very small inner circle, then three progressively larger circles, leaving about an inch of space between the outer two limits. -
Create the radial guides:
Using a protractor or just your eye and a ruler, divide the circle into 12 equal sections. Draw straight lines through the center point extending to the outermost circle to create 12 ‘slices’ of pie.
Smudge Alert
Cardboard is less absorbent than drawing paper, so ink sits on top longer. Use a scrap piece of paper under your drawing hand to prevent smearing wet ink.
Step 2: Penciling the Pattern
-
Sketch the inner flower:
In the second smallest circle, draw 12 simple petals. Each petal should peak where a radial guide line intersects with the circle’s edge. -
Draft the triangle layer:
Around the flower petals, within the next circle band, sketch triangular shapes. The base of each triangle should rest on the curve of the circle below, with the point touching the line above. -
Outline the large outer petals:
Sketch large, wide petals connecting the third circle to the outermost circle. These should be the largest shapes in your mandala, framing the inner design. -
Add geometric connectors:
Inside these large outer petals, use your ruler to draw straight lines connecting the widest points of the petals back toward the center, creating a diamond or kite-like effect within each petal.
Step 3: Inking the Design
-
Ink the central spokes:
Switch to your 0.5mm fine liner. Carefully trace over the 12 radial lines inside the very center circle, creating a wheel-spoke effect. -
Outline main shapes:
Trace the main structural lines: the inner flower petals, the triangle layer, and the large outer petals. I find it helps to rotate the cardboard as I work to keep my hand position consistent. -
Define the outer edge:
Ink a dashed or dotted line along the very outermost circle guide. This creates a soft border that contains the design without feeling too rigid. -
Erase pencil marks:
Allow the ink to dry completely—wait at least 15 minutes to prevent smudging. Gently erase all your pencil guides until only the clean ink lines remain.
Go White
For a dramatic pop, use a white gel pen to add highlights or fill in specific shapes. The white ink contrasts beautifully against the brown kraft cardboard.
Step 4: Adding Detail and Texture
-
Add inner circles:
Inside the first layer of flower petals, draw small, freehand circles near the tip of each petal. -
Detail the triangles:
Inside the triangular band, draw a smaller triangle within each shape. Fill the space between the inner and outer triangle with tiny stippling dots using your ultra-fine pen for texture. -
Embellish large petals:
Draw an inner contour line inside the top half of the large outer petals. Add a solid black dot at the junction where the geometric kite lines meet. -
Connect the tips:
Draw straight lines connecting the tips of the large outer petals to the center of the edge between them, creating a star-like geometry. -
Final dots:
Place a prominent black dot on the radial lines in the outer section to balance the visual weight of the center.
Now you have a balanced, geometric artwork ready to be framed or gifted


Have a question or want to share your own experience? I'd love to hear from you in the comments below!