If you’re craving that satisfying drippy look—half cute, half chaotic—you’re in the right headspace. These ideas are all about bold shapes, juicy melting effects, and clean outlines you can actually pull off on a sketchbook page.
Drippy Smiley Face Icon
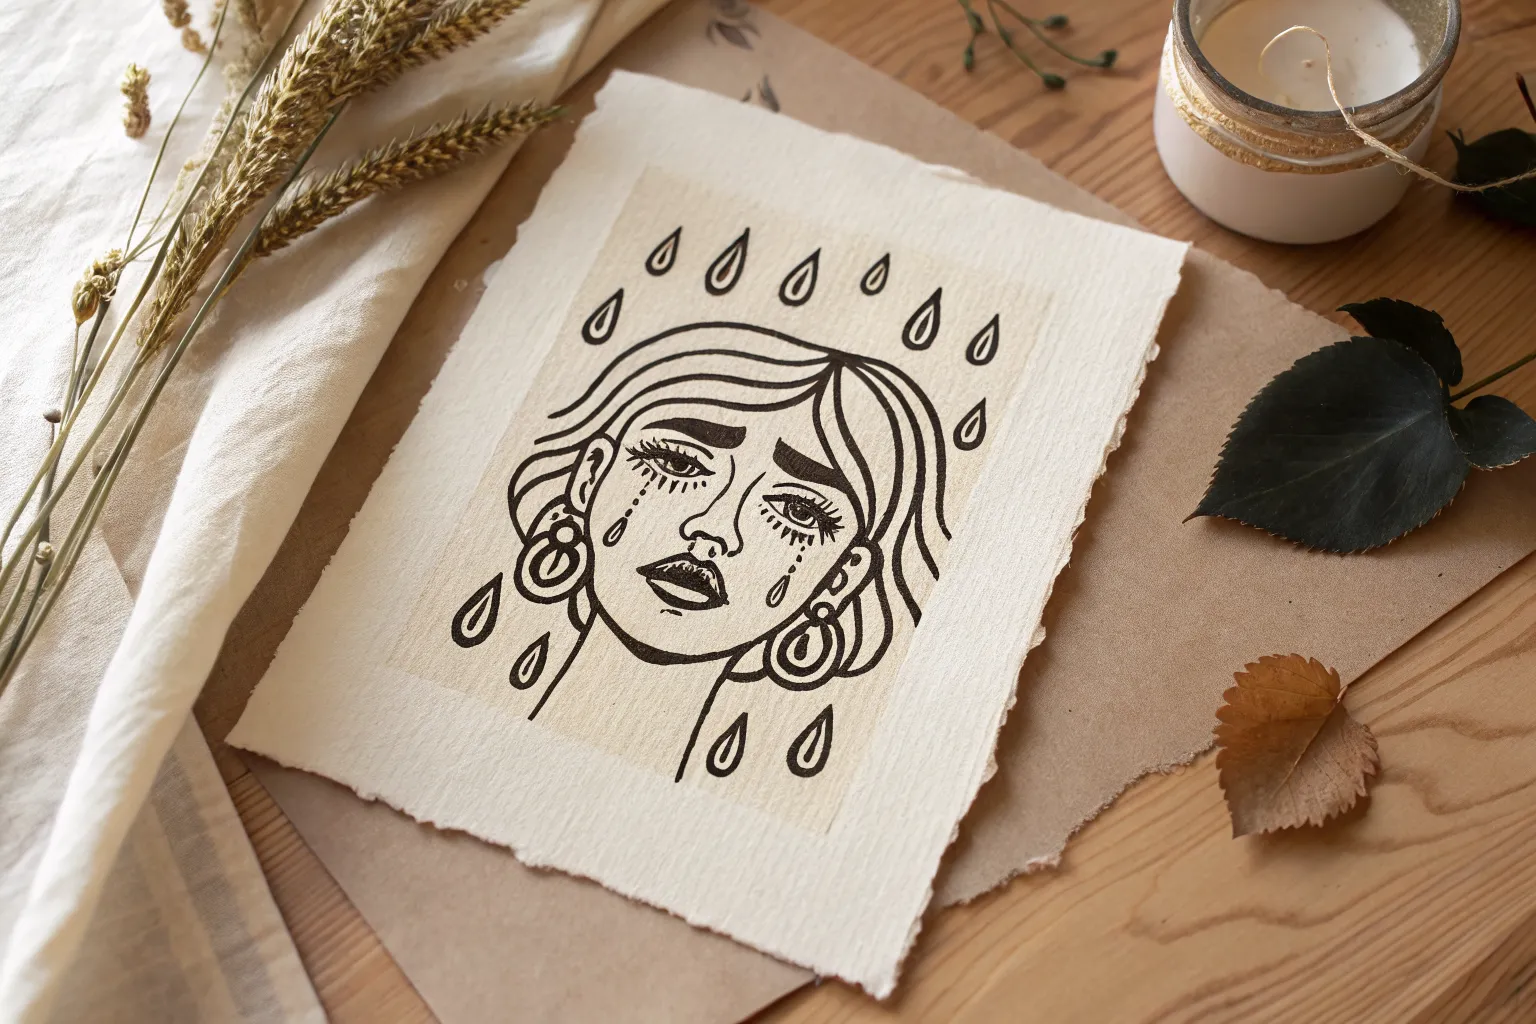
Transform a plain canvas tote into a piece of wearable art with this drippy smiley face design. The bold, monochrome graphic has a distressed, vintage stamp look that adds immediate character to an everyday accessory.
Step-by-Step Guide
Materials
- Beige or natural-colored canvas tote bag
- Fabric paint (black)
- Textile medium (optional, if using acrylics)
- Cardboard insert
- Pencil or disappearing fabric marker
- Round object for tracing (plate or bowl)
- Flat paintbrush (size 6 or 8)
- Fine liner paintbrush (size 0 or 1)
- Iron (for heat setting)
- Pressing cloth or parchment paper
Step 1: Preparation & Sketching
-
Prepare the canvas:
Before you begin, iron your tote bag to remove any deep creases that might interfere with your painting. A smooth surface is key for clean lines. -
Insert protection:
Place a piece of cardboard or thick paper inside the tote bag directly under where you plan to paint. This prevents the black paint from bleeding through to the other side of the bag. -
Trace the outline:
Find a round object like a small plate or bowl that fits well in the center of your bag. Lightly trace a circle using a pencil, leaving the bottom section faint or open. -
Sketch the drips:
Instead of completing the circle at the bottom, sketch irregular wavy lines and droplets. Vary the lengths of the drips to make the ‘melting’ effect look more organic. -
Add floating drops:
Draw three or four detached teardrop shapes below the main melting line. These ‘splatter’ marks add movement to the design. -
Draw the face features:
Sketch two tall ovals for eyes in the upper half of the circle. They should be slightly tilted inward toward each other for that classic retro feel. -
Sketch the smile:
Draw a wide ‘U’ shape for the mouth. Add small, curved ‘C’ shapes at the ends of the smile to create dimples.
Stamp Effect Trick
To get that gritty, vintage texture easily, paint the design on a sheet of craft foam first, then press it onto the fabric like a giant homemade stamp.
Step 2: Painting the Design
-
Outline the circle:
Dip your flat brush into black fabric paint. Carefully paint along your pencil line for the main circle, keeping the stroke thickness consistent—about 3-4mm wide. -
Paint the dripping edge:
Continue the outline into the drippy bottom section. I find it helpful to thicken the line slightly where the paint ‘pools’ at the bottom of a drip. -
Fill the detached drops:
Using your smaller brush, fill in the floating teardrop shapes you sketched earlier. Keep the edges sharp. -
Fill the eyes:
Switch back to the flat brush to fill in the oval eyes. Ensure the black is solid and opaque; you may need a second coat after the first dries slightly. -
Paint the smile:
Use the fine liner brush for the smile line. Follow your sketch carefully, tapering the line slightly as it connects to the cheeky dimples at the ends. -
Create the distressed texture:
To mimic the stamped look in the photo, take a mostly dry brush with very little paint on it. Lightly dab or stipple over the solid black areas to create tiny irregular voids or ‘noise’ along the edges.
Step 3: Finishing Touches
-
Clean up edges:
Inspect your lines. If any edges look too fuzzy, use the fine liner brush to crisp them up, but remember that a little irregularity adds to the hand-drawn charm. -
Let it dry completely:
Allow the paint to air dry for at least 24 hours. Don’t rush this step, as fabric paint needs time to bond with the fibers. -
Heat set the design:
Once dry, place a pressing cloth or parchment paper over the design. Iron on a high heat setting (no steam) for 3-5 minutes to permanently set the ink.
Neon Pop
Paint the smiley face in neon yellow first, let it dry, then layer the black drippy outline on top for a vibrant, high-contrast streetwear look.
Your moody, melting tote is now ready to carry your essentials with a bit of edgy attitude

Dripping Bubble Letter Tag
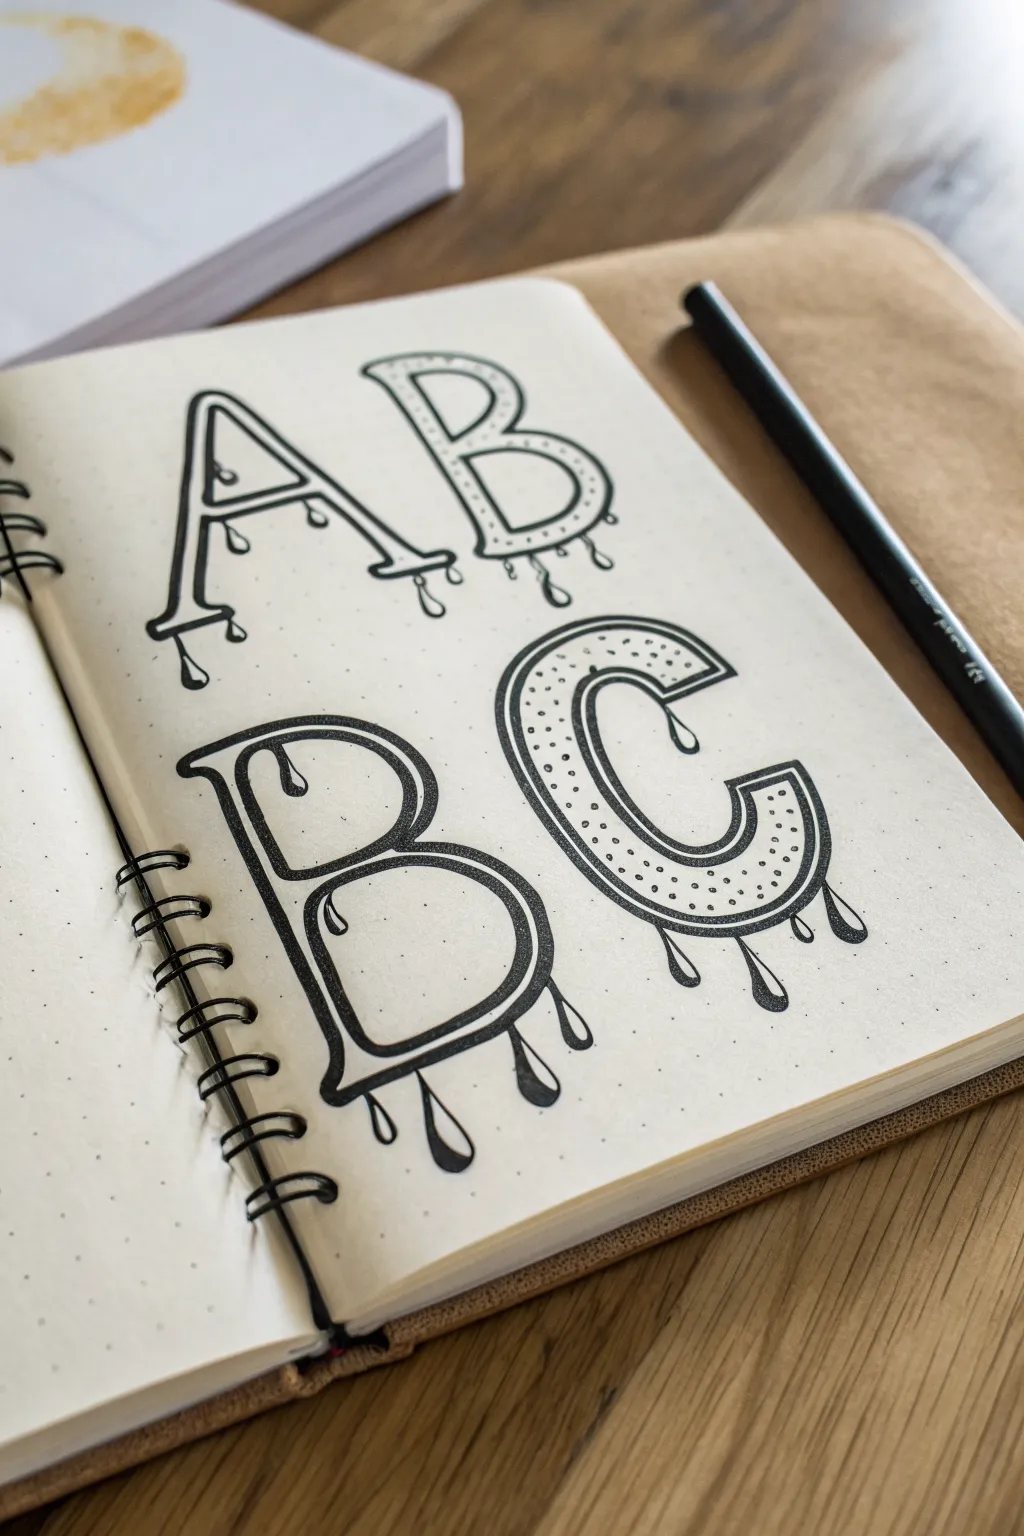
Learn to draw stylized letters that look like they are melting right off the page with this simple ink tutorial. By combining bold outlines with delicate drip details and stippling, you’ll create a striking, slightly grunge aesthetic perfect for bullet journals.
Step-by-Step Guide
Materials
- Dotted grid notebook or journal
- Pencil (HB or lighter)
- Eraser
- Fine liner pen (01 or 03 size)
- Thick black marker or brush pen (for filling)
Step 1: Drafting the Skeleton
-
Define the layout:
Open your dot grid notebook to a fresh page. Visualize where you want your letters to sit. For this layout, we are stacking two pairs of letters: ‘AB’ on top and ‘BC’ below. -
Sketch the basic forms:
Using a pencil and very light pressure, sketch the basic block letter shapes. Use the grid dots to keep your vertical lines straight and your widths consistent. -
Add the drip guides:
At the bottom of each letter stroke, lightly sketch elongated tear-drop shapes extending downward. Vary the lengths so some drips look like they are just forming, while others are long and heavy.
Gravity Matters
Always draw drips vertical! Even if a letter is slanted or curved (like the ‘C’), the drips must fall straight down relative to the page bottom to look realistic.
Step 2: Inking Guidelines
-
Outline the outer shape:
Switch to your fine liner pen. Choose a medium thickness (like an 03 or 05). Trace over your pencil sketch, carefully going around the drip shapes you added. -
Create the inner border:
Draw a second line inside the first outline, creating a double-stroke effect. Keep this inner line parallel to the outer one, but stop just before you reach the bottom where the drips begin. -
Connect the layers:
Where the inner line stops near the bottom, curve it gently to meet the outer line, emphasizing the fluid, liquid look of the letter. -
Erase pencil marks:
Wait a moment for the ink to set completely to avoid smudging, then gently erase all your initial pencil sketches.
Color Pop
Instead of black shading, use neon highlighters to fill the drips for a ‘toxic slime’ graffiti effect that jumps off the page.
Step 3: Adding Detail and Depth
-
Thicken the drips:
Go back over the bottom-most drips. Thicken the line weight slightly at the very bottom of each drop to simulate the weight of gathering liquid. -
Small floating drops:
Add a few detached droplets falling below the main letters. These should be small tear shapes that aren’t connected to the letters themselves. -
Internal stippling:
Using a very fine pen (01 or 005), add stippling (tiny dots) inside the space between your double lines. Concentrate the dots near the bottom of the letters to create a gradient shadow effect. -
Highlighting the drips:
On the larger black drips or thick outlines, leave a tiny white specular highlight (a small dot or crescent) to make the liquid look wet and shiny.
Step 4: Heavy Contrast
-
Identify shadow areas:
Decide on a light source (usually top-left). You will be adding heavy black shading to the sides opposite the light (bottom and right). -
Fill the drop shadows:
I particularly like using a thicker marker here to save time. Fill in the ‘shadow’ areas of the letters solid black, especially focusing on the drips themselves to make them pop. -
Refine the edges:
Check your outlines one last time. If any lines look shaky, go over them with a slightly heavier hand to smooth out the curves. -
Variation check:
Look at the ‘B’ and ‘C’ on the bottom row. Ensure the drip pattern is random enough so it doesn’t look like a copy-paste of the top row.
Now you have a bold, edgy lettering piece that adds instant character to your journal layout


Melting Skull With Paint Tears
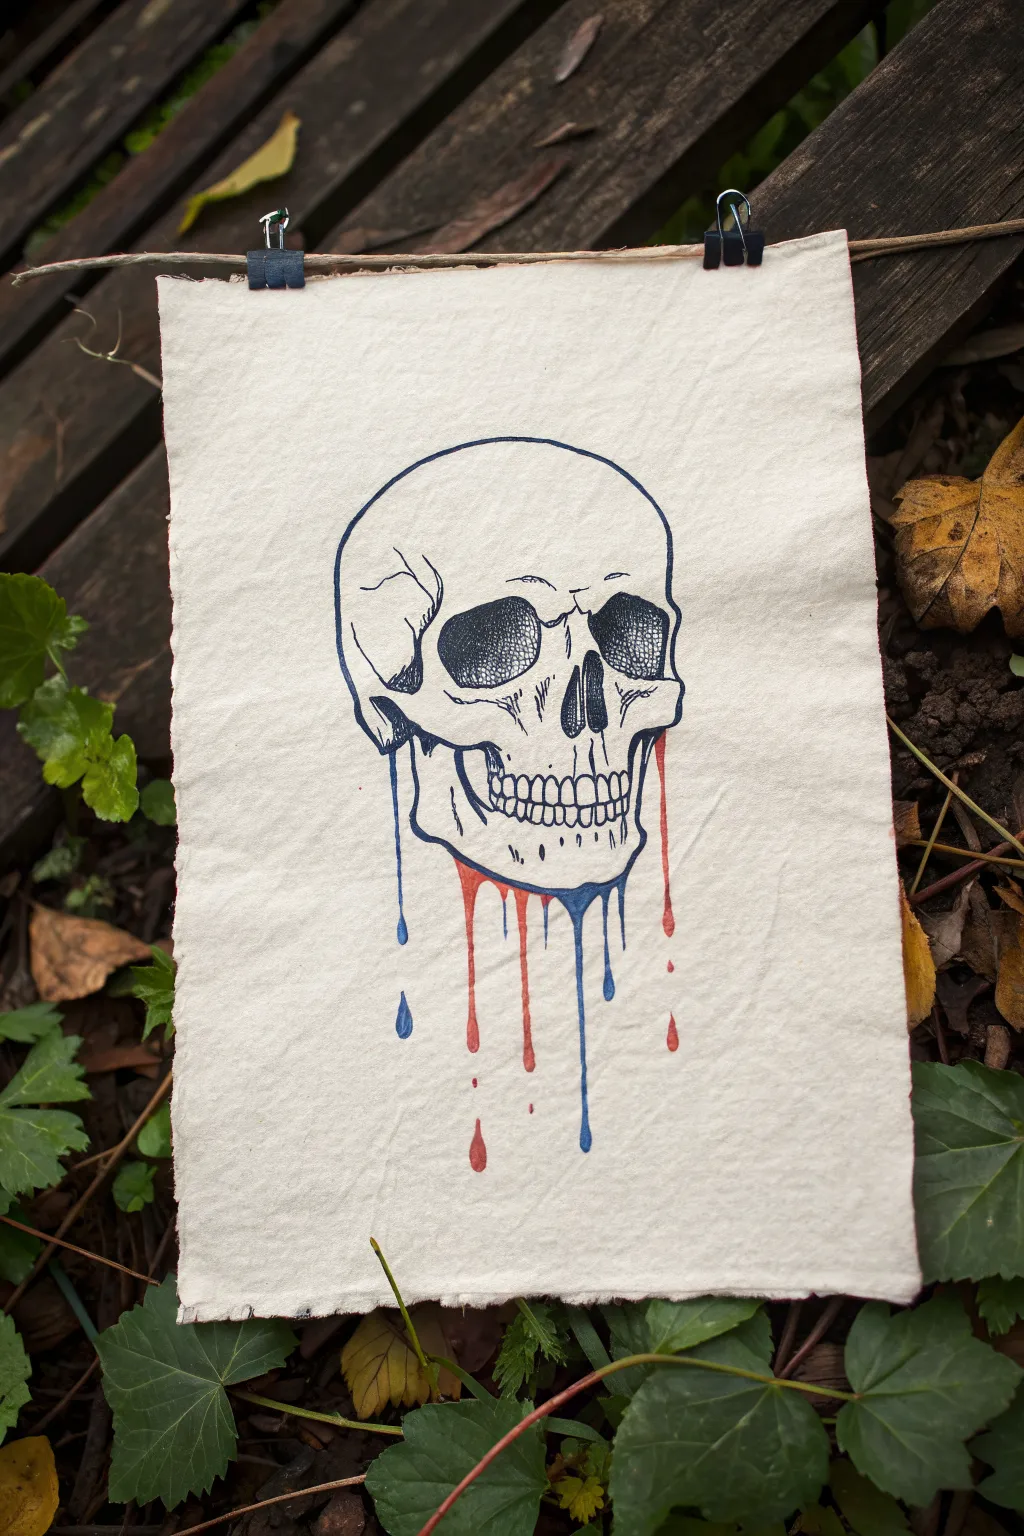
This striking illustration combines precise anatomical line work with the fluid chaos of dripping ink. The contrast between the rigid, dark blue linework of the skull and the unexpected blue and red tears creates a moody, surreal effect on textured paper.
Detailed Instructions
Materials
- Textured cream or off-white paper (heavyweight mixed media or watercolor paper)
- Fine liner pens (dark blue/indigo, size 0.3mm and 0.5mm)
- Liquid watercolor or fluid acrylic ink (Red and Blue)
- Small round paintbrush (size 2)
- Pencil (HB for sketching)
- Kneaded eraser
- Water container
- Paper towels
Step 1: Sketching the Anatomy
-
Basic Shapes:
Begin lightly with your pencil. Start with a large circle for the cranial mass and a squared-off jaw shape attached below it to establish the overall volume of the skull. -
Face Orientation:
Draw a faint vertical line slightly off-center to mark the 3/4 turn of the face. Add a horizontal line across the center where the eye sockets will sit. -
Eye Sockets and Nose:
Sketch the orbital cavities (eye sockets) as somewhat irregular, rounded rectangles. Between them, draw the inverted heart shape of the nasal cavity. -
Cheekbones and Jaw:
Define the zygomatic arches (cheekbones) protruding below the eye sockets. Curve the jawline downwards, ensuring the mandible connects properly to the upper skull. -
Teeth Placement:
Lightly sketch a curved band for the teeth. Don’t draw individual teeth yet; just block in the area where the upper and lower sets meet.
Step 2: Inking the Linework
-
Outline Contour:
Switch to your 0.5mm dark blue fine liner. Trace the outer contour of the skull, using a slightly broken or jittery line to simulate an aged bone texture. -
Defining Cavities:
Outline the eye sockets and nasal cavity. Inside these dark areas, use a stippling technique (lots of small dots) or tight cross-hatching to create depth without making it solid black. -
Teeth Detailing:
Use the 0.3mm pen for the teeth. Draw the roots slightly visible on the upper jaw and separate the teeth with thin, non-uniform lines to keep them looking organic. -
Cracks and Sutures:
Add the jagged squiggles of the cranial sutures on the forehead and side of the head. Include a few small cracks near the temple for character. -
Erase Basics:
Once the ink is completely dry—give it a few minutes—gently use the kneaded eraser to lift all visible pencil marks.
Gravity Assist
Don’t just draw the drips; let gravity help. Hold the paper vertically and load the brush wetly so the paint physically runs down the page naturally.
Step 3: The Melting Effect
-
Preparing the Drips:
Identify the lowest points of the jawline and cheekbones where gravity would naturally pull liquid down. These will be your anchor points for the paint. -
Applying Blue Drip:
Using your brush with blue ink/watercolor, carefully trace the bottom edge of the jaw on the right side. Let the paint pool slightly. -
Guiding the Flow:
I find it helpful to tilt the paper upright at this stage. If the paint is thick, use the tip of your brush to guide a stream of blue ink downwards to form a long, thin drip. -
Applying Red Drips:
Rinse your brush thoroughly. Pick up the red ink and apply it to the bottom of the left jaw and middle chin area. -
varying Lengths:
Create variation by making the red drips finish at different heights than the blue ones. Add a tiny detached droplet at the bottom of the longest streams for realism. -
Upper Bleeds:
Carefully touch a tiny amount of red ink to the corner of the jawbone or cheek, allowing it to look like it’s seeping out from behind the bone structure. -
Drying:
Let the piece dry flat to prevent the drips from running off the page or merging into a muddy color.
Color Shift
Try using metallic gold or silver ink for the drips instead of primary colors to give the piece a luxurious, ‘memento mori’ feel.
Now you have a marvellously macabre piece of art to hang up or display.
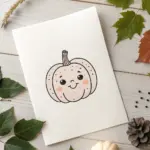
Drippy Ghost Sticker Drawing
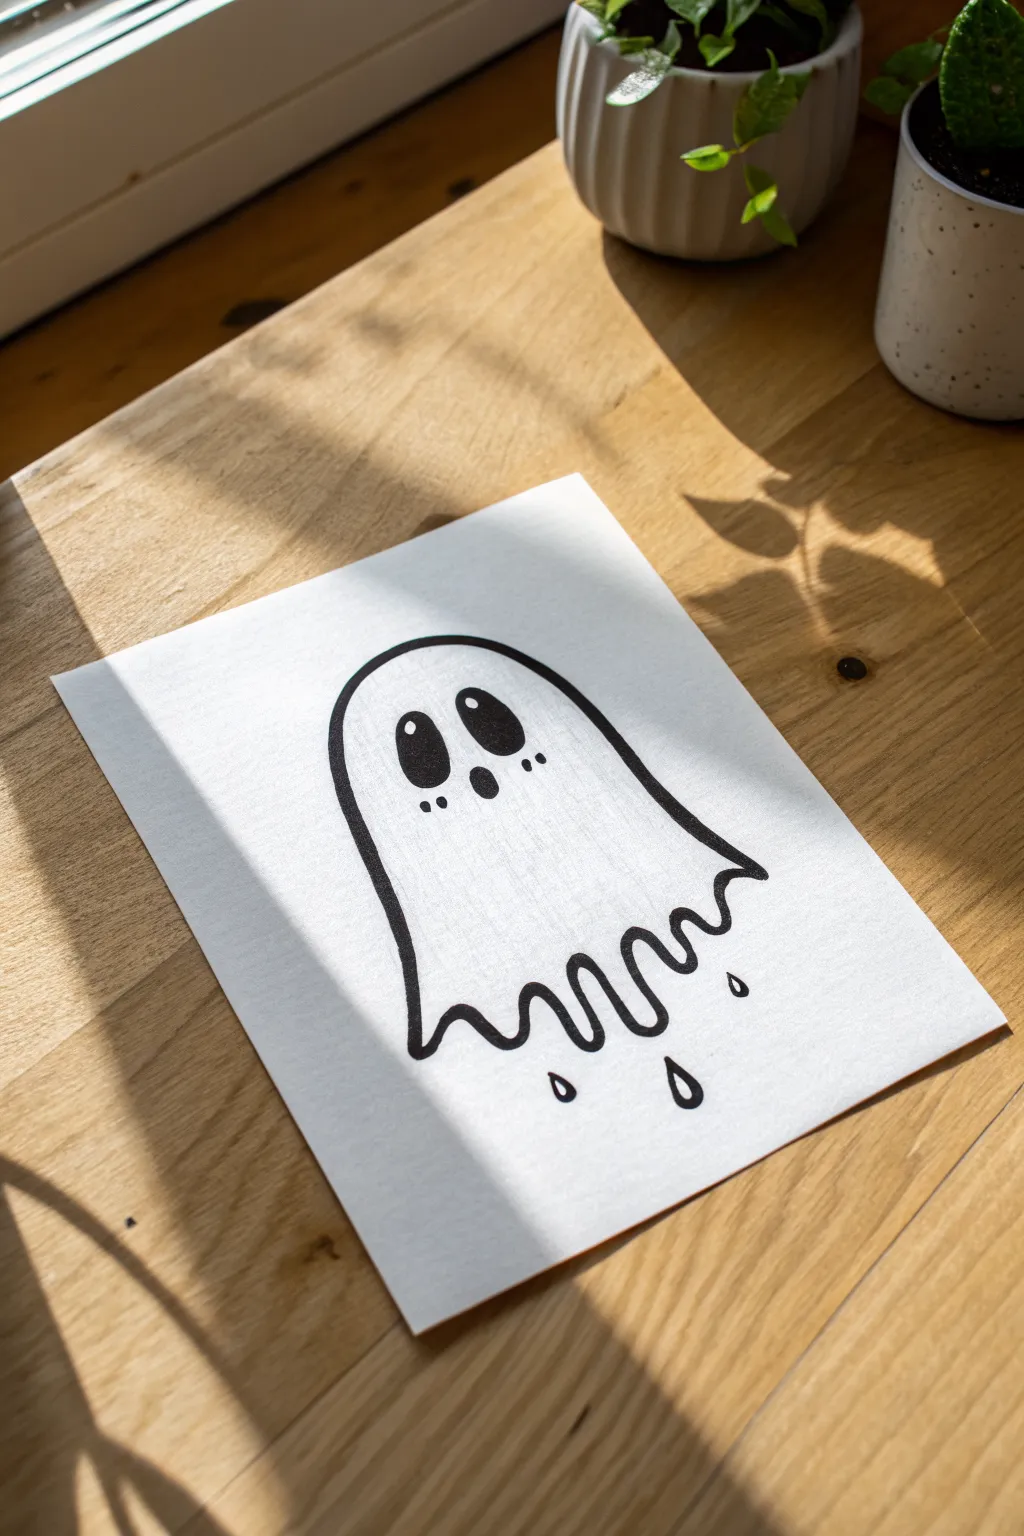
This charmingly simple ghost illustration combines bold, clean linework with a playful “melting” effect at the bottom for a spooky yet cute aesthetic. It’s a perfect beginner-friendly project that focuses on smoothness of line and high-contrast features.
Step-by-Step Guide
Materials
- Bright white drawing paper or cardstock (smooth finish is best)
- Pencil (HB or 2H)
- Eraser
- Fine liner pen (0.5mm)
- Thick black marker or brush pen
- Ruler (optional for centering)
Step 1: Drafting the Shape
-
Set the foundation:
Begin by lightly sketching a large, inverted U-shape in the center of your paper. This will be the main body and head of the ghost. -
Widen the base:
Extend the sides of your U-shape downwards, flaring them out ever so slightly so the ghost looks a bit wider at the bottom than at the top. -
Sketch the left drip:
Instead of drawing a straight line across the bottom, start on the left side and draw a wavy line that dips down into a blunt point, resembling a thick liquid drop. -
Create the central drips:
Continue sketching the bottom edge with two or three more varying drips. Make the middle ones slightly longer and more irregular to enhance the melting effect. -
Finish the hem:
Complete the bottom edge on the right side with a final, smaller drip that connects back up to the right side of the body. -
Add floating droplets:
Sketch three small, tear-drop shapes detached from the main body—one near the center drip and one on each side—to emphasize the liquid texture.
Shaky Lines?
If your long curves look wobbly, try ghosting the motion with your hand in the air before touching the paper. Drawing from the shoulder rather than the wrist also smooths out long strokes.
Step 2: Adding Personality
-
Position the eyes:
Near the top third of the ghost, lightly sketch two tall ovals for eyes. Angle them slightly inward toward each other to create a sweet, innocent expression. -
Draw the mouth:
Place a small, circular oval right between and slightly below the eyes for the mouth. Keep it small to maintain the cute proportion. -
Add blush marks:
Sketch two tiny dashes or dots underneath each eye to act as blushing cheeks. -
Detail the eyes:
Inside each eye oval, outline a small circle near the top. These will remain white as highlights.
Make it a Sticker
Draw this on adhesive label paper and cut it out leaving a uniform white border around the black outline. It instantly becomes a custom laptop sticker!
Step 3: Inking and Filling
-
Outline the body:
Using your thick black marker or brush pen, carefully trace over your pencil lines for the main body shape. I find dragging the pen towards my body helps keep the curve smooth. -
Refine the drips:
Continue tracing the dripping bottom edge. Ensure the connections between drips are rounded, not sharp, to look like thick goo. -
Ink the floating drops:
Outline the floating tear-drop shapes below the ghost with the same thick marker. -
Outline the face:
Switch to a slightly thinner nib if you have one, or use a lighter touch, to outline the eyes and mouth shapes. -
Fill the eyes:
Color in the eyes with solid black, being extremely careful to leave those small white highlight circles completely untouched. -
Fill the mouth:
Color in the small mouth oval completely black. -
Add the blush:
Use your fine liner to ink the two tiny blush marks under each eye. -
Clean up:
Let the ink dry completely for at least five minutes to prevent smudging. Once dry, gently erase all underlying pencil sketch lines.
Now you have a playfully spooky companion ready to haunt your sketchbook or journals

PENCIL GUIDE
Understanding Pencil Grades from H to B
From first sketch to finished drawing — learn pencil grades, line control, and shading techniques.
Explore the Full Guide
Paint Blob Turning Into Drips
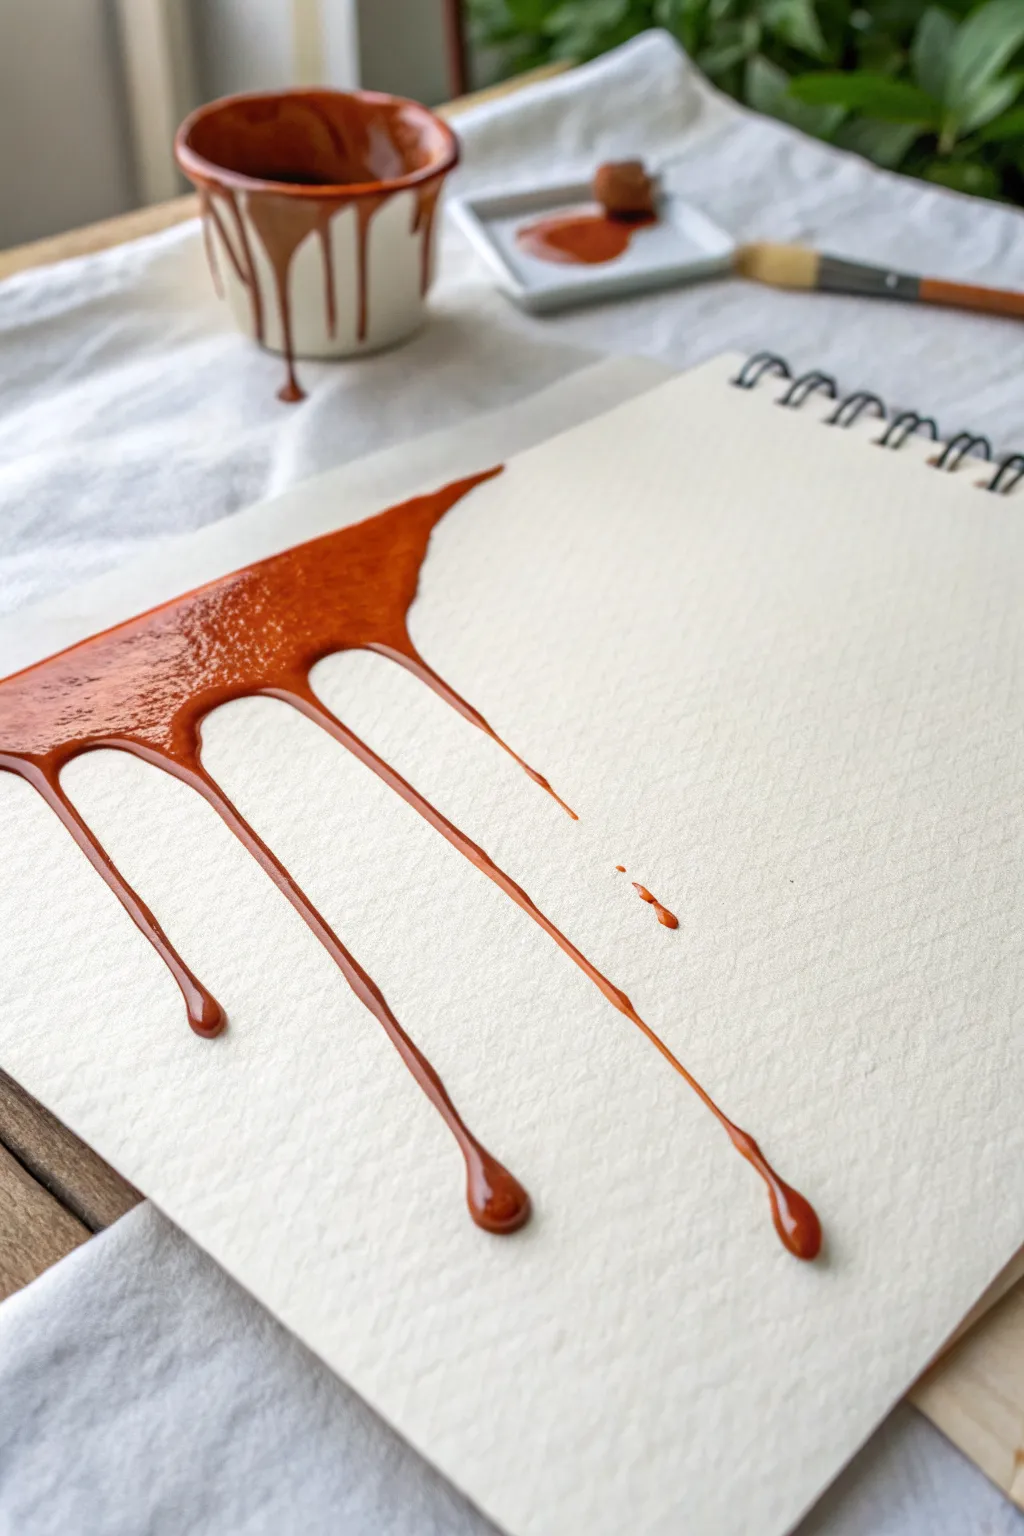
Capture the glossy, viscous motion of melting caramel or chocolate with this satisfying watercolor study. Using rich, warm tones and careful wet-on-dry techniques, you will create a realistic illusion of thick liquid flowing down thick sketch paper.
Step-by-Step
Materials
- Heavyweight watercolor sketchbook (cold press, approx. 300gsm)
- Reddish-brown watercolor paint (e.g., Burnt Sienna mixed with a touch of Alizarin Crimson) or liquid acrylic ink
- Round watercolor brush (size 6 or 8)
- Fine detail brush (size 0 or 1)
- Water cup
- Paper towel
- Pencil (HB or lighter)
- Optional: White gouache or gel pen for highlights
Step 1: Planning the Flow
-
Light Sketching:
Begin by lightly sketching a horizontal, wavy line across the upper third of your page. This will be the main ‘reservoir’ of the liquid. -
Marking Drip Paths:
From the wavy line, draw three distinct vertical paths. Make the center one the longest, and the left one the shortest. -
Shaping the Teardrops:
At the bottom of each vertical path, sketch a rounded teardrop shape. This bulbous end is crucial for conveying the weight of the fluid. -
Adding Stray Drops:
To add realism, lightly pencil in one or two tiny, detached droplets near the main streams, as if the liquid splattered slightly as it fell.
Fixing “Flat” Drips
If your drips look 2D, they likely lack tonal variation. Once dry, subtly glaze a darker version of your color on the bottom-right curve of each droplet to fake a shadow.
Step 2: Applying the Base Wash
-
Mixing the Color:
Prepare a generous puddle of your paint. Aim for a consistency similar to heavy cream—if it’s too watery, it won’t look viscous on the paper. -
Painting the Reservoir:
Lead your brush across the top horizontal section. Tilt your sketchbook slightly upward to encourage the pigment to pool at the bottom edge of this stripe. -
Starting the Descent:
Without lifting your brush, pull the paint down into the first drip path on the left. Keep the stroke unbroken to maintain a fluid connection. -
Filling the Teardrop:
When you reach the bulbous end, press the belly of the brush down to deposit more pigment. This natural pooling helps create a shadowed, 3D effect as it dries. -
Executing the Longest Drip:
Reload your brush with plenty of pigment and paint the central, longest drip. Move confidently; hesitation can cause jagged edges. -
Completing the Streams:
Finish the remaining drip on the right, ensuring the connection point at the top curves smoothly rather than forming a sharp angle.
Step 3: Refining and Detailing
-
Painting the Stray Drops:
Using your fine detail brush, carefully fill in the tiny detached droplets. Ensure they are aligned vertically with the flows above them. -
Reinforcing Saturation:
While the paint is still damp but not swimming, I like to drop tiny amounts of concentrated pigment into the very bottom of the teardrops to deepen the color. -
Softening Edges:
Check the top edge of your main reservoir. If it looks too perfect, break the line slightly with a damp brush to suggest movement. -
Wait for Drying:
Allow the piece to dry completely. Cold press paper has texture, so ensure no wet pockets remain in the valleys of the paper grain. -
Adding Highlights (Optional):
Observe where a light source would hit a glossy liquid. Use white gouache or a gel pen to add a tiny curved highlight on the upper left of each bulbous drip. -
Creating Specular Reflections:
Add a small dot or thin line of white on the main horizontal reservoir to suggest a wet, shiny surface.
Level Up: Texture
Make it sticky! Sprinkle a tiny pinch of salt into the wet paint at the top reservoir. As it dries, it creates a crystallized texture, looking like drying sugar or jam.
Enjoy the rich, tactile quality of your finished drip study
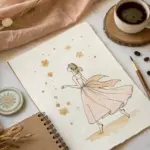
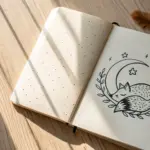
Dripping Star And Sparkle Icons
Create a cascade of celestial charm with these hand-carved star stamps featuring delicate, bead-like strings. The result is a repeating pattern that looks lovely on greeting cards or as unique wrapping paper, blending rustic textures with a dreamy motif.
Step-by-Step Guide
Materials
- Soft-cut lino block or rubber carving block
- Lino carving tools (V-gouge and U-gouge)
- Pencil and eraser
- Tracing paper (optional)
- Ink pads (Navy Blue, Gold, Burnt Orange, Teal)
- White or cream cardstock
- Fine-tip black drawing pen (0.3mm or 0.5mm)
- Ruler
Step 1: Design & Carve the Stamps
-
Draft the star shapes:
Sketch three or four slightly different five-pointed stars directly onto your carving block. Aim for a size around 1.5 to 2 inches wide. Don’t worry about perfect symmetry; a hand-drawn look adds character. -
Add internal details:
Within each star, draw simple internal patterns. You might try concentric stars, radiate lines from the center, or a simple outline border. Keep designs bold enough to carve easily. -
Carve the outlines:
Using your V-gouge tool, carefully carve away the rubber around the outside of your star lines. Always cut away from your body for safety. -
Clear the negative space:
Switch to a U-gouge or a wider blade to remove the larger background areas of the rubber block, leaving your star design raised. -
Carve the internal patterns:
Go back in with your finest V-gouge to carve the internal details you sketched. These lines should be shallow but clean to hold ink well without flooding.
Uneven Printing?
If your stamp prints look patchy, check your table surface. It must be perfectly hard and flat. Placing a thin foam sheet or magazine under your printing paper can actually help get a more consistent impression.
Step 2: Printing the Pattern
-
Plan the layout:
Place your cardstock on a flat surface. Using a pencil and ruler, lightly mark horizontal guidelines where you want your rows of stars to sit, spacing them generously to leave room for the ‘drips’. -
Ink the first star:
Press one of your carved stamps firmly onto an ink pad. For this project, alternating between navy blue, teal, and metallic gold creates a beautiful palette. Ensure the raised surface is fully coated. -
Stamp the main stars:
Press the stamp onto the paper along your first guideline. Apply even pressure without rocking the stamp, then lift straight up. I find holding the paper down with my other hand helps prevent smudges. -
Create the repeating pattern:
Continue stamping across the page, rotating between your different star designs and ink colors. Leave roughly an inch of space between each star. -
Clean and switch colors:
If you are using the same stamp for multiple colors, wipe it clean with a damp cloth or baby wipe before switching ink pads to avoid muddying the hues.
Make it Shine
Use a clear embossing powder over the wet stamped ink immediately after printing. Heat set it with a heat gun to create a raised, glossy, enamel-like texture that catches the light beautifully.
Step 3: Adding the Drip Details
-
Draw the main drop lines:
Once the stamped ink is dry, take your fine-tip black pen. From the bottom points of the stars, draw light, dotted or dashed lines extending downward. vary the lengths—some short, some long. -
Add tiny end stars:
At the end of the longer dotted lines, draw tiny freehand stars or diamonds. You can color these in with markers that match your ink pads for a cohesive look. -
Create secondary drips:
Add shorter dashed lines coming from the side points of the main stars. Terminate these with simple ‘x’ marks or small asterisks to simulate sparks. -
Enhance with color:
If you have small, colorful markers or gel pens, color in the tiny hanging stars. Using a contrasting color (like orange drops under a blue star) makes the design pop. -
Erase guidelines:
Wait until all ink—both stamped and drawn—is completely dry. Gently erase your pencil guidelines to finish the piece.
Now you have a custom patterned paper ready to frame or gift
BRUSH GUIDE
The Right Brush for Every Stroke
From clean lines to bold texture — master brush choice, stroke control, and essential techniques.
Explore the Full Guide
Drippy Checkerboard Fade
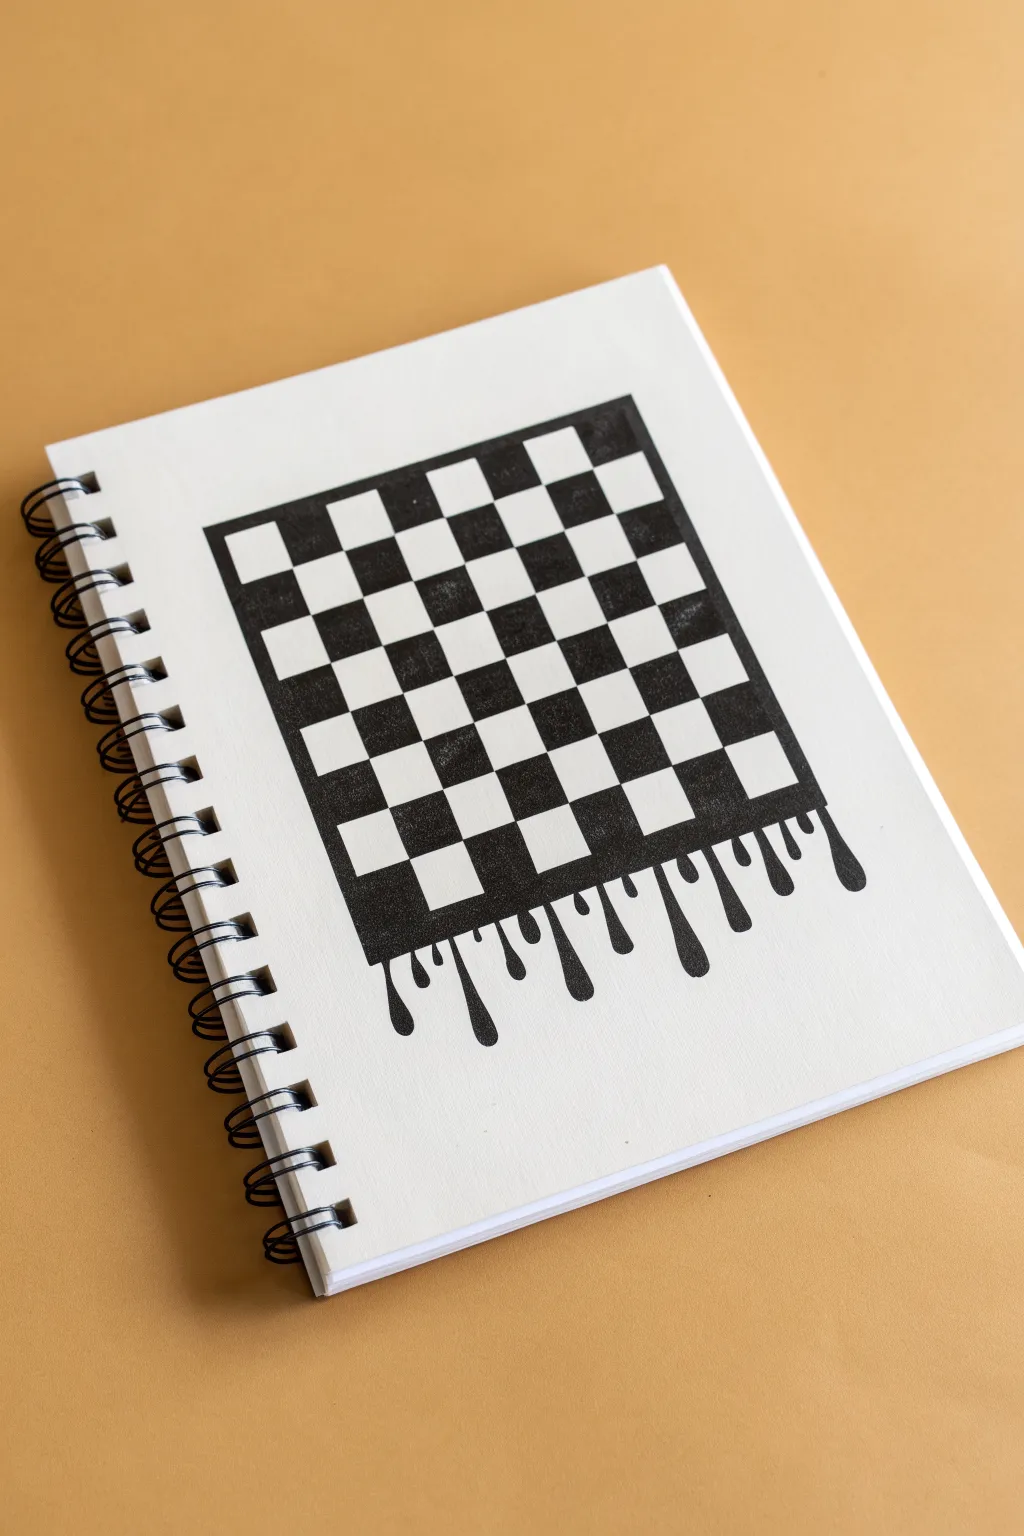
Transform a rigid geometric pattern into fluid art with this drippy checkerboard design. By combining precise grid work with free-flowing organic shapes, you’ll create a surreal visual effect that looks like reality is slowly melting away.
Step-by-Step Tutorial
Materials
- Spiral-bound sketchbook or heavy drawing paper
- Ruler or straight edge
- Pencil (HB or H)
- Eraser
- Fine liner pen (0.3mm or 0.5mm)
- Thick black marker or brush pen
- Masking tape (optional)
Step 1: Drafting the Grid
-
Establish the perimeter:
Begin by lightly sketching a square or rectangle in the center of your page using your pencil and ruler. Leave plenty of white space around the edges to frame the design. -
Mark geometric intervals:
Along the top and side edges of your box, make small tick marks at even intervals. For a classic checkerboard look, aim for about 1-inch or 2cm spacing, ensuring you have an even number of squares if possible. -
Draw the grid lines:
Connect the tick marks horizontally and vertically using your ruler. Keep your pencil pressure very light, as you will need to erase some of these lines later, especially near the bottom. -
Define the checkered pattern:
Lightly mark an ‘X’ inside every other square so you know which ones will eventually be filled in black. This prevents mistakes later when we start inking.
Grid Perfect
If you struggle with evenly spacing your grid, use a piece of grid paper or dot paper underneath your sketchbook page as a guide if your paper is thin enough to see through.
Step 2: Designing the Drips
-
Determine the melt line:
Focus on the bottom row of your grid. Instead of drawing a straight bottom edge, sketch a wavy, undulating line that cuts through the bottom squares. -
Sketch the primary drips:
Extend parts of that wavy line downward to create long, teardrop shapes. Vary the lengths—some should be short nubbins, while others stretch far down the page. -
Refine the fluid shapes:
Round out the bottoms of your drips so they look heavy with liquid. Ensure the top of each drip connects seamlessly to the black squares of the checkerboard pattern above. -
Erase lower boundaries:
Carefully erase the straight horizontal line that originally defined the bottom of your grid. The grid structure should now transition directly into your organic drip sketches.
Step 3: Inking and Filling
-
Outline the straight edges:
Switch to your fine liner pen. Use your ruler to trace the vertical and horizontal grid lines, but stop immediately when you reach the ‘melting’ section at the bottom. -
Outline the curves:
Freehand trace your pencil sketches for the drips. Focus on keeping the lines smooth and continuous to enhance the liquid effect. -
Start the fill process:
Using your thicker marker, begin filling in the squares you marked with an ‘X’ earlier. I find it safest to outline the inner edge of each square first before flooding the center to keep corners sharp. -
Fill the melting squares:
When you reach the bottom, fill the dripping shapes completely black. These should connect directly to the black squares above them, creating a unified, melting mass. -
Check for gaps:
Go back over your black areas to ensure they are solid and opaque. Patch up any white streaks or uneven marker coverage. -
Clean up:
Once the ink is completely dry—give it a few minutes to avoid smudges—take your eraser and gently remove all remaining graphite lines.
Warp Speed
Make the illusion trippier by slightly curving the vertical lines of the grid as they near the bottom, creating a sense that the fabric of the surface is stretching as it melts.
Now you have a striking piece of optical art that perfectly balances structure and chaos
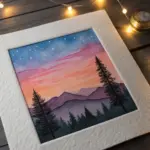
Rainbow Gradient Drips
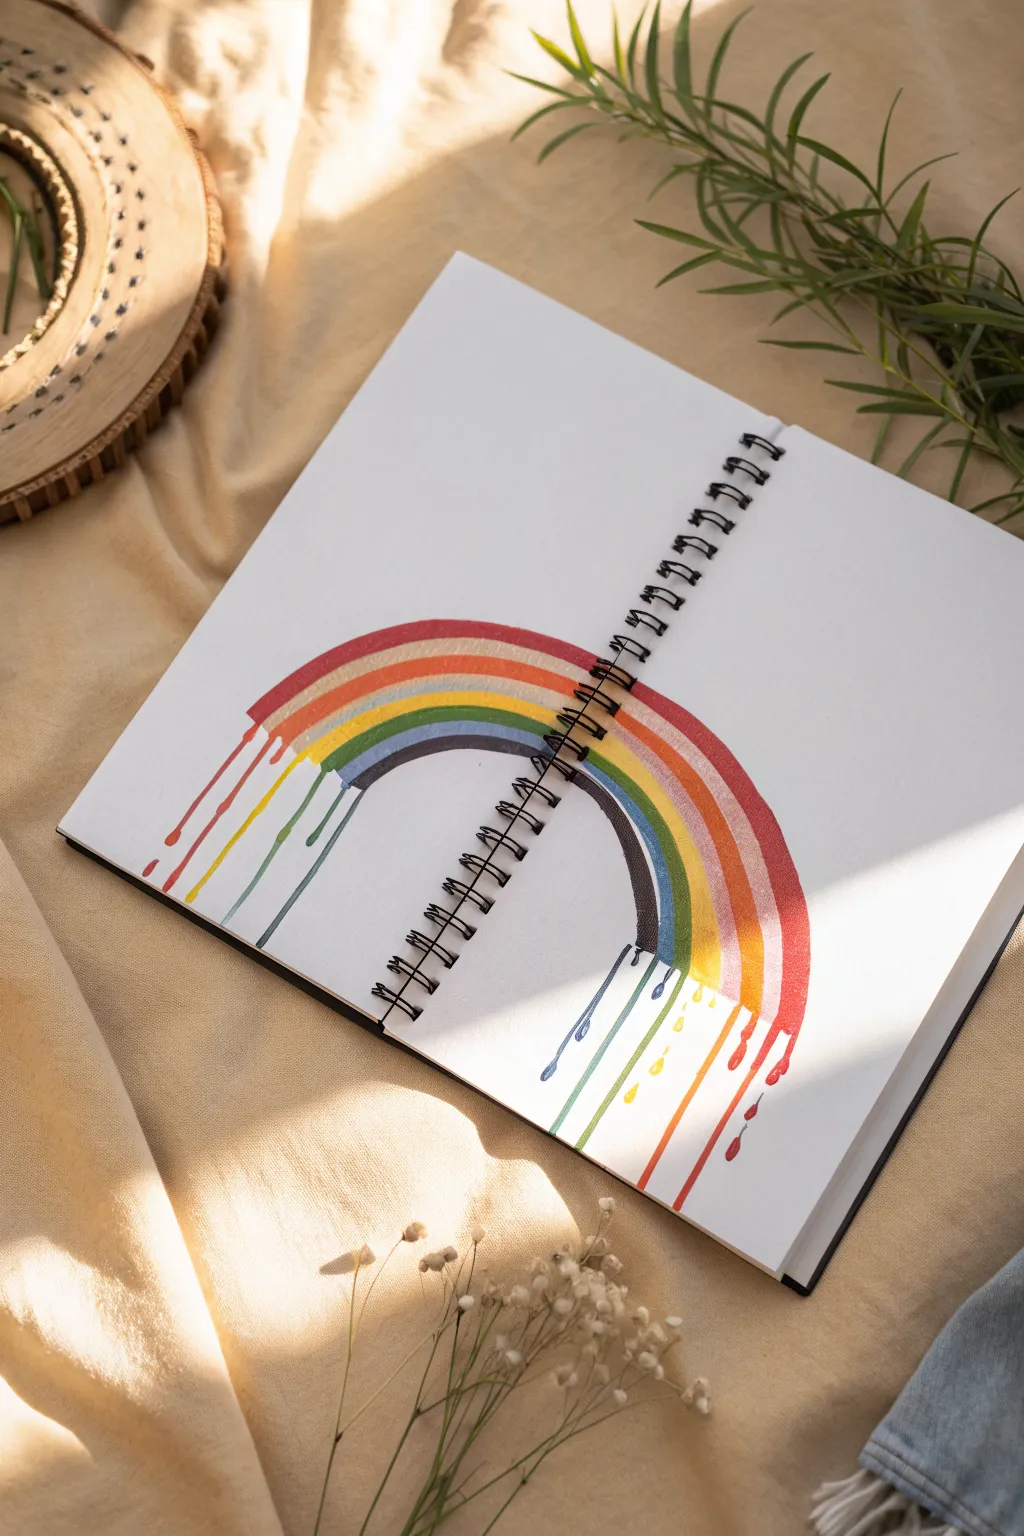
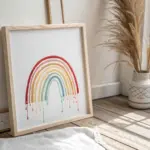
This whimsical sketchbook spread takes a classic rainbow arc and gives it a surreal twist with dripping paint effects. It spans across the spiral binding for a cohesive look, contrasting structured lines with fluid, organic drips.
Step-by-Step
Materials
- Spiral-bound sketchbook (heavyweight paper recommended)
- Pencil and eraser
- Compass or round object for tracing (optional)
- Watercolor markers, brush pens, or acrylic paint pens
- Fine liner pen (optional for outlining)
- Ruler
Step 1: Planning the Arch
-
Map the center:
Open your sketchbook flat. Locate the center point of the spiral binding where you want the highest point of your rainbow to sit. -
Sketch the curves:
Using a pencil, lightly sketch the outermost arch of the rainbow. You can use a compass placed near the bottom center of the page, or trace a large bowl if you want a perfect curve. -
Define the bands:
Sketch parallel curves inward to create six distinct bands for the standard rainbow colors. Keep the spacing relatively even, but don’t worry about perfection; a hand-drawn look adds charm. -
Plan the drips:
At the bottom ends of the rainbow (on both the left and right pages), lightly sketch where the paint will ‘drip’ down. Vary the lengths of these lines. -
Add teardrops:
At the end of your sketched drip lines, draw small teardrop shapes or circles to simulate pooling liquid. Scatter a few detached droplets below the main lines for a realistic splash effect.
Fixing Wobbly Lines
If your arch edges look shaky, thicken the line slightly to smooth it out. You can also outline the bands with a fine-point black pen for a bold, illustrative finish.
Step 2: Adding Color
-
Select your palette:
Gather your markers or pens in red, orange, yellow, green, blue, and purple or indigo. Test them on a scrap piece of paper to ensure the colors look good together. -
Start with Red:
Begin with the outermost band. Carefully fill it in with your red marker, following the curve of the arch. -
Extend the red drips:
When you reach the bottom of the red band, continue the color down into the sketched drip lines and droplets. Vary the pressure to get a tapered line if using a brush pen. -
Orange band:
Move to the next inner band. Color it orange, being careful not to bleed into the red. I find it helpful to turn the sketchbook slightly as I curve around the page. -
Create the orange drips:
Extend the orange down into its designated drips. Make sure the drip length is different from the red one next to it to keep the composition dynamic. -
Yellow and Green layer:
Continue filling the next bands with yellow and then green. If your markers are water-based, wait a moment between colors to prevent unwanted blending. -
Blue and Purple finish:
Complete the inner arches with blue and the final purple band. These inner drips will naturally be closer to the center of the page.
Step 3: Refining and Binding
-
Bridge the gap:
For the area crossing the spiral binding, carefully color right up to the holes on the paper. -
Color the coil (Optional):
If you want a continuous look and don’t mind altering your book, you can use a permanent marker or acrylic paint to color the metal wire itself where the rainbow crosses it. -
Enhance the droplets:
Go back to your droplets. Add a tiny bit of extra weight to the bottom of the teardrops to make them look heavy and full of liquid. -
Clean up sketch lines:
Once the ink is completely dry, use a soft eraser to gently remove any visible pencil marks from your initial sketch. -
Add highlights:
For an extra pop, use a white gel pen to add a tiny dot or curved line on the upper side of each colored droplet to suggest a reflection.
Level Up: Gravity Effect
Instead of drawing the drips, use actual watered-down watercolor paint. Tilt the sketchbook upright and let gravity pull the paint down naturally for authentic drips.
Close your sketchbook or display the spread open to enjoy your vibrant, melting masterpiece


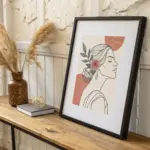
Negative-Space Drip Cutouts
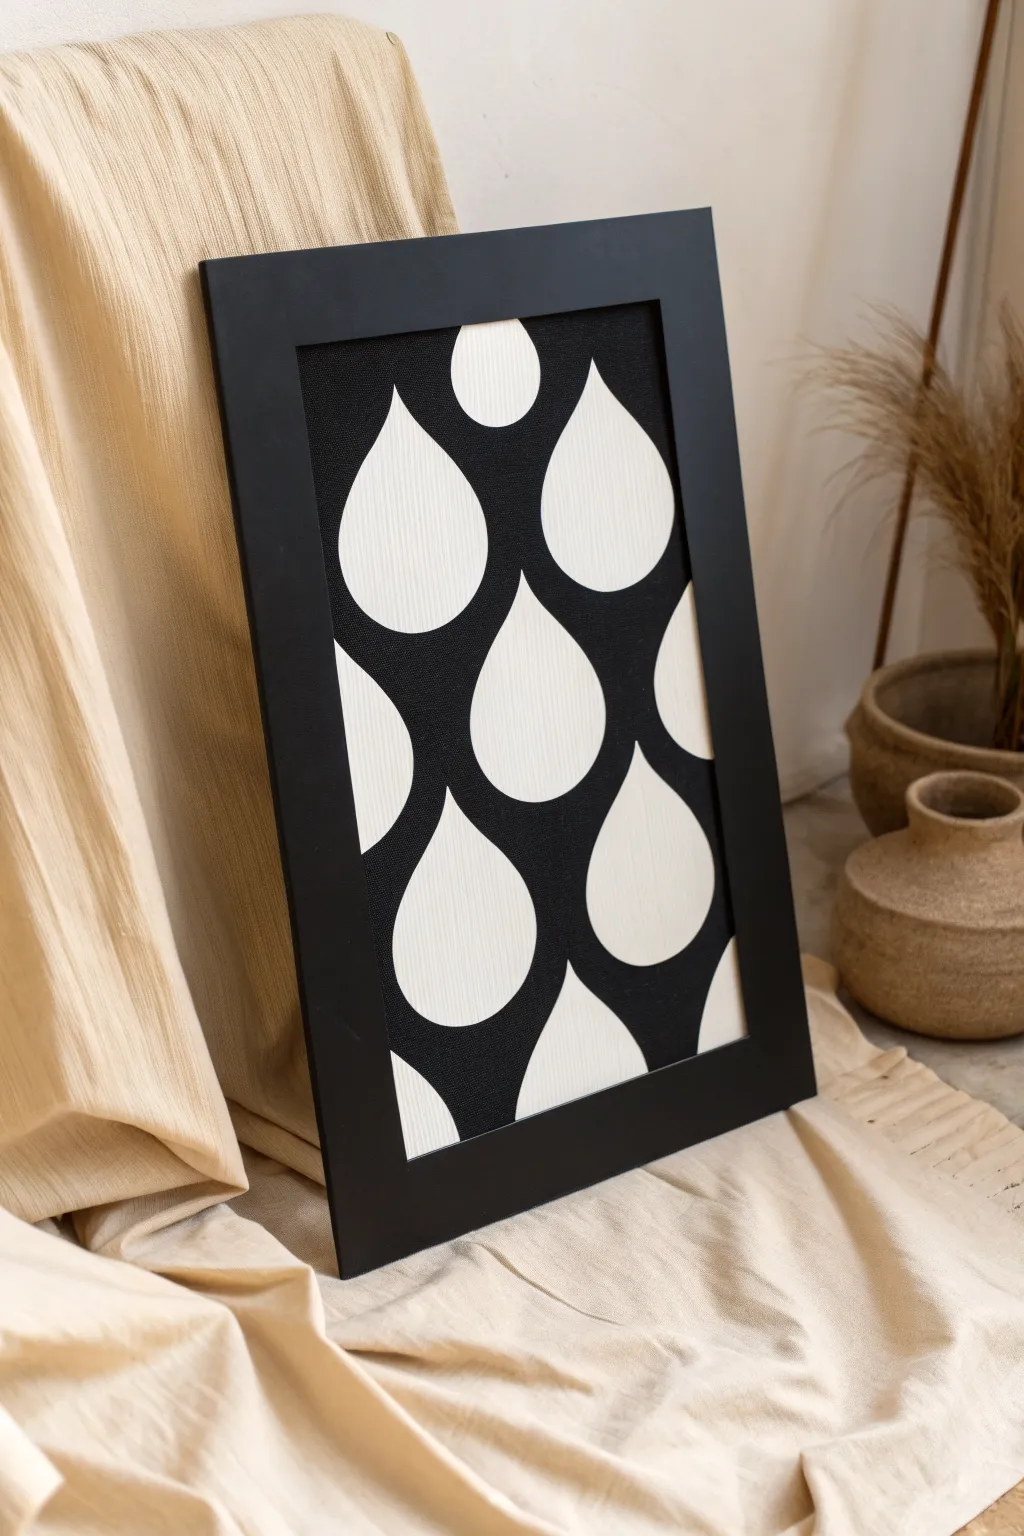
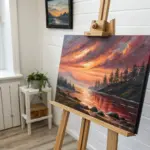
This striking piece features bold, white teardrop shapes set against a deep black background, creating a high-contrast pattern that feels both modern and organic. By carefully painting the negative space around the drops, you allow the natural texture of the canvas to shine through the design.
Step-by-Step Guide
Materials
- Rectangular stretched canvas (around 12×18 inches)
- Black acrylic paint (matte finish recommended)
- Wide flat brush (for large areas)
- Small angled shader brush (for edges)
- Cardstock or heavy paper
- Pencil
- Scissors
- Painter’s tape or masking tape (optional)
- Protective matte varnish
- Black wooden frame (to fit canvas size)
Step 1: Preparation & Templating
-
Create the drop template:
Start by drawing a perfect teardrop shape on your piece of cardstock. Aim for a shape that is about 3-4 inches tall with a rounded bottom and a sharp, tapered point. -
Refine the shape:
Cut out your teardrop carefully with scissors. Clean up any jagged edges, as this template will dictate the smoothness of every drop in your painting. -
Prime the canvas:
Ensure your canvas is clean and free of dust. If the canvas texture is too rough for your liking, you can apply a layer of white gesso first, though standard pre-primed canvas works perfectly for the texture seen in the photo. -
Plan the layout:
Place your template on the canvas to visualize the spacing. Notice that the pattern alternates: rows of drops are staggered like bricks to create a pleasing rhythm.
Wobbly Lines?
If you struggle with freehand curves, try using a flexible curve ruler or stencils. For sharper edges, you can use liquid masking fluid inside the drops before painting the black background.
Step 2: Tracing the Pattern
-
Trace the first row:
Starting near the top edge, lightly trace around your teardrop template with a pencil. Leave roughly an inch of space between each drop horizontally. -
Stagger the second row:
Move down to the next row and position the template so the point of the new drop sits in the gap between the two drops above it. Trace these shapes. -
Handle the edges:
When you reach the sides of the canvas, let the teardrop shape fall off the edge. Trace only the partial shape that remains on the canvas surface. -
Complete the grid:
Continue this staggered pattern all the way to the bottom. Don’t worry about faint pencil lines; the black paint will cover everything outside the drops.
Step 3: Painting the Negative Space
-
Outline the shapes:
Using your small angled brush and black acrylic paint, carefully paint the outline of the negative space. Do not paint inside the teardrops—keep them white. -
Define the curves:
Work slowly around the rounded bottoms of the drops. This is the most critical step for a clean look, so steady your hand against the canvas if needed. -
Sharpen the points:
Pay distinct attention to the top points of the drops. Use the very tip of your brush to ensure they remain sharp and haven’t become rounded blobs. -
Fill the background:
Once the delicate outlines are established, switch to your larger flat brush. Fill in the remaining negative space between the drops with solid black paint. -
Check for coverage:
Canvas texture can sometimes leave tiny white specks. Go over the large black areas a second time to ensure deep, opaque coverage without brushstrokes. -
Clean up edges:
If you accidentally got a little black paint inside a white drop, wait for it to dry completely, then carefully touch it up with a small amount of white gesso or heavy body white acrylic.
Level Up: Texture Play
Mix a texture medium or fine sand into your white gesso before applying it to the canvas. This will give the white teardrops a raised, tactile grit that contrasts beautifully with the smooth black paint.
Step 4: Finishing Touches
-
Let it cure:
Allow the paint to dry completely. Acrylics dry to the touch quickly, but giving it a few hours ensures the moisture has fully evaporated from the canvas fibers. -
Apply varnish:
To protect the black paint from scuffing and unify the sheen, apply a layer of matte varnish over the entire piece. This keeps the black looking velvety rather than shiny. -
Select a frame:
The artwork relies on strong contrast, so choose a simple, sleek black frame. A frame with a bit of width, as seen in the photo, adds weight and presence. -
Install the artwork:
Secure the canvas into the frame. Ensure the fit is tight so there are no distracting gaps between the canvas edge and the frame border.
Hang your new high-contrast masterpiece in a well-lit spot to let the simple geometry make its statement
Glitchy Drip Mashup Panel

This minimalist, high-contrast drawing features bold black drips falling across a stark white page. The clean lines and graphic style create a satisfying liquid effect that is perfect for filling negative space or starting a larger doodle spread.
Step-by-Step Tutorial
Materials
- Wire-bound sketchbook (heavyweight paper recommended)
- Black drawing ink or high-opacity black marker/fineliner
- Pencil (HB or lighter)
- Eraser
- Ruler (optional)
- White gel pen (optional for highlights)
Step 1: Planning the Flow
-
Define the top edge:
Start by lightly sketching a horizontal line near the very top of your page with a pencil. This will serve as the source where your liquid is pooling before it drips down. -
Sketch the main drip:
Draw the longest, most prominent drip on the left side. Sketch a vertical line that extends almost to the bottom of the page, widening slightly into a teardrop shape at the very end. -
Add the top ripples:
Along your top horizontal line, sketch uneven, wavy curves that dip down slightly. These represent the fluid gathering before it falls. Connect these wavy lines into the top of your main drip for a seamless look. -
Outline floating droplets:
To the right of the main stream, lightly sketch several detached teardrop shapes. Vary their sizes, placing larger, heavier drops lower down and smaller flecks higher up to mimic gravity. -
Refine the shapes:
Go back over your pencil outlines to smooth out any jerky lines. Fluid needs to look organic and curved, so round off any sharp corners on your droplets.
Bleeding Lines?
If your ink is feathering into the paper, switch to a pigment liner instead of a felt tip, or place a scrap sheet behind the page to catch bleed-through.
Step 2: Inking the Outlines
-
Trace the main stream:
Using a fine-tip black marker or pen, carefully trace the outline of your long left-hand drip. Keep your hand steady to ensure the long vertical lines stay straight and clean. -
Ink the top pool:
Trace the wavy ‘melting’ edge at the top of the page. Allow the line thickness to vary slightly here if you want a more organic feel. -
Outline the droplets:
Trace the perimeter of each floating droplet. Be particularly careful with the pointed tops of the teardrops to keep them sharp and directed upward. -
Erase guidelines:
Once the outline ink is completely dry, gently erase all your initial pencil sketches. This leaves you with clean, hollow shapes ready to be filled.
Step 3: Filling and Detailing
-
Fill the long drip:
Switch to a thicker marker or brush pen to fill in the long vertical drip. Work slowly to avoid coloring outside your crisp outlines. -
Create the highlights:
Before filling the floating droplets, decide where your light source is. I prefer to leave a tiny white crescent or oval shape inside the black area to act as a reflection. -
Fill the droplets:
Color in the rest of the droplets black, carefully working around the small white highlights you planned. If you accidentally fill a highlight, don’t worry—we can fix it later. -
Add secondary drops:
Look at the composition. If there are large empty gaps, add tiny, simple black dots or very small teardrops to balance the negative space. -
Sharpen the edges:
Use your finest pen to go back over the edges of your filled shapes. This crisps up the silhouette and corrects any fuzzy bleeding from the marker. -
Enhance highlights:
If your negative space highlights got messy or look too dull, use a white gel pen to add a crisp, bright white dot or curve on top of the black ink.
Add Some Glitch
For a cyber-aesthetic twist, slice the droplets horizontally with thin white lines, or shift parts of the drawing slightly to the left or right.
Now you have a bold, graphic element that brings a sense of motion to your sketchbook


Have a question or want to share your own experience? I'd love to hear from you in the comments below!