Spider webs are one of my favorite subjects because a few simple lines can turn into something instantly dramatic. Here are some cool spider web drawing ideas you can try today, from classic orb webs to unexpected, stylized twists.
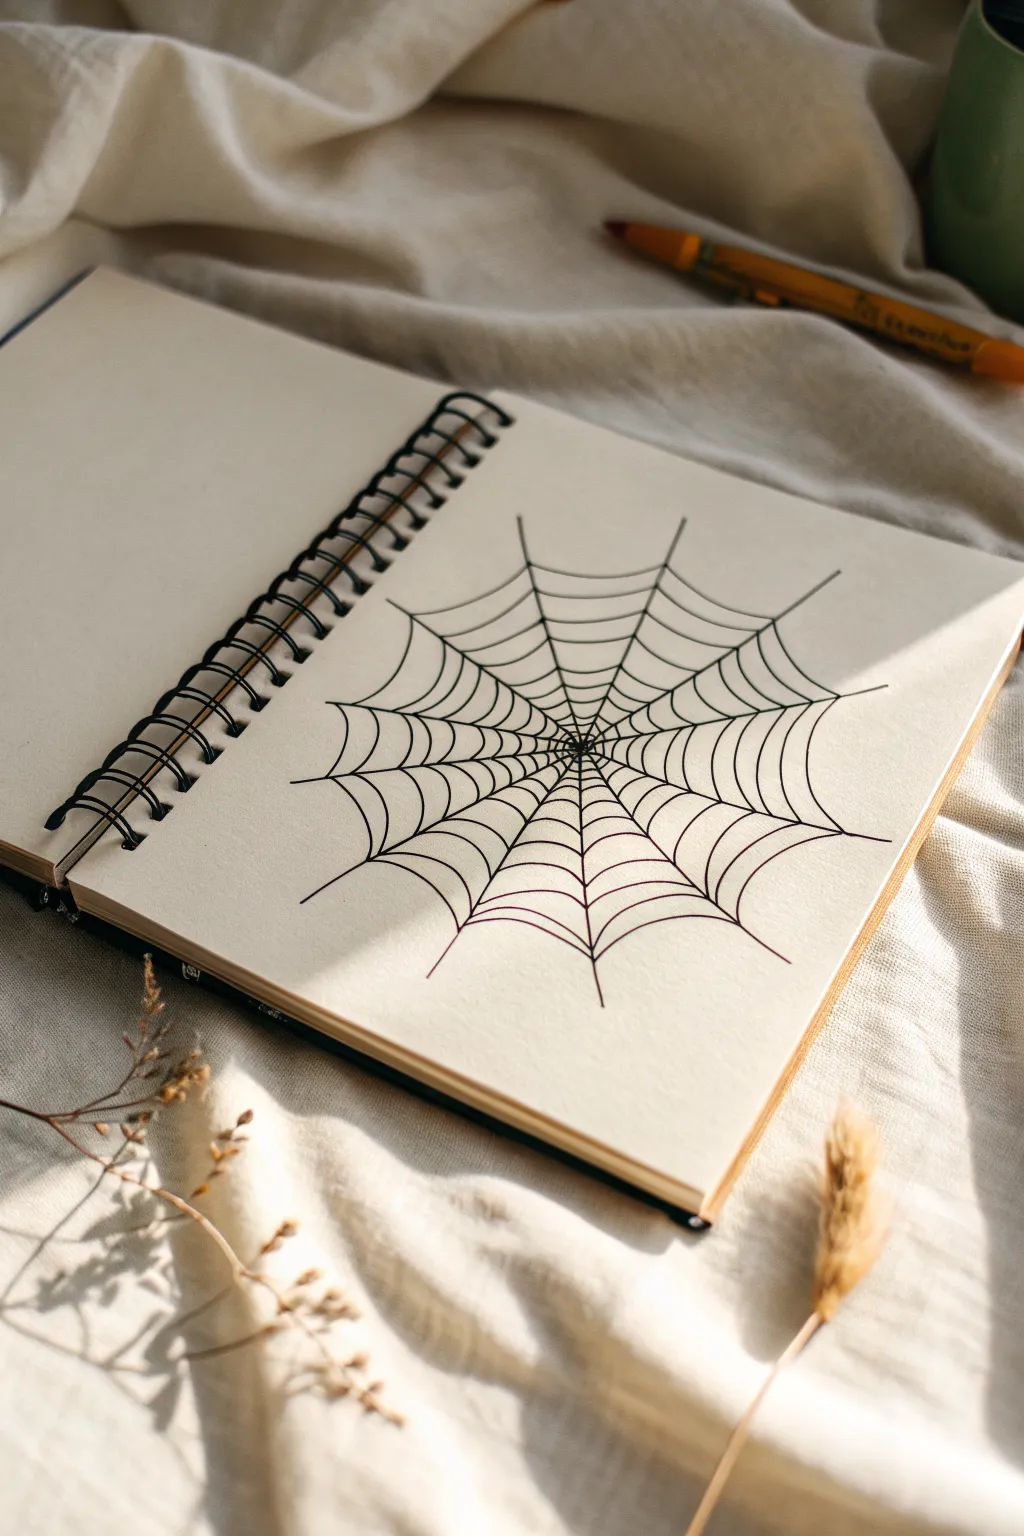
Classic Centered Orb Web
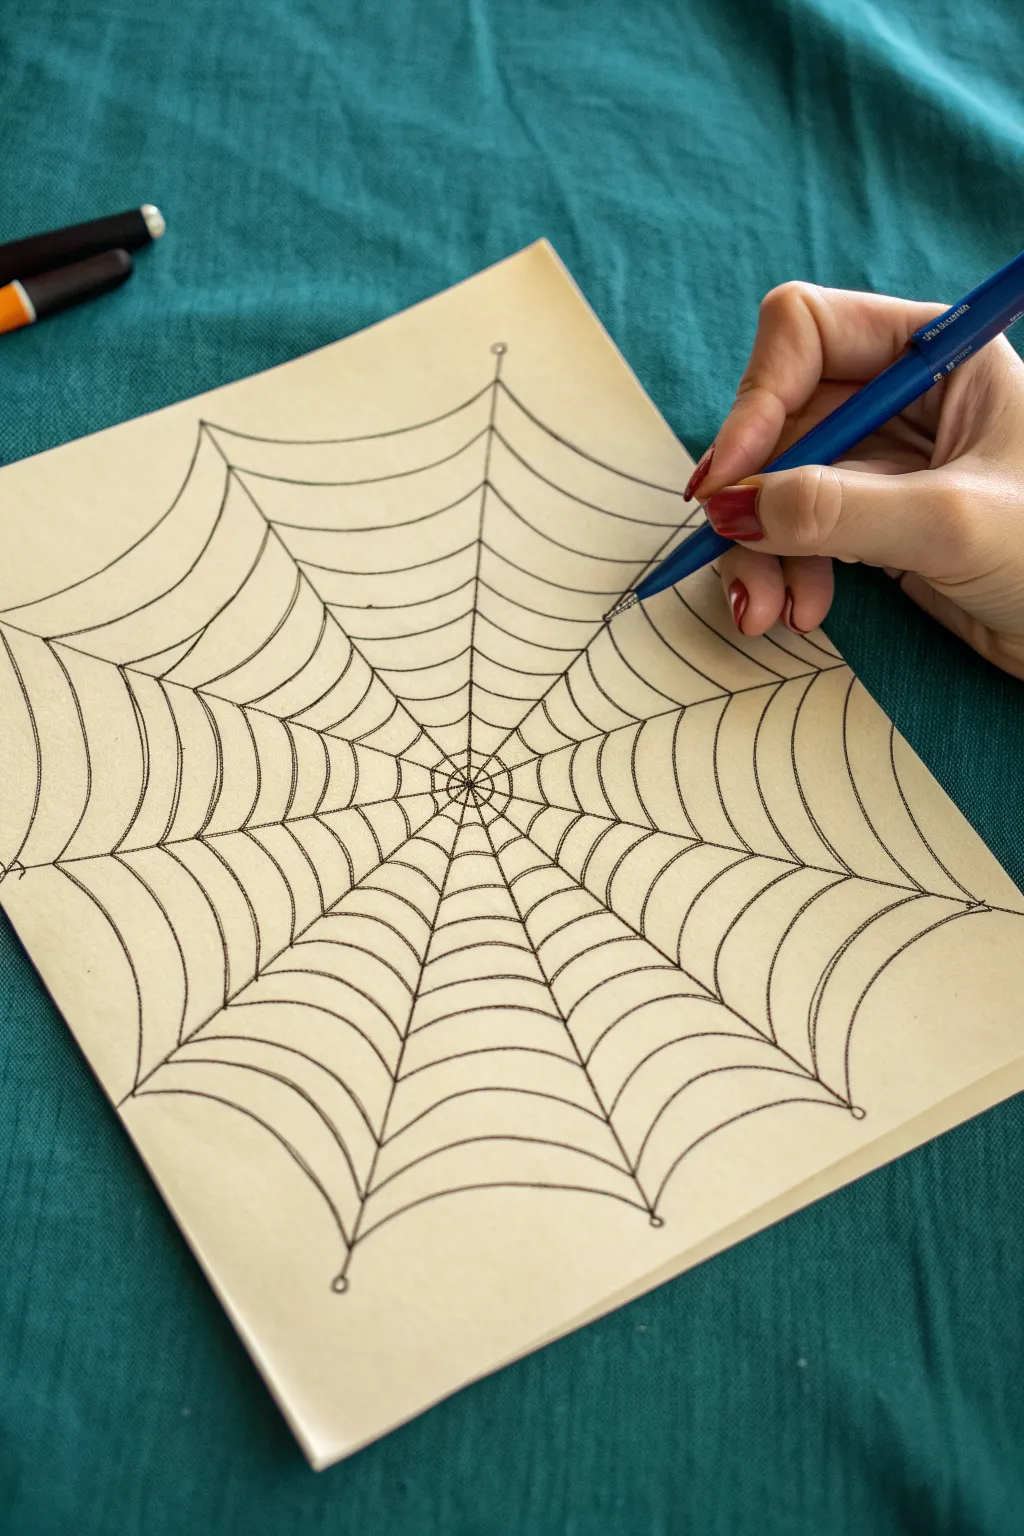
Capture the delicate geometry of nature with this refined yet approachable spider web drawing. Using fine lines and careful spacing, you will build a classic radial pattern that sits beautifully on a cream-colored sketchbook page.
Step-by-Step Guide
Materials
- Sketchbook with cream or off-white paper (smooth texture preferred)
- Fine liner pen (black, 0.3mm or 0.5mm)
- Pencil (HB or 2H for initial guidelines)
- Eraser
- Ruler (optional, for the initial structure)
Step 1: Laying the Foundation
-
Find the Center:
Begin by lightly marking a small dot in the center of your page with a pencil. This doesn’t need to be mathematically perfect, but try to place it where you want the heart of the web to be. -
Draw the Primary Spokes:
Sketch a vertical line passing through your center dot, extending almost to the edges of the paper. Then, cross this with a horizontal line to form a large plus sign. -
Add Diagonal Radials:
Draw two long diagonal lines that intersect the center point, creating an ‘X’ shape over your plus sign. You should now have a star-like shape with eight distinct spokes. -
Fill the Gaps:
Divide each of the existing eight sections in half by drawing another radial line from the center outwards. You should end up with roughly 16 radial lines fanning out like wheel spokes. -
Check Spacing:
Take a moment to look at your pencil spokes. If any gaps look significantly wider than others, you can lightly adjust them now before committing to ink.
Natural Imperfection
Don’t stress about symmetrical perfection. Real spiders often repair webs or miss a connection. An occasional broken thread or uneven gap adds charm.
Step 2: Weaving the Spiral
-
Ink the Center Hub:
Switch to your fine liner pen. Start at the very center by drawing a tiny, tight spiral or series of small concentric circles to anchor the middle of the web. -
Trace the Spokes:
carefully trace over your pencil radial lines with the pen. Use a confident, steady hand. Slight wobbles are actually desirable here, as they make the silk look organic rather than mechanical. -
Start the Inner Spiral:
Begin the first curved ‘bridge’ line near the center. Connect two adjacent spokes with a U-shaped curve that droobs slightly toward the center. -
Continue the First Ring:
Work your way around the center circle, connecting each spoke to its neighbor with these small, drooping curves until you complete the first full ring. -
Expand Outward:
Move about a half-inch further out along a spoke and start your second ring. I find it easiest to rotate the sketchbook as I work so my hand stays in a comfortable position for drawing curves. -
Vary the Spacing:
As you create subsequent rings moving outward, gradually increase the distance between rows. The gaps near the center should be tight, while the outer gaps become wider and more airy. -
Maintain the Droop:
Ensure every connecting line has that characteristic catenary curve—like a slack rope hanging between two poles. This ‘sag’ is crucial for a realistic look. -
Complete the Outer Regions:
Continue spiraling outward until you reach the ends of your spokes. The curves at the very edge can be the most dramatic and widest.
Step 3: Refining and Finishing
-
Thicken Main Lines:
Go back over just the main radial spokes with your pen a second time. This subtle added weight helps visually support the delicate spiral threads. -
Double the Connections:
For extra realism, create a ‘double line’ effect on a few random outer threads. Just draw a second, very thin line right next to an existing curve to mimic how light catches distinct strands. -
Erase Guidelines:
Allow the ink to dry completely—give it at least five minutes to avoid smudging. Then, gently erase any visible pencil marks underneath your ink work. -
Add Anchors:
Extend the very tips of the main spokes slightly past the last spiral ring, fading them out to suggest they are attached to distant branches or structures.
Dew Drop Detail
Add tiny, clear beads of white gel pen or acrylic along specific strands to mimic morning dew catching the sunlight.
Now you have a beautifully intricate web that evokes a crisp autumn morning


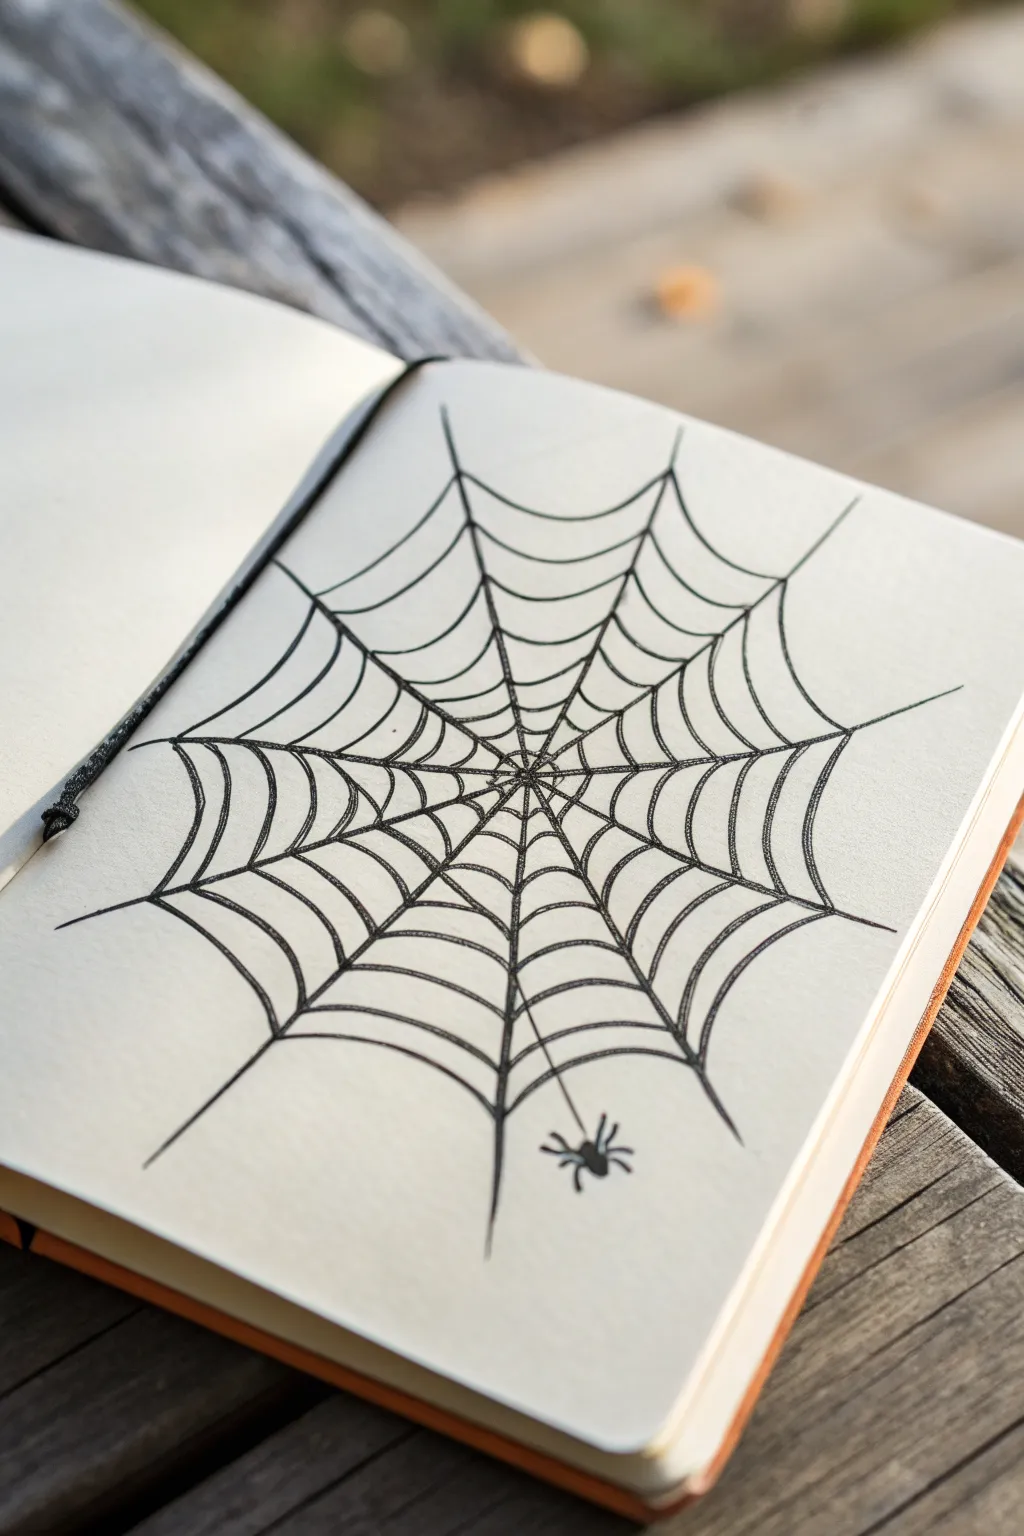
Simple Corner Spider Web
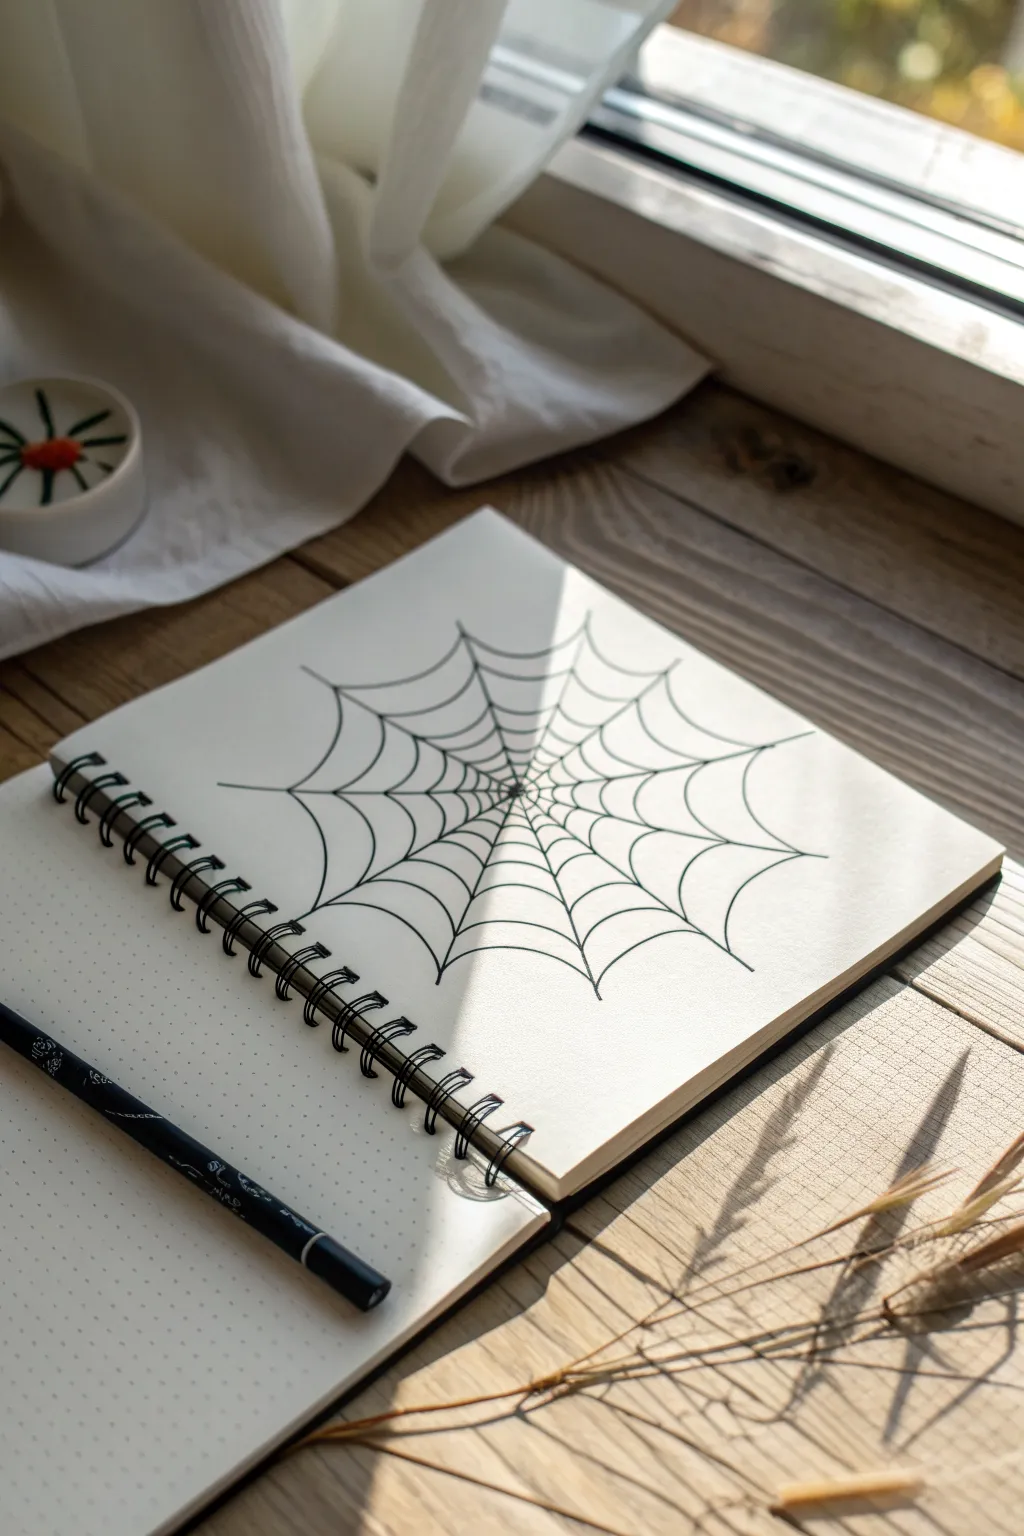
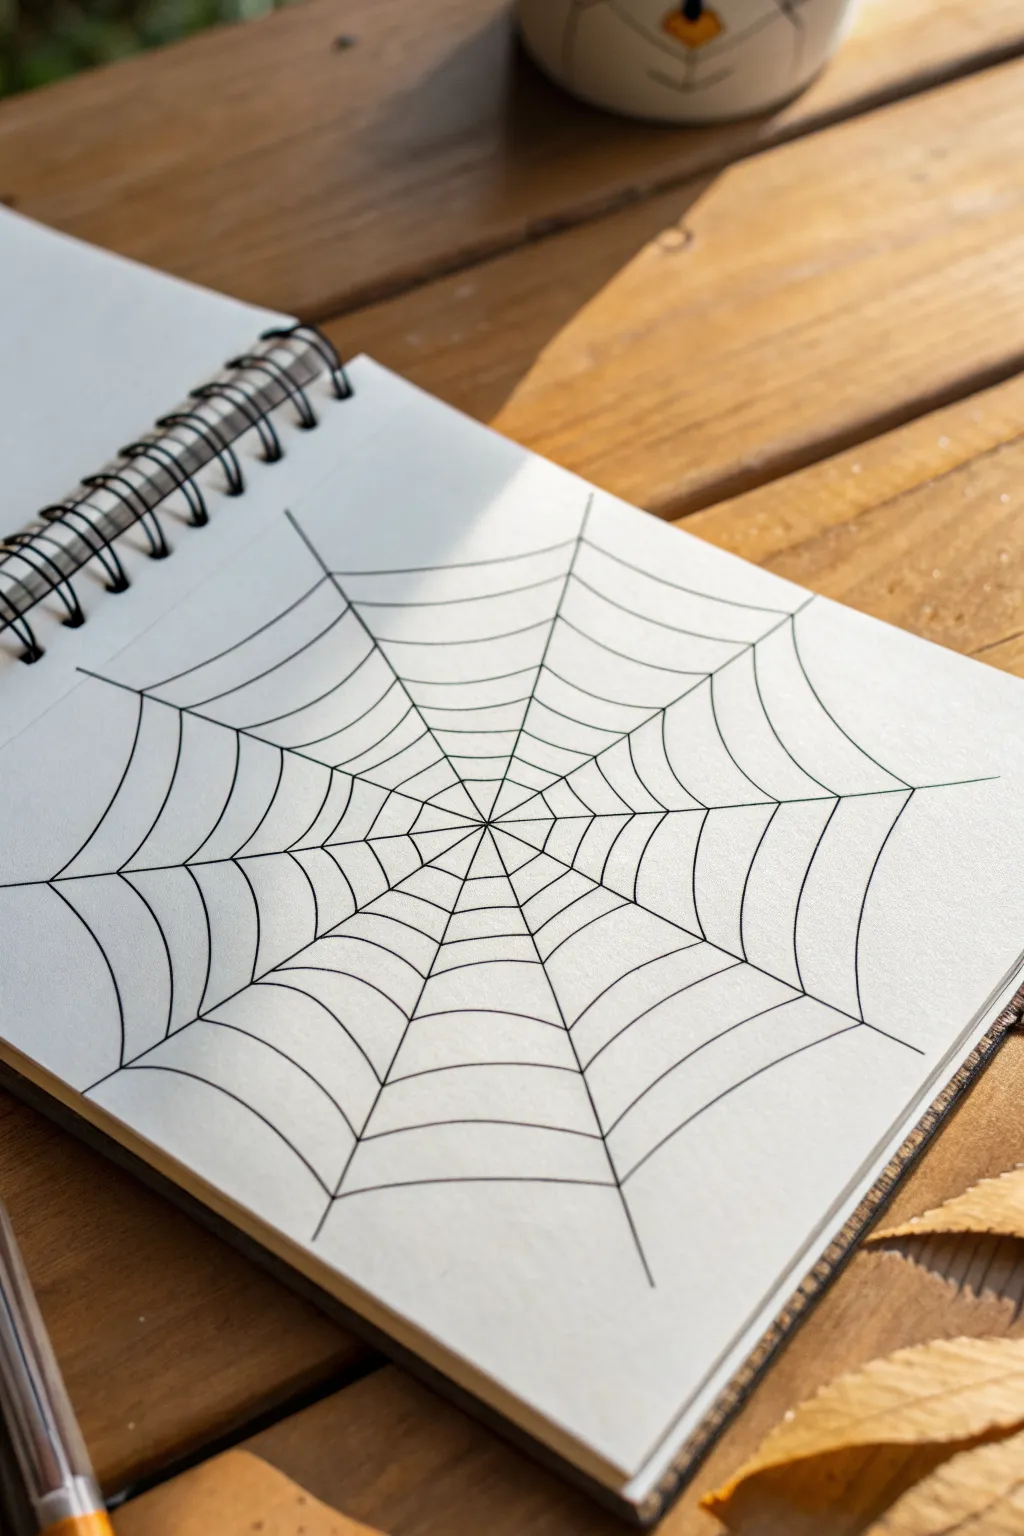
This project features a timeless, symmetrical spider web drawn in crisp black ink on dotted sketchbook paper. The result is a clean, minimal, and slightly spooky design that uses the geometry of the page to create a satisfying radiating pattern.
Step-by-Step
Materials
- Dotted grid sketchbook
- Fine liner pen (black, 0.5mm or 0.8mm)
- Pencil (HB or similar)
- Eraser
- Ruler (optional, but helpful for initial lines)
Step 1: Setting the Structure
-
Find the center:
Begin by locating the approximate center of your page. Since we are working on a dotted grid, pick a specific dot to serve as the anchor point for the entire web. -
Draw the main axis lines:
Using your pencil, draw a vertical line straight up from the center point and another distinct line straight down. Repeat this horizontally to create a basic cross shape. -
Add diagonal spokes:
Draw two diagonal lines that intersect through the center point, cutting the four quadrants in half. You should now have an eight-spoke asterisk shape. -
Create intermediate spokes:
To make the web fuller, add one more line between each of the existing spokes. Aim for even spacing, though it doesn’t need to be mathematically perfect. -
Lighten the guides:
Gently tap your eraser over the pencil lines until they are faint guides rather than dark strokes. This keeps the final ink work looking clean.
Natural Imperfection
Don’t stress about perfect symmetry. Real spider webs have glitches and varying tensions. A slightly uneven curve actually makes the drawing feel more organic and authentic.
Step 2: Weaving the Web
-
Start the center spiral:
Switch to your black fine liner. Place your pen nib right at the center dot and draw a tiny, tight spiral outward to bind the spokes together. -
Draw the first curve:
Move slightly further out on a vertical spoke. Draw a downward-curving line (like a concave smile) connecting to the next spoke to the right. -
Complete the first ring:
Continue connecting each spoke with these curved lines, moving in a circular motion around the center until you close the first full ring. -
Expand outward:
Move about half an inch further out on a spoke. Begin the second ring of curved connecting lines. -
Vary the spacing:
As you move away from the center, I like to gradually increase the distance between the rings. This creates a natural sense of perspective and expansion. -
Maintain curve consistency:
Try to keep the depth of each curve similar. Deeper curves make the web look looser, while shallow curves make it look taut. -
The outer rings:
Continue adding concentric rings until you reach a size you like. The drawing in the example stops comfortably before the edge of the page, leaving white space. -
Review standard lines:
Look over your structural ‘spoke’ lines. If you haven’t inked them yet, carefully trace over the faint pencil lines with your ink pen, stopping where the webbing ends.
Step 3: Refining and Finishing
-
Connect the tips:
At the very outer edge of the web, ensure the ends of the spokes extend just slightly past the last curved webbing line for a pointy, finished look. -
Thicken the center:
Go back to that very first center point and add a tiny bit more ink to darken the ‘hub’ of the web. This adds visual weight to the middle. -
Let the ink set:
Wait a few minutes to ensure the ink is completely dry. Fine liners on smooth paper can sometimes smear if you are impatient. -
Erase guidelines:
Take your eraser and thoroughly remove any remaining pencil marks underneath the ink. Be gentle so you don’t buckle the paper. -
Check line weight:
Scan the drawing for any broken lines or weak spots. Re-trace any segments that look too thin to ensure a bold, consistent black color throughout.
Add a Resident
Draw a single straight line dropping down from the web’s bottom edge. At the end of the line, sketch a small, simple spider silhouette dangling in empty space.
Now you have a striking geometric design that perfectly captures the delicate nature of a spider’s work


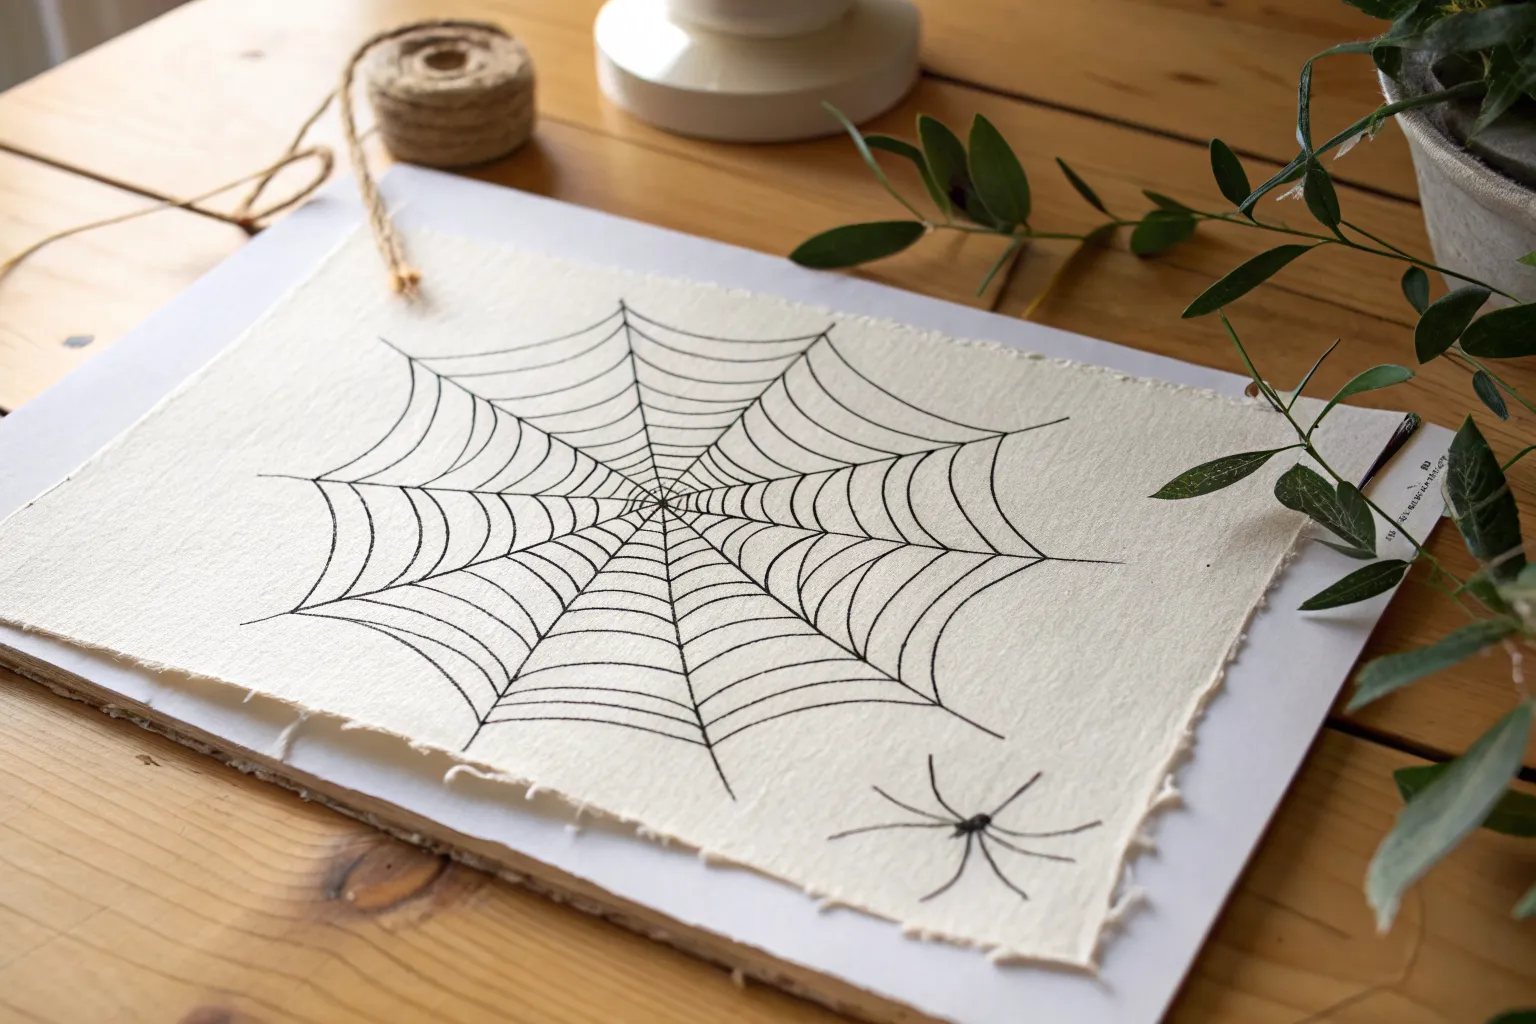
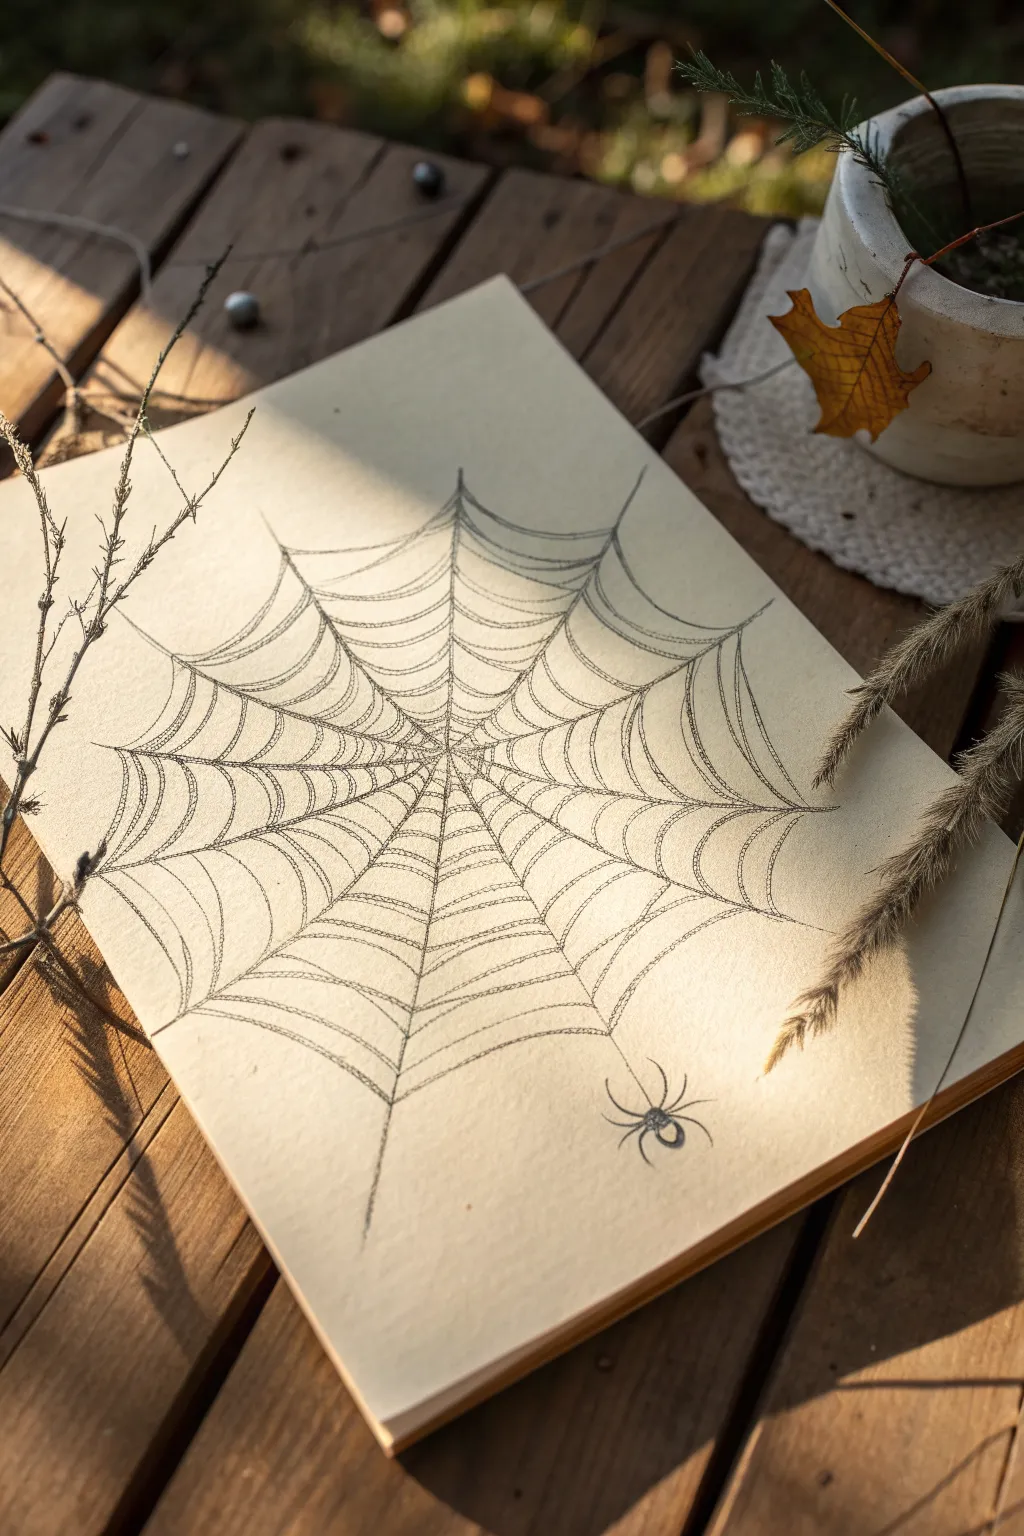
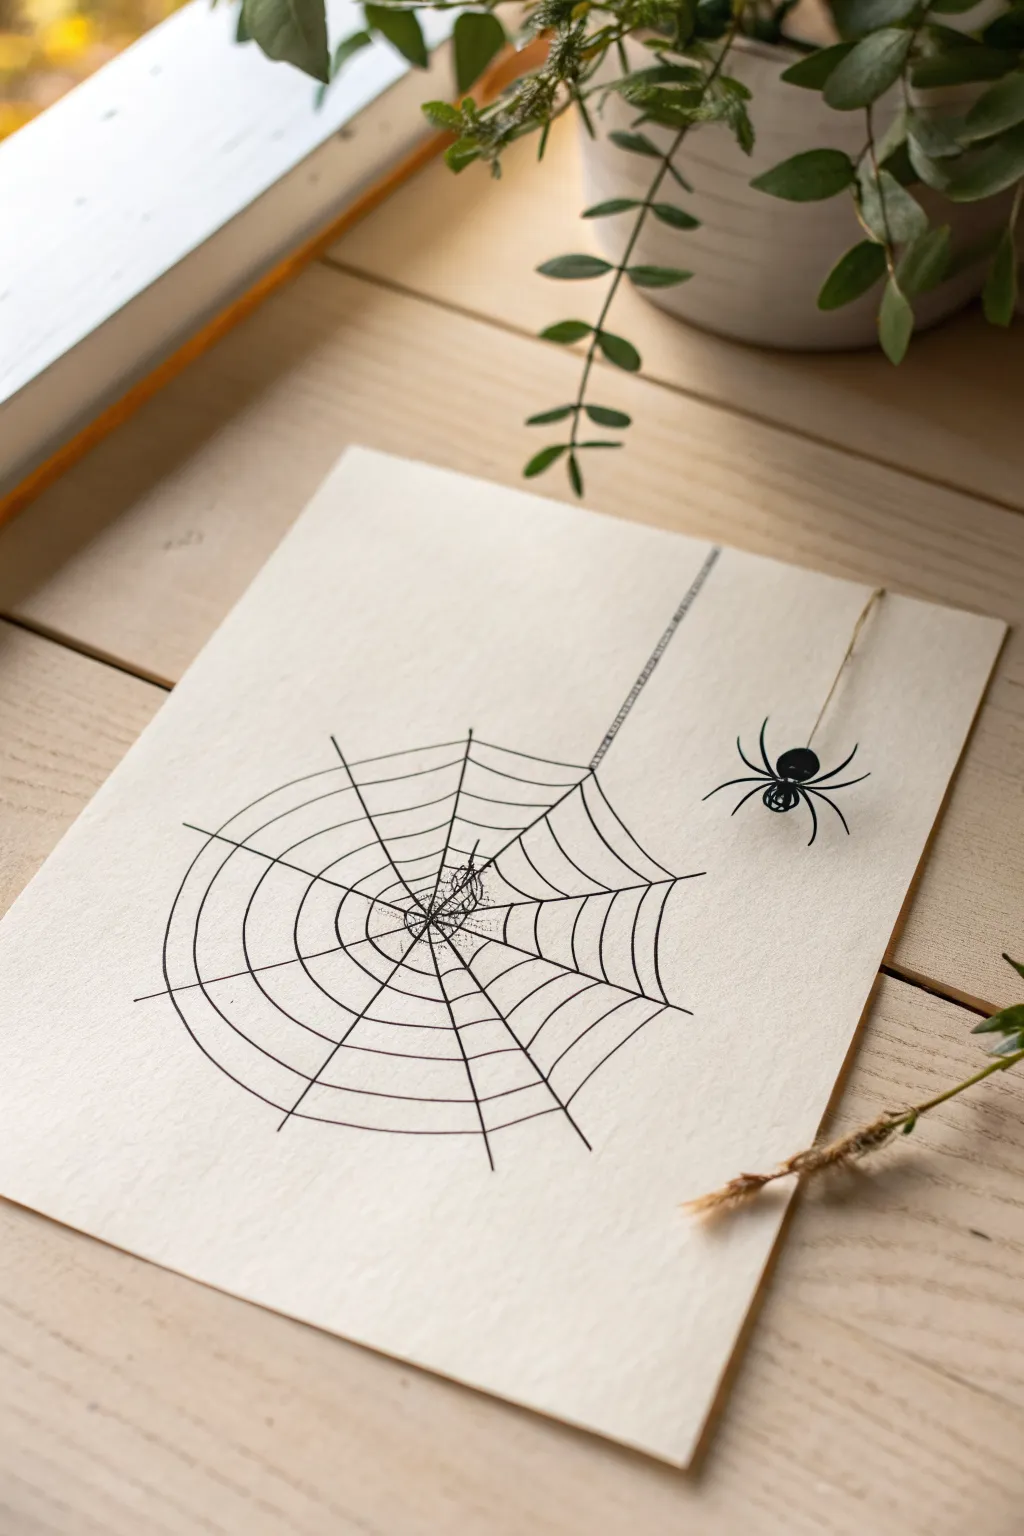
Web Stretched Between Two Objects
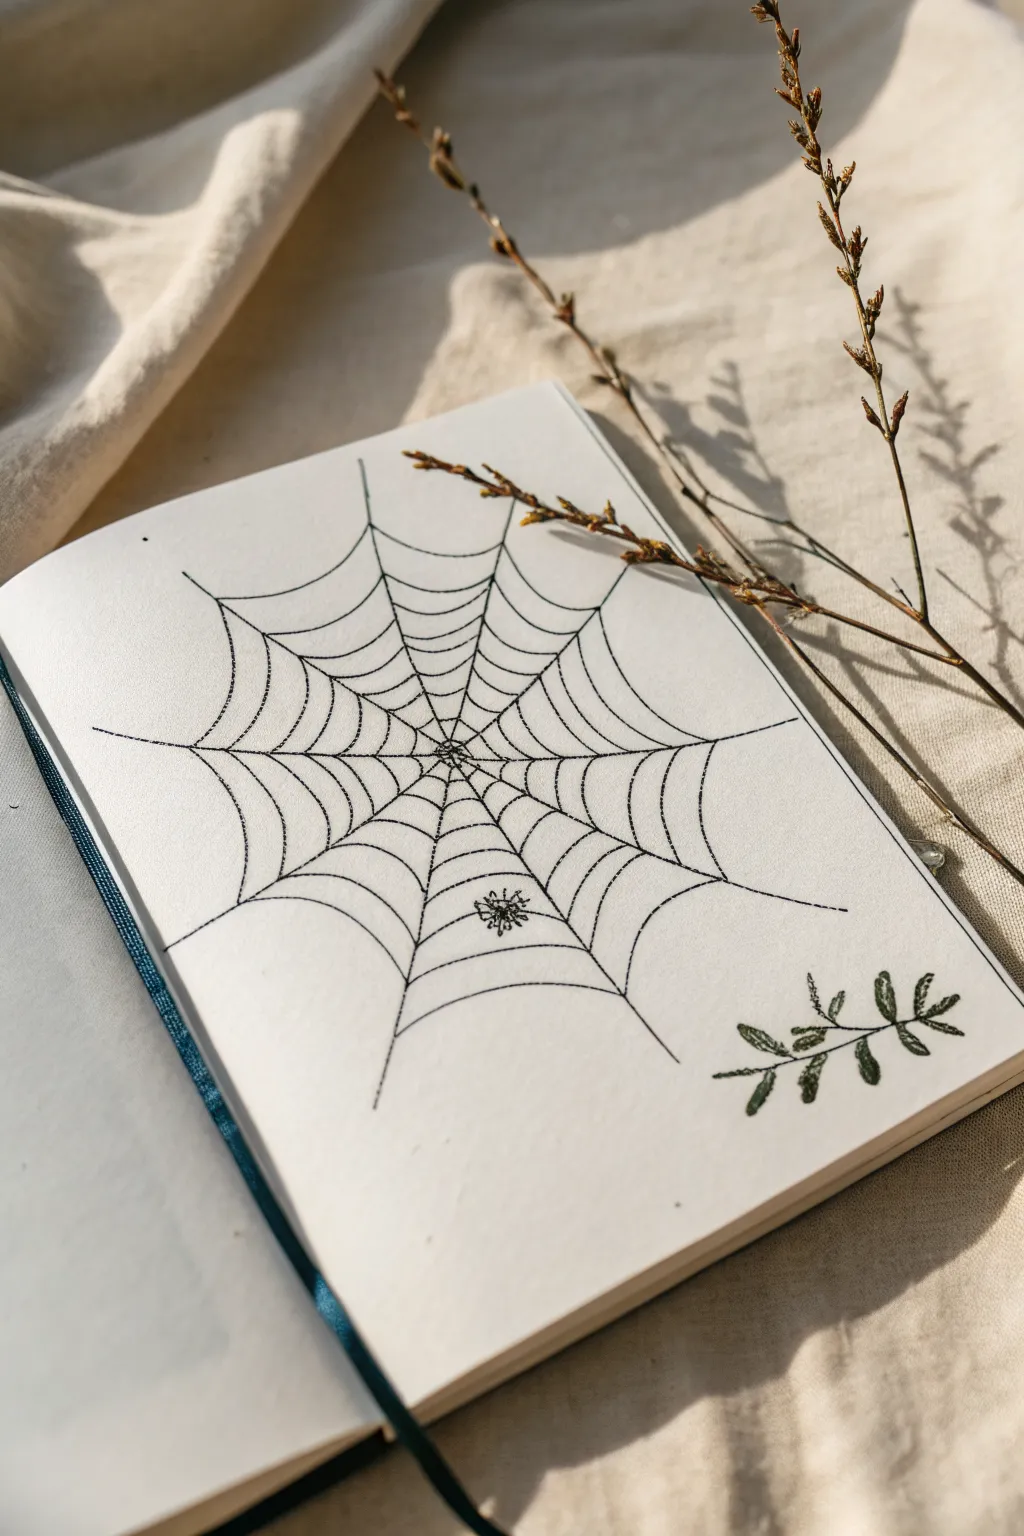
This minimalist ink drawing brings a classic spiderweb to life using fine lines and delicate stippling techniques on cream-colored paper. The inclusion of a small hanging spider and a botanical accent in the corner creates a beautifully balanced nature study perfect for your sketchbook.
How-To Guide
Materials
- Fine liner pen (01 or 03 size, black)
- Thicker drawing pen (05 or 08 size, black)
- Pencil (HB or H)
- Eraser
- Ruler (clear acrylic is best)
- Sketchbook or drawing paper (cream or off-white recommended)
Step 1: Conceptualizing the Structure
-
Find the center:
Start by lightly marking a small dot roughly in the center of your page with a pencil. This doesn’t need to be mathematically perfect; eyeing it works well for a natural look. -
Draw radial lines:
Using your ruler and pencil to guide you, draw straight lines radiating outward from that central dot. Aim for about 10 to 12 lines that extend toward the edges of the page, creating pie-slice shapes. -
Sketch the spiral structure:
Still using your pencil, sketch the horizontal webbing lines connecting the radial spokes. Start near the center and work outward in a spiral or concentric circles, letting the lines sag slightly in the middle to mimic gravity’s pull on silk.
Natural Imperfection
Don’t make your web perfectly symmetrical. Vary the spacing between the spiral threads—wider in some spots, narrower in others—to mimic a real web.
Step 2: Inking the Web
-
Trace the main spokes:
Switch to your finer pen (01 or 03). carefully trace over your radial pencil lines. Keep your hand relaxed; spider silk isn’t perfectly rigid, so a tiny bit of wobble adds character. -
Ink the inner spiral:
Begin inking the horizontal connecting threads starting from the center. Instead of a solid line, use a very light touch or even a broken line technique for the innermost, most delicate threads. -
Add detail to outer threads:
As you move to the outer rings where the gaps between spokes are wider, make your curved lines more pronounced. Ensure each line connects firmly to the radial spoke before dipping down to the next one. -
Thicken intersection points:
Go back to where the spiral threads meet the radial spokes. Use your pen to add tiny triangular fillets or thicken the ink slightly at these junctions, simulating how sticky silk gathers at connection points. -
Check the central hub:
Return to the very center of the web. Darken this area with a bit more scribbling or tight hatching to create a dense, messy hub where the spider would sit.
Ink Smearing?
If your eraser is dragging ink across the page, switch to a kneaded eraser. Press and lift the graphite off rather than rubbing back and forth.
Step 3: Adding the Residents
-
Outline the spider:
Choose a spot on the lower half of the web for your spider. Draw a small oval for the abdomen and a smaller shape for the head segment. -
Detail the legs:
Draw eight legs extending from the head section (cephalothorax). Make them slightly bent and creepy. I like to add tiny ‘hairs’ or scribbles to the body to give it texture rather than coloring it solid black. -
Sketch the botanical element:
In the bottom right corner, lightly sketch a simple curved stem with small, opposite-facing leaves. This frames the composition. -
Texture the leaves:
Ink the stem first, then outline the leaves. Instead of filling them in, use stippling (tiny dots) or short hatching lines inside the leaves to create shading and visual weight.
Step 4: Final Polish
-
Erase pencil guides:
Wait until the ink is completely dry—give it a few minutes to be safe. Gently erase all your initial pencil markings, being careful not to wrinkle the paper. -
Add floating threads:
To make the web look anchored, extend one or two of the main radial lines all the way to the edge of the paper, or add a loose, unconnected thread drifting off the side. -
Refine contrast:
Use your thicker pen (05 or 08) to selectively darken the underside of the spider and the stem of the plant. This adds depth and makes the drawing pop.
Now you have a delicate, spooky masterpiece captured on the page


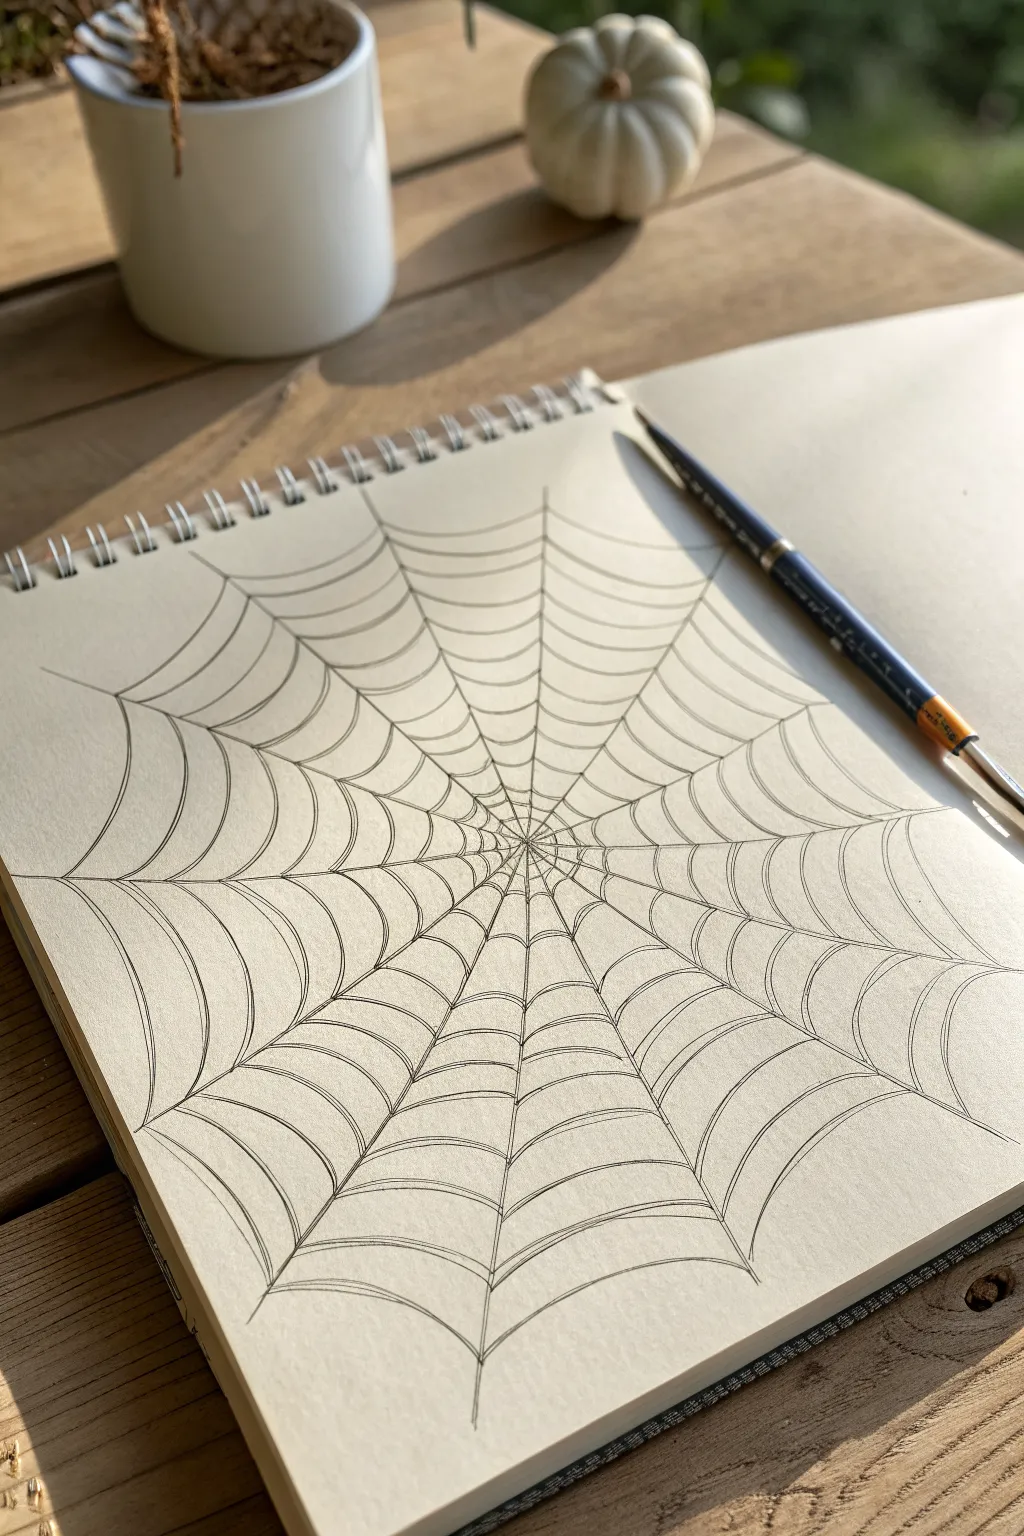
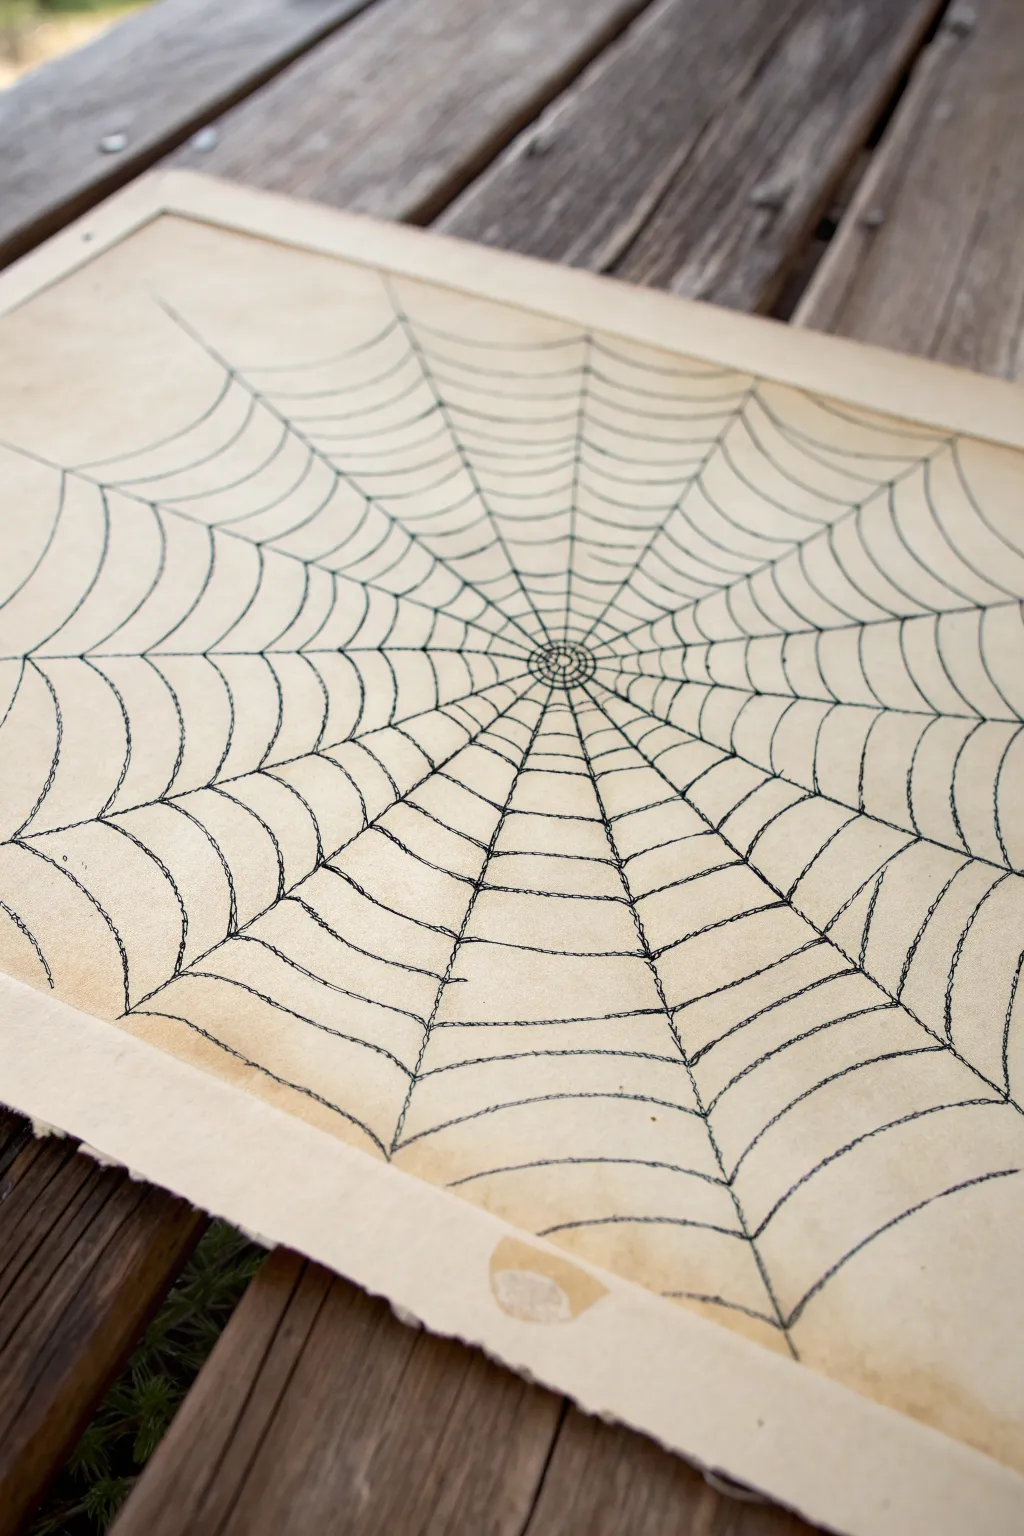
Spiral Web Twist
This project captures the timeless elegance of a traditional orb web, drawn with striking contrast on cream-colored paper. The design relies on clean, radial symmetry and delicate swoops to create a mesmerizing, slightly concave illusion.
Step-by-Step
Materials
- Spiral-bound sketchbook (cream or off-white paper recommended)
- Fine-liner pen (0.5mm or 0.8mm black)
- Pencil (HB or 2B)
- Eraser
- Ruler (optional, for guidelines)
Step 1: Setting the Foundation
-
Find the center:
Begin by lightly marking a small dot in the visual center of your sketchbook page with a pencil. This doesn’t have to be geometrically perfect, but it will serve as the anchor for the entire web. -
Draw the main axis lines:
Using your pencil, draw a vertical line straight through the center dot, extending about 3-4 inches up and down. Cross this with a horizontal line of similar length to create a large plus sign. -
Add diagonal spokes:
Draw two diagonal lines forming a broad ‘X’ through the center point. You should now have an asterisk shape with eight distinct sections. -
Fill the gaps:
Bisect the remaining large gaps with four more diagonal lines. The goal is to have roughly 12 to 16 radial spokes fanning out from the center like a bicycle wheel. -
Ink the anchor lines:
Take your black fine-liner and trace over your pencil spokes. Start from the center and flick your wrist outward for a sharp, tapered end on each line. Let the ink dry for a moment.
Step 2: Weaving the Spiral
-
Start the center cluster:
Near the central hub, draw very small, tight curved lines connecting the spokes. These first few rings should be quite close together to create that dense, dark middle section. -
Expand the first loop:
Move outward about a quarter-inch. Draw a scalloped line connecting two spokes. The line should curve inward towards the center, like a hanging piece of string. -
Complete the first ring:
Continue this scalloped motion all the way around the circle, connecting each spoke to its neighbor. Try to keep the distance from the center relatively consistent for this first full ring. -
Begin the spiral motion:
Instead of drawing separate concentric circles, you can now start spiraling outward. I find it easier to focus on one ‘row’ at a time, spacing the next curve slightly further out than the last. -
Widen the spacing:
As you move away from the center, increase the distance between your curved rows. This graduation in size is what gives the web its sense of depth and tension. -
Maintain the curve:
Ensure every connecting line dips inward deeply. If the lines are too straight, the web will look stiff; deep curves make it look like it’s catching the wind.
Wrist Mechanics
bRotate your sketchbook constantly as you work. Pulling the pen toward your body creates smoother, more consistent curves than pushing it away.
Step 3: Final Details
-
Extend the edges:
Toward the outer edges of the drawing, let the spiral pattern break. Draw a few connection lines that are much wider, skipping a spoke if you want a ‘broken’ or natural look, or just letting the radial lines extend nakedly beyond the last web strand. -
Darken the center:
Go back to the very center hub. Use your pen to thicken the intersection point, creating a bolder black spot where all the lines converge. -
Fix line weight:
Review your work. If any of the main radial spokes look too thin compared to the webbing, carefully re-trace them to add a tiny bit of weight. -
Erase guidelines:
Once the ink is completely dry—give it a solid five minutes to be safe—gently erase any remaining pencil marks underneath your ink. -
Clean up intersections:
Check the points where the web swoops meet the straight spokes. You can add a tiny dot of ink at these junctions to mimic the glue droplets spiders use, smoothing out the connection.
Wobbly Lines?
Don’t stress over shakes. Spider webs in nature are rarely perfect. A little wobble adds organic realism, making the web look weathered and real.
You now have a beautifully spun creation ready to catch admiration
BRUSH GUIDE
The Right Brush for Every Stroke
From clean lines to bold texture — master brush choice, stroke control, and essential techniques.
Explore the Full Guide
Tattered Abandoned Web
Capture the delicate geometry of nature with this intricate spider web drawing on textured paper. Using fine lines and careful shading, you’ll create a beautifully tattered, abandoned look that feels both spooky and serene.
Step-by-Step Tutorial
Materials
- Cream or off-white textured sketchbook paper
- HB or 2B graphite pencil (for sketching)
- Fine liner pens (0.1mm, 0.3mm, and 0.5mm, preferably black or dark grey)
- Kneadable eraser
- Ruler (optional, for guidelines)
Step 1: Laying the Foundation
-
Establish the center:
Begin by lightly marking a small dot slightly below the center of your page to serve as the anchor point for your web. -
Draw the radial threads:
From your center dot, sketch 10 to 12 long lines radiating outward toward the edges of the paper. Avoid making them perfectly straight; a slight curvature or wobble makes the web look more natural and organic. -
Add anchor points:
Extend a few of the top radial lines further than the others, implying they belong to structural branches outside the frame, creating an asymmetrical shape.
Uneven Ink Flow?
If your pen seems to skip, don’t fix it! Broken lines look exactly like old, dried silk threads glittering in the light. Embrace the imperfections.
Step 2: Weaving the Spiral
-
Start the inner spiral:
Starting very close to the center dot, draw small, scalloped curves connecting the radial lines. Keep these first loops tight and dense. -
Expand outward:
Working your way outward, continue drawing the spiral threads. Instead of a perfect continuous spiral, draw individual u-shaped curves between each radial spoke. -
Vary the spacing:
As you move further from the center, gradually increase the distance between rows. I like to let the spacing get significantly wider toward the outer edges to show the tension in the silk. -
Create the tattered look:
Stop some of the spiral lines abruptly before they reach a radial thread, or skip a section entirely. This simulates broken strands and gives the web that abandoned, weathered character. -
Extend the perimeter:
On the outer edges, let the scallops become very deep and exaggerated, stretching heavily between the main supports.
Step 3: Inking and Detailing
-
Trace the main lines:
Switch to your 0.3mm fine liner. Carefully go over your radial lines first. Don’t worry about being perfectly steady; a shaky hand actually adds realism to spider silk. -
Ink the spiral threads:
Use the 0.1mm pen for the spiral connections. These should be extremely delicate. Apply uneven pressure—press harder at the connection knots and lift slightly in the middle of the strand. -
Add connection knots:
Where the spiral meets the radial line, add a tiny dot or thicken the intersection slightly to mimic the sticky glue droplet that holds the web together. -
Texturize the strands:
Go back over select radial lines with the 0.1mm pen, adding a second, very faint line right next to the first in some areas to simulate a double-strand or shadow. -
Erase guidelines:
Once the ink is completely dry—give it a few minutes to be safe—gently lift the graphite sketch marks with your kneadable eraser.
Add Dew Drops
Use a white gel pen to add tiny dots along the spiral threads. This creates a morning dew effect that pops beautifully on cream paper.
Step 4: The Final Touch
-
Draw the spider body:
In the lower right quadrant, sketch a two-part body (a small cephalothorax and a larger abdomen) hanging from a long, single thread. -
Add the legs:
Draw eight legs. Since it’s hanging, the legs should curve upward and inward rather than sprawling out flat. -
Ink the spider:
Fill in the spider with the 0.5mm pen for solid black contrast against the delicate web. Leave a tiny speck of white on the abdomen for a highlight. -
Draw the drop line:
Connect the spider to the main web structure with a single, long line using the 0.1mm pen. Make this line fade slightly at the very bottom.
You now have a beautifully intricate web that evokes the quiet feeling of an autumn morning
Bold Line Weight Web
Capture the stark elegance of a spider web with this high-contrast black ink drawing. The emphasis here is on confident, varying line weights that give the web depth and a graphic, illustrative quality.
Step-by-Step
Materials
- Sketchbook with smooth, heavy paper
- Pencil (HB or H)
- Eraser (kneaded preferred)
- Fine liner pen (01 or 03 size)
- Thick illustration marker or brush pen (black)
- Ruler (optional)
Step 1: Laying the Foundation
-
Find the center:
Begin by lightly marking a small dot roughly in the center of your page to serve as the anchor point for the entire web. -
Draw the main spokes:
Using your pencil, sketch 8 to 10 straight lines radiating outward from that center dot like the spokes of a wheel. They don’t need to be perfectly symmetrical; slight unevenness adds natural realism. -
Add radial threads:
Starting near the center, lightly sketch curved lines connecting the spokes. These should look like little scallops or hammocks hanging between the straight lines. -
Spiral outward:
Continue adding these connecting curves, spiraling outward towards the edge of the page. Make the gaps between the rows wider as you move further from the center. -
Extend the anchors:
Identify a few of the main spoke lines that reach the very edges of your composition and extend them further than the rest, creating anchor points for the finished web.
Step 2: Inking the Structure
-
Start the center with fine lines:
Grab your thinner fine liner pen (01 or 03) to ink the very center section. These inner strands are often tighter and more delicate. -
Thicken the spokes:
Switch to your thicker marker or brush pen. Trace over the main radial spoke lines first. Apply consistent pressure to get a solid, bold black line. -
Ink the sweeping curves:
Using the same bold marker, trace the scalloped connecting threads. I find it helpful to rotate the sketchbook as I work to keep my hand angle comfortable. -
Create connection points:
As you ink the intersections where a curve meets a spoke, add a tiny bit of extra weight or a small triangular fillet in the corner to make the web look sticky and structural. -
Vary the line weight:
If your marker tip allows, try to make the middle of each scalloped line slightly thinner than the ends, simulating gravity pulling on the silk. -
Refine the edges:
Go over the outermost anchor lines again to ensure they taper off sharply at the ends, rather than ending in a blunt stump.
Bleeding Lines?
If bold markers bleed on your paper, switch to a pigment liner and build up line thickness by drawing parallel lines and filling them in.
Step 3: The Spider & Final Touches
-
Position the spider:
Choose a spot in the lower quadrant of the web. Draw a vertical line dropping down from one of the main web strands. -
Draw the body:
At the end of that vertical line, draw two small ovals—a smaller one for the head/thorax and a slightly larger one for the abdomen. -
Add the legs:
Carefully ink eight legs extending from the center of the body. Angle the front legs forward and the back legs backward for a realistic silhouette. -
Let the ink cure:
Give your drawing a few minutes to ensure the heavy ink lines are completely dry to the touch. -
Erase pencil guides:
Gently erase the underlying pencil structure. Be careful around the thicker ink areas to avoid smudging if the ink is still slightly damp deep down.
Natural Curves
Don’t connect lines perfectly straight across. The ‘dip’ in the horizontal threads is crucial for that heavy, draped look of a real web.
Now you have a striking, graphic spider web that pops off the page with its bold contrast

PENCIL GUIDE
Understanding Pencil Grades from H to B
From first sketch to finished drawing — learn pencil grades, line control, and shading techniques.
Explore the Full Guide
White-on-Black Web Study
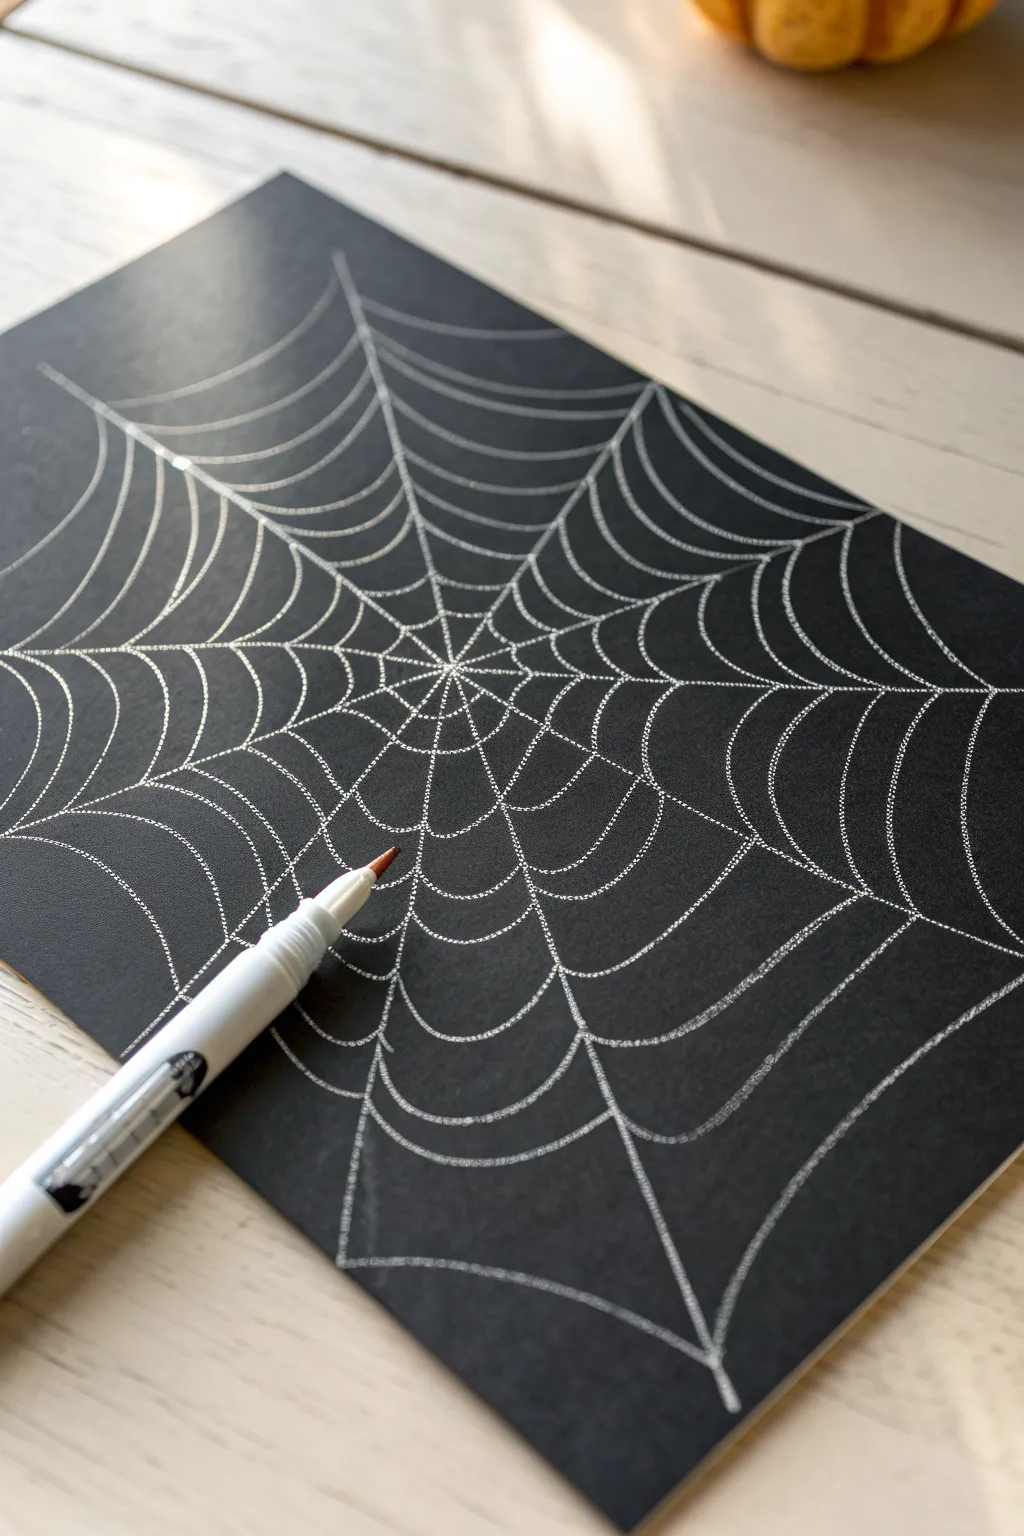
Go beyond the sketchbook basics with this striking white-on-black study that emphasizes negative space and precise linework. Using bright white gel ink on deep black cardstock creates a luminous, almost glowing effect that perfectly captures the delicate nature of a spider web.
How-To Guide
Materials
- Black cardstock or heavy construction paper
- White gel pen (medium or broad tip for visibility)
- Pencil (optional, for guidelines)
- Ruler (optional, but helpful for symmetry)
- Eraser
Step 1: Setting the Framework
-
Locate the center:
Begin by deciding where the center of your web will be. It doesn’t have to be perfectly centered on the page; an off-center origin point often makes the composition feel more dynamic. -
Draw the anchor lines:
Using your white gel pen, draw a single straight line extending from your center point toward the edge of the paper. -
Create the radial spokes:
Continuing from the center point, draw several more straight lines radiating outward like the spokes of a wheel. Aim for 8 to 10 main lines to give your web enough structure without making it too crowded. -
Check the spacing:
Notice the gaps between your spokes. They don’t need to be mathematically equal—natural webs are rarely perfect—but try to keep the distribution somewhat balanced across the page.
Step 2: Weaving the Web
-
Start the inner spiral:
Begin very close to the center point. Draw a small, curved line connecting two adjacent spokes. The curve should dip toward the center, creating a scalloped u-shape. -
Connect the first ring:
Continue connecting adjacent spokes with these small inverted arches until you have completed the first full circle around the center. -
Expand outward:
Move slightly further out along the spokes and begin a second ring. I like to keep the spacing between these first few rings quite tight to show the density of the web’s center. -
Vary the curves:
As you move further away from the center, let your connecting lines droop slightly more. Deepening the curve of each arch creates a sense of tension and weight in the silk. -
Maintain consistent spacing:
Try to keep the distance between each ring relatively consistent as you spiral outward, though you can gradually increase the gap size as you reach the edges.
Ink skipping?
If the gel pen skips on black paper, try cleaning the tip on a scrap piece of paper or warming the pen slightly in your hands to get the ink flowing smoothly again.
Step 3: Refining the Details
-
Watch your ink flow:
Gel pens can sometimes skip on textured cardstock. If lines look faint, retrace them gently, but avoid pressing too hard or the paper might pill. -
Handle the edges:
When your spiral rings reach the edge of the paper, don’t just stop. Let the curve run off the page naturally to suggest the web continues beyond the frame. -
Add connecting threads:
Look for any large open spaces in the outer areas. You can add extra ‘Y’ shape branches to your main spokes to fill empty voids if the web feels too sparse. -
Clean up intersections:
Go back to where your curved lines meet the straight spokes. Adding a tiny dot of ink or thickening the junction slightly can make the connections look stronger and more realistic.
Make it glisten
Add tiny dots of silver glitter glue or a metallic silver pen at random intersection points on the web to mimic morning dew drops catching the light.
Step 4: Finishing Touches
-
Review contrast:
Scan the drawing for any weak lines. The beauty of this piece relies on the high contrast, so ensure your white lines are opaque and bright. -
Add a stray thread:
For extra realism, you might add one or two loose, non-connecting threads near the bottom, showing where the web might be unfinished or broken. -
Let it dry:
White gel ink takes longer to dry than standard ballpoint. Be careful not to smudge your work with the side of your hand as you finish the final details.
Display your high-contrast drawing in a brightly lit area to really make those white lines pop against the dark background
Neon Rainbow Web
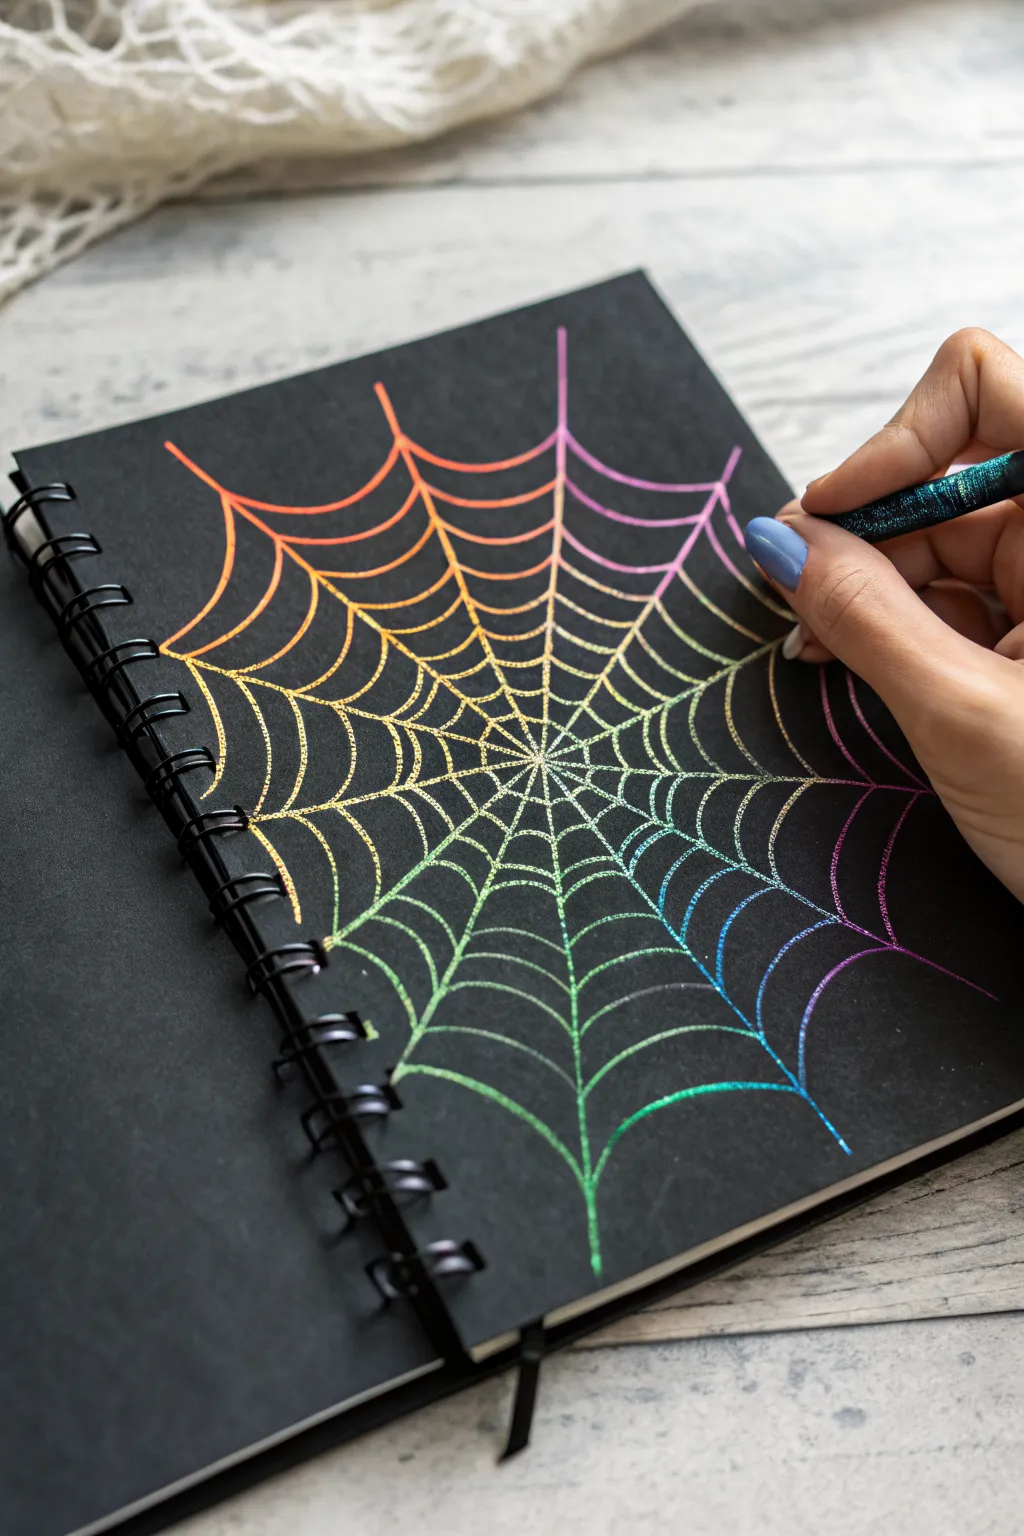
Transform a simple black page into a vibrant, neon masterpiece with this colorful spiderweb design. Whether using specialized scratch paper or bright gel pens, the striking contrast creates an electric effect that pops right off the page.
How-To Guide
Materials
- Black sketchbook or cardstock
- Neon gel pens (rainbow spectrum) OR Scratch art paper and wooden stylus
- Ruler (optional)
- Pencil (light lead)
Step 1: Planning the Structure
-
Identify the center:
Start by locating the approximate center of your page. This doesn’t need to be mathematically perfect; slightly off-center placement can actually make the web look more organic and natural. -
Draw the main spokes:
Using a light pencil touch or your stylus, draw a vertical line straight down from the top edge through your center point. Follow this with a horizontal line across the middle, creating a large cross shape. -
Add diagonal supports:
Draw two long diagonal lines through the center point, creating an ‘X’ shape over your initial cross. You should now have a star-like shape with eight distinct sections radiating from the middle. -
Fill intermediate gaps:
If you want a tighter web, you can add one more spoke in between each existing line. I find that eight to twelve main spokes usually provide the best balance for a page of this size.
Ink Smear Fix
If you smudge wet neon ink on black paper, wait for it to dry fully, then gently color over the smudge with a black colored pencil or marker to mask it.
Step 2: Weaving the Web
-
Select your starting color:
Grab your first neon gel pen—perhaps a bright orange or pink—or prepare your stylus. You will work in a spiral motion, changing colors gradually to create the gradient effect. -
Create the center spiral:
Starting very close to the center point, draw a tiny curved line connecting one spoke to the next. The curve should dip inward slightly, like a small smile or hammock. -
Continue the first ring:
Keep connecting the spokes with these small curved lines, working your way around the center point until you have completed the first tiny circle. -
Build outward:
Move slightly further out on a spoke and begin a second, larger ring. Maintain that inward curve for each segment; this ‘scalloped’ shape is what gives the web its characteristic sticky look. -
Transition colors:
As you move outward, switch your pen color every few rings. For a smooth gradient like the example, move in rainbow order: red to orange, to yellow, green, blue, and finally purple. -
Widen the spacing:
Notice how real webs get wider toward the edges. Let the distance between your concentric rings gradually increase as you work toward the perimeter of the page.
Step 3: Refining and Finishing
-
Reach the edges:
Continue spiraling outward until your web segments run off the edge of the paper. Don’t worry if the shape isn’t perfectly circular anymore; let it fill the rectangular space naturally. -
Retrace for vibrancy:
If you are using gel pens, the first pass might soak into the black paper slightly. Go back over any lines that look dim with a second coat of ink to ensure maximum neon brightness. -
Connect the anchors:
Extend the very ends of your main structural spokes (the straight lines) so they clearly overlap the final outer ring of the web, anchoring the design to the page visually. -
Clean up:
Once the ink is completely dry—give it a few minutes to be safe—gently erase any visible pencil guidelines from step one that weren’t covered by the neon ink.
Dew Drop Detail
Add tiny dots of white or silver gel pen at the intersections where the web lines cross to mimic morning dew glistening on the threads.
Now you have a glowing display of geometric art ready to admire


Warm vs. Cool Split Web
Capture the delicate beauty of a spider web on paper that looks like it was pulled from a century-old nature journal. This project combines simple line drawing with paper aging techniques to create a piece that feels timeless and slightly mysterious.
Step-by-Step Guide
Materials
- Heavyweight watercolor paper or mixed media paper
- Black waterproof archival ink pen (0.5mm tip)
- Black waterproof archival ink pen (0.1mm or 0.3mm tip)
- Pencil (HB)
- Eraser
- Ruler
- Strong black tea or instant coffee crystals
- Wide softness paintbrush or sponge brush
- Paper towels
Step 1: Preparing the Antique Canvas
-
Rough Step:
Begin by tearing the edges of your paper by hand. Avoid scissors; you want a rough, deckled edge to simulate old, handmade parchment. Pull the paper slowly toward you to create a fibrous, uneven border. -
Brew the Stain:
Create a very concentrated solution of black tea or instant coffee in a small cup of hot water. The darker the liquid, the more dramatic the aging effect will be. -
Apply the Age:
Using a wide brush or sponge, wash the tea or coffee solution over the entire surface of the paper. Don’t worry about evenness; pooling liquid in certain areas creates authentic-looking water stains. -
Add Texture:
While the paper is still wet, you can sprinkle a few grains of dry instant coffee or tea leaves onto the surface. These will burst into dark spots, adding speckles of age. -
Dry Completely:
Allow the paper to dry fully. I usually speed this up with a hair dryer on a low setting, which sometimes helps the paper buckle slightly for added texture. Ensure it is bone dry before drawing.
Ink Bleed Trick
If you want softer lines, draw on the paper while it’s ever-so-slightly damp from the tea staining. The ink will feather marginally.
Step 2: Constructing the Web Structure
-
Find the Center:
Lightly mark a central point on your dried paper with a pencil. It doesn’t have to be perfectly centered; slightly off-center compositions often look more natural. -
Draw Radiating Lines:
Using your ruler and pencil, draw straight lines radiating outward from the center point to the edges of the paper, like slices of a pie. Aim for 12 to 16 lines for a dense web. -
Ink the Spokes:
Switch to your thicker (0.5mm) black pen. Trace over your pencil guidelines. Do not use the ruler for this ink step; let your hand wobble slightly to give the distinct organic, shaky look seen in the reference. -
Create the Origin:
At the very center where the lines meet, draw a tiny, tight spiral or a series of very small concentric circles to anchor the web.
Step 3: Weaving the Silk
-
Start the Spiral:
Switch to your finer (0.1mm or 0.3mm) pen. Starting near the center, begin drawing the curved ‘bridge lines’ that connect the spokes. These should curve inward toward the center, creating scalloped shapes. -
Maintain the texture:
As you draw these connecting lines, create a slight ‘stitching’ motion or a subtle zigzag texture rather than a perfect smooth arc. This mimics the sticky, glistening nature of spider silk. -
Work Outward:
Continue spiraling outward, connecting spoke to spoke. Increase the spacing between the connecting lines as you move further away from the center of the web. -
Check the Tension:
Ensure the curve of each line dips appropriately. If they are too straight, the web looks stiff; if they droop too much, it looks old and broken. A gentle ‘U’ shape is ideal. -
Varied Spacing:
Don’t fret if the spacing isn’t mathematically perfect. In nature, webs have irregularities. Occasionally placing two rows closer together adds realism. -
Reach the Edges:
Continue the pattern until you run off the edge of the paper. It’s okay if some corners of the page don’t have cross-lines, leaving just the radiating spokes. -
Reinforce Junctions:
Go back to a few random intersections where the spiral meets the spoke. Thicken these joints slightly with a tiny dot of ink to mimic the glue droplets spiders use to secure the web. -
Clean Up:
Once the ink is completely dry (give it a few minutes to be safe), gently erase any visible pencil lines that weren’t covered by ink.
Shadow Play
Use a diluted grey marker or watercolor focused on just one side of each thread to add dimension, making the web appear to float off the page.
Now you have a hauntingly beautiful specimen that looks like a relic from a Victorian study
Web With Hanging Spider Silhouette
This elegant project combines crisp linework with bold silhouette art to create a striking Halloween decoration or year-round gothic accent. The contrast of the delicate web against the solid black spider on textured cream paper gives it a sophisticated, finished look.
Step-by-Step
Materials
- High-quality cream or off-white textured drawing paper (heavyweight)
- Fine liner pen (0.3mm or 0.5mm)
- Thicker black marker or brush pen (for the spider)
- Pencil (HB or H)
- Eraser (kneaded is best)
- Ruler or straight edge
- Compass (optional)
Step 1: Planning the Composition
-
Paper selection:
Begin by selecting a nice, heavyweight paper with some tooth or texture. This adds dimension to simple ink drawings. -
Sketch the anchor line:
Using your pencil and a ruler, lightly draw a diagonal line coming down from the top right area towards the center left. This will be the main thread the web hangs from. -
Establish the center:
Mark a focal point on that diagonal line where the center of your web will be. It shouldn’t be dead center on the page; keeping it slightly off-center looks more dynamic. -
Draft the radial lines:
Lightly sketch 7 to 9 radial lines exploding outward from that central point. These form the ‘spokes’ of the web. Make them slightly uneven in spacing to look organic.
Ink Smudge Rescue
If you accidentally smudge wet ink, turn it into a ‘fly’ caught in the web. Draw a tiny, messy squiggle over the smudge and add small wings.
Step 2: Drawing the Web Structure
-
Ink the main spoke:
Switch to your fine liner pen. Trace over that main diagonal anchor line you drew first, making it crisp and confident. -
Ink the radial spokes:
Carefully ink the other radial lines. Start from the center and pull the pen outward, lifting pressure at the end for a sharp taper. -
Start the spiral:
Begin close to the center point. Draw small, curved lines connecting the spokes. These first few should be very tight and possibly a bit messy to represent the dense center. -
Build the web outward:
Create the classic scalloped web shape by connecting the spokes with curved lines that dip toward the center. Work your way outward in a spiral pattern. -
Vary the spacing:
As you move away from the center, let the distance between your spiral rows get larger. This creates the illusion of perspective and natural tension. -
Add imperfections:
I like to occasionally double up a line or make one slightly wobbly. Real spider webs aren’t geometrically perfect, and these flaws add character.
Step 3: Creating the Hanging Spider
-
Position the drop line:
Decide where your spider will hang. Draw a straight vertical line hanging down from the upper right section of the paper, separate from the main web. -
Sketch the body:
At the end of that thread, lightly sketch two circles in pencil—a smaller one for the head/thorax and a larger, slightly oval one for the abdomen. -
Fill the silhouette:
Using your thicker marker or brush pen, fill in these shapes solidly black. Ensure the edges are smooth and round. -
Draft the legs:
Pencil in eight legs. The front two should curve forward, and the back six should curve backward and upward before bending down. -
Ink the legs:
Go over the legs with your fine liner. Start thick at the body and taper them to sharp points at the tips for a realistic silhouette. -
Refine the connection:
Ensure the silk thread connects seamlessly to the spinneret area at the back of the spider’s abdomen.
Make It 3D
For a mixed-media twist, glue a small length of real black thread for the spider’s hanging line instead of drawing it.
Step 4: Finishing Touches
-
Texture the center:
Go back to the very center of the web. Add tiny stippling dots or scratches with your finest pen to create that dense, messy look where the spider sits. -
Erase guidelines:
Wait until the ink is completely dry—give it a good five minutes to be safe. Gently erase all remaining pencil marks. -
Final assessment:
Check your line weights. If the main anchor thread looks too thin compared to the spider, thicken it slightly.
Frame this delicate piece in a simple black frame to let the high contrast really shine through
Dewdrop Web Highlights
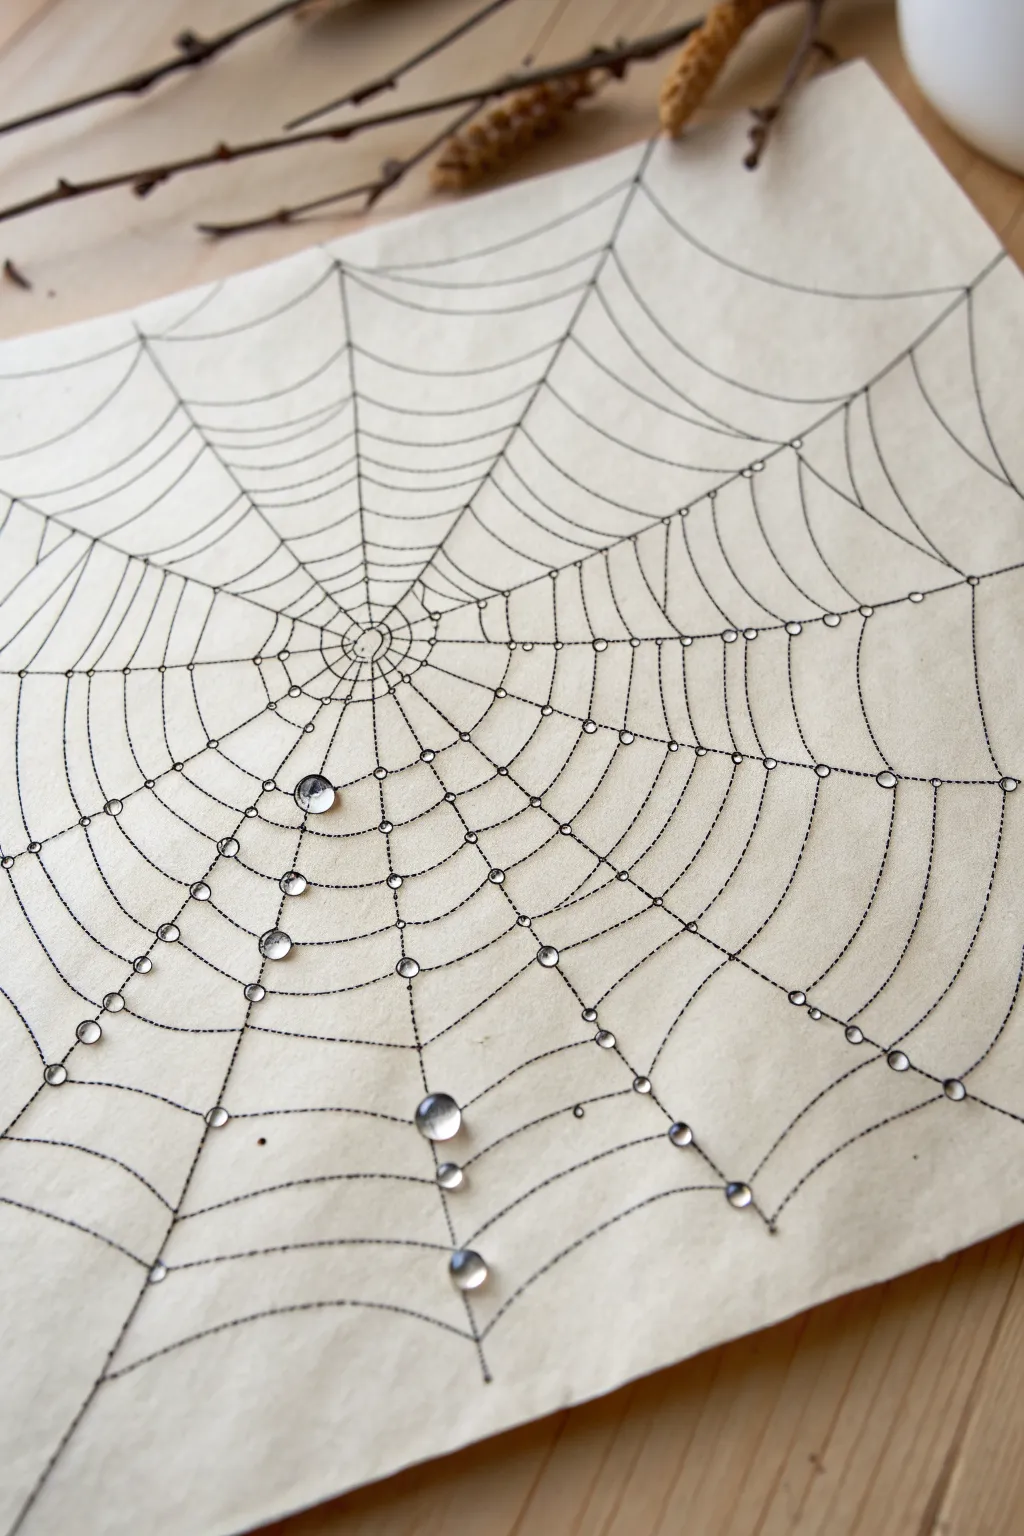
Create a mesmerizing, hyper-realistic spider web that appears freshly kissed by morning mist. By combining precise ink work with three-dimensional droplet effects, you’ll produce a tactile piece of art where the water looks real enough to touch.
Step-by-Step Guide
Materials
- High-quality off-white or cream textured paper (mixed media or watercolor paper)
- Black fine liner pens (sizes 0.1mm, 0.3mm, and 0.5mm)
- Pencil (HB or 2H)
- Eraser
- Ruler
- Clear drying dimensional glaze (like Glossy Accents) or clear UV resin
- White gel pen (optional for highlights)
- Fine tip paintbrush (if using UV resin)
Step 1: Laying the Foundation
-
Find the Center:
Begin by lightly marking a small dot near the center of your paper with your pencil. This doesn’t need to be dead center; an off-center placement often adds a more dynamic, natural feel to the composition. -
Draw Radial Lines:
Using a ruler and pencil, draw straight lines radiating outward from your center dot to the edges of the paper. Imagine cutting a pizza; start with 8-10 main spokes, spacing them somewhat unevenly to mimic nature’s imperfections. -
Sketch the Spirals:
Starting close to the center, lightly sketch the spiral threads connecting the radial spokes. Instead of perfect straight lines, let these curve slightly inward (concave) between each spoke, creating that classic drooping web effect. -
Expand the Pattern:
Continue sketching your spiral outward. As you move away from the center, the distance between the spiral rows should gradually increase. Don’t worry if your lines wobble; spider silk isn’t architectural steel.
Glaze Pro Tip
Don’t shake your glaze bottle before use! Shaking introduces air bubbles that will ruin the crystal-clear look of your water droplets. If bubbles appear, pop them instantly with a pin.
Step 2: Inking the Web
-
Trace Structural Lines:
Switch to your 0.5mm fine liner. Carefully trace over the main radial spokes first. These represent the anchor threads of the web, so they should be slightly bolder than the spiral threads. -
Detail the Spirals:
Use a thinner 0.1mm or 0.3mm pen for the spiral threads. Trace your pencil lines, maintaining that delicate, sagging curve between the spokes. Lift your pen pressure slightly at the center of each curve for a wispier look. -
Add Connection Points:
Where the spiral meets the radial line, add a tiny dot or slightly thicken the intersection with your pen. This small detail mimics the sticky glue joints spiders create. -
Erase Guidelines:
Wait at least 10-15 minutes for the ink to dry completely. Gently erase all visible pencil marks, ensuring you don’t smudge your crisp black lines.
Step 3: Creating the Dewdrops
-
Plan Droplet Placement:
Look at your web and decide where gravity would collect water. Focus on the lower sections of the sagging lines and the intersections where threads cross. -
Draw Small Beads:
With your fine liner, draw tiny circles directly on the web lines. Keep these small and irregularly spaced. Some should be singular, while others can be clustered in groups of two or three. -
Create Large Droplets:
Select a few focal points to draw larger, tear-drop or spherical shapes hanging from the threads. These will be your ‘hero’ drops that catch the most attention. -
Add Internal Shadows:
Inside your inked circles, add a tiny crescent of shading at the top of the droplet. This is counter-intuitive, but clear drops refract images upside down, often putting the darks at the top. -
Apply Dimensional Glaze:
This is the magic step. Take your dimensional glaze (or UV resin) and carefully squeeze a small dome of liquid directly over your drawn droplets. The surface tension will hold the liquid in a bead shape. -
Vary Droplet Sizes:
Squeeze gently for the tiny beads and a bit harder for the larger drops. I find that varying the height of the glaze domes makes the final texture much more convincing. -
Add Micro-Droplets:
Use a pin or toothpick dipped in glaze to place microscopic dots of clear liquid along distinct sections of the thread where you didn’t draw ink circles. These catch the light beautifully. -
Final Highlights:
If your glaze isn’t catching enough natural light, you can add a precise dot of white gel pen on top of the dried glaze to force a reflection, though the glossy medium usually does this on its own.
Level Up: Morning Light
Before applying the clear glaze, use very watered-down blue or grey watercolor to paint a tiny shadow underneath just the largest droplets for enhanced realism.
Let your artwork sit undisturbed on a flat surface overnight to ensure the droplets harden into perfect crystal beads
Perspective Web Tunnel
Learn to draw a mesmerizing optical illusion web that feels like it’s pulling you into its center. This geometric design uses simple repeating curves to create surprising depth on plain paper.
How-To Guide
Materials
- Light tan or cream-colored drawing paper (smooth texture)
- Blue fine-liner pen (0.4mm or similar)
- Pencil (HB or 2H for sketching)
- Ruler or straight edge
- Eraser
Step 1: Setting the Structure
-
Find your center:
Begin by marking a small dot in the absolute center of your paper. This will be the vanishing point for your perspective tunnel. -
Sketch the main spokes:
Using a ruler and a light pencil, draw straight lines radiating outward from that center dot all the way to the edges of the paper. -
Divide the space:
Make sure you have an even number of spokes—about 12 to 16 lines works best to create consistent segments for the web. -
Commit to ink:
Once you are happy with the spacing, trace over your pencil spokes with the blue fine-liner pen. -
Anchor the ends:
At the very end of each spoke, draw a tiny open circle or ‘node’ to give the web a finished, illustrative look.
Step 2: Weaving the Web
-
Start from the middle:
Begin drawing the connecting threads very close to the center point. These first few shapes will be tiny triangles or trapezoids. -
curve the lines:
Instead of drawing straight lines between the spokes, curve each connecting line inward toward the center. This concave curve is the secret to the ‘tunnel’ effect. -
Work in concentric rings:
Complete one full circle around the center before moving outward to the next layer. -
Increase the spacing:
As you move outward, I find it helpful to slightly increase the distance between the rings. The gaps should get wider the further you get from the center. -
Keep curves consistent:
Try to maintain the same depth of curve for each segment in a ring so the web looks symmetrical.
Wobbly Lines?
Don’t stress if curves aren’t perfect. A slight wobble actually makes the web look more organic and realistic, rather than computer-generated.
Step 3: Final Details
-
Connect the nodes:
Draw the curves connecting the endpoints of your spokes. These should be the deepest, widest curves of the whole drawing. -
Check line weight:
Go back over any lines that look too thin or broken. A consistent, solid blue line makes the graphic quality pop. -
Erase guidelines:
Wait for the ink to dry completely to avoid smudging, then gently erase any visible pencil marks underneath. -
Add subtle variation:
If you want a hint of texture, add a tiny second stroke to the ‘corners’ where the web meet the spokes, suggesting a knot.
Add a Spider
Draw a small silhouette of a spider hanging from one of the outer threads or sitting right in the center to give the tunnel a focal point.
You now have a striking geometric web that looks like it is stretching deep into the page
Geometric Polygon Web
This satisfying geometric drawing captures the classic symmetry of a spider web with clean, crisp lines. It’s a perfect beginner-friendly project that looks impressive but relies on simple repetitive patterns to build complexity.
Detailed Instructions
Materials
- Spiral-bound sketchbook (smooth white paper)
- Fine liner pen (black, 0.5mm or 0.8mm)
- Pencil (HB or 2B)
- Ruler or straight edge
- Eraser
Step 1: Setting the Foundation
-
Find your center:
Open your sketchbook to a fresh, clean page. Using your pencil, lightly mark a small dot in the visual center of the page. This doesn’t need to be mathematically perfect, but it will serve as the anchor for your entire web. -
Draw the main axis:
Place your ruler vertically through the center dot. Draw a light pencil line extending towards the top and bottom edges of the page. -
Creating the cross:
Rotate your ruler 90 degrees to create a horizontal line through the center dot, forming a large plus sign. -
Adding diagonals:
Line your ruler up diagonally through the center, cutting the top-right and bottom-left quadrants in half. Draw a line extending almost to the corners of the page. -
Completing the spokes:
Repeat the previous step for the opposite diagonal, cutting through the top-left and bottom-right quadrants. You should now have eight radial lines (‘spokes’) extending from the center like a pizza cut into eight slices. -
Inking the structure:
Take your fine liner pen. Carefully trace over your pencil spokes. Start from the center and pull the pen outward for smooth, confident lines. I find it helpful to rotate the sketchbook so I’m always drawing the line away from my body.
Curve Control
Rotate your entire sketchbook as you draw each individual curve. This keeps your hand in a comfortable, natural position for drawing arcs.
Step 2: Weaving the Web
-
Starting the center spiral:
Switch back to your pencil if you’re nervous, or go straight in with ink. Starting very close to the center point, draw a small, slightly curved line connecting two adjacent spokes. The curve should dip inward towards the center, like a tiny smile. -
Completing the first ring:
Continue connecting each spoke with these small inner curves until you complete the first full circle around the center point. It should look like a tiny flower or star. -
Expanding outward:
Move about a half-inch outward from your first ring. Draw a second ring of curved lines connecting the spokes. Keep the spacing consistent so the web looks symmetrical. -
Spacing your rings:
Continue this pattern, moving outward. As you get further from the center, you can slightly increase the distance between the rings to create a sense of expansion. -
Maintaining the curve:
Ensure each connecting line retains that inward ‘scalloped’ curve. This is crucial for the web effect; straight lines will make it look like a target or radar screen instead. -
Handling the edges:
As the web grows large, your radial spokes will diverge widely. Keep connecting them until you are near the edge of the paper, but leave some negative space around the border. -
Final inking pass:
If you sketched the web rings in pencil first, go over them now with your black fine liner. Use a steady hand and try to make the connections at the spokes sharp and clean.
Spooky Variations
Change the vibe by drawing a tiny spider silhouette hanging from one of the threads, or vary the line thickness for a more organic, uneven look.
Step 3: Final Touches
-
Checking line weight:
Look over your drawing. If you want the main radial spokes to stand out more, you can re-trace them carefully to make those lines slightly thicker than the connecting web threads. -
Erase guidelines:
Wait at least 5-10 minutes for the ink to dry completely. This is the hardest part—waiting! Once dry, gently erase any visible pencil marks from your initial layout. -
Create anchors (optional):
To make the web feel grounded, extend the very tips of the furthest radial lines just slightly past the last web ring, so they taper off naturally.
Now you have a strikingly crisp geometric web that jumps right off the page
Pattern-Filled Web Sections
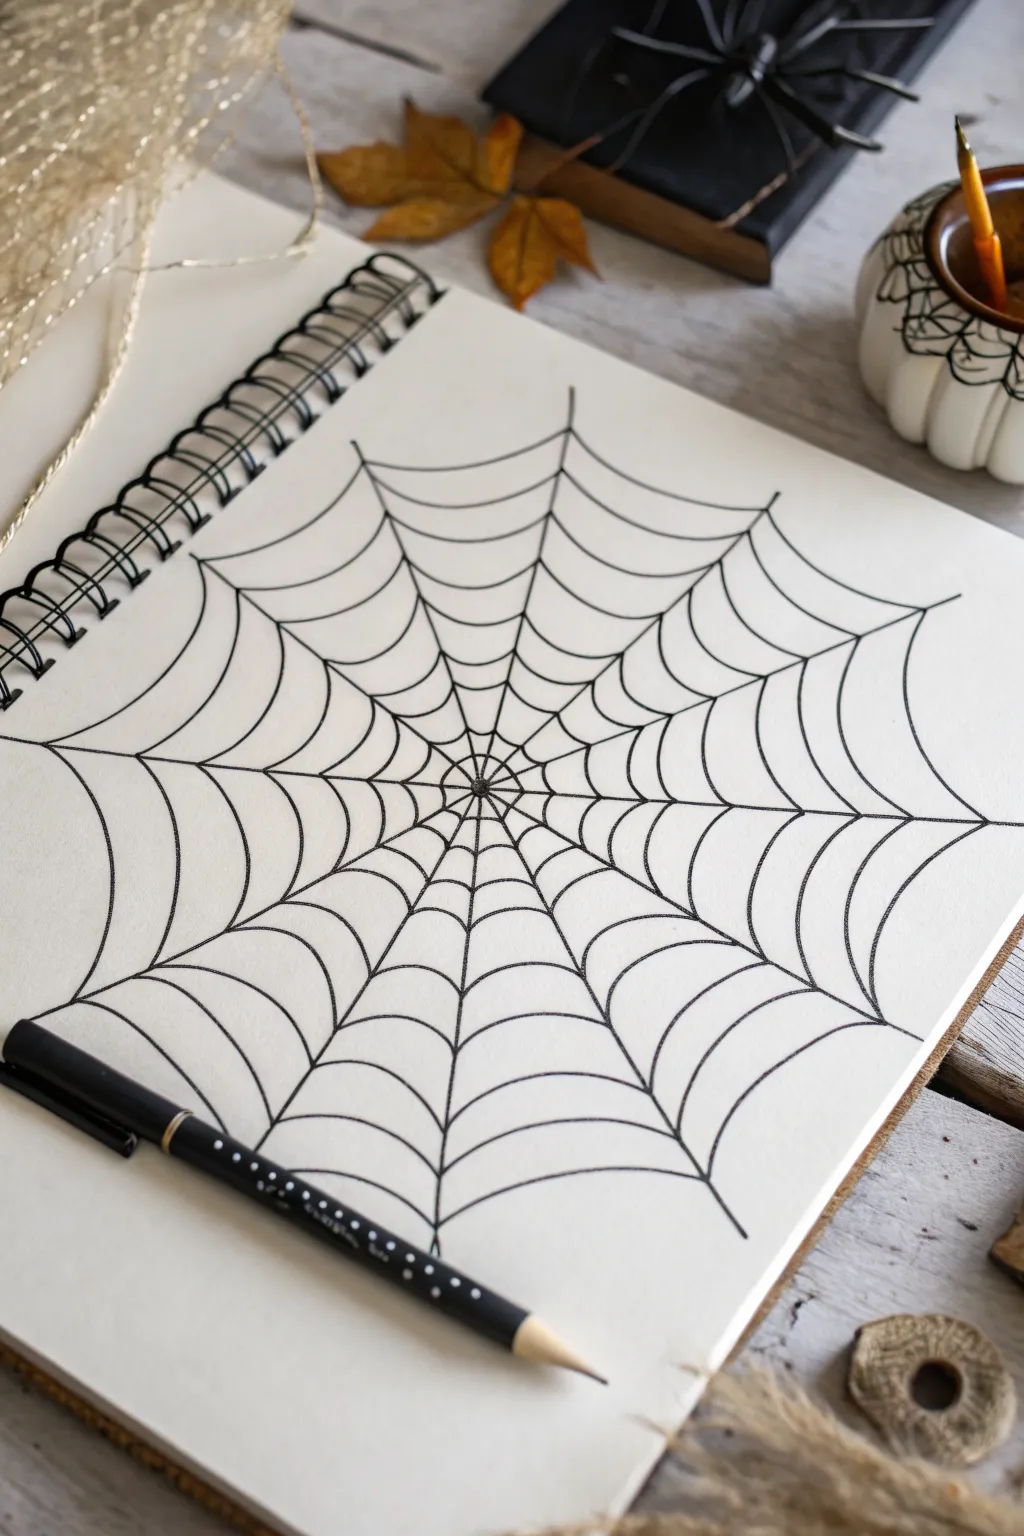
This project captures the quintessential spooky season aesthetic with a crisp, high-contrast spider web drawing. By focusing on steady radial lines and connecting curves, you’ll build a hypnotic, symmetrical design that pops off the page.
How-To Guide
Materials
- Sketchbook with smooth, heavy-weight paper (mixed media or bristol)
- H or HB pencil
- Fine-point black drawing pen (size 05 or 08)
- Pencil sharpener
- Eraser (kneaded preferred)
- Ruler (optional, for guidelines)
Step 1: Laying the Foundation
-
Find the center:
Begin by lightly marking a small dot in the very center of your sketchbook page with your pencil. This anchor point is crucial for keeping your web symmetrical. -
Draw the main axis:
Lightly sketch a vertical line passing through your center dot, extending almost to the top and bottom edges of the paper. -
Add the horizontal axis:
Cross your first line with a horizontal line through the center dot, creating a large ‘plus’ sign. -
Divide the quadrants:
Draw two diagonal lines that cut through the center, effectively bisecting the four quadrants you just made. You should now have an eight-spoke asterisk shape. -
Fill the gaps:
Between each of your eight main spokes, carefully draw one more radial line extending from the center. This creates a 16-spoke structure, which provides enough density for a realistic web look.
Step 2: Weaving the Web
-
Start the spiral:
Switch your focus to the very center. Draw tiny, curved lines connecting the spokes just millimeters from the central dot to create the web’s ‘hub’. -
Expand the first ring:
Moving slightly outward, draw your first true ring of ‘silk.’ Instead of straight lines, scallop them inward, dipping the line toward the center between each spoke. -
Continue the pattern:
Work your way outward, adding concentric rings. Try to keep the spacing somewhat consistent, but natural variations make it look more organic. -
Widen the spacing:
As you move toward the outer edges of the page, let the distance between your rings grow slightly larger. This perspective trick helps flat drawings feel more expansive. -
Handle the edges:
When you reach the edges of the paper, don’t force a full circle. Let the lines create an ‘open’ shape, as if the web is anchored to things outside the frame.
Shaky Lines?
If your scallops look jittery, try rotating the sketchbook as you work. Always drawing the curve in the direction that feels most natural to your hand stabilizes the stroke.
Step 3: Inking and Refining
-
Trace the spokes:
Take your fine-point black pen and carefully trace over your pencil spokes. I find it easier to pull the pen toward me rather than pushing it away for cleaner lines. -
Ink the curves:
Go over your scalloped connecting lines. Use confident, sweeping strokes to avoid shaky or jagged silk strands. -
Thicken intersections:
To add a subtle realistic touch, slightly thicken the ink right where a scalloped line meets a radial spoke. -
Darken the center:
Add a bit more ink density to the very center hub, creating a focal point where all the energy converges. -
Clean up:
Wait at least five minutes for the ink to dry completely. Test a small spot with your finger to ensure no smudging. -
Erase guidelines:
Gently glide your kneaded eraser over the entire drawing to lift the original pencil sketches, revealing the crisp black ink work underneath.
Vary Line Weight
Use a thicker pen (like an 08) for the main radial spokes and a thinner pen (like an 03) for the connecting silk threads to create instant depth.
Now you have a striking, minimalist web ready to stand alone or serve as a background for other spooky doodles


Have a question or want to share your own experience? I'd love to hear from you in the comments below!