
If you’re in the mood to paint something instantly lovable, a cute pig is basically the perfect subject. I’m sharing my favorite piggy ideas—starting super simple and classic, then sliding into the playful, quirky stuff once you’re warmed up.
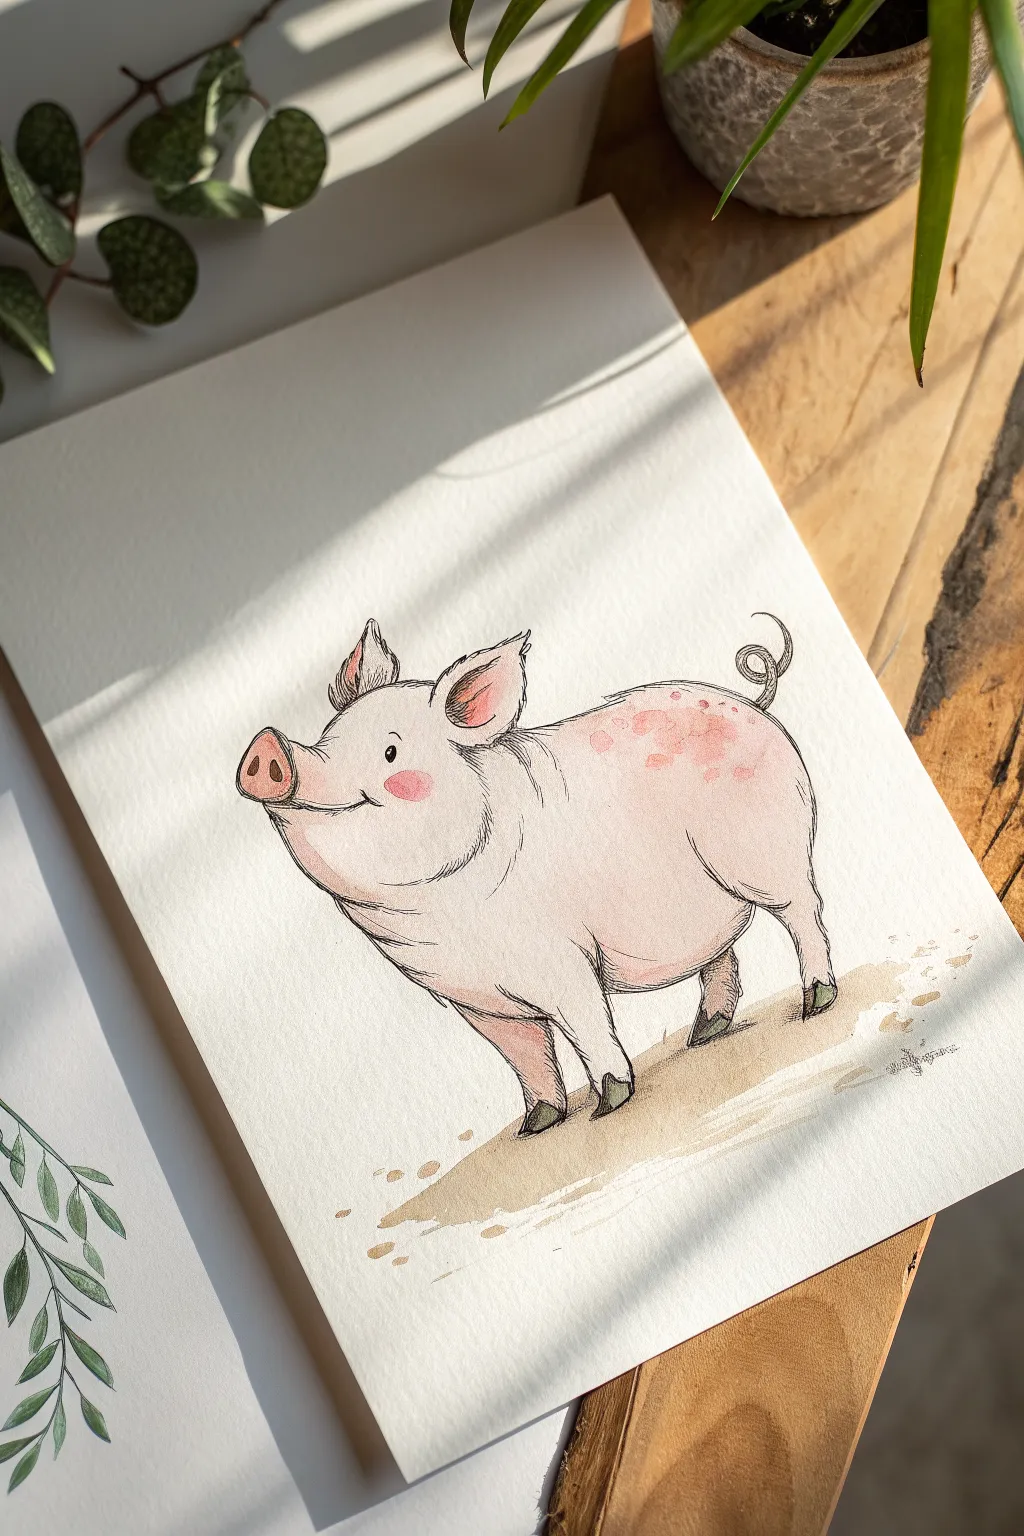
Simple Circle Piglet
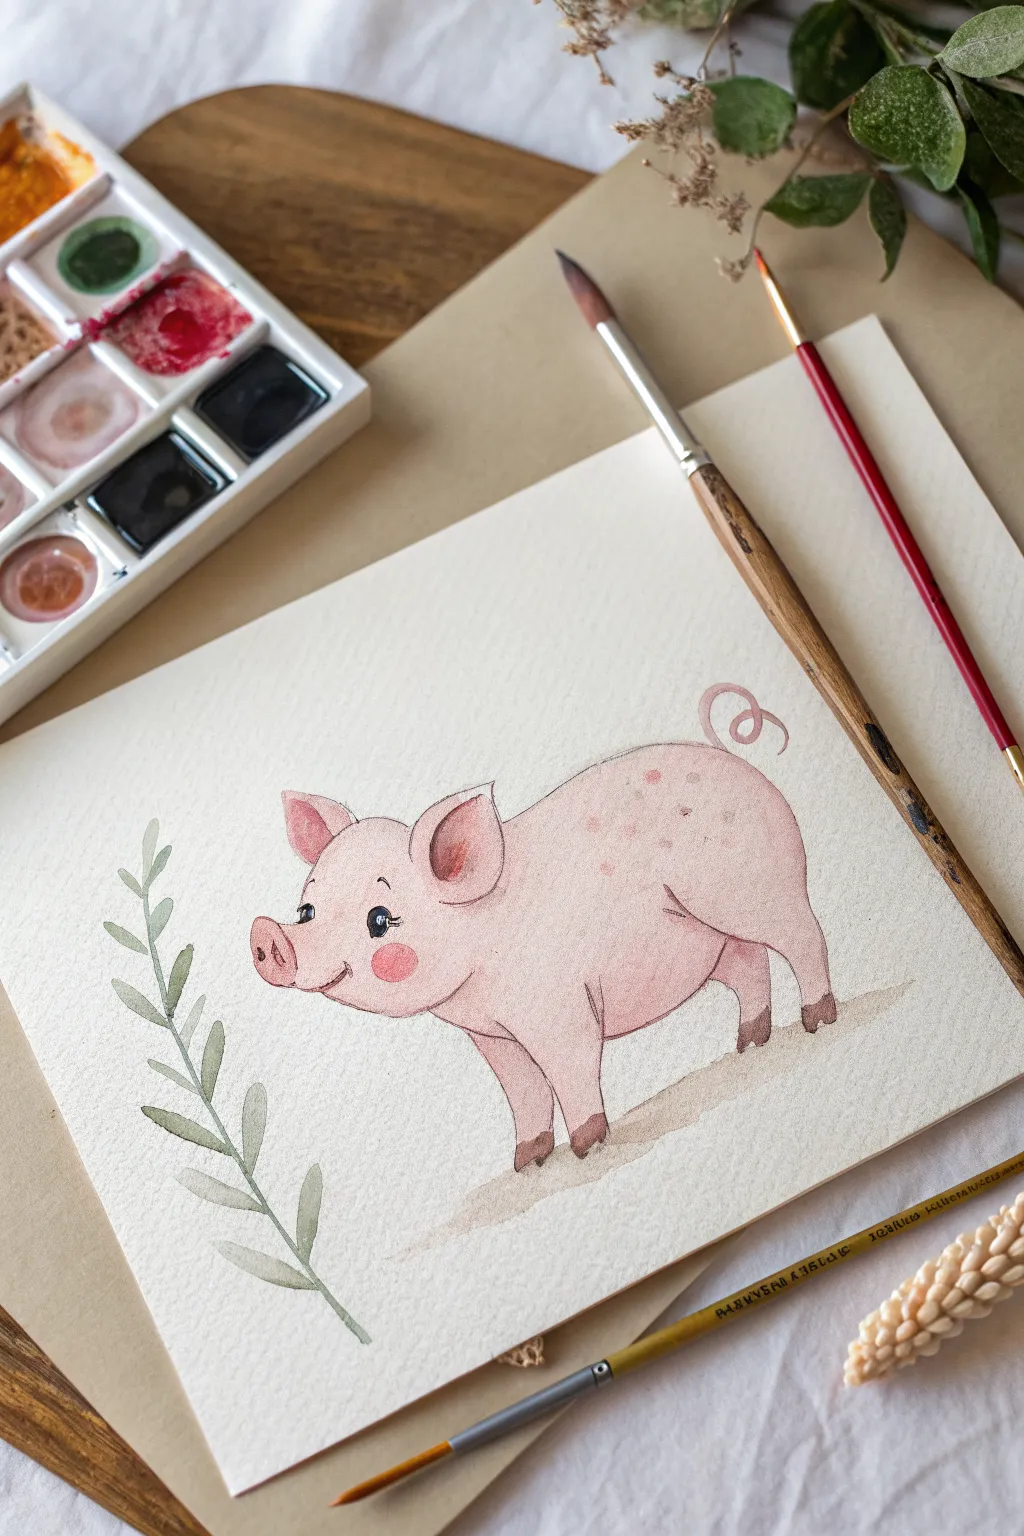
Capture the charm of farm life with this delightful watercolor piglet illustration. Soft pink washes and gentle details bring this friendly character to life, accompanied by a simple botanical sprig.
Detailed Instructions
Materials
- Cold press watercolor paper (300 gsm)
- Watercolor paints (Alizarin Crimson, Cadmium Red, Yellow Ochre, Burnt Umber, Sap Green, Lamp Black)
- Round brushes (sizing approx. 4, 2, and 00 for details)
- HB pencil for sketching
- Kneaded eraser
- Clean water
- Paper towels
Step 1: Sketching the Outline
-
Basic shapes:
Begin lightly with your HB pencil. Draw a large oval for the body and a slightly overlapping circle for the head on the left side. Don’t press too hard, as you want the pencil lines to disappear under the paint later. -
Refining the form:
Connect the head and body shapes with smooth, curved lines to create the neck and back. Add a cute, curled tail at the rear end. -
Adding features:
Sketch the snout as a small oval protruding from the face. Draw two large, pointed ears—one facing forward and one slightly turned back. Mark out the four legs, keeping them short and sturdy. -
The leafy branch:
To the left of the pig, draw a tall, slightly curved vertical line for the stem. Add simple, almond-shaped leaves alternating up the stem. -
Clean up:
Use your kneaded eraser to lighten the graphite lines until they are barely visible, just enough to guide your brush.
Clean Edges
Wait for adjacent sections to dry completely before painting next to them. This prevents the pink body color from bleeding into the green leaves or the brown ground shadow.
Step 2: Painting the Piglet
-
Initial wash:
Mix a very dilute wash of Alizarin Crimson with a touch of Yellow Ochre to create a pale skin tone. Using your size 4 round brush, fill in the entire body and head, working wet-on-dry. -
Soft shading:
While the first layer is still slightly damp, drop in a slightly more saturated pink (add a tiny bit of Cadmium Red) along the bottom of the belly and under the neck to create volume. -
Ears and snout:
Mix a darker, warmer pink. Use a size 2 brush to paint the inside of the ear and the tip of the snout. Soften the edges with a clean, damp brush to blend it into the lighter skin tone. -
Pink cheeks:
For that adorable blush, mix a watery circle of pure red or dark pink on the cheek area. Dab the edges with a tissue if it gets too intense. -
Texture spots:
Once the body wash is fully dry, mix a diluted purplish-pink. Lightly dab small spots onto the back and rump to give the piglet some speckled markings. -
Hooves and shadows:
I like to mix Burnt Umber with a touch of pink for the hooves. Carefully paint the bottom of each leg. Add a light wash of diluted brown underneath the pig to ground it with a shadow.
Adding Personality
Give your piglet character by adding accessories like a painted wildflower crown, a colorful bandana around the neck, or even a tiny blue bird sitting on its back.
Step 3: Details & Botany
-
Facial features:
Switch to your smallest brush (size 00). Using a mix of Lamp Black and blue (or just dark grey), carefully paint the eye, leaving a tiny white dot for the highlight. Add a small smile line. -
Outlining:
With a very fine brush and a slightly darker pink-brown mix, outline crucial areas like the ear folds, the curl of the tail, and the separation between the legs and belly. -
Greenery base:
Mix a light, watery Sap Green. Paint the stem and leaves of the plant to the left. Let the color flow naturally without overworking it. -
Leaf details:
While the leaves are drying, drop a slightly darker green into the base of each leaf where it connects to the stem to add depth. -
Final touches:
Check your painting for balance. Use a white gel pen or opaque white gouache if you lost the eye highlight or need to add a tiny shine to the nose.
Allow your painting to dry completely before framing your cheerful farmyard friend


Classic Pig Face Close-Up
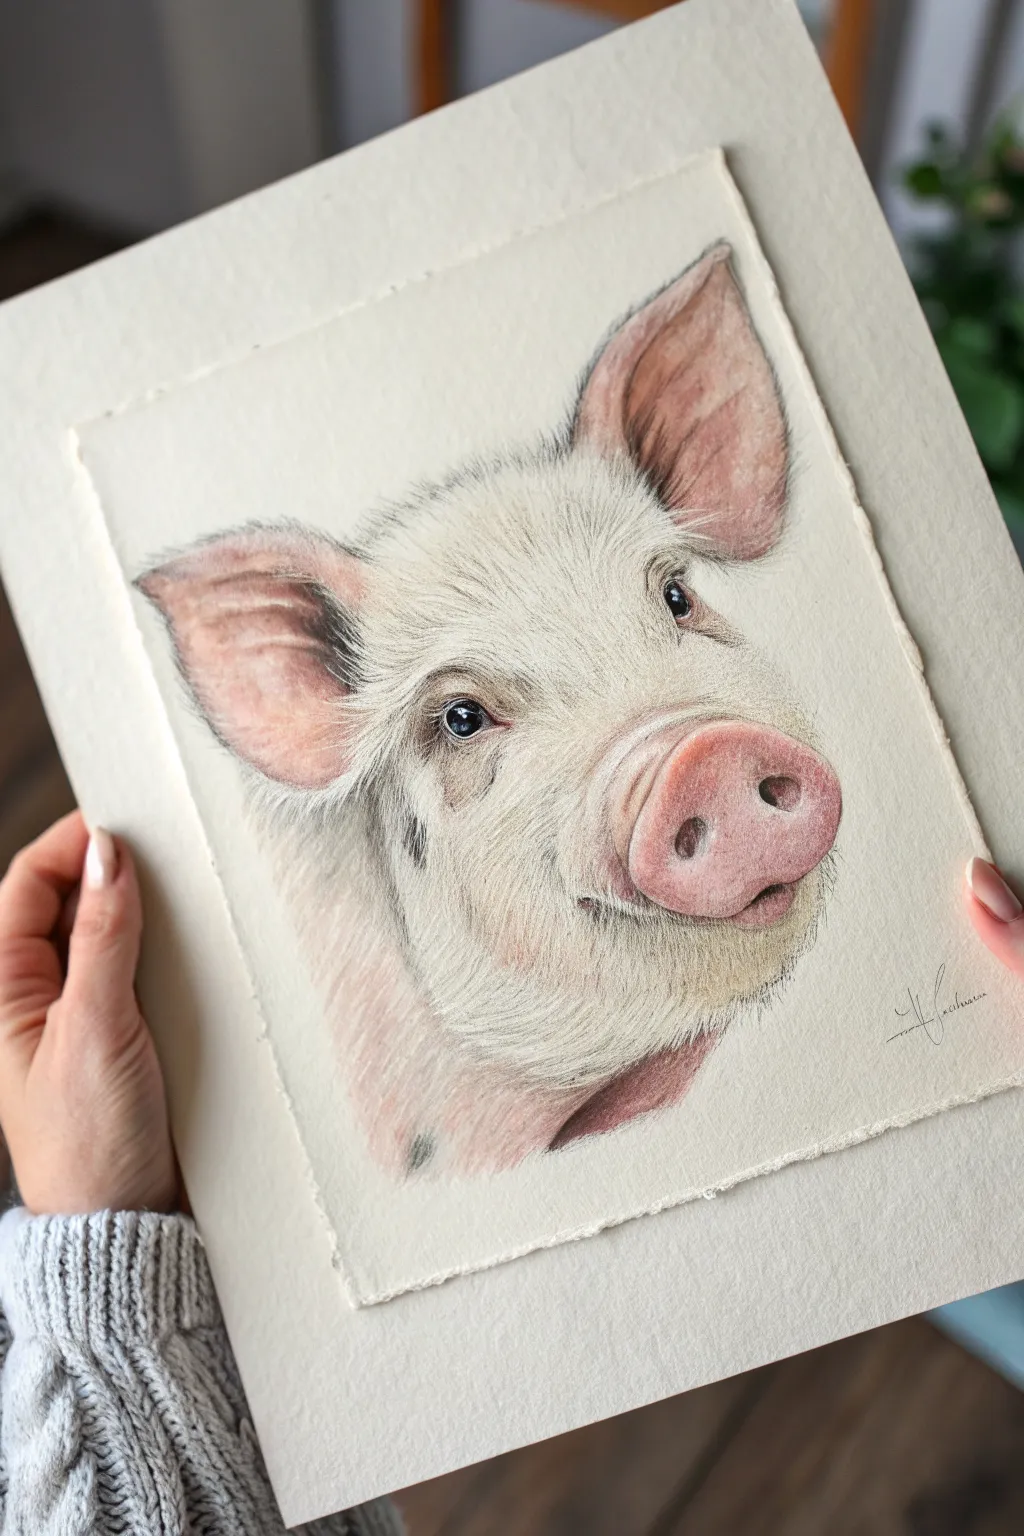
Capture the gentle charm of this barnyard friend with a soft, detailed colored pencil drawing. You will focus on building up layers of fur texture and capturing the warm pink tones of the snout and ears against a crisp white background.
Step-by-Step
Materials
- High-quality colored pencils (wax or oil-based)
- Heavyweight textured drawing paper (deckle-edge optional)
- Graphite pencil (HB for sketching)
- Kneaded eraser
- sharpener
- White gel pen or gouache (for highlights)
- Blending stump or tissue
Step 1: Initial Sketch & Outline
-
Map the proportions:
Begin by lightly sketching the main shapes of the pig’s head. Draw a large oval for the head and a smaller, distinct oval for the snout area. Position the ears high on the head, angling them outward. -
Refine the features:
Lightly delineate the eyes, nostrils, and the line of the mouth. The eyes should be spaced apart, aligned with the top of the snout. Ensure the mouth has a slight upward curve to create that subtle smile. -
Clean up the sketch:
Once you are happy with the placement, roll a kneaded eraser over your graphite lines to lift most of the graphite, leaving only a faint ghost image to guide your coloring. This prevents the grey graphite from muddying your colors later.
Step 2: Base Layers & Skin Tones
-
Lay the first pinks:
Using a very light touch, apply a pale pink or flesh tone to the snout, around the eyes, and inside the ears. Keep your strokes directional, following the curves of the face. -
Deepen the shadows:
Select a slightly darker, dusty rose or salmon color. Shade the inner depths of the ears, under the chin, and the shadow side of the snout. This establishes the volume early on. -
Add warmth:
Introduce a touch of warm peach or light terracotta to the tips of the ears and the cheeks. Blend these gently into the paler pinks if the transition feels too harsh.
Keep it Sharp
For realistic fur texture, rotate your pencil every few strokes. This keeps the lead point sharp, ensuring crisp, individual hairs rather than blurry lines.
Step 3: Detailed Features
-
Draw the eyes:
Use a dark brown or dark grey pencil for the eyes rather than straight black, which can look flat. Save a tiny spot of white paper for the catchlight, or add it later with white gel. I usually darken the upper eyelid rim to simulate eyelashes. -
Define the snout:
Work on the nostrils with a deep maroon or dark brown. Soften the edges of the nostrils so they recede naturally rather than looking like cutout holes. Enhance the texture of the nose pad with tiny, stippled dots using a sharp pink pencil. -
Ear details:
Deepen the shading inside the ear folds. The darkest crevices should be a rich brownish-pink. Leave the edges of the ears slightly lighter to suggest thin skin.
Uneven Texture?
If the paper tooth shows through too much, apply a colorless blender pencil or a white pencil with heavy pressure to burnish and smooth the layers.
Step 4: Fur Texture & Highlights
-
Start the hair strokes:
Ensure your pencils are extremely sharp. Using a cream or off-white pencil, begin drawing short, flicking strokes radiating outward from the center of the face. These strokes represent the coarse bristles. -
Layering lighter values:
Switch to a pure white pencil. Overlap the cream strokes, especially on the forehead, cheeks, and chin. Press firmly to make the white opaque against the toned areas underneath. -
Add directional flow:
Pay close attention to the direction the hair grows. Around the ears, the hair flicks outward; on the snout bridge, it flows upward. Varying stroke length adds realism. -
Shadowing the fur:
To give the white fur depth, use a very light grey or cool beige to add shadows beneath clumps of hair, particularly under the chin and behind the jawline.
Step 5: Final Touches
-
Intensify contrasts:
Go back with your darkest brown or black pencil and selectively darken the pupils, the nostrils, and the deepest shadow under the ear to make the drawing pop. -
Add spots:
If you want the spotted look from the reference, gently layer a dark grey or charcoal pencil in small patches on the neck or cheek, letting the white hairs show through on top. -
Final highlights:
Use a white gel pen or a tiny brush with white gouache for the final sharp highlights in the eyes and on the wettest part of the nose. -
Clean and protect:
Clean up any smudges on the background paper with your eraser. If you used deckle-edge paper, ensure the border remains pristine.
Step back and admire the sweet personality you’ve brought to life on the page


Chubby Pig With Curly Tail
Capture the charm of farm life with this delightful watercolor and ink illustration of a chubby piglet. Using soft washes for blushing cheeks and precise ink lines for character, you’ll create a piece that feels both classic and sweet.
Detailed Instructions
Materials
- Cold press watercolor paper (300 gsm)
- Watercolor paints (Alizarin Crimson, Yellow Ochre, Burnt Umber, a touch of Rose Madder)
- Fine liner waterproof ink pens (sizes 0.1, 0.3, and 0.5)
- Round watercolor brushes (size 4 and size 8)
- HB pencil and eraser
- Clean water and paper towels
Step 1: Sketching the Form
-
Rough shapes:
Begin with a light pencil sketch. Draw a large, slightly flattened oval for the body and a smaller, rounded shape attached to the left side for the head. Connect these shapes smoothly to form the neck. -
Adding features:
Sketch the snout as a flat oval on the face. Add two triangular shapes for ears—one perking up and one slightly folded. Draw the legs as sturdy, tapered rectangles, keeping the piglet looking grounded. -
Defining details:
Refine the outline. Give the chin a little curve for a smile and add the signature curly tail at the back. Don’t worry about perfect lines yet; just get the proportions right.
Step 2: Inking the Outline
-
Main contours:
Using a 0.3 or 0.5 waterproof pen, trace over your pencil lines. Use broken, sketchy strokes for the top of the back to suggest a bit of bristly texture rather than a single solid line. -
Facial details:
Switch to a delicate 0.1 pen for the facial features. carefully ink the eye, leaving a tiny white highlight, and draw the nostrils. Add the small smile line under the snout. -
Texture lines:
Add small, curved hatching lines around the neck rolls, under the belly, and near the ears to suggest loose skin and volume. Erase all pencil marks once the ink is totally dry.
Ink Confidence
Don’t try to make one long, continuous ink line. Using short, slightly overlapping strokes creates a furrier, more organic look suitable for animals.
Step 3: Applying Watercolor Washes
-
Base skin tone:
Mix a very watery wash of Alizarin Crimson with a tiny bit of Yellow Ochre to create a pale fleshy pink. Apply this wash over the entire body, but leave the top edge of the back and the center of the belly white for highlights. -
Softening edges:
While the paint is still damp, use a clean, wet brush to soften the edges where the pink meets the white paper, creating a seamless gradient. -
Blushing cheeks:
Drop a slightly more concentrated mix of Rose Madder or pink onto the cheek area while the base layer is barely damp. Let it bloom naturally to create a soft, flushed look. -
Ears and snout:
Paint the inside of the ears and the flat of the snout with a darker pink mix. I find adding a tiny touch of brown here helps distinguish these areas from the main skin. -
Adding spots:
While the back area is still slightly moist, dab in a few irregular spots using a diluted reddish-brown mix. Being wet-on-wet will keep the spots looking like natural pigmentation rather than painted shapes.
Muddy Puddles
Paint a small, reflective puddle near the hooves using a pale blue-grey wash. Let it dry, then add darker reflection lines of the legs into the water.
Step 4: Shading and Grounding
-
Body shadows:
Mix a cool shadow color using your pink mix with a tiny dot of blue or purple. Glaze this under the chin, belly, and behind the legs to give the piglet three-dimensional volume. -
Painting the hooves:
Use a concentrated dark grey or black wash for the hooves. Leave a tiny sliver of white at the top of each hoof to show shine. -
Ground shadow:
Mix Burnt Umber with plenty of water. Paint a loose, horizontal patch of color under the pig’s feet to ground the figure. Don’t overwork this; a simple wash suggests dirt or sand effectively. -
Splatter texture:
Load your brush with the ground color and tap it gently against your finger to splatter tiny dots of ‘dirt’ around the feet and lower legs. -
Final touches:
Once everything is bone dry, use your 0.1 pen to re-emphasize any lines that got lost under the paint, particularly around the eye and hoof clefts.
Now you have a charming little porker ready to brighten up any sketchbook page


Pig in a Mud Puddle
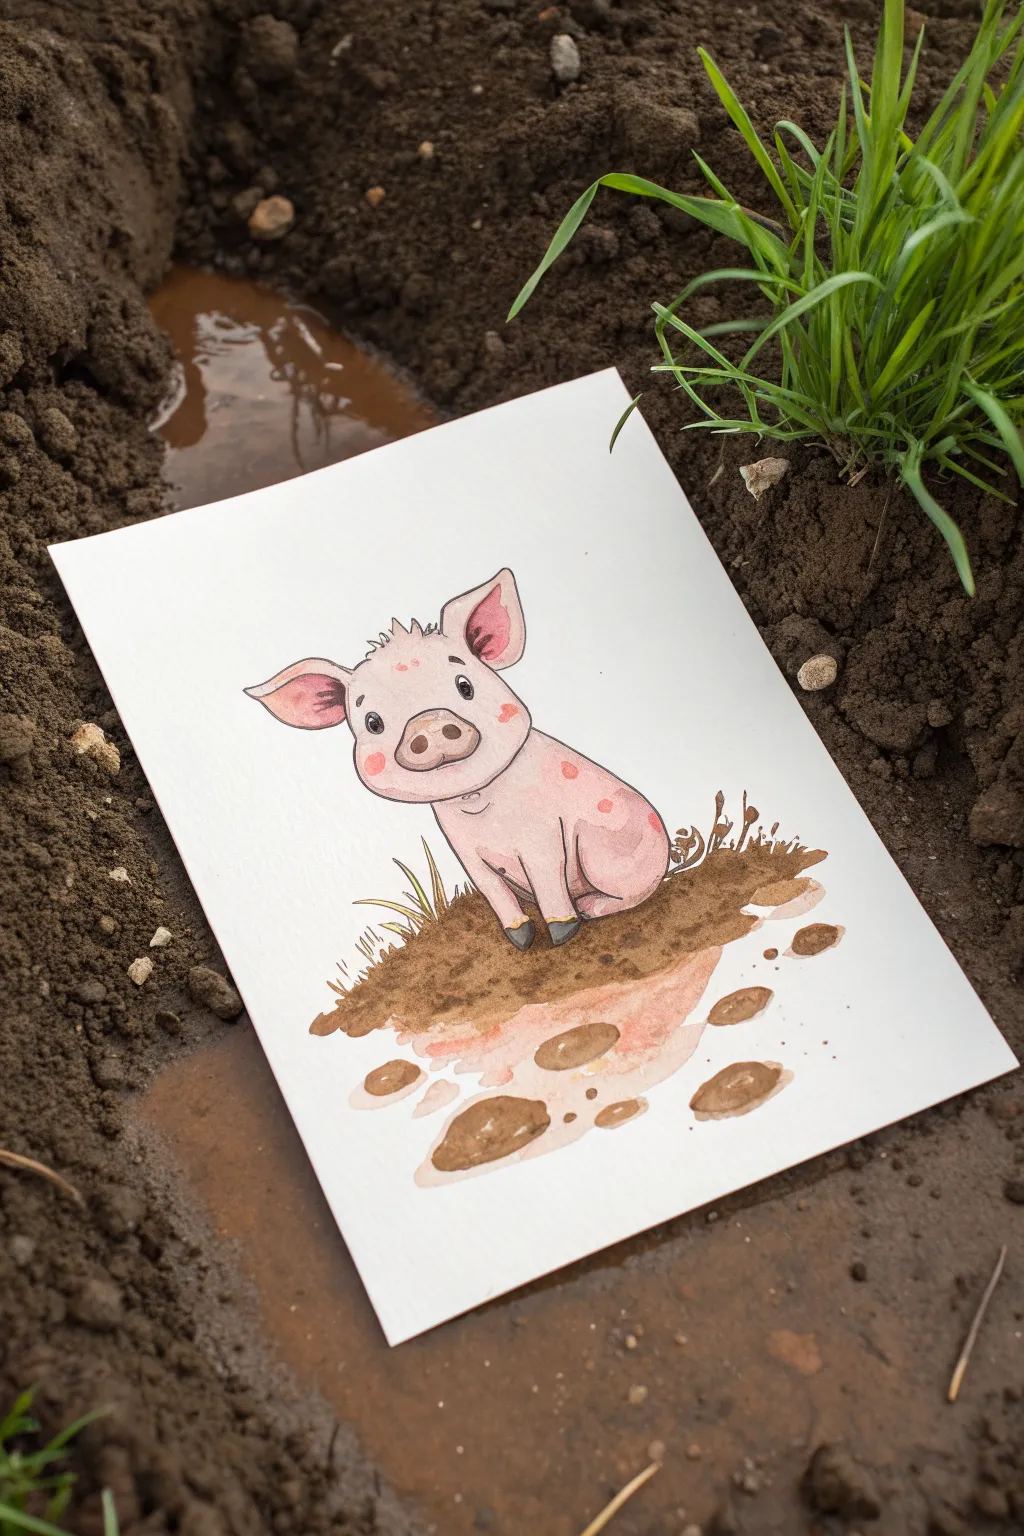
Capture the playful spirit of a farmyard friend with this delightful watercolor illustration. This painting features a soft pink piglet happily seated in a splashy mud puddle, combining clean line art with loose, gentle washes.
Step-by-Step
Materials
- Cold press watercolor paper (300 gsm)
- HB pencil and soft eraser
- Waterproof fine liner pen (black or dark brown, size 0.1 or 0.3)
- Watercolor paints (Alizarin Crimson, Yellow Ochre, Burnt Sienna, Burnt Umber)
- Round watercolor brushes (size 4 and 8)
- Paper towels
- Two jars of water
Step 1: Forming the Piglet
-
Outline the head:
Start near the center of your page by sketching a rounded, slightly squashed circle for the head. Add a smaller oval inside the lower half for the snout. -
Add the ears:
Draw two large, triangular ears sticking out from the top corners of the head. Give them a soft curve so they look floppy rather than stiff. -
Sketch the body:
Extend a curved line down from the head to form the back and belly. The body should look pear-shaped and slightly smaller than the head to emphasize the cute, cartoonish proportion. -
Draw the legs:
Sketch two front legs coming down from the chest, ending in small cloven hooves. Add a visible hind leg tucked underneath the body, showing the piglet is in a sitting position. -
Refine the face:
Place two small dots for eyes wide apart to increase cuteness. Add nostrils to the snout and a tiny curved smile just below it. Don’t forget a few tufts of hair on top of the head.
Step 2: Inking the Lines
-
Trace with pen:
Using your waterproof fine liner, carefully trace over your pencil sketch. Keep your hand relaxed to create fluid, continuous lines. -
Add texture marks:
Add small, broken lines near the ears and back to suggest fur texture. Draw a few blades of grass poking out from behind the piglet’s side. -
Erase pencil lines:
Wait until the ink is completely dry to prevent smudging. I usually give it at least five minutes before gently erasing all underlying graphite marks.
Muddy Waters
If your mud puddle looks too flat, drop clean water into the drying brown paint. This creates ‘blooms’ that perfectly mimic the texture of dirty, splashing water.
Step 3: Applying Color
-
Mix a pink base:
Dilute a tiny amount of Alizarin Crimson with plenty of water to create a very pale, watery pink. Test the color on a scrap piece of paper first; it should be barely there. -
Wash the body:
Paint the entire piglet with this pale pink wash. Work quickly so the paint doesn’t dry with hard edges, but leave the eyes white. -
Add shading:
While the first layer is still slightly damp, drop a slightly more concentrated pink into the bottom of the belly, the tips of the ears, and the cheeks. This creates a soft, natural gradient. -
Paint the spots:
Once the pink layer is dry, mix a slightly darker, reddish-pink. Paint small, irregular oval spots on the pig’s back and near the eye for character. -
Color the hooves and snout:
Use a diluted grey or brown for the hooves. Add a slightly darker pink tone to the snout to make it stand out from the face.
Little Artist Idea
Instead of splattering paint for mud, use a toothbrush to flick brown paint onto the paper for a finer, more misty spray effect around the puddle.
Step 4: Creating the Mud Puddle
-
Paint the ground:
Mix Burnt Sienna with a touch of Burnt Umber to make a warm brown. Paint a mound of dirt directly under the piglet, allowing it to look rough and uneven. -
Form the puddle reflection:
Use a very watery wash of the same brown mixed with a tiny bit of pink (reflection) to create the puddle shape below the dirt mound. Keep the edges irregular. -
Add mud splatters:
Load your brush with darker brown paint and tap it against your finger over the paper to create small splashes and spots around the puddle area. -
Detail the mud:
Paint a few larger, distinct oval shapes within the puddle area using a stronger brown mix to represent clumps of mud or stones sitting in the water. -
Final touches:
If desired, add a touch of pale green to the grass blades sketched earlier. Check the eyes and add a tiny white highlight with gouache or a gel pen if you painted over it.
Let your artwork dry completely before framing your charming little farmhouse scene
BRUSH GUIDE
The Right Brush for Every Stroke
From clean lines to bold texture — master brush choice, stroke control, and essential techniques.
Explore the Full Guide
Piglet in a Flower Meadow
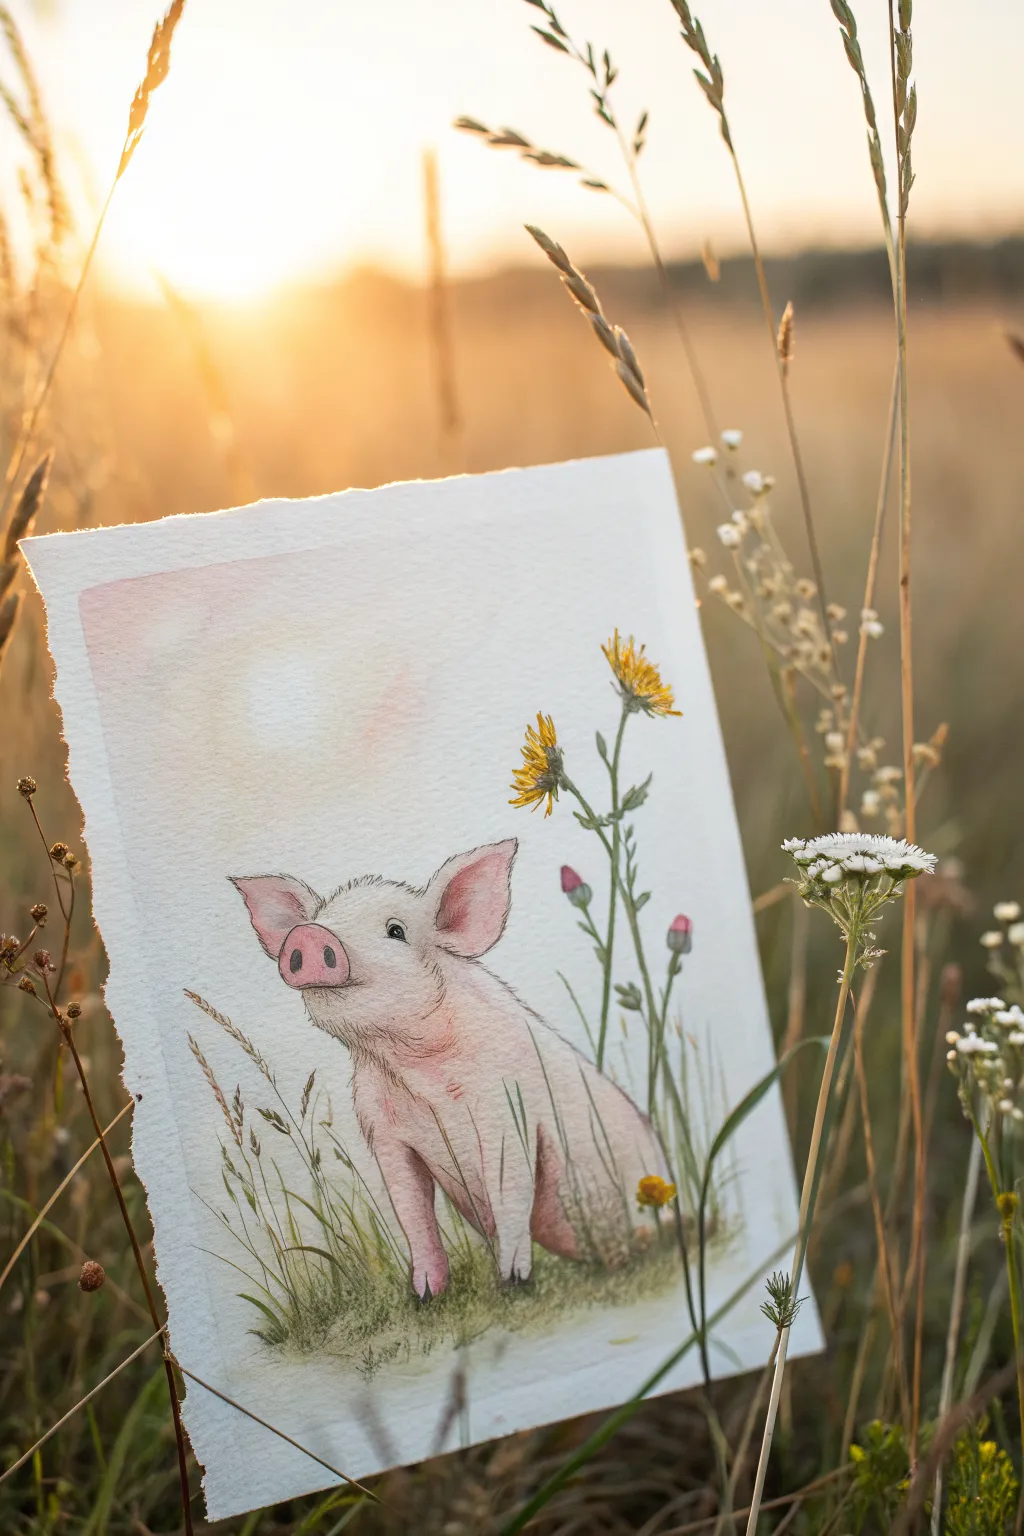
Capture the magic of golden hour with this heartwarming watercolor painting featuring a sweet piglet gazing up at wildflowers. The soft, sun-drenched background contrasts beautifully with the delicate line work and rosy tones of the little pig, creating a scene full of gentle wonder.
How-To Guide
Materials
- Cold press watercolor paper (300gsm/140lb)
- Pencil (HB or 2H)
- Kneadable eraser
- Watercolor paints (Alizarin Crimson, Sap Green, Yellow Ochre, Burnt Sienna, Payne’s Grey, Lemon Yellow)
- Round watercolor brushes (sizes 6, 4, and 00 for details)
- Masking fluid (optional, but helpful for whiskers)
- Paper towels
- Two jars of water
Step 1: Sketching the Subject
-
Outline the piglet:
Start with a light pencil sketch. Draw a gentle oval for the body and a slightly squared circle for the head. Position the piglet in the lower center of your paper, leaving plenty of room above for the sky and flowers. -
Define facial features:
Refine the snout, making it flat with two distinct nostrils. add the large, triangular ears—one perked up and one slightly floppy. Sketch the small, bright eye looking upward. -
Add nature elements:
Lightly sketch tall grass blades surrounding the pig and a few taller stems reaching up on the right side. Top these taller stems with rough outlines for the yellow flowers and buds.
Step 2: Painting the Background
-
Wet-on-wet sky:
Wet the entire upper portion of the paper with clean water, avoiding the piglet shape. Drop in a very dilute wash of Yellow Ochre mixed with a touch of Alizarin Crimson to create a warm, sunset glow. -
Suggestions of clouds:
While the paper is still damp, lift out a circular area above the pig’s head using a clean, thirsty brush or a paper towel to suggest a soft, hazy sun. -
Allow to dry:
Let this background wash dry completely before moving on to prevent bleeding into your main subject.
Muddied Colors?
If your pinks look dull, you may have overworked the wet paper. Let layers dry completely between coats to keep skin tones fresh and glowing.
Step 3: Bringing the Piglet to Life
-
Base skin tone:
Mix a very watery wash of Alizarin Crimson and a tiny dot of Burnt Sienna. Apply this pale pink over the entire piglet, leaving the eye and any highlight areas white. -
Shadows and depth:
Once the base layer is tacky but not soaking wet, add a slightly saturated mix of the same pink to the ears, under the chin, and along the belly to create roundness. -
Deepen the creases:
Using a size 4 brush, paint darker pink accents inside the ears, around the eye, and the folds on the snout. This directional shading gives the face character. -
Texture work:
I like to use a fairly dry brush now with a darker brownish-pink mix to create short, flicking strokes along the back and neck, mimicking coarse hair.
Pro Tip: Torn Edge
For the rustic look shown in the photo, deckle your paper edges by creating a crease, wetting the fold with a brush, and gently tearing the paper while wet.
Step 4: Flora and Finishing Touches
-
Painting the stems:
Mix Sap Green with a little Yellow Ochre. Using the size 4 brush, paint the tall flower stems with confident, upward strokes. -
Floral details:
Paint the flower heads with Lemon Yellow and touches of Burnt Sienna for the centers. Add small touches of pink for the buds near the stems. -
Grassy foreground:
Use quick, upward flicks of various green mixtures at the piglet’s feet. Let some grass blades overlap the pig’s hooves to settle it into the landscape. -
Final inking:
Once the paint is bone dry, use your smallest brush (size 00) with a mix of Payne’s Grey and Burnt Sienna to outline the eye, snout, and add fines lines for whiskers and ear hairs. -
Eye highlight:
Create the spark of life by ensuring the tiny white highlight in the eye is crisp; if you painted over it, use a dot of white gouache or a white gel pen.
Now you have a charming little countryside scene that perfectly captures the gentle nature of farm life
Barnyard Pig Portrait
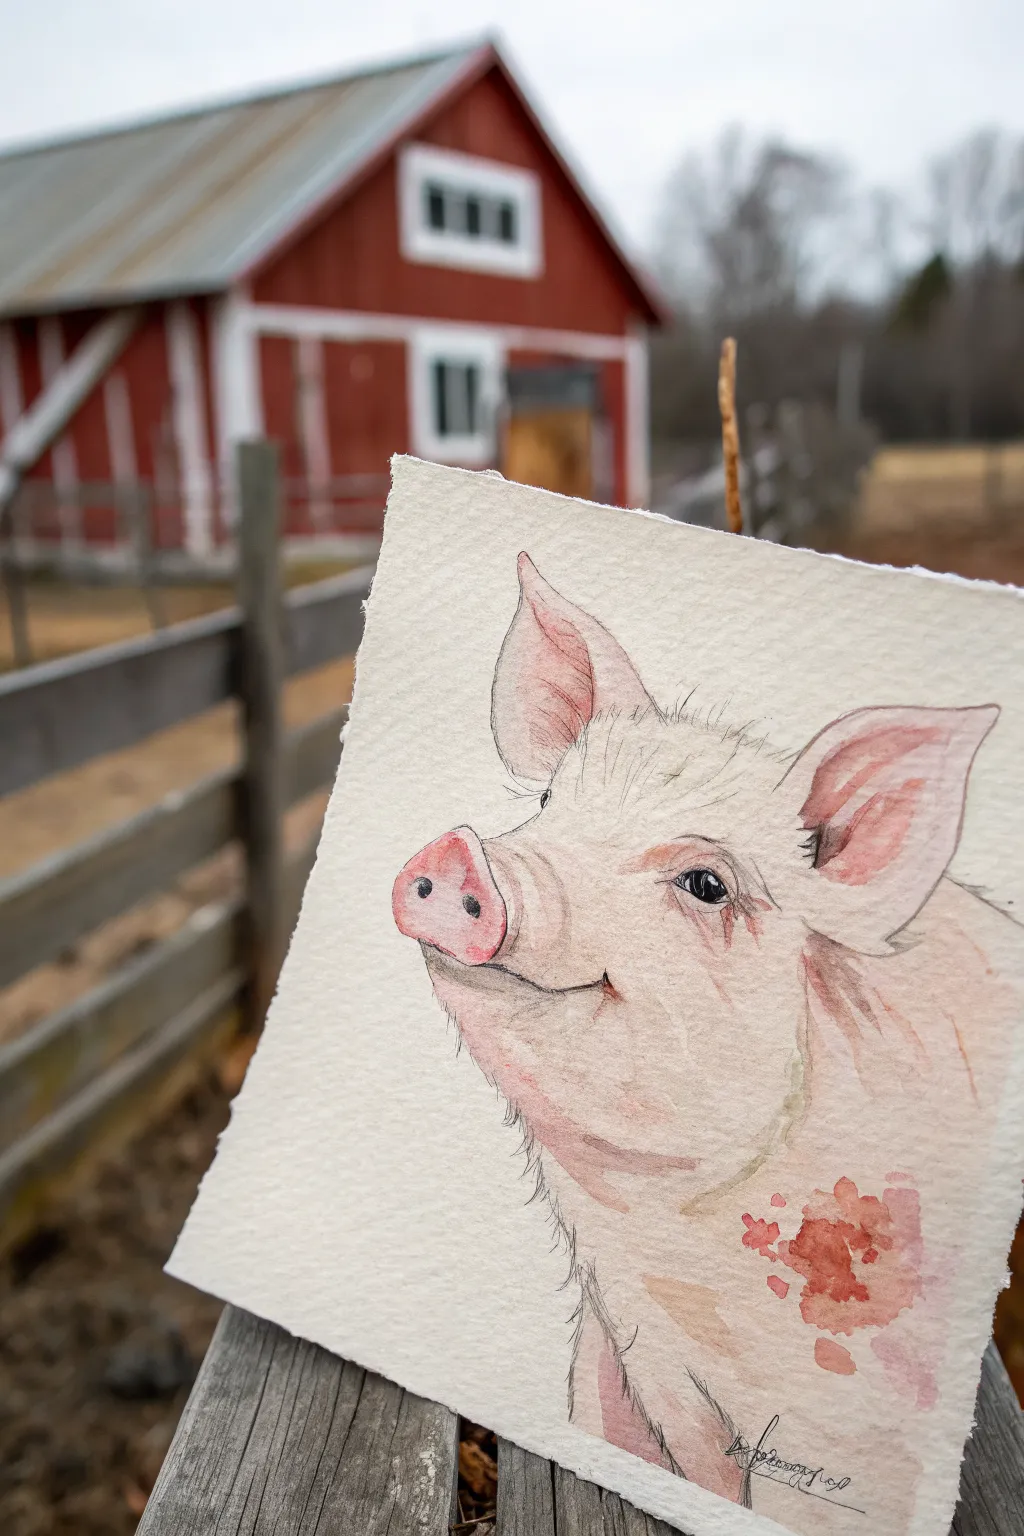
Capture the charm of farm life with this delicate watercolor and ink portrait of a smiling piglet. Using soft washes and fine linework on textured paper creates a rustic, timeless feel perfect for countryside decor.
Step-by-Step Tutorial
Materials
- Cold press watercolor paper (rough texture preferred)
- Pencil (HB or H for light sketching)
- Fine liner pen (black or sepia, waterproof, 0.1mm)
- Watercolor paints (Alizarin Crimson, Yellow Ochre, Burnt Sienna, Payne’s Grey, and a touch of Cerulean Blue)
- Round watercolor brushes (size 4 and 8)
- Water cups and paper towels
- Masking tape (optional, for securing paper)
Step 1: Sketching the Outline
-
Initial shapes:
Begin by lightly drawing a large oval for the head and a smaller, slightly flattened circle for the snout area. Imagine the head is tilted slightly upward. -
Refining the profile:
Connect the shapes to form the jawline and the bridge of the nose. Ensure the snout protrudes distinctively but curves gently back into the cheek. -
Ears and features:
Sketch two large, triangular ears. The ear closest to the viewer should be upright and open, while the further one can be slightly tucked behind the head. Mark the position for the eye about halfway up the head. -
The smile:
Draw the mouth line starting under the snout and curving upward into the cheek to create that signature happy expression.
Step 2: First Wash and Ink Work
-
Inking the contours:
Using your waterproof fine liner, go over your pencil lines. use broken, wispy strokes to suggest fur texture along the jawline and top of the head rather than solid, continuous lines. -
Adding details:
Add fine hatching lines inside the ears and along the neck to suggest shadow and depth. Erase your pencil marks once the ink is completely dry. -
Base skin tone:
Mix a very watery wash of Alizarin Crimson with a tiny drop of Yellow Ochre. Paint the entire pig shape with this pale tea-rose color, leaving the paper white for the highlight on the snout tip. -
Wet-on-wet blushing:
While the base layer is still damp, drop slightly more concentrated pink into the ears, the cheek, and the snout to create soft, diffused blushes. -
Initial drying:
Let this layer dry completely. The paper should feel room temperature to the touch, not cool.
Muddy Color Fix
If your pinks turn muddy or brown, stop and let the paper dry fully. Glaze a pure, transparent layer of Alizarin Crimson over the top to revive the rosy glow.
Step 3: Building Depth and Texture
-
Inner ear shadows:
Mix a darker pink using Alizarin Crimson and a touch of Burnt Sienna. Paint the deep recesses of the inner ears, feathering the edges out with a clean, damp brush. -
Defining the eye:
Paint the eye with a dark mix of Sepia or heavy black ink. Leave a tiny speck of white paper unpainted for the reflection to give the subject life. -
Eye contours:
Use a diluted grey-pink mix to paint delicate folds and wrinkles around the eye socket, emphasizing the happy squint. -
Snout definition:
Darken the nostrils with a deep pink-grey mix. Add a glaze of pink around the base of the snout to make it look three-dimensional. -
Textural hair strokes:
Using your smallest brush and a very dry mix of greyish-pink, flick tiny lines along the top of the snout and forehead to mimic coarse bristles. -
Neck shadows:
Glaze a cool shadow (add a dot of blue to your pink mix) under the jawline and down the neck to separate the head from the body.
Rustic Frame
Mount your finished painting on a piece of reclaimed barn wood or weathered pallet slat to enhance the farmhouse aesthetic shown in the photo.
Step 4: Final Flourishes
-
The splatter effect:
Mix a juicy puddle of reddish-brown paint. Load your brush and tap it gently over a finger to create organic splatters on the lower neck and chest area, adding an artistic, loose quality. -
Softening edges:
If any splatters look too harsh, touch them immediately with a damp paper towel to blot and soften them into the ‘fur’. -
Ink reinforcement:
Go back in with your pen to re-emphasize the eyelashes and the deepest corner of the mouth if the watercolor washes have obscured them. -
Highlight check:
If you lost the white highlight on the nose, use a white gel pen or a dab of white gouache to reclaim it. -
Signing off:
Add your signature in fine ink near the bottom, integrating it with the loose linework of the fur.
Set your painting against a natural backdrop to really let those soft pink tones shine

PENCIL GUIDE
Understanding Pencil Grades from H to B
From first sketch to finished drawing — learn pencil grades, line control, and shading techniques.
Explore the Full Guide
Sleeping Piglet on Straw
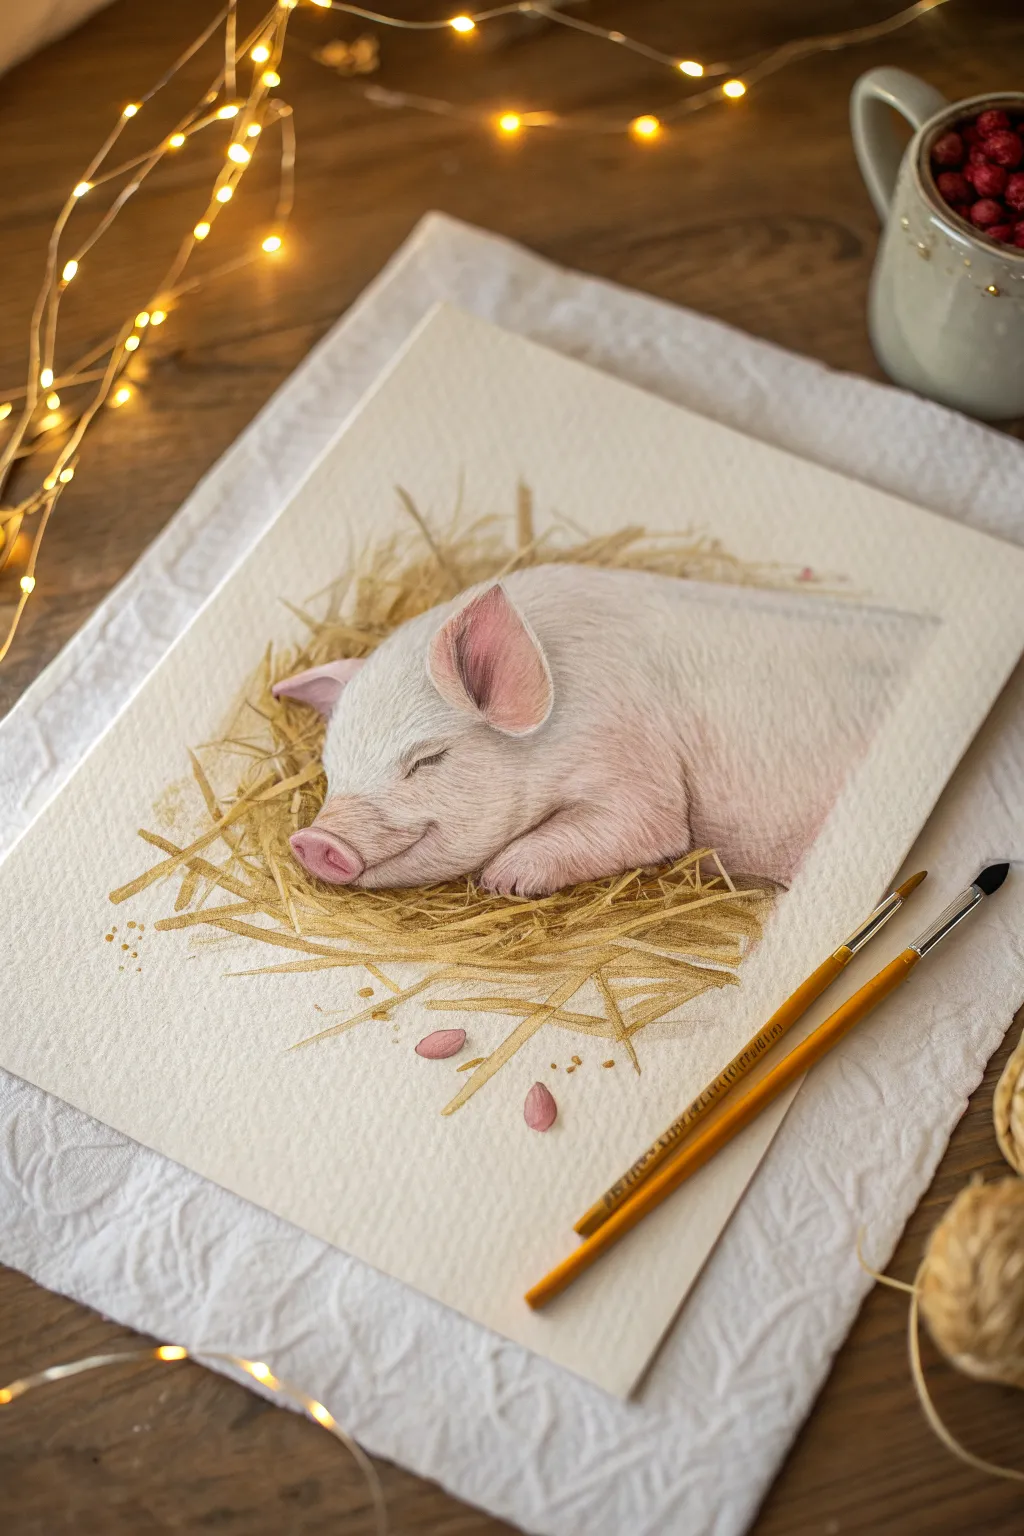
Capture the peaceful sweetness of a sleeping piglet with this warm and fuzzy watercolor project. Using soft washes of pink and detailed golden strokes for the straw, you’ll create a cozy scene that looks soft enough to touch.
Detailed Instructions
Materials
- Cold press watercolor paper (300 gsm)
- Watercolor paints (Alizarin Crimson, Yellow Ochre, Burnt Sienna, Payne’s Grey, Titanium White)
- Round watercolor brushes (Size 2, 6, and 8)
- Finer liner brush (Size 0 or 00)
- HB Drawing pencil for sketching
- Kneaded eraser
- White gouache (optional highlights)
- Clean water and paper towels
Step 1: Planning and Sketching
-
Outline the shape:
Begin with a very light pencil sketch. Draw a large, rounded oval for the piglet’s body, slightly flattened at the bottom where it rests on the straw. -
Add facial features:
Sketch the snout as a flattened circle near the left side. Add the two large, triangular ears—one perked slightly up and the other folded down. Keep the eye line simple; it’s just a gentle, curved slit to show the piglet is sleeping. -
Indicate the straw:
Loosely sketch a bed of straw underneath. Don’t draw every single piece yet; just mark the general direction of the chaos and areas where the straw overlaps.
Soft Fur Tip
For the softest looking piglet skin, dampen the paper slightly before adding the pink shadows. This diffuses the edges so there are no harsh lines on the body.
Step 2: Painting the Piglet
-
Base wash:
Mix a very watery pale pink using Alizarin Crimson and a touch of water. With the size 8 brush, apply a wet-on-wet wash over the piglet’s body, avoiding the ears and snout for now. Keep the edges soft. -
Deepen the shadows:
While the paper is still slightly damp, drop in a slightly darker pink mix (add a tiny bit of Burnt Sienna) under the chin, around the leg folds, and the belly area to create rounded form. -
Paint the snout and ears:
Use a richer pink for the snout and the inner ears. This area typically has more blood flow, so the color should be warmer. Allow the paint to bloom slightly for a natural skin texture. -
Create fur texture:
Once the base layer is completely dry, take your size 2 brush with a dry-brush technique. Using a grey-pink mixture, gently flick tiny, short strokes following the curve of the body to suggest fine, white bristles. -
Refine the face:
Use the liner brush with a darker grey-brown mix to define the crease of the sleeping eye and the nostrils. Keep these lines delicate so the expression stays peaceful. -
Add highlights:
I like to use a tiny dot of white gouache or undiluted white watercolor on the tip of the snout and the ridge of the ear to make them look moist and soft.
Muddy Color Fix
If your straw colors look muddy, let the yellow base layer dry completely before adding the darker brown stalks. Wet-on-wet brown over yellow can turn grey fast.
Step 3: Creating the Straw Nest
-
Base straw layer:
Mix Yellow Ochre with plenty of water. Paint broad, sweeping strokes underneath the piglet to establish the bulk of the hay bed. -
Define individual stalks:
Switch to a size 6 brush and a mix of Yellow Ochre and Burnt Sienna. Paint distinct, crossing lines over the dried base layer. Vary the pressure to make some stalks thick and others thin. -
Add depth and shadows:
Mix Burnt Sienna with a touch of Payne’s Grey. Paint the darkest shadows deep inside the straw pile, specifically right underneath the piglet’s belly where it presses into the bedding. -
Scattered details:
Paint a few loose pieces of straw ‘escaping’ the main pile on the left and right. Add small dots and irregular shapes near the edges to represent chaff or seeds. -
Petal accents:
Paint two or three small, simple pink ovals near the bottom of the straw to mimic fallen petals or seeds, tying the pink of the piglet into the surroundings.
Step back and admire your cozy little friend resting peacefully on the page
Pig Holding Heart Balloons
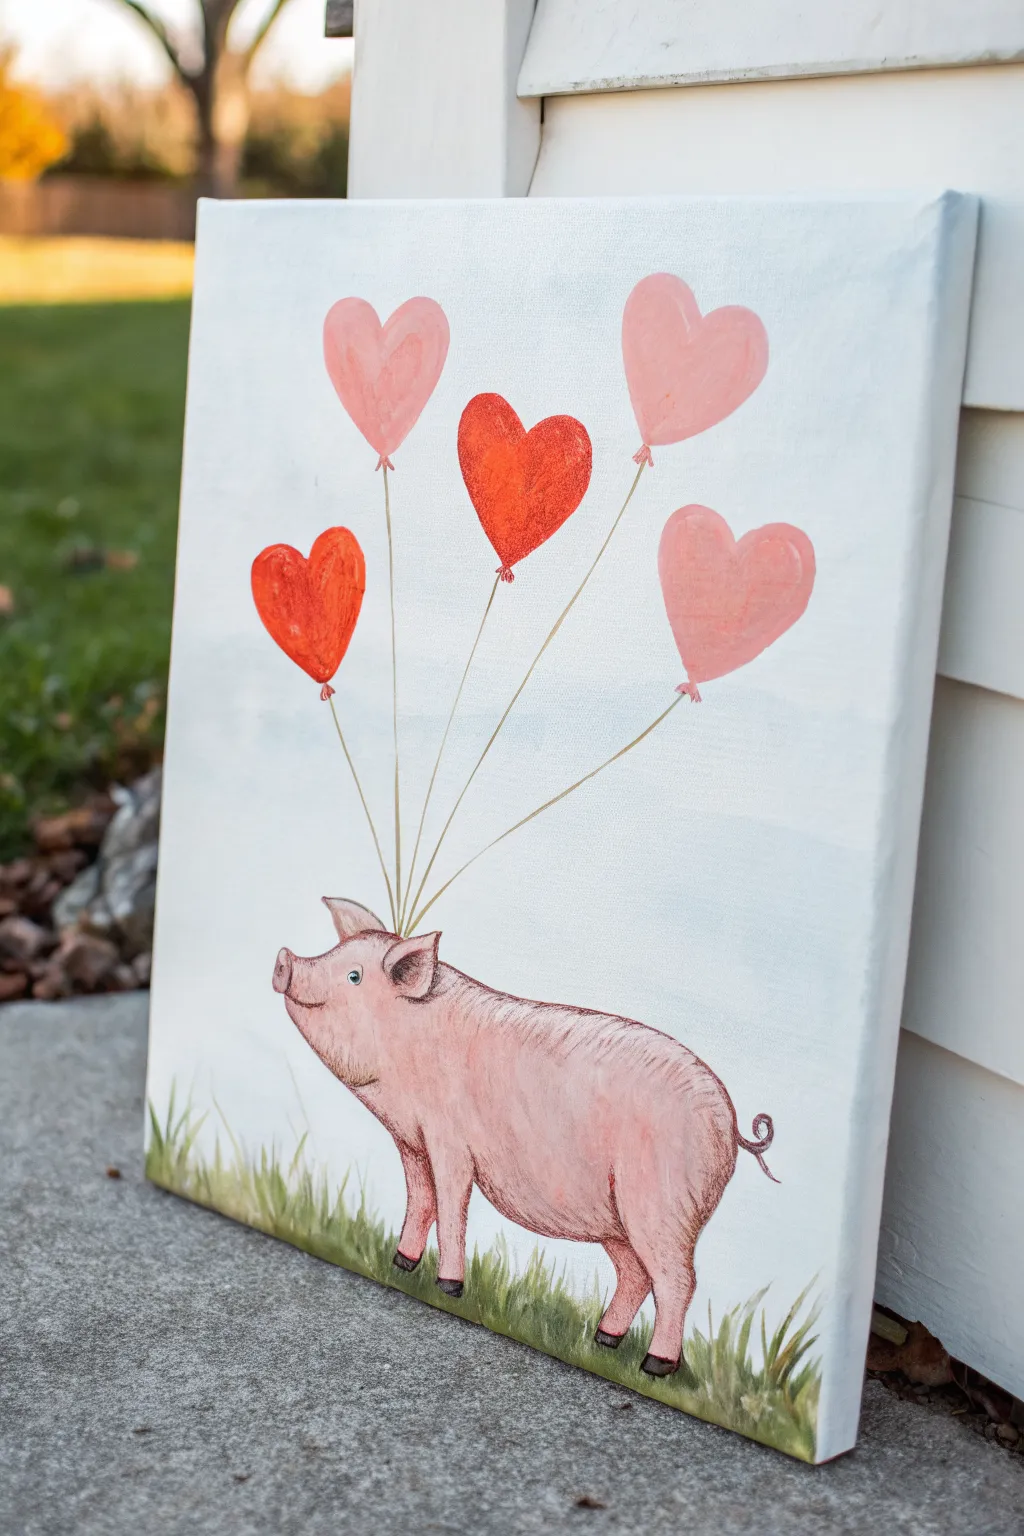
Capture the sweetness of a little pig taking flight with this adorable acrylic painting project. The soft sky background combined with vibrant heart balloons creates a cheerful scene perfect for a nursery or Valentine’s decor.
Step-by-Step Guide
Materials
- Square stretched canvas (12×12 or similar)
- Acrylic paints: Titanium White, Baby Pink, Magenta, Bright Red, Sap Green, Burnt Umber, Black
- Flat shader brush (3/4 inch)
- Small round detail brush (size 0 or 1)
- Medium round brush (size 4 or 6)
- Pencil and eraser
- Palette
- Water cup and paper towels
Step 1: Setting the Scene
-
Prepare the sky:
Mix a large amount of Titanium White with a tiny touch of light blue or gray to create an off-white, airy sky tone. -
Paint the background:
Using your large flat brush, cover the top 3/4 of the canvas with your sky mixture using broad horizontal strokes for a smooth finish. -
Sketch the composition:
Once the background is fully dry, lightly sketch the outline of the pig near the bottom center and five heart shapes floating above him. -
Connect the strings:
Draw five straight lines converging from the bottom of each balloon to a single point just behind the pig’s ears.
Pro Tip: Steady Hands
For the thin balloon strings, mix a drop of water into your paint to make it fluid like ink. This helps the brush glide smoothly without skipping.
Step 2: Painting the Pig
-
Base coat the body:
Mix Titanium White with a small amount of Baby Pink. Fill in the entire pig shape with this pale pink tone. -
Add gentle shading:
While the base is still slightly tacky, mix a slightly darker pink and blend it along the bottom of the belly and under the chin to create roundness. -
Define the texture and legs:
Use a small round brush with a darker brownish-pink to paint small, hair-like strokes along the back and outline the legs, separating the front and back sets. -
Paint the hooves:
Use Burnt Umber or Black to carefully fill in the hooves at the bottom of each leg. -
Detail the face:
With your smallest brush, paint the eye with a black dot and a tiny white reflection. Add a smiling mouth line and define the snout. -
Add final highlights:
I like to take pure white on a dry brush and dust the top of the pig’s snout and shoulder to make him look sun-kissed.
Troubleshooting: Chalky Pink
If your pink pig looks too chalky or flat, add a tiny dot of orange to your pink mix. This warmth makes the skin tone look much more alive.
Step 3: Balloons and Surroundings
-
Base coat the balloons:
Paint three of the hearts in a soft pink and two in a vibrant red. You may need two coats for the red to be fully opaque. -
Add balloon dimension:
Mix a lighter version of each balloon color. Paint a soft curve on the upper left side of each heart to mimic a reflection. -
Paint the strings:
Using a very thinned-down brown or gray paint and your liner brush, trace over your pencil lines for the balloon strings. -
Create the grass:
Load a medium brush with Sap Green. Use quick, upward flicking motions starting from the bottom edge to create blades of grass. -
Layer the grass:
Mix a little yellow into your green and add a second layer of grass blades in front for variety and depth. -
Final touches:
Use a fine liner brush to add the pig’s curly tail and verify any small details around the ears.
Step back and smile at your uplifting little creation


Pig Pair Nose-to-Nose

Capture a moment of sweet connection with this charming mixed-media illustration of two pigs sharing a nose boop. Combining soft watercolor washes with crisp ink detailing creates a playful, heartwarming piece perfect for a nursery or greeting card.
Detailed Instructions
Materials
- Cold-press watercolor paper (300 gsm)
- Watercolor paints (Pink, Brown, Green, Red)
- Round watercolor brushes (Size 4 and Size 0)
- Black fine liner pen (0.3mm or 0.5mm, waterproof)
- HB Pencil
- Eraser
- Jar of water
- Paper towel
Step 1: Sketching the Shape
-
Map out the composition:
Begin by lightly marking the horizon line near the bottom third of your paper to establish where the grass will separate from the sky. -
Outline the left pig:
Sketch the left pig as a rounded oval shape that tilts slightly upward. Add a small snout sticking up at a 45-degree angle towards the right. -
Sketch the right pig:
Draw the right pig’s body as a slightly larger oval, positioning it so its snout points downward to meet the first pig’s nose. They should be just touching. -
Add gentle details:
Lightly pencil in triangular ears, small legs, and curly tails for both animals. Don’t press too hard, as you want these lines to disappear under the paint later.
Muddy Colors?
If your pinks look dirty, clean your water jar immediately. Pigment residue from the green grass wash can turn your vibrant pinks into a dull gray very quickly.
Step 2: Painting the Base Layers
-
Mix your pink tone:
Create a soft, rosy pink by diluting a red or magenta watercolor with plenty of water. You want a very translucent wash for the bodies. -
Start the watercolor wash:
Using your size 4 brush, fill in the body of the left pig. Keep the edges wet to avoid hard lines forming in the middle of the shape. -
Paint the partner:
Repeat the process for the right pig. If the noses touch while wet, the colors might blend slightly, which actually adds a sweet effect. -
Add the grassy patch:
Mix a muted olive green. Paint a loose, horizontal strip beneath their feet, allowing the brush texture to show slightly for an organic feel. -
Let it dry mostly:
Allow the paint to settle until it is damp but no longer shiny. This prepares the surface for the second layer of color without bleeding excessively.
Add Sparkle
Mix a tiny amount of gold watercolor or use a metallic gold gel pen to add highlights to the floating hearts or the centers of the flowers.
Step 3: Adding Color Accents
-
Paint the hearts:
Using a slightly more saturated red or pink-brown mix, paint three floating hearts above the gap between their heads. -
Add rosy cheeks:
Dip your brush into a concentrated warm pink. Touched gently onto the cheek area of each pig to create a distinct blush spot. -
Detail the ears and snouts:
Use that same warm pink to darken the inner ears and the tips of the snouts for a bit of dimension. -
Paint floral elements:
Dab small spots of pink near the grass line to represent tiny flowers growing around their feet. -
Dry completely:
This is crucial—wait until the paper is bone dry before picking up your pen. If it’s cold to the touch, it’s still too wet for ink.
Step 4: Inking and Final Touches
-
Outline the bodies:
With your black fine liner, trace the outer edges of the pigs. Use broken lines occasionally to suggest fur texture rather than a solid, heavy outline. -
Draw facial features:
Ink the simple eye dots and the line of the mouth. I like to give the left pig a closed, smiling eye to show contentment. -
Add texture marks:
Make tiny stippling dots or small dashes along the pigs’ backs to mimic bristles and add visual interest to the large pink shapes. -
Define the surroundings:
Use quick, upward flicks of the pen along the green strip to create blades of grass, and outline the small flowers you painted. -
Scatter the confetti:
Ink tiny hearts, dots, and speckles in the empty white space above the pigs to create a magical, loving atmosphere.
Step back and smile at the sweet connection you’ve created on the page
Pig Family Trio
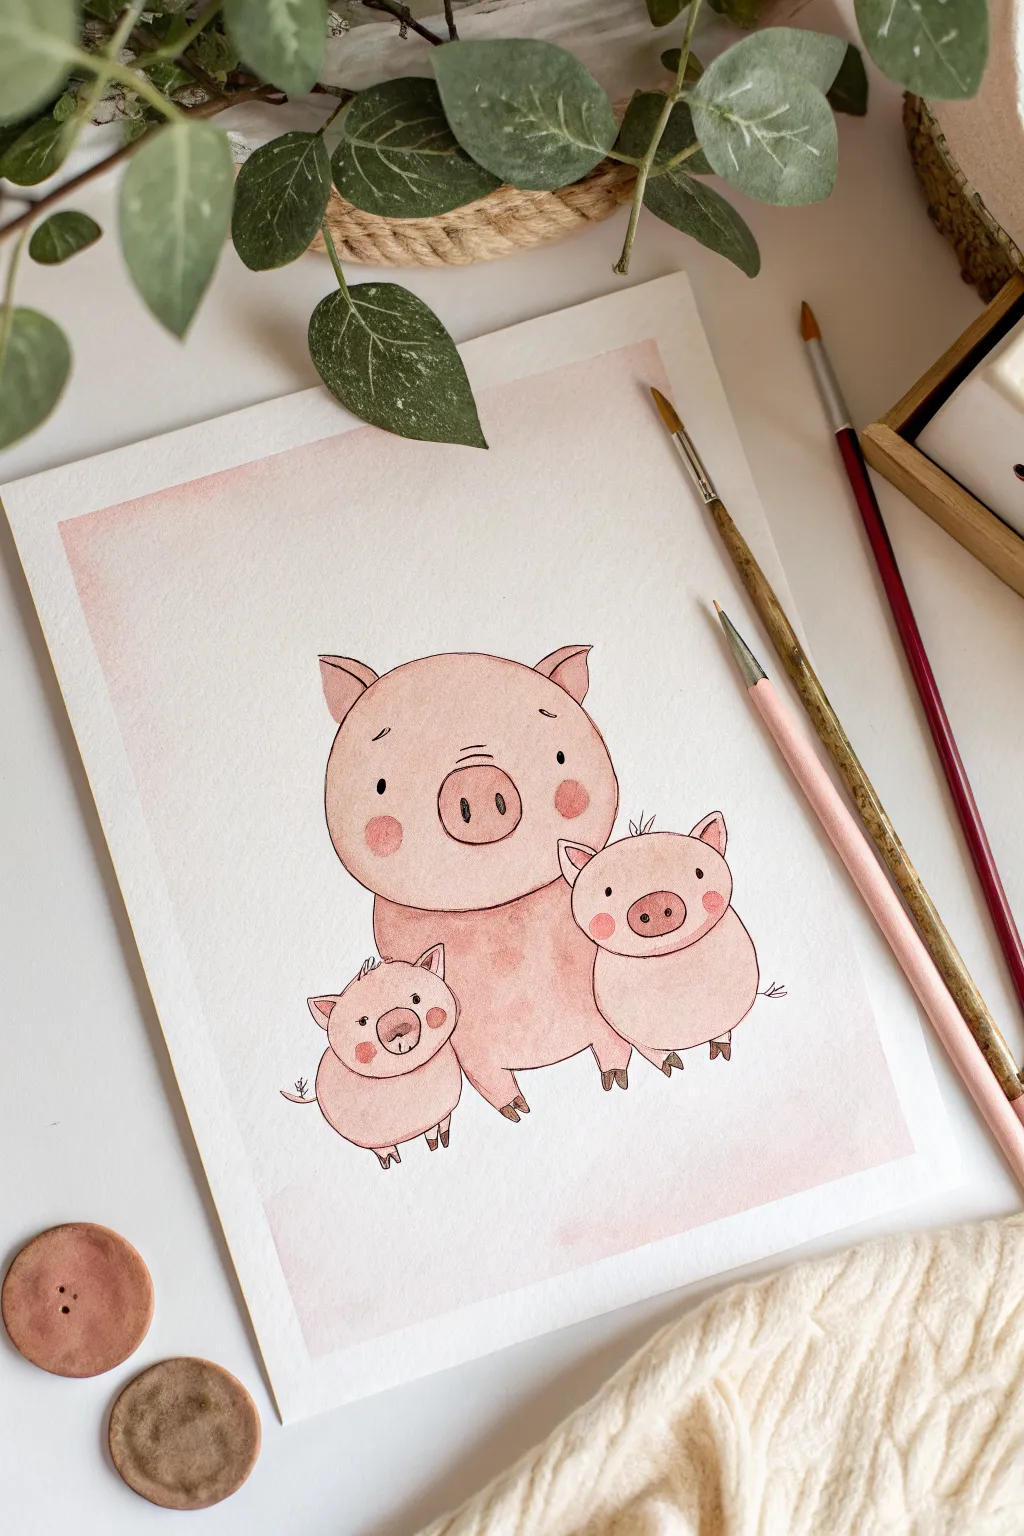
Capture the sweetness of a mother pig and her piglets with this charming watercolor illustration. Using soft washes of pink and delicate ink lines, you’ll create a heartwarming trio perfect for a nursery or greeting card.
How-To Guide
Materials
- Watercolor paper (cold press, 300gsm recommended)
- Watercolor paints (Alizarin Crimson, Burnt Sienna, Yellow Ochre)
- Round watercolor brushes (size 4 and 8)
- Fine liner pen (water-proof black ink, 0.3mm or 0.5mm)
- Graphite pencil (HB or H)
- Kneaded eraser
- Clean water and paper towel
- Masking tape
Step 1: Sketching the Layout
-
Prepare the paper:
Tape down your watercolor paper to a board to prevent buckling. Lightly establish a rectangular border leaving a generous white margin around the edges. -
Map out the shapes:
Using your pencil very lightly, draw a large oval in the center for the mother pig’s head. Add a larger, slightly flatter oval below it for her body. -
Add the piglets:
Position two smaller ovals overlapping the mother’s body—one to the lower right and one to the lower left. These will become the heads of the piglets. -
Refine the faces:
Draw the snouts as ovals within the face shapes. Add triangles for ears—floppy ones for the mom and perky ones for the piglets. Sketch in the small trotters and bodies for the little ones.
Smudge Alert
Wait for the paper to be completely room-temperature dry before inking. If the paper is cold, it’s damp, and your pen ink will bleed into the fibers.
Step 2: Applying the Background & Base Layers
-
Paint the soft border:
Mix a very dilute wash of Alizarin Crimson with plenty of water. Paint a loose rectangular wash around the pigs, fading it out as you reach the pencil border to create a soft, dreamy vignette. -
Mix the pig skin tone:
Create a warm pink by mixing Alizarin Crimson with a tiny touch of Yellow Ochre. Make sure you have enough mixed for all three pigs to keep the color consistent. -
First wash on the mother pig:
Using a size 8 brush, apply a light, even wash of the pink mix to the mother pig’s head and body. Work quickly to avoid hard edges. -
Paint the piglets:
While the mother dries, paint the two piglets with the same pink mixture. If you want variety, add a tiny bit more water to make one piglet slightly lighter. -
Let it dry completely:
Wait until the paper is bone dry. If it feels cool to the touch, it is still damp. This is crucial before adding details.
Make it a Scene
Use a weak green wash to paint simple grass blades near their feet, or add tiny blue flowers around them to ground the family in a meadow setting.
Step 3: Adding Depth and Texture
-
Layering the snouts:
Mix a slightly more saturated version of your pink. Paint the snouts on all three pigs to define them against the face. -
Adding rosy cheeks:
While the pink mix is on your palette, add a little red to make a blush color. Paint distinct circular cheeks on each pig. -
Shadows and spots:
I like to take a diluted Burnt Sienna or darker pink and dab small, wet spots onto the mother pig’s chest for texture. Add subtle shadows under the ears and where the piglets overlap the mother. -
Painting the trotters:
Use a mix of Burnt Sienna and a touch of black (or concentrated brown) to paint the small hooves on the piglets and the mother’s visible feet.
Step 4: Inking the Details
-
Outline the main shapes:
Once the paint is absolutely dry, use your fine liner pen to trace the pencil outlines. Keep your hand loose; broken or slightly wobbly lines add to the illustrative charm. -
Define the features:
Draw two small vertical ovals for nostrils on each snout. Add wide-set dots for eyes to give them a cute, innocent expression. -
Add whimsical touches:
Draw little tufts of hair on top of the piggy heads. sketch small, curly tails peeking out from behind the piglets. -
Expression lines:
Add tiny eyebrows above the eyes—slanted slightly upwards for a happy look. Draw a small curve for the mouth on the piglets. -
Final erase:
Gently gently rub your kneaded eraser over the drawing to lift any remaining visible pencil lines, leaving just the ink and watercolor.
Now you have an adorable porcine portrait ready to hang or gift to a friend
Kawaii Pig With Blush Cheeks
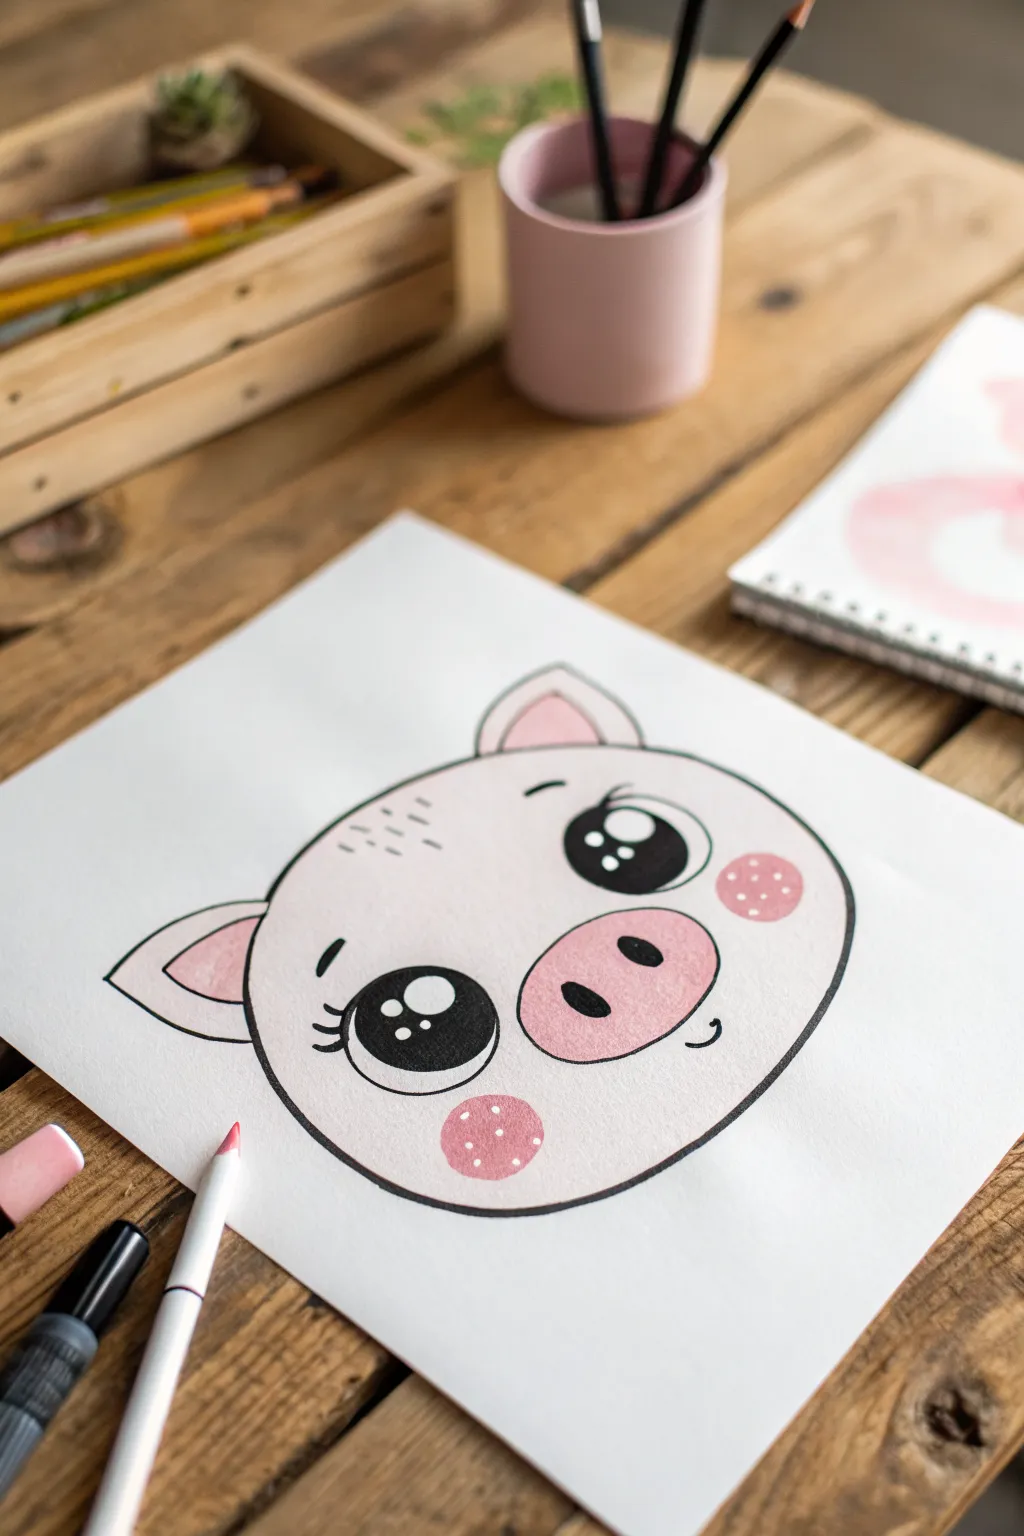
This adorable pig drawing captures the essence of kawaii style with its oversized eyes and sweet expression. Using a mix of soft pink shading and bold black outlines creates a finish that is both gentle and striking.
Step-by-Step
Materials
- Smooth white drawing paper or cardstock (A4 size)
- HB pencil
- Eraser
- Soft pink marker (alcohol-based or watercolor)
- Darker pink marker
- Black fineliner pen (0.5mm or 0.8mm)
- Thick black marker
- White gel pen or Posca marker
Step 1: Sketching the Basics
-
Outline the head:
Start by lightly sketching a wide oval shape in the center of your paper. Flatten the top and bottom slightly so it isn’t a perfect circle; pigs have somewhat squatter faces. -
Add the ears:
Draw two triangular shapes on the upper corners of the head. Curve the outer lines outwards slightly to make them look soft, and add smaller triangles inside for the inner ear. -
Place the snout:
In the lower middle third of the face, sketch a smaller, horizontal oval for the snout. This should be significantly wider than it is tall.
Step 2: Adding Facial Features
-
Sketch the eyes:
Draw two large circles on either side of the snout. In kawaii art, the eyes are often placed low on the face, roughly aligned with the top of the snout. -
Mark the highlights:
Inside each eye circle, lightly draw two or three smaller circles—a larger one near the top and smaller ones below—to reserve white space for those cute reflections later. -
Draw nostrils and smile:
Inside the snout oval, draw two darker, vertical ovals for nostrils. Add a tiny, curved line just under the right side of the snout for a smirk, and faint eyebrows above the eyes. -
Indicate blush spots:
Lightly mark circular areas on the cheeks, just below and to the outside of the eyes. These shouldn’t be perfect circles, but soft, round shapes.
Pro Tip: Eye Sparkle
If you accidentally color over the white eye highlights, don’t worry. Just use a white opaque paint pen or correction fluid to add the dots back in on top of the black.
Step 3: Adding Color
-
Base pink tone:
Using your soft pink marker, fill in the entire face shape, avoiding the eyes and the blush spots for now. Use broad, consistent strokes to minimize streaks. -
Darker details:
Switch to the darker pink marker. Color in the snout oval, the inner triangles of the ears, and the round blush spots on the cheeks. -
Texturize the cheeks:
Once the dark pink blush spots are dry, use your white gel pen to add tiny little dots inside the pink circles. This mimics a cute, speckled texture often seen in stickers.
Troubleshooting: Streaky Marker
Work quickly while the ink is still wet to blend strokes together. If streaks persist, let it dry completely and apply a second layer in the opposite direction.
Step 4: Inking and Definition
-
Outline the main shapes:
Take your black fineliner and carefully trace over the main head shape, the ears, and the snout. Keep your hand steady to ensure smooth, continuous lines. -
Fill the eyes:
Use the thicker black marker to fill in the large circles of the eyes. Be extremely careful to go *around* the small highlight circles you sketched earlier, leaving them pure white. -
Detail the eyes:
Add three small lashes extending from the outer corner of each eye using the fineliner. They should curve slightly upward. -
Define the snout:
Color the nostrils black using the thick marker. Trace the outline of the snout with the fineliner. -
Final touches:
Add the small smile line and eyebrows with the fineliner. Finally, add three or four tiny dashes on the upper left forehead to suggest a bit of fur or hair.
Your sweet pig illustration is now ready to brighten up a notebook or greeting card
Watercolor Wash Piglet

Capture the charm of a barnyard favorite with this delicate watercolor portrait. This project focuses on building soft textures for fur and creating a loose, expressive wash that fades beautifully into the white paper.
Step-by-Step Tutorial
Materials
- Cold press watercolor paper (300 gsm)
- H or HB pencil for sketching
- Kneaded eraser
- Watercolor paints (Alizarin Crimson, Burnt Sienna, Yellow Ochre, Ultramarine Blue, Lamp Black)
- Round brushes (sizes 2, 6, and 10)
- Clean water jar
- Paper towels
- Masking fluid (optional)
Step 1: Sketching and Initial Washes
-
Draft the outline:
Begin by lightly sketching the piglet’s head shape. Focus on the large oval for the head and triangular shapes for the ears, ensuring the snout is positioned centrally but slightly lower. -
Refine the features:
Add details to your sketch, like the nostrils, the curve of the mouth, the eye shape, and the inner folds of the ears. Keep pencil lines faint so they don’t show through the transparent paint later. -
Mix the skin tone:
Create a pale, watery mix of Alizarin Crimson and a tiny touch of Yellow Ochre to get a soft pink. Test it on a scrap piece of paper first; it should be very diluted. -
Base layer for the snout:
Using your size 6 brush, apply this pale pink wash to the snout area. While it’s still damp, drop in a slightly more saturated crimson mix near the bottom of the snout for volume. -
Wash the ears:
Apply the same pale pink wash to the inner ears. As you move toward the deeper folds of the ear, add a touch of Burnt Sienna to your pink mix to create shadow and depth.
Muddy Colors?
If your fur shadows look muddy, you might be overworking damp layers. Let each layer of fur texture dry completely before glazing color over it.
Step 2: Building Fur Texture
-
Create a shadow mix:
Mix a light grey-brown using Burnt Sienna and a touch of Ultramarine Blue. Dilute this heavily with water. -
Suggesting fur direction:
With the size 2 brush, start painting short, thin strokes to mimic fur. Observe the growth direction: strokes should radiate outward from the center of the face and flow back along the cheeks. -
Deepen the ear shadows:
Mix a stronger red-violet using Alizarin Crimson and Ultramarine Blue. Apply this to the deepest recesses of the inner ear to make them pop against the pale skin. -
Adding warmth to the cheeks:
Glaze a very watery yellow ochre over the cheek area to give the piglet a warm, lifelike glow. Ensure the previous fur layer is dry so it doesn’t smear. -
Establishing the dark patch:
For the darker patch near the eye, use a slightly thicker mix of Lamp Black and water. Apply it with short, jagged strokes to create a furry edge rather than a hard line.
Step 3: Eyes and Final Details
-
Painting the eye:
Paint the entire iris with a strong mix of Lamp Black. While painting, carefully leave a tiny white circle of unpainted paper for the highlight, which brings the animal to life. -
Adding nostril depth:
Use a mix of Alizarin Crimson and Burnt Sienna to paint the inside of the nostrils. Soften the edges with a clean, damp brush so they don’t look like pasted-on holes. -
Detailing the snout:
With your smallest brush, add tiny dots and faint lines on the pink snout to suggest skin texture and whisker follicles. -
Refining whiskers and lashes:
Add fine, dark lashes around the eye and a few scattered whiskers near the mouth. Use quick, confident flicks of the wrist for tapered lines. -
Creating the neck wash:
Mix a generous amount of watery pink and purple. Paint the neck area loosely, adding more water as you move downward to let the color bleed and fade out into the white paper. -
Applying splatters:
Load your brush with the pink neck-wash color. Tap the brush handle against your finger over the bottom area of the painting to create artistic splatters and droplets.
Make It Sparkle
For extra magic, mix a tiny bit of iridescent medium into your final splatter mix. The droplets will catch the light subtly when dry.
Allow the wash and splatters to dry completely before erasing any visible pencil lines for a clean finish
Floral Crown Pig Portrait
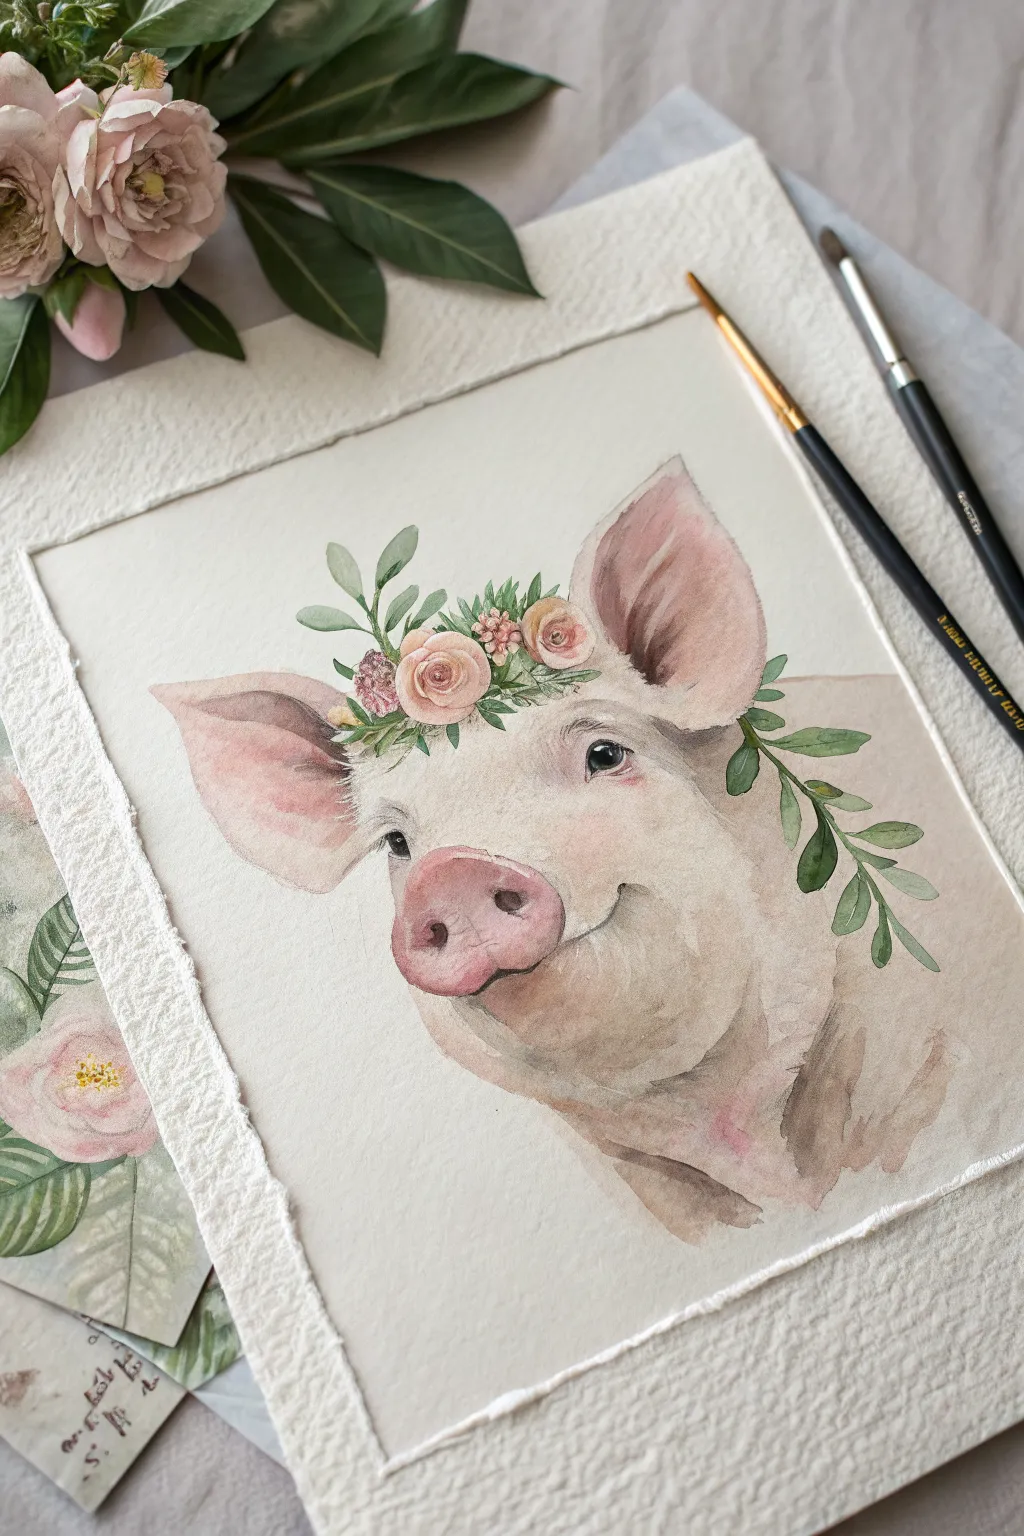
Capture the charm of a sweet piglet adorned with a delicate floral crown in this gentle watercolor project. The soft pink hues and realistic details create a heartwarming portrait perfect for a nursery or farm-style decor.
Step-by-Step Tutorial
Materials
- Cold press watercolor paper (300 gsm or higher)
- Watercolor paints (Alizarin Crimson, Yellow Ochre, Burnt Umber, Sap Green, Payne’s Grey)
- Round watercolor brushes (Size 8 for washes, Size 2 for details)
- HB Pencil and kneaded eraser
- masking tape
- Clean water and palette
- Paper towels
Step 1: Preparation and Sketching
-
Paper Setup:
Begin by taping down your cold press watercolor paper to a hardboard using masking tape. This prevents the paper from buckling when wet. Ensure the edges are sealed well to create that crisp white border later. -
Initial Outline:
Lightly sketch the pig’s head shape using an HB pencil. Focus on the large oval for the head and triangular shapes for the ears. Keep your lines very faint so they don’t show through the translucent watercolor. -
Feature Placement:
Map out the facial features gently. Position the large snout centrally but slightly lower, draw the almond-shaped eyes wide apart, and hint at the gentle curve of the smile. -
Floral Crown Sketch:
Sketch the floral crown loosely across the forehead. Don’t draw every petal; just indicate the placement of the main roses and the flow of the leafy vines cascading down the right ear.
Muddy Colors?
If your pinks look dirty, you may be overworking the layers while wet. Allow each layer to dry completely before glazing shadows on top to keep colors fresh.
Step 2: Painting the Piglet
-
Base Skin Tone:
Mix a very watery wash of Alizarin Crimson with a tiny touch of Yellow Ochre. Apply this pale pink wash over the entire face and ears, avoiding the eyes and the flowers. -
Ear Depth:
While the base is still slightly damp, drop a slightly more concentrated mix of Alizarin Crimson into the inner ears to create depth and shadow. -
Building Form:
Once the first layer is dry, mix a soft grey-pink using your base color and a touch of Payne’s Grey. Glaze this under the chin, around the snout, and under the floral crown to create three-dimensional form. -
Snout Definition:
Use a stronger pink mix for the snout. Paint the main shape, then lift out a small highlight on the top ridge with a clean, damp brush before it dries to make it look moist. -
Nostrils and Eyes:
Switch to your size 2 brush. Mix Payne’s Grey with Burnt Umber for a dark, warm black. Carefully paint the eyes, leaving a tiny speck of white paper for the catchlight. Paint the nostrils using a focused, dark pink-brown mix. -
Soft Fur Texture:
Use a fairly dry brush with a pale grey-brown mix to create subtle strokes around the edges of the ears and cheeks, suggesting fine hair rather than hard outlines.
Step 3: The Floral Crown
-
Rose Base:
Paint the rose shapes with a diluted mix of Alizarin Crimson and Yellow Ochre. Let the water pool slightly to create natural variation. -
Petal Definition:
Before the roses fully dry, use a slightly darker, thicker mix of the same color to swirl in the center petal shapes, letting them bleed softly into the wet base. -
Leafy Greens:
Mix Sap Green with a touch of Burnt Umber for a natural, muted olive tone. Paint the leaves stemming from the flowers, varying the pressure to get tapered tips. -
Trailing Vines:
Extend a vine down the right side of the face using the tip of your fine brush. Add smaller leaves here, keeping the green transparency high so it doesn’t overpower the pig’s face.
Pro Tip: Eye Sparkle
For the most lifelike eyes, make sure your white reflection dot is in the exact same position on both eyes (e.g., top right at 2 o’clock).
Step 4: Final Touches
-
Deepening Shadows:
Assess the contrast. If the pig looks flat, add a specific shadow right under the snout and beneath the ears using a translucent purple-grey glaze. -
The Smile:
Reinforce the mouth line with a medium-strength brown/pink mix, extending the corner upward to ensure that happy expression really shines through. -
White Details:
If you lost any highlights in the eyes or on the nose, use a tiny dot of white gouache or a white gel pen to bring back the sparkle.
Peel off the tape carefully to reveal your crisp edges and enjoy this cheerful addition to your portfolio
Pig in Rain Boots
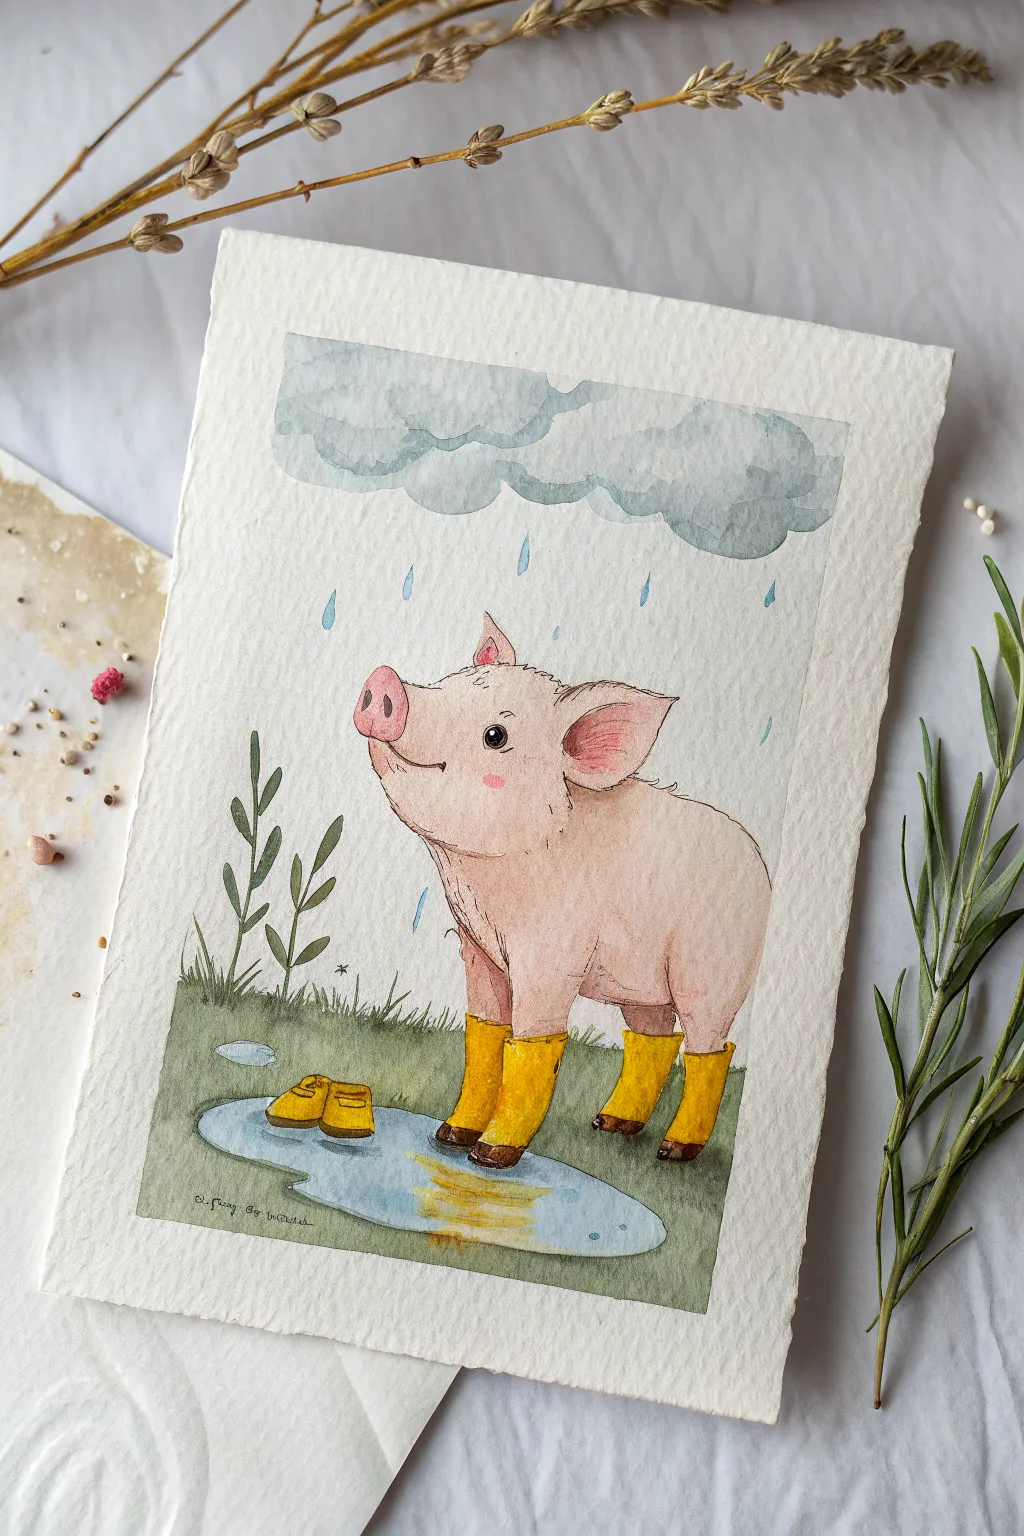
This whimsical watercolor painting captures the joy of a rainy day with a smiling piglet sporting bright yellow wellies. The soft washes and delicate linework create a charming, illustrative style perfect for a nursery or greeting card.
Step-by-Step
Materials
- Cold press watercolor paper (300 gsm)
- Watercolor paints (Pink, Yellow, Payne’s Grey, Raw Umber, Sap Green)
- Pencil (HB or H)
- Kneaded eraser
- Waterproof fine liner pen (0.1mm, brown or sepia)
- Round watercolor brushes (Size 4 and Size 0)
- White gouache or white gel pen
- Paper towels
- Water cups
Step 1: Sketching the Composition
-
Outline the pig:
Begin with a light pencil sketch. Draw a large oval for the body and a smaller circle for the head. Add the snout, triangular ears, and simplistic legs. Keep your lines faint so they don’t show through the paint. -
Add the accessories:
Draw the rain boots onto the pig’s hooves. They should look slightly oversized and slouchy. Sketch a small puddle beneath the pig and two tiny yellow floating shoes separately in the water to the left. -
Set the scene:
Sketch a fluffy, elongated cloud hovering above the pig. Add faint vertical lines to indicate rain direction. Finally, draw some simple, wispy plant shapes on the left side and some grass tufts near the feet.
Step 2: Painting the Piglet
-
Base wash:
Mix a very watery, pale pink using a touch of red and plenty of water. Wash this over the entire pig, avoiding the eyes and boots. While it’s still damp, drop slightly more saturated pink onto the snout, ears, and belly to create soft shadows. -
Deepen the shading:
Once the first layer is dry, mix a slightly darker, purplish-pink tone. Use this to paint the inside of the ears, the shadow under the chin, and along the bottom curve of the belly to give the piglet volume. -
Rosy cheeks:
Dilute a warmer pink or red and gently dab a small circle on the cheek. Soften the edges with a clean, damp brush so it blends naturally into the skin tone.
Highlight Hacking
If you forgot to leave white space on the boots for shine, don’t worry. A dab of white gouache or a white POSCA pen applied at the very end creates a perfect wet-look reflection.
Step 3: Boots and Puddle
-
Yellow boots:
Load your brush with bright yellow paint. Fill in the four rain boots on the pig’s legs. I like to leave a tiny sliver of white paper unpainted on the curve of the boot to act as a highlight. -
Paint the puddle:
Use a very diluted blue-grey mix for the puddle. Paint loosely within your sketch lines. While the puddle is wet, drop in a reflection of the yellow boots directly beneath the pig’s feet using watered-down yellow. -
Floating shoes:
Paint the two small separate shoes floating in the puddle with the same bright yellow used for the boots. Add a tiny shadow beneath them on the water.
Muddy colors?
Wait for each section (pig body vs. boots) to dry completely before painting the adjacent part. If wet pink touches wet yellow, they will bleed into orange.
Step 4: Background and Details
-
Cloud wash:
Mix a cool grey (Payne’s Grey works well) with lots of water. Paint the cloud shape using a wet-on-wet technique so the pigment blooms softly. Let the bottom edge be slightly uneven. -
Grass and ground:
Using a mossy green shade, paint the ground area behind the puddle. Use short, upward strokes to simulate grass blades, varying the height and direction for a natural look. -
Raindrops:
With a fine brush and diluted blue paint, add small teardrop shapes falling from the cloud. Keep them random and scattered. -
Inking the outlines:
Once the painting is completely bone-dry, use your brown fine liner to trace the pencil lines. Use broken, sketchy lines for the pig’s fur and smoother lines for the boots and puddle. -
Final highlights:
Use white gouache or a gel pen to add a tiny sparkle to the pig’s eye and reinforce the highlights on the wet rain boots.
Step 5: Finishing Touches
-
Texturing:
Add tiny dashed lines on the pig’s body with the pen to suggest bristles. Add a few small dots or ‘splatters’ near the puddle to show movement. -
Sign and clean:
Erase any remaining pencil marks gently. Sign your name near the grass line.
Now you have a delightful little artwork ready to brighten up any rainy afternoon
Tea Party Piglet Scene
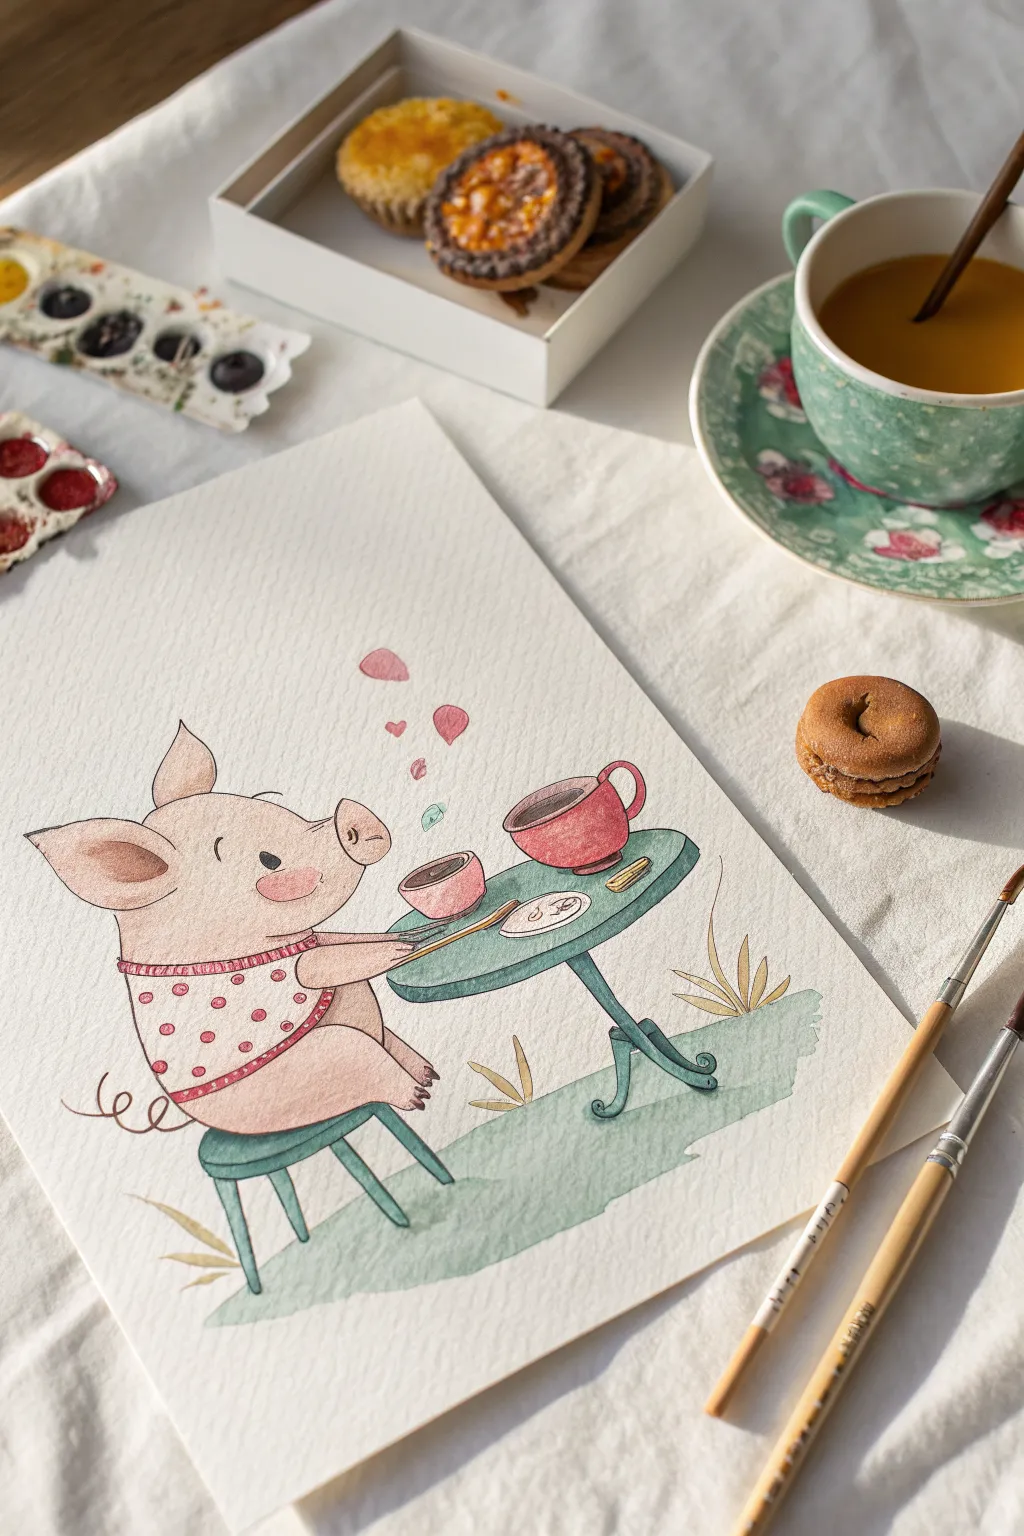
Capture the sweetness of a delightful afternoon tea with this charming watercolor illustration. Featuring a smiling piglet in a polka-dot dress enjoying a warm cuppa, this project uses soft washes and fine ink details to create a cozy, storybook feel.
Detailed Instructions
Materials
- Cold press watercolor paper (A4 or similar size)
- Watercolor paint set (pinks, greens, warm reds, browns)
- Round watercolor brushes (size 4 and 8)
- Fine liner pen (brown or sepia, waterproof)
- Pencil (HB) and eraser
- Clean water and paper towels
- Palette for mixing
Step 1: Sketching the Scene
-
Map out the composition:
Begin by lightly sketching the main shapes. Draw a large oval for the piglet’s body on the left and an oval table surface on the right. -
Refine the piglet’s form:
Add the piglet’s head with a gentle snout, pointed ears, and a curly tail. Sketch the arms resting on the table and the legs dangling from the stool. Don’t forget the little dress shape. -
Add the furniture:
Draw the stool beneath the piglet with simple, curved legs. Sketch the table’s pedestal leg, giving it a playful, curved design at the base. -
Set the table:
Sketch a teacup and saucer in front of the piglet, a larger teapot or mug on the other side, and a small plate with a cookie. -
Include atmospheric details:
Add floating heart shapes and flower petals rising from the cups to suggest a lovely aroma. Sketch a few blades of grass near the table legs to ground the scene.
Step 2: Watercolor Application
-
Paint the piglet’s skin:
Mix a very dilute, pale pink wash. Gently fill in the piglet’s face, arms, and legs. While the paint is still wet, drop a slightly darker pink onto the snout and cheeks for a rosy blush. -
Color the dress:
Once the skin is dry, paint the dress area with a clean, light wash. Avoiding the polka dots if possible is tricky, so I usually paint the whole dress a very pale cream or pink first and add darker dots later. -
Paint the furniture:
Use a muted teal or sage green for the table and stool. Keep the wash somewhat translucent to maintain the watercolor texture. -
Add the tea set colors:
Color the teacup and large mug with a warm rose or terracotta red. Paint the tea inside with a dark brown mix. -
Create the grassy ground:
Mix a watery green and apply a loose, organic wash beneath the furniture to represent the grass. Let the edges fade out naturally.
Loose Lines
Don’t try to make your ink outlines perfect. Allowing the watercolor to spill slightly outside the lines adds to the charming, hand-painted aesthetic.
Step 3: Adding Details & Definition
-
Enhance the dress pattern:
Using a smaller brush and a more concentrated red-pink, carefully dab small circles onto the dried dress area to create the polka dots. -
Add floating hearts:
Paint the floating hearts and petals above the table using the same pinks from the dress to tie the colors together. -
Deepen the shadows:
Mix a slightly darker version of your skin tone (pink with a touch of brown) and add subtle shadows under the piglet’s chin, arms, and where the legs meet the stool. -
Outline with ink:
Once the painting is completely bone-dry, use a brown fine liner to trace your pencil lines. Keep the lines somewhat broken and sketchy for a lively look rather than a rigid outline. -
Final facial features:
Inking the eye is crucial; draw a small curved line for the closed, smiling eye, and add the nostrils. This brings the piglet’s personality to life. -
Texture the grass:
Use the pen to add small flicks and lines within the green wash area to suggest individual blades of grass.
Pattern Play
Customize the piglet by changing the dress pattern! Try painting tiny stripes, little flowers, or a plaid design instead of polka dots.
Now you have a sweet little scene perfect for a greeting card or nursery art
Patchwork Pattern Pig
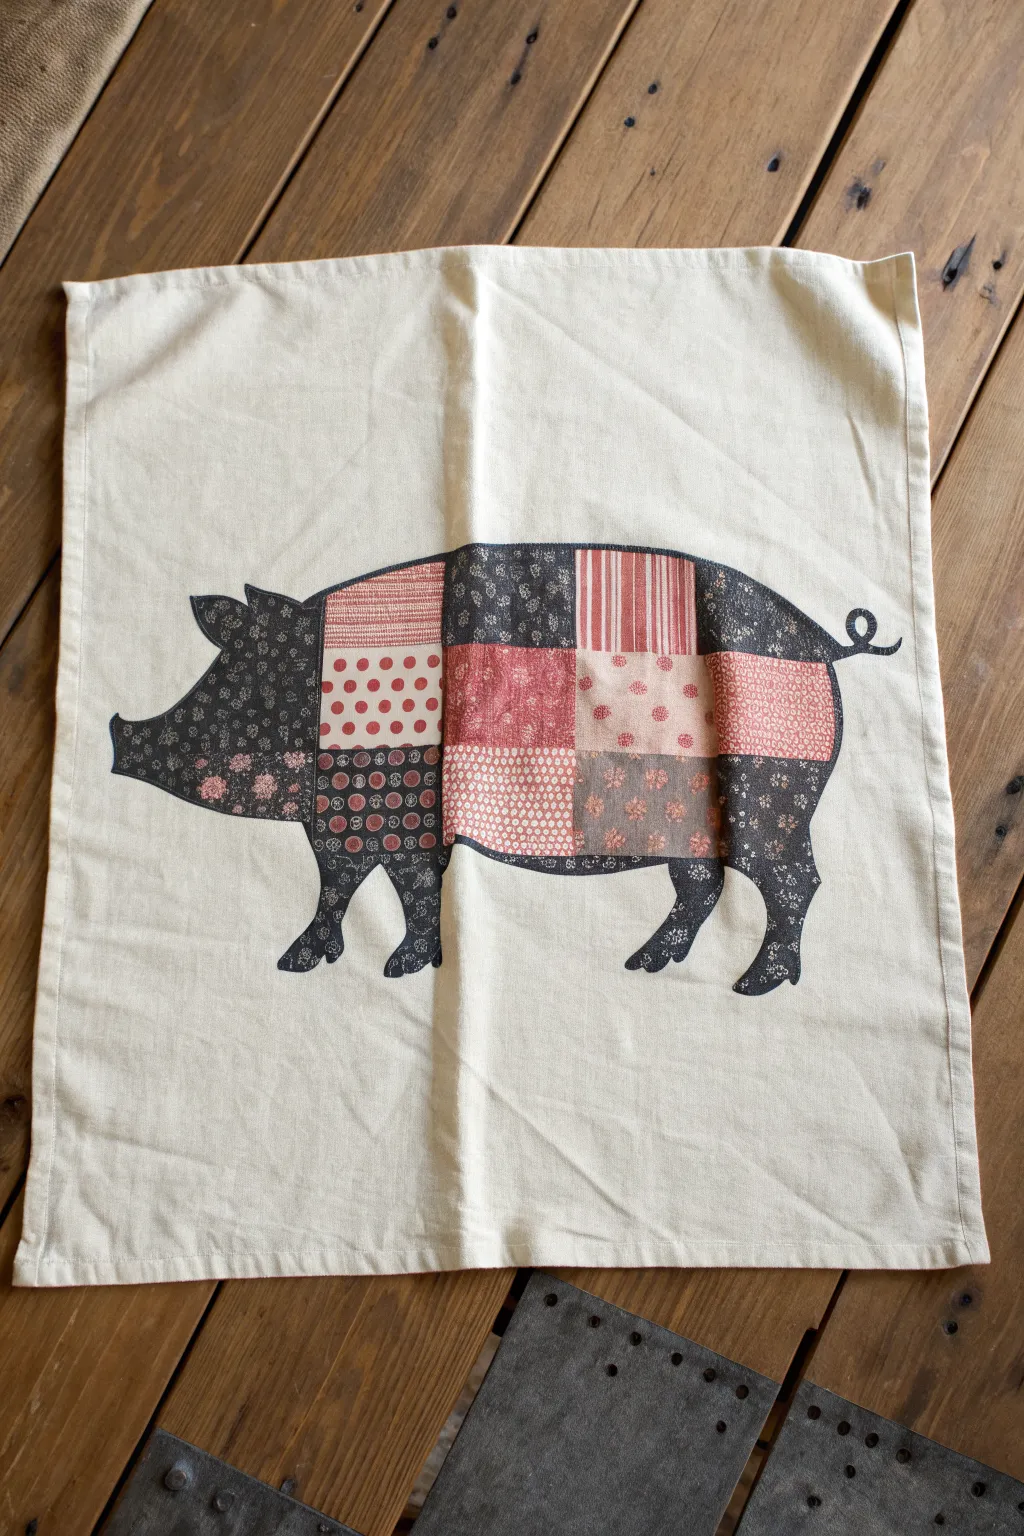
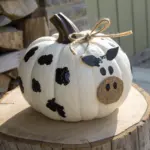
Bring farmhouse charm to your kitchen with this clever faux-patchwork pig design. Instead of sewing complicated quilt blocks, you’ll use fabric paints and stencils to create the cozy look of patchwork directly onto a simple flour sack towel.
Step-by-Step Tutorial
Materials
- Flour sack towel or plain cotton tea towel (pre-washed)
- Fabric medium
- Acrylic craft paints (black, barn red, muted pink, cream)
- Large pig silhouette stencil (or freezer paper to make your own)
- Painter’s tape or low-tack masking tape
- Small stencil brushes or sponge daubers
- Fine liner brush
- Small geometric stencils (dots, stripes, tiny florals)
- Iron and pressing cloth
Step 1: Preparation and Outline
-
Prepare the fabric:
Start by washing and drying your towel without fabric softener to ensure the paint adheres properly. Iron out all wrinkles so you have a perfectly flat surface to work on. -
Apply the main pig silhouette:
Center your large pig stencil on the fabric. If you are cutting your own from freezer paper, iron the shiny side down onto the fabric to seal the edges completely. -
Grid the body:
Using thin strips of painter’s tape or a light pencil, mark out a grid of squares inside the main body of the pig. Leave the head, legs, and tail free of the grid, as these will be solid black.
Use Freezer Paper
Print a pig outline on the paper side of freezer paper. Cut out the inside, then iron the shiny side to your fabric. It creates a perfect temporary seal.
Step 2: Painting the Patchwork
-
Mix your paints:
Mix fabric medium into your acrylic paints according to the bottle instructions. This keeps the painted fabric soft and launderable rather than stiff. -
Paint the solid sections first:
Using the sponge dauber and black paint, fill in the head, snout, legs, and the curly tail. Use a pouncing motion to drive the paint into the weave without pushing it under the stencil edges. -
Base coat the squares:
Work through your grid of squares. Paint some squares solid red, some solid cream, and some a muted pink. Leave a few blank or paint them black if you want dark patterned blocks later. -
Let it dry completely:
Allow these base colors to dry fully. If the paint is still wet, your masking tape for the next step will pull it up. -
Create the patterns:
Place your small geometric stencils over the dry colored squares. Add red stripes over a cream square, cream polka dots over a red square, or little flowers over a pink square. Vary the patterns to mimic scrap fabric. -
Add intricate details:
For the more delicate patterns, like the tiny floral print on the black sections, I find a fine liner brush works best to manually dap on small clusters of three dots.
Vintage Fade
Mix a tiny drop of water into your acrylics for a more transparent, worn-in vintage look rather than a solid, opaque plastic finish.
Step 3: Finishing Touches
-
Remove the tape grid:
Carefully peel away the tape or erase the pencil lines that separated your patchwork squares. -
Define the seams:
Using the fine liner brush and black paint, go over the grid lines you just revealed. Paint thin, slightly wavering lines to simulate the seams where quilt blocks would be stitched. -
Add stitch marks:
For extra realism, paint tiny tick marks or dashes along these black seam lines to look like thread stitching. -
Reveal the full pig:
Slowly peel off the main pig stencil or freezer paper. Fix any rough outer edges with a small brush if paint bled slightly. -
Heat set the paint:
Allow the project to cure for 24 hours. Then, place a pressing cloth over the design and iron on high heat (no steam) for 3-5 minutes to permanently set the ink.
Once heat set, your adorable patchwork pig towel is ready to handle wash day and brighten up the kitchen
Galaxy Astronaut Piglet
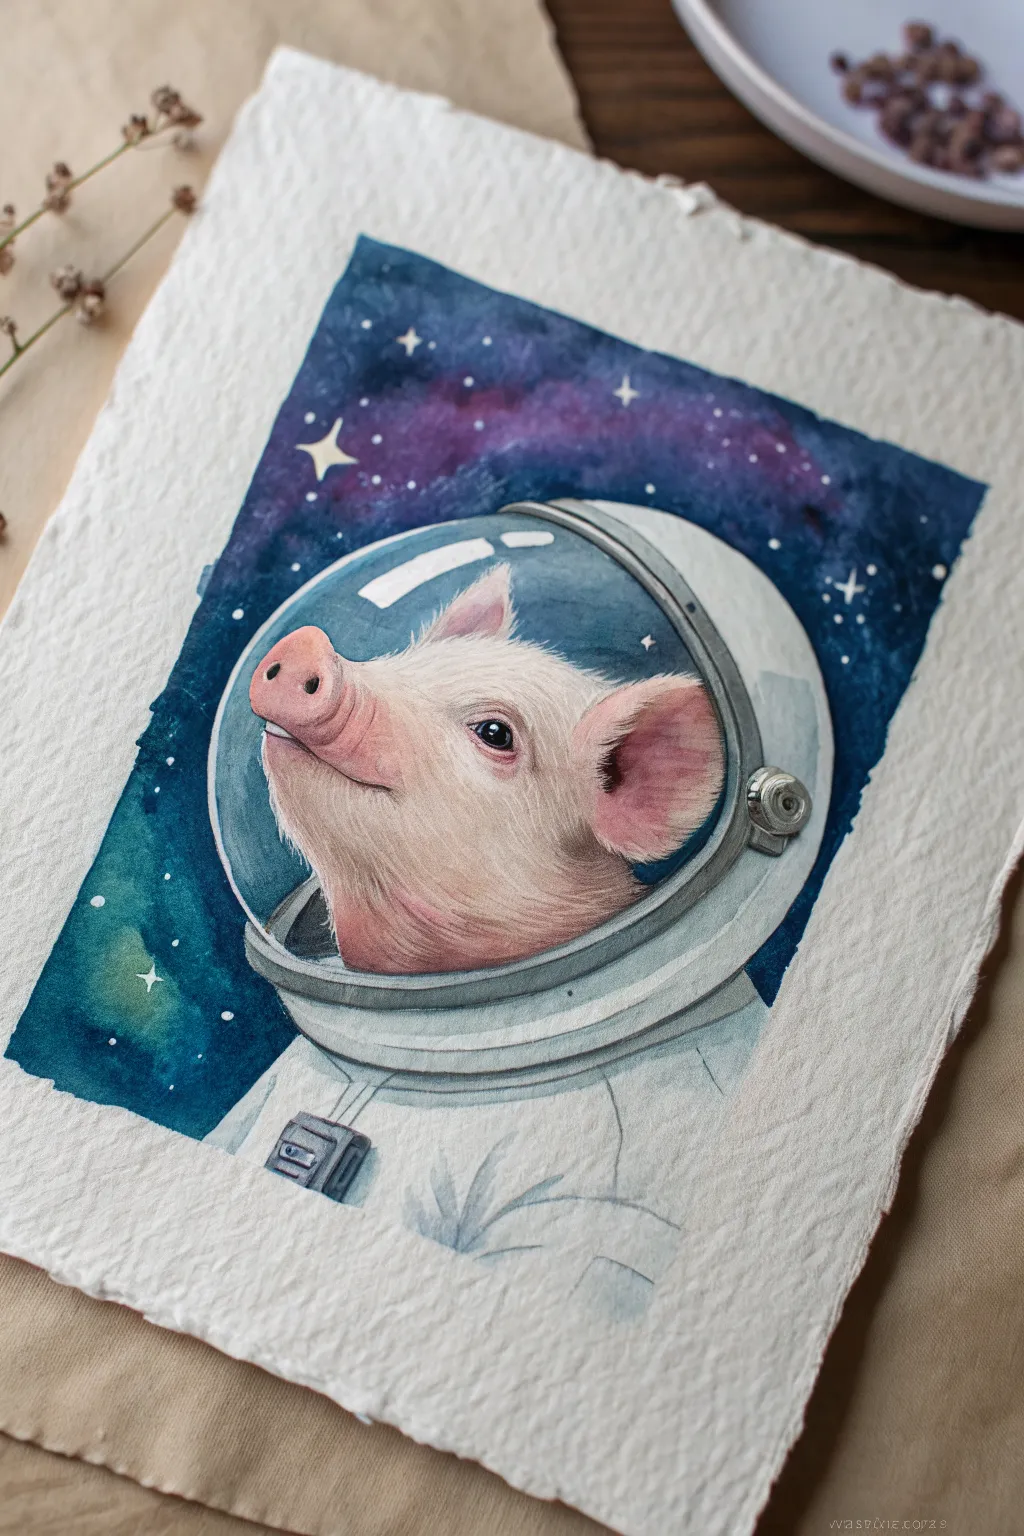
Capture the cosmic wonder of a piglet astronaut gazing into the stars with this enchanting watercolor project. You will learn to balance a vibrant galaxy background with the soft, realistic textures of the piglet’s skin and diving suit.
Step-by-Step Guide
Materials
- Cold-pressed watercolor paper (300 gsm or heaver, with rough edges)
- Watercolor paints (Indigo, Prussian Blue, Purple, Magenta, Pink, Burnt Sienna, White Gouache)
- Masking fluid and applicator
- Synthetic round brushes (Sizes 2, 6, and 10)
- Pencil (HB) and eraser
- Two jars of water
- Paper towels
- White gel pen (optional)
Step 1: Preparation and Sketching
-
Define the boundaries:
Begin by lightly marking a rectangular border for your background, leaving a generous margin of white paper. The rough edge of the paper adds character, so plan for the painting to float in the center. -
Sketch the piglet:
Using an HB pencil, draw the piglet’s profile in the center. Focus on the snout pointing upward and the gentle curve of the jawline. -
Outline the helmet:
Sketch a perfect circle around the head for the helmet glass, then add a thicker rim around the neck area. Include the small circular port detail on the side of the helmet. -
Mask the stars:
Dip a fine applicator or an old brush into masking fluid. Dot random stars into the background area, varying their sizes. Add a few four-pointed star shapes for extra sparkle. -
Protect the subject:
Apply masking fluid carefully along the outer edge of the helmet and the piglet to protect the white paper while you paint the dark background.
Step 2: The Cosmic Background
-
Wet-on-wet base:
With your size 10 brush, wet the rectangular background area with clean water. The paper should be glistening but not pooling. -
Drop in deep colors:
Load your brush with Indigo and Prussian Blue. Drop the color into the corners and edges of the rectangle, letting it bloom inward. -
Create the nebula:
While the blue is still wet, drop in Magenta and Purple near the top center to create a nebula effect. Let these colors blend naturally with the blues. -
Darken the depths:
Once the first layer is damp (not soaking), add a second concentrated layer of Indigo to the darkest corners to create depth of space. -
Reveal the stars:
Allow the background to dry completely. Gently rub off the masking fluid to reveal the crisp white stars underneath.
Make Space Sparkle
For a magical finish, flick a stiff toothbrush loaded with white gouache over the dry background. This creates tiny, distant stars that add immense depth.
Step 3: Painting the Piglet
-
Base skin tone:
Mix a very dilute wash of Pink and a touch of Burnt Sienna. Apply this wash over the entire piglet face, except for the eye and the brightest highlight on the snout. -
Deepen the shadows:
While the base is semi-dry, use a size 6 brush to add a slightly darker pink mix under the chin, inside the ear, and around the eye socket to build form. -
Texture the skin:
Switch to a size 2 brush. I find that using tiny, short strokes with a thicker pink mix mimics the texture of fine hair and skin wrinkles, particularly on the neck. -
Detail the eye:
Paint the eye using a dark brown or black mix, leaving a tiny speck of white paper for the catchlight. Outline the eye rim with a soft pink-grey. -
Refine the snout:
Add a rosier pink to the tip of the nose and the nostril area. Soften the edges with a damp brush so the transition isn’t harsh.
Add a Constellation
Instead of random stars, use a white gel pen to draw a real constellation like Ursa Major or Cassiopeia in the background for an educational twist.
Step 4: The Helmet and Suit
-
Glass reflections:
For the helmet glass, mix a very watery blue-grey. Paint curved strokes inside the helmet outline, leaving large white gaps to represent reflections on the glass surface. -
Helmet rim shading:
Paint the helmet’s neck ring with a cool grey. Add darker grey wet-on-dry to the bottom of the rings to show curvature and weight. -
Suit fabric:
Use a extremely pale grey wash for the space suit body. Keep it loose and sketch-like, fading the color out as it moves away from the helmet to keep focus on the face. -
Metallic details:
Paint the side knob and the chest patch with a concentrated grey mix. Add a dot of white gouache or gel pen to the metal knob for a sharp highlight. -
Final highlights:
Use white gouache to sharpen the reflections on the helmet glass and add final whiskers to the piglet’s chin.
Peel off the tape carefully to reveal your cosmic traveler ready for adventure.

Have a question or want to share your own experience? I'd love to hear from you in the comments below!