If you’re craving a cheerful project that feels doable in one sitting, a cute sunflower painting is my go-to every time. I pulled together my favorite easy sunflower painting ideas that keep the shapes simple but still look totally display-worthy.
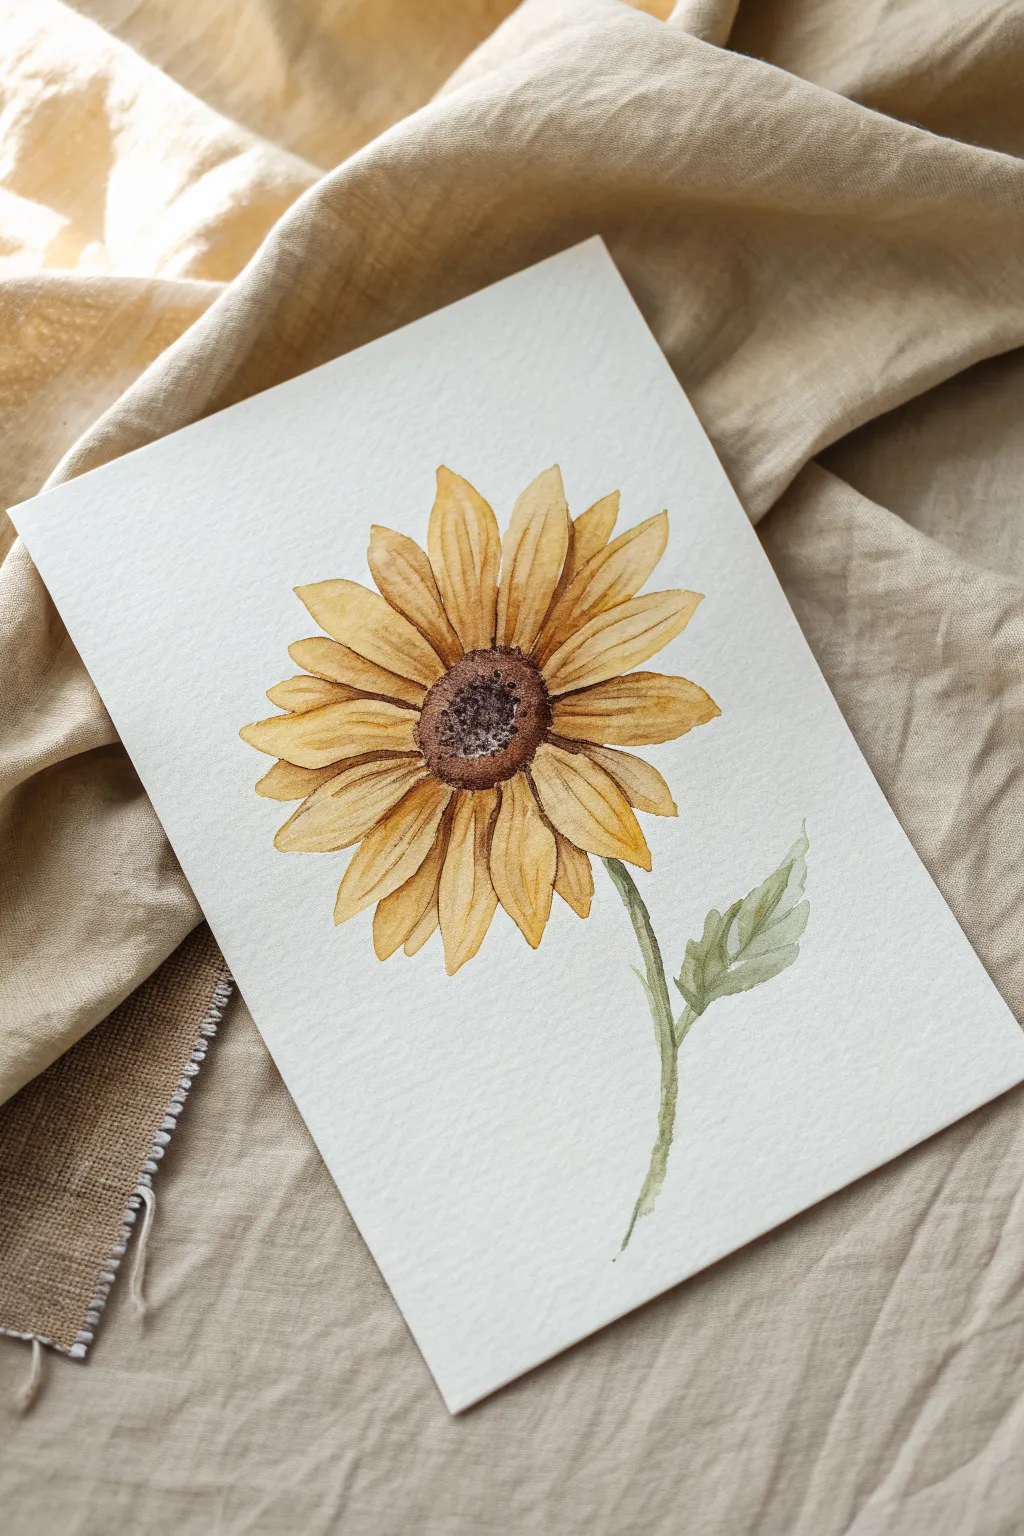
Corner Bloom Sunflower Crop
Capture the golden warmth of late summer with this charming watercolor study of a single sunflower bloom. This project uses loose, airy layers and wet-on-dry techniques to create distinct petals and leafy textures that pop off the page.
Step-by-Step Tutorial
Materials
- Cold press watercolor paper (300gsm/140lb)
- Watercolor paints (Cadmium Yellow, Yellow Ochre, Burnt Sienna, Burnt Umber, Sap Green)
- Round watercolor brushes (sizes 4 and 8)
- Fine liner brush (size 0 or 1)
- Pencil (HB or 2H)
- Kneaded eraser
- Jar of clean water
- Paper towel or cloth
Step 1: Sketching the Framework
-
Position the center:
Start by lightly sketching an oval shape in the upper-middle section of your paper. This will be the disk florets (the dark center) of the sunflower. Keep it slightly tilted to the left for a natural look. -
Map out petitioner layers:
Draw faint guidelines for two layers of petals radiating outward from the center oval. Make the petals slightly irregular—some curving tips, some overlapping—rather than perfectly uniform. -
Stem and leaves:
Sketch a long, slightly curved stem extending from the flower base toward the bottom right corner. Add outlines for two large leaves on the stem, and a small bud or sepal peeking out just under the main flower head. -
Refine and lighten:
Once satisfied with the composition, use your kneaded eraser to lift off excess graphite until only faint ghost lines remain. This prevents pencil marks from muddying the yellow paint later.
Preserve the Sunlight
Don’t overwork the yellow petals! The luminosity of watercolor comes from the white paper shining through, so keep your yellow washes transparent and light.
Step 2: Golden Petals
-
First petal wash:
Mix a watery wash of Cadmium Yellow. Using your size 8 brush, fill in the petals, intentionally leaving tiny slivers of white paper between some petals to define their edges. -
Add warmth:
While the first layer is still slightly damp, drop very small touches of Yellow Ochre near the base of the petals where they meet the center. This creates a natural shadow gradient. -
Define individual petals:
Let the first layer dry completely. Now, mix a slightly more saturated Cadmium Yellow. Glaze over specific petals, particularly the ones that appear ‘behind’ others, to create depth. -
Details and veins:
Switch to a size 4 or fine liner brush. Using a mix of Yellow Ochre and a tiny dot of Burnt Sienna, paint very fine, delicate lines along the length of the petals to suggest veins and texture. -
Sepal accents:
For the small green bud tucked under the petals, mix a light Sap Green and fill in the shape. Add a touch of yellow to the tips to tie it into the flower.
Muddy Centers?
If the brown center bleeds into the yellow petals, your yellow layer wasn’t dry enough. Let it dry completely, or leave a tiny hairline gap between the center and petals.
Step 3: The Heart of the Flower
-
Center base layer:
Wet the oval center area lying flat on the paper. Drop in a mix of Burnt Sienna and Yellow Ochre, allowing the colors to bleed together for a soft, fuzzy base. -
Deepening the core:
While the center is still wet, drop concentrated Burnt Umber into the middle of the oval, leaving the outer ring lighter (Burnt Sienna). This creates a 3D effect. -
Texture stippling:
Once the center is fully dry, take a nearly dry brush with thick dark brown paint. Stipple (tap essentially vertical dots) over the dark center to mimic the texture of the seeds.
Step 4: Leaves and Finishing Touches
-
Stem foundation:
Paint the stem using Sap Green. While wet, touch the left side of the stem with a slightly darker green mix to suggest roundness and shadow. -
Leaf washes:
Fill in the leaf shapes with a watery Sap Green. I like to leave a thin white line down the center of the larger leaves to represent the main vein without needing to paint it later. -
Leaf details:
Once the leaves dry, use a deeper green (Sap Green mixed with a touch of Burnt Umber) to paint the veins radiating from the center line and to darken the shaded undersides of the leaves. -
Grounding wash:
Mix a very dilute, watery yellow wash. Paint a broad, loose horizontal stripe across the bottom of the stem to ‘ground’ the painting so it doesn’t feel like it’s floating in space. -
Final assessment:
Step back and look at your contrast. If the flower center needs more darkness, stipple a bit of black or intense dark brown right in the very middle indentation.
Now you have a vibrant botanical illustration ready to frame or give as a card

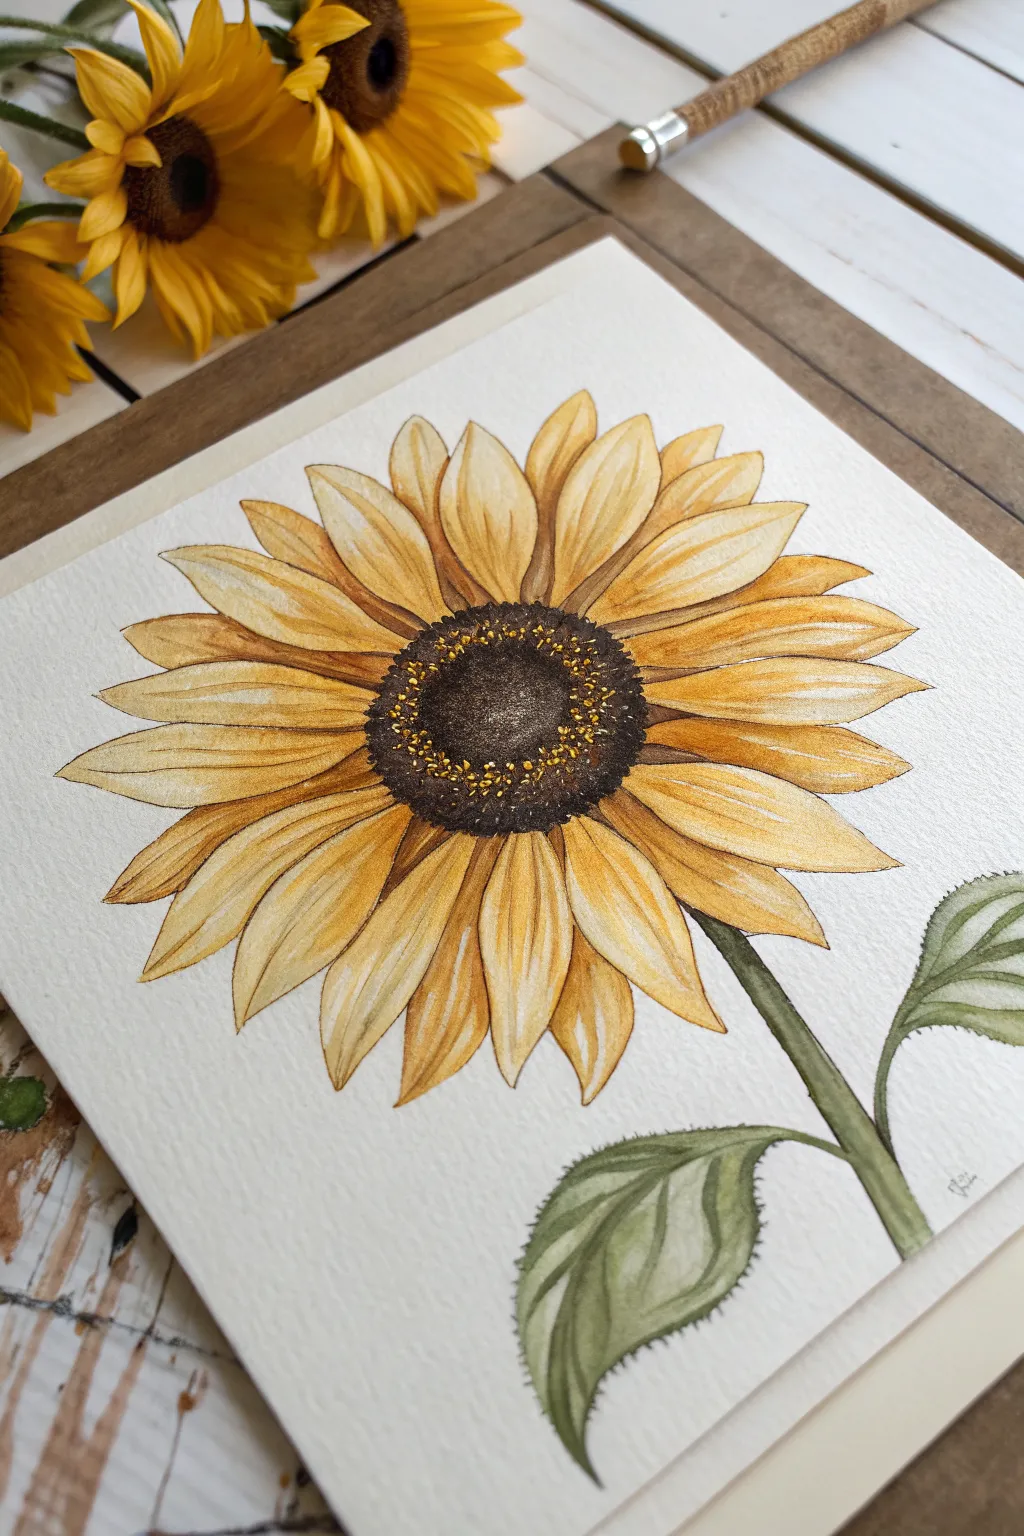
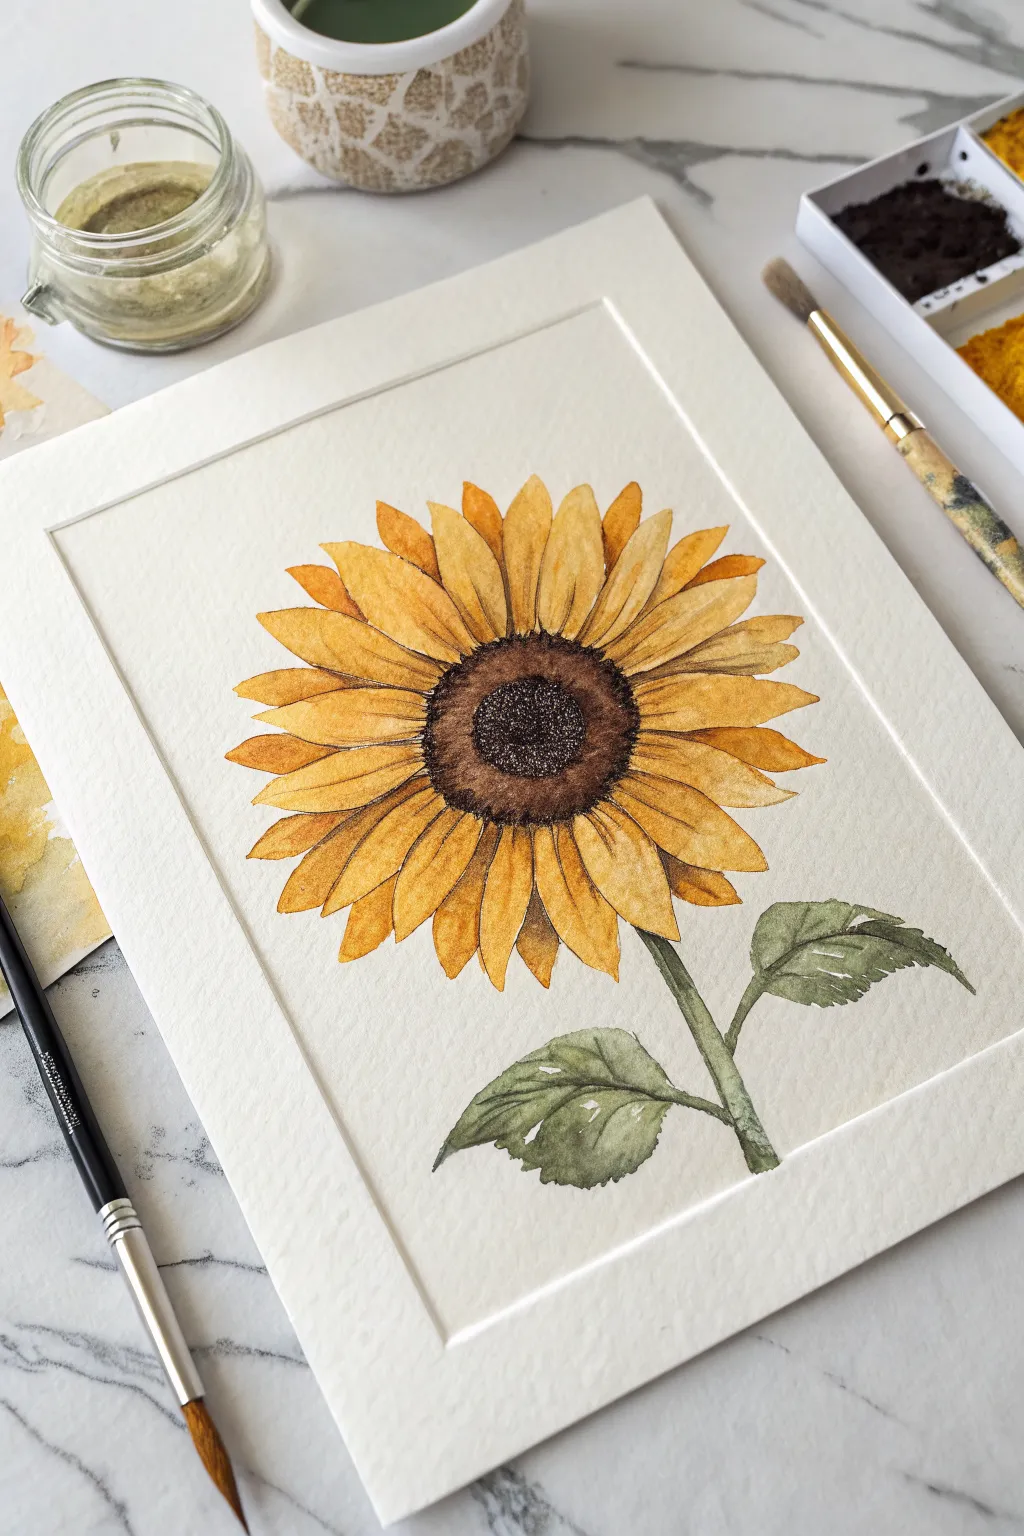
Single Sunflower With Two Simple Leaves
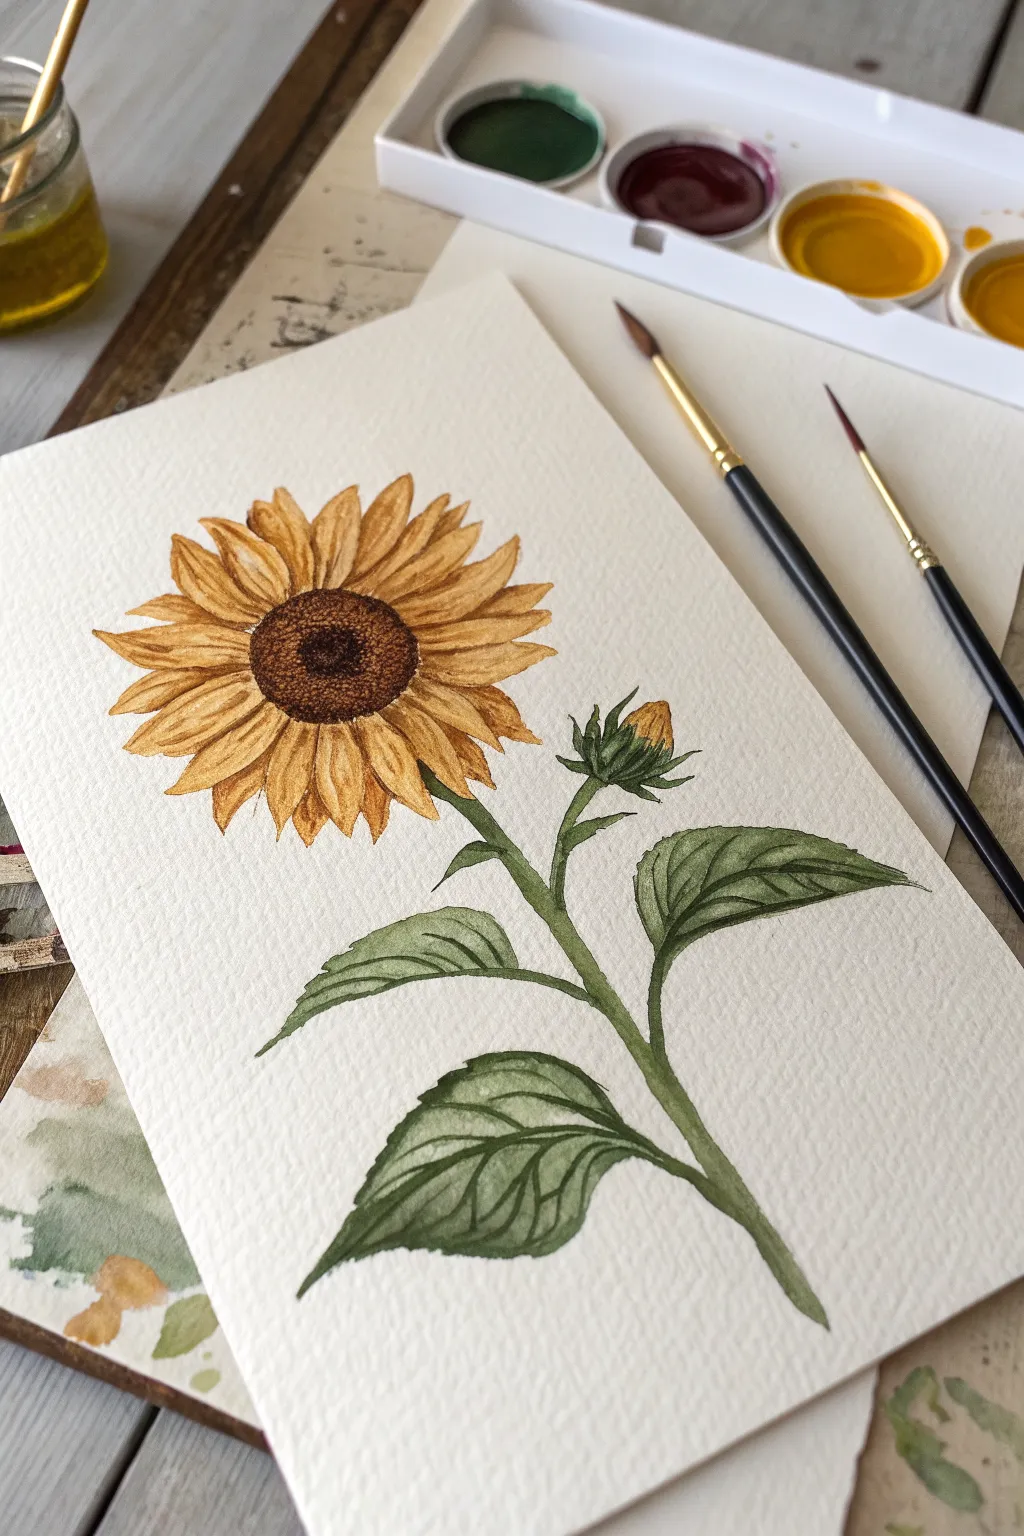
This charming, single-stem watercolor sunflower captures the warmth of summer with its golden petals and textured center. The composition is clean and classic, featuring two realistically veined leaves and a budding flower that adds a lovely touch of life to the artwork.
Detailed Instructions
Materials
- Cold press watercolor paper (approx. 300gsm)
- Watercolor paints (Yellow Ochre, Burnt Sienna, Burnt Umber, Sap Green, Dark Green)
- Round brushes (Size 6 for petals/leaves, Size 2 for details)
- Pencil (HB or H)
- Kneaded eraser
- Clean water jar
- Paper towel
Step 1: Sketching the Layout
-
Outline the head:
Start by lightly sketching a medium-sized oval near the top center of your page to represent the flower’s center disk. Around this, draw a larger, faint circle to guide where the petals will end. -
Draw the petals:
Refine the petal shapes. They should be somewhat pointed and slightly overlapping. Notice how some petals look like they are behind others; sketch these layers gently. -
Stem and leaves:
Draw the main stem curving slightly downwards to the right. Add two large, teardrop-shaped leaves branching off the lower stem—one pointing left, one pointing right. -
Add the bud:
Just to the right of the main flower head, sketch a small, closed bud on a short stem. Include the spiky green sepals hugging the bottom of the yellow bud. -
Clean up:
The pencil lines should be barely visible, so use your kneaded eraser to lift off any heavy graphite before you start painting.
Step 2: Painting the Flower
-
Base layer for petals:
Mix a watery wash of Yellow Ochre. Using your larger brush, fill in the petals. Don’t worry about being perfectly even; slight variations in water amount create nice texture. -
Deepening the petals:
While the first layer is still slightly damp, drop a touch of Burnt Sienna into the base of the petals near the center disk to create depth and shadow. -
Painting the center:
Once the petals are dry, fill the center oval with a mix of Burnt Sienna and Burnt Umber. Use a stippling motion (dabbing the brush tip) to mimic the fuzzy texture of seeds. -
Darkening the core:
While the center is wet, drop cooler, darker brown (or a tiny bit of black mixed with brown) right into the very middle of the disk. -
Petal details:
Switch to your size 2 brush. Mix a slightly more pigmented Yellow Ochre or light orange. Paint fine lines down the center of some petals to suggest creases and form.
Stippling Success
For the seed texture, hold your brush vertically. Tap the tip repeatedly on the paper rather than stroking. This creates that realistic, fuzzy, seed-packed look in the center.
Step 3: Greenery and Details
-
The stem:
Load your brush with Sap Green and paint the main stem and the smaller stem for the bud. Keep the stroke fluid and continuous if possible. -
Leaf base layer:
Paint the two large leaves with a light wash of Sap Green. Let these dry completely before moving to the next step so the details don’t bleed. -
Bud details:
Paint the sepals (the leafy greens) around the bud, and add a heavy dab of yellow for the peek of color inside. -
Veining the leaves:
I like to use a mixture of Sap Green and a touch of Burnt Umber for this. Using the fine tip of the size 2 brush, carefully paint the central vein and the branching veins on the dry leaves. -
Final texture:
Return to the flower center. Once fully dry, use the small brush with a very dark brown to add distinct stipple dots around the outer edge of the center disk for extra definition. -
Connection points:
Add tiny, darker green shadows where the leaf stems meet the main stalk to firmly ground them.
Go Bigger
Instead of a single stem, try painting a cluster of three sunflowers at different heights. Vary the direction each flower faces to make the composition feel natural and wild.
Step back and admire the sunny warmth your new painting brings to the room


Smiling Sunflower Face
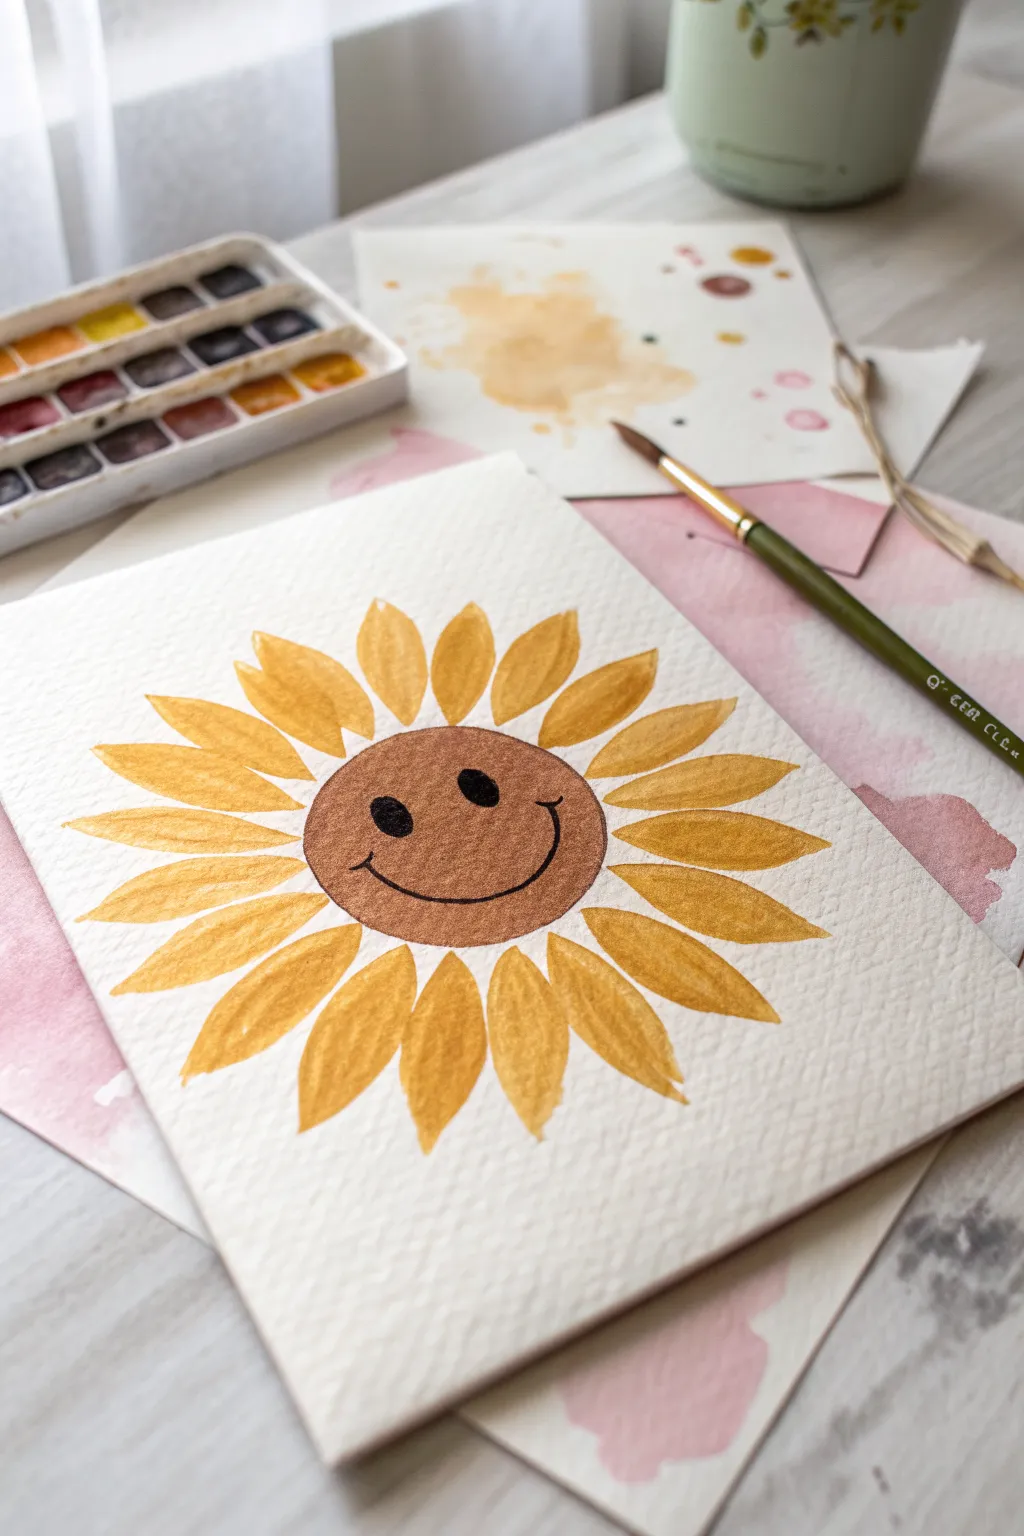
Brighten up your sketchbook with this cheerful sunflower illustration that smiles right back at you. Using simple watercolor techniques, this project combines golden petals with an illustrated face for a piece that radiates positivity.
Step-by-Step Guide
Materials
- Cold press watercolor paper (A5 or similar)
- Watercolor paints (Yellow Ochre, Cadmium Yellow, Burnt Sienna)
- Round watercolor brushes (sizes 6 and 2)
- Black waterproof fine liner pen or black ink
- Pencil and eraser
- Jar of clean water
- Paper towel
Step 1: Planning the Layout
-
Center the face:
Begin by lightly sketching a perfect circle in the middle of your paper using a pencil. This will form the sunflower’s face but make sure not to press too hard so the lines disappear later. -
Mark the petals:
Sketch faint guidelines for the petals radiating outward from your circle. aim for roughly 16-20 petal shapes, keeping them pointed at the tips and wider near the base. -
Refine the facial features:
Inside the center circle, lightly mark two oval shapes for eyes and a wide U-shape for the smile to ensure the expression is centered before you commit with paint.
Brush Control Trick
For perfectly pointed petals, always drag your brush towards your body. Start heavy near the center, then lift the brush straight up as you pull away to create the tip.
Step 2: Painting the Center
-
Mix the brown tone:
Create a warm, medium brown by mixing Burnt Sienna with a tiny touch of red or orange on your palette suitable for the flower’s disc. -
Fill the circle:
Using your size 6 brush, carefully fill in the center circle. Use enough water to make the paint flow smoothly to the edges, but keep the pigment dense enough to look solid. -
Let it dry completely:
This is crucial to prevent colors bleeding. Wait until the brown center is bone dry before touching any yellow petals to it. I usually wait about 10-15 minutes here.
Texture Twist
While the brown center is still wet, sprinkle a pinch of salt on it. Brush it off when dry to create a mottled, seed-like texture perfect for sunflowers.
Step 3: Adding the Petals
-
Prepare the yellow mix:
Load your brush with a mix of Yellow Ochre and Cadmium Yellow. You want a color that feels sunny but has enough depth to stand out against the white paper. -
Paint the first petal:
Start at the 12 o’clock position. Press the belly of the brush down near the brown center to create the wide base, then lift as you pull outward to create a tapered point. -
Work in opposites:
To keep the flower symmetrical, paint the petal directly opposite the first one (at 6 o’clock), then the ones at 3 and 9 o’clock. -
Fill the gaps:
Continue painting petals in the remaining spaces. Don’t worry if they aren’t identical; slight variations in size and shape make the flower look more organic and charming. -
Leave tiny gaps:
Try to leave a hairline gap of white space between the brown center and the start of the yellow paint to prevent muddy bleeding and add a little highlight. -
Second layer (optional):
If your petals dry too pale, you can glaze a second layer of slightly more intense yellow over them once the first layer is fully dry.
Step 4: The Finishing Touches
-
Ink the eyes:
Once the brown center is 100% dry, use a black fine liner or a small brush with black ink to fill in the oval eyes you sketched earlier. -
Draw the smile:
Carefully trace your smile line with the black pen. Make the line slightly thicker in the middle and tapered at the ends for a classic cartoon look. -
Add detail lines:
Add tiny little ‘cheek’ creases at the ends of the smile to give the face extra character. -
Erase guidelines:
When you are absolutely certain all paint and ink is dry, gently erase any remaining visible pencil marks from around the petals. -
Flatten the paper:
If your paper has buckled slightly from the water, place the painting under a heavy book overnight once it’s dry to flatten it out.
Display your happy little sunflower on a desk or wall to bring a daily dose of cheer to your space


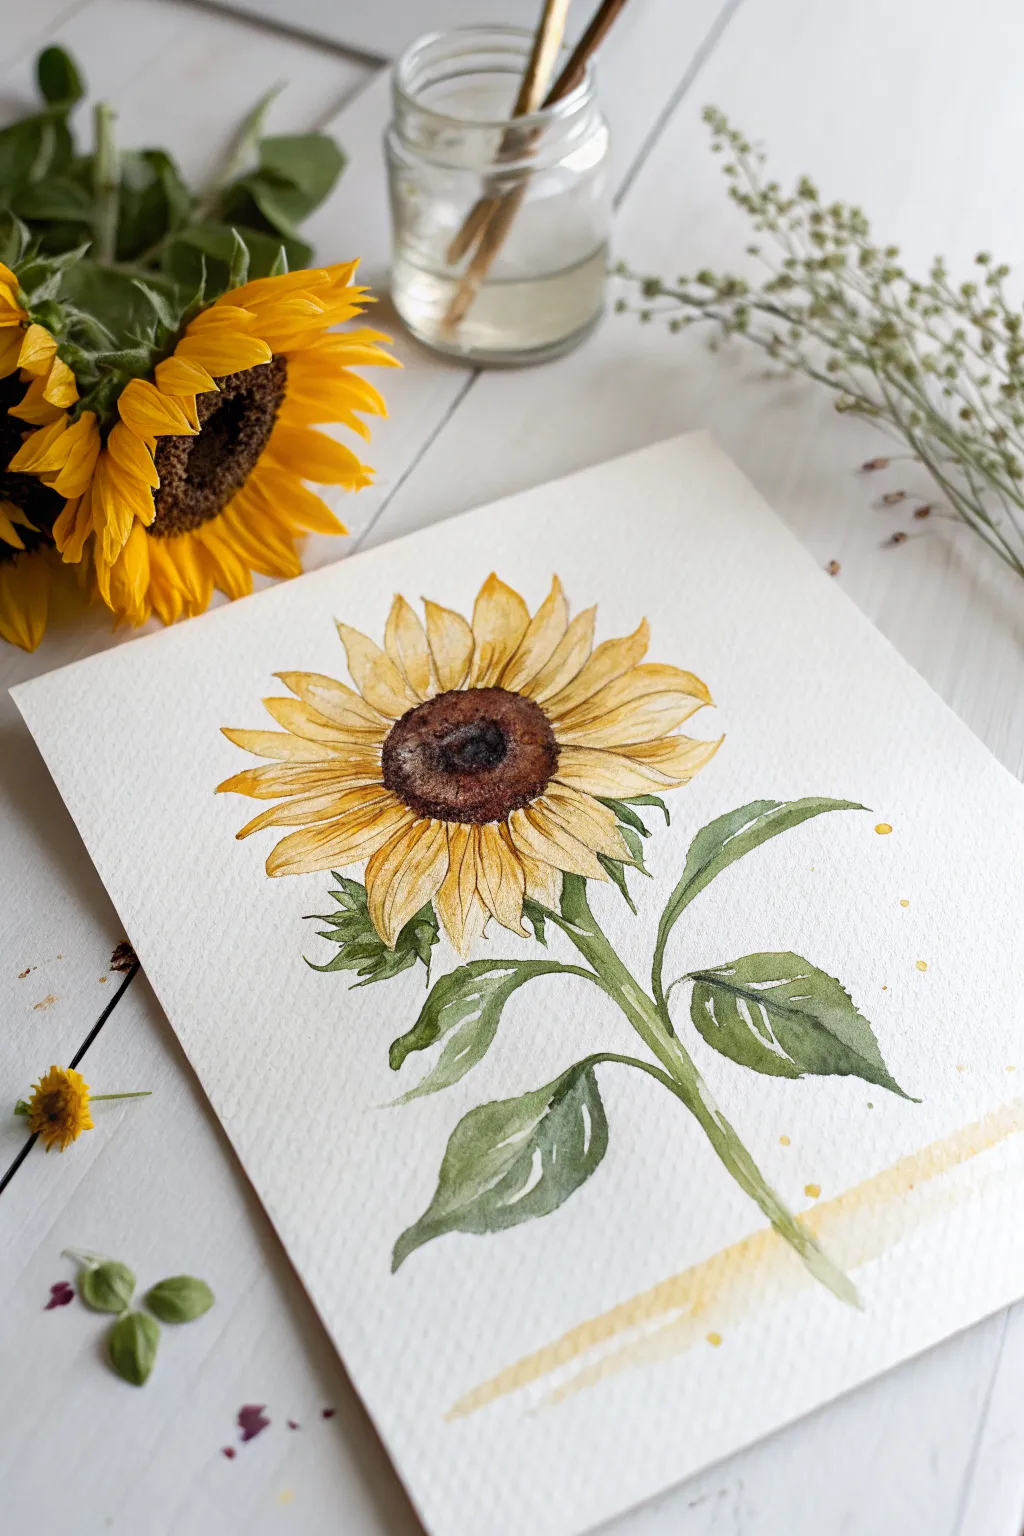
Easy Watercolor Sunflower Wash
Capture the warmth of summer with this gentle watercolor sunflower study, featuring delicate yellow washes and a textured center. The loose, organic feel of the petals against the crisp white paper makes for a lovely piece of botanical art that feels effortlessly light.
Step-by-Step
Materials
- Cold press watercolor paper (300 gsm)
- Round watercolor brushes (size 4 and 8)
- Pencil (HB or H)
- Kneaded eraser
- Watercolor paints: Yellow Ochre, Cadmium Yellow, Burnt Sienna, Burnt Umber, Sap Green
- Two jars of water
- Palette for mixing
- Paper towels
Step 1: Sketching the Flower
-
Outline the center:
Begin by lightly drawing a small oval shape slightly above the middle of your paper. This will be the seed head. Remember to keep your lines faint so they don’t show through the transparent watercolor later. -
Draw the petals:
Sketch the petals radiating outward from the center oval. Start with the petals that are closest to the viewer (the ones fully visible), making them slightly irregular and pointed at the tips. The petals don’t need to be perfect; natural variation adds character. -
Add background petals:
Fill in the gaps between your main petals with smaller, partial petal shapes peeking out from behind. This creates depth and volume without overcomplicating the sketch. -
Sketch the stem and leaf:
Draw a gently curved line extending downwards from the flower head for the stem. Add a single, jagged leaf branching off the right side near the bottom. -
Clean up:
Use your kneaded eraser to roll over the sketch, lifting up excess graphite until the lines are barely visible
Fixing Blooms
If water pushes pigment into ugly ‘cauliflower’ blooms, wait for it to dry completely. Then, use a damp, stiff brush to gently scrub and feather the hard edge.
Step 2: Painting the Petals
-
Mix your yellow:
Prepare a watery mix of Cadmium Yellow with a touch of Yellow Ochre on your palette. You want a warm, golden hue rather than a bright lemon yellow. -
First wash:
Using your size 8 brush, paint the petals with clear water first, then drop in your yellow mix. Let the pigment flow naturally to the edges but try to leave tiny slivers of white paper between petals to keep them distinct. -
Deepen the color:
While the paint is still damp, drop a slightly more concentrated Yellow Ochre mixture near the base of the petals (where they meet the center). This creates a natural gradient. -
Define the layers:
Paint the background petals now. I like to use a slightly darker, more amber mix for these to push them visually behind the front petals. -
Add texture:
Once the initial wash is almost dry, use a smaller brush to paint very thin, faint lines down the center of a few key petals to suggest veins using a dilute brown-yellow mix.
Step 3: The Center & Stem
-
Base for the center:
Mix Burnt Sienna with a little Burnt Umber. Paint the center oval, dabbing the brush rather than stroking, to start building that fuzzy texture. -
Darken the middle:
While the center is damp, drop concentrated Burnt Umber or a dark brown into the very middle of the oval. This ‘wet-on-wet’ technique creates a soft, diffused dark spot. -
Detail the seeds:
Wait for the center to dry completely. Then, using a damp brush with very little dark brown paint (dry brush technique), stipple tiny dots around the outer rim of the center to simulate seeds. -
Paint the stem:
Mix Sap Green with a tiny bit of brown to mute it. Paint the stem with a confident, sweeping stroke. Let the color fade slightly near the bottom for a loose effect. -
Paint the leaf:
Fill in the leaf shape with your green mix. While wet, drop a slightly darker green into the shadow areas of the leaf to give it dimension. -
Final touches:
Assess your painting. If the border between the petals and the brown center looks too harsh, soften it with a clean, slightly damp brush.
Add Sparkle
For a magical touch, splatter tiny droplets of gold watercolor or white gouache near the petals after the painting is fully dry to mimic pollen dust in the air.
Allow your beautiful sunflower to dry completely before removing it from your workspace to display.
BRUSH GUIDE
The Right Brush for Every Stroke
From clean lines to bold texture — master brush choice, stroke control, and essential techniques.
Explore the Full Guide
Layered Petals in Two Rows
Capture the warmth of summer with this detailed sunflower study, characterized by its luminous, two-tiered petal structure and textured center. This project focuses on building depth through transparency and distinct layering, resulting in a vibrant botanical illustration.
Detailed Instructions
Materials
- Cold press watercolor paper (300 gsm)
- Watercolor paints (Yellow Ochre, Cadmium Yellow, Burnt Umber, Sap Green, Sepia)
- Round brushes (flats sizes 2, 4, and 6)
- Pencil (HB or H)
- Kneaded eraser
- White or yellow gouache (optional for details)
- Water cups and paper towels
Step 1: Sketching the Structure
-
Define the center:
Begin by lightly drawing a circle in the upper center of your page to represent the flower’s disk. It doesn’t need to be perfectly round; a slightly organic shape feels more natural. -
Map the front petals:
Around the central disk, sketch the first row of petals. Make these broad and pointed at the tips, ensuring they overlap slightly at the base. Keep your pencil pressure very light so the lines don’t show through the paint later. -
Add the back layer:
In the gaps between the front petals, draw the tips of the second row of petals peaking out behind them. This creates that ‘two-row’ look crucial to the artwork’s depth. -
Sketch stem and leaves:
Draw a sturdy stem curving slightly downward from the flower head. Add two large, jagged-edged leaves attached to the stem, mimicking the serrated edges typical of sunflower foliage.
Muddy Centers?
If the yellow pollen dots blend into the brown center and turn mushy, ensure the brown layer is 100% dry before adding yellow. Use less water on the yellow brush.
Step 2: Painting the Petals
-
Base wash for front petals:
Mix a watery wash of Cadmium Yellow. Paint the front row of petals, leaving tiny slivers of white paper between them to keep the shapes distinct. Let this layer dry completely. -
Base wash for back petals:
Once the front row is dry, paint the back row of petals using a slightly darker mix—perhaps add a tiny touch of Yellow Ochre to your Cadmium Yellow. This value difference instantly pushes them into the background. -
Deepening the color:
Using Yellow Ochre, glaze over the base of the petals where they meet the center. Use a damp, clean brush to soften the edge of this pigment, blending it outward toward the tip. -
Adding texture lines:
Switch to your smallest brush (size 2). Mix a Burnt Umber or a darker yellow-brown. Paint thin, delicate veins running from the base of the petal toward the tip to mimic the crinkled texture of the flower. -
Shadowing the layers:
To separate the layers further, add a cast shadow on the back petals right where the front petals overlap them. A dilute mix of purple or brown works well here for a natural shadow tone.
Level Up: Dew Drops
Paint 1-2 small, clear water droplets on a petal using lifting techniques and white gouache highlights to make the flower look fresh from the garden.
Step 3: The Center and Foliage
-
First layer of the disk:
Paint the entire center circle with a medium wash of Burnt Umber. While it’s still damp, drop in concentrated Sepia or dark brown around the outer edges to create a domed effect. -
Stippling texture:
Once the center is dry, use the tip of a small brush with thick dark brown paint to stipple dots around the outer rim of the center, creating the seed texture. -
Adding the ‘gold’:
To create the pollen ring, I like to use a clean brush to dab dots of thick Cadmium Yellow or yellow gouache right over the transition zone where the dark center meets the petals. -
Painting the stem:
Paint the stem with Sap Green. While wet, drop a darker green (mixed with a little brown) along one side to give the stem cylindrical volume. -
Leaf details:
Fill the leaves with a light wash of Sap Green. Once dry, paint the veins with a darker green mixture, leaving the spaces between veins lighter to suggest the leaf’s ribbing structure. -
Final leaf texture:
Use a very fine brush to create small, hair-like strokes along the stem and the edges of the leaves for a realistic fuzzy texture. -
Final touches:
Review your painting. If any petal edges look too soft, redefine them with a very thin line of brown paint to make the flower pop against the white paper.
Step back and admire the lovely depth you have achieved with your layered petal technique
Dotted Seed Center Texture
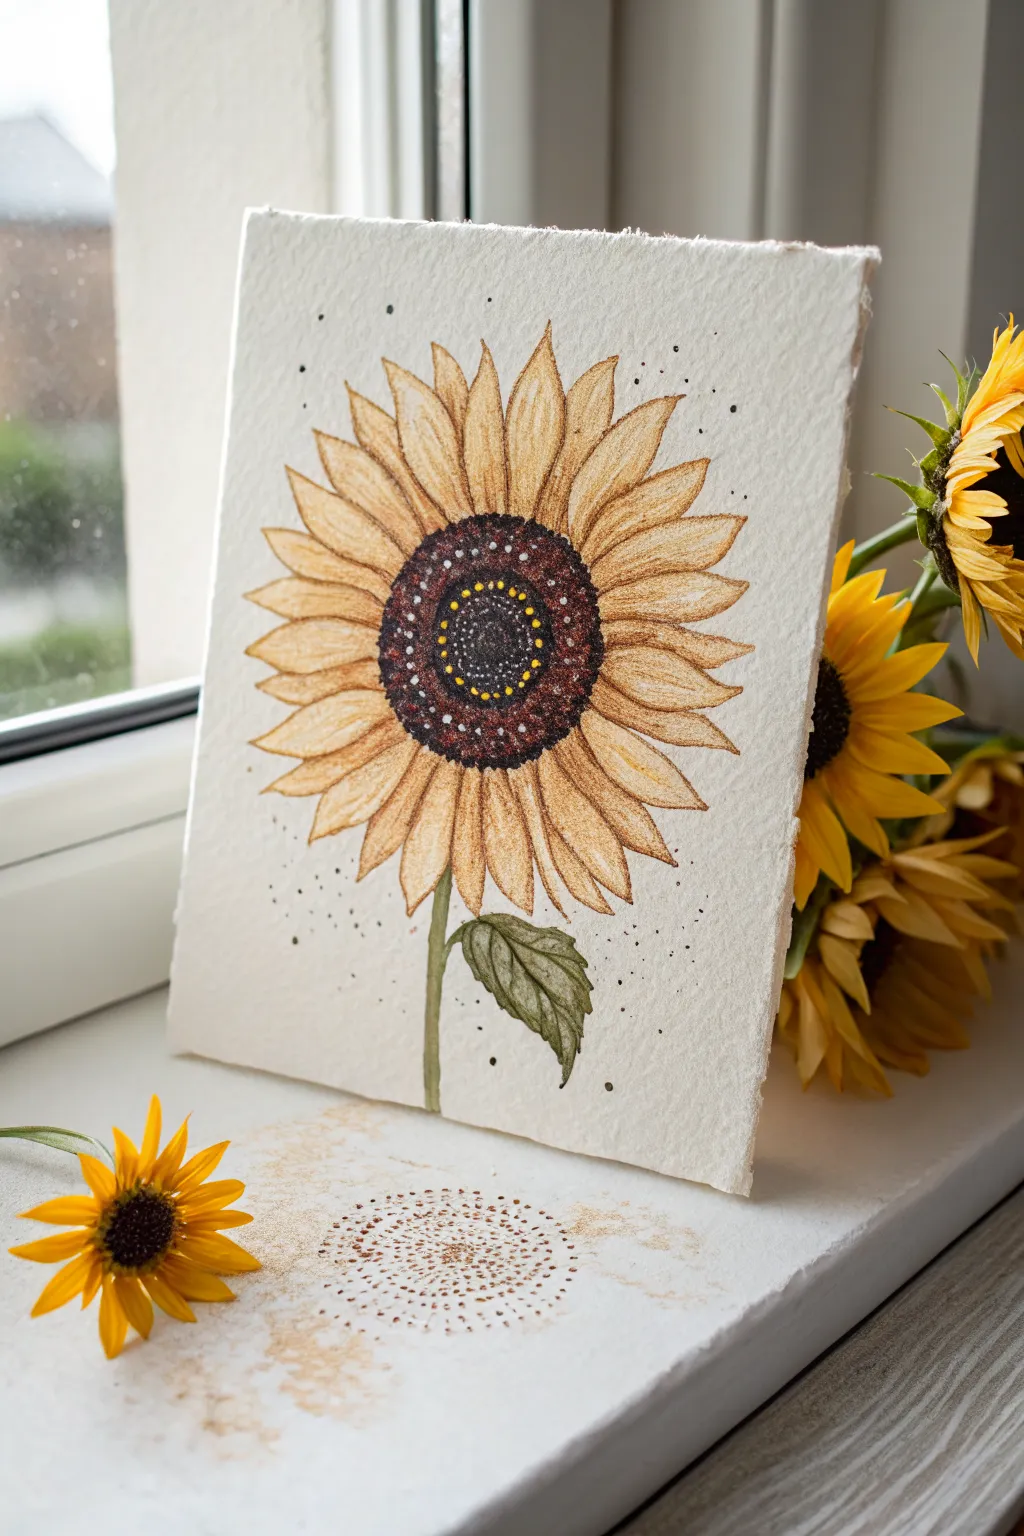
Capture the rustic charm of late summer with this textured sunflower illustration. Using simple stippling techniques and warm earth tones, you’ll create a piece that feels both organic and delightfully detailed.
Step-by-Step Guide
Materials
- Cold press watercolor paper (A5 or 5×7 inches)
- Pencil (HB or H)
- Kneaded eraser
- Watercolor paints (Yellow Ochre, Burnt Sienna, Burnt Umber, Sap Green)
- Fine liner pens (Dark brown or black, 0.1mm and 0.3mm)
- White gel pen or gouache
- Small round brushes (Size 2 and 4)
- Paper towel
Step 1: Sketching the Flower
-
Center Placement:
Begin by lightly sketching a medium-sized circle slightly above the center of your paper. This doesn’t need to be perfectly round; a slight oval shape looks more natural. -
Petal Guidelines:
Draw faint lines radiating outward from the center circle to guide your petal direction. This ensures the flower looks symmetrical without feeling stiff. -
Drafting Petals:
Sketch two layers of petals. Start with the front layer, making them broad and slightly pointed at the tips. Fill the gaps between them with a second layer of petals peeking out from behind. -
Stem and Leaf:
Draw a sturdy stem extending downward from the flower head. Add a single, textured leaf on the right side of the stem, curving slightly downwards. -
Refine Line Work:
Go over your pencil lines with a very light touch to lift excess graphite with your kneaded eraser, leaving just a ghost of the image to guide your painting.
Step 2: Layering Color
-
Petal Base Coat:
Mix a watery wash of Yellow Ochre. Paint the petals loosely, leaving tiny slivers of white paper showing near the tips for natural highlights. -
Deepening Values:
While the first layer is still slightly damp, drop a mix of Burnt Sienna near the base of the petals where they meet the center. Let this bleed outward naturally. -
Center Foundation:
Paint the center circle with a solid coat of Burnt Umber. Don’t worry about texture yet; just establish a dark, rich base color. -
Stem and Leaf Color:
Paint the stem and leaf with Sap Green. Adding a tiny touch of brown to your green mix will give it that late-summer, earthy look rather than a bright spring green. -
Drying Time:
Allow the entire painting to dry completely. The paper must be bone dry before we add the ink details to prevent the pens from bleeding.
Uneven Dots?
Don’t panic! Real distinct sunflower seeds are chaotic. If a cluster of dots gets too dark or dense, balance it by adding a few white gel pen dots over the top once dry.
Step 3: Adding Texture and Detail
-
Petal Definition:
Using a 0.1mm brown fine liner, outline the petals with sketchy, broken lines. Don’t trace perfectly; let the line wander slightly. -
Petal Veins:
Flick the fine liner from the base of the petal upward to create delicate vein lines. Keep these strokes quick and light. -
Stippling the Center:
This is the most crucial step for the seed texture. Using a 0.3mm pen, create a dense ring of dots around the outer edge of the brown center. -
Inner Rings:
Continue stippling in concentric circles moving inward. Leave some spacing between dots as you move toward the very middle to show the underlying paint. -
Bright Accents:
Once the ink is dry, use a white gel pen or yellow gouache to add a ring of bright dots in the middle section of the seed head. This creates dimension and simulates pollen. -
Atmospheric Speckles:
Dip a stiff brush or an old toothbrush into diluted brown paint. Run your thumb across the bristles to flick tiny speckles across the whole paper for a rustic finish. -
Rough Edges:
I love the look of deckled edges, so you can carefully tear the edges of your paper against a ruler if you didn’t start with rough-edged paper.
Golden Glow
Mix a tiny bit of gold metallic watercolor into your yellow paint for the petals. It adds a subtle shimmer that catches the light beautifully when displayed.
Place your finished artwork on a windowsill or frame it to bring a permanent slice of sunshine into your home

PENCIL GUIDE
Understanding Pencil Grades from H to B
From first sketch to finished drawing — learn pencil grades, line control, and shading techniques.
Explore the Full Guide
Petal Tips With Quick Highlights
Capture the warmth of late summer with this cheerful sunflower study, featuring delicate watercolor layers and crisp petal details. The textured paper adds a lovely organic feel to the finished piece, making the golden hues truly pop.
Step-by-Step
Materials
- Cold press watercolor paper (300 gsm)
- Watercolor paints (Cadmium Yellow, Yellow Ochre, Burnt Sienna, Burnt Umber, Sap Green)
- Round watercolor brushes (Size 4 and 8)
- Fine liner brush (Size 0 or 1)
- HB pencil
- Kneaed eraser
- 2 jars of water
- Paper towels
Step 1: Sketching and Center
-
Light Outline:
Begin by lightly sketching a large circle for the flower head and a smaller circle inside for the center disc. Keep your pencil strokes faint so they don’t show through the transparent paint later. -
Drafting Petals:
Around the inner circle, draw long, teardrop-shaped petals radiating outward. Overlap them slightly to create depth, making some appear behind others. Don’t worry about perfect symmetry; nature is rarely perfect. -
Adding the Stem:
Sketch a thick, slightly curved stem descending from the flower head, and add two large, jagged leaves branching off near the bottom. -
Base for the Center:
Mix a wash of Burnt Sienna and Burnt Umber. With your size 4 brush, fill in the center circle. Use a stippling motion (tapping the brush tip) rather than smooth strokes to immediately suggest the seedy texture. -
Darkening the Core:
While the center is still damp, drop concentrated Burnt Umber or a tiny touch of black into the very middle. Let this bleed outward slightly to create a natural gradient from dark center to lighter edge.
Step 2: Painting the Petals
-
First Petal Wash:
Mix a vibrant Cadmium Yellow with plenty of water. Paint the entire shape of each petal. To keep the colors clean, I like to paint every other petal first, letting them dry before painting the touching neighbors. -
Adding Warmth:
While the yellow wash is still wet on a petal, touch a bit of Yellow Ochre to the base of the petal (near the center disc). Let it bleed upward naturally to simulate shadow. -
Leaves and Stem:
Mix Sap Green with a touch of brown to get an olive tone. Paint the stem and leaves. Leave tiny slivers of white paper along the leaf veins to act as natural highlights. -
Second Layer Glazing:
Once the first layer is completely dry, mix a slightly stronger Yellow Ochre. Glaze this over the petals that are meant to be in the background or shadowed by overlapping petals. -
Defining Edges:
Using the tip of your size 4 brush and a mix of Yellow Ochre and Burnt Sienna, carefully paint thin lines along the separation points between petals to distinguish them clearly.
Bleeding Colors?
If petals bleed into each other, you’re painting adjacent areas too quickly. Wait for one petal to be bone-dry before starting its neighbor to keep edges crisp.
Step 3: Details and Highlights
-
Petal Veins:
Switch to your fine liner brush. Mix a watery orange-brown hue. Paint very fine, sweeping lines from the base of the petals outward to create delicate veining. -
Deep Shadows:
Add small, triangular shadows right where the petals meet the brown center using a dark brown mix. This lifts the center disc forward visually. -
Texturing the Center:
Go back to the brown center disc. Use the fine brush to stipple tiny dark dots over the dried wash, intensifying the seed texture, especially around the outer ring of the center. -
Leaf details:
Strengthen the shadows on the underside of the leaves with a darker green mix, blending the edges softly into the lighter green areas. -
Final Highlights:
This is the crucial step for that glowing look. If you lost any highlights, use a tiny amount of opaque white gouache or a white gel pen to add very minimal, swift ticks to the very tips of the petals and the top edges of the leaves.
Elevate It
Add a sprinkle of salt onto the wet center disc wash. As it dries, the salt pushes pigment away, creating an incredible, complex texture perfect for seeds.
Step back and admire how your simple layering created distinct, glowing petals full of life
Blue Sky Gradient Sunflower
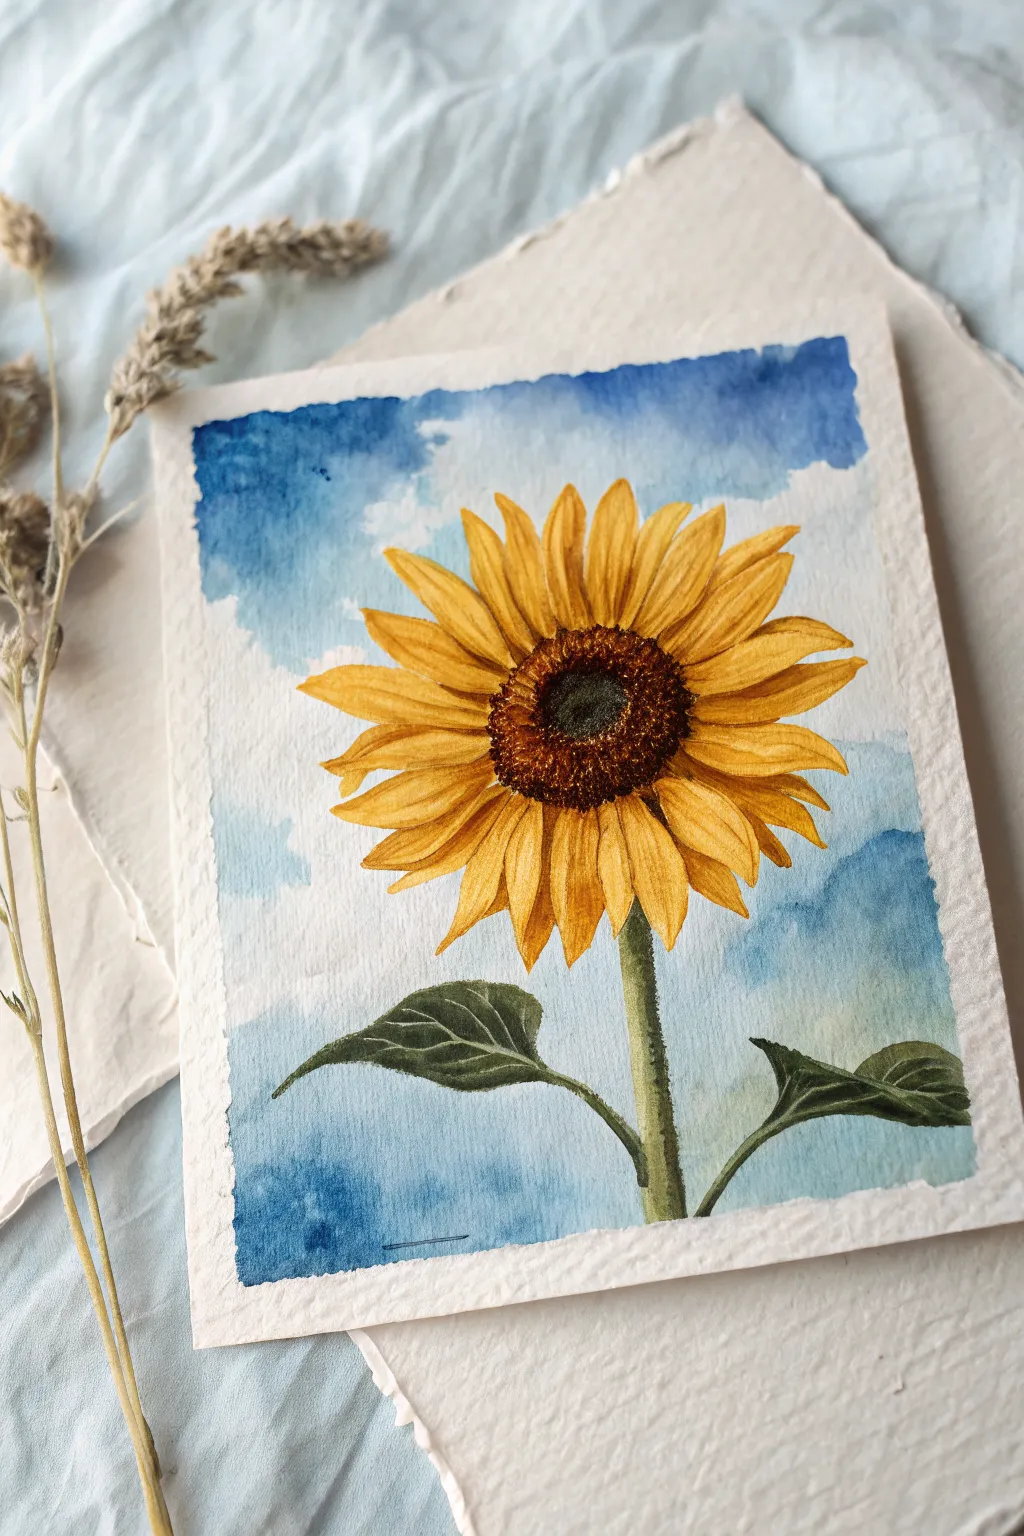
Capture the warmth of a perfect summer day with this bright and cheerful watercolor sunflower. The contrast between the vibrant yellow petals and the dreamy blue gradient background makes this piece pop off the textured paper.
Step-by-Step Guide
Materials
- Cold press watercolor paper (300 gsm)
- Watercolor paints (Cadmium Yellow, Yellow Ochre, Burnt Sienna, Burnt Umber, Ultramarine Blue, Prussian Blue, Sap Green)
- Round watercolor brushes (size 2, 6, and 10)
- Masking fluid (optional)
- Pencil (HB or 2H)
- Kneaded eraser
- Two jars of water
- Paper towels
- Painter’s tape
Step 1: Preparation and Sketching
-
Prepare the paper:
Tape down your watercolor paper to a hard board on all four sides. This prevents buckling when you add water and creates that crisp, clean white border seen in the example. -
Map the center:
Lightly sketch a circle in the upper-middle portion of your paper. This will be the dark center of the sunflower. Keep your pencil lines very faint so they don’t show through the yellow paint later. -
Draw the petals:
Sketch two rows of petals radiating from the center. Make the front row petals wider and slightly shorter, and the back row petals peeking out between them, slightly longer and thinner. Don’t worry about perfect symmetry; nature is imperfect. -
Add the stem and leaves:
Draw a sturdy stem extending straight down from the flower head. Add two large, heart-shaped leaves branching off near the bottom, giving them a slight curve as if they are drooping under their own weight.
Bleeding Colors?
If blue sky bleeds into yellow petals, you didn’t let the sky dry enough! Wait until paper feels room temp to the touch, not cool, before starting the flower.
Step 2: Painting the Sky
-
Masking (Optional):
If you’re worried about painting over the yellow petals with blue, apply masking fluid carefully over the sketched flower and leaves. Let it dry completely. If you skip this, just paint carefully around your pencil lines. -
Wet-on-wet technique:
Using your size 10 brush, wet the entire background area with clean water. The paper should glisten but not have standing puddles. -
Create the gradient:
Load your brush with a mix of Ultramarine and Prussian Blue. Start at the top corners, dropping in concentrated pigment. As you move down the paper, add more water to your brush to dilute the color. -
Form the clouds:
While the blue paint is still wet, lift out pigment using a crumpled paper towel or a dry, clean brush to create soft, white cloud shapes. This negative painting technique gives that fluffy, airy look.
Level Up: Salt Texture
While the blue sky wash is still wet, sprinkle a pinch of table salt on the paint. As it dries, it creates beautiful, starry textures perfect for a summer sky.
Step 3: The Vibrant Sunflower
-
Base layer for petals:
Once the sky is bone dry (remove masking fluid now if used), paint all the petals with a light wash of clean Cadmium Yellow. Let this layer dry fully. -
Define the shadows:
Mix a little Yellow Ochre with your Cadmium Yellow. Use the size 6 brush to paint the base of the petals (where they meet the center) and add lines along the veins of each petal. -
Deepen the contrast:
For the petals in the background or underneath others, apply a glaze of dilute Burnt Sienna to create depth and separation between the layers. -
Texture the center:
Fill the center circle with a mix of Burnt Sienna and Burnt Umber. While it’s still damp, drop in concentrated Burnt Umber or a touch of black in the very middle. -
Stippling details:
Using the tip of your smallest brush (size 2), stipple tiny dots of dark brown and black around the outer ring of the center to mimic the texture of seeds.
Step 4: Stem and Leaves
-
Base green layer:
Paint the stem and leaves with a light wash of Sap Green. I usually like to keep this initial layer quite watery to capture light. -
Shadows and veins:
While the green is still slightly damp, drop in a darker mix of Sap Green and a tiny bit of blue on the underside of the leaves and the shadowed side of the stem. -
Leaf detailing:
Wait for the leaves to dry, then use your size 2 brush to paint thin, darker green lines for the veins. Leave tiny slivers of the lighter green showing for highlights. -
Fuzzy texture:
To make the stem look fuzzy like a real sunflower, use a fairly dry brush with green paint and gently scumble (drag) it along the edge of the stem, creating a rough, textured outline.
Peel off your tape to reveal those crisp edges and enjoy your slice of eternal summer.


Sunflower in a Simple Jar
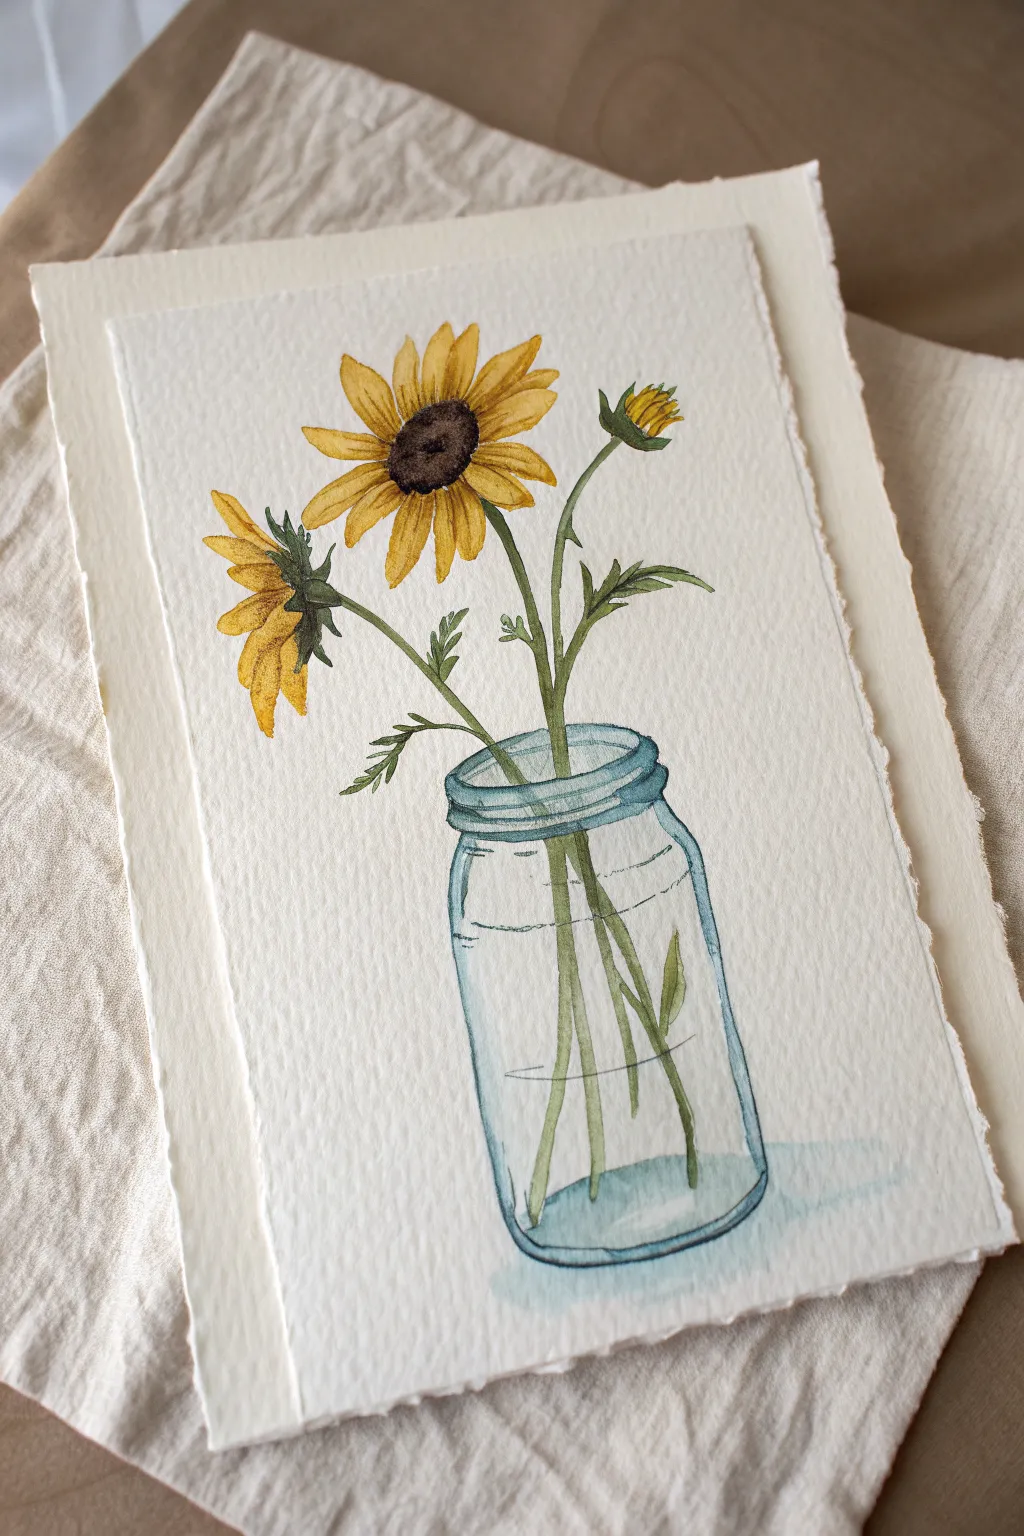
Capture the rustic charm of late summer with this delicate watercolor painting featuring cheery yellow blooms in a vintage glass jar. This project teaches you how to create transparency effects for the glass while keeping the flowers vibrant and lively.
Step-by-Step
Materials
- Cold-pressed watercolor paper (300 gsm)
- Watercolor paints (Cadmium Yellow, Yellow Ochre, Burnt Umber, Sap Green, Phthalo Blue)
- Round brushes (sizes 2, 4, and 6)
- Pencil (HB or lighter) and kneaded eraser
- Two jars of water
- Paper towels or a rag
- Masking tape (optional)
Step 1: Sketching the Composition
-
Outline the jar:
Begin by lightly sketching the outline of a mason jar in the center of your paper. Focus on the curves of the rim and the slightly threaded neck area, keeping your pencil lines extremely faint so they don’t show through the paint later. -
Position the main flowers:
Sketch the center of the main sunflower near the top middle. Add a second flower turning away on the left, and a small, tight bud on the right side. -
Connect with stems:
Draw three distinct stems crossing inside the jar. Remember that light refraction makes stems look slightly broken or magnified where they enter the water line, so offset the lines slightly at the water level. -
Map out the leaves:
Add small, jagged leaves sprouting from the stems above the jar rim. Keep these loose and organic rather than stiff.
Glass Looks Flat?
To make glass look round, leave the middle of the jar almost white and concentrate the blue color only on the edges and rims. The contrast creates the curve.
Step 2: Painting the Blooms
-
First wash of petals:
Using your size 4 brush, mix a watery Cadmium Yellow. Paint the petals of the main flower, leaving tiny white gaps between them to define their individual shapes. Repeat for the side flower. -
Adding depth to the yellow:
While the yellow is still slightly damp, drop in touches of Yellow Ochre near the base of the petals (where they meet the center). This creates a natural shadow without making the flower look muddy. -
Painting the flower center:
Mix Burnt Umber with a tiny touch of blue to create a deep, dark brown. Paint the center of the main sunflower. I like to stipple this part—dabbing the brush tip repeatedly—to mimic the texture of seeds. -
Defining the bud:
Paint the tight yellow tip of the bud on the right, then enclose it with green sepals using Sap Green. Use the very tip of your brush for the fine points. -
Adding shadows to the side flower:
For the flower turning away on the left, paint the green calyx (the cup holding the petals) first, then deepen the shadows on the underside of the yellow petals with a mix of Yellow and a hint of Brown.
Pro Tip: Texture
Let the flower centers dry completely, then use a white gel pen to add tiny dots over the dark brown paint. This mimics the pollen and seeds perfectly.
Step 3: Stems and Foliage
-
Upper stems:
Using the size 2 brush and Sap Green, carefully paint the stems above the jar. Make the lines slightly uneven for a more natural look, adding small thorns or bumps if you wish. -
Painting the leaves:
Fill in the sketched leaves with green. To make them interesting, let some parts be a watery pale green and drop darker pigment into the tips while wet. -
Stems inside the jar:
Paint the stems inside the glass. These should be slightly lighter and more blurred than the stems outside to suggest they are behind glass and water.
Step 4: Creating the Glass Jar
-
Mixing the glass color:
Prepare a very diluted wash of Phthalo Blue with a tiny touch of green to get that vintage ‘coke bottle’ glass color. It should be barely tinted water. -
Defining the rim:
With a steady hand and a size 2 brush, paint the rings of the jar’s neck. Use more pigment here to show the thickness of the glass, leaving crisp white highlights unpainted. -
Washing the jar body:
Paint the sides and bottom of the jar with your pale blue wash. Leave the center mostly white or extremely pale to show the reflection of light on the curved surface. -
Water line and bottom:
Paint a thin ellipse for the water line inside the jar. Darken the blue pigment significantly at the very bottom corners and base of the jar where the glass is thickest. -
Cast shadow:
Using a watery version of your glass blue mix, add a soft shadow pooling to the right of the jar base to ground the object.
Allow your painting to dry fully before framing this slice of summer sunshine
Mini Sunflower Bouquet Card
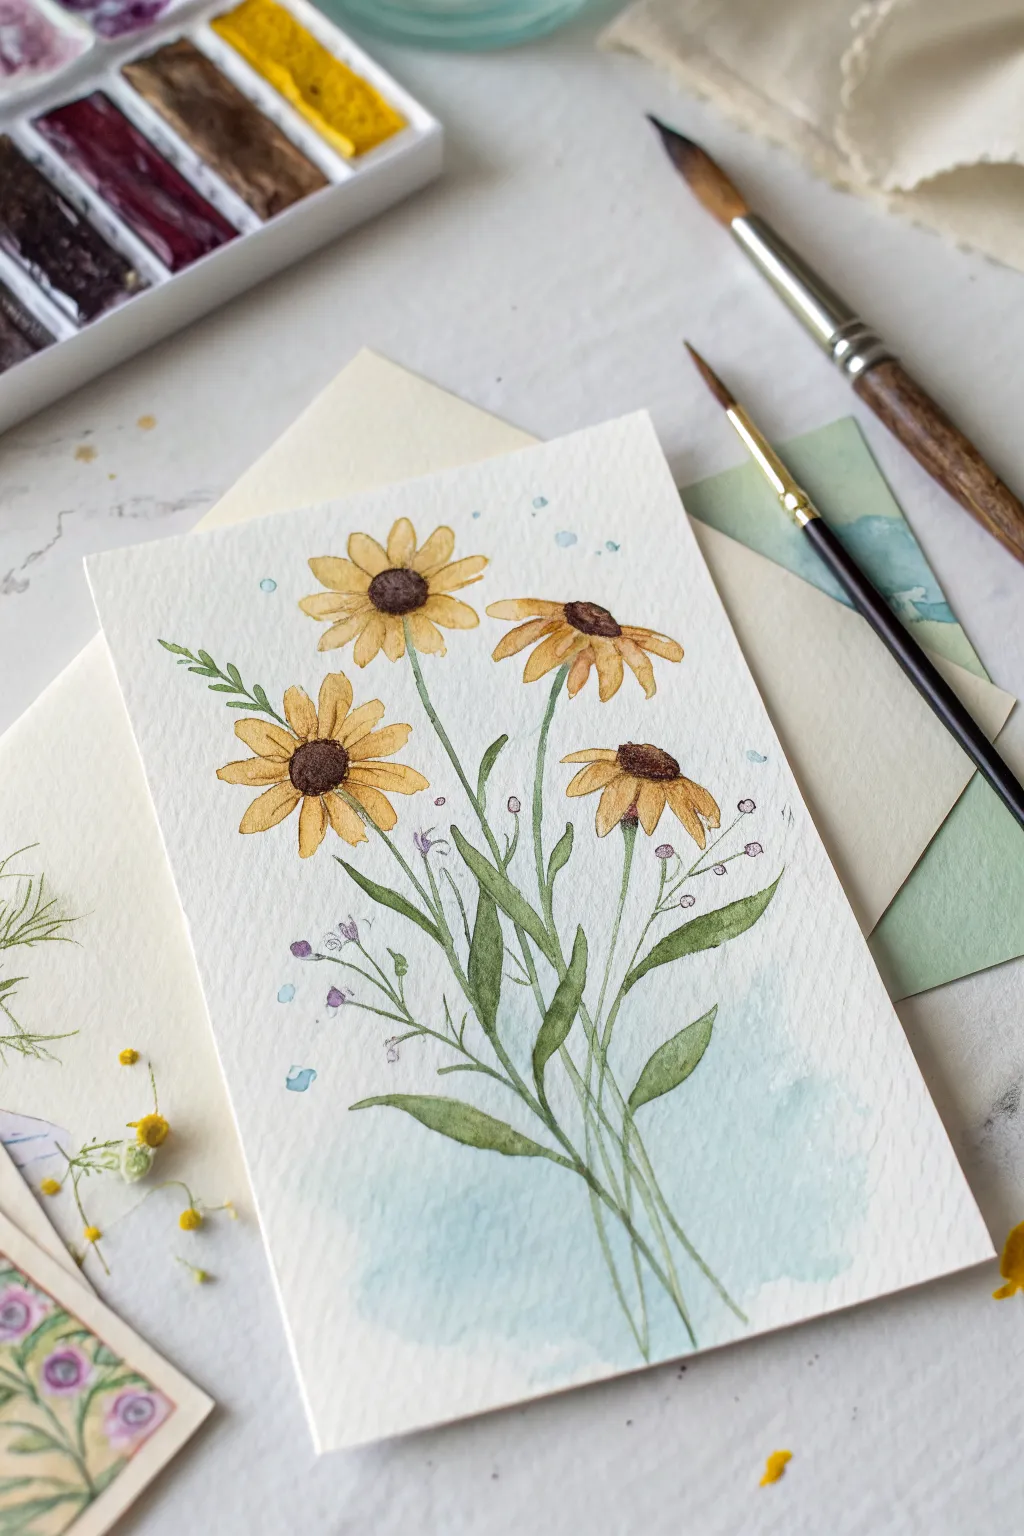
Capture the warmth of late summer with this charming watercolor card, featuring soft yellow blooms and delicate greenery. The loose, watery style creates a gentle, handmade feel that’s perfect for a thoughtful greeting card or a small framed art piece.
Step-by-Step Tutorial
Materials
- Cold press watercolor paper (approx. 5×7 inches)
- Watercolor paints (Yellow Ochre, Burnt Sienna, Sap Green, Cobalt Blue, Burnt Umber)
- Round watercolor brushes (size 6 for washes, size 2 for details)
- Pencil (HB or H for light lines)
- Kneaded eraser
- Jar of clean water
- Paper towel or rag
- Palette for mixing
Step 1: Planning the Composition
-
Sketch the flower placement:
Begin with a very light pencil sketch. Draw four loose ovals to mark where the flower heads will go—two facing forward on the left, and two angled slightly downward on the right. -
Map the stems:
Draw thin, curving lines extending downwards from the flower heads. Let the stems cross over each other naturally near the bottom to create a gathered bouquet look. -
Add leaf outlines:
Sketch long, lance-shaped leaves attached to the main stems. Vary their sizes, drawing some pointing upward and others drooping slightly for realistic movement. -
Indicate filler flowers:
Draw tiny, faint circles on thin branching sprigs in the empty spaces between the main stems to represent the delicate purple filler flowers. -
Lighten the guidelines:
Take your kneaded eraser and gently roll it over the entire sketch. You want the lines to be barely visible—just enough to guide your brush without showing through the paint.
Muddy Petals?
If your brown centers are bleeding too much into the yellow petals, your petals were too wet. Wait for the yellow to dry completely before painting the centers next time.
Step 2: Painting the Blooms
-
Mix your petal color:
On your palette, dilute Yellow Ochre with plenty of water to create a soft, transparent straw-yellow hue. -
Paint the petals:
Using the size 6 brush, paint the petals radiating from the center of each flower. Keep the strokes loose and don’t worry if they touch or bleed slightly; leave small white gaps between some petals for highlights. -
Add warmth to the petals:
While the yellow paint is still slightly damp, drop a tiny bit of undiluted Yellow Ochre or a touch of orange near the base of the petals (closest to the center) to add depth. -
Paint the centers:
Once the petals are mostly dry, mix Burnt Umber with a tiny touch of Burnt Sienna. Paint the round centers of the flowers. For the side-facing blooms, paint a cone-like shape protruding from the petals. -
Texture the centers:
While the brown centers are damp, touch the very top edge with a slightly darker brown mixture to give the impression of dimension and shadow.
Step 3: Adding Greenery and Details
-
Mix the green shades:
Prepare a puddle of Sap Green. Make a second puddle by mixing Sap Green with a little Cobalt Blue for a cooler, shadowed green. -
Paint the stems:
Switch to your size 2 brush. Using the lighter Sap Green mixture, carefully trace the stem lines from top to bottom with a steady hand. -
Fill in the leaves:
Paint the leaves using the size 6 brush. Press down at the base of the leaf to widen the stroke, then lift as you reach the tip. I often switch between the lighter and cooler green mixtures here to create variety. -
Connect the buds:
Paint the thin, branching stems for the filler flowers. Use the very tip of your size 2 brush for these extremely delicate lines. -
Add the purple buds:
Mix a very watery purple using red and blue. Dab tiny, irregular dots onto the ends of the thin branching stems to create the wild filler flowers.
Paper Matters
Use 100% cotton paper for that classic texture. It creates softer edges for the blue background wash compared to wood pulp paper, which can dry with hard lines.
Step 4: Final Touches
-
Create the background wash:
Mix a very distinct, watery puddle of Cobalt Blue with plenty of clean water. It should be barely tinted. -
Apply the background:
Paint a loose, organic blob of this blue water behind the lower stems and leaves. Let the color flow unevenly and fade out into the white paper at the edges. -
Splatter texture:
Load your brush with the pale blue wash and tap the handle against your finger to splatter small droplets around the bouquet, adding energy to the composition. -
Define the petals:
Once everything is bone dry, use a fine liner or your smallest brush with a slightly darker yellow-brown mix to add very faint lines separating overlapping petals if they merged too much. -
Darken the flower centers:
Finally, stipple (dot) a concentrated dark brown onto the bottom curve of the flower centers to emphasize their roundness.
Let your beautiful floral card dry completely before writing a message inside.
Sunflower Field With Simple Stamps
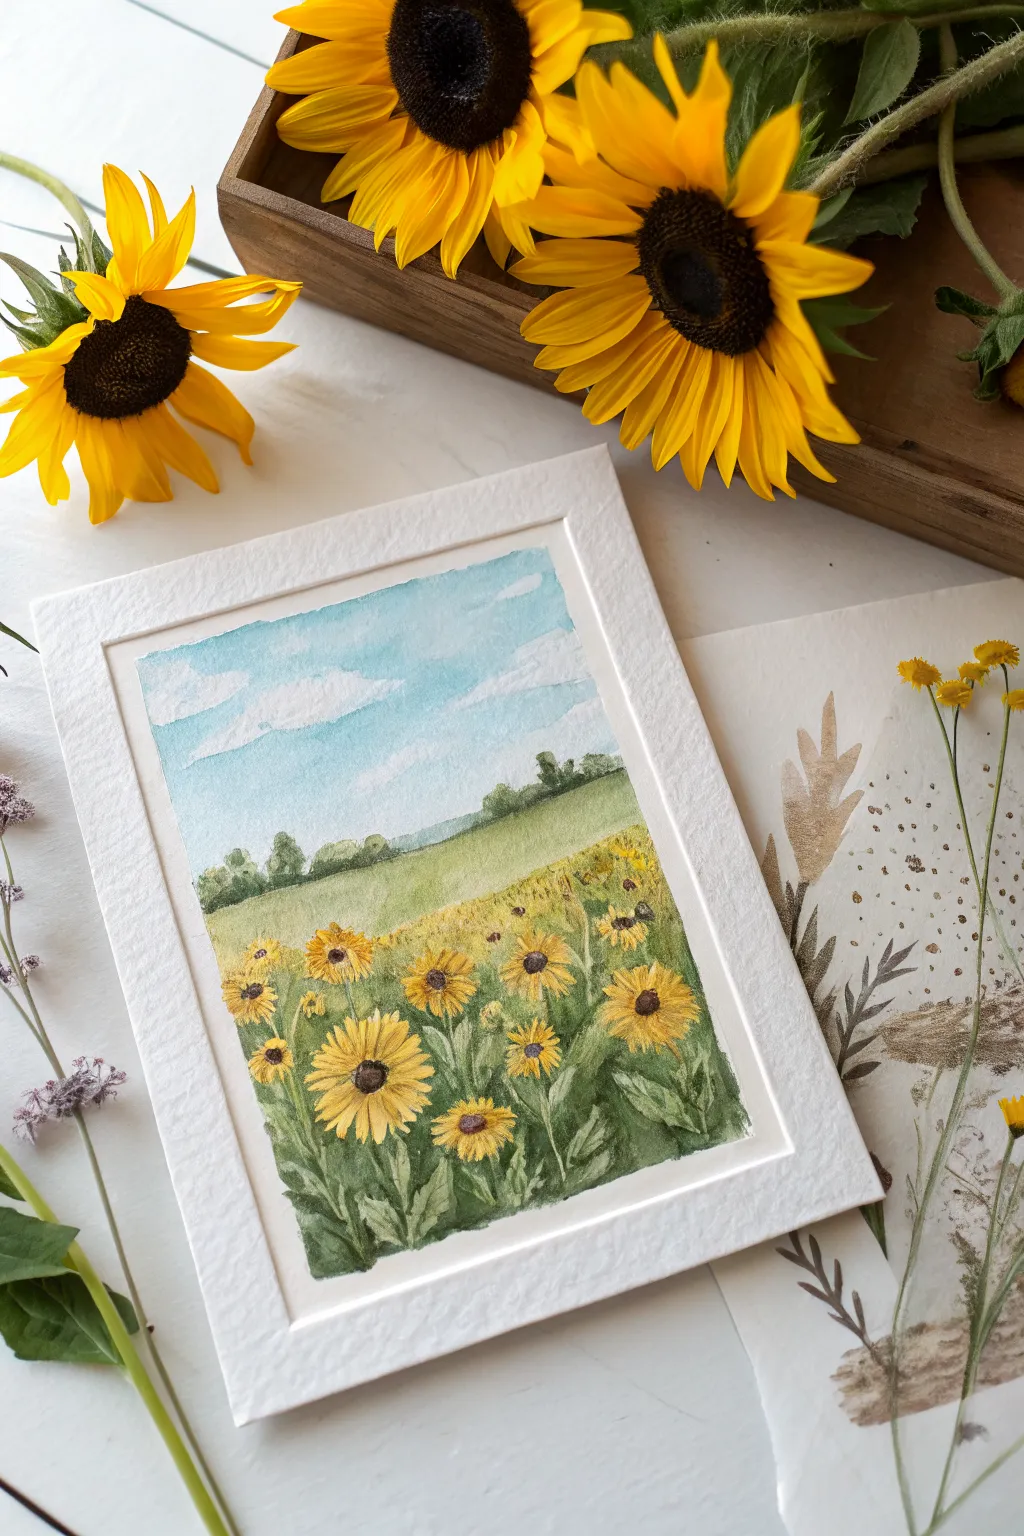
Capture the warmth of a summer afternoon with this serene watercolor landscape featuring a field of golden sunflowers beneath a soft blue sky. This project combines simple washes for the background with detailed floral work in the foreground, creating depth and charm perfect for framing.
How-To Guide
Materials
- Cold press watercolor paper (approx 5×7 inches)
- Watercolor paints (Cerulean Blue, Sap Green, Olive Green, Yellow Ochre, Cadmium Yellow, Burnt Umber)
- Round brushes (size 6 for washes, size 2 for details)
- Masking tape or painter’s tape
- Pencil and kneaded eraser
- Paper towels
- Two jars of water
- Optional: White gouache for highlights
- Textured cardstock for mounting
Step 1: Setting the Scene
-
Prepare your paper:
Tape down your watercolor paper to a hard board using masking tape. This creates a clean white border and prevents the paper from buckling when wet. -
Sketch the horizon:
Using a pencil, lightly draw a horizontal line about two-thirds of the way down the paper. This separates the sky from the field. Lightly sketch a few circles in the foreground where your largest sunflowers will sit. -
Paint the sky wash:
Wet the sky area with clean water. Load your size 6 brush with a diluted Cerulean Blue and sweep it across the top, fading it out as you approach the horizon line. Leave small, irregular patches of white paper dry to form soft clouds. -
Refine the clouds:
While the sky is still damp, you can lift out pigment with a thirsty (clean, damp) brush or a paper towel to define fluffy white cloud shapes.
Stamp Instead of Paint
For the distant yellow flowers, try dipping the eraser end of a pencil into yellow paint and stamping it. It creates perfect, uniform circles for far-away blooms.
Step 2: Building the Landscape
-
Create the distant tree line:
Once the sky is dry, mix a soft green using Sap Green and a touch of Burnt Umber. Paint small, uneven bush shapes along the horizon line. Vary the height to make it look like a natural row of trees. -
Lay the field base:
For the grassy field, mix a light, watery wash of Olive Light or a yellow-green. Paint the entire area below the tree line, carefully painting *around* the pencil circles you drew for the foreground sunflowers. -
Darken the foreground:
While the green wash is still wet, drop in darker green (Sap Green mixed with a little blue) at the very bottom of the page. This gradient helps create the illusion of distance.
Muddy Greens?
If your flower stems are blending into the background wash and looking muddy, ensure the first layer is 100% dry before adding the darker definition layers.
Step 3: Bringing the Flowers to Life
-
Paint the petals:
Using your size 2 brush and Cadmium Yellow mixed with a bit of Yellow Ochre, paint the sunflower petals. Start from the center and pull brushstrokes outward. Make the petals in the foreground larger and more defined. -
Add distant blooms:
For the flowers further back in the field, simply dab small spots of yellow paint. You don’t need detailed petals here; simple distinct dots suggest a field full of blooms. -
Detail the centers:
Once the yellow petals are fully dry, mix Burnt Umber with a tiny touch of blue to make a deep brown. Paint the centers of the sunflowers, stippling (dotting) the paint to give them a fuzzy texture. -
Add stems and leaves:
Switch back to your green mix. Paint stems connecting to the flower heads and add large, jagged leaves at the bottom among the foreground flowers. -
Refine the foliage:
Use a darker green to paint negative space between the stems and leaves. This dark background makes the bright yellow flowers pop forward.
Step 4: Finishing Touches
-
Highlight the centers:
I like to take a tiny bit of Yellow Ochre or white gouache and dab a small highlight on the upper left side of the brown flower centers to show where the sun hits them. -
Add cloud shadows:
If your clouds look too flat, mix a very watery grey-purple and add a thin shadow to the bottom edge of the white cloud shapes. -
Remove tape:
Wait until the painting is completely bone-dry. Peel the tape away slowly at a 45-degree angle to reveal your crisp edges. -
Mount artwork:
To mimic the look in the photo, mount your painting onto a piece of textured white cardstock or watercolor paper that is slightly larger, creating a secondary frame effect.
Place your finished piece in a simple frame or on a mini easel to bring a daily dose of sunshine into your room
Loose Brushstroke Sunflower Close-Up
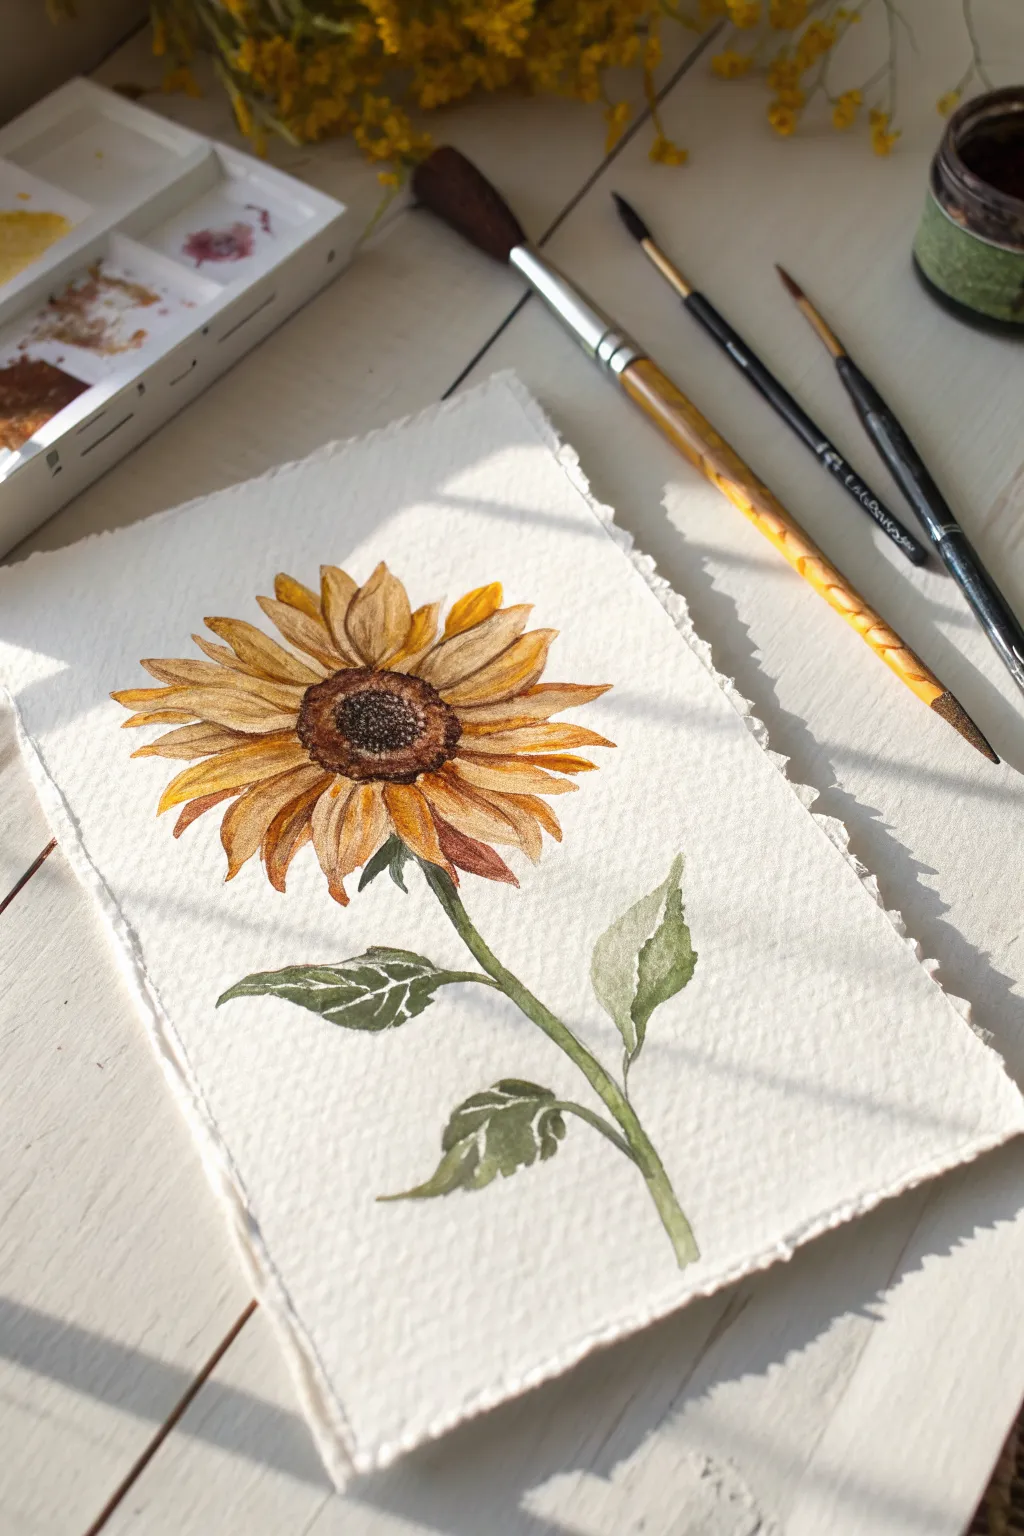
Capture the golden warmth of late summer with this charming watercolor study. Featuring delicate, layered petals and a textured center, this project uses the white of the paper to bring natural light into your floral composition.
Step-by-Step Guide
Materials
- Cold press watercolor paper (deckle edge preferred, approx. 5×7 inches)
- Watercolor paints (Yellow Ochre, Cadmium Yellow, Burnt Sienna, Burnt Umber, Sap Green)
- Round watercolor brushes (Size 4 and Size 8)
- Fine detail brush (Size 0 or 1)
- Pencil (HB or 2H)
- Kneaded eraser
- Clean water jar
- Paper towels
Step 1: Sketching the Bloom
-
Outline the center:
Begin by lightly sketching a slightly flattened oval in the upper-middle section of your paper. This will be the seed head. Keep your pencil lines very faint so they don’t show through the transparent watercolor later. -
Draft the petals:
Draw the petals radiating outward from the center. Aim for variety in their shapes—some should be broad and fully visible, while others can be tucked behind or curving slightly. Don’t make them perfect; natural imperfections add character. -
Add the stem and leaves:
Sketch a gentle, slightly curved line extending downward for the stem. Add two or three leaves along the stem, keeping their edges slightly jagged to mimic a real sunflower leaf structure.
Step 2: Painting the Petals
-
First wash:
Using your Size 8 brush, mix a watery wash of Cadmium Yellow. Paint the entire shape of the petals, but be sure to leave tiny slivers of white paper between some petals or at the tips for highlights. -
Shadows and depth:
While the first layer is still slightly damp, drop in touches of Yellow Ochre near the base of the petals where they meet the center. This wet-on-wet technique creates a soft, natural gradient. -
Defining the petals:
Once the first layer is dry, mix a stronger concentration of Yellow Ochre with a tiny touch of Burnt Sienna. Use the Size 4 brush to paint the shadows between overlapping petals and add linear texture lines along the length of the petals. -
Deepening the tones:
Add a few strokes of pure Burnt Sienna to the tips of a few petals or the undersides of those that are curling. This adds that sun-baked, late-afternoon look to the flower.
Muddy Centers?
Make sure your yellow petals represent completely dry before painting the brown center. If wet paint touches wet paint here, the brown will bleed into the yellow petals.
Step 3: Creating the Center
-
Base layer:
Paint the oval center with a wash of Burnt Sienna. Keep the edges soft where it touches the yellow petals. -
Adding texture:
While the center is still wet, drop in concentrated Burnt Umber around the outer rim of the oval. This creates a domed effect, making the center look 3D. -
Stippling details:
Wait for the center to dry completely. Switching to your detail brush or the tip of the Size 4, use a dark brown-black mix to stipple tiny dots across the center. Concentrate the dots on the shadowed side (usually the bottom left) to enhance the texture.
Add Some sparkle
Once the painting is totally dry, use a white gel pen to add tiny dots to the dark center seeds or highlight the very tips of the leaves for extra dimension.
Step 4: Stem and Leaves
-
Base green:
Mix a light wash of Sap Green and paint the stem and the basic shape of the leaves. I like to keep this initial layer very fluid and transparent. -
Leaf details:
Once the green base is dry, mix a darker green by adding a little Burnt Umber to your Sap Green. Paint the veins and shadow areas on the leaves, leaving the lighter base color visible as highlights. -
Final stem touches:
Run a thin line of the darker green along one side of the stem to give it roundness and volume.
Step 5: Finishing Touches
-
Assess contrast:
Step back and look at your painting. If the petals look flat, add a glaze of orange-yellow to the shadowed areas. -
Refine edges:
Use a barely damp brush to soften any hard edges that feel too crisp, particularly where the petals meet the center.
Allow your beautiful sunflower to dry completely before framing it or gifting it to a friend
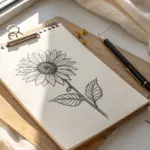
Bold Outline Sunflower Cartoon Style
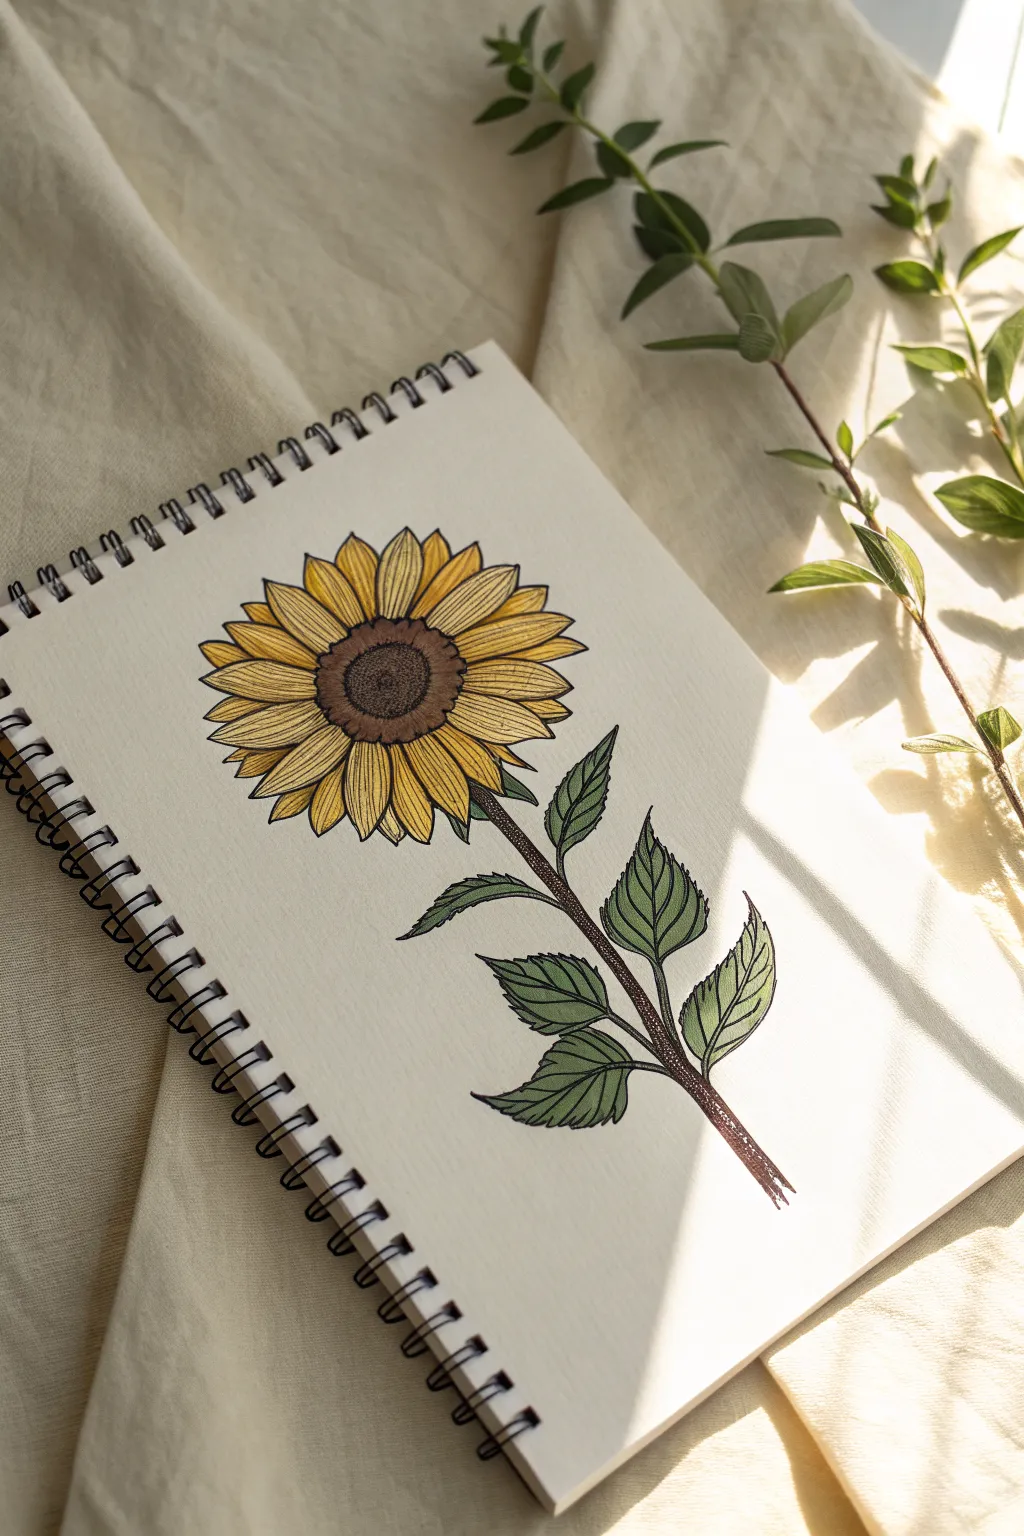
Capture the golden warmth of late summer with this delicately illustrated sunflower in your sketchbook. Combining crisp ink linework with soft washes of color creates a striking balance between bold illustration and botanical study.
Step-by-Step Tutorial
Materials
- Spiral-bound sketchbook (mixed media or heavy drawing paper)
- Pencil (HB or 2H)
- Eraser
- Fine liner pens (Black, sizes 0.1, 0.3, and 0.5)
- Watercolor paints or alcohol-based markers (Yellow, Ochre, Brown, Green)
- Small round paintbrush (size 2 or 4)
- Water cup and paper towel
Step 1: Penciling the Framework
-
Establish the center:
Start by drawing a medium-sized circle in the upper third of your page. This doesn’t need to be perfectly round; a slight oval shape gives the flower a natural tilt. -
Draft the petals:
Lightly sketch two layers of petals radiating from the center. Draw the front layer first with broad, pointed oval shapes, then fill the gaps behind them with peeking tips of the second layer. -
Add the stem and leaves:
Draw a sturdy, slightly curved stem extending downward from the flower head. Sketch varying sizes of pointed, serrated leaves attached to the stem in an alternating pattern, angling them upwards.
Step 2: Inking the Details
-
Outline the center:
Using a 0.5 pen, ink the outer edge of the seed head. Use a slightly bumpy line to suggest texture, rather than a perfect smooth circle. -
Texture the seeds:
Switch to a 0.1 pen to stipple the center. Creating tiny dots and small ‘c’ shapes, pack them denser at the outer ring of the center and leave the middle slightly lighter to suggest dimension. -
Ink the petals:
Outline your petals with the 0.3 pen. Add a central vein line down the middle of each petal, and a few very fine parallel lines near the base of the petals to create shading. -
Define the foliage:
Outline the stem and leaves with the 0.3 or 0.5 pen. Pay close attention to the jagged edges of the leaves. Draw a central vein for each leaf and smaller veins branching out towards the edges. -
Final leaf detailing:
Add fine hatching lines along the veins of the leaves using your thinnest 0.1 pen. This adds that crucial botanical illustration look. -
Clean up:
Once the ink is completely dry—give it a full minute—gently erase all your pencil guidelines to leave a clean black-and-white drawing.
Ink Smearing?
If your black lines bleed when adding paint, your pen isn’t waterproof. Switch to markers for color, or ensure you are using pigment liners labeled ‘waterproof’ or ‘archival’ before painting.
Step 3: Adding Color
-
Base yellow wash:
If using watercolor, wet your brush and pick up a bright lemon yellow. Fill in the petals, but try not to overwork the paper. I find leaving tiny slivers of white paper adds sparkle. -
Deepen the petals:
While the yellow is still slightly damp, drop a touch of yellow ochre or light orange near the base of the petals where they meet the center. This creates a natural gradient. -
Color the center:
Paint the seed head with a medium brown. For the outer ring of the center (the ‘halo’), mix a darker brown or sepia to create a sense of depth and concavity. -
Greenery base:
Paint the stem and leaves with a sap green. Apply it fairly evenly, respecting the lines you drew earlier. -
Shade the leaves:
Mix a tiny bit of brown or indigo into your green. Apply this darker shade along the central veins and the shadowed side of the stem to make the foliage pop off the page. -
Refine contrast:
Once dry, look at the stem. If the ink lines look faded under the paint, carefully re-trace the thickest outline of the stem with your 0.5 pen to restore the bold ‘cartoon’ feel.
Vintage Vibe
Wash the entire background with a very diluted tea stain or pale beige watercolor before starting to give the sketchbook page an aged, antique botanical journal appearance.
Close your sketchbook and admire how a simple combination of line and wash brings such cheerful energy to the page
Sunflower Wreath Circle
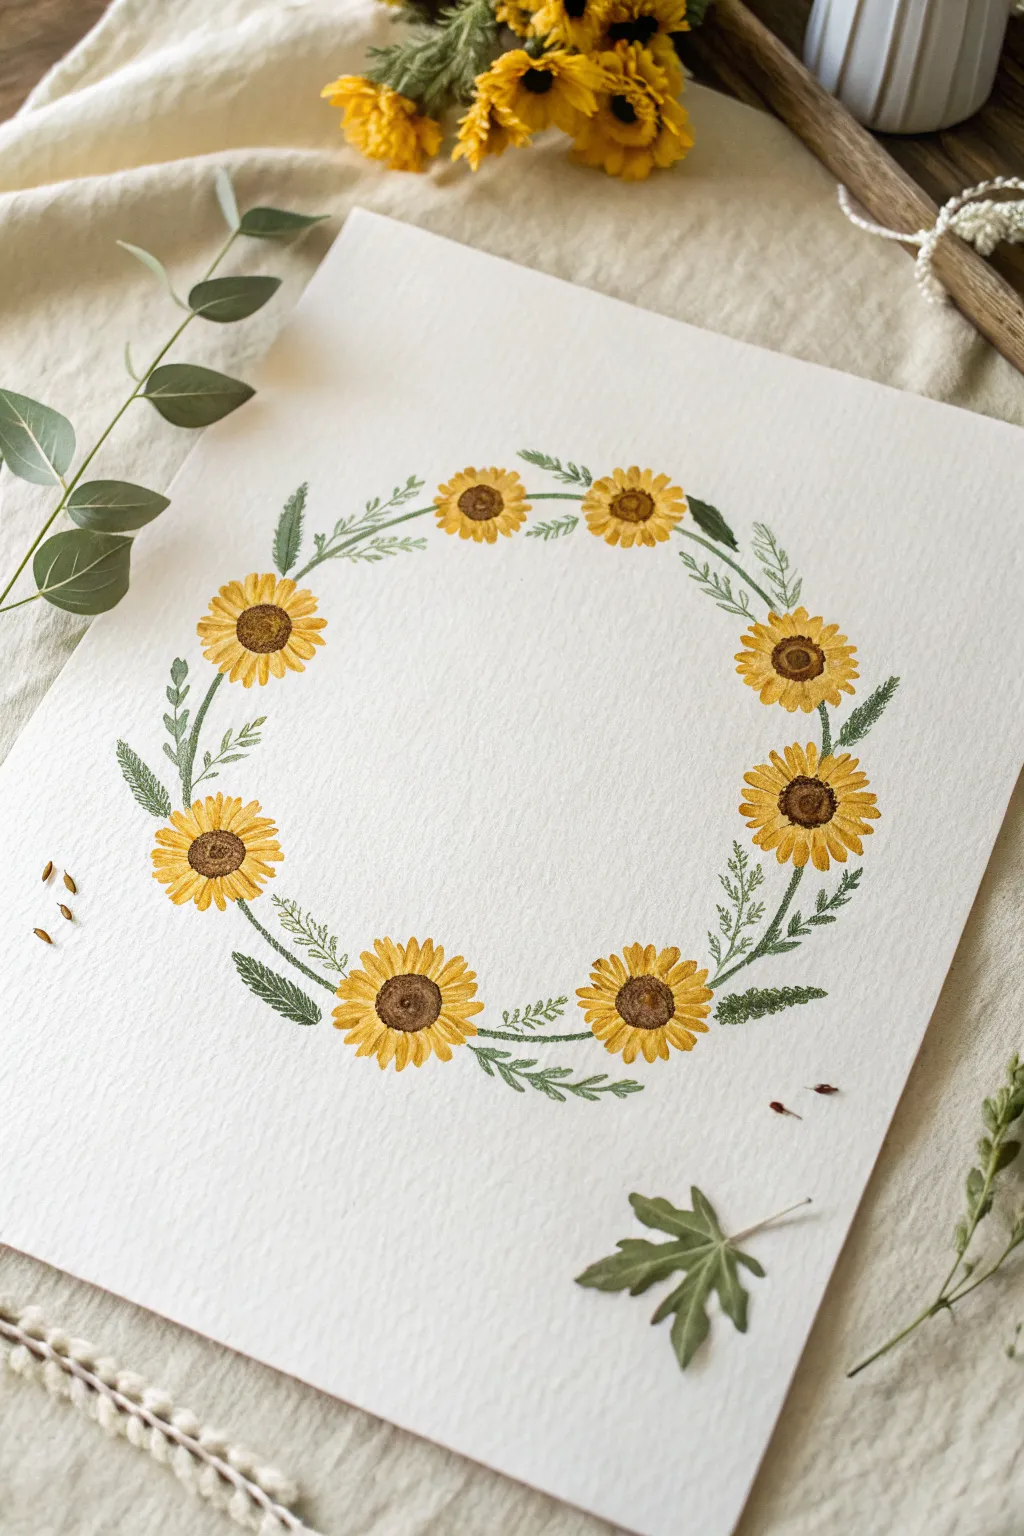
Brighten any room with this delicate watercolor wreath, featuring eight cheerful sunflowers arranged in a perfect circle. The combination of warm ochre petals and soft sage greenery creates a timeless botanical look that is simpler to achieve than it appears.
Step-by-Step
Materials
- Cold-pressed watercolor paper (300 gsm)
- Watercolor paints (Yellow Ochre, Cadmium Yellow, Burnt Sienna, Burnt Umber, Sap Green, Olive Green)
- Round brushes (size 2 and size 6)
- Pencil (HB or lighter)
- Compass or a circular bowl to trace
- Kneaded eraser
- Jar of clean water
- Paper towels
Step 1: Drafting the Design
-
Pencil the guide:
Begin by lightly drawing a large circle in the center of your paper using a compass or by tracing a bowl. This will be the spine of your wreath. -
Mark flower positions:
Around the circle circumference, lightly mark eight evenly spaced spots. Imagine a clock face: mark 12, 3, 6, and 9 first, then place a mark exactly between each of those. -
Sketch the centers:
At each mark, lightly sketch a dime-sized circle for the sunflower center. Keep your pencil pressure extremely light so the graphite won’t show through the yellow paint later.
Loose is Better
Don’t stress about perfect petals. Wiggle your brush slightly as you lift it off the paper to give the petal tips a natural, slightly ragged edge.
Step 2: Painting the Sunflowers
-
First layer of petals:
Using your size 6 brush, load it with a watery mix of Cadmium Yellow. Paint almond-shaped petals radiating outward from one of your center circles. Leave small gaps between petals for a natural look. -
Complete the ring:
Repeat this process for all eight flowers. Don’t worry about them looking identical; slight variations in size and petal direction add charm. -
Add depth color:
While the first layer is still slightly damp but not soaking, mix a little Yellow Ochre into your brush. Touch the base of the petals (nearest the center) to let the darker yellow bleed outward softly. -
Paint the centers:
Rinse your brush and pick up Burnt Sienna. Dab color into the circular centers. While wet, drop in tiny specs of Burnt Umber on one side of the center to create a shadow effect. -
Second petal layer:
Once the first layer of yellow is fully dry, use more pigmented Yellow Ochre to paint a few additional petals in the gaps between the original ones. I like to keep these slightly shorter to create a layered effect.
Level Up: Calligraphy
The empty space inside this wreath is perfect for a quote or name. Use a micron pen to add lettering in the center after the painting is fully dry.
Step 3: Adding Greenery
-
Connect the circle:
Use your size 2 brush and a thin mixture of Sap Green to paint the main vine. Follow your original pencil line, carefully weaving between the flowers to connect them. -
Paint large leaves:
Switch back to the size 6 brush. With Olive Green, paint two or three larger, serrated leaves stemming from the vine near each flower cluster. -
Add fern details:
Using the tip of the size 2 brush and a darker green mix, paint delicate fern-like fronds. These should curve outward from the main circle to fill the empty white space. -
Layering foliage:
For visual interest, mix a very pale, watery green. Paint faint, ghostly leaves behind the darker ones to create an illusion of depth and fullness.
Step 4: Finishing Touches
-
Texturing the centers:
Once the brown centers are bone dry, take your smallest brush with thick dark brown paint. Stipple tiny dots onto the centers to mimic seeds. -
Enhance contrast:
If any petals look too flat, add a very thin line of diluted orange or light brown between them to separate the shapes. -
Erase guides:
When you are absolutely certain the paper is dry—if it feels cool to the touch, it’s still wet—gently use the kneaded eraser to lift any visible pencil lines.
Hang your lovely botanical creation in a spot that needs a little extra sunshine
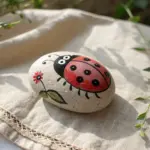
Sunflower With a Tiny Ladybug
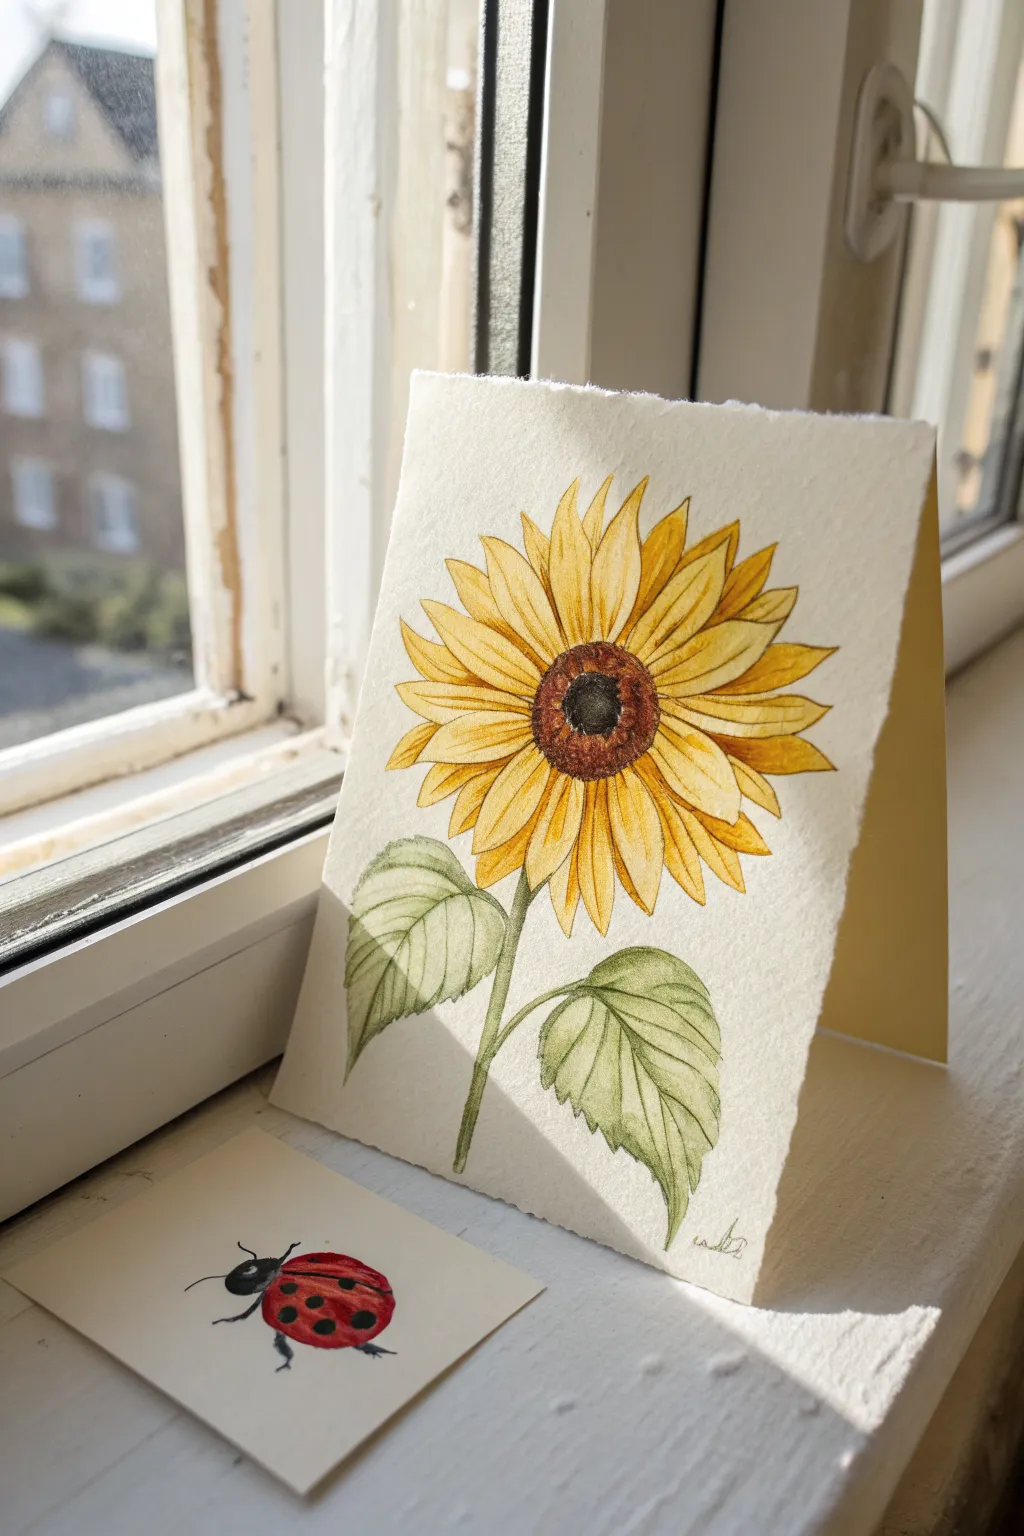
Brighten someone’s day with this charming watercolor card featuring a vibrant sunflower and a sweet companion piece of a little ladybug. The textured paper and delicate ink details give these illustrations a wonderful, handmade boutique feel.
Step-by-Step
Materials
- Cold press watercolor paper (300 gsm, heavy texture)
- Watercolor paints (Yellow Ochre, Cadmium Yellow, Burnt Sienna, Burnt Umber, Sap Green)
- Fine liner pen (black or dark sepia, waterproof, Size 01 or 03)
- Round watercolor brushes (Size 2 and Size 6)
- Pencil (HB) and eraser
- Palette for mixing
- Water jars and paper towels
Step 1: Planning the Composition
-
Prepare your paper:
Start by cutting a sheet of thick, textured watercolor paper to your desired card size. Score and fold it in half carefully. Cut a separate, smaller square of paper (about 3×3 inches) for the ladybug companion piece. -
Sketch the sunflower center:
On the folded card, lightly draw a medium-sized circle in the upper center using your pencil. This will guide the seed head placement. -
Outline the petals:
Sketch two rows of petals radiating from the center circle. Let the petals be slightly irregular, with some overlapping others and curving gently. Add pointed tips for a natural look. -
Add the stem and leaves:
Draw a sturdy stem extending from behind the bottom petals down to the card’s edge. Add two large, heart-shaped leaves branching off the stem—one higher on the left, one lower on the right. -
Sketch the ladybug:
On the small square paper, draw a simple oval shape for the ladybug’s body and a smaller semi-circle for the head. Add stick-like legs extending from the sides.
Use Torn Edges
For that rustic, artisanal look shown in the photo, gently tear the edges of your watercolor paper against a ruler instead of cutting with scissors.
Step 2: Painting the Sunflower
-
Base wash for petals:
Mix a light wash of Cadmium Yellow. Paint the entire petal area, letting the water carry the pigment. Don’t worry about staying perfectly inside the lines; a loose style works well here. -
Adding petal depth:
While the yellow is still slightly damp, drop touches of Yellow Ochre near the base of the petals where they meet the center. This creates a natural gradient. -
Painting the leaves:
Mix Sap Green with a tiny touch of Burnt Sienna to de-saturate it. Paint the leaves and stem with this wash. Use the tip of your brush to guide the paint into the pointed tips of the leaves. -
Create the center eye:
Once the petals are dry, wet the center circle. Paint the outer ring with Burnt Sienna and the very center with a dark mix of Burnt Umber. Let the colors bleed slightly into each other. -
Second layer on petals:
After the first layer dries completely, use a slightly more concentrated Yellow Ochre to paint the petals that appear to be ‘behind’ the front row, adding dimension.
Bleeding Lines?
If your fine liner ink bleeds into the paint, the paper wasn’t fully dry. Use a hairdryer on a low setting or wait 15 more minutes before inking.
Step 3: Painting the Ladybug
-
Red body wash:
Paint the main oval body of the ladybug with a bright clean red. Keep the paint fluid but not pooling. -
Head and legs:
Use a very dark grey or black watercolor mix (or very concentrated Burnt Umber mixed with blue) to carefully paint the head and the small antennae.
Step 4: Inking and Details
-
Dry completely:
Wait until both papers are bone dry. If the paper feels cool to the touch, it still holds moisture which can ruin your ink lines. -
Outline the sunflower:
Using your fine liner pen, trace over your pencil lines on the sunflower. Use broken, sketchy lines rather than a single solid contour to enhance the illustrative style. -
Detail the center:
Stipple (dot) the dark center of the flower with the pen to simulate seeds. Density the dots near the bottom right of the center circle for shadow. -
Add leaf veins:
Draw a central vein down each leaf, then add smaller branching veins. Keep the touch light and delicate. -
Outline the ladybug:
ink the outline of the ladybug. Draw a line down the center of the red shell to separate the wings, and color in the black spots. -
Final touches:
Erase any visible pencil marks gently. If desired, dry brush a tiny bit of dark brown on the sunflower center for texture.
Display your joyful sunflower card on a windowsill where the light can catch the texture of the paper.
Pastel Background Cute Sunflower
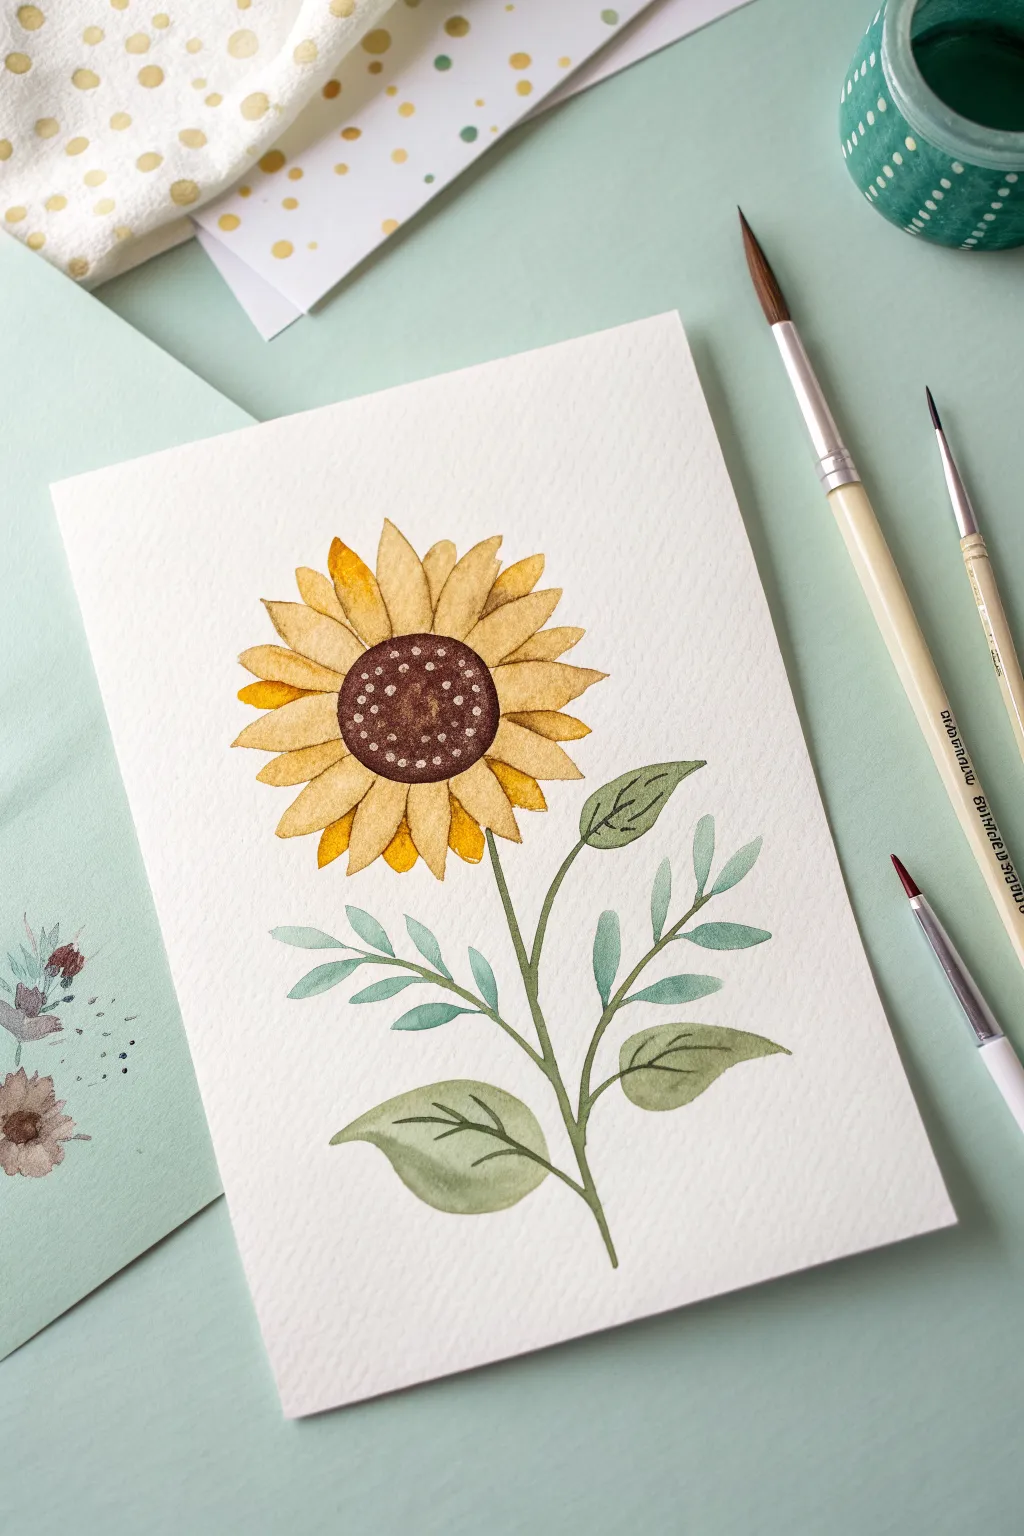
This charming project captures the warmth of a sunflower with a gentle, illustrative style perfect for beginners. The clean lines and soft yellow hues create a lovely piece of art that looks beautiful on a greeting card or framed on a shelf.
How-To Guide
Materials
- Cold press watercolor paper (A5 or 5×7 inch size)
- Watercolor paints (Yellow Ochre, Lemon Yellow, Burnt Umber, Burnt Sienna, Sap Green, Teal or Turquoise)
- Round watercolor brushes (Size 6 for petals/leaves, Size 2 for details)
- Fine liner brush (optional for stems)
- Graphite pencil (HB or 2H)
- Kneaded eraser
- Jar of clean water
- Paper towel
Step 1: Sketching the Outline
-
Place the center:
Start by lightly sketching a medium-sized circle in the upper third of your paper. This doesn’t need to be perfect; a slightly organic shape feels more natural. -
Add petal guides:
Draw the first layer of petals radiating out from the center circle. Aim for a mix of pointed and slightly rounded tips, keeping them relatively short and chunky for a cute look. -
Fill the gaps:
Sketch a second layer of petal tips peeking out from behind the first layer to create fullness. These should just be small triangles filling the V-shapes between the front petals. -
Draft the stem:
Draw a slender, slightly curved line extending from the bottom of the flower head down towards the bottom right of the page. -
Sketch the foliage:
Add two large leaves near the base of the stem. Then, draw two branching stems curving upward from the main stalk—one on the left, one on the right—and add small, oval-shaped leaves to these branches. -
Lighten the lines:
Gently roll a kneaded eraser over your entire sketch. You want the graphite lines to be barely visible so they don’t show through the transparent watercolor later.
Step 2: Painting the flower
-
Base layer for the center:
Mix a watery wash of Burnt Sienna or warm brown. Fill in the center circle completely. While it’s still wet, drop in a slightly darker brown (Burnt Umber) near the edges to create a gentle curve effect. -
First petal wash:
Using a size 6 brush, mix a soft Yellow Ochre. Paint every other petal on the main layer, leaving a tiny gap between them to prevent the colors from merging into one blob. -
Second petal set:
Once the first set is damp but not soaking, fill in the remaining front petals. Vary your color slightly by adding a touch of Lemon Yellow to your mix for interest. -
Painting the back petals:
For the petals peeking from behind, use a slightly darker or more orange-tinted yellow. This deeper shade pushes them visually into the background. -
Adding texture:
I like to wait until the petals are mostly dry, then use the tip of my brush to add very subtle vertical lines at the base of each petal using a slightly concentrated Yellow Ochre mixture.
Fixing Bleeds
If yellow paint bleeds into the brown center, don’t panic. Let it dry completely, then paint over the mistake with a thick, concentrated layer of your dark brown paint to cover it.
Step 3: Stems and Details
-
Stem base color:
Mix a muted Sap Green. Using your thinner brush, carefully paint the main stem and the two branching offshoots. Keep your hand steady and use light pressure for thin lines. -
Painting the main leaves:
Fill in the two large bottom leaves with your Sap Green mix. While wet, you can drop a tiny bit of darker green at the base of the leaf where it meets the stem. -
Painting the decorative leaves:
For the smaller leaves on the side branches, mix a ‘cool’ green by adding a touch of Teal or Turquoise to your green paint. This bluish-green contrast adds a lovely whimsical touch. -
Leaf detailing:
Once the large green leaves are completely dry, use a fine liner brush or the very tip of your size 2 brush to paint thin, dark green veins down the center. -
Center texture:
Prepare a thick, creamy mixture of dark brown. Dot this color around the outer ring of the flower center to create a seed texture. -
White highlights:
Finish the center by using opaque white gouache or a white gel pen to add tiny dots in the very middle of the dark brown center. This mimics the light catching the seeds.
Add a Glittery Pop
Once the painting is totally dry, paint a thin layer of gold watercolor or metallic ink over the yellow petals to make the sunflower shimmer in the light.
Now step back and admire how a few simple shapes and colors came together to make a warm, cheerful botanical illustration
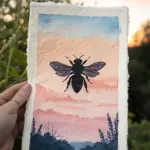
Sunflower Silhouette With Sunset
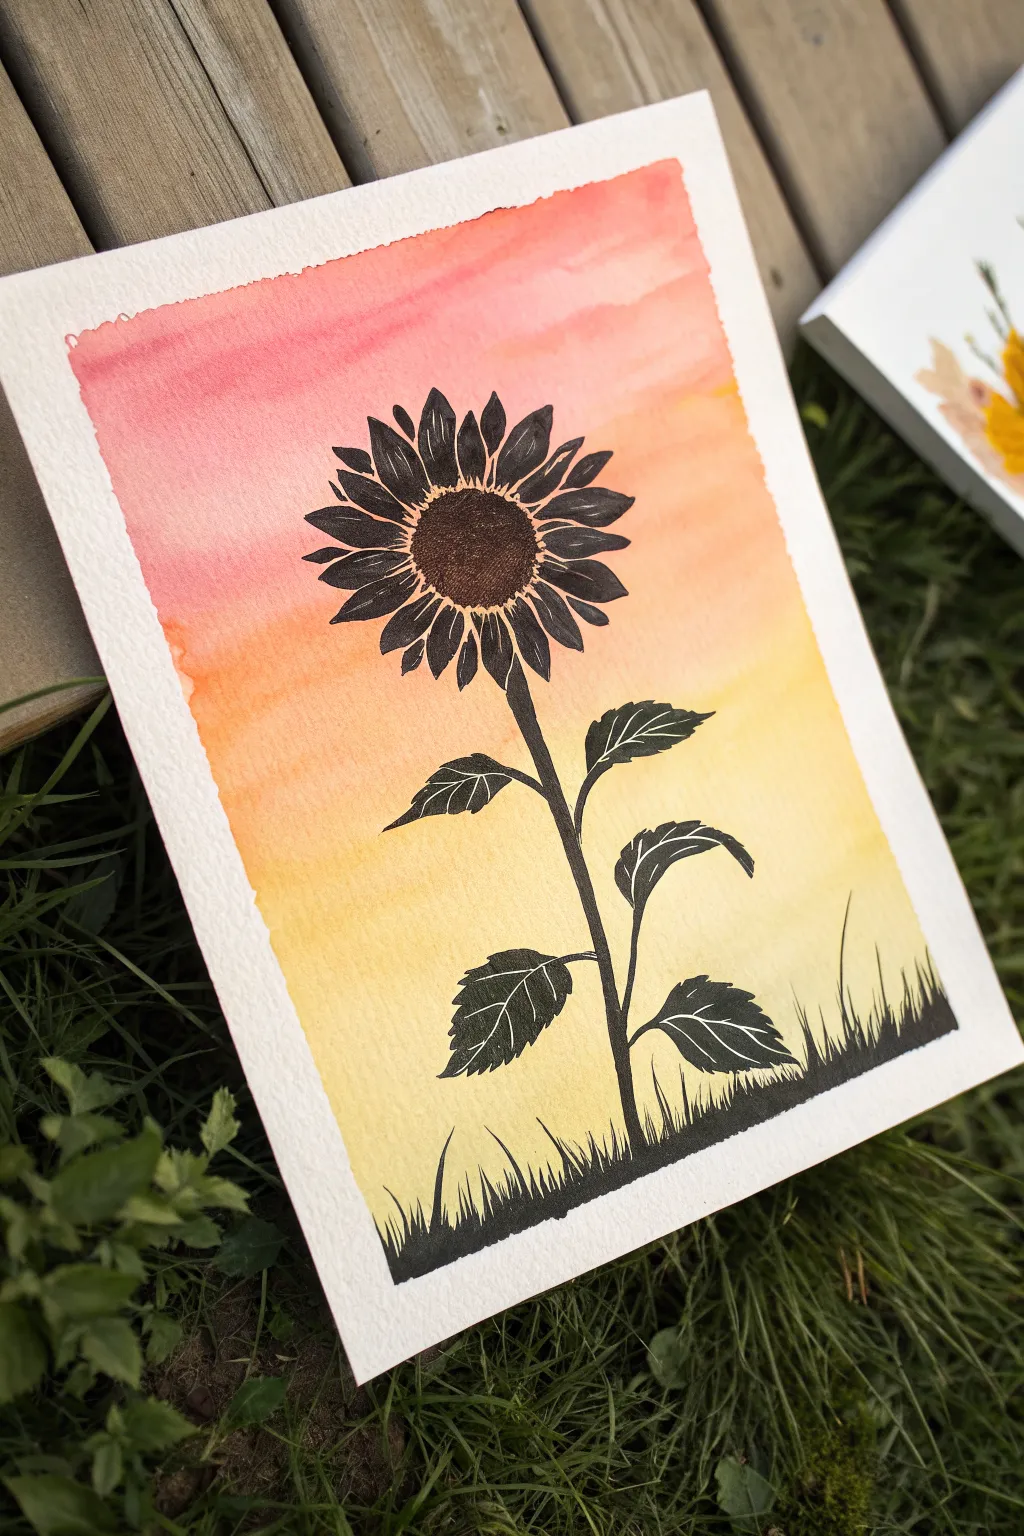
Capture the warmth of a setting sun with this striking watercolor and ink project. By combining a soft, glowing gradient wash with a bold, high-contrast silhouette, you can create a piece that feels both dramatic and serene.
Step-by-Step Tutorial
Materials
- Cold press watercolor paper (A4 or similar)
- Watercolor paints (Red, Orange, Yellow)
- Flat wash brush (large)
- Round brush (small/medium)
- Black waterproof ink or black acrylic paint
- Fine liner brush or black micron pen (optional)
- White gel pen (optional alternative for details)
- Masking tape
- Clean water and paper towels
Step 1: Painting the Sunset Sky
-
Prepare the paper:
Tape down all four edges of your watercolor paper to a board or table. This prevents buckling and creates that crisp white border seen in the final piece. -
Mix your palette:
Prepare three generous puddles of paint: a reddish-pink, a warm orange, and a bright yellow. You want them watery but vibrant. -
Apply the top strip:
Using a clean, wide flat brush, wet the entire paper surface lightly. Then, load your brush with the reddish-pink and paint a horizontal strip across the top third of the paper. -
Blend in the orange:
Rinse your brush slightly and pick up the orange paint. Apply this directly below the red, slightly overlapping the wet edge so the colors bleed together naturally. -
Finish with yellow:
Clean your brush again and switch to the bright yellow for the bottom third of the paper. Drag the yellow up slightly into the orange to complete the seamless gradient. -
Let it dry completely:
This is crucial. The background must be bone-dry before you add the silhouette, or the black ink will feather and ruin the crisp lines. I usually wait at least 30 minutes or use a hairdryer.
Bleeding Lines?
If black ink spreads into the sunset, the paper wasn’t dry enough. Let it dry, then use opaque white gouache to clean up the edge, or turn the mistake into a thicker petal.
Step 2: Creating the Sunflower Silhouette
-
Sketch the outline:
Lightly sketch the sunflower position with a pencil. Draw a center circle, the radiating petals, a central stem, and a few large leaves. -
Paint the stem:
Using a medium round brush and black ink (or thinned black acrylic), paint the main stem. Keep your hand steady to create a smooth, organic curve. -
Outline the leaves:
Carefully outline the leaf shapes. Don’t fill them in yet. Draw the serrated (jagged) edges of the leaves first. -
Create leaf veins:
This art style uses negative space for details. Paint the black interior of the leaves but deliberately leave thin lines of the sunset background showing through to represent the veins. -
Outline the flower center:
Paint the large central disk of the sunflower. Stipple the edges slightly to suggest texture, rather than making it a perfect circle. -
Define the petals:
Switch to a smaller brush. Outline each petal individually. Just like the leaves, you want to leave a tiny sliver of ‘white’ (background color) space down the center of some petals to give them dimension. -
Fill the petals:
Fill in the rest of the petal shapes with solid black, being careful not to paint over your negative space lines. -
Add texture to the center:
If the center disk looks too flat, use a white gel pen or very dry white gouache to stipple tiny dots in the middle after the black ink is dry, though the original uses texture within the black itself. -
Paint the grass:
At the very bottom of the stem, paint a jagged, grassy horizon line. Use quick, upward flicking motions with a fine brush to mimic blades of grass. -
Final touches:
Check for any uneven black areas and apply a second coat if needed to make the silhouette truly opaque. Once everything is 100% dry, carefully peel off the masking tape.
Vein Trick
Struggling to leave thin gaps for veins? Paint the leaf solid black first, let it dry, then draw the veins on top using a white gel pen for an easier alternative.
Now you have a bold, high-contrast piece of art that perfectly captures the golden hour
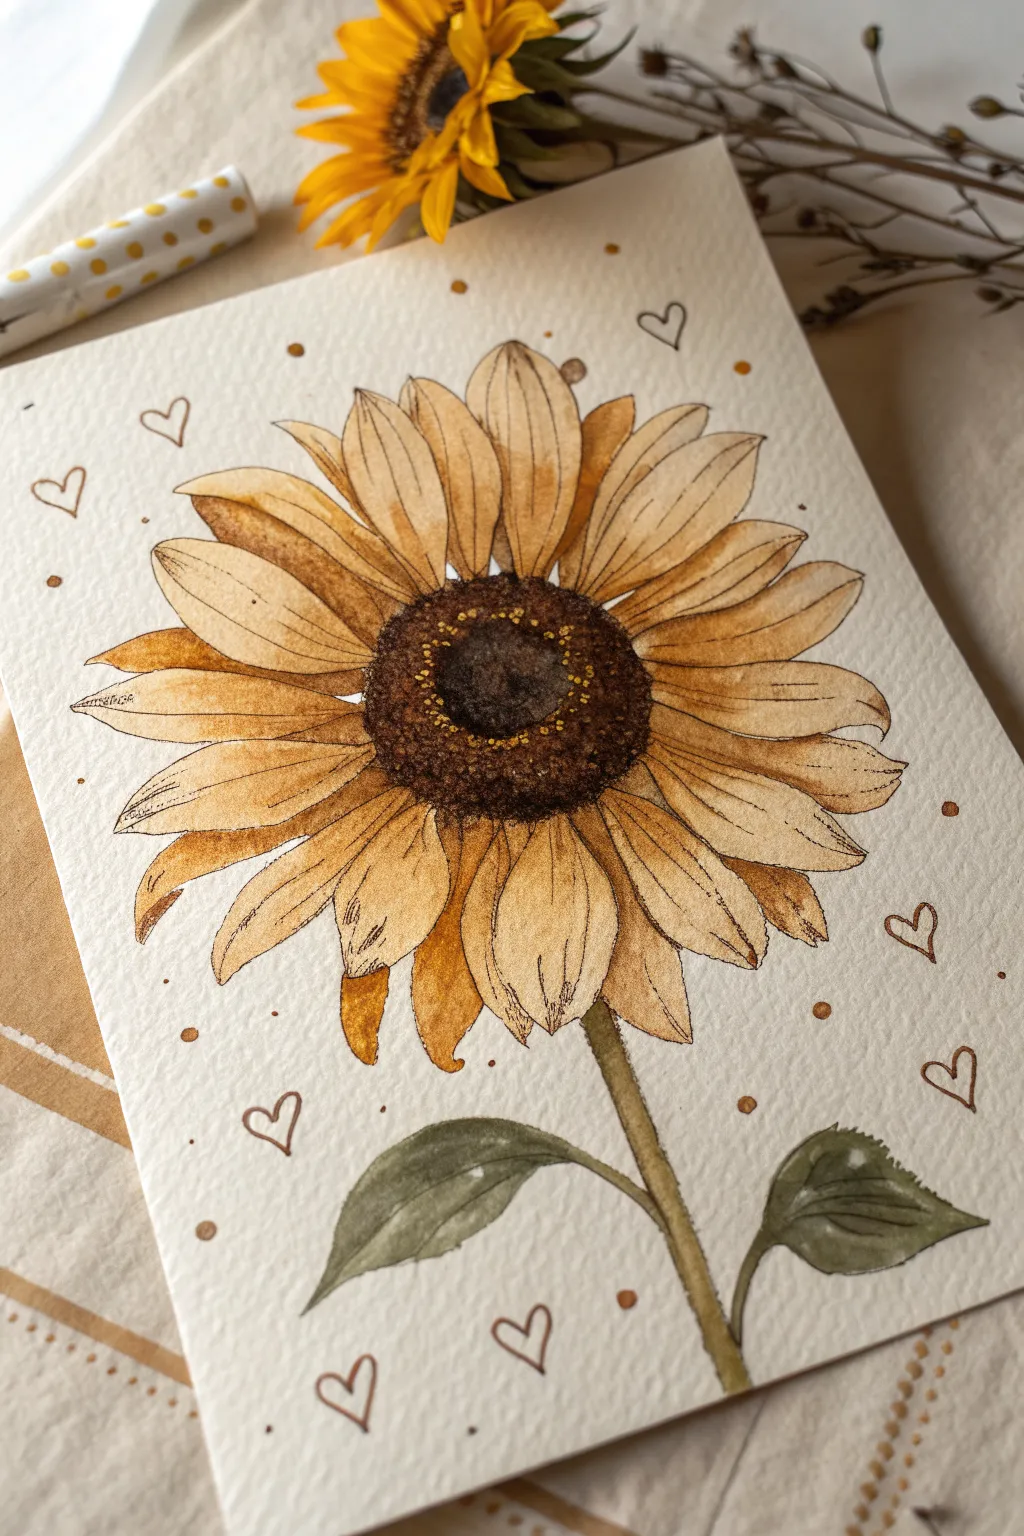
Pattern-Filled Sunflower Petals

This charming project combines loose watercolor techniques with delicate pen work to create a vintage-inspired sunflower illustration. The finished piece features warm golden petals, playful floating hearts, and defined ink outlines perfect for a greeting card or wall art.
Detailed Instructions
Materials
- Cold-pressed watercolor paper (300 gsm)
- Watercolor paint set (Yellow Ochre, Burnt Sienna, Burnt Umber, Sap Green)
- Round watercolor brushes (sizes 2, 4, and 6)
- Fine-liner pen (brown or sepia, waterproof ink, size 01 or 03)
- HB pencil
- Kneaded eraser
- Jar of clean water
- Paper towel
Step 1: Sketching the Composition
-
Center placement:
Begin by lightly sketching a medium-sized circle in the center of your paper using your HB pencil. This will serve as the seed head of the sunflower. -
Drawing the petals:
Sketch two layers of petals radiating from the center. Make the front layer petals slightly wider and the background petals peeking out from behind more narrow. Keep the shapes organic, allowing some to curve or twist slightly for a natural look. -
Adding stem and leaves:
Draw a sturdy stem extending straight down from the flower head. Add two leaves near the bottom—one curving left and one right—giving them a elongated teardrop shape. -
Decorative elements:
Lightly pencil in small, scattered hearts flowing upwards on the left and right sides of the flower. Mark random spots for decorative dots around the petals.
Step 2: Painting the Sunflower
-
Base wash for petals:
Mix a watery wash of Yellow Ochre. Using your size 6 brush, fill in all the petals, keeping the application loose. It’s okay if the color isn’t perfectly even; slight pooling adds character. -
Shading the petals:
While the base layer is still slightly damp, drop a stronger concentration of Yellow Ochre or a touch of Burnt Sienna into the base of each petal where it meets the center. Let this bleed outward naturally. -
Painting the center:
Switch to Burnt Umber for the seed head. Paint the center circle, making the outer edges slightly darker than the very middle to create a sense of curvature. -
Adding texture to the center:
While the brown center is wet, tap in tiny dots of very dark brown or black watercolor around the outer rim of the circle to simulate depth and seeds. -
Painting the greenery:
Use Sap Green slightly muted with a touch of brown for the stem and leaves. Paint the stem in a single confident stroke. Fill the leaves, leaving tiny slivers of white paper showing for highlights if you can. -
Adding decorative splatters:
Load a small brush with diluted gold or ochre paint. Gently tap the handle against your finger to sprinkle a few controlled splatters around the flower. -
Drying time:
Allow the entire painting to dry completely. The paper must be bone dry before the next step to prevent ink bleeding.
Ink Confidence
Don’t try to make your ink lines perfectly smooth. A shaky or ‘broken’ line style actually enhances the vintage, hand-drawn aesthetic of this specific illustration style.
Step 3: Inking and Details
-
Outlining the petals:
Using your waterproof brown fine-liner, trace the pencil outlines of the petals. Keep your hand loose; broken or doubled lines add to the illustrative charm. -
Petal veins:
Draw faint, quick vertical lines inside the petals to suggest veins. These shouldn’t touch the top or bottom edges completely—let them ‘float’ in the middle of the petal shapes. -
Defining the center:
Stipple (dot) heavily with your pen around the outer edge of the brown center. Add a ring of small yellow or white gel pen dots inside the dark center if you want extra pop. -
Inking the leaves:
Outline the stem and leaves. Add a central vein line to each leaf, keeping the lines organic and slightly wiggly rather than ruler-straight. -
Drawing the hearts:
Trace over your floating heart sketches with the brown pen. You can leave them as open outlines to keep the design airy. -
Final decorative dots:
Add small ink dots or circles where you previously splattered paint, or in empty spaces to balance the composition. -
Clean up:
Once you are certain the ink is 100% dry, gently erase any visible pencil marks with the kneaded eraser to reveal your clean illustration.
Metallic Accent
Use a metallic gold watercolor paint for the internal seed dots or the floating hearts. When the light hits the paper, your sunflower will shimmer delicately.
Frame your cheerful creation or gift it to a friend to brighten their day
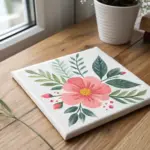
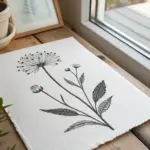


Have a question or want to share your own experience? I'd love to hear from you in the comments below!