
Whenever December rolls around, I get this irresistible urge to fill my sketchbook with cozy winter drawings—the kind that feel like warm lights on an early sunset. Here are my favorite December drawing ideas you can use for journaling spreads, card-style illustrations, or just a relaxing nightly doodle session.
December Hand-Lettered Title Page
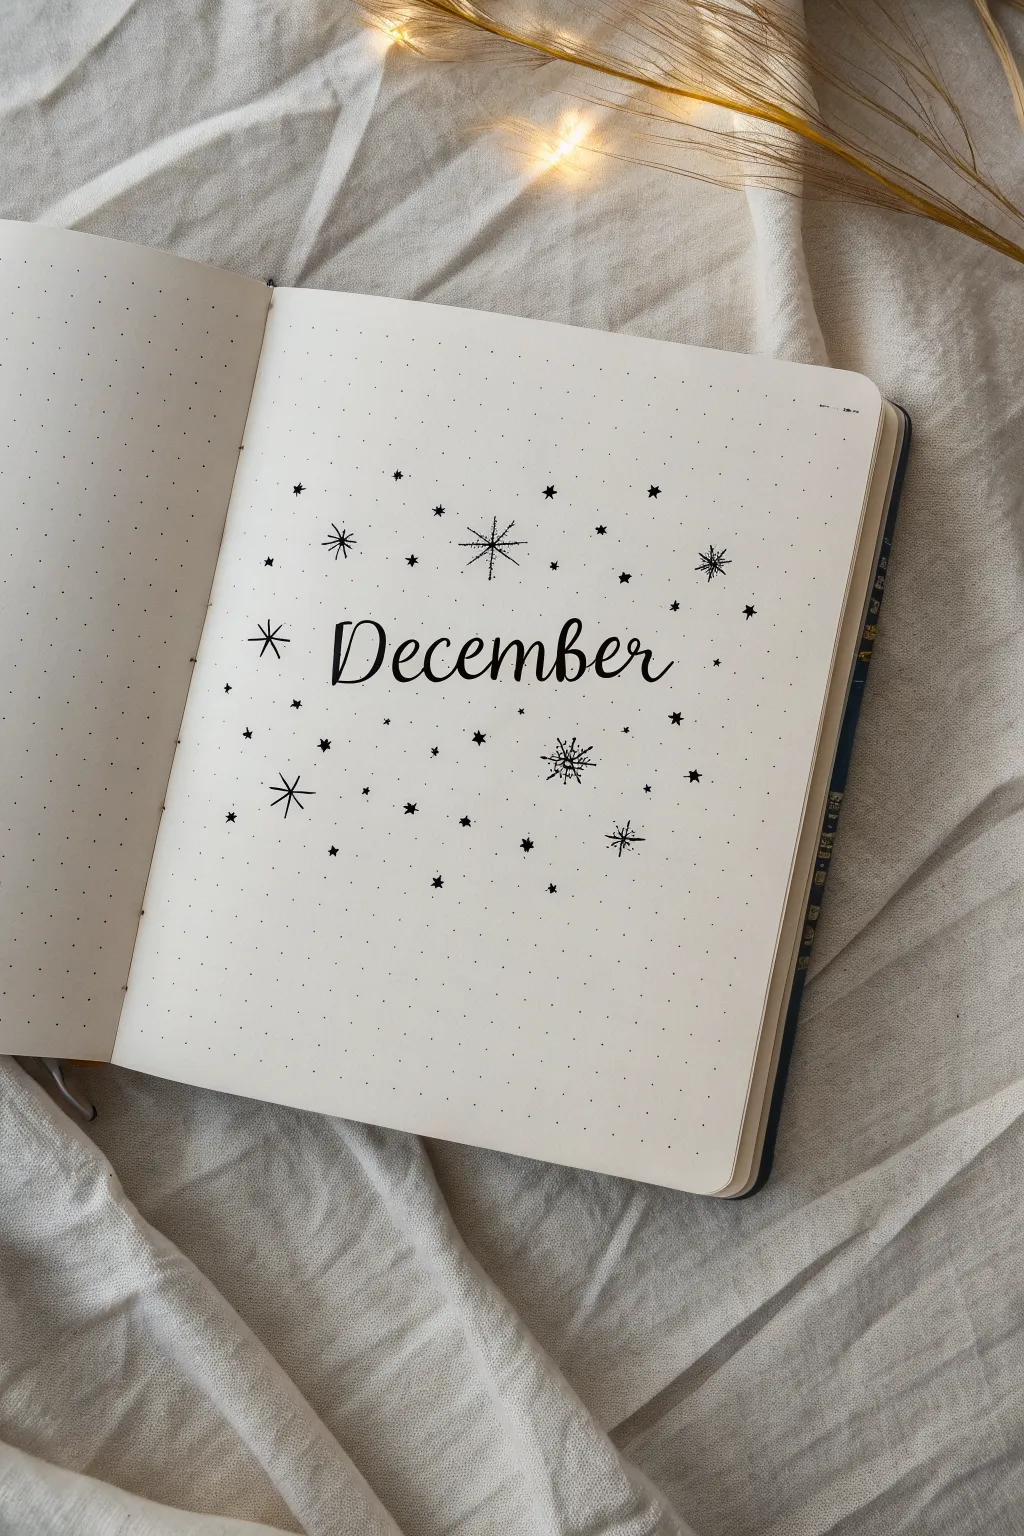
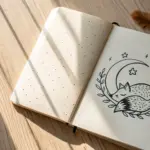
Embrace the quiet beauty of winter with this elegant, minimalist title page. Using just a single black pen and a dotted grid, you will create a refined layout featuring hand-lettering surrounded by a delicate constellation of stars and snowflakes.
Step-by-Step Tutorial
Materials
- Dotted notebook or bullet journal
- Fine liner pen (black, size 0.3mm or 0.5mm)
- Pencil
- Eraser
- Ruler (optional)
Step 1: Planning and Pencil Sketching
-
Locate the center:
Open your dotted notebook to a fresh two-page spread. Count the dots horizontally and vertically to find the exact center of the right-hand page, as this will be your focal point. -
Draft the lettering baseline:
Using a pencil, lightly draw a horizontal guideline where you want the word ‘December’ to sit. This ensures your text remains straight and balanced. -
Sketch the word structure:
Lightly pencil in the word ‘December’ in a cursive style. Focus on getting the spacing between letters even rather than perfecting the shape immediately. Keep your ‘D’ slightly separated for a classic look. -
Refine the letterforms:
Go back over your pencil sketch to thicken the downstrokes slightly, creating a faux-calligraphy effect. Make sure the loops on your ‘e’s and the curves of the ‘m’ are consistent in size.
Oops! Ink Smudge?
If you smudge ink while erasing, turn the smudge into a ‘nebula’ by drawing tiny stippled dots over it, transforming the mistake into a dense star cluster.
Step 2: Inking the Typography
-
Trace the outline:
Take your fine liner pen and carefully trace the outer edges of your penciled letters. Work slowly to keep your lines smooth and free of jitters. -
Fill the downstrokes:
If you sketched the thickened downstrokes, fill them in solid black now. If you are just using monoline lettering, simply go over your pencil lines with a confident, steady hand. -
Add connecting flourishes:
Extend the tail of the ‘r’ slightly outward and ensure the connection points between letters flow naturally. I find taking a breath before each stroke helps steady my hand.
Add Some Shine
For a magical winter touch, re-trace select stars or the center of the snowflakes with a metallic silver or gold gel pen to catch the light.
Step 3: Creating the Celestial Background
-
Establish the major stars:
Select 3 or 4 spots around the word to place your largest elements. Draw these as eight-pointed stars: a vertical line, a horizontal line, and two shorter diagonal lines crossing the center. -
Draw medium-sized sparkle bursts:
In the empty spaces between the large stars, add medium-sized glimmers. These can be drawn as simple six-pointed asterisks. -
Add standard five-point stars:
Scatter several classic, tiny five-point stars around the text. Fill them in completely with black ink so they stand out as solid shapes against the white paper. -
Incorporate snowflakes:
To hint at winter, draw one or two stylized snowflakes. Start with a six-pointed asterisk and add small ‘V’ shapes at the end of each line to create distinct branches. -
Sprinkle micro details:
Fill the remaining negative space with very small dots and tiny four-pointed plus signs. Keep these random to mimic the organic feel of a night sky.
Step 4: Finishing Touches
-
Check density:
Step back and look at the spread. Ensure the stars are denser near the word ‘December’ and gradually spread out as they move toward the edges of the page. -
Erase pencil marks:
Wait at least 15 minutes to ensure the ink is completely dry. Gently erase all pencil guidelines and sketch marks, being careful not to crumple the paper. -
Final crisping:
Once the graphite is gone, you might notice some lines look faint. Retouch any star tips or letter edges that need clearer definition.
Enjoy using this serene layout to organize your plans for the holiday season

Pine and Berry Wreath Frame
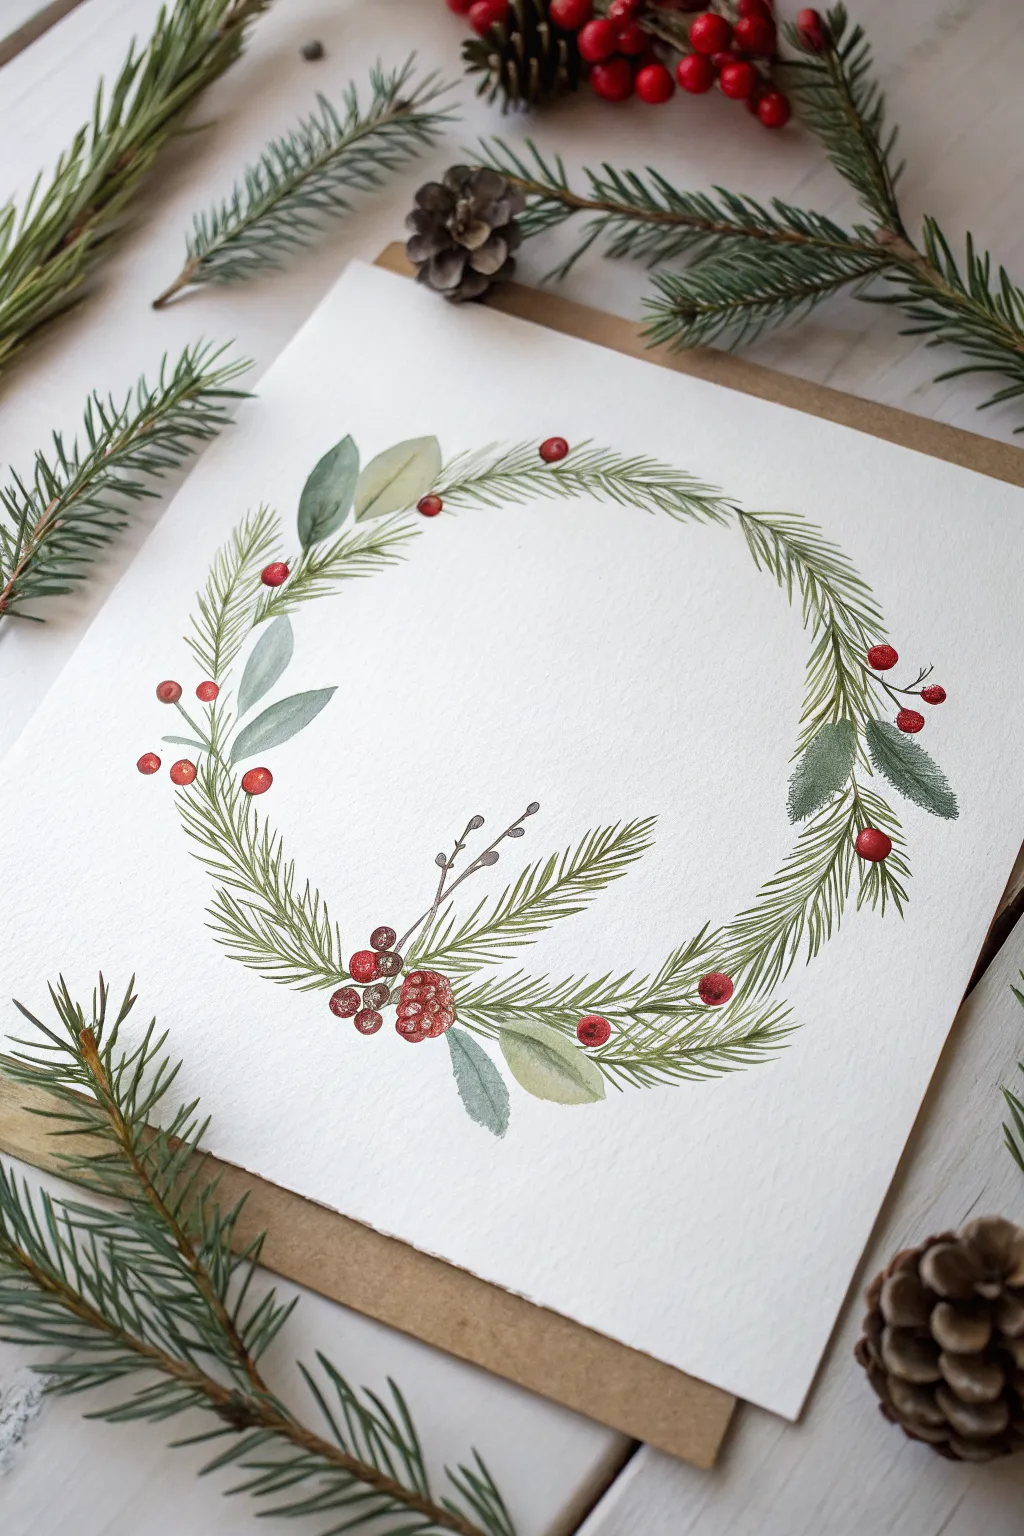
Capture the delicate beauty of the season with this elegant watercolor wreath featuring fine pine needles and vibrant berries. The airy composition and soft, natural tones make it a perfect design for holiday cards or seasonal wall art.
Step-by-Step
Materials
- Cold press watercolor paper (300 gsm)
- Round watercolor brushes (sizes 2, 4, and 0 for details)
- Watercolor paints (Sap Green, Hooker’s Green, Alizarin Crimson, Burnt Umber, Payne’s Grey)
- Pencil (HB or H)
- Clean water and mixing palette
- Paper towels
Step 1: Planning the Structure
-
Trace the circle:
Start by lightly sketching a perfect circle in the center of your paper. You can trace a bowl or use a compass, but keep the line very faint so it doesn’t show through the transparency of the watercolor later. -
Map the focal points:
Mark three primary clusters for your foliage: a larger, denser cluster at the bottom (around the 6 o’clock position), and two smaller clusters on the left (9 o’clock) and right (3 o’clock). This asymmetry gives the wreath a natural flow.
Muddy Greens?
If your pine needles are blending into a blob, ensure the bottom layer is completely dry before painting top layers. Use a hair dryer on low heat to speed this up.
Step 2: Painting the Greenery
-
Base layer of leaves:
Mix a watery Sap Green with a touch of Payne’s Grey for a muted tone. Using your size 4 brush, paint the broad, flat leaves first, particularly near the bottom cluster and the left side. -
Varying the greens:
While the first leaves are damp, drop a tiny bit of darker green into the base of each leaf to add depth. Let these dry completely before moving on. -
Pine needle foundations:
Switch to a size 2 brush. Mix Hooker’s Green with a little Burnt Umber to warm it up. Start drawing the main curved stems of the pine branches, following the curvature of your pencil circle. -
Adding pine texture:
Using quick, flicking motions, paint the individual pine needles radiating from the stems. Keep your strokes loose and airy; avoid making them too uniform or stiff. -
Building density:
Layer a second, darker shade of green pine needles over the first set once they are dry. Focus this density at the bottom of the wreath to weigh the composition down visually.
Step 3: Adding Berries and Details
-
Scattering the berries:
Load a size 2 brush with concentrated Alizarin Crimson. place small red berries throughout the wreath, clustering them in groups of two or three near the leafy sections. -
Berry highlights:
Leave a tiny speck of white paper unpainted on each berry to represent a shine, or lift a little pigment with a thirsty brush while the paint is still wet. -
Painting the twig accents:
Mix a dark Burnt Umber. Using your finest brush (size 0), paint delicate, bare twigs sticking out from the bottom cluster. These thin lines add nice contrast to the soft pine needles. -
Creating the focal pinecone features:
At the bottom center, paint the small textured clusters that resemble tiny pinecones or dried berries. Use a stippling motion with Burnt Umber and a touch of Red to create a rough, organic texture.
Add Some Frost
Once dry, use a white gel pen or white gouache on a dry brush to add frost accents to the berries and tips of the pine needles for a snowy effect.
Step 4: Final Touches
-
Connecting the elements:
Look for any large gaps. Use very watered-down green to add faint ‘ghost’ needles or stems in the background, which makes the wreath look fuller without adding visual weight. -
Deepening contrasts:
I like to go back in with my darkest green mix and add a few sharp, defined pine needles on top of the driest layers to bring the foreground into focus. -
Erase guidelines:
Once the painting is 100% bone dry, gently erase any visible pencil marks from your initial circle guide.
Mount your finished piece on kraft cardstock for a rustic, handmade holiday feel


Cozy Mug and Mittens Doodle Set
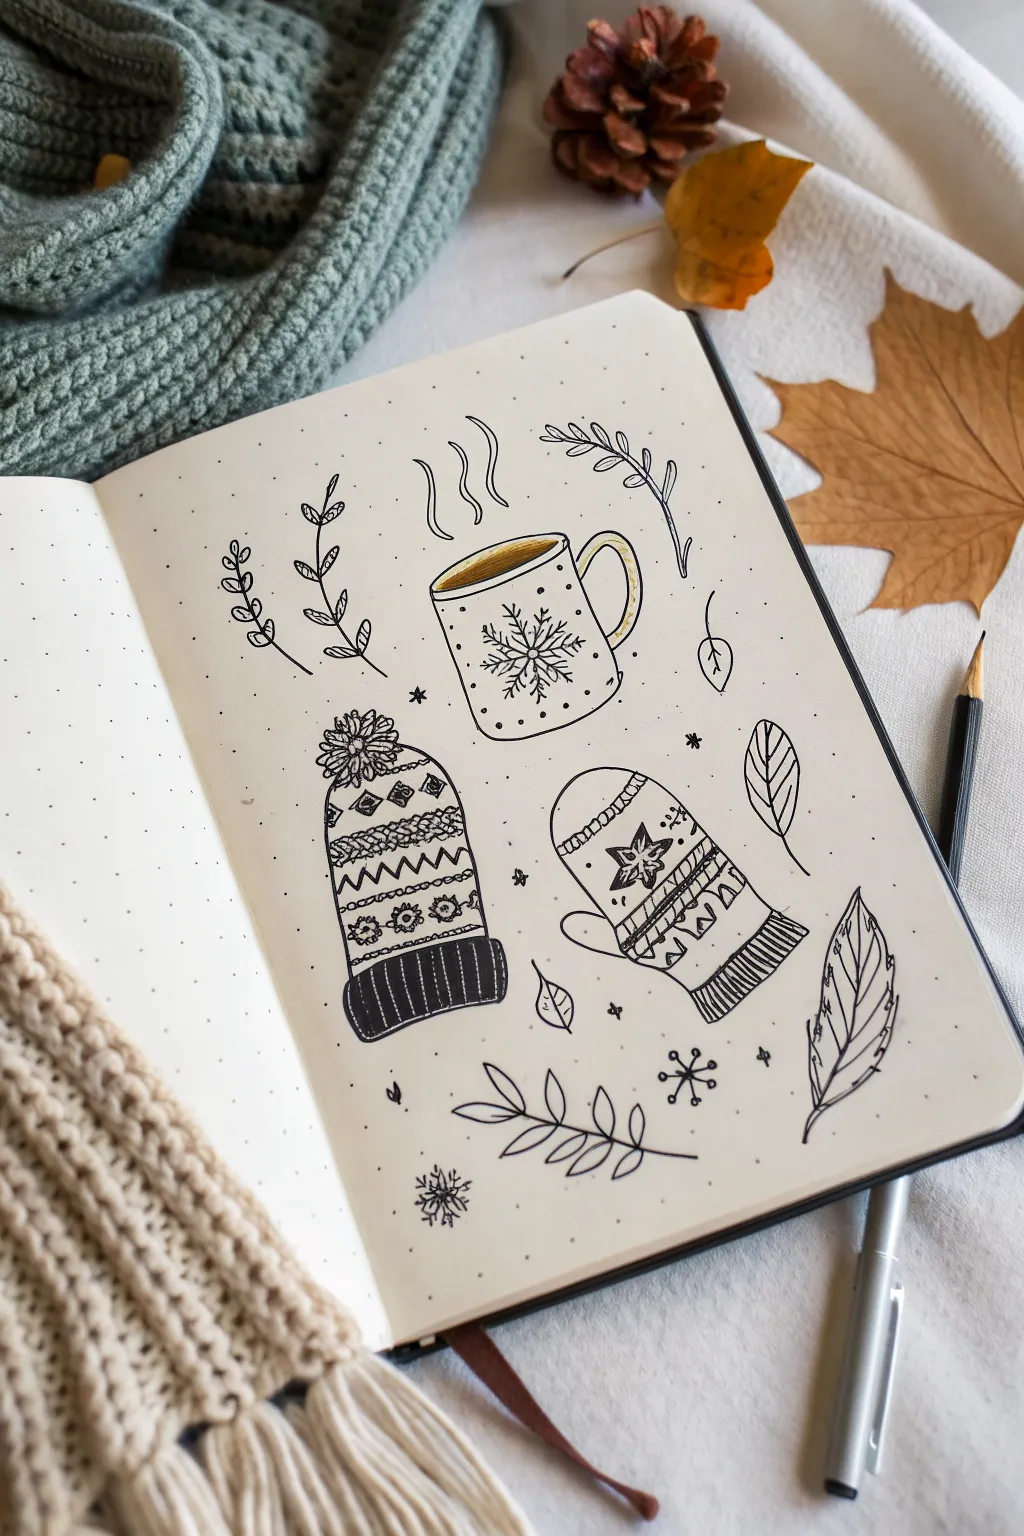
Embrace the crisp weather with this charming set of winter-themed illustrations, perfect for your bullet journal or sketchbook. This layout features fine-line drawings of seasonal essentials like a steaming mug, a knit beanie, mittens, and scattered leaves to evoke a warm, cozy feeling.
How-To Guide
Materials
- Dot grid notebook or journal
- Fine liner pen (black, 0.3mm or 0.5mm)
- Pencil (HB or 2B)
- Soft eraser
- Gold or yellow marker/brush pen (optional)
Step 1: Sketching the Layout
-
Establish the mug:
Begin near the top center of your page by sketching a simple, rounded cylinder for the mug. Keep the lines light with your pencil. Add a C-shaped handle on the right side. -
Outline the winter hat:
Below and slightly to the left of the mug, sketch the outline of a beanie. Draw a fluffy pom-pom circle on top, a bell-shaped body, and a rectangular cuff at the bottom. -
Place the mitten:
To the right of the hat, draw a mitten shape at an angle. Make the main hand section rounded and attach a separate thumb section pointing to the left. Don’t forget the cuff at the wrist. -
Add floating elements:
Fill the empty spaces around your main three items with simple leaf shapes, sprigs, and small snowflakes. Place a large maple leaf outline in the bottom right corner and smaller sprigs drifting in from the top left.
Step 2: Inking the Main Items
-
Ink the coffee mug:
Using your fine liner, trace over the mug’s pencil lines. Inside the mug, draw a small ellipse near the rim to show the liquid level. Draw three wavy steam lines rising from the top. -
Decorate the mug:
Draw a snowflake design in the center of the mug’s body. Surround it with small dots to mimic a speckled ceramic texture. -
Define the pom-pom:
Move to the beanie. Instead of a solid line for the pom-pom, use short, spiky strokes radiating outward from the center to create a fluffy texture. -
Detail the hat patterns:
Divide the main body of the hat into horizontal bands. Fill these bands with alternating patterns: zig-zags, small triangles, and little flower-like clusters. Ink the cuff with vertical lines to look like ribbing. -
Finalize the hat cuff:
Darken the cuff area significantly, perhaps by coloring it in solid black or using very dense hatching, leaving small white gaps for highlight if desired. -
Ink the mitten:
Trace the mitten outline. Similar to the hat, draw a horizontal band across the knuckles and fill it with a star or snowflake motif and zig-zag lines. Use cross-hatching or vertical lines on the cuff to suggest a knit texture.
Uneven patterns?
Drawing knit patterns can be tricky. Don’t worry if your zig-zags aren’t perfect; the irregularities actually make the drawing look more like cozy, hand-knit wool texturing.
Step 3: The Finishing Touches
-
Ink the botanical elements:
Go over your surrounding leaf sketches. For the large leaf in the bottom right, add a central vein and branching veins. For the smaller sprigs, keep the leaves simple and teardrop-shaped. -
Add scattered details:
Draw tiny snowflakes (simple crosses with V-shapes at the ends) and single dots throughout the empty white space to make the page feel full and festive. -
Erase pencil guides:
Wait a moment for the ink to be completely dry to avoid smudging. Gently erase all underlying pencil sketches until the page is clean. -
Add a pop of color:
If you have a gold or yellow marker, carefully color in the liquid inside the mug and add a highlight stroke to the mug’s rim or handle for a touch of warmth.
Texture Boost
Use a light grey marker or a stippling technique (lots of tiny dots) to add shadows under the mug and mitten. This grounds the objects so they don’t look like they are floating.
Now you have a wonderful winter-themed spread ready to greet the colder days ahead

Candy Cane Stripe Shading अभ्यास

Capture the sweetness of the season with this focused study on drawing a classic candy cane. This project breaks down the process from simple outlines to realistic curved stripes and dimensional shading.
Step-by-Step Tutorial
Materials
- Spiral-bound sketchbook or drawing paper
- Fine-liner pen (black, 0.3mm or 0.5mm)
- Red colored pencil (wax or oil-based)
- Pencil (HB for sketching)
- Eraser
Step 1: Drafting the Shapes
-
Sketch the curve:
Begin by lightly sketching the basic ‘J’ shape of the candy cane with your HB pencil. Focus on keeping the width consistent from the bottom stem all the way through the curved hook at the top. -
Define the outline:
Once you are happy with the faint pencil shape, trace over the perimeter with your black fine-liner pen. Keep your hand steady to create clean, smooth lines for the outer edges. -
Plot the stripes:
Using the fine-liner, draw the diagonal stripes across the cane. Crucially, these lines shouldn’t be straight; curve them slightly to match the rounded form of the candy. Imagine drawing rubber bands wrapped around a cylinder. -
Vary the width:
To make it look authentic, alternate between thick and thin bands. A classic pattern usually has a wide stripe followed by one or two very thin stripes. -
Erase guidelines:
Wait a moment for the ink to fully set so it doesn’t smudge, then gently erase all your initial pencil sketches.
Step 2: Adding Color and Dimension
-
First layer of red:
Select your red colored pencil. identify the wide stripes that will be red (leaving the thin stripes white). Start filling them in with light pressure to establish the base color. -
Establish the light source:
Decide where your light feels like it’s coming from—in this example, the light hits the center-left. This means the highlight will run down the middle of the cane. -
Build darker edges:
Press harder with your red pencil along the outer edges of the red stripes. This creates a shadow effect that makes the cane look round rather than flat. -
Fade to center:
Gradually lighten your pressure as you color toward the center of the stripe. I like to leave the very center of the red band slightly paler to mimic a glossy sheen. -
Shade the white stripes:
The white stripes aren’t perfectly flat white. Use your black pen or a very light gray pencil to add tiny, vertical hatch marks on the extreme edges of the white sections. -
Add contour lines:
On the uncolored ‘study’ cane, practice drawing contour lines. Use thin, curved pen strokes that follow the roundness of the cane to act as a guide for where stripes would go. -
Deepen the shadows:
Go back to your colored cane. Add a second layer of deep red on the absolute edges of the colored stripes to maximize the contrast against the white paper. -
Final ink touches:
If the colored pencil has obscured any of your black outline, carefully re-trace those specific segments with your fine-liner to sharpen the drawing.
Curve Check
If your candy cane looks flat, your stripe lines might be too straight. Make sure every stripe line curves in the same direction to mimic a cylinder shape.
Pro Tip: Highlight trick
Leave a tiny, thin vertical gap of white paper right in the middle of your red shading. It creates an instant, high-gloss ‘hard candy’ shine effect.
Enjoy seeing your festive sketches pop off the page with these simple shading techniques
BRUSH GUIDE
The Right Brush for Every Stroke
From clean lines to bold texture — master brush choice, stroke control, and essential techniques.
Explore the Full Guide
Ornament Pattern Sampler
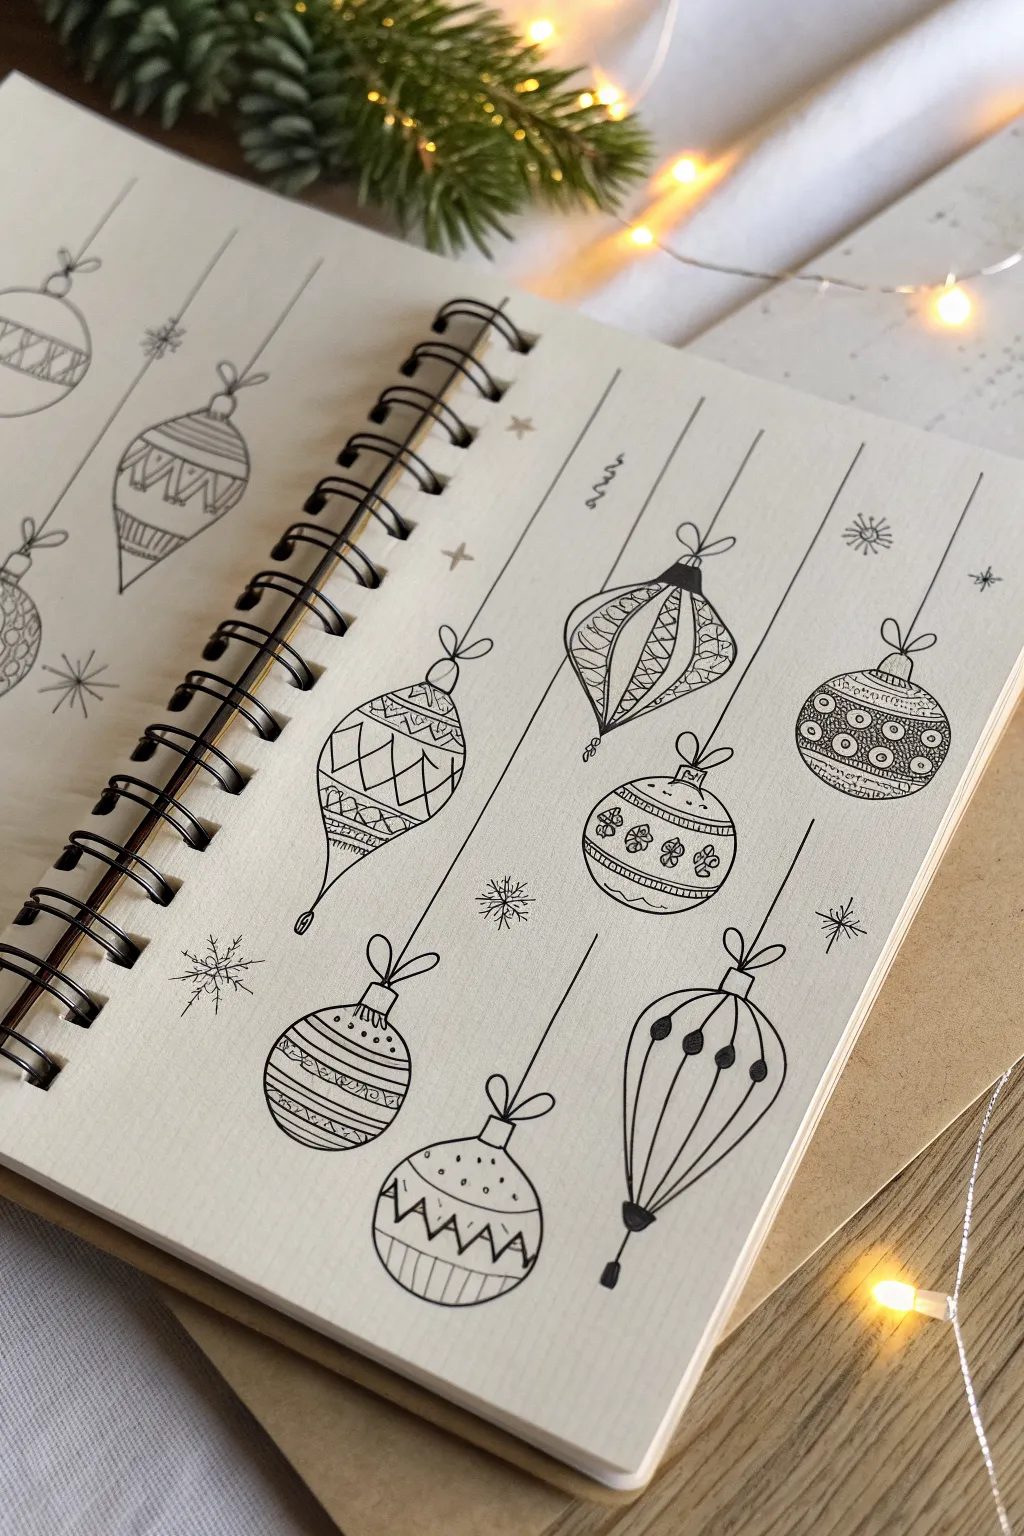
Capture the magic of holiday decorating on paper with this delicate study of hanging baubles. Featuring varied shapes and intricate line patterns, this ink drawing creates a cozy, festive spread perfect for your sketchbook or bullet journal.
Step-by-Step Guide
Materials
- Dotted or blank sketchbook (cream paper adds warmth)
- Fine liner pen (01 or 03 size, black)
- Thicker drawing pen (05 or 08 size, black)
- Pencil (HB)
- Eraser
- Ruler
Step 1: Planning the Layout
-
Map the strings:
Begin by lightly sketching vertical lines using your ruler and pencil. Vary the lengths so the ornaments will hang at staggered heights, creating a pleasing rhythm across the page. -
Sketch the silhouettes:
At the bottom of each vertical line, lightly draw the basic shapes of your ornaments. Mix up the forms—try circles, teardrops, ovals, and tapered finial shapes to add visual interest. -
Refine the forms:
Go back over your rough shapes to define the contours more clearly. Add the small caps and loops at the top where the ornament connects to the string.
Wobbly Lines?
Don’t stress if your circles aren’t perfect. Re-trace the outline loosely a second time to create a ‘sketched’ style that intentionally embraces imperfection.
Step 2: Inking the Foundation
-
Draw the main strings:
Using your fine liner, carefully trace the long vertical strings. You can use a ruler for precision, or freehand it for a slightly more organic feel. -
Add the bows:
At the connection point between the string and the ornament cap, draw small, simple bows. Keep the loops loose and playful. -
Outline the shapes:
Trace the outer perimeter of each ornament with your 03 or 05 pen. Make these lines confident and smooth. -
Erase pencil marks:
Once the ink is completely dry—give it a minute to avoid smudges—gently erase all your underlying pencil sketches so you have a clean slate for detailing.
Step 3: Adding Decorative Patterns
-
Divide the space:
On the larger round ornaments, use your fine liner to draw horizontal bands across the shape. These will serve as containers for your patterns. -
Fill with geometrics:
Inside the bands, doodle simple repeating geometric shapes. Triangles, zig-zags, and cross-hatching work beautifully. I like to alternate dense patterns with open space. -
Create the scalloped look:
For the teardrop-shaped ornaments, try drawing vertical curved lines that follow the form of the bauble, mimicking gathered fabric or faceted glass. -
Add organic details:
Incorporate small organic motifs like tiny flowers, leaves, or berries into the wider open bands of the round ornaments. -
Detail the finials:
For the elongated, pointy ornaments, add vertical stripes or dots. Draw a small bead or tassel at the very bottom tip for elegance.
Add Some Shine
Use a white gel pen to add small highlights on top of the black ink patterns or colored sections to make the glass look reflective and glossy.
Step 4: Environmental Details
-
Draw filler elements:
In the empty spaces between the hanging strings, draw small, delicate snowflakes or stars. Simple asterisks or six-pointed sketched stars work best. -
Add a few sparkles:
Draw tiny solid diamonds or dots near the ornaments to suggest the glint of light reflecting off the glass surfaces. -
Enhance contrast:
Use your thicker pen to darken specific areas, such as the ornament caps or specific bands within the patterns. This contrast makes the doodle pop.
Now you have a charming collection of festive ornaments to brighten up your winter journal pages
Simple Christmas Tree With Layered Branches
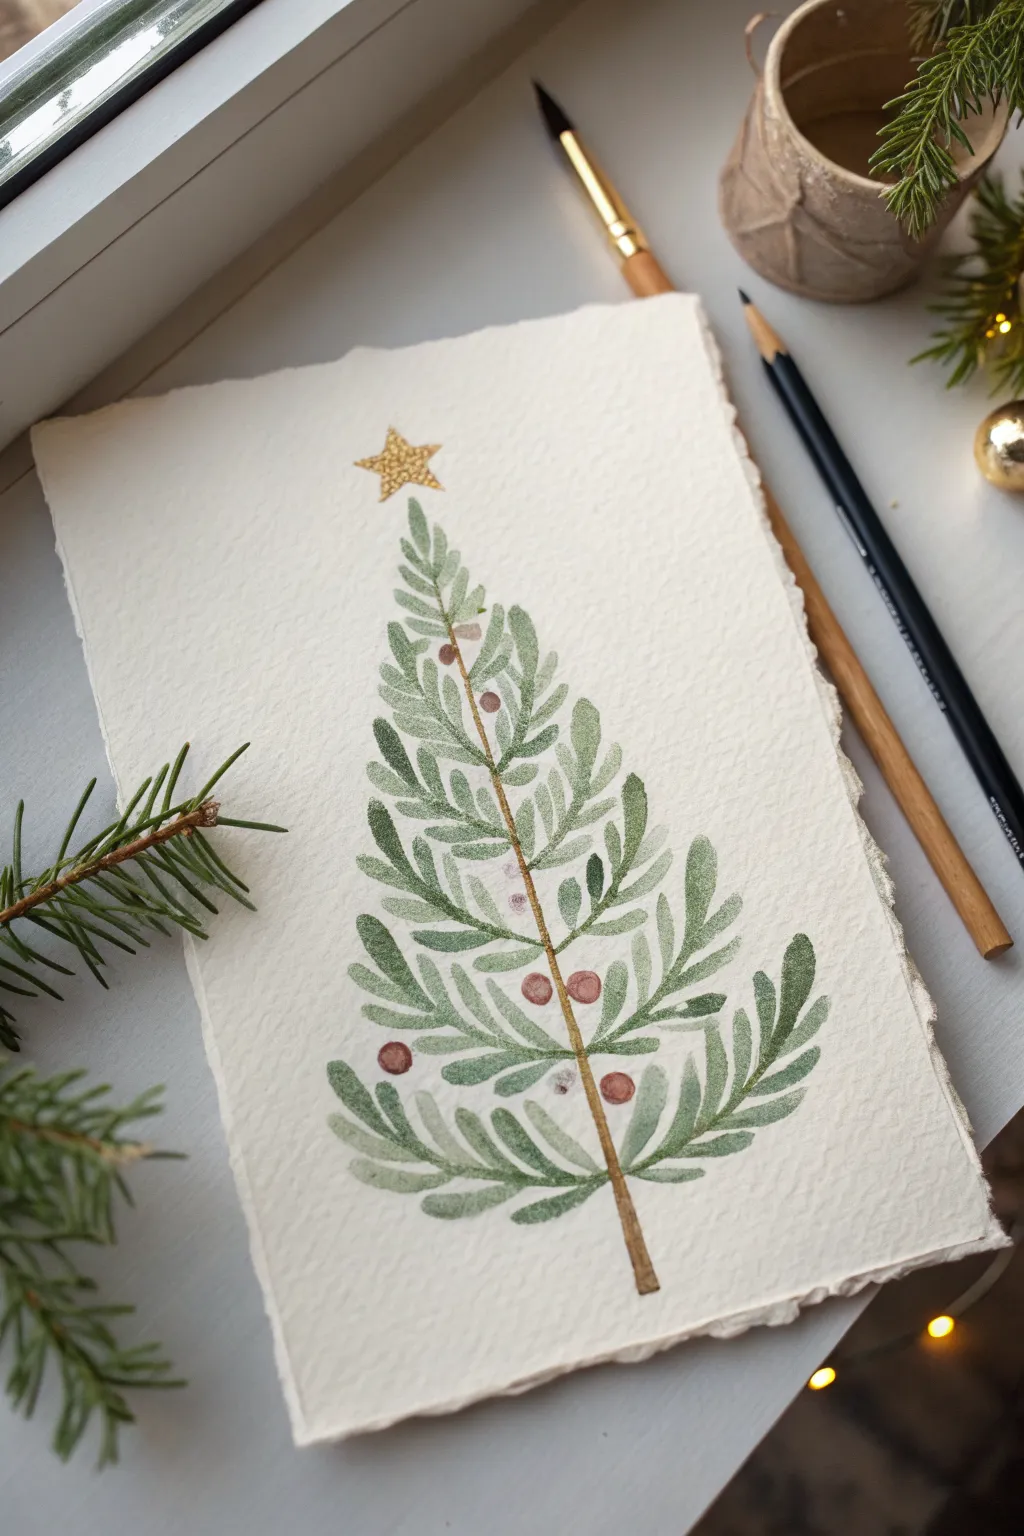
This charming holiday project transforms simple, fern-like fronds into a festive Christmas tree complete with a sparkling topper. The soft layers of watercolor green create natural depth, making it a perfect handmade card or seasonal art piece.
Detailed Instructions
Materials
- Heavyweight watercolor paper (cold press, ideally with deckle edges)
- Watercolor paints (Sap Green, darker Forest Green, Burnt Sienna/Brown, Deep Red)
- Metallic gold paint or gold watercolor
- Small round brushes (size 2 and 4)
- Pencil (HB or H for faint lines)
- Cup of water and paper towels
Step 1: Planning the Structure
-
Mark the guide:
Begin by lightly sketching a single vertical line down the center of your paper to act as the trunk’s guide. -
Define the shape:
Lightly mark a small dot at the top for the star and two wider points at the bottom to define the triangle shape of the tree, ensuring symmetrical width.
Wet-on-Dry Texture
Paint the leaves on dry paper rather than wetting it first. This ‘wet-on-dry’ technique keeps the edges of your fern leaves crisp and distinct, preventing the tree from turning into a green blur.
Step 2: Painting the Foliage
-
Mix your greens:
Prepare a palette with two shades of green: a lighter, watery sap green and a deeper, more saturated forest green. -
Start the trunk:
Using a thin brush and brown watercolor, paint a very fine line following your pencil guide, but stop about an inch from the top where the star will be. -
First branches:
Starting near the top, paint small, upward-curving brushstrokes branching out from the trunk. Treat each branch like a fern frond. -
Building the leaves:
For each branch, paint tiny, tear-drop shaped leaves along the stem. Use the tip of your round brush and press down gently to create the leaf belly, then lift for the point. -
Descend and widen:
Work your way down the trunk, making each subsequent layer of branches slightly longer and wider than the one above it. -
Layering colors:
As you paint lower branches, alternate dipped brushes between your light and dark green mixes. This creates natural variation without needing to wait for layers to dry fully. -
Fill the bottom:
At the base, curve the longest branches slightly upward at the tips to give the tree a buoyant, festive feel. -
Thicken the trunk:
Return to the exposed bottom section of the trunk and thicken it slightly with more brown paint, grounding the tree.
Step 3: Adding Details
-
Drying time:
Let the greenery dry completely. If you add berries too soon, the red will bleed into the green branches. -
Paint the berries:
Using a deep red, dab small round circles sporadically across the tree. Place some ‘inside’ the branches and some near the tips. -
Berry variation:
Dilute your red paint slightly for a few berries to create transparency, making some look further back than others. -
The golden star:
With metallic gold paint, carefully draw a five-pointed star at the very top, floating slightly above the highest branch tip. -
Internal sparkle:
If you have a very fine detail brush, you can add a thin line of gold highlight along the central trunk for a magical touch. -
Texture the star:
Once the star’s base layer is dry, dab a second layer of thick gold paint in the center to give it a textured, glittery appearance.
Snowy Highlights
After everything is fully dry, use opaque white gouache or a white gel pen to add tiny dots of ‘snow’ on the top edges of the branches or highlights on the red berries for extra dimension.
Allow the finished piece to dry flat overnight to prevent the paper from buckling

PENCIL GUIDE
Understanding Pencil Grades from H to B
From first sketch to finished drawing — learn pencil grades, line control, and shading techniques.
Explore the Full Guide
Snowflake Variation Practice Page
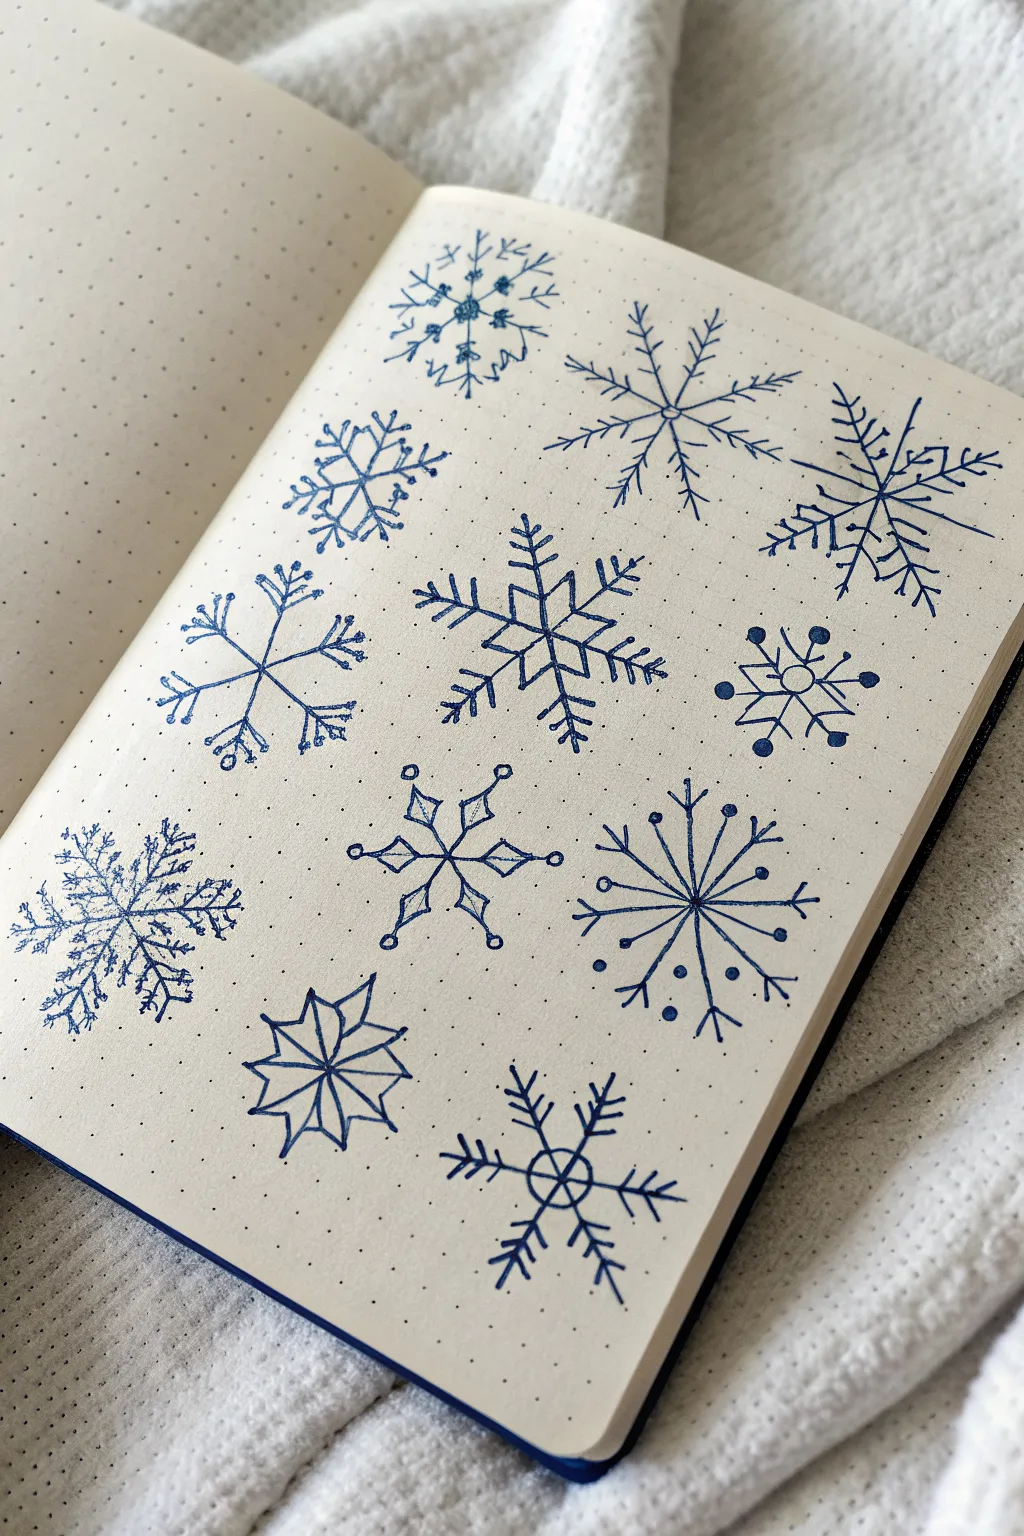
This practice page explores the endless geometric diversity of winter by filling a journal spread with twelve unique snowflake designs. Using a single blue hue on dot grid paper simplifies the process, allowing you to focus entirely on pattern and line variation.
Step-by-Step
Materials
- Dot grid journal (A5 size recommended)
- Blue fineliner or felt tip pen (0.5mm size ideal)
- Ruler (optional, for straight lines)
- Pencil and eraser (for sketching layouts)
Step 1: Setting the Grid
-
Visualize the spacing:
Before drawing, look at your dot grid page and mentally divide it into three columns and four rows. This will give you space for twelve distinct snowflakes without them crowding each other. -
Mark the centers:
Using a pencil, lightly mark the center point for each of the twelve snowflakes. Aim to leave specific numbers of dot-grid squares between each center point to keep the page balanced.
Uneven Lines?
If your six-pointed stars look lopsided, start by drawing a vertical line, then imagine a giant ‘X’ crossing through its center. This helps spacing more than drawing horizontals first.
Step 2: Row 1: Organic & Branching Styles
-
Draw the first classic flake:
In the top left spot, draw a simple six-pointed star using three crossing lines. Add small ‘V’ shapes along the arms and tiny circles at the very tips for a whimsical feel. -
Create the delicate crystal:
For the second snowflake, draw a long vertical line crossed by two diagonals. Keep the lines very thin and add tiny, branching twigs near the ends of each arm, varying their lengths naturally. -
Structure the third design:
Move to the top right. Draw a central six-pointed base, then add secondary ‘V’ shapes pointing outward on each arm. Connect these V-shapes with straight lines to create a webbed look.
Pro Tip: Dot Grid Logic
Use the dots! Count them to ensure your snowflake arms are exactly the same length. For example, extend every arm exactly 3 dots away from the center for perfect symmetry.
Step 3: Row 2: Geometric & Sharp Lines
-
Draw the starburst:
Start the second row with a six-pointed asterisk. At the end of each line, draw a small diamond shape. Inside the diamond, add a tiny dot or line for extra detail. -
Create the layered hexagon:
In the middle of the second row, draw a standard six-arm star. Connect the arms about halfway down with straight lines to form a hexagon. Repeat this with smaller lines closer to the center. -
Sketch the arrow flake:
For the right-side design, draw your six main lines. Instead of traditional branches, draw arrow-heads pointing inward towards the center on every arm.
Step 4: Row 3: Rounded & Decorative Elements
-
Draw the lollipop flake:
For the third row left, draw a simple six-armed star. At the end of every arm, draw a solid filled-in circle. Add a small hollow circle halfway down the length of each arm. -
Design the floral flake:
In the center spot, draw six arms. Instead of straight branches, draw curved petal-like shapes radiating from the center point between the main lines. -
Create the dotted burst:
On the right, draw a six-pointed star. Between each main arm, draw a shorter line that floats slightly, not touching the center. Top every single line with a small dot.
Step 5: Row 4: Complex Structures
-
Draft the heavy crystal:
Start the bottom row by drawing a thick six-pointed star. Go over your lines twice to bold them. Add extensive feathering strokes along the sides of each arm. -
Construct the star-point flake:
In the bottom center, draw a central point. Radiate six diamond shapes outward that touch at their bases, creating a flower-like geometric star. -
Finish with the compass flake:
For the final snowflake, draw a vertical line and a horizontal line. Add diagonal lines crossing through the center. Draw a small circle encompassing the intersection, creating a compass-like appearance. -
Erase guidelines:
Wait at least 5-10 minutes for the ink to fully cure across the page. Gently erase any pencil layout marks you made in the beginning.
Now you have a full reference sheet of winter patterns to use in your future seasonal spreads
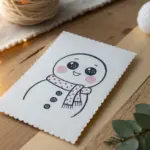
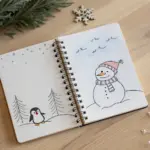
Snowman Character Lineup
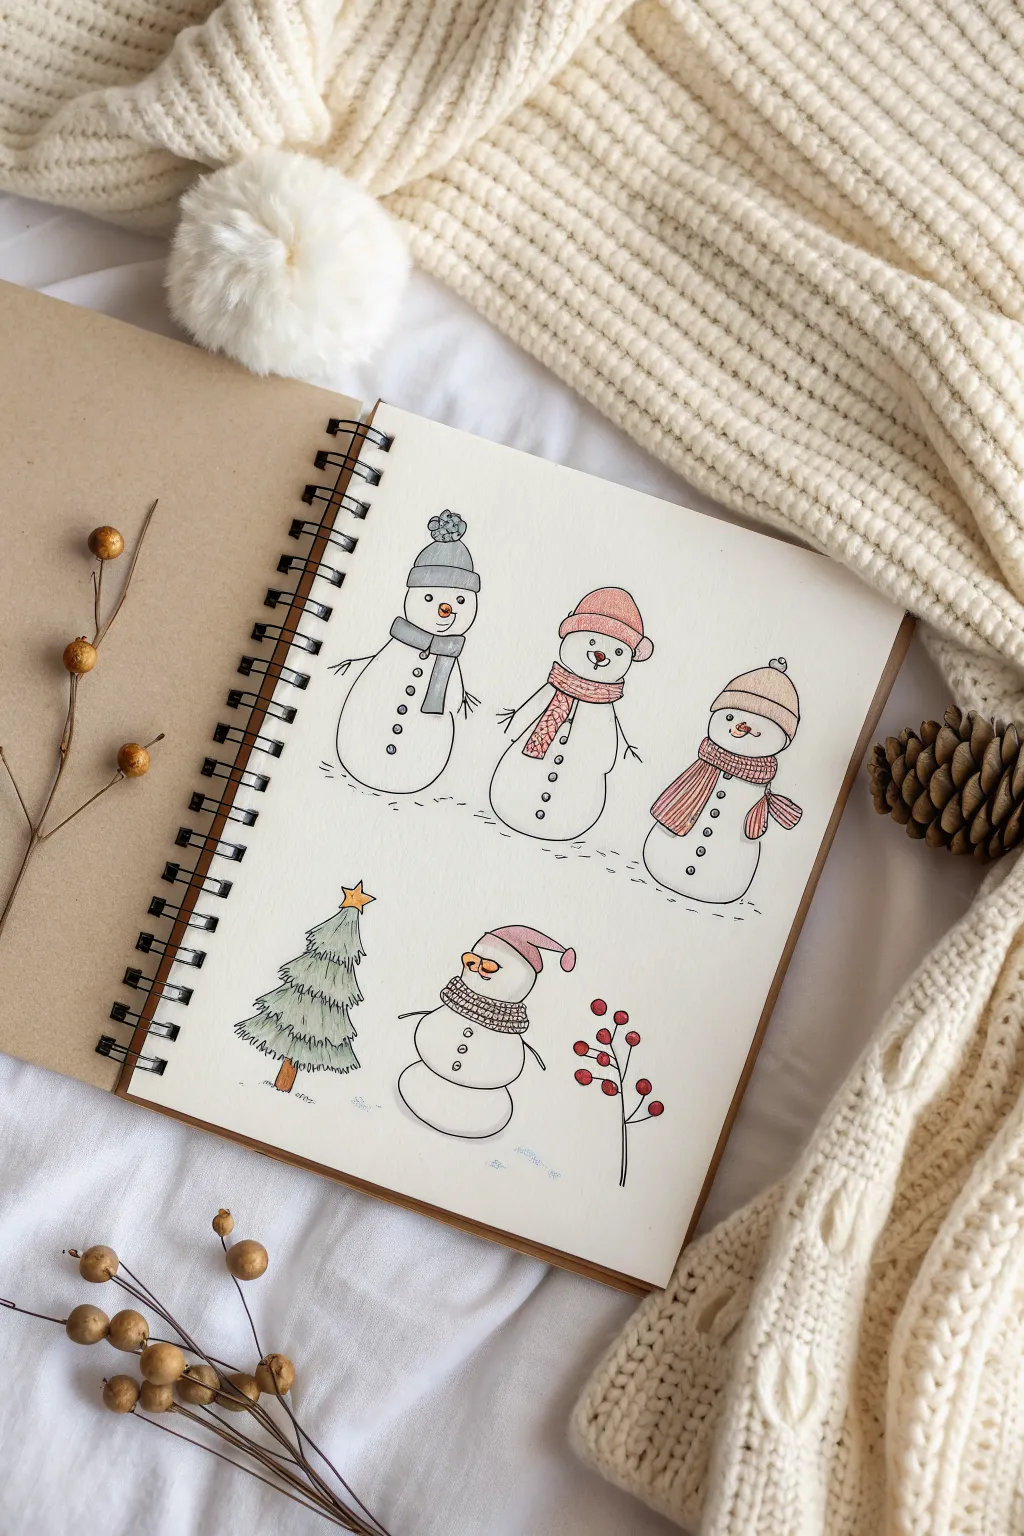
Capture the whimsical charm of winter with this delightful character lineup featuring four personality-filled snowmen and festive accessories. This tutorial guides you through creating a clean, illustrative spread using fineliners and soft colors for a warm, hand-drawn aesthetic.
Step-by-Step Guide
Materials
- Wire-bound sketchbook (tan or kraft paper cover shown, drawing is on white paper)
- Black archival fineliner pen (0.3mm or 0.5mm)
- Pencil (HB or 2B) for sketching
- Soft eraser
- Colored pencils or alcohol markers (Grey, Blush Pink, Red/Maroon, Sage Green, Orange, Yellow)
- White gel pen (optional for highlights)
Step 1: Setting the Scene
-
Planning the layout:
Visualize the page arrangement by imagining two horizontal rows. The top row will house three main snowman characters standing side-by-side, while the bottom row will feature a smaller Christmas tree on the left, a cool accessories-wearing snowman in the center, and a berry sprig on the right. -
Drafting the top row shapes:
Using a pencil with very light pressure, draw the basic shapes for the first three snowmen. Start with a smaller circle for the head and a larger, slightly squashed oval for the body underneath. Leave about an inch of space between each character. -
Drafting the bottom row elements:
Below the first lineup, sketch a triangular shape for the tree, a classic two-ball snowman shape for the center figure, and a tall, thin vertical line for the berry stem.
Step 2: Character Details
-
Sketching the first snowman (left):
On the top-left snowman, add a winter hat with a pom-pom on top. Draw a simple scarf draped around the neck with one end hanging down the front. Add stick arms pointing slightly downwards. -
Sketching the middle snowman:
Give the center snowman a simpler beanie hat and a scarf wrapped snugly. Position the stick arms angled downwards and away from the body. -
Sketching the third snowman (right):
For the top-right character, draw a beanie without a pom-pom. Design the scarf to wrap around the neck with both ends hanging down to the right side. -
Adding facial features:
Lightly sketch carrot noses pointing left or right for variety. Add small dots for eyes and a curved line of dots for mouths. Mark the placement of buttons down their bellies.
Pro Tip: Texture Trick
When coloring the knit hats, use tiny circular pencil strokes rather than straight lines. This mimics the fuzzy texture of wool yarn much better than flat coloring.
Step 3: Inking the Outlines
-
Tracing the main lines:
Switch to your black fineliner. Carefully trace the outlines of the snowmen’s heads and bodies. Keep your lines relatively smooth but don’t worry about perfection; a little wobble adds character. -
Detailing the accessories:
Ink the hats and scarves. Add texture lines to the hats—vertical stripes for ribbing or cross-hatching for a knit look. Make sure the scarves look like they are draping naturally over the curves of the snowmen. -
Defining the features:
Ink the small button eyes, the carrot noses, and the ‘coal’ mouths. Carefully draw the buttons down the front of each body. -
Drawing the bottom row:
Ink the Christmas tree using jagged, downward strokes to simulate layered branches, topping it with a star. Ink the ‘cool’ snowman with his sunglasses and sideways hat found in the bottom row.Finally, draw the stem and attached berries on the right side. -
Erasing pencil marks:
Wait a moment for the ink to dry completely to prevent smearing. Gently erase all the underlying pencil sketches to reveal the clean line art.
Level Up: Snowy Sparkle
Use a white gel pen to add tiny dots on the scarves and hats to look like fresh snowflakes, or add highlights to the sunglasses on the bottom snowman.
Step 4: Adding Color
-
Coloring the hats:
Use a grey colored pencil or marker for the first snowman’s hat and scarf. For the middle snowman, fill the hat and scarf with a soft pink or muted red. Use a beige or light brown tone for the third snowman’s accessories. -
Adding scarf patterns:
Once the base color is down, use your fineliner again to add patterns over the color if desired, such as little stripes or checks on the scarves. -
Coloring the noses and tree:
Fill the carrot noses with a bright orange. Color the Christmas tree with a sage green, using vertical strokes to mimic needles, and color the star yellow. Color the tree trunk brown. -
Coloring the berries:
Use a deep red or maroon to color the round berries on the bottom right sprig. I find that leaving a tiny speck of white uncolored on each berry creates a natural shine. -
Finishing touches:
Add very subtle ground lines under the snowmen with short, broken horizontal dashes to ground them, so they don’t look like they are floating.
Close your sketchbook knowing you have captured a perfect slice of winter cheer on paper


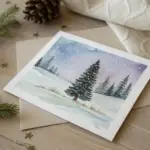
Snow Globe Scene in a Circle
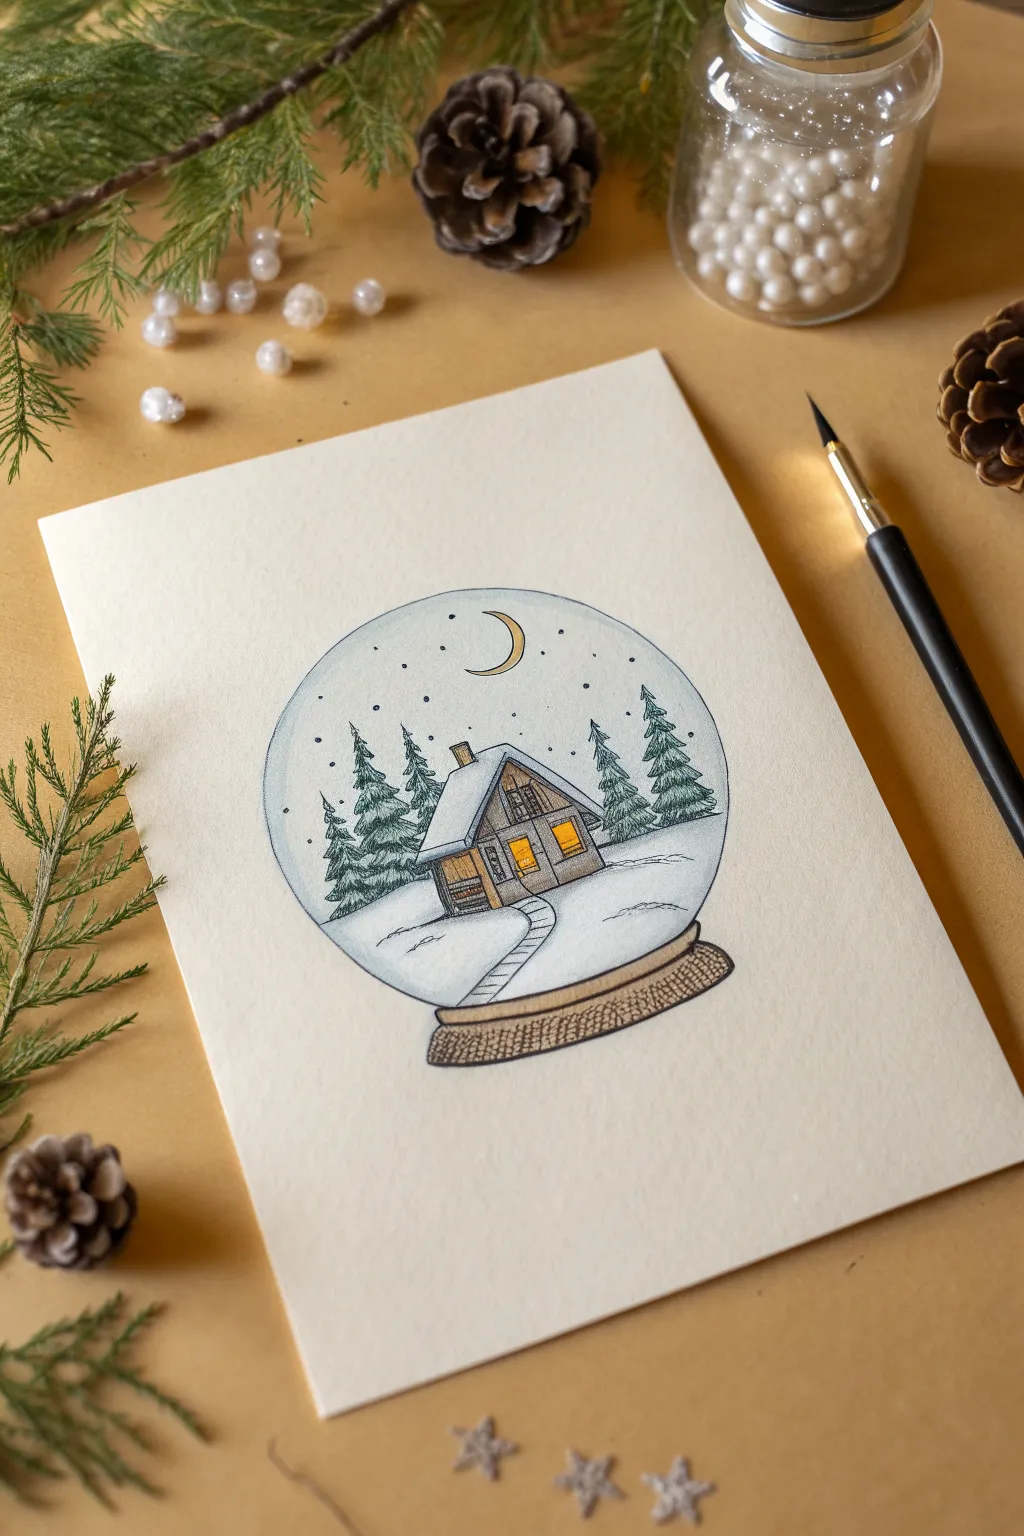
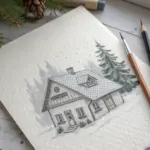
Capture the stillness of a winter night with this charming snow globe drawing featuring a rustic cabin nestled among pines. Using simple ink lines and soft color touches, you’ll create a peaceful scene perfect for holiday cards or winter decor.
Step-by-Step Tutorial
Materials
- Cream or off-white cardstock (A5 size)
- Pencil and eraser
- Compass or circular object for tracing
- Fine-liner pen (0.1mm and 0.3mm, black)
- Colored pencils (brown, grey, dark green, yellow, light blue)
- Ruler
Step 1: Drafting the Outline
-
Draw the globe shape:
Begin by using a compass to draw a perfect circle in the center of your paper. If you don’t have a compass, trace around a bowl or large jar lid lightly with a pencil. -
Add the base:
Sketch the base of the snow globe directly under the circle. Draw a flattened oval shape that slightly overlaps the bottom of the globe, giving it a sturdy, weighted look. -
Establish the ground line:
Inside the circle, draw a soft, curving horizon line about one-third of the way up from the bottom. This will separate the snowy ground from the sky. -
Sketch the cabin structure:
Place the cabin slightly off-center on the snow hill. Draw a simple perspective box with a pitched roof, ensuring the front face and side face are visible. -
Add trees and details:
Lightly sketch triangular shapes for pine trees on either side of the cabin. Add a winding path leading from the cabin door down towards the bottom right edge of the globe.
Uneven Circle?
If your hand-drawn circle looks wobbly, don’t worry. Just thicken the outline slightly on the thinner spots to even out the visual weight of the globe.
Step 2: Inking the Scene
-
Outline the globe:
Go over your main circle and base with a steady hand using a fine-liner. I like to keep this line relatively thin so it doesn’t overpower the drawing inside. -
Ink the cabin details:
Define the cabin logs using horizontal strokes on the walls. Outline the windows, door, and chimney, adding small vertical lines on the roof to suggest shingles or texture. -
Detail the evergreens:
For the trees, use jagged, zig-zag motions to create the texture of pine needles. Start wide at the bottom and taper to a point at the top. -
Create the path and snow:
Ink the edges of the path with broken lines to make it look like it’s buried in snow. Add a few horizontal streaks across the white ground to suggest drifts. -
Add the night sky:
Draw a thin crescent moon near the top center. Dot the sky with tiny specks and small circles to represent falling snow.
Step 3: Adding Color
-
Color the cabin:
Use a medium brown pencil to color the walls of the cabin. Press lightly to let the paper texture show through, giving it a rustic wood feel. -
Light up the windows:
Fill the window panes with a bright yellow. This crucial step creates that warm, inviting ‘cozy’ feeling against the cold backdrop. -
Shade the roof and snow:
Take a light blue or cool grey pencil and add very subtle shading to the left side of the roof and the snow drifts. This limited palette keeps the drawing looking crisp and wintery. -
Color the trees:
Use a dark green pencil for the pine trees. Layer the color slightly darker on the right side of each tree to create depth and shadow. -
Finish the base:
Color the snow globe base with a textured brown. You can use cross-hatching pencil strokes here to mimic a woven or wooden texture. -
Tint the globe glass:
Very lightly shade the upper inner edge of the circle with light blue. This suggests the curvature and reflection of the glass globe. -
Make the moon glow:
Add a touch of yellow to the crescent moon to match the warm light coming from the cabin windows. -
Final clean up:
Once you are sure the ink is totally dry, gently erase any remaining pencil guidelines to leave a clean, professional finish.
Add Sparkle
After coloring, use a white gel pen to add tiny bright dots over the trees and roof. It makes the fresh snow look like it is glistening.
Now you have a serene winter scene captured on paper, ready to share or frame for the holidays
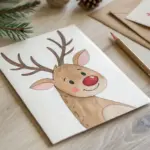
Reindeer Portrait With Soft Shading
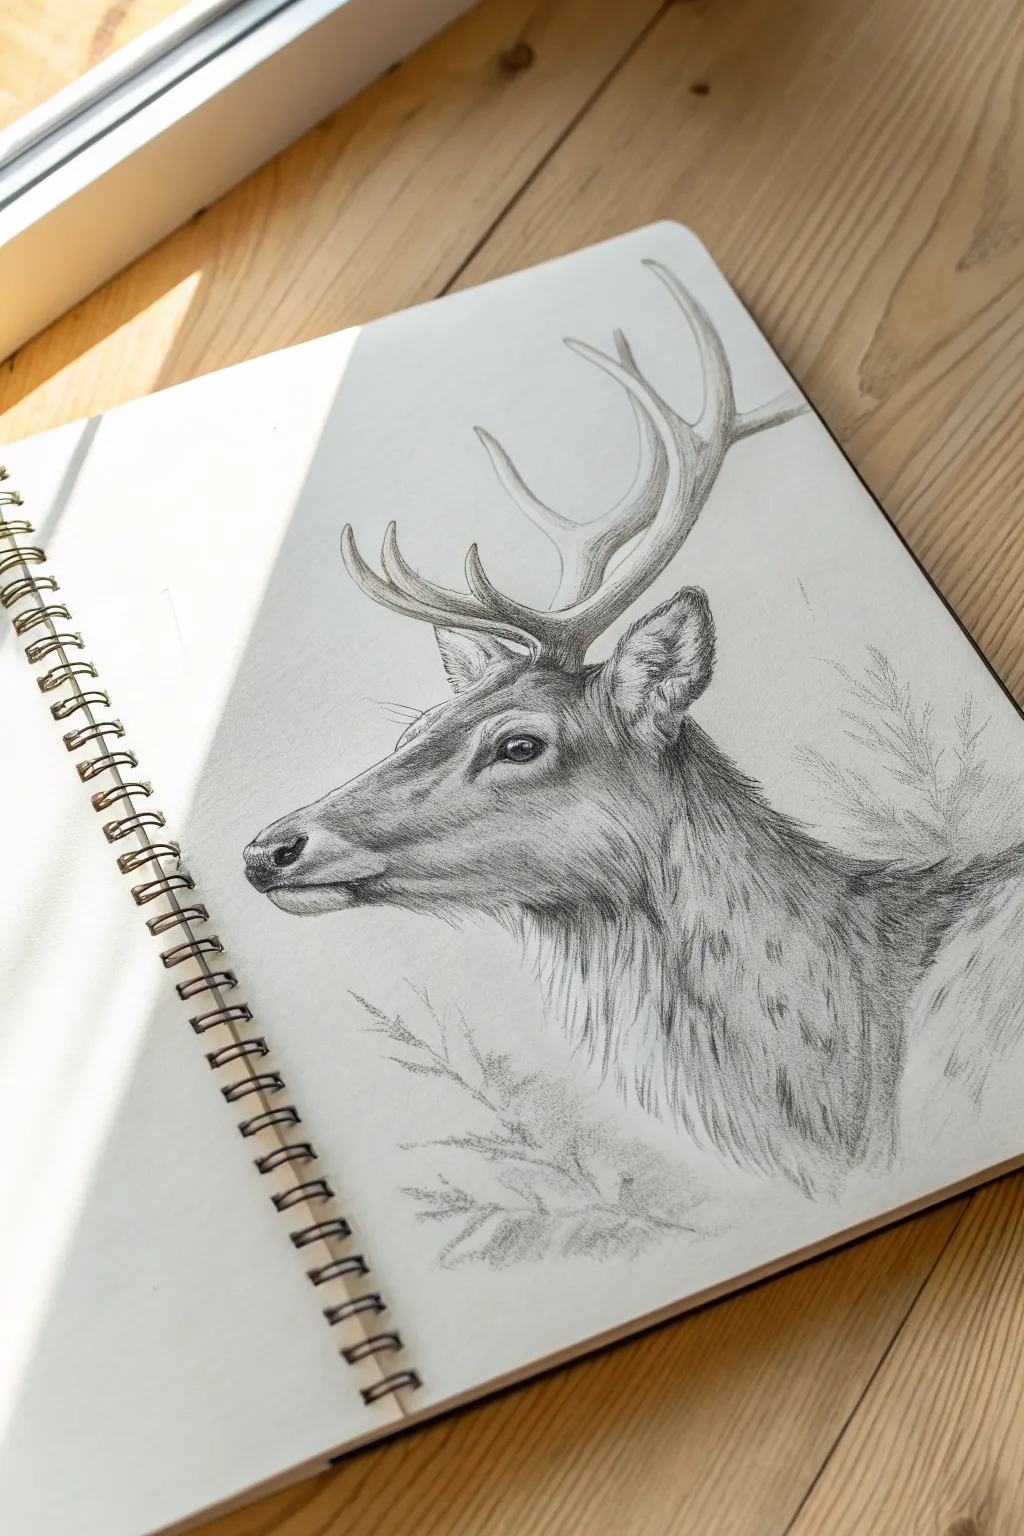
Capture the quiet majesty of a reindeer with this detailed graphite study, focusing on realistic fur textures and subtle tonal shifts. The result is a soft, elegant portrait perfect for your holiday sketchbook.
Step-by-Step Guide
Materials
- High-quality sketchbook paper (medium tooth)
- Graphite pencils (HB, 2B, 4B, 6B)
- Mechanical pencil (0.5mm HB for details)
- Kneaded eraser
- Blending stump or tortillon
- Clean tissue or paper towel
Step 1: Structural Outline
-
Basic Shapes:
Start with a light HB pencil to block in the main forms. Draw a slanted oval for the head and a tapered cylinder for the muzzle. Keep these lines very faint, as they serve only as guidelines. -
Positioning Features:
Mark the eye placement about halfway down the head oval. Sketch a small triangle for the nose at the tip of the muzzle and indicate the curve of the jawline. -
Ears and Antlers:
Add the leaf-shaped ear, angled slightly back. For the antlers, draw a main curving beam extending backward, then add the tines branching off. Focus on the gesture and direction rather than thickness right now. -
Refining the Contour:
Go over your guidelines with a slightly firmer line to define the final silhouette of the deer. Pay attention to the subtle dip in the forehead and the rounded shape of the nostril.
Too Smudgy?
If your drawing gets muddy, rest your hand on a clean scrap sheet of paper while you draw. This prevents your palm from dragging graphite across finished areas.
Step 2: Shading and Form
-
The Eye:
Switch to a 4B pencil to darken the pupil, leaving a tiny circle of white paper for the highlight. Shade the iris slightly lighter, and darken the tear duct area for depth. -
Muzzle Shading:
Using a 2B pencil, apply soft hatching along the side of the muzzle. I like to follow the underlying bone structure here to give the face solidity. -
Darkest Values:
Use a 6B pencil to fill in the nostrils and the deep crease of the mouth. Add depth inside the ear and under the jawline where the shadow is strongest. -
Soft Blending:
Gently smooth out your base shading on the face using a blending stump. Do not blend everything; leave the highlighted areas on the nose bridge and cheekbone clean.
Winter Sparkle
Use a white gel pen to add tiny dots of snow on the antlers or eyelashes. It adds a magical winter feel and enhances the contrast against the dark graphite.
Step 3: Texturing the Fur
-
Short Fur Direction:
With a sharp mechanical pencil or freshly sharpened HB, draw short, directional strokes for the fur on the face. The fur flows away from the nose and sweeps back across the cheek. -
Neck Texture:
The fur on the neck is longer and coarser. Use quicker, longer strokes with a 2B pencil, layering them to build density. Let the strokes overlap to look natural. -
Ear Detail:
Fill the ear with fluffy looking strokes. The edges should look soft and fuzzy, not outlined with a hard line. -
Adding Contrast:
Go back in with a 4B pencil to deepen the shadows between clumps of fur on the neck. This negative shading makes the lighter hairs pop forward.
Step 4: Antlers and Background
-
Antler Volume:
Shade the antlers using a cylindrical form concept—darker on the bottom edge, lighter on top. Add small, rugged texture lines to make them look like bone, not smooth plastic. -
Refining Edges:
Clean up the silhouette. If the pencil smudged outside the lines, use your kneaded eraser to lift it, keeping a crisp boundary against the white paper. -
Whiskers and Details:
Use a sharp HB to flick in a few delicate whiskers near the nose and above the eye. These should be swift lines that taper at the end. -
Atmospheric Elements:
Lightly sketch some vague pine branches in the background using the side of your pencil. Keep these very faint and undefined to ensure they don’t distract from the main portrait.
Take a moment to admire the lifelike gaze of your reindeer before closing your sketchbook
Long December Night Sky Study
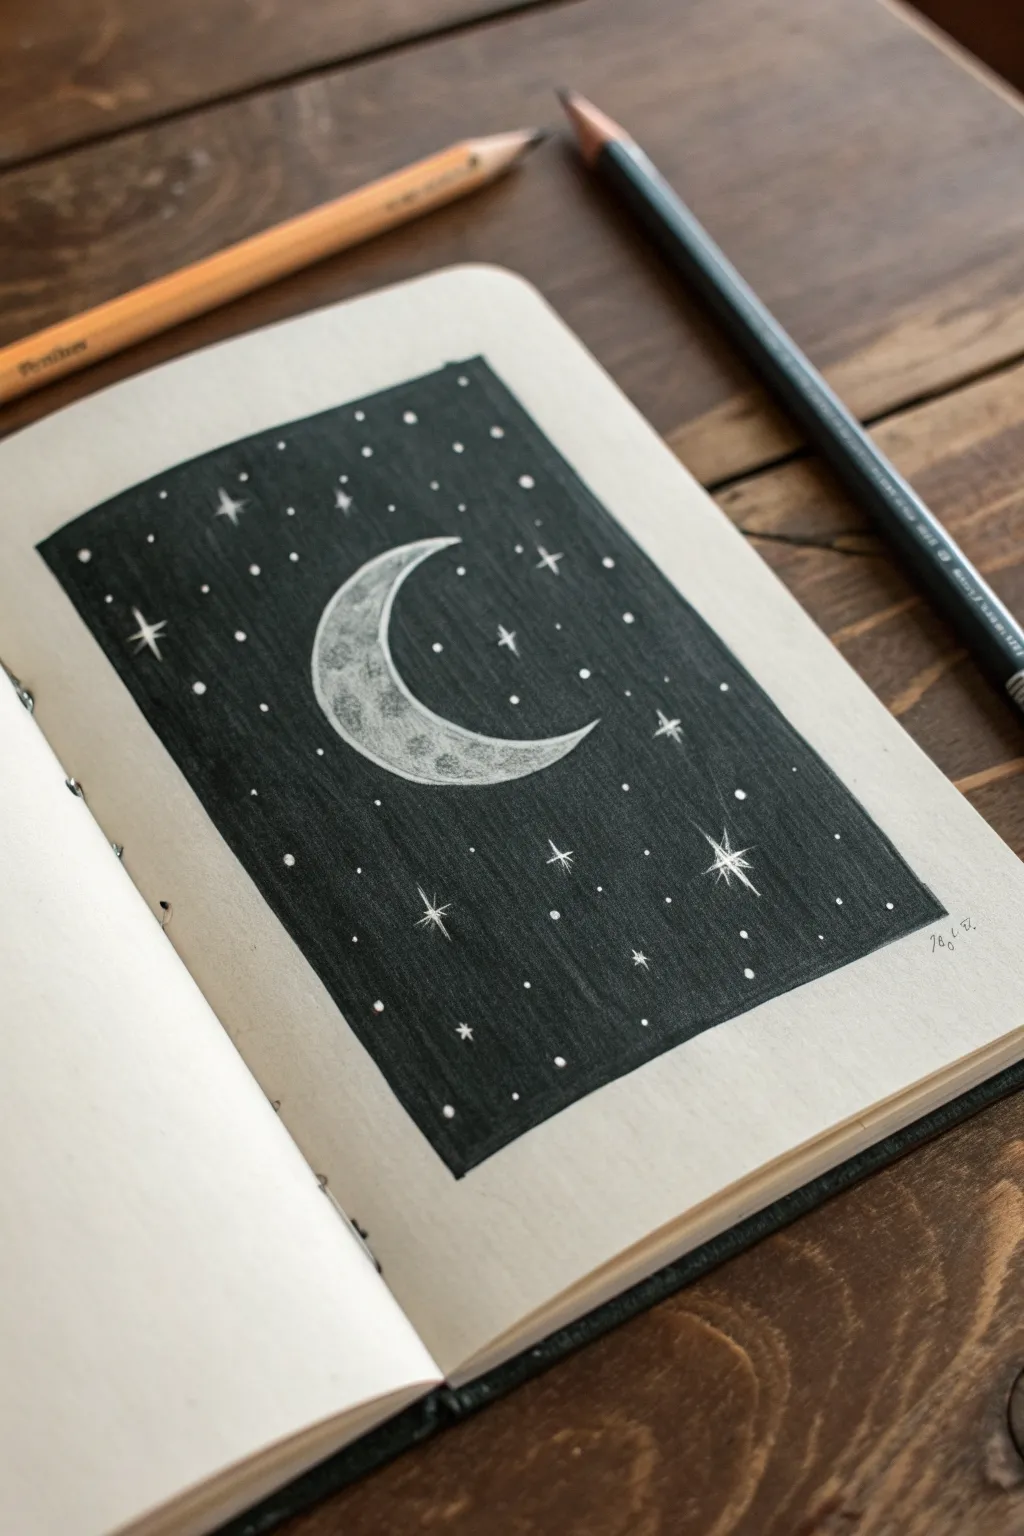
Capture the stark beauty of a clear December night with this high-contrast sketchbook study. By reserving white space and saturating the dark background, you’ll create a striking celestial scene that seems to glow right off the page.
Step-by-Step Tutorial
Materials
- Sketchbook with smooth, thick paper (cream or off-white works best)
- HB pencil for initial sketching
- Ruler
- Black ink marker or dark charcoal pencil (for the background)
- White gel pen (optional, for final touches)
- Clean eraser
- Blending stump (if using charcoal)
Step 1: Planning the Composition
-
Define the boundaries:
Begin by lightly drawing a vertical rectangle in the center of your sketchbook page using your ruler and an HB pencil. Leave a generous margin of white space around the edges to frame your artwork. -
Sketch the crescent shape:
Inside the rectangle, lightly sketch a large crescent moon. Place it slightly off-center or right in the middle depending on your preference. Focus on getting the curve smooth and tapering the points to sharp tips. -
Mark the larger stars:
Decide where your brightest stars will go. Lightly draw small crosses or asterisks in the negative space around the moon to reserve these areas. Don’t worry about the tiny dots yet, just the main features.
Step 2: Creating the Night Sky
-
Outline the preserved areas:
With your black medium (ink or charcoal), carefully trace the outline of your rectangle, executing a crisp, straight edge. Then, carefully outline the crescent moon and the larger star shapes you marked earlier. -
Fill the background borders:
Start filling in the darkness from the outer edges of the rectangle, working inward. This helps establish the sharp boundary early on. -
Approach the moon:
Work slowly as you color near the moon’s surface. You want a very sharp contrast here, so take your time to ensure the black touches the pencil line exactly without bleeding into the white cratered area. -
Saturate the darkness:
Fill the rest of the night sky. If you are using charcoal or pencil, use small circular motions to get a dense, solid black with minimal texture. If using ink, use long, overlapping strokes to ensure opacity. -
Reserve small stars:
As you fill the void, try to leave tiny pinpricks of white paper untouched scattered randomly. These will become your distant stars. I find this looks more organic than adding white ink later. -
Deepen the contrast:
Go over the background a second time if needed. The darker the sky, the brighter your moon will appear. Ensure the coverage is uniform and patchy areas are smoothed out.
Uneven Black Fill?
If your background looks streaky with marker, let it dry completely and apply a second layer in perpendicular strokes. For pencil, blend lightly with a tissue.
Step 3: Detailing the Moon and Stars
-
Texture the moon:
Using your graphite pencil very lightly, add faint texture to the moon’s surface. Draw subtle, irregular circles for craters and soft smudges to represent the lunar seas (maria). -
Keep it subtle:
Don’t over-shade the moon; it needs to remain mostly white to contrast against the heavy black background. Just a hint of grey graphite gives it dimension. -
Refine the starbursts:
Go back to your reserved star shapes. Use the pencil to sharpen their points or, if you filled over them by accident, use a white gel pen to draw sharp 4-pointed or 8-pointed stars. -
Add varied starlight:
Dot the night sky with a white gel pen to add more stars of varying sizes. Mix tiny specks with slightly larger dots to create depth and a realistic galaxy effect. -
Clean up edges:
Inspect the main rectangular border. If the edges look fuzzy, use your ruler and pen to sharpen them one last time for a crisp, card-like appearance. -
Erase guidelines:
Once you are absolutely sure the ink or charcoal is dry, gently erase any visible pencil marks from the initial sketch on the moon or around the white border margins.
Make it Glow
Use a white colored pencil to add a very faint, hazy halo around the crescent moon or the largest stars. This softens the harsh ink edge and creates a glowing effect.
Now you have a serene piece of the cosmos captured in your sketchbook to enjoy
Holiday Market Street Sketch
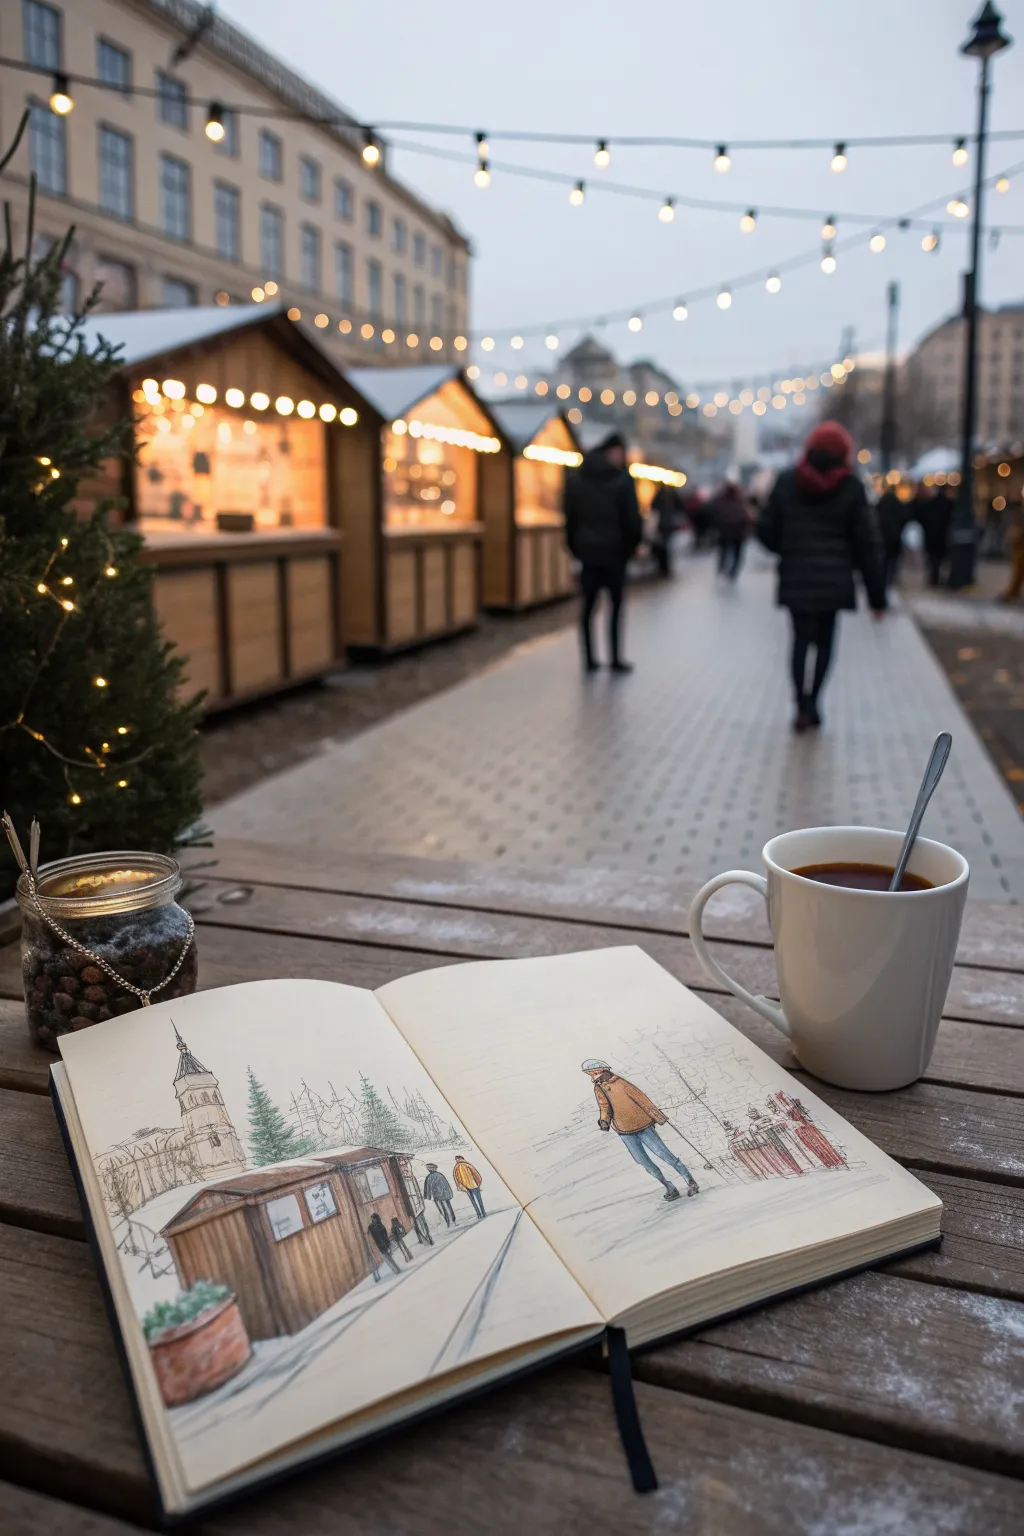
Capture the festive atmosphere of a winter market with this charming double-page spread. Using a combination of loose ink lines and soft watercolor washes, you’ll recreate a snowy scene featuring wooden stalls, wandering figures, and distant architecture.
Step-by-Step Tutorial
Materials
- A5 or A4 sketchbook (heavyweight paper suitable for watercolor)
- Fine liner pens (sizes 0.1, 0.3, and 0.5, waterproof ink)
- Watercolor set (Earth tones: burnt sienna, yellow ochre; Cool tones: ultramarine blue, grey; Accents: red)
- Small round watercolor brush (size 4 or 6)
- HB pencil
- Kneadable eraser
- Jar of water and paper towels
Step 1: Planning the Composition
-
Establish the Horizon:
Open your sketchbook to a fresh double-page spread. Lightly sketch a horizon line with your pencil across both pages, keeping it slightly below the center. This will ground your figures and the market stalls. -
Block in Main Structures:
On the left page, sketch a rectangular box shape closest to the viewer in the bottom left corner—this will be the main market stall. Behind it, sketch a tall, narrow rectangle for the church tower. -
Position the Figures:
On the right page, draw a simple stick figure walking away from the viewer to establish scale. Add loose outlines for shoppers near the stall on the left page and a small group on the far right. -
Add Background Elements:
Lightly pencil in triangular shapes for pine trees between the buildings and background structures to create depth.
Muddy colors?
If your wood tones look dirty, you may be mixing cool and warm colors too much on the paper. Let the brown layer dry completely before adding any grey shadow glazes over it.
Step 2: Inking the Scene
-
Outline the Main Stall:
Switch to a 0.5 pen for the foreground stall. Draw the vertical wooden planks with slightly wobbly lines to suggest rough timber. Define the roofline clearly, leaving the top open for snow. -
Detail the Architecture:
Use a 0.3 pen to ink the church tower in the background. Keep the details simpler here; suggest windows and brickwork with small, broken lines rather than continuous strokes. -
Define the Shopper:
On the right page, ink the main figure using the 0.3 pen. Focus on the coat and jeans, using flowing lines to show movement. Don’t worry about facial details; the back view keeps it anonymous and atmospheric. -
Sketch Background People:
Use your finest 0.1 pen for the distant figures near the stall and on the far right. These should be little more than quick silhouettes and outlines. -
Texture the Trees:
Use quick, scribbly loops and zig-zags with the 0.1 pen to create the texture of the pine trees behind the stall. -
Ground the Scene:
Add horizontal hatching lines on the ground to suggest shadows and the paved street texture, particularly under the walker’s feet and the stall base. -
Erase Pencil Lines:
Wait a moment for the ink to fully set, then gently remove all pencil guides with your kneadable eraser.
Step 3: Adding Watercolor Washes
-
Warm Wooden Tones:
Mix a watery Burnt Sienna with a touch of Yellow Ochre. Paint the vertical planks of the market stall, leaving thin white gaps between lines to simulate light and snow. -
Clothing Accents:
Paint the main figure’s coat in an ochre or light brown to match the warm palette. Touch a bit of red onto the distant figures for festive pops of color. -
Cool Shadow Tones:
Dilute a grey or pale blue wash heavily. Apply this to the figure’s jeans and add a cast shadow stretching out from their feet across the white paper ‘snow’. -
Atmospheric Background:
I find a very pale grey wash works best for the church tower. Keep it lighter than the foreground stall to push it into the distance. -
Greenery:
Dab a muted green into the pine trees. keep the color uneven and loose so it doesn’t look like a solid block. -
Final Foreground Details:
Once the stall is dry, add a touch of terracotta or red to the pot foundation in the very front corner. -
Review and Refine:
Check your contrast. If the main figure feels too light against the snow, add a second layer of blue to the jeans or shadows to anchor them firmly.
Add some magic
Use a white gel pen or opaque white gouache to add bright highlights on the stall roof and figure’s shoulders to mimic freshly fallen snow.
Now you have a wonderful winter memory perfectly preserved in your sketchbook to enjoy year-round
Drawcember Daily Prompt Grid
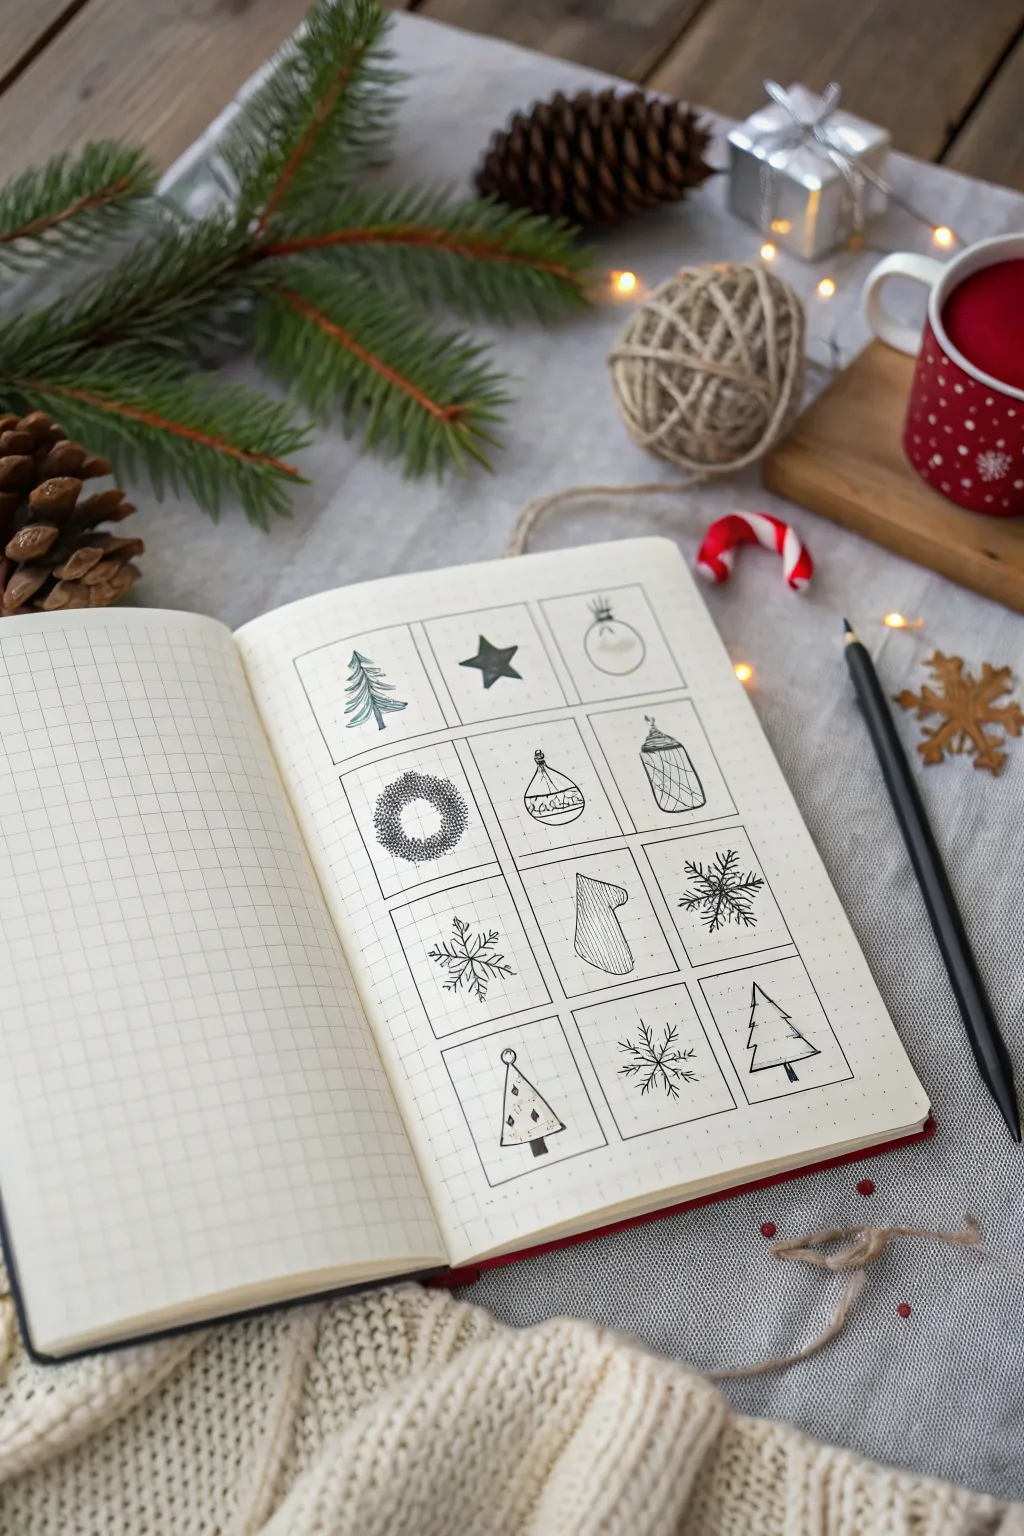
Capture the festive spirit with this organized and charming collection of holiday doodles, perfect for tracking a daily drawing challenge like Drawcember. This minimalist layout features twelve distinct winter symbols, ranging from delicate snowflakes to cozy stockings, all framed neatly within a hand-drawn grid.
How-To Guide
Materials
- A5 dot grid or square grid notebook (cream paper recommended)
- Fine liner pen (black, 0.3mm or 0.5mm)
- Thicker drawing pen, brush pen, or marker for shadows (optional)
- Mechanical pencil and eraser
- Ruler (clear grid ruler works best)
Step 1: Setting the Framework
-
Assess the spacing:
Begin by counting the grid squares available on your page to ensure your layout is centered. You will need space for a 3-column by 4-row grid. -
Draft the grid lines:
Using a mechanical pencil and ruler, lightly sketch out twelve equal squares. Leave a small margin of negative space (about one or two grid units) between each box to let the individual drawings breathe. -
Refine the borders:
Once you are happy with the layout, go over your pencil lines with a fine liner pen. Keep your hand steady but don’t worry about machine-perfect lines; a slight wobble adds character. -
Clean up placement:
Wait a moment for the ink to dry completely, then gently erase all the initial pencil grid lines to reveal your crisp, empty frames.
Grid Consistency
Count the grid dots carefully! A standard layout is often 6×6 or 8×8 dots per square to ensure they are all identical.
Step 2: Filling the Top Row
-
Draw the fir tree:
In the first box, pencil a vertical centerline. Draw downward-sloping branches layered on top of each other, getting wider towards the bottom. Add texture with short, flicked vertical strokes to mimic needles. -
Sketch the star:
In the middle box, draw a classic five-pointed star. I find it helpful to draw a faint pentagon first as a guide. Fill it in with a darker wash or heavy scribbling for contrast. -
Add the bauble:
For the third box, draw a simple circle. Top it with a small rectangle and a loop for the hanger. Keep the interior minimal, perhaps just a horizon line or a quick shine mark.
Add a Splash of Color
Use a metallic gold or silver gel pen to add tiny accents—like the star, tree topper, or ornament hooks—for festive sparkle.
Step 3: Detailed Middle Rows
-
Create the wreath:
Start with a light pencil circle. Using your pen, create the wreath texture by drawing tiny, rapid spirals or squiggles along that circular path to simulate dense foliage. -
Outline the ornaments:
In the next two boxes, draw varied ornament shapes—a teardrop and a lantern style. Decorate them with simple geometric patterns like horizontal stripes or cross-hatching. -
Design the snowflake:
Draw a small cross, then an ‘X’ through the center. Add small ‘V’ shapes at the end of each arm to create the crystalline structure. -
Hang the stocking:
Sketch a simple sock shape. Add vertical lines inside the main body to suggest a rib-knit texture, leaving the heel and toe plain. -
Draw the second snowflake:
Try a different variation here. Start with the same central axis, but use branching lines that look more like tiny fern leaves for a feathery effect.
Step 4: Final Touches
-
Draft the minimalist trees:
In the bottom row, experiment with stylized trees. For the left one, draw a simple triangle on a stick and add small dots for decorations. For the right one, stack three triangles of increasing size. -
Complex snowflake:
In the remaining center box, draw your most intricate snowflake yet, combining the previous ‘V’ shapes with extra radiating lines for fullness. -
Inking the doodles:
Carefully trace over all your penciled illustrations with the fine liner. Use a varied pressure—heavier on outlines, lighter on interior textures. -
Erase guidelines:
Once the ink is fully cured, do a final comprehensive pass with your eraser to remove every trace of graphite. -
Add shading accents:
If you wish, use a grey marker or diluted ink to add a tiny drop shadow to the right of objects like the star or the stocking to make them pop off the page.
Fill your new grid with these festive shapes and enjoy the accomplishment of a completed holiday spread
Monochrome December Ink Wash Silhouettes
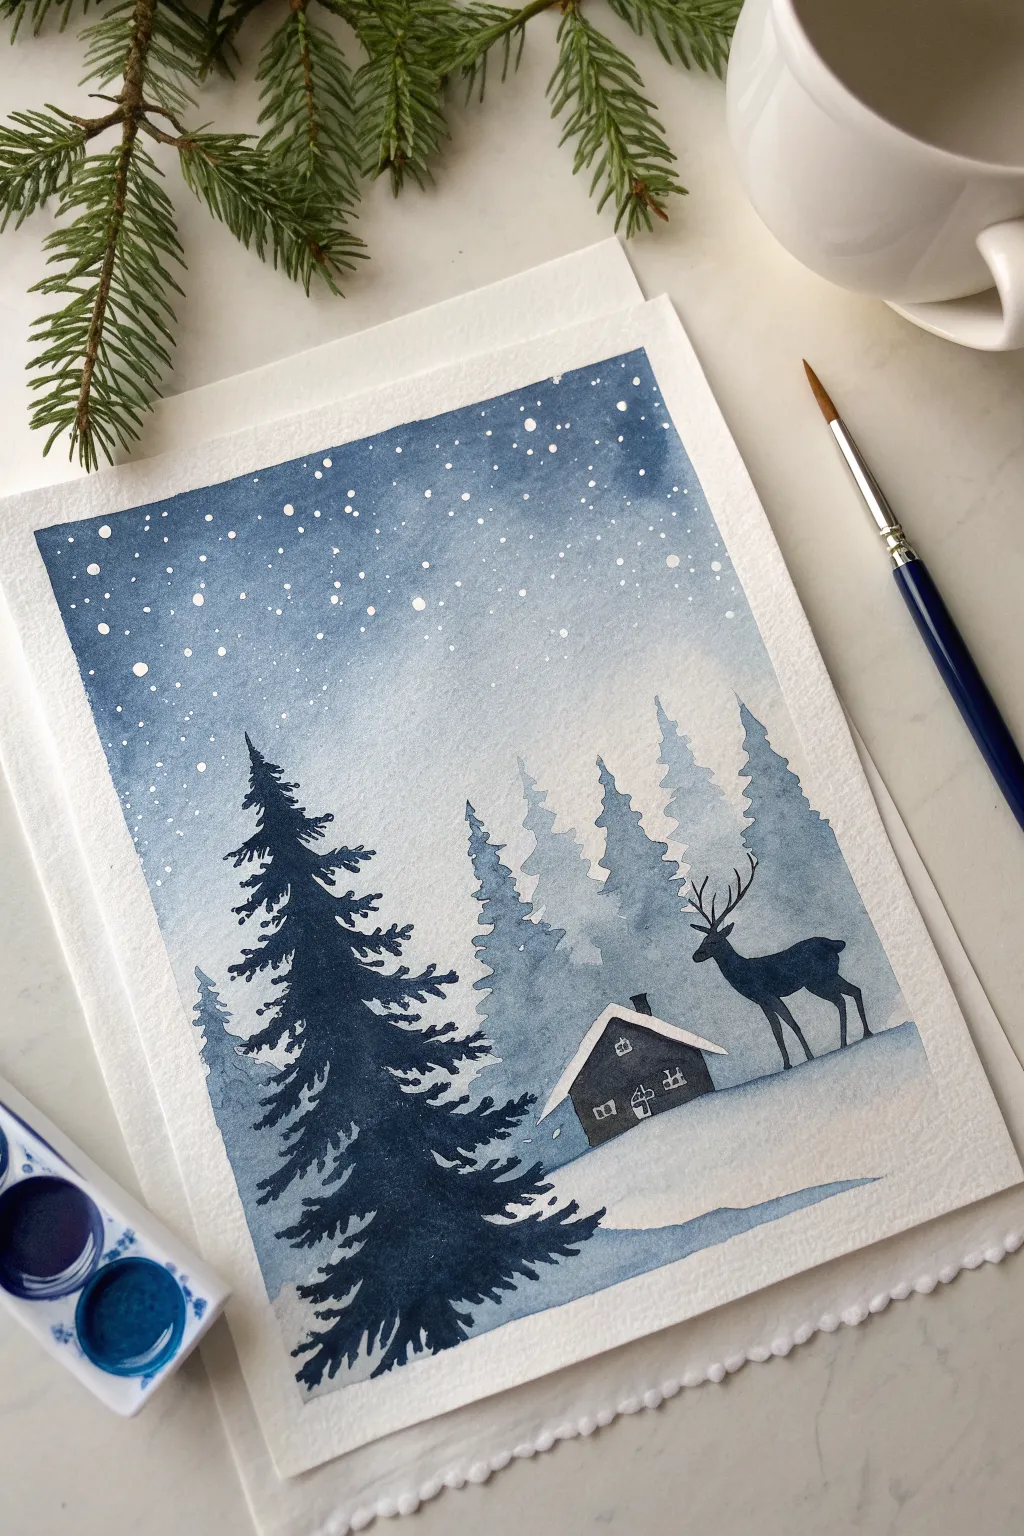
Capture the stillness of a snowy December evening with this serene monochromatic watercolor painting. Using just one shade of blue, you’ll learn to create depth through layering and atmospheric perspective, resulting in a dreamy winter landscape.
Step-by-Step Guide
Materials
- Cold press watercolor paper (approx. 5×7 inches)
- Indigo or Prussian Blue watercolor paint
- White gouache or white ink
- Masking tape
- Round watercolor brushes (size 6 for washes, size 0 or 1 for details)
- Palette
- Two jars of water
- Paper towels
Step 1: Setting the Scene
-
Preparation:
Begin by taping down all four edges of your watercolor paper to a rigid board. This prevents the paper from buckling when wet and ensures you get that crisp, clean white border at the end. -
Sky Gradient:
Mix a medium-strength wash of your blue paint. Wet the top two-thirds of the paper with clean water, then apply the blue paint starting from the top edge, allowing it to naturally fade into lighter values as you move down towards the horizon line. -
Adding Stars:
While the sky is still slightly damp but not soaking wet, load a small brush with white gouache or ink. Gently tap the handle against your finger to splatter tiny droplets across the upper sky to create stars. Let this layer dry completely.
Step 2: Creating Atmosphere
-
Distant Trees:
Mix a very dilute, watery puddle of your blue paint. Using a size 6 brush, paint loose, jagged shapes to represent a line of distant pine trees along the horizon. The pigment should be faint to suggest they are far away in the mist. -
Mid-ground Trees:
Once the first layer of trees is dry, mix a slightly more saturated puddle of blue. Paint a second row of trees slightly lower and overlapping the first set. This darker value brings them forward visually. -
Snowy Ground:
Using the same mid-tone blue, paint a sweeping curve at the bottom to define the snowy hill. Leave the area directly above this line white to represent the snow-covered ground reflecting light.
Mist Control
For the foggy background trees, test the color on a scrap piece of paper first. It should dry much lighter than it looks when wet to achieve that ghostly effect.
Step 3: Foreground Elements
-
The Cabin Shape:
Switch to your smaller detail brush. Sketch the outline of a simple cabin roof and body using a medium-dark blue. Leave the roof completely unpainted (white paper) to look like heavy snow. -
Cabin Details:
Fill in the front facade of the house with dark blue paint, carefully painting around tiny squares for the windows. If you accidentally fill them in, you can add them back later with white gouache. -
Chimney and Shadow:
Add a small rectangular chimney on the roof. I like to add a subtle line of blue shadow under the eaves of the roof to make the snow look thick and dimensional. -
The Reindeer Silhouette:
To the right of the cabin, use a concentrated, dark mixture of paint to silhouette the reindeer. Start with the body shape, then carefully add the legs and the neck, ensuring the feet feel planted on the snow line. -
Antlers:
With the very tip of your smallest brush (size 0), paint delicate, branching lines for the antlers. Keep your hand steady and lift the brush at the end of each stroke for a fine point.
Add Magic
Mix a tiny amount of silver metallic watercolor into your blue paint for the night sky wash to give the finished piece a subtle, frosty shimmer.
Step 4: The Main Tree
-
Tree Trunk:
Using your darkest, most saturated paint mixture (almost black-blue), draw a faint vertical guide line on the left side of the paper where the large foreground tree will stand. -
Tree Top:
Starting at the top of your guide line, paint small, sharp distinct branches pointing slightly upward. Keep the silhouette narrow at the peak. -
Building Volume:
Work your way down the tree, making the branches wider and heavier. Use a dabbing motion to simulate clumps of needles rather than painting individual leaves. -
Texture:
Leave tiny gaps of paper showing through the dense branches occasionally. This prevents the tree from looking like a solid triangle and adds realism to the foliage. -
Base Branches:
At the bottom of the tree, extend the branches further out to the right, letting them overlap the distant background trees. This high contrast creates a powerful sense of depth. -
Final Touches:
Check your windows; if they aren’t bright enough, add a tiny touch of white gouache or gel pen to make them pop. Add a faint cast shadow under the reindeer and cabin. -
The Reveal:
Wait until the paper is absolutely bone dry. Peel the masking tape away slowly at a 45-degree angle to reveal the crisp edges.
Now you have a peaceful winter vignette perfect for a handmade holiday card or a seasonal display
December Memories Collage Spread

Capture the quiet magic of the season with this minimalist journal spread, featuring delicate line drawings of ornaments and winter motifs. This layout combines simple ink sketches with small pops of color to create a serene space for recording December memories or to-do lists.
Step-by-Step
Materials
- A5 Spiral-bound notebook (lined or dot grid)
- Black fine liner pen (0.3mm or 0.5mm)
- Black fountain pen or gel pen (for thicker lines)
- Green colored pencil or marker
- Ruler (optional)
- Pencil and eraser
Step 1: Planning and Layout
-
Prepare the page:
Open your spiral-bound notebook to a fresh two-page spread. Ensure the surface is flat. If you are using a new pen, test it on a scrap piece of paper first to ensure the ink flows smoothly without skipping. -
Sketch placement lightly:
Using a pencil, very faintly mark where your header elements will go. You want a horizontal garland on the left page and a singular focal point star on the top of the right page.
Pen Pressure
Vary your pen pressure. Press harder for the outline of ornaments and lighter for the inner details to create depth.
Step 2: Left Page: The Ornament Garland
-
Draw the garland string:
On the left page, about three or four lines down from the top, draw a swooping horizontal line. It doesn’t need to be perfectly straight; a slight curve mimics a hanging string. Add small loops or bows where the ornaments will attach. -
Sketch the first ornament:
Draw a teardrop shape hanging from the left side of your string. Inside, draw a horizontal line and fill the bottom half with small vertical hatching lines to create texture. -
Add a bauble:
Next to the teardrop, draw a classic round ornament. Give it a small cap at the top. Decorate the inside with a tiny circle or star in the center. -
Draw a geometric tree:
For the third ornament, draw a simple triangle to represent a tree. Add horizontal stripes across the triangle for a modern look. -
Detailed lettering:
Above the garland string, use your fine liner to write a quote or decoration. In the example, small, rune-like or decorative text follows the curve of the string. Keep these letters very small and precise. -
Add list headers:
Move down to the middle and bottom of the left page. Use your fountain pen or thicker gel pen to write section headers like ‘Remember’ or ‘Shopping List’ on the lines.
Mixed Media
Use a metallic gold or silver gel pen for the ornament hooks and the light string to add a festive shimmer to the page.
Step 3: Right Page: Stars and Snowflakes
-
Draw the main star:
On the top left of the right page, outline a five-pointed star. This is the only element we’ll be coloring, so make the outline distinct. -
Add color:
Take your green colored pencil or marker and fill in the star. I like to keep the coloring somewhat soft to match the cozy aesthetic. -
Overlay detail:
Once the green is down (and dry, if you used marker), use your black pen to draw a smaller star or snowflake pattern inside the green shape for contrast. -
Create a decorative border:
Above the star, draw a dotted line that angles upward toward the top right corner. Add tiny dots or circles along it to look like a string of lights or snow. -
Sketch a snowflake:
To the right of the star, draw a six-pointed snowflake. Start with a simple cross, add a horizontal line through the center, and add little ‘V’ shapes at the ends of each arm. -
Draw a stylized pine tree:
Between the star and the snowflake, draw a tiny, vertical stick figure tree. Use a straight vertical line for the trunk and small, varying horizontal dashes for the branches. -
List content:
Below these drawings, use your best handwriting to add list items or journal entries. Using a thinner pen here helps keep the text legible and neat against the lined paper.
Step 4: Finishing Touches
-
Erase pencil marks:
Wait at least five minutes to ensure all ink is completely dry to prevent smudging. Gently erase any visible pencil guidelines. -
Add final details:
Review your spread. If any lines look too thin, go over them once more to add weight, particularly on the ornament outlines.
Enjoy filling your new spread with warm holiday memories and plans

Have a question or want to share your own experience? I'd love to hear from you in the comments below!