When I’m sketching a dream house, I always start with bold, modern shapes that feel clean, airy, and a little bit luxurious. Here are my favorite modern house drawing ideas to help you build strong structure fast and then layer in those satisfying details.
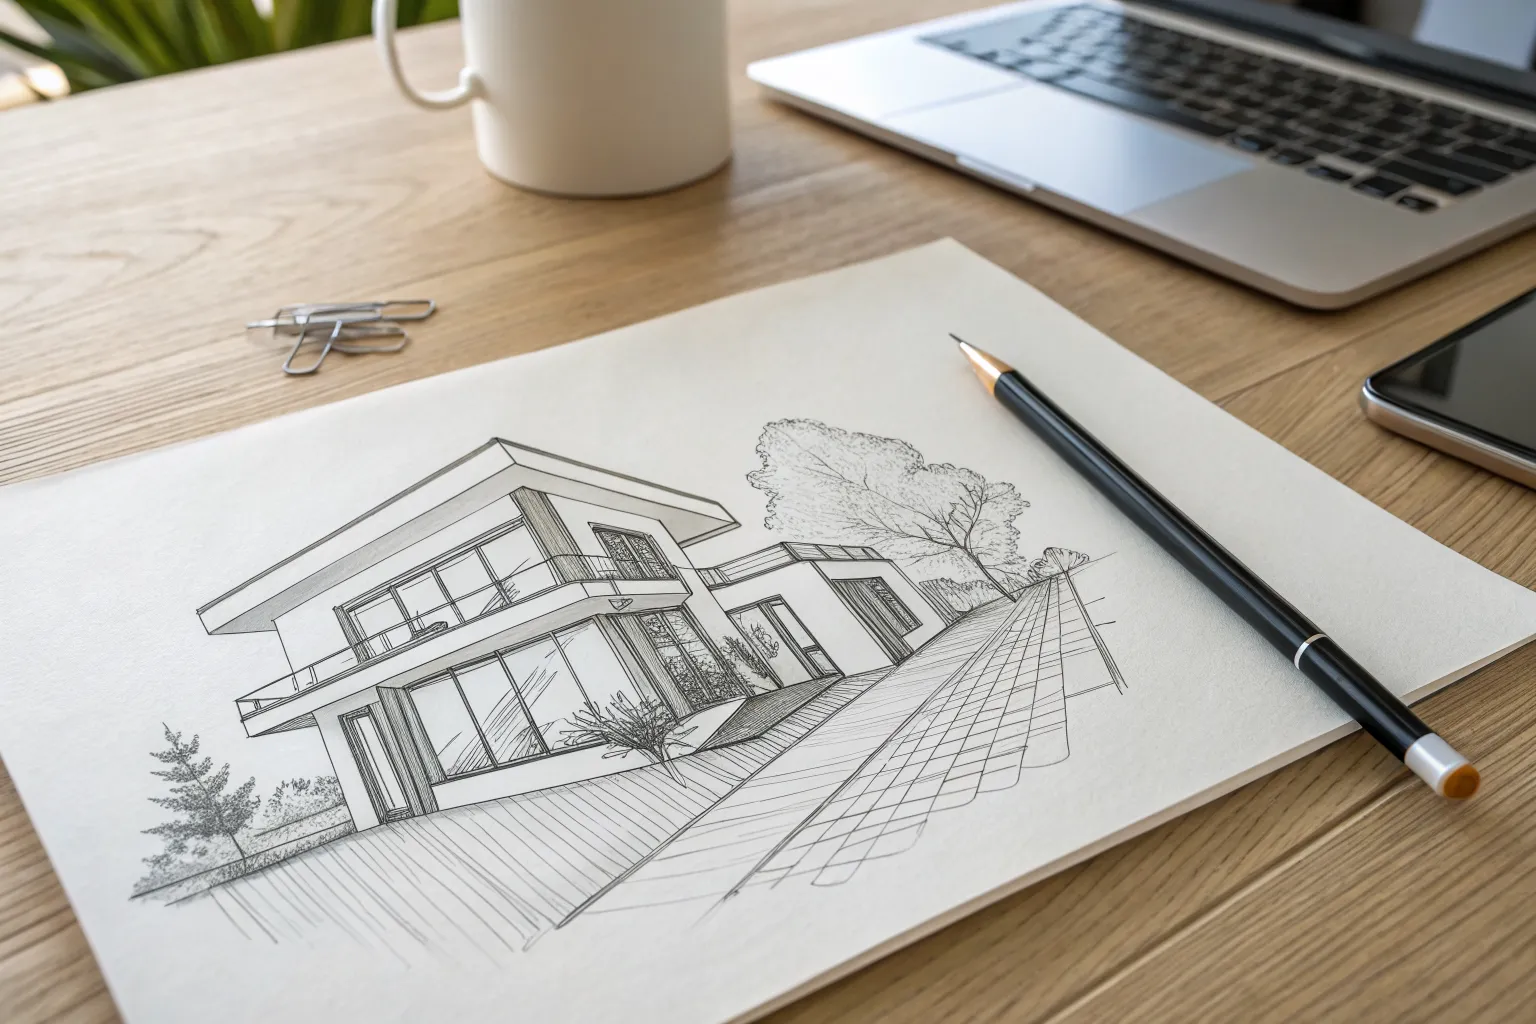
Boxy Modern House in Two-Point Perspective
Master the clean lines and dynamic angles of contemporary architecture with this detailed pen and ink drawing tutorial. By utilizing two-point perspective, you will create a convincing 3D representation of a minimalist home surrounded by structured landscaping.
How-To Guide
Materials
- White smooth Bristol paper (A3 or similar size)
- HB graphite pencil for sketching
- Fine liner pens (sizes 0.1, 0.3, and 0.5)
- Long ruler (30cm or 50cm)
- Eraser (kneaded or high-polymer)
- Reference photo of a modern box-style house
Step 1: Setting the Perspective Framework
-
Establish the horizon line:
Begin by lightly drawing a horizontal line across your paper, roughly one-third of the way up from the bottom. This is your eye level. -
Mark vanishing points:
Place two small dots on the far left and right edges of your horizon line. These are your Vanishing Points (VPs) that will guide all your angled lines. -
Draw the leading corner:
Draw a vertical line near the center of the paper, crossing the horizon line. This represents the corner of the house closest to the viewer. -
Connect to vanishing points:
From both the top and bottom of your central vertical line, use your ruler to draw light guidelines connecting back to both the left and right vanishing points. This creates the basic ‘box’ of the building. -
Define the building’s length:
Draw two more vertical lines on either side of the center line to determine how wide the house will be on each face, completing the primary cube shape.
Wonky Walls?
If your house looks distorted, check your vertical lines. In 2-point perspective, all vertical lines must be perfectly straight up and down, parallel to the side of the paper.
Step 2: Adding Architectural Details
-
Structure the second floor overhang:
Modern houses often have jutting sections. Add a horizontal line slightly below the roofline on the left face, and extend it out past the corner, connecting it back to the right VP to create a cantilevered look. -
Block in windows and doors:
Using vertical lines for the sides and guidelines connected to the VPs for the tops and bottoms, lightly sketch large rectangular spaces for the sliding glass doors and upper windows. -
Sketch the driveway and patio:
From the base of the house, draw lines extending towards the bottom corners of the paper to form the driveway and paved areas. Keep these aligned with your perspective system. -
Outline landscaping elements:
Lightly sketch irregular shapes for bushes near the foundation and indicate the position of trees on the left and right edges to frame the composition.
Elevate the Look
Add a wash of light grey watercolor or alcohol marker to the windows and shadows. This mixed-media approach adds immediate professional depth to the line work.
Step 3: Inking and Refining
-
Outline the main structure:
Switch to a 0.5 fine liner pen. Carefully trace over the final vertical and perspective lines of the house’s exterior walls, using your ruler to keep them crisp. -
Detail the window frames:
Use a thinner 0.3 pen to ink the window frames. Draw double lines to give the frames thickness, rather than just a single line. -
Define the ground textures:
With the 0.1 pen, add texture to the driveway. Stipple (dots) or use very light, broken lines to suggest concrete or gravel without overpowering the drawing. -
Ink the foliage:
For the trees and bushes, put the ruler aside. Use a loose, slightly scribbly hand with the 0.3 pen to create organic leafy textures that contrast with the rigid house. -
Add depth with hatching:
Identify where the light is coming from (usually the top left or right). Use simple parallel hatching lines on the shadowed side of the building to create volume. -
Create glass reflections:
Draw diagonal, parallel lines across parts of the window glass to simulate reflection. Don’t fill the whole window; just hint at the sheen. -
Clean up the drawing:
Once the ink is completely dry—I usually give it at least 15 minutes to be safe—gently erase all your graphite pencil guidelines. -
Final foliage details:
Use your finest 0.1 pen to add delicate grass blades in the foreground and tiny twigs on the tree branches. -
Weight the bottom:
Go back over the very bottom lines of the house and the planting beds with the 0.5 pen to ‘ground’ the building and separate it from the earth.
Enjoy the satisfaction of seeing your structured, modern architectural design come to life on the page


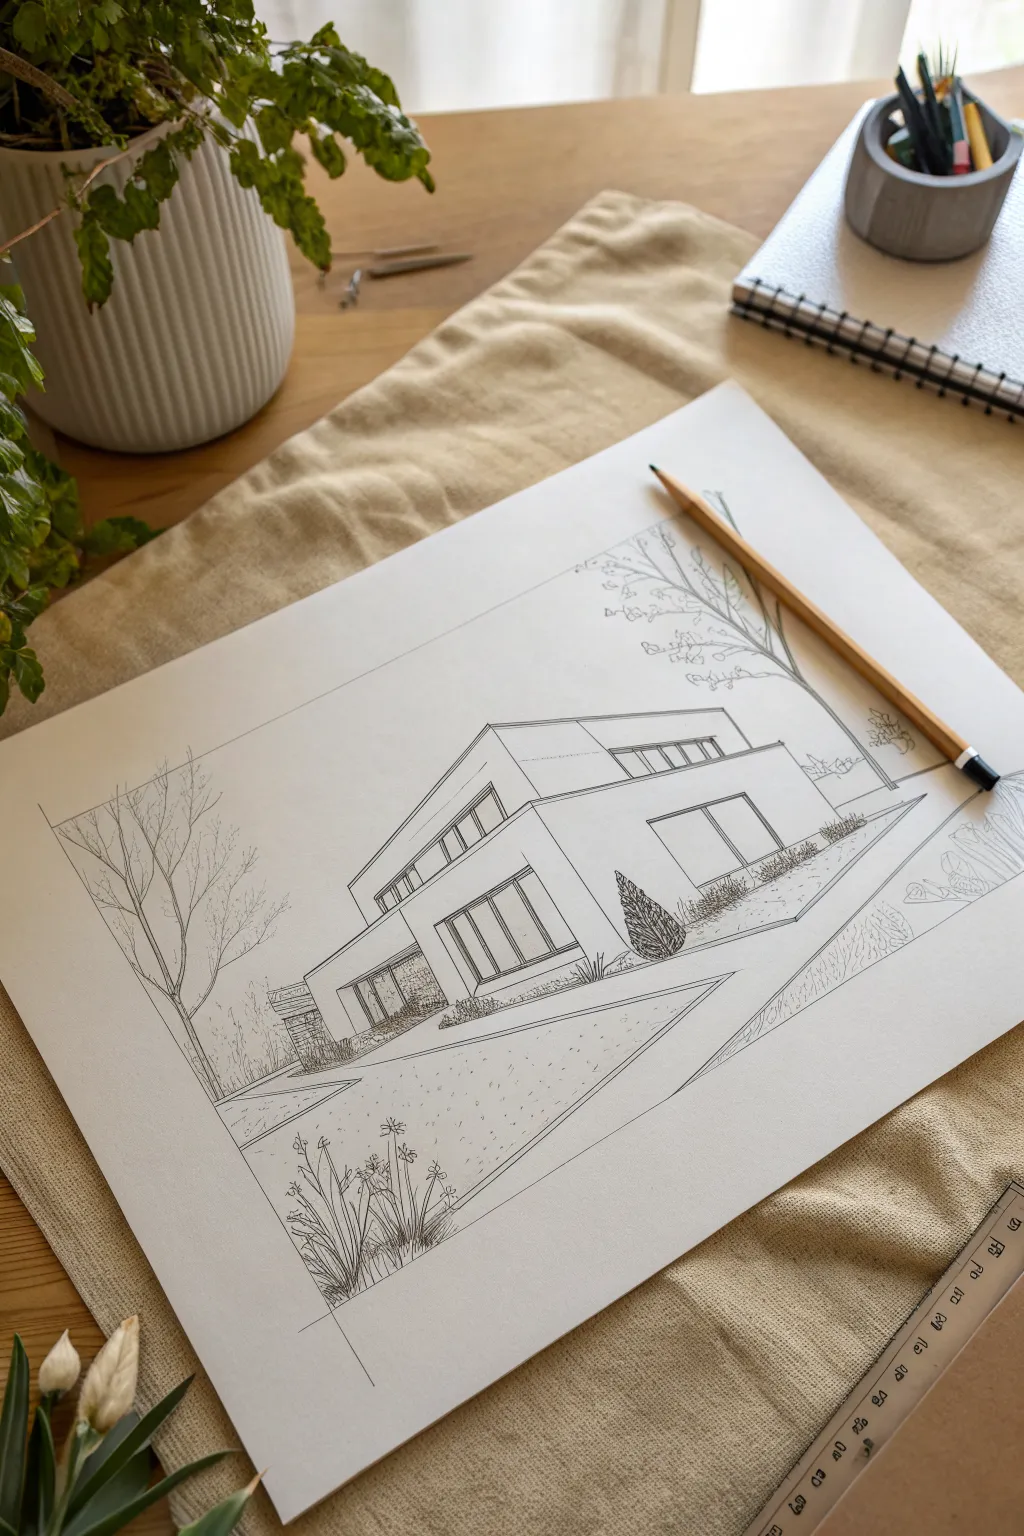
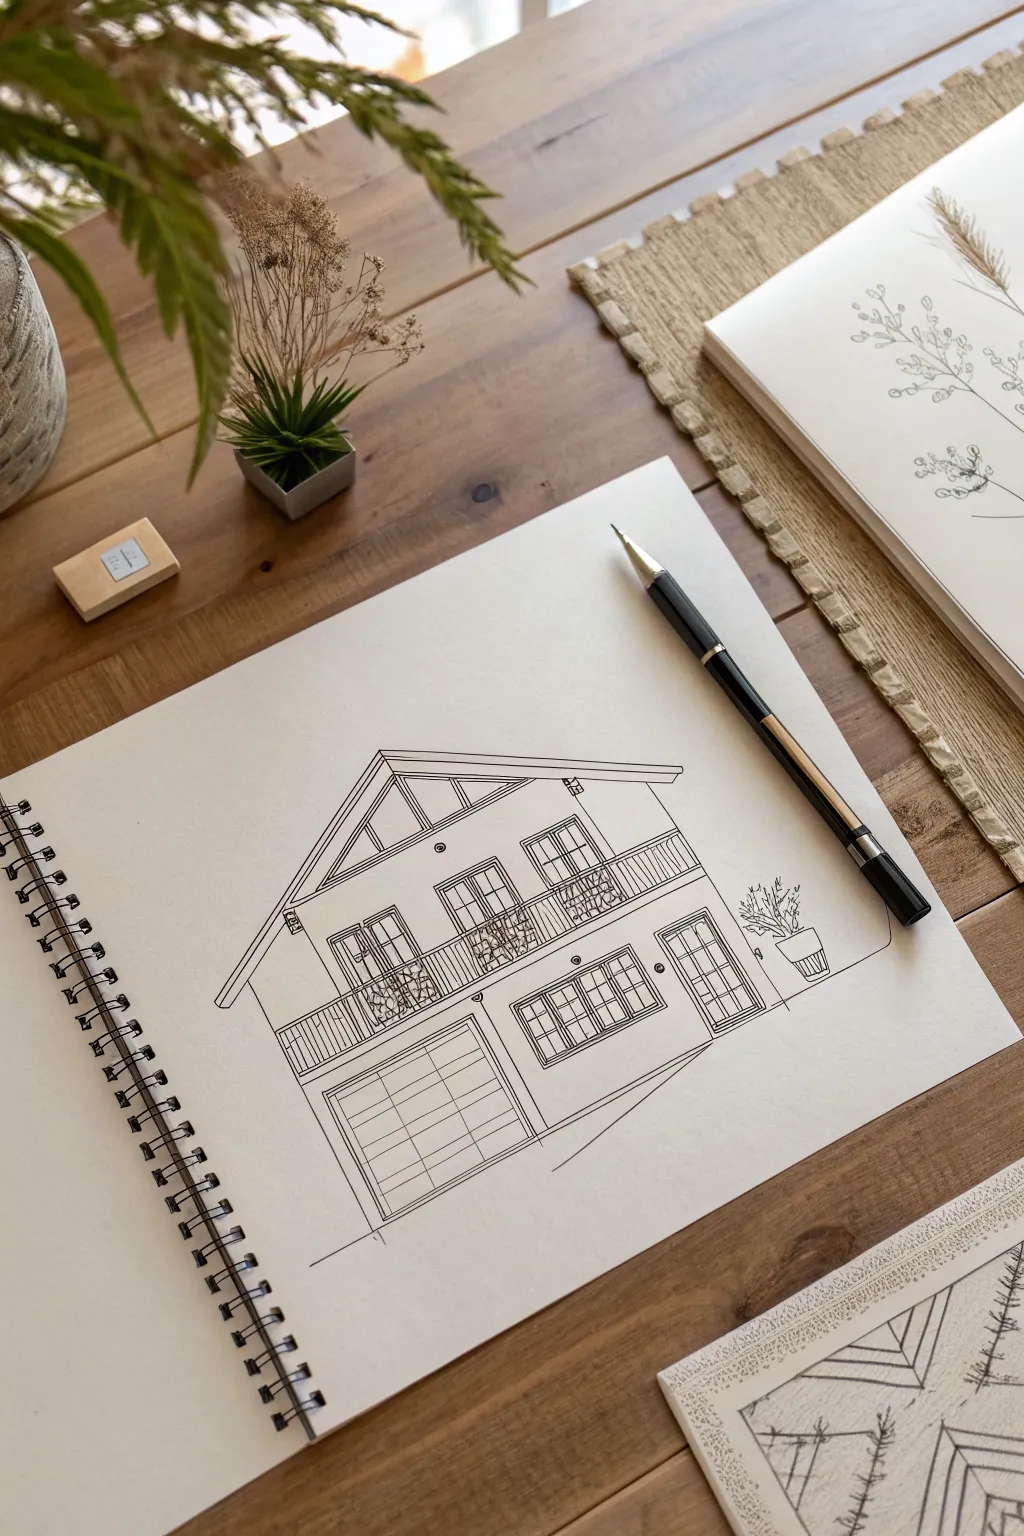
Flat Rooflines and Clean Overhangs
Capture the clean lines and striking geometry of modern architecture with this detailed architectural sketch. The sharp shadows and precise perspective give the drawing a professional, three-dimensional feel while maintaining the charm of a hand-drawn artwork.
Step-by-Step
Materials
- Smooth heavyweight sketchbook paper (off-white or cream)
- HB or 2H pencil for initial layout
- Fine liner pens (sizes 0.1, 0.3, and 0.5mm, black ink)
- Ruler or straight edge
- Kneaded eraser
- Graphite pencil (2B or 4B) for shading
Step 1: Establishing the Perspective
-
Define the Horizon Line:
Begin by lightly drawing a horizon line about one-third of the way up your page. Locate two vanishing points far off to the left and right—this two-point perspective is crucial for the angular, modern look. -
Block in the Main Volume:
Sketch the vertical corner edge of the house near the center. From the top and bottom of this line, draw guidelines to your vanishing points to establishing the basic box shape of the building. -
Add the Upper Overhang:
Draw the dramatic roof overhang. Extend the roof lines well beyond the walls to create that signature ‘flat roof’ aesthetic, angling the underside slightly upward to show depth. -
Define the Terrace:
Sketch the lower terrace that wraps around the house. Use your vanishing points to ensure the balcony railing and the floor slab align perfectly with the roof above.
Step 2: Detailing the Architecture
-
Outline Windows and Doors:
Mark out the large floor-to-ceiling windows on both levels. Keep the vertical lines perfectly straight and parallel to the page edges, while the horizontal tops and bottoms should follow perspective lines. -
Sketch the Balcony Railing:
Draw the horizontal bars of the balcony railing. I find it helpful to draw the posts first to gauge spacing before adding the connective rails. -
Add Landscaping Elements:
Lightly sketch the position of the paved walkway in the foreground, the small bush near the front, and the potted plant near the entrance to ground the building. -
Refine the Brick Texture:
Indicate where the brick texture will go on the lower facade. You don’t need to draw every brick; just suggest rows that follow the perspective lines.
Clean Lines Tip
Rotate your sketchbook so your hand is always pulling the pen toward you, not pushing it away. This offers better control for straight lines.
Step 3: Inking the Lines
-
Main Structural Lines:
Switch to your 0.5mm fine liner. Ink the main outer edges of the roof, the balcony slab, and the corners of the house. Use a ruler for these long, crucial lines. -
Window Frames:
Use a 0.3mm pen for the window frames. Double up your lines slightly to give the frames thickness, rather than just a single stick figure line. -
Railing and Details:
Carefully ink the balcony railings and the thin potted plant stems. Use a steady hand here or a ruler if you are shaky. -
Brickwork and Paving:
With a 0.1mm pen, draw partial brick lines. Keep them broken and sporadic to suggest texture without cluttering the drawing. Do the same for the crazy-paving pattern on the walkway. -
Organic Elements:
Ink the bushes and trees with a loose, scribbly motion. Unlike the rigid house, these should feel soft and natural. -
Erase Pencil Guidelines:
Wait for the ink to dry completely to avoid smudging, then gently erase all your pencil construction lines with a kneaded eraser.
Add Atmosphere
Draw distinct tree branch shadows falling across the face of the building or the foreground pavement to suggest a sunny day.
Step 4: Shading and Depth
-
Cast Heavy Shadows:
Using a 2B or 4B pencil, shade the underside of the roof overhangs heavily. This contrast is what makes the roof look like it is floating. -
Window Reflections:
Add vertical hatching strokes across the windows using a fine liner or pencil. Leave some areas white to represent glass reflections. -
Wall Shading:
Apply very light graphite shading to the side wall of the house (the left face) to emphasize the light source coming from the right. -
Ground Shadows:
Add a dark cast shadow on the ground extending from the bushes and the house itself. This anchors the building to the earth. -
Final Touches:
Review the contrast. Darken the deepest corners of the balcony and the window frames to make the architectural features pop.
Enjoy seeing your modern architectural vision come to life on the page

Floor-to-Ceiling Glass Window Wall
Capture the sleek lines and airy feel of modern architecture with this mixed-media sketch. By combining crisp pen work with warm toned markers, you’ll recreate the inviting glow of a floor-to-ceiling glass design directly in your sketchbook.
Step-by-Step Tutorial
Materials
- Hardbound sketchbook with cream or off-white paper (heavyweight)
- H or HB pencil for initial layout
- Fine liner pens (sizes 0.1, 0.3, and 0.5)
- Alcohol-based markers (warm beige, light timber, and cool grey)
- White gel pen
- Ruler or straight edge
- Kneaded eraser
Step 1: Laying the Architectural Foundation
-
Establish the horizon line:
Begin by lightly drawing a horizontal line across your page with your pencil. This will determine your eye level and ensure the perspective of the house looks realistic. -
Block in the main volumes:
Using two-point perspective, lightly sketch the large rectangular box shape of the house. Pay attention to the angle of the roofline; modern homes often have flat or mono-pitch roofs that add dynamic angles. -
Define the glass facade:
Mark out the large grid for the floor-to-ceiling windows on the main face of the house. Keep your vertical lines perfectly straight up and down, while the horizontal lines should vanish toward your perspective points. -
Add structural details:
Sketch in the thickness of the floor slabs and the balcony railings. Don’t forget the exterior staircase on the right side; block these in as simple geometric steps to start. -
Place organic elements:
Loosely sketch the placement of the large tree on the left and the shrubbery in the foreground. Keep these lines organic and jagged to contrast with the sharp lines of the building.
Step 2: Inking the Structure
-
Outline the main structure:
Switch to a 0.5 fine liner. Carefully go over the main outline of the house, the roofline, and the ground line. Use a ruler if you want a technical look, or freehand it for a looser, more artistic vibe. -
Detail the windows:
Use a finer 0.1 or 0.3 pen for the window frames. Draw double lines for the frames to indicate thickness, rather than a single stick line. This small detail adds significant realism. -
Ink the environment:
Use a sketchy, broken line for the trees and bushes. For the pine trees, use quick, short zig-zag strokes to mimic needles. Avoid outlining the entire foliage mass; instead, focus on the texture and shadow areas. -
Add textual elements:
If you wish to mimic an architect’s journal, add some scribbled ‘notes’ or illegible text lines near the stairs or bottom corner using your thinnest pen. -
Erase pencil guides:
Once the ink is completely dry—give it a minute or two to prevent smudging—gently lift all visible graphite marks with a kneaded eraser.
Uneven Perspective?
If your roof angles look ‘off’, re-check your vanishing points. Extend the lines lightly to the edge of the page to ensure they converge at the same horizon height.
Step 3: Adding Color and Depth
-
Apply base wood tones:
Using a warm beige or light timber marker, color in the solid wall sections of the house. I find that leaving small streaks or white gaps helps simulate natural wood grain texture. -
Shade the glass:
Use a very light cool grey marker to tint the windows. Don’t color them in solid; instead, use diagonal strokes to suggest reflection and transparency, leaving plenty of paper white. -
Reinforce shadows:
Take a slightly darker marker tone (or layer your beige) and add shadows under the roof overhangs and beneath the balcony. This grounds the building and gives it 3D volume. -
Texture the surroundings:
Add very light, quick strokes of grey or desaturated green to the ground and tree trunks. Keep the landscape coloring minimal to ensure the house remains the focal point. -
Highlight with white:
Finally, take your white gel pen and add a few crisp lines on the glass areas to represent strong reflections. You can also use this to clean up any marker bleed on the window frames.
Architectural “Pop”
Make the outline of the entire building slightly thicker (0.8mm) than the internal details. This pulls the object forward from the background immediately.
Now you have a sophisticated architectural study that beautifully captures the essence of modern living.


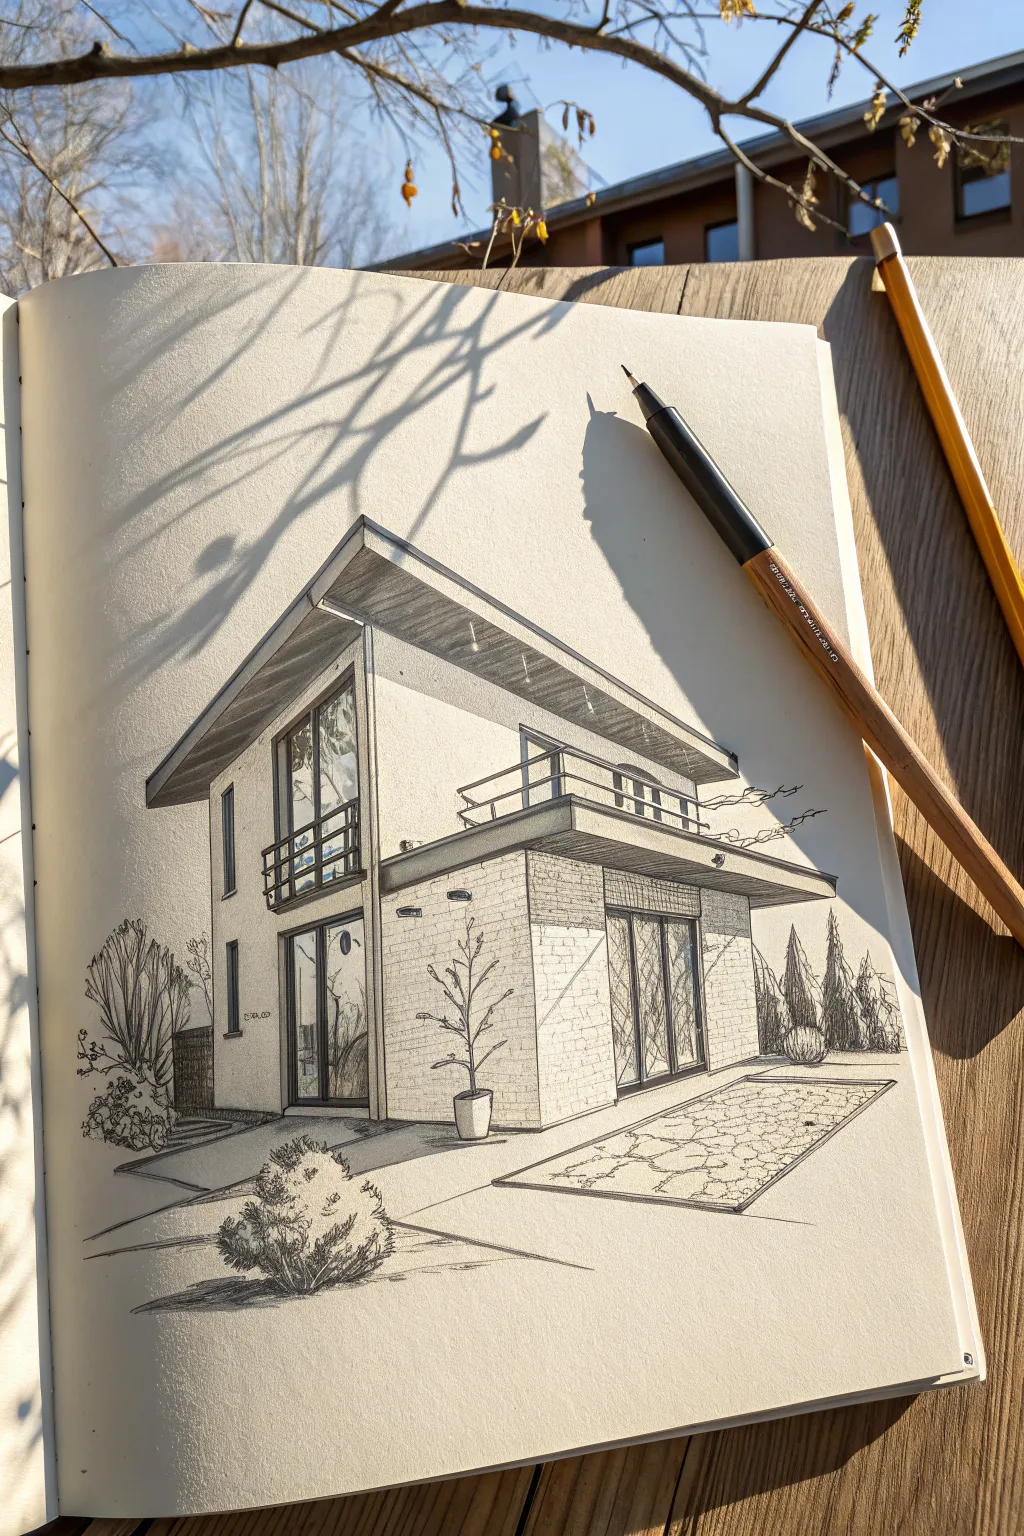
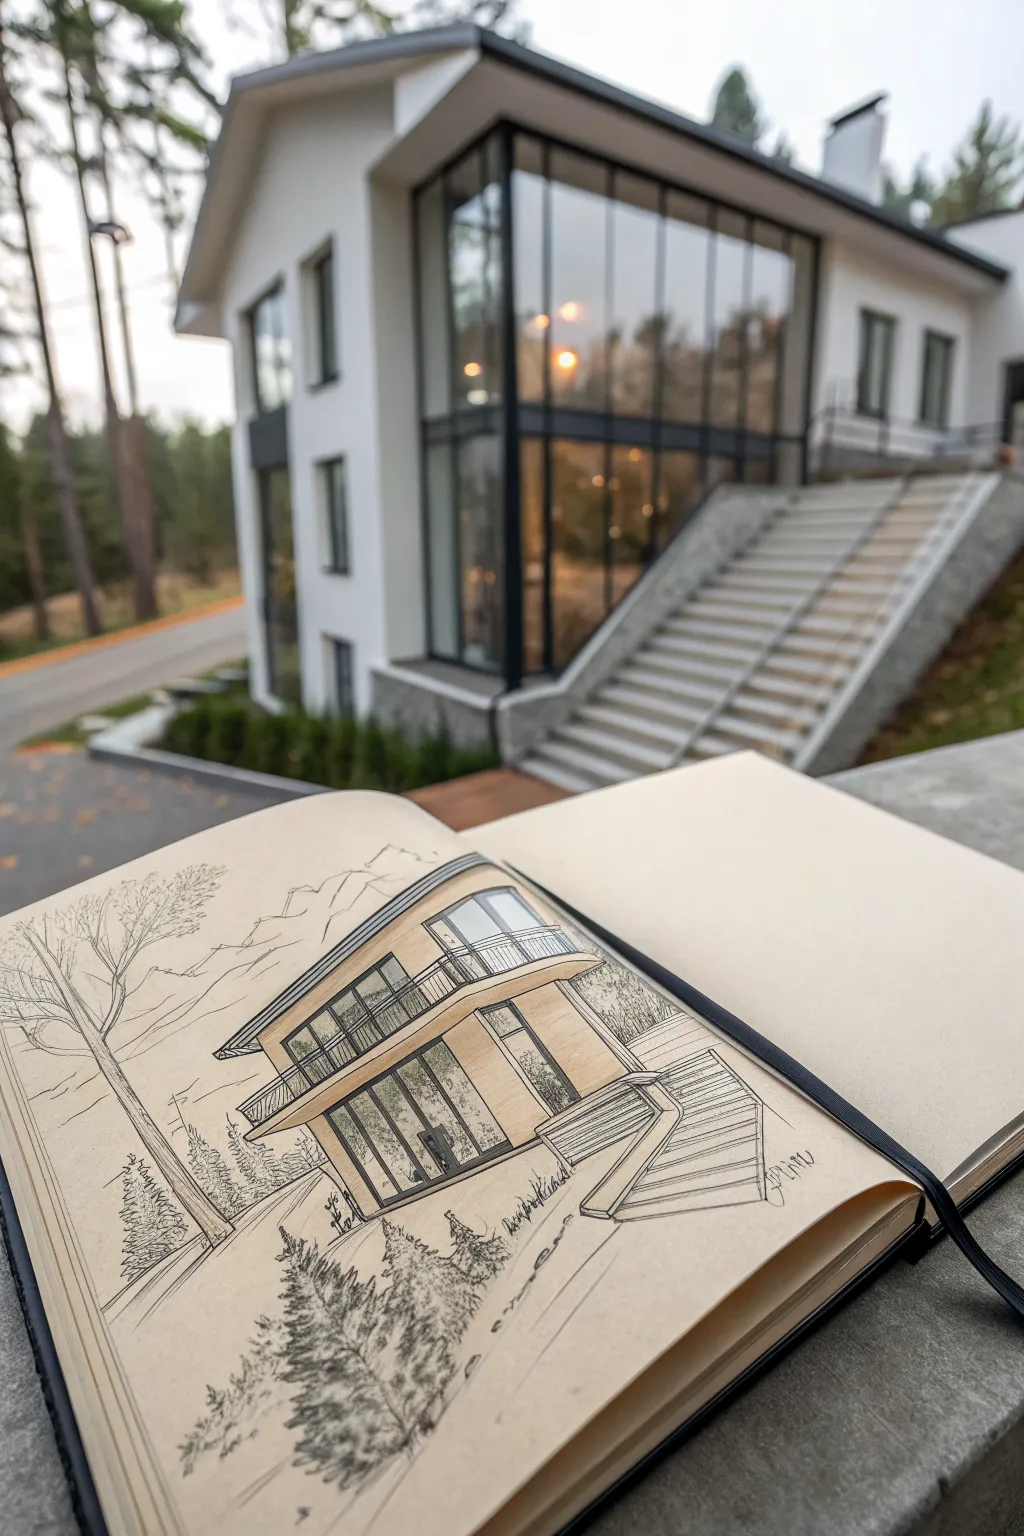
Cantilevered Second Floor for Drama
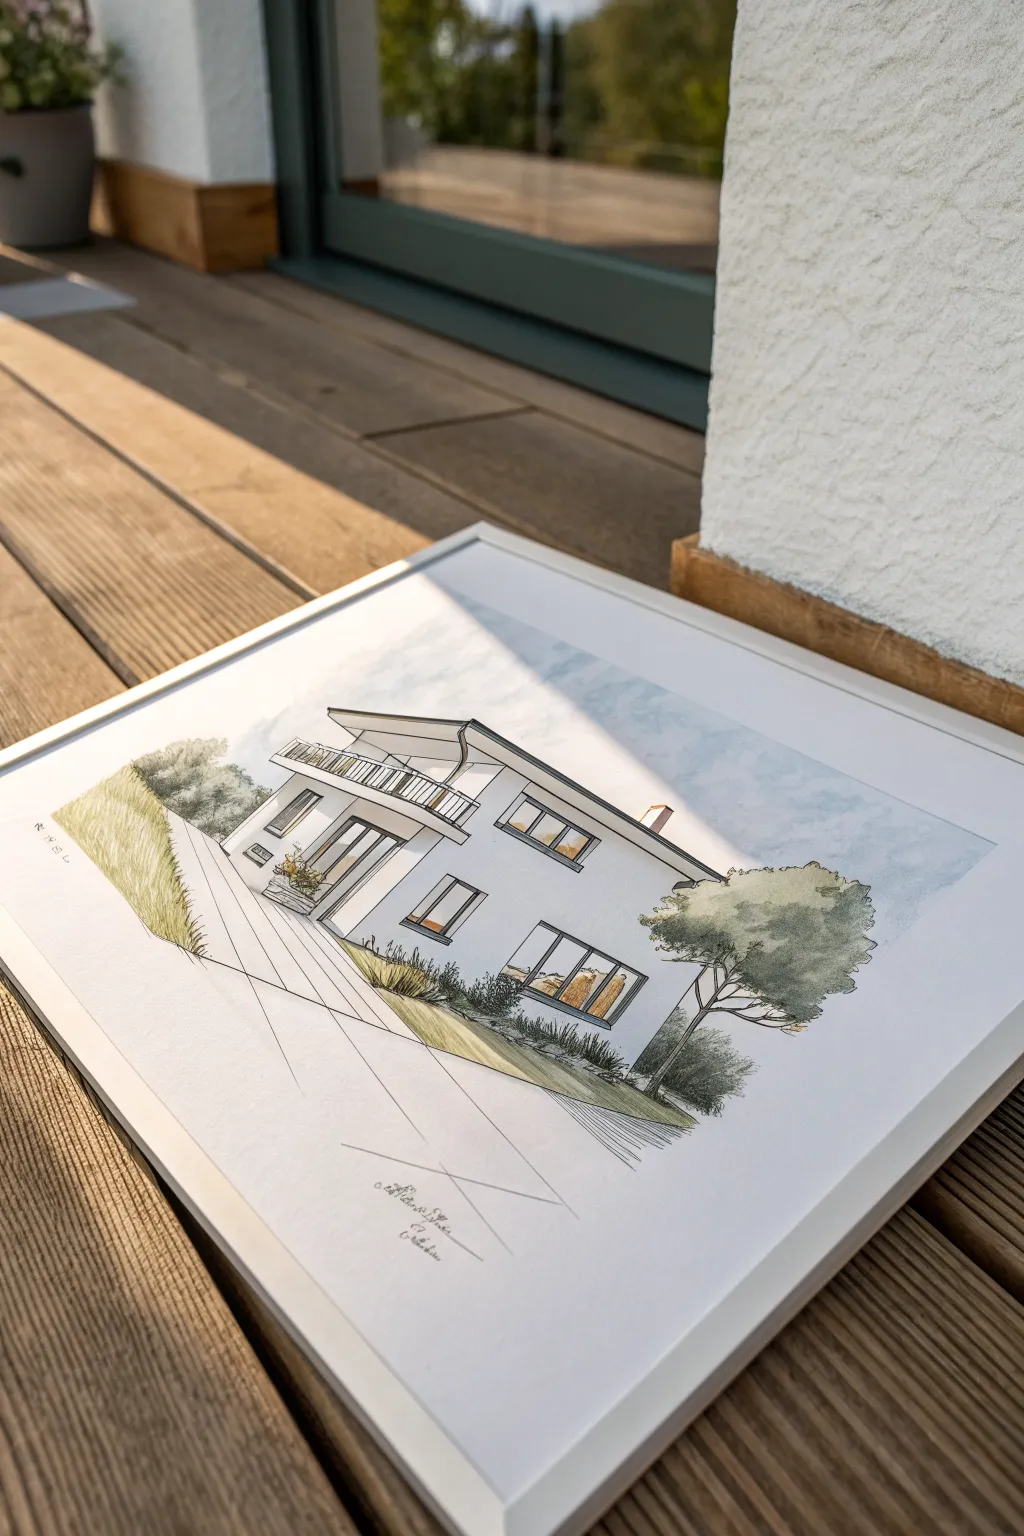
Capture the sleek lines of modern architecture with this mixed-media rendering that combines precision drawing with soft watercolor washes. The finished piece has a professional yet hand-drawn warmth, perfect for visualizing dream home concepts or as a personalized housewarming gift.
How-To Guide
Materials
- Hot press watercolor paper (smooth texture)
- Pencil (HB or 2H)
- Fine liner pens (0.1, 0.3, and 0.5mm, waterproof black ink)
- Ruler or T-square
- Watercolor paints (Cobalt Blue, Burnt Sienna, Sap Green, Yellow Ochre, Payne’s Grey)
- Round watercolor brushes (size 4 and 8)
- White gel pen (optional)
- Masking tape
- Paper towels
- White or light wood frame
Step 1: Planning and Pencil Work
-
Prepare your paper:
Tape your watercolor paper down to a board or table on all four sides. This prevents buckling when you add water later and creates a clean white border. -
Establish the horizon:
Lightly draw a horizon line about one-third of the way up the page. Since this is an architectural drawing, perspective is key. Mark two vanishing points on this line (far left and far right) to guide your angles. -
Block in the main volumes:
Using your ruler and a light pencil touch, sketch the main rectangular box of the house. Pay special attention to the cantilevered second floor—ensure it extends noticeably beyond the ground floor to create that dramatic overhang shown in the photo. -
Add architectural details:
Refine the sketch by adding window frames, the balcony railing, the chimney, and the roofline. Keep these lines crisp. Don’t worry about shading yet; just focus on the structural outlines. -
Sketch the landscape:
Loosely sketch a large tree on the right side and some shrubbery near the foundation. Draw the angled lines of the driveway or path leading up to the house in the foreground.
Wobbly Lines?
If your hand shakes while inking long straight lines, pull the pen toward your body rather than pushing it away. This helps stabilize your stroke against the ruler.
Step 2: Inking the Structure
-
Outline main structural lines:
Switch to a 0.5mm fineliner. Carefully trace over the main exterior walls and roofline. Utilize your ruler for these long, straight lines to maintain that modern, clean look. -
Detail the windows and railing:
Use a finer 0.1mm pen for delicate areas like the window muntins and vertical balcony railings. A lighter line weight here adds depth and keeps the drawing from looking clunky. -
Ink the foliage:
Put the ruler away. Use a 0.3mm pen to draw the tree foliage and bushes with loose, squiggly organic lines. Do not close every leaf shape; keep it open and airy to let the color do the work later. -
Erase pencil guides:
Wait at least 10 minutes to ensure the ink is completely dry. Gently erase all visible pencil lines, leaving only your crisp ink drawing.
Step 3: Watercolor Washes
-
Paint the sky:
Mix a very dilute wash of Cobalt Blue. Wet the sky area with clean water first, then drop in the pigment, blotting some areas with a paper towel to create soft, cloud-like textures. -
Warm the building:
While the house is mostly white, it needs shadow to show form. Mix a very light grey-blue (using Cobalt and a touch of Payne’s Grey) and paint the underside of the cantilever and the roof overhangs to create depth. -
Glaze the windows:
Paint the glass areas with a mix of Payne’s Grey and a tiny drop of Yellow Ochre to reflect the landscape. Keep the center of the panes lighter to suggest reflection. -
Color the landscape:
Mix Sap Green with a little burnt Sienna for a natural foliage color. Paint the tree and bushes loosely, letting the color bleed slightly outside your ink lines for an artistic feel. I like to vary the green intensity to suggest light hitting the leaves. -
Ground the structure:
Use a light wash of Yellow Ochre and Sienna for the dried grass areas on the slope. Add a very faint, watery grey wash to the driveway area to distinguish it from the white paper.
Level Up: Sun Dapple
Use a white gel pen or gouache to add tiny dots of highlight on the tree leaves and the edges of the window glass for a sparkling, sun-drenched effect.
Step 4: Final Touches
-
Deepen the shadows:
Once the first layers are dry, go back with a slightly darker grey-blue mix. precise shadows under the balcony and eaves will make the white house pop against the background. -
Add signature touches:
Use your 0.1mm pen to add a few loose scribbles of grass texture in the foreground and sign your name at the bottom with a flourish. -
Frame your work:
Carefully peel off the tape. Place the artwork in a simple white or light wood frame to complement the modern aesthetic of the subject matter.
Hang your architectural masterpiece in a well-lit spot to inspire your future building projects
BRUSH GUIDE
The Right Brush for Every Stroke
From clean lines to bold texture — master brush choice, stroke control, and essential techniques.
Explore the Full Guide
Simple Minimalist Landscaping Around the House
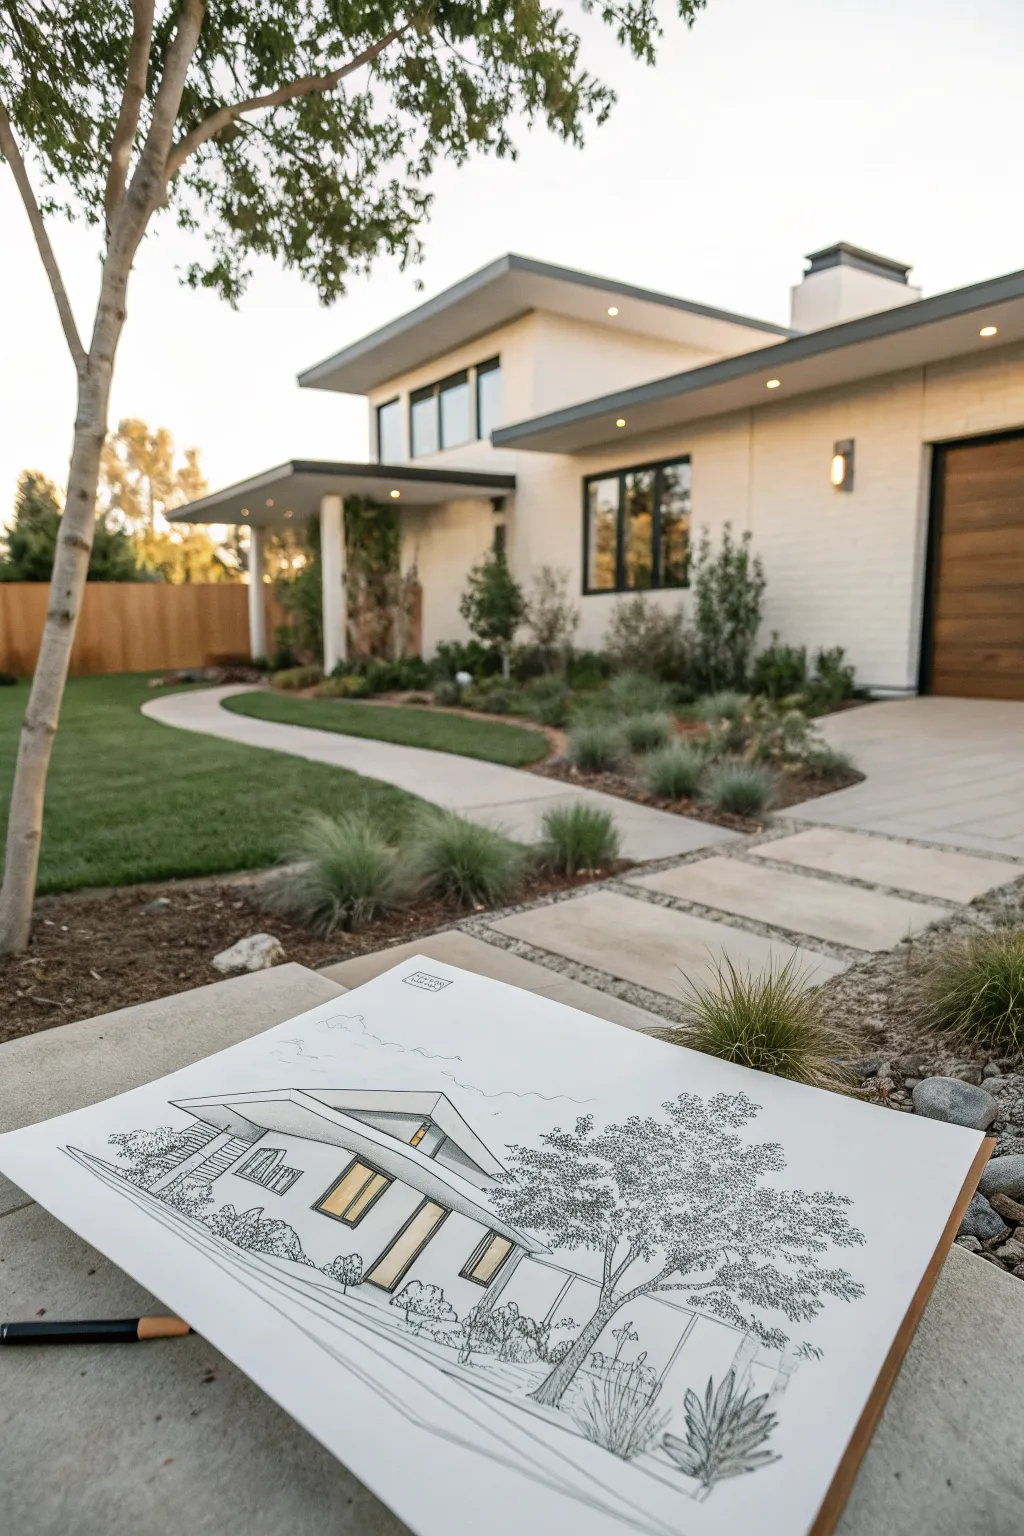
Capture the clean lines and harmonious landscaping of mid-century architecture with this pen and ink illustration. This project focuses on simple perspective, textural stippling for foliage, and selective pops of color to bring warmth to the windows.
Step-by-Step
Materials
- High-quality sketchbook paper (heavyweight, smooth finish)
- Graphite pencil (HB or 2H)
- Fine liner pens (0.1, 0.3, and 0.5 sizes)
- Ruler or straight edge
- Yellow or warm gold marker/colored pencil
- Eraser (kneaded preferred)
Step 1: Laying the Structural Foundation
-
Establish the horizon line:
Begin by lightly drawing a horizontal line across the lower third of your page. This will base your perspective and ground the house. -
Draft the main volumes:
Using your ruler and pencil, sketch the primary rectangular box of the house. Angle the side walls slightly toward vanishing points to create a subtle two-point perspective. -
Add the roofline:
Draw the distinctive varied rooflines. Create a large, sloped roof section on the left and a lower, flatter roof section on the right to mimic the mid-century asymmetrical style. -
Define windows and doors:
Sketch tall rectangles for the floor-to-ceiling windows. Ensure the vertical lines remain perfectly straight up and down, regardless of the perspective angles. -
Block in landscape elements:
Lightly outline the position of the large tree in the foreground and the smaller shrubs near the foundation. Use loose circles and organic shapes for now.
Step 2: Constructing with Ink
-
Ink the structural outlines:
Switch to a 0.5 pen for the main architectural lines. Trace your pencil marks for the roof, walls, and driveway, keeping your hand steady against the ruler. -
Detail the overhangs:
Use a 0.3 pen to add depth to the roof overhangs (eaves). Draw a parallel line just under the roof edge to show thickness. -
Draw window frames:
With the 0.1 pen, carefully ink the window frames and mullions. These delicate lines prevent the windows from looking too heavy. -
Add texture to the facade:
If there remain any blank wall spaces (like the chimney or side walls), use very faint vertical hatching with the 0.1 pen to suggest siding or material texture. -
Erase guidelines:
Once the ink is completely dry—give it a full minute—gently erase all the underlying graphite pencil lines to clean up the drawing.
Stippling Wisdom
For better tree texture, vary your dotting speed. Fast dots create irregular, organic shapes perfect for leaves, while slow, careful dots look too mechanical.
Step 3: Landscaping and Final Touches
-
Outline the tree trunk:
Using the 0.3 pen, draw the gnarled trunk of the foreground tree. Use broken, shaky lines to suggest bark texture rather than straight, smooth strokes. -
Stipple the leaves:
Take your time with this step. Using the 0.3 pen, create the tree canopy by clustering thousands of small dots (stippling). Concentrate dots more densely near the branches for shadow and spread them out at the edges. -
Suggest ground cover:
Sketch small, jagged tufts of grass and low-lying shrubs along the base of the house using quick, upward flicks of your 0.1 pen. -
Add driveway details:
Draw long, sweeping lines to define the driveway and walkway borders. I like to keep these lines slightly loose to contrast with the rigid architecture. -
Pop of warmth:
Use your yellow marker or colored pencil to fill in the window panes. Leave small slivers of white paper within the yellow to represent reflections on the glass. -
Final contrast check:
Review your drawing. If the tree looks too flat, add more stippling dots to the underside of the canopy to deepen the shadows and make the foliage pop.
Shaky Lines?
If you struggle with straight lines even with a ruler, embrace it. Intentionally wiggly lines (the ‘architectural wiggle’) adds character and hides mistakes.
Now you have a stylish architectural rendering that perfectly captures the modern aesthetic
Linear Driveway and Concrete Paver Walkway
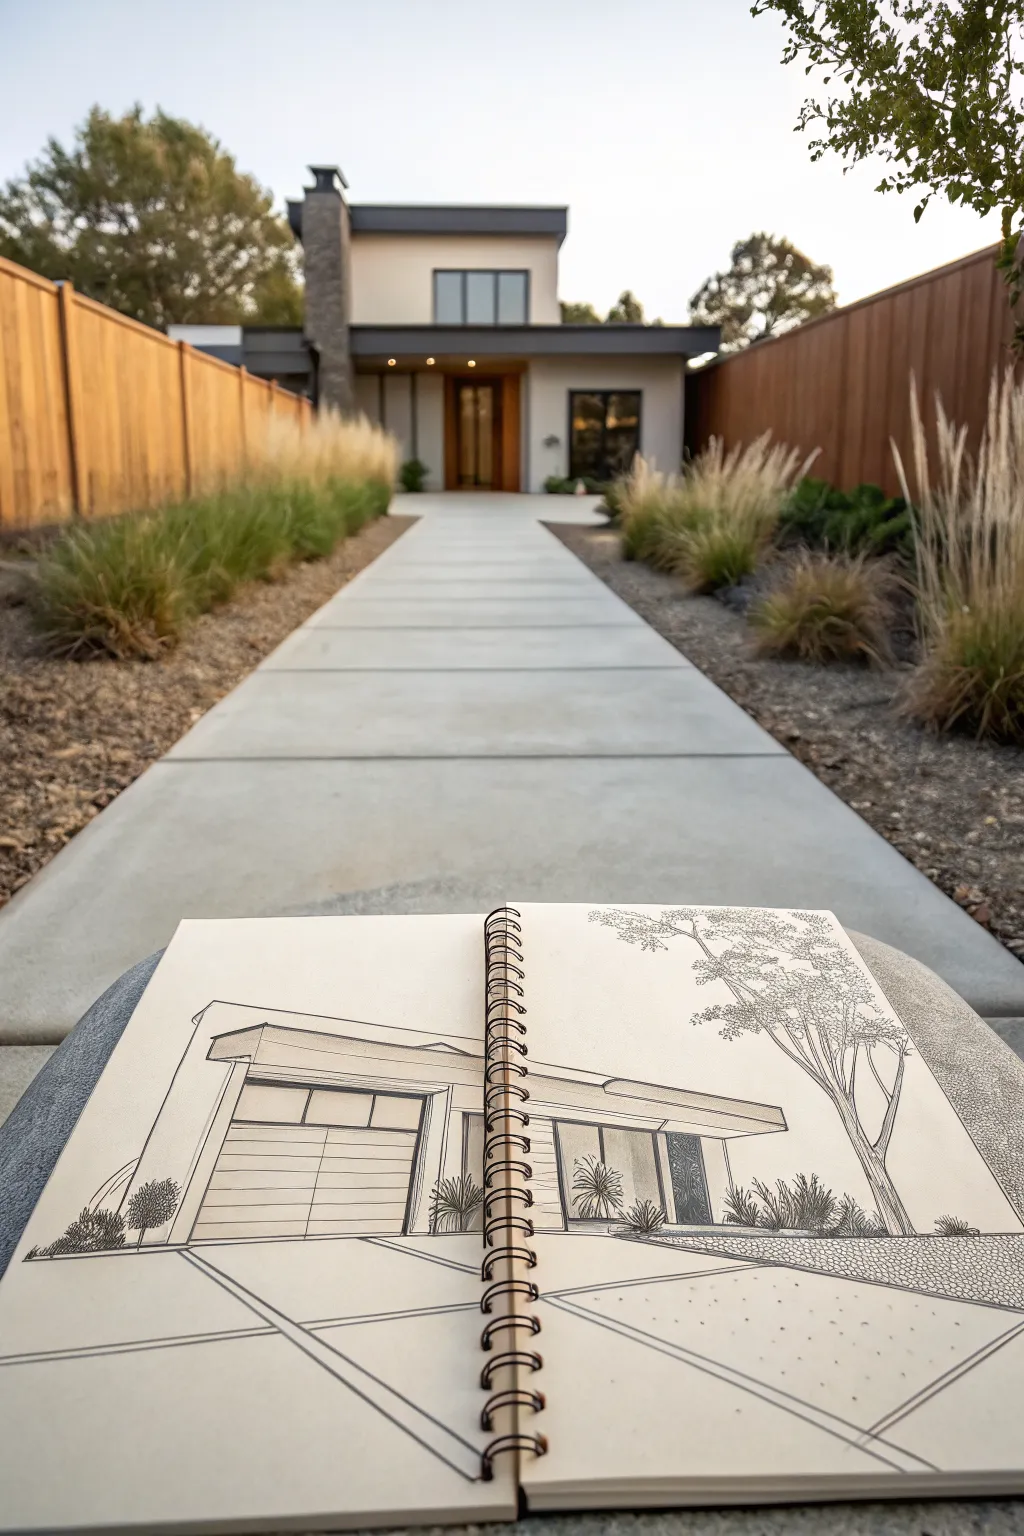
Capture the clean lines and architectural elegance of a modern home with this precise pencil drawing tutorial. You’ll learn how to establish a strong perspective that leads the viewer’s eye right up the driveway and into the welcoming structure of the house.
Step-by-Step Guide
Materials
- Spiral-bound sketchbook (heavyweight paper recommended)
- Set of graphite pencils (HB, 2B, 4B)
- Fine-point black ink pen (0.3mm or 0.5mm)
- Ruler or straight edge
- Kneaded eraser
Step 1: Establishing the Perspective
-
Define the Horizon Line:
Begin by lightly drawing a horizontal line across your page, roughly one-third of the way up from the bottom. This will serve as your eye level for the drawing. -
Set the Vanishing Point:
Mark a small dot on the horizon line near the center-right of the page. This single vanishing point will anchor all your receding lines, creating depth. -
Draw the Driveway Edge:
Using your ruler, draw a diagonal line from the bottom left corner of the page extending toward your vanishing point. This establishes the left edge of the driveway. -
Complete the Driveway Shape:
Draw the right edge of the driveway starting near the bottom middle, angling it toward the same vanishing point. Now, add horizontal lines across the driveway to represent the concrete pavers, spacing them closer together as they move away from you.
Step 2: Structuring the House
-
Block in the Garage Volume:
On the left side of the driveway end, lightly sketch a large rectangle for the garage face. Ensure the top and bottom lines of the garage recede properly toward the vanishing point. -
Add the Roof Overhang:
Sketch a thick, flat horizontal bar sitting atop your main rectangle. Let it extend slightly past the structure on the right side to create that distinct modern cantilever. -
Define the Front Entry:
To the right of the garage block, draw the recessed entryway. Use vertical lines to indicate columns or wall separations, and remember that lines receding into the house should angle toward your vanishing point. -
Detail the Garage Door:
Inside the garage rectangle, draw a smaller rectangle for the door frame. Use horizontal lines to panel the door, keeping them parallel to the ground line.
Architect’s Secret
Extend your lines slightly past the corners where they meet. This ‘overshoot’ technique gives the drawing a dynamic, energetic architectural look.
Step 3: Refining with Ink
-
Outline the Main Structure:
Switch to your fine-point black pen. Carefully trace over your graphite structural lines, using the ruler for crisp, architectural edges on the roof and walls. -
Freehand the Landscaping:
Put the ruler aside. Use quick, scribbly motions to create the textures of the bushes near the house foundation. Keep the strokes loose to contrast with the rigid building lines. -
Draw the Tree:
On the right side, sketch a tall tree trunk that splits into several branches. Use a stippling or small loop technique for the leaves to create a light, airy canopy that frames the roofline. -
Ink the Driveway Pavers:
Go back to the driveway and ink the horizontal distinct sections. Notice how the lines in the foreground are thicker and darker, while distant lines become thinner.
Boost the Realism
Use a light gray marker to add a quick wash of shadow on the driveway, casting it diagonally from the building to ground the structure firmly.
Step 4: Shading and Texture
-
Add Glass Reflections:
Use vertical hatching with your pen on the windows and entryway glass. Keep the lines close together but leave white gaps to suggest reflection and depth. -
Create Driveway Texture:
In the bottom right foreground, add small stippled dots or tiny circles to suggest gravel or texture where the concrete meets the landscaping. -
Shade the Garage Door:
Use a light 2B pencil to gently shade the garage door panels, pressing harder near the top of each panel to show the slight indentation. -
Deepen Shadows:
With a 4B pencil, darken the areas under the roof overhang and inside the recessed entry. This high contrast is crucial for making the form pop. -
Final Cleanup:
Once the ink is completely dry, use your kneaded eraser to lift away all remaining graphite guidelines, leaving a clean, professional architectural sketch.
Enjoy the satisfaction of seeing clean lines and bold perspective come together on your page

PENCIL GUIDE
Understanding Pencil Grades from H to B
From first sketch to finished drawing — learn pencil grades, line control, and shading techniques.
Explore the Full Guide
Warm Light and Bold Shadow Value Planes
Capture the essence of a modern home with this crisp architectural sketch, emphasizing clean lines and dramatic value contrast. Using fine liners on quality paper, you will learn to translate a real-life structure into a stylized, striking illustration.
How-To Guide
Materials
- Spiral-bound sketchbook (heavyweight mixed media or cartridge paper)
- HB graphite pencil
- Kneaded eraser
- Fine liner pens (sizes 0.1, 0.3, and 0.5)
- Ruler or straight edge
- Outdoor reference or photo of a modern house
Step 1: Drafting the Perspective
-
Establish the horizon line:
Begin by lightly drawing a horizontal line across the lower third of your page with your HB pencil. This represents your eye level and anchors the building’s perspective. -
Block in main volumes:
Visualize the house as simple geometric boxes. Lightly sketch the main rectangular block of the house, ensuring the vertical lines are perfectly straight up and down. -
Define vanishing points:
Extend the angled roof and base lines lightly to check your perspective; for a view like this, the parallel lines commonly converge at two vanishing points on the horizon line. -
Add structural details:
Refine the pencil sketch by indicating the placement of the balcony, large windows, and the overhanging roof. Keep these lines faint so they can be easily erased later. -
Place landscape elements:
Roughly outline the foreground tree on the left, the bushes near the house foundation, and the pathway leading away from the viewer.
Step 2: Inking the Structure
-
Outline the main form:
Switch to your 0.5 pen for the strongest structural lines. Carefully trace the outer silhouette of the house and the main roofline, using a ruler if you want a technical look or freehand for a looser feel. -
Define windows and frames:
Using a slightly thinner 0.3 pen, draw the window frames and mullions. I find that keeping these lines crisp is crucial for communicating the modern glass aesthetic. -
Add texture to the facade:
If parts of the house feature stone or brick, use a 0.1 pen to draw small, erratic horizontal marks or brick patterns. Don’t fill the whole area; imply the texture near the corners and base. -
Hatch the shadows:
Identify where the light is hitting (from the left in this scene). Use diagonal hatching with the 0.1 pen to darken the side of the house facing away from the light, creating immediate volume. -
Detail the balcony railing:
Use the finest 0.1 tip to draw the delicate railing of the balcony. Ensure the spacing is consistent to maintain the sense of scale.
Loose but Straight
To get straight lines without a ruler, lock your wrist and move your entire arm from the shoulder. Drawing slightly faster actually helps reduce shakiness.
Step 3: Adding Nature and Depth
-
Ink the foreground tree:
Draw the bare tree on the left using jagged, organic lines. Vary the line weight, making the trunk thicker at the bottom and the branches hair-thin at the tips. -
Create shrubbery texture:
For the bushes along the foundation and right side, use a ‘scumbling’ or scribble technique with the 0.3 pen. This dense texture contrasts beautifully with the straight architectural lines. -
Ground the building:
Draw the pavement and pathway lines. Use broken lines for the driveway cracks or paving stones to keep the foreground from looking too heavy. -
Enhance contrast:
Go back in with the 0.5 pen and darken the deepest shadows—specifically under the roof eaves and behind the bushes—to make the white paper pop. -
Sketch the grass:
Use quick, short vertical flicks with the 0.1 pen around the base of the tree and pathway to suggest grass blades without drawing every single one. -
Clean up:
Once the ink is completely dry (wait at least five minutes to prevent smudging), gently erase all remaining pencil guidelines with your kneaded eraser.
Add a Splash
Use diluted watercolor or gray marker to add transparent washes over your shadows. This adds a layer of depth without overpowering the delicate ink work.
Now you have a timeless architectural study that celebrates light and structure
Modern Entry Moment With a Recessed Door
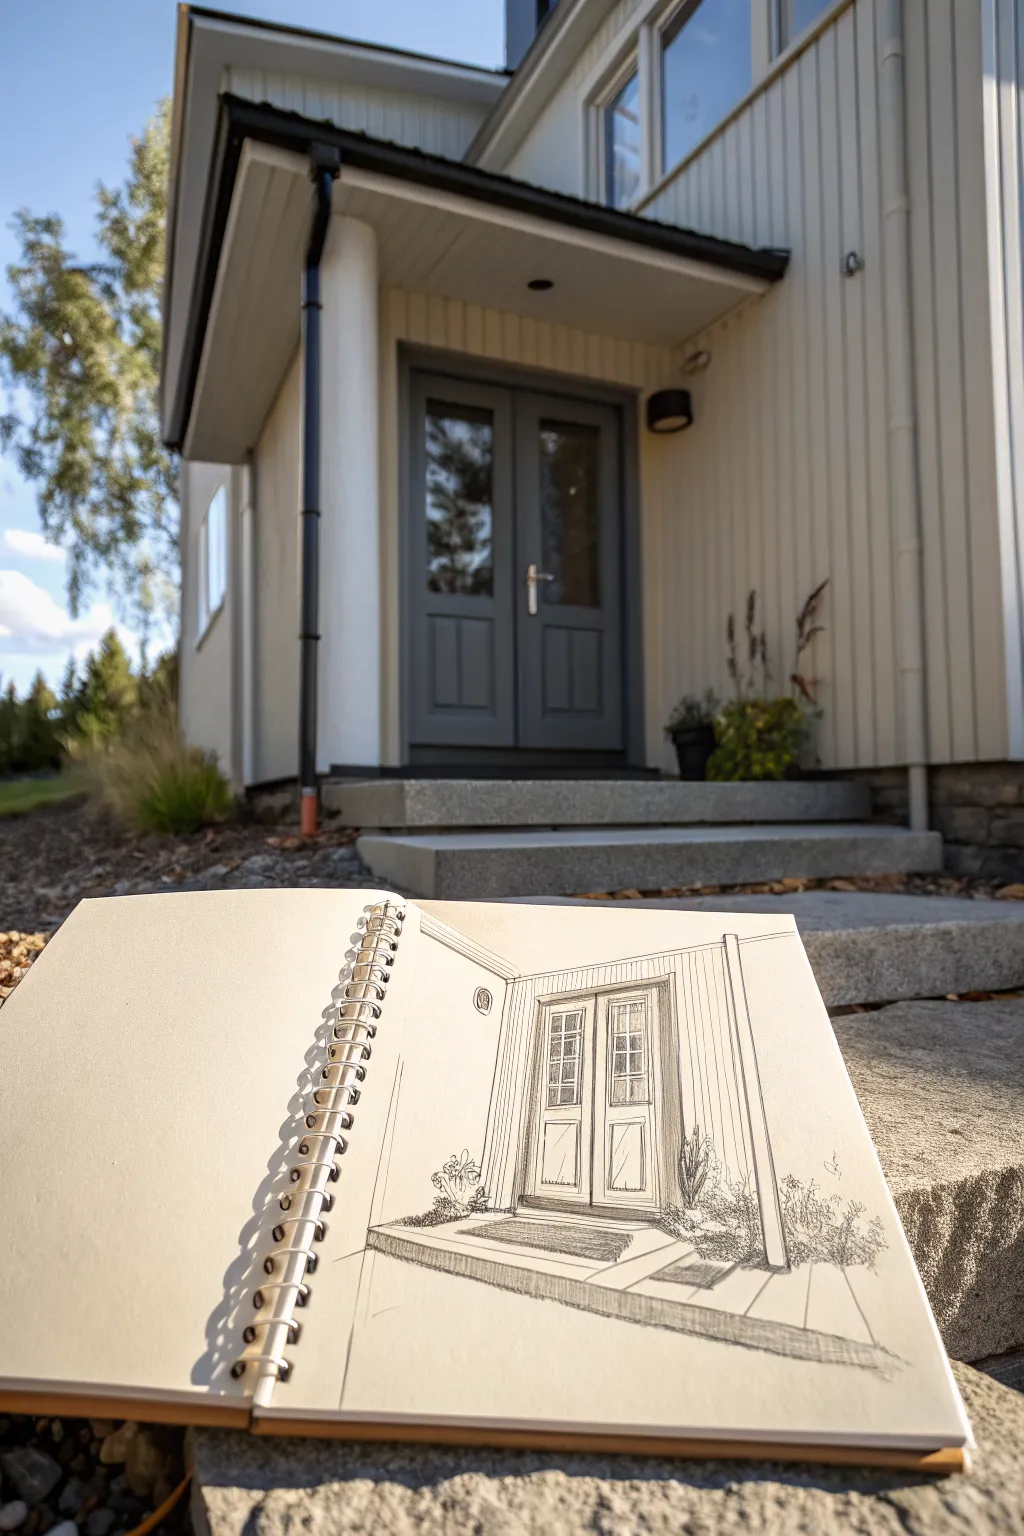
Capture the clean lines and inviting depth of a modern entryway with this architectural sketching project. By contrasting precise vertical siding against the recessed shadows of a doorway, you’ll create a drawing that feels both structured and lively.
Step-by-Step Guide
Materials
- Spiral-bound sketchbook (heavyweight paper preferred)
- HB graphite pencil (for initial layout)
- 2B or 4B graphite pencil (for shading)
- Fine-tip ink pen (optional, for final lines)
- Ruler or straight edge
- Kneaded eraser
- Pencil sharpener
Step 1: Establishing the Perspective
-
Observe the corner:
Start by identifying the main corner of the entryway walls. Draw a vertical line slightly off-center on your page to represent where the two walls meet. -
Set the ground lines:
From the bottom of your vertical line, draw two angled lines moving outward to create the base of the walls. The angle on the right should be slightly steeper if your view is angled that way, mimicking two-point perspective. -
Define the roofline:
From the top of your vertical line, sketch the corresponding top angles for the walls. Keep them parallel to your ground lines for a simple isometric feel, or slightly converging if you want true perspective. -
Block in the door frame:
On the longer wall (likely the right side), lightly draw a large rectangle for the door frame. Ensure the vertical sides remain perfectly straight up and down, not tilted.
Loose but Straight
Don’t use a ruler for final lines. Draw freehand but lock your wrist and move your whole arm. The slight imperfection makes the sketch feel authentic.
Step 2: Adding Architectural Details
-
Divide the doors:
Split the door rectangle in half vertically to create the double doors. Lightly sketch the inner rectangles for the window panes on the upper half of each door. -
Create the panels:
Below the window panes, draw the rectangular recessed panels on the bottom half of the doors. Keep your lines light so you can adjust the proportions. -
Sketch the porch step:
Extend the ground line forward to create the rectangular platform of the porch step. Give it a tiny bit of thickness by dropping short vertical lines at the corners. -
Siding guidelines:
Lightly mark even spacing across both walls for the vertical siding. I find using a ruler here helps keep the rhythm consistent, even if I draw the final lines freehand.
Step 3: Refining and Texturing
-
Draw the siding:
Go over your vertical spacing marks with confident, darker strokes. Don’t worry if lines aren’t machine-perfect; a little wobble adds character. -
Detail the door frame:
Thicken the lines around the door frame to show the casing. Add a second inner line to the window panes to suggest the glazing bars. -
Add the hardware:
Place small, distinct marks for the door handles at the center meeting point of the double doors. -
Suggest landscaping:
At the base of the walls, use loose, scribbly strokes to indicate small shrubs or potted plants. This organic texture contrasts nicely with the rigid architectural lines.
Add a Vignette
Instead of drawing the whole house, fade your lines out on the edges. This ‘vignette’ style focuses the eye purely on the entryway design.
Step 4: Shading and Final Touches
-
Shade the glass:
Use your softer pencil (2B or 4B) to lightly shade the window panes. Leave tiny white slivers plain to represent reflections on the glass. -
Deepen the recess:
Add shading under the roof overhang and mainly inside the door recess. This shadow is what pushes the door ‘back’ into the house visually. -
Texture the porch:
Add subtle horizontal hatching on the porch step to differentiate the concrete or stone texture from the vertical wood siding. -
Clean up edges:
Use your kneaded eraser to lift any stray construction lines or smudges around the border of the drawing. -
Final heavy lines:
Take a sharp pencil or a fine pen and re-trace the most important outlines—the corner of the house and the door frame—to make them pop.
Now you have a charming architectural study that captures the essence of a modern home entrance


L-Shaped Modern House Wrapping a Courtyard
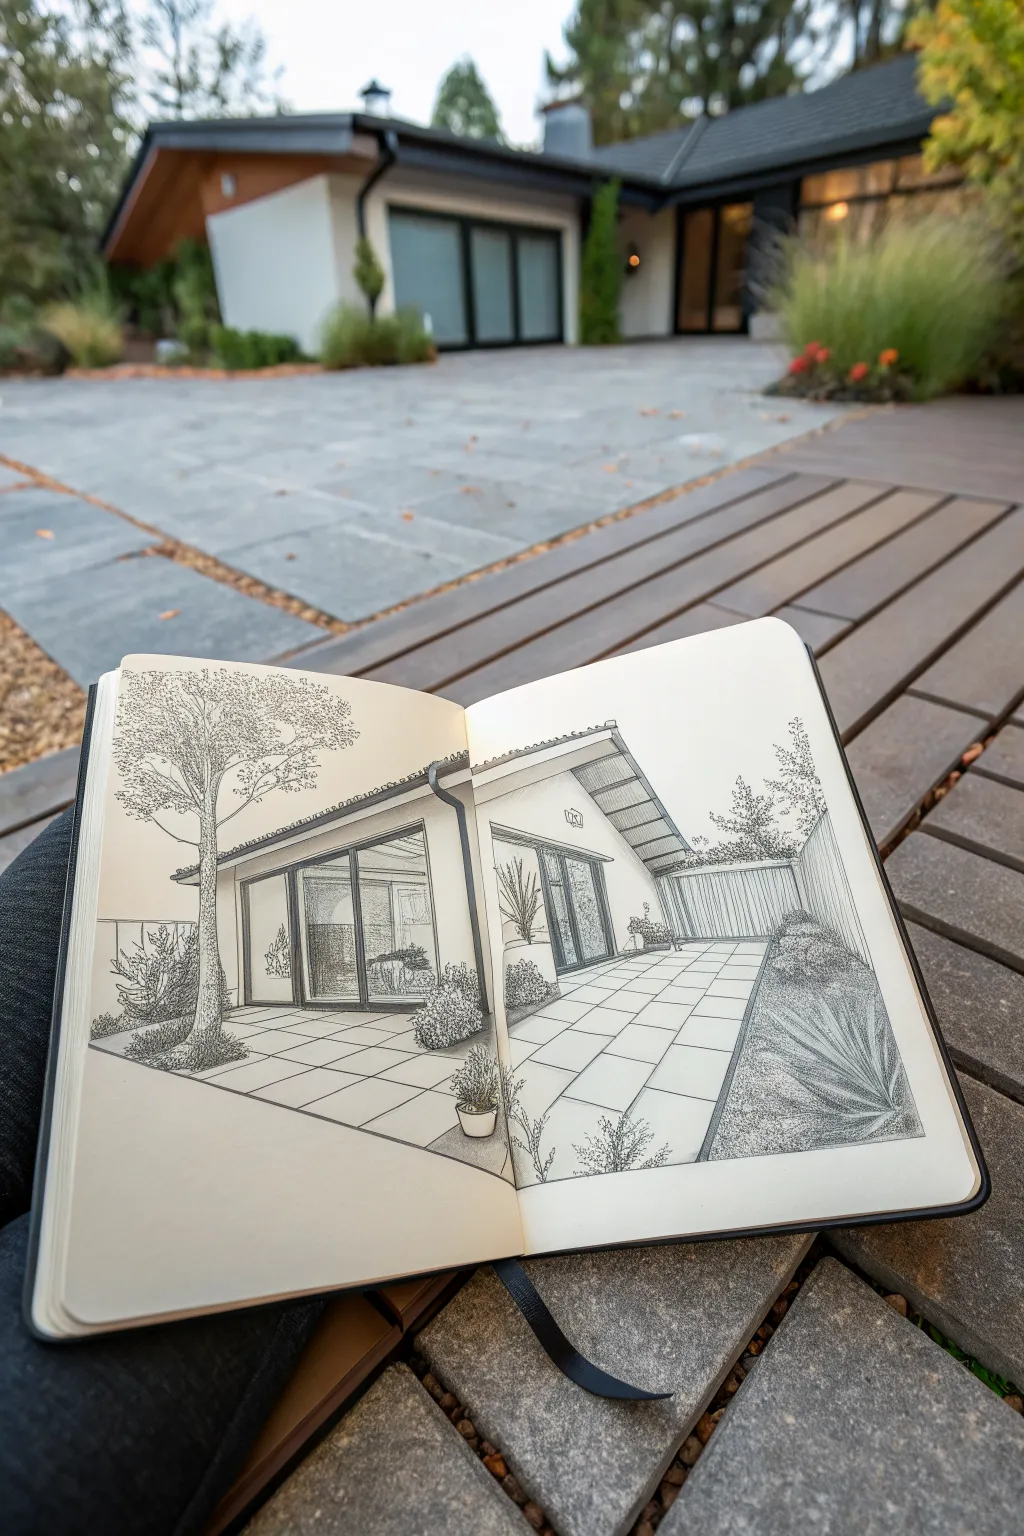
This tutorial guides you through creating a crisp architectural sketch of a modern home embracing a serene courtyard. Using fine liners and perspective techniques, you’ll capture the clean lines and inviting outdoor space of this dream design.
Step-by-Step
Materials
- A5 or A4 sketchbook (smooth or mixed media paper recommended)
- HB or H graphite pencil
- Kneaded eraser
- Ruler or straight edge
- Fine liner pens (sizes 0.05, 0.1, 0.3, and 0.5)
- Blending stump (optional)
Step 1: Laying the Structural Foundation
-
Establish the horizon line:
Begin by lightly drawing a horizontal line across the lower third of your spread. This will serve as your eye level and ground the structure. -
Set up the two-point perspective:
Mark two vanishing points on the far left and far right of your horizon line. Since the house wraps around a corner, these points are crucial for getting the angles of the roof and walls correct. -
Block in the main L-shape:
Using your pencil and ruler, rough in the two main rectangular volumes of the house meeting at a central corner. Keep your lines very light so they can be erased later. -
Define the rooflines:
Sketch the slanted rooflines. Notice how the roof extends slightly beyond the walls to create overhangs; capture this detail to add depth to the structure. -
Outline the glazing:
Draw the large rectangles that will become the sliding glass doors. These modern homes rely heavily on glass, so ensure these shapes are prominent on the courtyard-facing walls.
Step 2: Inking the Architecture
-
Ink the structural outlines:
Switch to a 0.3 or 0.5 pen. Carefully go over the main vertical lines of the walls and the horizontal lines of the roof. Use a ruler for the straight architectural edges to keep them crisp. -
Detail the door frames:
Use a thinner 0.1 pen to draw the frames of the sliding doors. Create a double line for each frame to give it thickness, rather than a single flat line. -
Add roof texture:
With a 0.05 or 0.1 pen, draw the subtle lines indicating the roof tiles or standing seam metal. Keep these lines consistently spaced and following the perspective toward your vanishing points. -
Draw the gutter system:
Use a slightly thicker line (0.3) to add the downspout running vertically down the corner where the two building wings meet. This adds realism and separates the planes. -
Pave the courtyard:
Pencil in a grid for the patio tiles. When inking, use a 0.1 pen. The lines should converge toward your vanishing points to make the patio look flat and expansive.
Wobbly Lines?
If your straight lines aren’t perfect, don’t panic. Go over them once more with a slightly thicker pen. Typical architectural sketches often have ‘loose’ lines that add character.
Step 3: Adding Nature and Depth
-
Sketch the foreground tree:
On the left page, draw the trunk and branches of the large tree. Use organic, wavy lines with a 0.3 pen to contrast with the straight lines of the house. -
Stipple the foliage:
For the tree leaves and bushes, use a 0.05 pen to create texture. Instead of drawing individual leaves, use clusters of small dots (stippling) or tiny scribbles to suggest mass and shadow. -
Detail the planters and pots:
Draw the potted plant in the foreground near the page fold. Adding these small elements helps frame the view and creates a sense of scale. -
Shade the interior:
Use hatching (closely spaced parallel lines) to darken the interior of the house behind the glass. Leave some areas white to represent reflections on the windows. -
Ground the scene with shadows:
Identify where the sun is coming from (likely top left) and add cast shadows on the patio from the roof overhangs and the tree. Use diagonal hatching with a 0.1 pen for a clean, architectural look. -
Clean up:
Wait for the ink to dry completely to avoid smudging. Then, gently erase all your initial pencil guidelines to reveal the sharp, finished drawing.
Pro Tip: Depth Control
Use line weight to create depth. Objects closer to you (like the foreground tree) should have thicker outlines than the distant fence or background trees.
Now you have a serene architectural snapshot that invites the viewer to step into your imagined courtyard
Modern House With a Pool Reflection Scene
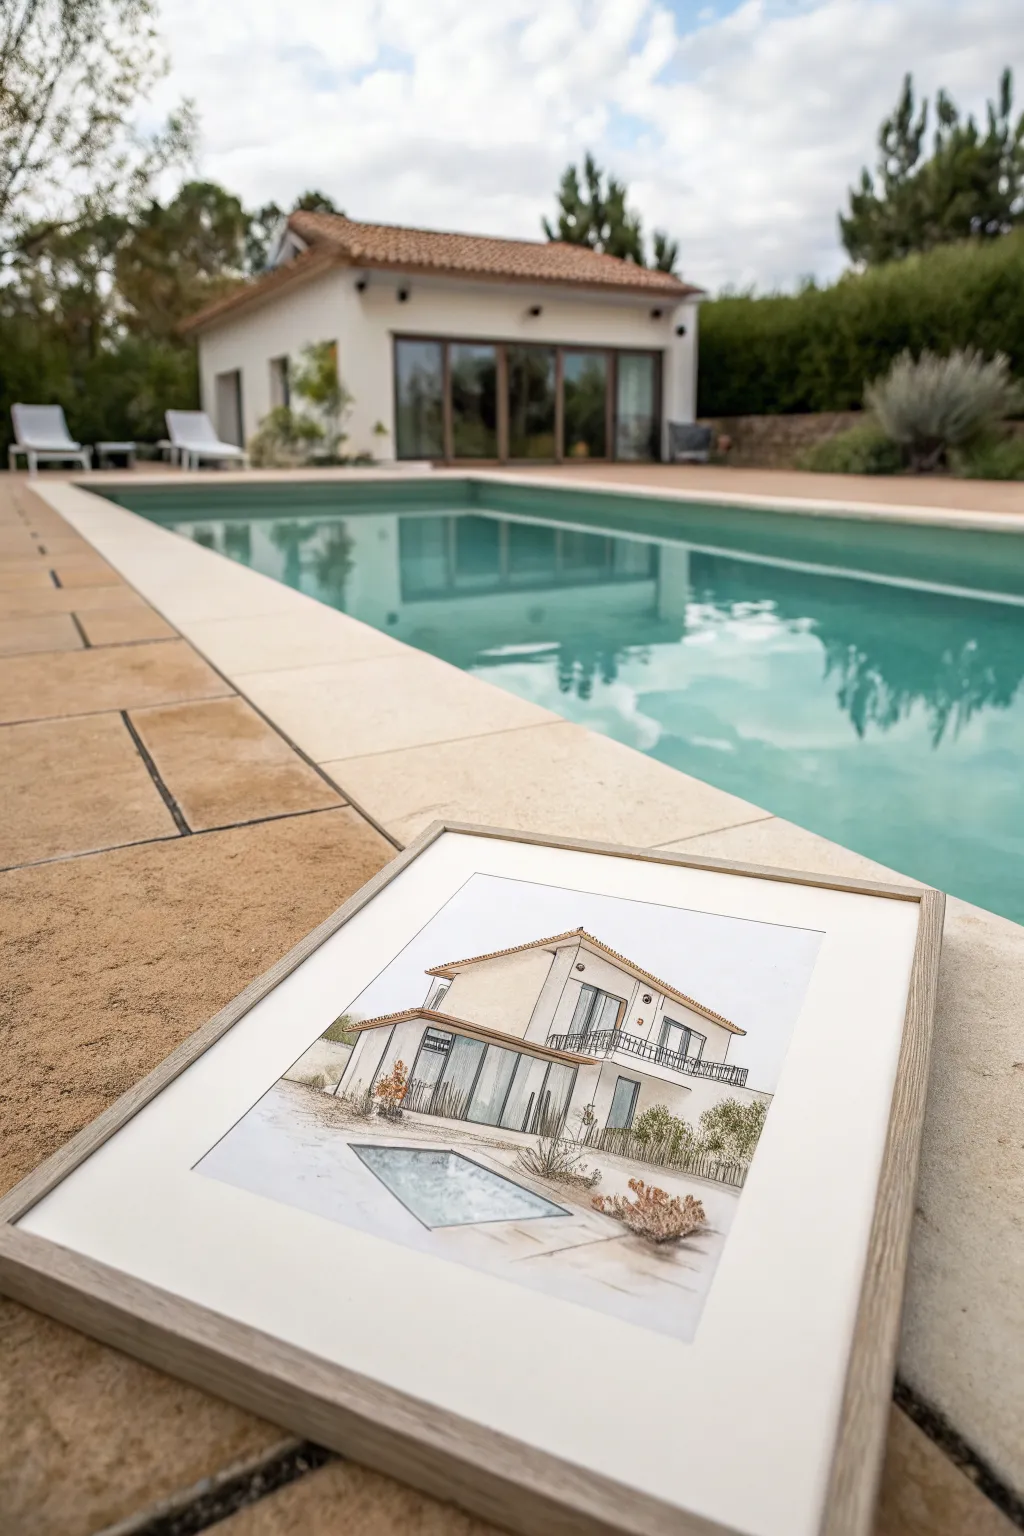
Capture the clean lines and serene atmosphere of a modern home with this mixed-media architectural sketch. Combining precise ink work with soft watercolor washes creates a professional illustration style that beautifully documents your dream home.
Detailed Instructions
Materials
- Hot press watercolor paper (A4 or similar size)
- Pencil (HB or 2H)
- Good quality eraser
- Ruler or architectural scale
- Waterproof fine liner pens (0.1mm, 0.3mm, 0.5mm)
- Watercolor paint set
- Round watercolor brushes (sizes 4 and 8)
- Paper towels
- Two jars of water
- Light wood frame for display
Step 1: Drafting the Structure
-
Establish the horizon line:
Start by lightly drawing a horizontal line across the distinct lower third of your paper to represent the ground level. -
Block in the main volumes:
Using your pencil and ruler, lightly sketch the main rectangular forms of the house. Focus on the large two-story section first, ensuring the roof angles are consistent. -
Add the perspective lines:
If drawing from an angle, mark a vanishing point on your horizon line. Lightly trace lines from the corners of your house block toward this point to create accurate 3D depth. -
Detail the architectural features:
Sketch in the large sliding glass doors on the ground floor and the balcony railing on the second floor. Keep these pencil lines very faint as guides. -
Outline the pool:
In the foreground, draw the geometric shape of the pool. Use the same perspective rules to make the rectangle appear to recede into the distance.
Step 2: Inking the Design
-
Ink the structural lines:
Switch to your 0.5mm waterproof pen. Go over the main outer walls and roofline of the house with confident, straight strokes. Use a ruler if you want a technical look, or freehand for vibrancy. -
Define the windows and doors:
Use the 0.3mm pen to outline the window frames and sliding doors. Add double lines to indicate the thickness of the frames. -
Create texture with hatching:
With the finest 0.1mm pen, add vertical hatching lines on the glass areas to suggest reflections. Don’t fill them completely; leave white space for highlights. -
Add landscape elements:
Switch back to a looser, freehand style to ink the bushes and small trees around the base of the house. Scumbled, scribbly lines work well here to contrast the rigid architecture. -
Erase pencil guides:
Wait at least 15 minutes for the ink to be perfectly dry, then gently erase all visible pencil marks to clean up the drawing surface.
Clean Lines
For steadier ink lines, exhale slowly as you draw each long stroke. It naturally relaxes your hand muscles and reduces jitters.
Step 3: Watercolor Application
-
Wash the walls:
Mix a very dilute beige or cream color. Apply this wash over the house walls, leaving the window glass and roof trim white for now. -
Paint the roof:
Mix a terracotta or burnt sienna shade. Paint the roof tiles, varying the intensity slightly to add texture to the clay surface. -
Tint the glass:
Use a heavily diluted cool grey or pale blue. Carefully paint the glass panes, creating a gradient that gets lighter toward the top of each window. -
Color the water:
For the pool, mix a bright turquoise. Apply it with horizontal strokes, leaving small slivers of white paper showing through to mimic sunlight sparkling on the water. -
Ground the scene:
Paint the terrace area with a blend of light grey and raw sienna. I like to use a ‘wet-on-dry’ technique here to keep the edges crisp against the grass areas. -
Fill in the greenery:
Use various shades of sap green and olive for the bushes. Dab the color on loosely rather than painting solid shapes to maintain that sketchy feel. -
Add final shadows:
Once the main colors are dry, mix a transparent grey-purple. Paint shadows under the eaves and the balcony to give the building weight and dimension. -
Frame the artwork:
Allow the paper to dry completely flat. Mount it in a simple light wood frame to complement the clean aesthetic of the modern drawing.
Muddy Colors?
If your watercolors look muddy, you’re likely overworking wet areas. Let each layer dry completely before adding shadows or details on top.
Now you have a timeless rendering of modern architecture ready to display in your home
Nighttime Modern House With Glowing Windows
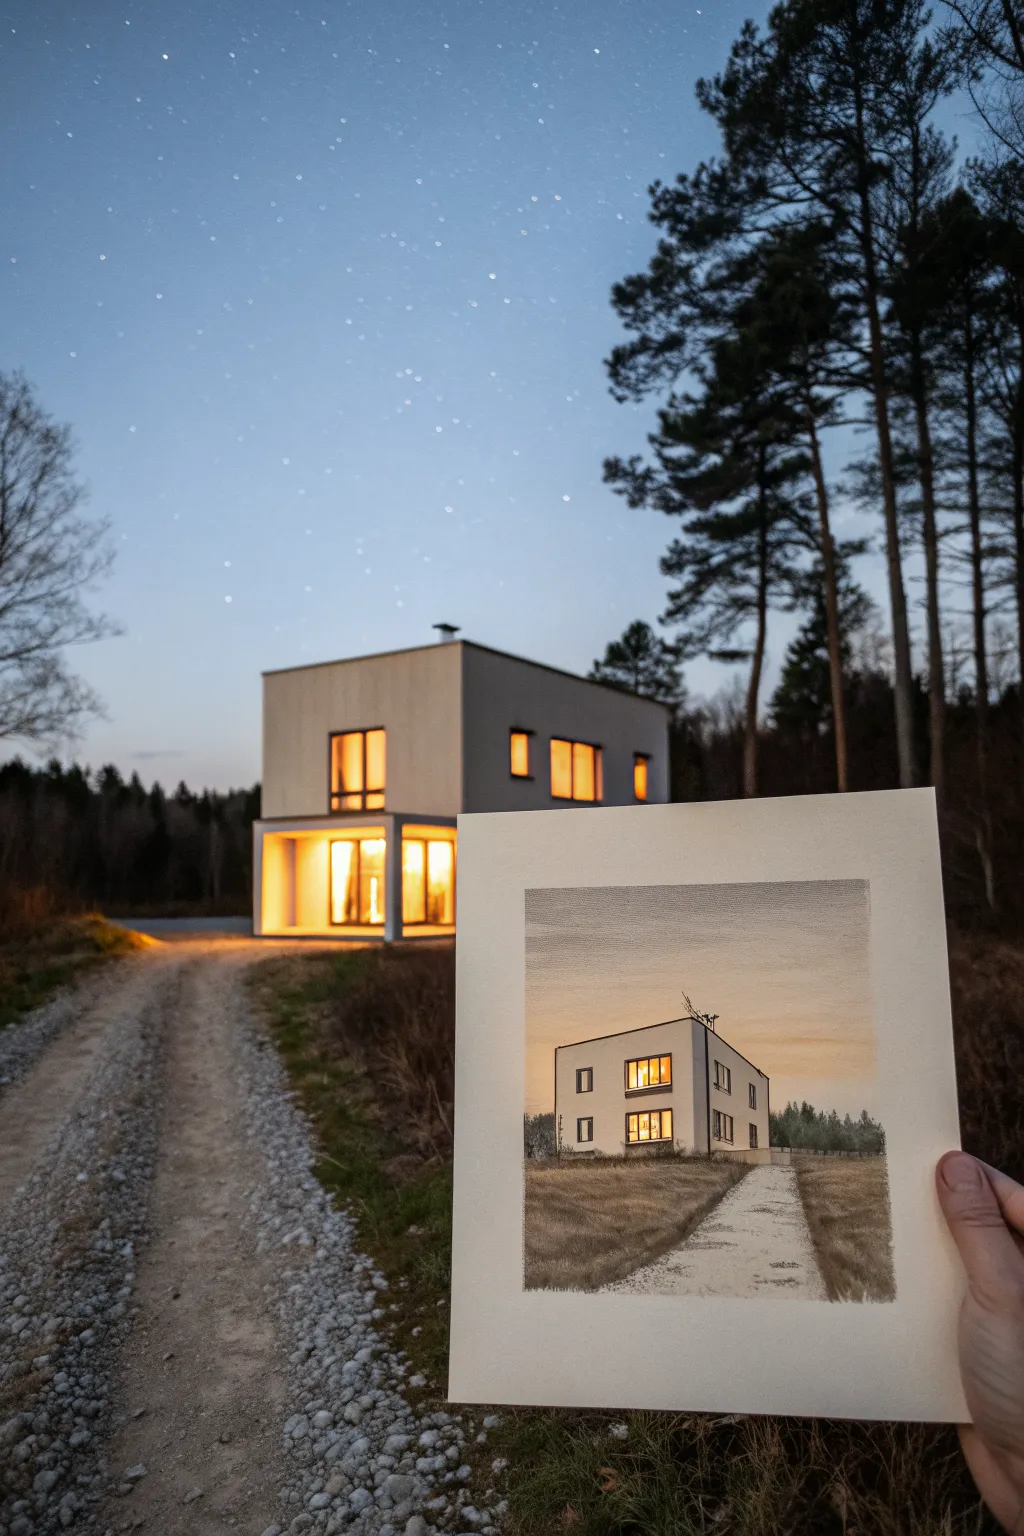
Capture the cozy glow of modern architecture against a sunset sky with this mixed media study. Blending watercolor washes for the atmosphere with precise ink lines for the structure creates a striking balance between softness and rigidity.
Step-by-Step Tutorial
Materials
- Hot press watercolor paper (approx 6×6 inches)
- Pencil (HB or H)
- Ruler
- Waterproof fineliner pens (0.1mm and 0.3mm, black)
- Watercolor paints (Yellow ochre, burnt sienna, sepia, indigo, payne’s grey)
- Synthetic round brush (size 4)
- White gel pen or gouache
Step 1: Structural Layout
-
Establish the horizon:
Begin by lightly drawing a horizon line about one-third of the way up from the bottom of your paper using your pencil and ruler. -
Block in the house shape:
Draw the main cubic volume of the house. Since it’s a perspective drawing, ensure your vertical lines are perfectly straight up and down, while the horizontal lines angled away for the roof and base converge slightly toward a vanishing point off the page. -
Position the windows:
Lightly sketch the rectangular window openings. Pay close attention to their alignment; they are key to the modern aesthetic. Add the extension on the right side of the main block. -
Outline the path:
Draw the boundaries of the gravel driveway leading from the foreground toward the house, narrowing as it approaches the building to enhance depth.
Straight Edges
For ultra-crisp architectural lines, flip your ruler over so the beveled edge faces down. This prevents the ink from bleeding under the ruler and smudging your paper.
Step 2: Ink Work
-
Inking the structure:
Using the 0.3mm waterproof fineliner and your ruler, go over the main structural lines of the house. Keep these lines crisp and confident. -
Adding details:
Switch to the finer 0.1mm pen to draw the window frames. Add the small details like the antenna on the roof and the dark vertical fence posts in the background. -
Erase pencil guides:
Once the ink is completely dry—give it a few minutes to be safe—gently erase all your graphite sketch lines so the paper is clean for painting.
Dynamic Skies
Try painting the sky wet-on-wet with purple and deep blue at the very top, fading into the orange horizon, to create a more dramatic ‘magic hour’ twilight effect.
Step 3: Painting Atmosphere
-
Sky wash:
Mix a very watery wash of yellow ochre and apply it near the horizon line behind the house. While it’s still wet, blend upwards into a soft grey-blue mix (indigo + lots of water) for the upper sky. -
The glowing windows:
Drop purely saturated yellow ochre or a warm yellow-orange into the window rectangles to create the illuminated interior effect. Keep this distinct from the white window frames. -
House shadows:
Paint the shadowed side of the house (the left face) with a very pale, cool grey. Leave the front face mostly the white of the paper or a barely-there cream wash to suggest reflected light. -
Ground layer:
Apply a rough wash of burnt sienna mixed with sepia for the grassy areas. Use horizontal brush strokes to suggest the lay of the land.
Step 4: Depth and Texture
-
Darkening the foreground:
Once the first ground layer is dry, mix a darker sepia and stipple the foreground grass to add texture and framing. You want the bottom corners to be darker than the area near the house. -
Background trees:
Paint the distant treeline using a cool grey-green mix. Keep this shape soft and silhouette-like so it recedes into the background. -
Texturing the path:
Use a dry brush technique with diluted sepia to skitter across the path area, mimicking gravel without coloring it in solid. -
Final window glow:
If the windows dried too light, glaze a second layer of orange-yellow over them to really make them pop against the darkening landscape.
Step back and admire how the warm windows invite you into your miniature architectural scene
Architectural Concept Sketch With Loose Marker Wash
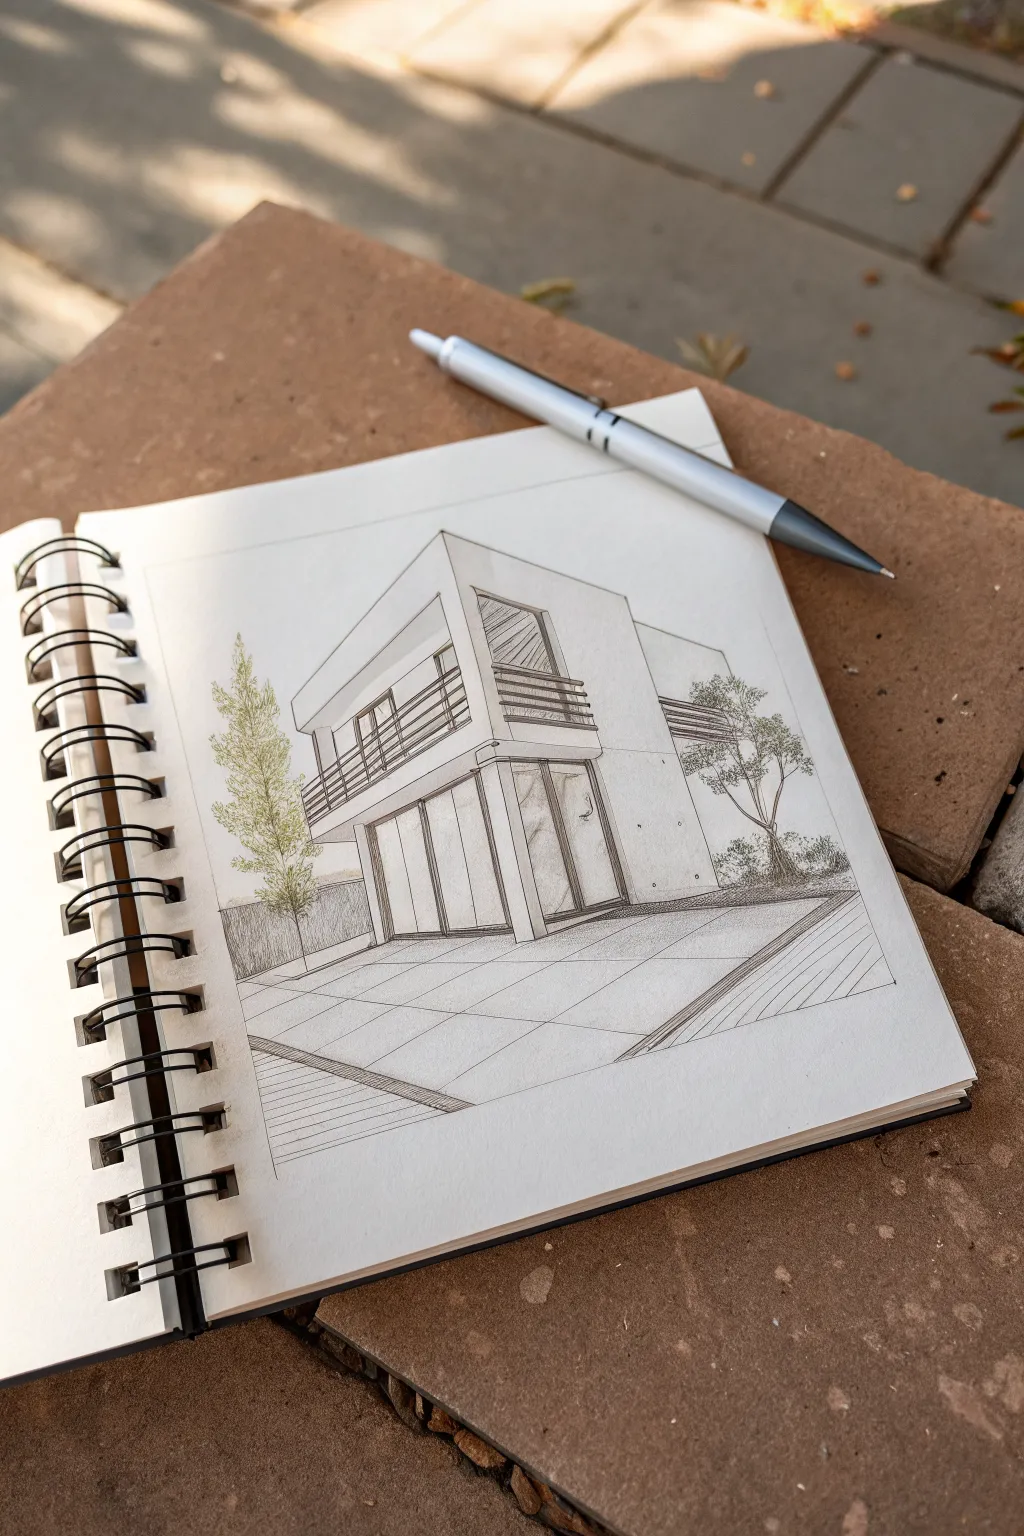
Capture the sleek lines and airy geometry of modern architecture in this detailed sketchbook study. This project focuses on mastering two-point perspective and combining crisp ink lines with subtle organic textures for a balanced architectural rendering.
Step-by-Step Guide
Materials
- Spiral-bound sketchbook (smooth or mixed media paper recommended)
- Mechanical pencil (0.5mm HB or similar)
- Fine liner pens (sizes 0.1, 0.3, and 0.5)
- Ruler or straight edge
- Light gray alcohol marker (cool gray)
- Eraser
Step 1: Laying the Perspective Framework
-
Establish the Horizon:
Begin by lightly sketching a horizontal line roughly across the middle-lower third of your page. This is your eye level. -
Set Vanishing Points:
Mark two vanishing points on the far left and far right of your horizon line. For a natural look, these points should ideally be off the page, so just imagine them extending outwards. -
Draw the Leading Corner:
Draw a vertical line slightly to the left of the page center. This represents the closest corner of the house and sets the height for both stories. -
Connect to Vanishing Points:
From the top and bottom of your vertical line, draw light guidelines receding toward your imaginary left and right vanishing points to create the basic box shape of the house.
Step 2: Defining Architectural Volumes
-
Carve Out the Structure:
Divide your initial box into two levels. Sketch the overhang of the second floor, allowing it to jut out slightly over the ground floor area on the left side. -
Outline Windows and Doors:
Using your vanishing points as guides, block in large rectangular shapes for the sliding glass doors on the bottom and the balcony window on top. -
Add Balcony Details:
Sketch the railing lines on the upper left balcony. Keep these lines parallel to your perspective guidelines to maintain depth. -
Ground and Patio:
Extend lines from the base of the house to define a large, paved patio area in the foreground. Use the vanishing points to create the grid pattern of the patio tiles.
Clean Lines Only
Smudged ink ruins sharp architecture. Always lift your ruler straight up rather than sliding it across the paper, and wipe the ruler’s edge frequently.
Step 3: Inking and Detailing
-
Ink the Structural Lines:
Switch to a 0.5 pen for the main outline of the building. Use a ruler for the straight structural edges to get that crisp architectural look. -
Detail the Windows:
Use a finer 0.1 pen to draw the window frames and mullions. I find lighter lines here make the glass feel more delicate compared to the concrete walls. -
Texture the Patio:
Ink the grid lines of the patio pavement. Add diagonal hatching to the border areas of the patio to suggest a different material or texture. -
Balcony Railings:
Carefully ink the horizontal rails of the balcony. Using a slightly thicker line on the underside of each rail can suggest shadow and volume.
Environment Reflection
To make the large glass windows look realistic rather than empty, draw faint, diagonal hatching lines across them to suggest reflections of the sky.
Step 4: Organic Elements & Shading
-
Sketch the Left Tree:
Draw a tall, slender cypress-style tree on the left. Use quick, upward scribble strokes to create a leafy texture that contrasts with the rigid house duties. -
Add the Right Tree:
Place a smaller, more branching tree on the right side behind the house. Use loose, circular scribbles for the canopy to create depth. -
Ink the Vegetation:
Go over your tree sketches with a 0.3 pen. Keep your hand loose and avoid perfect outlines; broken lines work best for foliage. -
Erase Pencil Guidelines:
Once the ink is completely dry, gently erase all your initial pencil construction lines to reveal the clean drawing. -
Apply Marker Wash:
Use a light gray marker to add subtle shadows under the roof overhangs, inside the door frames, and on the side of the house facing away from the light source. -
Grounding Shadows:
Add a few quick horizontal hatched lines at the base of the trees and the house to ‘ground’ them, confirming they are sitting on a solid surface.
Step back and admire how a few simple geometric rules can build a convincing three-dimensional home.
Minimal Line Art Modern House Silhouette
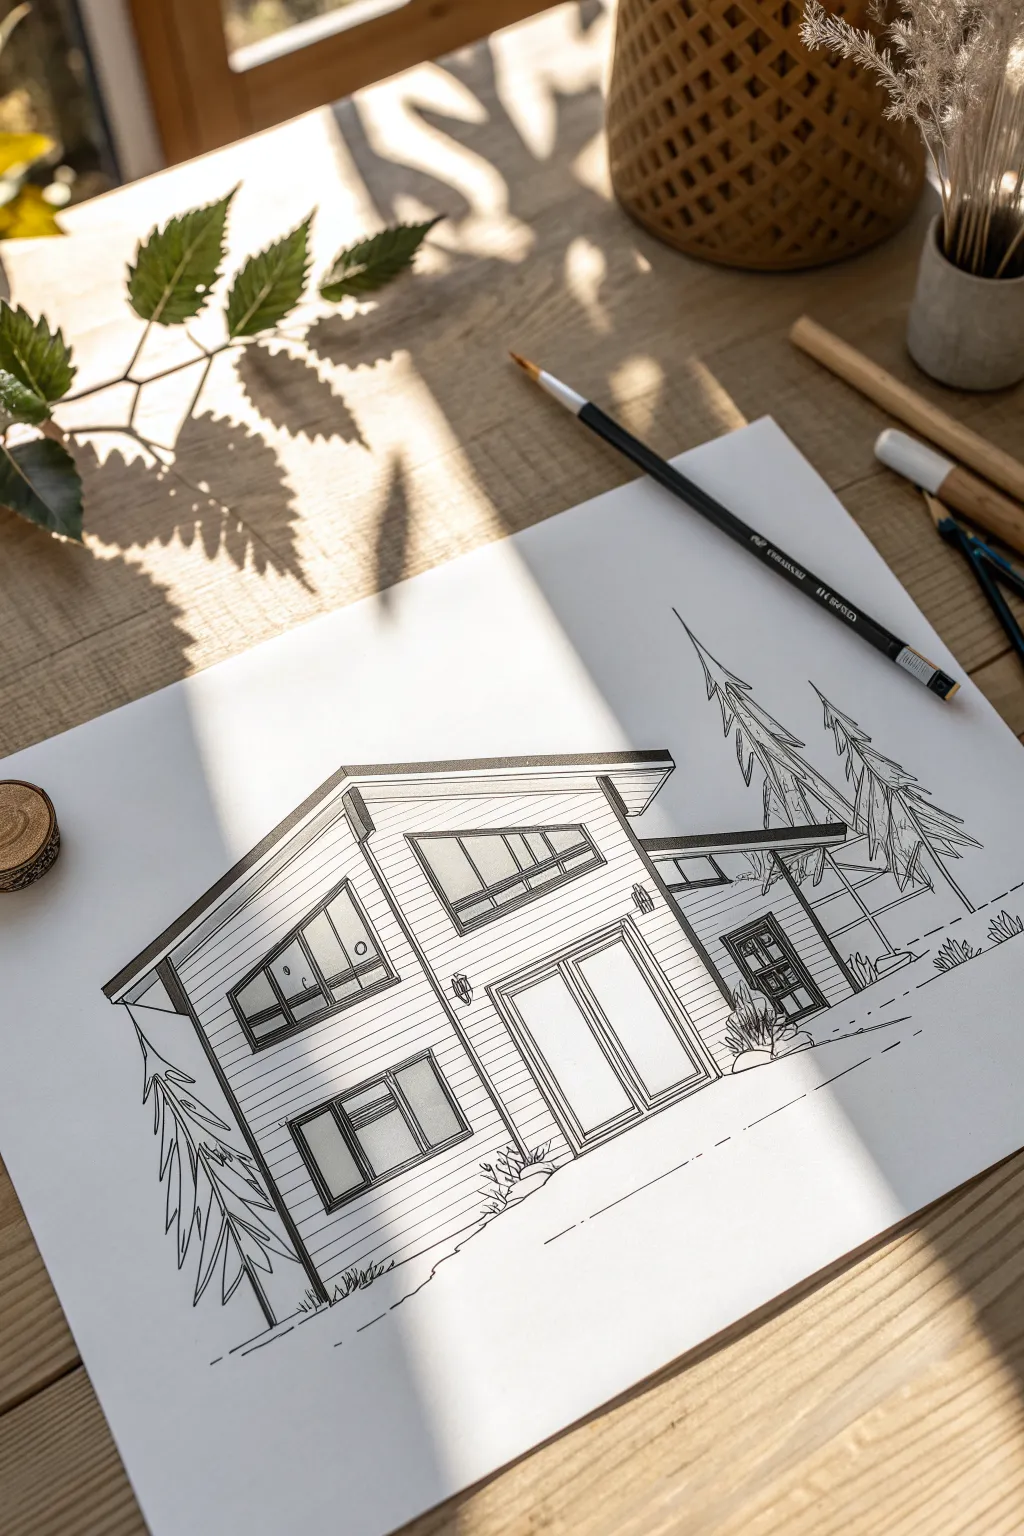
Capture the sleek elegance of modern architecture with this crisp line art drawing, featuring clean angles and stylized pine trees. The high-contrast black ink on white paper creates a striking, minimalist aesthetic perfect for framing.
Detailed Instructions
Materials
- High-quality white drawing paper (Bristol or smooth mixed media)
- Graphite pencil (HB or 2H for initial sketching)
- Fine liner pens (sizes 0.1, 0.3, and 0.5mm)
- Ruler or straight edge
- Eraser (kneaded preferred)
- Reference photo of a shed-roof house
Step 1: Drafting the Structure
-
Establish the horizon:
Begin by lightly drawing a faint horizon line across the lower third of your paper using your pencil and ruler. This grounds the house. -
Block in the main volumes:
Sketch two main rectangular shapes to form the body of the house. The larger section on the left should be taller to accommodate the double-story design. -
Add the shed roof lines:
Draw the signature angled ‘shed’ rooflines. The left roof should slope dramatically downward to the left, while the smaller right section slopes towards the right. -
Outline window and door placements:
Lightly mark the locations for the large sliding glass doors on the ground floor and the angular trapezoidal window on the upper floor. -
Refine architectural details:
Pencil in the smaller side windows, the entrance overhang on the right, and the vertical siding texture guidelines.
Wobbly Lines?
If your ruler slips, don’t panic. Thicken the line to hide the mistake, or turn the error into an architectural detail like a double frame or trim.
Step 2: Inking the Lines
-
Outline the main silhouette:
Switch to your 0.5mm fine liner. Use your ruler to confidentially ink the exterior walls and the strong roof lines. Keep your hand steady for crisp edges. -
Define the window frames:
Use a 0.3mm pen to draw the heavy frames of the windows and doors. I find it helpful to draw the outer frame first, then add the inner sash lines. -
Add siding texture:
With a 0.1mm pen and a ruler, draw the horizontal siding lines. Space them evenly, but don’t worry if they aren’t mathematically perfect—it adds character. -
Detail the glass reflections:
For the window glass, draw very fine diagonal hatching marks using the 0.1mm pen to suggest reflection and depth without filling them in completely. -
Draw the landscaping:
Switch to freehand drawing for the organic elements. Sketch irregular, angular shapes for the pine trees on the right and the smaller shrubbery near the foundation. -
Enhance the trees:
Use quick, flicking strokes to create pine needles on your tree outlines. Keep these lines loose to contrast with the rigid house structure.
Add Watercolor
For a softer look, add a light wash of warm grey or creative colors to the sky or trees after the waterproof ink has fully dried.
Step 3: Final Touches
-
Strengthen shadows:
Go back with the 0.5mm pen and thicken the lines underneath the roof eaves and window sills to create implied shadows. -
Add ground details:
Draw a few broken, horizontal lines in the foreground to suggest a path or lawn, fading out as you move away from the house. -
Erase pencil marks:
Wait until the ink is completely dry—give it a few extra minutes just to be safe. Gently erase all underlying graphite sketches. -
Review contrast:
Step back and look at the composition. If the house feels too light, darken the window interiors slightly with cross-hatching.
Now you have a stylish architectural illustration ready to display
Cutaway Modern House Showing Interior Levels
Capture the clean lines and cozy structure of a modern two-story home with this precise ink drawing tutorial. Using fine-tip pens on smooth paper, you’ll learn to build an architectural sketch from basic geometric shapes into a detailed, professional-looking illustration.
Step-by-Step Tutorial
Materials
- Spiral-bound sketchbook (smooth Bristol or heavyweight drawing paper)
- Mechanical pencil (HB or H lead)
- Ruler or straight edge
- Fine liner pen (0.3mm or 0.5mm, black)
- Ultra-fine liner pen (0.05mm or 0.1mm, black)
- Kneaded eraser or high-quality plastic eraser
Step 1: Laying the Structural Foundation
-
Establish the horizon:
Start by lightly sketching a horizontal line near the bottom third of your page to represent the ground level. This anchors your house so it doesn’t feel like it’s floating. -
Outline the main volume:
Draw a large rectangle for the main body of the house. Since we are drawing a front elevation view, you don’t need to worry about perspective vanishing points; just keep your vertical lines straight up and down. -
Add the roof pitch:
Above your main rectangle, draw a large triangle for the gable roof. Make the pitch moderately steep to mimic a chalet style. Extend the eaves slightly past the walls on both the left and right sides. -
Define the floors:
Draw a horizontal line across the middle of the house to separate the ground floor from the second story. This will help you place the balcony and windows accurately later. -
Block in the garage:
In the lower left quadrant of the ground floor, sketch a large square or rectangle for the garage door area.
Step 2: Sketching Architectural Details
-
Position the balcony:
Create the balcony structure on the second floor. Sketch a rectangle extending across the majority of the upper level, leaving space for the railing detail. -
Place upper windows:
Sketch two sets of double doors or tall windows leading onto the balcony. Center them or space them evenly to create symmetry. -
Add lower windows and entry:
On the ground floor to the right of the garage, sketch a large picture window. Further to the right, outline the front door area with a simple frame. -
Detail the roof overhang:
Draw a second line parallel to the roofline to show the thickness of the fascia board. Add a small triangular detail near the peak of the gable for visual interest. -
Draft the garage panels:
Divide the garage door rectangle into horizontal sections to simulate panels. Keep these lines parallel to the ground line.
Straight Line Secret
If you don’t have a ruler, use the edge of another piece of thick paper or cardstock. It’s often easier to maneuver around the page than a bulky plastic ruler.
Step 3: Inking the Design
-
Main structural lines:
Switch to your 0.5mm fine liner. Carefully trace the main outline of the house, the roof, and the ground line. Use a ruler here if you want a crisp, technical look, or freehand it for a sketchier vibe. -
Ink the windows and doors:
Use the same 0.5mm pen to outline the window frames and door frames. I find that defining the outer edges first makes the interior details easier to manage. -
Detail the balcony railing:
Switch to a finer 0.1mm or 0.3mm pen. Draw vertical lines for the balcony railing. Space them closely together to create a texture that differs from the rest of the house. -
Add window panes:
With the fine 0.1mm pen, draw the muntins (the grid lines) inside the windows. Keep these lines thin to suggest glass. -
Texture the garage:
Ink the horizontal panel lines on the garage door using the 0.3mm pen. -
Add the potted plant:
On the far right, sketch a simple geometric pot and some loose, organic squiggles for a plant. This organic shape contrasts nicely with the rigid architecture.
Smudge Alert
Ink smearing is the enemy of crisp architectural drawings. Always place a scrap piece of paper under your drawing hand to protect the work you’ve already finished.
Step 4: Finishing Touches
-
Erase pencil guides:
Wait until the ink is completely dry—give it a full minute or two. Then, gently erase all the underlying pencil graphite using a kneaded eraser to avoid damaging the paper surface. -
Strengthen shadowed areas:
Use your thicker pen to add a second pass to the bottom of the roof eaves and the underside of the balcony. This ‘line weight’ variation adds depth. -
Ground the drawing:
Extend the ground line slightly past the house on both sides. You can add a faint diagonal slope line in the foreground to suggest a driveway or landscaping.
Now you have a crisp, modern architectural sketch that looks ready for a blueprint presentation
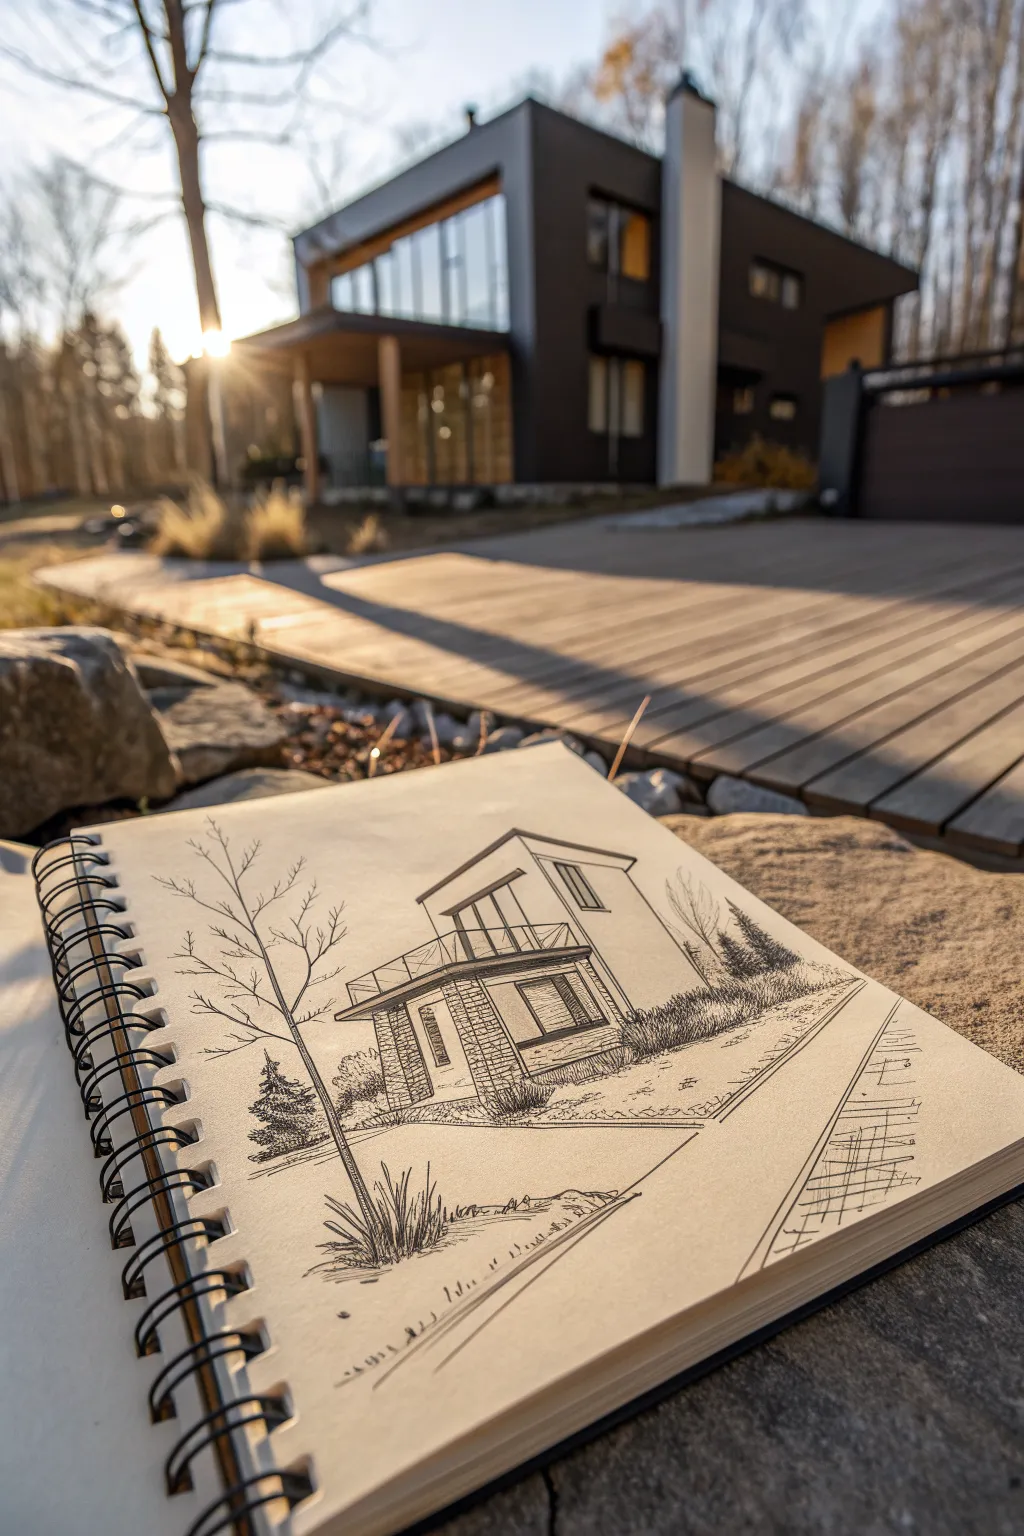
Futuristic Modern Dream House on a Hillside

Capture the stark beauty of modern architecture against a rugged landscape with this precise ink drawing tutorial. You’ll create a clean, architectural illustration that contrasts sharp structural lines with organic, stippled vegetation.
Step-by-Step
Materials
- Spiral-bound sketchbook (heavyweight paper, approx. 140gsm)
- Hard graphite pencil (2H or H)
- Fine liner pens (sizes 0.1, 0.3, and 0.5)
- Ruler or straight edge
- Kneaded eraser
Step 1: Laying the Architectural Foundation
-
Analyze the perspective:
Begin by observing the two-point perspective of the house. Identify the horizon line, which will be relatively low in this composition to make the structure loom impressively. -
Rough out the main volume:
Using your H pencil and a light touch, block in the primary rectangular box of the main living area. Keep these lines faint so they can be easily erased later. -
Add the roof overhang:
Sketch the flat roof, ensuring it extends significantly past the walls to create that classic modernist overhang. Check that the angles converge towards your vanishing points. -
Draft the tiered base:
Draw the series of stepped platforms and stairs leading up to the house. These should follow the slope of the imagined hill, creating a zig-zag pattern leading to the entrance. -
Detail the windows:
Lightly indicate the vertical divisions for the floor-to-ceiling windows. I find it helpful to mark the frames first before drawing the glass panes.
Uneven Ink Flow?
If your fine liner starts skipping, hold the pen vertical to the paper. Angle drawing can dry out the tip. Scribble on a scrap paper to restart the ink flow.
Step 2: Inking the Structure
-
Define the roofline:
Switch to a 0.5 fine liner. Use a ruler to ink the strong, confident line of the flat roof. This is the heaviest line in the drawing and grounds the structure. -
Ink the structural columns:
Use the 0.5 pen for the main vertical supports and outer walls. These lines should be perfectly vertical to convey stability. -
Refine the window frames:
Switch to a 0.3 pen. Draw the frames of the windows and the railing on the deck. Freehand these lines slightly if you want a more organic sketch feel, or stick to the ruler for precision. -
Texture the stairs:
Using a 0.1 pen, draw the horizontal planks of the wooden walkways and stairs. Keep the spacing consistent, but vary the line weight slightly to suggest wood grain. -
Erase pencil guides:
Once the ink is completely dry—give it a few minutes to be safe—gently roll a kneaded eraser over the page to lift the graphite without damaging the paper surface.
Add a Wash
For a softer look, use a waterbrush to pull ink from fresh lines before they dry, creating instant grey shadows without cross-hatching.
Step 3: Adding Landscape and Texture
-
Outline the vegetation masses:
With the 0.3 pen, draw loose, bumpy outlines for the bushes flanking the stairs and the small tree near the house. Don’t close every shape; keep it open and airy. -
Stipple the dense foliage:
Use the 0.3 pen to add shading to the bushes. Instead of lines, use rapid dots (stippling). Cluster them tightly at the bottom of the bushes for shadow and spread them out near the top. -
Detail the tree:
Switch to the 0.1 pen for the tree leaves. Use tiny scribbles or loops to create a lighter, fluffier texture compared to the heavy ground cover. -
Suggest grass texture:
In the foreground areas, use quick, upward flicks with the 0.1 pen to create tall, wild grasses. Vary the direction of the strokes to make it look natural and wind-blown. -
Add architectural shadows:
Using the 0.1 pen, add hatching (diagonal parallel lines) under the roof overhang and beneath the deck to give the building depth and dimension. -
Final contrast check:
Step back and assess your drawing. If the foreground bushes need more weight, add a few more dots with the 0.5 pen to deepen the darkest shadows.
Close your sketchbook knowing you’ve preserved a moment of architectural calm.
Ultra-Modern Glass Box With Abstract Reflections
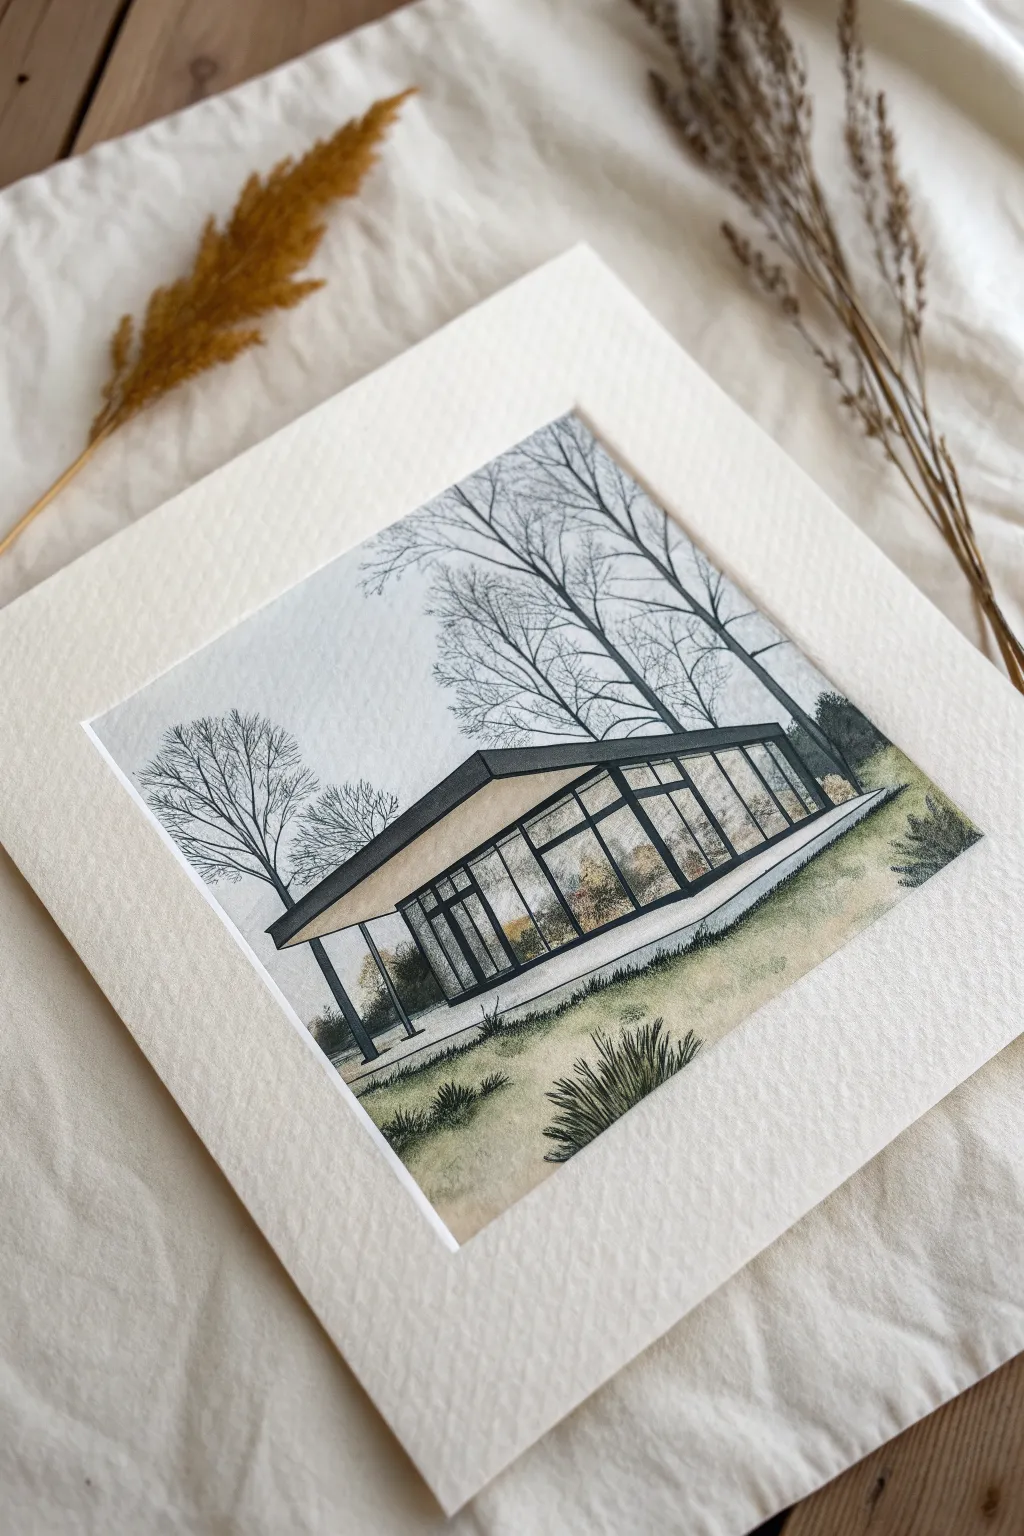
This project captures the sleek lines of mid-century modern architecture using a blend of precise ink work and soft watercolor washes. The result is a sophisticated illustration that contrasts sharp structural geometry with organic, wintery landscaping.
Step-by-Step Tutorial
Materials
- Hot press watercolor paper (smooth finish)
- Pencil (HB or 2H)
- Ruler or T-square
- Waterproof fine liner pens (0.1, 0.3, and 0.5mm, black)
- Watercolor paint set (earth tones, greys, indigos)
- Synthetic watercolor brushes (Size 2 round, Size 6 round)
- Mapping pen or dip pen (optional for tree textures)
- Masking tape
- Paper towels and water cup
Step 1: Drafting the Structure
-
Paper Preparation:
Begin by taping your hot press watercolor paper down to a board to prevent warping. A smooth ‘hot press’ paper is crucial here because it allows your ink lines to remain crisp without bleeding into paper texture. -
Horizon Line:
Using your pencil and ruler, lightly draw a horizon line across the lower third of the paper. This establishes the ground plane where the house will sit. -
Architectural Blocking:
Sketch the main box shape of the house in two-point perspective. Focus on the large rectangle of the roof fascia first, angling it slightly upward towards the right. -
Adding Grid Lines:
Lightly rule the vertical columns and window mullions. The spacing should be consistent to mimic glass panels; double-check your perspective angles on the bottom edge of the floor slab to ensure it matches the roof angle. -
Tree Placement:
Sketch the skeleton shapes of the tall, bare trees behind the house. Keep lines loose and organic to contrast against the rigid house structure.
Step 2: Inking the Details
-
main Structure Ink:
Switch to your 0.5mm waterproof pen. Carefully trace the main structural beams—the roof line, the floor slab, and the primary vertical columns. Use a ruler here for absolute precision. -
Window Frames:
Using a finer 0.3mm pen, ink the window frames and mullions. These lines should be slightly thinner than the main structure to create depth. -
Organic Linework:
For the trees, put away the ruler. Use a 0.1mm pen or a dip pen to draw the trunk and branches. Use shaky, uneven strokes to mimic natural branch growth, getting thinner as you reach the tips. -
Foreground Grass:
Add small tufts of grass in the foreground using quick, upward flicks with the 0.1mm pen. Don’t outline the whole ground; just suggest texture. -
Erase Pencil:
Once the ink is completely dry—wait at least 10 minutes to be safe—gently erase all the pencil guidelines.
Uneven Washes?
If you get ‘blooms’ or uneven drying marks in the large sky area, dampen the entire section with clean water first (wet-on-wet technique) to help the pigment spread smoothly.
Step 3: Watercolor Washes
-
Sky Wash:
Mix a very dilute wash of cool grey or faint blue. Paint the sky area, carefully cutting around the white roof and the tree trunks. Keep this wash very pale to maintain a minimalist look. -
Glass Reflections:
This is the defining step. Paint the glass panes with a watery mix of indigo and payne’s grey. Leave random vertical strips unpainted white to suggest strong reflections on the glass surface. -
Warming the Interior:
While the glass wash is still damp, drop in tiny hints of burnt sienna or yellow ochre near the bottom of the window panes. This suggests warm interior light or furniture seen through the glass. -
Roof and Structure:
Paint the roof fascia and columns with a deeper, opaque grey. I find that doing this after the glass helps frame the transparency effectively. -
Ground Layer:
Apply a wash of olive green mixed with a little brown for the lawn. Let the color fade out as it moves towards the bottom edges of the paper for a vignette effect. -
Adding Shadows:
Mix a darker green-grey and paint distinct shadows under the trees and beneath the house slab to ground the structure. -
Final Touches:
Once dry, use your finest pen to add tiny scribbles back over the grass areas to deepen the texture, and add a few final dark branches to the trees.
Pro Tip: Reflection Realism
Don’t paint every window pane identically. Vary the darkness significantly between panels to mimic how light hits glass at different angles.
Frame your architectural study with a wide mount to emphasize its modern simplicity


Have a question or want to share your own experience? I'd love to hear from you in the comments below!