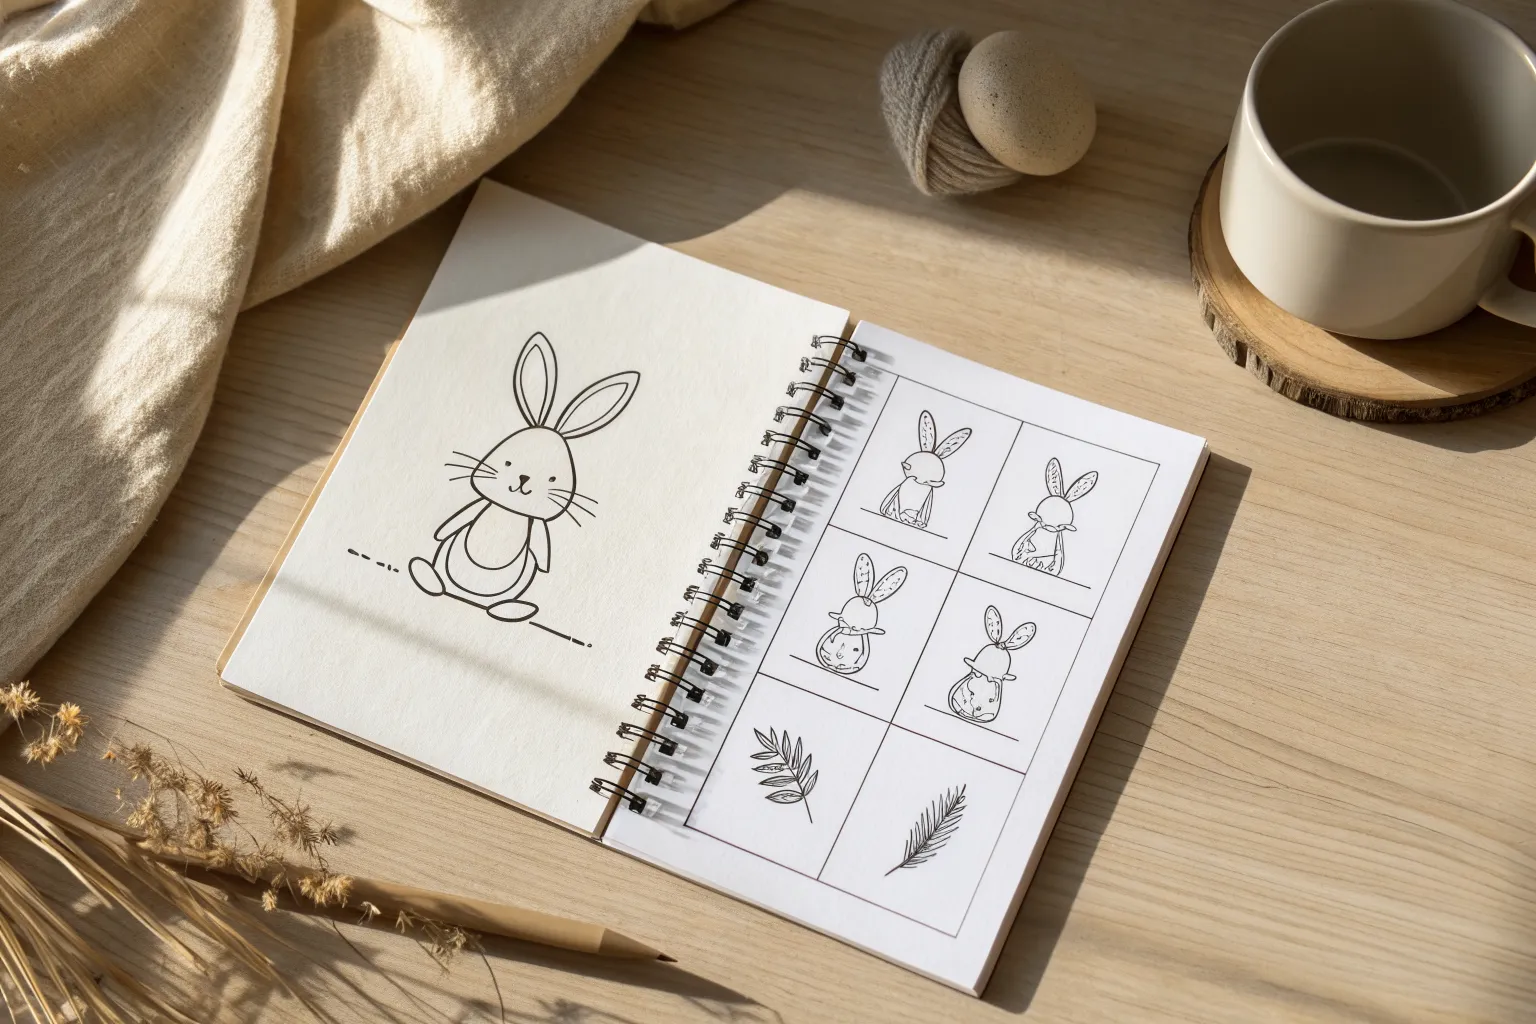
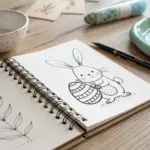
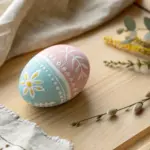
Whenever I’m craving something cute and quick to sketch, Easter drawing is my go-to because it’s packed with simple shapes and happy little details. Here are my favorite easy ideas you can draw in a few minutes—perfect for playful practice, cards, or a cozy sketchbook page.
Easy Easter Bunny With Simple Shapes
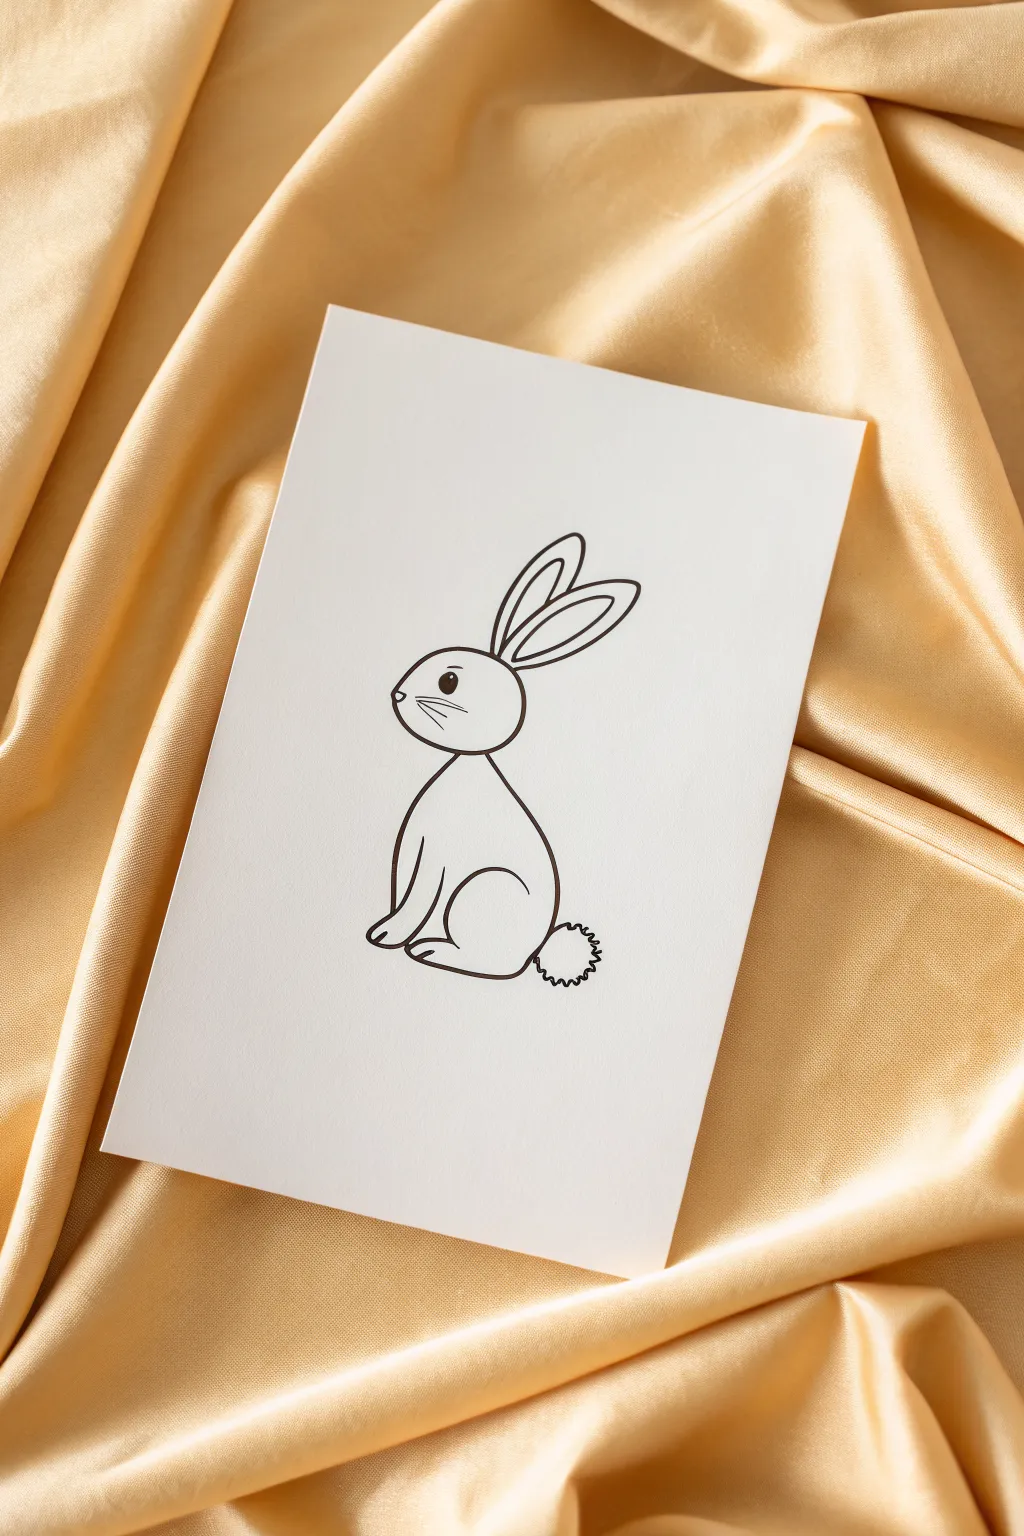
This minimal bunny drawing relies on clean, confident lines to create a charming Easter character. It’s the perfect project for beginners because it breaks a cute animal down into very manageable, basic shapes.
How-To Guide
Materials
- White cardstock or heavyweight drawing paper
- Pencil (HB or 2H)
- Eraser
- Black fine liner pen (0.5mm or 0.8mm)
- Ruler (optional, for finding the center)
Step 1: Drafting the Base Shapes
-
Position the paper:
Place your sheet of white cardstock on a flat surface. You can orient it vertically to give the bunny plenty of headroom for its ears. -
Draw the head:
Sketch a light oval shape near the upper middle of the page. This oval should be slightly tilted, with the narrower end pointing toward the left for the nose. -
Add the body shape:
Directly underneath the head oval, lightly sketch a larger, rounded shape for the body. It should look a bit like a gumdrop or a pear sitting on its wide bottom. -
Draft the ears:
Draw two long, looping ovals extending from the top right of the head. Make the back ear slightly smaller to suggest perspective. -
Define the legs:
Inside the body shape, sketch a curved line near the front to indicate the front leg. Near the back bottom, draw a small semicircle to mark where the hind leg and thigh will be.
Wobbly Lines?
Draw from your shoulder, not your wrist. Keep your hand moving at a steady pace—lines drawn too slowly often end up looking shaky.
Step 2: Inking the Outline
-
Outline the head:
Using your black fine liner, tracing over your pencil sketch. Start with the head, but leave the bottom neck area open where it connects to the body. -
Draw the back curve:
Create a smooth, continuous line from the back of the neck down to the rabbit’s bottom. Keep this line fluid to give the bunny a soft, seated posture. -
Create the front chest:
Draw a curved line coming down from the chin, arching slightly outward for the chest, and then down towards the paws. -
Define the front paws:
At the bottom of the chest line, draw a small, rounded shape for the paws resting on the ground. You can add a tiny tick mark to separate the toes. -
Ink the hind leg:
Draw a large ‘C’ curve inside the lower body area to define the haunch. I find it helps to connect this line smoothly to the bottom of the paper for the back foot. -
Connect the feet:
Draw a straight horizontal line connecting the front paws to the back foot to ground the character. -
Ink the ears:
Trace the long ear shapes. Inside both ears, draw a smaller, similar shape to represent the inner ear fold. -
Add the tail:
Instead of a smooth line, use small, jagged scribbles to draw a circle at the bunny’s lower back. This jagged texture makes the tail look fluffy.
Fluffier Bunny
To make the rabbit look softer, break up the solid outline on the chest and back with small, broken dashed lines to suggest fur texture.
Step 3: Adding Facial Details
-
Draw the eye:
Place a solid black circle in the upper middle of the head. Leave a tiny white dot uncolored near the top of the circle to create a highlight. -
Add the nose:
On the far left tip of the face, draw a very small, dark triangle or circle for the nose. -
Create whiskers:
Draw three quick, short lines radiating backward from the nose area to give the bunny its whiskers. -
Erase guidelines:
Wait at least two minutes for the link to dry completely. Once dry, gently erase all the underlying pencil sketch marks to leave a crisp, clean illustration.
Now you have an adorable, minimal piece of art ready to display or give as a card


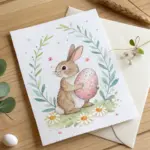
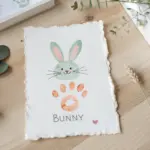
Simple Bunny Face in a Circle
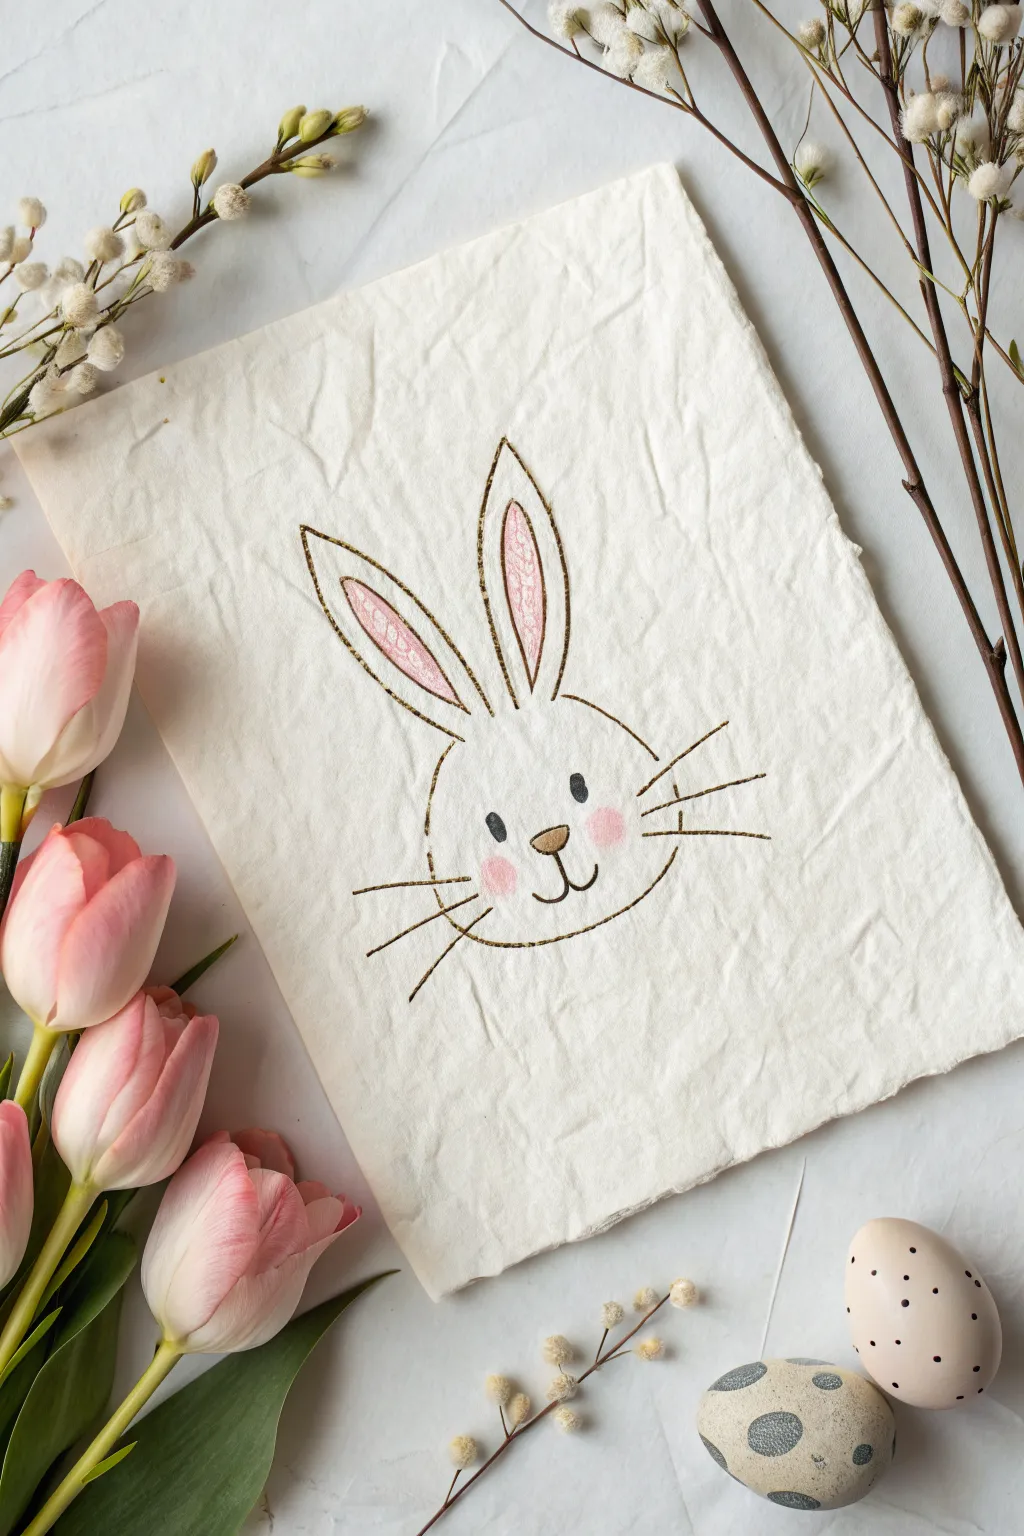
Create this elegant yet adorable bunny greeting card using metallic ink on textured paper. The result is a simple, sophisticated illustration that pairs the charm of a child’s drawing with a high-end, embossed look.
Step-by-Step Guide
Materials
- Heavyweight textured cardstock (cream or off-white)
- Gold metallic gel pen or ultra-fine paint marker
- Soft pink colored pencil or pastel chalk
- Black fine-liner pen
- Pencil (HB or similar light graphite)
- Eraser
- Circular object or compass (optional)
Step 1: Sketching the Base
-
Prepare your paper:
Start with a piece of handmade or textured paper. Tearing the edges slightly carefully gives it that deckled, vintage look shown in the photo. -
Outline the head shape:
Using a very light pencil touch, draw a simplified, squat circle for the bunny’s head. It doesn’t need to be perfectly round; a slight oval shape works well too. -
Add the ears:
Draw two long, pointed ears extending from the top of the head. Make them slightly asymmetrical—perhaps one leaning a bit more than the other—to add character. -
Sketch the inner ears:
Inside the main ear shapes, lightly sketch smaller, teardrop-like shapes for the inner ear details. -
Place the facial features:
Mark light dots for the eyes, a small rounded triangle for the nose, and the classic ‘w’ shape for the mouth anchor points.
Paper Texture Tip
If using heavily textured paper, press the gold pen down firmly and move slowly. This allows the ink to pool slightly in the paper’s crevices for a richer line.
Step 2: Inking the Gold Lines
-
Trace the main outline:
Take your gold metallic pen. Start tracing over your pencil lines for the head and the outer ears. Use a deliberate, slightly sketchy hand rather than a single perfect continuous line; this creates visual texture. -
Refine the ears:
Go over the outer ear lines again if needed to ensure the gold pigment stands out against the textured paper surface. -
Create the whiskers:
Drawing quickly and confidently, flick three straight lines outward from each cheek. Quick strokes prevent shaky lines. -
Ink the nose:
Outline the small triangle nose with the gold pen. You can choose to leave it hollow for now or fill it in with a soft brown later. -
Draw the mouth:
Connect the bottom of the nose to two curved lines forming the smile. Keep these lines simple and clean.
Step 3: Adding Color and Detail
-
Color the inner ears:
Using a soft pink colored pencil, gently shade the inner ear shapes you sketched earlier. Use a circular motion to blend the pigment into the paper’s texture. -
Fill the cheeks:
Apply two soft circles of pink to the bunny’s cheeks. I find usually rubbing the pencil lightly creates a sweet, flushed look without being too heavy. -
Add the eyes:
Switch to your black fine-liner. Draw two solid black ovals for the eyes. They should be relatively small and spaced widely apart. -
Darken the nose:
If you want a contrast, lightly shade the inside of the nose with a brown pencil or go over the outline once more to thicken it. -
Erase pencil marks:
Wait until you are absolutely certain the metallic ink is dry, then gently erase any visible graphite guidelines. -
Gold accents:
Finally, add tiny touches of gold ink over the pink inner ears to integrate them with the rest of the metallic drawing.
Smudged Ink?
Metallic gel pens take longer to dry than regular ink. If you smudge a line, wait for it to fully dry, then carefully scratch the smudge away with an X-Acto knife.
Now you have a charming piece of art ready to be framed or sent as a special Easter greeting


Decorated Easter Egg Pattern Parade
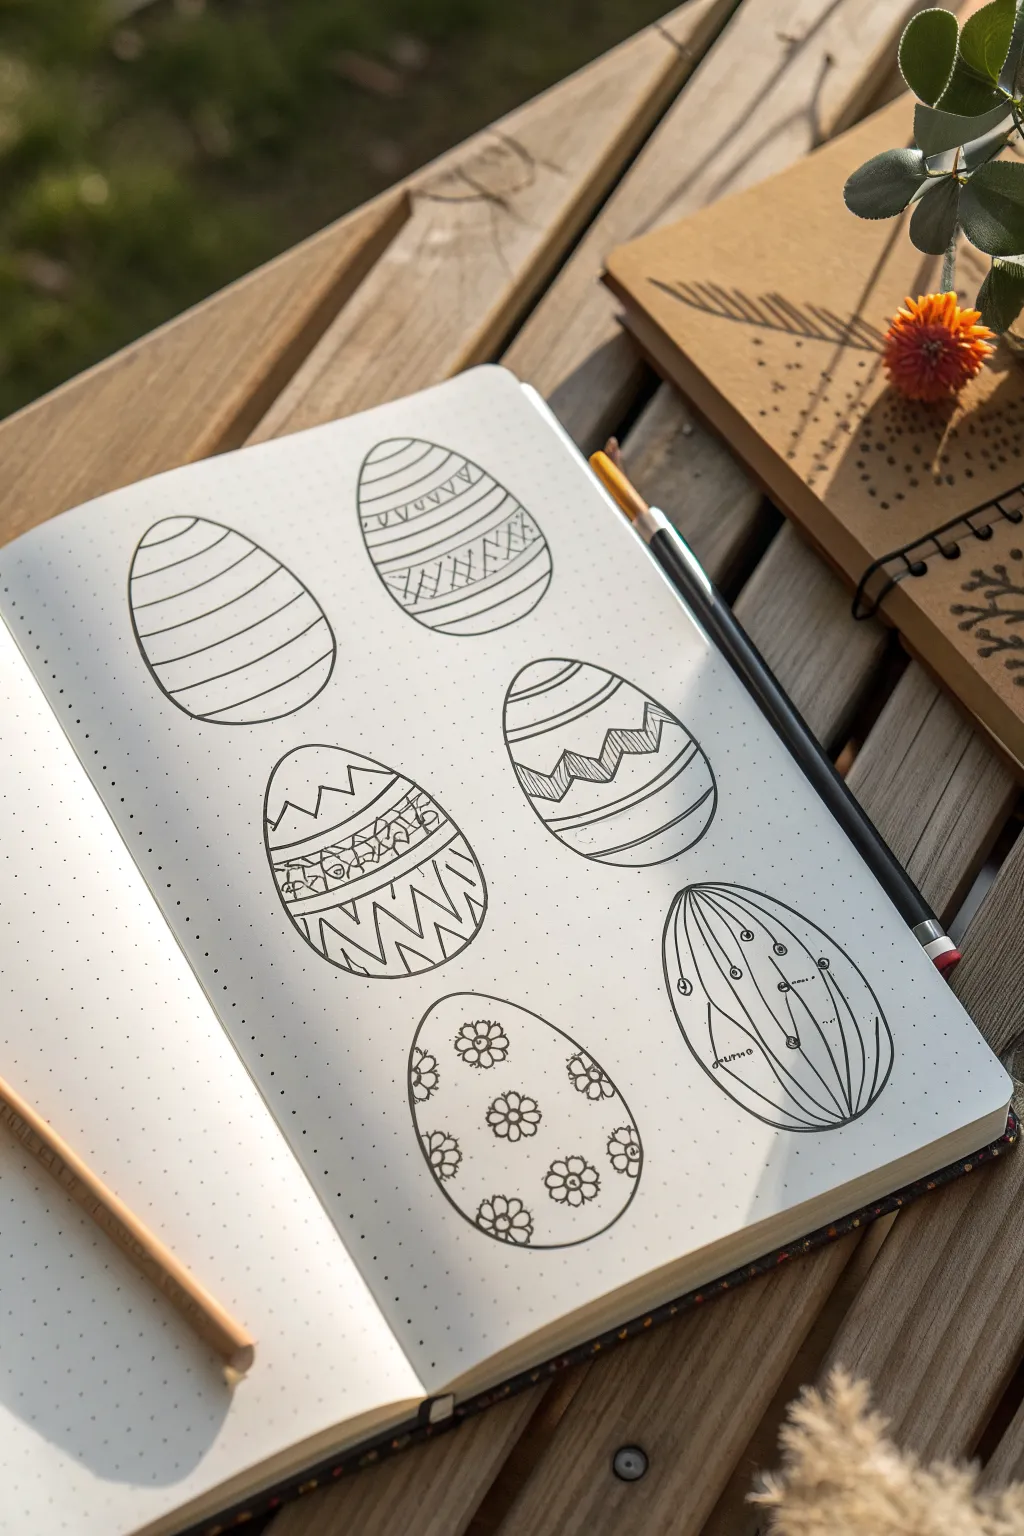
Celebrate the season with this simple yet striking layout featuring six uniquely patterned Easter eggs. Using basic geometric shapes and repetitive lines, you’ll create a cohesive parade of designs perfect for a bullet journal spread or handmade card.
How-To Guide
Materials
- Dotted bullet journal or grid paper
- Fine liner pen (black, 0.3mm or 0.5mm)
- Pencil (HB or H)
- Eraser
- Ruler (optional but helpful)
Step 1: Planning and Foundation
-
Map out the positions:
Start by identifying six evenly spaced locations on your page. The dots in your journal are invaluable here; count them to ensure equal distance between your rows and columns. -
Sketch the egg outlines:
Using your pencil, lightly draw six oval egg shapes. Aim for a slightly wider bottom and a narrower top for that classic egg silhouette, keeping them all roughly the same size. -
Ink the outlines:
Once you are happy with the symmetry of your pencil sketches, trace over the perimeter of each egg with your black fine liner. Keep your hand steady and confident for smooth curves. -
Erase guidelines:
Wait a moment for the ink to set to avoid smudging, then gently erase the underlying pencil marks so you have six clean, empty egg shapes ready for decoration.
Wobbly Ovals?
If free-handing ovals is tough, cut a simple egg template out of cardstock or thin cardboard and trace it six times for perfect uniformity.
Step 2: Creating the Linear Patterns
-
Design the first egg:
For the top-left egg, draw simple horizontal curved lines across the width. Space them consistently to create stripes, following the curvature of the egg to give it a sense of volume. -
Add detail to the second egg:
Move to the top-right egg. Divide it into sections with horizontal bands. Fill the center band with a cross-hatch or net pattern, and add small triangles to the band above it. -
Draw the zig-zags:
On the middle-right egg, draw two horizontal lines near the center. Inside this band, draw a sharp zig-zag line. Add vertical hatching lines inside the zig-zag triangles for contrast.
Step 3: Complex Geometrics and Florals
-
Structure the middle-left egg:
Divide this egg into three main sections using horizontal lines. In the top section, draw a large zig-zag. In the bottom section, draw larger, bolder zig-zags. -
Fill the detail band:
For the center band of that same egg, fill it with a dense, organic pattern like small clustered circles or a crackle effect to contrast with the sharp lines above and below. -
Create the vertical striped egg:
On the bottom-right egg, draw curved vertical lines running from the top tip to the bottom curve. This mimics the longitude lines on a globe. -
Embellish the vertical lines:
Add tiny circles along a few of these vertical lines to look like beads on a string. Vary the placement so the ‘beads’ don’t align perfectly horizontally. -
Draw the floral egg:
For the final bottom-center egg, ignore bands and stripes. Instead, draw simple five-petaled flowers scattered randomly across the surface. -
Refine the flowers:
Add a small circle in the center of each flower and perhaps a few tiny dots in the empty spaces between the blooms to make the design feel complete.
Make It Pop
Once the black ink is completely dry, use colored pencils or watercolor markers to fill in specific bands or flowers for a vibrant spring look.
Step 4: Final Touches
-
Review line weight:
Look over your designs. If any main outline looks too thin compared to the patterns inside, carefully go over it again to thicken the outer shell boundary. -
Clean up:
Do a final pass with your eraser to remove any stray pencil marks that might be lingering inside the complex patterns. -
Add shading (optional):
If you want more depth, I sometimes use a very light grey marker or pencil to add a small shadow on the right side of each egg, grounding them on the page.
You now have a delightful collection of patterned eggs ready to brighten up your spring journal spread


Stacked Easter Eggs Tower
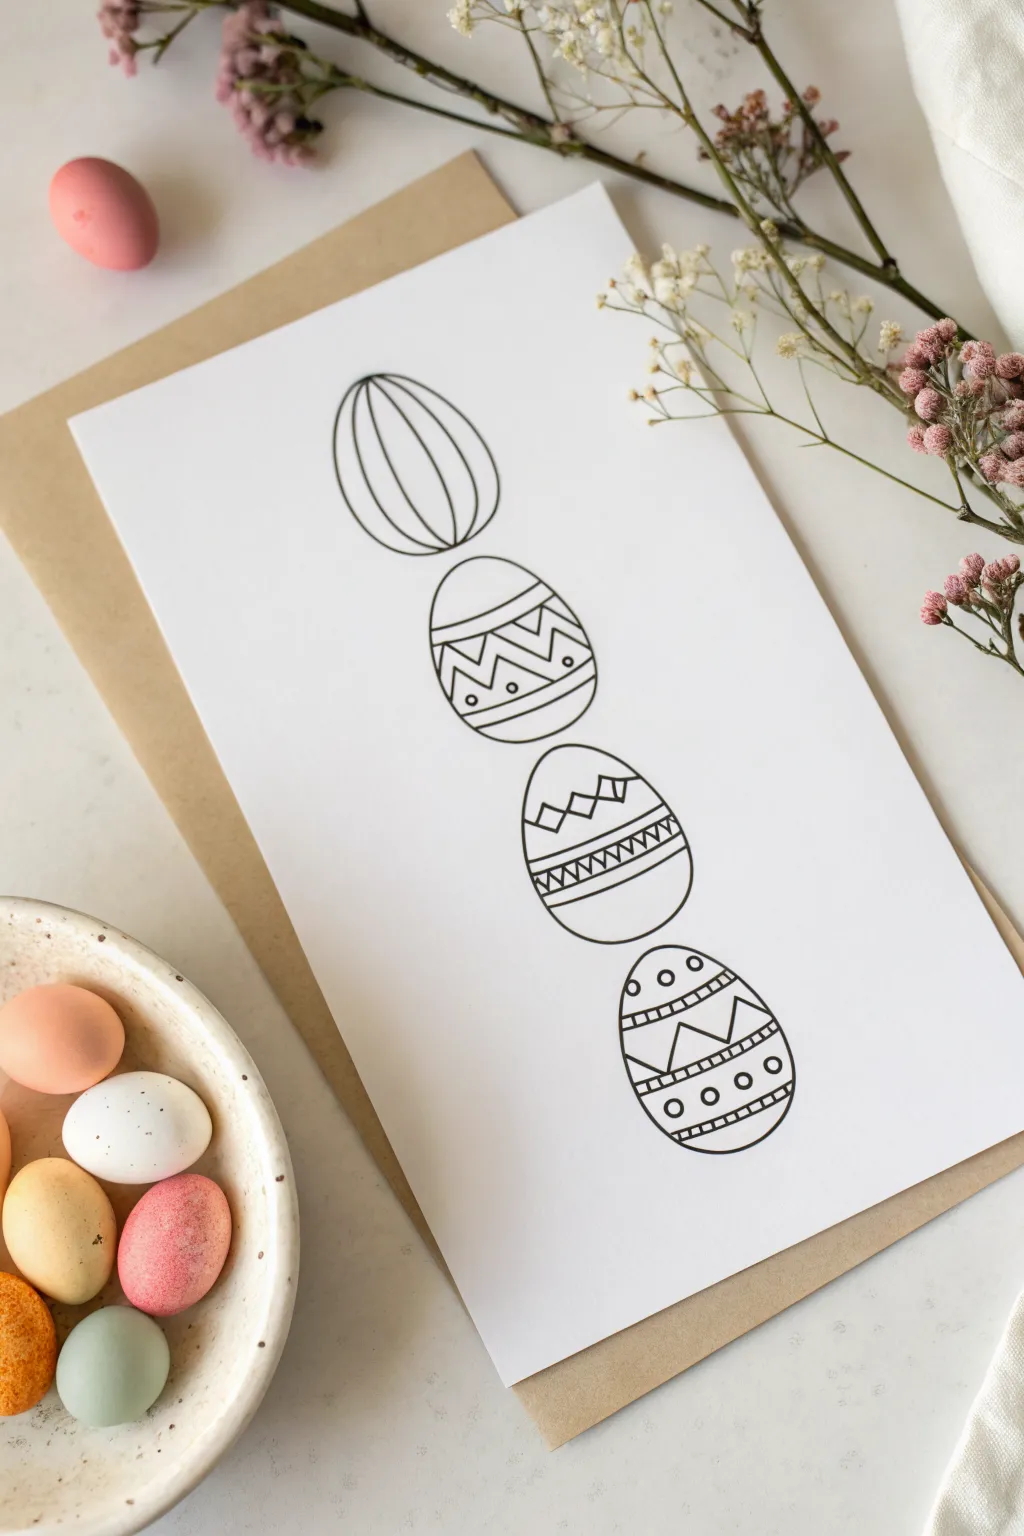
Create a playful and minimalist piece of Easter art with this vertical stack of patterned eggs. This line drawing project focuses on clean shapes and geometric details, making it perfect for a coloring page or a standalone greeting card design.
Step-by-Step Tutorial
Materials
- White cardstock or heavyweight drawing paper
- Pencil (HB or lighter)
- Black fine liner pen (0.5mm or 0.8mm)
- Eraser
- Ruler (optional, for spacing)
- Circle template or oval stencil (optional)
Step 1: Planning the Structure
-
Establish the centerline:
Begin by lightly sketching a vertical line down the center of your paper. This invisible guide will help ensure your eggs don’t lean to one side. -
Mark egg positions:
Along your centerline, make four small tick marks to denote where the top and bottom of each egg will sit. Leave a tiny gap between each mark so the eggs look like they are balancing on top of one another rather than merging. -
Sketch the top egg:
Draw the first egg shape at the very top. Aim for a classic oval that is slightly narrower at the top and wider at the bottom. -
Continue the stack:
Sketch the remaining three eggs below the first one, using your tick marks as a guide. Try to keep them roughly the same size, though slight variations add a charming hand-drawn feel. -
Check the balance:
Step back and look at your pencil sketch. If the tower looks like it’s falling over, adjust the horizontal placement of the ovals until they feel centered on your vertical guide.
Step 2: Adding Patterns
-
Design the top egg:
For the highest egg, sketch vertical curved lines running from the top tip to the bottom curve. Visualize the egg as a sphere to curve the lines correctly, giving it a 3D striped effect. -
Pattern the second egg:
On the second egg down, draw two horizontal bands across the middle. Inside this belt, draw a zigzag line. Add small circles in the valleys of the zigzags for extra detail. -
Detail the third egg:
This egg features a geometric band in the center. Draw two parallel lines, then add a zigzag pattern similar to the previous egg, but slightly sharper or varied. Below this band, add a row of small vertical tick marks or a ‘stitch’ line. -
Decorate the bottom egg:
For the base egg, create a wide band near the top with a row of small circles. Below that, add a large zigzag pattern. Finish with a ‘ladder’ style band near the bottom curve.
Wobbly Ovals?
If you struggle drawing symmetrical eggs, cut a single egg shape out of scrap paper or thick card. Use this template to trace all four outlines perfectly.
Step 3: Inking and Finishing
-
Outline the main shapes:
Using your black fine liner, carefully trace the outer contour of each egg. I find it helpful to rotate the paper as I draw to keep my hand at a comfortable angle. -
Trace the designs:
Go over your internal pencil patterns with the ink. Be deliberate with your lines; clear, confident strokes look better than sketchy ones. -
Clean up intersections:
Where patterns meet the edge of the egg, ensure the ink lines touch the outline clearly to create a solid, finished look. -
Let the ink set:
Wait a few minutes to ensure the ink is completely dry. This prevents the dreaded smudge during the next step. -
Erase pencil guides:
Gently erase the central vertical line and the underlying egg sketches, leaving only the crisp black ink work. -
Final assessment:
Inspect your lines. If any lines look too thin or broken, re-trace them carefully to thicken and smooth them out.
Make It Pop
Once the ink is dry, use watercolors or soft colored pencils to fill in the bands. Leave some areas white for a modern, high-contrast look.
You now have a clean, stylized Easter design ready to be framed or colored in with your favorite pastels
BRUSH GUIDE
The Right Brush for Every Stroke
From clean lines to bold texture — master brush choice, stroke control, and essential techniques.
Explore the Full Guide
Bunny Holding a Carrot

Capture the sweetness of spring with this adorable illustration featuring a blushing bunny hugging a giant carrot. The clean black outlines and soft block colors make this project perfect for homemade Easter cards or cute wall art.
How-To Guide
Materials
- Heavyweight white cardstock or watercolor paper
- Pencil (HB or lighter)
- Eraser
- Fine liner pen (black, waterproof, size 0.5 or 0.8)
- Alcohol markers or color pencils (Orange, Green, Pink)
- White gel pen (optional for highlights)
Step 1: Sketching the Shapes
-
Outline the bunny’s body:
Begin by lightly sketching a large, rounded bean shape for the bunny’s body. The bottom should be wider than the top to give it a seated posture. -
Add the giant carrot:
Draw a long, inverted triangle shape overlapping the front of the bunny’s body. Make it large—it should take up almost the entire height of the bunny for that cute, exaggerated look. -
Refine the carrot shape:
Round off the top corners of the triangle significantly and slightly curve the tip to make it look organic, not geometric. -
Sketch the ears:
At the top of the head, draw two long, oval-like ears. One can point slightly back while the other stands taller. Add smaller inner ear shapes inside each one. -
Position the arms:
Draw two small, curved shapes coming from the bunny’s body to ‘hug’ the carrot. The left paw should hold the side, while the right paw reaches around the front. -
Shape the legs and tail:
At the bottom of the body, sketch oval shapes for the feet sticking out. Add a small, fluffy cloud shape on the lower right back for the tail.
Step 2: Inking the Lines
-
Trace the main outlines:
Using your black fine liner, go over your pencil lines. Use a steady, confident hand. I like to vary the line weight slightly, lifting pressure at the ends of strokes. -
Draw the carrot details:
Ink the carrot outline, but don’t close the top where the greens will go. Add several short horizontal lines across the carrot body to create texture. -
Add the carrot tops:
Draw three distinct leaf stems coming out of the top of the carrot. Give them pointed, almond-shaped leaves. -
Create the face:
In the center of the head area, draw two small dots for eyes. Below them, add a tiny rounded nose and a ‘w’ shape for the mouth. Add a small winking curve near the cheek. -
Add floating hearts:
To fill the empty space to the left, draw two simple heart outlines floating above each other. -
Dry and erase:
Wait at least five minutes for the ink to dry completely to avoid smearing. Gently erase all visible pencil marks.
Ink Tip
If your hand is shaky, pull the pen toward you rather than pushing it away. You’ll have much more control over the curve of the bunny’s back.
Step 3: Adding Color
-
Color the carrot:
Fill in the carrot body with a bright orange marker. Try to color in single direction strokes to keep it uniform. -
Fill the greens:
Use a muted or olive green shade for the leaves at the top of the carrot. -
Rosy cheeks and ears:
Take a soft pink marker. Color the inner ear shapes. For the cheek, draw a small circle right under the eye; it’s okay if it looks a bit sketchy or textured. -
Final touches:
If you want extra dimension, add tiny white gel pen dots to the eyes or the carrot for highlights.
Make it Pop
Use a light grey marker to add a simple shadow on the ground under the bunny. This grounds the character so it doesn’t look like it’s floating.
Now your bunny is ready to hop into an envelope and brighten someone’s day
Simple Tulips Around Easter Eggs
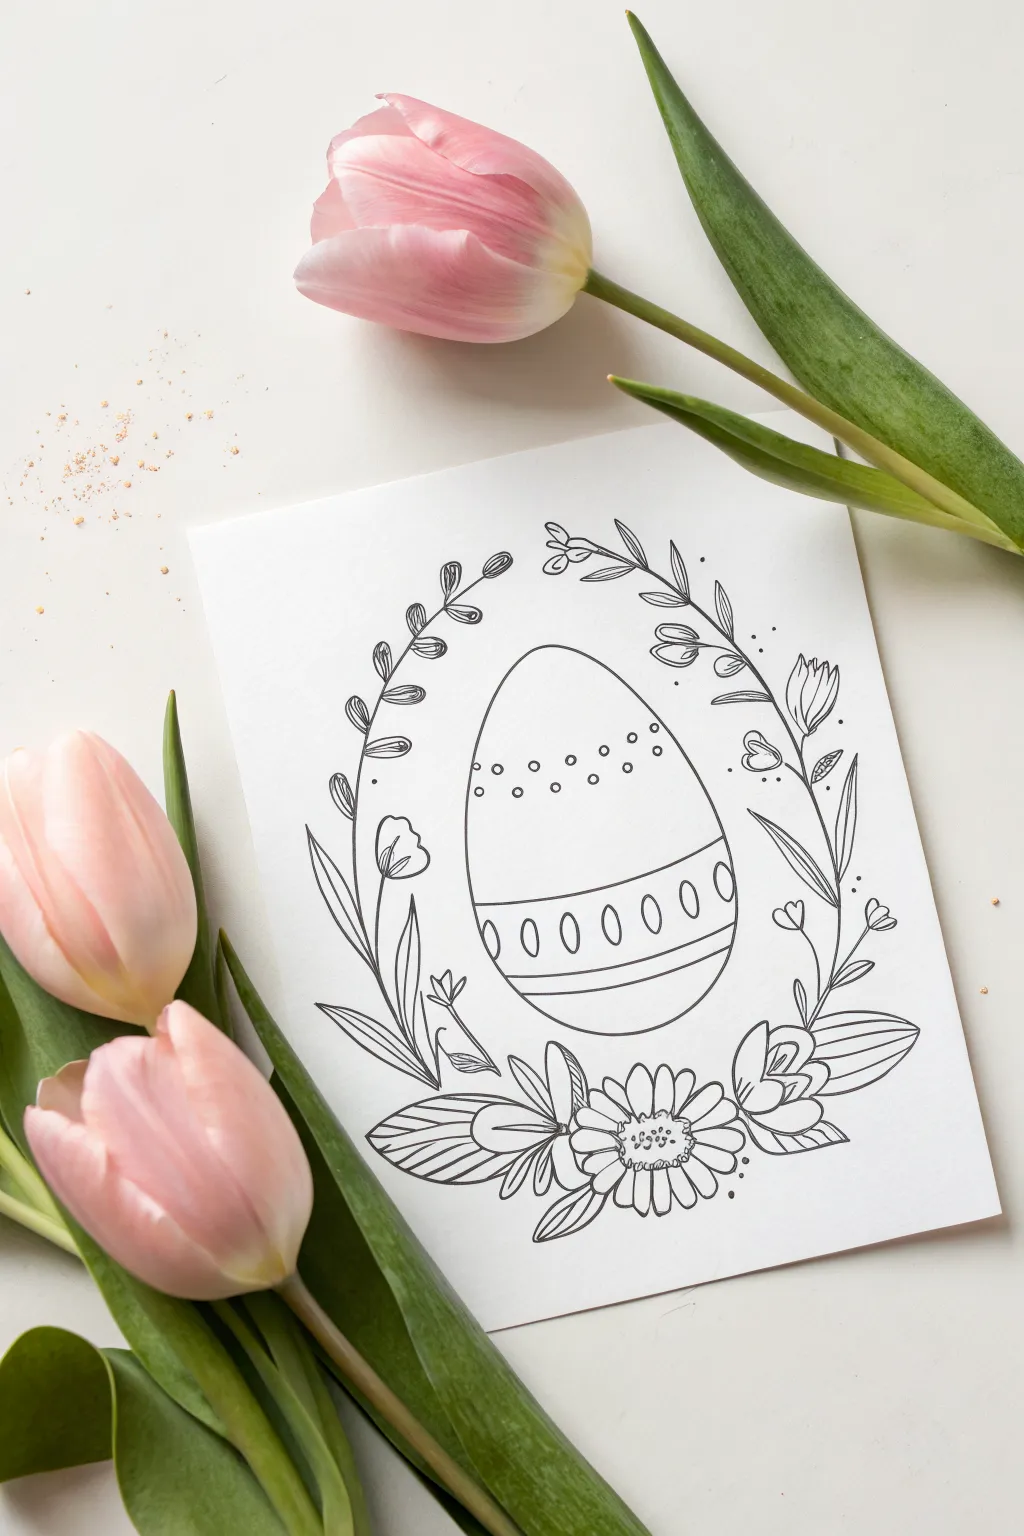
This elegant line drawing combines the charm of spring florals with a classic Easter egg motif. Using simple pen strokes, you’ll create a beautifully framed design that works perfectly as a greeting card or a coloring page project.
Step-by-Step Tutorial
Materials
- White cardstock or heavy drawing paper (5×7 inches)
- Pencil (HB or H for light sketching)
- Eraser (kneaded eraser preferred)
- Fine liner pen (black, 0.3mm or 0.5mm)
- Ruler (optional)
Step 1: Sketching the Framework
-
Center the egg:
Begin by lightly sketching a large oval in the vertical center of your paper. The top should be slightly narrower than the bottom to get that classic egg shape. -
Mark the wreath boundaries:
Sketch a very faint, larger oval around the egg to serve as a guideline for where your flowers will go. Leave about an inch of space between the egg and this outer guideline. -
Draft the bottom anchor flower:
At the very bottom center of your wreath guideline, sketch a circle for the center of the daisy-like flower, then add oblong petals radiating outward. -
Place the side tulips:
On the lower left and right diagonals, sketch simple U-shapes that taper at the top to represent the tulip heads. These should be slightly angled outward. -
Sketch the upper branches:
Draw two curving lines extending from the tulips up toward the top center of the page, nearly touching but leaving a small gap.
Fixing Wobbly Lines
If a smooth line goes astray, thicken the line slightly in that area to disguise the wobble, or turn the mistake into a new leaf or bud.
Step 2: Designing the Egg
-
Add horizontal bands:
Inside your central egg, draw two slightly curved horizontal lines across the lower third to create a wide band. -
Draw the ovals:
Within that wide band, sketches a row of tall, narrow ovals standing upright. Try to space them evenly across the strip. -
Add the dotted detail:
Near the top third of the egg, lightly mark a curved row of small circles. I find it helps to draw the middle one first and work outward to keep it symmetrical.
Step 3: Inking the Florals
-
Outline the main bloom:
Switch to your fine liner pen. Start by tracing the bottom daisy, giving the petal tips slight imperfections or indents to make them look more natural. -
Ink the flower center:
Fill the center of the daisy with tiny, tight clusters of small circles and dots to create texture. -
Define the tulips:
Trace your tulip sketches. Instead of a solid outline, use two or three overlapping curved lines to define the petals, making them look closed but full. -
Add the leaves:
Draw long, pointed leaves extending from the base of the flowers. Draw a line down the center of each leaf for the vein, but stop it halfway for a stylized look. -
Create the vine structure:
Ink the long, thin stems reaching upward. Along these stems, add small, teardrop-shaped leaves in pairs, getting smaller as you reach the top. -
Add filler details:
In gaps between the main flowers, draw tiny circular buds on thin stems and a few extra single leaves to balance the wreath.
Level Up: Watercolor Wash
Use watercolor paints to loosely fill the shapes. Let the color bleed slightly outside the lines for a trendy, artistic look.
Step 4: Finalizing the Design
-
Ink the egg outline:
Carefully trace the main oval shape of the egg. Using a steady hand here is key; try to pull the pen toward you rather than pushing it away. -
Trace the patterns:
Go over the horizontal stripes and the decorative ovals inside the band. Ink the small dots near the top. -
Add decorative dots:
Scatter a few tiny black dots around the outside of the wreath and near the flower centers to add a whimsical, magical dust effect. -
Erase and clean:
Wait at least 5-10 minutes for ink to fully dry. Gently erase all pencil lines, being careful not to buckle the paper.
Now you have a charming, hand-drawn design ready to be gifted or displayed for the holiday

PENCIL GUIDE
Understanding Pencil Grades from H to B
From first sketch to finished drawing — learn pencil grades, line control, and shading techniques.
Explore the Full Guide
Happy Easter Lettering With Tiny Icons
This charming design combines playful hand-lettering with tiny, colorful Easter icons to create a festive page layout. The clean lines and soft pastel touches give it a modern, minimalist feel perfect for bullet journals, cards, or sketchbook practice.
Step-by-Step
Materials
- Spiral-bound sketchbook or heavy cardstock
- Pencil (HB or H)
- Eraser (kneaded preferred)
- Fine-liner pen (0.3mm or 0.5mm, black)
- Colored pencils or fine-tip markers (pastel orange, pink, green, blue)
- Ruler
Step 1: Drafting the Layout
-
Find the center:
Begin by lightly marking the vertical center of your page with a pencil. This will help align your text and icons symmetrically. -
Map out text lines:
Use your ruler to draw two horizontal baselines in the middle of the page where the words ‘HAPPY’ and ‘EASTER’ will sit. Leave about an inch of space between the two lines. -
Sketch the letters:
Lightly pencil in the words ‘HAPPY EASTER’ in a tall, skinny sans-serif style. Focus on keeping the height of the letters consistent, but don’t worry about perfect spacing—a little irregularity adds to the hand-drawn charm. -
Plan the icons:
Above the word ‘HAPPY’, sketch four small shapes evenly spaced: a leafy sprig, an oval egg, a round fruit or egg, a pointy carrot, and another oval egg. Keep them small and floating slightly above the text. -
Add bottom details:
Below the word ‘EASTER’, sketch three central eggs and flank them with two leafy sprigs mirrored on the outside, creating a balanced curve underneath the text.
Oops! Smudged Ink?
If you erase too soon and smear ink, turn the smudge into a shadow or a new doodle element like a falling petal or an extra confetti dot.
Step 2: Inking the Design
-
Trace the lettering:
Take your fine-liner pen and carefully go over your pencil letters. For a whimsical look, you can make the crossbars (like on the ‘H’, ‘A’, ‘E’, and ‘R’) slightly lower or higher than usual. -
Refine the top icons:
Ink the top row sketches. Give the carrot a leafy top, add texture to the eggs (tiny dots or stripes), and outline the leaves with simple, fluid strokes. -
Outline the bottom row:
Ink the bottom elements. Pay attention to the patterns inside the bottom eggs; one has jagged crack lines, one has horizontal waves, and one has small circles. -
Add decorative dots:
Sprinkle tiny ink dots randomly around the top and bottom icons to fill empty negative space and add a confetti-like effect. -
Erase guidelines:
Wait at least 5-10 minutes for the ink to dry completely to avoid smearing. Then, gently erase all your pencil guides and sketch lines.
Make It Pop
Use a white gel pen to add small highlights on the colored eggs and fruit. This tiny reflection makes the doodles look dimensional and cute.
Step 3: Adding Color
-
Color the carrot and orange:
Using a soft orange pencil or marker, fill in the carrot and the round shape next to it. Keep the shading light and somewhat loose; it doesn’t need to be perfectly opaque. -
Tint the pink egg:
Use a pastel pink to color the second shape in the top row. I like to leave tiny accidental white spots to keep the texture feeling organic. -
Greenery details:
Take a light green shade and fill in the leaves on the carrot, the fruit stem, and the leafy sprigs on the far left and right. Color the leaves lightly so the black outline remains crisp. -
Blue accents:
Use a soft blue for the egg on the far right of the top row and the middle egg on the bottom row. Color gently over any patterns you drew. -
Detail coloring:
Add small touches of color to the remaining bottom eggs—perhaps red dots for the spotted egg and leave the cracked egg black and white for contrast. -
Final decorative touches:
If you used colored pencils, add a few tiny colored dots mixed in with your black ink dots for extra vibrancy.
Now you have a delightful, hand-drawn Easter page ready to brighten your journal or be gifted as a card
Mini Easter Doodle Sheet
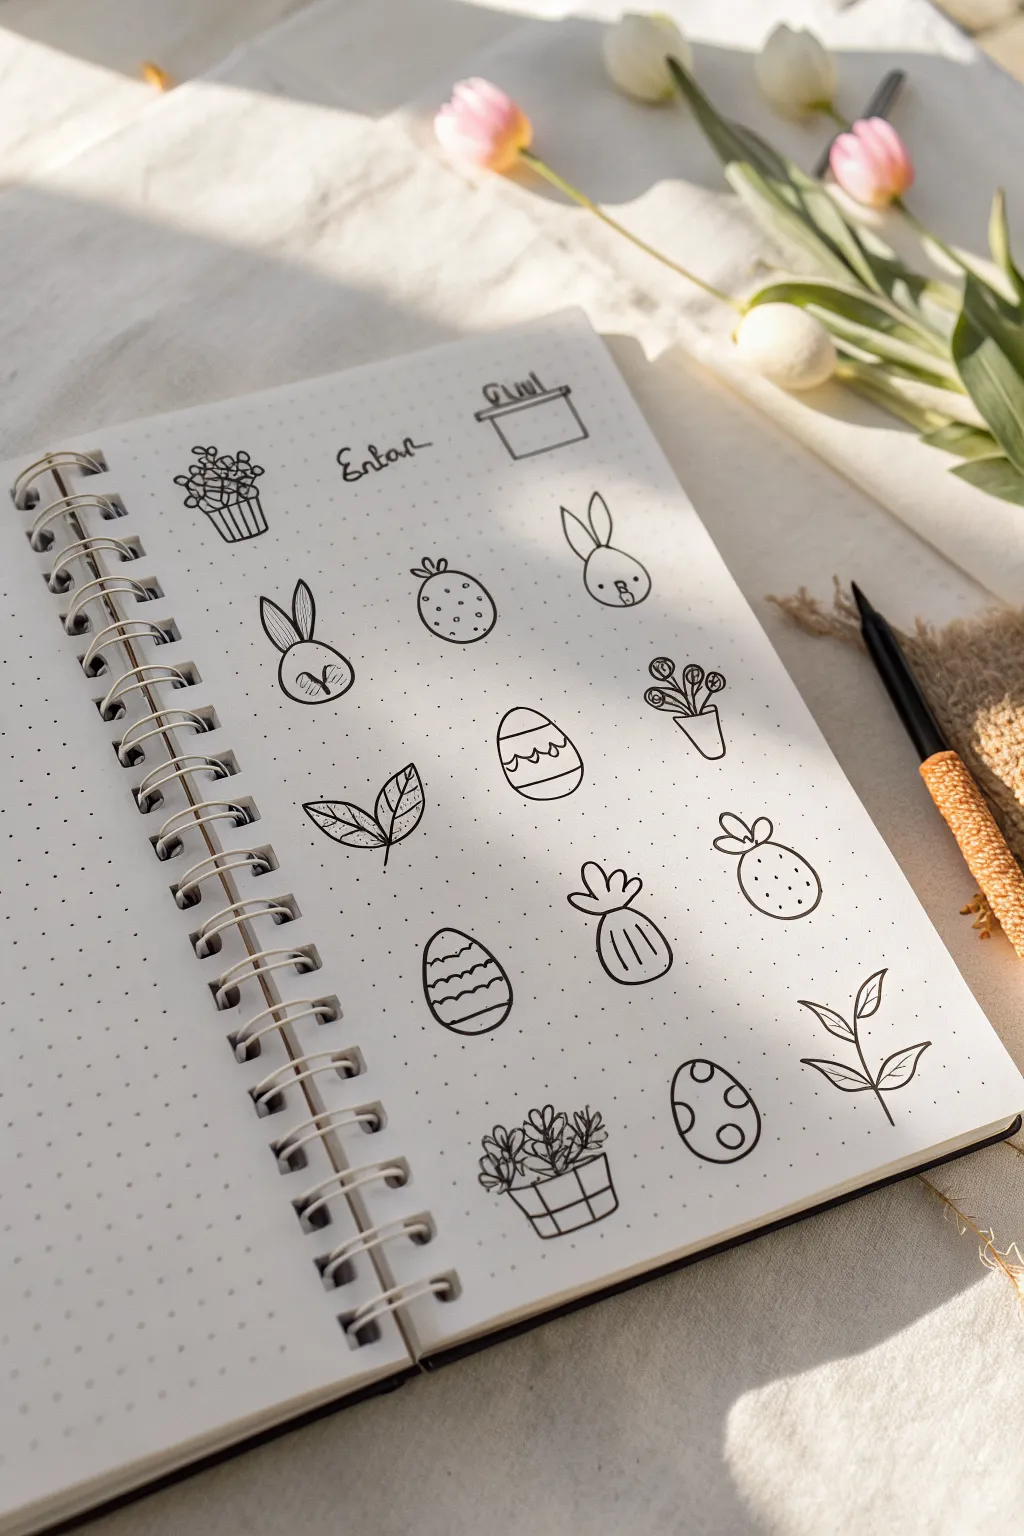
Fill a bullet journal page with these charming, minimalist Easter icons that feel fresh and festive. The simple black line art on dot grid paper creates a clean, cohesive look perfect for adding holiday cheer to your April spreads.
Step-by-Step Guide
Materials
- A5 Dot grid notebook (or loose dot grid paper)
- Fine liner pen (0.3mm or 0.5mm, black)
- Pencil (HB or H)
- Eraser
- Ruler (optional, for spacing)
Step 1: Setting the Layout
-
Define the grid:
Visualize a 4×4 or 3×5 layout on your page. You don’t need to draw boxes, but mentally spacing out where each icon will live ensures the final sheet looks balanced and intentional. -
Sketch the title:
At the very top, lightly sketch a header. The example uses a simple script word like ‘Easter’ or ‘Spring’ alongside a tiny hanging banner doodle to set the theme.
Ink Confidence
Work top-to-bottom and left-to-right (if right-handed) when inking. This prevents your hand from smudging fresh ink on completed doodles.
Step 2: Drawing the Bunny Motifs
-
Start the first bunny head:
Near the top, draw a simple circle. Add two long, oval-shaped ears pointing upwards. Keep the lines smooth and continuous. -
Add bunny details:
Inside the circle, draw two dots for eyes and a tiny ‘x’ or nose shape for the mouth. Add simple curved lines inside the ears for depth. -
Draw the peeking bunny:
For a variation, draw just the top half of a circle with ears sticking up. This looks like a bunny peeking over a ledge or out of a hole.
Step 3: Creating Decorative Eggs
-
Outline the egg shapes:
Scatter three or four oval egg shapes throughout the page. Keep their sizes relatively consistent with the bunny heads. -
Decorate with stripes:
On one egg, draw horizontal bands. Fill some bands with zig-zag lines, others with straight lines, and leave some blank for variety. -
Add polka dots:
On another egg, draw small circles of varying sizes. I find drawing them slightly off-center makes them look more organic. -
Try a scalloped pattern:
For a third egg design, use scalloped or wavy lines across the center to mimic a traditional dyed Easter egg pattern.
Add Pop of Color
Use pastel highlighters to color in just one element of each doodle (like the carrot orange or the egg stripes) for a soft, cohesive aesthetic.
Step 4: Adding Flora and Planters
-
Draw a small pot:
Sketch a small trapezoid shape for a flower pot. Add a thin rim at the top. -
Add a blooming plant:
Coming out of the pot, draw three thin stems. Top each stem with a simple cluster of circles or a tulip shape to represent spring blooms. -
Sketch a leafy branch:
Draw a curved line for a stem. Add almond-shaped leaves in pairs along the stem. Keep the tips pointed for a crisp look. -
Create a succulent doodle:
Draw a wide, shallow bowl shape. Fill the top with small, clustered ovals to represent leafy succulent textures.
Step 5: Drawing Seasonal Vegetables
-
Draw a carrot:
Sketch an inverted teardrop shape that is slightly lumpy. Add short horizontal lines across the body for texture. -
Add carrot greens:
Top the carrot with three small loops or leaf shapes sprouting from the center. -
Draw a radish or turnip:
Create a rounder vegetable shape with a small root tail. Add leafy greens emerging from the top similar to the carrot but wider.
Step 6: Finalizing the Artwork
-
Check balance:
Look at your spread. If there are awkward gaps, add tiny filler elements like single dots, small hearts, or sparkles to fill the negative space. -
Ink the lines:
Go over your pencil sketches with your fine liner. Use meaningful strokes—confident lines look better than sketchy, feathery ones. -
Erase guidelines:
Wait until the ink is completely dry to avoid smearing. Gently erase all underlying pencil marks to reveal your crisp, clean doodles.
Now you have a library of cute spring motifs ready to decorate your journals and cards


Bunny Popping Out of an Easter Egg
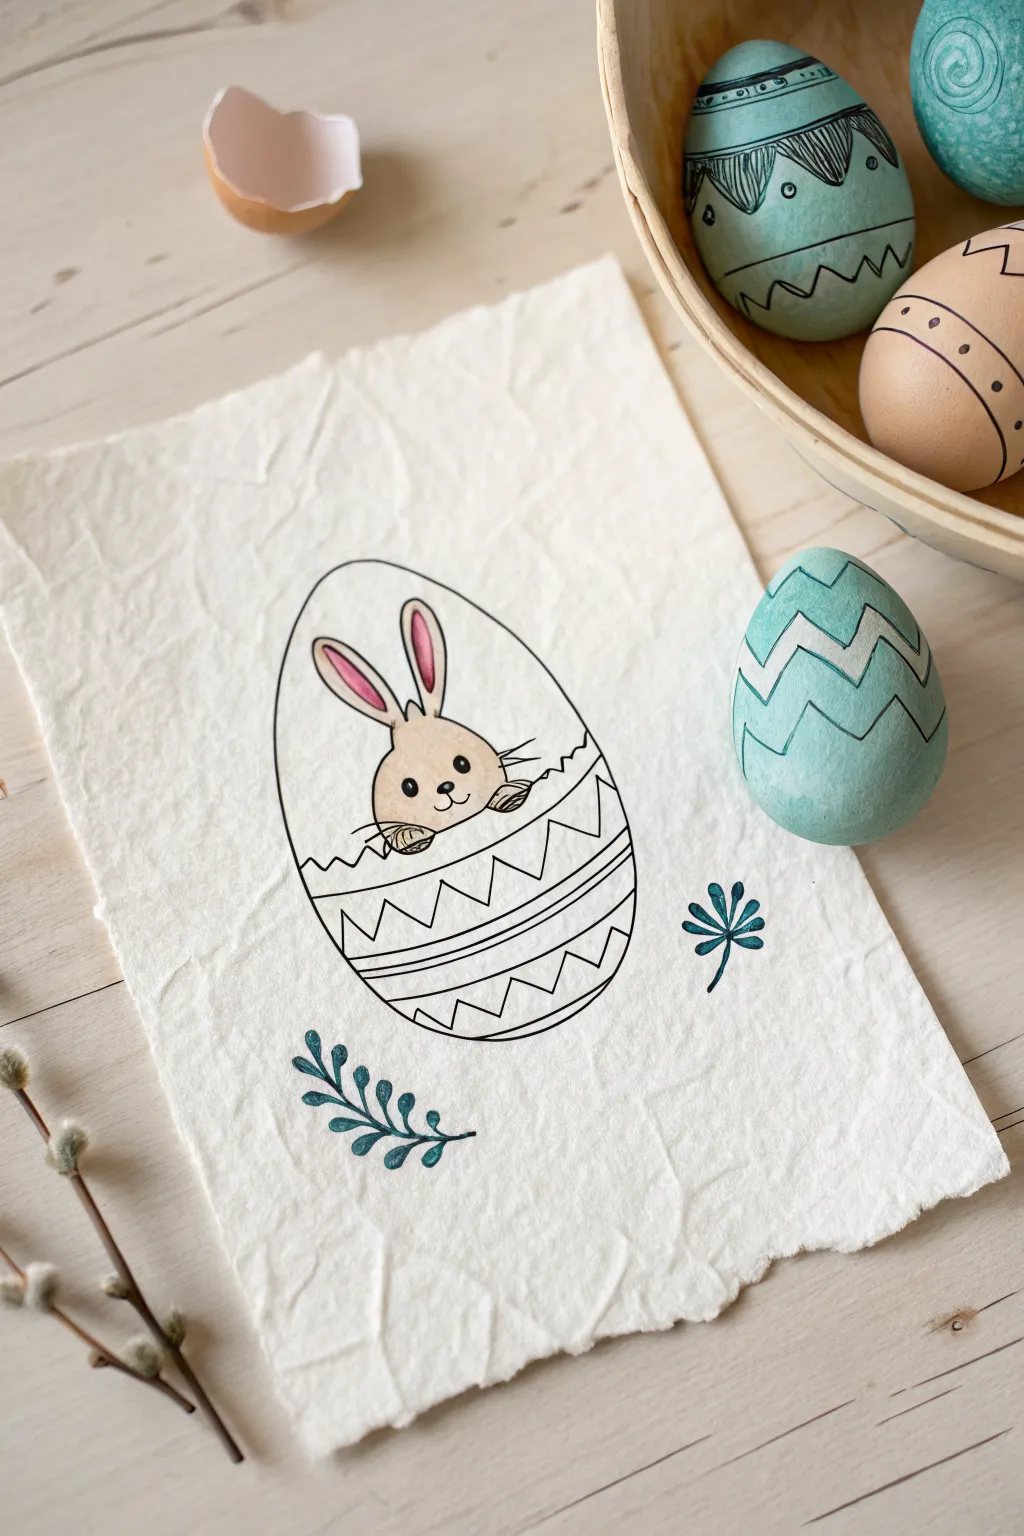
For the perfect blend of rustic charm and Easter sweetness, this project captures a little bunny popping out of a patterned shell. Drawn on textured handmade-style paper, the clean ink lines and soft coloring create a timeless holiday greeting or decoration.
Step-by-Step
Materials
- Textured handmade paper (off-white or cream)
- Black fineliner pens (0.3mm and 0.5mm)
- Pencil (HB or 2H for sketching)
- Eraser (kneaded preferred)
- Colored pencils or fine-tip markers (soft brown, pink, teal)
- Ruler (optional)
Step 1: Sketching the Main Forms
-
Outline the Egg Shape:
Begin by lightly sketching a large oval in the center of your textured paper. Aim for a classic egg shape that is slightly wider at the bottom and narrower at the top. -
Draw the Bunny’s Head:
Inside the oval, about halfway up, sketch a semi-circle for the top of the bunny’s head. Add two long, rounded ovals extending upward for the ears. -
Add the Shell Crack:
Draw the jagged edge of the cracked shell directly across the bunny’s chest area. Use a zig-zag line technique to simulate where the egg has broken open to reveal the animal inside. -
Sketch the Facial Features:
Lightly place two small circles for eyes, a tiny triangle nose, and a curved ‘w’ shape for the mouth. Don’t forget the inner ear shapes, which follow the curve of the outer ears. -
Sketch the Paws:
Add two tiny, rounded paw shapes resting just over the edge of the cracked shell, looking as if the bunny is pushing itself up.
Step 2: Decorating and Inking
-
Design the Egg Patterns:
Below the crack line, sketch your decorative bands. Draw horizontal lines to create sections, then fill them with zig-zags (chevron patterns) and simple straight stripes. -
Add Botanical Accents:
Sketch two small leaf sprigs floating on the outside of the egg—one on the bottom left and a different, radiating leaf shape on the right. -
Ink the Outline:
Switch to your 0.5mm black fineliner. Carefully trace the main egg outline and the bunny’s head. I like to keep my hand loose here to accommodate the bumps in the textured paper. -
Detail the Face:
Use a thinner 0.3mm pen for the facial details. Fill in the eyes completely black, leaving a tiny white speck for a highlight if possible, and trace the whiskers. -
Refine the Patterns:
Ink the decorative lines on the eggshell. Make the horizontal separating lines slightly bolder than the zig-zag patterns inside them. -
Erase Sketches:
Wait at least five minutes for the ink to fully dry, then gently erase your pencil guidelines. Be careful not to snag the textured paper surface.
Textured Paper Tip
When drawing on bumpy, handmade paper, pull your pen toward you rather than pushing it away. This prevents the nib from catching on the paper fibers and creating splatters.
Step 3: Adding Color
-
Color the Bunny:
Using a soft brown colored pencil or marker, gently fill in the bunny’s fur. Apply the color lightly to keep it subtle. -
Add Pink Accents:
Color the inner ears with a soft pink. You can also add a barely-there blush to the cheeks if you wish. -
Color the Leaves:
Use a teal or dark blue-green to fill in the floating leaf sprigs on either side of the egg. Press firmly to make these small elements pop. -
Final Touches:
Review your drawing. If the textured paper caused any ink lines to skip, go back with your finest pen and carefully connect any gaps for a crisp finish.
Uneven Egg Shape?
If sketching a symmetrical egg is hard, cut a simple template out of scrap paper first. Trace around it lightly to get the perfect oval before adding your details.
Now you have a charming piece of art ready to be displayed or sent as a thoughtful card.
Easy Easter Animal in Bunny Ears
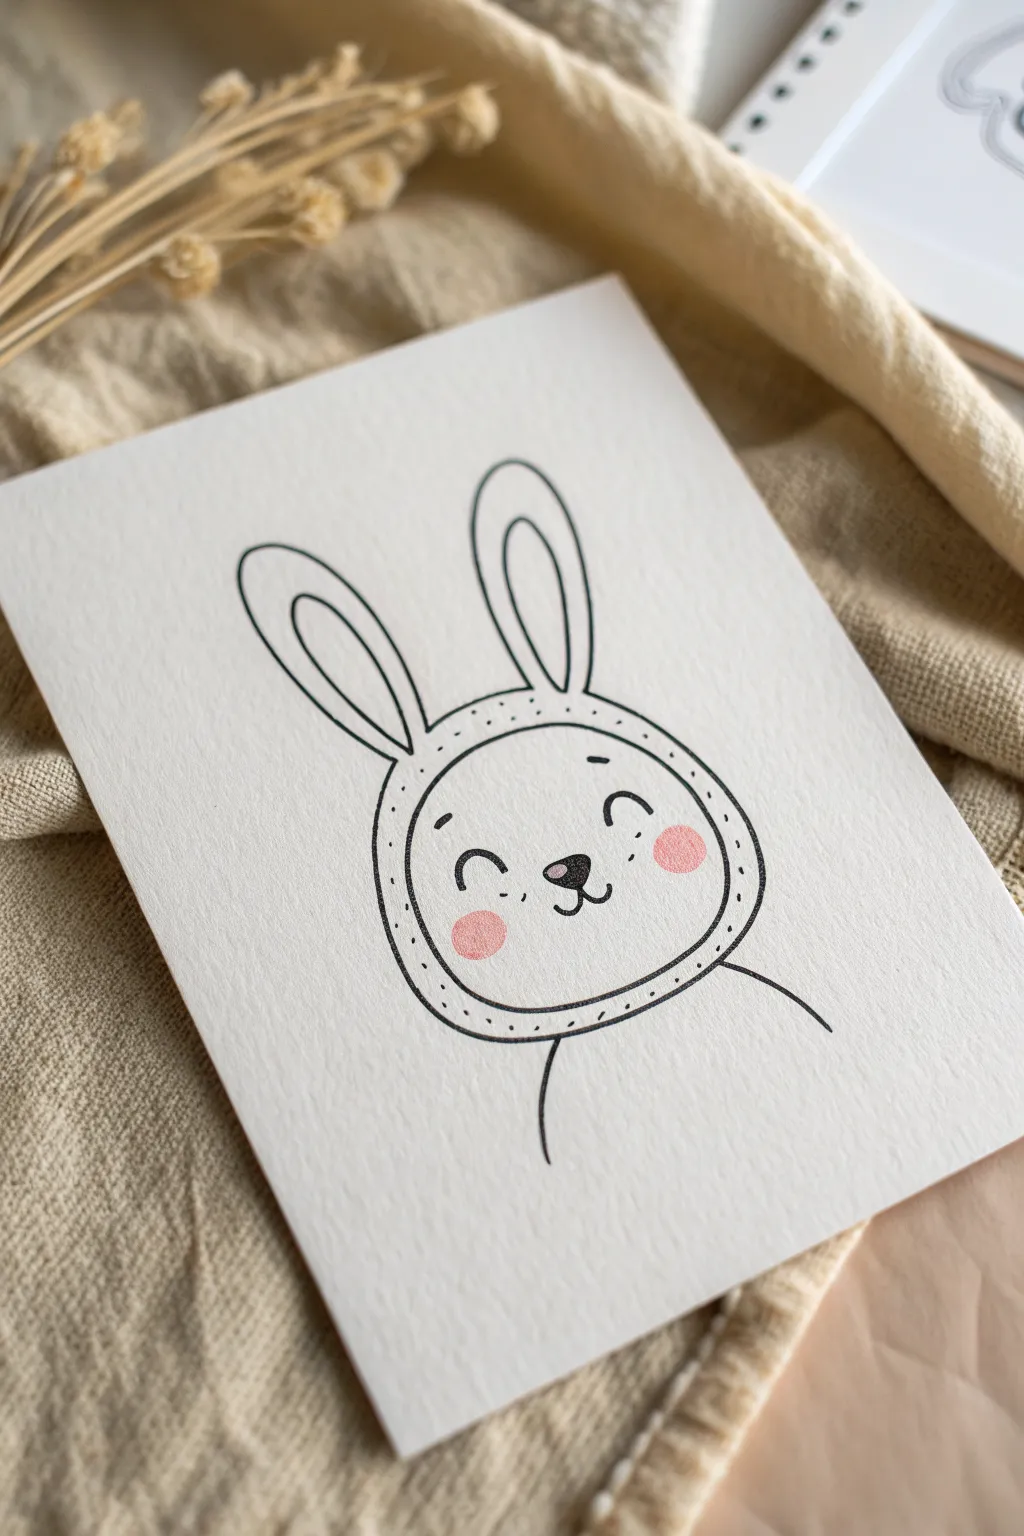
This charmingly minimal drawing captures a sweet character wearing a bunny-eared hood, perfect for greeting cards or nursery art. The clean black lines against the textured paper create a modern yet cozy aesthetic that is surprisingly simple to achieve.
Step-by-Step Tutorial
Materials
- Heavyweight textured drawing paper or watercolor paper (cold press)
- Fine-point black drawing pen (archival ink recommended)
- Pencil (HB or H)
- Soft eraser
- Pink colored pencil or pastel crayon
Step 1: Setting the Guidelines
-
Light sketch:
Begin by lightly sketching a large circle in the lower center of your paper using your pencil. This will form the hood around the face. -
Adding the ears:
Draw two long, looping oval shapes extending upward from the top of the circle. Make the left ear slightly angled outward and the right ear more vertical for a natural look. -
Defining the face:
Inside the main circle, lightly mark where the inner face shape will go. It occupies the bottom two-thirds of the hood circle.
Wobbly Lines?
Don’t stress if your circles aren’t perfect! Slight imperfections add to the hand-drawn charm. Embrace the “organic” look rather than geometric perfection.
Step 2: Inking the Outlines
-
Tracing the hood:
Switch to your black ink pen. Carefully trace over your pencil circle, but try to keep the line smooth and continuous rather than sketchy. -
Inner rim detail:
Draw a second, slightly smaller circle inside the first one to create the rim of the hood. Keep the distance between the two lines consistent. -
Ear outlines:
Ink the outer shapes of the ears, connecting them seamlessly to the top of the hood. -
Ear interiors:
Draw smaller, similar oval shapes inside each ear. These typically follow the curve of the outer ear but stop before hitting the hood. -
Shoulder lines:
Add two simple curved lines extending downward from the bottom of the hood to suggest the shoulders.
Step 3: Creating the Face
-
The nose:
Place a small, inverted triangle with rounded corners in the center of the face area. Color it in black, leaving a tiny white dot for a highlight if you wish. -
The mouth:
Draw a small ‘w’ shape directly attached to the bottom point of the nose to create the mouth anchor. -
Smiling eyes:
Add two upward-curving semi-circles for the eyes. Positioning them slightly far apart gives the character a sweeter, more innocent look. -
Eyebrows:
Place small, short dashes or angled lines above the eyes to add expression. -
Freckles:
Dot three or four tiny specks on each cheek area using the very tip of your pen.
Make it a Bear
Swap the long bunny ears for two small semi-circles on top to instantly transform this into a teddy bear hood instead.
Step 4: Adding Texture and Color
-
Erase pencil:
Wait a moment for the ink to set, then gently erase all your initial pencil guidelines. -
Hood stitching:
To give the hood a fabric feel, add tiny dots or short dashes inside the rim space (between your two hood circles). -
Rosy cheeks:
Take your pink pencil or pastel. Pressing lightly, draw circular blush spots on the cheeks. -
Blending the blush:
I usually soften the cheek color by rubbing it gently with a clean fingertip or cotton swab to make it look like a soft stain on the paper.
Now you have a sweet little character ready to brighten up any Easter card or gift tag
Funny Bunny Donut Treat
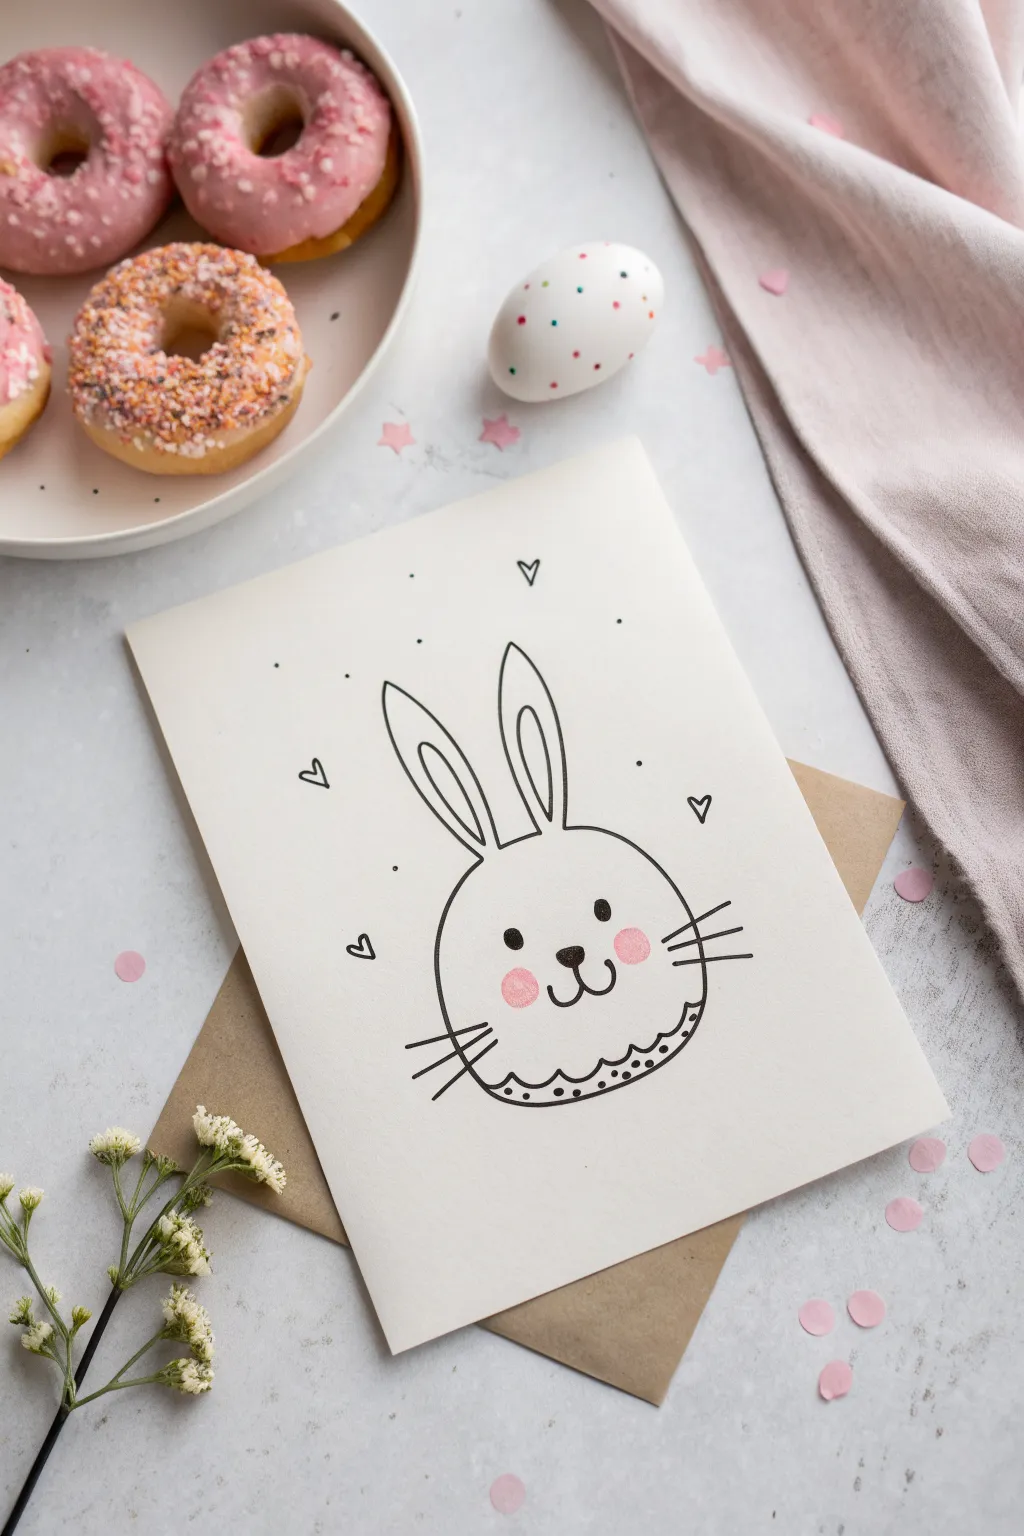
This adorable greeting card combines a classic bunny face with a sweet twist—the bottom half is drawn like a frosted donut! With its minimalist line art and touches of pink, it’s a quick and charming project perfect for Easter greetings.
Step-by-Step
Materials
- Heavyweight cream or off-white cardstock
- Fine-point black fineliner pen (0.5mm)
- Medium-point black marker or brush pen
- Pink colored pencil or pastel chalk
- Pencil and eraser
- Ruler (optional)
- Kraft paper envelope (A5 size)
Step 1: Planning the Layout
-
Prepare the card base:
Start with a piece of heavyweight cardstock folded to your desired size, likely an A5 card. Ensure the crease is sharp so the card lays relatively flat while you draw. -
Sketch the head shape:
Using a pencil and a very light touch, draw a large, slightly flattened circle in the lower-middle section of the card. This will be the bunny’s head. -
Add the ears:
Sketch two tall, elongated oval shapes extending upwards from the top of the circle. Try to angle them slightly outward for a perkier look. -
Rough out the features:
Lightly mark the position for the eyes, the small triangular nose, and the mouth. At the bottom of the circle, sketch a wavy line to represent the donut frosting dripping down.
Circle Perfection Tip
Struggling to draw a perfect circle for the head? Lightly trace the rim of a drinking glass or a masking tape roll with your pencil first.
Step 2: Inking the Outline
-
Outline the head:
Using your medium-point black marker, trace over your pencil sketch for the main head shape. Keep your hand steady and aim for a smooth, continuous curve. -
Define the ears:
Outline the outer ears with the same marker. Inside each ear, draw a smaller, similar shape for the inner ear detail. -
Draw the donut details:
At the bottom of the face, ink the wavy ‘frosting’ line. Leave the space below this line empty for now, as that’s where the ‘sprinkles’ will go. -
Add the sprinkles:
Switch to your fine-point pen. Below the wavy line, draw small dots and tiny circles to mimic sprinkles on the bottom curve of the donut ‘bun’.
Step 3: Adding Facial Features
-
Draw the eyes:
With the medium marker, draw two small, solid black circles for the eyes. Ideally, place them slightly wide apart for a cute expression. -
Create the nose and mouth:
Draw a small, rounded triangle for the nose between the eyes. From the bottom tip of the nose, draw two curved lines branching out (like a ‘w’) to form the mouth. -
Add whiskers:
Using quick, confident strokes with the fine-point pen, draw three whiskers extending horizontally from each cheek area. -
Erase pencil lines:
Wait a full minute or two to ensure the ink is completely dry. Then, gently erase all visible pencil sketches underneath your ink work.
Smudged Ink?
If you accidentally smudge the black ink while erasing, turn it into a ‘shadow’ or ‘rosy cheek’ by blending it out gently with the pink pencil.
Step 4: Color and Final Details
-
Apply rosy cheeks:
Take a pink colored pencil. Gently shade two circular patches on the cheeks. I like to build the color up in layers rather than pressing hard all at once. -
Draw floating hearts:
Using the fine-point pen, draw small, simple heart outlines scattered around the bunny’s head. Five or six hearts create a nice balance. -
Add stippling details:
To fill empty space without clutter, add tiny dots (stippling) randomly around the bunny and hearts using the fine tip pen. -
Add color to sprinkles (optional):
If you want a pop of color, you can lightly touch the sprinkles at the bottom with the pink pencil, though black and white looks very chic. -
Check balance:
Hold the card at arm’s length. If the composition feels too bottom-heavy, add another small heart or dot near the top of the ears.
Now you have a whimsical, hand-drawn card ready to send to someone special this holiday.
Space Bunny Beaming Up an Easter Egg
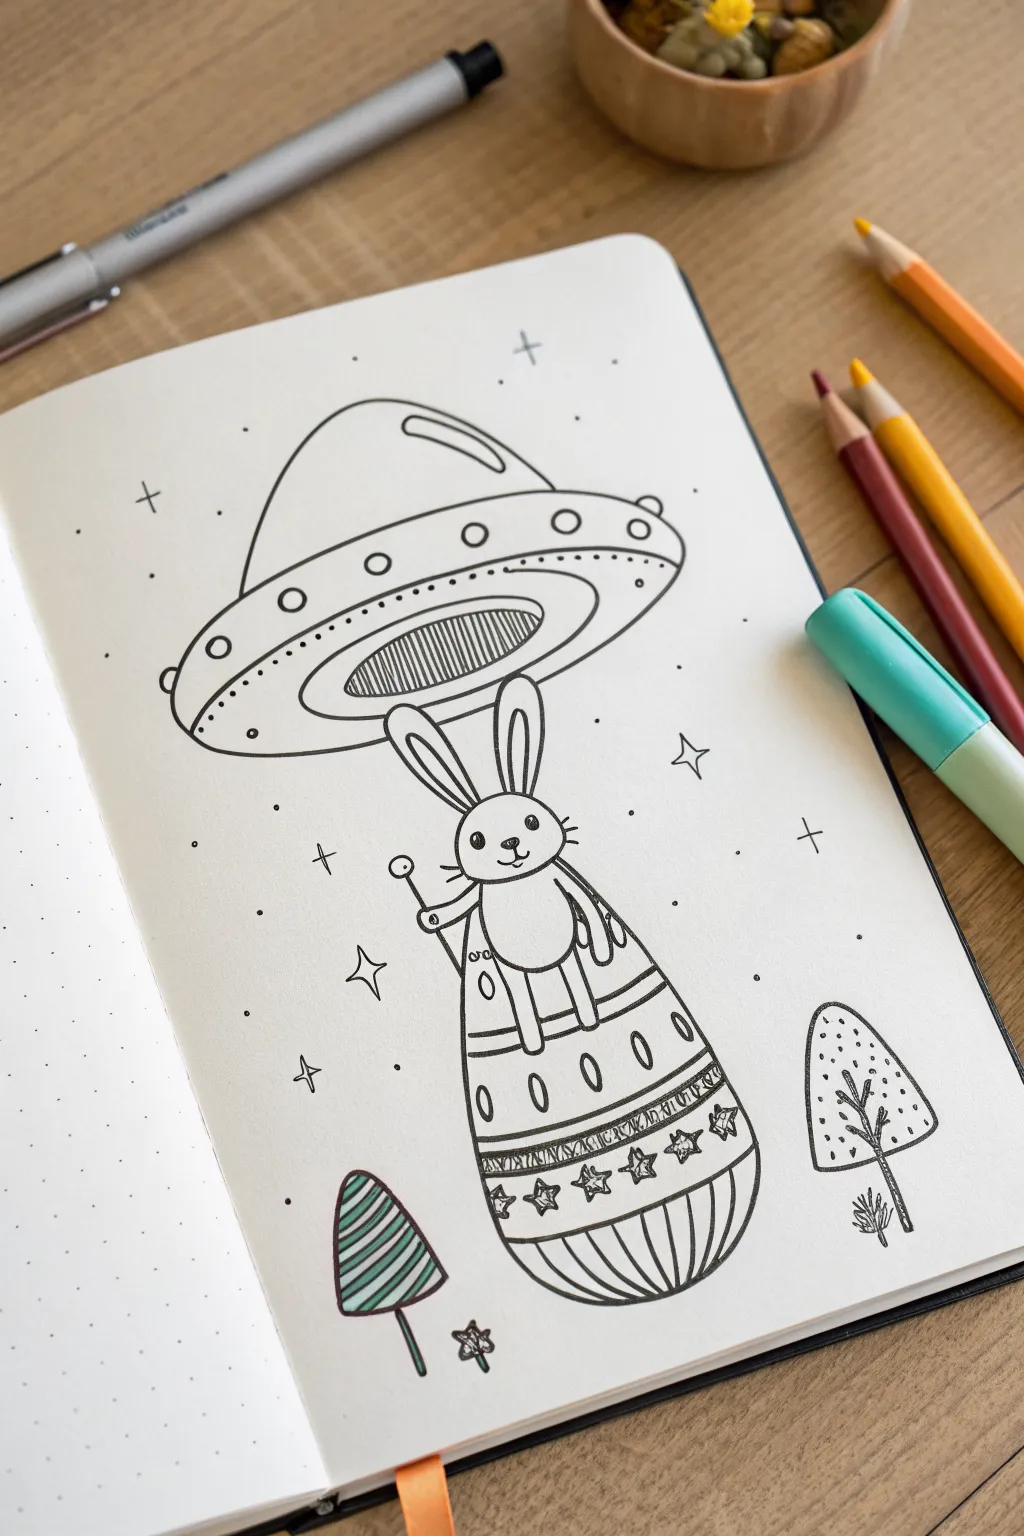
Blast off into a whimsical world with this doodle of a UFO beaming up a highly decorated Easter egg, piloted by an adventurous bunny. The crisp black fineliner style on dotted grid paper gives it a clean, modern illustration vibe that’s incredibly satisfying to draw.
Step-by-Step Tutorial
Materials
- Dotted grid notebook or bullet journal
- Fine tip black drawing pen (0.3mm or 0.5mm)
- Pencil (HB or lighter)
- Eraser
- Teal marker or highlighter (optional for accents)
- Colored pencils (optional for trees/accents)
Step 1: Drafting the UFO
-
Establish the Dome:
Start near the top of your page. Lightly pencil a smooth, rounded semi-circle for the top of the UFO’s cockpit. Keep the bottom flat but slightly curved upward to give it perspective. -
Draw the Saucer Rim:
Below the dome, sketch a wide, flattened oval that extends past the dome on both sides. This is the main body of the spaceship. -
Add Dimension:
Draw a second, slightly smaller curve inside the bottom edge of your saucer oval to create a lip or rim. Then, add a smaller oval in the very center of the saucer’s underside—this is where the beam comes out. -
Detail the Ship:
Pencil in small circles along the saucer’s rim for lights. Add a small ‘glint’ shape on the upper right of the glass dome to suggest reflection.
Wobbly Circles?
Don’t stress about perfect ovals. If a line goes rogue, just thicken the outline slightly to hide the bump. It adds character to the doodle style.
Step 2: The Bunny & The Egg
-
Position the Bunny:
Directly below the central beam hole, sketch the bunny’s head. It should be an oval shape. Add two long, upright ears poking out from the top of the head. -
Draw the Face:
Add two dots for eyes, a tiny triangle nose, and a simple ‘w’ mouth. Don’t forget whiskers! -
Outline the Egg Body:
Instead of a regular body, the bunny is emerging from a massive Easter egg. Draw a large, tapered oval shape starting just below the bunny’s head, extending downward like a capsule. -
Add Arms and Legs:
Pencil in two simple arms holding onto the top edge of the egg. For legs, draw two rectangular shapes dangling over the egg’s first decorative stripe. -
Sketch the Beam Lines:
Connect the UFO’s beam emitter to the bunny’s ears with two faint vertical lines, suggesting the tractor beam is capturing them.
Dot Grid Guide
Use the grid dots to align the UFO and the egg perfectly vertical. Count 3 dots out from the center to keep the saucer symmetrical.
Step 3: Inking & Decorations
-
Ink the Main Outlines:
Switch to your black fineliner. Carefully trace over your main pencil lines for the UFO, bunny, and egg shape. I prefer to rotate my notebook slightly to get smoother curves. -
Decorate the Egg:
Divide the egg into horizontal sections with curved bands. Fill the bottom section with vertical stripes, the middle with a row of stars, and add a detailed band of squiggles or tiny triangles above that. -
Add Egg Details:
In the upper sections of the egg, draw a row of distinct oval shapes. Ink the bunny’s paws resting on the rim. -
Texture the UFO:
Use vertical hatching lines inside the central beam emitter hole to make it look dark and recessed. Ink the small circle lights on the saucer rim. -
Draw the Background Elements:
To the left and right of the egg, draw stylized, whimsical trees. One can be a striped cone shape (like a candy tree), and the other a mushroom shape with spots. -
Starry Sky:
Fill the empty space around the scene with tiny dots, small crosses for stars, and a few larger four-pointed sparkles to emphasize the space theme.
Step 4: Finishing Touches
-
Clean Up:
Wait at least a full minute for the ink to dry completely, then gently erase all remaining pencil guidelines. -
Optional Color Accents:
If you wish, use a teal marker to fill in just one tree or add a highlight to the pen itself for a pop of color, keeping the rest of the drawing monochrome.
Now you have a cosmic Easter scene ready to decorate your journal spread


Have a question or want to share your own experience? I'd love to hear from you in the comments below!