
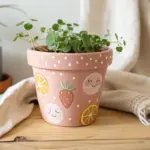
Some days you just want an easy little sketch that turns out cute without a ton of planning, and pandas totally deliver. Here are my favorite easy cute panda drawing ideas—simple shapes, sweet expressions, and tiny props that make your doodles feel instantly lovable.
Sitting Panda With Tiny Paws
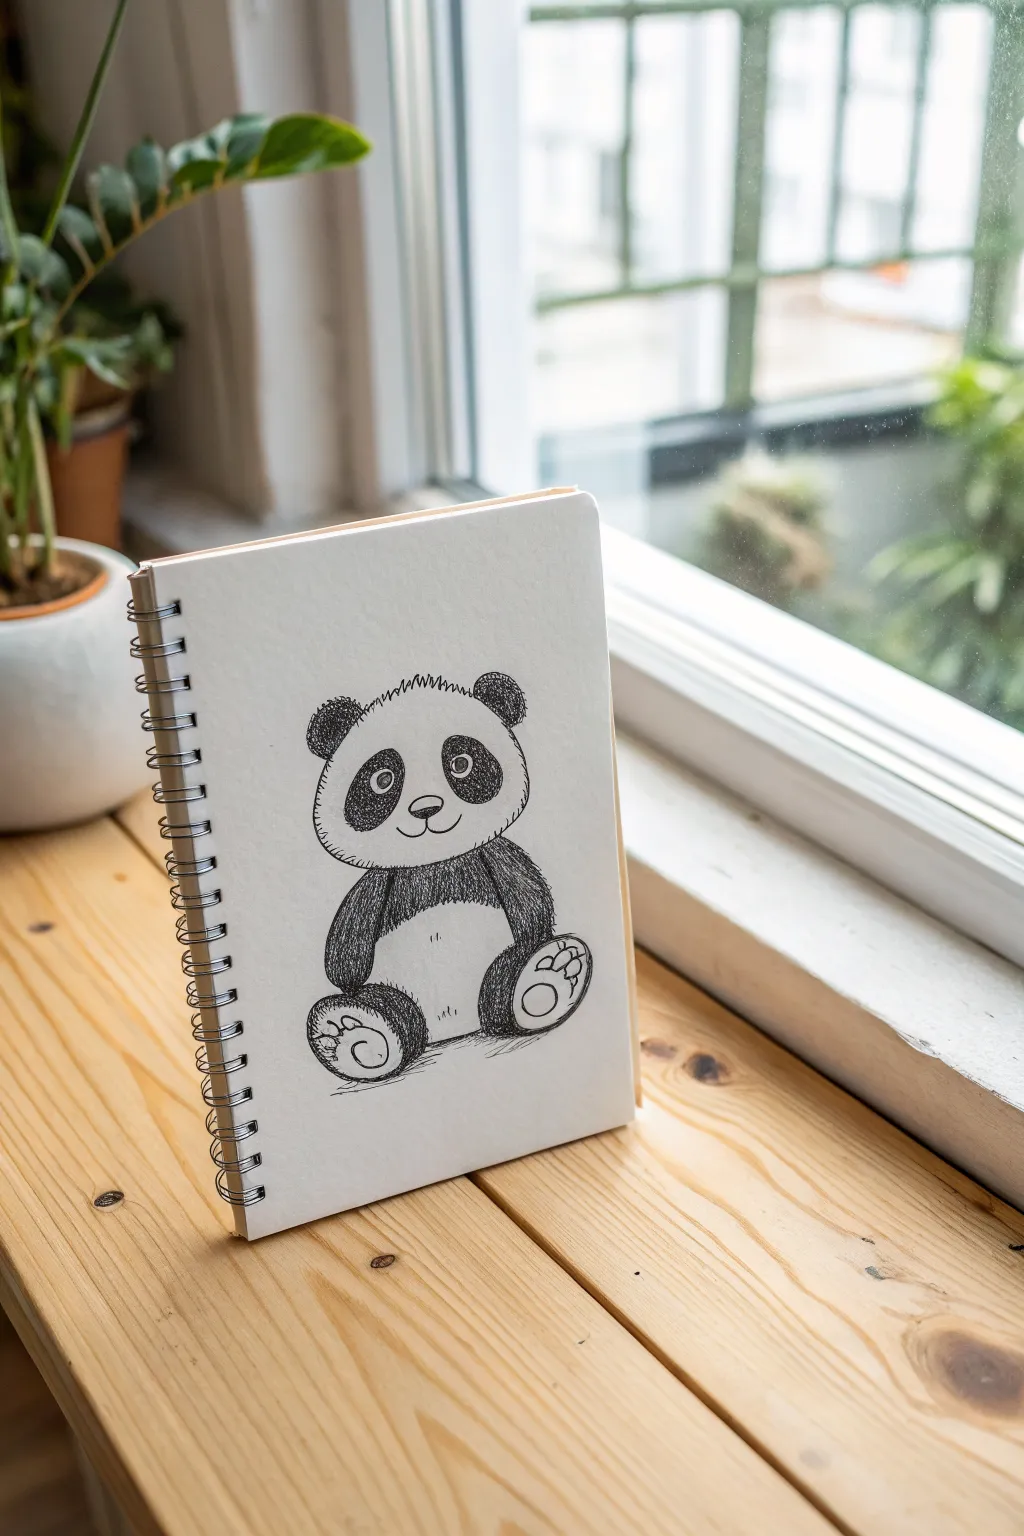
Capture the charm of a cuddly panda with this simple yet expressive sketchbook drawing. You’ll create a character full of personality using basic shapes and careful shading to bring out that soft, furry texture.
Step-by-Step
Materials
- Spiral-bound sketchbook (medium weight paper)
- HB or 2B pencil for sketching
- Fine liner pen (black, approx. 0.5mm)
- Slightly thicker felt-tip pen or marker (black)
- Eraser
Step 1: Building the Basic Form
-
Head shape:
Start by drawing a large, slightly squashed oval for the panda’s head. Keep your pencil lines very light at this stage so they are easy to erase later. -
Body outline:
Attach a smaller, rounded shape directly underneath the head for the body. It should look a bit like a bean bag or a rounded pear sitting on the ground. -
Ears and paws:
Add two small semi-circles on top of the head for ears. For the arms, draw two oval shapes extending from the shoulders down towards the belly. -
Legs placement:
Sketch two large oval shapes on either side of the bottom of the body for the rear feet. These should be quite prominent to give that seated, teddy-bear look. -
Facial features:
Inside the head, lightly mark out two large, tilted oval patches for the eyes. Add a small nose triangle and a simple ‘w’ shape for the mouth.
Hatching Help
If your hatching looks too messy, try to keep your pen strokes parallel and evenly spaced. Don’t press too hard; light, quick flicks create the best fur texture.
Step 2: Inking the Details
-
Outline the head:
Switch to your fine liner pen. Go over the head outline, but instead of a smooth solid line, use short, broken strokes to simulate fur texture. -
Defining the face:
Ink the nose and mouth. Draw small circles inside the eye patches for the actual eyes, leaving a tiny white dot in each pupil for a highlight. -
Furry ears:
Outline the ears with that same jagged, grassy stroke. Then, use your thicker marker or pen to color them in completely black, stippling the edges slightly to keep them fluffy. -
Eye patches:
Fill in the large eye patches around the pupils with the black marker. Leave the pupils themselves clearly defined, and perhaps a tiny rim of white around the eye if you want extra contrast. -
Drawing the arms:
Ink the arms using vertical hatching lines. This means drawing many close, parallel lines to fill the shape rather than coloring it solid black. It gives a great textured look. -
Belly definition:
Draw the curve of the white belly, separating it from the dark arms and legs. Keep this line light and broken.
Step 3: Texturing and Finishing
-
Hatching the body:
Continue the hatching technique on the dark parts of the body. Make your pen strokes follow the curve of the panda’s form to make it look rounder. -
Detailing the feet:
Ink the outlines of the feet. Inside the soles, draw a large oval pad and three smaller toe beans. Use a few scribbly lines to shade around the pads, keeping the pads themselves white. -
Adding swirls:
For a whimsical touch, add a small swirl or spiral inside the largest pad on each foot. -
Refining the fur:
Add tiny little tick marks on top of the head and along the cheeks to suggest stray hairs standing up. -
Clean up:
Wait a minute for the ink to dry completely, then gently erase all your initial pencil guidelines. -
Grounding shadow:
Add a few quick horizontal hatched lines underneath the panda’s bottom so it doesn’t look like it’s floating in space. -
Belly texture:
Finally, add just two or three tiny tick marks in the center of the white belly area to break up the empty space.
Eye Highlights
Accidentally colored in the white highlight dot? Use a white gel pen or a tiny dot of white acrylic paint to bring the sparkle back to the panda’s eyes.
Now your sketchbook has a delightful new resident ready to make anyone smile


Waving Panda Hello
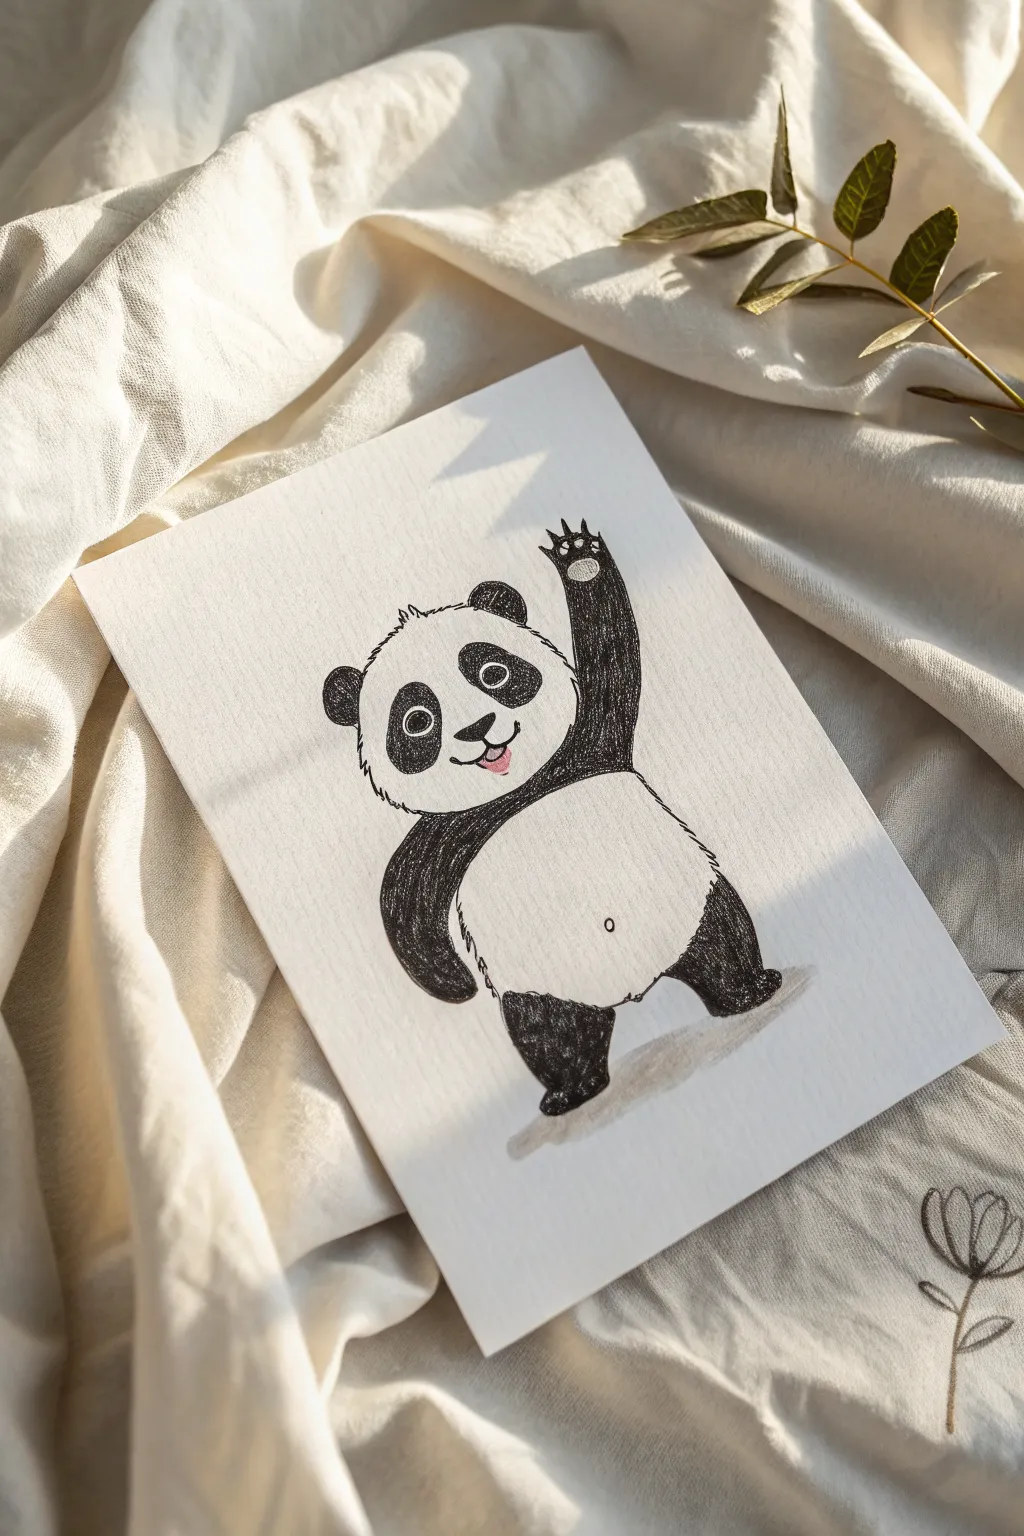
Capture a cheerful greeting with this adorable sketch of a panda waving high. Using simple shapes and textured shading, this drawing brings a sense of playful movement to a classic, lovable subject.
Detailed Instructions
Materials
- Heavyweight drawing paper or cardstock (A5 size)
- HB pencil for sketching
- Fine black liner pen (0.3mm or 0.5mm)
- Soft charcoal pencil or black colored pencil
- Pink colored pencil
- Eraser
- Blending stump (optional)
- Light grey marker or watercolor (for shadow)
Step 1: Drafting the Shapes
-
Head shape:
Start by lightly sketching a large, slightly flattened oval for the panda’s head. It should be wider than it is tall, almost like a bean shape. -
Body outline:
Attach a rounded, pear-like shape beneath the head for the body. The body should be roughly the same height as the head but slightly narrower at the top. -
Waving arm placement:
Draw the panda’s right arm (viewer’s right) extending straight up. Make it a long, curved cylinder that tapers slightly towards the paw. -
Static arm placement:
Sketch the left arm resting against the body, curving inwards like a little sausage shape, hugging the tummy. -
Legs and feet:
add two small, stubby legs at the bottom. Position them relatively wide apart to give the panda a sturdy, cute stance. -
Facial features:
Mark the eye patches with two large, tilted ovals. Add a small triangular nose in the center and a little curved ‘w’ shape for the mouth.
Step 2: Inking the Outline
-
Fur texture:
Using your fine black liner, go over your pencil lines. Instead of a smooth continuous line, uses short, jagged strokes to simulate fluffy fur, especially on the cheeks and outline of the body. -
Defining the wave:
Ink the raised arm. At the top, draw the paw pad details—a larger pad in the center and smaller circles for the toes. -
Belly markings:
Draw the circular separation line on the tummy where the black fur meets the white fur. Ink a tiny belly button in the center of the white space. -
Erase pencil:
Once the ink is completely dry, gently erase all the underlying graphite sketch lines to clean up the drawing.
Uneven Fur?
If your fur spikes look messy, try standardizing your stroke direction. Always flick your pen outward, away from the body center.
Step 3: Filing and Shading
-
Coloring the darks:
Take your charcoal pencil or black colored pencil. Fill in the ears, eye patches, arms, and legs. I find that using circular strokes helps create a dense, textured look. -
Eye details:
Within the dark eye patches, leave a small white circle for the highlight, but darken the rest of the pupil significantly to make the eyes pop. -
Adding the tongue:
Use a soft pink colored pencil to fill in the small tongue hanging out of the mouth for that cheeky expression. -
Texturing the fur:
Go back over the black areas with your liner or a sharper black pencil to add darker hatching lines, emphasizing the depth of the fur. -
Grounding shadow:
Using a light grey marker or a very diluted watercolor wash, paint a loose, organic shadow shape directly beneath the feet. -
Softening edges:
If the shadow looks too harsh, use a blending stump or a clean finger to smudge the edges slightly for a natural cast shadow effect.
Depth Trick
Press harder with your black pencil on the ‘underside’ of the arms to create natural shadow volume.
Now you have a friendly panda ready to wave hello to anyone who sees your sketchbook

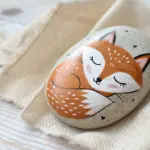

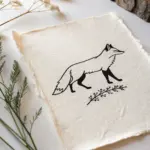
Sleeping Panda Curl
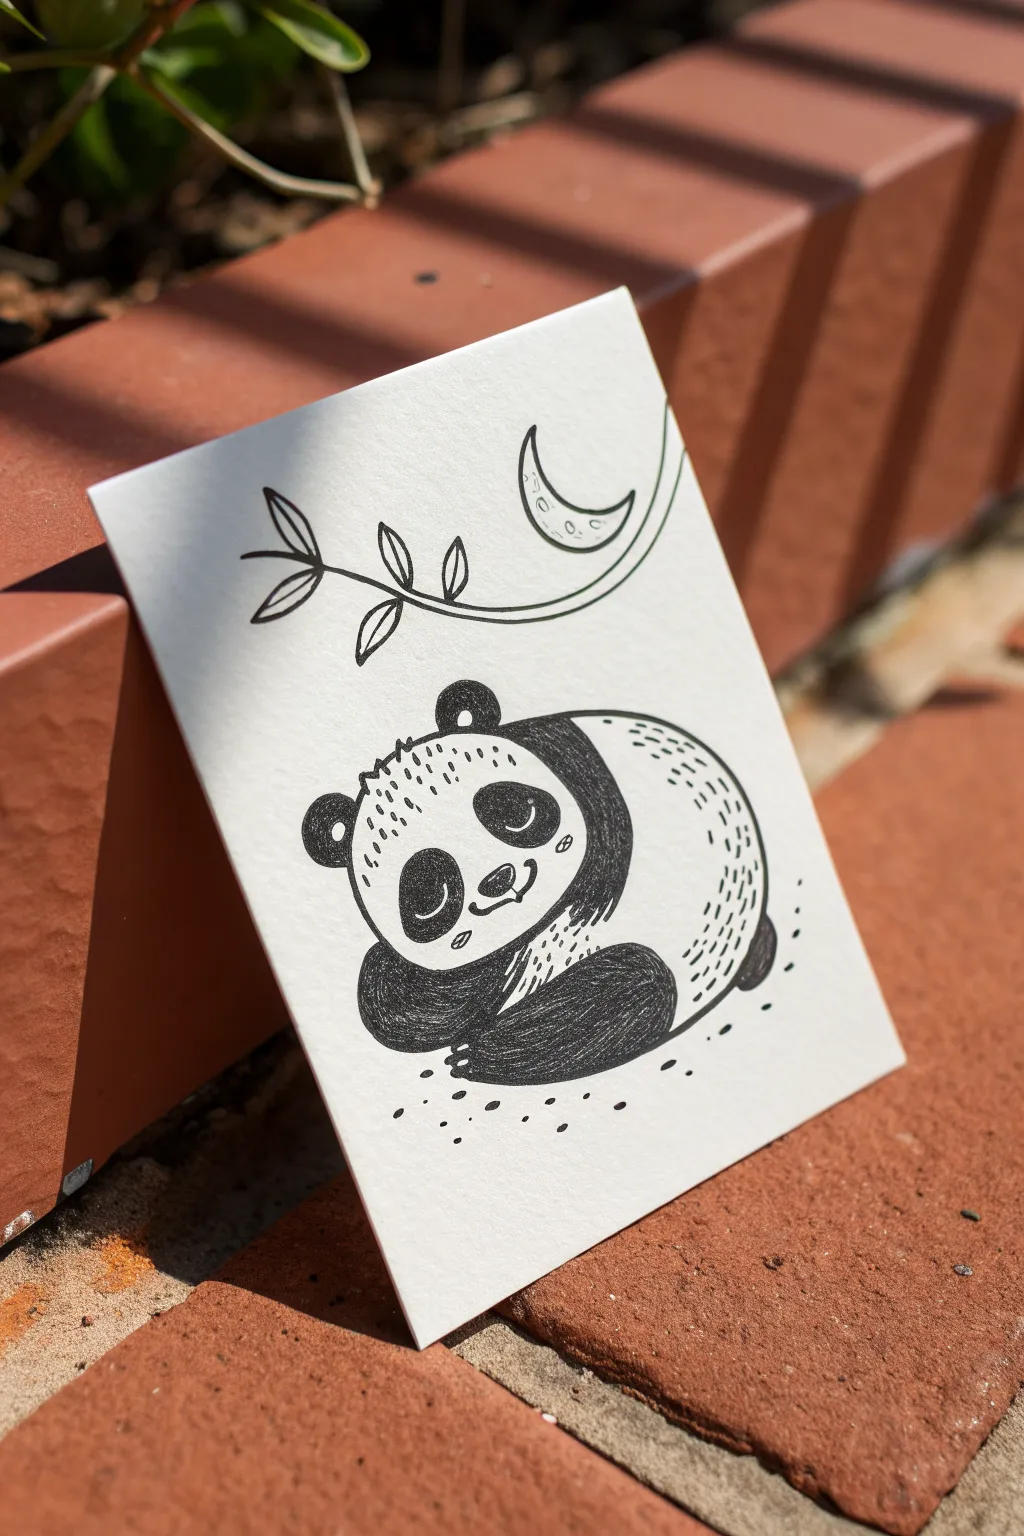
Capture the peaceful essence of a sleeping panda with this charming pen-and-ink illustration. The focus is on clean lines and gentle stippling to create a soft, rounded look perfect for a greeting card or sketchbook page.
Step-by-Step Guide
Materials
- Heavyweight white drawing paper or cardstock
- Pencil (HB or H for light sketching)
- Eraser (kneaded preferred)
- Fine liner pen (01 or 03 size)
- Medium liner pen (05 or 08 size)
- Black marker or brush pen (for filling large areas)
Step 1: Drafting the Shapes
-
Establish the curve:
Start with your pencil by drawing a large, slightly flattened oval shape that tilts downward to the right. This will act as the main body of the curled-up panda. -
Add the head:
Draw a smaller, round circle overlapping the left upper side of your body oval. Erase the intersecting line so the two shapes merge into one continuous bean-like form. -
Position the features:
Sketch two smaller circles on top of the head for ears. Inside the face, lightly mark two oval patches for the eyes, slanted slightly downwards to look sleepy. -
Curled limbs:
At the bottom of the body, sketch a rounded shape tucked under the chin for the front paw, and a small nub of a tail at the very back.
Ink Smearing?
Patience is key with heavy black fills. Place a scrap piece of paper under your drawing hand to prevent oils or friction from smudging the wet ink as you work across the page.
Step 2: Inking the Outline
-
Define the silhouette:
Switch to your medium liner pen (like an 05). Carefully trace the outer edge of the panda, but use broken, dashed lines along the back and top of the head to suggest fluffy fur texture. -
Draw the face:
Ink the nose first—a small, rounded triangle with a tiny line curling down for the mouth. Outline the eye patches, keeping them smooth and rounded. -
Add the eyes:
Inside the eye patches, draw two closed eyelids as downward-curving crescents. This gives the panda that peaceful, slumbering expression. -
Ink the limbs:
Define the front paw tucked under the chin and the rear leg curled up against the body. Keep your lines confident but relaxed.
Make it Shine
Use a white gel pen to add tiny highlights on the black nose or in the center of the dark fur patches. This small pop of brightness makes the character look instantly more alive.
Step 3: Filling and Texturing
-
Fill the darks:
Using your thicker marker or brush pen, fill in the ears, the eye patches, the nose, the front arm band, and the rear leg. Leave the main face and body white. -
Create texture:
Take your finest pen (01). Add tiny, short hatch marks inside the black filled areas, specifically on the arm and leg, to give the black fur some depth and direction rather than being flat ink. -
Stipple the white fur:
To make the white parts look round, add small sets of dashed lines or dots along the curved back and the top of the head. This suggests volume without needing grey shading. -
Add cheek details:
Place a few tiny dots on the cheeks and a small dash under the eye patches to add character and cuteness.
Step 4: Background Elements
-
Draw the branch:
Above the panda, ink a simple curved line sweeping from left to right. Add four or five simple leaf shapes attached directly to the stem. -
Add the moon:
To the right of the branch, draw a crescent moon shape. Add a few tiny craters inside it for detail. -
Grounding shadow:
Using your fine pen, create a loose cluster of dots (stippling) directly underneath the panda. This grounds the drawing so the bear doesn’t look like it’s floating. -
Cleanup:
Once the ink is completely dry, gently erase all your underlying pencil sketches to reveal the clean, crisp illustration.
Now you have a serene little bear ready to drift off to sleep on your page

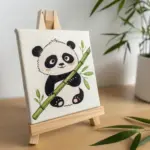
Panda Holding Bamboo Stick
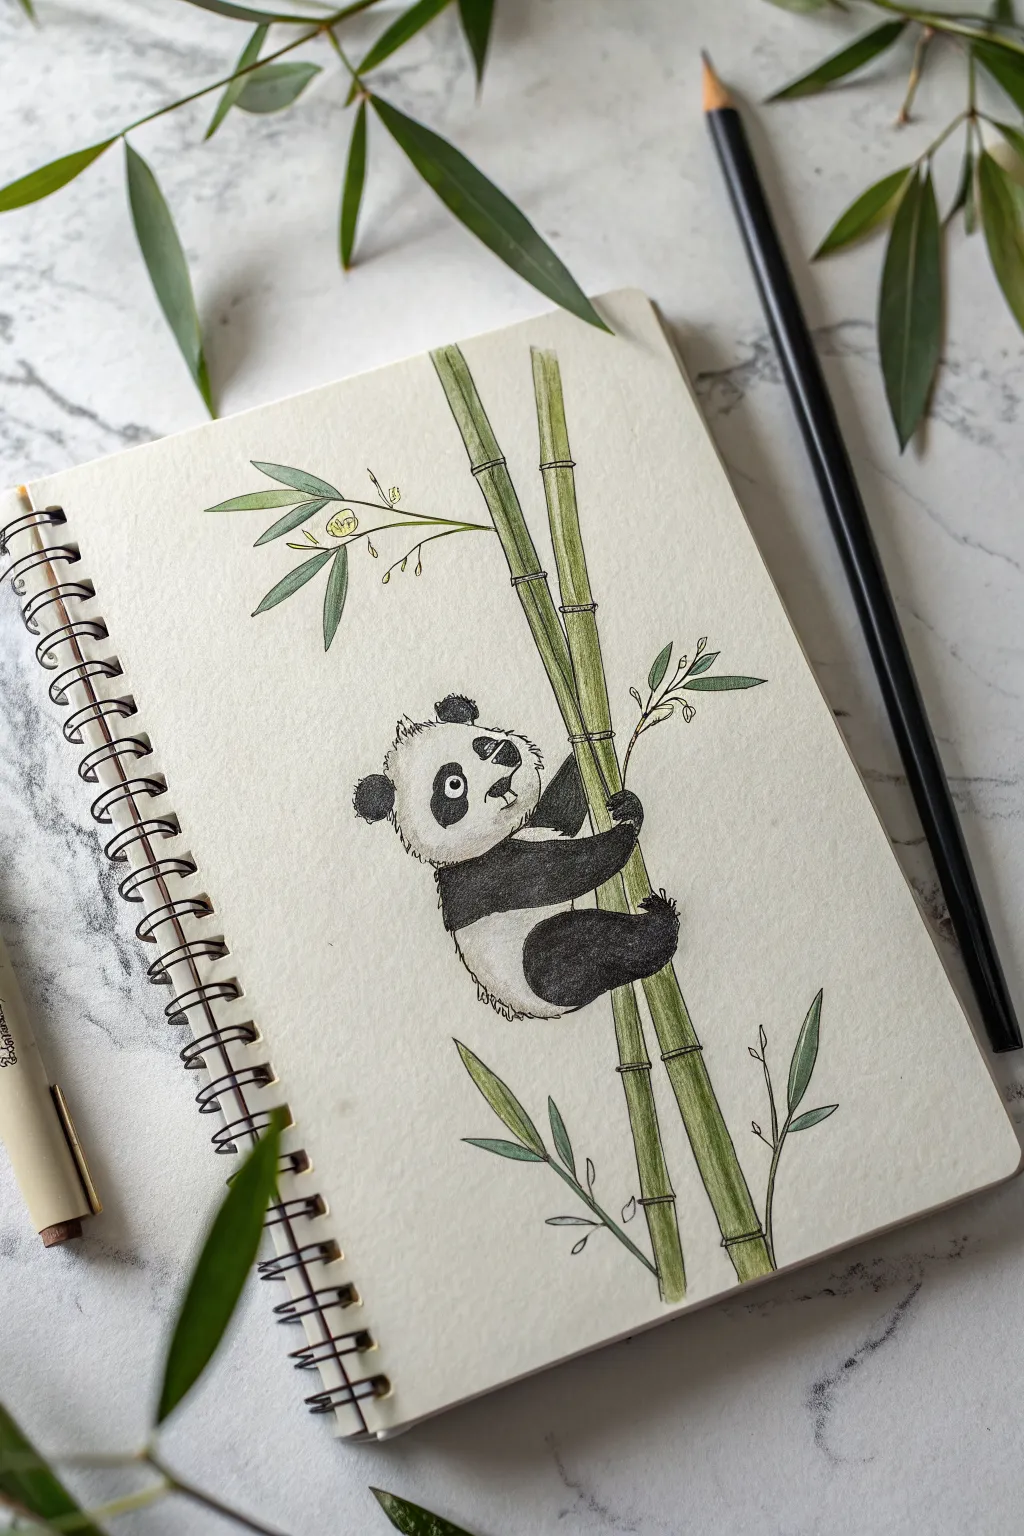
Capture the charm of a panda midway through a bamboo climb with this serene nature sketch. The textured paper and soft green tones create an organic, peaceful scene perfect for your sketchbook.
Step-by-Step Tutorial
Materials
- Spiral-bound sketchbook with textured paper
- HB graphite pencil for sketching
- Fine-tip black drawing pen (0.3mm or 0.5mm)
- Colored pencils (Olive Green, Sap Green, Lime Green, Warm Grey, Black)
- Eraser
- Pencil sharpener
Step 1: Sketching the Composition
-
Draw the bamboo guidelines:
Begin by lightly drawing two long, slightly diagonal parallel lines running from the bottom to the top of your page. These will become the two main bamboo stalks. Make them lean slightly to the right for a dynamic composition. -
Add bamboo segments:
Mark horizontal rings across the stalks at irregular intervals to indicate the bamboo nodes. I like to space them further apart near the top. -
Position the panda:
Sketch a round shape for the head between the two stalks, positioned slightly left of center. Add a larger, bean-shaped oval below it for the body, angling it as if the panda is clinging to the bamboo. -
Outline the limbs:
Draw the front right arm reaching across to grasp the right stalk. Sketch the back leg tucked up against the same stalk, creating that classic climbing posture. -
Add leafy details:
Sketch thin, arching branches extending from the bamboo nodes. Add slender, lance-shaped leaves to the ends of these branches, varying their sizes to look natural.
Keep it Furry
When inking the panda, don’t close every line. Leave small gaps in the outline of the fur to make the character feel softer and less like a cartoon and more like a sketch.
Step 2: Defining the Panda
-
Detail the face:
Draw two small circles for the ears on top of the head. Sketch the distinctive eye patches—oval shapes tilting slightly downward. Add a small triangular nose and a curved mouth line. -
Refine the fur texture:
Using your pencil, go over the outline of the panda’s head and body with short, jagged strokes instead of smooth lines. This creates the illusion of fluffy fur. -
Ink the panda outline:
Take your fine-tip black pen and carefully trace over your pencil sketch. Use broken, feathery strokes for the fur, but cleaner, smoother lines for the nose and claws. -
Fill the black areas:
Identify the dark patches: the ears, eye patches, nose, arms, legs, and the band across the shoulders. Use a black colored pencil to fill these in firmly, pressing harder for deep black coverage while leaving the texture visible. -
Shade the white fur:
To keep the white fur from looking flat, lightly shade the underside of the belly and the side of the face with a warm grey pencil. Keep this very subtle.
Panda looking flat?
The white fur needs shadow to have volume. add a very faint layer of grey or light blue on the belly specifically where the arm casts a shadow.
Step 3: Coloring the Bamboo
-
Base layer for stalks:
Use a Lime Green colored pencil to lay down a light base color on the bamboo stalks. Apply the color in vertical strokes following the direction of growth. -
Add depth and shadow:
Switch to an Olive Green pencil. Shade the edges of the bamboo stalks to make them look cylindrical. Add a little extra shadow right under the horizontal node rings. -
Define the nodes:
Use a sharp Sap Green or brown pencil to draw thin lines across the nodes perfectly. Add tiny vertical ticks at these joints to show the bamboo’s texture. -
Color the leaves:
Fill in the leaves with a mix of Sap Green and Olive Green. Keep the tips slightly lighter and the base of the leaves darker to give them dimension. -
Final touches:
Use your pen to add very fine details to the bamboo, like tiny cracks or extra definition on the nodes. Erase any remaining stray pencil lines to clean up the page.
Now you have a charming panda climbing steadily up the page
BRUSH GUIDE
The Right Brush for Every Stroke
From clean lines to bold texture — master brush choice, stroke control, and essential techniques.
Explore the Full Guide
Panda Eating Bamboo Bite

Capture the whimsy of a hungry panda with this charming watercolor and ink illustration. The textured paper adds a rustic feel to this simple, joyful character design.
Step-by-Step Guide
Materials
- Cold press watercolor paper (deckle edge optional)
- Black fine liner pen (waterproof, sizes 03 and 05)
- Watercolor paints (Black, Sap Green, Yellow Ochre, Alizarin Crimson)
- Round watercolor brushes (size 4 and size 0)
- Pencil and eraser
- Jar of clean water
- Paper towel
Step 1: Sketching the Shapes
-
Head Outline:
Begin with a light pencil sketch. Draw a large, slightly flattened circle for the panda’s head. -
Adding Ears:
Place two small, rounded semi-circles on the top corners of the head for ears. -
Face Features:
Sketch two kidney-bean shapes for the eye patches. Add a small triangular nose and a ‘W’ shape for the mouth below it. Draw a small U-shape sticking out for the tongue. -
Body and Arms:
Lightly sketch the upper torso below the head. Add two arm shapes reaching inward, as if holding something diagonally across the chest. -
Bamboo Stock:
Draw a long, segmented stick passing through the paws. Add a few small shoots and pointed leaves springing from the nodes.
Deckle Edge Trick
To get the torn paper look shown in the photo, wet the edges of your watercolor paper with a brush, wait a moment, and gently tear the strip away.
Step 2: Inking the Details
-
Outline the Fur:
Using the 03 fine liner, ink the outline of the head. Instead of a solid line, use short, broken strokes to mimic fluffy fur texture. -
Refining the Face:
Ink the nose and mouth. Draw the eyes as small circles within the patches, leaving tiny white dots for highlights. -
Body Texture:
Ink the arms and body outline, continuing with the same short, fur-like strokes used on the head. -
Bamboo Details:
Trace the bamboo stick and leaves with smooth, continuous lines to contrast with the furry texture of the bear. Erase all pencil marks once the ink is completely dry.
Step 3: Watercolor Wash
-
Painting the Ears:
Mix a watery black watercolor wash. Fill in the ears, letting the edges stay slightly uneven for a soft look. -
Eye Patches:
Paint the eye patches with the black wash. I like to keep the center near the eyes slightly darker. -
Furry Arms:
Paint the arms and visible shoulder area with the black paint. While wet, you can drop in a tiny bit more pigment at the bottom of the arms for shading. -
Soft Belly:
Dilute your black paint significantly until it is a very pale gray. Add a faint wash to the belly area and the bottom of the face for shadow. -
Bamboo Green:
Mix Sap Green with a touch of Yellow Ochre. Paint the bamboo stalk, lifting a little color in the center of each segment for a highlight. -
Leaf Details:
Use the size 0 brush to carefully paint the leaves with the same green mix. -
Pink Tongue:
Finish by painting the tongue with a diluted crimson wash.
Make it a Series
Draw three pandas on separate cards: one eating, one sleeping, and one playing, to create a framed nursery triptych.
Let your artwork dry completely before framing it or turning it into a charming greeting card
Panda With Blush Cheeks
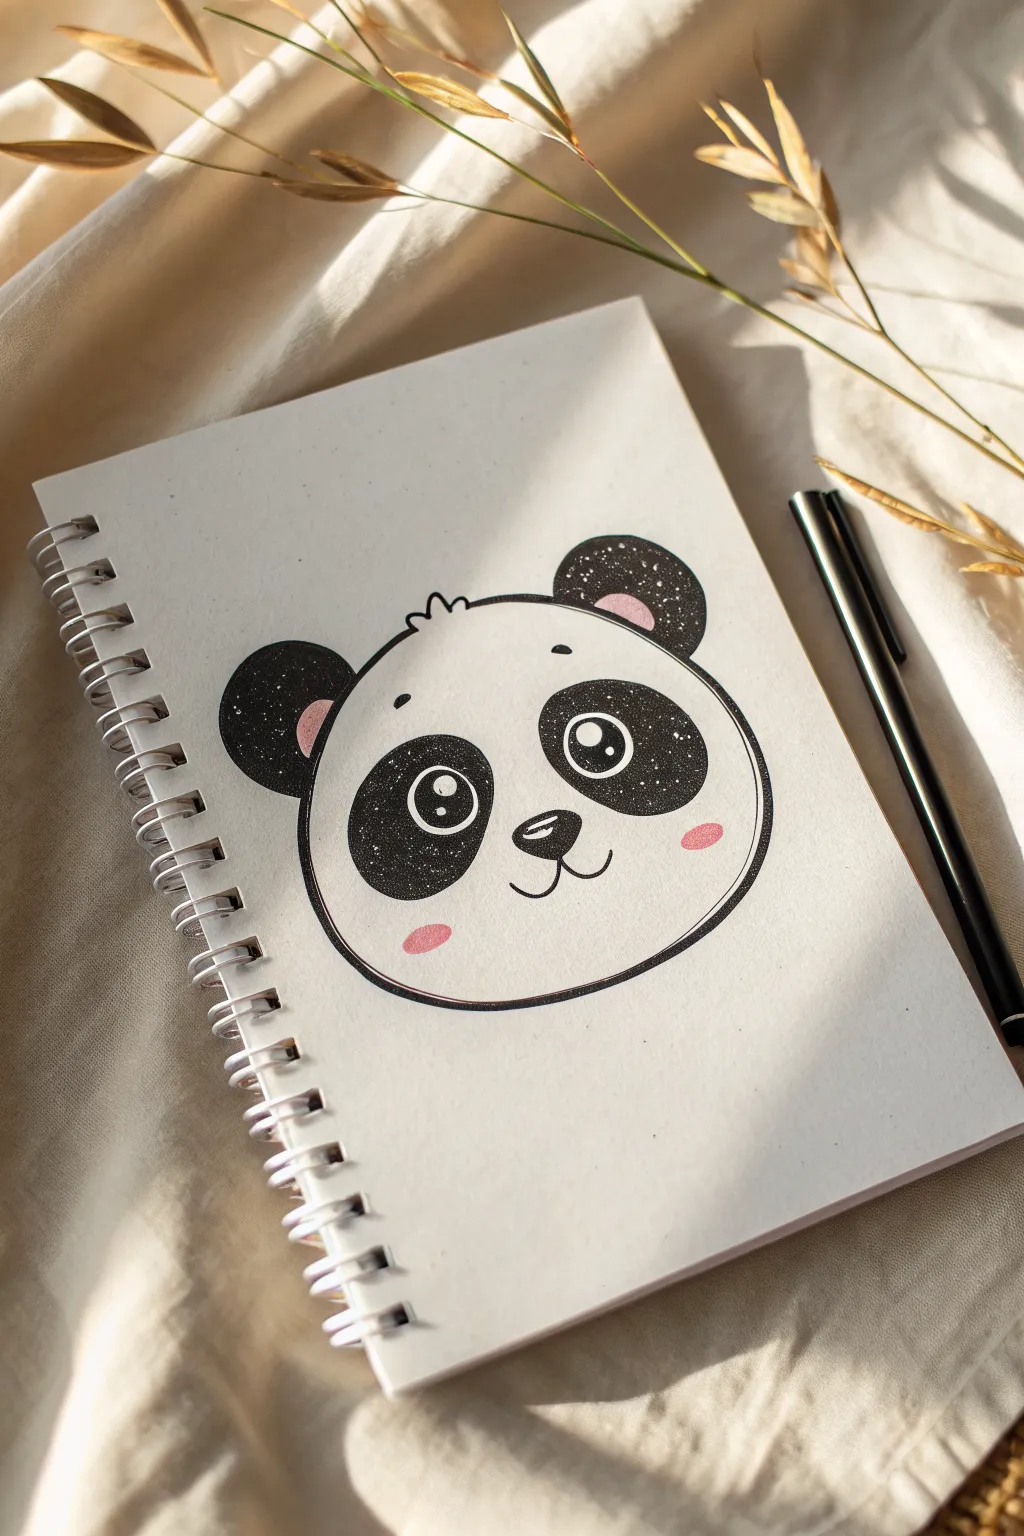
This adorable panda features deep black details filled with a starry night effect, giving a magical twist to a classic doodle. The soft blush marks and simple lines make it a perfect quick sketch for your journal or sketchbook.
Step-by-Step Tutorial
Materials
- Spiral-bound sketchbook or drawing paper
- Pencil (HB or 2B)
- Eraser
- Fine liner or black gel pen (0.5mm)
- Thick black marker or brush pen
- White gel pen (for the stars)
- Pink marker or colored pencil (pastel shade)
Step 1: Base Sketch
-
Map the head shape:
Start by lightly sketching a wide oval shape for the panda’s head. Keep the bottom slightly flatter than the top to give it a chubby, cute look. -
Position the ears:
Draw two semi-circles on the top left and top right of the head oval. They should be relatively large compared to the head, like Mickey Mouse ears but set wider apart. -
Place the eye patches:
Inside the face, sketch two large, tilted oval shapes for the eye patches. They should slant slightly inwards towards the nose area. -
Add facial features:
Draw a small, rounded triangular nose in the center, just below the eye patches. Add a simple ‘w’ shape or two curved lines coming from the nose to form the mouth. -
Refine the outline:
Go over your head shape sketch. At the very top center of the head, add a tiny tuft of fur using three small, jagged zig-zag lines.
Ink Patience
Wait for the black marker to be bone-dry before using the white gel pen layer. If the black is wet, it will mix with the white and turn gray.
Step 2: Inking and Filling
-
Outline the main shapes:
Using your fine liner or black gel pen, carefully trace over your pencil lines for the head shape, ears, and facial features. Keep your hand steady for smooth curves. -
Draw the pupils:
Inside the large eye patches, draw smaller circles for the actual eyes. Near the top of each eye circle, draw a tiny highlight circle and a slightly larger highlight circle to make them look shiny. -
Ink the nose:
Fill in the nose with black but leave a small, horizontal sliver white near the top for a highlight. -
Fill the ears:
Use your thicker black marker to fill in the ears completely solid black. Leave a small semi-circle empty at the base of each ear if you want to color it pink later, or fill it all in. -
Fill the eye patches:
carefully color in the large oval eye patches using the thick marker. Be very careful not to color inside the eye circles—those need to stay white for now. -
Detail the eyes:
Switch back to the fine pen to color the pupils black, ensuring you preserve those tiny white reflection circles you drew earlier.
Make it a Sticker
Draw this on sticker paper and cut it out leaving a small white border. It makes for an adorable custom decoration for your laptop or water bottle.
Step 3: Cosmic Details & Finish
-
Add eyebrow accents:
Draw tiny floating eyebrows above the eye patches using short, curved dashes to give the panda a sweet expression. -
Create the starry texture:
Once the black ink in the ears and eye patches is completely dry, take your white gel pen. Gently tap small dots of varying sizes onto the black areas. -
Vary the stars:
Make some dots tiny and others slightly larger to mimic a galaxy or starry night effect inside the dark fur. -
Add the blush:
Using a pastel pink marker or colored pencil, draw a small oval horizontally on each cheek, just below the eye patches. -
Color ear details:
If you left space in the ears earlier, add a touch of pink there too. If not, just the cheek blush is plenty cute. -
Clean up:
Wait for all ink to be fully dry to avoid smudging, then gently erase any visible pencil sketch lines underneath your ink.
Enjoy the whimsical charm of your new starry-eyed panda drawing

PENCIL GUIDE
Understanding Pencil Grades from H to B
From first sketch to finished drawing — learn pencil grades, line control, and shading techniques.
Explore the Full Guide
Winking Panda Expression
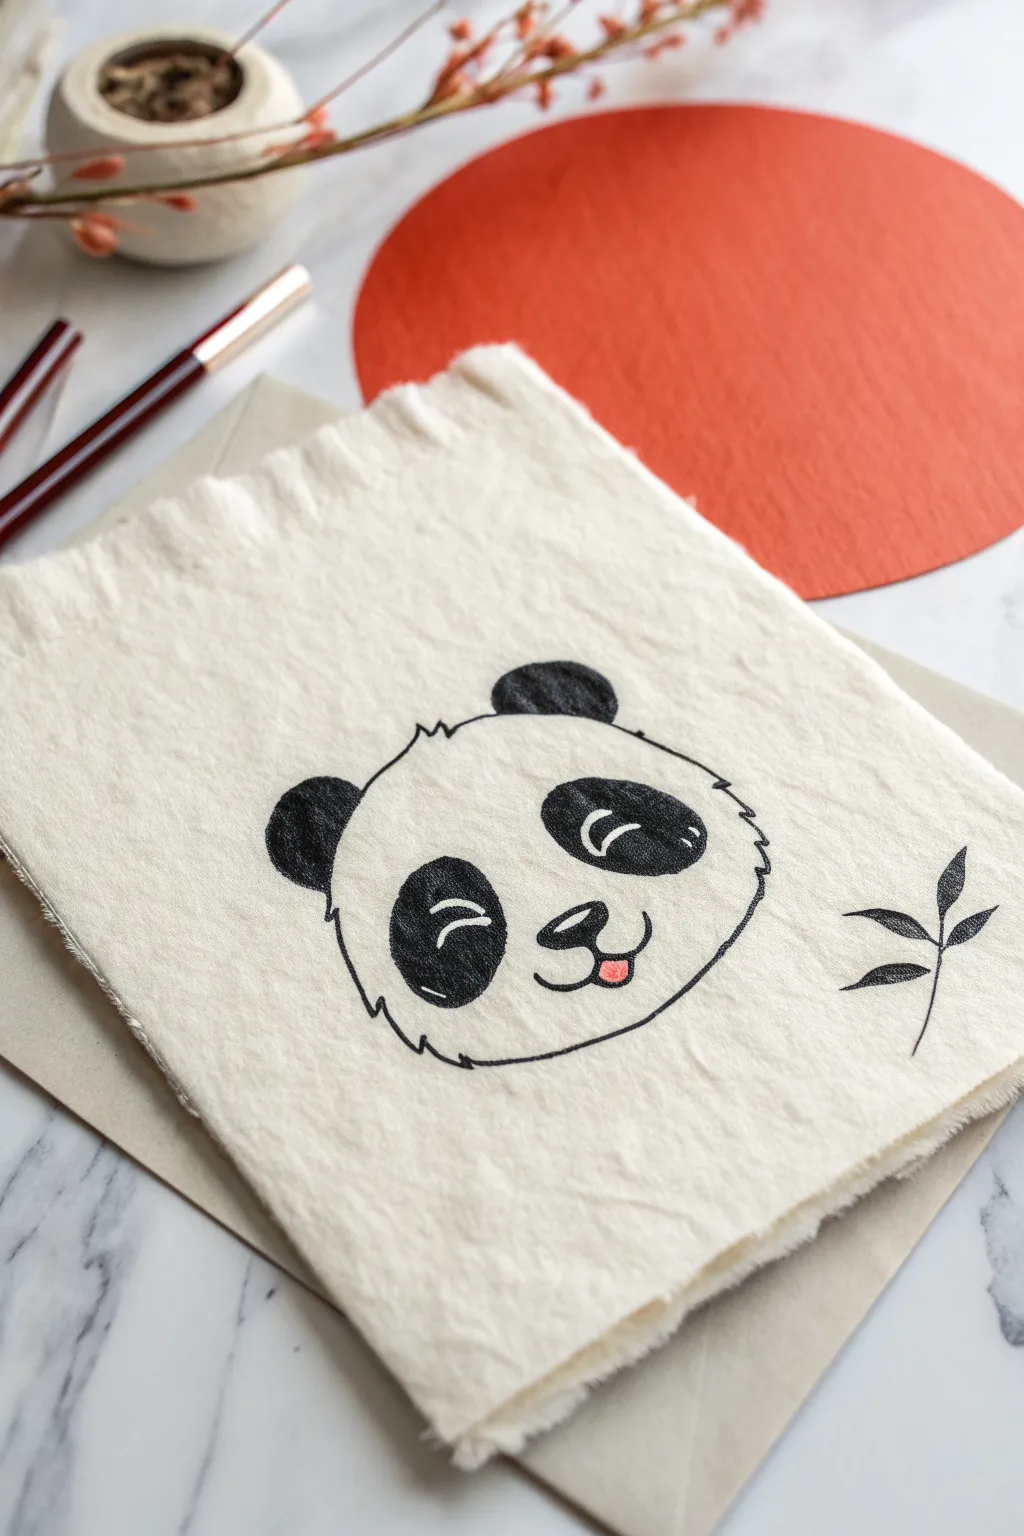
Capture a moment of playful charm with this minimalist winking panda illustration on textured handmade paper. The rough edges of the paper perfectly complement the organic, sketchy style of the line art, creating a card that feels both rustic and sweet.
How-To Guide
Materials
- Heavyweight handmade cotton rag paper (deckle edge, roughly 5×7 inches)
- Black waterproof fine liner pen (0.5mm)
- Black brush pen or broad felt-tip marker
- Pink or coral colored pencil or marker
- Pencil (HB or lighter)
- Kneaded eraser
- Scrap paper for sketching
Step 1: Drafting the Face
-
Center layout:
Begin by finding the visual center of your handmade paper. Since the edges are uneven, don’t worry about perfect geometric centering; aim for visual balance. Lightly sketch a wide, flattened oval shape for the panda’s head. -
Ear placement:
Mark two small semi-circles on the top left and top right of the head curve. These will be the ears. Keep them somewhat small relative to the head to maintain that ‘cute’ proportion. -
Eye patches:
Sketch two large, slanted kidney-bean shapes for the eye patches. The left one should tilt slightly left, and the right one slightly right. These patches define the panda’s expression, so take your time placing them. -
Nose and mouth:
Draw a small, rounded triangular nose in the center, just below the eye line. From the bottom of the nose, sketch a small ‘w’ shape for the mouth. Add a tiny U-shape below the mouth line for the tongue. -
Refining the outline:
Go back over your head outline. Instead of a smooth line, practice making the line slightly jagged or furry in places, especially on the cheeks, to suggest fur texture.
Handling Texture
Handmade paper has deep grooves. If your pen skips, slow down and gently go over the line again rather than pressing harder, which can snag the nib.
Step 2: Inking the Details
-
Outline the head:
Using your fine liner pen (0.5mm), trace over your pencil sketch of the head shape. Use short, broken strokes to create a furry effect rather than one continuous smooth line. -
Filling the ears:
Use the thicker black brush pen or broad marker to color in the ears completely solid black. The contrast between the solid black and the textured paper looks wonderful here. -
Detailing the left eye:
Switch back to the fine liner. Inside the left eye patch, draw a downward curving arc for a closed, happy eye. Then, use the brush pen to fill the patch around this arc, leaving the arc white (negative space). -
Detailing the right eye:
For the winking eye on the right, draw two small curved lines inside the patch to represent the eyelids crinkling. Carefully fill in the patch with black ink, preserving those two white curved lines. -
Nose and mouth ink:
Outline the nose and the mouth ‘w’ shape with the fine liner. Leave the nose hollow for now or fill it in depending on your preference—the example keeps the nose outline distinct. -
Adding color:
Take your pink or coral marker and carefully color in the small U-shape tongue. It adds just the right pop of color to the monochrome design.
Smudge Alert
Ink bleeds more on cotton rag paper. If outlines look fuzzy, your pen is too slow. Use faster, confident strokes to keep lines crisp and clean.
Step 3: Finishing Touches
-
Bamboo accents:
To the right of the panda face, sketch a simple stem with three leaves. The lines should be fluid and elegant. -
Inking the bamboo:
Ink the bamboo leaves with the fine liner. You can fill the leaves in completely for a silhouette look, or use hatching lines for a lighter texture. -
cleanup:
Wait at least 15 minutes for the ink to fully set into the heavy paper fibers. I usually wait a bit longer with handmade paper just to be safe. Erasures can smudge easily on this texture. -
Erase pencil lines:
Gently dab—don’t rub—with a kneaded eraser to lift the graphite lines without damaging the delicate paper surface.
Now you have an adorable, handcrafted card ready to brighten someone’s day
Panda With Heart Hug
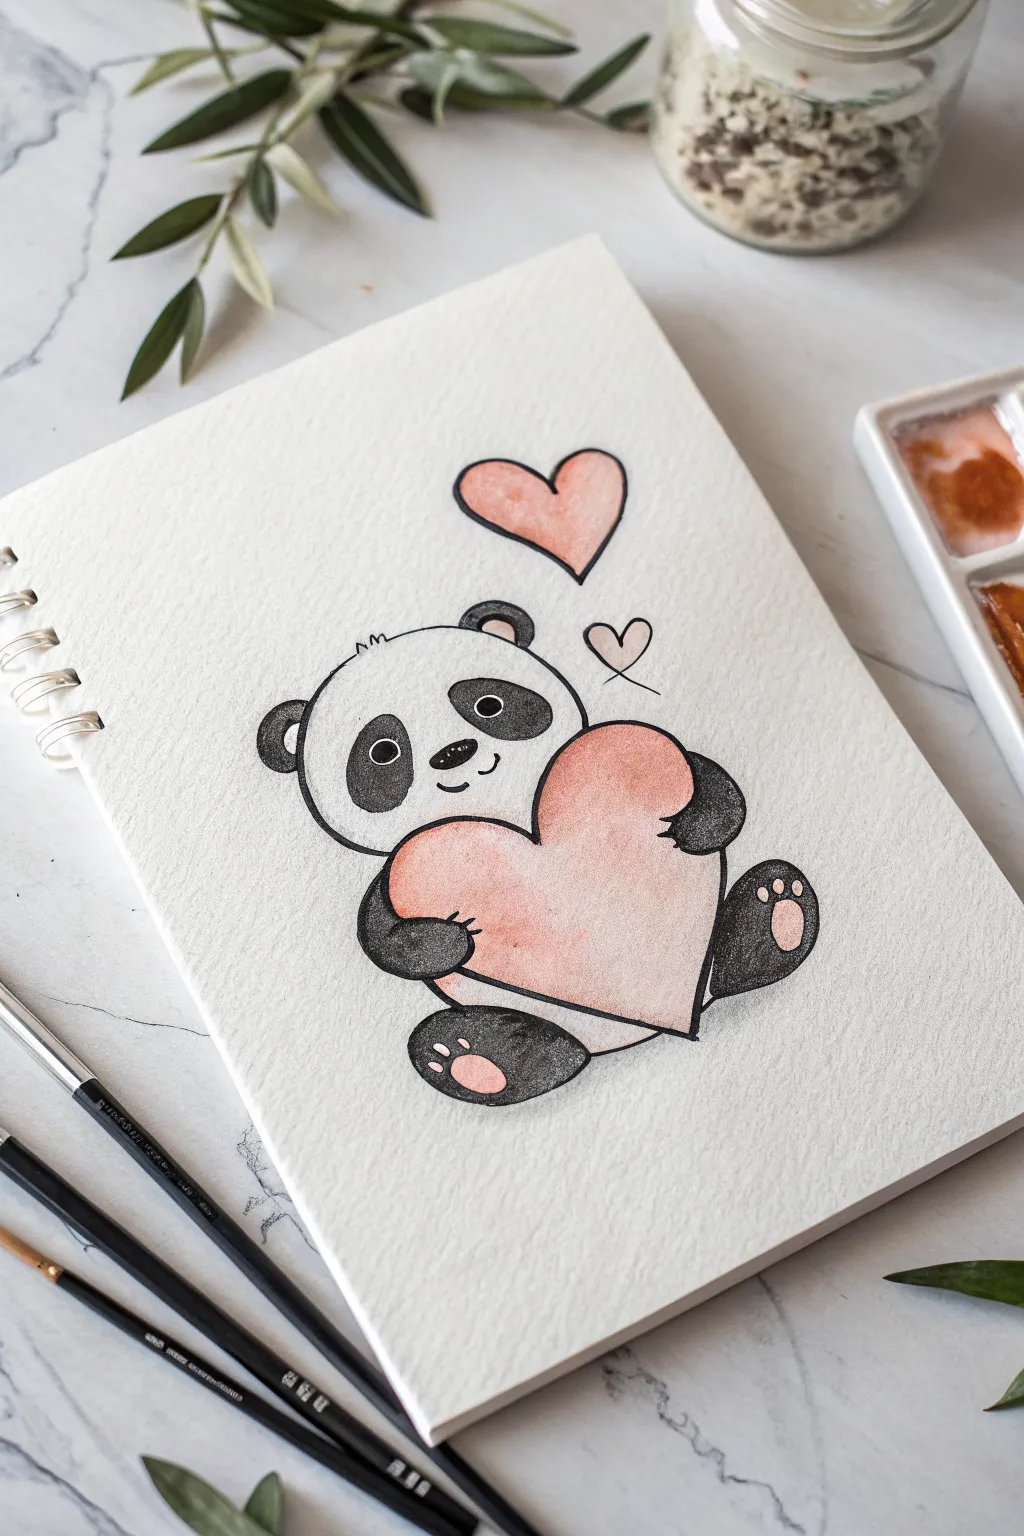
This adorable project captures a sweet panda hugging a giant heart, rendered in soft watercolors and crisp ink lines. It is a perfect blend of sketching and painting that creates a warm, textured illustration suitable for cards or sketchbook journaling.
Detailed Instructions
Materials
- Cold press watercolor paper (textured)
- Pencil (HB or lighter) and eraser
- Waterproof fine liner pen (black, 0.3mm or 0.5mm)
- Watercolor paints (Black, Lamp Black, Pink/Rose)
- Round watercolor brush (size 4 or 6)
- Clean water and paper towel
Step 1: Sketching the Shapes
-
Map out the head:
Begin by lightly sketching a slightly flattened oval for the panda’s head. Keep your pencil pressure very light so you can erase lines easily later. -
Place the big heart:
Draw a large heart shape that overlaps the bottom third of the head oval. The top curves of the heart should obscure the panda’s chin area, making it look like it’s being held tight. -
Add the ears:
Sketch two semi-circles on top of the head for ears. Position them widely apart to enhance the cute factor. -
Draw the paws:
Add two small, rounded shapes gripping the sides of the heart for the front paws. Then, draw two larger oval shapes near the bottom of the heart for the feet sticking out. -
Face details:
Inside the head, sketch two large, angled ovals for the eye patches. Add a small nose and a simple curved mouth line right between the eyes. -
Floating hearts:
Draw a medium-sized heart floating above the panda’s head to the right, and a tiny outline of a heart just below that one.
Bleeding Lines?
If your black ink bleeds when you paint over it, stop immediately. Your pen might not be waterproof. Switch to painting the color first, letting it dry completely, and then adding the ink lines on top.
Step 2: Inking the Outline
-
Outline the main shapes:
Using your waterproof fine liner, carefully trace over your pencil lines. I prefer to use a slightly broken or sketchy line for the fur to suggest softness rather than a solid, rigid wire. -
Detail the feet:
Draw the paw pads on the bottom feet—one large pad and three smaller toe beans on each foot. -
Refine the face:
Ink the nose and mouth. For the eyes, draw small circles inside the patches for the actual eyes, leaving a tiny white sparkle in each pupil. -
Erase guidelines:
Wait a moment to ensure the ink is totally dry, then gently erase all visible pencil marks to clean up the drawing.
Step 3: Painting with Watercolors
-
Paint the black patches:
Load your brush with black watercolor. Carefully fill in the eye patches, ears, arms, and legs. Use enough pigment to get a solid dark tone immediately. -
Soften the black:
While the black paint is still slightly damp, you can dab a clean, thirsty brush on huge highlight areas (like the center of the ears or feet) to lift a tiny bit of color for dimension. -
Paint the large heart:
Mix a watery pink or rose wash. Apply this to the main heart the panda is holding. Start with more pigment at the top left and use water to fade it slightly towards the bottom right for a gradient effect. -
Color the pads and nose:
Use a slightly more concentrated pink for the paw pads on the feet and a tiny dot for the nose if you want it pink, or stick to black for the nose. -
Floating heart wash:
Paint the floating heart above the head with the same pink mix, keeping the edges crisp. -
Cheek flush:
With a very diluted, watery pink on a clean brush, gently dab two small circles on the panda’s white cheeks for a subtle blush. -
Final touches:
Once the main heart is dry, use your black pen/paint to add small hash marks or shading lines near where the paws grip the heart to show shadow.
Make it Shine
Once the watercolor is dry, use a white gel pen to add highlights to the black eyes and the shiny part of the nose to bring the character to life.
Now you have a charming little panda friend ready to share some love on your page


Panda Sitting in a Cup
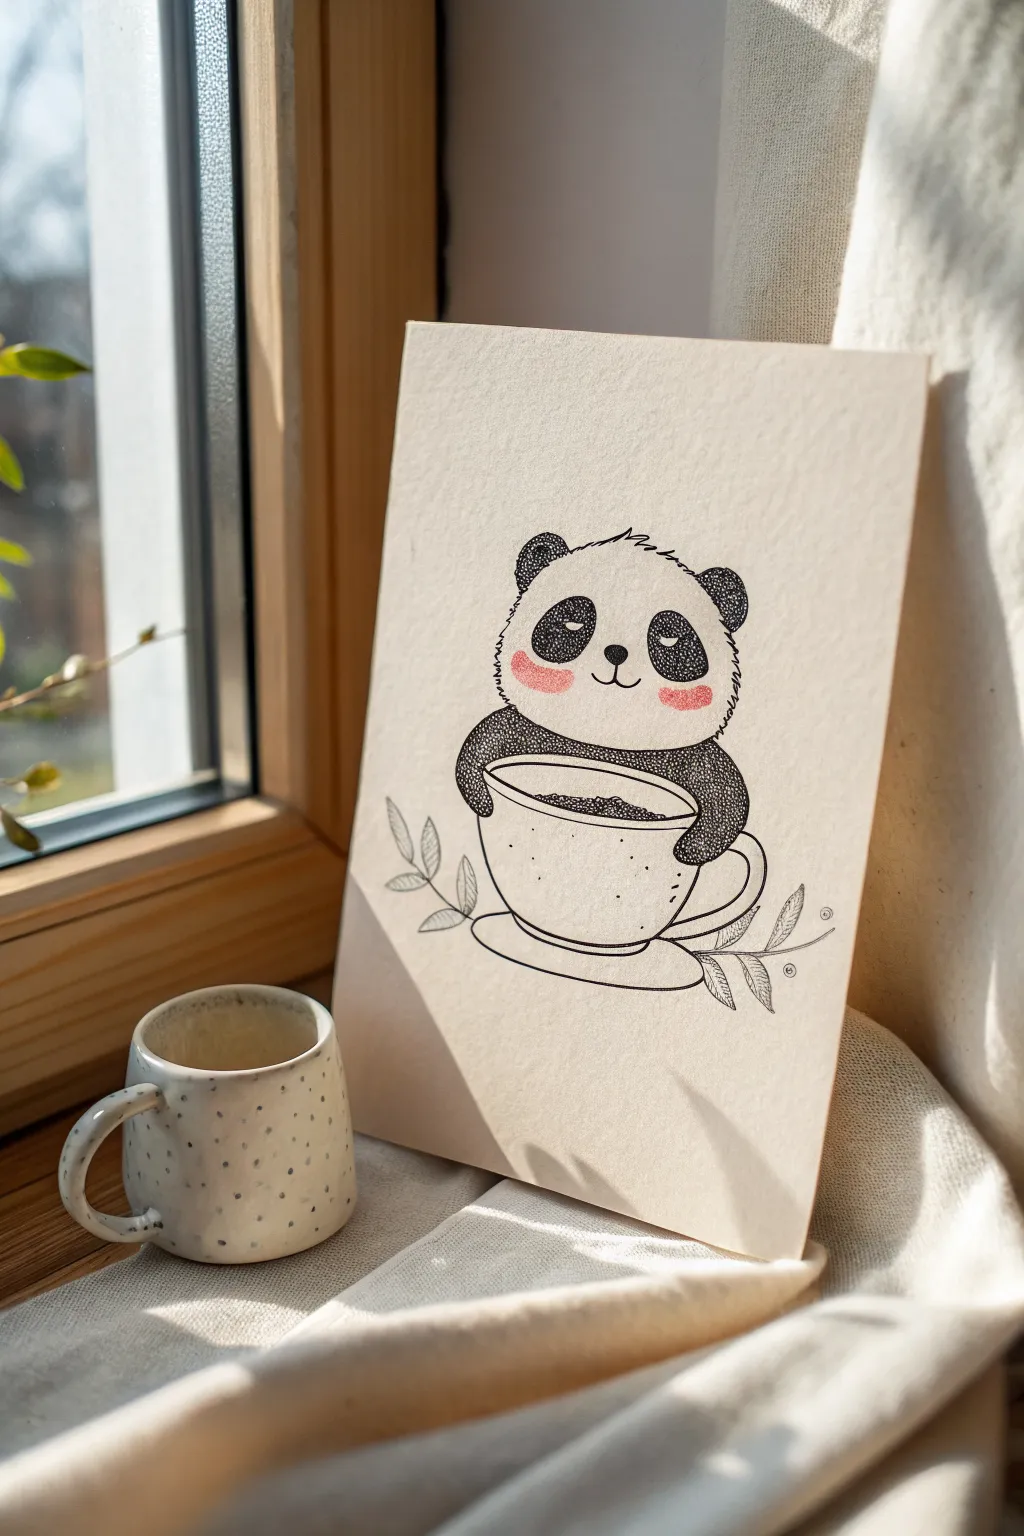
Capture the ultimate cozy vibe with this adorable illustration of a panda savoring a warm drink. Using simple fineliner techniques like stippling, you’ll create a textured, huggable character on cream-colored paper.
Step-by-Step Guide
Materials
- Light cream or off-white cardstock (A5 size)
- HB pencil
- Soft eraser
- Black fineliner pens (0.1mm, 0.3mm, and 0.5mm)
- Soft pink colored pencil or pastel
Step 1: Sketching the Foundations
-
Center the composition:
Start by finding the vertical center of your paper. Draw a large, wide ‘U’ shape near the bottom third to form the bowl of the teacup. -
Add the panda’s body:
Resting right on the rim of the cup, sketch a rounded, bean-shaped oval for the panda’s head and upper body combined. It should look like it’s peeking over the edge. -
Define the limbs:
Sketch two rounded shapes wrapping around the front of the cup rim to serve as paws. Draw two small semi-circles on top of the head for ears. -
Detail the face:
Lightly mark the placement for the eyes, a small triangular nose, and a simple mouth. Keep the eyes droopy and relaxed to match the sleepy mood. -
Add the floral accents:
Draw simple, curved lines extending from behind the cup’s saucer on the left and right sides. Add small, leaf-shaped ovals along these stems.
Dot Fatigue?
Stippling takes time. If your hand cramps, take breaks! Rushing leads to messy ‘tails’ on your dots. Twist the pen slightly as you work to keep the tip round.
Step 2: Inking and Outline
-
Trace the main lines:
Using your 0.3mm fineliner, go over your pencil lines. Give the panda’s fur a slightly jagged, irregular line quality to suggest fluffiness, rather than a perfect smooth curve. -
Refine the cup:
Ink the cup and saucer with smoother, more confident strokes. Add the handle on the right side, ensuring it connects naturally to the cup body. -
Erase guidelines:
Once the ink is completely dry to the touch, gently erase all underlying pencil marks to reveal a clean line drawing.
Step 3: Texture and Shading
-
Start stippling the ears:
Switch to a 0.5mm pen for the dark areas. Instead of coloring solid black, fill the ears with dense dots (stippling). Keep the dots tighter near the edges and slightly looser in the center for depth. -
Create the eye patches:
Use the same stippling technique for the distinctive black eye patches. I like to start dense around the eyes and fade slightly outward to make the transition look soft. -
Fill the arms:
Stipple the panda’s arms wrapping around the cup. This takes patience; layering the dots creates that rich, dark gray tone that looks like fur. -
Detail the drink:
Inside the cup rim, add stippling to represent the coffee or tea surface. Make the dots denser near the rim’s edge to show a shadow cast by the cup. -
Add cup details:
Switch to a delicate 0.1mm pen. Add a few very sparse dots on the ceramic cup for texture, and draw a thin ‘rim’ line below the main opening. -
Detail the leaves:
Use the 0.1mm pen to add veins to the leaves. Use short, flicking strokes to give them a sketched, botanical look. -
Add facial expression:
Darken the nose and mouth features. Ensure the eyes have small white highlights left un-inked to keep the panda looking alive.
Make It Yours
Try drawing steam rising from the cup in swirling, broken lines, or change the beverage to a latte heart design for extra sweetness.
Step 4: Final Touches
-
Apply the blush:
Take your soft pink colored pencil. Very gently sketch circular patches on the cheeks. Shade lightly at first, building up color slowly so it doesn’t look too harsh against the ink. -
Review contrast:
Step back and look at the drawing. If the black fur areas look too pale, add another layer of dots to deepen the contrast.
Place your finished drawing near a window for the perfect cozy aesthetic alongside your morning brew
Panda Holding a Warm Drink
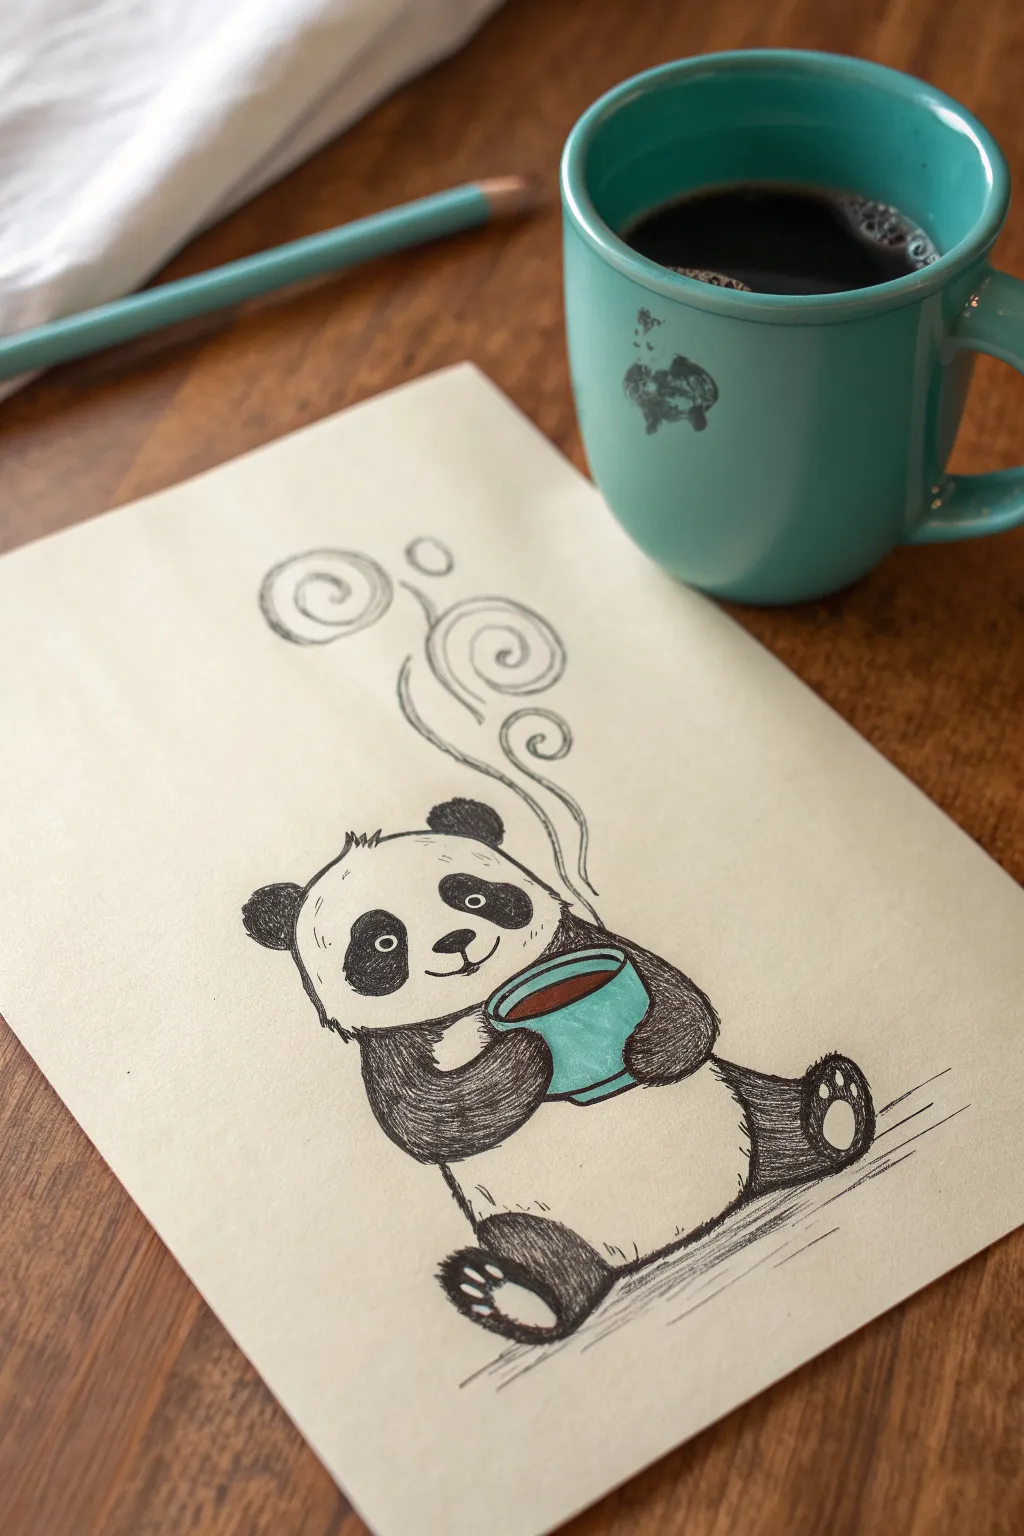
Capture the comforting vibe of a warm drink with this adorable sketch of a panda enjoying a quiet moment. Using simple hatching techniques for texture and a pop of color for the mug, you’ll create a charming illustration perfect for a greeting card or sketchbook page.
Step-by-Step Tutorial
Materials
- Cream or off-white drawing paper (medium weight)
- Pencil (HB or 2B) for sketching
- Fine liner pens (black, size 0.3mm and 0.5mm)
- Teal or turquoise colored pencil (or marker)
- Dark brown colored pencil
- Eraser
Step 1: Sketching the Foundations
-
Head shape:
Begin by lightly sketching a large, rounded oval for the panda’s head. It should be slightly flattened at the bottom where it sits on the body. -
Body outline:
Draw a pear-shaped body extending downwards from the head. The base should be wide and grounded, giving the panda a slouching, relaxed posture. -
Legs and feet:
Sketch two stubby legs extending forward from the bottom of the body. Add oval shapes at the ends for the feet, angling them slightly outward. -
Arms and mug:
Draw two curving arms reaching toward the center of the chest. Between the paws, sketch a simple mug shape—a rounded cylinder with a small handle on the right side. -
Facial features:
Place two small ears on the top corners of the head. Inside the face, sketch kidney-bean shapes for the eye patches, a small triangular nose, and a simple curved ‘w’ shape for the mouth.
Step 2: Inking and Outline
-
Trace the main lines:
Using your 0.5mm fine liner, carefully go over your pencil sketch. Use short, slightly jagged strokes for the fur areas to suggest fluffiness, especially on the cheeks and top of the head. -
Detail the face:
Ink the nose and mouth. For the eyes, draw small circles inside the patches, leaving tiny white dots for highlights, then fill in the pupils black. -
Outline the mug:
Switch to a smoother, continuous line for the mug to make it look solid and ceramic, contrasting with the furry texture of the bear. -
Add steam swirls:
Above the mug, draw three playful, spiraling lines rising upward to represent steam. Vary the size of the swirls, making them larger as they go higher. -
Erase pencil guides:
Wait a moment for the ink to dry completely, then gently erase all the underlying pencil sketch lines to clean up your drawing.
Hatching Trick
Keep your hatching lines loose and quick. Perfect parallel lines look rigid; slight variations make the panda’s fur look softer and more natural.
Step 3: Shading and Texture
-
Fill the dark fur:
Using the 0.3mm pen, begin shading the ears, eye patches, arms, and legs. Instead of coloring them solid black, use dense hatching marks (lines close together) to create a dark, textured grey. -
Cross-hatching depth:
Go back over the darkest areas—like the bottom of the paws and the center of the eye patches—with cross-hatching (lines going the opposite direction) to deepen the shadow. -
Paw pads:
On the soles of the feet, draw the main pad and toe beans. Leave these white or lightly textured, while darkening the fur around them. -
Grounding shadow:
Add horizontal sketching lines underneath the panda’s bottom and legs to anchor the figure so it doesn’t look like it’s floating.
Make It Seasonal
Change the steam swirls into tiny hearts for Valentine’s Day, or add a classic red scarf around the panda’s neck for a winter holiday version.
Step 4: Adding Color
-
Color the mug:
Take your teal or turquoise colored pencil and fill in the mug shape. Press harder on the sides and bottom to create a rounded, 3D effect, leaving the center slightly lighter. -
Fill the coffee:
Use the dark brown pencil to color the liquid inside the mug. Leave a very thin rim of white at the top edge of the liquid to show reflected light. -
Final touches:
Add a few loose ink dots around the drawing for atmosphere and strengthen any outline lines that might have faded during coloring.
Now you have a charming little coffee companion to brighten up your desk or art journal
Panda With a Birthday Hat
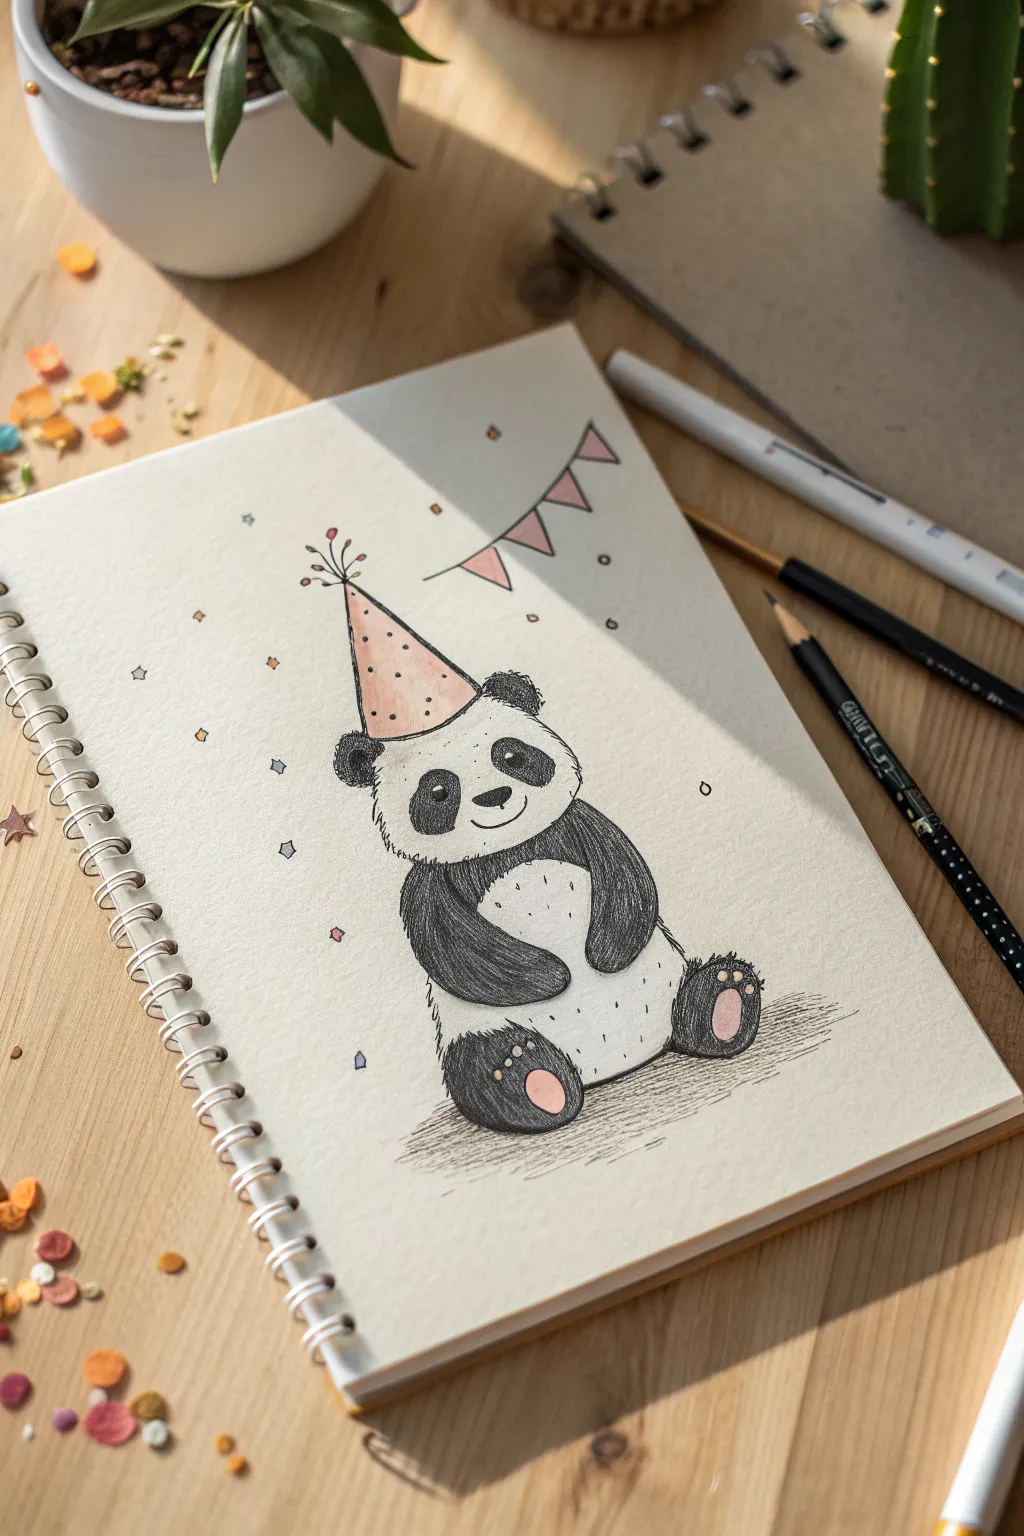
Celebrate creativity with this adorable sketched panda ready for a festive occasion. Using simple shapes and gentle shading, this project captures a soft, illustrative style perfect for greeting cards or sketchbook doodles.
Step-by-Step
Materials
- Spiral-bound sketchbook or drawing paper
- HB graphite pencil (for sketching)
- Black fine liner or gel pen (0.5mm)
- Black colored pencil or soft charcoal pencil
- Pink colored pencil (pastel shade)
- Eraser
Step 1: Planning the Shapes
-
Outline the head:
Start by lightly sketching a slightly flattened circle for the panda’s head. Keep your pencil pressure very light so you can erase guidelines later. -
Add the body:
Draw an oval shape directly beneath the head for the body. It should be slightly taller than the head and wider at the bottom to give the panda a seated posture. -
Place the limbs:
Sketch two smaller ovals near the top of the body for the arms, curving them inward as if they are resting on a belly. Add two rounded shapes at the bottom corners for the feet. -
Top it off:
Draw a tall, narrow triangle sitting slightly askew on the panda’s head for the party hat.
Step 2: Sketching Features
-
Draw the ears:
Add two small semi-circles on the top corners of the head. Position them just behind where the hat rests. -
Eye patches:
Inside the face, sketch two large, tilted oval shapes for the iconic panda eye patches. They should slant slightly downward toward the nose. -
Face details:
Place a small, horizontal oval for the nose between the eye patches. Draw a simple ‘w’ shape beneath it for the smiling mouth. -
Hat decorations:
Add a pom-pom shape to the tip of the hat using small radiating lines. Draw faint polka dots inside the hat triangle.
Smudgy Pages?
Place a scrap piece of paper under your drawing hand. This acts as a shield, preventing your skin from dragging graphite or fresh ink across the white paper.
Step 3: Inking and Coloring
-
Refine the outline:
Use your black fine liner or gel pen to trace over your pencil sketch. Instead of a solid, continuous line, use short, sketchy strokes to mimic the texture of fur. -
Detail the fur:
When inking the belly and face, break the line work even more to make the panda look fluffy. Erase your initial pencil guidelines once the ink is totally dry. -
Coloring the black patches:
Switch to your black colored pencil. Fill in the ears, arms, and legs. Use circular coloring motions to build up texture rather than flat color. -
Darken the eyes:
Fill in the eye patches with the black pencil, but leave two tiny white circles inside each dark patch for the eyes themselves to sparkle. -
Add pink accents:
Take your pastel pink pencil and gently color the party hat. Also color the oval pads on the bottom of the feet and add a tiny blush to the cheeks. -
Shadowing the body:
I like to use the black pencil very lightly to add soft shadows under the chin and around the bottom of the belly to give the drawing dimension.
Pro Fur Texture
Don’t outline the white belly completely. Leave gaps in the line art where the light would hit to make the panda look softer and rounder.
Step 4: Final Touches
-
Ground the figure:
Using horizontal hatching lines with your fine liner, create a shadow on the ‘floor’ beneath the panda so it doesn’t look like it’s floating. -
Banner creation:
In the background, draw a curved line for a string and hang three small triangles from it to make a festive bunting banner. -
Color the banner:
Lightly shade the banner flags with the pink pencil to match the hat, keeping the color soft and airy. -
Confetti details:
Scatter small shapes around the panda—little stars, diamonds, and circles—using the fine liner. Add tiny touches of pink or yellow pencil to a few of them. -
Review contrast:
Check your black areas. If they look too grey, layer more black pencil over the top to make the dark fur really pop against the white paper.
Now you have a charming party panda ready to bring a smile to anyone’s face
Panda Wearing a Tiny Crown
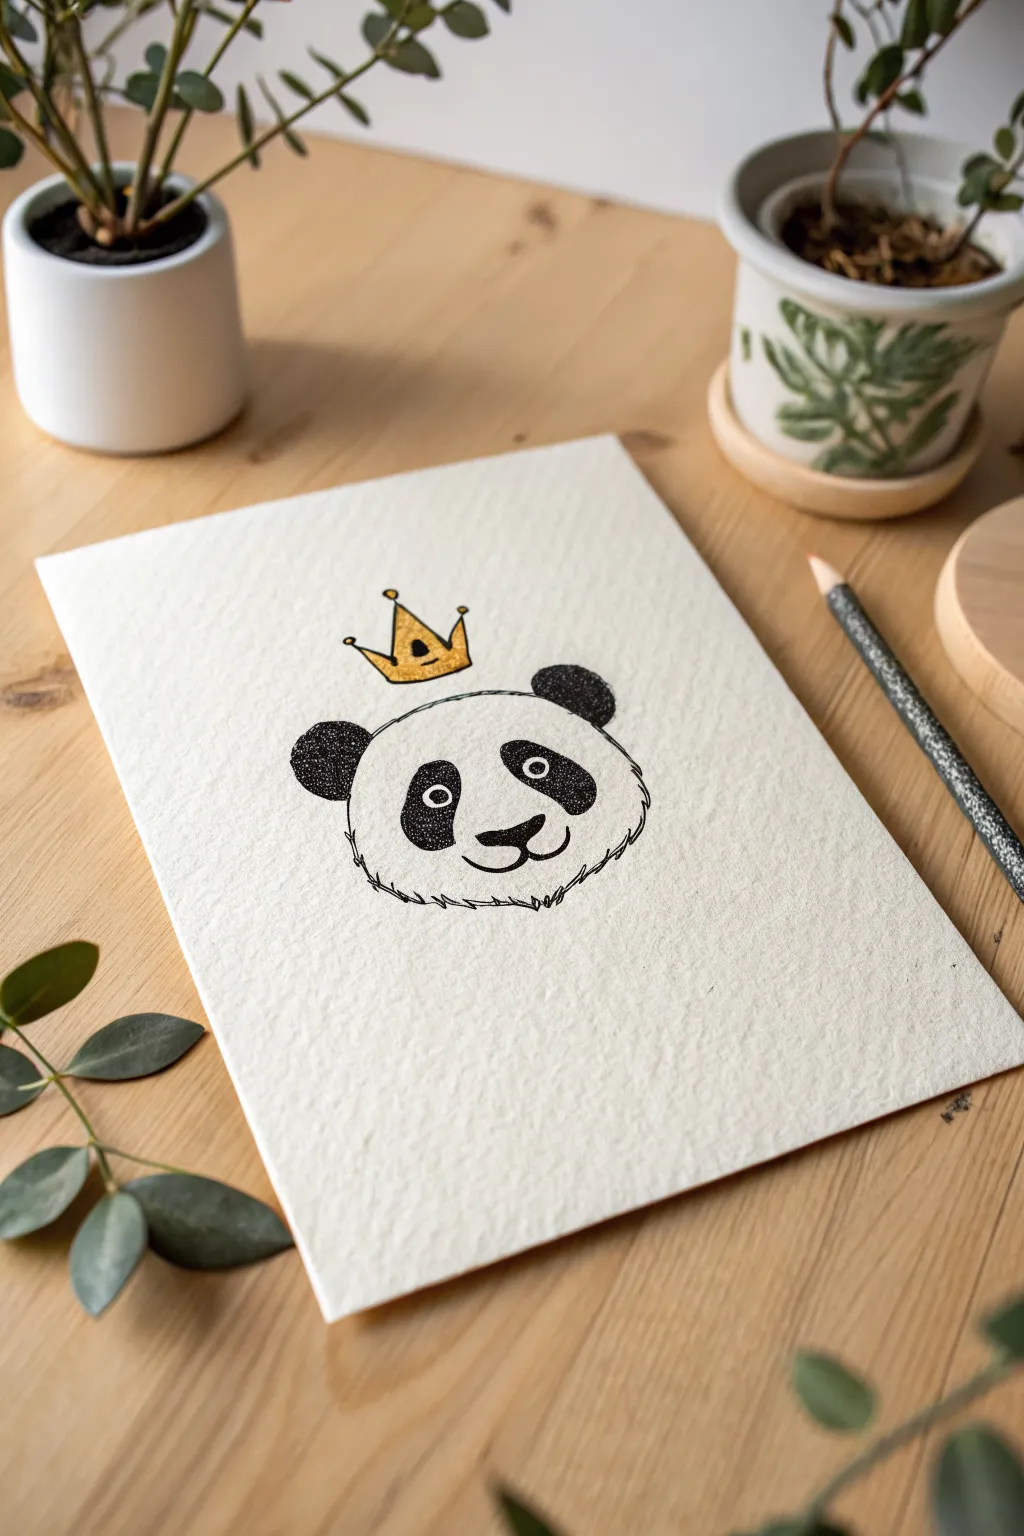
This minimal yet charming project features a cute panda head topped with a whimsical golden crown. The textured paper and slightly jagged ink lines give it a lovely, hand-drawn character that feels warm and approachable.
How-To Guide
Materials
- Textured watercolor paper or heavyweight cardstock (off-white/cream)
- Black fine liner pen (sizes 0.3 or 0.5)
- Gold metallic marker or gold gel pen
- Pencil (HB or 2B)
- Soft eraser
Step 1: Sketching the Foundations
-
Outline the head shape:
Begin by lightly sketching a wide, flattened oval shape for the panda’s head using your pencil. Keep the bottom slightly flatter than the top to give it a chubby cheek look. -
Position the ears:
Add two distinct semicircles on the upper left and right corners of your head shape. These should be generous in size but not overwhelming. -
Place the crown:
Float a small, three-pointed crown slightly off-center on the top of the panda’s head. It shouldn’t touch the head line directly; leave a tiny gap to make it look like it’s hovering or sitting lightly. -
Map the facial features:
Sketch two large oval patches for the eyes, tilting them slightly inward toward the nose. Below them, add a small triangular nose and a simple ‘w’ shape for the mouth.
Step 2: Inking the Panda
-
Draw the fur texture:
Switch to your black fine liner. Instead of tracing a solid continuous line for the head shape, use short, quick, jagged strokes. This mimics the fluffy texture of fur, especially around the cheeks and chin. -
Outline the ears:
Ink the outlines of the ears. You can keep these lines slightly smoother than the chin, but a little wobble adds character. -
Fill the ears:
Using a stippling or tight scribbling motion, fill in the ears completely black. Don’t make it a solid block of ink; let tiny specks of white paper show through for texture. -
Ink the eye patches:
Outline the eye patches and fill them in using the same textured scribbling method as the ears. Create a dense dark area but keep it organic. -
Define the eyes:
Inside the dark patches, leave small white circles un-inked for the eyes themselves. Within those white circles, draw tiny black pupils to bring the panda to life. -
Nose and mouth:
Ink the nose solidly black, rounding the corners softy. Trace the mouth line with a slightly thicker stroke to make the smile pop.
Uneven Fur Texture?
If your fur lines look too uniform, change the speed of your pen. Faster flicks create sharper, more natural-looking hair tapers than slow, deliberate lines.
Step 3: Adding the Royal Touch
-
Outline the crown:
Carefully trace the pencil outline of the crown with your fine liner. Add tiny circles at the very tips of the three points. -
Add crown details:
Draw a curved line across the crown’s base to give it some dimension. -
Apply the gold:
Take your gold metallic marker and fill in the crown. I find it helpful to work quickly to avoid streak marks, letting the ink pool slightly for a rich shine. -
Erase pencil marks:
Wait until the black ink and gold marker are completely dry—give it at least five minutes. Gently erase all visible pencil guidelines to clean up your drawing. -
Final texture check:
Look over the fur lines on the cheeks. If they look too sparse, add a few more rapid, short strokes to fluff up the panda’s face.
Make It Sparkle
For extra dimension on the crown, wait for the gold ink to dry, then add a tiny white gel pen dot on one side to simulate a light reflection or shine.
Frame your regal creation or gift it to a friend who needs a smile
Panda With Round Glasses
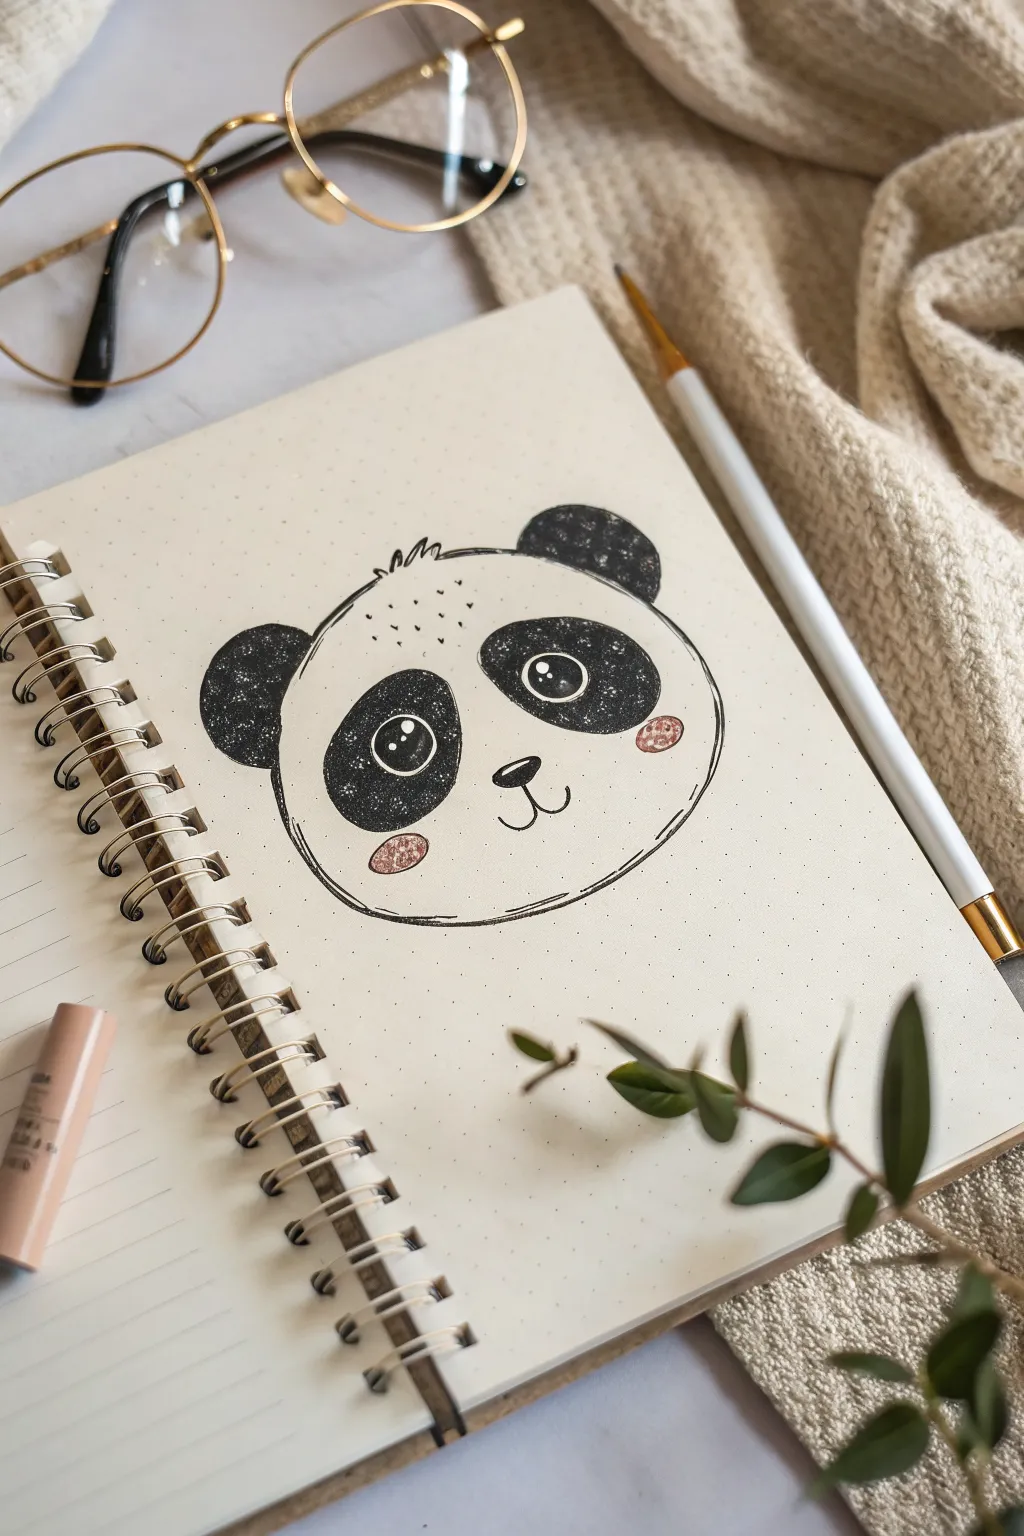
This adorable panda doodle is perfect for adding a touch of cuteness to your bullet journal spreads or sketchbooks. With its expressive eyes and simple shapes, it captures a sweet, minimalist aesthetic that is surprisingly easy to recreate.
Detailed Instructions
Materials
- Dotted or grid notebook (bullet journal)
- Pencil (HB or H)
- Eraser
- Black fineliner pen (0.3mm or 0.5mm)
- Black brush pen or thick marker
- Pink colored pencil or pastel highlighter
- White gel pen
Step 1: Sketching the Base
-
Outline the head shape:
Start by lightly sketching a wide, slightly flattened oval for the panda’s head. The bottom should be a bit flatter than the top to give it a chubby cheek look. -
Position the ears:
Draw two small semicircles on the top corners of the head. Space them out widely so they sit almost at the ’10 o’clock’ and ‘2 o’clock’ positions. -
Sketch the eye patches:
Inside the face, sketch two large, bean-shaped ovals for the classic panda eye patches. They should tilt slightly inwards toward the nose, resembling kidney beans. -
Add facial features:
Center a small, rounded triangle for the nose between the eye patches. Draw two small curved lines coming down from the nose to form the mouth, similar to a wide ‘w’ shape. -
Detail the eyes:
Inside the dark eye patches, draw smaller circles for the actual eyes. Add a tiny highlight circle inside each eye near the top right for that sparkling look.
Uneven Eyes?
Don’t sweat symmetry! If one eye patch is slightly larger, just thicken the outline of the other to match. Slight variations add character.
Step 2: Inking and Filling
-
Outline the head:
Using your black fineliner, trace over your pencil outline for the head. Instead of a single continuous line, use slightly broken, sketchy strokes to suggest softness or fur. -
Add fur details:
At the very top center of the head, draw a few small zig-zag spurts of hair to give the panda a little tuft. -
Outline the ears:
Trace the ears with your fineliner. I find a slightly wiggly line works better here than a perfect geometric arc to keep it organic. -
Outline the patches:
Go over the outlines of the large eye patches. Be careful to preserve the inner eye circles you sketched earlier. -
Fill the ears:
Switch to a thicker marker or brush pen to fill in the ears solid black. Leave some tiny white speckles or texture if you want a ‘crayon’ look, or fill it completely for a bold graphic style. -
Fill the eye patches:
Carefully color in the large kidney-bean shapes around the eyes with your black marker. Work slowly around the inner eye circle so you don’t accidentally color over it. -
Detail the inner eye:
Switch back to the fineliner. Draw the pupil inside the eye circle, leaving the tiny highlight white. Color the rest of the pupil black.
Step 3: Final Touches
-
Ink the nose and mouth:
Trace the nose and fill it black, leaving a tiny sliver of white at the top for a shine. Trace the ‘w’ mouth shape neatly. -
Erase pencil marks:
Wait until the ink is completely dry to avoid smudging, then gently erase all your underlying pencil sketches. -
Add rosy cheeks:
Using a pink colored pencil or a pastel highlighter, draw small circles on the cheeks just below the eye patches. Fill them in softly. -
Add texture to the cheeks:
Take your white gel pen and add tiny dots over the pink cheek circles to give them a glittery or textured effect. -
Add texture to the black areas:
If your black marker looks too flat, use the white gel pen to add tiny stippling dots inside the black ears and eye patches for a subtle ‘starry’ texture. -
Draw forehead details:
Finish up by adding a few tiny dots or dashes on the forehead specifically between the ears to mimic fur texture or freckles.
Add Accessories
Before you ink, sketch a pair of round glasses or a tiny party hat on your panda to customize it for different journal themes.
Now you have a sweet little companion on your page ready to brighten up your day
Panda Stack Totem
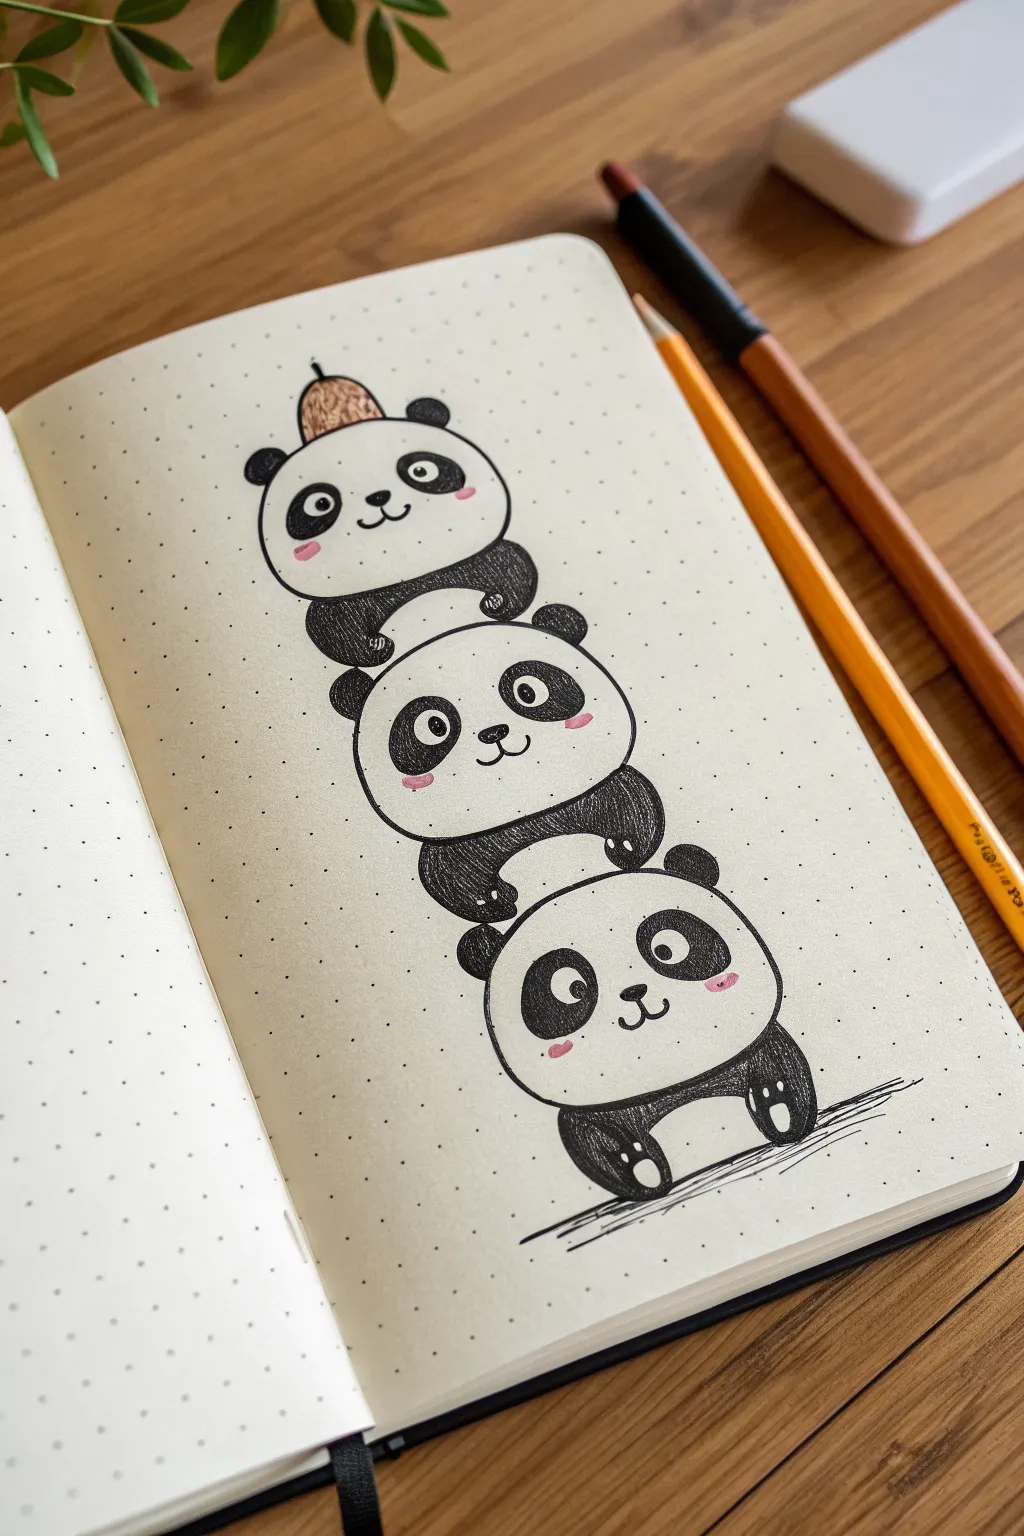
Create a whimsical tower of three chubby pandas balancing on top of each other in your bullet journal. This adorable doodle uses simple overlapping circles and bold black ink to make the characters pop off the dotted page.
Step-by-Step Guide
Materials
- Dotted grid notebook or sketchbook
- Pencil (HB or lighter)
- Eraser
- Fine liner pen (black, 0.3mm or 0.5mm)
- Black marker or brush pen (for filling)
- Orange or light brown colored pencil/marker
- Pink highlighter or colored pencil (for cheeks)
Step 1: Sketching the Base Shapes
-
Map out the positions:
Start near the bottom of your page. Lightly sketch a large oval lying horizontally. This will be the head of the bottom panda. -
Stack the second head:
Directly above the first oval, sketch a second similar oval. Ensure it overlaps slightly with the top edge of the bottom shape to create a connected look. -
Add the top tier:
Draw a third oval on top of the stack. This one can be slightly smaller or rounder than the bottom two. -
Sketch the bodies:
For the bottom panda, draw a rounded U-shape beneath the head for the lower body. For the middle and top pandas, suggest their bodies by drawing curved lines wrapped around the head below them. -
Add the limbs:
Sketch small oval paws. The bottom panda needs feet planted on the ground. The middle and top pandas need arms hugging the head beneath them, and little feet kicking out to the sides. -
Top it off:
Draw a small acorn shape balanced on the very top panda’s head for a cute accessory.
Step 2: Adding Facial Details
-
Outline the eye patches:
Inside each head oval, draw two large, tilted oval shapes for the signature panda eye patches. They should slant slightly downwards toward the nose. -
Place the eyes:
Inside the patches, draw small circles for the actual eyes. Place them near the top of the patch to make the pandas look like they are looking up or forward. -
Draw noses and mouths:
Between the eye patches, add a small rounded triangular nose and a simple ‘3’ shape or anchor shape for the smiling mouth. -
Add the ears:
Sketch two semi-circles on top of each head. Make them small and round.
Smudge Alert
Wait at least 5 minutes before erasing pencil lines. Ink on smooth dot grid paper often sits on top longer than standard paper and smears easily.
Step 3: Inking and Coloring
-
Outline the main shapes:
Take your fine liner pen and carefully trace over your pencil lines. I prefer to outline the overlapping parts first so I don’t accidentally draw through a paw or ear. -
Fill the dark areas:
Switch to a thicker marker or brush pen to fill in the ears, arms, legs, and eye patches. Leave a tiny white dot inside the eyes for a highlight. -
Refine the paws:
For the bottom panda’s feet, you can leave three tiny white circles inside the black fill to represent paw pads. -
Color the acorn:
Use your orange or light brown pencil to color the acorn hat on top. You can add a little texture to the top part of the acorn with small squiggly lines. -
Add blush:
Using a pink colored pencil or highlighter, add small horizontal ovals underneath the eyes of each panda for rosy cheeks. -
Ground the drawing:
Use your fine liner to sketch quick, horizontal scribbles underneath the bottom panda to create a shadow and ground the stack. -
Clean up:
Wait for the ink to be completely dry, then gently erase all remaining pencil sketch lines.
Expression Variation
Change the eye placement! Make one panda wink, or have the middle one look sideways to give each character a unique personality.
Now you have a charming panda totem pole to broaden your journal spread smile
Panda in a Leafy Wreath
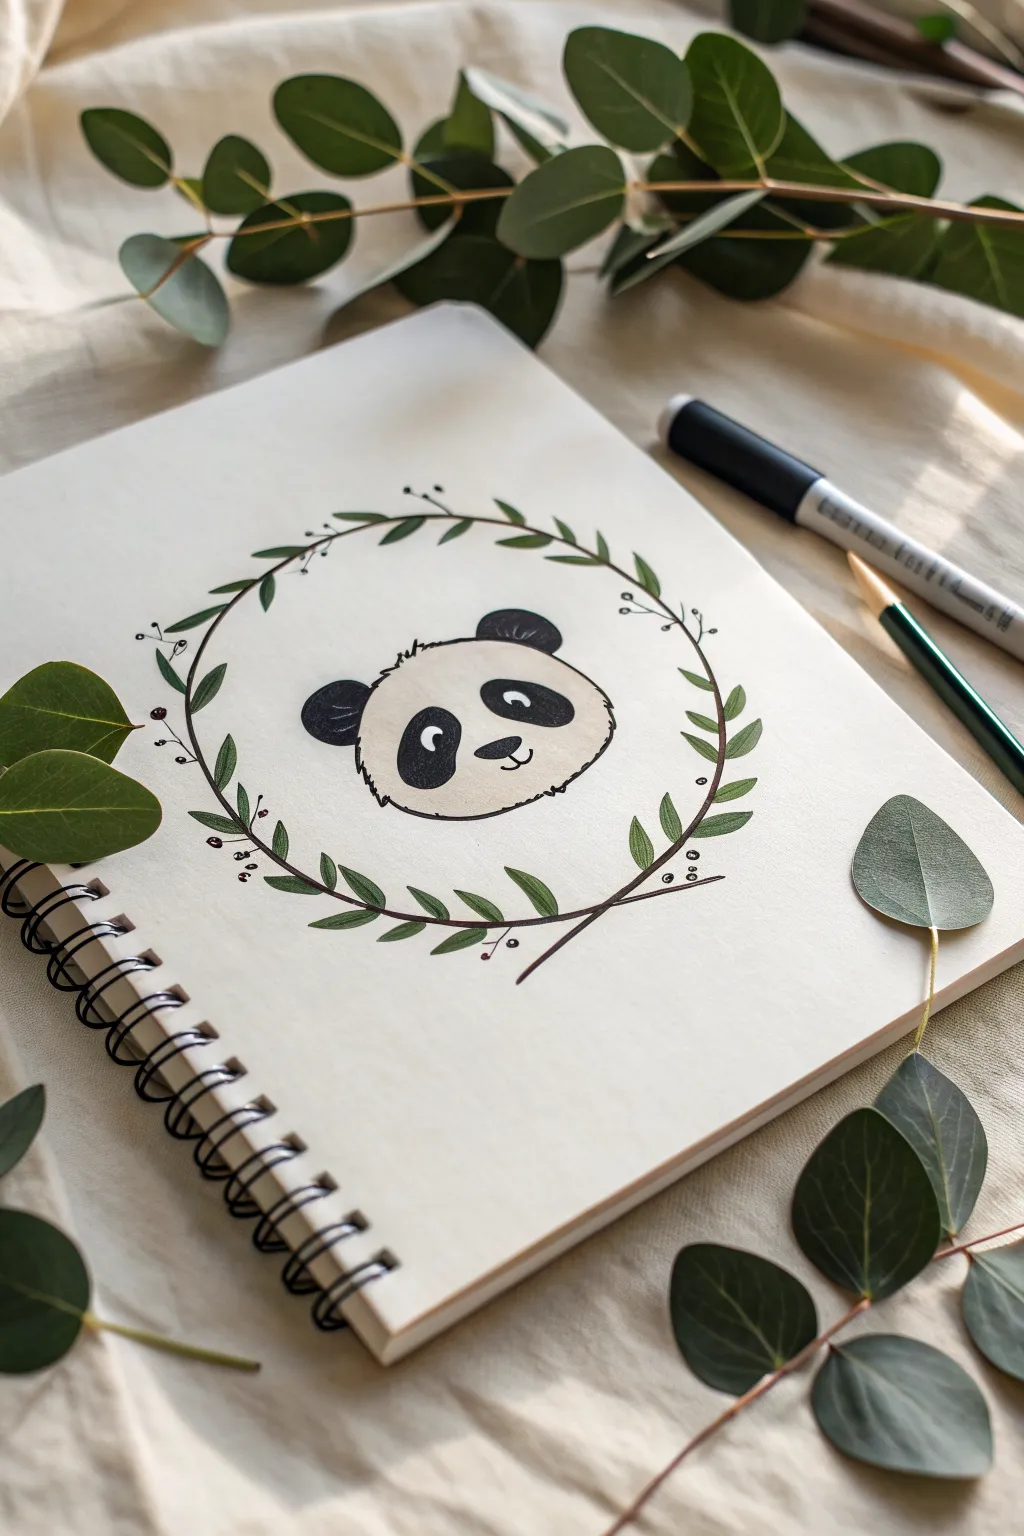
This charming sketch frames a sweet panda face with a delicate, nature-inspired border. The contrast between the bold black marker of the panda and the softer, earthy green of the leaves creates a balanced and calming composition perfect for a sketchbook page.
How-To Guide
Materials
- Sketchbook with quality drawing paper
- HB or 2B pencil for initial sketching
- Soft eraser
- Black felt-tip pen or fine liner (0.5mm)
- Thicker black marker (for filling in)
- Green colored pencil (olive or forest green)
- Brown fine liner pen (0.3mm or 0.5mm)
Step 1: Sketching the Composition
-
Lightly draw a circle:
Start by drawing a very faint circle in the center of your page using your pencil. This will serve as the guide for your wreath, though the leaves won’t follow it perfectly. -
Outline the panda head:
In the middle of your circle guide, sketch a soft, wide oval shape for the panda’s head. Imagine a slightly flattened marshmallow to get that cute, chubby look. -
Placement of ears:
Add two semi-circles on top of the head for the ears. They should be spaced apart quite widely to leave room for the face details later. -
Face guidelines:
Lightly sketch the large, kidney-bean shapes for the eye patches. Ensure they angle slightly downward towards the nose area. -
Refining the nose and mouth:
Place a small triangular nose between the eye patches and draw a simple ‘w’ shape for the mouth just below it.
Step 2: Inking the Panda
-
Define the head shape:
Using your fine black pen, ink the outline of the head. Instead of a solid smooth line, use short, broken strokes to simulate a furry texture, especially around the cheeks. -
Fill the ears:
Outline the ears with a solid line, then switch to your thicker black marker to fill them in completely black. -
Inking the eye patches:
Outline the eye patches first. Inside each patch, draw a small white circle for the highlight, then fill the rest of the patch with solid black. -
Adding the eyes:
Inside the black patches, if you left a large enough white area, draw the actual eye pupil looking upward or sideways for a playful expression. If you filled the patch solid, you can just leave the white highlights as the ‘eyes’. -
Nose and mouth details:
Ink the nose in black, leaving a tiny sliver of white for a highlight if possible. Trace over the mouth line carefully. -
Erase pencil marks:
Once the ink is completely dry—I like to give it minute just to be safe—gently erase the pencil guidelines from the face.
Natural Imperfection
Don’t try to make the wreath circle perfectly round. Wobbly lines and leaves pointing in different directions make the foliage look more organic and realistic.
Step 3: Creating the Wreath
-
Drawing the main branch:
Take your brown fine liner. Using your initial pencil circle as a guide, draw two long, curving branches that meet at the bottom and curve up around the panda. They don’t need to close perfectly at the top. -
Branch variation:
Let the brown lines cross over each other slightly at the bottom intersection to make it look like real twigs. -
Adding leaf spines:
With the brown pen, draw tiny stems branching off the main circle ring. Alternate them left and right along the curve. -
Drawing the leaves:
Pick up your green colored pencil. Draw simple, pointed oval leaf shapes attached to the little brown stems you just created. -
Filling the leaves:
Shade inside the leaves with the green pencil. Use medium pressure for an earthy, textured look rather than a completely solid block of color. -
Adding berries:
Switch back to the brown fine liner or a dark red pen if you have one. Draw tiny clusters of three small circles at random intervals along the wreath for berries. -
Final leaf details:
Go back over a few leaves with the green pencil, pressing harder near the base of the leaf to create a slight gradient effect. -
Final clean up:
Erase the original large pencil circle guide, leaving only your finished wreath and panda.
Seasonal Twist
Change the wreath for the seasons! Use orange leaves for autumn, bright flowers for spring, or add holly berries and pine needles for a winter theme.
Now you have a sweet panda portrait nestled in nature to brighten up your sketchbook
Panda With a Tiny Butterfly Friend
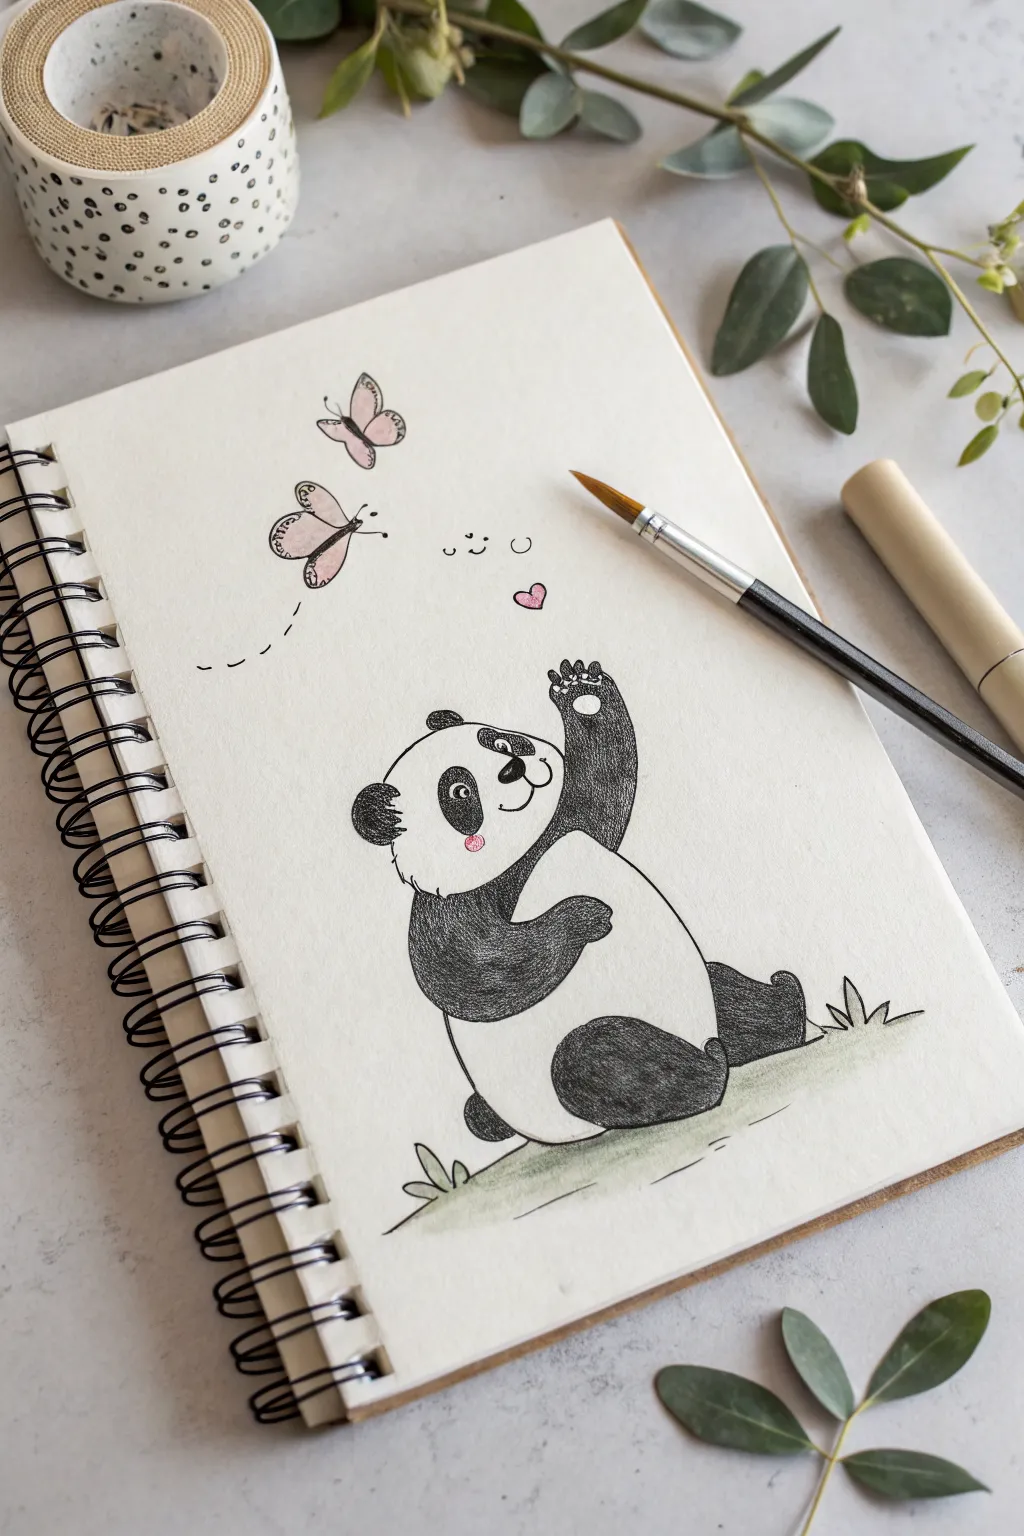
This sweet illustration captures a joyful moment between a playful panda and two fluttering butterflies. The drawing combines crisp ink lines with soft, textured shading to bring the friendly bear to life on the page.
Detailed Instructions
Materials
- Spiral-bound sketchbook or drawing paper
- Pencil (HB or 2B for sketching)
- Black fine liner pen (0.3mm or 0.5mm)
- Black colored pencil or graphite stick for shading
- Pink colored pencil or light watercolor wash
- Eraser
Step 1: Sketching the Panda
-
Basic shapes:
Start lightly with your pencil. Draw a large oval for the panda’s body sitting on the ground, and a slightly flattened circle overlapping the top for the head. -
Add limbs:
Sketch a rounded shape for the arm reaching upwards, as if waving. Draw a smaller oval for the other arm resting on the belly. Add two rounded feet sticking out at the bottom to show the sitting posture. -
Face placement:
Lightly mark a cross on the face to help position the features. Place two small circles for the eyes and a small triangular nose just below the center line. -
Ears and details:
Add two semi-circles on top of the head for ears. Sketch the eye patches around the eyes—these are shaped a bit like kidney beans tilting away from the nose.
Texturing Tip
Don’t press too hard when shading the black fur. Layering light scribbles creates a much fluffier look than one heavy, solid layer of darkness.
Step 2: Drawing the Butterflies
-
Positioning:
Toward the upper left of the page, pencil in the shapes of two butterflies. One should be slightly higher than the other. -
Wing shapes:
Draw simple, rounded wings. Make the top wings larger and the bottom wings slightly smaller and teardrop-shaped. -
Flight path:
Draw a faint dashed line curving from the lower butterfly toward the left edge of the paper to suggest movement.
Step 3: Inking and Outline
-
Trace the drawing:
Take your black fine liner and carefully go over your pencil lines. Use jagged, short strokes for the panda’s fur to make it look fluffy, especially around the cheeks and tummy. -
Refine the face:
Ink the nose and the smile. Draw the pupils inside the eyes, leaving a tiny white sparkle in each for a lively expression. -
Clean up:
Once the ink is completely dry, erase all the underlying pencil marks to leave a clean, crisp outline.
Ink Smudges?
If you are right-handed, work from left to right when inking (and vice versa) to avoid dragging your hand through wet ink before it dries.
Step 4: Shading and Color
-
Dark fur texture:
Using a black colored pencil or a softer graphite pencil, fill in the ears, eye patches, arms, and legs. Instead of coloring solidly, use small, dense circular scribbles to mimic the texture of thick fur. -
Deepen the blacks:
I like to go over the darkest areas, like the center of the belly band and the feet, with a second layer of texture to create depth. -
Soft touches:
With a pink pencil or a very light dab of watercolor, add rosy cheeks to the panda and color the butterfly wings. Add a tiny floating heart near the panda’s raised hand. -
Grounding the scene:
Lightly sketch a few tufts of grass near the panda’s bottom. Add a very faint wash of green or grey shadow underneath to ground the figure so he isn’t floating in space. -
Whiskers and final details:
Add three tiny dots on each cheek for whiskers. Finally, ink the antennae on the butterflies to complete the interaction.
Now you have a charming scene of friendship ready to brighten up your sketchbook


Have a question or want to share your own experience? I'd love to hear from you in the comments below!