
Faces can feel intimidating, but they get so much easier when you treat them like a few simple shapes and a couple of clear choices. Here are my favorite easy face drawing ideas to help you sketch something that looks confident fast—no perfection required.
Front View Face With Simple Guidelines
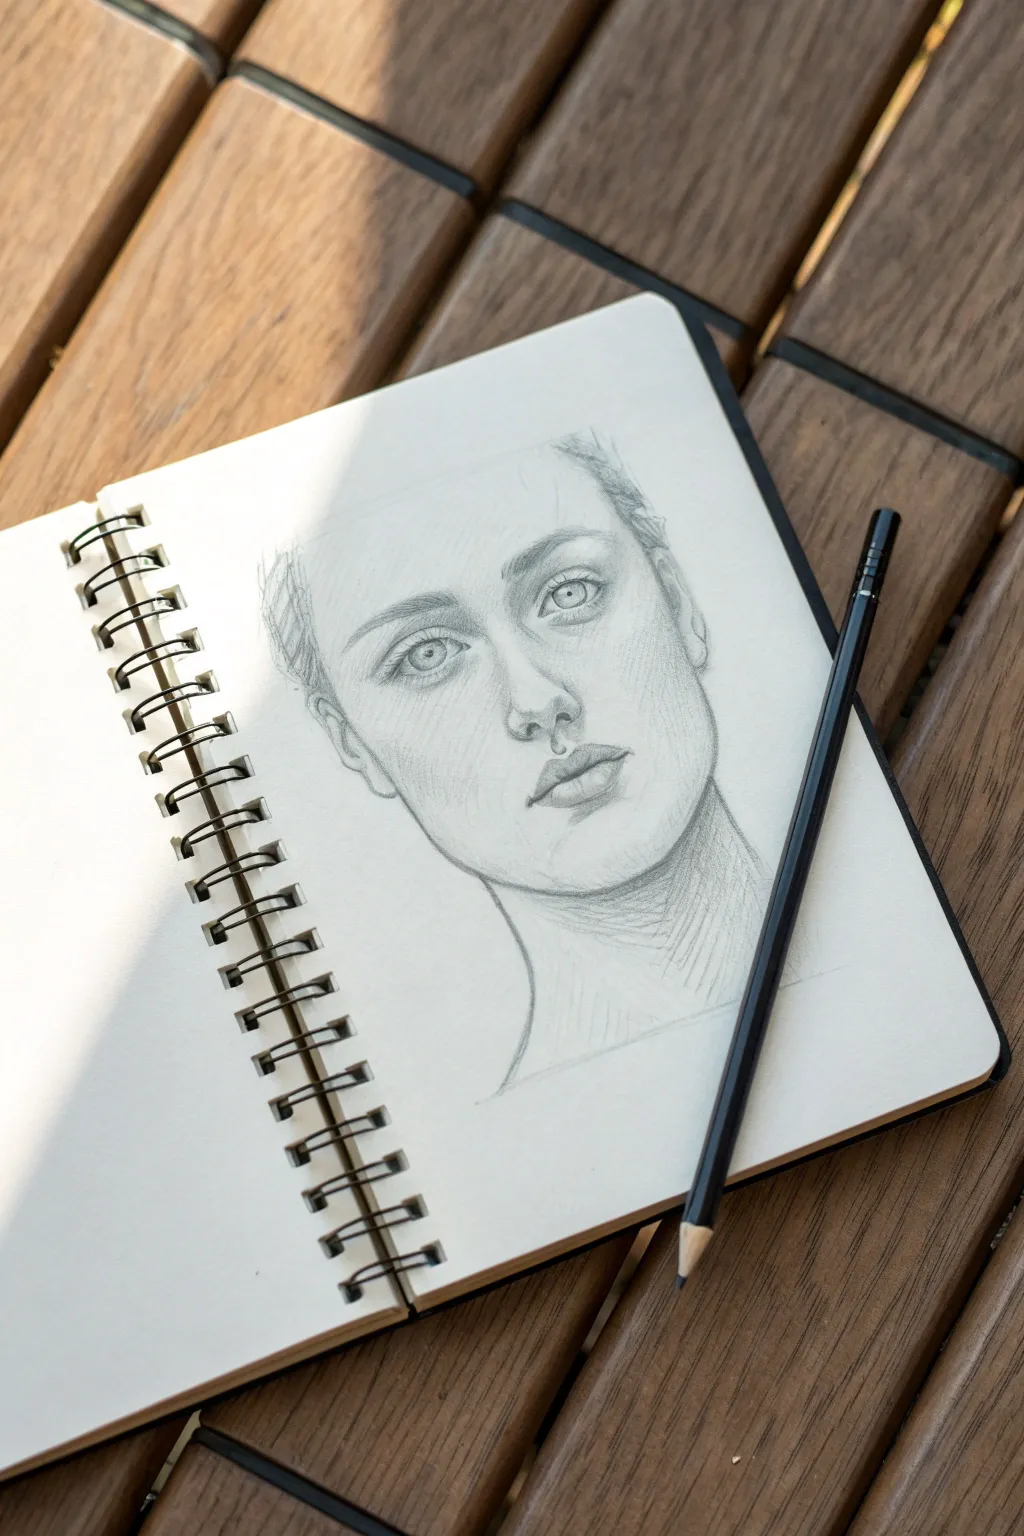
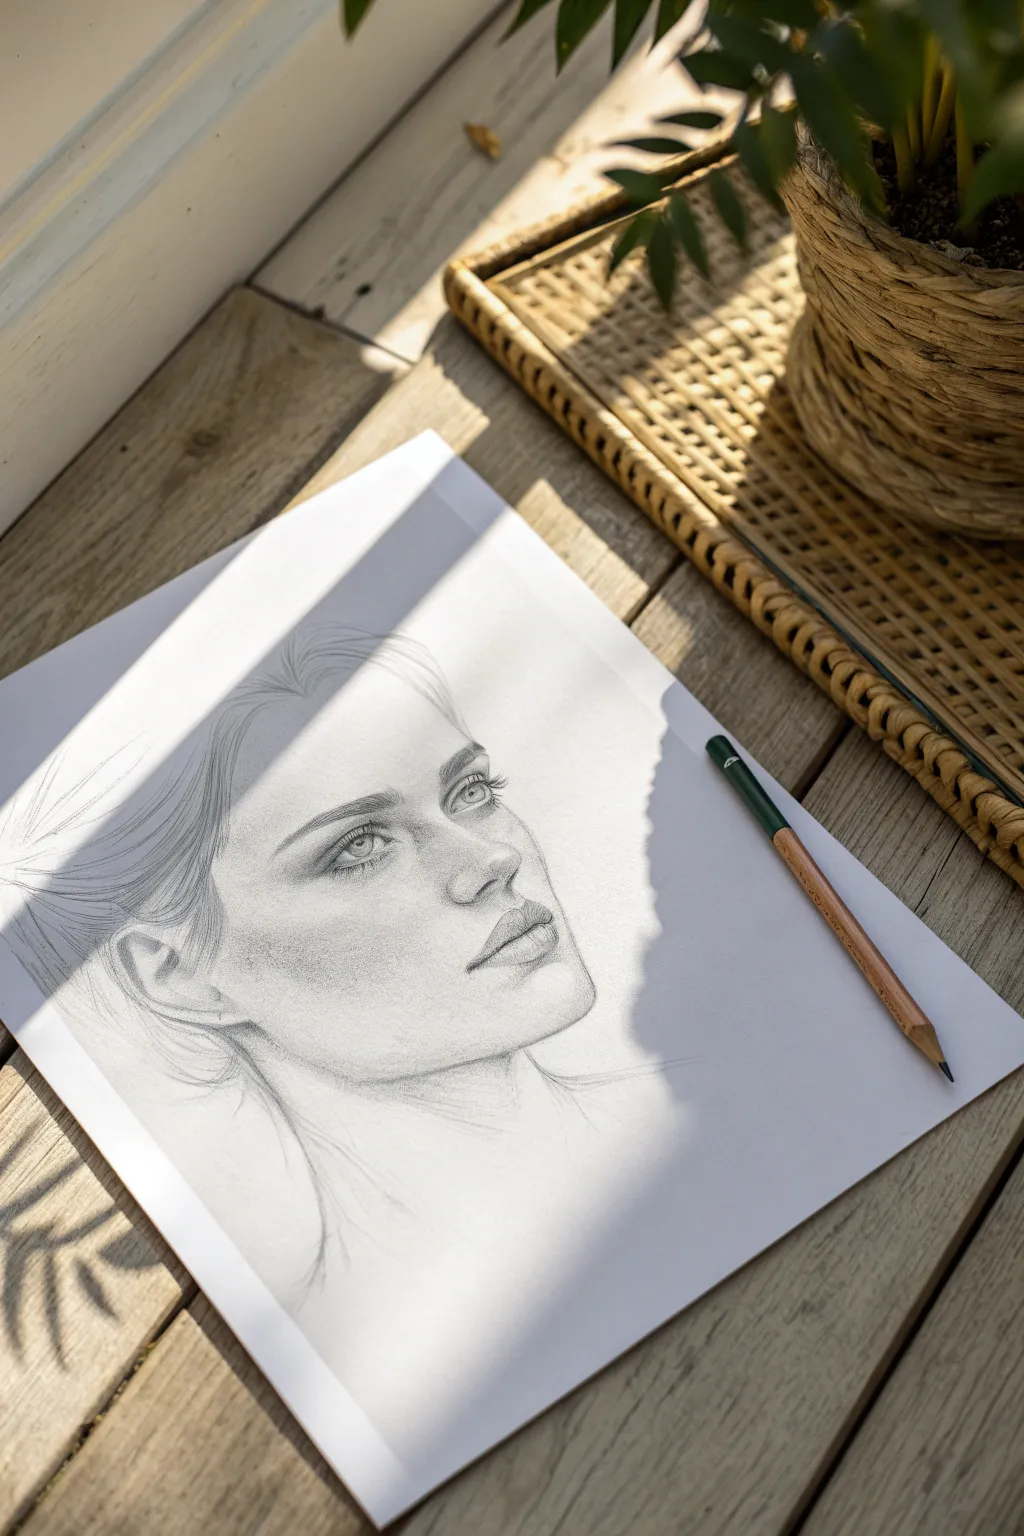
Master the fundamentals of facial proportions with this clean, pencil-drawn study that captures a serene expression. Using soft shading and deliberate line work, you will build a realistic front-facing portrait that balances structure with gentle details.
Detailed Instructions
Materials
- Sketchbook with smooth, medium-weight paper
- HB graphite pencil (for initial sketching)
- 2B or 4B graphite pencil (for shading and details)
- Kneaded eraser
- Pencil sharpener
- Tissue or blending stump (optional)
Step 1: Establishing Proportions
-
Draw the main oval:
Begin with a light, loose oval shape in the center of your page to represent the skull. Keep the top slightly wider than the bottom to mimic the natural jawline centering. -
Add a vertical axis:
Drawing lightly with your HB pencil, divide the face vertically down the middle. This centerline helps ensure symmetry for the nose and mouth placement. -
Mark the horizontal guides:
Sketch a horizontal line halfway down the oval for the eyes. Add another line halfway between the eye line and the chin for the nose, and one more halfway between the nose line and chin for the mouth. -
Outline the jaw and neck:
Refine the lower half of the oval into a more structured jawline that angles gently toward the chin. Sweep two curved lines down from the jaw area to suggest a slender neck.
Pro Tip: Eye Spacing
To check your proportions, visualize a third ‘invisible’ eye perfectly fitting between the two real eyes. If the gap is too wide or narrow, the face will look off.
Step 2: Features and Structure
-
Place the eyes:
On the central horizontal line, sketch the basic almond shapes of the eyes. Leave a space between them roughly equal to the width of one eye. -
Define the nose bridge:
Lightly indicate the bridge of the nose connecting down from the inner brow area. At the nose guideline, sketch the central ball of the nose and two subtle curves for the nostrils. -
Sketch the lips:
Draw the parting line of the mouth first, giving it a slight dip in the center (the ‘Cupid’s bow’). Add the top lip shape and a fuller bottom lip curve underneath. -
Indicate the ears:
Mark the ears on the sides of the head. The tops should generally align with the eyebrows, and the bottoms with the base of the nose. -
Draft the hairline:
Sketch a soft hairline well above the brow, pulling the hair back away from the face to keep the focus on the features.
Level Up: Cross-Hatching
Instead of smooth blending, use deliberate cross-hatching (intersecting lines) for shadows. It gives the drawing a classic, academic sketchbook feel.
Step 3: Shading and Refinement
-
Detail the eyes:
Switch to a slightly sharper pencil. Draw the circular iris and pupil within each eye, leaving a tiny white spot for the catchlight to bring them to life. -
Darken the lashes and brows:
Thicken the upper lash line and add individual distinct lashes. Fill in the eyebrows with short, directional strokes that mimic hair growth. -
Add nose shading:
Instead of outlining the nose, use soft shading on the sides of the bridge and under the tip to define its shape. This prevents the nose from looking flat or cartoonish. -
Contour the cheeks:
Apply very light diagonal hatching strokes along the cheekbones and the side of the face. I find clear diagonal lines here add artistic texture while defining the bone structure. -
Shade the lips:
Darken the corners of the mouth and the line between the lips. Shade the upper lip slightly darker than the lower lip to simulate overhead lighting. -
Define the neck and jaw shadow:
Add a cast shadow under the jawline onto the neck. Use loose, sketchy hatching lines here to suggest the texture of skin stretching over the neck muscles. -
Draw hair texture:
Use quick, confident strokes to suggest hair pulled back at the temples. You don’t need to draw every strand; just suggest the direction and volume. -
Final contrast check:
Deepen the darkest areas—pupils, nostrils, corners of the mouth—to make the portrait pop. Use your kneaded eraser to lift graphite from high points like the nose tip and cheekbones for highlights.
Take a moment to step back and appreciate how simple guidelines transformed into a complex human face


Classic 3/4 View Face Sketch
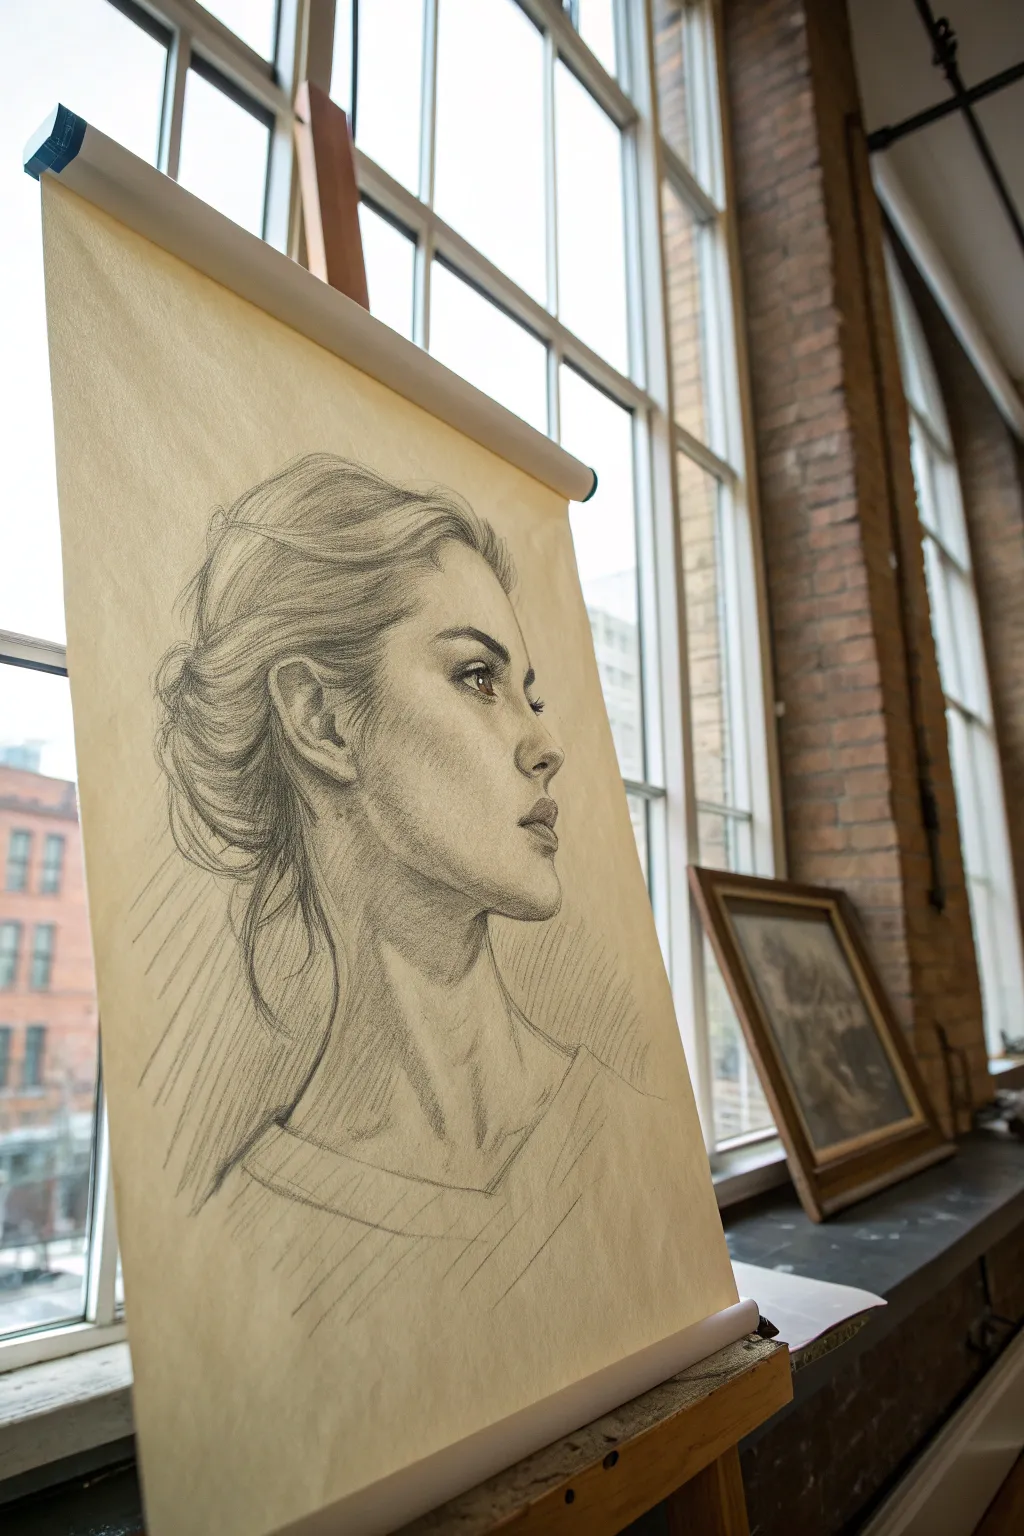
Capture the elegance of traditional portraiture with this detailed pencil study on toned paper. By working on a warm, tan surface, focusing on subtle shading, and using classical structural techniques, you’ll create a sophisticated profile that feels timeless and expressive.
Step-by-Step Guide
Materials
- Tan or beige drawing paper (large sheet)
- Hard graphite pencil (HB or H) for layout
- Soft graphite pencils (2B, 4B, 6B)
- Kneaded eraser
- Blending stump or tortillon
- Drawing board or easel
- Masking tape
Step 1: Structural Layout
-
Establish the Head Shape:
Begin with a hard pencil (HB) using very light pressure. Draw a slightly tilted oval for the cranium and attach a jawline that sweeps down and forward. This creates the basic mass of the head before you worry about features. -
Define the Center Line:
Sketch a curved vertical line down the front of the face. Since this is a profile view slightly turned away, this line follows the contour of the forehead, nose, lips, and chin. This is crucial for aligning the features correctly. -
Mark Feature Placements:
Lightly mark horizontal lines across your center line to indicate where drawing elements will go. Place the brow line about halfway down the head, the nose bottom halfway between brow and chin, and the mouth about one-third down from the nose. -
Sketch the Neck and Shoulders:
Extend two sweeping lines downward for the neck and suggest the slope of the shoulders. Keep these lines loose and gestural to ensure the head doesn’t look like it’s floating in space.
Step 2: Developing Features
-
Draft the Eye and Brow:
Sketch the almond shape of the eye, ensuring the pupil is looking forward. Because of the angle, the far eye isn’t visible, but the bridge of the nose should obstruct our view slightly. Thicken the brow line with short, directional strokes. -
Refine the Nose Profile:
Carve out the silhouette of the nose. Pay attention to the subtle bump on the bridge and the curve of the nostril wing. The nostril itself should be a dark accent, but keep the edges soft. -
Shape the Mouth and Chin:
Draw the lips, emphasizing the m-shape of the upper lip. The lower lip should be fuller and slightly recessed compared to the upper lip. Define the chin with a firm curve that leads back into the jawline. -
Construct the Ear:
Place the ear between the eye line and the nose line. Draw the outer C-shape first, then add the inner folds (the helix and antihelix) with organic, curving lines.
Fixing Flat Features
If the face looks flat, your values are likely too similar. Don’t be afraid to press harder with the 6B pencil in the deepest shadows (under jaw, nostril) to push the mid-tones forward
Step 3: Shading and Form
-
Apply Base Values:
Switch to a softer pencil (2B). Lightly shade the side of the face that turns away from the light source—typically the side of the cheek, under the jaw, and the neck. Use broad, parallel strokes (hatching). -
Deepen Shadows:
Using a 4B pencil, darken the area under the chin, the hollow of the ear, and the corner of the eye. I find that deepening the shadow directly under the nose helps pop the form forward immediately. -
Soften Transitions:
Use a blending stump to gently smudge the graphite on the cheek and neck. This creates the smooth skin texture typical of classical portraits. Be careful not to over-blend; leave some pencil texture visible. -
Sculpt the Neck Structure:
Add shading around the sternocleidomastoid muscle (the large muscle running from behind the ear to the collarbone). This anatomical detail adds realism and strength to the pose.
Chalk Highlights
Since you are working on tanned paper, use a white charcoal pencil or white pastel to add distinct highlights to the tip of the nose, the lower lip, and the top of the cheekbone
Step 4: Hair and Final Touches
-
Map Hair Flow:
Draw long, sweeping lines to indicate the direction of the hair pulled back into a bun. Don’t draw individual strands yet; focus on large clumps or ribbons of hair. -
Add Darkest Accents:
Use your 6B pencil to darken the deepest crevices of the hair bun and the nape of the neck. This high contrast makes the lighter paper tone act as a highlight. -
Refine Hair Strands:
Add loose, wispy strands escaping the bun near the ear and neck. These flyaways add movement and keep the drawing from looking stiff. -
Suggest Clothing:
Use quick, diagonal hatching to suggest the neckline of a shirt or sweater. Keep this very loose and sketchy to ensure the focus remains on the face. -
Final Contrast Check:
Step back and squint at your drawing. Darken the pupil, the eyelash line, and the nostril one last time to anchor the focal points.
Step back and admire how the warm paper tone brings life to your classical portrait study


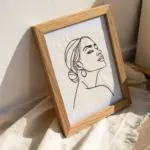
Easy Profile Face With One Flowing Line
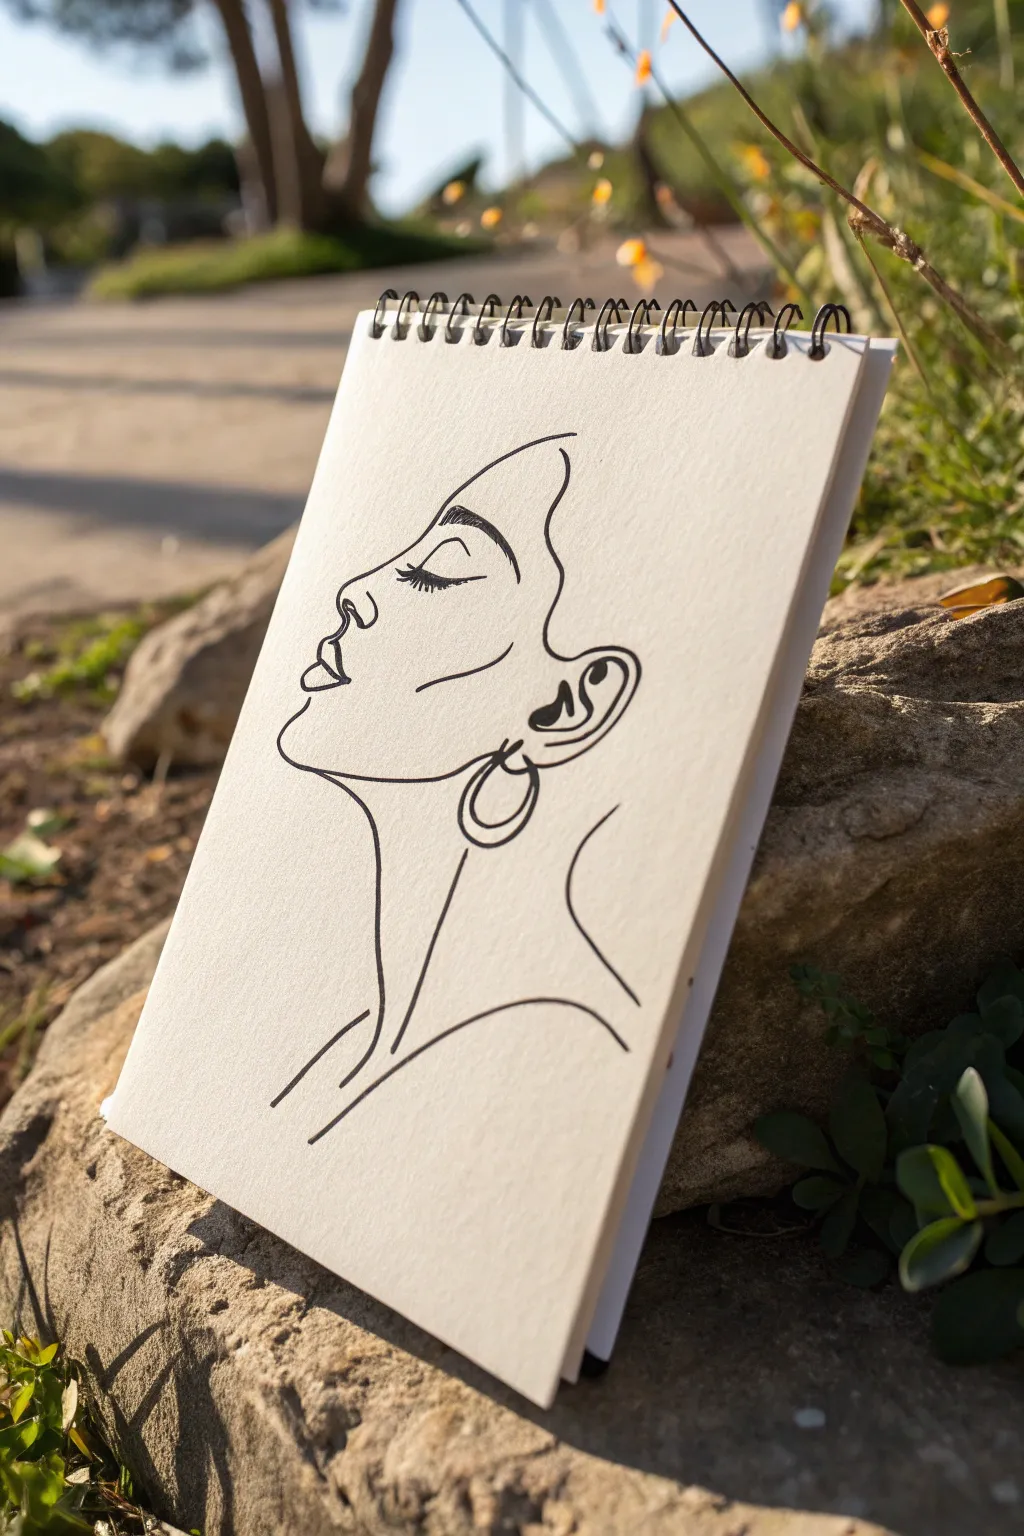
Capture the elegance of a female profile using fluid, confident strokes in this minimalist sketching project. The result is a sophisticated and modern piece of art that relies on simplicity and negative space to convey emotion.
How-To Guide
Materials
- Spiral-bound sketchbook with medium-tooth paper
- Pencil (HB or 2B for sketching)
- Kneaded eraser
- Fine liner pen (0.5mm or 0.8mm ink pen)
- Ruler (optional for placement)
Step 1: Drafting the Contour
-
Establish the forehead:
Begin with a faint pencil sketch to map out the placement. Start the actual line work near the top left of the page, drawing a gentle curve downward to form the forehead. -
Shape the nose:
Continue the line from the forehead, dipping inward slightly for the bridge of the nose, then curving out to create a small, upturned nose tip. -
Define the upper lip:
From the base of the nose, draw a short, sharp curve inward and then outward to create the pout of the upper lip. -
Complete the mouth:
mirroring the curve of the upper lip, draw the fuller lower lip immediately below it. Leave a tiny gap between the lips if you want a more relaxed expression. -
Carve the chin and jaw:
From the lower lip, sweep the line inward to form a soft chin, then continue that line backward and upward to define the jawline, stopping before you reach where the ear would be.
Keep it Flowing
Try not to lift your pen often. Long, continuous strokes look more confident and elegant than short, scratchy sketching lines.
Step 2: Adding Features and Details
-
Position the closed eye:
Locate the eye level slightly below the bridge of the nose. Draw a simple, arched curve to represent a closed eyelid. -
Thicken the lashes:
Go over the lash line again with your pen, adding tiny vertical strokes or filling it in to create the look of thick, dark eyelashes. -
Arch the eyebrow:
Above the eye, draw a bold, arched eyebrow. Outline the shape first, then fill it in with small, directional strokes to mimic hair texture. -
Draw the ear:
Place the ear at the end of the jawline interact. Draw a C-shape with an inner swirl to suggest the cartilage structure. -
Add the hoop earring:
Attached to the earlobe, draw two concentric circles to form a simple hoop earring. -
Refine the cheekbone:
Add a subtle, floating curved line below the eye to suggest the cheekbone structure without connecting it to the main profile outline.
Add a Splash
Once the ink is dry, add a single abstract shape of watercolor (like a soft pink or blue circle) behind the profile for a pop of color.
Step 3: Finishing the Silhouette
-
Outline the hairline:
Start back at the top forehead line. Draw a wavy, abstract line moving backward and down to suggest hair tucked behind the ear. -
Extend the neck:
From the bottom of the chin, draw a long, elegant curve downward for the front of the neck. -
Define the back of the neck:
Draw a complementary curve starting from behind the ear/hairline area, sweeping down toward the shoulder. -
Suggest the collarbone:
At the base of the neck lines, add loose, sweeping strokes that hint at the collarbone and shoulder without closing the shape entirely. -
Inking the final lines:
Once satisfied with the sketch, retrace your preliminary pencil marks with the fine liner pen. Use a steady hand to create smooth, consistent lines. -
Vary line weight:
I find that going back over key curves—like the jawline and neck—to slightly thicken them adds lovely dimension to a simple drawing. -
Erase guidelines:
Wait for the ink to dry completely to avoid smudging. Then, gently rub the kneaded eraser over the entire drawing to lift any visible pencil marks.
Now you have a chic piece of minimalist art ready to display or gift to a friend


Cute Cartoon Face With Big Eyes
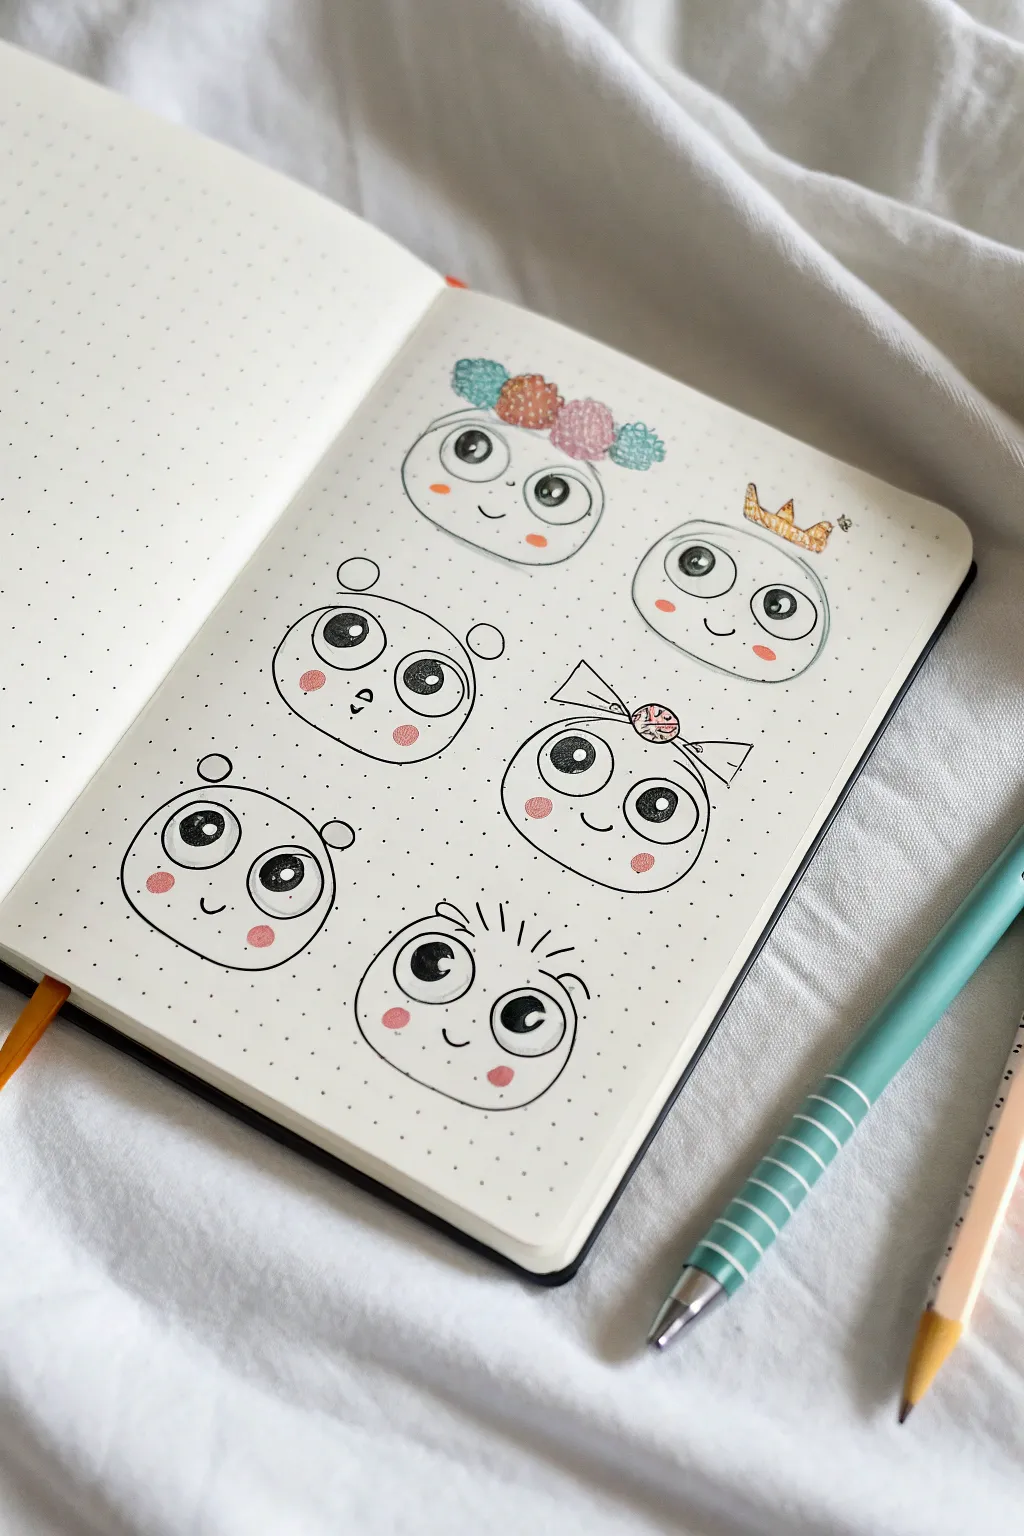
Brighten up your sketchbook or bullet journal with this set of six adorably expressive cartoon faces. These simple, round characters use minimal lines and big, shiny eyes to convey a ton of personality.
Detailed Instructions
Materials
- Dotted bullet journal or sketchbook page
- Light pencil (HB or H)
- Eraser
- Black fineliner pen (0.3 to 0.5mm)
- Black brush pen or thicker marker (for pupils)
- Colored pencils or fine markers (pink, blue, yellow, teal)
- White gel pen (optional for highlights)
Step 1: Planning the Layout
-
Sketch guides:
Begin by lightly sketching six evenly spaced circles on your dotted paper using pencil. Arranging them in two columns of three keeps the page neat. -
Refine the shapes:
Soften the bottom of each circle slightly to make them look more like squishy buns or marshmallows rather than perfect geometric spheres.
Step 2: Drawing the Base Faces
-
Ink the outlines:
Using your black fineliner, trace over your pencil outlines. Keep your hand loose; slight wobbles actually make the characters look cuter and more organic. -
Add eye circles:
Inside each face, draw two large circles for the eyes. Position them roughly in the center of the face, leaving enough space between them for a tiny mouth. -
Draw the pupils:
Inside each large eye circle, draw a smaller circle for the pupil, looking slightly toward the upper right or left. -
Add shine:
Within those pupils, draw a tiny bubble or two near the top edges to represent the light reflection. This ‘sparkle’ is crucial for the cute effect. -
Fill the eyes:
Switch to a thicker marker or brush pen to fill in the pupils black, being very careful to leave those tiny white reflection bubbles completely empty. -
Add mouths:
On the first face (top left), draw a simple upward curved line for a smile centered between the eyes. -
Vary the expressions:
For the other faces, try different tiny mouths: a small ‘o’ shape, a crooked smile, or a wide grin to give each one a unique personality.
Ink Smearing?
If your black ink smears when you erase pencil lines or add color, switch to a waterproof archival ink pen (like a Micron) and wait at least 15 minutes before erasing.
Step 3: Adding Accessories
-
Flower crown:
On the top-left character, sketch three small, puffy shapes on top of the head for a flower crown. -
Tiny crown:
For the top-right character, draw a small, three-pointed crown tilted slightly to the side. -
Bear ears:
On the middle-left character, add two small semi-circles on the top corners of the head to mimic bear ears. -
Big bow:
Give the middle-right character a large bow. Draw a circle in the center of the forehead line, then two triangles flaring out to the sides. -
Panda ears:
For the bottom-left doodle, draw slightly larger semi-circles for ears. Inside the face, draw faint outlines around the eyes to suggest panda markings. -
Messy hair:
On the final bottom-right character, flick your pen upward in short, quick strokes along the top curve to create spiky hair. -
Erase pencil:
Once the ink is completely dry, gently erase all your underlying pencil sketches to clean up the page.
Customize It
Turn these into a mood tracker by leaving the mouths blank until the end of the day, drawing the expression that matches how you felt.
Step 4: Coloring and Details
-
Rosy cheeks:
Using a pink colored pencil, gently shade small oval blushes underneath the eyes of every character. Press lightly for a soft, airbrushed look. -
Color expectations:
Color in the accessories. Use blue and pink for the flower crown, yellow for the royal crown, and add a little pink pattern to the hair bow. -
Final touches:
Add tiny details like eyebrows or eyelashes with your thinnest pen. Floating shapes like small circles or a tiny bee near the crown add extra charm.
You now have a delightful page of expressions ready to greet you every time you open your journal.

PENCIL GUIDE
Understanding Pencil Grades from H to B
From first sketch to finished drawing — learn pencil grades, line control, and shading techniques.
Explore the Full Guide
Minimal Line Art Face in One Stroke
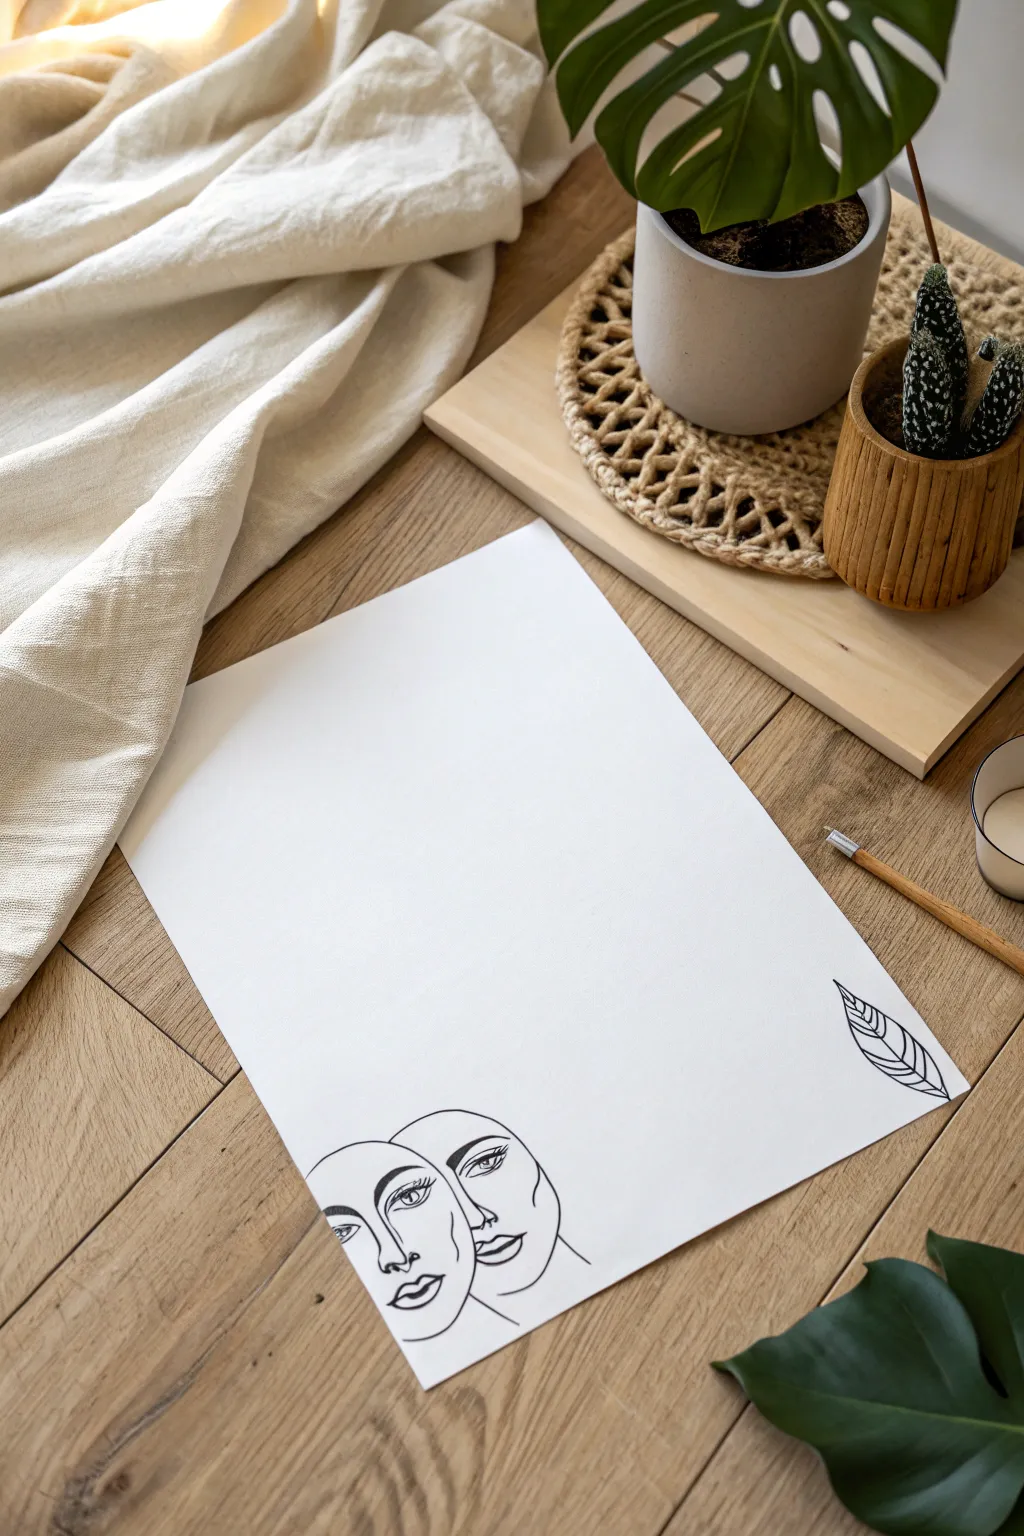
Capture the beauty of connection with this elegant continuous-style line drawing featuring two overlapping faces. The striking contrast of bold black ink against crisp white paper creates a modern, sophisticated piece perfect for framing.
Step-by-Step Tutorial
Materials
- High-quality white drawing paper (heavyweight cardstock or mixed media paper recommended)
- Black fine liner pen (0.3mm or 0.5mm)
- Black brush pen or thicker marker (for bold lines)
- Pencil (HB or H)
- Soft twist-up eraser
- Ruler (optional, for placement)
Step 1: Planning and Sketching
-
Paper Preparation:
Begin by positioning your paper vertically on a flat, clean surface. Ensure you have ample lighting to see your pencil lines clearly. -
Rough Layout:
Visualize the composition first. The dual faces will anchor the bottom left corner, while a small leaf motif will balance the design in the bottom right corner. -
First Face Outline:
Using your pencil very lightly, sketch an oval shape for the first face on the far left. It should be slightly tilted, looking towards the right. -
Second Face Outline:
Sketch the second face overlapping the first one slightly. This face should be positioned just behind and slightly above the first, creating a sense of intimacy. -
Mapping Facial Features:
Draw horizontal guidelines lightly across both ovals to align the eyes, noses, and mouths. This ensures the proportions feel realistic despite the abstract style. -
Defining the Eyes:
Sketch the almond shapes of the eyes. For the front face, the eye is fully visible. For the second face, align the eye just slightly higher and to the right. -
Nose and Mouth Placement:
Mark the curvature of the noses and the fullness of the lips using simple, fluid lines. Keep these sketches loose; you don’t need excessive detail. -
Leaf Accent:
In the bottom right corner, lightly sketch a simple leaf shape pointing upwards towards the center, mirroring the angle of the faces.
Smudge Prevention
Place a scrap piece of paper under your drawing hand while you ink. This protects the pristine white paper from oils on your skin and prevents smearing wet ink.
Step 2: Inking and Refining
-
Tracing the Eyes:
Switch to your fine liner pen. Carefully ink the eyes first, adding a small circle for the iris and darkening the pupil, leaving a tiny white speck for a highlight. -
Adding Lashes:
Use quick, short flicks with the fine liner to create the eyelashes. Keep them clustered at the outer corners for a feminine touch. -
Brows and Bold Lines:
Using a slightly thicker pen or varying your pressure, draw the eyebrows. I emphasize the arch to give the faces an expressive look. -
The Contours:
Begin tracing the outer contours of the faces. Instead of closing every shape, leave gaps near the jawlines or hair to maintain that airy, minimal aesthetic. -
Nose and Lips:
Ink the noses using a single line that suggests the bridge and nostril. Outline the lips carefully, emphasizing the cupids bow. -
Connecting the Faces:
Where the two faces overlap, choose which lines take precedence. Allow the profile of the front face to cut clearly across the cheek of the back face. -
Inking the Leaf:
Go over your leaf sketch in the opposite corner with steady strokes, adding a central vein and diagonal lines for texture. -
Weight Variation:
Look over your drawing. Go back and thicken specific curves—like the underside of the jaw or the side of the nose—to add depth and visual interest. -
Cleaning Up:
Wait at least 5-10 minutes to ensure the ink is completely dry. Gently erase all underlying pencil marks with a soft eraser to reveal the clean design.
Creative Twist
Instead of black ink, try using a deep navy or terracotta fine liner. You can also add a wash of watercolor inside the overlapping face area for a pop of color.
Now you have a serene piece of modern art ready to display on your desk or wall
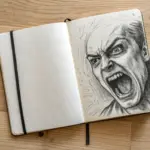
Half Face Portrait Split Down the Middle
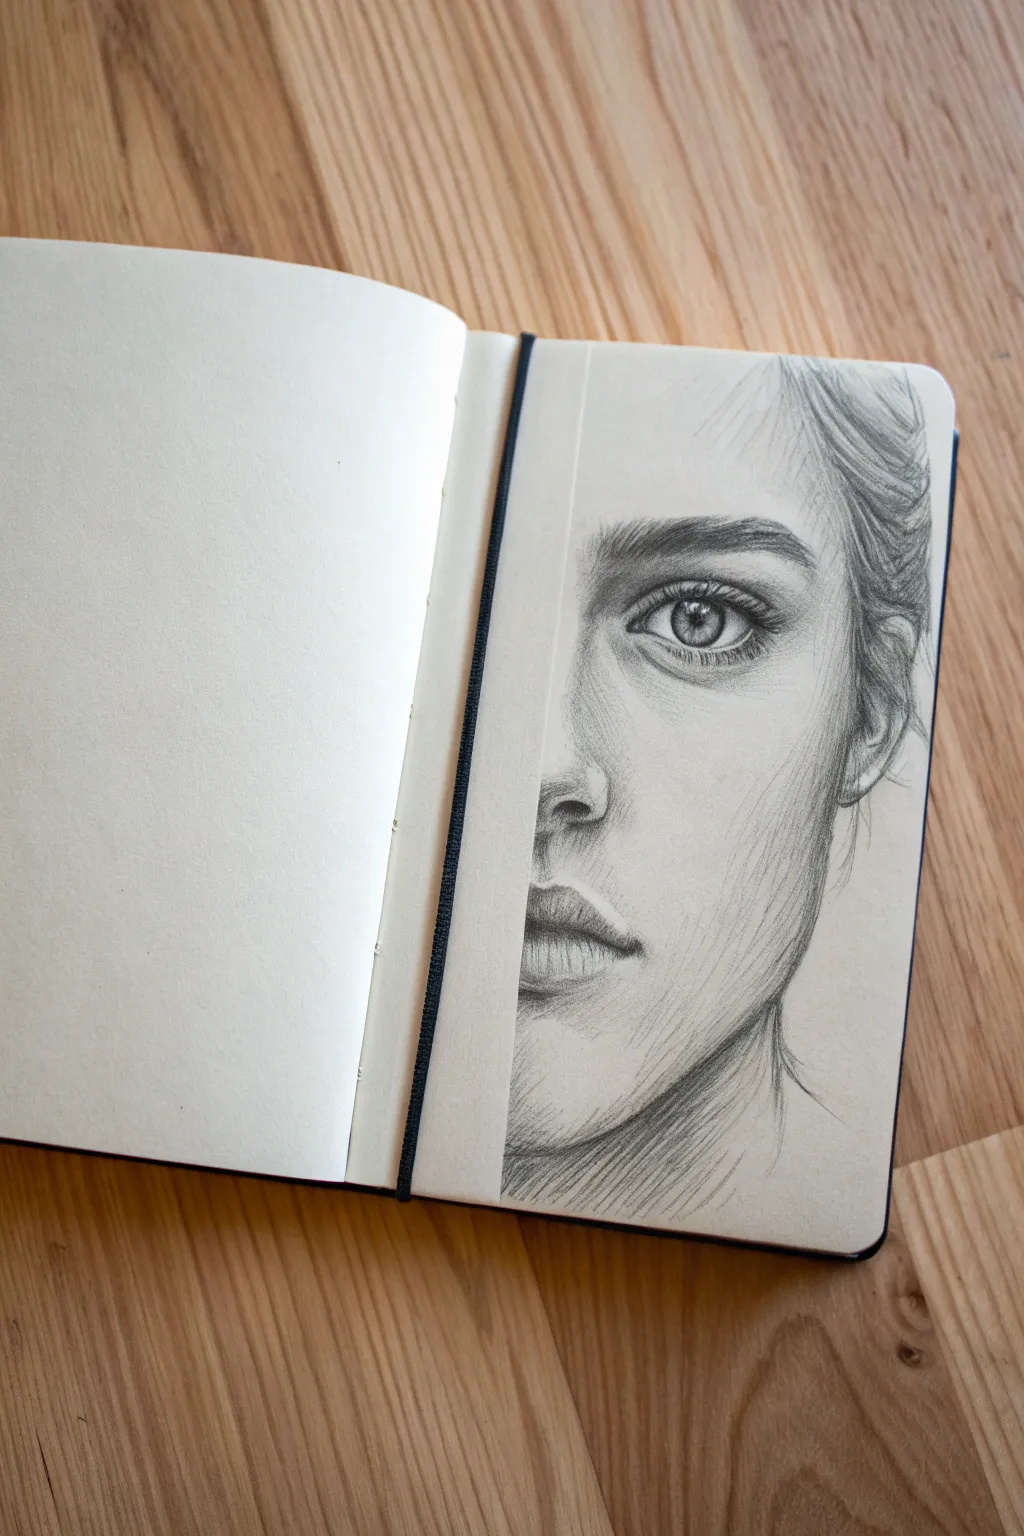
This captivating project plays with negative space and framing by drawing only half of a portrait directly up to the gutter of your sketchbook. The result is a striking, partially revealed face that looks like it’s emerging from behind the page binding.
Step-by-Step Guide
Materials
- Hardcover sketchbook (moleskine style preferred)
- HB or 2B pencil for sketching
- 4B or 6B pencil for shading
- Kneaded eraser
- Blending stump or Q-tip
- Ruler (optional)
Step 1: Planning and Foundation
-
Prepare the workspace:
Open your sketchbook to a fresh spread. Since we are drawing on the right side, ensure the elastic band or binding strap is pulled vertically down the gutter to act as a straight edge, or simply use the natural fold of the paper as your guide. -
Mark the centerline:
Visualize the gutter (the fold where the pages meet) as the exact center of the face. Lightly mark horizontal guidelines for where the eye line, nose base, and mouth line will sit. -
Rough in the head shape:
Using an HB pencil with a light touch, sketch the outer contour of the right side of the face. Start from the forehead, curve down the cheekbone, jawline, and chin, ensuring the shape feels proportional to the hidden left half. -
Place the features:
Sketch the eyebrow arch, the eye shape, the half-nose, and half-lips. Pay close attention to the features touching the gutter; half the nose and lips should disappear cleanly into the fold.
Step 2: Drawing the Eye and Brow
-
Detail the iris and pupil:
Switch to a darker pencil (4B) to outline the iris. Draw the pupil in the center, leaving a small, crisp white circle for the highlight to bring life to the eye. -
Shade the eye:
Fill in the pupil dark black. Shade the iris with radial lines moving outward from the pupil. Add shadow under the upper eyelid to create depth. -
Add lashes and definition:
Draw the eyelashes using quick, curved flicks that taper at the ends. Darken the upper lash line significantly to frame the eye. -
Build the eyebrow:
Sketch individual hair strokes for the eyebrow. Start with lighter strokes and layer darker ones on top, following the natural direction of hair growth towards the temple.
Smudge Control
Place a scrap piece of paper under your drawing hand. This prevents your palm from dragging graphite across the paper and ruining your clean skin tones.
Step 3: Shading and Form
-
Define the nose bridging:
Shade the side of the bridge of the nose. Keep the shading subtle; you don’t need hard lines here, just soft shadows to suggest the slope leading into the eye socket. -
Shade the nostril:
Darken the nostril curve. Since it’s a half-face, only the right nostril is visible. Ensure the shading under the nose creates a soft gradient towards the lip. -
Sculpt the lips:
Outline the lips lightly. Shade the upper lip darker than the lower lip. On the bottom lip, leave a small lighter area in the center to make it look plump and three-dimensional. -
Contour the face:
Apply broader shading along the side of the face, under the cheekbone, and along the jawline. I find using the side of the pencil lead helps create smoother coverage for these larger skin areas. -
Blend for smoothness:
Use a blending stump or a clean tissue to softly smudge your shading on the skin. This eliminates harsh pencil strokes and gives the skin a realistic, soft texture.
Go Digital
Take a photo of your finished sketch. Mirror the image in an editing app to instantly see what the ‘full’ face would look like for a fun symmetry test.
Step 4: Hair and Final Details
-
Establish hair direction:
Sketch long, flowing lines for the hair, pulling it back away from the face as seen in the reference. Ensure the strokes originate from the hairline area. -
Add depth to the hair:
Use your darkest pencil (6B) to add shadows where hair strands clump together or tuck behind the ear. Leave some areas white to represent shiny highlights. -
Refine the gutter edge:
Check the vertical line by the binding. The drawing should stop abruptly but naturally. If you have any smudges on the opposite (empty) page, erase them now to keep the contrast sharp. -
Add neck shading:
Use directional hatching lines on the neck area to suggest shadow under the jaw. These lines can be a bit looser and more expressive than the face shading.
Close your sketchbook and capture the satisfying look of half a face peering out from the binding
BRUSH GUIDE
The Right Brush for Every Stroke
From clean lines to bold texture — master brush choice, stroke control, and essential techniques.
Explore the Full Guide
Face Using the Five-Eyes Width Trick

This sketch breaks down facial anatomy into manageable geometric sections, resulting in a serene, balanced portrait. By using simple guide circles and lines on dotted paper, you’ll demystify placement and create realistic features with confidence.
Step-by-Step Tutorial
Materials
- Dotted or grid notebook (A5 size recommended)
- Mechanical pencil (HB or 2B) or a sharp wooden pencil
- Fine liner pen (optional, for final touches)
- Eraser
- Ruler (optional)
Step 1: Setting the Foundation
-
Draw the cranial sphere:
Start by lightly sketching a large circle near the top center of your page. This will represent the upper portion of the skull. Use the dots on your paper to help keep it symmetrical. -
Define the central axis:
Draw a vertical line straight down through the center of your circle. Extend this line well below the circle to determine the length of the face. -
Map the eye line:
Horizontal lines are crucial here. Isolate the horizontal center of the face by drawing a line across the sphere, roughly halfway down the total head length. -
Establish the jawline:
From the sides of your circle, bring two angled lines down to meet your central vertical line. Curve them gently to form a soft, tapered chin.
Oops! Eyes uneven?
If one eye looks higher, use a ruler to check alignment with the dots on your paper. Flip your notebook upside down; this trick instantly reveals asymmetry you missed.
Step 2: The Five-Eyes Technique
-
Mark eye spacing:
On your horizontal eye line, divide the width of the head into five equal sections. The spaces between the eyes should be exactly the width of one eye. -
Sketch the eye shapes:
Draw almond shapes in the second and fourth sections. Keep the lines light for now so you can adjust the shape. -
Add structural circles:
Drawing purely from imagination can be tough, so I like to sketch large, faint circles around each eye socket area. These should touch the center line and extend out to the temples, helping define the cheekbones later. -
Detail the irises and pupils:
Place a circle inside each almond shape for the iris. Draw a smaller, filled circle in the center for the pupil, leaving a tiny white speck for a highlight.
Step 3: Refining Features
-
Position the nose:
The nose sits in the central ‘eye-width’ section. Draw a small circle for the tip of the nose just below where the large eye-socket circles would intersect. -
Draw the nostrils:
Add small curves on either side of the nose tip circle. Keep them narrow; the total width of the nose usually aligns with the inner corners of the eyes. -
Place the mouth:
Halfway between the nose and the chin, mark the line for the mouth. Sketch the upper lip with a definitive ‘cupid’s bow’ dip in the center. -
Fuller lower lip:
Draw the bottom lip slightly thicker than the top one. Use a curved line underneath to suggest the shadow of the lower lip. -
Define the brows:
Sketch the eyebrows following the top curve of your structural eye-socket circles. Use short, feathery strokes to mimic hair texture.
Level Up: Color Accents
Use a colored pencil or watercolor wash to highlight just the irises or the lips. This pop of color against the graphite sketch creates a stunning focal point.
Step 4: Ears, Neck, and Shading
-
Locate the ears:
The top of the ears should align with the eyes, and the bottom should align roughly with the nose tip. Sketch simple C-shapes on the sides of the head. -
Draw the neck:
Extend two vertical lines down from the jawline. Notice in the example how the neck flares slightly outward at the bottom to suggest the trapezius muscles. -
Suggest collarbones:
Draw faint, sweeping lines extending from the base of the neck towards the shoulders to indicate the clavicles. -
Strengthen the jaw:
Go over your initial jawline sketch with a darker, more confident stroke. Make sure the curve is smooth. -
Add gentle shading:
Lightly shade under the eyebrows, beneath the nose, and under the lower lip. You can also add diagonal hatching inside the iris for depth. -
Final clean up:
You can leave the construction lines visible for an artistic, ‘work-in-progress’ look, or erase the initial circles and center lines for a cleaner portrait.
Now you have a structurally sound portrait base ready for any style of hair or expression you choose to add
Quick Eye Practice With an Expression Sheet
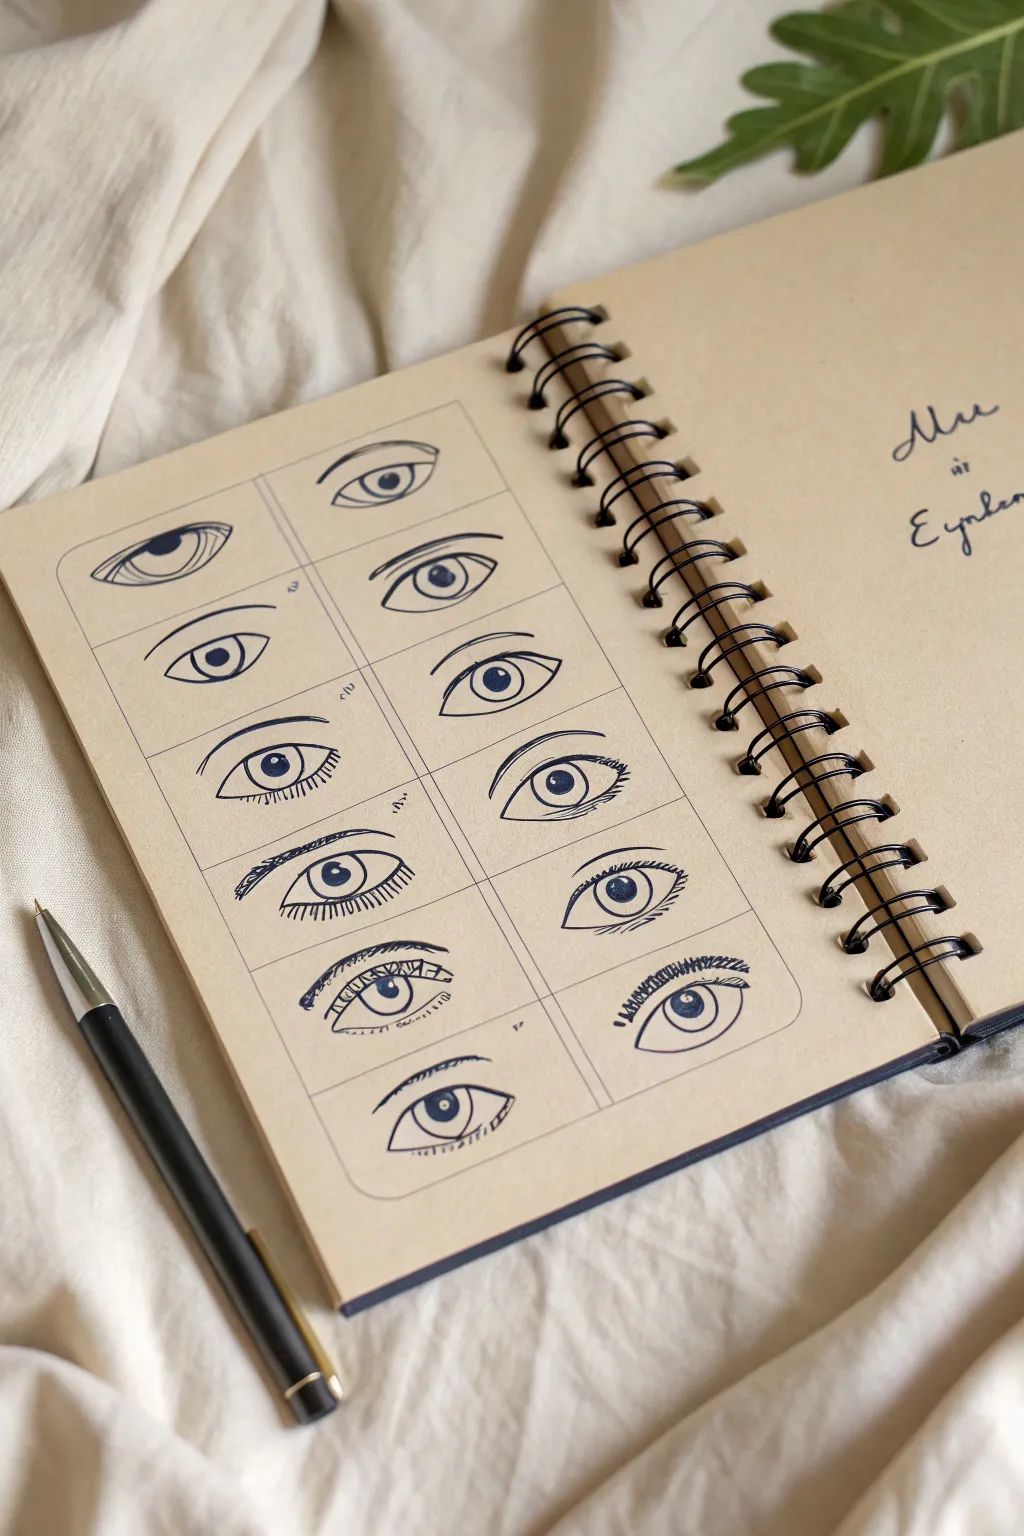
Master the subtleties of the gaze with this structured practice approach that breaks down eye shapes into manageable sketches. By working within a pre-drawn grid, you can focus entirely on varying the lids, lashes, and irises to create a diverse range of illustrated expressions.
Step-by-Step Guide
Materials
- A5 or A4 spiral-bound sketchbook (kraft or tan paper recommended)
- Ruler
- Fine-tipped blue gel pen or fountain pen
- Pencil (HB or 2B)
- Eraser
Step 1: Preparation
-
Set up your workspace:
Find a comfortable, well-lit surface. Since we are working with ink, ensure your arm has room to move freely without smudging the page. -
Draw the main grid:
Using your ruler and a light pencil touch, draw a large rectangular box on the left page of your sketchbook. Leave a generous margin around the edges for clean presentation. -
Divide into cells:
Split your large rectangle into two equal vertical columns. Then, divide those columns horizontally to create roughly 10-12 uniform rectangular cells. -
Ink the grid:
Take your blue gel pen and trace over your pencil grid lines. Use the ruler again for crisp, professional-looking borders. -
Erase guidelines:
Wait at least five minutes for the gel ink to dry completely. Gently erase the underlying pencil graphite so only the blue grid remains.
Keep it Clean
Place a scrap piece of paper under your drawing hand as you work down the page. This prevents the oils from your skin or wet ink from smudging your earlier work.
Step 2: Sketching the Basics
-
Define the upper lash lines:
Start each box by drawing just the upper eyelid curve. Vary the arch height—make some rounded, some flatter, and some angled downwards to suggest different moods. -
Add the lower lash lines:
Draw the bottom curves to close the eye shapes. Experiment with almond shapes, round circles, or narrow slits. Don’t worry about symmetry between the boxes; each one is unique. -
Place the irises:
Draw the circles for the irises. I find looking at where the eyelid intersects the circle helps define the expression; a covered top suggests relaxation, while a full circle suggests surprise. -
Mark the pupils:
Fill in the solid dark pupils in the center of your irises. Keep them centered for a direct gaze or off-center to suggest the eye is looking sideways.
Uneven Eyes?
If an eye shape looks lopsided, thicken the upper lash line on the lower side. This visual trick balances the shape without needing to erase or restart.
Step 3: Adding Character & Detail
-
Draw the eyelid crease:
Add a thin line above the upper lash line to indicate the eyelid fold. The distance of this line from the eye changes the perceived depth of the socket. -
Ink the first lashes:
Select a few eyes to give prominent lashes. Use quick, flicking motions starting from the lash line and curving outward. Vary the pressure to taper the ends. -
Experiment with lash styles:
Try different styles in different boxes: thick singular blocks for a stylized look, individual hairs for realism, or sparse dashes for a minimalist approach. -
Add texture to the iris:
Instead of filling the iris completely, leave a small white circle for a highlight. You can use tiny hatching lines around the pupil to suggest depth. -
Define eyebrows:
Sketch eyebrows above selected eyes. Use the angle of the brow to reinforce the emotion—angled down for anger, arched high for curiosity. -
Add text elements:
On the opposite page, use your best cursive handwriting to add a title like ‘Eye Expression Study’ or simple notes about what you learned.
Fill the remaining empty cells whenever you have a sparse moment to practice a new shape or emotion


Hair as Big Shapes, Not Tiny Strands
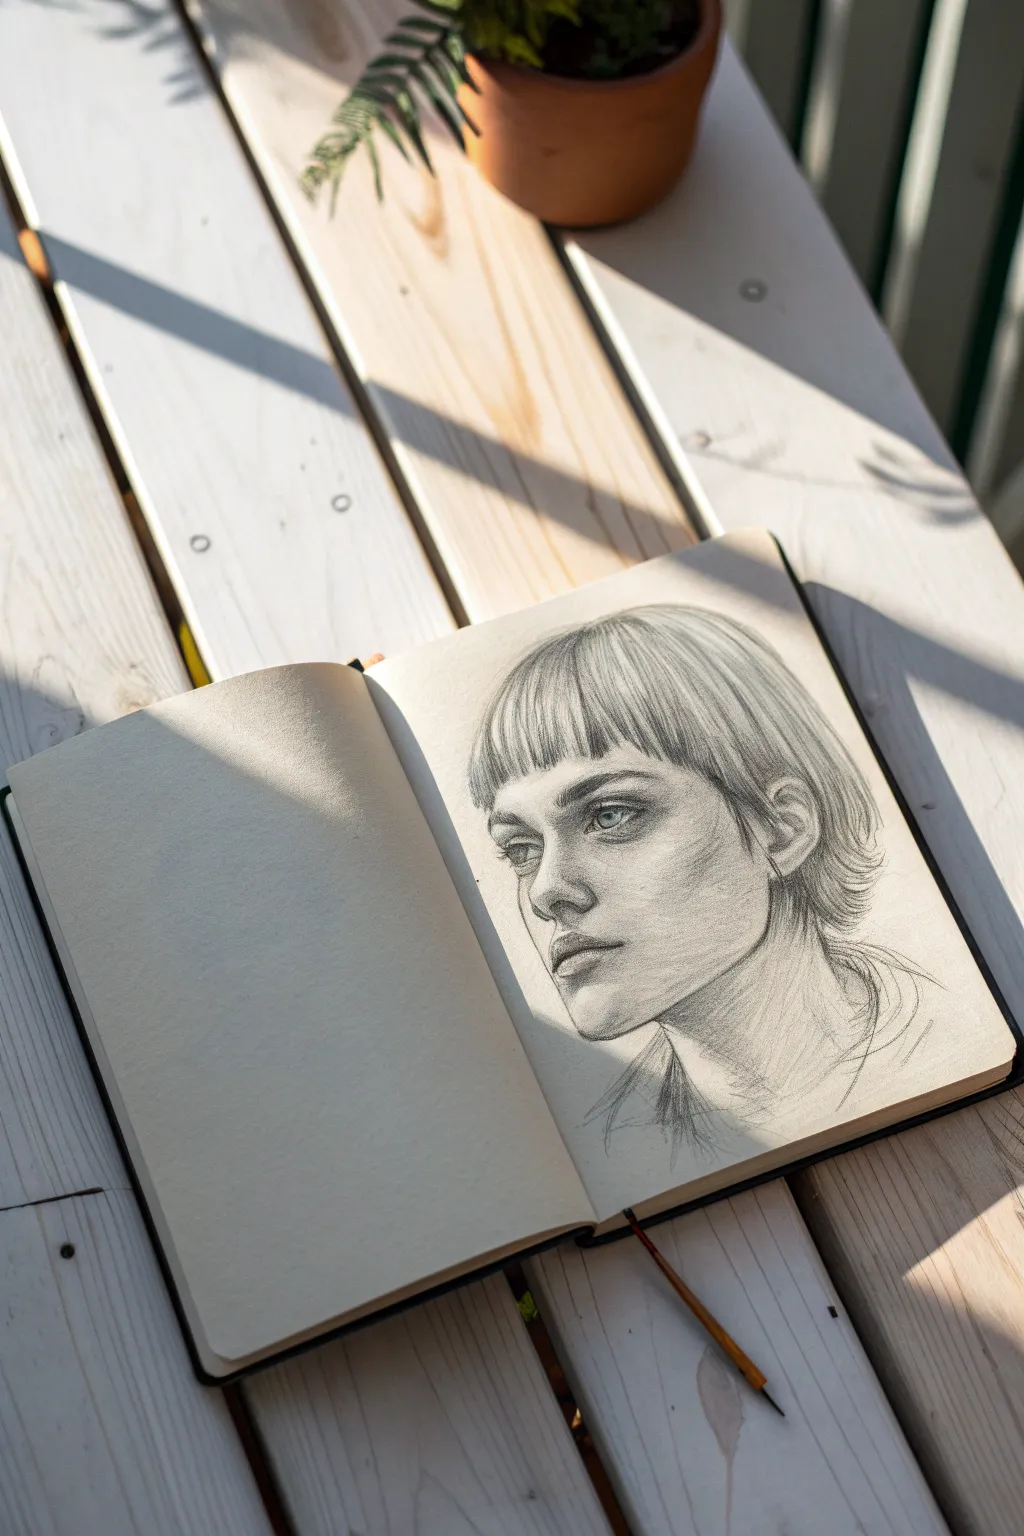
This classic graphite portrait focuses on capturing the clean lines of a short, fringed haircut and soft facial features. It’s a fantastic exercise in balancing detailed shading around the eyes with broader, simpler strokes for the hair.
Step-by-Step Guide
Materials
- Sketchbook with smooth or medium-tooth paper
- HB pencil (for initial sketching)
- 2B and 4B pencils (for shading and depth)
- Kneaded eraser
- Standard eraser
- Blending stump (optional)
Step 1: Laying the Groundwork
-
Establish the head shape:
Begin with a light, loose circle for the cranium. Extend a curved line downwards to mark the jawline, keeping the angle soft to match the reference’s youthful face shape. -
Map facial guidelines:
Draw a vertical centerline that curves slightly to the left, indicating the three-quarter view. Add horizontal lines for the eyes, nose base, and mouth placement. -
Sketch the hair mass:
Instead of drawing individual strands, block in the hair as a solid helmet-like shape. Outline the fringe (bangs) straight across the forehead and curve the sides around the ears.
Hair Grouping
Don’t draw every strand! Group hair into thick ribbons or chunks first. Shade the ‘valleys’ between these chunks dark, leaving the ‘peaks’ light.
Step 2: Defining the Features
-
Place the eyes:
Sketch the almond shapes of the eyes on your guideline. Since the face is turned, the left eye should appear slightly shorter horizontally than the right eye due to foreshortening. -
Refine the nose and mouth:
Draw the nose using a small curve for the tip and a darker accent for the nostril. Sketch the lips, emphasizing the shadow line between them rather than outlining the whole mouth. -
Develop the eyes:
Using a 2B pencil, darken the upper lash lines and fill in the pupils. Leave a tiny white spot in each pupil for the catchlight to bring the subject to life. -
Shape the eyebrows:
Draw the eyebrows with short, flicking strokes that follow the hair growth direction. Keep them slightly thicker towards the nose and tapering out towards the temples.
Softer Skin Tone
Rub some graphite onto a scrap paper, pick it up with a tissue, and gently rub it onto the face for an ultra-smooth, delicate skin texture foundation.
Step 3: Shading and Form
-
Shade the skin:
Switch to your HB pencil and lightly shade the side of the face away from the light source. Focus on the hollow of the cheek, the side of the nose, and under the lower lip. -
Deepen contrast:
Use a 4B pencil to darken the deepest shadows: inside the nostril, the corners of the mouth, and the crease of the eyelid. I find this sudden contrast helps the face pop immediately. -
Soft blending:
Use a blending stump or a clean tissue to soften the skin shading, ensuring a smooth transition between light and dark areas on the cheek and jaw.
Step 4: Hair Texture and Detailing
-
Define the bangs:
Return to the hair. Draw vertical strokes down the forehead for the fringe, varying the pressure to create light and dark patches that suggest clumps of hair rather than single hairs. -
Add hair volume:
On the crown of the head, use long, sweeping strokes with the 2B pencil. Follow the curve of the skull to make the hair look round and voluminous. -
Detail the ear area:
Refine the hair tucked behind the ear. Darken the area just behind the earlobe to create separation between the neck and the jawline. -
Sketch neck clothing:
Loosely sketch the collar of a shirt or jacket. Keep these lines significantly rougher and lighter than the face to ensure the viewer’s focus remains on the portrait. -
Final clean up:
Use the kneaded eraser to lift out highlights on the tip of the nose, the cheekbones, and the shiny part of the hair ‘helmet’ to simulate glossy texture.
Close your sketchbook knowing you’ve practiced essential structure and shading techniques today
Soft Shading With Face Planes
Capture the delicate beauty of a realistic female portrait by focusing on the underlying structure of the face. This project emphasizes soft, graduated shading techniques to render the planes of the cheeks, nose, and jawline, creating a lifelike three-dimensional effect.
How-To Guide
Materials
- High-quality drawing paper (smooth or medium tooth)
- Graphite pencils (ranges HB, 2B, 4B)
- Mechanical pencil (0.5mm HB for fine details)
- Kneaded eraser
- Blending stump or tortillon
- Tissue or soft cloth for smoothing
Step 1: Drafting the Structure
-
Establish the head shape:
Begin with a light, loose oval to represent the cranium. Tilt it slightly to the right to match the three-quarter view pose seen in the reference. -
Map facial guidelines:
Draw a vertical centerline curving down the front of the face. Add horizontal guidelines for the eyebrows, eyes, nose base, and mouth to ensure correct proportions. -
Sketch the jawline and neck:
Define the jawline with a soft curve that connects to the chin. Extend the neck lines down, keeping them graceful and indicative of the head’s turn. -
Place the features:
Lightly sketch the almond shapes of the eyes, the bridge and tip of the nose, and the contours of the lips. Verify the placement against your guidelines before committing to darker lines.
Use the Paper Plane
To prevent your hand from smudging your work while shading, place a clean sheet of scrap paper under your drawing hand as a protective shield.
Step 2: Defining Features
-
Detail the eyes:
Switch to a mechanical pencil or a sharpened HB. Draw the iris and pupil, leaving a tiny white spot for the catchlight. Add the upper eyelid crease and lightly suggest the lashes. -
Sculpt the nose:
Focus on the nostrils and the underside of the nose tip. Avoid harsh outlines for the bridge; instead, let the shading we’ll add later define its shape. -
Shape the mouth:
Define the center line of the mouth first, noting the small dip in the middle. Outline the upper and lower lips, keeping the lines soft, especially on the bottom lip. -
Refine the hair outline:
Sketch broad, sweeping strokes to indicate the flow of hair pulled back from the face. Don’t draw every strand yet; just establish the main volume and directional flow.
Muddy Shading?
If shadows look dirty or gray rather than deep, you’re likely over-blending. Re-apply graphite with a sharp pencil and leave it unblended for texture.
Step 3: Shading and Form
-
Lay down the base tone:
Using the side of a 2B pencil, apply a very light, even layer of graphite over the shadowed side of the face (the left side in this view) and under the jaw. -
Shade the eye sockets:
Deepen the shadows in the inner corners of the eyes and beneath the brow bone. This recession is crucial for realistic depth. -
Model the cheekbones:
I find it helpful to visualize the cheek as a sloping plane. Shade underneath the cheekbone, blending upwards softly to create the rounded form of the cheek. -
Contour the nose:
Add shading to the side of the nose bridge and the underside of the tip. Keep the transition to the highlighted bridge very subtle. -
Render the lips:
Shade the upper lip slightly darker than the lower lip. Add small, curved vertical strokes on the lower lip to mimic texture, and darken the corners of the mouth. -
Blend for softness:
Use a blending stump or a tissue to gently smudge your graphite layers. Move in circular motions to marry the tones together, eliminating harsh pencil strokes. -
Deepen contrast:
Go back in with a 4B pencil to darken the deepest shadows: pupils, nostrils, the crease of the mouth, and tight areas under the jawline.
Step 4: Final Touches
-
Lift highlights:
Take your kneaded eraser and shape it into a point. Gently dab or stroke the paper to lift graphite from high points: the tip of the nose, the brow bone, the fullest part of the cheek, and the center of the lower lip. -
Detail the hair:
Add a few sharper, darker lines within the hair mass to suggest individual strands and movement, particularly where the hair meets the forehead and ears. -
Clean up edges:
Erase any remaining construction lines or smudges outside the main drawing area to give the portrait a crisp, finished look.
Step back and admire how the interplay of light and shadow brings your portrait to life.
Masked Face With Simplified Features
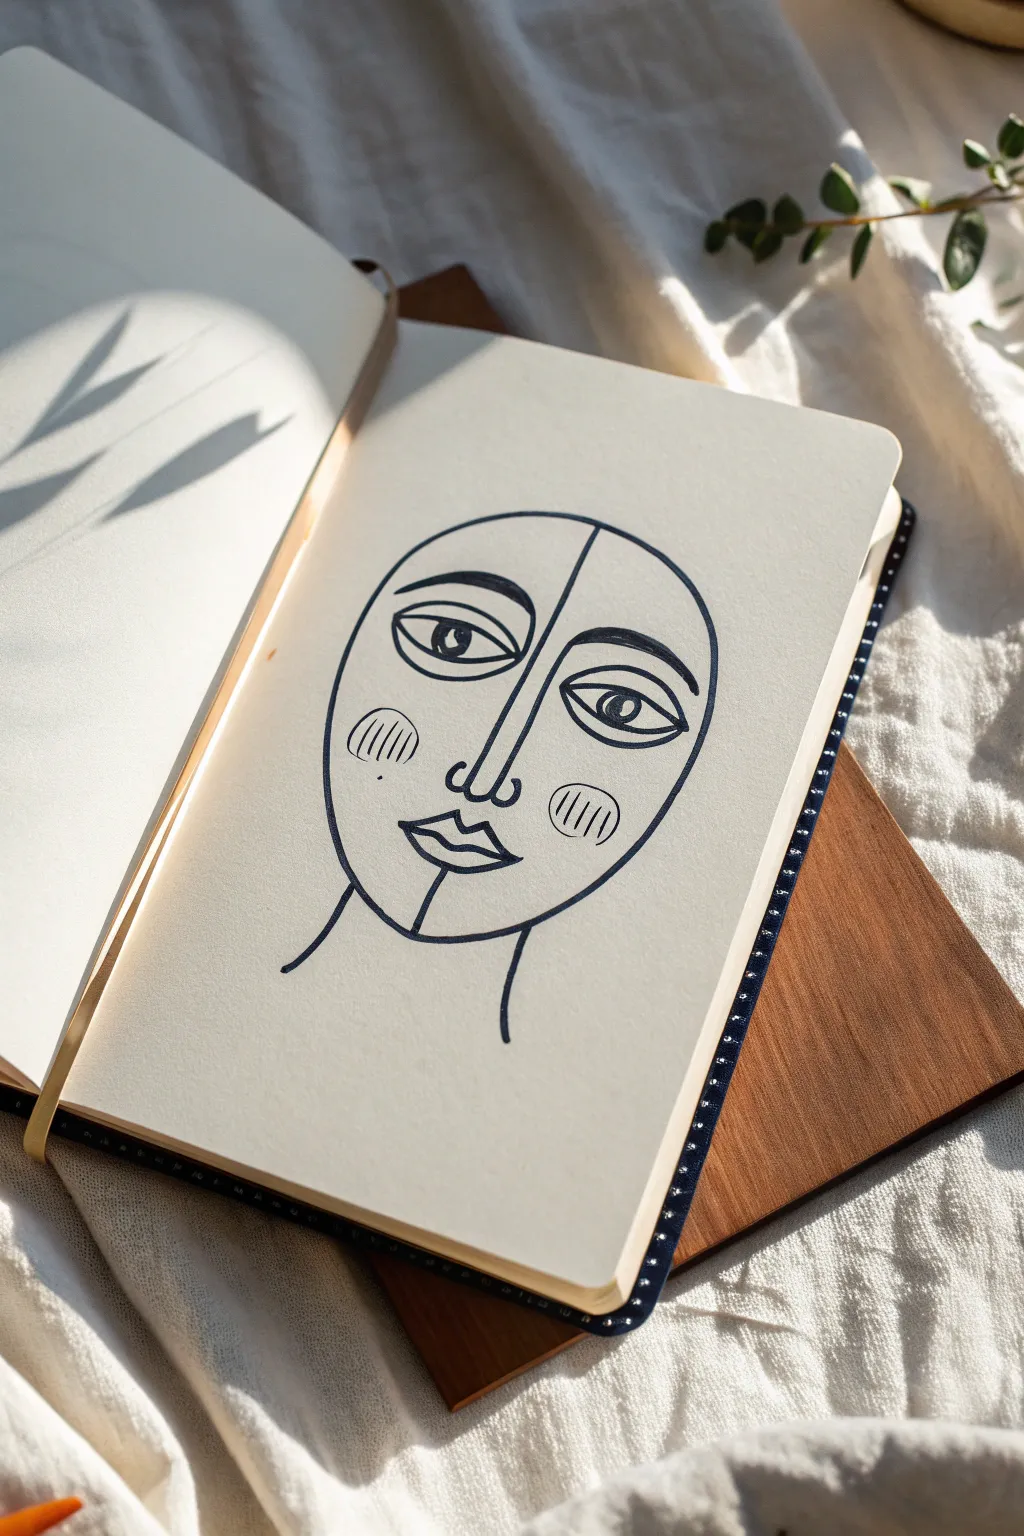
This striking masked face drawing uses clean lines and simple geometry to create a modern, artistic portrait. By breaking the face down into basic shapes and a central dividing line, you achieve a sophisticated look that feels impactful yet minimal.
Detailed Instructions
Materials
- Cream or off-white sketchbook paper
- Fine liner pen (0.5mm, black)
- Thick marker or brush pen (black)
- Pencil (HB or 2B for sketching)
- Eraser
Step 1: Planning the Structure
-
Draw the main oval:
Start with a light pencil sketch of a large, smooth oval shape in the center of your page. It should be slightly taller than it is wide, roughly the shape of an egg standing on its narrow end. -
Add the central divider:
Draw a vertical line straight down the middle of the oval. This isn’t just a guide; it will become a defining feature of the nose and forehead later. -
Mark feature positions:
Lightly dash horizontal guidelines across the vertical line to mark where the eyes, nose base, and mouth will sit. Keep the eyes relatively high to give that elongated, stylized look.
Step 2: Inking the Face Features
-
Outline the left eye:
Using your fine liner, draw an almond shape on the left side. Make the upper lid curve strongly and the bottom lid flattened slightly. -
Create the iris and pupil:
Draw a perfect circle inside the eye for the iris. Inside that, place a smaller black dot for the pupil, leaving a tiny white speck as a highlight. -
Mirror the right eye:
Repeat the almond shape and iris on the right side. Don’t worry about perfect symmetry; a little variation adds to the hand-drawn charm. -
Draw the brows:
Above each eye, draw a bold, curved arch. I like to thicken these lines slightly or double them up to give the eyebrows significant visual weight. -
Form the nose bridge:
Trace over your central pencil line with the black pen, starting from the forehead and stopping right where the nostrils will be. -
Detail the nostrils:
At the bottom of the nose line, draw two small loops curving outward—like an inverted ‘w’ shape—to form the nose tip.
Wobbly Lines?
Don’t fret if your oval isn’t perfect. In this style, ‘mistakes’ look intentional. Emphasize a wobble by going over it again to make the line weight uneven and artistic.
Step 3: Adding Character & Cheeks
-
Draw the lips:
Create the upper lip with two distinct peaks (the cupid’s bow). Draw a simple curved line for the bottom lip. Make the line between them connect to the central vertical axis. -
Extend the chin line:
Draw a straight vertical line extending down from the middle of the bottom lip to the bottom of your initial oval shape. -
Add rosy cheeks:
On the left cheek, draw a circle but don’t outline it completely. Instead, fill the imagined circular space with 5-6 short, vertical hatch lines. -
Hatch the right cheek:
Do the same for the right cheek, using short vertical strokes to create a circular blush effect without a hard outline. -
Outline the face shape:
Go over your initial pencil oval with the thicker marker or brush pen. This heavier weight frames the delicate interior details perfectly. -
Create the neck:
Draw two simple, curved lines extending downward from the jawline to suggest a slender neck. -
Clean up sketch lines:
Wait at least five minutes for the ink to fully cure. Once dry, gently erase all underlying pencil marks to reveal the crisp black lines.
Try Contrast
Fill in one half of the face shape (separated by the central nose line) with a distinctive color like terracotta or ochre to make the drawing pop against the cream paper.
You now have a chic, gallery-worthy piece of line art in your sketchbook
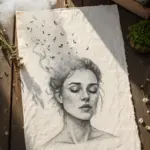
Pattern-Filled Face Silhouette
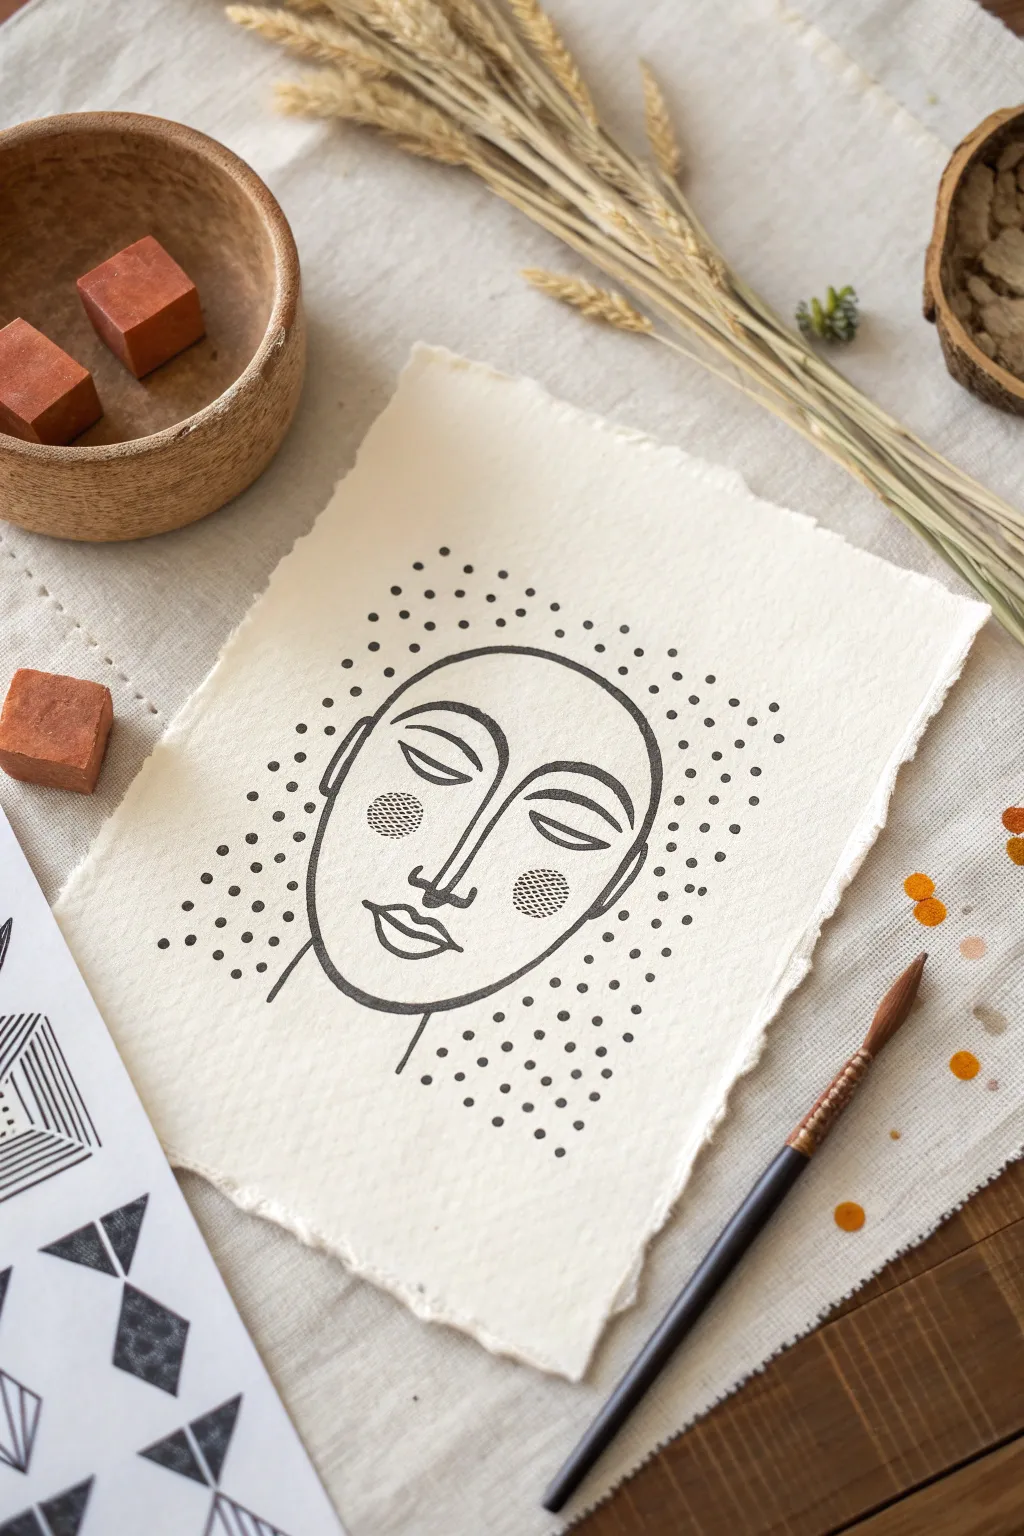
Embrace a minimalist aesthetic with this stunning yet simple line drawing project. Using rough-edged deckled paper and bold black ink, you’ll create a serene face surrounded by a delicate stippled halo that adds texture and depth to the composition.
How-To Guide
Materials
- Heavyweight textured watercolor paper or handmade cotton rag paper (deckled edge)
- Black ink fine liner pen (0.5mm or 0.8mm)
- Thicker black marker or brush pen for main lines
- Pencil (HB or H)
- Soft eraser
- Ruler (optional, if grid method helps you)
- Reference image of the face design
Step 1: Preparation & Sketching
-
Prepare your paper:
Start by selecting a high-quality piece of heavy paper. If yours doesn’t have that rustic look seen in the photo, you can carefully tear the edges by wetting them slightly with a brush and water, then gently pulling away the excess paper to create a faux-deckled edge. -
Observe the oval:
Lightly sketch a large, smooth oval in the center of your paper using your pencil. This will serve as the boundary for the face. Keep your pressure extremely light so it can be erased completely later. -
Mark facial guidelines:
Draw a faint vertical line down the center of the oval to help with symmetry. Then, mark horizontal lines for the eyes (about halfway down) and the base of the nose. -
Sketch the nose bridge:
Begin sketching the central feature: a long, elegant nose bridge that extends straight down from the forehead. Notice how designs like this use a continuous line style—connect the nose bridge directly into the eyebrow lines. -
Form the eyebrows and eyes:
Sketch broad, arched lines for the eyebrows. Below them, draw the almond shapes of the closed eyes. The lids are simple curves, giving the face a peaceful, sleeping expression. -
Define the face shape:
Refine the outer oval contour. Add the suggestion of ears on either side, simplified into streamlined curves. Bring the jawline down to a gentle point.
Step 2: Inking the Design
-
Choose your pen:
Select a marker or pen with a consistent, medium thickness. A brush pen can work if the tip is firm, but a standard felt-tip marker often gives that steady, bold look seen in the example. -
Ink the main outlines:
Trace over your pencil lines with confidence. Start with the outer face shape and neck lines to establish the frame. -
Detail the features:
Carefully ink the nose and eyebrows. Keep your hand steady to ensure smooth, flowing curves rather than jagged strokes. -
Add the mouth:
Ink the lips, focusing on the Cupid’s bow on the top lip and a fuller curve on the bottom lip. The mouth should look relaxed. -
Create cheek details:
Draw small circles on the cheeks for a stylized blush effect. Instead of filling them solid, use a fine liner to cross-hatch or create a tiny mesh pattern inside each circle for visual interest. -
Erase pencil marks:
Wait until the ink is completely dry—I usually give it at least 15 minutes to be safe. Then, gently erase all underlying pencil sketches to clean up the artwork.
Ink Control
For perfectly round dots, press the pen tip straight down vertically rather than at an angle. Hold for a split second to let the ink bleed just enough to form a circle.
Step 3: The Stipple Halo
-
Visualize the aura:
Imagine a rectangular border or a messy aura surrounding the head. You won’t draw a line for this; strict borders are defined only by where the dots stop. -
Begin the dot work:
Using your thicker marker, start placing dots randomly around the outside of the face outline. Keep the dots distinct and round, not like dashes. -
Manage density:
Focus the dots closer to the face outline first, but keep the spacing relatively uniform and open. This isn’t a shading gradient; it’s a pattern, so try to keep equal distance between most points. -
Expand outward:
Continue adding dots until you’ve formed a rough rectangular shape framing the head. The contrast between the organic face curves and the structured dot grid makes the image pop. -
Final review:
Step back and look at the balance. If any areas look too empty, add a single dot to fill the void. The goal is an airy, effortless feel.
Add Gold Accents
Once the black ink is dry, use a gold metallic paint pen to fill in the ‘blush’ circles on the cheeks or add a few gold dots to the surrounding halo for a touch of luxury.
Now you have a serene piece of modern art ready to frame or gift


Have a question or want to share your own experience? I'd love to hear from you in the comments below!