When you’re painting a sun, you get instant payoff: a simple circle can look absolutely radiant with just a little color blending. I pulled together my favorite easy sun painting ideas that feel doable in one sitting but still look like you really know what you’re doing.
Classic Sunset Over the Ocean
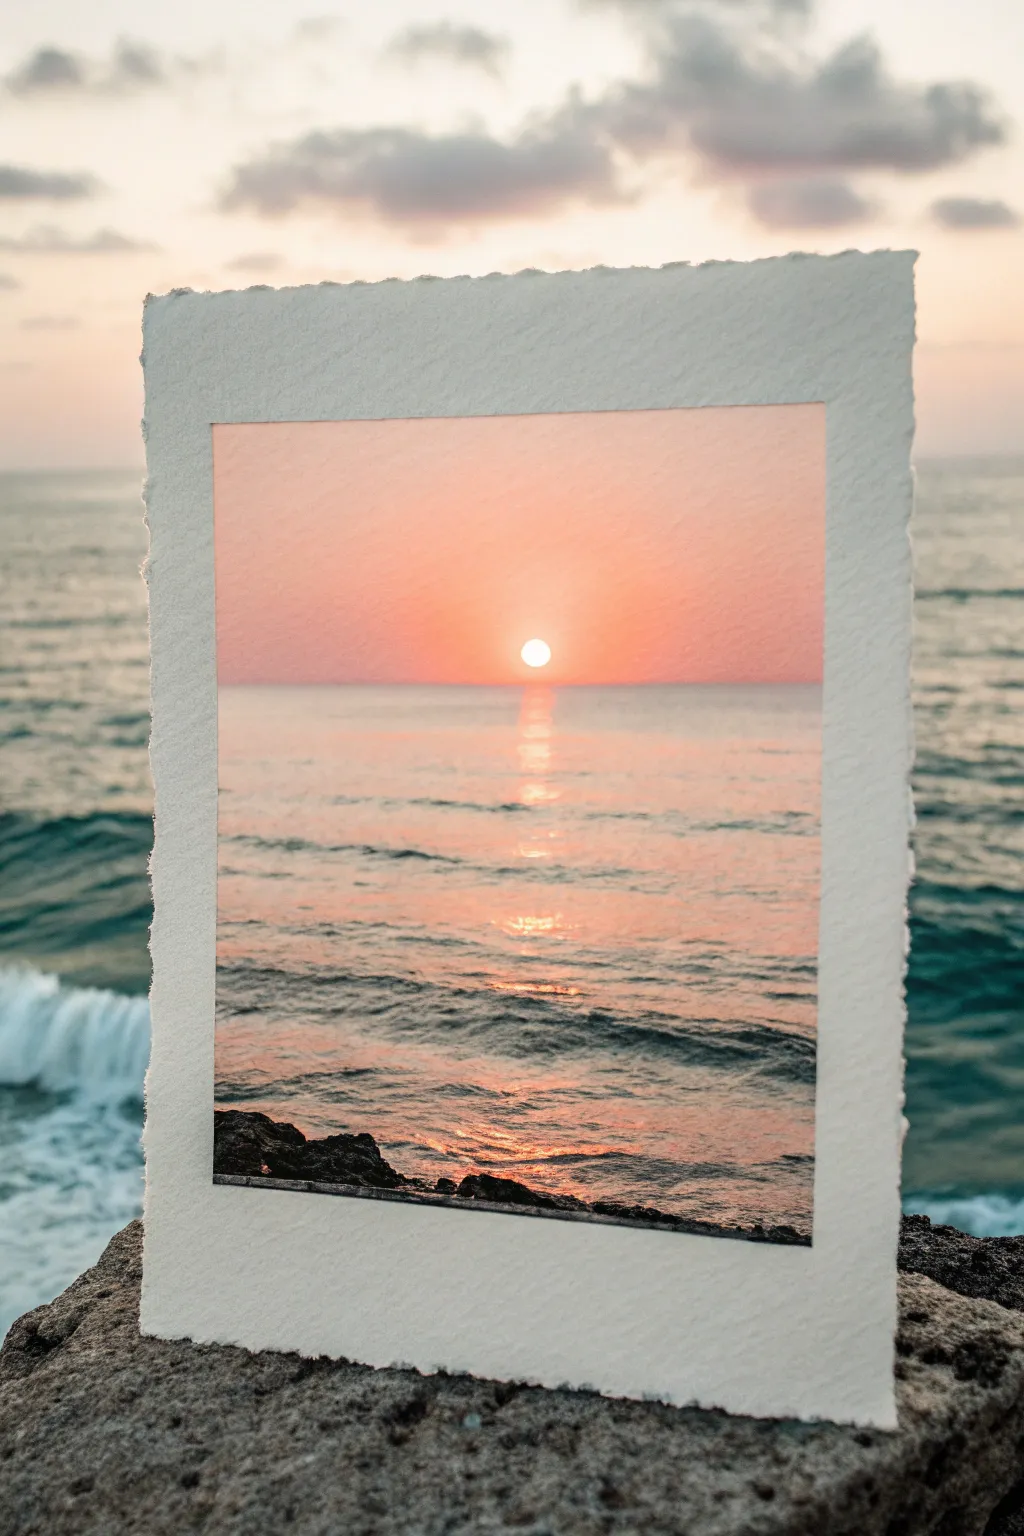
Create a breathtaking visual trick by painting a sunset that perfectly aligns with the real horizon. This project captures the soft, glowing transition of the sun dipping into the ocean, framed within beautiful deckled-edge paper.
Step-by-Step Guide
Materials
- Heavyweight cold-press watercolor paper (300gsm)
- Watercolor paints (Alizarin Crimson, Cadmium Yellow, Ultramarine Blue, Burnt Sienna)
- Painter’s tape or masking tape
- Flat wash brush (3/4 inch)
- Round brush (size 6 or 8)
- Small liner brush
- Cup of water and paper towels
- Pencil and ruler
Step 1: Preparation & Sky Wash
-
Prepare the paper:
Tear your watercolor paper to size rather than cutting it with scissors. This creates the soft, deckled edge seen in the photo. Aim for a rectangular shape, roughly 5×7 inches. -
Mask the borders:
Measure a uniform border (about 1 inch) around the edges of your paper. Apply painter’s tape carefully along these lines to create a crisp, clean rectangular painting area in the center. -
Establish the horizon:
Lightly draw a horizontal line with your pencil across the center of the taped area. This will separate your sky from your ocean. -
Wet the sky area:
Using clean water, brush a thin, even layer over the entire sky section (top half). The paper should be damp and glistening, but not forming puddles. -
Paint the first gradient:
Load your flat brush with a watery Cadmium Yellow. Start just above the horizon line and brush upward, fading it out as you reach the middle of the sky section. -
Intensify the sky:
While the yellow is still damp, mix a soft orange using yellow and a touch of Alizarin Crimson. Apply this from the top of the sky downwards, letting it blend naturally into the yellow near the horizon. -
Add warmth:
For that rosy sunset glow, add a very dilute wash of crimson just at the upper corners, blending it down very softly. Let the sky layer dry completely before moving on.
Step 2: Ocean & Sun Details
-
Paint the water base:
Mix a muted purple-grey by combining Ultramarine Blue with a tiny bit of Burnt Sienna and Alizarin Crimson. Using horizontal strokes, paint the water section, leaving gaps of white paper near the center for the sun’s reflection. -
Define the horizon:
With a slightly darker version of your ocean color, carefully paint a straight line along the horizon using your round brush to separate the sea from the sky. -
Create the sun:
Mix a thick, opaque white (gouache works best here, or very concentrated watercolor straight from the tube). Paint a small, perfect circle just touching the horizon line in the center. -
add the reflection path:
Using the same yellow-orange mix from the sky, paint horizontal dashes directly under the sun. Start narrow near the horizon and widen the path slightly as you move down. -
Layer wave details:
Switch to your smaller brush. Use a darker blue-grey mix to add thin, horizontal lines across the water to represent ripples. Ensure these lines break and skip over the orange reflection area. -
Deepen the foreground:
For the bottom part of the water, use your darkest blue mix. Paint thicker, more organic wave shapes to suggest the water is closer to the viewer. -
Paint the rocky silhouette:
Mix a very dark grey or black using blue and brown. At the very bottom edge of the painting area, dab in rough, irregular shapes to mimic foreground rocks or a shoreline.
Bleeding Edges?
If paint seeps under your tape, use a slightly damp, clean stiff brush to gently scrub and lift the excess color while it’s still wet, or mask tighter next time.
Step 3: Finishing Touches
-
Add sun glare:
Take a tiny bit of white paint and add very thin highlights on the tops of the closest waves and along the edges of the reflection path for sparkle. -
Dry completely:
Wait for the entire painting to be bone dry. If the paper feels cold to the touch, it’s still wet inside the fibers. -
Reveal the painting:
Gently peel away the painter’s tape. Pull it away from the painting at a 45-degree angle to ensure a crisp, clean edge. -
Photograph your work:
Take your finished piece to a beach or a window with a view. Hold it up or prop it on a rock so the painted horizon aligns with the real one for the perfect optical illusion photo.
Make it Sparkle
Mix a tiny amount of iridescent medium or metallic gold watercolor into your sun reflection path for a shimmer that catches the light beautifully.
Now you have a portable sunset that creates a stunning illusion wherever you take it


Golden Sunrise Above Soft Hills
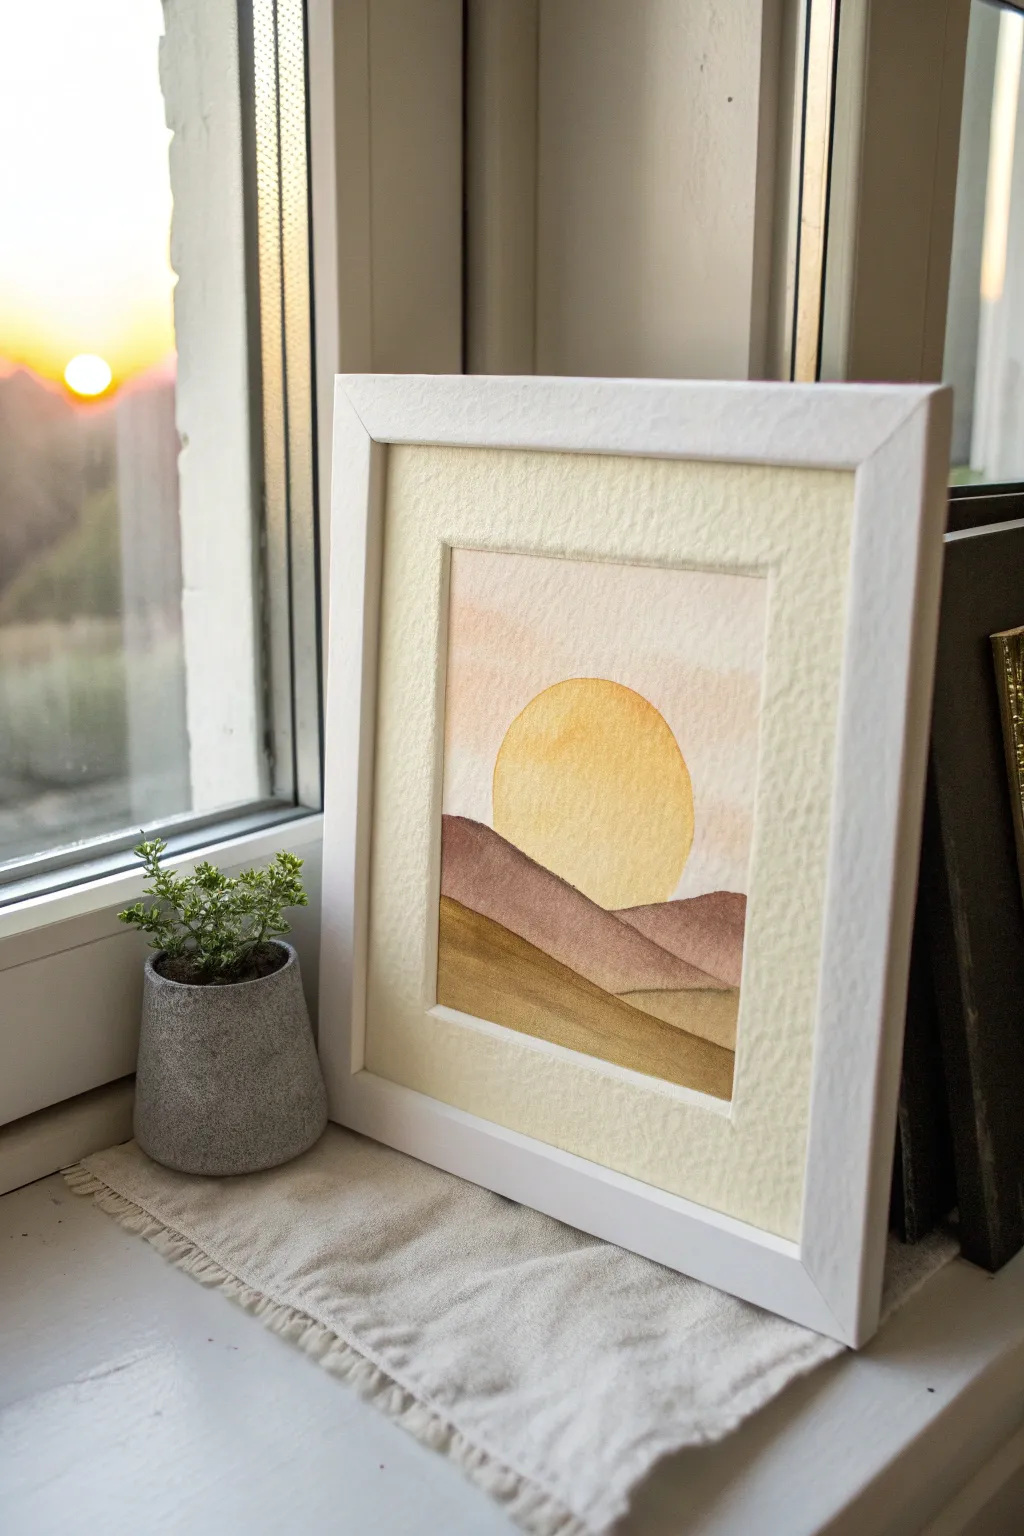
Capture the serene warmth of a sunrise with this minimalist watercolor landscape featuring abstract rolling hills and a glowing sun. The soft, bleeding edges and muted earth tones create a calm, modern geometric aesthetic perfect for framing.
How-To Guide
Materials
- Cold press watercolor paper (300 gsm)
- Watercolor paints (Yellow Ochre, Burnt Sienna, Raw Umber, Sepia)
- Round watercolor brushes (sizes 6 and 10)
- Masking tape or painter’s tape
- Clean water jar
- Paper towels
- Pencil and circular object for tracing (like a small bowl)
- White or cream textured mat board
- White wooden frame
Step 1: Preparation & Sketching
-
Prepare the paper:
Cut your watercolor paper to fit inside your chosen mat opening, leaving about half an inch of excess on all sides for mounting. Tape the paper down to a hard board using masking tape to prevent buckling during the painting process. -
Outline the sun:
Place your circular object near the center, slightly shifted upward, and lightly trace the sun shape using a pencil. Keep the line very faint so it doesn’t show through the yellow paint later. -
Sketch the hills:
Draw two or three gentle, overlapping curved lines across the bottom half of the paper to represent the rolling hills. These lines should intersect with the sun and each other to create depth.
Step 2: Painting the Sun & Sky
-
Paint the sun base:
Load your size 10 brush with clean water and wet the inside of the sun circle. Drop in a diluted wash of Yellow Ochre, letting it bloom naturally to the edges for a soft look. -
Add warmth:
While the sun is still damp, dab a slightly more concentrated Yellow Ochre near the bottom edge of the circle to create a subtle gradient effect. -
Create the sky wash:
Mix a very watery, pale wash of Burnt Sienna or a soft peach tone. Using the large brush, paint horizontal strokes across the sky area, carefully avoiding the sun circle. -
Dry completely:
Let this layer dry fully before moving on. You can use a craft dryer or hairdryer on a low setting if you are impatient, but air drying usually yields smoother textures.
Uneven Wash?
If you get ‘cauliflower’ blooms in your paint, it means you added water to a drying section. Embrace it for texture, or keep the initial wash consistently wet to avoid it.
Step 3: Layering the Hills
-
Paint the furthest hill:
Mix Burnt Sienna with a touch of Sepia to create a muted reddish-brown. Paint the hill shape that sits furthest back, carefully cutting around the sun shape where they overlap. -
Wait for the layer:
Allow this hill to dry until it is no longer distinctively shiny. If you paint an adjacent section too soon, the colors will bleed into each other uncontrollably. -
Paint the middle ground:
Use a mix of Raw Umber and Yellow Ochre for a lighter, golden-brown hill section. Apply this to the middle hill shape, ensuring the edge touching the previous hill is crisp. -
Add the foreground:
For the closest hill at the very bottom, use a darker mix of Sepia and Raw Umber. Paint this section solidly, grounding the composition with visual weight. -
Refine edges:
I like to go back with a slightly damp, clean brush (size 6) to soften any harsh lines within the hill shapes themselves, while keeping the outlines crisp.
Extra Sparkle
Mix a tiny amount of gold gouache or metallic watercolor into the yellow sun layer to make the artwork shimmer beautifully when the light hits it.
Step 4: Finishing Touches
-
Create texture:
Once the paint is semi-dry but still cool to the touch, you can lightly dab a few areas with a paper towel to lift pigment and create a gentle, textured appearance. -
Final drying:
Let the entire painting dry completely, preferably overnight, to ensure the heavy paper flattens back out. -
Remove tape:
Peel the masking tape away slowly at a 45-degree angle to reveal the clean paper edges. -
Mount artwork:
Position your painting behind the textured mat board, securing it with tape on the back. -
Frame it:
Place the matted artwork into the white wooden frame and secure the backing.
Now you have a tranquil piece of sunny art ready to brighten any corner of your home


Big Center Sun With Easy Radiating Rays
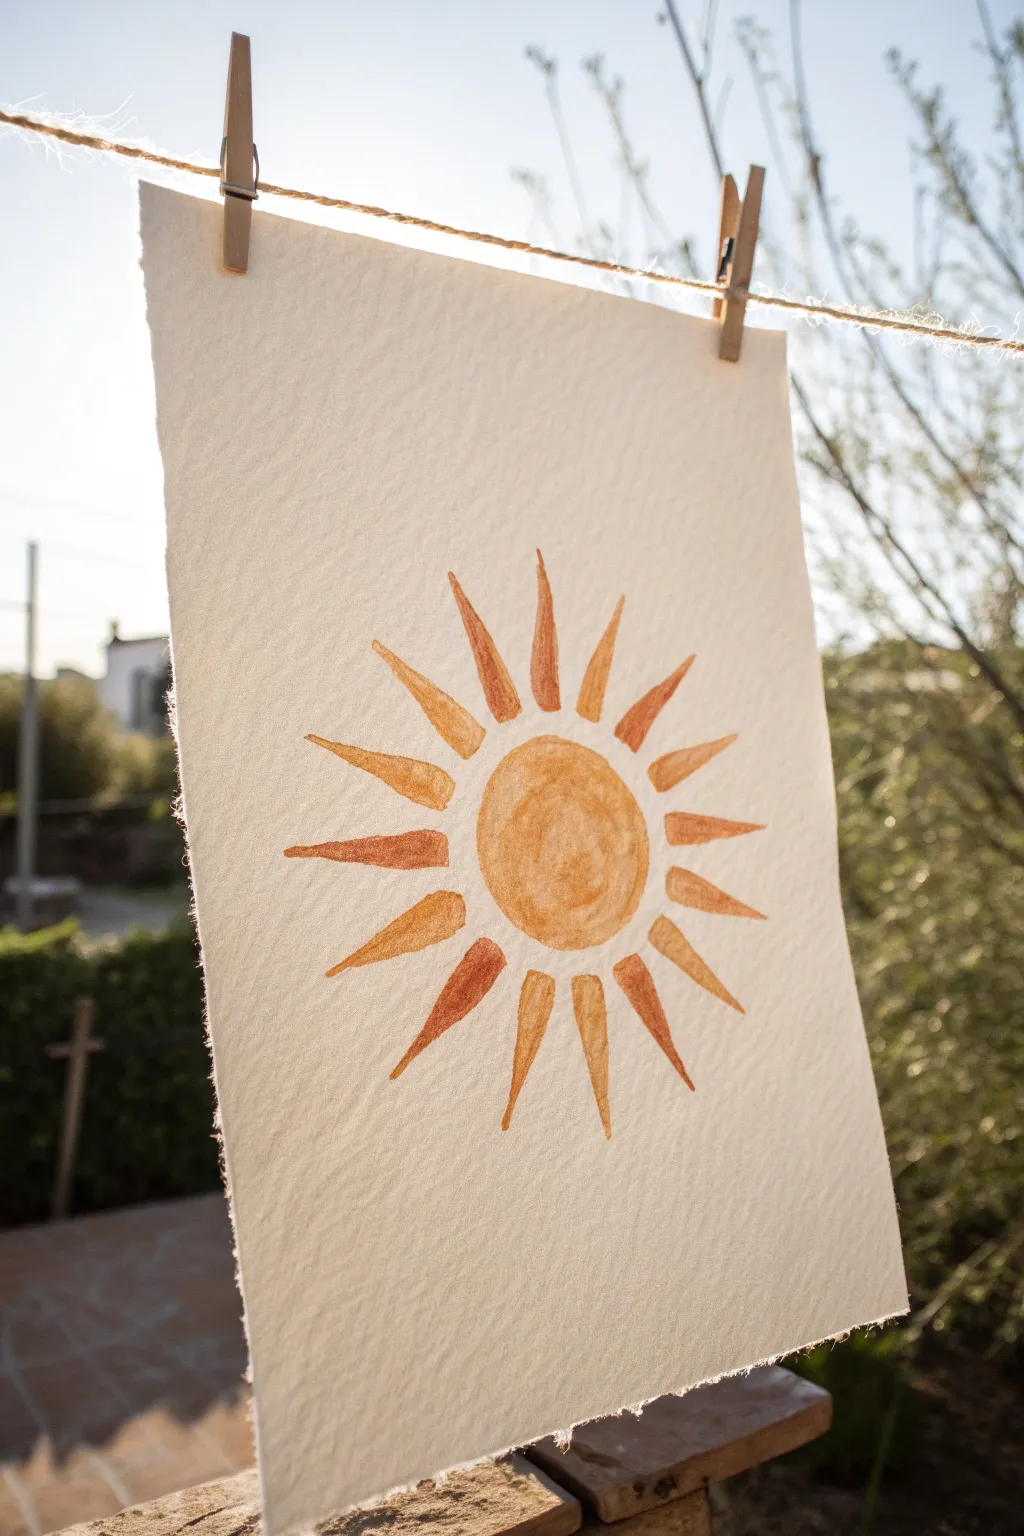
Capture the golden warmth of a summer afternoon with this simple yet striking watercolor project. The naturally textured paper and warm amber tones give this sun painting a lovely, organic feel that looks beautiful hanging anywhere.
Step-by-Step Tutorial
Materials
- Cold-pressed watercolor paper (300gsm/140lb)
- Watercolor paints (Yellow Ochre, Burnt Sienna, Cadmium Orange)
- Round watercolor brush (size 6 or 8)
- Jar of water
- Paper towel
- Pencil (optional)
- Ruler or straight edge (for tearing paper)
Step 1: Preparing the Paper
-
Tear the edges:
Start by creating that beautiful deckled edge look. Place your ruler firmly against the paper where you want the edge to be. -
Finish the tear:
Pull the paper upward and toward you against the straight edge to create a rough, fibrous border rather than a clean cut. -
Repeat on all sides:
Do this for all four sides until you have a rectangle roughly 8×10 inches, or whatever size suits your space best.
Step 2: Painting the Sun’s Core
-
Sketch lightly:
If you’re nervous about freehanding, use a pencil to lightly sketch a circle in the center of the paper, about 2-3 inches in diameter. -
Mix your base color:
Load your brush with a mix of Yellow Ochre and a touch of water. You want a warm, golden yellow that isn’t too thick. -
Fill the circle:
Paint inside your circle shape. Don’t worry about making the fill perfectly solid; let the texture of the watercolor paper show through. -
Add warmth:
While the yellow paint is still wet, drop in a small amount of diluted Cadmium Orange or Burnt Sienna near the edges or center. -
Blend naturally:
Let these darker colors bleed naturally into the yellow to create depth and that distinct mottled watercolor texture. -
Let it dry:
Wait for the center circle to dry completely before moving on. This prevents the rays from bleeding into the middle.
Natural Texture
To get the specific gritty texture inside the sun, sprinkle a tiny pinch of table salt onto the center circle while the paint is still very wet, then brush it off once dry.
Step 3: Adding the Rays
-
Plan the rays:
Visualize the rays radiating outward like the hours on a clock face. You’ll want about 14-16 distinct triangle shapes. -
Mix a darker tone:
For the rays, use a slightly more concentrated mix of Burnt Sienna or Orange so they stand out against the paper. -
Paint the first ray:
Start at the 12 o’clock position. Press the brush down near the circle’s edge (without touching it) to make the base of the triangle, then lift as you pull outward to create a point. -
Create opposites:
I find it helpful to paint the ray at the 6 o’clock position next to ensure things stay balanced. -
Fill the gaps:
Continue painting rays at the 3 and 9 o’clock positions, then fill in the remaining spaces evenly between them. -
Vary the color:
As you paint each ray, slightly vary the amount of water or pigment on your brush. This creates the lovely variation in transparency seen in the reference image. -
Refine shapes:
If any rays look too thin, gently widen the base with the tip of your brush, keeping the connection to the center circle slightly separated by a sliver of white paper.
Blooms & Backruns?
If you get water marks (cauliflower edges) inside the shapes, don’t fix them! This is part of the charm. If you really dislike one, soften it with a damp, clean brush.
Step 4: Final Touches
-
Check transparency:
Look for areas that might have dried too light. You can glaze a second layer of very watery orange over a few random rays to add richness. -
Dry completely:
Let the painting sit flat until it is bone dry to prevent the paper from buckling further. -
Flatten if needed:
If the paper curled too much from the water, place it under a heavy book overnight once it is 100% dry.
Hang your finished masterpiece in a sunny window or clip it to a line for a warm, cheerful display
Sunset Sky With Simple Cloud Bands
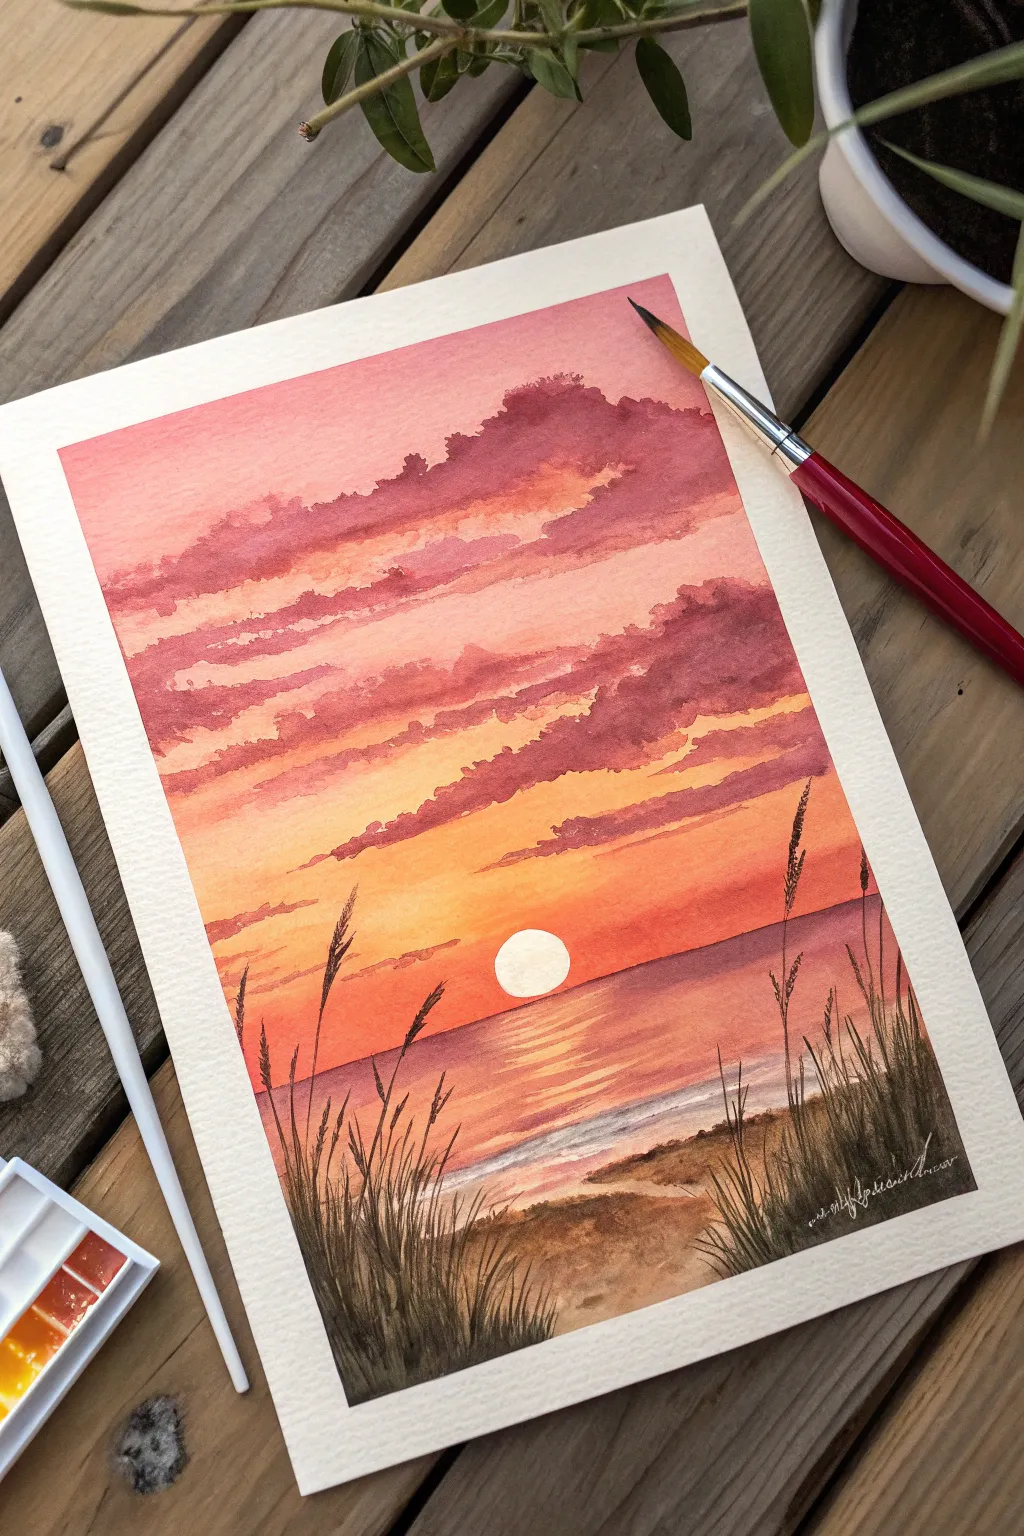
Capture the magic of golden hour with this vibrant watercolor landscape featuring layers of cotton-candy clouds and silhouetted sea oats. The warm gradient of the sky transitions beautifully into the cool reflection on the water, creating a peaceful beach scene.
How-To Guide
Materials
- Cold-pressed watercolor paper (300 gsm)
- Watercolor paints (Cadmium Red, Alizarin Crimson, Cadmium Yellow, Ultramarine Blue, Burnt Umber)
- Round brushes (size 8 or 10 for washes, size 2 or 4 for details)
- Masking tape or artist tape
- Clean water jar
- Paper towels
- Palette for mixing
Step 1: Setting the Scene
-
Tape the edges:
Begin by taping down all four sides of your watercolor paper to a board or table. This creates that crisp white border seen in the final piece and prevents the paper from buckling when wet. -
Sketch the horizon:
Lightly draw a straight horizontal line about one-third of the way up from the bottom of the paper to separate the sea from the sky. Mark a small circle for the sun just above the horizon line in the center. -
Mask the sun:
To keep the sun bright white, carefully paint around the circle you drew, or apply a drop of masking fluid if you have it. For this tutorial, we will carefully paint around it using the ‘negative space’ technique.
Step 2: Painting the Sky Gradient
-
Wet the sky area:
Using a clean, large brush, wet the entire sky area with clear water, stopping exactly at the horizon line. Avoid getting water inside your sun circle. -
Apply the yellow base:
Load your brush with a watery Cadmium Yellow. Start painting around the sun area, letting the yellow bleed outward but keeping the paper white immediately inside the circle. -
Transition to orange:
Mix a bit of red into your yellow to make a warm orange. Apply this in horizontal strokes above the yellow area, blending them softly while the paper is still damp. -
Deepen the pinks:
As you move higher up the paper, introduce Alizarin Crimson or a pinkish-red. Paint broad horizontal strokes, allowing the color to fade out slightly at the very top edge for a lighter feel. -
Dry completely:
Let this base layer dry completely. The paper must be bone-dry before adding clouds, or they will blur too much.
Too much bloom?
If your clouds look like cauliflowers, your sky layer wasn’t dry enough or your cloud brush was too wet. Blot excess water from your brush onto a towel before touching the paper.
Step 3: Cloud Layers & Ocean
-
Mix cloud color:
Create a dusty purple by mixing Alizarin Crimson with a touch of Ultramarine Blue and Burnt Umber. You want a color that is darker than your sky but still warm. -
Paint upper clouds:
Using a medium round brush, dab in the fluffy cloud shapes near the top. Keep the edges slightly irregular and soft to mimic the texture of distant clouds. -
Add lower cloud bands:
Paint thinner, flatter bands of purple-pink clouds closer to the horizon. These should be smaller to suggest distance. -
Paint the water base:
Mix a diluted wash of your reddish-pink and purple. Paint the water area below the horizon, leaving a vertical zig-zag column of white paper directly under the sun for the reflection. -
Deepen water horizon:
Add a stronger line of purple pigment right along the horizon line to separate sky from sea. -
Define the reflection:
While the water paint is still damp but not soaking, use a damp brush to soften the edges of the white reflection area, blending the pink water inward slightly.
Add sparkle
Once everything is perfectly dry, use a white gel pen to add tiny, sharp highlights to the center of the sun’s reflection on the water for an extra glistening effect.
Step 4: Foreground Details
-
Paint the sand:
Mix Burnt Umber with plenty of water for a sandy beige. Paint the bottom right corner, creating a sloping dune shape. Let the paint granulate slightly for texture. -
Add shadows to sand:
Drop darker brown into the wet sand wash near the bottom edge to create depth and uneven terrain. -
Mix silhouette color:
Create a very dark mix using Burnt Umber and Ultramarine Blue. Use very little water; you want a deeply saturated near-black color. -
Paint grass blades:
Switch to your smallest detail brush. Using the dark mix, paint long, sweeping lines upward from the sand dune. Vary the pressure: press down at the base and flick upward to create thin tips. -
Add seed heads:
At the tips of some grass blades, verify the paint is tacky or dry, then dab uneven texture to create the look of seed heads or heavy reeds swaying in the wind. -
Final touches:
Sign your work in white gouache or a gel pen in the corner, then carefully peel off the tape at a 45-degree angle to reveal your clean edges.
Now you have a serene coastal view that will never fade
BRUSH GUIDE
The Right Brush for Every Stroke
From clean lines to bold texture — master brush choice, stroke control, and essential techniques.
Explore the Full Guide
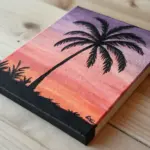
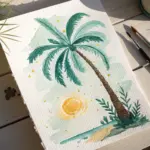
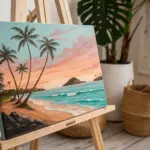
Palm Tree Silhouette and Low Sun

Capture the warmth of a setting sun with this minimalist watercolor landscape featuring a striking black palm tree silhouette. Using warm washes and bold contrast, you will create a postcard-perfect scene that feels like a summer evening.
Detailed Instructions
Materials
- Deckle-edge watercolor paper (cold press creates nice texture)
- Watercolor paints (Yellow Ochre, Burnt Sienna, Burnt Umber, Black)
- Masking tape (optional, for securing paper)
- Round brushes (size 6 for washes, size 2 for details)
- Jar of clean water
- Paper towels
- Pencil (HB or lighter)
Step 1: Setting the Sky
-
Prepare the paper:
Start with a piece of deckle-edge watercolor paper to mimic the organic feel of the reference. If you don’t have this paper, you can carefully tear the edges of a standard sheet against a ruler for a similar effect. -
Sketch the horizon:
Lightly draw a horizontal line about one-third of the way up from the bottom of the paper. This separates your sky from the water, but keep the line very faint so it disappears under the paint. -
Mix the sky wash:
Dilute a Yellow Ochre or a soft warm beige with plenty of water. You want a very pale, creamy consistency that looks like light sand. -
Apply the background wash:
Using your larger round brush, cover the entire sky area with this pale wash. Bring it all the way down to your horizon line, ensuring an even, flat coat without streaks. -
Add warmth near the horizon:
While the sky is still slightly damp, mix a tiny bit of Burnt Sienna into your yellow mix and gently glaze the area just above the horizon line to suggest the glowing atmosphere of sunset.
Dry Brush Texture
When painting the palm leaves, blot your brush slightly on a paper towel first. The dryer brush creates wispy, broken lines that look more like real foliage.
Step 2: Painting the Sun and Water
-
Let the sky dry:
Wait until the sky layer is completely bone dry. Attempting to paint the sun too soon will cause it to bleed into a fuzzy blob. -
Paint the sun:
Mix a saturated Burnt Sienna or orange-red. Load your brush and paint a clean circle low in the sky, slightly to the right of the center. Make it opaque enough to stand out against the pale background. -
Establish the water base:
Below the horizon line, paint a wash of Burnt Sienna or warm orange. This base color represents the reflection of the sunset on the water’s surface. -
Add water ripples:
While the water area is wet, drop in slightly darker orange or dilute brown (Burnt Umber) in horizontal zigzag strokes directly under where the sun sits. This mimics the shimmering reflection path. -
Define the distant land:
Once the sky and water are dry, mix a diluted dark brown or grey. Paint low, rolling hill shapes right on the horizon line. These should be darker than the water but lighter than the foreground silhouette to create depth. -
Dry thoroughly:
Let the entire painting dry completely. This is crucial because the black silhouette needs a stable, dry surface for crisp edges.
Bleeding Edges?
If your sun bleeds into the sky, the paper was too damp. Blot it immediately with a tissue, let it dry completely, and then repaint the circle with thicker paint.
Step 3: The Silhouette Details
-
Mix the silhouette black:
You need a deep, opaque black for the palm tree. If you find tube black too flat, I prefer mixing black with a touch of dark brown to give it richness. -
Paint the trunk:
Start at the bottom left section of the paper. Paint a curved trunk rising upward and leaning slightly to the right. Make the base wider and taper it as it reaches the fronds. -
Form the foreground land:
Connect the base of the tree to a jagged, rocky foreground shape at the very bottom of the paper. Use the same black mixture to ground the tree. -
Outline the main frond spines:
Using your smaller detail brush, paint 5 to 7 curved lines radiating outward from the top of the trunk. These are the spines of your palm leaves. -
Add the leaves:
Use quick, flicking strokes to paint the individual leaves coming off each spine. Keep your brush touches loose and ragged to mimic the texture of palm fronds catching the breeze. -
Overlay the leaves:
Don’t be afraid to let some leaves overlap the sun circle you painted earlier. This overlap really sells the silhouette effect. -
Add foreground grasses:
At the bottom of the black land mass, use the tip of your smallest brush to flick upward, creating thin blades of grass or small plants silhouetted against the water. -
Final touches:
Check your density. If the black looks patchy after drying, carefully apply a second coat to the darkest areas to ensure a solid, graphic silhouette.
Place your finished piece in a frame or display it on a stand to enjoy those eternal sunset vibes
Sun and Birds in Minimal Silhouette

Capture the serene warmth of a setting sun with this minimalist watercolor landscape. The soft washes of sky blue and peach create a perfect backdrop for a bold sun and delicate bird silhouettes.
How-To Guide
Materials
- Cold-pressed watercolor paper (300 gsm recommended)
- Watercolor paints (Yellow Ochre or Cadmium Yellow, Orange, Sky Blue, Paynes Gray or Black)
- Masking tape
- Flat wash brush (3/4 inch)
- Round brush (size 4 or 6)
- Fine liner brush (size 0 or 00)
- Circular stencil or compass
- Clean water and paper towels
Step 1: Preparing the Sky
-
Secure the paper:
Tape down all four edges of your watercolor paper to a board. This creates the crisp white border seen in the example and prevents buckling. -
Outline the sun:
Lightly trace a circle in the center of the paper using a stencil or compass. Keep the pencil line very faint so it doesn’t show through the paint later. -
Wet the sky area:
Use your large flat brush to apply clean water to the upper third of the paper. Avoid the circle area; we want that to stay dry for now. -
Wash in the blue:
Load your brush with a diluted Sky Blue. Gently sweep it across the top wet area, letting it fade naturally as you move downwards toward the middle of the page. -
Add warmth below:
While the paper is still slightly damp (but not the blue part), apply a very pale wash of peach or diluted orange to the middle section, just below where the blue ends but above the horizon line.
Bleeding Lines?
If your sun bleeds into the sky, the sky wasn’t dry enough. Use a clean, damp brush to gently ‘lift’ the unwanted paint while it’s still wet.
Step 2: Painting the Sun
-
Fill the sun base:
Once the sky is completely dry, pick up your round brush. Wet the inside of your pencil circle carefully with clean water. -
Drop in color:
Load your brush with a sunny Yellow Ochre or Cadmium Yellow and touch it to the wet circle. Watch the color spread to the edges. -
Create a gradient:
While the yellow is wet, drop a small amount of orange paint near the bottom of the circle. Let the colors bleed together naturally for a dimensional look. -
Let it set:
Allow the sun to dry completely before moving on to avoid smearing the bright shape.
Enhance the Sun
For a glowing effect, lift a tiny highlight from the top left of the wet sun with a thirsty brush or corner of a paper towel.
Step 3: Creating the Landscape
-
Paint the horizon base:
Mix a watery green-grey using blue and a touch of yellow. Paint a loose, uneven strip across the bottom third of the paper to form the distant horizon. -
Add the foreground wash:
Beneath the horizon strip, fill the rest of the bottom area with a slightly darker, more saturated green wash. Let this dry fully. -
Layer the grass:
Using a slightly darker green mixture (less water, more pigment), paint a second, jagged layer right along the bottom edge to suggest depth. -
Detail the blades:
Switch to your fine liner brush or the tip of your round brush. Paint individual blades of grass and leafy stems rising from the bottom edge using vertical flicking motions. -
Vary the heights:
Make sure some grass blades are tall and others short to keep the composition looking organic and wild.
Step 4: Final Details
-
Practice the birds:
I recommend sketching a few ‘V’ shapes on scratch paper first to get the movement right before painting on your artwork. -
Paint the flock:
Using the fine liner brush and black or Payne’s Gray, paint a curved line of small, silhouetted birds flying diagonally upwards toward the right side of the paper. -
Vary bird sizes:
Paint the birds slightly smaller as they get further away (higher up) to create perspective. -
Peel the tape:
Once everything is bone dry, carefully peel off the masking tape at a 45-degree angle to reveal your clean white border.
Frame your piece or gift it to bring a little sunshine into someone’s day

PENCIL GUIDE
Understanding Pencil Grades from H to B
From first sketch to finished drawing — learn pencil grades, line control, and shading techniques.
Explore the Full Guide
Simple Sun Reflection on a Lake
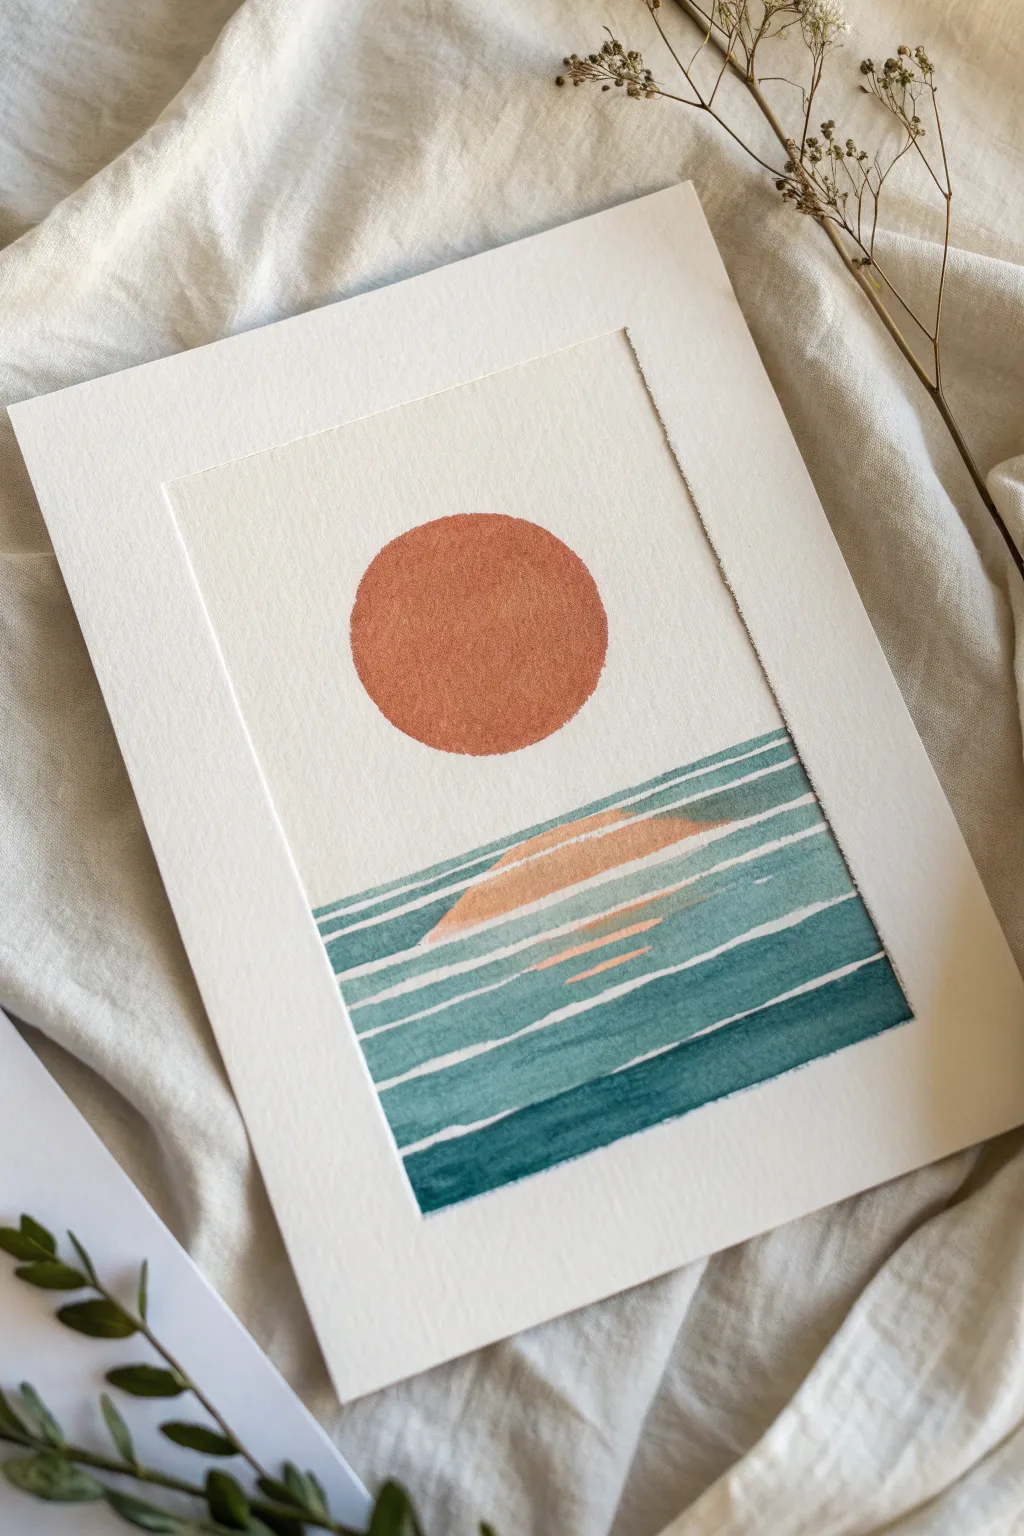
Capture the calm of a setting sun with this minimalist lake scene, characterized by its clean lines and soothing teal palette. Using simple brushstrokes and masking techniques, this project creates a lovely interplay between the warm sun and cool water.
Step-by-Step Tutorial
Materials
- Cold pressed watercolor paper (heavyweight, e.g., 300gsm)
- Painter’s tape or masking tape
- Gouache or opaque watercolor paints (Burnt Sienna, Teal, White, Dark Blue)
- Flat shader brush (size 6 or 8)
- Small round detail brush (size 2)
- Palette for mixing
- Cup of water and paper towels
- Ruler and pencil
- Compass or circle stencil
Step 1: Preparation and Sketching
-
Tape the borders:
Begin by taping down all four sides of your watercolor paper to a hard surface. This creates the crisp white border seen in the final piece and keeps the paper flat while painting. -
Mark the inner frame:
For the distinct embossed-look frame, gently measure about an inch inside your taped border. Use a ruler to lightly draw a rectangle with a pencil. This will be your painting boundary. -
Draw the sun:
Position your compass or stencil in the upper third of the sketched rectangle. Lightly draw a perfect circle for the sun. -
Sketch the water lines:
Starting just below the halfway point of your rectangle, sketch faint horizontal lines to mark where the water waves will go. These don’t need to be perfectly straight; a slight organic wobble adds charm.
Step 2: Painting the Sun and Sky
-
Mix the sun color:
Mix a warm, rusty orange using Burnt Sienna with a touch of red or orange. If using gouache, ensure it has a creamy consistency like melted ice cream. -
Fill in the sun:
Carefully paint inside your circle outline using the round brush. Keep the edges as neat as possible, but don’t worry if the texture looks slightly grainy; that’s the beauty of cold-pressed paper. -
Paint the reflection base:
Using a lighter version of your sun color (mix in some white), paint a semi-circle or mound shape directly below the sun, right where the water begins. This acts as the glowing reflection on the surface. -
Let it dry completey:
Allow these orange elements to dry fully. If the paint is wet, the blue layers you add next might muddy the colors.
Clean Lines Hack
Does your hand shake? Use a ruler as a guide for your brush handle (not the bristles) to keep your horizontal water lines straight.
Step 3: Creating the Water
-
Prepare the teal gradient:
Mix three shades of teal: a light milky teal for the top waves, a medium teal, and a deep blue-green for the bottom. -
Paint the top wave:
Using your flat brush and the lightest teal mix, paint the first horizontal strip of water. Start from the left pencil line, stroke across the orange reflection, and end at the right pencil line. -
Add white space:
Leave a very thin sliver of unpainted white paper below that first stroke. This negative space mimics the light catching the ripples. -
Layer the middle waves:
Switch to your medium teal shade. Paint the next few horizontal strips below, maintaining those thin white gaps between each stroke. As you paint over the orange reflection area, let the brush skipping create a layered effect. -
Detail the reflection:
I like to go back with a tiny bit of the light orange mix and add small dashes between the teal waves in the reflection zone, reinforcing the shimmer. -
Depict the deep water:
For the bottom third of the water, use your darkest blue-green mix. Make these strokes slightly wider and simpler to show the depth of the lake. -
Clean up edges:
If any paint went outside your pencil rectangle, you can touch it up with a bit of opaque white paint, or simply embrace the handmade look. -
Add texture (optional):
If the water looks too flat, dry brush a little bit of the lighter teal over the dark teal areas to suggest surface movement.
Golden Hour Glow
Mix a tiny amount of metallic gold paint into your orange reflection color for a subtle shimmer that catches the light.
Step 4: Finishing Touches
-
Dry thoroughly:
Wait until the paint is bone dry. Gouache can smudge easily if damp. -
Erase pencil guides:
Gently erase the vertical and horizontal pencil lines that defined your painting area. Be careful not to scrub over the painted sections. -
Create the embossed edge:
To mimic the textured edge in the inspiration photo, you can use a bone folder or a clean butter knife to gently score along the invisible line where the paint ends and the white margin begins. -
Peel the tape:
Slowly peel away the painter’s tape at a 45-degree angle to reveal your crisp outer border.
Step back and admire the serene atmosphere you’ve created with just a few colors and careful spacing
Warm Gradient Sun With Sponge-Stamped Circle
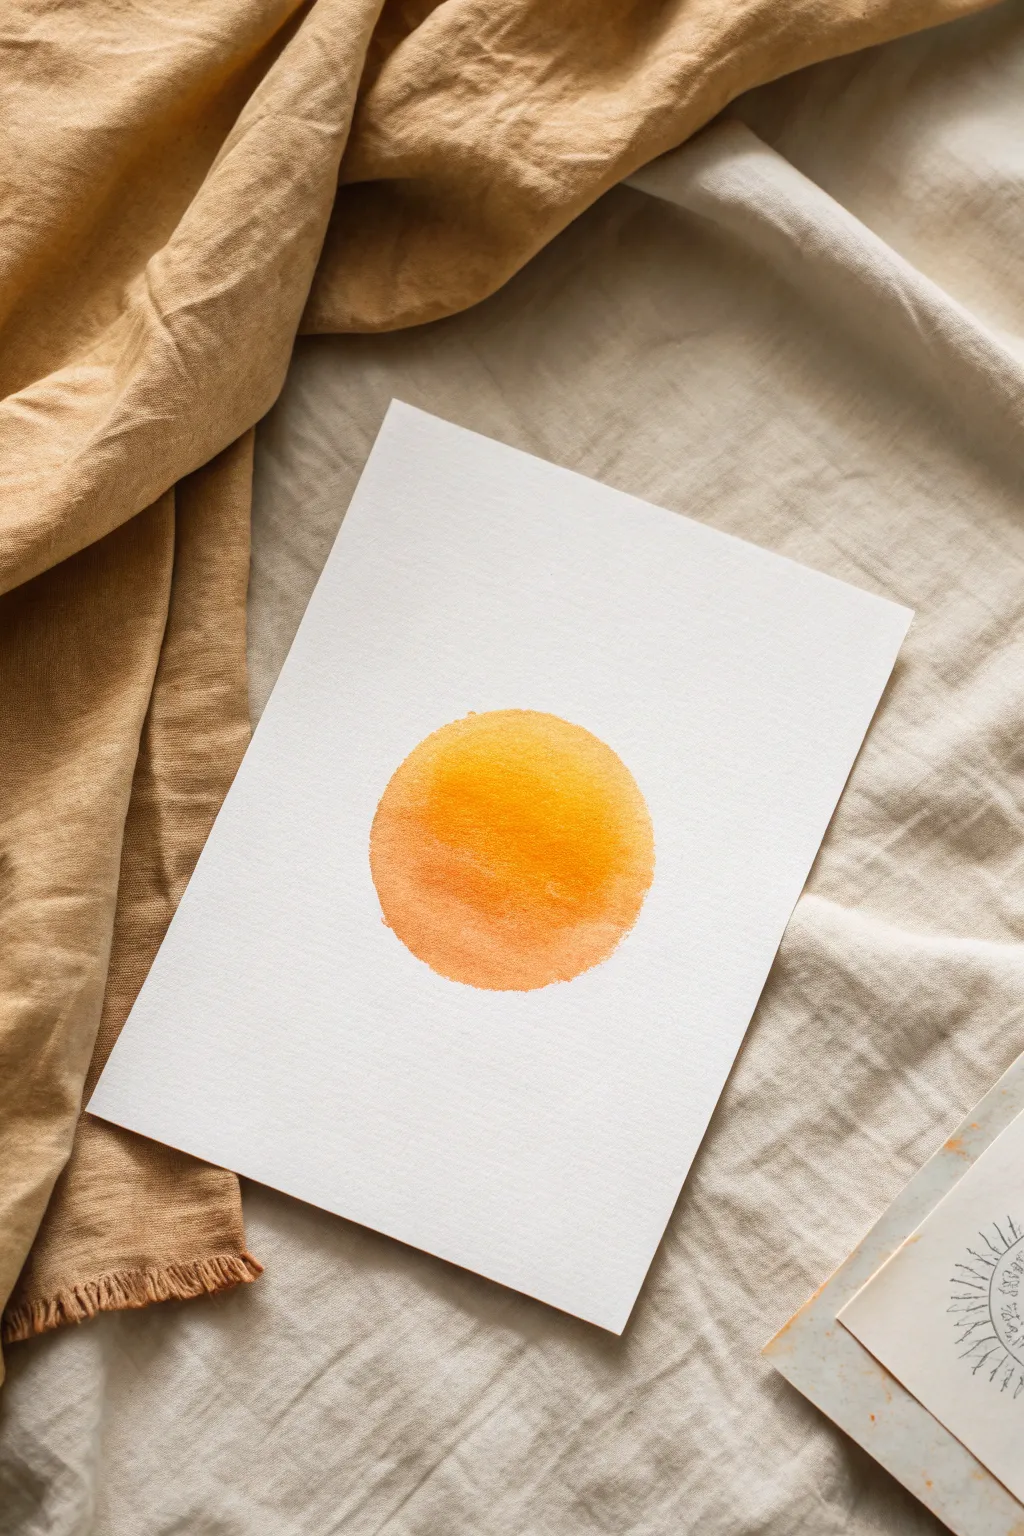
This minimalist art piece captures the gentle warmth of the sun using a soft gradient of oranges and yellows. The textured, diffused edges give it an organic feel that looks lovely framed or as a greeting card.
Step-by-Step
Materials
- Heavyweight cold press watercolor paper (300 gsm)
- Round synthetic craft sponge or blending foam
- Watercolor paints or acrylic inks (Cadmium Yellow, Orange, Vermilion)
- Palette or small plate for mixing
- Spray bottle with water
- Pencil
- Circular object for tracing (like a jar lid, approx. 3 inches)
- Paper towels
Step 1: Preparation & Outline
-
Prepare your workspace:
Clear a flat surface and lay down a protective cloth if needed. Have your sponge, paints, and mist bottle within easy reach. -
Position the circle:
Take your heavyweight watercolor paper and decide where you want the sun. Center placement usually works best for this minimalist style. -
Trace the guide:
Place your circular object (like a jar lid) lightly on the paper. Use a pencil to trace a very faint circle. -
Lighten the line:
Since watercolors are transparent, you don’t want a heavy graphite line showing through. Gently erase the circle until it is barely visible—just enough to guide your sponge.
Uneven Edges?
If your circle isn’t perfectly round, don’t worry. You can gently dab a little paint just outside the edge to correct the shape, or embrace the organic look.
Step 2: Mixing Palette
-
Prepare the yellow:
Squeeze a small amount of Cadmium Yellow onto your palette. Add a few drops of water to create a milky, fluid consistency. -
Prepare the orange:
Next to the yellow, mix your orange paint. Aim for a similar fluid consistency. You want the colors to be vibrant but wet enough to blend. -
Create a transition shade:
Mix a tiny bit of orange into a separate puddle of yellow to create a golden, intermediate hue. -
Dampen the sponge:
Dip your round sponge into clean water and squeeze it out thoroughly. It should be damp, not dripping.
Step 3: Creating the Gradient
-
Load the sponge with yellow:
Dab the top half of your damp sponge into the yellow paint. I prefer to blot it once on a paper towel to remove excess liquid. -
Start stamping:
Gently press the sponge onto the upper area of your penciled circle. Use a straight up-and-down dabbing motion to create a textured effect. -
Add the orange tones:
While the yellow is still wet, dip the bottom portion of your sponge into the orange mix. -
Blend on paper:
Stamp the orange into the lower half of the circle. As you move toward the middle, let the orange slightly overlap the yellow to create a soft gradient. -
Enhance the saturation:
If the colors look too pale, reload your sponge with slightly more concentrated paint and dab over the existing areas. -
Refine the edges:
Carefully dab along the faint pencil line to define the circle’s shape. The edge should be relatively crisp but retain that lovely sponge texture. -
Soften the center:
If the gradient line in the middle looks too harsh, dab a clean, slightly damp part of the sponge over the transition zone to smooth it out.
Pro Tip: Texture Boost
For more interesting texture, use a natural sea sponge instead of a synthetic craft sponge. The irregular holes create beautiful, organic patterns.
Step 4: Finishing Touches
-
Check for gaps:
Look closely at the texture. If there are white spots that look unnatural, lightly dab them with the appropriate color. -
Let it dry completely:
Allow the paint to air dry undisturbed. This prevents the pigments from running and ruining the crisp circular shape. -
Erase guidelines:
Once the paint is 100% bone dry to the touch, gently erase any remaining visible pencil marks from the outer edge. -
Flatten the paper:
If the water caused the paper to buckle slightly, place the dry artwork under a heavy book overnight to flatten it.
Hang your warm, sun-soaked creation in a spot that needs a little extra brightness


Easy Sun Halo With Dry Brush Glow
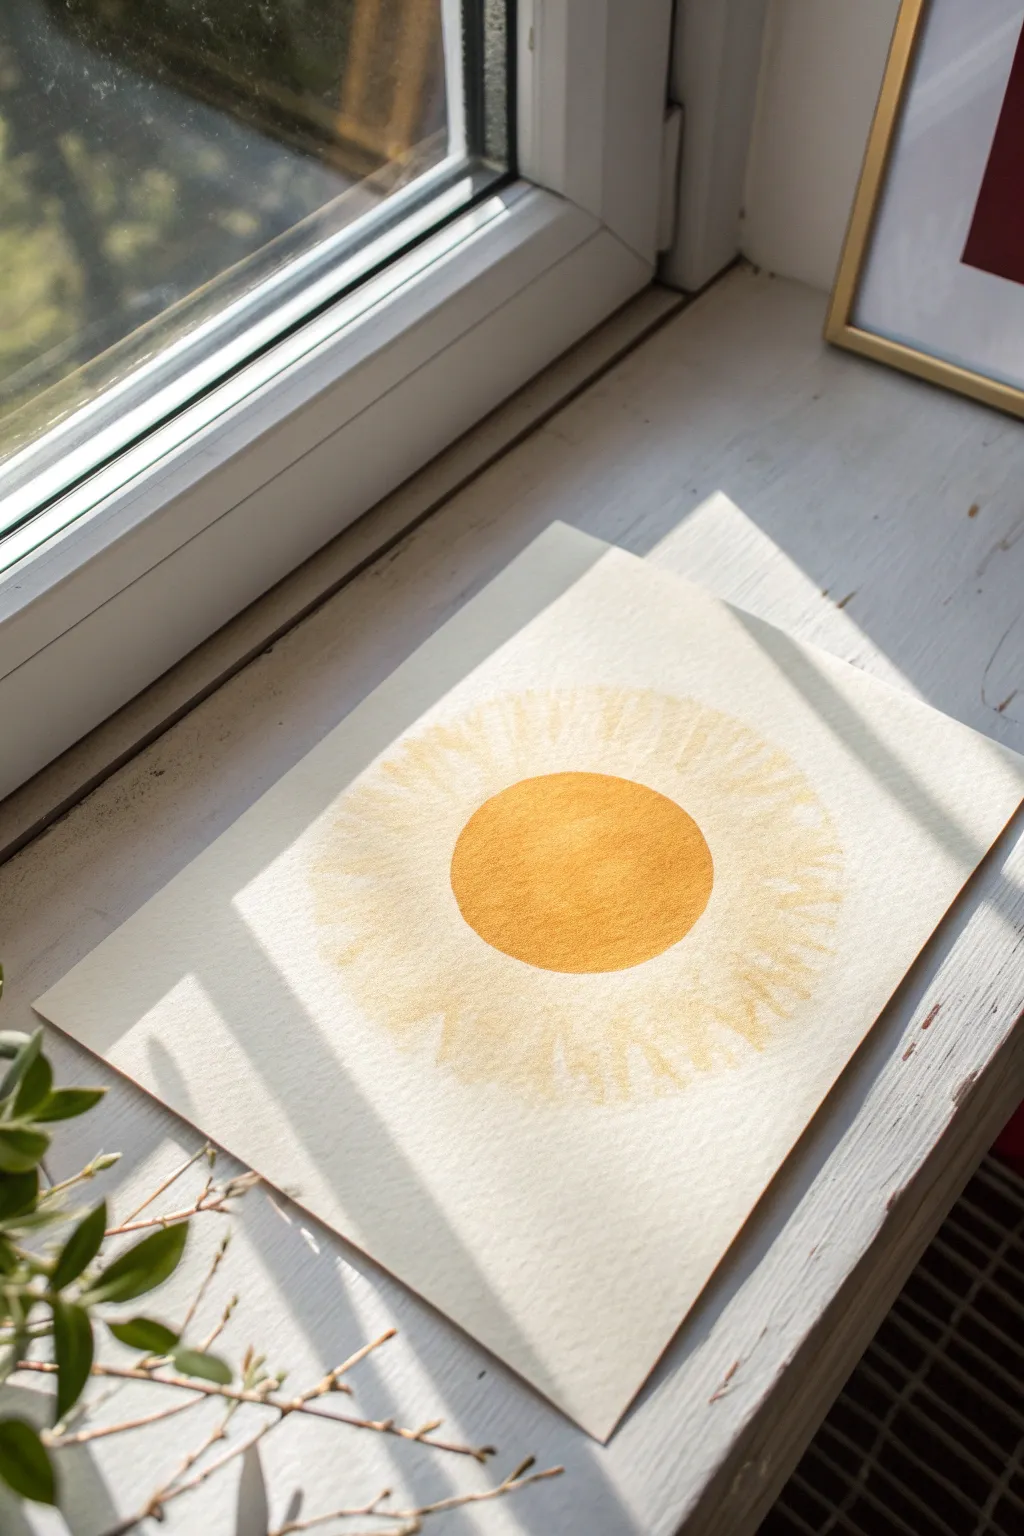
Capture the warmth of a sunny day with this minimalist watercolor project that focuses on texture and light. By combining a saturated core with delicate, dry-brushed rays, you’ll create a glowing sun that feels both modern and organic.
Step-by-Step Guide
Materials
- Cold press watercolor paper (140lb/300gsm)
- Round watercolor brush (size 8 or 10)
- Flat shader brush or stiff bristle brush
- Yellow ochre watercolor paint
- Cadmium yellow or deep orange watercolor paint
- Clean water
- Paper towels
- Pencil
- Circular object for tracing (like a jar lid)
Step 1: Preparation & Central Sun
-
Outline the sun:
Begin by placing your circular object in the center of your watercolor paper. Lightly trace around it with a pencil to create a perfect circle guide. -
Mix your core color:
In your palette, mix a rich, saturated blend of yellow ochre and a touch of deep orange. You want a warm, golden egg-yolk color that is opaque enough to stand out but still transparent. -
Paint the inner circle:
Load your round brush with the paint mixture. Carefully fill in the penciled circle, working from the center outward to the edges to keep the paint wet. -
Refine the edge:
Use the tip of the brush to ensure the circumference is neat and distinct. If paint pools on one side, lift the excess with a thirsty, clean brush. -
Initial drying:
Let this central circle dry completely. It is crucial that the center is dry before you start the halo so the colors don’t bleed into each other unintentionally.
Too much water?
If your dry brush strokes look like solid puddles, your brush is too wet. Blot it aggressively on a towel until it barely leaves a mark, then try again.
Step 2: Creating the Dry Brush Halo
-
Prepare the lighter wash:
Dilute your original yellow mixture with significantly more water. You want a very pale, subtle yellow wash for the rays. -
Load and blot:
Dip your flat brush or stiff bristle brush into the pale wash. Immediately blot the brush onto a paper towel to remove almost all the moisture. The bristles should feel damp, not wet. -
Start the halo:
Position your brush about half an inch away from the edge of the dried sun circle. You don’t want to touch the main sun just yet. -
Drag the brush:
Using quick, flicking motions, drag the brush outwards towards the edge of the paper. Use very light pressure to catch the tooth of the paper texture. -
Build the ring:
Work your way around the sun, creating a ring of these faint, textured strokes. Leave a small negative space gap between the sun and the start of the rays initially. -
Connect the rays:
Once the outer ring is established, gently extend the strokes inward to just barely kiss the edge of the central sun circle. I find this creates a nice vibration between the solid shape and the textured rays. -
Vary the length:
Go back around and extend some rays further out than others. The irregularity makes the glow feel more natural and less like a mechanical gear. -
Add warmth:
Pick up a tiny bit of slightly more saturated yellow on your dry brush. Add a few accent strokes within the halo to create depth. -
Check texture:
Ensure the white of the paper is showing through your strokes. If the paint looks too solid, blot your brush more thoroughly. -
Final drying:
Allow the halo to dry completely. The textured strokes should dry very quickly compared to the center. -
Erase guides:
Once the paper is bone dry, gently erase any visible pencil marks from your initial tracing.
Enhance textue
Use rough or cold press watercolor paper rather than hot press. The bumpier texture grabs the pigment better for that distinct separated look.
Place your finished piece near a window to let natural light enhance the glowing effect you’ve created
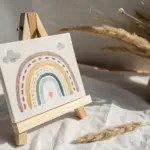
Day and Night Split With Sun on One Side
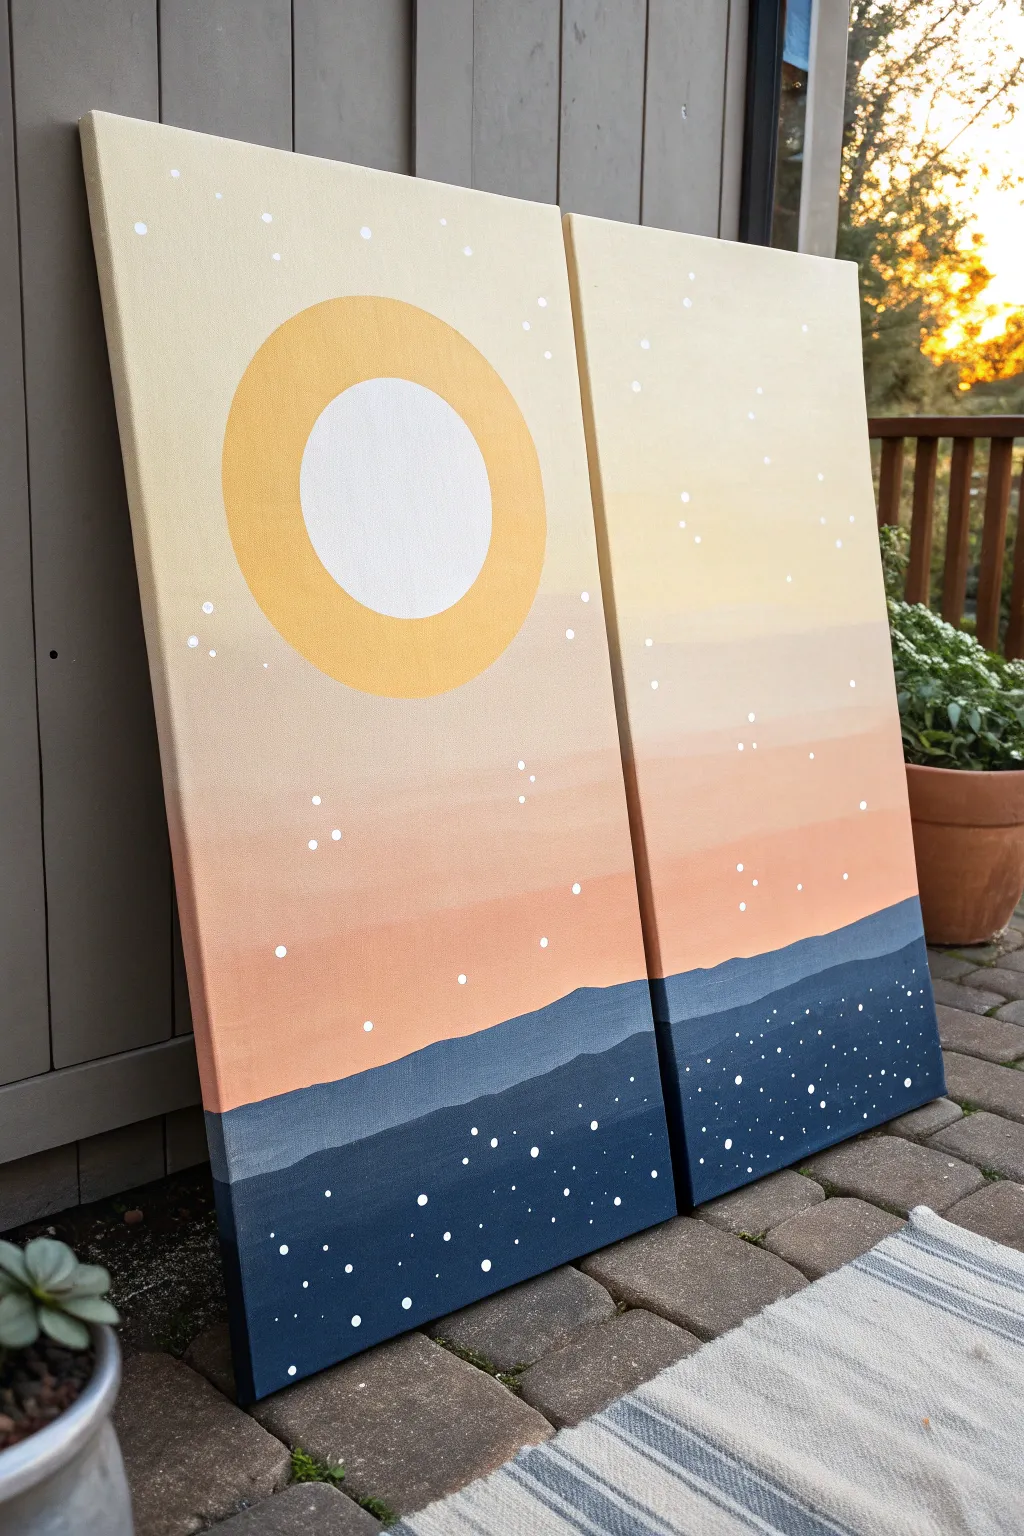
Create a stunning statement piece by splitting a serene landscape across two canvases. This diptych features a gradient sunset sky, a bold stylized sun, and rolling night hills, all connected seamlessly to form one cohesive image.
Step-by-Step Tutorial
Materials
- Two long rectangular canvases (e.g., 12×24 or 15×30 inches)
- Acrylic paints (Titanium White, Yellow Ochre or Mustard, Light Peach, Coral or Soft Orange, Dark Blue/Payne’s Grey, Black)
- Wide flat wash brush (2-inch width)
- Medium flat brush (1-inch width)
- Small round detail brush
- Painter’s tape or masking tape
- Large circular object for tracing (like a dinner plate or bowl)
- Smaller circular object for tracing (like a saucer or lid)
- Pencil
- Palette for mixing gradients
- Cup of water and paper towels
Step 1: Preparation and Sketching
-
Align the canvases:
Lay your two canvases side-by-side on a flat surface, touching each other. They need to be perfectly aligned so your drawing flows from one to the next seamlessly. -
Trace the sun:
Place your larger circular object on the left canvas, positioned in the upper third area. Lightly trace around it with a pencil to create the outer edge of the sun ring. Then, center your smaller object inside that circle and trace again to create the inner sun circle. -
Draft the horizon lines:
Sketch a wavy, organic line across the bottom quarter of both canvases to represent the nearest hill. Add a second, slightly higher wavy line behind it for the distant mountains. Ensure the lines connect smoothly across the gap between the two canvases.
Step 2: Painting the Gradient Sky
-
Mix your sky colors:
Prepare a gradient palette: a pale creamy yellow for the top, a warm peach for the middle, and a deeper coral orange for the horizon line just above the hills. -
Paint the top section:
Using your wide flat brush, paint the top third of both canvases with the pale creamy yellow. Paint right over your pencil lines for the sun—you’ll paint the sun on top later, which usually gives a cleaner edge. -
Apply the middle band:
While the yellow is still slightly wet, brush the peach color across the middle section of the sky. Use long, horizontal strokes that span the width of the canvas to encourage blending. -
Blend the transition:
Clean your brush slightly (keep it damp but not soaking) and gently brush back and forth where the yellow and peach meet to create a soft, ombre transition. -
Finish the lower sky:
Apply the coral orange to the area just above your pencil sketched hills. Blend this upward into the peach section using the same horizontal stroke technique. Let the entire background dry completely before moving on.
Paint Lifting?
If blending the sky lifts the previous layer, your paint might be drying too fast. Mist the canvas lightly with water or use a slow-drying medium to keep the acrylics workable longer.
Step 3: Painting the Sun and Landscape
-
Re-trace the sun if needed:
If your paint covered the pencil lines too opaquely, place your circular objects back in the original spot on the left canvas and lightly re-trace them. -
Fill the sun ring:
Mix a warm mustard yellow or yellow ochre. Using a medium flat brush, carefully fill in the donut-shaped ring of the sun. You may need two coats for solid, opaque coverage. -
Paint the sun center:
Fill the inner circle with pure Titanium White. Use a steady hand or a smaller brush for the edges to keep the circle crisp. -
Paint the distant mountains:
Mix a muted slate blue (blue mixed with a little grey or white). Fill in the mountain shape that sits furthest back (the higher pencil line). Paint cleanly along the top edge, overlapping the sky slightly. -
Paint the foreground hills:
Mix a very dark navy blue (dark blue plus a touch of black). Fill in the bottom-most hill shape, covering the bottom edge of the slate blue mountains. I find outlining the top curve first with a smaller brush helps create a sharp silhouette. -
Wrap the edges:
Don’t forget the sides! carry your sky stripes, mountain colors, and hill colors around the deep edges of the canvas for a professional, finished look.
Make It 3D
For a magical touch, glue tiny rhinestones or flat-backed crystals over the white star dots in the dark blue hill section. They will catch the light and shimmer like real fireflies.
Step 4: Adding the Stars
-
Dot the hills:
Once the dark blue hills are dry, use your smallest detail brush or the handle end of a paintbrush dipped in white paint. Dot small ‘stars’ or fireflies densely across the dark blue foreground. -
Add sky stars:
Add scattered white dots in the sky area. Keep them sparse in the yellow areas and slightly more frequent in the peach/orange sections for balance. -
Vary dot sizes:
To make it look more natural, make some dots tiny and others slightly larger. You can achieve this by varying the pressure you put on the brush handle. -
Final drying:
Allow the canvases to dry flat for at least an hour to prevent any thick dots of paint from dripping or smearing.
Hang your pieces with a small gap between them to enhance the modern diptych effect.
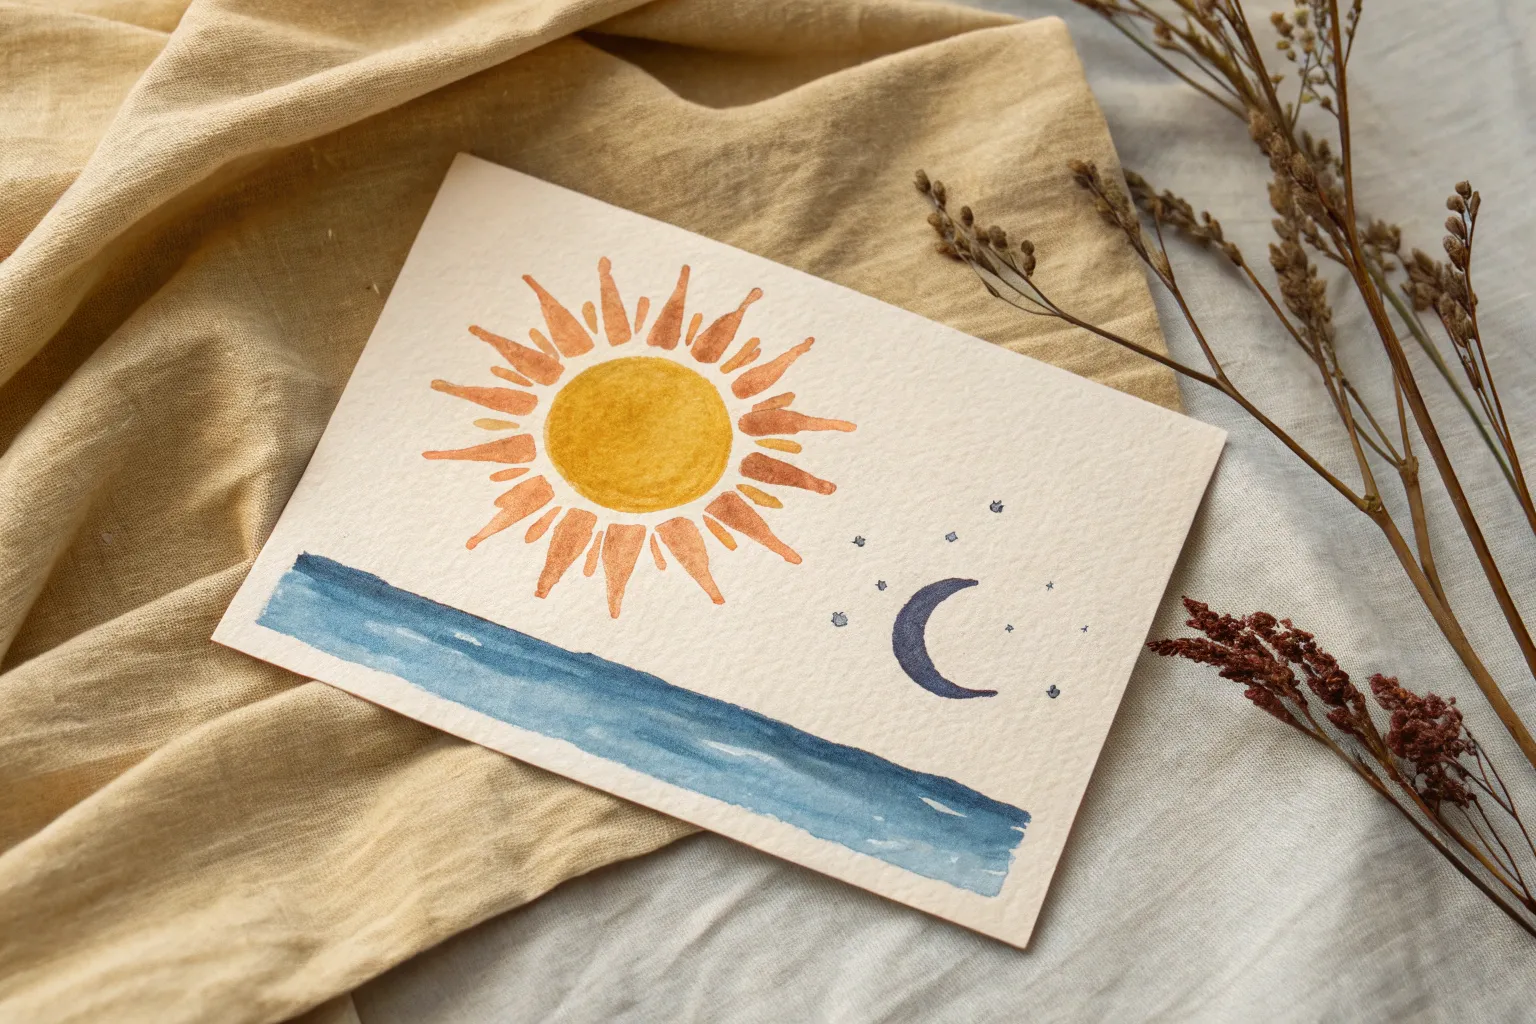
Sun and Crescent Moon Sharing the Sky
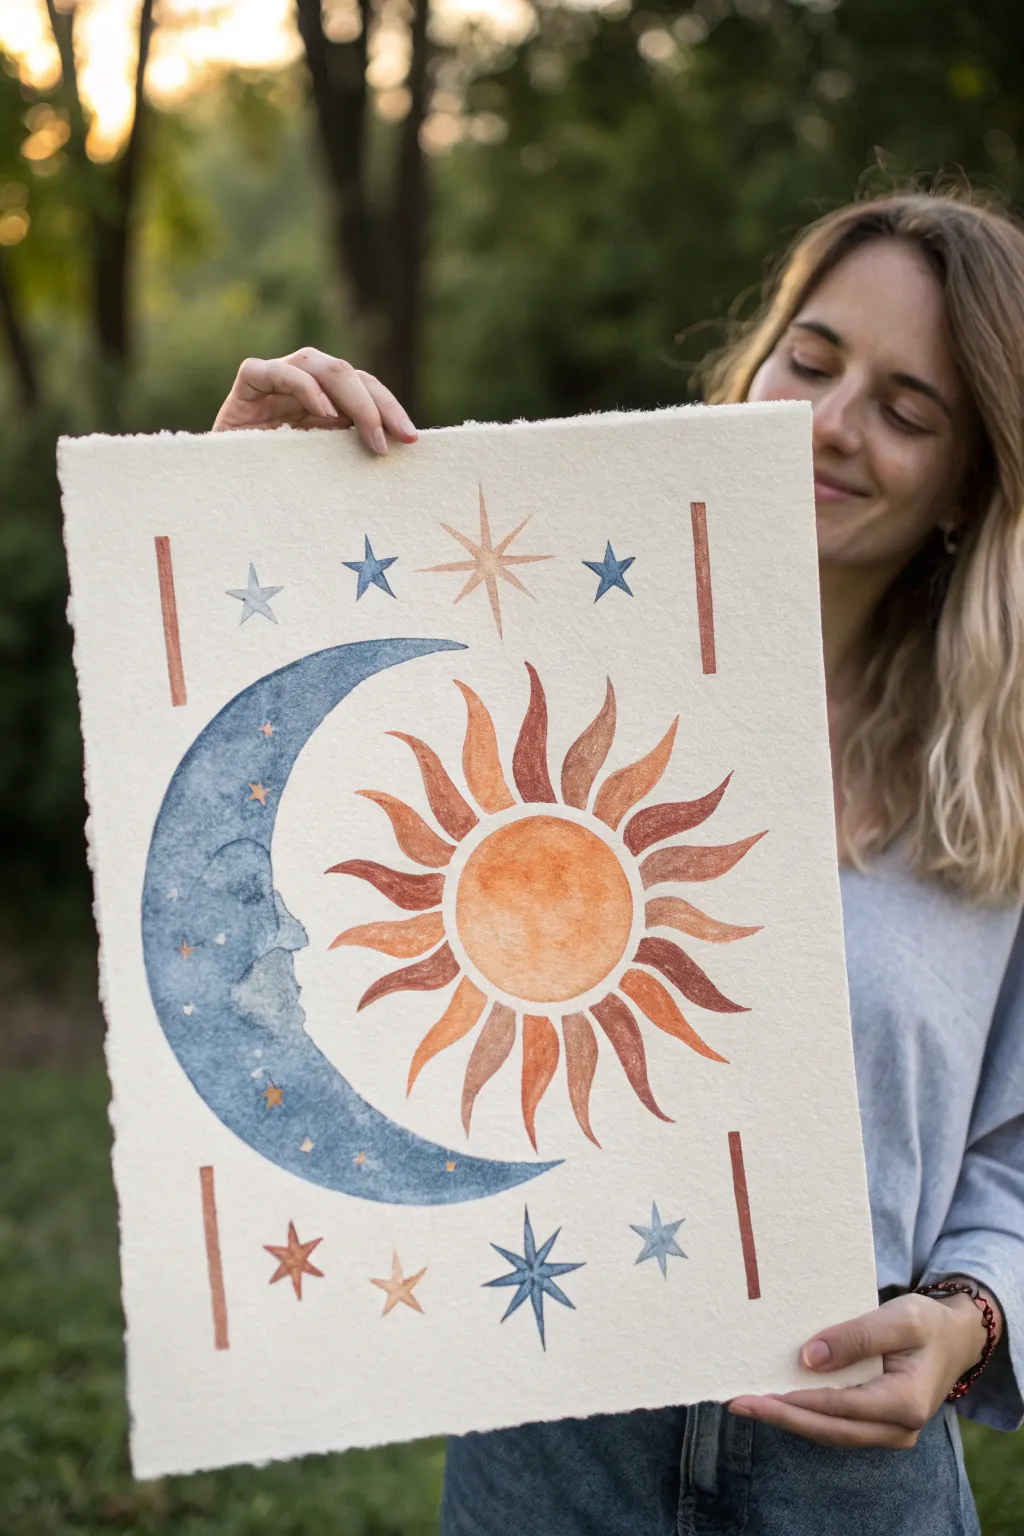
This whimsical watercolor painting captures the mystical bond between a textured blue crescent moon and a warm, radiant sun sharing the same space. The composition is balanced with decorative stars and vertical lines, all painted on beautiful deckled-edge paper for an artisanal feel.
Step-by-Step Guide
Materials
- Heavyweight watercolor paper (300gsm/140lb) with deckled edges
- Watercolor paints (Indigo, Prussian Blue, Burnt Sienna, Yellow Ochre, Cadmium Orange)
- Metallic gold or bronze watercolor paint (optional for accents)
- Round watercolor brushes (sizes 2, 4, and 6)
- Pencil and eraser
- Compass or two round objects for tracing
- Ruler
- Jar of water
- Paper towels
Step 1: Sketching the Celestial Bodies
-
Map out the composition:
Begin by lightly finding the center of your paper. Use a compass or trace a large round object to draw a circle for the sun in the middle-right area. Don’t press too hard with your pencil; watercolor is transparent, and dark lines might show through. -
Outline the crescent moon:
To the left of the sun, draw a larger arc that curves around it. This will be the outer edge of your crescent moon. Draw the inner edge so it cups the sun, leaving a comfortable gap between the two celestial bodies. -
Add facial profile details:
If you want to add the subtle face seen in the moon, sketch a gentle profile (forehead, nose, lips, chin) along the inner curve of the crescent. Keep it soft and dreamy rather than sharp. -
Draw the rays and stars:
Sketch wavy, flame-like rays radiating from the sun. Vary their lengths slightly for a natural look. Use a ruler to mark the positions for the vertical decorative bars and the stars above and below the main figures.
Uneven Watermarks?
If your large moon wash dries with unwanted hard edges (blooms), gently scrub the area with a damp stiff brush to soften looking lines, or paint over it with a creative ‘crater’ texture.
Step 2: Painting the Blue Crescent Moon
-
Mix your moon color:
Create a deep, moody blue by mixing Indigo with a touch of Prussian Blue. You want a color that feels like the night sky. Dilute it slightly with water to allow for texture. -
Apply the base wash:
Using a size 6 brush, fill in the crescent moon shape. Use the wet-on-dry technique here to keep the edges crisp. While the paint is still wet, you can drop in slightly darker pigment in random spots to create a crater-like texture. -
Create texture effects:
To mimic the stony look in the reference, try lifting a little pigment with a thirsty (damp but clean) brush or blotting gently with a paper towel in a few areas while the wash is drying. -
Add subtle details:
Once the blue layer is dry, use a size 2 brush and a darker concentration of the blue mix to define the facial profile and add small crater details or shadows within the moon’s surface.
Step 3: Painting the Sun
-
Paint the sun’s core:
Load your size 6 brush with a warm mix of Yellow Ochre and a hint of Cadmium Orange. Paint the central circle of the sun. Keep the wash even, or let it pool slightly in the center for a glowing effect. -
Start the sun rays:
For the rays, switch to a size 4 brush. Mix Burnt Sienna with Orange to get a terracotta hue. Paint every other ray with this color, following the wavy sketches you made earlier. -
Alternate ray colors:
For the remaining rays, mix a slightly lighter or darker version—perhaps adding a touch of red or sticking to pure ochre—to create visual interest and depth between the flames.
Vintage Patina
Dip the edges of the paper in weak tea or coffee before painting (let it dry fully!) to give the deckled edges an aged, antique parchment look.
Step 4: Adding Decorative Elements
-
Detailed stars:
Using your smallest brush (size 2), paint the stars at the top and bottom. Use the blue mix for the larger, multi-pointed stars and a rusty orange for the smaller, simple stars. -
Paint the vertical bars:
Carefully paint the four vertical decorative lines using the Burnt Sienna mix. A ruler can help guide your hand, but a slightly imperfect line adds to the hand-painted charm. -
Add metallic accents:
I particularly enjoy adding tiny gold stars directly onto the blue moon once it’s completely dry. Use metallic watercolor or a gold gel pen to draw tiny sparkles or dots on the dried blue surface.
Step 5: Final Touches
-
Erase pencil lines:
Ensure your painting is 100% dry—cool to the touch. Gently erase any visible pencil marks, being careful not to scrub the paint. -
Review and refine:
Step back and look at the balance. If the sun looks too pale, you can glaze a second layer of transparent orange over the center to boost the vibrance.
Frame your celestial duo in a simple wooden frame to let those beautiful paper edges shine.
Cartoon Sun Face With Simple Lashes
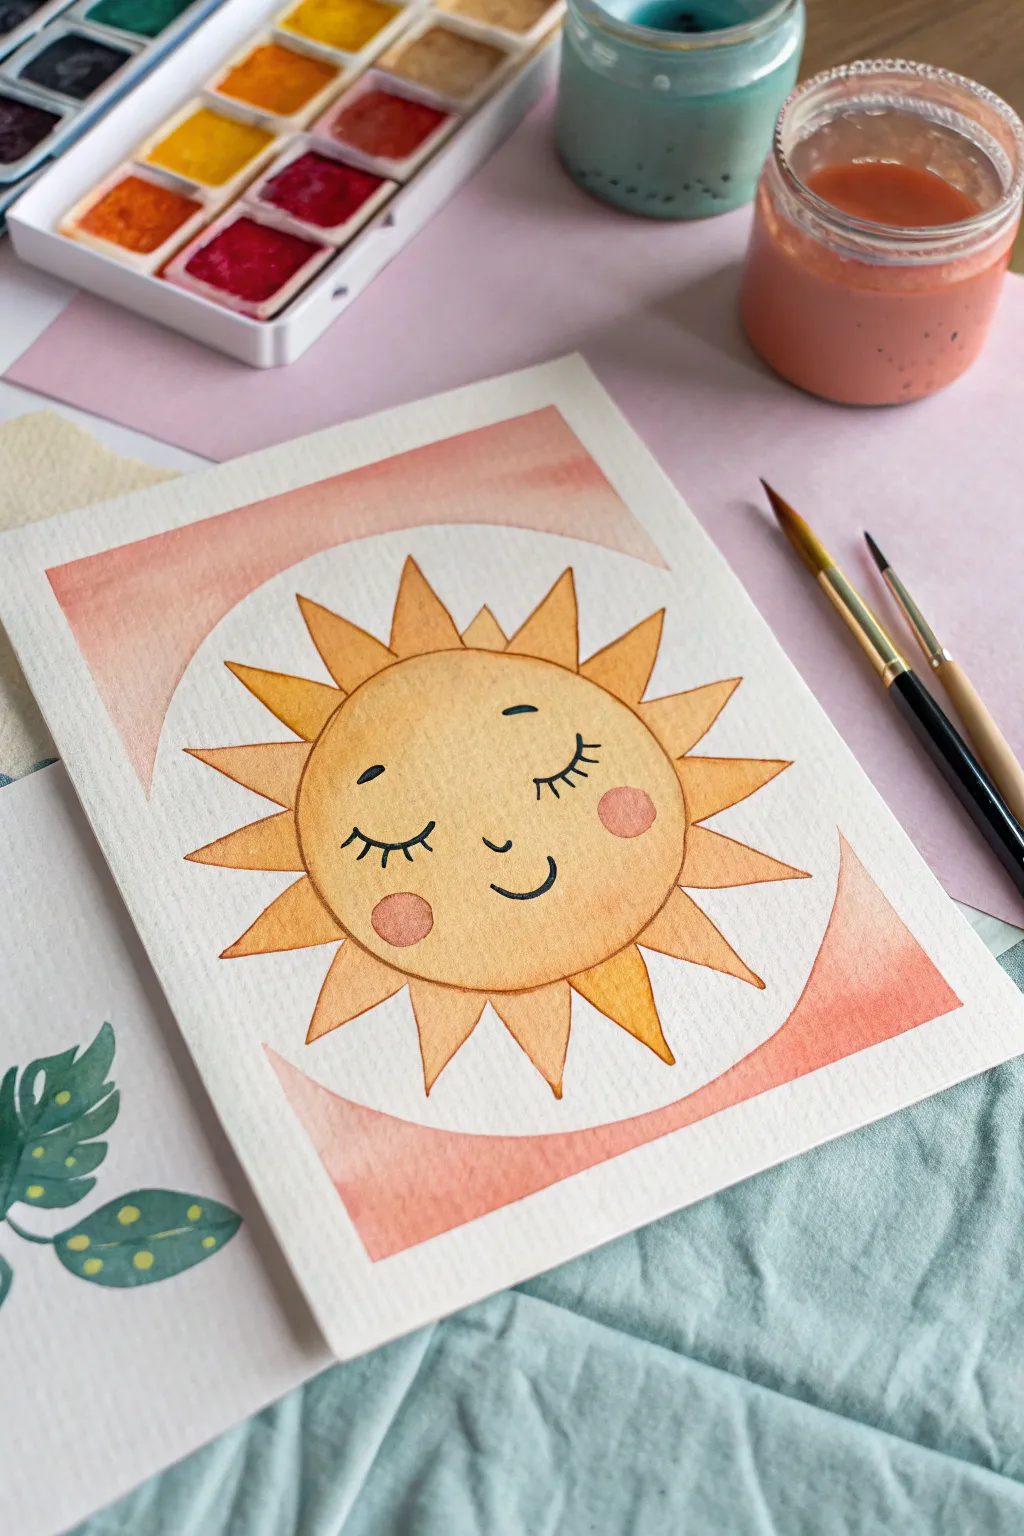
Brighten someone’s day with this charming watercolor sun illustration, featuring cheerful cheeks and delicate lashes. The soft gradient background adds a modern, boho touch to this sweet character face, perfect for a greeting card or nursery art.
How-To Guide
Materials
- Cold press watercolor paper (A5 size or cut to suit)
- Watercolor paints (Yellow Ochre, Cadmium Yellow, Vermilion/Orange, Burnt Sienna)
- Round watercolor brushes (Size 6 for washes, Size 2 for details)
- Pencil and eraser
- Compass or a circular object to trace
- Fine liner pen (Black, waterproof)
- Masking tape (optional)
- Palette for mixing
Step 1: Planning and Sketching
-
Center Your Sun:
Begin by finding the center of your watercolor paper. Use a compass or trace a small bowl to draw a perfect circle lightly in pencil. This will form the sun’s smiling face. -
Draw the Rays:
Sketch triangular rays extending outward from the central circle. Aim for a mix of slightly wider and narrower triangles to give it a playful, hand-drawn character rather than rigid geometric perfection. -
Add the Border Curves:
Lightly sketch two wide, gentle curves—one arching over the top of the sun and one scooping underneath. These lines define the peach-colored background areas at the top and bottom of the paper. -
Face Details:
Inside the circle, sketch the facial features. Place two small curves for closed eyes with eyelashes, a tiny nose curve, and a happy smile. Mark out two small circles for the rosy cheeks.
Clean Edges Pro Tip
To get perfectly sharp edges on the top and bottom colored curves, use artists’ masking tape to block off the negative space around the sun before you start painting those sections.
Step 2: Painting the Sun
-
Base Layer for the Face:
Mix a warm, golden yellow using Cadmium Yellow with a touch of Yellow Ochre. Using your larger round brush, fill in the central circle with an even wash of color. -
Wet-on-Wet Shading:
While the face is still slightly damp, drop a tiny bit of stronger Yellow Ochre or diluted Orange along the bottom edge of the circle. This creates a subtle shadow that makes the sun look spherical. -
Let it Dry:
Allow the central face area to dry completely before moving on to the rays. This prevents the yellow paint from bleeding outward. -
Painting the Rays:
Paint the triangular rays using a similar golden yellow mix. I like to vary the intensity slightly, making some rays a bit more orange by adding Vermilion to the mix for visual interest. -
Gradient Background:
Mix a watery coral or peach color. Paint the top curved section, starting with more pigment at the very top edge and fading it out with clear water as you approach the sun’s rays. -
Bottom Curve:
Repeat this process for the bottom curved section, keeping the color strongest at the bottom edge of the paper and fading upward.
Step 3: Details and Definition
-
Rosy Cheeks:
Once the face is fully dry, mix a diluted pink or salmon color. Carefully paint the two small circles for the cheeks. -
Outlining the Sun:
Take your fine liner pen or a very fine brush with concentrated brown paint. Go over the pencil lines of the sun’s central circle and the triangular rays to define the shape. -
Defining the Face:
Using the same black fine liner, carefully trace the facial features. Draw the closed eyelids, add three wispy lashes to each eye, and ink the nose and smile. -
Adding Dimension:
If you want more depth, use a clean, damp brush to gently lift a tiny bit of color from the top-left of the sun’s face to create a highlight. -
Final Cleanup:
Wait until the painting is bone dry—touch it lightly with the back of your hand to check. Gently erase any visible pencil marks that weren’t covered by paint or ink.
Level Up: Metallic Pop
Mix a little gold metallic watercolor or gouache into the yellow paint for the sun’s rays. It will make the artwork shimmer beautifully when the light hits the paper.
Now you have a warm, happy piece of art ready to brighten up any room
Swirly Sun Rays for a Playful Look
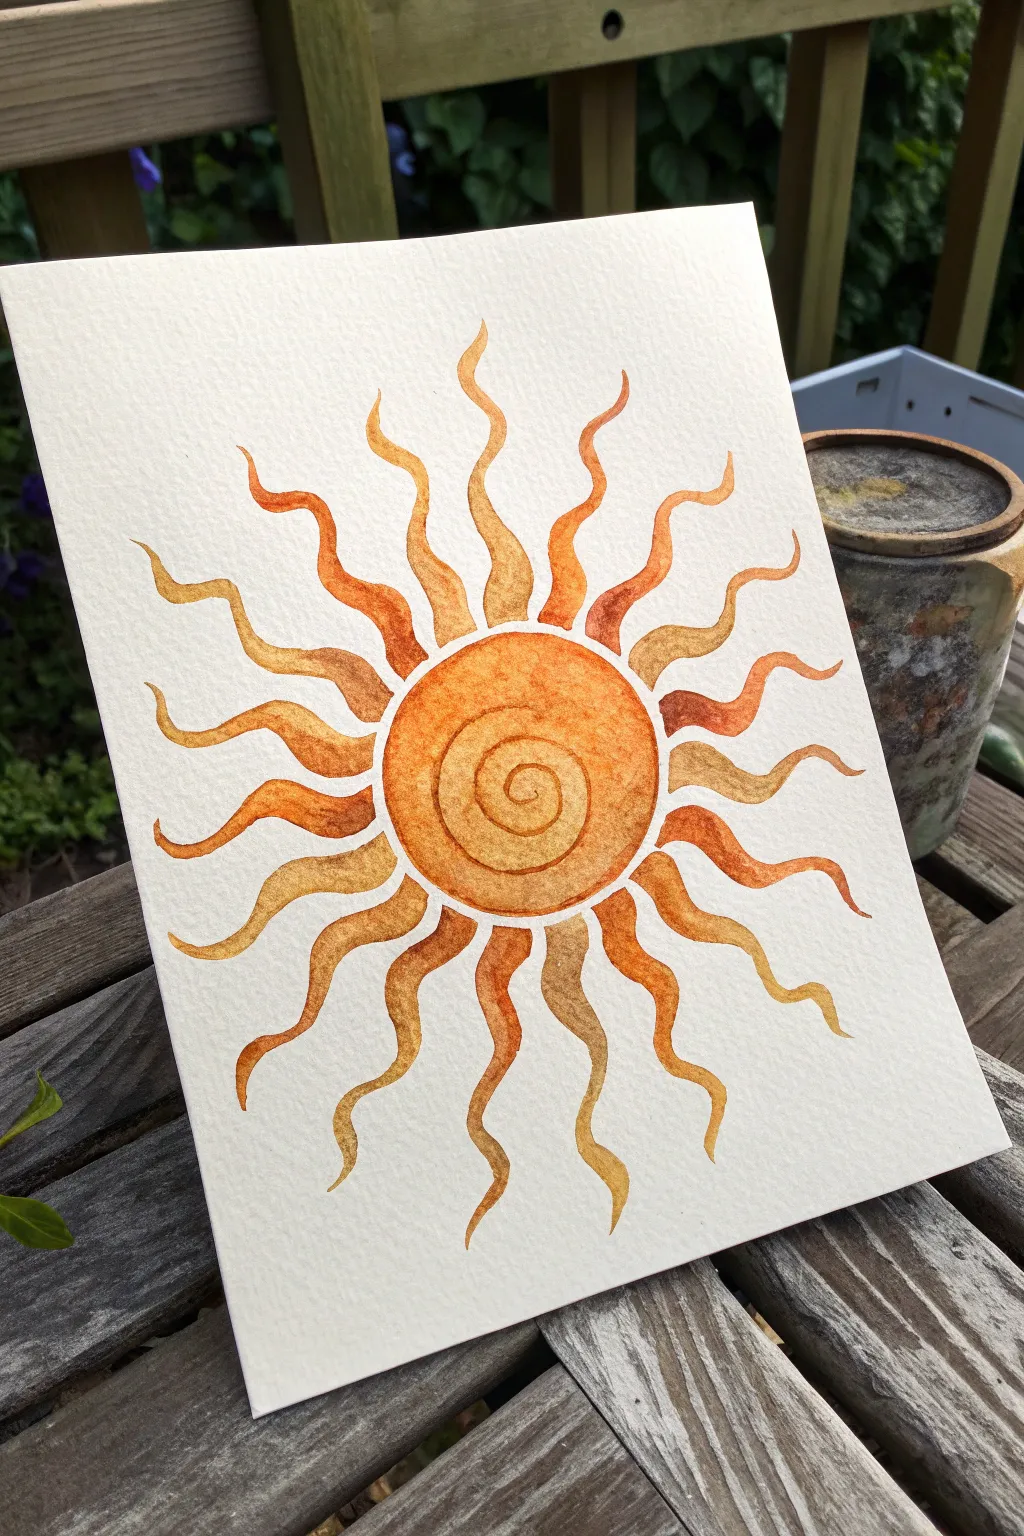
Brighten up your sketchbook with this radiant watercolor sun that features playful, dancing rays. The warm blend of amber, orange, and gold tones creates a cozy, inviting feel that looks lovely framed or as part of a handmade card.
Step-by-Step
Materials
- Cold-press watercolor paper (140lb/300gsm)
- Watercolor paints (Yellow ochre, burnt sienna, cadmium orange)
- Round watercolor brush (size 6 or 8)
- Light pencil (HB or H)
- Compass or a circular object for tracing
- Clean water jar
- Paper towels
Step 1: Sketching the Layout
-
Draw the center circle:
Begin by lightly tracing a circle in the center of your paper using a compass or a small bowl. Keep this pencil line very faint so it doesn’t show through the paint later. -
Add the inner spiral:
Starting from the exact center of your circle, lightly sketch a loose spiral that winds outward until it almost touches the edge of the circle. -
Mark the ray positions:
To ensure even spacing, make tiny tick marks around the outside of the circle where you want each ray to begin. Aim for about 16 to 18 rays for a full look. -
Sketch the wavy rays:
Draw the wavy rays extending outward from your tick marks. Make them taper to a point at the end, resembling wavy daggers or flames. Vary the length slightly for a more organic, natural feel.
Step 2: Painting the Center
-
Mix a base orange:
On your palette, mix a generous amount of cadmium orange with a touch of yellow ochre to warm it up. The mixture should be fluid but pigment-rich. -
Paint the spiral line:
Using the tip of your round brush, carefully paint along the pencil line of the spiral inside the sun. Keep the line thickness relatively consistent. -
Fill the center gaps:
While the spiral line is still damp, wash a lighter version of your orange mix (add more water) into the spaces between the spiral lines. This creates a soft contrast between the darker spiral and the background of the disc. -
Let the center dry:
Allow the center circle to dry completely. This is crucial so you don’t smudge the center when working on the rays.
Bleeding Edges?
If your rays are merging into a blob, you are working too fast. Let each sun ray dry completely before painting the one right next to it.
Step 3: Painting the Rays
-
Prepare varied mixes:
Create three distinct puddles of paint on your palette: pure yellow ochre, a burnt sienna, and a reddish-orange mix. You will alternate these to give the rays depth. -
Paint the first ray:
Load your brush with the yellow ochre mix. Start at the base of a ray near the circle (but not touching the center paint yet) and pull the brush outward in a wavy motion to the tip. -
Drop in color:
while the first ray is still wet, touch the very tip or the base with a tiny bit of burnt sienna. Watch the colors bleed together naturally to create a gradient. -
Skip around the circle:
To prevent wet rays from bleeding into each other, paint every other ray first. Skip one space, paint the next ray, and repeat around the circle. -
Vary the hues:
I like to switch up the primary color for different rays—painting some mostly orange and others more brownish-gold—to make the sun look vibrant and alive. -
Wait for the first set to dry:
Let the first batch of rays dry fully. If the paper feels cool to the touch, it’s still damp. -
Fill in remaining rays:
Go back and paint the remaining rays in the empty spaces. Since the neighbors are dry, you can paint right up to the edge without worrying about unwanted bleeding. -
Refine the connection points:
Once all rays are painted, carefully use the tip of your brush to tidy up where the rays meet the central circle, leaving a tiny sliver of white paper between the disc and the rays if you want a distinct separation.
Color Harmony Tip
Mix your colors on the paper rather than fully on the palette. Drop a darker color into a wet, lighter wash for beautiful, natural gradients.
Once dry, erase any visible pencil marks to reveal your shining masterpiece
Sunburst Pattern in Two Warm Colors
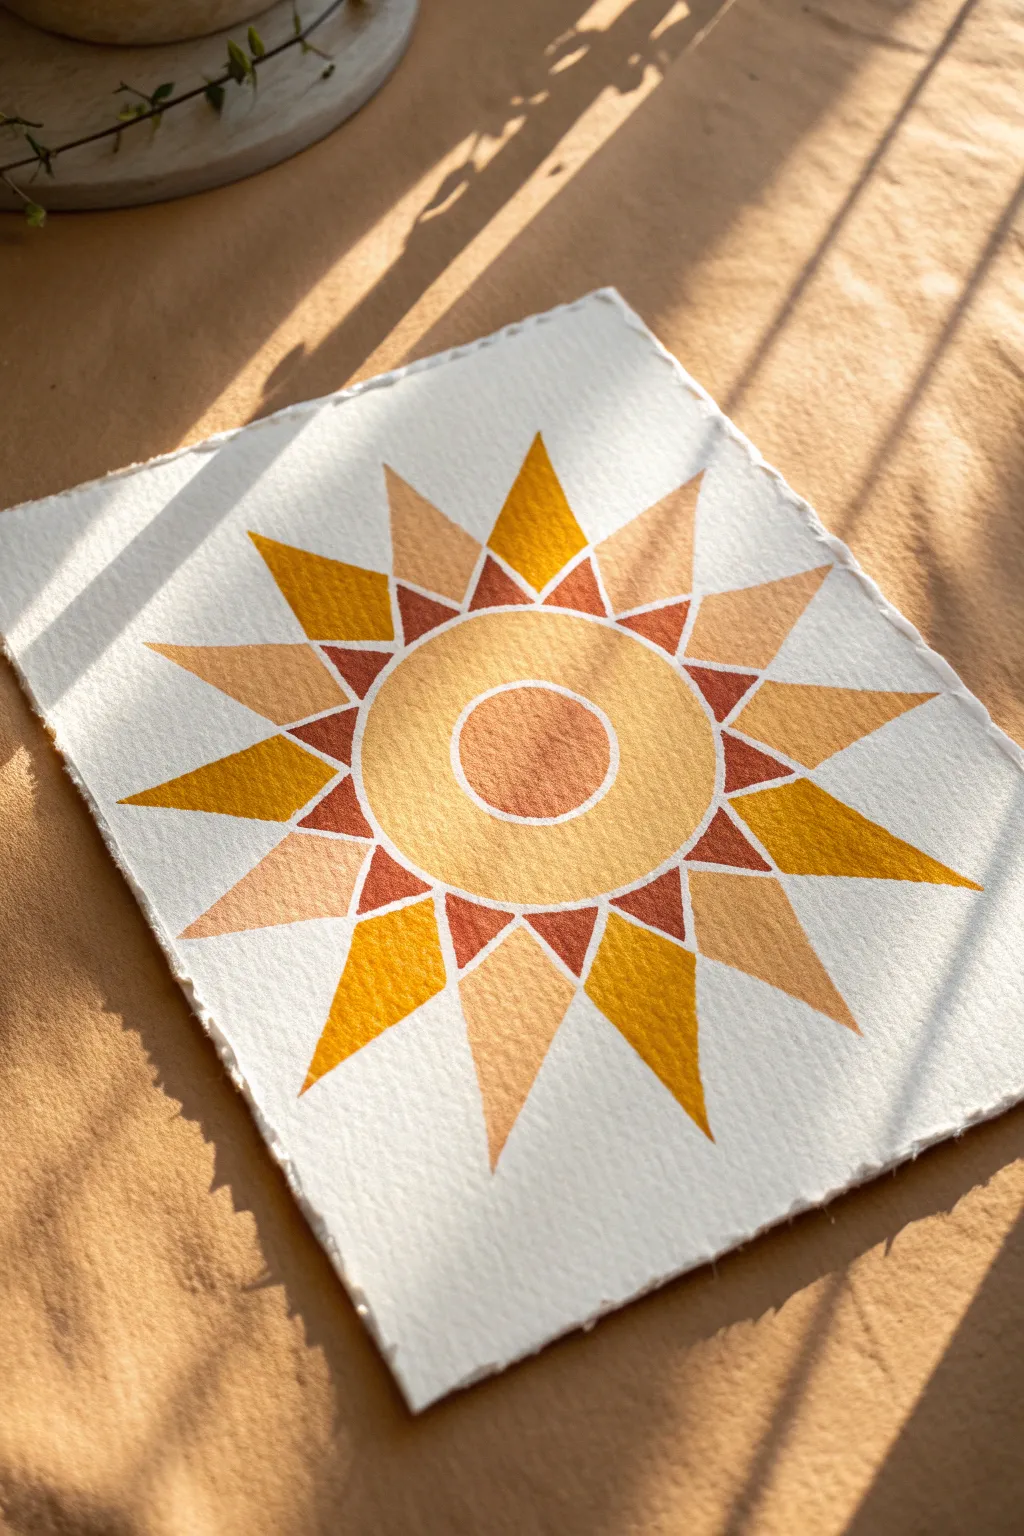
Capture the warmth of a golden hour with this structured yet earthy sunburst painting. Using a defined geometric layout and warm ochre tones on textured paper creates a piece that feels both modern and timeless.
Step-by-Step Guide
Materials
- Cold press watercolor paper (deckle edge preferred)
- Watercolor or gouache paints (mustard yellow, burnt sienna, terracotta, light peach)
- Pencil and eraser
- Compass or circular objects loosely sized for tracing
- Ruler
- Masking fluid (optional but recommended) or white gel pen
- Small round brushes (size 2 and 4)
- Palette for mixing
Step 1: Planning the Geometry
-
Center the design:
Find the rough center of your square paper. Use a compass to draw a small circle in the very middle (about 1 inch diameter) for the sun’s core. -
Create the rings:
Draw a second, larger circle around the first one (about 2.5 inches diameter) to create the broad band of the sun’s body. -
Mark the dividers:
Use a ruler to lightly draw lines intersecting the center like a pie chart. Start with a vertical and horizontal line, then bisect those quadrants to create 8 equal sections. Extend these lines well past your outer circle. -
Bisect again:
Bisect the 8 sections one more time so you have 16 distinct radial lines coming from the center. This grid is crucial for keeping your rays even. -
Sketch the rays:
On every other radial line, measure about 2 inches out from the large circle and make a mark. Connect this mark back to the large circle’s edge at the neighboring radial lines to form tall triangles. -
Add connecting triangles:
In the gaps between the tall rays, draw smaller, inverted triangles that point inward toward the center circle. The base of these triangles should align with the base of the tall rays.
Keep It Steady
Rest the heel of your hand on a clean sheet of scrap paper while painting. This prevents smudging and gives you better control for those precise geometric edges.
Step 2: Applying Resist or Defining Lines
-
Preserve the white lines:
The charm of this piece lies in the crisp white gaps between shapes. If you have masking fluid, apply thin lines over your pencil marks now. If not, you will simply paint carefully, leaving a tiny sliver of dry paper between every color block. -
Clean up sketch:
Lightly erase your guide lines until they are barely visible, especially if you aren’t using masking fluid, so the graphite doesn’t muddy your yellow paint.
Step 3: Painting the Warm Tones
-
Mix your palette:
Prepare three distinct warm shades: a deep mustard yellow, a soft peachy sand, and a rich reddish-terracotta. Test them on scrap paper to ensure they look harmonious together. -
Paint the core:
Fill the very center small circle with your terracotta color. Use the tip of your brush to keep the edge neat. -
Fill the sun band:
Paint the wide ring surrounding the core with the mustard yellow. I find that working in sections helps maintain an even wash. -
Start the rays:
Paint the tall, outer rays using an alternating pattern. Paint one ray mustard yellow, skip the next, and paint the third ray the soft peachy sand color. Continue alternating around the circle. -
Paint the inner triangles:
Fill the small, inverted triangles (the ones pointing inward) with the terracotta shade. This dark color adds a nice contrast and anchors the design. -
Review edges:
Check your edges. If you’ve painted ‘around’ the white lines, you might need to tidy up any wobbly spots with a slightly damp brush to lift excess paint.
Go Metallic
Enhance the sun motif by swapping the mustard yellow paint for a metallic gold watercolor. It will catch the light beautifully when hung on a wall.
Step 4: Finishing Touches
-
Let it dry completely:
Wait for the paint to be bone dry. If the paper feels cool to the touch, it is still damp deep down. -
Remove masking:
If you used masking fluid, gently rub it away with your finger or a rubber cement pickup to reveal the crisp white lines underneath. -
Add detail (optional):
If your white gaps got painted over, you can re-establish them using a white gel pen or opaque white gouache and a fine liner brush.
Now you have a radiant piece of art that brings a little sunshine into any room.
Dot Mandala Sun With Layered Rings
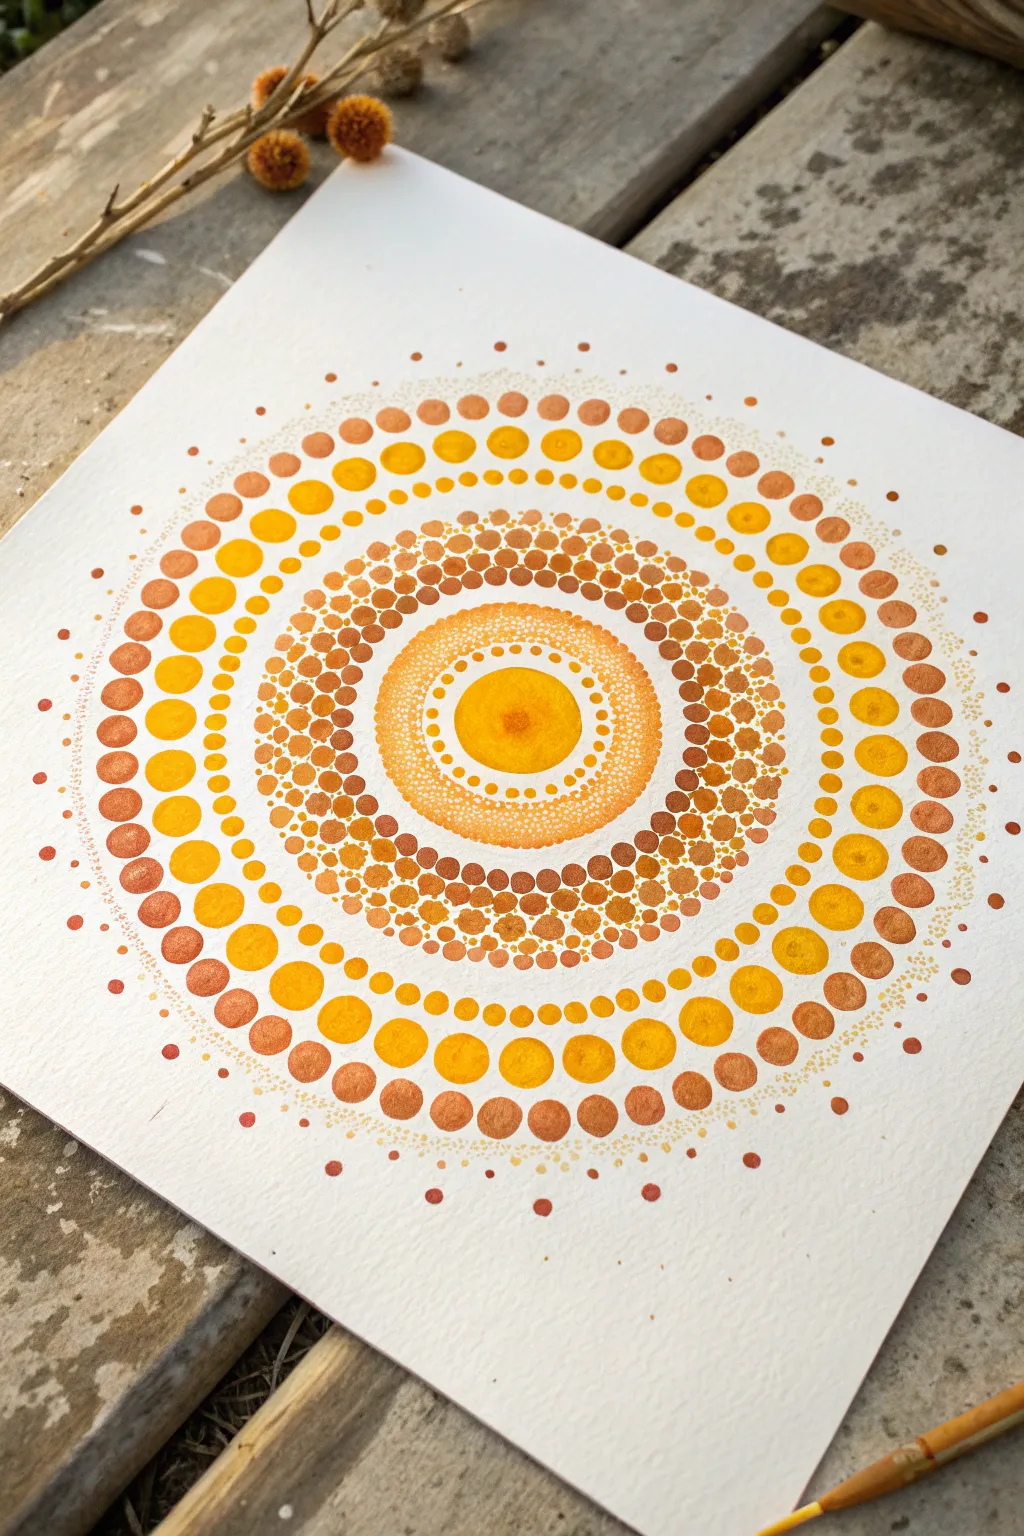
This radiant mandala captures the warmth of the sun using gradient rings of dots in shifting sizes. The design moves outward from a central solid sun into layers of intricate stippling and bold, larger dots for a stunning, hypnotic effect.
Step-by-Step
Materials
- Square watercolor paper or heavy cardstock (approx. 8×8 inches)
- Acrylic paints (Yellow Ochre, Cadmium Yellow, Orange, Burnt Sienna, White)
- Dotting tools (various sizes) or ends of paintbrushes/dowels
- Fine detail paintbrush (size 0 or 00)
- Palette for mixing custom shades
- Pencil and compass
- Eraser
- Paper towel and water cup
Step 1: Preparation & Central Sun
-
Grid lines:
Begin by finding the exact center of your paper. Using a compass, lightly draw a series of concentric circles moving outward from the center. Space them about 0.5 to 1 inch apart to serve as guides for your dot layers. Erase these lines very gently later, so keep them faint. -
Central core:
Load a medium brush with a mix of Cadmium Yellow and a touch of Orange. Paint a solid circle in the very center, about the size of a large coin. Ensure the edges are crisp and round. -
First ring:
Once the center is dry to the touch, mix a lighter yellow (add white to your Cadmium Yellow). Using a small dotting tool, place a ring of medium-sized dots immediately around the central circle, leaving a tiny gap between them and the core.
Step 2: Building the Inner Pattern
-
Micro-stippling layer:
Create a broad band of tiny stippling dots. This section, surrounding your first ring, relies on density rather than precision. Use your smallest tool or a toothpick with diluted orange-yellow paint to tap hundreds of tiny dots, keeping them dense near the center and slightly looser as you move outward. -
Defining the stipple edge:
Border this stippled section with a deliberate ring of small, neat dots in a light peach color. This acts as a container for the chaotic stippling texture and brings structure back to the mandala. -
The textured band:
The next major band is complex. Use a Burnt Sienna or terracotta shade to create a wide ring composed of many small, tightly packed dots. Unlike the random stippling, these should feel more organized, creating a darker, textured belt around the sun.
Paint Consistency Pro Tip
For perfect domes, your paint should be like fluid yogurt. If peaks form when you lift the tool, the paint is too thick; add a drop of pouring medium or water.
Step 3: The Radiant Rays
-
Primary large dots:
Now for the boldest feature. Mix a bright, pure Yellow. Select your largest dotting tool (or a pencil eraser) and place a ring of large, dominant dots. Spacing is key here; ensure they are evenly distributed around the circumference. -
Inner transitional dots:
In the space between your textured terracotta band and the large yellow dots, add two rows of medium-sized dots. Use a gradient of Orange to Yellow Ochre to smooth the visual transition. -
Outer accent ring:
Move outside the large yellow dots. Switch to a reddish-brown or copper hue. Place medium dots in the gaps between the large yellow ones to create an interlocking effect. -
Second outer ring:
Add another ring of the reddish-brown dots, slightly smaller, aligned directly above the previous copper ones. This creates radial lines that draw the eye outward. -
Tiny expansive details:
Using your smallest tool and a very pale yellow or off-white, add tiny ‘dust’ dots freely around the outer edges of the mandala. Scatter them loosely to give the impression of light fading into the atmosphere. -
Final accents:
Look at the four corners of your paper. Add a few lone, medium-sized reddish dots floating away from the main design to break the perfect circle and add artistic movement. -
Cleanup:
Allow the paint to cure completely—overnight is best for thick dots. Once fully hard, gently erase any visible pencil guidelines from the beginning step.
Metallic Level Up
Swap the Burnt Sienna or Orange paint for a Metallic Copper or Gold. When the light hits the finished piece, the ring will shimmer like real sunlight.
Step back and admire how the simple placement of dots creates such a warm, glowing vibration on the page
Stained Glass Sun With White Dividers
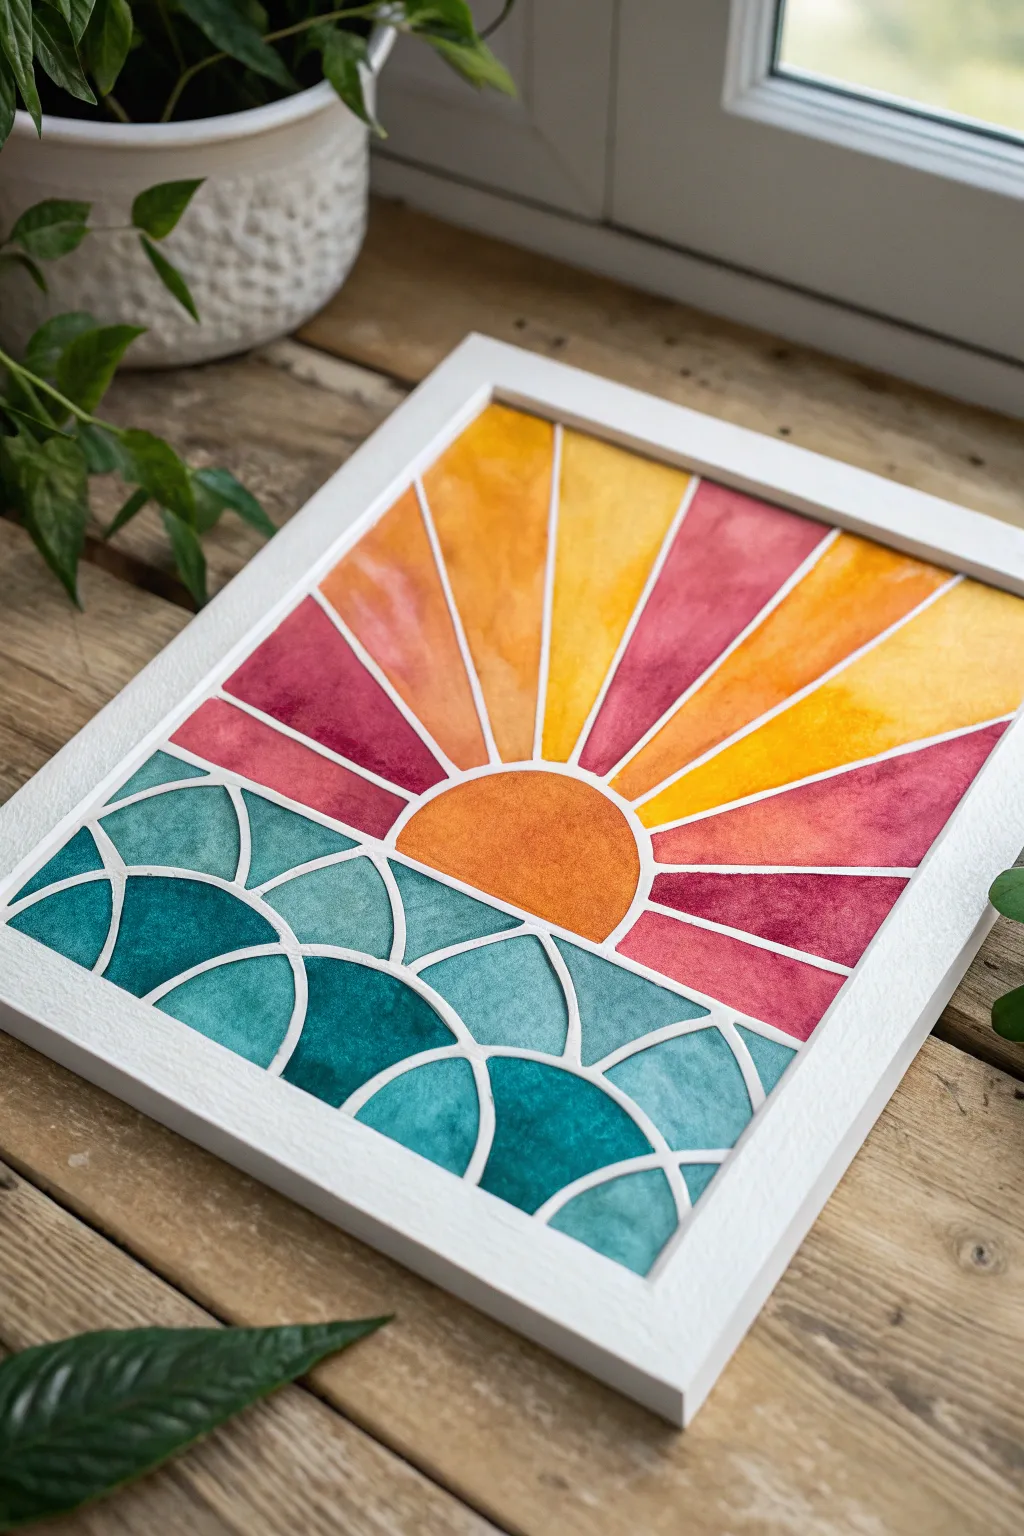
Capture the warmth of a sunrise with this radiant, geometric watercolor painting that mimics the look of stained glass. Bold, segmented rays of light meet a calming pattern of overlapping ocean waves, all separated by crisp white lines for a clean, modern finish.
Detailed Instructions
Materials
- Cold press watercolor paper (heavyweight, at least 300 gsm)
- Watercolor paints (yellow, orange, red, magenta, teal, turquoise)
- Masking fluid (drawing gum) or thin artist tape/washi tape
- Fine-tip applicator bottle (for masking fluid) or a ruling pen
- Watercolor brushes (medium round brush and large flat wash brush)
- Pencil and eraser
- Ruler
- Compass or circle stencil
- Painter’s tape
- Wooden board or hard surface
- White frame (optional, for display)
Step 1: Preparation & Sketching
-
Secure the paper:
Tape your watercolor paper down to a flat board using painter’s tape on all four sides. This prevents the paper from buckling when it gets wet and creates a clean border. -
Establish the horizon:
Use a ruler to lightly draw a horizontal line across the middle of the paper. This will separate your sun from the ocean waves. -
Draw the sun:
center your compass on the horizon line and draw a semi-circle for the sun’s core. From that core, use your ruler to draw radiating lines outward to the edges of the paper to create the sun rays. -
Create the wave pattern:
Below the horizon, use your compass or a circle stencil to draw rows of overlapping semi-circles. Start with a top row that touches the horizon, then offset the row below it like fish scales or shingles.
Pro Tip: Liquid Frisket
If you don’t have a reliable fine-tip bottle, coat a thin brush in bar soap before dipping it in masking fluid. The soap protects the bristles and makes clean-up much easier.
Step 2: Applying the Resist
-
Apply masking fluid lines:
Pour masking fluid into a fine-tip applicator bottle. Carefully trace over all your pencil lines—both the sun rays and the wave curves. These lines will eventually become the crisp white dividers. -
Let it cure completely:
Allow the masking fluid to dry thoroughly. It should feel rubbery and not tacky to the touch. I usually give this at least 30-45 minutes to ensure no wet fluid ruins the brushes.
Troubleshooting: Tearing Paper
If the paper tears when removing masking fluid, you pulled too fast or the paper was damp. Always pull the elastic gum parallel to the paper surface, not straight up.
Step 3: Painting the Sun
-
Paint the sun core:
Start with the central semi-circle. Mix a vibrant orange watercolor and fill the shape. Keep the wash relatively flat or dab in a little yellow while wet for subtle texture. -
Select warm colors:
Prepare a palette of warm tones: bright yellow, deep orange, red, and magenta. You want a gradient effect moving outward or alternating colors. -
Fill the rays:
Paint the segmented rays one by one. I like to alternate between yellow, orange, and magenta to create a dynamic, glowing effect. Let neighboring sections dry slightly if you are worried about bleeding, though the masking fluid should stop it. -
Add texture:
While the paint is still damp on the rays, drop in slightly more concentrated pigment at the bottom of each ray (near the sun core) to create a gentle ombre fade upward.
Step 4: Painting the Ocean
-
Mix cool tones:
Prepare variations of teal, turquoise, and deep blue. Having 2-3 distinct shades will give the waves depth and dimension. -
Paint the wave segments:
Fill in the semi-circle wave shapes. Try not to put the exact same shade of blue next to itself; alternate light teal with darker turquoise to distinguish the overlapping scales. -
Create water effects:
For a ‘stained glass’ texture, allow the watercolor to pool slightly in some corners or lift pigment from the center of a shape with a dry brush to mimic light reflecting on water. -
Final drying time:
Let the entire painting dry completely. The paper must be bone-dry before the next step, or you risk tearing the surface.
Step 5: The Reveal
-
Remove masking fluid:
Gently rub the masking fluid with your finger or a rubber cement pickup tool. Peel it away slowly to reveal the stark white paper underneath. -
Clean up edges:
Use a white eraser to gently remove any remaining pencil marks that might be visible within the white lines. -
Frame your work:
Remove the painter’s tape from the borders and place your artwork in a simple white frame to echo the white dividers within the painting.
Hang your luminous sun near a window and watch the colors brighten your room.
Abstract Sun With Bold Color Blocks
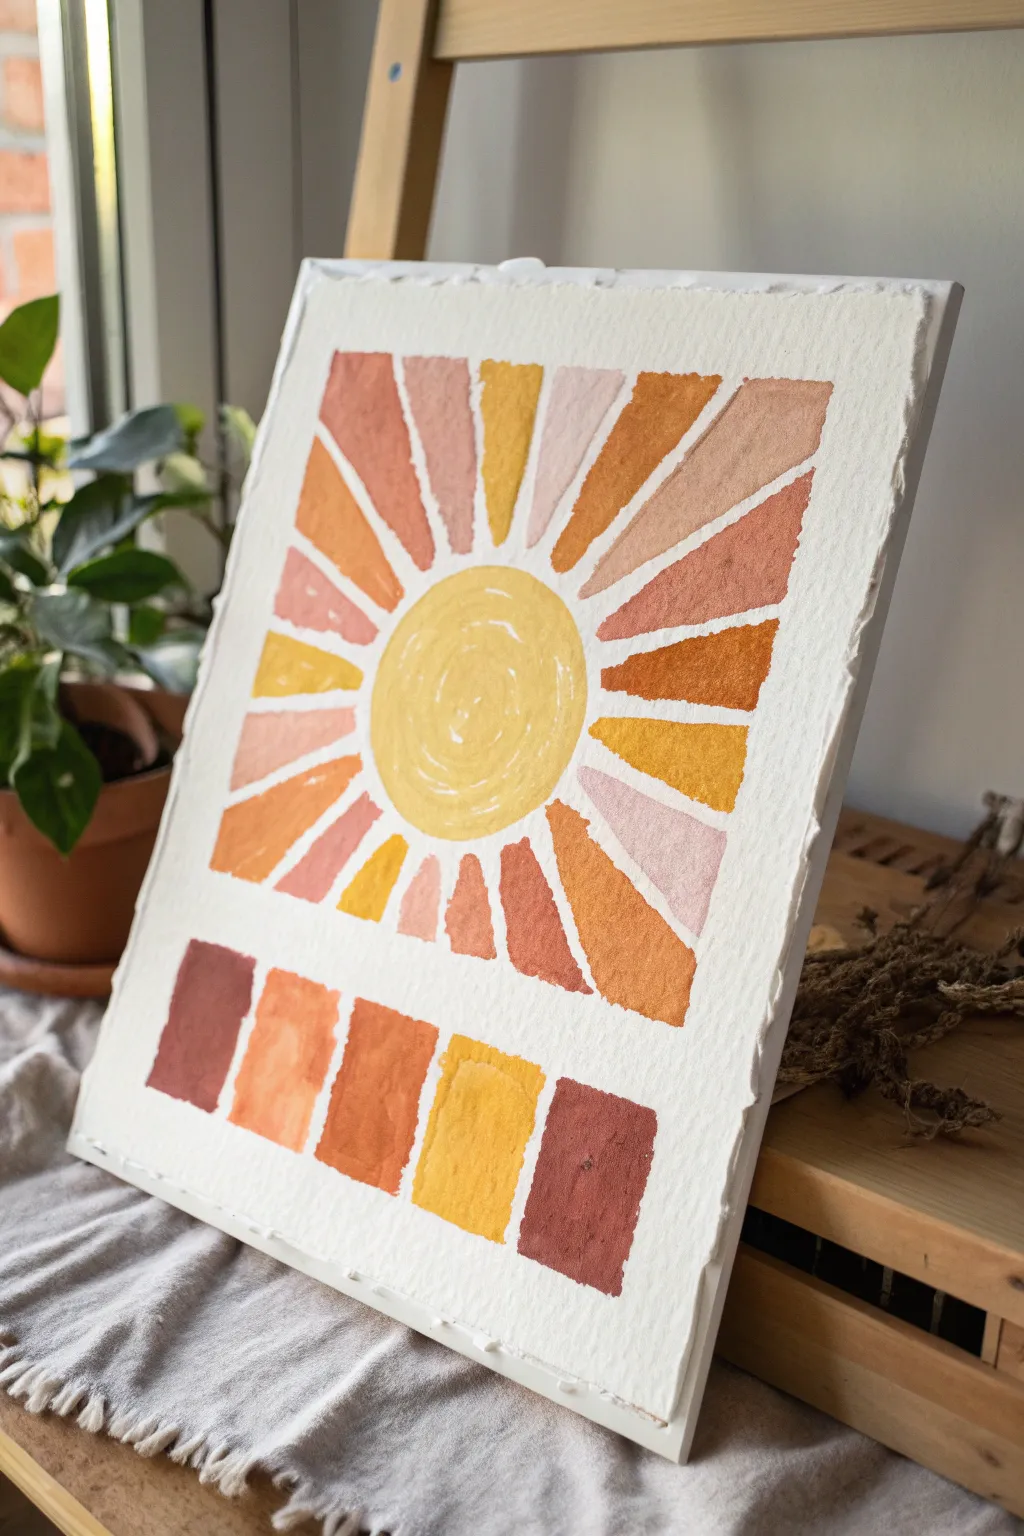
This cheerful project combines a warm, retro color palette with geometric simplicity to create a stunning piece of abstract art. The heavy texture of handmade paper adds a rustic charm, while the bold, segmented rays evoke the feeling of a bright summer day.
Step-by-Step Guide
Materials
- Heavyweight textured watercolor paper (deckle-edge preferred)
- Pencil for light sketching
- Ruler
- Compass or round object (approx. 3-inch diameter)
- Acrylic paints (Terracotta, Ochre, Mustard Yellow, Soft Pink, Burnt Orange)
- Flat shader brushes (medium and small)
- Masking tape or painter’s tape
- Mixing palette
- Cup of water and paper towels
Step 1: Planning the Layout
-
Secure the paper:
Begin by taping your textured paper down to a flat surface or drawing board. Since the paper has a beautiful deckle edge, tape it from the back or very lightly at the extreme corners to avoid damaging the texture. -
Sketch the sun:
Find the general center of your paper. Using a compass or by tracing a circular object like a jam jar lid, lightly sketch a circle in the middle of the page. This will be the face of your sun. -
Draw the rays:
Using a ruler, lightly draw straight lines radiating outward from the central circle to the edges of the paper. Space them somewhat evenly, but don’t worry about perfection; organic variation adds character. Aim for about 16-20 total sections. -
Define the color grid:
Below the sun area, leave about an inch of white space. Then, sketch a horizontal row of five rectangular blocks. These will serve as a color palette feature at the bottom of the composition. -
Segment the rays:
To achieve the ‘blocked’ look seen in the reference, sketch a gap between each sun ray. Instead of lines touching, draw narrow parallel lines so there is a sliver of white paper separating every single color block.
Step 2: Painting the Sun and Rays
-
Prepare your palette:
Squeeze out your acrylics: Terracotta, Ochre, Mustard Yellow, Soft Pink, and Burnt Orange. If your colors feel too vibrant, mix in a tiny dot of brown or white to achieve that muted, earthen retro tone. -
Paint the center:
Start with the central sun circle using a bright yellow mix. Apply the paint in a swirling motion to create a slightly textured, circular brushstroke pattern that mimics the spinning sun. -
Start the ray sequence:
Choose a starting ray at the top and paint it with one of your darker orange tones. Use a flat shader brush to get crisp, straight edges along your pencil lines. -
Alternate colors:
Work your way around the circle, painting each ray a different color. I like to randomize the pattern rather than following a strict A-B-C sequence to keep the look dynamic. -
Maintain the gaps:
As you paint, pay careful attention to the white gaps you sketched earlier. These negative spaces are crucial for the geometric style—keep them clean and paint-free. -
Second coat:
Depending on the opacity of your paint, you may need a second coat on some of the lighter pinks or yellows to ensure the textured paper doesn’t show through too much.
Crisp Lines Trick
For ultra-sharp edges on textured paper, apply painter’s tape along your pencil lines, then paint a thin layer of matte medium over the edge to seal it before adding color.
Step 3: Finishing Touches
-
Fill the bottom blocks:
Move to the bottom row of five rectangles. Paint them in a gradient or random order using the exact same five colors you used for the sun rays to tie the piece together. -
Clean up edges:
Inspect your rays. If any edges look ragged, use your smallest flat brush with slightly thinned paint to sharpen the lines carefully. -
Erase pencil marks:
Once the paint is completely bone dry, take a clean eraser and gently remove any visible pencil lines in the white gaps. Be gentle to avoid rubbing the texture off the paper.
Paint Bleeding?
If paint bleeds into the white gaps, wait for it to dry completely. Then, use opaque white acrylic or gouache to carefully paint over the mistake and restore the gap.
Hang your finished piece near a window to let the natural light enhance those warm, sunny tones
Sun Behind Mountain Peaks in Simple Layers
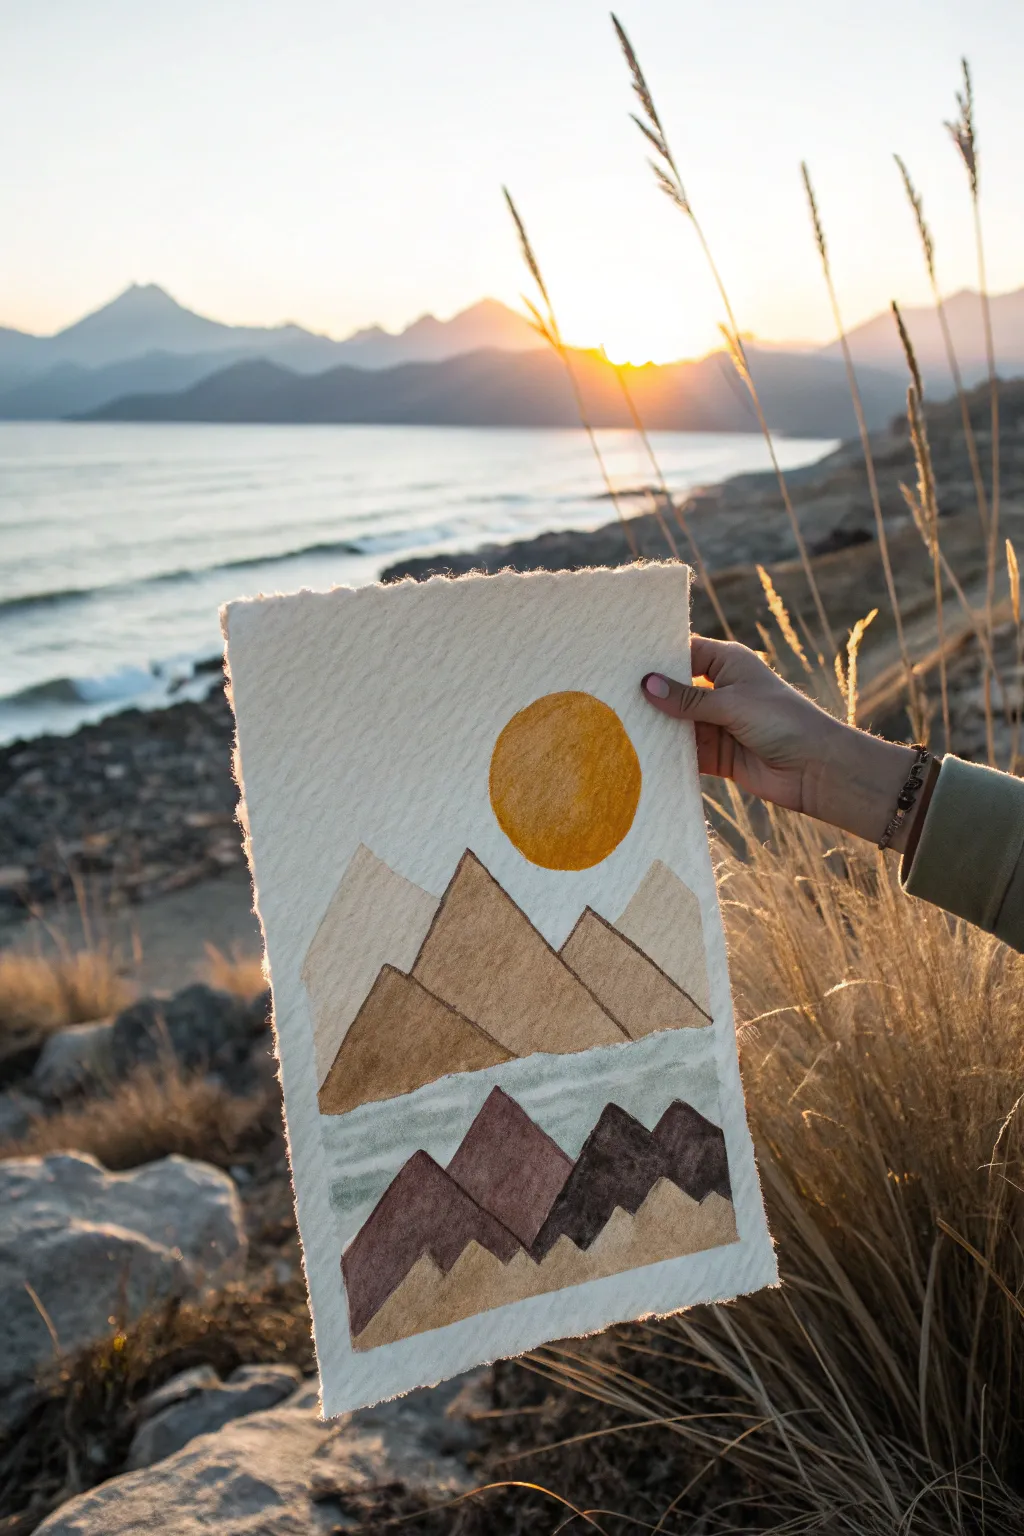
This serene landscape captures the golden hour with a beautiful balance of clean geometric shapes and organic paper textures. Using a layered approach, you’ll create stylized mountain peaks bathed in the warmth of a textured sun.
How-To Guide
Materials
- Heavyweight textured watercolor paper (rough grain)
- Pencil for sketching
- Watercolor paints or gouache
- Flat shader brushes (medium and small)
- Round brush (medium)
- Ruler
- Masking tape (optional)
- Paper towels
- Water cups
Step 1: Preparation and Sketching
-
Prepare your paper:
Start by tearing the edges of your paper manually rather than cutting them. This deckled edge effect gives the finished piece a rustic, handmade feel. -
Map out the horizon:
Use a pencil and ruler to lightly mark a horizontal line roughly two-thirds of the way down the page. This will separate your upper lighter mountains from the darker foreground peaks. -
Outline the sun:
In the large upper section, trace a perfect circle using a round object or compass. Position it slightly off-center to the right for a balanced composition. -
Sketch the peaks:
Draw the mountain geometry. Create three overlapping triangles for the upper range and a more jagged set of three or four peaks for the bottom section. Keep lines light so they disappear under the paint.
Step 2: Painting the Upper Elements
-
Paint the golden sun:
Mix a warm, deep yellow akin to ochre or cadmium yellow. Fill in the circle carefully. For that textured look seen in the photo, dab the paint slightly rather than smooth sweeping strokes. -
Mix the background mountain colors:
Prepare two shades of beige: a very pale, milky sand color and a slightly deeper tan. The variation helps distinguish the peaks from one another. -
Fill the furthest peaks:
Using the pale sand color, paint the outline of the furthest or ‘back’ triangles first. Let them dry completely so colors don’t bleed. -
Add the mid-ground mountains:
Once the back layer is dry, use the deeper tan shade to paint the large central triangle and the one to its right. Use a flat brush to keep the edges crisp. -
Create the texture strip:
Between the upper and lower mountains, paint a horizontal band using a muted, watery sage green or grey-blue. Use a dry-brush technique here to let the paper’s rough grain show through, mimicking water or mist.
Deckled Edge Secret
To get perfectly soft torn edges, paint a line of water where you want the tear, wait 30 seconds, then pull the paper gently apart.
Step 3: Adding Depth and Detail
-
Mix foreground earth tones:
Prepare a palette of darker earth tones: a rich maroon-brown, a deep coffee brown, and a medium caramel. -
Paint the darkest peaks:
Select the triangles that will be furthest back in your bottom cluster. Paint these in the deep coffee brown to create contrast and anchor the image. -
Layer the maroon tones:
Use the maroon-brown mix for the prominent foreground peaks. I find that slightly overlapping the ‘mist’ layer above helps integrate the scene. -
Add the final highlights:
For the very front jagged shapes, use the lighter caramel tone. This contrast makes them pop against the dark mountains behind them. -
Add texture:
While the paint is just damp, you can lift a tiny bit of pigment with a thirst brush or add speckles for a stone-like effect. -
Clean up edges:
Once fully dry, use a small flat brush with a tiny bit of opaque paint to sharpen any triangle points that got messy. -
Erase guidelines:
Double check that the paint is bone dry, then gently erase any visible pencil lines, particularly around the sun and the pale mountains.
Metallic Accent
For a magical touch, repaint the sun with metallic gold watercolor or gold leaf to make it truly shine when the light hits it.
Place your finished piece in a floating frame to show off those beautiful torn edges
Negative Space Sun Cutout Look

Capture the warmth of a golden afternoon with this striking watercolor sun painting. By leaving a deliberate band of unpainted paper between the core and the rays, you create a glowing halo effect that adds modern flair and brightness to the classic motif.
Step-by-Step Guide
Materials
- Cold press watercolor paper (A4 or similar size)
- Pencil (HB or lighter)
- Circular object for tracing (like a jar lid or roll of tape)
- Round watercolor brush (size 6 or 8)
- Fine liner brush (size 2 or 4)
- Watercolor paints (Yellow Ochre, Burnt Sienna, Burnt Umber)
- Palette for mixing
- Jar of clean water
- Paper towel
Step 1: Planning the Design
-
Outline the core:
Begin by placing your circular object in the center of the watercolor paper. -
Trace lightly:
Using a very light touch with your pencil, trace around the object to create the sun’s central disk. Keep the line faint so it disappears under the paint later. -
Mark the halo:
Sketch a very faint second circle freehand about a quarter-inch outside the first one. This marks the ‘no paint zone’—the negative space gap. -
Sketch the rays:
Outside the second circle, lightly sketch your ray pattern. Aim for an alternating pattern: one tall, sharp triangle followed by a shorter, floating teardrop shape. -
Refine the symmetry:
Work your way around the circle sketch, adjusting the spacing so the rays look balanced, though they don’t need to be mathematically perfect.
Uneven Gaps?
If you accidentally paint into the white gap, don’t panic. Gently lift the mistake with a clean, damp brush, or embrace the imperfection—hand-painted art is beautiful because it isn’t printed.
Step 2: Painting the Core
-
Mix the golden hue:
On your palette, mix a generous amount of Yellow Ochre with a tiny touch of Burnt Sienna to create a warm, honey-gold color. -
Wet the center:
Take your clean round brush and apply clear water inside the central circle outline, stopping just short of the pencil line. -
Drop in color:
Load your brush with the gold mix and touch it to the wet paper. Watch the color bloom and spread. -
Even out the wash:
Gently guide the pigment to the edges of the circle, ensuring an even coat. If it puddles, dab your brush on a paper towel to lift the excess. -
Dry completely:
It is crucial to let this center circle dry fully before moving on, or you risk smudging paint across your pristine negative space.
Step 3: Adding the Rays
-
Mix the ray color:
Create a darker, earthier mix for the rays. Use Burnt Sienna as the base and add a little Burnt Umber to deepen it into a copper-rust shade. -
Start the main spikes:
Switch to your smaller brush for better control. Begin painting the tall triangular rays, starting from the outer pencil line and pulling the brush outward to a point. -
Shape the base:
Carefully paint the flat bottom of the triangle along the invisible outer circle line, ensuring you maintain that crisp white gap between the ray and the sun’s center. -
Add the teardrops:
Between each triangular spike, paint the floating teardrop shapes. Use the tip of the brush to define the top/bottom points and press down slightly in the middle to widen the shape. -
Rotate and repeat:
Rotate your paper as you work around the sun. This prevents your hand from smearing wet paint and keeps your angle consistent. -
Add subtle details:
I like to add tiny dots of the rust color at, or just above, the very tips of the sharpest rays for a delicate finishing touch. -
Final erase:
Once the painting is bone dry—give it extra time just to be safe—gently erase any visible pencil marks from the negative space gap.
Add Texture
While the center circle is still wet, sprinkle a few grains of table salt into the pigment. Brush it off once dry to reveal a subtle, starry texture inside the sun.
Now you have a warm, glowing piece of art ready to brighten up any corner of your room
Textured Sun Using Thick Paint Strokes
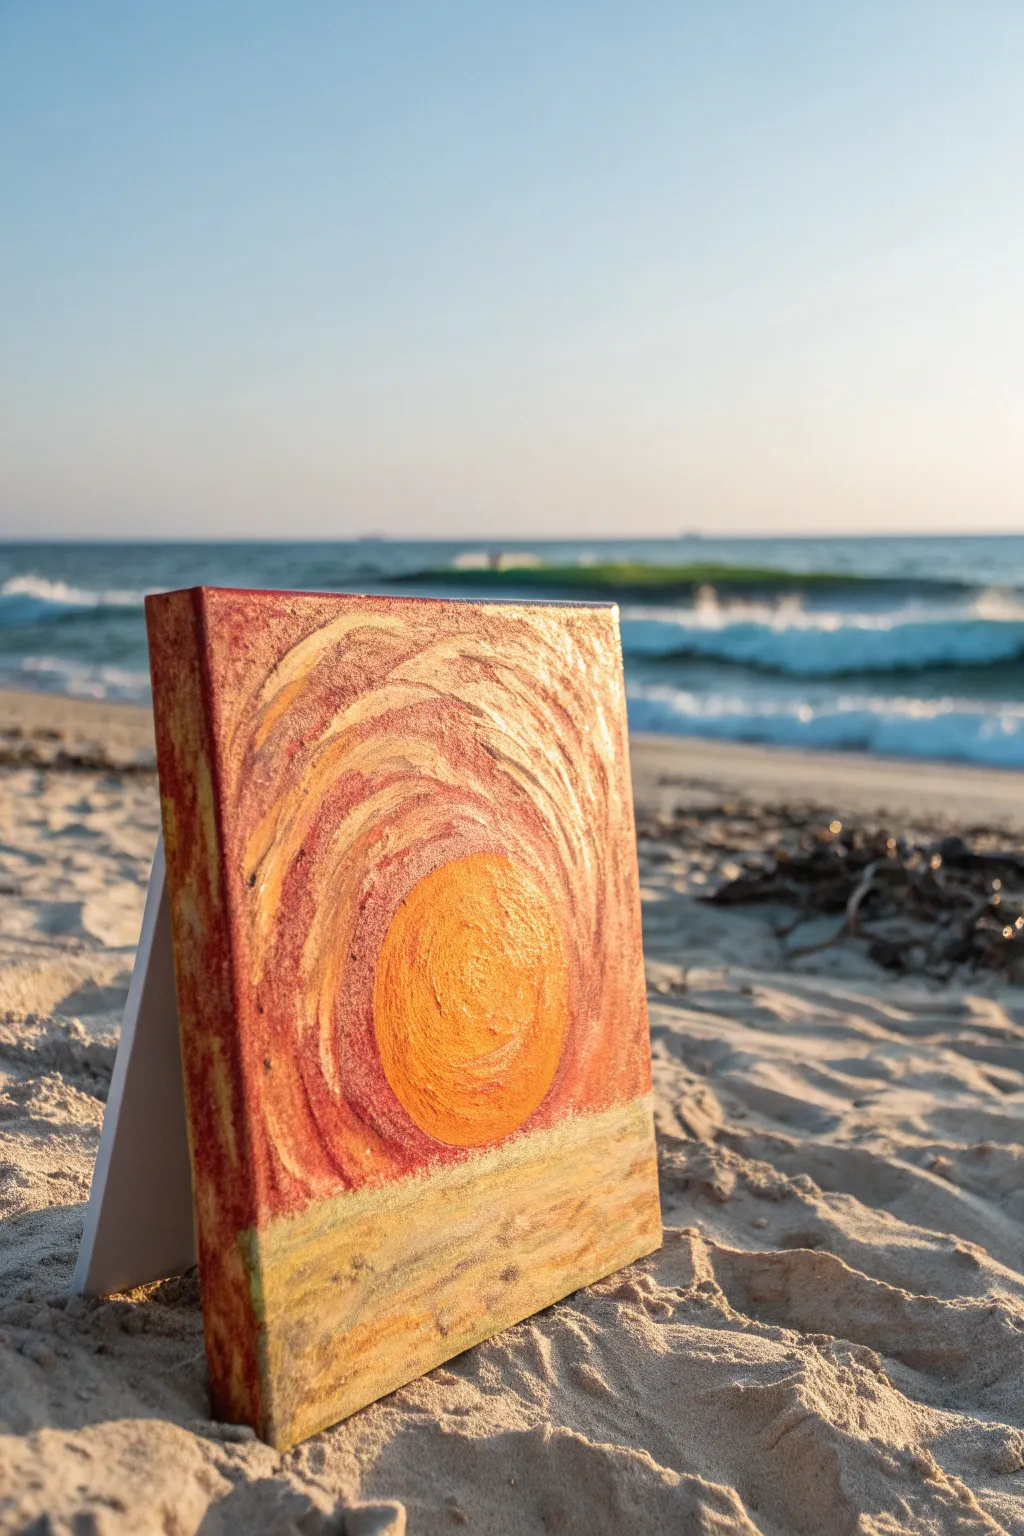
Capture the raw energy of a morning sun with this impressively textured mini canvas project. Using heavy body acrylics and deliberate brushstrokes, you’ll build up layers that practically leap off the surface to mimic heat and light.
Step-by-Step
Materials
- Small square stretched canvas (e.g., 6×6 or 8×8)
- Heavy body acrylic paints (titanium white, cadmium yellow, cadmium red, burnt sienna, yellow ochre)
- Modeling paste (optional, for extra texture)
- Palette knife
- Flat bristle brush (medium)
- Round brush (small)
- Palette or paper plate
- Easel or prop (for drying)
Step 1: Setting the Horizon
-
Prime the surface:
Start by ensuring your canvas is clean. If you want a smoother starting point, apply a thin coat of gesso, though the heavy texture of this project usually covers the canvas weave well enough on its own. -
Mark the horizon line:
About one-quarter of the way up from the bottom edge, lightly sketch a straight horizontal line across the canvas. This separates your glowing sky from the sandy ground below. -
Mix the ground color:
On your palette, combine yellow ochre with a generous amount of titanium white and a tiny touch of burnt sienna. You want a pale, warm beige that mimics dry beach sand. -
Paint the base:
Apply this sandy mixture to the bottom section of the canvas using a flat bristle brush. Don’t worry about being perfectly smooth; horizontal strokes add to the feeling of shifting sand. -
Add ground texture:
While the paint is wet, stipple the surface slightly with the tip of your brush or a palette knife to create roughness. This mimics the grainy texture seen in the reference photo.
Sticky Situation?
If the heavy paint is dragging too much and revealing the canvas, dab a tiny amount of water on your brush, but not enough to make the paint runny.
Step 2: Building the Sun
-
Outline the orb:
Directly in the center of the upper section, lightly sketch a large circle. It should take up a significant portion of the sky area, resting just above the horizon line. -
Mix the sun base:
Create a vibrant orange by mixing cadmium yellow with a small amount of cadmium red. Keep the paint thick; do not dilute it with water. -
Thicken the paint:
If I really want that 3D look, I mix equal parts modeling paste into my acrylic paint here. This helps the spiral texture hold its shape as it dries. -
Apply the sun spiral:
Load your brush or palette knife heavily. Starting from the very center of your circle, apply the paint in a tight, outward-spiraling motion until you fill the entire orb shape. -
Refine the edges:
Use a smaller round brush to tidy up the perimeter of the sun, ensuring it is relatively round but still maintains that rough, impasto quality.
Add Some sparkle
Mix a tiny amount of gold iridescent medium or gold glitter into the orange sun paint for a subtle shimmer that catches the sunlight when displayed.
Step 3: Creating the Swirling Sky
-
Mix the sky transition color:
Prepare a reddish-orange hue that is slightly darker than your sun color. Add a touch of burnt sienna to deepen it for the area immediately surrounding the orb. -
Start the inner aura:
Paint around the sun using curved strokes that echo the shape of the orb. Follow the curve upwards, imagining the heat radiating outward. -
Lighten the mixture:
As you move further away from the sun, mix more titanium white and yellow into your reddish tint creates a creamy, peachy tone. -
Create the upper swirls:
Use broad, sweeping curved strokes to fill the top corners of the canvas. Drag the brush so the bristles leave visible tracks in the thick paint, emphasizing the movement. -
Blend wet-on-wet:
Where your darker red zone meets the lighter cream zone, gently softly blend the colors while they are still wet to create a natural gradient of heat. -
Paint the sides:
Don’t forget the edges of the canvas. Extend your sky and ground colors around the sides so the painting looks finished even without a frame. -
Add final highlights:
With a clean brush, pick up pure titanium white. Add a few very light, dry-brushed highlights to the top curves of the sky and the texture of the sand. -
Dry properly:
Because the paint is applied thickly, allow the artwork to dry flat for at least 24 hours to prevent the heavy strokes from slumping or cracking.
Prop your finished masterpiece on a shelf or desk to bring a little permanent sunshine into your room
Cosmic Sun With Speckled Star Dust
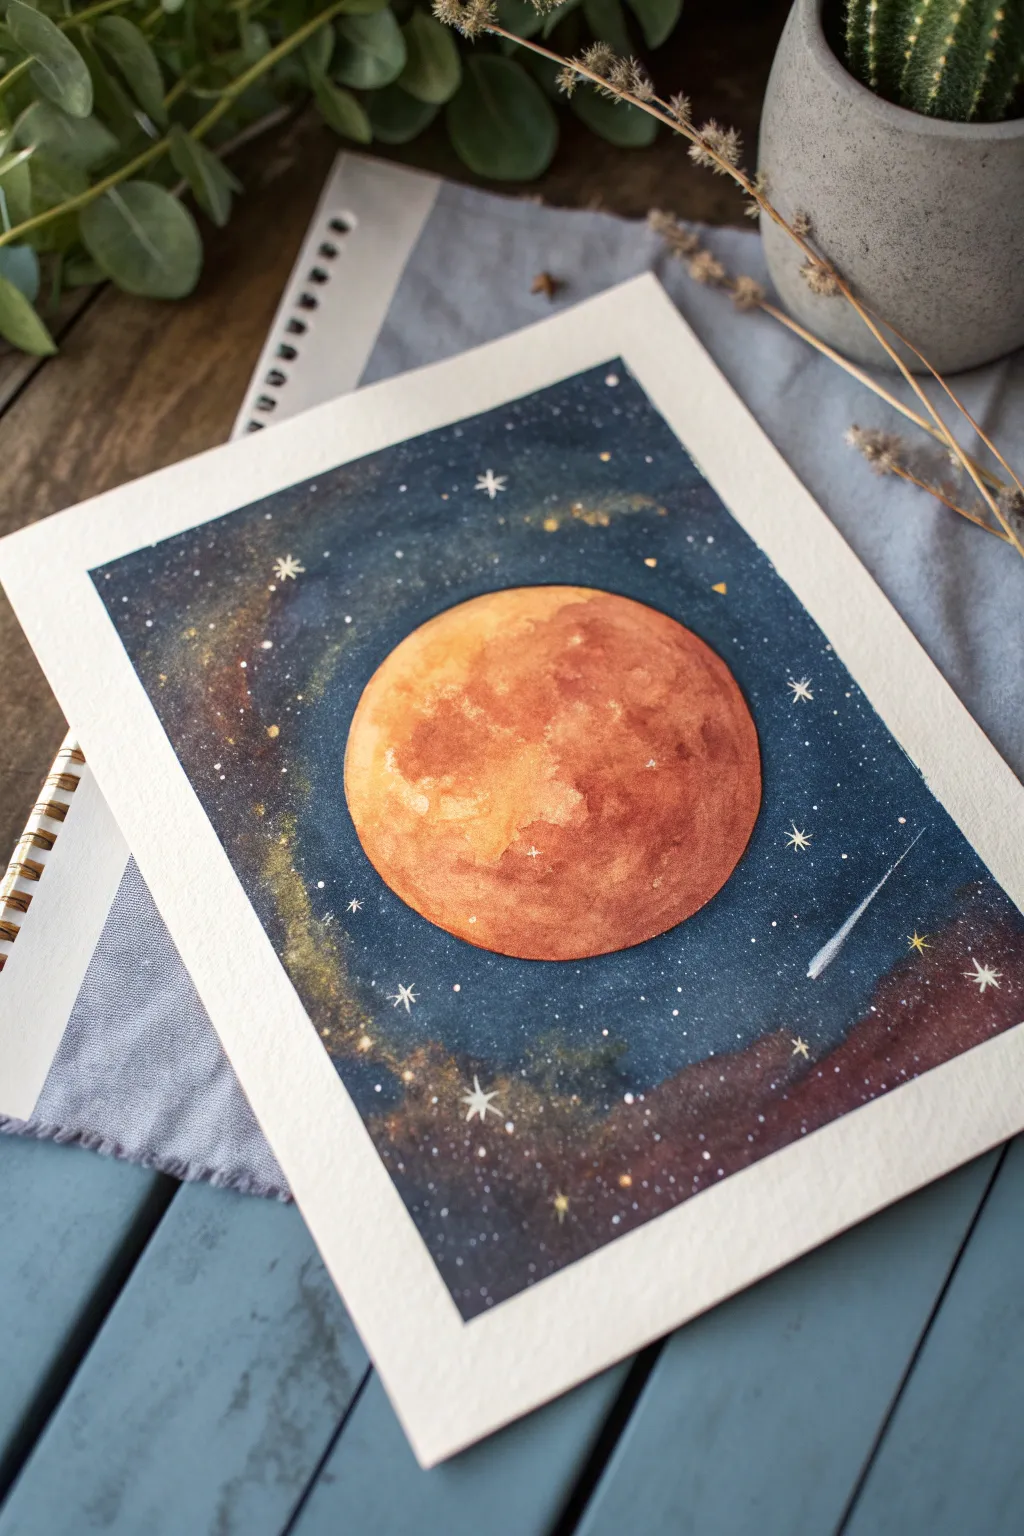
Capture the mystic beauty of the cosmos with this stunning watercolor piece featuring a textured, fiery sun set against a deep indigo galaxy. This project emphasizes wet-on-wet blending techniques to create atmospheric depth and vibrant celestial energy.
How-To Guide
Materials
- Cold press watercolor paper (300 gsm)
- Masking tape
- Compass or circular template (approx. 3-4 inches diameter)
- Pencil and eraser
- Watercolor paints (Indigo, Payne’s Gray, Burnt Sienna, Cadmium Orange, Yellow Ochre, Alizarin Crimson)
- Round brushes (large size 10-12, medium size 6, small detail brush size 0-2)
- White gouache or white gel pen
- Clean water cups
- Paper towels
- Salt (optional for texture)
- Toothbrush (for splattering)
Step 1: Preparation and The Sun
-
Secure your paper:
Tape down your watercolor paper to a board or table on all four sides. This creates a crisp white border and prevents buckling when we apply heavy washes later. -
Draft the layout:
Using a compass or a circular object like a masking tape roll, lightly trace a perfect circle in the center of the page. Keep your pencil lines faint so they don’t show through the lighter sun colors. -
Wet the circle:
Dip your medium brush in clean water and carefully fill the inside of the sun circle. It should be glistening with water but not forming a puddle. -
Apply the base warmth:
Load your brush with vivid Cadmium Orange and Yellow Ochre. Touch the wet paper and let the colors bloom naturally, leaving some areas slightly lighter for highlights. -
Add texture and depth:
While the sun is still wet, drop in Burnt Sienna and touches of Alizarin Crimson in random patches to mimic craters and solar flares. I like to tilt the paper slightly to help the pigments drift and mix organically. -
Let it dry completely:
Wait for the sun to be bone dry. This is crucial before moving to the background to avoid the dark galaxy colors bleeding into your bright sun.
Step 2: The Galaxy Background
-
Mask the sun (optional):
If you have steady hands, you can paint around the circle. For extra safety, you can apply liquid masking fluid over the dry sun or carefully cut a circle of masking tape to cover it. -
Wet the background:
Wet the entire area around the sun with clean water. Work right up to the pencil edge of your circle, being careful not to overlap. -
Lay down the deep blues:
Start applying Indigo and Payne’s Gray heavily around the corners and edges of the paper. Use a large brush to sweep these dark colors inward. -
Create faint nebula swirls:
Near the sun and diagonally across the page, introduce watered-down washes of lighter ochre or a faint rusty brown to suggest nebula dust mixing with the darkness. -
Blend the transition:
Smooth out the harsh lines between the dark blue space and the lighter nebula clouds. The wet paper should help these soften automatically. -
Paint the bottom corners:
At the bottom right, add hints of deep violet or reddish-brown to create a subtle variation in the galactic cloud structure, grounding the composition. -
Refine the sun’s edge:
Using a smaller brush loaded with concentrated Indigo, carefully trace around the sun’s perimeter to make the orange pop against the dark void. This creates that sharp, crisp boundary.
Cosmic Texture
While the sun is wet, sprinkle a few grains of table salt onto the paint. Let it dry, then brush it off to create crater-like textures.
Step 3: Stardust and Details
-
Dry the background:
Let the background layer dry fully. If the paper feels cool to the touch, it’s still damp inside, so give it a few more minutes. -
Splatter the stars:
Mix white gouache with a tiny bit of water until it’s creamy. Dip an old toothbrush or stiff brush in it, and flick the bristles to spray fine mist over the dark background. -
Draw larger stars:
Using a size 0 brush or a white gel pen, manually paint a few distinct, larger four-pointed stars scattered around the sun for emphasis. -
Add a shooting star:
Create a fine white line streaking across the bottom right quadrant. Press harder at the ‘head’ and lift off quickly for the tail to create a sense of motion. -
Final touches:
Add tiny clusters of white dots in the nebula areas to suggest dense star fields. -
The reveal:
Once everything is absolutely dry, slowly peel off the masking tape at an angle away from the paper to reveal your clean white border.
Level Up: Gold accents
Use metallic gold watercolor paint for the larger stars or to line the rim of the sun for a magical, shimmering finish.
Step back and admire the vibrant contrast of your fiery sun glowing in the cold depths of space
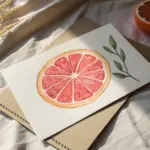


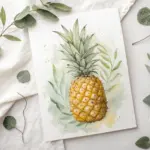
Have a question or want to share your own experience? I'd love to hear from you in the comments below!