If you’ve ever wanted your sketches to look like they belong on an ancient temple wall, Egyptian style drawing is such a fun place to play. I pulled together ideas that start super simple (easy symbols!) and build up to full-on pharaonic scenes with that classic composite view vibe.
Eye of Horus Mini Studies
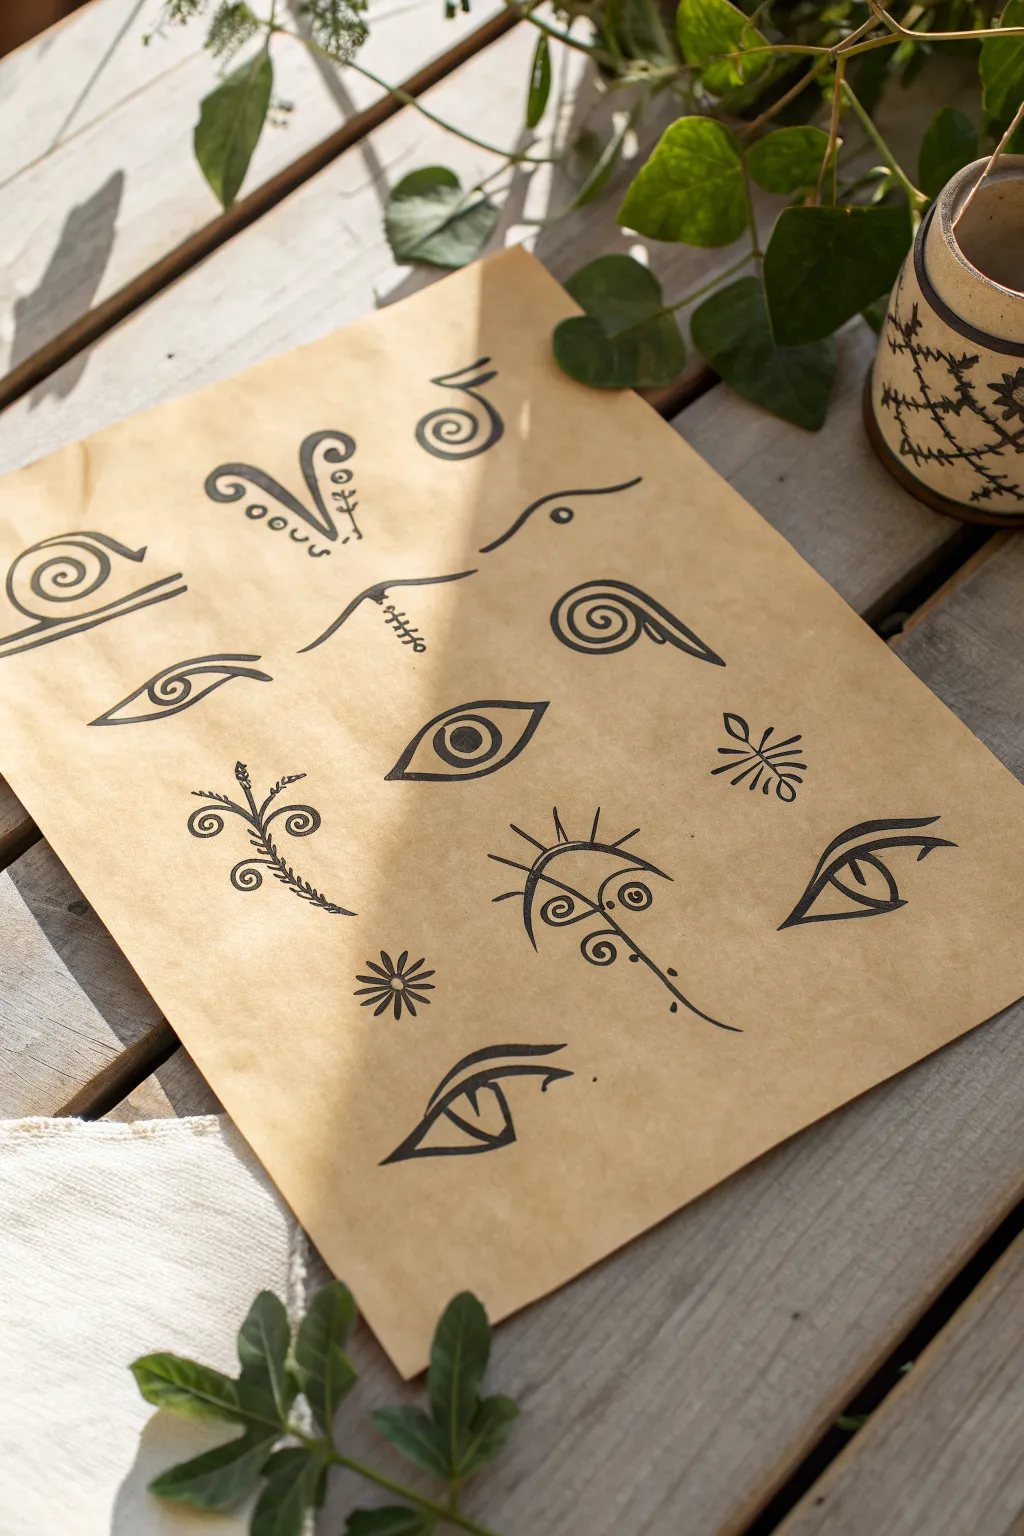
Capture the mystic allure of ancient Egypt by creating a study page of stylized symbols and eyes on aged-look paper. This project explores the iconic Eye of Horus through simple, flowing lines and bold organic shapes.
Step-by-Step Guide
Materials
- Heavyweight drawing paper (kraft or tan toned paper)
- Black ink fineliner pens (various sizes like 0.3mm and 0.8mm)
- Black brush pen or calligraphy marker
- Pencil (HB for sketching)
- Soft eraser
- Ruler (optional)
Step 1: Preparation and Layout
-
Select your paper:
Choose a tan or kraft-colored paper to mimic the look of ancient papyrus or parchment. A slight texture works well to give the ink some character. -
Plan the composition:
Lightly sketch a grid or random placement plan with your pencil. You want the symbols to feel scattered but balanced, leaving enough negative space so the page doesn’t look cluttered. -
Sketch the central symbols:
Start by lightly penciling the larger eye motifs in the center. Focus on the classic almond shape of the eye and the distinctive swooping lines that extend downwards.
Smudge Alert
If ink smears, turn the mistake into a ‘distressed’ artifact feature by dabbing it with a tissue to fade it out.
Step 2: Drawing the Eyes
-
Outline the first eye:
Using a 0.5mm fineliner, trace over your pencil sketch for the central eye. Make the top lid line slightly thicker than the bottom to add weight. -
Add the pupil:
Draw the iris and pupil. For a stylized look, you can leave the iris as a simple circle or fill it in solid black, leaving a tiny white dot for a highlight. -
Create variation:
Move to a different spot on the page and draw a variation of the eye—perhaps one that is more angular or has an elongated tail. I like to make some eyes look more human and others more abstract. -
Inking the details:
Switch to a brush pen to fill in larger dark areas, such as the thick eyebrows or the solid pupils. The brush pen gives a lovely variable line width that mimics traditional reed pens.
Step 3: Adding Decorative Symbols
-
Draw spiral motifs:
In the empty spaces, sketch spiral shapes that resemble curling fern fronds or decorative flourishes. Keep the lines smooth and confident. -
Detailed linework:
Add small embellishments to your spirals, such as tiny dots or dashed lines following the curve, using your finest pen (0.3mm). -
Create organic flora:
Draw the plant-like symbol with curling leaves on the left side. Start with a central stem and let the leaves unfurl symmetrically, adding small dots at the tips for texture. -
Geometric accents:
Add the radiating sun-like symbol or the small flower burst. These geometric shapes contrast nicely with the organic curves of the eyes. -
Hieroglyphic touches:
Incorporate small, abstract marks like zig-zags, triangles, or squiggly lines near the larger drawings to suggest text or magical annotations.
Gold Leaf Accent
Apply tiny touches of gold leaf or gold ink to the pupils or spiral centers for a royal, pharaonic finish.
Step 4: Finishing Touches
-
Erase pencil lines:
Wait until the ink is completely dry—give it a few extra minutes just to be safe—then gently erase all visible pencil marks. -
Reinforce blacks:
Check your black filled areas. Go over any patchy spots with your brush pen to ensure they are opaque and bold. -
Thicken key lines:
To make the drawings pop, re-trace the outer contour of the eyes with a thicker pen. This variable line weight adds depth and mimics the look of ancient calligraphy. -
Distress the paper (optional):
For an even older look, you can crumple the paper edges slightly or gently curl a corner to enhance the artifact aesthetic.
Display your finished study sheet in a simple frame or use it as a striking cover for a sketchbook.

Ankh Sketches With Decorative Ends
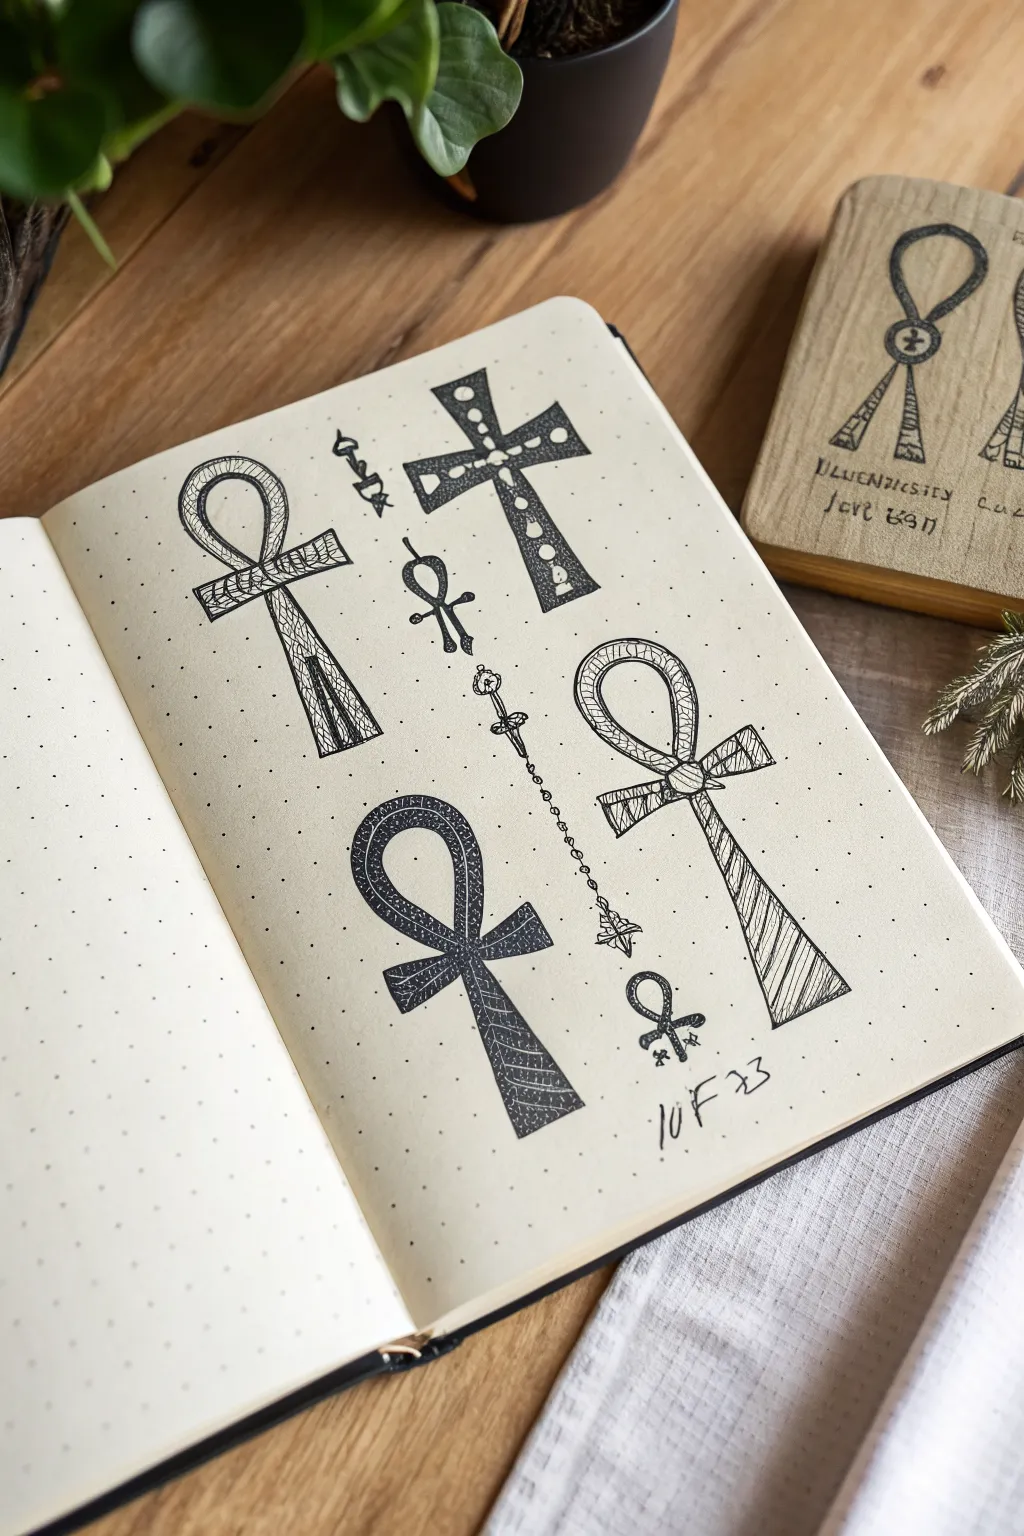
Capture the mystic elegance of ancient Egypt with this collection of Ankh and cross variations drawn on a dotted journal page. These intricate black ink designs feature different decorative fills and ornaments, making for a relaxing and striking practice page.
Step-by-Step
Materials
- Dot grid notebook or journal (A5 size recommended)
- Fine liner pens (sizes 0.1, 0.3, and 0.5)
- Mechanical pencil (HB)
- High-quality eraser
- Ruler (optional, for the central guides)
Step 1: Drafting the Foundations
-
Establish the layout:
Begin by visualizing the placement on your dot grid page. You will need space for three large symbols—top left, bottom left, and bottom right—and a central vertical decorative divider. There is also a cross variant at the top center. -
Sketch the primary Ankh spines:
Using your pencil, lightly draw the vertical center lines for the three main Ankhs. Use the grid dots to keep them perfectly straight. Each spine should be roughly 10-12 dots high. -
Draw the loops:
Sketch the teardrop-shaped loops at the top of each spine. For the variety shown, make the top-left loop slightly wider, the bottom-left loop more circular, and the bottom-right loop tall and slender. -
Add the crossbars:
Sketch horizontal bars just below the loops. These should extend evenly on both sides of the vertical spine. Vary the width slightly for each design to give them unique character. -
Outline the cross variant:
In the upper middle space, sketch a standard Latin cross shape with slightly flared ends, ensuring it doesn’t overlap with the Ankh to its left. -
Draft the central divider:
Lightly pencil a vertical line down the exact center of the page. Along this line, sketch a mix of small symbols: a tiny Ankh, a flower-topped staff, and a small hanging ornament.
Step 2: Inking outlines
-
Define the shapes:
Switch to a 0.5 fineliner. Carefully trace over your pencil outlines for the main body of the symbols. For the Ankhs, verify that the ‘arms’ and the ‘stem’ flair out slightly at the ends, rather than being perfect rectangles. -
Create double borders:
On the top-left and top-center cross designs, draw an inner border line parallel to the outer edge. This creates a frame for your internal patterns. -
Refine the central divider:
Ink the delicate central chain design. Use a 0.3 pen for this to keep it lighter than the main symbols. Draw the tiny links and the flower bud shape carefully.
Ink Smudge Savior
If you smudge wet ink, don’t erase! Turn the smudge into a shadow or add more stippling dots around the area to camouflage the mistake intentionally.
Step 3: Texturing and Patterning
-
Pattern the top-left Ankh:
Using a 0.1 or 0.3 pen, fill the inner space of this Ankh with a disorganized, organic ‘crackled’ pattern. These are essentially small, irregular geometric shapes fitted together like a mosaic. -
Decorate the cross:
Inside the double border of the top-center cross, draw randomly placed circles of different sizes. Fill in the negative space around the circles with solid black ink to make the ‘bubbles’ pop. -
Stripe the bottom-left Ankh:
For the dark Ankh at the bottom left, draw diagonal white stripes. The easiest way to do this is to draw the diagonal lines first, then color in the spaces between them with solid black ink. This creates a bold, high-contrast look. -
Lines for the bottom-right Ankh:
On the final large Ankh, use a 0.1 pen to draw simple diagonal hatching lines in the stem and horizontal hatching in the crossbar. Keep the loop mostly clear or add a double outline for simplicity. -
Add the knot detail:
Where the loop meets the crossbar on the bottom-right Ankh, draw a small, wrapped ‘knot’ design to make it look like rope or fabric tied together.
Level Up: Gold Leaf
After inking, dab small amounts of gold watercolor paint or a gold gel pen inside the empty circles of the cross for a royal Egyptian aesthetic.
Step 4: Finishing Touches
-
Detail the central chain:
Add tiny circles or dots along the central vertical chain and clarify the small symbols at the top and bottom of this line. -
Erase guidelines:
Wait at least five minutes to ensure the ink is completely dry. Gently erase all remaining pencil marks, being careful not to buckle the paper. -
Add texture to the background:
I prefer to add very sparse stippling (dots) around the outside of the symbols with your 0.1 pen. This adds a bit of grit and integrates the drawing into the page. -
Sign and date:
In the bottom right corner, swiftly write the date or a small signature in a loose, casual script as seen in the reference.
Now you have a page of ancient symbols ready to inspire your next journal entry


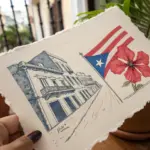
Simple Pyramids in a Desert Horizon
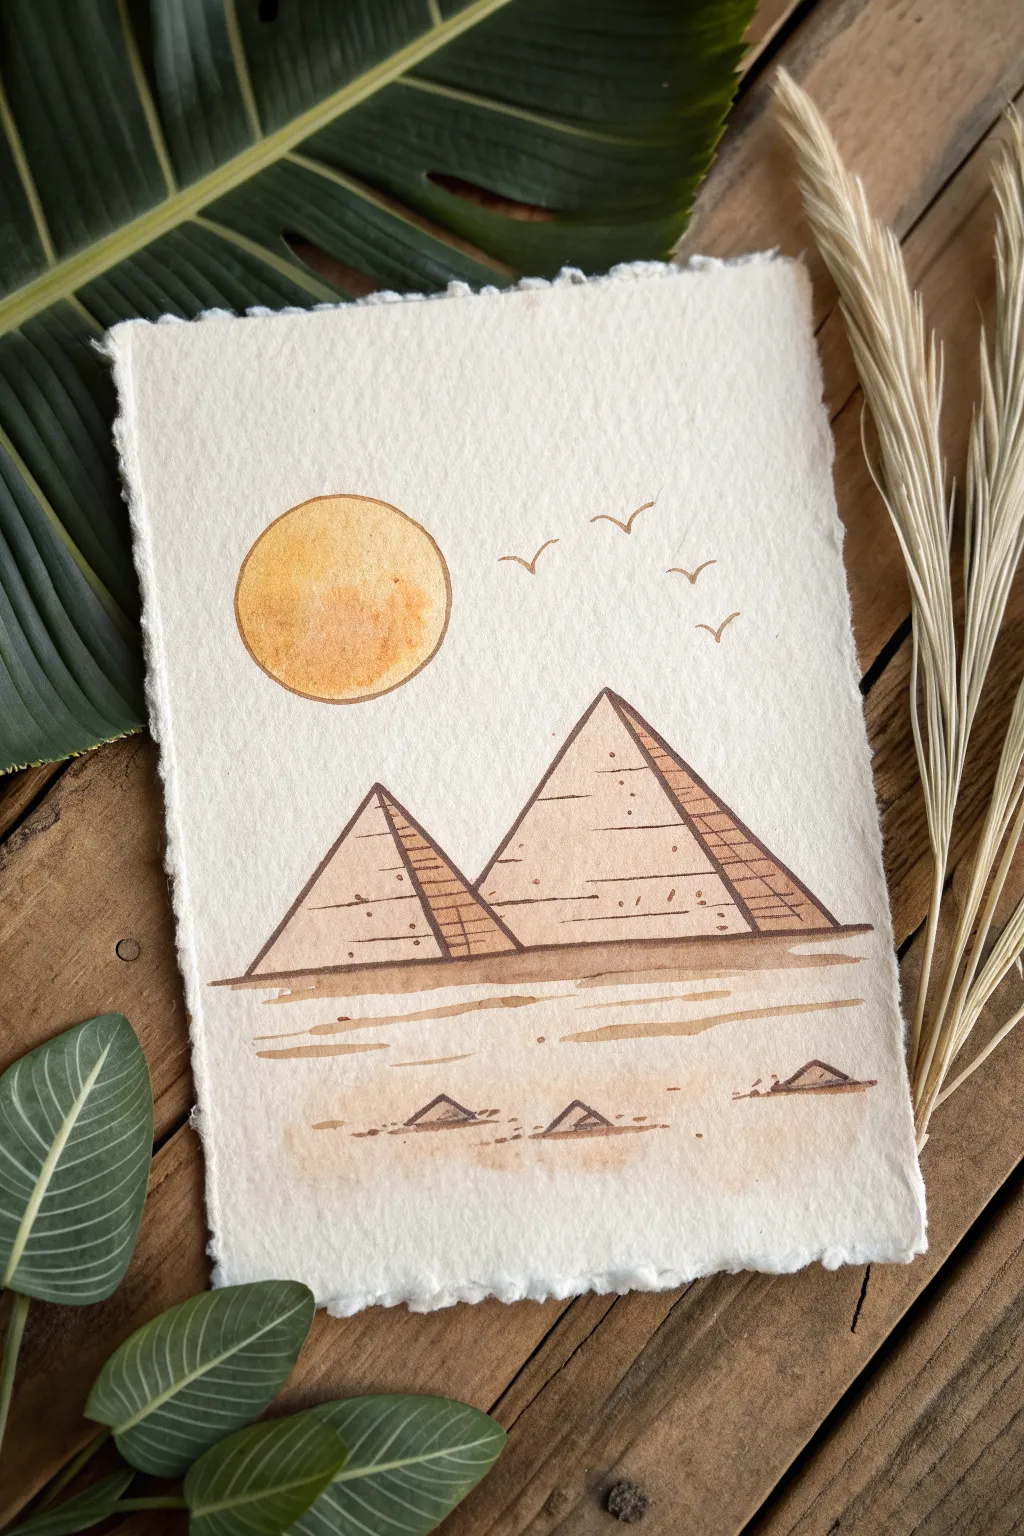
Capture the warmth of an ancient landscape with this minimalist watercolor and ink illustration. Using earthy tones and deckle-edged paper, you’ll create a serene scene perfect for framing or gifting.
Step-by-Step Tutorial
Materials
- Cold-pressed watercolor paper (heavyweight, approx. 300gsm)
- Watercolor paints (Yellow Ochre, Burnt Sienna, Raw Umber)
- Round watercolor brush (size 4 or 6)
- Fine-point waterproof pigment liner (brown or sepia, size 0.3 or 0.5)
- Pencil and eraser
- Ruler
- Jar of water
- Paper towels
Step 1: Setting the Scene
-
Prepare your paper:
Start by tearing the edges of your watercolor paper to create a rustic, deckle-edge look. You can do this by folding the paper back and forth along a ruler and carefully ripping it, or just tearing freehand for a more organic feel. -
Sketch the horizon:
Lightly sketch a horizontal line about one-third of the way up from the bottom of the page. This doesn’t need to be perfectly straight, as desert horizons have natural variation. -
Outline the pyramids:
Draw two large triangles resting on your horizon line. Make the one on the right slightly larger and overlapping the left one. Use your ruler if you want crisp lines, but a steady hand works well giving it character. -
Add the sun:
In the upper left quadrant of the sky, sketch a perfect circle for the sun. You can trace a coin or small lid to get the shape right.
Natural Edges Pro Tip
To get softer deckled edges, crease the paper, paint a line of water along the fold, wait 30 seconds, then tear. The wet fibers separate gently for a fuzzy look.
Step 2: Watercolor Washes
-
Paint the sun:
Mix a watery wash of Yellow Ochre with a touch of Burnt Sienna. Fill in the sun circle using the wet-on-dry technique. While it’s still wet, drop a tiny bit of concentrated pigment near the bottom edge to create a gradient effect. -
Base layer for pyramids:
Mix a very pale wash of Burnt Sienna (lots of water, little paint). Fill in both triangle shapes entirely. Let this layer dry completely before moving on. -
Adding dimension:
Once dry, paint the right-hand side of each pyramid with a slightly darker, more concentrated mix of Burnt Sienna. This indicates where the shadow falls and gives the flat shapes volume. -
Foreground wash:
Using a very dilute mix of Raw Umber and Yellow Ochre, paint loose, horizontal strokes across the bottom third of the paper. Leave plenty of white space between strokes to suggest light hitting the sand or water. -
Painting reflections:
Add small, triangular shapes in the foreground directly beneath the main pyramids. Keep these very faint and watery, suggesting either dunes in the distance or a reflection on a mirage. -
Let it dry:
Patience is key here—allow the entire painting to bone dry. Use a hairdryer on a low setting if you are eager to proceed.
Step 3: Inking the Details
-
Outline the sun:
Taking your brown pigment liner, carefully trace the circumference of your painted sun. A slightly broken or varying line weight adds to the hand-drawn charm. -
Define the pyramids:
Outline the triangular forms of your pyramids. Draw a line down the center of each (slightly offset to the right) to separate the light side from the shadowed side. -
Add texture:
On the darker, shadowed side of the pyramids, draw horizontal hatching lines. Space them somewhat evenly but don’t worry about perfection; this texture suggests the stone blocks. -
Add texture marks:
On the lighter faces of the pyramids, add a few random dots and tiny dashes to give the impression of weathered stone. -
Ground the scene:
Draw a solid line across the base of the pyramids. Below this, add a few broken, wavy horizontal lines to emphasize the ground texture. -
Detail the foreground:
Outline the tops of the small foreground triangle shapes. Add a little hatching to their sides, mirroring the main pyramids but with less detail. -
Add birds:
Draw a few simple ‘V’ shapes in the sky to the right of the sun. Vary their sizes and angles to make them look like a natural flock in flight. -
Final touches:
Erase any visible pencil marks that show through the watercolor, being careful not to smudge the ink if it isn’t fully set.
Level Up: Metallic Touch
Once the paint is dry, use a gold metallic paint pen to add tiny highlights to the sun’s edge or the bird wings for a magical, shimmering finish.
Now you have a timeless piece of desert art ready to display on your desk or wall

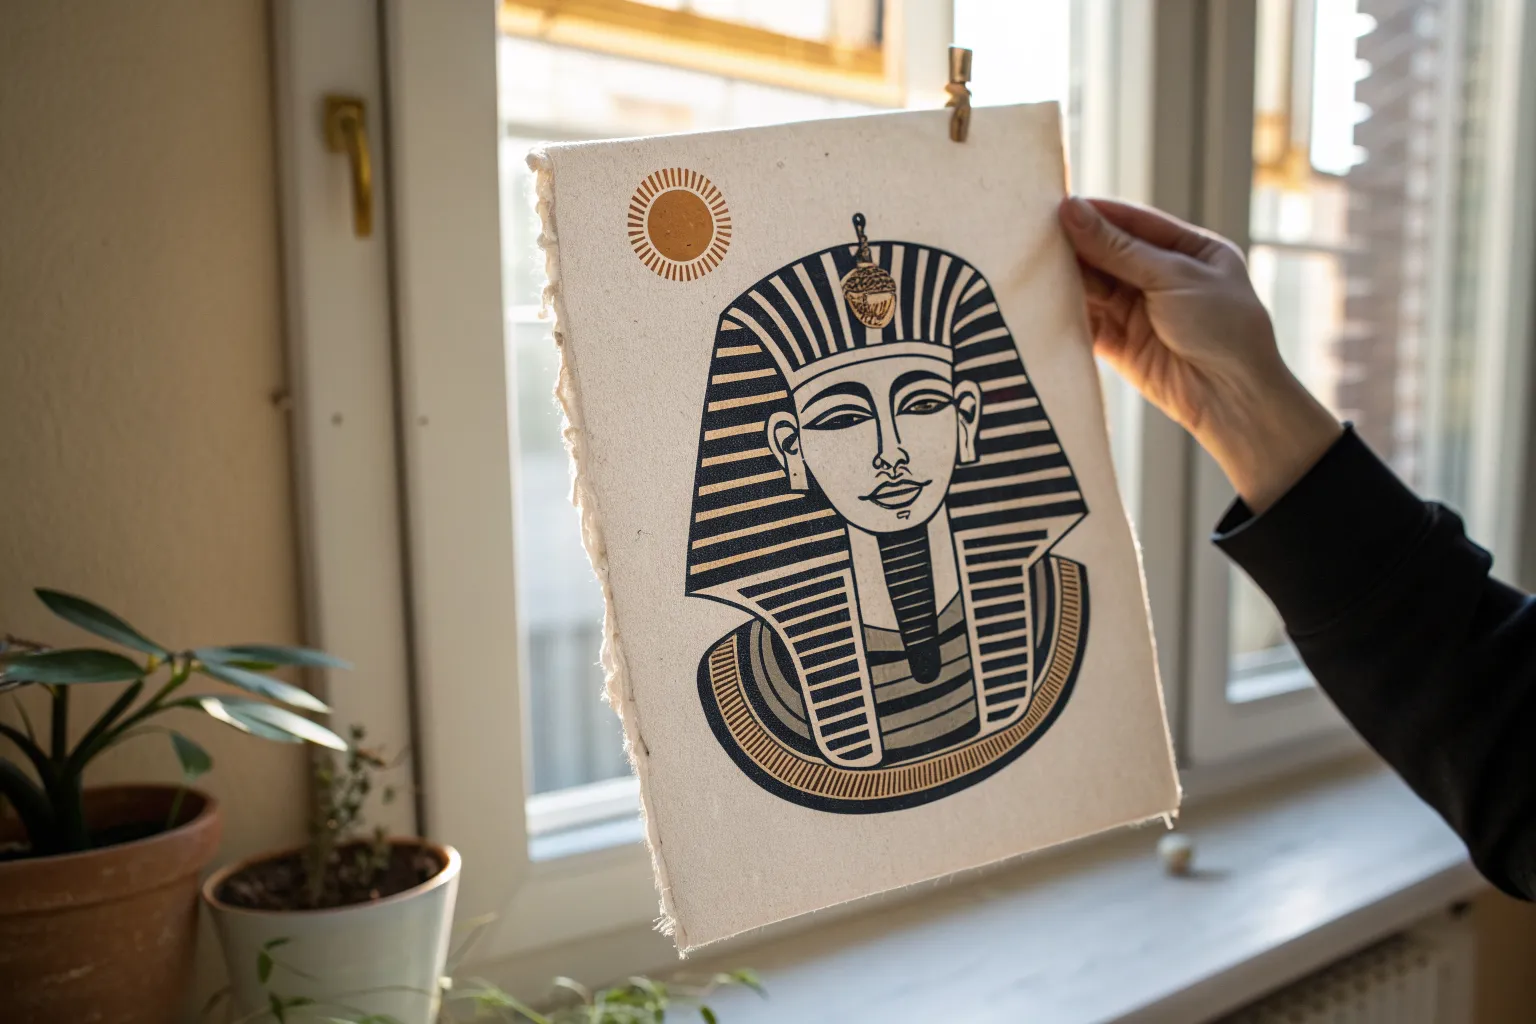
Sphinx Profile With Nemes Stripes
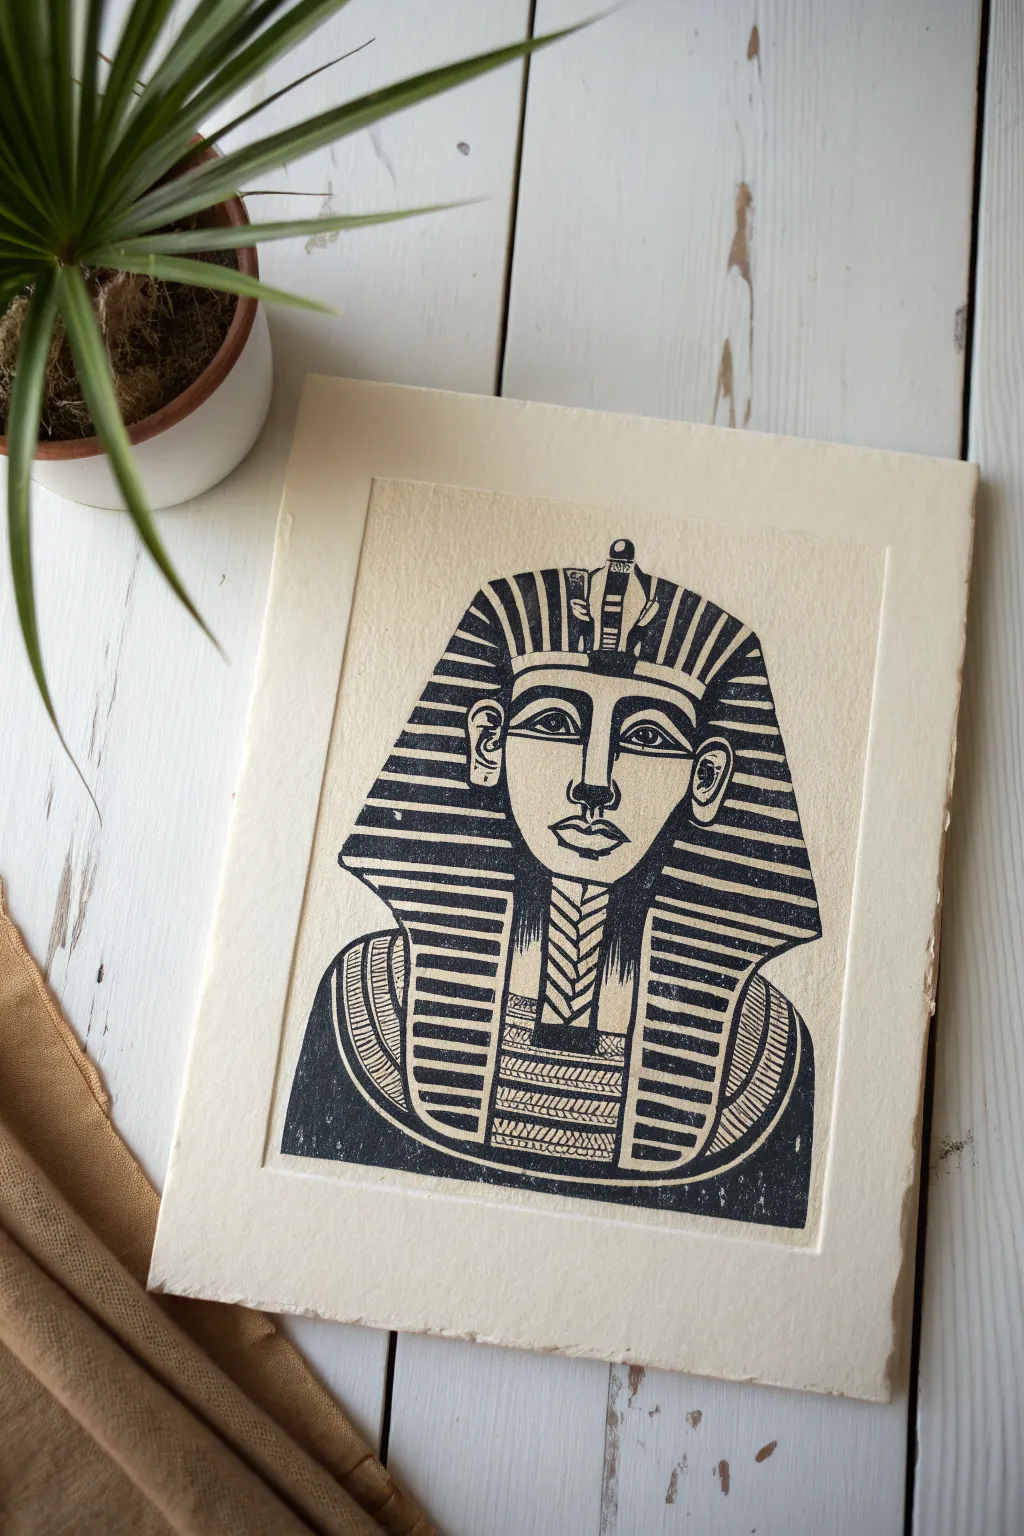
Capture the bold, graphic beauty of ancient Egyptian art with this striking linocut print tutorial. The high-contrast black ink against textured off-white paper perfectly mimics the timeless, stony gaze of a sphinx or pharaoh.
Step-by-Step Guide
Materials
- Soft-cut lino block (4×6 or 5×7 inches)
- Linocut carving tools (V-gouge and U-gouge)
- Block printing ink (black, oil-based or water-soluble)
- Brayer (rubber roller)
- Baren or a wooden spoon
- Pencil and tracing paper
- Heavyweight printmaking paper (cream or off-white)
- Smooth surface or glass slab for inking
Step 1: Planning and Transfer
-
Draft the concept:
Begin by sketching the pharaoh’s face on regular paper. Focus on symmetry for the Nemes headdress, ensuring the characteristic stripes fan out evenly on both sides of the face. -
Define the features:
Simplify the facial features into bold shapes. The eyes should be almond-shaped with distinct outlines, and the lips full. Remember, in relief printing, whatever you draw will be the mirror image when printed. -
Transfer to block:
Trace over your final sketch with a soft pencil (like a 4B or 6B). Place the drawing face down onto your lino block and rub the back firmly to transfer the graphite image. -
Indicate negative space:
Before picking up a tool, use a permanent marker to color in the areas you want to remain black. This visual guide prevents accidental carving of the wrong sections.
Patchy Ink Coverage?
If your print looks salty or speckled, you likely didn’t use enough ink. Add a tiny bit more to your slab and listen for a sticky ‘hissing’ sound when rolling.
Step 2: Carving the Block
-
Outline fine details:
Using your smallest V-gouge tool, carefully carve along the thin outlines of the eyes, nose, and lips. I find that carving away from my body helps maintain better control on these delicate curves. -
Carve the Nemes stripes:
Switch to a slightly wider tool to carve the white stripes of the headdress. Try to keep consistent pressure so the lines remain uniform in width. -
Detail the beard:
Use short, repetitive scoop cuts to create the braided texture of the ceremonial beard. This adds specific directional texture that contrasts with the smooth face. -
Clear large areas:
Use a wide U-gouge to clear away the large background areas around the head. You don’t need to make this perfectly smooth; leaving small ridges creates ‘chatter’ that adds handmade charm. -
Refine the necklace:
Carve the intricate horizontal bands of the collar (wesekh) using the small V-gouge, creating a mix of zig-zags and straight lines to mimic jewelry beads. -
Check your work:
Brush away any loose linoleum crumbs. You can do a quick rubbing with a crayon and thin paper to see if any areas need deeper carving before inking.
Warm Up Your Lino
If the lino block feels too hard or stiff to carve safely, try sitting on it for five minutes or briefly using a hairdryer. The warmth softens the material significantly.
Step 3: Inking and Printing
-
Prepare the ink:
Squeeze a small line of black block printing ink onto your glass slab or smooth tray. Roll the brayer back and forth and lift it occasionally to create a velvety, even layer on the roller. -
Ink the block:
Roll the inked brayer over your carved block. Apply the ink in multiple directions to ensure all raised surfaces are covered, but be careful not to flood the fine carved lines. -
Position the paper:
Carefully align your textured printmaking paper over the inked block. Once the paper touches the ink, do not shift it, or the image will smudge. -
Burnish the print:
Using a baren or the back of a wooden spoon, rub the back of the paper in circular motions. Apply firm, even pressure over the entire design, paying special attention to the edges. -
The reveal:
Slowly peel one corner of the paper back to check the ink density. If it looks patchy, lay it back down and rub that specific area again. -
Final pull:
Gently peel the paper entirely off the block to reveal your print. Set it aside in a safe, flat place to dry completely, which may take a day or two depending on the ink used.
Framing this handmade print creates a sophisticated focal point for any room.

PENCIL GUIDE
Understanding Pencil Grades from H to B
From first sketch to finished drawing — learn pencil grades, line control, and shading techniques.
Explore the Full Guide
Classic Composite Figure Pose
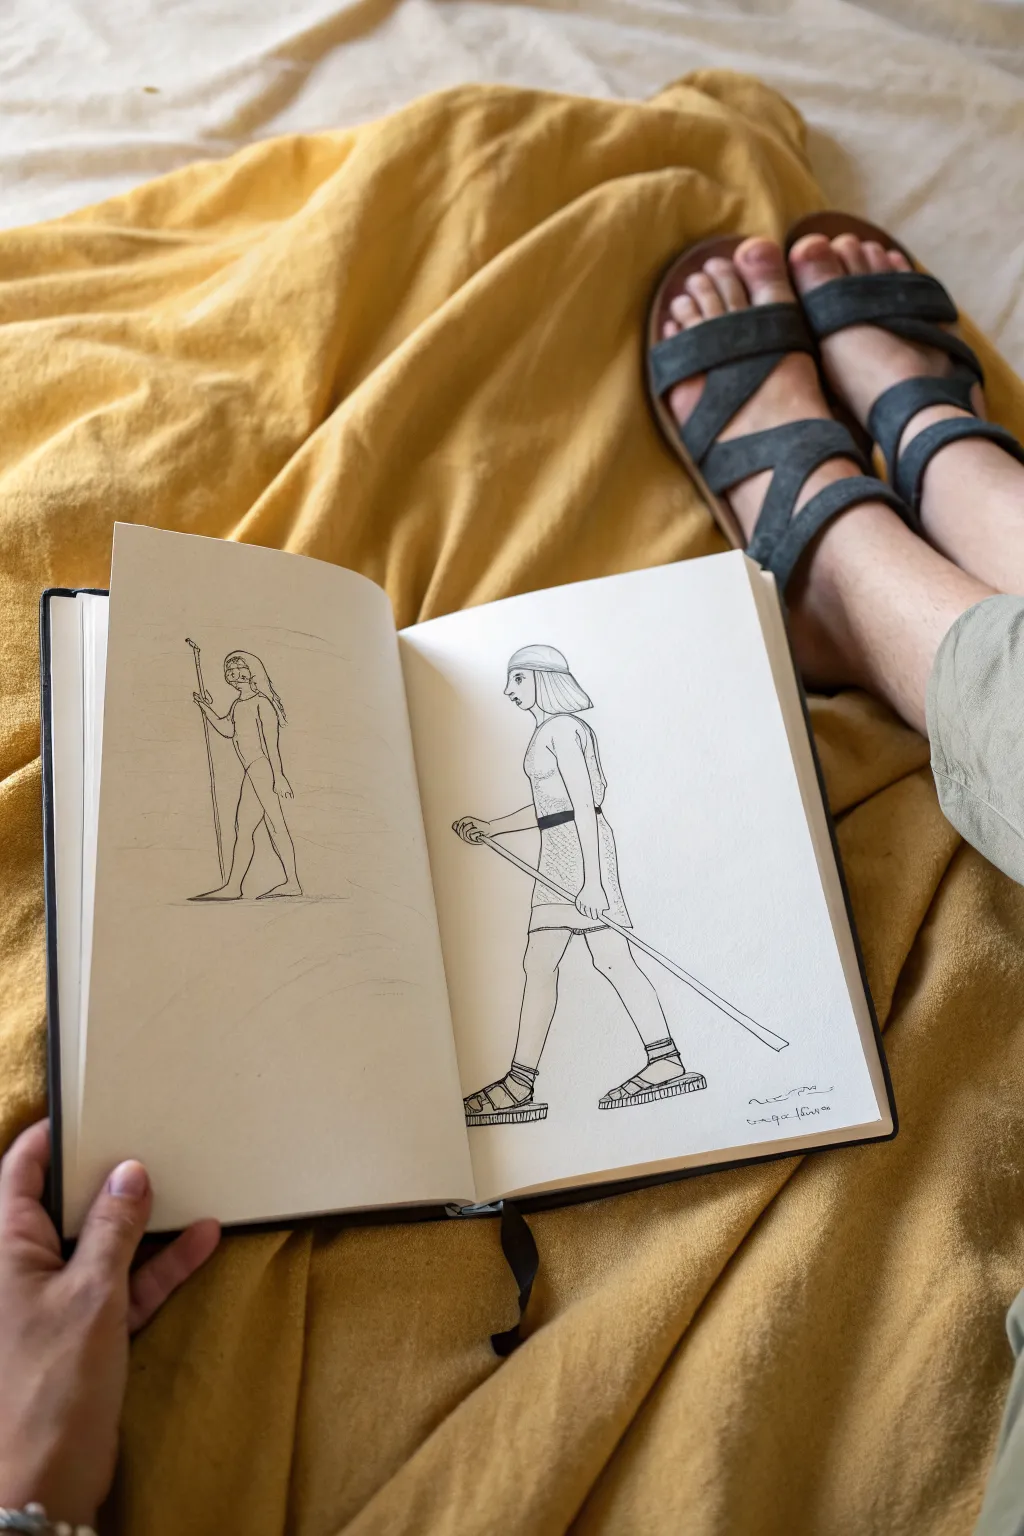
Master the iconic ancient Egyptian art style by recreating this classic figure in a composite pose, combining profile and frontal perspectives. This sketch captures the rigid yet graceful movement of historical reliefs using simple line work and careful proportion.
Step-by-Step Tutorial
Materials
- A5 Sketchbook or heavy drawing paper
- HB Graphite pencil (for underdrawing)
- Fine liner pen (black, 0.3mm or 0.5mm)
- Kneadable eraser
- Ruler (optional)
Step 1: Planning the Canon of Proportions
-
Establish the ground line:
Start by drawing a faint horizontal line near the bottom of your page to serve as the ground level where the feet will rest. -
Sketch the central axis:
Lightly draw a vertical line rising from the ground line to determine the full height of your figure. Egyptian art follows a strict grid, so envisioning this vertical structure helps keep the posture upright. -
Block in the head and torso:
At the top of your axis, sketch a simple oval for the head in profile. Below that, draw a rectangular shape for the torso, but keep it facing forward (frontal view) essentially creating an inverted triangle shape that tapers at the waist. -
Position the legs:
Draw the legs in profile, striding forward. The front leg should extend out, bent slightly at the knee, while the back leg remains straighter. Ensure the feet are also in a strict profile view, distinct from the frontal torso. -
Add the arms and staff:
Sketch the arms extending from the frontal shoulders. Position the front arm bent at the elbow to hold a staff, and let the back arm extend slightly behind the body. Draw a long, straight diagonal line for the staff intersecting the hand.
Uneven Proportions?
If the figure looks unbalanced, check the ’18-square grid’ rule. The hairline to the ground should be roughly 18 units high, with knees at unit 6.
Step 2: Refining the Form
-
Define the profile face:
Refine the head shape. Draw the nose, lips, and chin in a sharp profile outline. Remember the unique Egyptian quirk: draw the eye facing frontally (lens-shaped) even though the face is sideways. -
Shape the headdress:
Sketch the outline of the ‘nemes’ or wig. It should sit low on the forehead, curve around the ear, and flare out slightly at the bottom, resting on the shoulders. -
Detail the torso and waist:
Soften the boxy torso sketch. Draw the curve of the chest and narrow the waist. Add a belt line just above the hips to separate the upper body from the kilt. -
Draw the kilt:
Outline the triangular shape of the kilt (shendyt). The front edge should slope diagonally, following the movement of the forward thigh, while the back remains relatively vertical. -
Refine the limbs:
Go over the arms and legs, giving them muscle definition but keeping the lines smooth and stylized. Pay close attention to the hands; they should grip the staff firmly. -
Sketch the sandals:
Draw simple straps across the feet and ankles. Add the thick soles of the sandals underneath the feet, ensuring they align perfectly with your ground line.
Ancient Texture
To mimic papyrus, use a slightly warm-toned off-white paper or add a very light wash of tea or coffee before starting your drawing.
Step 3: Inking and Finalizing
-
Begin the inking process:
Switch to your fine liner pen. Start at the head, carefully tracing over your refined pencil lines with a confident, steady hand. I like to rotate the book slightly to get the best angle for smooth curves. -
Ink facial features and hair:
Carefullyink the eye and eyebrow. For the hair or wig, use vertical hatching lines to create texture, implying strands without drawing every single hair. -
Define the clothing texture:
Ink the belt and the kilt. Add subtle dashed or stippled texture to the garment to suggest woven linen, contrasting it with the smooth skin. -
Outline the body and staff:
Continue inking the arms, legs, and the long staff. Keep the line weight consistent to mimic the engraved look of stone reliefs. -
Detail the sandals:
Ink the straps and the striped pattern on the sandal soles. The stripes on the soles add a nice graphic weight to the bottom of the drawing. -
Erase pencil marks:
Once the ink is completely dry (wait at least a few minutes), use your kneadable eraser to gently lift away all the graphite underdrawing, leaving a crisp black-and-white illustration.
You have captured a timeless piece of history in your sketchbook, ready to stand the test of time
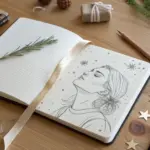
Pharaoh Head Study With Kohl Eye
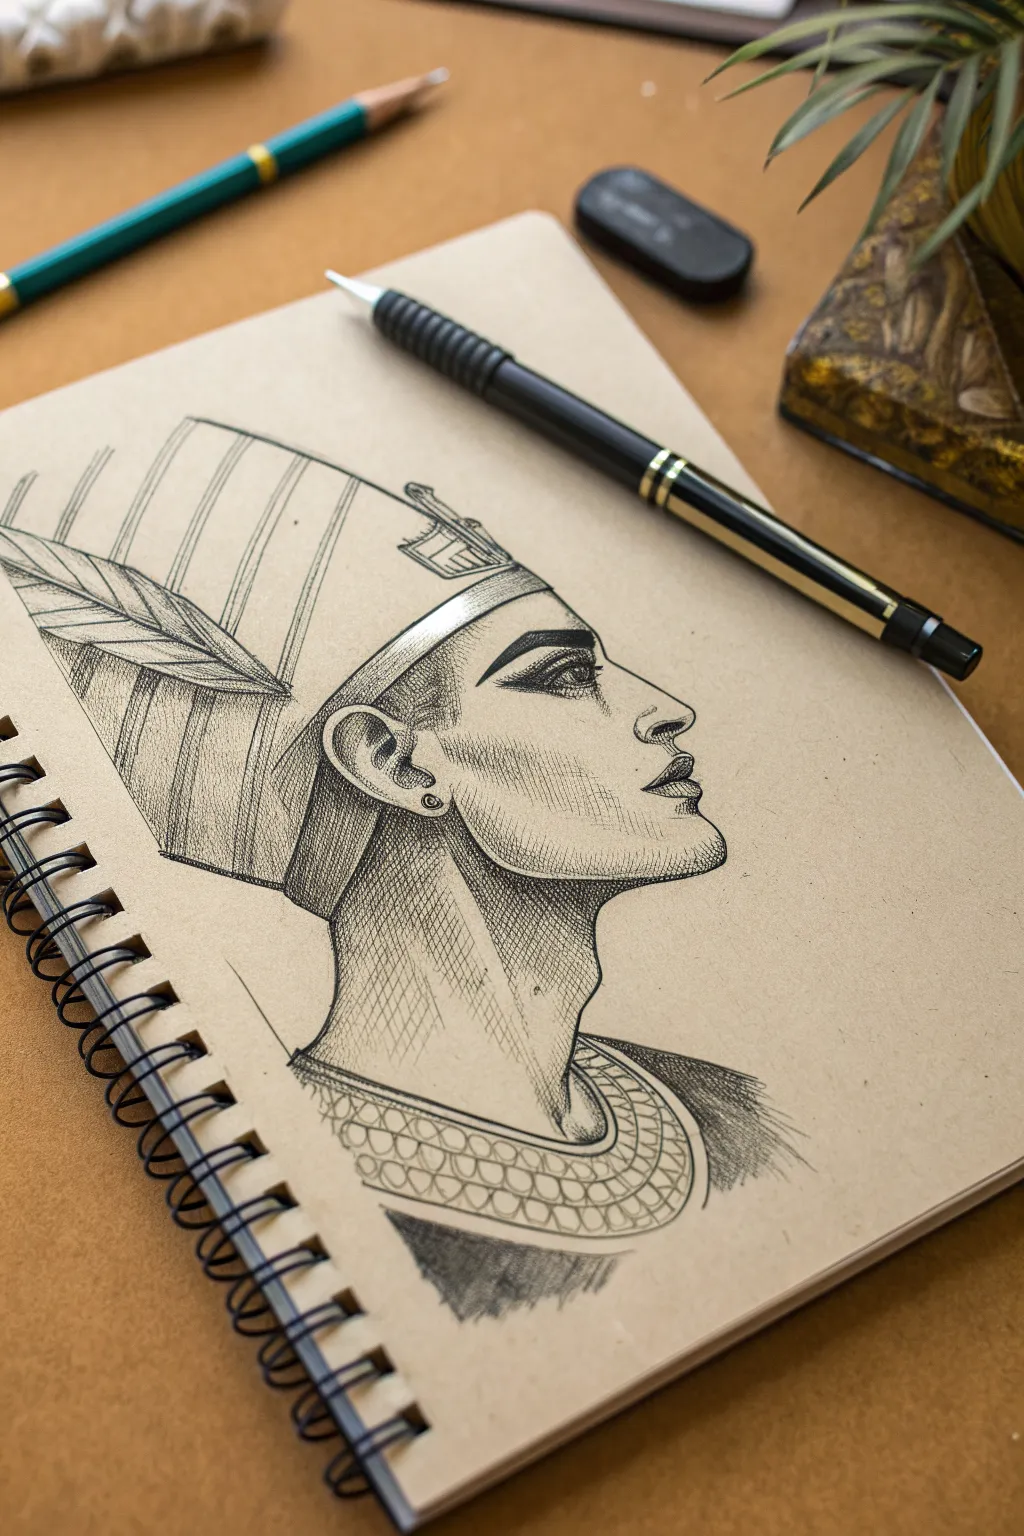
This elegant ink drawing captures the regal profile of the iconic Egyptian queen Nefertiti, featuring classic cross-hatching techniques and strong structural lines. The artwork uses the warm tone of tan paper to serve as a mid-tone, allowing the black ink to pop dramatically while creating a vintage, scholarly aesthetic.
Detailed Instructions
Materials
- Tan or toned tan sketchbook paper
- HB graphite pencil
- Kneaded eraser
- Fine liner pens (0.1mm, 0.3mm, 0.5mm)
- Black ink pen or brush pen (for solid blacks)
- White charcoal pencil or white gel pen (optional for highlights)
Step 1: Drafting the Structure
-
Establish the Head Shape:
Begin with your HB pencil, using very light pressure. Draw a large, slightly tilted oval for the main mass of the head. Add a vertical line near the front to mark where the profile will sit. -
Block in the Crown:
Sketch the distinct tall, flat-topped crown shape extending backwards from the forehead. It should flare slightly wider at the top than at the base. Add the large triangular feather shape tucked into the back band of the crown. -
Map the Facial Features:
Mark horizontal guidelines for the eye, nose, and mouth. Sketch the sharp, sloping nose profile, the full lips, and the strong jawline that curves up to the ear. Position the ear relatively low and far back to match the Egyptian artistic canon. -
Define the Neck and Collar:
Draw the long, slender neck lines, ensuring the front line curves gracefully into the chin. Sketch the broad, curved shape of the collar (wesekh) resting on the collarbones.
Step 2: Inking the Outlines
-
Select Your Line Weights:
Switch to a 0.3mm fine liner. Carefully go over your pencil lines, starting with the profile of the face. Use confident, single strokes rather than sketchy lines for the nose and lips. -
Refine the Eye:
Use a slightly thicker pen (0.5mm) for the eye to mimic the heavy kohl eyeliner. Extend the eyeliner significantly past the outer corner of the eye in a straight, horizontal line. -
Outline the Crown Details:
Ink the outer shape of the crown. Add the horizontal band across the forehead and the Uraeus (cobra symbol) at the front. Draw the vertical lines that texturize the crown, curving them slightly to match the cylindrical volume. -
Detail the Feather:
Outline the feather shape at the back of the crown. Draw the central spine (rachis) of the feather and then add diagonal lines for the vanes, keeping the spacing somewhat irregular for a natural look.
Smudge Alert
Ink on toned paper can sit on the surface longer than on standard paper. Keep a scrap piece of paper under your drawing hand to prevent smearing your fresh lines while you work across the page.
Step 3: Shading and Cross-Hatching
-
Shadow Mapping:
Identify where the light source is coming from—in this drawing, it hits the front of the face. Lightly mark with a pencil where the deepest shadows will fall: under the jaw, the neck, and the back of the cheek. -
Hatching the Neck:
Using a 0.1mm pen, start hatching the neck. Draw crisp diagonal lines running from the jawline down towards the back of the neck. For deeper shadows under the chin, add a second layer of lines perpendicular to the first (cross-hatching). -
Contouring the Face:
Add subtle hatching on the cheekbone and temple. I find it helpful to curve these lines slightly to follow the roundness of the cheek, which enhances the feeling of volume. -
Darkening Under the Jaw:
Build up density right under the jawline to separate the head from the neck. This area should be significantly darker to create depth. -
Texturing the Crown:
Add vertical hatching between the structural lines of the crown. Keep these lines very fine and close together on the shaded side (the back) of the crown to make it look rounded. -
Filling the Collar:
Inside the collar outline, draw rows of small U-shapes to represent beads or scales. Keep them loose and sketchy rather than geometrically perfect. -
Lower Garment Shading:
Use a brush pen or thicker marker to lay down lighter grey or heavy black strokes for the clothing below the collar. This anchors the portrait.
Pro Tip: Directional Strokes
When hatching the neck, align your pen strokes with the anatomy of the sternocleidomastoid muscle. Following the natural muscle direction makes the anatomy look believable rather than stiff.
Step 4: Final Touches
-
Deepening Values:
Step back and look at contrast. Add more cross-hatching to the back of the neck and the area behind the ear if the drawing feels too flat. -
Refining the Eye Detail:
Add tiny, delicate lashes and darken the pupil, leaving a small speck of white paper for the catchlight. -
Erase Pencil Guidelines:
Wait at least 5-10 minutes to ensure the ink is totally dry, then gently erase all visible graphite marks with your kneaded eraser. -
Optional Highlights:
If you have a white charcoal pencil or gel pen, add tiny touches of white to the bridge of the nose and the top of the lip to bring the figure forward.
Now you have a timeless study that captures the majesty of ancient Egyptian art
BRUSH GUIDE
The Right Brush for Every Stroke
From clean lines to bold texture — master brush choice, stroke control, and essential techniques.
Explore the Full Guide
Nefertiti-Inspired Royal Bust
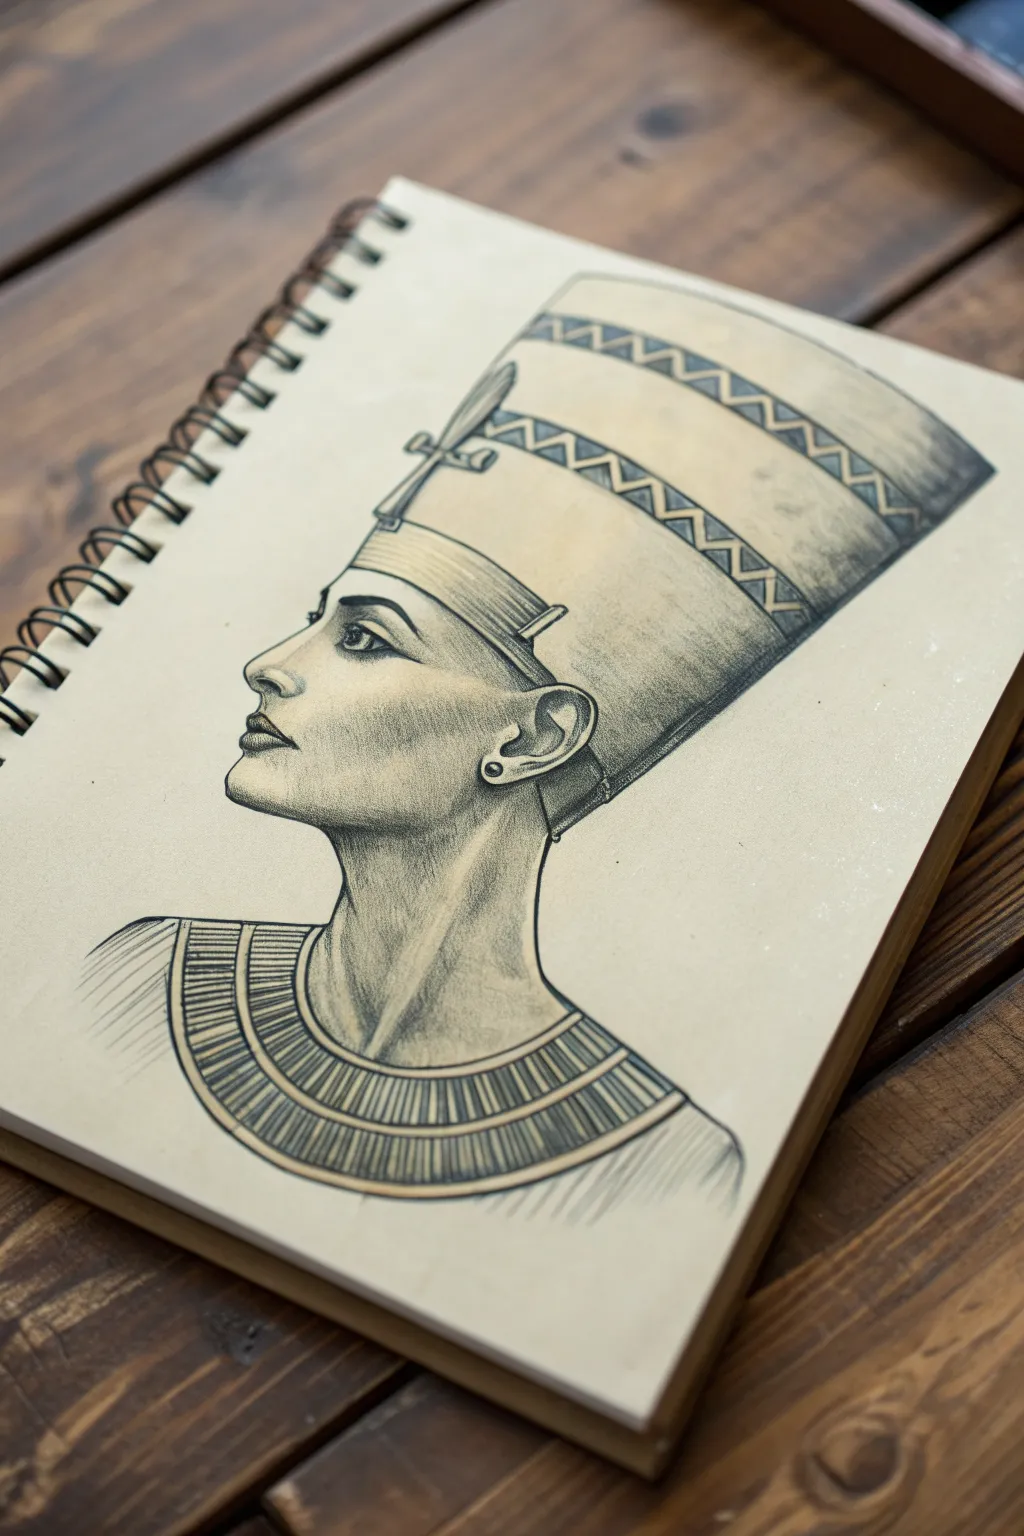
Capture the timeless elegance of ancient royalty with this detailed graphite study of Queen Nefertiti. This project focuses on mastering profile proportions and rendering the subtle textures of skin versus the rigid geometry of the iconic crown.
How-To Guide
Materials
- Heavyweight cream-colored sketch paper (smooth finish)
- H and HB pencils for outlining
- 2B and 4B pencils for shading
- Fine mechanical pencil (0.5mm)
- Kneaded eraser
- Blending stump or tortillon
- Ruler
Step 1: Establishing the Profile
-
Basic Shapes:
Begin with a light H pencil to block out the basic cranial mass as a circle. Add an elongated rectangle angling backward from the forehead to represent the tall crown. -
Profile Line:
Draw a vertical centerline to help align facial features. Mark horizontal guides for the brow, the base of the nose, the lips, and the chin. The nose should be prominent and straight, typical of Amarna period art. -
Mapping Features:
Sketch the outline of the forehead sloping into the nose. Define the lips with a fuller bottom lip and a firm chin. Place the ear relatively low, aligning the top with the eye line. -
The Crown’s Structure:
Refine the shape of the crown. It expands slightly as it goes up. Add the band across the forehead and the iconic uraeus (serpent) shape at the front, though keep it simplified for now. -
Neck and Shoulders:
Extend the neck line downwards, giving it a graceful, slender length. Sketch the broad, circular collar (usekh) resting on the chest, curving it to follow the form of the torso.
Keep it Sharp
For the intricate geometric patterns on the crown and collar, keep your pencil extremely sharp. A dull point will smudge the tiny triangles.
Step 2: Refining and Shading
-
Defining the Eye:
Switch to an HB pencil. detailed the almond-shaped eye. The upper lid should be heavy and the eyebrow long and arched. Add the pupil and iris, leaving a tiny spot of white paper for the catchlight. -
Facial Contouring:
Using a 2B pencil, begin shading the face. Focus on the cheekbone; shade beneath it to carve out the structure. Add soft shadows around the nose and under the bottom lip. -
Smooth Transitions:
Use a blending stump to soften your pencil strokes on the skin. You want the face to look smooth and statue-like, not scratchy. I like to lift highlights back out with a kneaded eraser on the cheek and nose tip. -
Ear Details:
Darken the inner folds of the ear with a 4B pencil to create depth. Ensure the transition from the jawline to the neck is distinct but shadowed. -
Crown Texture:
Shade the main body of the crown using vertical strokes that follow the curvature of the headgear. Keep the light source consistent, coming from the front-left, meaning the back of the crown is darker.
Step 3: Ornamentation and Final Touches
-
Geometric Bands:
Draw the zigzag and diamond patterns on the crown’s upper and lower bands. Use a mechanical pencil for these precision lines. Shade the darker triangles to make the pattern pop. -
The Uraeus:
Detail the serpent head at the front of the crown. Use sharp, dark lines to define its edges against the lighter crown background. -
Collar Detailing:
Draw the vertical distinct bands of the neck collar. These should radiate outward from the neck base. Vary the pressure to show the curve of the collar over the shoulders. -
Darkest Darks:
Take your 4B pencil and re-trace the main profile outline to give it a strong, illustrative border. Deepen the pupil, the nostril, and the shadow under the chin. -
Shoulder Hatching:
Add light diagonal hatching marks on the shoulders below the collar to suggest form fading off the page, keeping the focus on the head. -
Final Cleanup:
Erase any wayward smudge marks from the background. Sharpen the outer contour of the crown one last time to ensure a crisp silhouette.
Add a Splash of Gold
Once the graphite drawing is done, use a gold gel pen or metallic watercolor just on the crown bands and collar for a stunning mixed-media pop.
You have now immortalized one of history’s most famous queens in your sketchbook
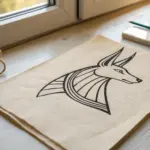
Anubis Guardian Pose
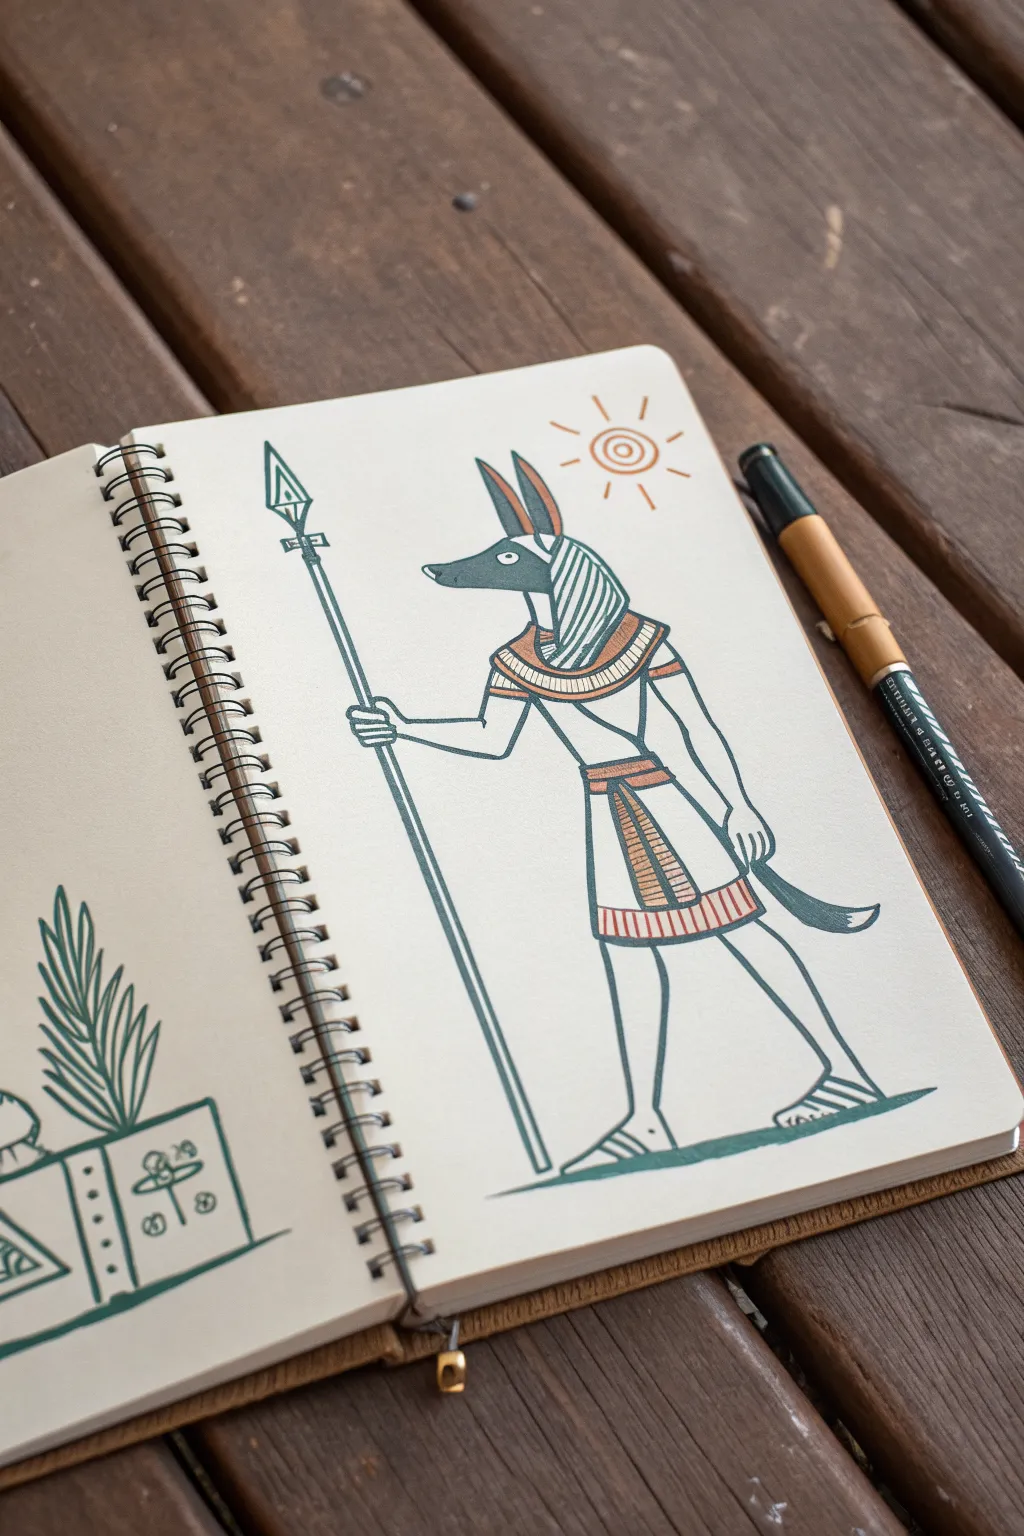
Capture the spirit of ancient Egypt with this stylized drawing of Anubis, the jackal-headed deity. This tutorial breaks down the classic profile view and regal accessories into simple lines and bold, minimal colors, perfect for a sketchbook page.
Step-by-Step
Materials
- Sketchbook with cream or off-white paper
- Pencil (HB or 2B) for initial sketching
- Eraser
- Fine liner pen (Dark Teal/Petrol Blue or Black)
- Felt tip marker or pen (Earth Orange/Terracotta color)
- Ruler (optional)
Step 1: Drafting the Basic Form
-
Position the figure:
Visualize where Anubis will stand on your page. Leave enough room at the top for the sun symbol and to the left for his spear. Lightly mark the ground line near the bottom. -
Sketch the head shape:
Start with the distinct jackal profile. Draw a long, tapering snout pointing left. Add two tall, pointed ears standing upright on the top of the head. -
Outline the torso and arms:
Draw the upper body in a semi-profile view. The chest should be relatively flat. Sketch the left arm extending forward (holding the spear) and the right arm hanging down by his side. -
Add the kilt and legs:
Below the waist, draw a triangular shape for the traditional sheen or kilt. Then, sketch the legs in the classic stride position—left leg forward, right leg back—ensuring the feet are flat on your ground line. -
Detail the accessories:
Add the ‘nemes’ headdress flowing down from behind the ears to the shoulders. Draw the broad collar necklace around the neck area. Sketch the long spear shaft running vertically through his left hand.
Step 2: Refining and Inking
-
Start the main outline:
Switch to your dark teal or petrol blue fine liner. Begin tracing over your pencil sketch, starting with the snout and ears. Keep your lines steady and consistent in thickness. -
Ink the headdress and collar:
Outline the flowing headdress. Inside the collar area, draw concentric curved lines to create the rows of beads or goldwork. -
Define the spear:
Draw the long shaft of the spear using a ruler if you want it perfectly straight, or freehand for a more organic feel. Add the spearhead at the top with a simple diamond shape and a cross-bar. -
Complete the body lines:
Trace the rest of the body, including the arms, kilt, and legs. Don’t forget the long, curved tail emerging from the back of the kilt. -
Add kilt details:
Draw the belt and the central sash hanging down the front of the kilt. Add vertical stripes inside the sash and along the bottom hem of the skirt. -
Ground the figure:
Draw a bold, solid line beneath the feet to represent the ground. This gives the figure weight and stability. -
Erase pencil marks:
Once the ink is completely dry, gently erase the underlying graphite sketch to clean up the page.
Straight Lines Made Easy
Struggling with the long spear shaft? Draw two dots—one at the top and one at the bottom—and keep your eye on the destination dot as you draw the line connecting them.
Step 3: Adding Color
-
Color the ears and skin:
Using your teal pen, carefully fill in the jackal’s head, the hand holding the spear, and the hand by his side. Leave a small white circle for the eye to make it pop. -
Stripe the headdress:
With the same teal pen, add diagonal stripes to the headdress. Alternating between ink and paper creates that classic striped texture. -
Apply terracotta accents:
Switch to your earth orange marker. Fill in the inside of the tall ears, leaving a teal border. -
Color the jewelry:
Use the orange marker to fill in alternating bands on the broad collar necklace. This contrast mimics gold and lapis lazuli. -
Detail the clothing:
Fill in the belt, the central sash, and the bottom hem of the kilt with the orange marker. Keep the coloring neat within your ink lines. -
Draw the sun disk:
In the upper right corner, draw a small circle with the orange marker. Add a ring around it, and then simple straight lines radiating outward to represent the sun’s rays. -
Final touches:
I like to scan the drawing one last time for any gaps. If you feel bold, add a few small lines on the feet to suggest sandal straps.
Pro Tip: Consistent Color
To prevent the marker ink from streaking on larger areas like the head, work in small circular motions rather than long back-and-forth strokes. This saturates the paper evenly.
This regal guardian is now ready to protect the pages of your sketchbook


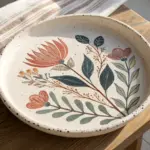
Bastet as a Regal Seated Cat
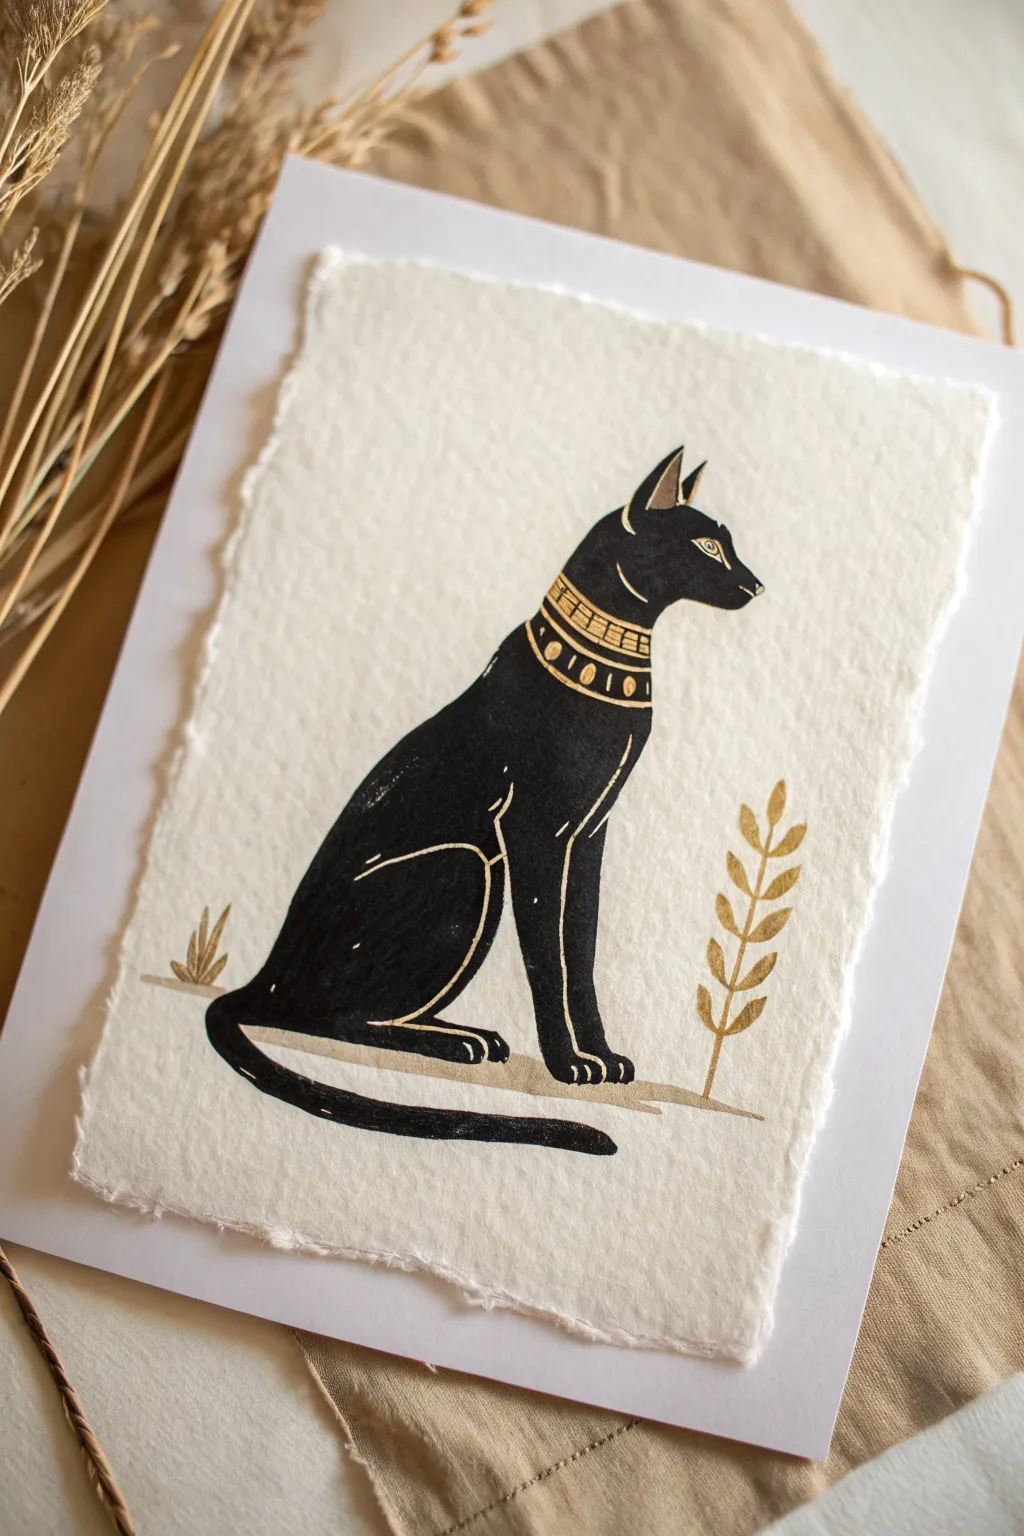
Capture the timeless elegance of the Egyptian goddess Bastet in this striking mixed-media piece. Contrasting deep black ink with accents of shimmering gold on textured paper, this project creates a regal, handcrafted look perfect for framing.
Step-by-Step Guide
Materials
- Heavyweight textured paper (watercolor or handmade cotton rag paper)
- Black India ink or high-quality black gouache
- Gold metallic paint (acrylic or gouache) or a gold gel pen
- Pencil (HB or H)
- Kneaded eraser
- Fine liner brush (size 0 or 00)
- Medium round brush (size 4 or 6)
- Small cup of water
- Palette or mixing dish
- Ruler (optional)
Step 1: Planning and Sketching
-
Prepare the paper:
Start by tearing the edges of your heavy paper to create a deckled edge effect if it doesn’t already have one. This adds to the ancient, papyrus-like aesthetic. Lay the paper flat on a clean surface. -
Establish the ground line:
Lightly sketch a horizontal line near the bottom third of the paper. This doesn’t need to be perfectly straight; a slight organic curve mimics the desert floor. -
Block in the main shape:
Using your pencil, draw a tall, slender oval for the cat’s body and a smaller circle for the head. Connect them with a graceful, sloping neck line. Bastet has a very distinct, elongated posture. -
Refine the silhouette:
Shape the pencil sketch into a classic seated cat profile. Define the pointed ears (tall and alert), the slope of the back, and the front legs which should look strong and vertical. -
Add the tail:
Sketch the tail wrapping around the base of the cat’s body, creating a long, elegant curve that balances the composition. -
Detail the collar:
Lightly mark the area for the ‘Usekh’ collar—the wide, decorative necklace. Draw curved bands around the neck/chest area where the gold details will eventually go.
Clean Lines Tip
If your hand is shaky with a brush, use a gold gel pen for the fine details on the body and collar. It offers more control than a brush.
Step 2: Inking the Silhouette
-
Outline carefully:
Switch to your fine liner brush and black India ink. Carefully outline the entire silhouette of the cat. Keep your hand steady to ensure smooth, continuous lines. -
Fill the body:
Using the medium round brush, fill in the main body with solid black ink. Work methodically to avoid patchiness. The ink should be opaque and rich. -
Preserve the details:
Be careful *not* to paint over the collar area heavily if your gold paint isn’t fully opaque. I prefer to leave the collar bands slightly lighter or unpainted if I’m using a transparent gold, but for opaque gold acrylics, you can paint the whole form black first. -
Define the legs:
Ensure the separation between the front legs and the back leg is clear in your silhouette. You can leave a hairline gap of white paper or use a thinner line to distinguish them. -
Let it dry completely:
Allow the black ink to dry thoroughly. This is crucial—if the black is wet, the gold step will smear and become muddy.
Make It Ancient
After the art is dry, lightly dab a tea bag over the white paper areas to stain it light brown, creating an aged, parchment-like appearance.
Step 3: Gilding and Accents
-
Paint the collar:
Dip your fine brush into the gold metallic paint. Carefully fill in the bands of the collar. You might need two layers to get a truly brilliant shine. -
Add collar patterns:
Once the gold base is dry, use a very fine touch of black ink (or a black fineliner pen) to add small geometric details—vertical ticks or dots—inside the gold bands. -
Detail the ear and eye:
Use the gold paint to outline the inner shape of the ear. Paint a stylized Egyptian eye; an almond shape with a small pupil and an extended eyeliner flick. -
Adding definition lines:
With an extremely fine brush and gold paint, add subtle definition lines on the black body: a curve for the shoulder blade, a line defining the thigh, and small lines for the toes. -
Paint the foliage:
To the right of the cat, paint a simple, stylized plant using the gold paint. A central stem with paired leaves ascending creates a nice vertical balance. -
Add the ground detail:
Mix a very watery wash of brown or diluted gold paint. Swipe a transparent line under the cat to ground the figure, giving it a surface to sit on. -
Final touches:
Add a tiny golden tuft of grass on the left side for asymmetry. Check your blacks for any opacity issues and touch up if necessary.
Mount your finished piece on a contrasting background sheet to highlight those beautiful deckled edges.
Scarab Beetle With Sun Disk
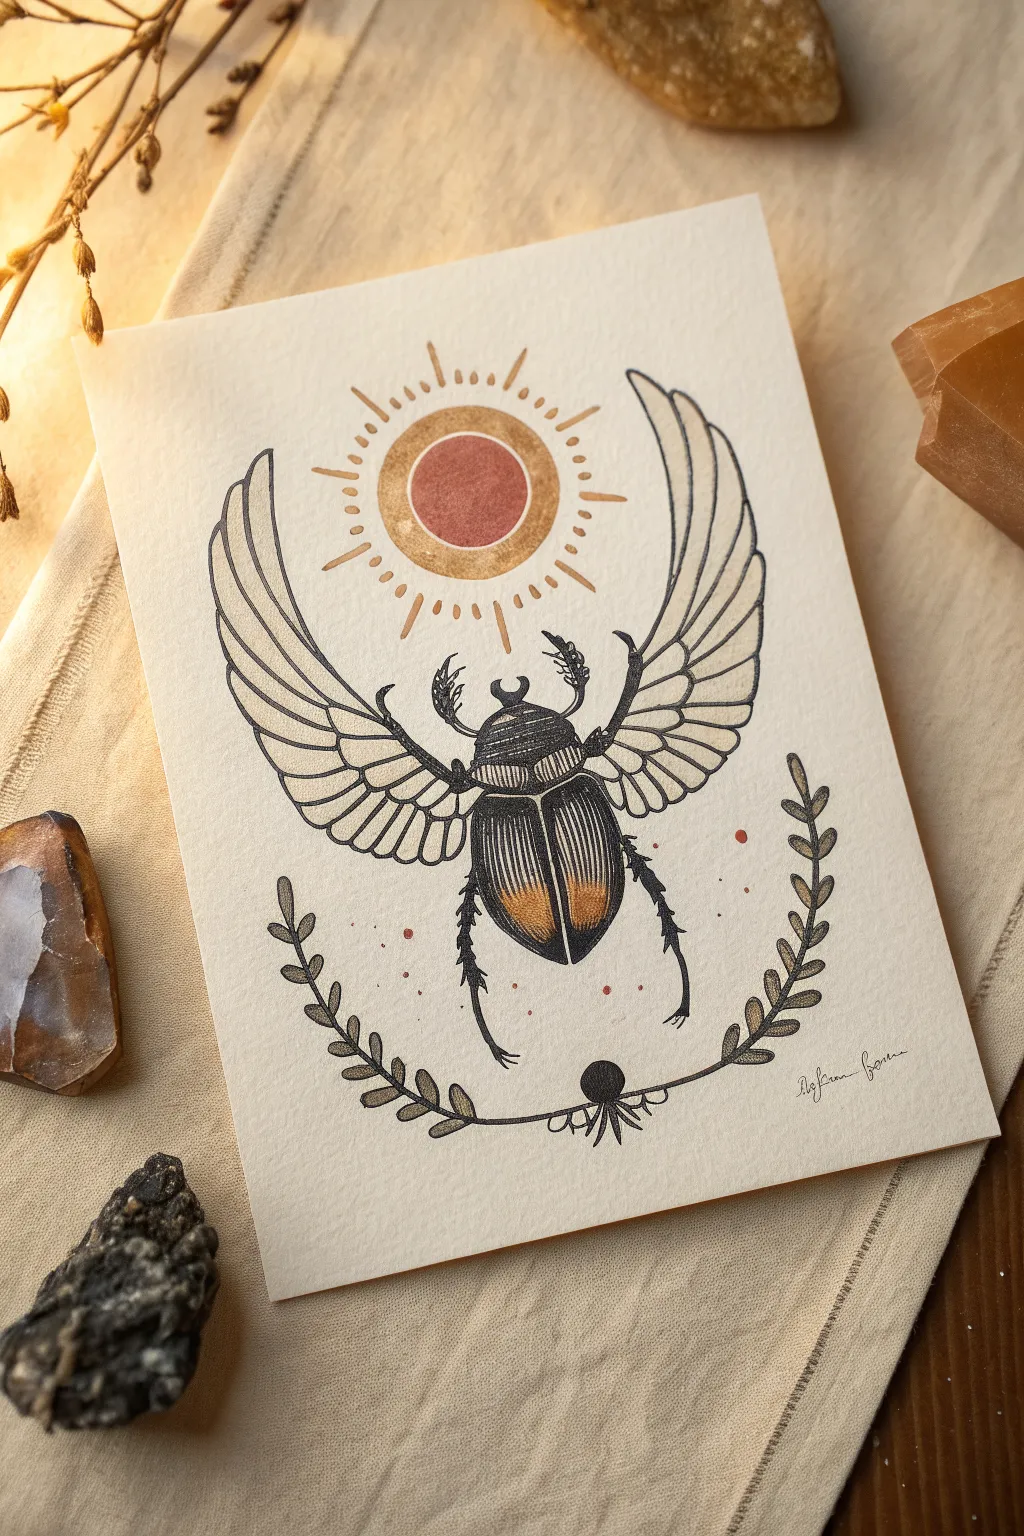
This stunning illustration captures the timeless beauty of Egyptian symbolism with a detailed winged scarab beetle reaching toward a radiant sun disk. Using fine liners and warm, metallic accents, you’ll create a piece that feels both ancient and delicately modern.
Step-by-Step Tutorial
Materials
- Heavyweight cream or off-white textured paper (watercolor or mixed media paper ideally)
- Fine liner pens (sizes 0.05, 0.1, and 0.5 – black)
- Gold metallic paint or gold ink pen
- Rust/terracotta colored watercolor, ink, or marker
- Pencil (HB or H for light sketching)
- Ruler
- Compass or small circular object for tracing
- Eraser (kneaded is best)
Step 1: Drafting the Foundations
-
Create the central axis:
Begin by lightly drawing a vertical line down the center of your paper with a ruler. This will help you keep the beetle and the sun perfectly aligned, as symmetry is key for this style. -
Draft the sun disk:
Near the top third of the page, use a compass or trace a bottle cap to draw a perfect circle for the sun disk. Draw a slightly larger concentric circle around it to create a thick border for the gold halo later. -
Sketch the beetle’s body:
Below the sun, sketch the scarab’s main body shapes. Start with an oval for the abdomen, a smaller semi-circle for the thorax (mid-section), and a small head shape. Keep your pencil pressure very light so lines can be erased easily. -
Outline the wings:
Extending from the beetle’s shoulders, draw two long, sweeping curves upward toward the sun disk. Mirror these curves on the underside to define the wing shape. They should look like elongated feathers or leaves reaching for the sky. -
Add the botanical base:
At the bottom, sketch two curved lines springing from a central point below the beetle, creating a U-shape. Add small, leaf-like shapes along these stems to form the laurel wreath that grounds the composition.
Symmetry Struggles?
If drawing the wings symmetrically is hard, draw one side perfectly on tracing paper first. Flip the paper over and transfer the design to the other side for a perfect mirror image.
Step 2: Inking the Details
-
Define the beetle’s shell:
Switch to your 0.1 fine liner. Carefully outline the beetle’s body segments. For the abdomen (the main shell), draw vertical stripes that curve slightly with the body’s shape to create volume. -
Detail the head and legs:
Draw the beetle’s front legs reaching upward and the back legs extending down. Notice how scarab legs are jagged; add little spikes or ‘hairs’ along the legs for texture. I find using a slight stippling motion here adds nice realism. -
Ink the wing feathers:
Inside the wing outlines, draw long, flowing lines to separate the feathers. Start at the base (near the body) and sweep outward. The feathers near the bottom should be shorter, getting longer as they move up the wing. -
Refine the sun:
Ink the outer and inner circles of the sun disk. Carefully trace the radiating lines (rays) around the sun. Alternate between longer lines and shorter dashes to replicate the pattern shown in the reference. -
Complete the laurel wreath:
Ink the leaves at the bottom. Keep the lines somewhat organic and imperfect to contrast with the geometric precision of the sun disk. Add a small, stylized lotus or decorative element at the very bottom center.
Step 3: Adding Color and Texture
-
Color the sun core:
Use your rust or terracotta color (watercolor or marker) to fill in the absolute center circle of the sun disk. Apply the color evenly for a flat, graphic look. -
Apply the gold halo:
Use gold metallic paint or a gold pen to fill the ring surrounding the red sun core. If using paint, allow it to sit on the surface slightly for a richer texture when dry. -
Gild the beetle:
Apply touches of gold to the beetle’s shell. Focus the gold on the lower outer edges of the wing cases (elytra) to make them look iridescent and rounded. -
Stipple shading:
Using your finest 0.05 pen, add tiny dots (stippling) near the edges of the beetle’s body and at the base of the wings where they meet the body. This creates deep shadows without solid black blocks. -
Clean up:
Wait at least 15-20 minutes to ensure all ink and paint is bone dry. Gently erase all your initial pencil guidelines. -
Final decorative touches:
Add a few tiny red or rust dots loosely scattered around the beetle for balance. You can also shade the leaves slightly with gray or a very desaturated brown to give them depth. -
Sign your work:
Add your signature in a small, cursive script near the bottom right to complete the composition.
Pro Tip: Vintage Paper Look
For an authentic aged papyrus feel, lightly wash your paper with strong brewed tea or diluted coffee and let it dry completely flat before you start drawing.
Now you have a piece of mystical, ancient-inspired art ready to display or gift.
Hieroglyph Border Frames
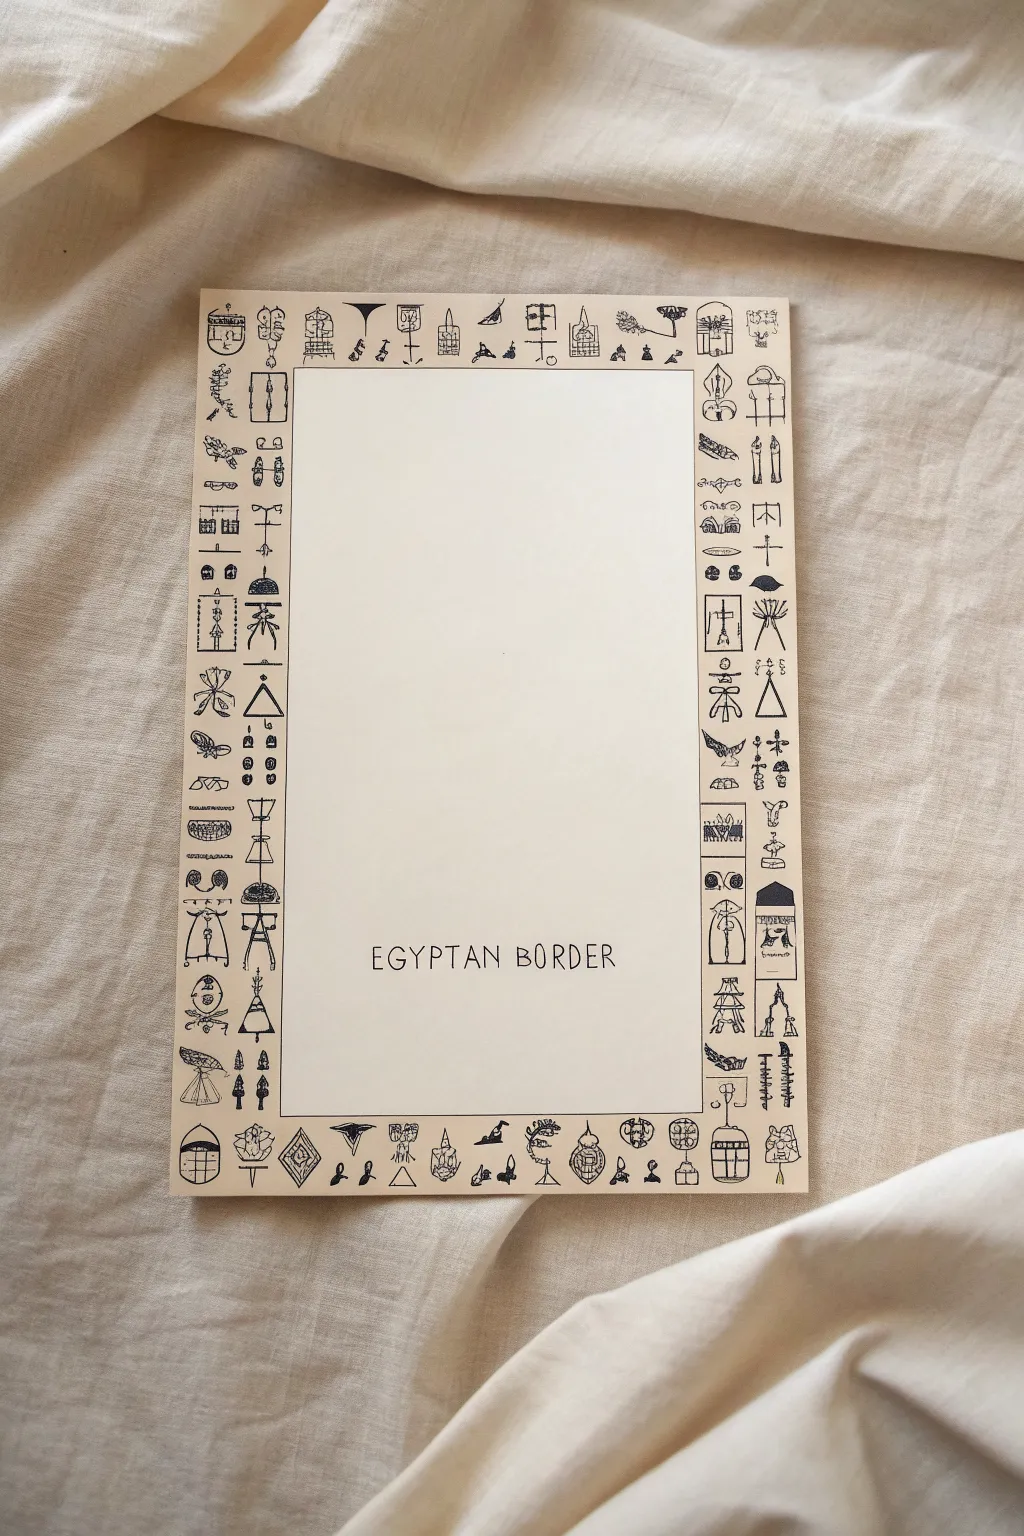
Create a stunning, personalized piece of stationery featuring a border of intricate, hieroglyph-inspired sketches. This project combines simple line drawing with a historical aesthetic, resulting in a unique frame perfect for calligraphy or special notes.
Detailed Instructions
Materials
- High-quality cream or off-white cardstock (A4 or letter size)
- Fine-liner pen (black, 0.3mm or 0.5mm)
- Pencil (HB or H for light lines)
- Ruler
- Eraser (kneaded eraser preferred)
Step 1: Planning the Layout
-
Define the margins:
Start by measuring a consistent margin around your paper. Using your ruler and pencil, lightly draw a rectangle about 1.5 to 2 inches from the edge of the paper. This creates the outer boundary for your drawings. -
Mark the inner edge:
Draw a second rectangle inside the first one, leaving about 1 to 1.5 inches of space between them. This channel creates the ‘border zone’ where your illustrations will live. -
Create a faint grid:
To keep your symbols organized, very lightly sketch horizontal and vertical dividers within your border zone. They don’t need to be perfectly even squares; rectangular spaces work well for taller symbols like obelisks. -
Draft the title text:
Find the bottom center of the inner blank space. Lightly pencil in the text ‘EGYPTIAN BORDER’ (or your chosen phrase) with simple, clean block lettering to check the spacing.
Design Tip
Don’t try to replicate real hieroglyphs perfectly. Inventing your own abstract geometric shapes that ‘feel’ ancient works just as well.
Step 2: Sketching the Symbols
-
Select your motifs:
Look at the reference image or use a reference sheet of Egyptian symbols. Good choices include eyes of Horus, ankhs, pyramids, scarab beetles, lotus flowers, vases, and stylized figures. -
Start penciling drawings:
Begin sketching your chosen symbols into the grid spaces you created. Don’t worry about perfection; the charm of this style is the hand-drawn, slightly rustic feel. -
Vary the scale:
Mix larger icons with smaller ones. For example, fill one large box with a pyramid, but use a narrow vertical space for a standing staff or obelisk. -
Add filler details:
In the negative space between larger symbols, sketch tiny triangles, dots, or small glyphs to make the border feel dense and rich. -
Check the corners:
Pay special attention to the four corners. Place substantial, symmetrical items like large beetles or decorative squares here to anchor the design visually.
Step 3: Inking and Finalizing
-
Trace with fine-liner:
Take your black fine-liner pen and carefully trace over your pencil sketches. Use a steady hand, but embrace the organic wobble of the ink—it mimics ancient markings. -
Ink the inner border line:
Draw the continuous straight line that defines the inner edge of the border. Using a ruler is optional here; a freehand line adds more character. -
Add shading and texture:
Go back into your inked drawings and add small hatch marks or fill in dark areas (like the top of a pyramid or the body of a bird) to create contrast. -
Letter the text:
Ink your ‘EGYPTIAN BORDER’ text. I find that keeping the lettering thin and sans-serif compliments the busy border nicely. -
Erase guidelines:
Wait for the ink to dry completely to avoid smudging. Then, gently erase all your pencil guides, grid lines, and layout marks. -
Refine the details:
Look over the clean artwork. If any areas look too empty, add a few tiny ink dots or dashes to balance the visual weight across the page.
Tea Staining
For an authentic papyrus look, lightly dab the paper with a wet tea bag and let it dry before you start drawing your border.
Your historical stationery is now ready to frame or fill with writing
Usekh Collar Pattern Sampler
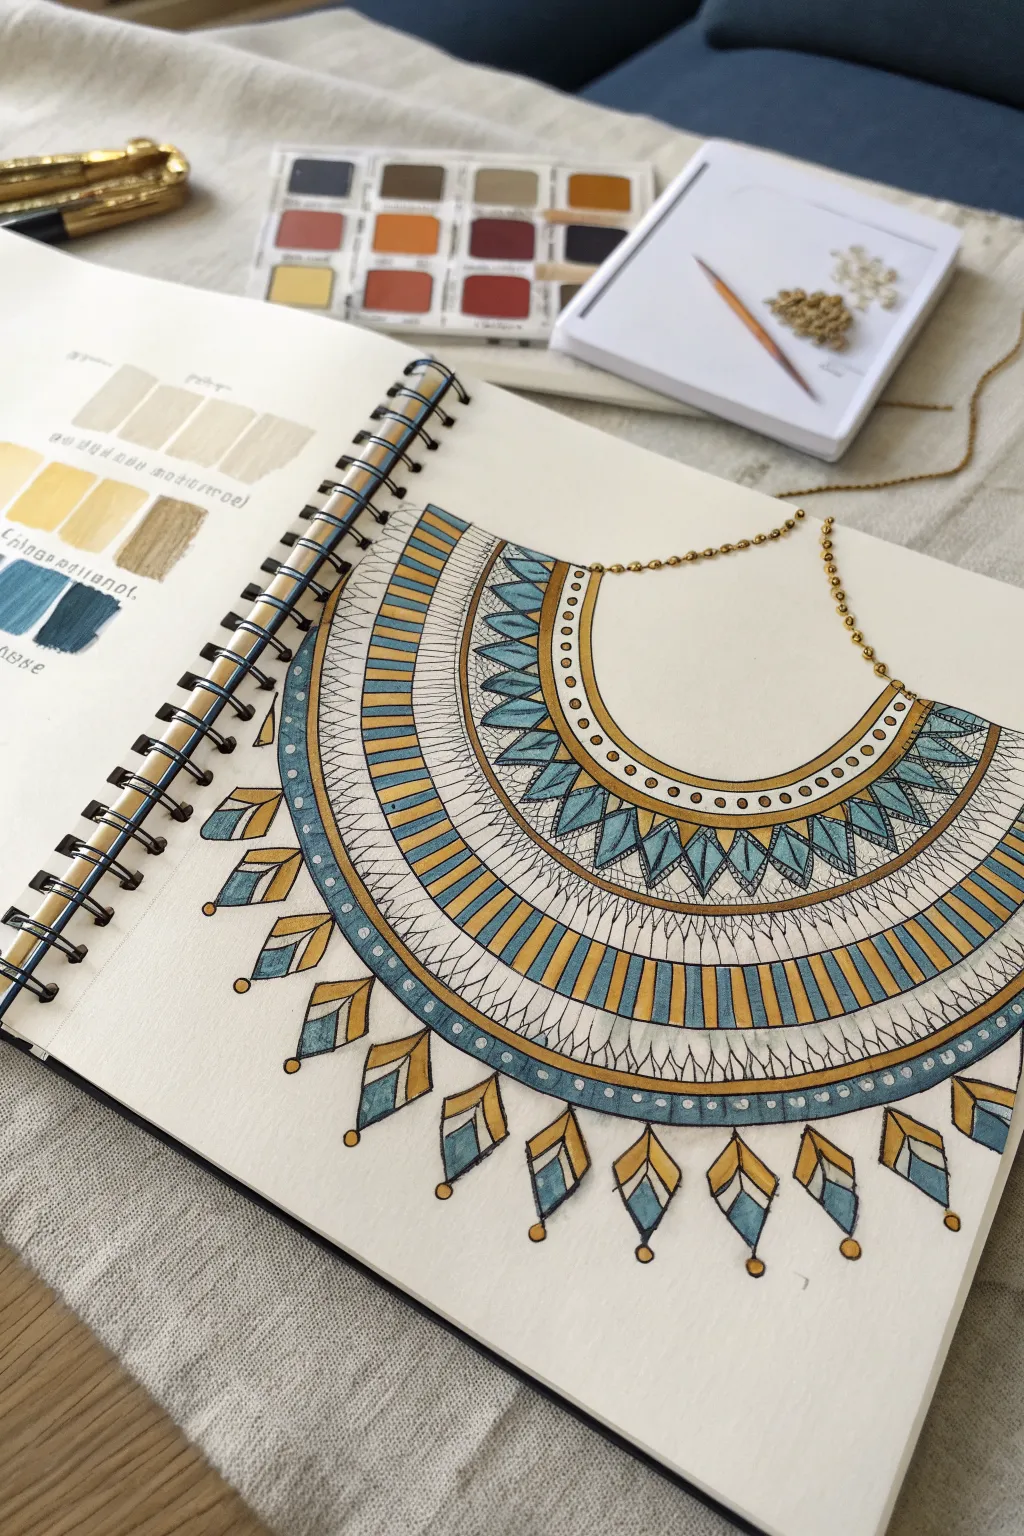
This detailed sketchbook study captures the geometric elegance of an ancient Egyptian Usekh collar, rendered in rich teals and antiqued golds. The project focuses on precision line work and careful shading to create the illusion of three-dimensional beads and metalwork on a flat page.
How-To Guide
Materials
- Spiral-bound mixed media or thick sketch paper
- Fine-liner pens (black, sizes 0.1mm, 0.3mm, 0.5mm)
- Alcohol-based markers (muted gold, deep teal, light cream/beige)
- Ruler and compass (or circular templates)
- Pencil (HB) and eraser
- White gel pen for highlights
Step 1: Drafting the Structure
-
Establish the curve:
Begin by using a compass to lightly draw a series of concentric semi-circles starting from the top center of your page. These guidelines will define the width of each ornamental band in the collar. -
Section off the bands:
Divide the space between your concentric arcs into specific design zones. The innermost band is narrow for small beads, followed by a wider band for lotus petals, a striped band, and finally the outer decorative drop shapes. -
Mark the center line:
Draw a very faint vertical line down the exact center. This ensures symmetry, which is crucial for Egyptian motifs, allowing you to mirror the patterns correctly on the left and right sides. -
Sketch the geometric patterns:
Using a ruler, lightly pencil in the vertical dividers for the striped sections. For the petal shapes, freehand sketch the triangular motifs, keeping them evenly spaced within their designated band.
Step 2: Inking and Definition
-
Outline main contours:
Switch to a 0.5mm fine-liner to trace the major concentric arcs. Use a steady hand or a French curve to keep these lines clean and continuous, anchoring the design. -
Detail the beadwork:
With a finer 0.1mm pen, draw the intricate details. Fill in the small circles in the top band and define the individual pointed petals in the second band. I find that pulling the pen toward you helps maintain control on these small shapes. -
Draw the hanging elements:
carefully outline the diamond-shaped pendants hanging from the bottom edge. Ensure the connecting loops are visible to make them look like attached jewelry pieces. -
Add the chain:
Draw a simple dotted chain extending from the top corners of the collar towards the page edges, simulating how the necklace would be worn. -
Erase pencil guides:
Once the ink is completely dry—give it a full minute just to be safe—gently erase all underlying pencil marks to reveal the clean line art.
Bleed-Through Blues
If using alcohol markers, place a scrap sheet of cardstock behind your page. This prevents the ink from bleeding onto the next clean sheet of your sketchbook.
Step 3: Adding Color and Texture
-
Swatch your colors:
Before committing to the main drawing, use the left page of your sketchbook to test your marker combinations. You want a gold that isn’t too yellow and a teal that feels aged and mineral-like. -
Fill the gold sections:
Start with your gold marker. Fill every other stripe in the middle band, the centers of the petals, and the outer rims of the diamond pendants. Apply the ink smoothly to avoid streaking. -
Apply the teal tones:
Color the alternate stripes and the inner details of the petals with the deep teal marker. Use the fine tip of the marker to stay strictly within the lines. -
Shade for dimension:
Go back over the bottom edges of the ‘beads’ and geometric shapes with a second layer of the same color or a light grey marker. This adds a subtle shadow that implies roundness and weight. -
Add decorative stippling:
Using your 0.1mm pen, add tiny dots or hatching inside the lighter bands to simulate texture without darkening the area completely.
Gilded Edges
Use a metallic gold gel pen or actual gold leaf paint on the yellow sections for a finish that catches the light and mimics real gold jewelry.
Step 4: Final Highlights
-
Create shine:
Take a white gel pen and add tiny dots or lines on the upper left side of each gold and teal segment. This reflection makes the materials look like polished stone or enamel. -
Clean up edges:
If any marker bled outside the lines, carefully thicken the black outline in that spot to hide the imperfection. -
Draw the swatches:
To complete the sketchbook aesthetic, draw formal square swatches of your color palette on the opposing page, labeling them with the marker names or color codes.
Now you have a stunning jewelry design study that looks ready to be crafted into a real artifact
Nemes Headdress Stripe Practice
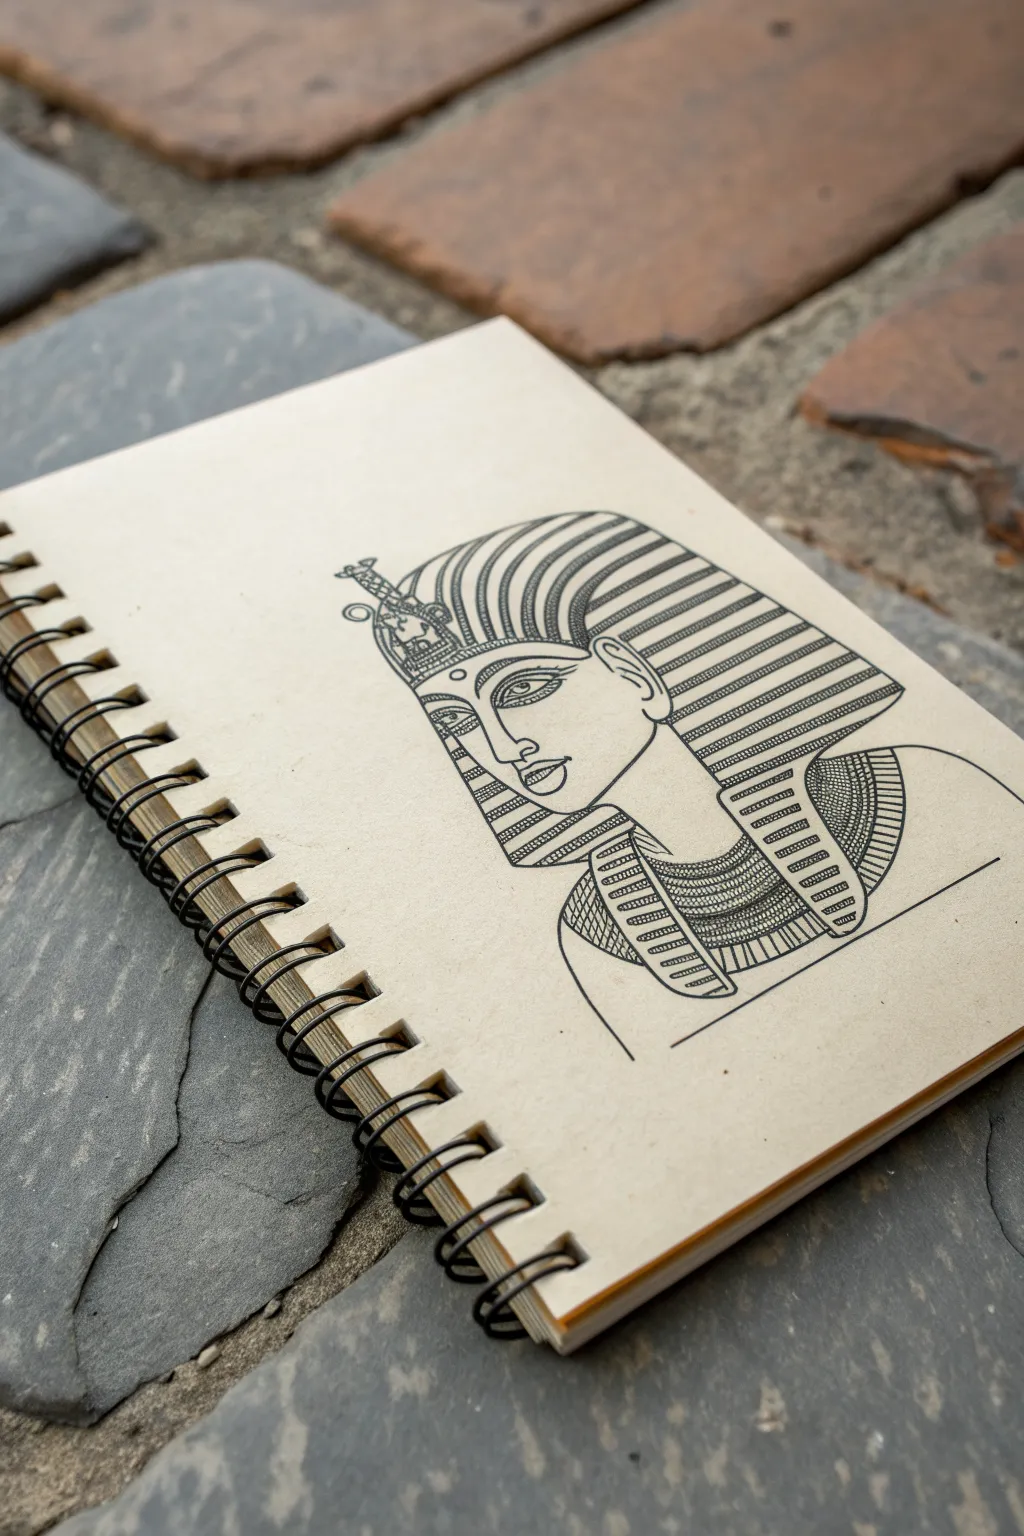
Master the iconic profile of an ancient Egyptian ruler with this focused line drawing study. This project emphasizes clean, confident ink work and the rhythmic balance of the traditional Nemes headdress stripes.
Step-by-Step Tutorial
Materials
- Spiral-bound sketchbook (smooth paper)
- HB pencil
- Fine-point black drawing pen (0.5mm)
- Extra-fine black drawing pen (0.1mm or 0.3mm)
- Kneaded eraser
- Ruler (optional)
Step 1: Pencil Understructure
-
Map the head shape:
Begin with your HB pencil, drawing a light circle for the cranium and extending a jawline down and forward to establish the profile view. -
Draft the facial features:
Sketch the nose bridge, ensuring it flows directly from the forehead. Mark the position of the eye—remembering that Egyptian art often depicts the eye front-facing even on a profile head—and the lips. -
Outline the headdress shape:
Draw the outer contour of the Nemes headdress. It should curve over the forehead, sweep back behind the ear, and flare out at the bottom to rest on the shoulders. -
Add the uraeus:
Position the uraeus (the cobra figurine) on the brow. It sits right in the center of the forehead band. -
Section the stripes:
Lightly sketch the directional flow of the stripes on the headdress. They should radiate from the top center and curve downward along the sides. -
Detail the collar:
Outline the broad collar (wesekh) around the neck area, indicating curved rows where the jewelry beads will go.
Curve Control
When drawing the headdress stripes, don’t use a ruler. Hand-drawn lines that slightly wobble look more like fabric draping over a head than rigid metal.
Step 2: Inking the Outline
-
Trace the profile:
Using the 0.5mm pen, carefully ink the profile line of the face. Keep your hand steady to create a smooth, continuous line from forehead to chin. -
Define the eye and ear:
Ink the eye with a prominent almond shape and the distinct cosmetic line extending backward. Outline the ear, which sits just in front of the headdress flap. -
Ink the main structural lines:
Go over the main outer shape of the headdress and the shoulder lines. I find it helpful to rotate the sketchbook slightly here to get the best angle for these long curves. -
Secure the decorative elements:
Ink the outlines of the cobra on the brow and the main sections of the collar necklace.
Step 3: Detailing and Texture
-
Stripe the top section:
Switch to your finer pen (0.3mm or 0.1mm). Fill in the stripes on the top of the head, ensuring the lines curve to follow the roundness of the skull. -
Stripe the side lappets:
Draw the parallel stripes running down the side flaps of the headdress. Keep the spacing as consistent as possible to maintain that classic geometric look. -
Detail the cobra:
Add tiny marks or scales to the uraeus figurine to differentiate it from the smooth cloth of the headdress. -
Fill the collar rows:
Work on the neck collar. Instead of just straight lines, use tightly packed vertical dashes or small curves within the rows to simulate strings of beads. -
Refine the eyebrows:
Darken the eyebrow line significantly. It should be bold and stylized, mirroring the cosmetic line of the eye. -
Clean up:
Wait at least five minutes to ensure the ink is completely dry, then gently erase all visible pencil marks with your kneaded eraser. -
Final weight check:
Look over the drawing. If the main profile outline feels too thin compared to the pattern density, carefully thicken that outer line with your 0.5mm pen to make the figure pop.
Smudge Prevention
If you are right-handed, ink from left to right across the headdress to avoid dragging your hand through wet ink. Lefty? Go right to left.
You now have a classical Egyptian study that captures the elegance of ancient lineage.
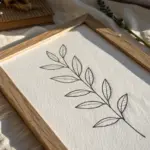
Papyrus Texture Background Wash
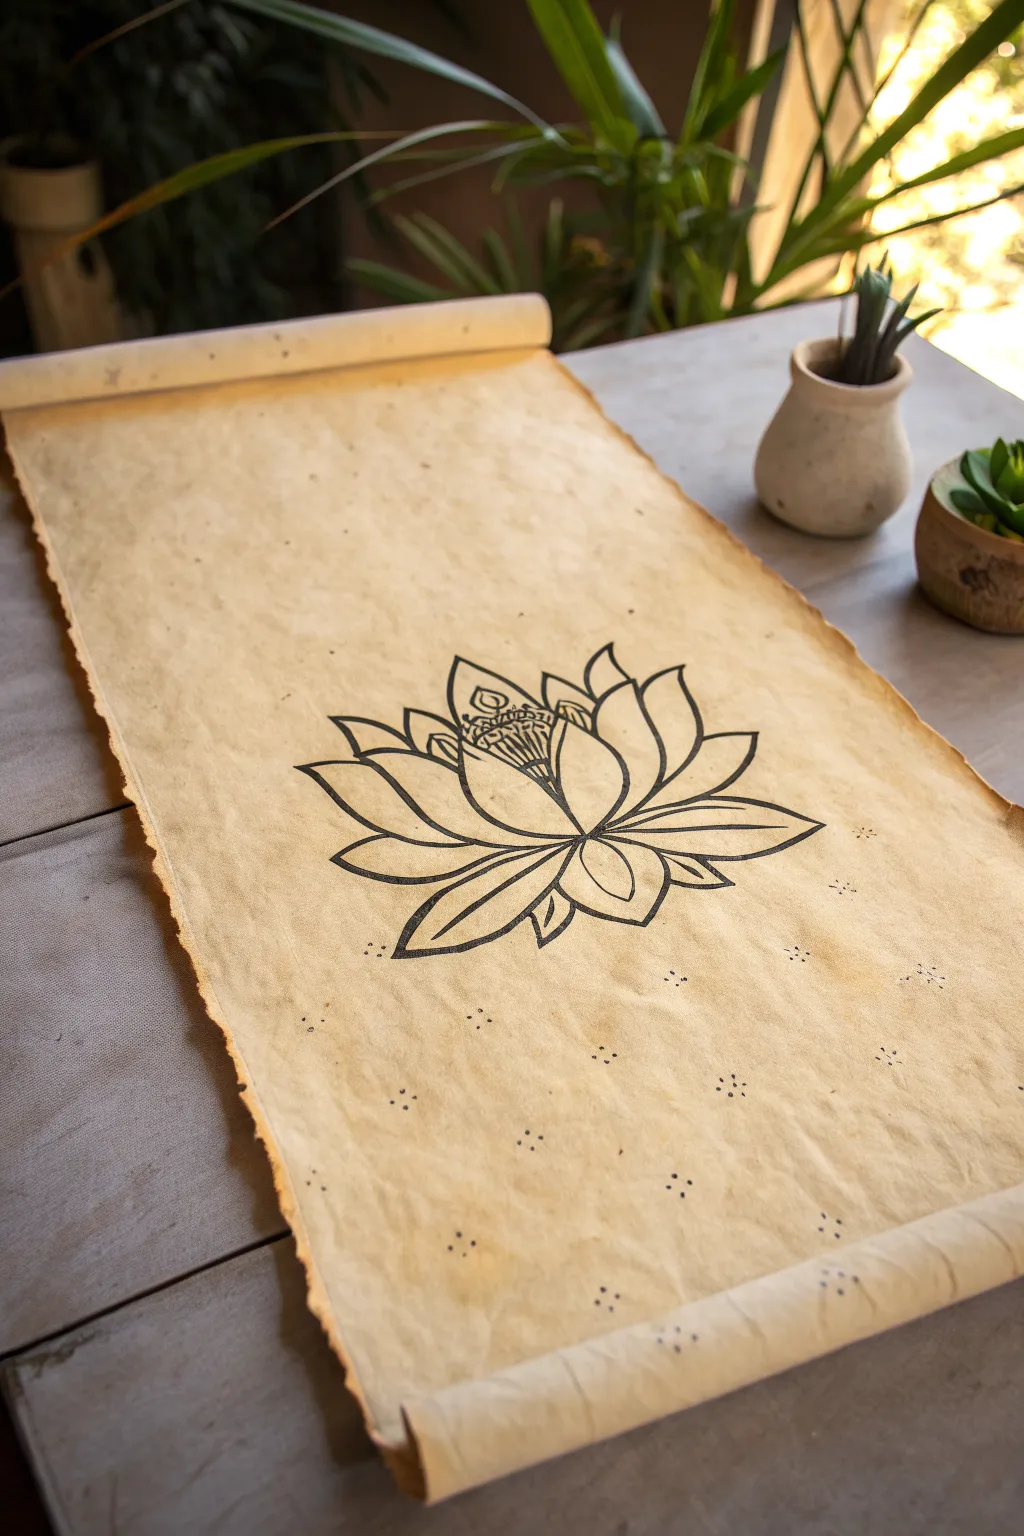
Transport your art back in time by creating a faux-papyrus scroll featuring a bold, symbolic lotus design. This project combines simple coffee staining techniques with crisp ink work to achieve an authentic, ancient artifact look.
Step-by-Step Guide
Materials
- Heavyweight watercolor paper or mixed media paper (A3 size ideal)
- Strong brewed coffee or tea (cooled)
- Wide flat paintbrush or sponge brush
- Black waterproof fine liner pen (0.5mm or 0.8mm)
- Black brush pen or broad marker
- Pencil and eraser
- Ruler
- Paper towels
- Two wooden dowels or chopsticks (optional for rolling)
- Glue or double-sided tape
Step 1: Preparing the Aged Paper
-
Tear the edges:
Start by manually tearing the four edges of your paper to remove the harsh factory straight lines. This rough, decked edge is essential for the ancient, handmade papyrus aesthetic. -
Create the wash:
Brew a very strong cup of coffee or dark tea and let it cool completely. The stronger the brew, the richer and darker your ‘aged’ effect will be. -
Apply the base coat:
Using a wide flat brush or a sponge, saturate the entire surface of the paper with your coffee mixture. Don’t worry about being even; pools of liquid create natural-looking stains. -
Adding texture:
While the paper is still wet, sprinkle a few grains of instant coffee directly onto the surface. These will burst into dark, concentrated speckles that mimic the imperfections of real papyrus. -
Crumple and smooth:
For extreme aging, I like to gently crumple the damp paper into a loose ball, then carefully flatten it back out. This traps dark pigment in the creases, enhancing the weathered look. -
Drying the paper:
Let the paper dry completely. You can speed this up with a hair dryer, or bake it in an oven on the lowest setting for a few minutes (watch it closely to prevent burning).
Step 2: Drawing the Lotus
-
Sketch the center:
Once the paper is crisp and dry, use a pencil to lightly sketch the central seed pod of the lotus. Place it slightly below the vertical center of the scroll. -
Add the main petals:
Draw the central, upward-facing petals surrounding the pod. Keep lines flowing and organic, tapering them to sharp points at the top. -
Expand the bloom:
Sketch the lower, wider petals that fan out to the sides. Egyptian lotus art often emphasizes symmetry, so try to mirror the left and right sides as you work. -
Ink the outlines:
Switch to your black brush pen or broad marker. Trace over your pencil lines with confident, fluid strokes. Varying the line weight slightly adds character to the drawing. -
Detail the interior:
Use the finer waterproof pen to add details inside the seed pod and any subtle texture lines on the petals. This contrast between thick outlines and thin details makes the image pop. -
Clean up sketches:
Wait until the ink is completely dry—wet ink will smear on the textured paper—then gently erase any visible pencil marks.
Uneven is Better
Don’t press your paper perfectly flat when drying. Letting it warp and buckle slightly adds to the authentic, stiff feel of dried papyrus or animal skin styling.
Step 3: Final Touches and Assembly
-
Add geometric accents:
Using your fine liner, add small clusters of dots in a loose pattern around the bottom half of the lotus. Groups of four dots in a diamond shape work well for this style. -
Curl the edges:
To give the paper a permanent curl, roll the top and bottom edges tightly around a pencil, hold for ten seconds, and release. -
Attach the rollers:
Apply a thin line of glue along the very top and bottom edges on the back side. Place your wooden dowels here. -
Roll the scroll:
Roll the paper over the dowels about one or two turns to hide the wood and secure the scroll shape. Hold in place until the glue sets firmly.
Ink Bleeding?
If your ink feathers into the paper fibers, the paper might still be damp deep down. Ensure it is bone-dry before inking, or switch to a pigment-based art marker which bleeds less.
Now you have a stunning piece of history to hang on your wall or gift to a mythology enthusiast
Gold and Lapis Limited Palette Study

Capture the mystic elegance of ancient Egypt by creating a study of four distinct symbols using a restricted palette of metallic gold, deep teal, and black. This project focuses on clean lines and the stunning contrast between shimmering metallic ink and matte colors on crisp white paper.
How-To Guide
Materials
- High-quality sketchbook or smooth bristol paper
- HB graphite pencil
- Kneaded eraser
- Metallic gold paint marker (fine and medium tip)
- Teal or lapis lazuli colored brush pen or alcohol marker
- Deep green fine-liner
- Black ink drawing pen (0.5mm)
- Ruler
Step 1: Planning and Sketching
-
Layout the page:
Visualize your composition. You’ll need space for four distinct icons: an ornate cross-like symbol on the left, a winged sun disk top-center, a scarab beetle on the right, and an Eye of Horus variation at the bottom. -
Draft the winged sun:
Start with the top-center design. Lightly sketch a small circle, then extend two triangular wing shapes outward. Draw a long diamond shape extending downward from the center, creating a unique stylized interpretation. -
Sketch the ornamental cross:
On the left side, draw a vertical axis and a horizontal crossbar. Below the intersection, sketch an elongated oval shape that tapers into a point, resembling a decorative shield or heavy pendant. -
Outline the scarab:
On the right, draw an oval for the beetle’s body. Add a semi-circle at the top for the head. Sketch curved wings extending from the sides, fanning out like palm fronds. -
Draft the eye symbol:
At the bottom center, sketch a wide, stylized eye shape. Below the pupil, draw a vertical line that crosses a horizontal bow-tie shape, anchoring the design with a heavy black base.
Smudge Prevention
Metallic markers take longer to dry than alcohol ink. Place a scrap piece of paper under your hand while drawing to avoid smearing the gold.
Step 2: Applying Gold and Detail
-
Fill the winged sun:
Using your gold metallic marker, color in the wings. Use careful strokes to mimic feathery textures. Outline the central circle and the downward-pointing diamond shape in gold. -
Detail the left ornament:
Trace the outer edges of the cross-like symbol with the gold marker. Fill in the thick border of the central oval. Leave the internal patterns blank for now. -
Refine the gold internal patterns:
Switch to a fine-tip gold pen if you have one. Inside the ‘shield’ area of the left symbol, draw the intricate interior curving lines and the central vertical bar. -
Add gold to the scarab:
On the scarab beetle, apply gold solely to the bands separating the head and thorax, and add thin gold accents along the spines of the teal wings.
Ancient Texture
Use a tea-stained paper or lightly sponge the edges of your sketchbook page with distress ink to give your study the look of an aged papyrus scroll.
Step 3: Adding Color and Contrast
-
Color the scarab body:
Take your teal or lapis marker and fill in the main oval body of the beetle. The color should be rich and saturated. -
Define the scarab wings:
Carefully color the individual feathers or segments of the scarab’s wings with the teal marker. Leave tiny gaps between the segments to let the paper or gold accents show through. -
Ink the bottom symbol:
This symbol relies on heavy contrast. Use your black marker to fill in the pupil and the thick ‘bow-tie’ base shape. Keep the upper eyelid line thick and bold. -
Outline the scarab details:
I like to use a deep green fine-liner here to add definition without the harshness of black. Outline the teal segments of the scarab’s wings and define the legs.
Step 4: Final Touches
-
Enhance the left symbol:
Return to the gold ornament on the left. Use a very fine black or dark bronze pen to add tiny geometric details inside the top crossbar, giving it depth. -
Sharpen edges:
Review all your gold shapes. If the edges look fuzzy, use a fine-tip pen to carefully re-define the outline, making the gold pop against the white paper. -
Erase guidelines:
Wait at least 15 minutes to ensure all ink, especially the metallic marker, is completely cured. Gently erase your initial pencil sketches.
Your page of golden artifacts is now complete and ready to inspire further historical exploration
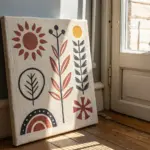
Egyptian Zodiac Ceiling-Inspired Mandala
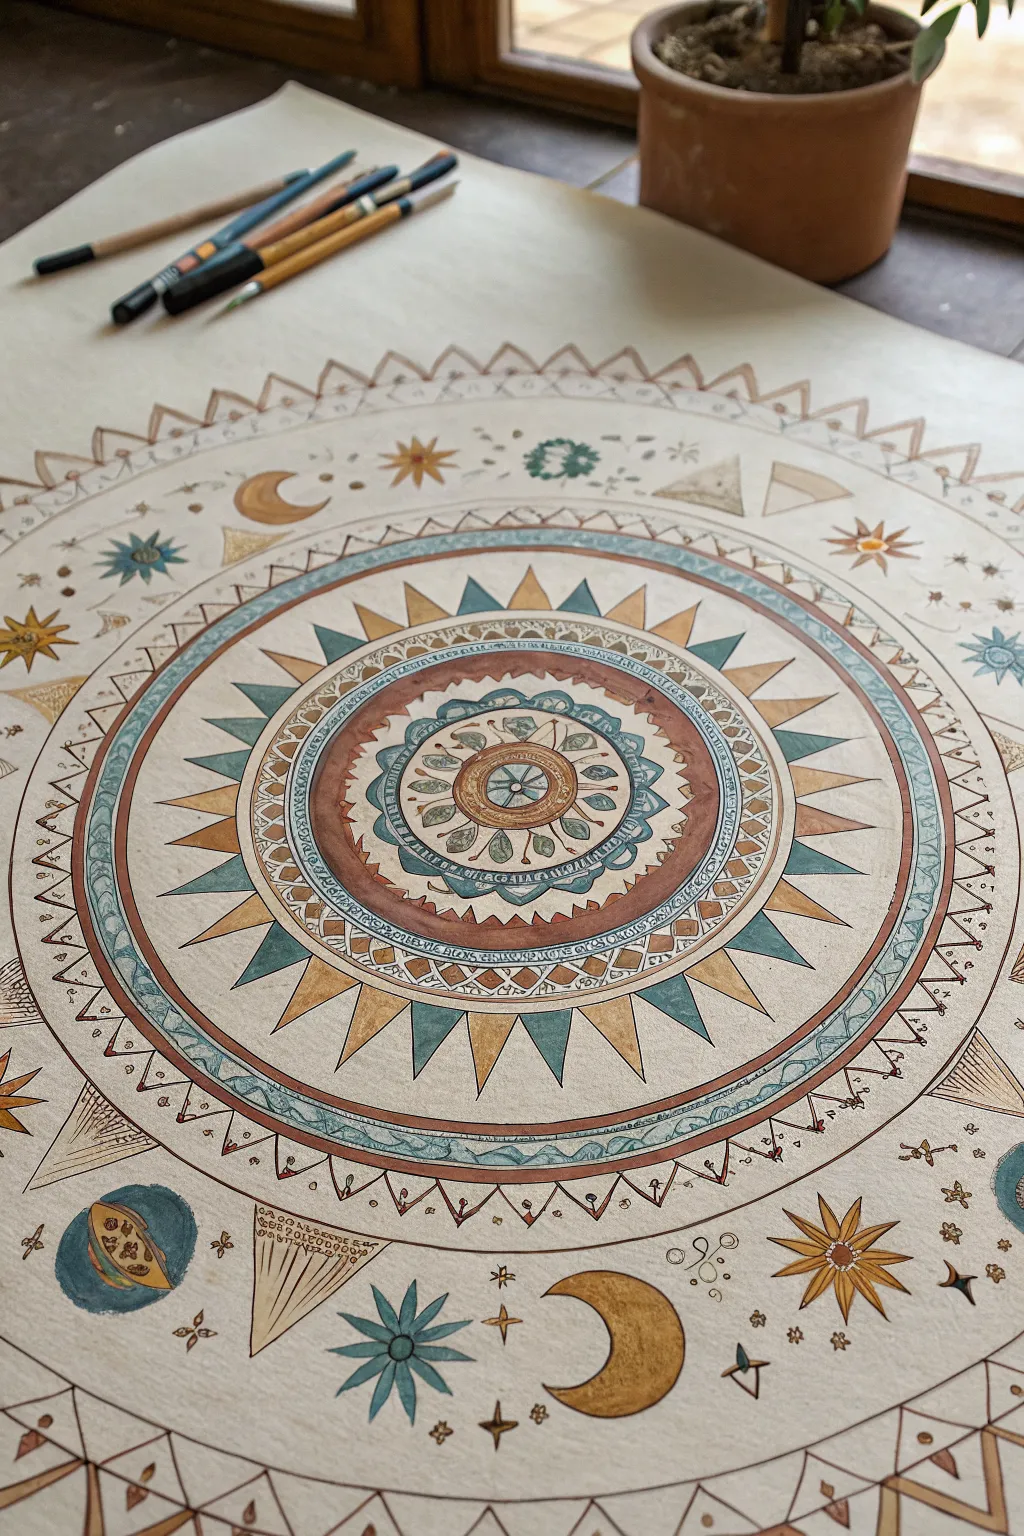
Draw inspiration from the famous Dendera zodiac with this intricate, hand-painted mandala that combines geometric precision with celestial motifs. The result is a stunning, warm-toned artwork featuring sunbursts, moons, and pyramids arranged in harmonious concentric circles.
Detailed Instructions
Materials
- Heavyweight watercolor paper (hot press for smoother lines)
- Drawing compass
- Protractor
- HB pencil and eraser
- Ruler
- Watercolors or gouache (ochre, terracotta, teal, gold, brown)
- Fine liner pens (0.1mm and 0.5mm, black and sepia)
- Round brushes (sizes 0, 2, and 4)
- Small jar for water
- Paper towel
Step 1: Setting the Geometry
-
Find the center:
Begin by lightly marking the exact center of your watercolor paper. This anchor point is crucial for the entire radial design. -
Draft concentric circles:
Using your compass, draw a series of light concentric circles. You will need about eight distinct rings: a small core, a slightly larger floral zone, a wide band for the sunburst, a decorative border, and larger outer rings for the floating celestial elements and the final triangular border. -
Divide the circle:
Use a protractor to divide your circle into equal segments. Lightly sketching radial lines every 15 or 30 degrees will help you space the sun rays and border triangles evenly later on.
Wobbly Circles?
If your compass slips, don’t worry. Use a circular object like a bowl or plate to trace your main rings. It’s often more stable than a compass for beginners.
Step 2: Drawing the Core
-
Sketch the central lotus:
In the innermost circle, sketch a small wheel-like design. Surrounding this, draw a ring of petal shapes reminiscent of an Egyptian blue lotus, alternating with small leaf forms. -
Add the inner bands:
Moving outward, draft the first decorative bands. One should be a simple solid ring, and the next should feature a repeating pattern of small diamonds or zig-zags. -
Create the sunburst:
In the widest central band, draw large, sharp triangles pointing outward to represent sun rays. Alternate their sizes or add smaller triangular ‘fillers’ between the main rays to create density.
Step 3: Drafting the Celestial Outer Rings
-
Layout the floating symbols:
In the large negative space outside the sunburst, lightly sketch scattered Egyptian-inspired motifs. Include crescent moons, eight-pointed stars, small pyramids, and perhaps a stylized planet or comet. -
Define the outer border:
For the outermost rim, draw a continuous zigzag pattern to create a border of small triangles resembling pyramid silhouettes.
Add Metallic Flair
Swap standard yellow paint for gold gouache or metallic watercolor. It catches the light and mimics the real gold leaf used in ancient temples.
Step 4: Painting
-
Apply base washes:
Start applying color with your size 4 brush. Use a watery wash of terracotta for the ring surrounding the central lotus and a pale ochre for the sun rays. I prefer to work from the center outward to avoid smudging. -
Add teal accents:
Switch to a teal or turquoise shade. Paint the alternating triangles in the sunburst ring and the petal details in the center. This cool color contrasts beautifully with the warm earth tones. -
Paint the celestial motifs:
Use gold or deep yellow paint for the moon crescents and stars. For the pyramids and small planetary details, mix a bit of brown with your ochre to give them visual weight. -
Fill the borders:
Carefully paint the thin decorative bands with alternating colors—some sections in terracotta, others in teal. Keep the paint consistency creamy to prevent bleeding between these small sections.
Step 5: Inking and Details
-
Outline the center:
Once the paint is completely dry, use a 0.1mm pen to outline the central lotus and the intricate geometric patterns in the inner rings. Keep your hand steady and relaxed. -
Define the rays:
Ink the sunburst rays. You can add texture here by drawing tiny lines or stippling inside the golden rays to suggest an engraved metal look. -
Detail the sky elements:
Outline the stars, moons, and pyramids. Add small decorative dashes or dots floating in the empty space between these items to make the ‘sky’ feel active and magical. -
Texturize the paper:
To mimic an aged papyrus look, you can very lightly sponge a dilute wash of tea or watered-down brown paint over the unpainted background areas, avoiding your fresh illustrations.
Step back and admire how the geometric rhythm brings order to your personal night sky


Have a question or want to share your own experience? I'd love to hear from you in the comments below!