Whenever I paint a family canvas, I’m really painting connection—those tiny everyday moments that somehow turn into the big stuff. These ideas are meant to feel personal and doable, even if you’d rather avoid painting realistic faces.
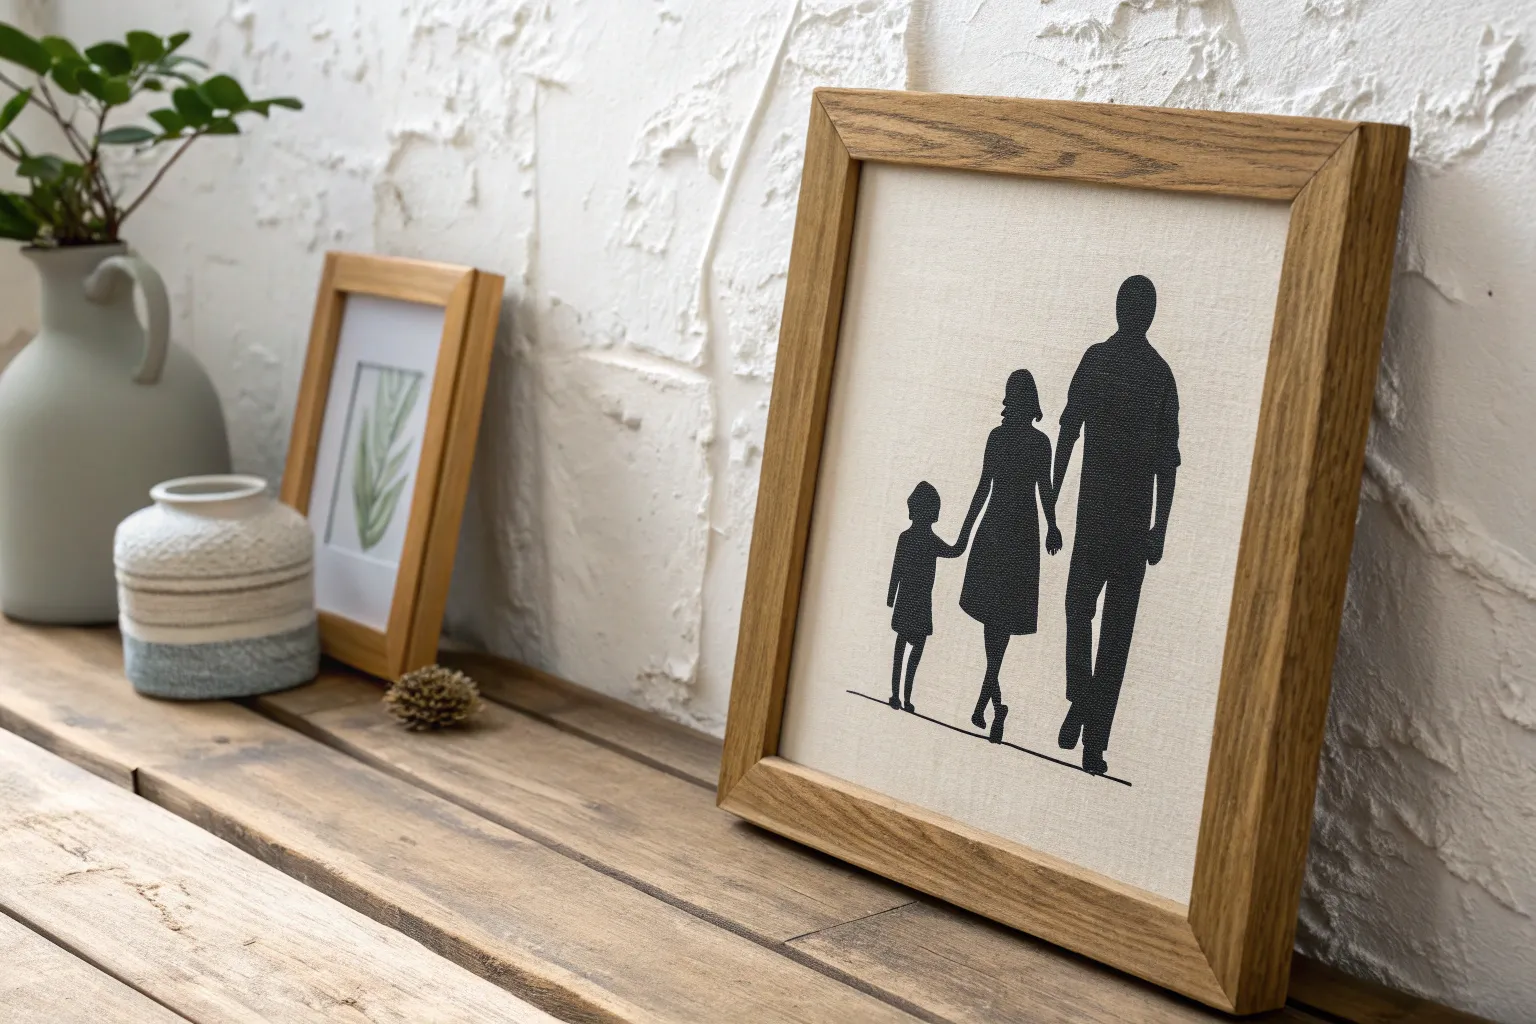
Family Silhouettes at Sunset
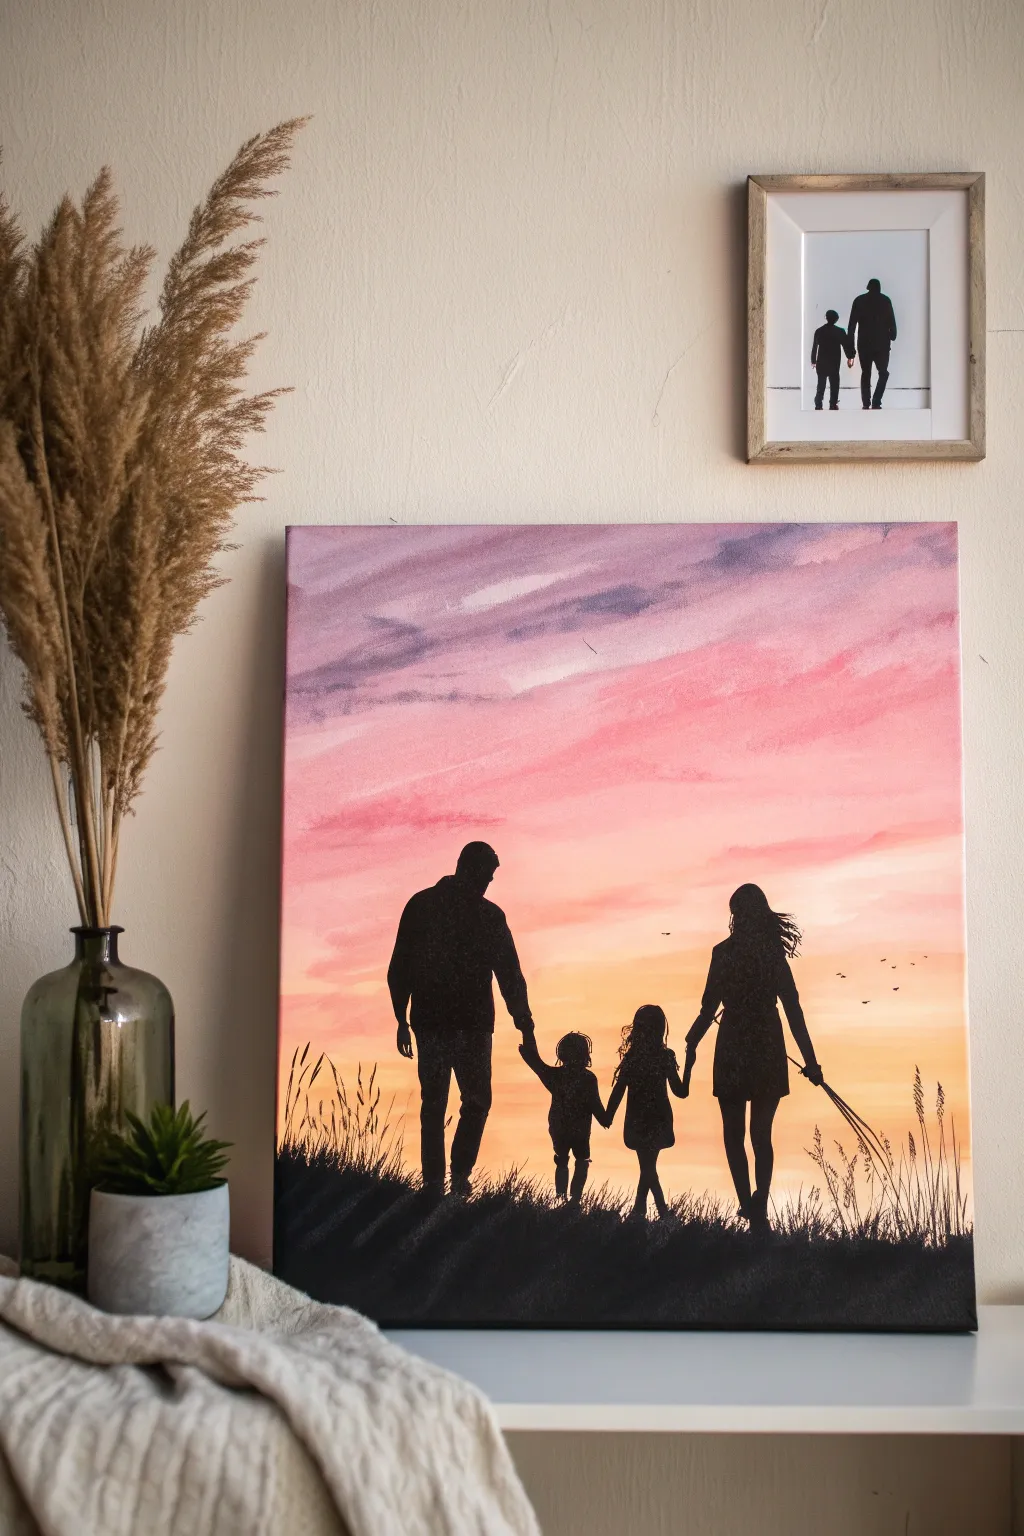
Capture the warmth of family bonds against a breathtaking evening sky with this stunning silhouette painting. The soft, blended watercolor background contrasts beautifully with the sharp black figures, creating a timeless keepsake that glows with emotion.
Step-by-Step Guide
Materials
- Square stretched canvas (approx. 16×16 or 20×20 inches)
- Acrylic paints: Titanium White, Cadmium Yellow, Orange, Magenta, Purple/Violet, Carbon Black
- Large flat wash brush (2-inch)
- Medium round brush
- Fine liner brush (size 0 or 00)
- Pencil and eraser
- Water cup and paper towels
- Palette or paper plate
- Optional: Printed reference photo of your family’s silhouette
Step 1: Painting the Sky
-
Prepare the canvas:
Start by lightly misting your canvas with water or brushing a very thin layer of water over it. This helps acrylics blend smoothly to mimic a watercolor gradient. -
Mix the horizon color:
On your palette, mix Titanium White with a small amount of warm Cadmium Yellow. You want a pale, glowing sunlight color. -
Paint the horizon line:
Using your large flat brush, apply this pale yellow mixture across the canvas, roughly one-third of the way up from the bottom. Let the strokes be loose and horizontal. -
Add the middle tones:
Without cleaning your brush thoroughly, pick up some Orange and blend it into the wet yellow as you move upward. Allow the colors to streak naturally. -
Introduce pink hues:
Switch to Magenta mixed with a touch of White. Apply this above the orange section, using broad, sweeping horizontal strokes to create soft clouds. -
Paint the upper sky:
Mix Purple with a little White and apply it to the very top of the canvas. Blend the bottom edge of the purple section down into the pink to create a dreamy transition. -
Add cloud texture:
While the paint is still tacky, use a dry, clean brush to gently drag across the transition zones (purple to pink, pink to orange). This softens any hard lines and creates a windswept cloud effect. -
Let it dry completely:
Allow the background to dry fully before moving to the next step. If the canvas feels cool to the touch, it’s still wet.
Step 2: Creating the Silhouettes
-
Draft the figures:
Using a pencil, lightly sketch the outline of your family members walking along the bottom third of the canvas. Focus on the distinct shapes of heads and body posture rather than details. -
Outline the main shapes:
Load your medium round brush with Carbon Black paint. Carefully trace over your pencil lines to establish the solid outer edges of the adults. -
Fill the bodies:
Fill in the large shapes of the adults with solid black paint. Apply a second coat if the background color shows through; opacity is key here. -
Paint the children:
Switch to a smaller brush to paint the children’s figures. Pay attention to how their hands connect with the parents’ hands. -
Refine the edges:
Use your fine liner brush to clean up any rough edges on the silhouettes, particularly around hair and clothing folds.
Uneven Gradients?
If your sky colors aren’t blending well, keep a spray bottle handy to lightly mist the canvas as you work. The moisture re-activates acrylics just enough to smooth out transitions.
Step 3: Final Details
-
Add the grassy ground:
Using the medium brush and black paint, create a solid, uneven ground line beneath the feet. Use tapping motions to simulate uneven terrain. -
Paint tall grass blades:
Load your fine liner brush with slightly watered-down black paint. I like to use quick, upward flicking motions to create thin, tapering blades of grass rising from the ground. -
Add taller reeds:
In the corners, paint taller stalks or reeds. Add small, dashed strokes at the tops of these stalks to resemble seed heads or wheat. -
Included distant birds:
With the very tip of your liner brush, add tiny ‘v’ or ‘m’ shapes in the distance on the right side of the sky to represent birds flying away. -
Final inspection:
Step back and look for any spots where the black isn’t fully opaque. Touch up these areas to ensure a crisp, deep silhouette.
Pro Tip: Sharp Lines
For ultra-crisp silhouettes, trace your figures onto painter’s tape, cut them out with a craft knife, stick them to the dry background, paint over them, and peel away.
Hang your completed artwork in a bright spot where the colors can truly shine.


Birds on a Wire Family Portrait
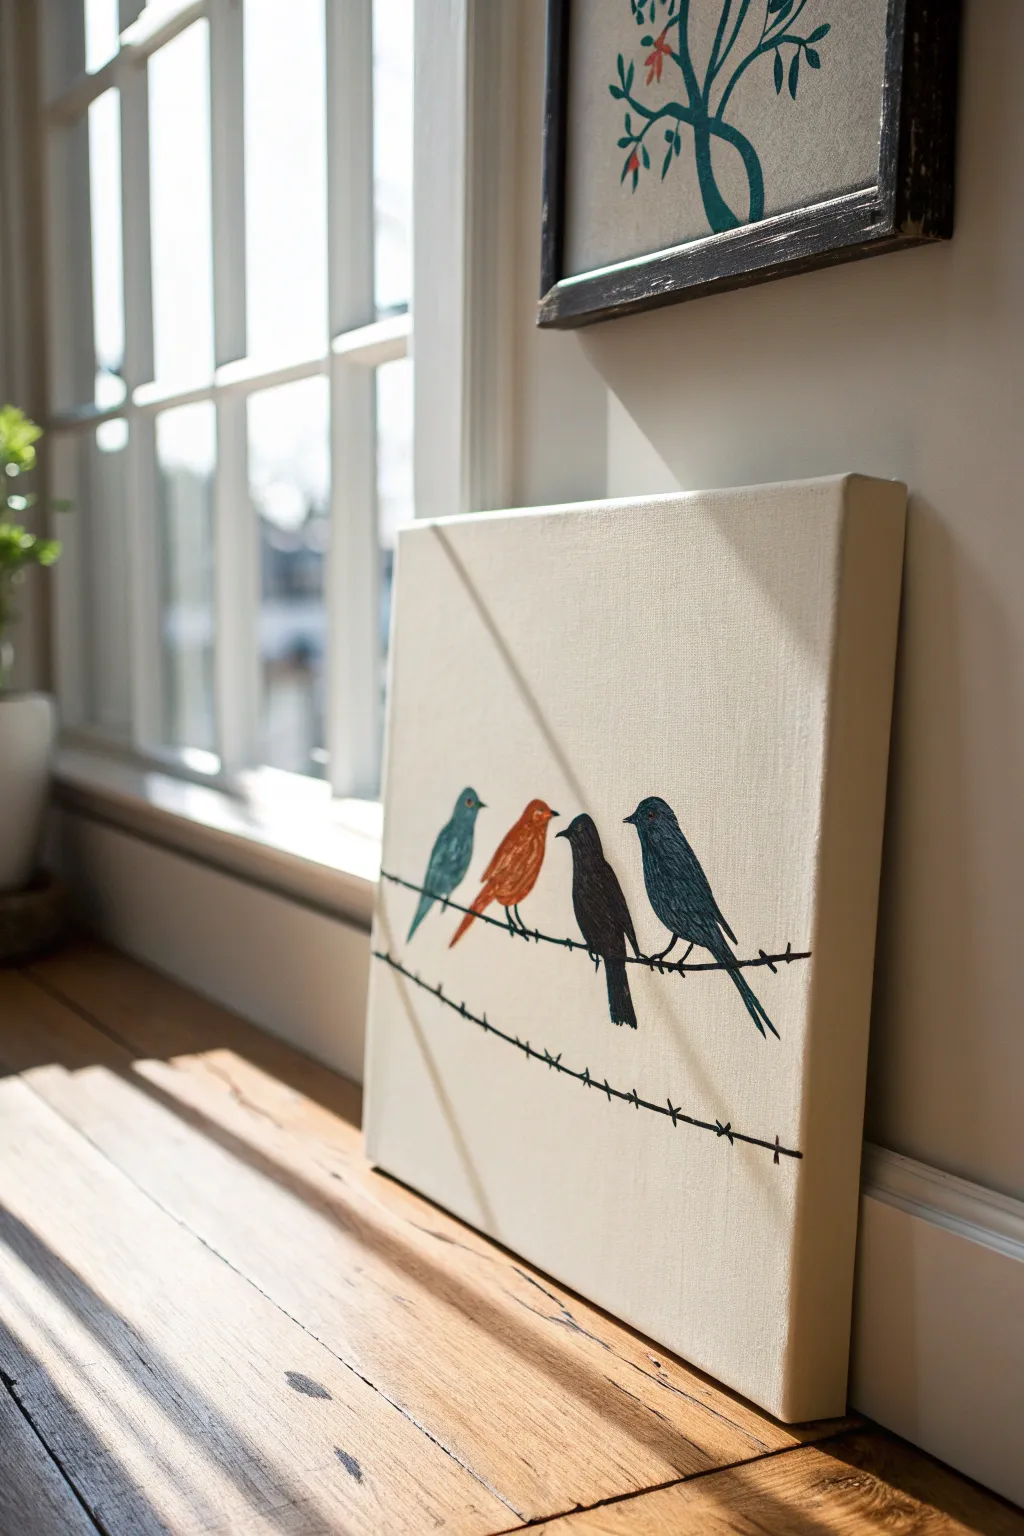
This rustic and charming canvas features a simplified representation of a family as birds resting on a barbed wire fence. With its clean background and distinct silhouettes, it’s a perfect beginner-friendly project that captures personality through color and size.
Step-by-Step Guide
Materials
- Pre-stretched canvas (e.g., 12×12 or 16×20 inches, depending on family size)
- Acrylic paints: Cream/Off-white (background), Teal, Orange, Black, Dark Navy Blue
- Flat brush (1-inch) for background
- Small round brush (size 2 or 4) for birds
- Fine liner brush (size 0 or 00) for wire details
- Pencil and eraser
- Ruler
- Optional: Cardstock or stencil film for bird shapes
Step 1: Preparation and Background
-
Prime the canvas:
Start by giving your entire canvas a solid coat of cream or warm off-white acrylic paint. This creates that soft, slightly aged look compared to stark white. -
Add texture (optional):
For a more rustic feel, apply a second coat using cross-hatch brush strokes before the first layer is fully dry, or simply let the first coat dry completely for a smooth finish. -
Plan the composition:
Once the background is bone dry, lightly use a pencil and ruler to mark where your wires will go. Draw two horizontal lines across the canvas: one higher up for the birds to sit on, and one lower down for balance. -
Sketch the birds:
Lightly sketch the outlines of your birds sitting on the top line. Vary the sizes to represent different family members—parents slightly larger, children smaller. Don’t worry about details like beaks or feet yet, just focus on the tear-drop body shapes.
Step 2: Painting the Birds
-
First coat: Teal bird:
Using your small round brush, fill in the first bird shape with teal paint. Start from the center and push the paint toward the edges for a clean line. -
First coat: Orange bird:
Rinse your brush thoroughly and paint the second bird with a bright, warm orange. This color often needs two coats to be opaque, so keep the first layer thin. -
First coat: Dark birds:
Paint the remaining birds. In our example, one is solid black and the other is a deep navy blue. These darker colors usually cover well in one pass. -
Refine the edges:
Once the base coats are dry to the touch, go back over any patchy areas with a second coat to ensure the colors are solid and vibrant. -
Add subtle texture:
I like to take a nearly dry brush with a slightly lighter shade of the base color and gently tap the center of the bird bodies. This gives them a little dimension so they don’t look like flat stickers.
Uneven Wire Lines?
Don’t stress if your hand shakes! Wires naturally sag and bend. Emphasize the wobble slightly to make it look like an intentional rustic style choice rather than a mistake.
Step 3: The Wire and Details
-
Paint the main wire lines:
Switch to your fine liner brush and black paint. Carefully trace over your horizontal pencil lines. The line doesn’t need to be perfectly straight; a little wobble adds to the wire effect. -
Add the barbs:
To create the barbed wire look, paint small ‘X’ shapes along the line at random intervals. Add tiny horizontal dashes extending from the center of each ‘X’ to simulate the twisted knot where the barb is tied. -
Connect the birds:
Using the very tip of your liner brush, paint tiny black legs gripping the wire. Just two small lines per leg is enough to ground them. -
Paint beaks:
Add small triangle beaks to each bird. You can use black for consistency, or a dark grey. Point them in different directions to suggest interaction between family members. -
Eyes and highlights:
Dip the back end of your paintbrush in white paint and dot a small eye onto each bird. Once dry, add a tiny black dot in the center for the pupil. -
Wing definition:
Mix a slightly darker version of each bird’s body color. Paint a simple curved wing shape on the side of the body to suggest a folded wing. -
Erase pencil marks:
Ensure the black paint is completely cured (wait at least an hour), then gently erase any visible pencil lines from your initial sketch.
Personalize It
Instead of realistic colors, paint each bird in the favorite color of the family member it represents. You can also vary the bird species based on personality.
Hang your new family portrait in a sunny spot where the colors can truly stand out


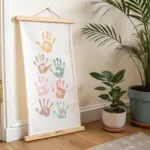
Painted Family Tree With Names
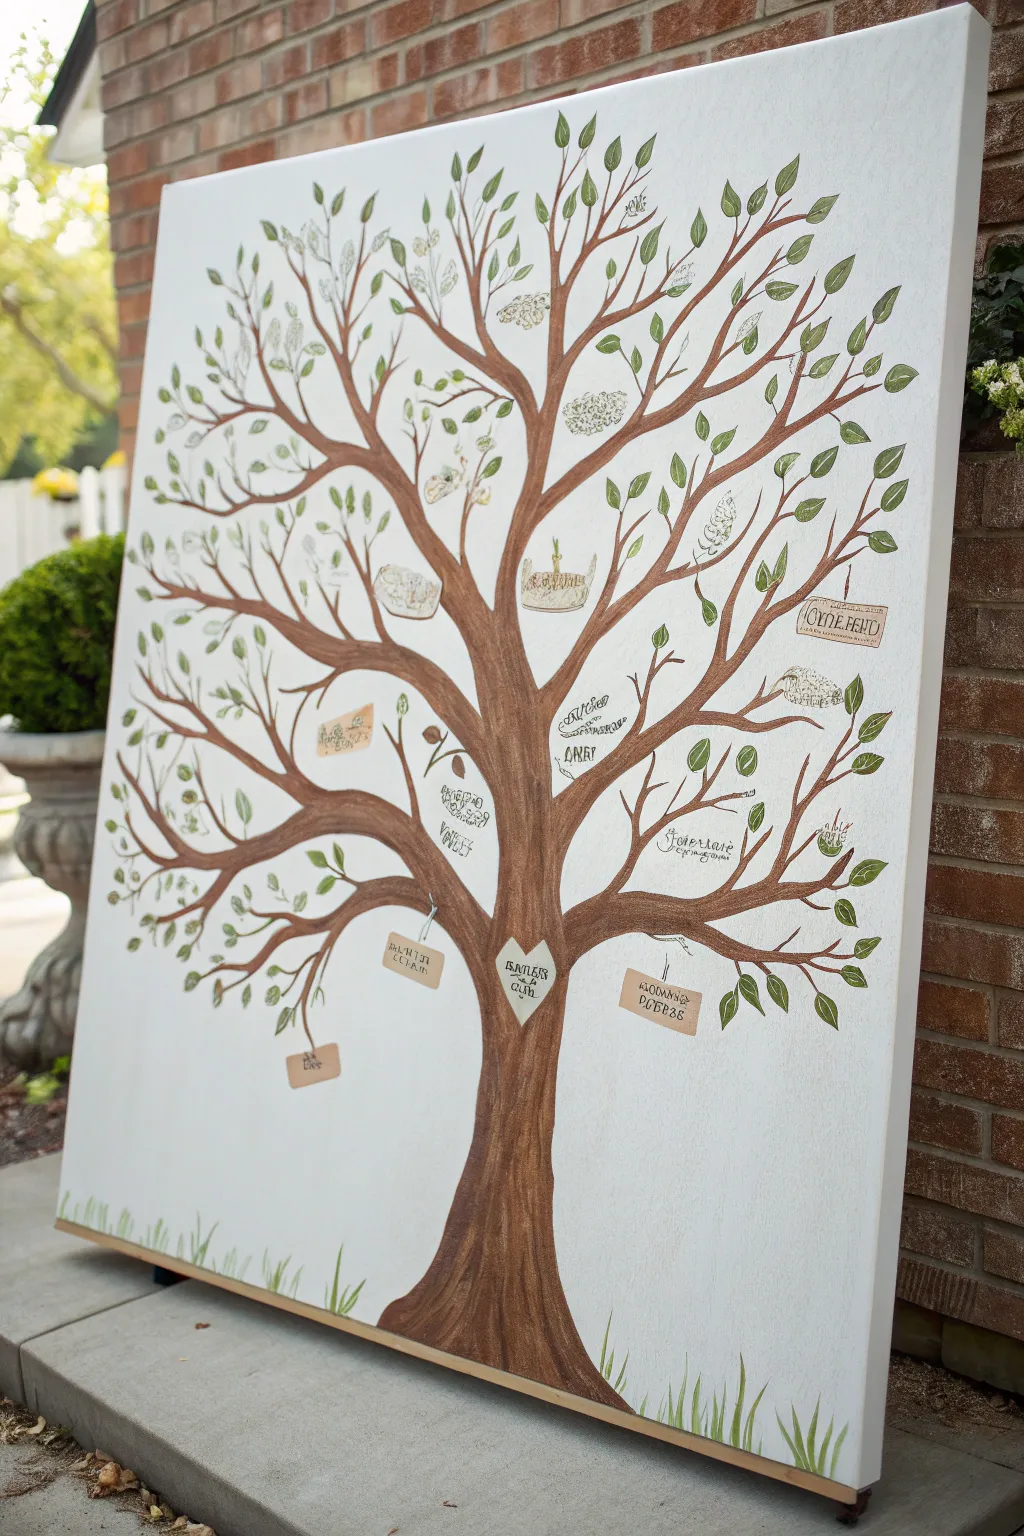
Create a timeless heirloom with this hand-painted family tree, featuring a textured trunk and delicate leaves on a large-scale canvas. With personalized hanging tags and a charming heart motif, it serves as both beautiful decor and a meaningful record of your lineage.
How-To Guide
Materials
- Large stretched canvas (24×36 or larger recommended)
- Acrylic paints: Burnt Umber, Raw Sienna, Titanium White, Sap Green, Olive Green
- Assorted paintbrushes: large flat brush, medium filbert, fine liner brush
- Pencil and eraser
- Mixing palette
- Water cup and paper towels
- Easel (optional but helpful for large canvases)
Step 1: Sketching the Foundation
-
Prepare the canvas:
Start with a clean, white canvas. If you want a smoother surface, apply a thin coat of gesso and sand it lightly once dry, though the raw texture works well for this rustic look. -
Outline the trunk:
Using a pencil, lightly sketch the main trunk in the center. Make the base wide and tapering upward, branching out into two or three main thick limbs. -
Draw primary branches:
Extend lines from your main limbs to create a network of branches. Ensure they reach towards the corners and edges to fill the negative space comfortably. -
Add the heart:
Sketch a simple heart shape on the lower trunk, roughly where the main branches begin to diverge. This will act as the focal point for the family nucleus. -
Map out name tags:
Lightly draw small rectangles hanging from various branches where you plan to write family names. Arranging these now helps ensure you have enough space for everyone.
Step 2: Painting the Tree Structure
-
Base coat the trunk:
Mix Burnt Umber with a touch of fluid medium or water. Paint the entire trunk and branches with a flat brush, using long, vertical strokes to mimic wood grain. -
Add highlights:
While the base coat is still slightly tacky, mix Raw Sienna with a little White. Dry-brush this lighter color down the center of the trunk and on the tops of branches to create volume. -
Deepen the shadows:
Use pure Burnt Umber or mix in a tiny dot of black to paint the undersides of the branches and the edges of the trunk, giving the tree a 3D rounded appearance. -
Paint the heart:
Fill the heart shape with a very pale beige (White mixed with a tiny drop of Brown). Outline it with the darker brown to make it look carved into the bark. -
Texturize the bark:
Take your fine liner brush with watered-down dark brown paint and add squiggly, organic lines up and down the trunk to simulate rough bark texture.
Oops, Shaky Lines?
If your hand shakes while lettering names, don’t foster stress. Use an ultra-fine tip permanent marker or paint pen instead of a brush for crisp, legible text.
Step 3: Adding Foliage and Details
-
Paint base leaves:
Load a filbert brush with Sap Green. Press and lift the brush at the ends of twigs to create almond-shaped leaves. Distribute them evenly but avoid perfect symmetry. -
Layer with lighter greens:
Mix Olive Green with a bit of White. painting a second set of leaves, some overlapping the darker ones, to add depth and variety to the canopy. -
Paint the grass:
At the very bottom of the canvas, use quick, upward flicking motions with a small brush and your green mixtures to confuse a simple grassy base. -
Create the hanging tags:
Paint the sketched rectangles with a light tan or parchment color. I find it helps to do two thin coats here so the background doesn’t show through. -
Add strings:
Use your finest liner brush and diluted dark brown or grey paint to draw thin lines connecting the tags to the branches, making them look suspended. -
Letter the names:
Once the tags are fully bone-dry, use a fine tip marker or a very steady hand with paint to write family names inside the tags and the main family name inside the heart. -
Final touches:
Step back and assess your tree. Add a few stray falling leaves or tiny accent lines on the tags to finish the piece.
Customize Your Canopy
Designate generations by leaf color! Use dark green for ancestors, lighter green for children, and maybe small distinct buds for the newest grandchildren.
Hang your masterpiece in a central gathering spot where the whole family can admire their roots


Family Canvas With Pets Included
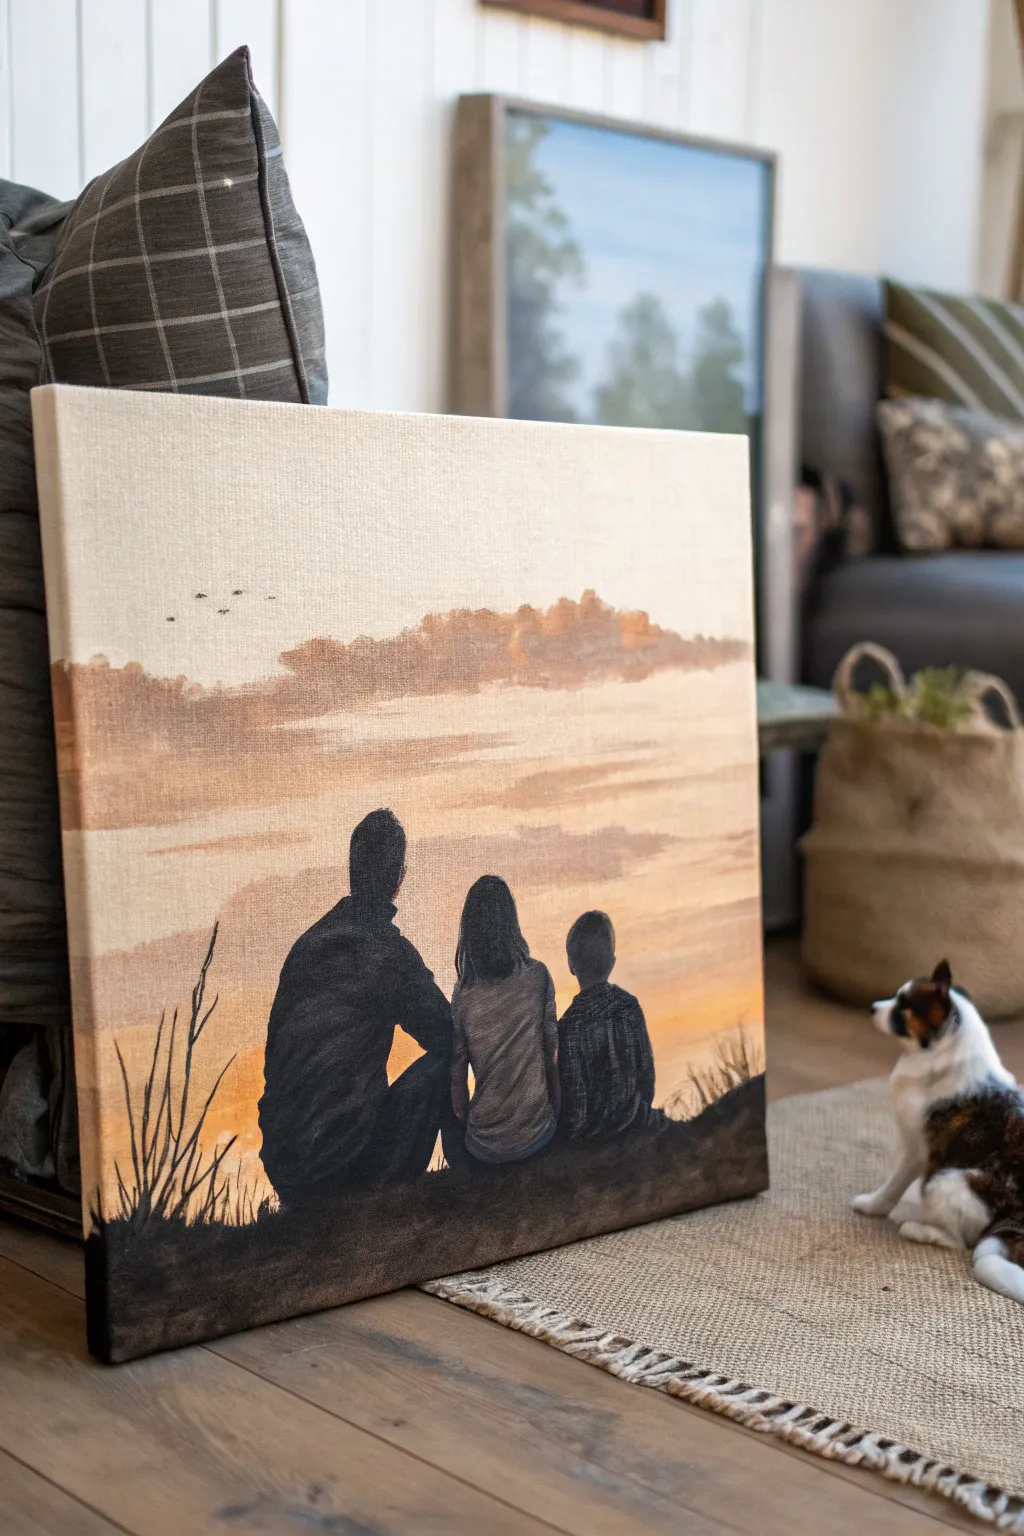
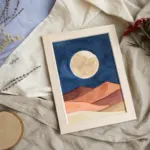
Capture a serene moment forever with this beautiful silhouette painting featuring a father and two children overlooking a misty lake at sunset. The warm, hazy tones and striking dark figures create a timeless piece of wall art that feels both personal and artistic.
How-To Guide
Materials
- Stretched canvas (square format, e.g., 20×20 inches)
- Acrylic paints (Titanium White, Burnt Sienna, Yellow Ochre, Burnt Umber, Mars Black, Ultramarine Blue)
- Medium and large flat brushes
- Small round detail brush (size 0 or 1)
- Palette or mixing plate
- Water cup and paper towels
- Pencil and eraser
- Reference photo of your subjects (optional)
Step 1: Planning the Composition
-
Sketch the horizon:
Lightly draw a horizontal line roughly one-third of the way up from the bottom of the canvas. This doesn’t need to be perfectly straight, as it represents the distant shore. -
Outline the figures:
Sketch the silhouettes of the three figures sitting in the foreground. Focus on the main shapes—the slump of the shoulders and the direction of the heads—rather than fine details like clothing folds. -
Mark the background elements:
Faintly sketch an uneven line above the horizon to represent the distant treeline. Keep this organic and loose.
Uneven Silhouettes?
If your silhouette edges look shaky, wait for the paint to dry fully. Then, re-paint the edge with the background sky color to ‘cut back’ into the shape and refine the line.
Step 2: Painting the Sky and Water
-
Mix the sky base:
Create a very pale, warm cream color by mixing a large amount of Titanium White with a tiny touch of Yellow Ochre and Burnt Sienna. -
Apply the background wash:
Using a large flat brush, paint the entire sky area above the treeline. Keep the paint somewhat thin to let the canvas texture show through slightly, creating a hazy effect. -
Paint the water reflection:
Use the same pale cream mixture to paint the water area below the horizon line. Add horizontal strokes of a slightly darker peach tone (more Burnt Sienna) to suggest ripples and reflections. -
Add warmth to the horizon:
While the paint is still slightly wet, blend a soft orange-brown tone horizontally just above the water line to create the glow of the setting sun. -
Create the distant trees:
Mix a muted brown using Burnt Sienna and a touch of Burnt Umber. With a medium brush, dab in the treeline using vertical stippling motions to suggest foliage. Soften the bottom edge where it meets the water. -
Add the tree reflection:
Paint a mirrored, blurred version of the treeline into the water using horizontal strokes. The color should be slightly lighter and less distinct than the trees themselves.
Softer Horizons
To make the background look more distant and misty, use a dry, clean brush to gently blur the wet paint where the treeline meets the sky. This softens the focus.
Step 3: Creating the Silhouettes
-
Mix the silhouette color:
Mix Mars Black with a small amount of Ultramarine Blue. Pure black can look flat, so the blue adds a deep, rich coolness closer to a natural shadow. -
Block in the main shapes:
Using a medium flat brush, fill in the bodies of the figures. Ensure the edges are crisp against the background. -
Refine the edges:
Switch to a small round brush to carefully paint the contours of the heads, hair, and shoulders. Paying attention to the hair shape is crucial for accurate likenesses in silhouette. -
Add clothing texture:
Mix a dark grey by adding a little white to your black mixture. Use the dry-brush technique to lightly drag this color over the shirts to suggest fabric folds and highlights captured by the ambient light. -
Ground the figures:
Paint the dark grassy bank underneath the figures using the black mixture. Use upward flicking motions at the edges to simulate tall grass blades.
Step 4: Final Details
-
Add foreground grasses:
Using your smallest detail brush and the black mixture, paint thin, delicate stalks of grass rising up on the left and right sides of the canvas. -
Paint the birds:
With the tip of your smallest brush, add three or four tiny ‘v’ shapes in the upper left sky to represent distant birds. -
Glaze for atmosphere:
Once everything is completely dry, mix a tiny amount of Yellow Ochre with a lot of glazing medium or water. Lightly wash over the water area to unify the tones and add warmth. -
Varnish the piece:
Protect your painting with a coat of matte or satin varnish to seal the acrylics and even out the sheen.
Hang your new masterpiece in a well-lit spot where the warm tones can truly shine
BRUSH GUIDE
The Right Brush for Every Stroke
From clean lines to bold texture — master brush choice, stroke control, and essential techniques.
Explore the Full Guide
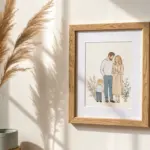
One-Line Family Portrait
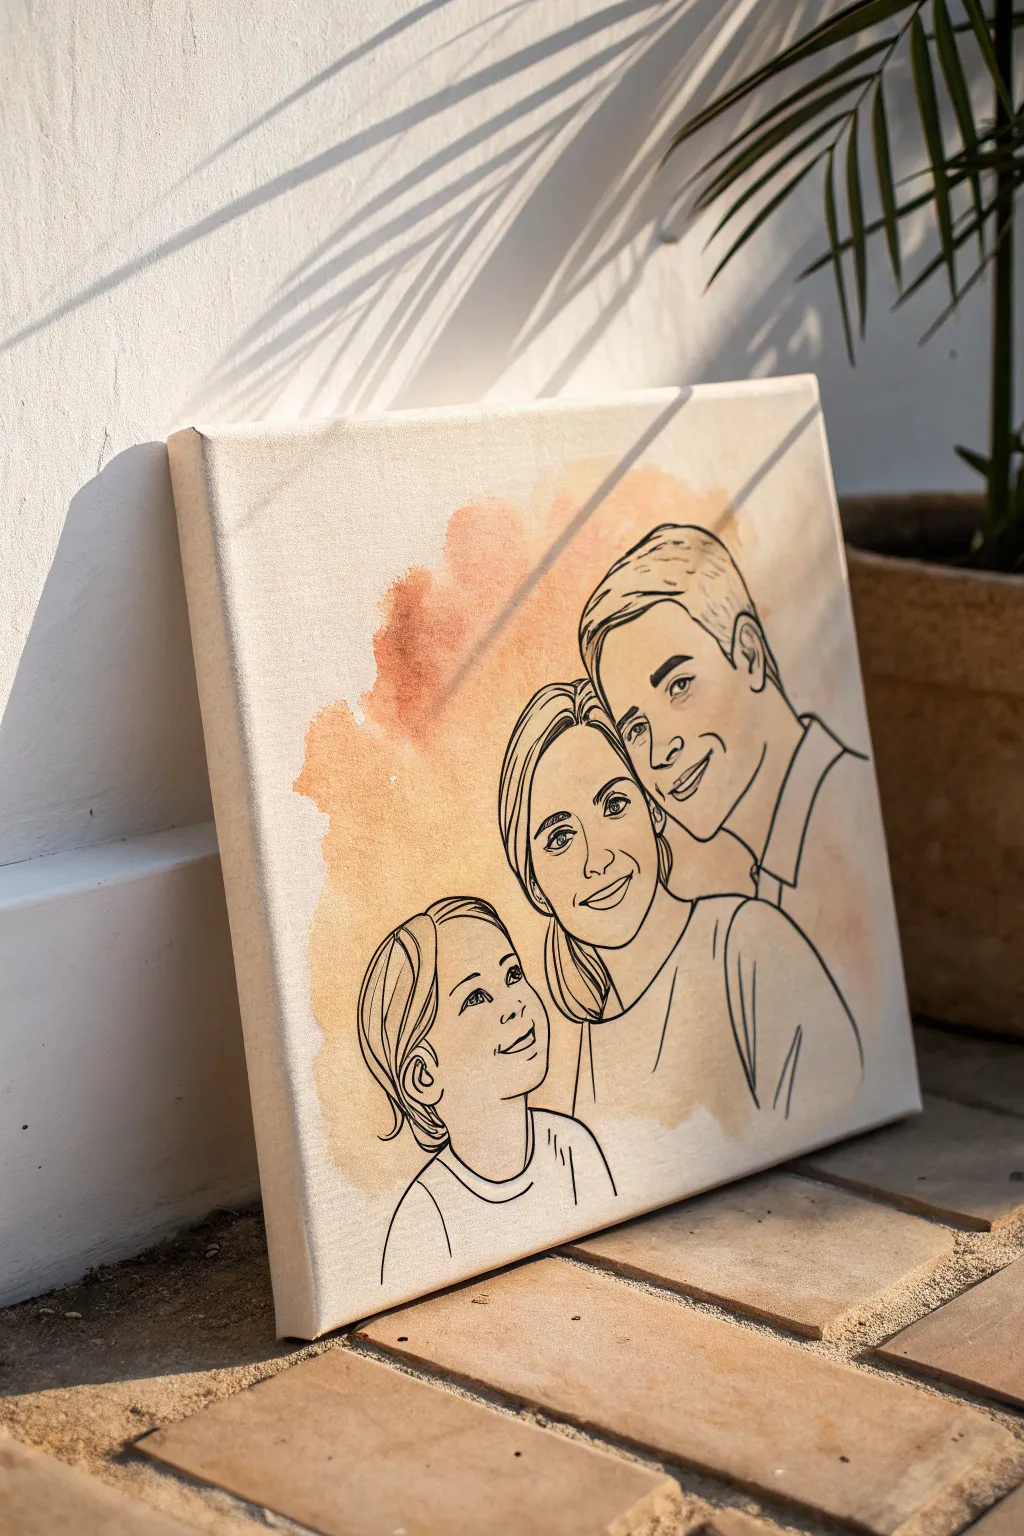
This elegant project combines the precision of modern line art with the soft, organic feel of watercolor. By layering a delicate, abstract wash behind a crisp black contour drawing, you create a timeless family portrait that feels both artistic and personal.
Detailed Instructions
Materials
- Stretched canvas (12×12 or similar size)
- Watercolor paints (shades of ochre, burnt sienna, and peach)
- Black acrylic paint marker (fine and medium tips)
- OR waterproof India ink pen (if working on paper mounted to canvas)
- Flat wash brush (1-inch width)
- Soft round brush (size 8 or 10)
- Pencil and eraser
- Carbon transfer paper
- Reference photo of your family
- Digital tablet (optional, for tracing preparation)
- Sealant spray (matte finish)
Step 1: Preparation & Design
-
Choosing the photo:
Select a well-lit family photo where faces are clearly visible. Profiles or 3/4 angles work beautifully for this line art style as they capture distinct features without needing heavy shading. -
Creating the line art sketch:
Using a tablet or tracing paper over your printed photo, trace the major contours of the faces, hair, and shoulders. Aim for a simplified style—you don’t need every eyelash, just the defining lines that make the person recognizable. -
Refining the composition:
Once your line drawing is ready, resize it to fit your canvas dimensions. I find it helpful to leave plenty of negative space around the subjects to let the background wash breathe.
Canvas Prep Tip
Canvases are often too slick for watercolor. Apply ‘Watercolor Ground’ first—it creates an absorbent surface that lets pigment bloom and flow like paper.
Step 2: The Watercolor Wash
-
Prepping the canvas surface:
Standard canvases are primed for acrylics, which repel water. To make watercolor work, coat the canvas with a thin layer of watercolor ground or extra gesso, allowing it to dry completely for 24 hours. -
Mixing your palette:
Mix a warm, earthy palette using ochre, burnt sienna, and a touch of peach. You want these colors to be very diluted and transparent, not opaque. -
Applying the wash:
Using a wet flat brush, dampen the center area of the canvas where the portraits will go. The shape should be irregular and organic, not a perfect square. -
Dropping in color:
While the surface is damp, touch your loaded round brush to the canvas. Let the ochre and sienna bleed into each other naturally. -
Softening edges:
Use a clean, damp brush to feather out the edges of the color patch so it fades gently into the white canvas rather than stopping abruptly. -
Drying time:
Let this layer dry completely. The canvas must be bone dry before you attempt to transfer the drawing, or the paper will smudge.
Step 3: Line Art Application
-
Transferring the design:
Tape your line drawing sketch over the dried watercolor wash. Slide a sheet of carbon paper underneath, carbon side down. -
Tracing the lines:
Go over your sketch lines with a pencil, applying firm pressure to transfer the design onto the painted canvas surface. -
Inking the outline:
Take your black acrylic paint marker (fine tip) and begin tracing the transferred lines. Start from the top left (if you are right-handed) to avoid smudging your work as you go. -
Varying line weight:
For the outer contours of the hair and shoulders, you might switch to a medium tip marker to add some visual weight and stability to the drawing. -
Adding delicate details:
Use the absolute finest tip available for facial features like eyes and lips. Keep your hand steady and try to make confident, continuous strokes rather than sketching back and forth. -
Cleaning up:
Once the ink is fully dry (give it at least an hour to be safe), use a soft eraser to gently remove any visible pencil or carbon marks.
Add Metallic Flair
Once the black ink is dry, use a gold leaf pen to highlight small details like jewelry or add a thin golden rim to the watercolor wash edge.
Step 4: Finishing Touches
-
Sealing the art:
Because watercolor can reactivate with moisture, spray the entire canvas with a matte fixative or varnish. Do this in light, even coats outdoors. -
Final inspection:
Check for any gaps in your black lines that might need a tiny touch-up after sealing, though usually, the spray sets everything perfectly.
Hang your new modern heirloom in a spot with good natural light to highlight the subtle textures of the watercolor wash


Have a question or want to share your own experience? I'd love to hear from you in the comments below!