If you’ve been craving that calm, outdoorsy vibe indoors, a forest wall painting is one of the easiest ways to change the whole mood of a room. I’m going to share my favorite simple ideas that look intentional and stylish, even if you’re keeping the shapes super basic.
Classic Pine Tree Silhouette Wall
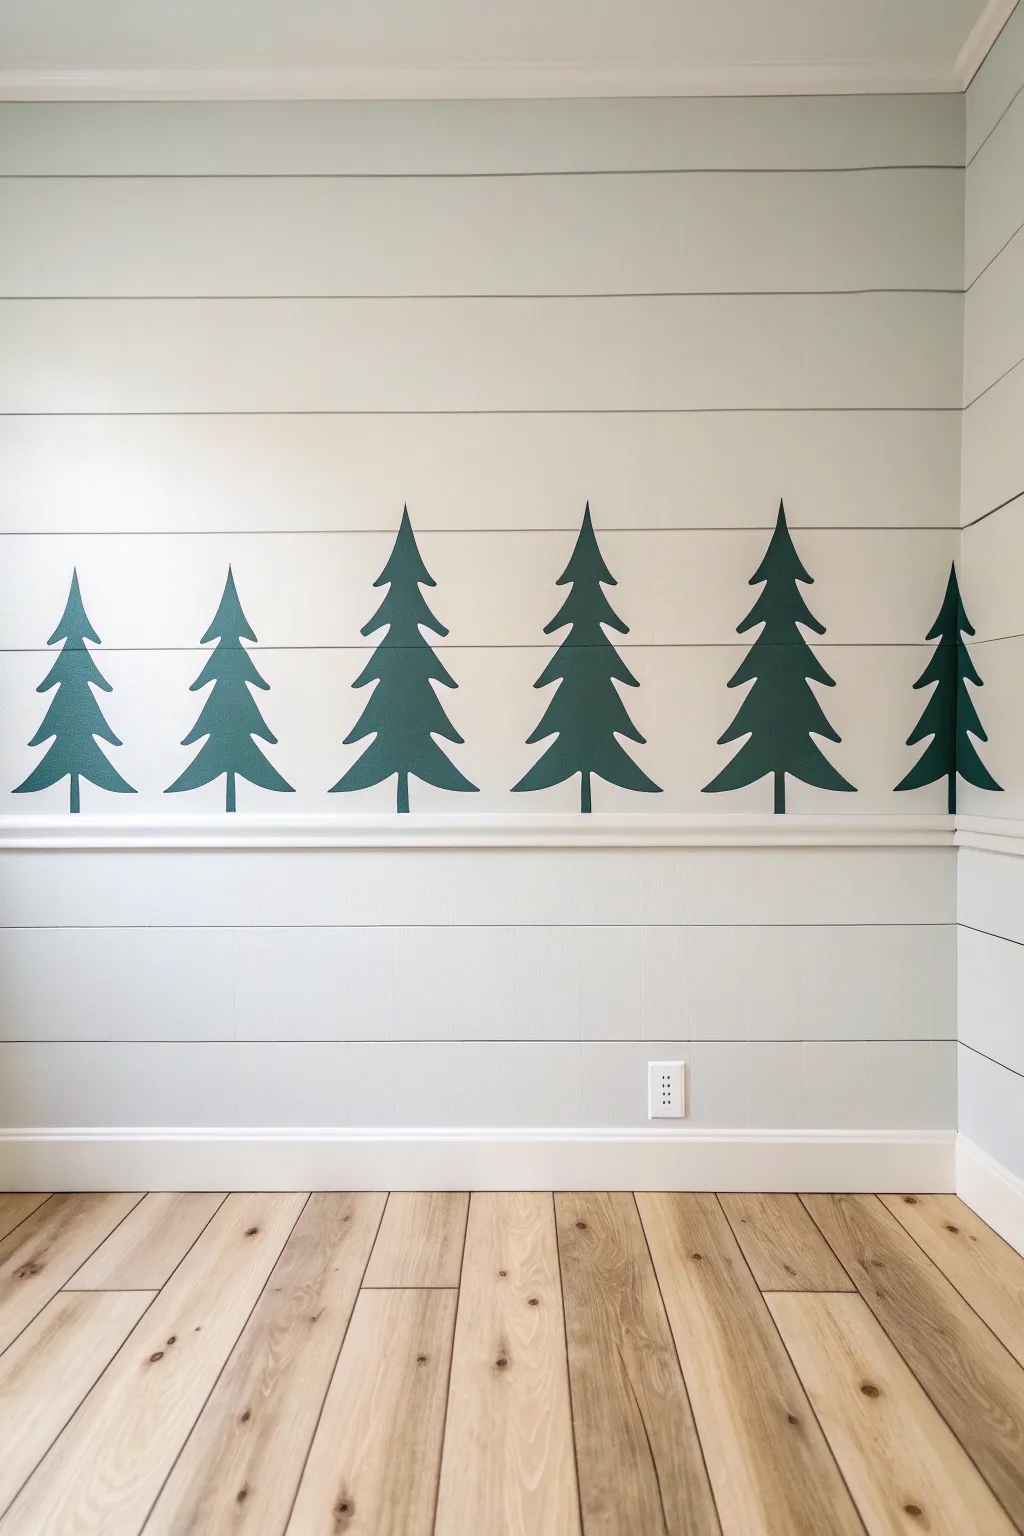
Bring the calming simplicity of a winter forest indoors with this clean, minimalist mural project. By repeating a classic pine tree silhouette across a shiplap wall, you create a striking yet serene focal point perfect for a nursery or modern entryway.
Step-by-Step
Materials
- Forest green latex paint (matte or eggshell finish)
- Painter’s tape (blue or green)
- Stencil plastic sheets or heavy cardstock
- Craft knife or scissors
- Small foam roller
- Small angled sash brush
- Pencil
- Level (2-foot or laser level)
- Tape measure
- Drop cloth
Step 1: Preparation and Template Creation
-
Prepare the workspace:
Clear the area against the wall and lay down your drop cloth to protect the flooring. If your baseboards or chair rail need protection, apply painter’s tape along the edges now. -
Design your tree:
Sketch a simple pine tree silhouette on a piece of paper first. Aim for a symmetrical design with roughly 3-4 distinct tiered sections of branches and a simple trunk at the bottom. -
Create the stencil:
Once satisfied with the shape, transfer your design onto a sheet of stencil plastic or heavy cardstock. I prefer stencil plastic because it doesn’t get soggy with paint, allowing for crisper lines. -
Cut out the template:
Using a sharp craft knife, carefully cut out the interior of the tree shape. Keep the edges smooth, as any jagged cuts will show up in your final paint job. -
Measure the wall:
Measure the total width of your wall space. Decide how many trees you want—the example uses six—and calculate the spacing so they are equidistant. Mark the center point of each tree lightly with a pencil.
Step 2: Painting the Forest
-
Align the first tree:
Starting with the left-most or center mark, position your stencil. Use a level to ensure the trunk is perfectly vertical, then tape the stencil securely to the wall. -
Load the foam roller:
Pour a small amount of forest green paint into a tray. Load your small foam roller, but then offload most of the paint onto the tray’s ridges until the roller feels almost dry. -
Apply the first coat:
Roll over the stencil using light pressure. By using a ‘dry roller’ technique, you prevent paint from bleeding under the stencil edges, which is crucial on textured surfaces like shiplap. -
Refine the edges:
For the sharp tips of the branches where the roller might not reach fully, use a very small brush to dab paint into the corners of the stencil gently. -
Peel and repeat:
Carefully peel the stencil off the wall while the paint is still wet. Check the back of the stencil for any wet paint and wipe it clean before moving to your next pencil mark. -
Paint the remaining trees:
Repeat the taping, rolling, and peeling process for each of the remaining tree locations, double-checking relative heights with your level as you go. -
Handle corners:
If your design wraps into a corner like the one on the far right, bend the flexible stencil into the corner and use your brush to stipple paint into the crease rather than rolling.
Adhesion Hack
Spray the back of your stencil with a low-tack repositionable spray adhesive. This creates a tight seal against the wall and prevents paint bleed much better than tape alone.
Step 3: Finishing Touches
-
Inspect for gaps:
Once the trees are dry to the touch, inspect the groove lines of the shiplap. Sometimes the roller misses the deep recesses between planks. -
Fill the grooves:
Take your small angled brush and carefully hand-paint the green into the horizontal shiplap gaps within the tree silhouettes to ensure the image looks continuous. -
Clean up lines:
If any paint bled under the stencil, use a small artist’s brush and your wall’s original background color to touch up and sharpen the edges of the branches. -
Final dry:
Remove all remaining painter’s tape from the baseboards or chair rail and allow the full design to cure for at least 24 hours.
Winter Wonderland
Once the green paint is fully dry, dry-brush a tiny amount of white paint onto the tops of the branches to create a subtle, snowy ‘flocked’ effect.
Step back and admire how a simple repeated shape has completely transformed the character of your room


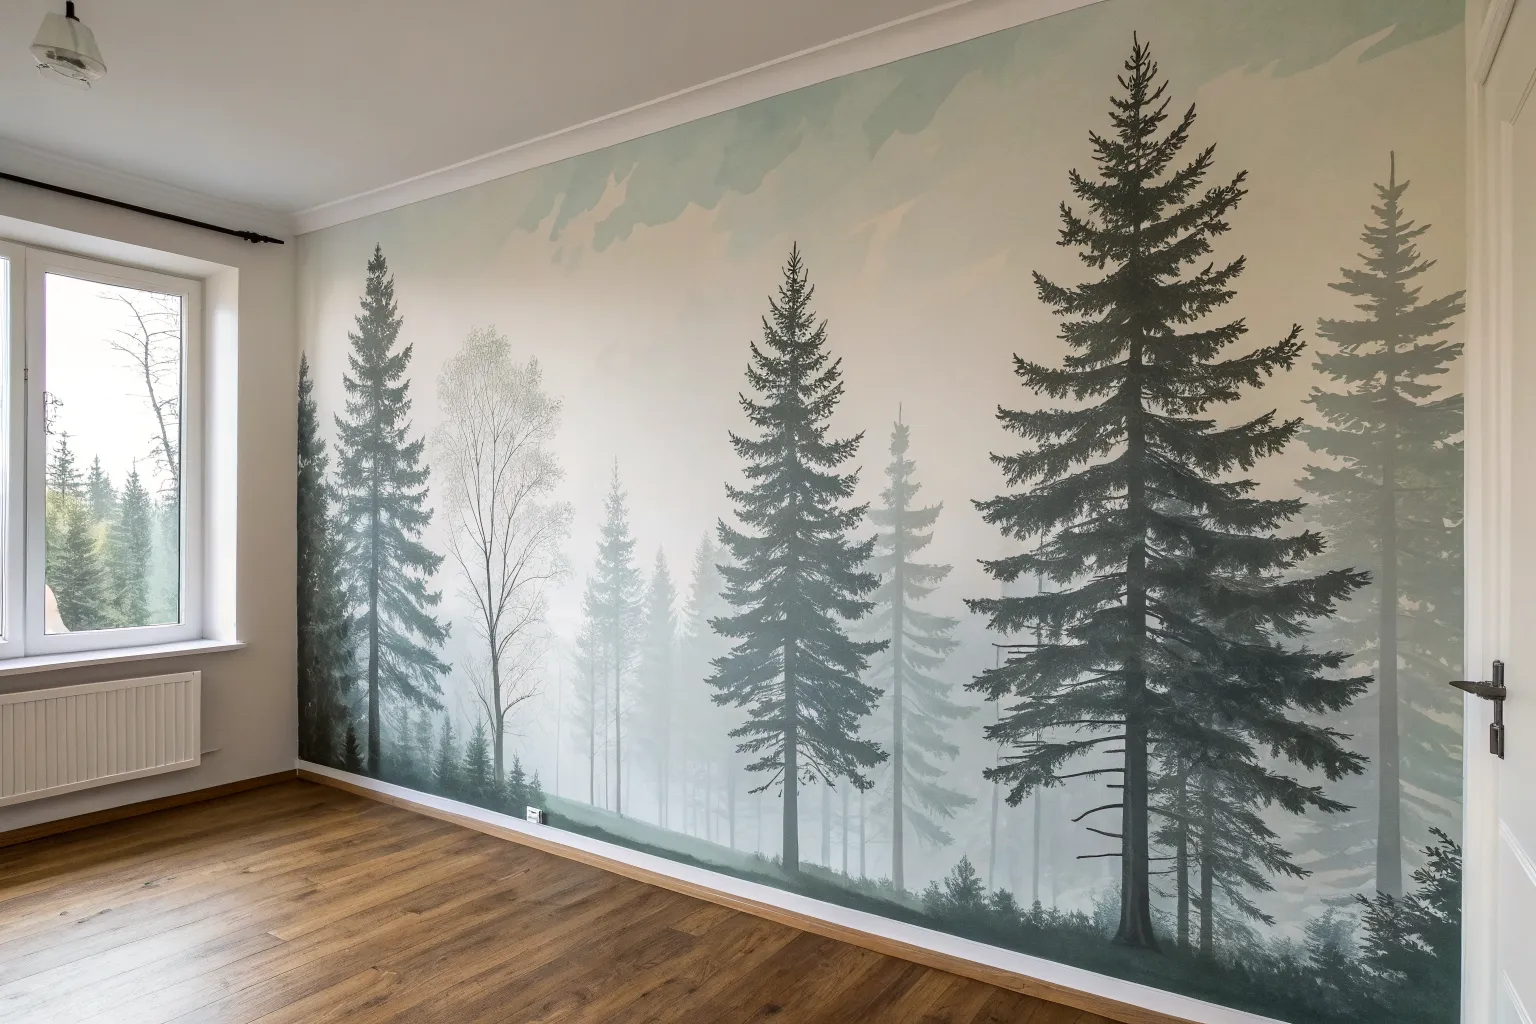
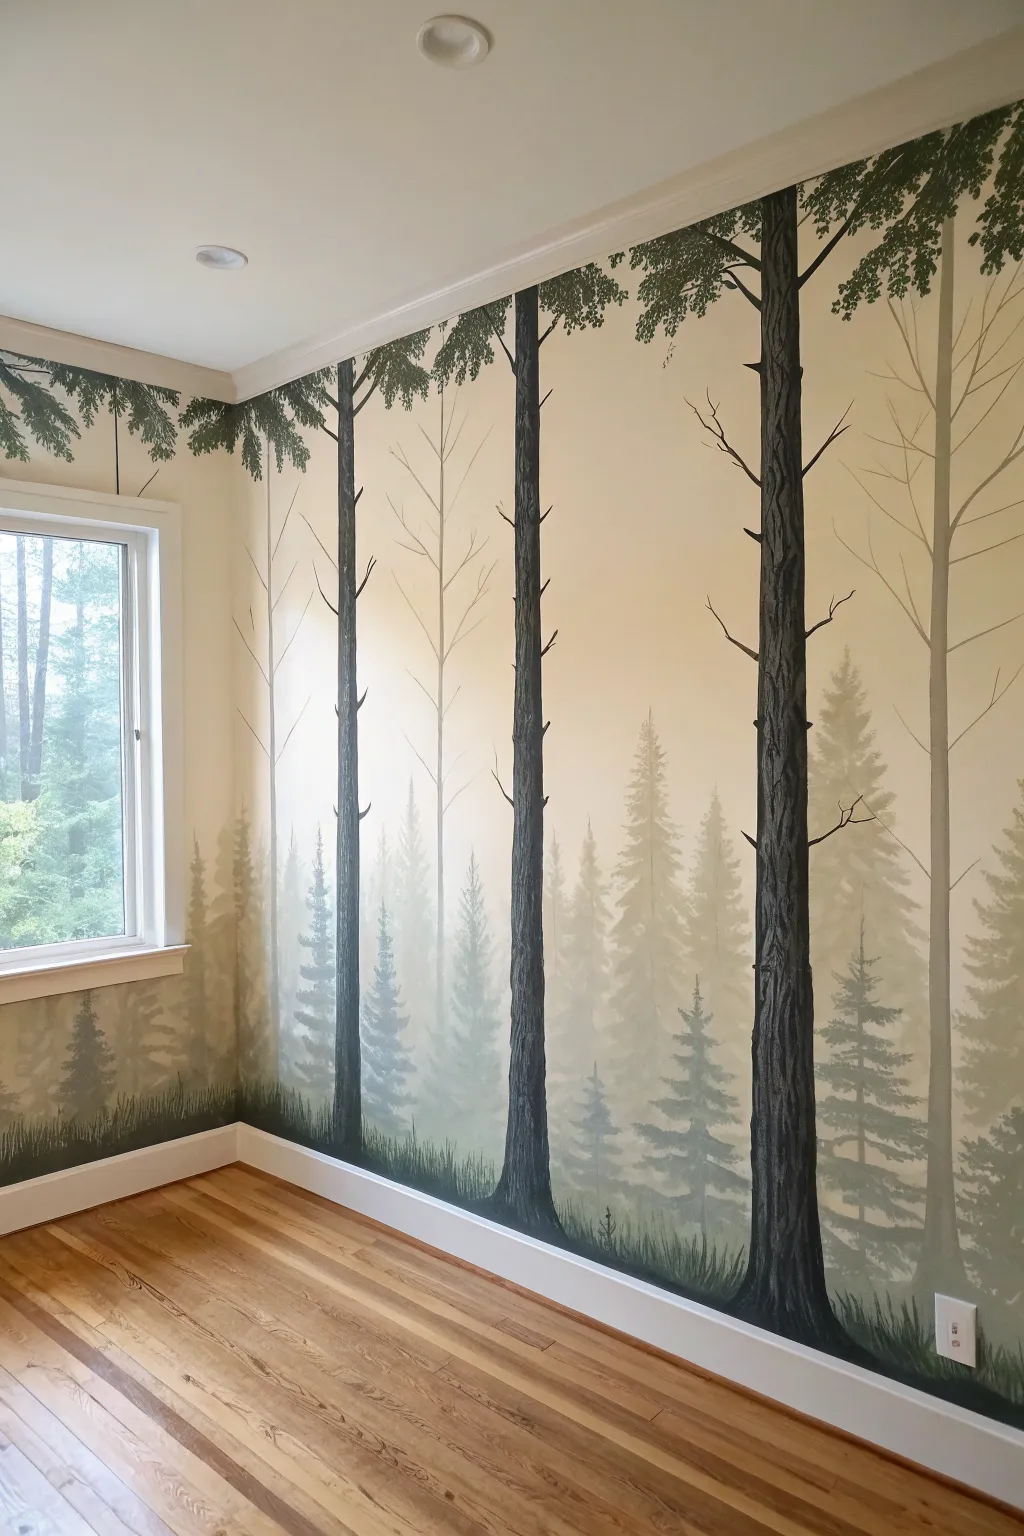
Tall Trunks to Make the Wall Feel Higher
Transform a standard room into a towering woodland sanctuary with this immersive wall mural that uses vertical lines to trick the eye. By layering faint, foggy trees behind bold, dark trunks, you’ll create an incredible sense of depth and height that makes ceilings feel miles away.
How-To Guide
Materials
- Interior latex paint (white or very light gray for base)
- Interior latex paint (dark forest green)
- Interior latex paint (medium gray-green)
- Glaze medium or water for thinning
- Assorted angled sash brushes (2-inch and 1-inch)
- Small round artist brushes (size 4 and 8) for branches
- Painter’s tape
- Drop cloths
- Pencil
- Step ladder
- Level (optional)
Step 1: Preparation and Base Layer
-
Prep the workspace:
Clear the area of furniture and lay down drop cloths to protect your flooring. Tape off the baseboards, ceiling line, and any door or window frames with high-quality painter’s tape to ensure crisp edges. -
Apply the atmospheric base:
Roll on your base wall color. A soft, hazy white or very pale gray works best to represent the furthest point of the foggy distance. Let this dry completely relative to the paint manufacturer’s instructions, usually at least 4 hours. -
Sketch the layout:
Lightly sketch vertical lines with a pencil to mark where your main trees will stand. Don’t use a ruler; the natural wobble of your hand will make the trees look organic rather than like prison bars. Vary the spacing so it doesn’t look like a patterned wallpaper.
Step 2: Painting the Background Layer
-
Mix the ‘foggy’ shade:
Create a mixture for the distant trees. Mix your medium gray-green paint with about 40% glaze medium or water. This translucency is key to the ‘mist’ effect shown in the image. -
Paint the distant trunks:
Using a 2-inch brush, paint these background trees. Keep them thin and pale. Start from the bottom and pull the brush upward toward the ceiling in long, continuous strokes. -
Add delicate branches:
Switch to a smaller round brush while your paint is still wet. Pull tiny branches outward from the main trunks in ‘Y’ shapes. Keep these branches very thin and indistinct; they should feel like they are fading into the background. -
Create the lower canopy:
near the floor line, dab the brush to create the suggestion of distant treetops or bushes. You don’t need detail here, just soft shapes that ground the forest floor. -
Let it cure:
Allow this background layer to dry fully. If the trees look too dark, you can dry-brush a little of the wall color over them to push them back further.
Natural spacing trick
Avoid evenly spacing the trees. In nature, trees grow in clumps. Place two trunks very close together, then leave a wide gap before the next one to keep the scene organic.
Step 3: The Foreground Giants
-
Position the main trunks:
Identify where you want your boldest, darkest trees. These should be the thickest trunks, placed occasionally to anchor the composition—perhaps one flaking a doorway or corner. -
paint the dark trunks:
Using your full-strength dark forest green paint and a sturdy angled sash brush, paint these vertical trunks. I like to start at the bottom and wiggle the brush slightly as I move up to create a bark-like texture on the edges. -
Taper the tops:
As you reach the ceiling, let the trunk split into two or three main vertical branches. These shouldn’t fan out widely but should stay relatively upright to clear the headspace. -
Connect the branches:
Use your round artist brush to add smaller, darker branches connecting to the main trunk. These should be sharper and more defined than your background layer branches. -
Add bark detail:
For the largest trees, add vertical striations. Mix a tiny bit of black or dark gray into your green and paint thin, vertical lines inside the trunk to simulate the rough bark texture seen in the reference.
Trees look too stiff?
If your branches look like stick figures, remember that real branches attach at acute angles and get thinner as they go out. Wiggle your brush slightly as you paint for gnarly joints.
Step 4: Grounding the Scene
-
Build the forest floor:
At the base of the wall (the bottom 1-2 feet), use the dark green paint to create a silhouette of pine trees. Use a stippling motion with an old brush to mimic pine needle textures. -
Layer the undergrowth:
Paint smaller pine shapes in front of the lighter background trees but behind the dark foreground trunks. This creates a mid-ground that ties the whole scene together. -
Refine edges:
Check the edges where your trees meet the ceiling and baseboards. Use a small brush to touch up these connection points for a seamless built-in look. -
Remove tape:
Slowly peel off your painter’s tape while the final touches are still slightly tacky to prevent peeling dry paint layers.
Step back and enjoy the serene, towering atmosphere you’ve brought into your home.


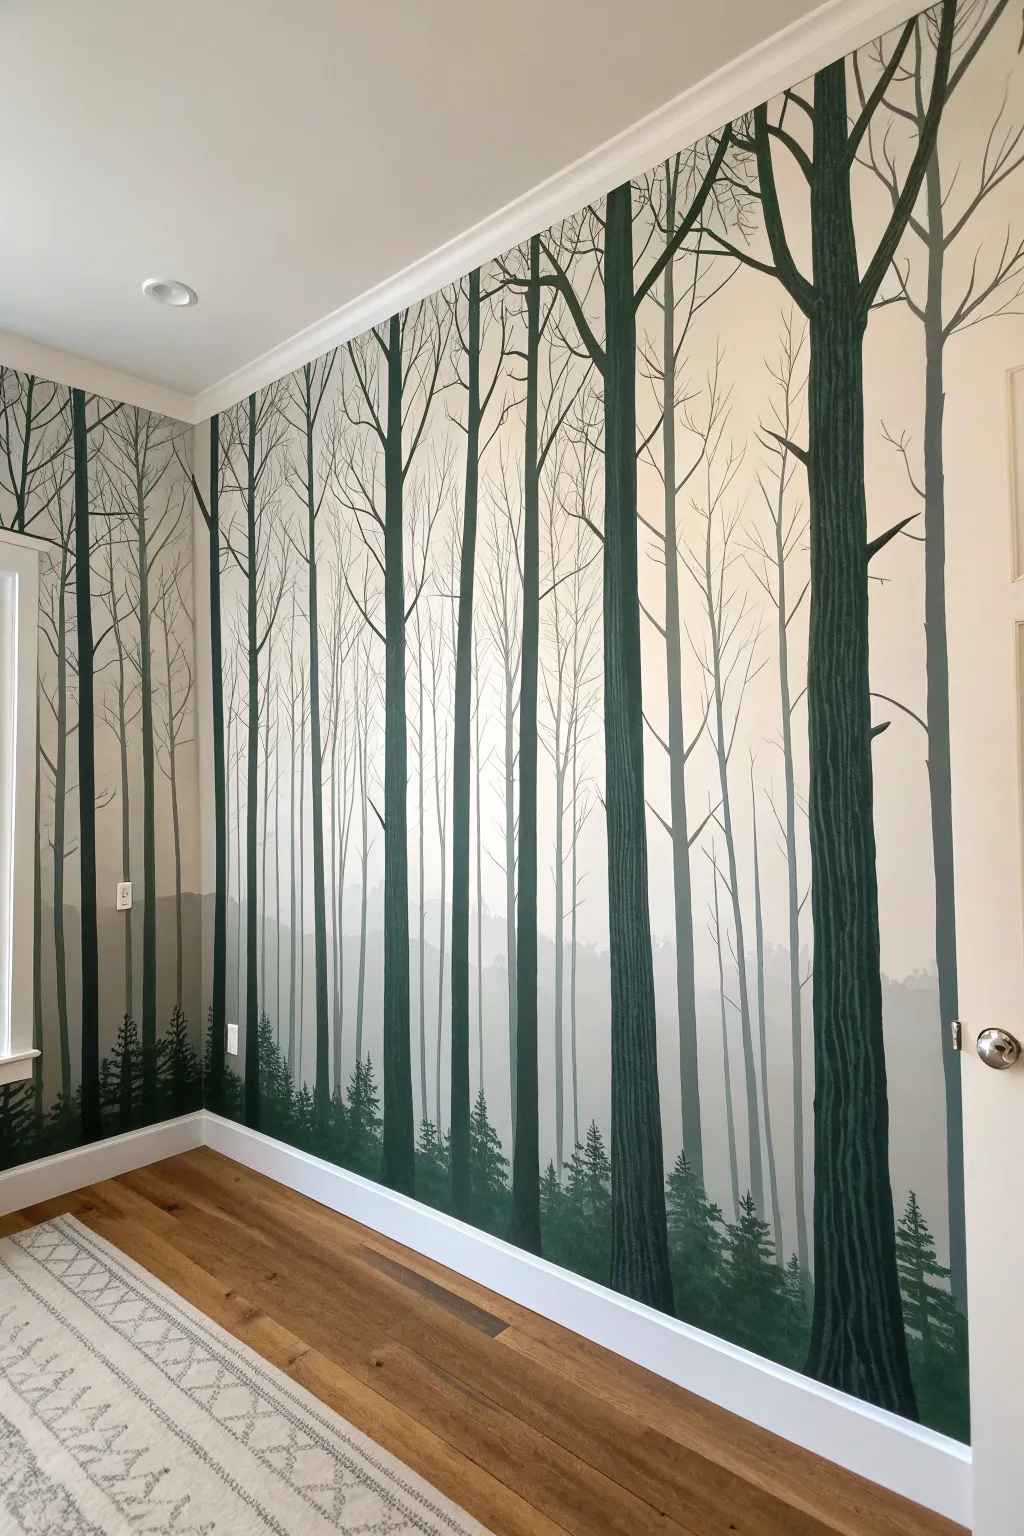
Corner-Wrap Forest Mural
Transform a plain corner into a serene woodland retreat with this wrap-around mural. By layering soft, atmospheric pines behind bold, foreground trunks, you’ll create a striking sense of depth that opens up the room.
Detailed Instructions
Materials
- Interior latex paint (Cream/Beige base)
- Acrylic mural paints (Dark Forest Green, Sage Green, Gray, Black, White)
- Wide painter’s tape
- Large roller and tray
- Assorted brushes (2-inch flat, 1-inch angled sash, fine liner)
- Sea sponge or rag (optional for texture)
- Chalk or pastel pencil (for sketching)
- Drop cloths
- Step ladder
Step 1: Setting the Atmosphere
-
Prepare the workspace:
Clear the corner of furniture and lay down drop cloths to protect your hardwood floors. Tape off the baseboards, ceiling molding, and window frames securely with painter’s tape to ensure crisp edges. -
Apply the base coat:
Roll on the background color, a warm cream or soft beige, over the entire wall section. This acts as your sky and the light filtering through the fog. Apply two coats if necessary for solid coverage and let it dry completely. -
Mix the mist color:
Create a very pale, grayish-green color by mixing specific amounts of white with a touch of sage green and gray. Ideally, this should be only two or three shades darker than your wall color to create that distant ‘foggy’ look.
Fixing “Floating” Trees
If your background trees look like they are hovering, sponge a horizontal band of ‘fog’ (white mixed with base wall color) across their bases to settle them into the landscape.
Step 2: Painting the Distant Forest
-
Paint the furthest trees:
Using the pale mist mixture and a 2-inch flat brush, paint simple triangular pine silhouettes in the background. Keep the edges soft and don’t worry about detail; these are meant to look like they are receding into the fog. -
Create the middle ground:
Mix a slightly darker version of your green-gray paint. Paint a second layer of trees slightly in front of the first set, overlapping them occasionally. Make these slightly more defined but still hazy. -
Add faint floor foliage:
Use the same middle-ground color to dab a low lying ‘mist’ or grass line near the baseboard. This grounds the distant trees so they aren’t floating in space. -
Feather the edges:
While the paint is still tacky, use a dry brush or a rag to gently feather the edges of these background trees. This enhances the atmospheric perspective essential for this look.
Level Up: Window Reflection
Add a subtle glaze of white paint (mixed 1:4 with glaze medium) on the sides of the trunks facing the actual room window to mimic real light hitting the painted bark.
Step 3: The Foreground Giants
-
Sketch the main trunks:
Once the background acts are dry, use chalk to sketch the placement of the three large foreground trees. Position one directly in the corner to mask the room’s angle, and space the others irregularly for a natural feel. -
Block in the trunks:
Mix a dark, charcoal-green (almost black). Using a 1-inch angled brush, paint the long, vertical trunks following your chalk lines. Extend them all the way from the baseboard to the crown molding to mimic towering height. -
Add bark texture:
Don’t paint the trunks a solid flat color. While the dark paint is wet, dip a smaller brush into a slightly lighter grey-brown and stipple it vertically up the trunk. This creates the rough, fissured bark texture seen in the reference. -
Paint the thin branches:
Switch to a fine liner brush or a small round brush. With varying pressure, pull thin, jagged branches extending horizontally from the main trunks. Keep these sparse and brittle-looking, characteristically pine-like. -
Leaf out the canopy:
At the very top, near the ceiling, dab clusters of pine needles using a dry brush technique with dark green paint. Let them hang down slightly from the branches to frame the top of the mural.
Step 4: Finishing Touches
-
Add the grassy floor:
At the bottom of the wall, use the dark trunk color to paint varied vertical strokes representing tall grasses. Overlap these with the base of the trees to integrate the trunks into the scene. -
Adjust verticality:
Step back and check your large trunks. If they look too wobbly, carefully refine the edges with the background wall color to straighten them out visually. -
Paint secondary saplings:
For added depth, I often like to paint one or two very thin, leafless saplings in a medium-gray tone between the large trunks. This acts as a bridge between the foggy background and the stark foreground. -
Final detail enhancement:
Add tiny highlights to the bark on the side of the trees facing the presumed light source (the window) using a light grey paint. This makes the trunks look cylindrical rather than flat. -
Remove tape and clean up:
Once the paint is dry to the touch, slowly peel away the painter’s tape at a 45-degree angle. Touch up any spots where paint might have bled under the tape with a small brush.
Step back and enjoy the peaceful depth your new forest brings to the room


Soft Sage Forest for a Nursery Wall
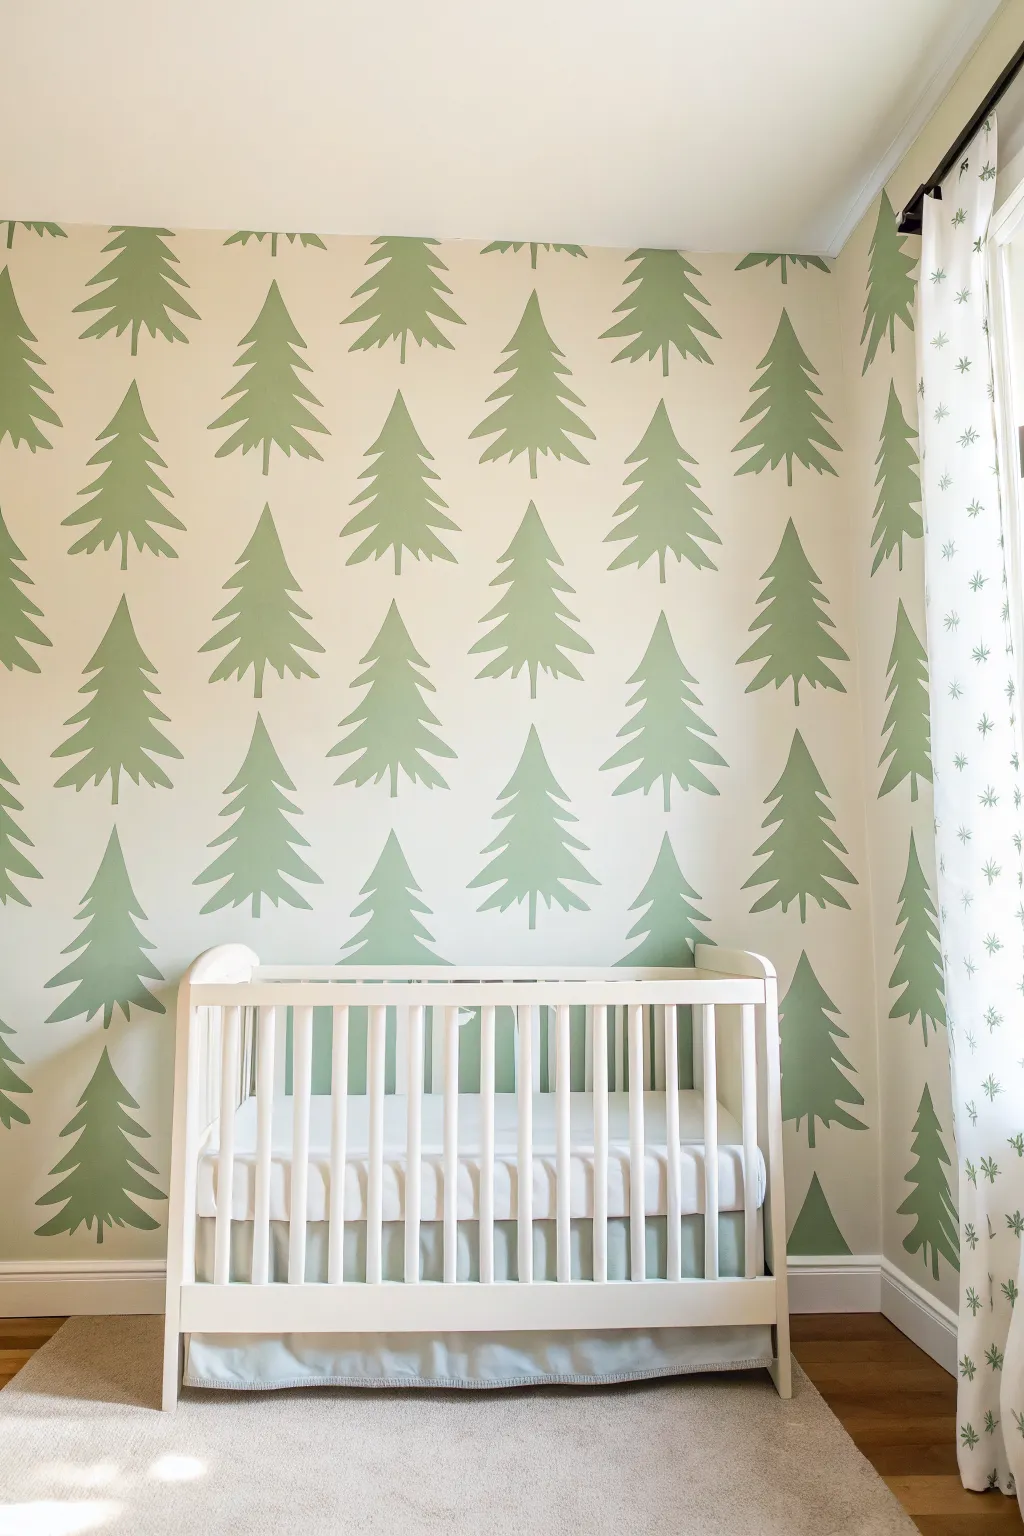
Transform a plain nursery wall into a serene woodland escape with this repetitive pine tree motif. Using a simple stencil technique creates a consistent, block-print style finish that feels both modern and cozy.
Step-by-Step Tutorial
Materials
- Latex wall paint in soft sage green
- Latex wall paint in cream/off-white (for base)
- Large sheet of mylar or thin plastic
- Painter’s tape
- High-density foam roller (4-inch)
- Small roller tray
- Craft knife (X-Acto)
- Cutting mat or thick cardboard
- Level
- Pencil
- Tape measure
- Paper towels
- Small artist brush (for touch-ups)
Step 1: Preparation & Base Coat
-
Clear the area:
Move the crib and any furniture away from the wall to give yourself plenty of working space. Lay down a drop cloth to protect the flooring. -
Paint the background:
Apply your cream or off-white base color to the entire wall. Use a standard large roller for this. Two coats are usually best for a rich, solid finish. Let this dry completely for at least 24 hours before stenciling.
Adhesive Spray Magic
Apply a light mist of repositionable stencil adhesive spray to the back of your stencil. It seals the edges tighter than tape alone, drastically reducing paint bleed.
Step 2: Creating the Stencil
-
Sketch the design:
Draw a stylized pine tree shape on a piece of paper first to perfect your design. Aim for slightly curved, drooping branches and a simple trunk to match the ‘folk art’ look in the photo. -
Transfer to mylar:
Place your sheet of mylar over your sketch and trace the tree shape with a permanent marker. I suggest making two identical stencils just in case one gets too messy or damaged. -
Cut the stencil:
Using a sharp craft knife and a cutting mat, carefully cut out the tree shape. Take your time around the jagged branch tips to ensure clean lines. -
Add registration marks:
To help with spacing, cut small notches or draw lines on the clear mylar about 6-8 inches from the tree cutout on both sides and the top. This will act as a guide for where to place the next tree.
Step 3: Mapping the Wall
-
Determine spacing:
Decide on your pattern density. The example shows an offset (brick) pattern where rows alternate. Measure the width of your wall and calculate how many trees will fit comfortably. -
Mark vertical guides:
Use a level and a measuring tape to lightly mark vertical plumb lines with a pencil. These lines will ensure your trees don’t start leaning as you move across the wall. -
Define the first row:
Measure down from the ceiling to mark the top of your first row of trees. It is crucial to start from the top and work your way down so you don’t smudge wet paint.
Bleeding Edges?
If paint is seeping under the plastic, your roller is too wet. Offload more paint onto a paper towel until the roller feels tacky and almost dry to the touch.
Step 4: Painting the Forest
-
Secure the stencil:
Tape your stencil to the wall at your first starting point, usually the top left corner. Double-check with a small torpedo level to make sure the trunk is perfectly vertical. -
Load the roller:
Pour a small amount of sage green paint into your tray. Load the foam roller, but then roll it off onto a paper towel until it is almost dry. This ‘dry rolling’ technique is critical to prevent paint from bleeding under the stencil. -
Roll the first tree:
Apply the paint over the stencil using light, even pressure. Do not press hard. It’s better to do two very light passes than one heavy one that globs up. -
Remove and repeat:
Carefully peel the tape and lift the stencil straight off the wall. Move to the next spot in the horizontal row, using your registration marks or a spacer to keep the distance consistent. -
Clean the stencil periodically:
After every 3-4 trees, check the back of your stencil. If paint is building up, wipe it off gently with a damp cloth or swap to your backup stencil to avoid smudging the wall. -
Start the offset row:
Once the first row is done, start the second row perfectly centered between the trees of the row above. This creates that pleasing triangular visual rhythm. -
Continue down the wall:
Work your way down, alternating the starting position for each row to maintain the staggered brick pattern. Take frequent breaks to step back and check your alignment. -
Handle corners and edges:
When you reach the edges or the baseboard, you may need to bend the flexible stencils into the corner. Tape the stencil securely to prevent it from popping out while you roll. -
Final touches:
Once all paint is dry, inspect your trees. Use a small artist brush and your cream base paint to ‘erase’ any bleed-through or mistakes, sharpening the edges of the branches.
Step back and admire the calm, wooded atmosphere you have created for the little one’s room
BRUSH GUIDE
The Right Brush for Every Stroke
From clean lines to bold texture — master brush choice, stroke control, and essential techniques.
Explore the Full Guide
Monochrome Forest Feature Wall
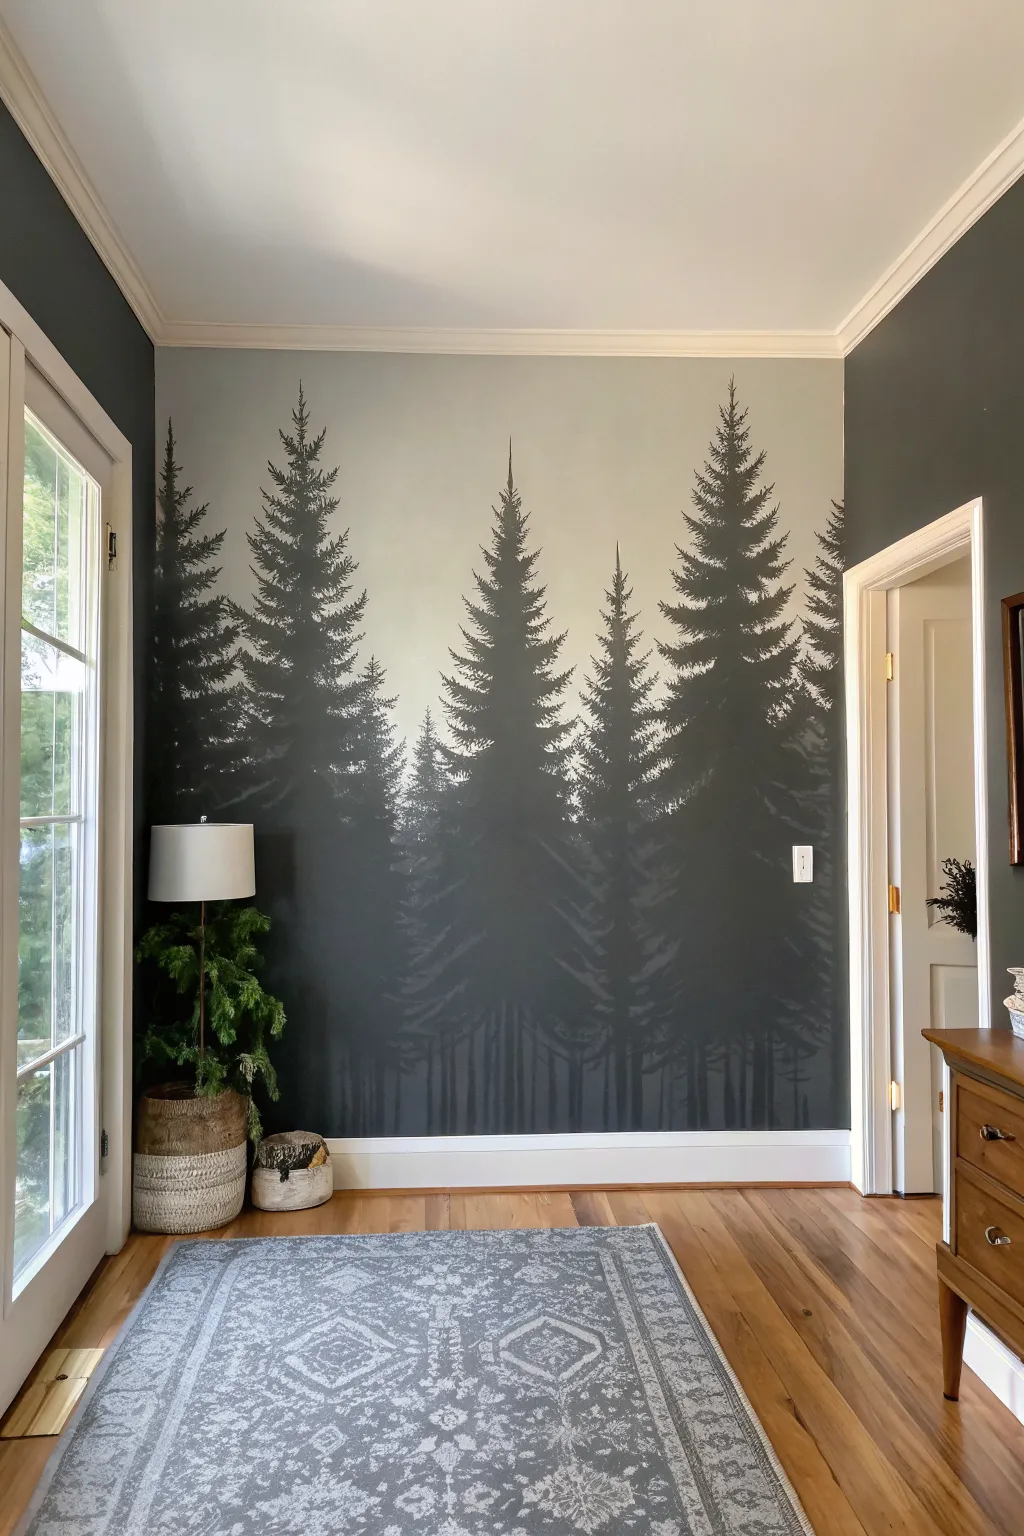
Transform a plain wall into a serene, mood-filled forest retreat with this large-scale mural project. By layering just a few shades of grey paint, you will create a stunning illusion of depth that makes the trees appear to recede into a morning fog.
Step-by-Step Guide
Materials
- Interior latex paint (base wall color: light dove grey)
- Interior latex paint (dark charcoal or soft black)
- Mixing glaze or clear scumble medium
- Assorted flat angled brushes (1-inch to 2.5-inch)
- Small round detail brush
- Painter’s tape
- Drop cloths
- Plastic cups or trays for mixing
- Pencil
- Ladder or sturdy step stool
Step 1: Preparation & Background
-
Prepare the workspace:
Clear the area of furniture and lay down drop cloths to protect your flooring. Tape off the baseboards, ceiling line, and adjoining walls with painter’s tape to ensure crisp edges. -
Apply the base coat:
Roll on your base wall color, which will serve as the ‘sky’ and the furthest background mist. A very light dove grey or cool off-white works best here so the dark trees stand out. Let this dry completely, ideally overnight. -
Plan the composition:
Stand back and lightly sketch vertical lines with a pencil to mark where the trunks of your main foreground trees will go. You don’t need to draw branches; just establish the spacing so the forest doesn’t feel cluttered.
Step 2: Mixing & Layering
-
Mix the mid-tone shade:
Create a ‘ghost tree’ color by mixing one part of your dark charcoal paint with about three parts of the light base color (or white). Add a splash of glaze to make it slightly translucent. -
Paint the background trees:
Using a 2-inch angled brush, paint the faintest, furthest trees first. Keep these shapes simple and slightly blurry; avoid sharp details. These trees should look like they are far away in the fog. -
Establish the tree shape:
For the pine shape, start at the top with a thin point and work downward, using a dabbing motion to create the look of boughs. Widen the tree gradually as you descend. -
Mix the second layer color:
Once the faint background trees are dry to the touch, mix a darker grey. This should be about a 50/50 mix of your charcoal and base color. This layer will sit in front of the Ghost trees. -
Paint the mid-ground trees:
Paint this second set of trees, overlapping the lighter ones slightly. Make the branches a bit more defined here, using the corner of your angled brush to flick outward for pine needles.
Fixing “Solid” Trees
If trees look like heavy triangles, dip a brush in the background wall color and dab ‘sky holes’ back into the dense branches to open them up.
Step 3: Foreground & Details
-
Prepare the darkest shade:
Pour your dark charcoal or soft black paint into a fresh container. You can use it straight from the can for maximum contrast, or add just a tiny drop of glaze to improve flow. -
Paint the main trunks:
Paint a solid vertical line for the trunk of your foreground trees. It doesn’t need to be perfectly straight—organic wobbles make it look more natural. -
Add foreground branches:
Starting from the top of the trunk, use a sweeping, downward motion to create heavy pine boughs. I like to lay the brush flat and twist it slightly at the end of the stroke to mimic natural growth. -
Fill in the canopy:
Continue working down the tree, making the branches wider and denser near the bottom. Leave small gaps of light showing through the branches periodically so the tree doesn’t look like a solid triangle. -
Create the forest floor:
At the very bottom, blend the dark tree bases together with vertical strokes that fade downward, suggesting dense undergrowth or shadows near the ground. -
Add fine details:
Switch to a small round brush. Dip into the dark paint and add tiny, stray twigs or defined pine tips to the edges of the largest trees to break up any smooth outlines. -
Refine the edges:
Step back and look for any awkward gaps. You can add small, partial tree tops peeking up from the bottom in the mid-tone grey to fill empty spaces. -
Clean up:
Remove the painter’s tape slowly while the paint is still slightly tacky to prevent peeling. Touch up any baseboard edges if paint managed to seep through.
Take It Further
For a magical winter morning vibe, lightly sponge a watered-down white glaze over the very bottom of the wall to create a rising ground fog effect.
With the tape removed, you can step back and admire the depth and tranquility of your custom indoor forest
Forest Horizon Band at Chair-Rail Height
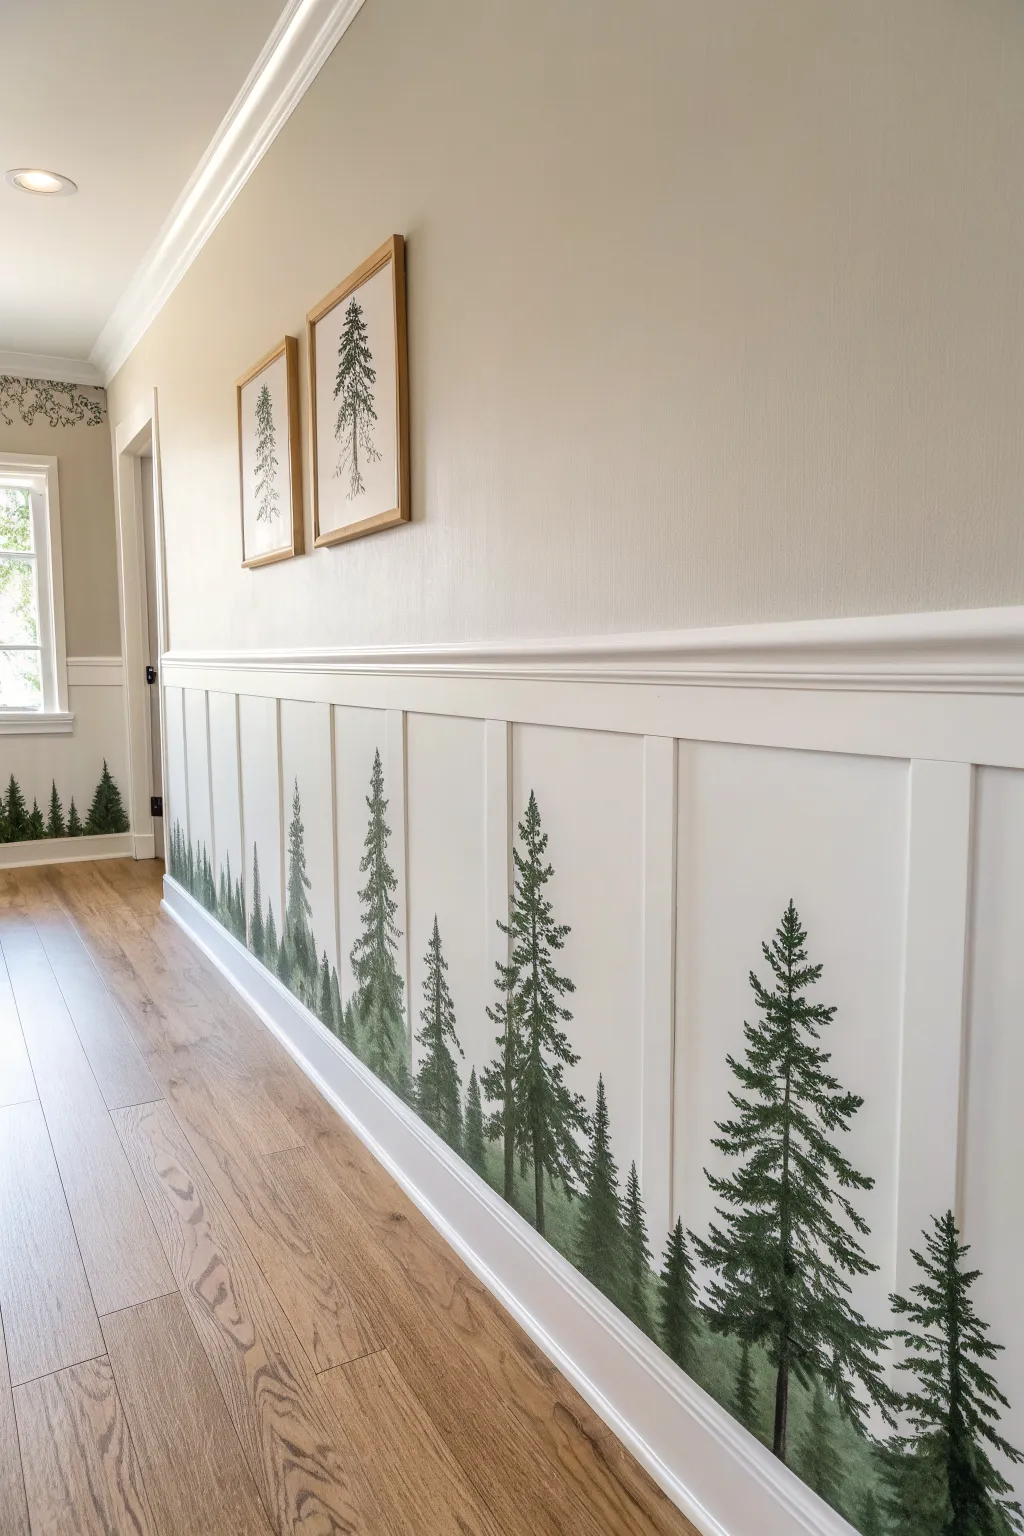
Transform ordinary hallway wainscoting into a serene woodland walk with this clever mural technique. By using the recessed panels of board and batten as natural frames, you can create a continuous, misty evergreen forest that adds incredible depth and character to your space.
Step-by-Step
Materials
- Interior latex paint (white for trim/wainscoting)
- Interior latex paint (dark forest green)
- Interior latex paint (sage or moss green)
- Acrylic glaze medium
- Painter’s tape (high quality)
- Angled sash brush (2-inch)
- Small flat artist brushes (various sizes)
- Fan brush (size 4 or 6)
- Small foam roller
- Drop cloths
- Pencil
- Paper plates or mixing palette
- Cleaning rags
Step 1: Preparation and Base Coat
-
Prepare the workspace:
Clear the hallway and lay down drop cloths to protect your flooring. Wipe down the existing wainscoting to ensure it is free of dust and oils, which helps the paint adhere properly. -
Refresh the wainscoting:
Since the forest sits inside the panels, the surrounding trim needs to be pristine. Apply a fresh coat of white semi-gloss or satin paint to the rails, stiles, and baseboards using your angled sash brush and foam roller. -
Paint the panel background:
Paint the flat recessed areas of the wainscoting with a clean white base coat. Even though you’ll be painting trees over it, starting with a fresh slate ensures the greens will pop. Let this dry completely, preferably overnight. -
Tape off the edges:
Once the white paint is fully cured, carefully apply painter’s tape along the inner edges of the stile and rail frames. This protects the raised woodwork from stray brushstrokes when you start painting the trees.
Natural Variety Tip
Avoid making trees identical triangles. Give some ‘damage’—a missing branch on one side or a crooked top—to make the forest feel organic and real.
Step 2: Creating the Background Trees
-
Mix a hazy green:
Create a lighter, misty green for the distant trees. Mix your sage green paint with a generous amount of glazing medium and a touch of white. The glaze makes the paint translucent, creating that ‘far away’ look. -
Sketch placement lightly:
Using a pencil, very lightly mark vertical lines where you want your trees to stand. Vary the spacing—some should be close together, others apart—to mimic a natural forest rhythm. -
Paint the distant trunks:
With a small flat brush and your glaze mix, paint thin vertical lines for the trunks. Don’t make them perfectly straight; natural trunks have slight wobbles. -
Add foliage texture:
Switch to a dry flat brush or an old scruffy brush. Dip just the tip into your glaze mix and tap it vertically along the trunk lines to create soft, indistinct branches. Keep the bottom of the panels slightly denser with color. -
Soften the edges:
While the paint is still tacky, use a clean, dry rag to gently dab at the edges of these background trees. This blurs them slightly, pushing them visually into the distance.
Step 3: Painting the Foreground Forest
-
Prepare the dark green:
Pour your dark forest green paint onto the palette. You can use it straight for maximum contrast or mix in a tiny bit of glaze if you want smoother flow. -
Establish foreground trunks:
Paint strong, dark vertical lines for the main trees using a small flat brush. Place these ‘in front’ of the lighter trees, staggering them so they don’t perfectly align. -
Start the branches at the top:
Using a fan brush or a small detail brush, start at the top of a trunk. Use quick, short strokes that angle slightly downward to create the iconic pine tree silhouette. -
Build the mid-section:
As you move down the tree, widen your strokes. I find that twisting the brush slightly as I lift it off the wall helps create jagged, realistic needle textures. -
Anchor the bottom:
Near the bottom of the panel, allow the branches to become dense and merge together. Create a dark, grassy texture along the very bottom edge of the panel to simulate the forest floor. -
Add detail to foliage:
Go back with your darkest green and add tiny dabs of paint to the outer tips of the branches to simulate individual clusters of needles. -
Blend the ground level:
Use a dry brush to feather the dark green paint upwards from the bottom edge, blending it into the lower branches. This grounds the trees so they aren’t floating in space.
Level Up: Birds in Flight
Once fully dry, use a zero-point detail brush and black paint to add tiny, simple ‘v’ shapes in the upper white space for distant birds.
Step 4: Finishing Touches
-
Review and refine:
Step back to look at the hallway as a whole. If any area looks too sparse, add a small sapling or extra branch with the dark green paint. -
Remove the tape:
Carefully peel off the painter’s tape while the paint is still slightly tacky to prevent peeling the dry film. Pull the tape away from the painted edge at a 45-degree angle. -
Touch up edges:
If any green paint bled onto the white trim, wait for it to dry, then do a quick touch-up with your white trim paint and a small detail brush.
Now you have a serene, custom mural that adds depth to your hallway without overwhelming the space

PENCIL GUIDE
Understanding Pencil Grades from H to B
From first sketch to finished drawing — learn pencil grades, line control, and shading techniques.
Explore the Full Guide
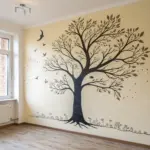
One Giant Tree as a Statement
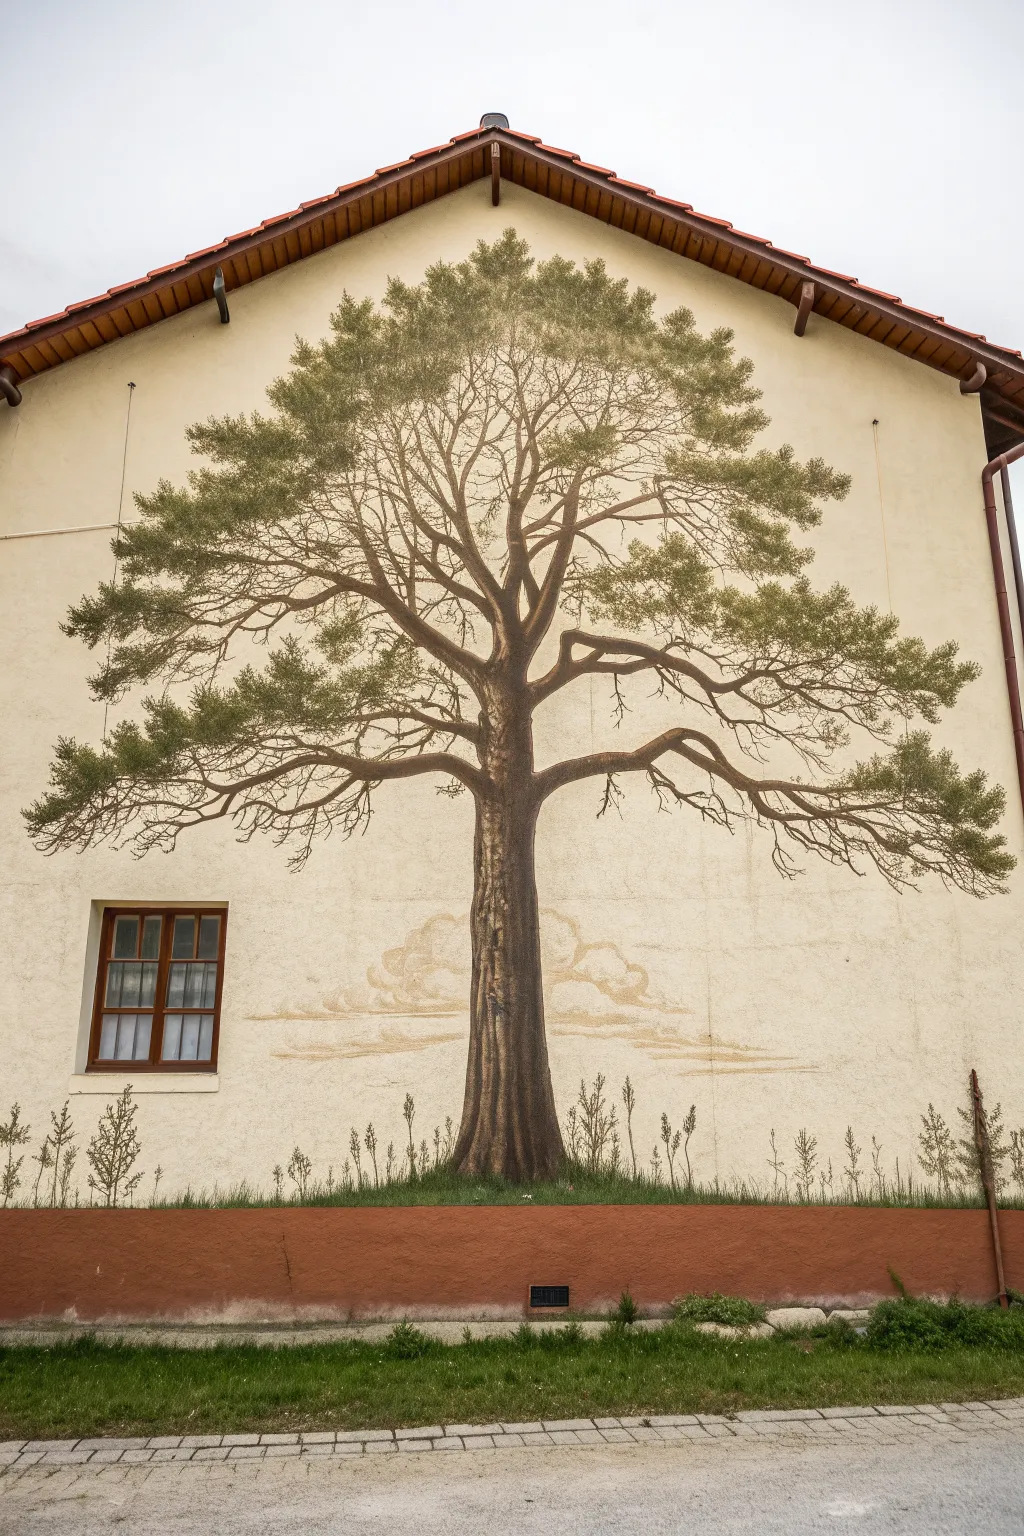
Transform a plain exterior gable wall into a stunning focal point with this large-scale mural of a majestic pine tree. This project uses a blend of structured sketching and freehand painting techniques to create a realistic, slightly weathered look that integrates beautifully with outdoor stucco.
How-To Guide
Materials
- Exterior masonry primer
- High-quality exterior house paint (cream/beige for background)
- Exterior acrylic mural paints (dark brown, medium brown, grey-brown, olive green, sap green, muted yellow)
- Digital projector (essential for scale)
- Scaffolding or sturdy ladder
- Chalk or pastel crayons (light brown)
- Assorted paintbrushes (large angle sash brushes, small round detail brushes)
- Sea sponge or stippling brush
- Extension pole
Step 1: Preparation and Background
-
Assess and clean the surface:
Before painting, ensure the stucco or wall surface is clean and free of loose debris. Pressure wash gently if necessary and let it dry completely. If the existing paint is old or flaking, apply a coat of high-quality masonry primer to ensure your artwork lasts. -
Refresh the base coat:
For the best contrast, roll on a fresh coat of warm cream or beige exterior paint across the entire mural area. This provides a uniform canvas and helps the tree colors pop without being too harsh. -
Project the outline:
Wait for twilight or evening. Set up your digital projector on stable ground to cast the image of the tree onto the wall. Adjust the distance until the tree crown fills the upper triangular space perfectly. -
Trace the guides:
Using chalk or a light brown pastel crayon, trace the main trunk lines and the major primary branches. Don’t worry about every single twig or needle cluster yet; just get the skeleton of the tree accurate.
Natural Texture Hack
Don’t fight the wall’s texture! If the stucco is bumpy, allow the brush to skip over the pits. This ‘broken’ line naturally mimics the roughness of pine bark without extra effort.
Step 2: Painting the Trunk and Branches
-
Block in the trunk:
Mix a dark, cool brown. Using a medium-sized angle brush, fill in the main trunk shape you traced. Keep the edges slightly rough to mimic bark texture, rather than perfectly smooth lines. -
Establish the main branches:
Extend the dark brown paint out into the primary limbs. Notice how pine branches often dip down before curving back up; capturing this gesture is crucial for realism. -
Add bark dimension:
Once the dark base is dry, mix a lighter grey-brown shade. Using a smaller brush or a dry-brushing technique, streak this color vertically up the trunk. This highlights the ridges of the bark and gives the tree a cylindrical volume. -
Paint secondary branches:
Switch to a smaller round brush and your dark brown paint. Create the finer network of branches that fan out from the main limbs. Use a thinning medium if needed to help the paint flow over the textured stucco. -
Create depth with shadow:
I like to go back in with a very dark, nearly black-brown to deepen the crevices where branches meet the trunk or cross over each other. This small step adds massive structural weight to the image.
Wobbly Lines?
If your branches look shaky, don’t worry. Tree limbs are organic and imperfect. Step back 10 feet; you’ll likely find those ‘mistakes’ actually add character and realism.
Step 3: Foliage and Atmosphere
-
Mix your greens:
Prepare two shades of green: a deep olive for the shadow areas of the needles and a lighter sap green for the sunlit tips. Avoid neon greens; sticking to earthy tones looks much more natural outdoors. -
Stipple the base foliage:
Using an old, splayed bristle brush or a natural sea sponge, dip into the dark olive green. Lightly dab and stipple the paint onto the ends of the branches. Keep the clusters airy and separated to allow the sky color to show through. -
Layer the highlights:
While the dark green is still slightly tacky, lightly stipple the lighter sap green over the top portions of the needle clusters. This simulates sunlight hitting the canopy. -
Add atmospheric clouds:
Mix a watery glaze of muted yellow-ochre and white. Near the lower third of the tree, use a large soft brush to scumble in faint, billowy cloud shapes behind the trunk. Keep this very subtle and transparent so it looks like distant haze.
Step 4: Grounding and Details
-
Paint the base vegetation:
At the very bottom where the wall meets the trim, paint a darker green undulating line to represent a grassy hill. This anchors the giant tree so it doesn’t look like it’s floating. -
Add vertical grasses:
Using a liner brush or a long-bristled script brush, flick upward strokes from the green base using varied earth tones (browns and greens) to create tall, wild grasses and weeds. -
Detail the grass tips:
Dot the tops of some grass stalks with small dabs of light brown or beige to suggest seed heads or flowers. This adds a nice textural contrast to the heavy trunk. -
Final stepping back:
Climb down and view the mural from the street. If any branch looks too thin or disconnected, thicken the connection point. Ensure the foliage feels balanced on both sides of the gable. -
Seal the work (optional):
If you live in a harsh climate, apply a clear, matte exterior masonry sealer over the painted areas once fully cured to protect the pigments from UV fading and weather damage.
Now step back and admire how your new landmark brings a touch of wild nature to the neighborhood.
Negative-Space Forest Using the Wall Color
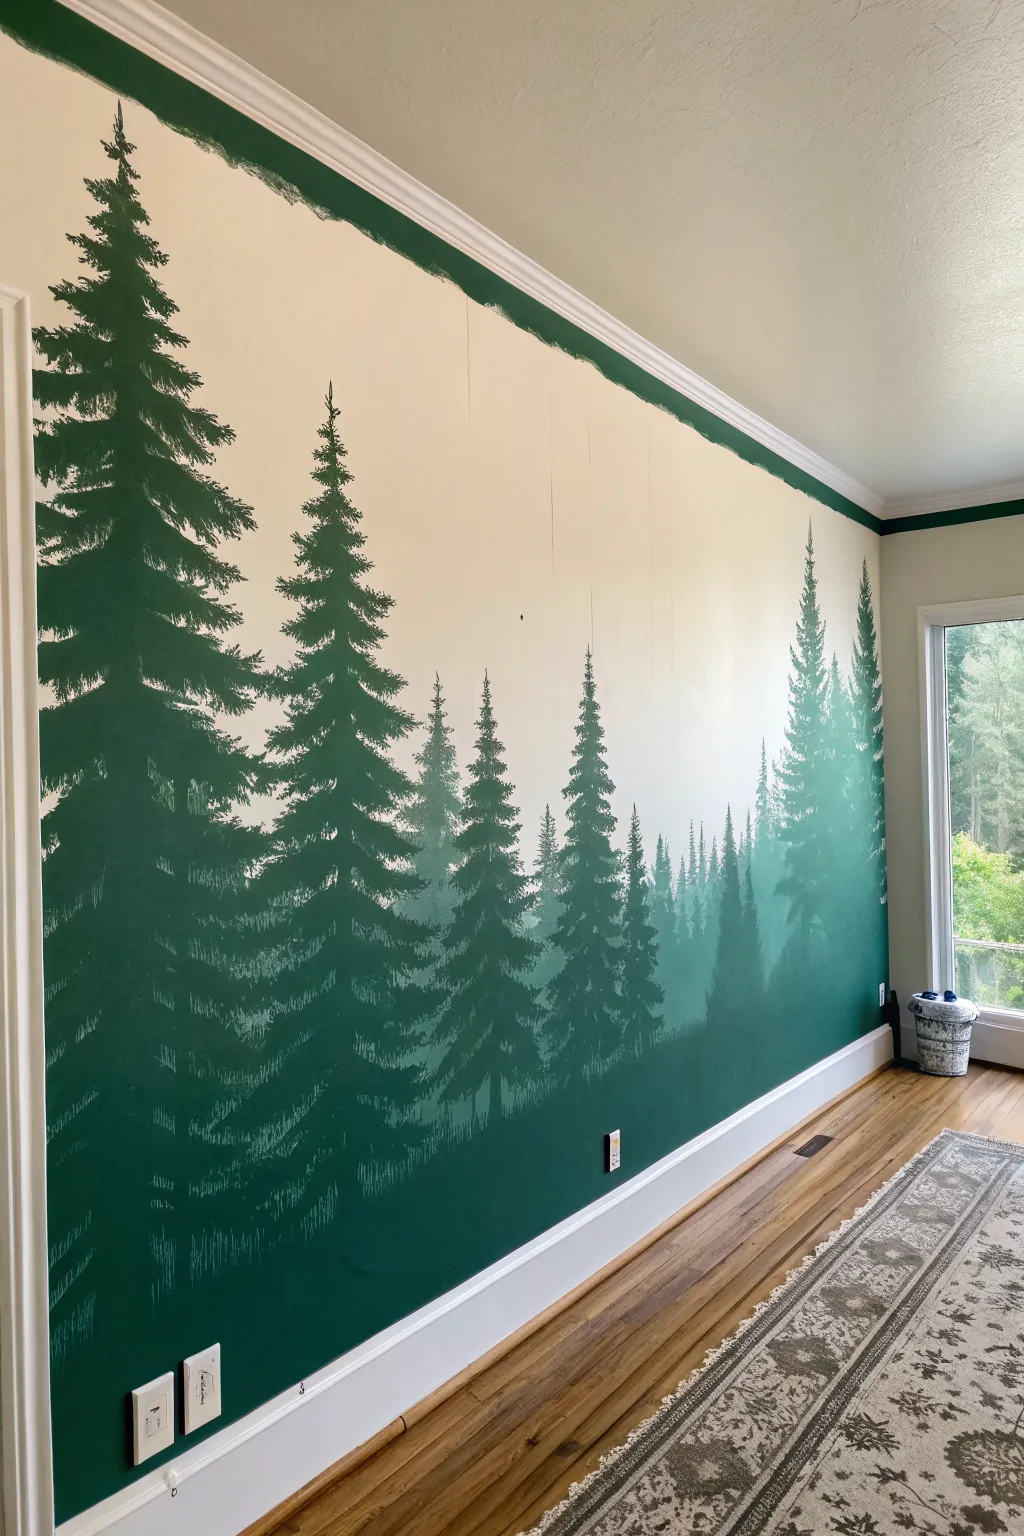
Transform a plain wall into a misty woodland retreat using a simple layering technique and shades of green. This project balances bold, dark foreground trees with soft, faded background pines to create stunning mood and depth.
Step-by-Step
Materials
- Interior latex paint (base wall color, e.g., cream/beige)
- Interior latex paint (dark forest green)
- White paint (for mixing tints)
- Angled sash brush (2-inch)
- Square flat artist brush (1-inch or similar)
- Small round tip detail brush
- Paint tray and liners
- Mixing cups or separate trays
- Painter’s tape
- Pencil
- Step ladder
- Drop cloth
Step 1: Preparation & Mapping
-
Prep the workspace:
Clear furniture away from the wall and lay down your drop cloth to protect the floor. If your base wall color isn’t already the creamy beige you want for the sky, apply that first and let it cure for at least 24 hours. -
Tape boundaries:
Apply painter’s tape to the baseboards, adjoining walls, and ceiling line to ensure crisp edges. If you have outlets, remove the covers and tape over the sockets. -
Frame the top edge:
Using your dark green paint, cut in a thick, uneven border along the top edge of the wall where the ceiling meets. This creates a defined frame that adds a stylized, artistic touch to the mural. -
Sketch the treeline:
Lightly sketch vertical lines with a pencil to mark where your largest foreground trees will stand. Vary their height and spacing so they don’t look like a picket fence; nature is random.
Step 2: Painting the Foreground
-
Establish the trunks:
Dip your angled brush into the darkest, unmixed green paint. Paint the central trunks of your foreground trees first, following your pencil guides from the baseboard upward. -
Create the branches:
Switch to a smaller flat brush. Starting at the top of a trunk, paint downward-sloping branches using quick, horizontal dabbing motions. Press harder near the trunk and lift off as you move outward to taper the needles. -
Fill the bottom:
As you move down the tree, make the branches wider and denser. Near the bottom third of the wall, allow the branches of neighboring trees to overlap completely, creating a solid wall of dark green at the base. -
Add texture:
While the paint is wet, use a dry, stiff brush to feather the edges of the branches slightly. This ‘dry brush’ technique mimics the look of individual pine needles. -
Let it dry:
Allow this dark foreground layer to dry completely (about 2-4 hours) before starting the next layer. This prevents the colors from muddying together.
Fixing “Blobby” Branches
If branches look too heavy, wait for the green to dry. Then, use a small brush with the wall color to paint ‘negative space’ back into the tree, defining the gaps between boughs.
Step 3: Layering Depth
-
Mix the mid-tone:
Pour some dark green into a mixing cup and add a small amount of white paint (or your wall color). Mix thoroughly until you have a shade that looks like a hazy version of your original green. -
Paint mid-ground trees:
Paint new trees in the gaps between your dark foreground trees. Make these slightly shorter and less detailed. The lighter color pushes them visually into the distance. -
Mix the ghost tone:
Create a third shade that is very pale—mostly white or wall color with just a hint of green. This will be for the furthest trees. -
Add distant pines:
Using the ‘ghost tone,’ paint smaller, narrower trees in the remaining background spaces. These should look faint, almost like shadows or fog. -
Blur the bases:
I find it helpful to not bring these ghost trees all the way to the floor. Instead, fade them out as they disappear behind the darker foreground trees.
Create a Misty Effect
For a foggier look, water down your lightest paint mix slightly (1 part water to 4 parts paint). This creates a translucent glaze that lets the wall texture show through.
Step 4: Final Details
-
Refine needle details:
Use your smallest detail brush with the dark green paint to add tiny, stray sprigs or defined tips to the tops of the main trees. -
Clean up splatters:
Check for any accidental drips on your ‘sky’ area. Wipe them immediately with a damp rag or touch them up with the base wall paint once dry. -
Remove tape:
Carefully peel off the painter’s tape while the paint is still slightly tacky to avoid pulling up any dried chips. -
Reinstall covers:
Once the wall is fully dry, screw your outlet covers back on.
Step back and enjoy the serene atmosphere of your new indoor forest


Have a question or want to share your own experience? I'd love to hear from you in the comments below!