When a mom and son paint together, it’s not just about the finished piece—it’s about the little moments that happen between brushstrokes. Here are my favorite mom and son painting ideas that capture that bond, from super simple keepsakes to artsy, wow-factor projects.
Handprint Heart Keepsake
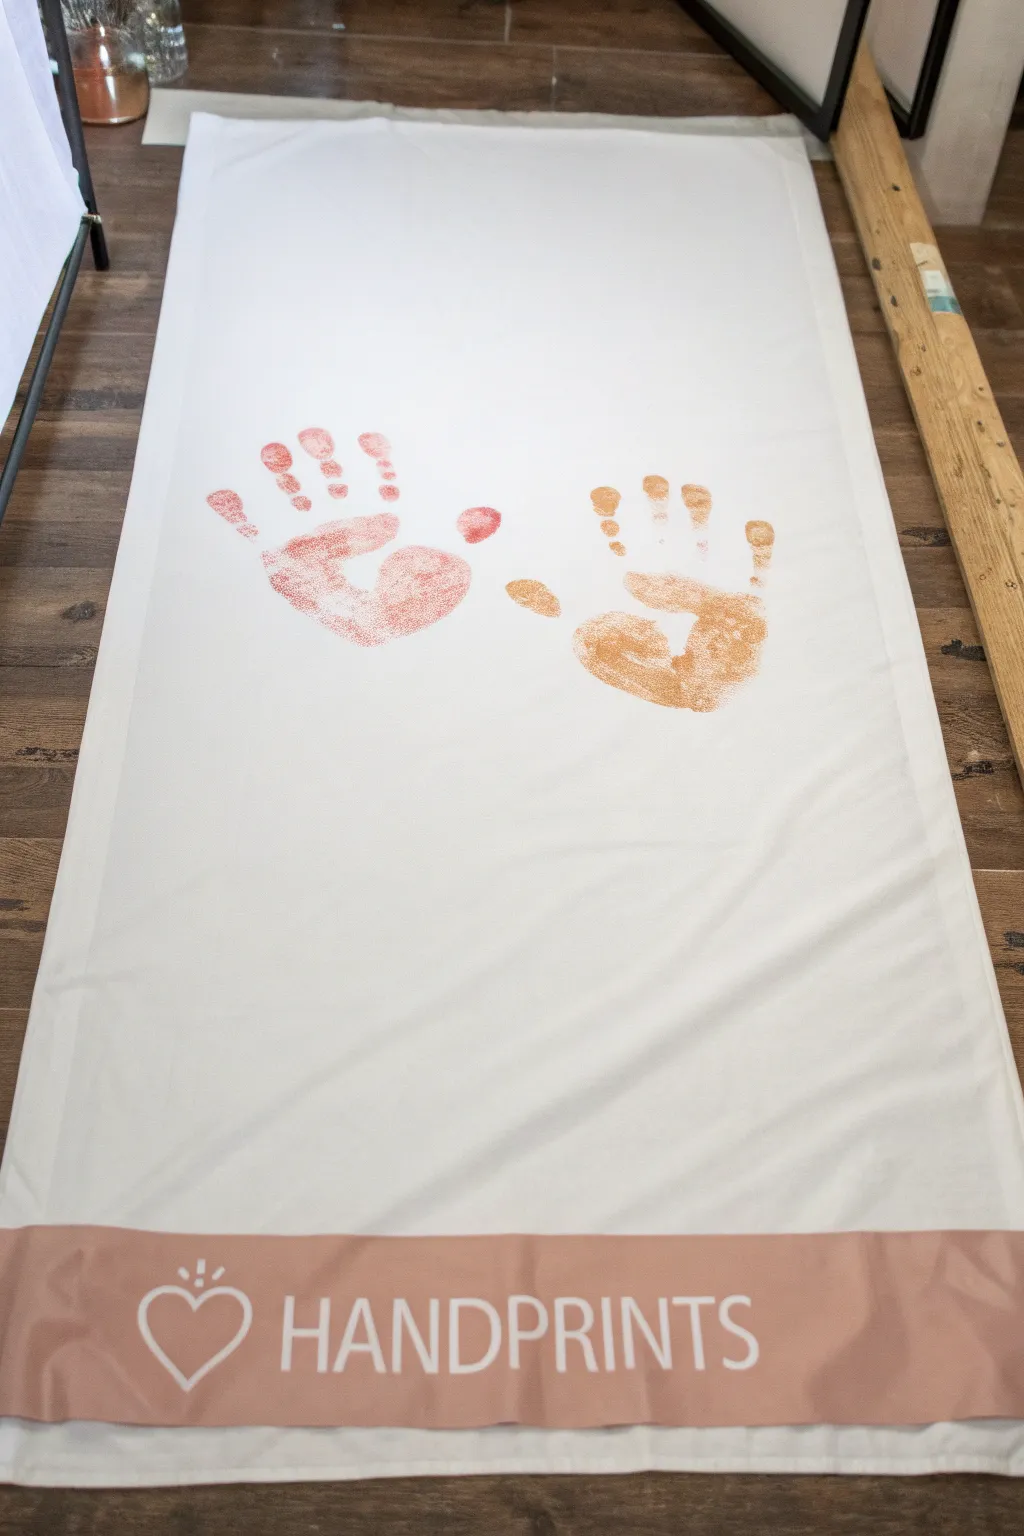
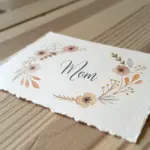
Preserve a sweet moment in time with this elegant table runner featuring the handprints of mother and son. The minimalist design combines a clean white background with warm, dusty rose accents for a keepsake that fits beautifully into modern décor.
Step-by-Step Tutorial
Materials
- White cotton or linen table runner (approx. 14×72 inches)
- Fabric paint (soft red/pink and gold/orange)
- Fabric paint (dusty rose/mauve for the border)
- White fabric paint or paint pen (for lettering)
- Wide foam brush or sponge applicator
- Painter’s tape or masking tape
- Stencil depicting a heart and the word ‘HANDPRINTS’ (can use a Cricut or pre-made stencil)
- Drop cloth or plastic sheet
- Paper plate or palette
- Iron (for heat setting)
Step 1: Preparation and Base
-
Prepare your workspace:
Lay out a plastic sheet or drop cloth on a flat surface like a large table or the clean floor shown here. -
Smooth the fabric:
Iron the white table runner thoroughly to remove any creases or fold lines, ensuring a perfectly flat surface for printing. -
Position the runner:
Lay the runner flat on your prepared surface, taping down the corners lightly if needed to prevent shifting. -
Tape the border area:
Measure about 4-6 inches up from the bottom edge of the runner and apply a strip of painter’s tape straight across the width to mark off the bottom border. -
Seal the tape edge:
Press down firmly along the edge of the tape nearest the bottom to prevent paint from bleeding underneath.
Patchy Prints?
If a handprint looks too faint or missing spots, use a small detail brush with the same paint color to carefully fill in the gaps while creating the look of skin texture.
Step 2: Creating the Handprints
-
Prepare the handprint colors:
Squeeze a generous amount of the red/pink paint and the gold/orange paint onto your paper plate. -
Test placement:
Before painting, hold your hands hovering over the center of the runner to visualize spacing; you want them side-by-side but slightly angled away from each other. -
Coat the first hand:
Using a foam brush, apply an even coat of the reddish-pink paint to the mother’s hand (or whichever hand goes on the left). -
Print the first hand:
Press the painted hand firmly onto the left-center of the fabric, ensuring the palm and all fingers are pressed down before lifting straight up. -
Coat the second hand:
Clean the foam brush or grab a new one, then coat the son’s hand with the orange-gold paint. -
Print the second hand:
Press the second hand onto the fabric to the right of the first print, angling it slightly so the thumbs are indistinguishable or splayed, mirroring the first print. -
Let the prints dry:
Allow the handprints to dry completely to the touch before moving on to the border work to avoid smudging.
Step 3: Border and Lettering
-
Paint the bottom border:
Using the dusty rose fabric paint and a wide brush or sponge, fill in the rectangular area below your tape line heavily and evenly. -
Remove tape:
While the paint is still slightly tacky (but not wet enough to drip), carefully peel back the painter’s tape to reveal a crisp line. -
Allow thorough drying:
I usually let this bottom block dry for several hours or overnight, as it is a thick layer of paint. -
Position the stencil:
Place your ‘HANDPRINTS’ text and heart icon stencil centrally over the dried dusty rose border. -
Stipple the white text:
Using a small sponge dauber and white fabric paint, gently stipple over the stencil openings. Use an up-and-down motion to prevent bleed. -
Reveal the text:
Carefully lift the stencil straight up to reveal the white ‘HANDPRINTS’ graphic against the rose background. -
Heat set the paint:
Once everything is fully cured (check your paint bottle instructions, usually 24-72 hours), iron the backside of the runner to heat-set the design for permanence.
Make it a Duo
Add the current year in small text under the heart icon, or create a matching runner for the other end of the table with footprints instead of handprints.
Display your beautiful runner on a dining table or hang it vertically as a wall banner to celebrate this special bond
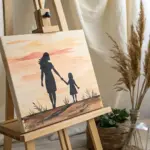

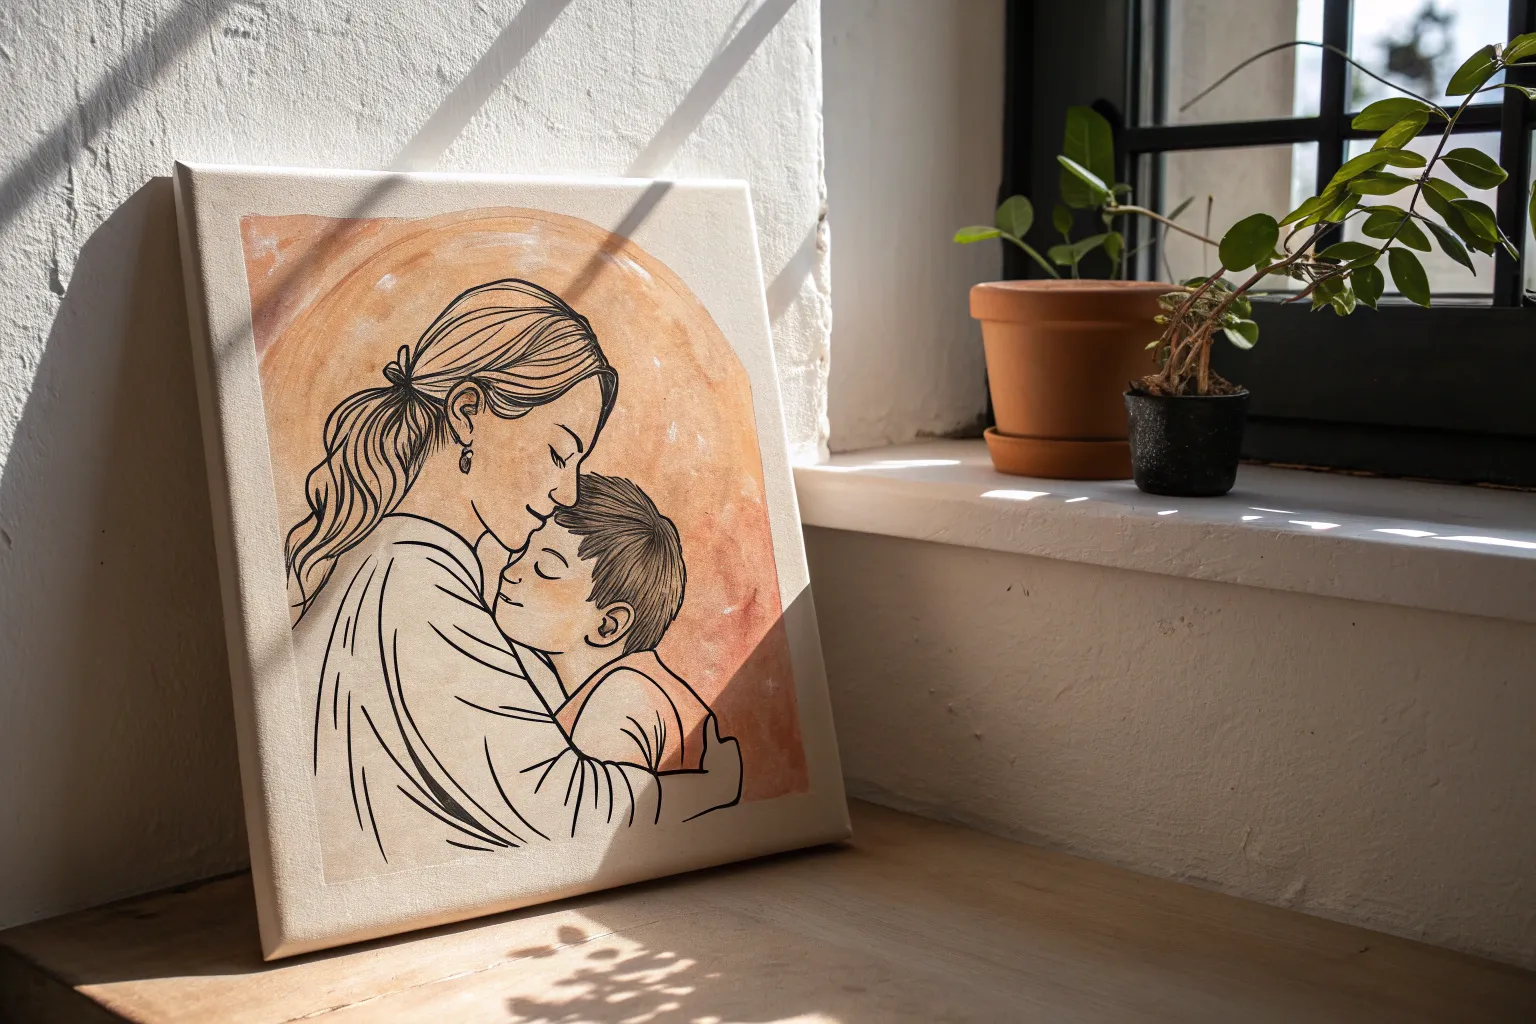
Simple Mom and Son Silhouette
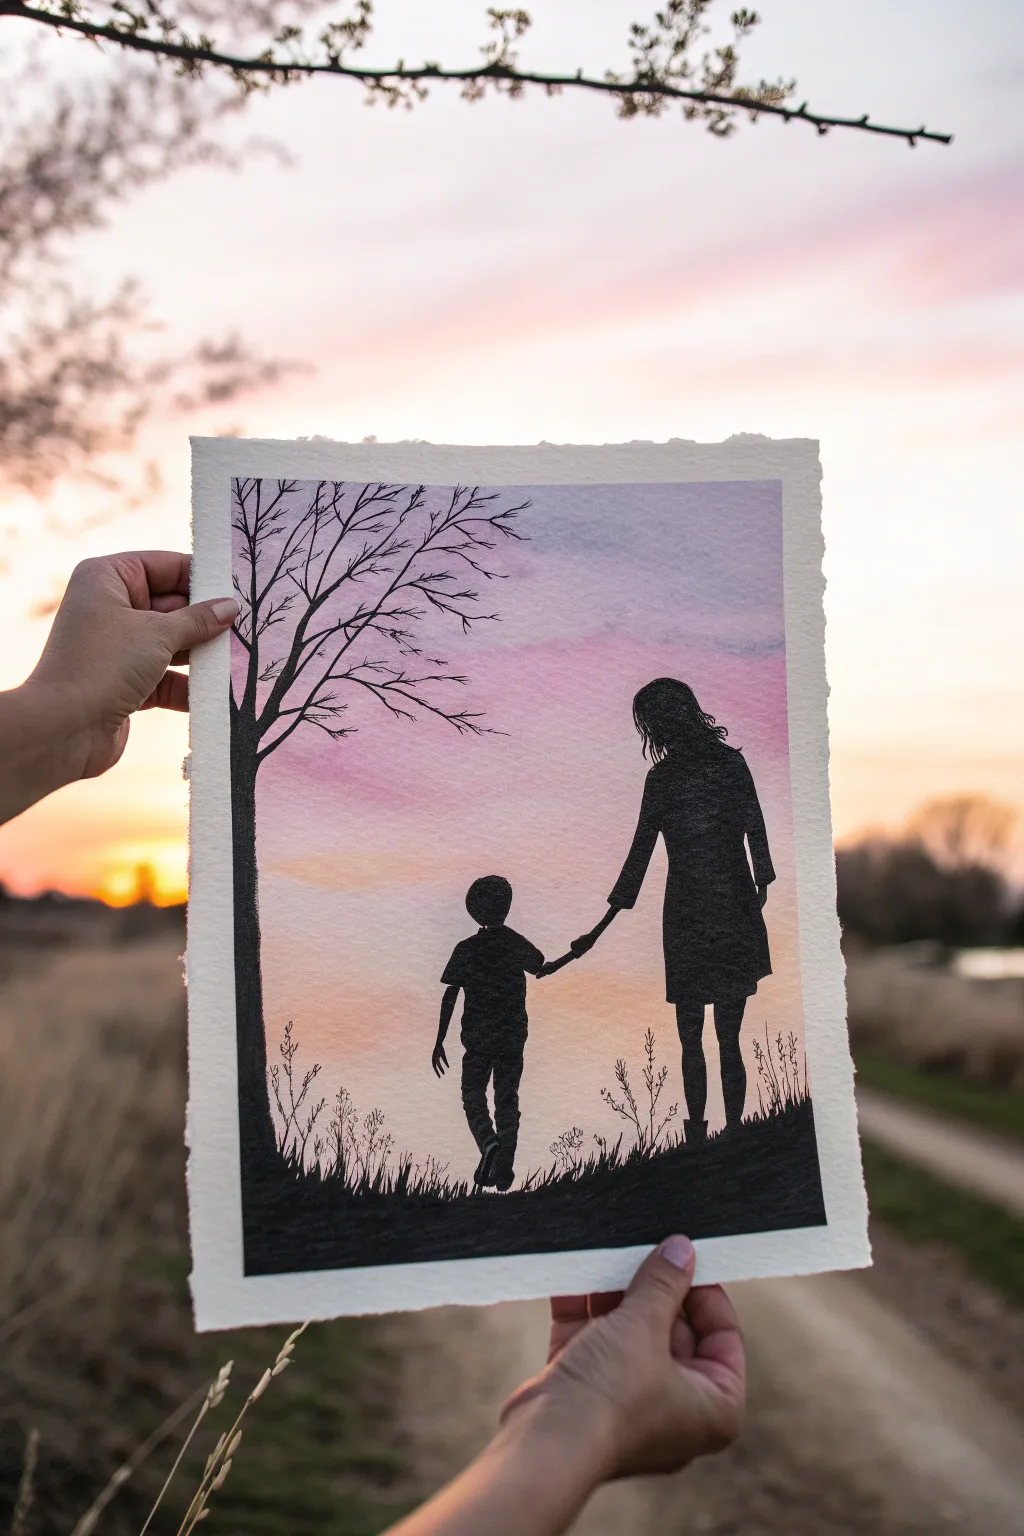
Capture the tender bond between mother and son with this striking high-contrast silhouette painting. Using a glowing watercolor wash for the sky and bold black ink for the figures, you’ll create a heartwarming scene that pops against the soft sunset background.
Step-by-Step Guide
Materials
- Cold press watercolor paper (300 gsm)
- Watercolor paints (Pink, Purple, Orange, Yellow)
- Black gouache or black India ink
- Large flat wash brush
- Round watercolor brush (size 6 or 8)
- Fine liner brush (size 0 or 00)
- Masking tape
- Pencil and eraser
- Paper towel
- Water jar
Step 1: Painting the Sky
-
Prepare the paper:
Tape down all four edges of your watercolor paper to a board. This creates that crisp white border seen in the photo and prevents the paper from buckling when wet. -
Pre-wet the surface:
Using your large flat brush, apply a clean coat of water across the entire paper surface. You want it shiny and damp, but not dripping with puddles. -
Apply the top gradient:
Load your brush with a soft purple or lavender. Start at the very top edge and paint horizontal strokes, letting the color naturally diffuse downward into the damp paper. -
Blend in pinks:
While the purple is still wet, introduce a rose pink just below it. Overlap the stroke slightly with the purple to encourage a smooth, soft transition between the cool and warm tones. -
Add warmth near the horizon:
As you move toward the bottom third of the paper, switch to a warm orange and finally a soft yellow near the imaginary horizon line. Keep your strokes loose and horizontal. -
Create soft clouds:
While the wash is still wet, you can lift out a few faint cloud shapes using a clean, thirsty brush, or dab in a slightly more concentrated purple streak for cloud texture. -
Refine the gradient:
I usually tilt the board slightly to help gravity blend the bands of color together seamlessly. If any hard lines form, soften them with a damp brush immediately. -
Dry completely:
Allow the background to dry fully. This is crucial; if the paper is damp, your black silhouettes will bleed and ruin the crisp edges. Use a hairdryer on low heat if you’re impatient.
Step 2: Drawing the Base
-
Sketch the horizon:
Lightly pencil in a slightly uneven ground line across the bottom. Don’t make it perfectly straight; a little slope adds realism. -
Outline the figures:
Sketch the outline of the mother and son holding hands. Focus on the shape of their clothes and posture—the mother in a dress or coat, the boy in shorts and t-shirt. Keep the pencil lines very faint. -
Position the tree:
On the left side, sketch the trunk of a tree rising up and disappearing off the top edge. Draw the main branches arching toward the center of the sky.
Uneven Coverage?
If your black silhouette looks patchy or gray after drying, don’t worry. Just wait for it to dry completely and apply a second coat of ink or gouache for a true, deep black finish.
Step 3: Painting the Silhouettes
-
Fill the ground:
Switch to black gouache or ink for maximum opacity. Using the round brush, paint the solid black ground along the bottom, carefully following your penciled hill line. -
Paint the figures:
Fill in the mother and son figures. Use the point of your brush to carefully define the edges of their heads and limbs. Ensure the black is solid and opaque; act quickly so it dries evenly. -
Detail the connection:
Pay special attention to where their hands meet. This is the focal point of the emotion, so use a smaller brush if needed to keep the connection clear and delicate. -
Paint the tree trunk:
Paint the main trunk on the left. Make the base slightly wider where it meets the ground and taper it as it goes up. -
Add main branches:
Extend the branches outward. Trees are organic, so let your hand wobble slightly to create natural-looking, knobby wood textures rather than straight lines. -
Add fine twigs:
Switch to your fine liner brush. Add thin detailed twigs coming off the main branches. Vary the pressure to make the lines taper off into nothing at the ends. -
Create grass texture:
Using the liner brush with slightly drier paint, flick quick, upward strokes along the ground line to create grass blades and weeds peaking up into the sunset. -
Final touches:
Add a few taller, distinct weed stalks or flowers in the foreground for depth. Once everything is 100% dry, peel off the tape slowly at a 45-degree angle.
Pro Tip: Perspective
Make the grass blades near the figures smaller and the ones at the very bottom edge of the paper larger and looser. This simple trick creates instant depth and makes the view feel closer.
Frame your silhouette against a window to see how beautiful the light looks passing through the sky colors

Back View Walking Together
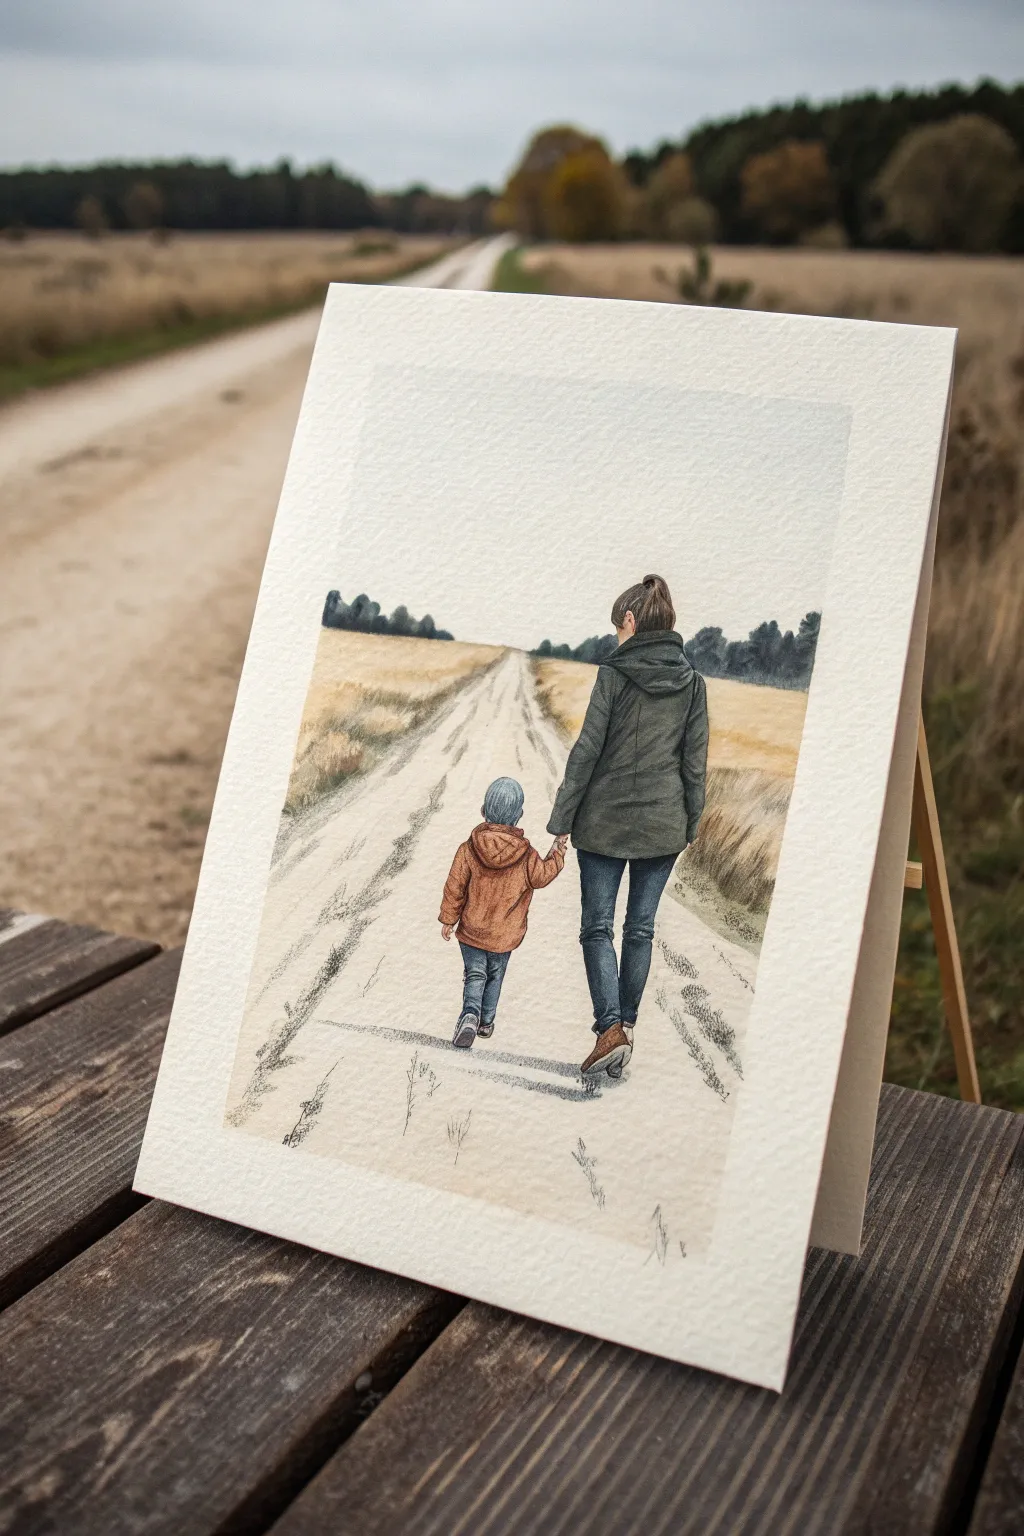
This tender watercolor illustration captures a quiet moment of connection between mother and son as they walk hand-in-hand down a country lane. The soft, earthy palette and textured paper create a nostalgic, timeless feel perfect for a heartfelt gift or keepsake.
Step-by-Step
Materials
- Cold press watercolor paper (300 gsm recommended for texture)
- Watercolor paints (Payne’s Grey, Burnt Sienna, Yellow Ochre, Ultramarine Blue, Sap Green)
- Pencils (HB for sketching, 2B/4B for shading details)
- Fine liner pens (sepia or dark grey, 0.1mm and 0.3mm)
- Round watercolor brushes (mixed sizes: 2, 4, and 8)
- Flat wash brush (1/2 inch)
- Masking tape
- Paper towels
- Jar of water
Step 1: Setting the Scene
-
Prepare the paper:
Tape your watercolor paper down to a board using masking tape on all four sides. This prevents the paper from buckling when wet and creates that crisp, clean white border seen in the final piece. -
Lightly sketch the composition:
Using an HB pencil, sketch the horizon line about two-thirds of the way up the page. Draw the converging lines of the dirt road leading to a vanishing point near the center. -
Add the figures:
Sketch the outlines of the mother and child in the foreground. Focus on their relative heights and the connection of their hands. Keep the pencil pressure extremely light so lines won’t show through the transparent paint later. -
Define the background:
Loosely sketch a line of trees along the horizon. Don’t worry about individual leaves; just capture the organic, uneven shape of the tree line against the sky.
Dry Brushing Magic
For the dirt road texture, load your brush with pigment and then dab it on a towel until almost dry before dragging it across the paper. This catches only the ‘peaks’ of the paper grain.
Step 2: Layering the Landscape
-
Paint the sky:
Wet the sky area with clean water first. Drop in a very faint wash of diluted Ultramarine Blue or Payne’s Grey, keeping it palest near the horizon to suggest distance. Let this dry completely. -
Create the fields:
Mix a wash of Yellow Ochre with a touch of Burnt Sienna. Apply this to the fields on either side of the road using your flat brush, leaving the road area mostly white for now. -
Paint the distant trees:
Mix Sap Green with a little Payne’s Grey to get a muted, shadowy green. Paint the tree line along the horizon while the field wash is dry, allowing the edges to be slightly rough for a natural look. -
Wash the road:
For the dirt path, use a extremely diluted mix of the field color (Yellow Ochre) and perhaps a cooling touch of violet or grey for shadows. Apply broad strokes following the direction of the road.
Step 3: Painting the Figures
-
Base layer for clothing:
Paint the mother’s jacket with a blend of Payne’s Grey and Green. For her jeans, use a classic denim mix of Ultramarine and a touch of black. Paint the boy’s jacket with a warm Burnt Sienna or terracotta hue. -
Adding shadows to clothes:
Once the base layers are damp (not soaking), drop in concentrated pigment into the folds of the jackets and jeans—specifically under the arms, at the knees, and where the fabric creases. -
Hair and skin details:
Paint the hair using Burnt Umber or a dark brown mix. Leave tiny slivers of white paper to represent light catching the strands. Paint the visible hands with a very diluted mix of Sienna and Ochre. -
Painting the shoes:
Use a darker brown for the boots and shoes. Pay attention to the angle of the feet to simulate the walking motion.
Muddy Colors?
If your colors look dull or brown, you may be over-mixing on the paper while wet. Let layers dry completely between applications, especially when placing figures over such a light background.
Step 4: Refining and detailing
-
Texture the road:
Using a dry brush technique with a grey-brown mix, lightly drag your brush over the road area. The textured cold-press paper will catch the pigment, creating the look of dirt and gravel tracks. -
Add grassy textures:
With a small round brush (size 2), flick upward strokes of darker ochre and green along the edges of the road to suggest tall dry grass pushing in from the fields. -
Enhance figure outlines:
Once everything is fully dry, take your fine liner pen or a sharpened pencil. delicately outline significant edges of the clothing to separate the figures from the background, but keep the line broken in places for softness. -
Cast shadows:
Mix a transparent purple-grey wash. Paint shadows stretching from the feet diagonally across the road to ground the figures and show the direction of the light. -
Final pencil details:
I find that adding a light graphite shading over the darkest folds of the jeans gives a lovely mixed-media texture. Scribble lightly to deepen those shadows. -
Grass foreground details:
Use your finest pen or brush to add a few distinct weeds or grass blades in the immediate foreground at the bottom of the paper to create depth. -
Clean up:
Wait until the painting is bone dry. Gently peel away the masking tape at a 45-degree angle to reveal your crisp white border.
Frame this gentle scene in a simple wood frame to complement the earthy tones and natural subject matter.


Bedtime Story Scene
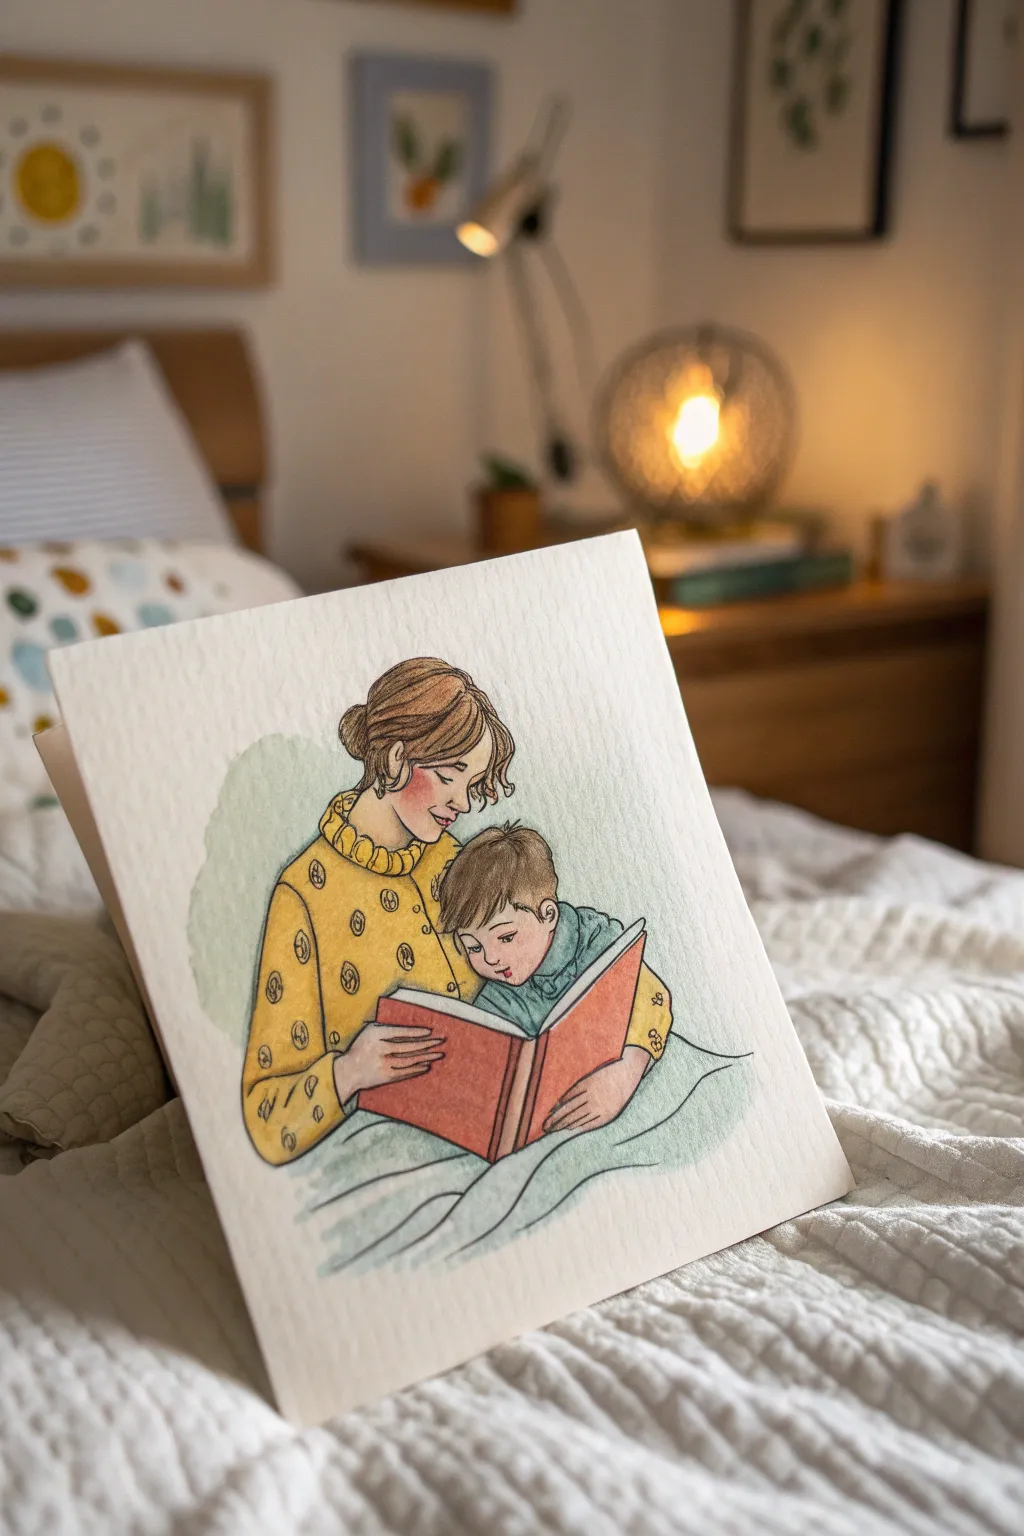
Capture the tender moment of a mother and son reading together with this charming ink and watercolor illustration. The style relies on clean line work filled with soft, warm washes of color to create a peaceful bedtime atmosphere.
Step-by-Step Guide
Materials
- Cold press watercolor block (approx. 8×8 inches)
- Pencil and kneaded eraser
- Waterproof fine liner pens (0.1mm and 0.3mm, black or sepia)
- Watercolor paints (Yellow Ochre, Burnt Sienna, Payne’s Grey, Alizarin Crimson, Sap Green)
- Round watercolor brushes (Size 4 and Size 0 or 00 for details)
- Two water jars
- Paper towel
Step 1: Planning the Composition
-
Establish the shapes:
Begin by lightly sketching the two main figures. Think of the mother’s torso as a gentle triangle shape and the boy’s head leaning comfortably into her chest. Don’t press hard with your pencil; you want these lines to be barely visible later. -
Refine the faces:
Sketch the profiles carefully. The mother looks down with soft eyes, while the boy’s gaze is directed at the book. Keep their features simple—just a hint of a nose and a small smile is often enough to convey emotion. -
Add hair and clothing details:
Draw the mother’s loose bun and the boy’s soft fringe. Sketch the high collar of the mother’s sweater and the open book they are holding. I like to add a few curved lines around the boy’s waist to suggest a blanket or sheet covering them.
Step 2: Inking the Lines
-
Outline the figures:
Using your 0.3mm waterproof pen, carefully trace over your pencil lines. Focus on the main contours first—the sweep of the shoulders and the outer edges of the book. -
Detail the hair:
Switch to a finer 0.1mm pen for the hair. Use sweeping, confident strokes to create the texture of hair strands, following the curve of the head rather than drawing straight lines. -
Pattern the sweater:
Draw the pattern on the mother’s yellow shirt. Create small, oval-like motifs with loose, scribbly lines to give the fabric a cozy, hand-drawn textile feel. -
Erase pencil marks:
Wait at least five to ten minutes to ensure the ink is totally dry. Once safe, gently run your kneaded eraser over the entire drawing to lift the graphite, leaving only your crisp ink lines.
Pro Tip: Loose Lines
Don’t connect every single ink line perfectly. Leaving small gaps in the outlines allows the drawing to breathe and look less stiff.
Step 3: Adding the Color
-
Paint skin tones:
Mix a very watery wash of Burnt Sienna with a tiny touch of Yellow Ochre. Apply this pale mix to the faces and hands. While still wet, drop a tiny dot of diluted Alizarin Crimson onto the cheeks for a natural blush. -
Color the hair:
Paint the mother’s hair with a light wash of brown. Once that layer is damp but not soaking, add darker brown strokes near the roots and base of the bun to create volume. -
Fill the mother’s sweater:
Load your size 4 brush with a warm Yellow Ochre. Paint the sweater carefully, working around the patterned ink marks you made earlier so the color remains vibrant. -
Paint the book cover:
Use a reddish-brown or muted terracotta for the book cover. Keep the edges neat against the figures’ hands. -
Wash the bedding:
Mix a very pale, watery Payne’s Grey or light blue-green. Apply this loosely over the bedding area, letting the color fade out into the white paper at the bottom to create a vignette effect. -
Add the background wash:
Create a very dilute, pale green wash. Paint a soft, irregular shape behind the mother’s back to ground the figures, but leave the rest of the paper white for a clean look.
Level Up: Greeting Card
Scan your finished painting and print it on folded textured cardstock to make personalized Mother’s Day cards for friends and family.
Step 4: Final Shadows & Details
-
Deepen the shadows:
Once your first layers are bone dry, mix a slightly darker version of your skin tone (add a touch of blue or purple to the mix). Paint small shadows under the chin, under the hair, and where the hands hold the book. -
Enhance text and texture:
Use the fine 0.1mm pen to add tiny ‘text’ lines on the book pages. You can also add a few extra hatching lines in the deepest folds of the fabric for more dimension. -
Final check:
Review the piece. If the boy’s shirt needs color, add a soft teal or blue wash, keeping it lighter than the mother’s sweater to maintain focus on the center.
Once the paint is fully dry, you have a heartwarming keepsake celebrating the simple joy of reading together
BRUSH GUIDE
The Right Brush for Every Stroke
From clean lines to bold texture — master brush choice, stroke control, and essential techniques.
Explore the Full Guide
Love You to the Moon
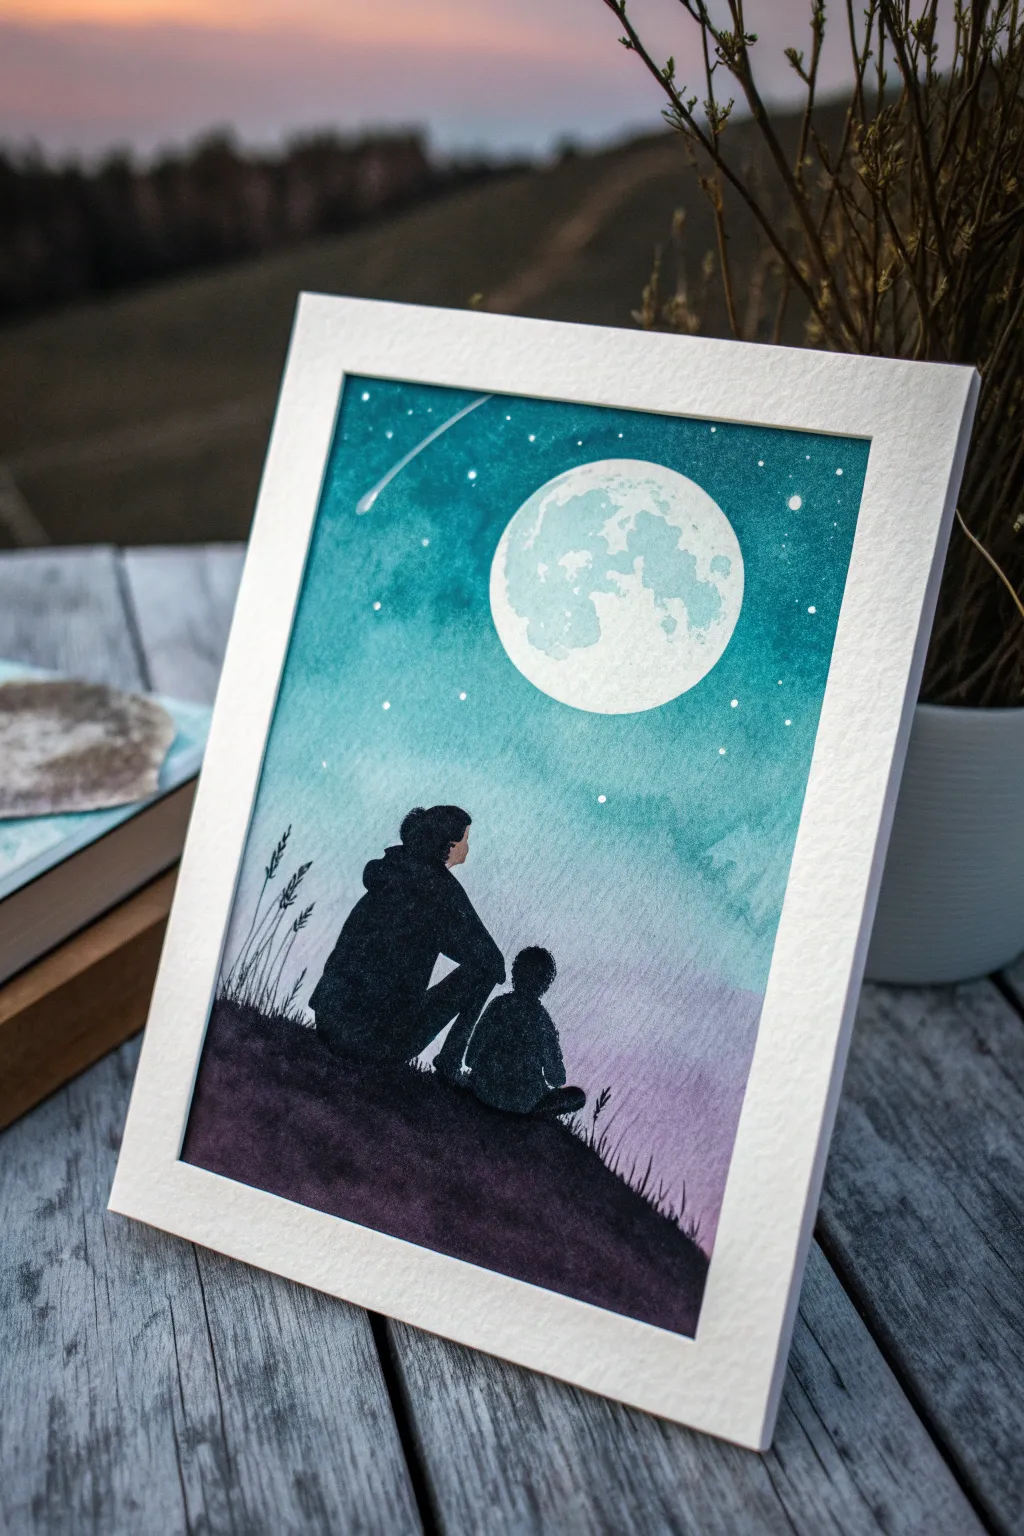
Capture the quiet bond between mother and son with this atmospheric watercolor piece featuring a luminous moon and teal night sky. The contrasting black silhouettes create a striking focal point against the soft, blended background gradients.
Step-by-Step
Materials
- Cold press watercolor paper (A4 or similar)
- Watercolor paints (teal, prussian blue, violet/purple, black)
- White gouache or white ink
- Large round brush (size 10 or 12)
- Medium round brush (size 6)
- Fine detail brush (size 0 or 1)
- Masking fluid (drawing gum) with an applicator or old brush
- Paper towels
- Washi tape or painter’s tape
- Palette
- Pencil and eraser
- Jar of clean water
Step 1: Preparation & Masking
-
Secure the paper:
Tape down all four edges of your watercolor paper to a sturdy board or table using washi tape. This creates a crisp white border and prevents the paper from buckling when wet. -
Sketch the moon:
Lightly trace a circle for the moon in the upper center of the page. You can use a jar lid or compass to get a perfect circle. -
Sketch the horizon:
Draw a gently sloping hill line near the bottom third of the paper where your silhouettes will sit. -
Apply masking fluid:
Fill the entire moon circle with masking fluid to protect the white paper. Let this dry completely before touching it with any paint; it should feel rubbery to the touch.
Step 2: Painting the Sky
-
Wet the sky area:
Dip your large brush in clean water and wet the entire sky area, stopping just at the hill line. The paper should be glistening but not forming puddles. -
Apply the teal base:
Load your brush with a watery teal or turquoise paint. Start at the top of the paper often works best, brushing down towards the middle with horizontal strokes. -
Deepen the upper sky:
While the paper is still wet, drop in concentrated Prussian blue or a darker teal at the very top corners to create a vignette effect. -
Blend the horizon color:
Clean your brush, pick up a soft violet or purple, and paint the lower sky area just above the hill line. Allow the teal and purple to merge naturally where they meet. -
Add salt textures (optional):
If you want extra texture in the sky, you can sprinkle a tiny pinch of salt into the wet paint now, but for the smooth look in the example, simply let the gradient dry undisturbed. -
Let it dry thoroughly:
Allow the background to dry completely. The paper must be bone dry before the next step to prevent bleeding.
Moon Glow Trick
To make the moon really shine, dampen the teal paint just around the outer edge of the moon circle and lift a tiny bit of color with a clean paper towel after the sky is dry.
Step 3: The Moon & Stars
-
Remove the mask:
Gently rub away the masking fluid from the moon using your finger or a rubber cement pickup tool to reveal the stark white circle. -
Texture the moon:
With a damp (not dripping) brush and very dilute pale blue-grey paint, dab irregular crater shapes onto the white moon. Leave plenty of bright white space for the glow. -
Splatter stars:
Cover your foreground hill with a scrap paper. Load a stiff brush or toothbrush with white gouache, use your thumb to flick the bristles, and spray fine white speckles across the teal sky. -
Detail brighter stars:
Use your fine detail brush and thick white gouache to manually dot a few larger, distinct stars. I like to add a single shooting star trail for a bit of magic.
Uneven Watermarks?
If your sky dries with hard ‘cauliflower’ edges, it means you added water to paint that was already half-dry. Next time, work faster and keep the sheen on the paper consistent.
Step 4: The Silhouettes
-
Outline the figures:
Lightly sketch the outline of the mother and child sitting on the hill. Focus on the shape of the clothing folds and posture rather than facial features. -
Paint the hill:
Mix a deep, saturated black (painting directly with black gouache or concentrated watercolor). Fill in the ground area first, creating a solid base. -
Fill the figures:
Carefully fill in your sketched figures with the solid black. Use the fine tip of your brush to get crisp edges on the hair and the folds of the jacket. -
Add grassy details:
Using the very tip of your detail brush, flick quick, upward strokes from the top of the hill line to create the silhouette of tall grass blades or wild wheat.
Peeling off the tape to reveal those crisp edges is the most satisfying part of this cosmic creation
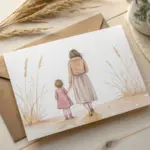
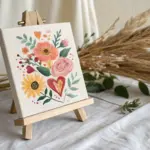
Nature Walk With Wildflowers
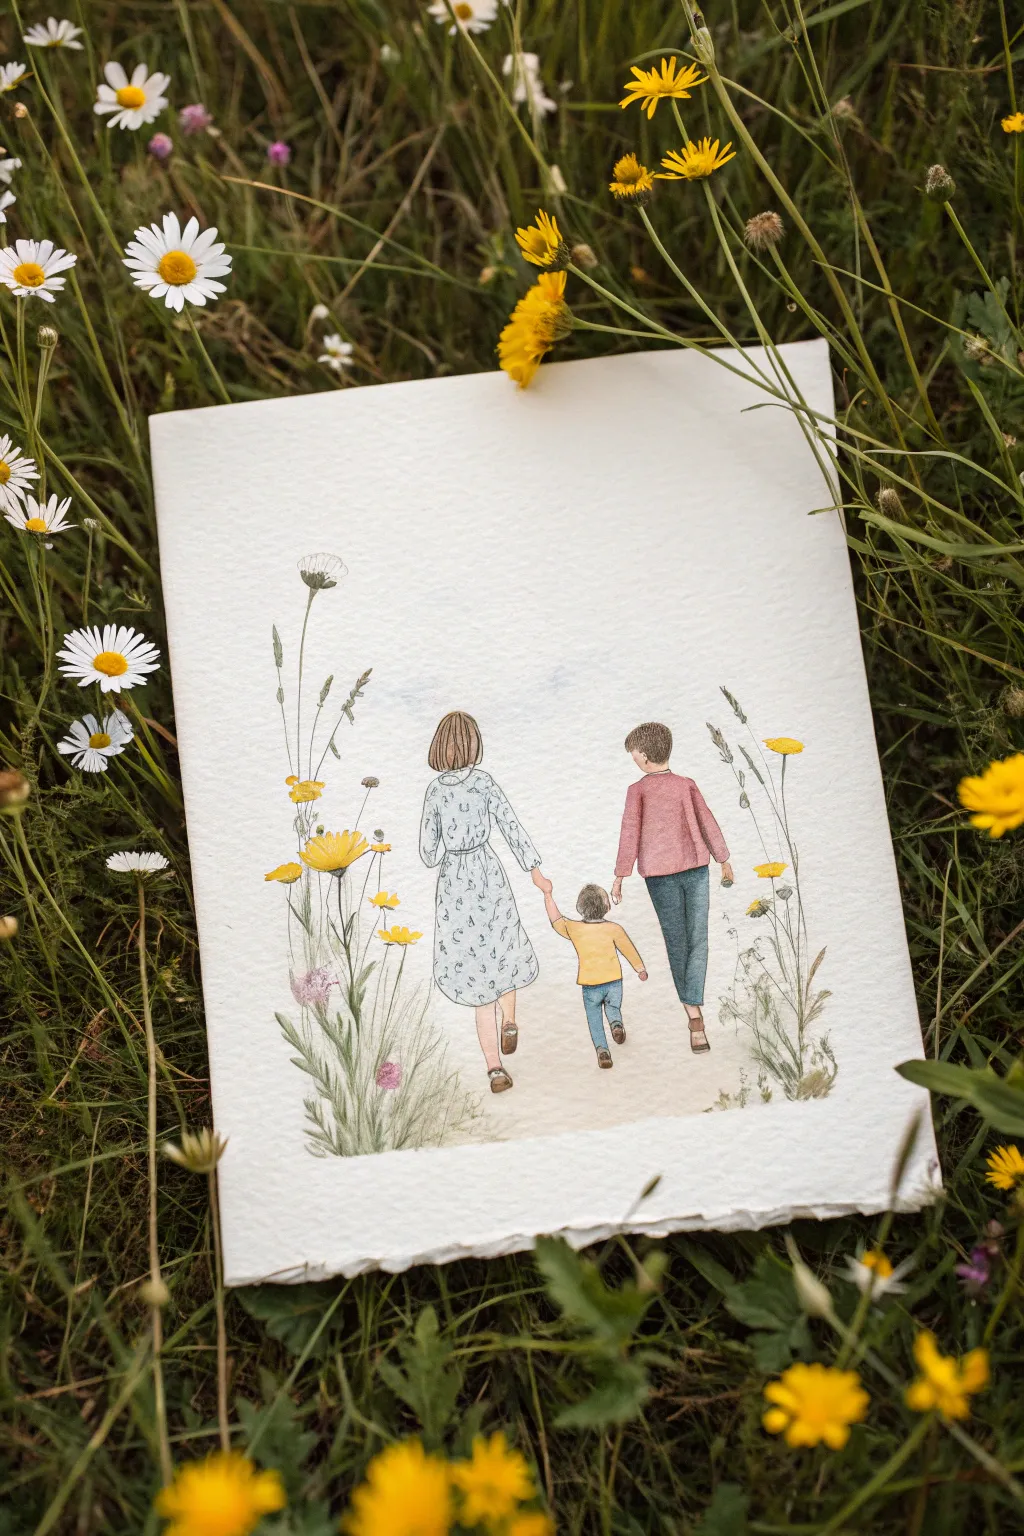
Capture a sweet moment of connection with this delicate watercolor illustration featuring a mother and her sons walking amidst tall grass. Using light washes and fine ink details, you’ll create a soft, nostalgic scene that feels like a treasured memory.
Step-by-Step
Materials
- Cold press watercolor paper (deckle edge optional)
- Watercolor paints (Cerulean Blue, Sap Green, Yellow Ochre, Burnt Sienna, Alizarin Crimson)
- Fine liner waterproof pen (0.1 or 0.05 size, sepia or black)
- Round watercolor brushes (size 2 and 4)
- Pencil (HB) and kneadable eraser
- Jar of clean water
- Paper towels
Step 1: Sketching the Figures
-
Outline the figures:
Begin by lightly sketching the three figures from behind in the center of your page. Draw the mother on the left, an older boy on the right, and the smallest child in the middle, holding hands to form a chain. -
Refine clothing details:
Add details to their clothing, sketching a flowing mid-length dress for the mother, jeans and a sweater for the older boy, and a t-shirt and jeans for the little one. Keep the lines loose and relaxed. -
Map the tall grass:
Lightly indicate where the tall wildflowers will frame the scene. Sketch long, vertical stems rising on the left and right sides, curving slightly inward to cradle the figures. -
Soften the lines:
Take your kneadable eraser and gently roll it over the entire sketch. You want the graphite to be barely visible so it doesn’t muddy the watercolor later.
Natural Texture
To mimic the featured image, tear the edges of your paper against a ruler before you start painting for a soft, deckle-edge effect.
Step 2: Painting the Family
-
Wash the mother’s dress:
Mix a very watery puddle of Cerulean Blue. Using your size 4 brush, fill in the mother’s dress, leaving tiny white gaps for the floral pattern later. Let the paint pool slightly at the hem for shade. -
Paint the boys’ clothes:
Paint the older boy’s sweater with a diluted Alizarin Crimson (a dusty pink/red) and the little one’s shirt with Yellow Ochre. For their jeans, use a mix of blue with a touch of grey or brown to execute a denim look. -
Add skin tones and hair:
Mix a pale skin tone using Yellow Ochre and a tiny dot of red. Paint the visible arms and legs. Once dry, paint the hair using Burnt Sienna or Umber, varying the brown values to show light hitting the top of their heads. -
Ground the figures:
Mix a very faint beige-grey wash. Swiftly brush a path beneath their feet, fading it out into the white paper as it moves up the page to suggest distance.
Ink Bleeding?
If your pen lines bloat or smudge, the paper is still damp. Wait until the paper feels cool and dry to the touch before any inking.
Step 3: Illustrating the Meadow
-
Paint the flower stems:
Switch to your size 2 brush and Sap Green. Paint thin, varied lines for the grass blades and stems on the sides. Make some stems tall and wispy, others shorter and thicker. -
Add floral blooms:
Dab spots of Yellow Ochre for the larger flowers and tiny dots of muted pink or violet for smaller buds. Keep these loose; they don’t need to be biologically perfect. -
Layer the greens:
While the first green layer is dry, add a few overlapping grass blades in a slightly darker green mix. This creates depth without overcrowding the delicate composition.
Step 4: Inking the Details
-
Outline the clothes:
Once the paint is completely bone-dry, use your fine liner pen to outline the clothing folds. Use broken, sketchy lines rather than continuous heavy outlines to keep the airy feel. -
Define the hair and shoes:
Add texture to the hair with short, directional strokes. Outline the shoes—I find that adding a tiny dark sole to the shoes really helps plant the figures on the ground. -
Draw the dress pattern:
Draw tiny, quick floral squiggles or ‘c’ shapes on the mother’s blue dress to create the pattern. Keep them random and sparse. -
Detail the wildflowers:
Ink the stems and flower heads on the framing plants. Add little stamens to the yellow flowers and jagged edges to the leaves for a realistic field-guide look. -
Final touches:
Erase any remaining pencil marks that might still be showing through. If the painting feels too light, you can add a second glaze of color to the shadows on the clothes.
Now you have a charming keepsake that perfectly captures the gentle rhythm of a family walk

PENCIL GUIDE
Understanding Pencil Grades from H to B
From first sketch to finished drawing — learn pencil grades, line control, and shading techniques.
Explore the Full Guide
Pinky Promise Close-Up
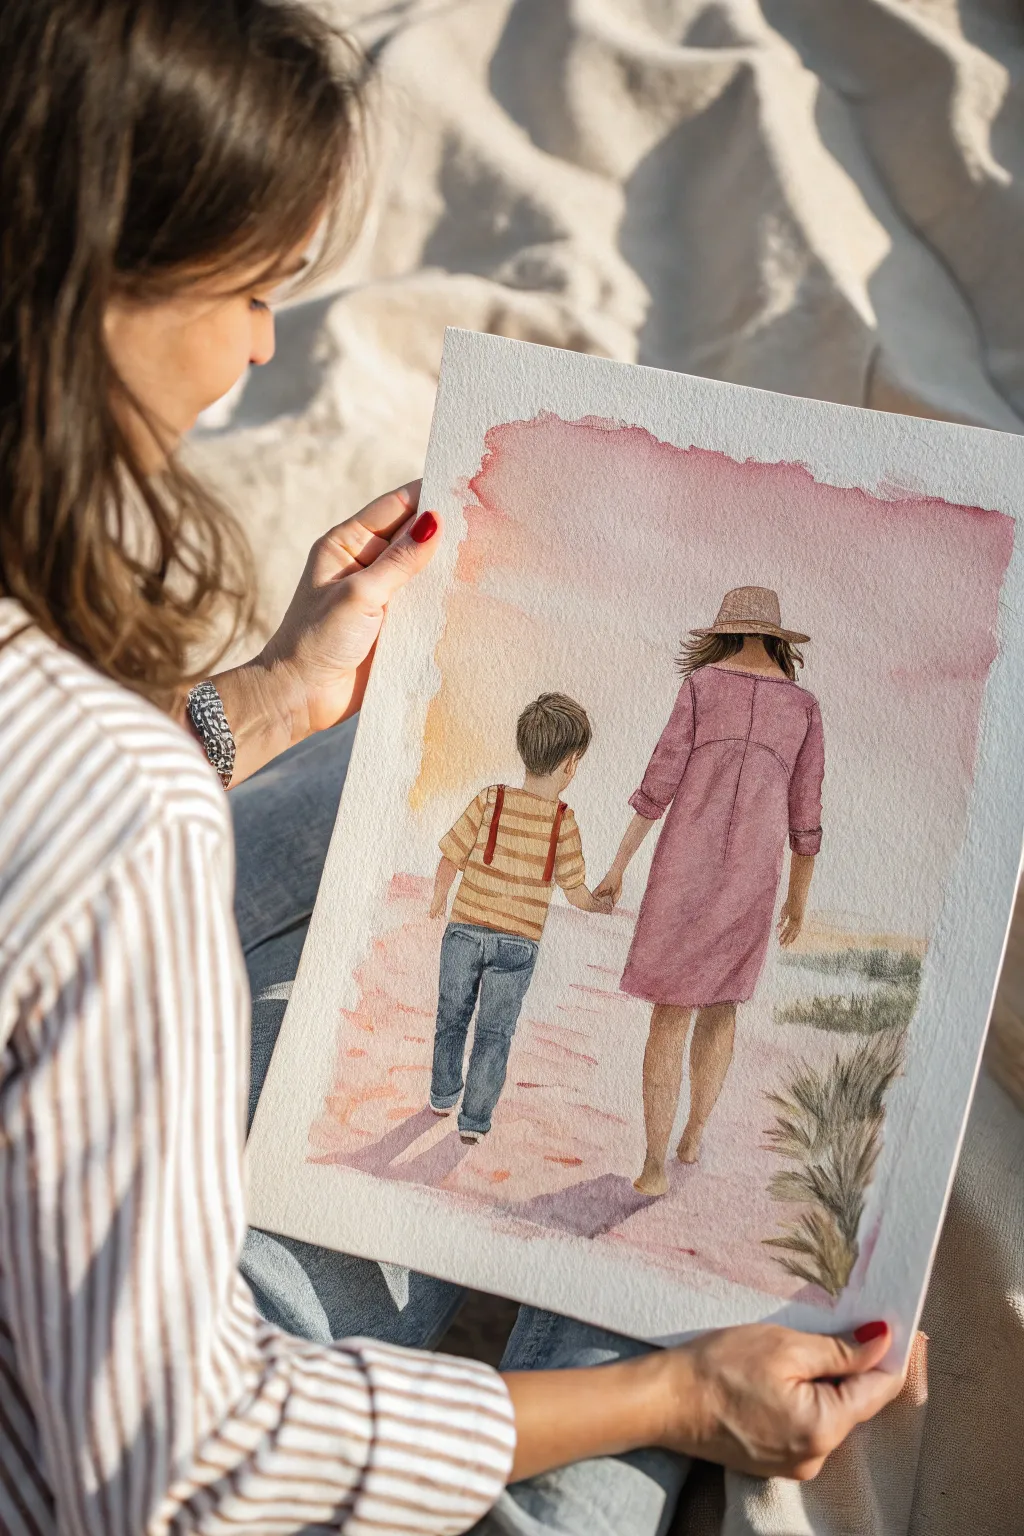
Capture a tender moment of connection with this soft watercolor portrait of a mother and son walking hand-in-hand toward the horizon. The loose, warm washes and gentle detailing create a nostalgic, dreamlike quality perfect for framing a favorite memory.
Step-by-Step Guide
Materials
- Cold press watercolor paper (140lb/300gsm)
- Watercolor paints (Alizarin Crimson, Yellow Ochre, Burnt Sienna, Ultramarine Blue, Prussian Blue)
- Round brushes (size 8 for washes, size 4 and 2 for details)
- Pencil (HB or H) and kneaded eraser
- Masking tape
- Jars of water
- Paper towels
Step 1: Sketching and Sky Wash
-
Prepare the paper:
Tape down all four edges of your watercolor paper to a board to prevent buckling. Ensure the tape is secure so the edges remain crisp. -
Draft the figures:
Examine the reference photo. Lightly sketch the mother on the right and the son on the left. Focus on the simple shapes of their clothing rather than anatomical details since their backs are turned. Pay attention to the height difference. -
Refine the hands:
Carefully draw the joined hands between them. This is the emotional focal point, so take your time getting the connection right. -
Add clothing details:
Sketch the folds in the mother’s dress and the hat on her head. For the boy, outline his shirt stripes and the suspenders or pants rise. -
Wet-on-wet sky:
Using your largest brush, wet the entire upper portion of the paper with clean water, avoiding the figures. The paper should glisten but not have puddles. -
Apply the sunset colors:
Drop in a dilute mix of Alizarin Crimson and a touch of Yellow Ochre. Let the colors bleed naturally down the page, becoming lighter near the horizon line behind the figures to create that soft, atmospheric glow.
Bleeding Lines?
If paint bleeds from the clothes into the sky, your background wasn’t fully dry. Blot immediately with a tissue and let it dry 100% before fixing edges.
Step 2: Painting the Figures
-
Base tone for skin:
Mix a light skin tone using Yellow Ochre and a tiny dot of Alizarin Crimson. Paint the legs, arms, and necks of both figures. Keep this wash very pale initially. -
Mother’s dress base:
Mix a dusty rose color using Alizarin Crimson neutralized with a little green or brown. Paint the dress with the size 4 brush. While wet, drop slightly darker pigment into the shadow areas where the fabric folds. -
Boy’s shirt stripes:
Wait for the skin areas to dry completely. For the boy’s shirt, paint the yellow stripes first using Yellow Ochre. Once dry, carefully paint the darker brownish-orange stripes in between. -
Jeans texture:
Mix Prussian Blue with a touch of grey. Paint the jeans, using vertical strokes to mimic denim texture. Leave tiny highlights near the knees or folds white for contrast. -
Hair details:
Using a size 2 brush and a mix of Burnt Sienna and Umbria, paint the hair. Use swift, confident strokes to suggest movement in the wind, especially for the mother’s hair under the hat. -
Shadows on skin:
Once the initial skin layer is dry, mix a slightly darker, cooler version of your flesh tone. Apply shadows to the inner calves and the underside of the arms to give the limbs volume.
Pro Tip: Fabric Fold Depth
To make the dress folds look realistic, paint the darker shadow side of the fold while the base color is still slightly damp for a soft transition.
Step 3: Ground and Final Touches
-
Foreground wash:
Wet the ground area around their feet. Apply a very pale, pinkish-brown wash to simulate sand reflecting the sunset sky. Keep it lighter than the figures. -
Cast shadows:
Mix a transparent purple-grey. Paint the long cast shadows stretching forward from their feet. Soften the edges of these shadows with a damp brush so they aren’t too harsh. -
Grassy textures:
On the right side, add some loose, dry-brush strokes in muted greens and browns to suggest beach grass. This frames the composition nicely. -
Define the edges:
Review the painting. If the figures look too soft against the background, I emphasize the edges of the clothing with a very fine line of darker paint to make them pop. -
Remove tape:
Wait until the paper is completely bone-dry. Peel the masking tape away slowly at a 45-degree angle to reveal the clean white border.
Step back and admire the gentle warmth of your captured memory
Superhero Son and Strong Mom
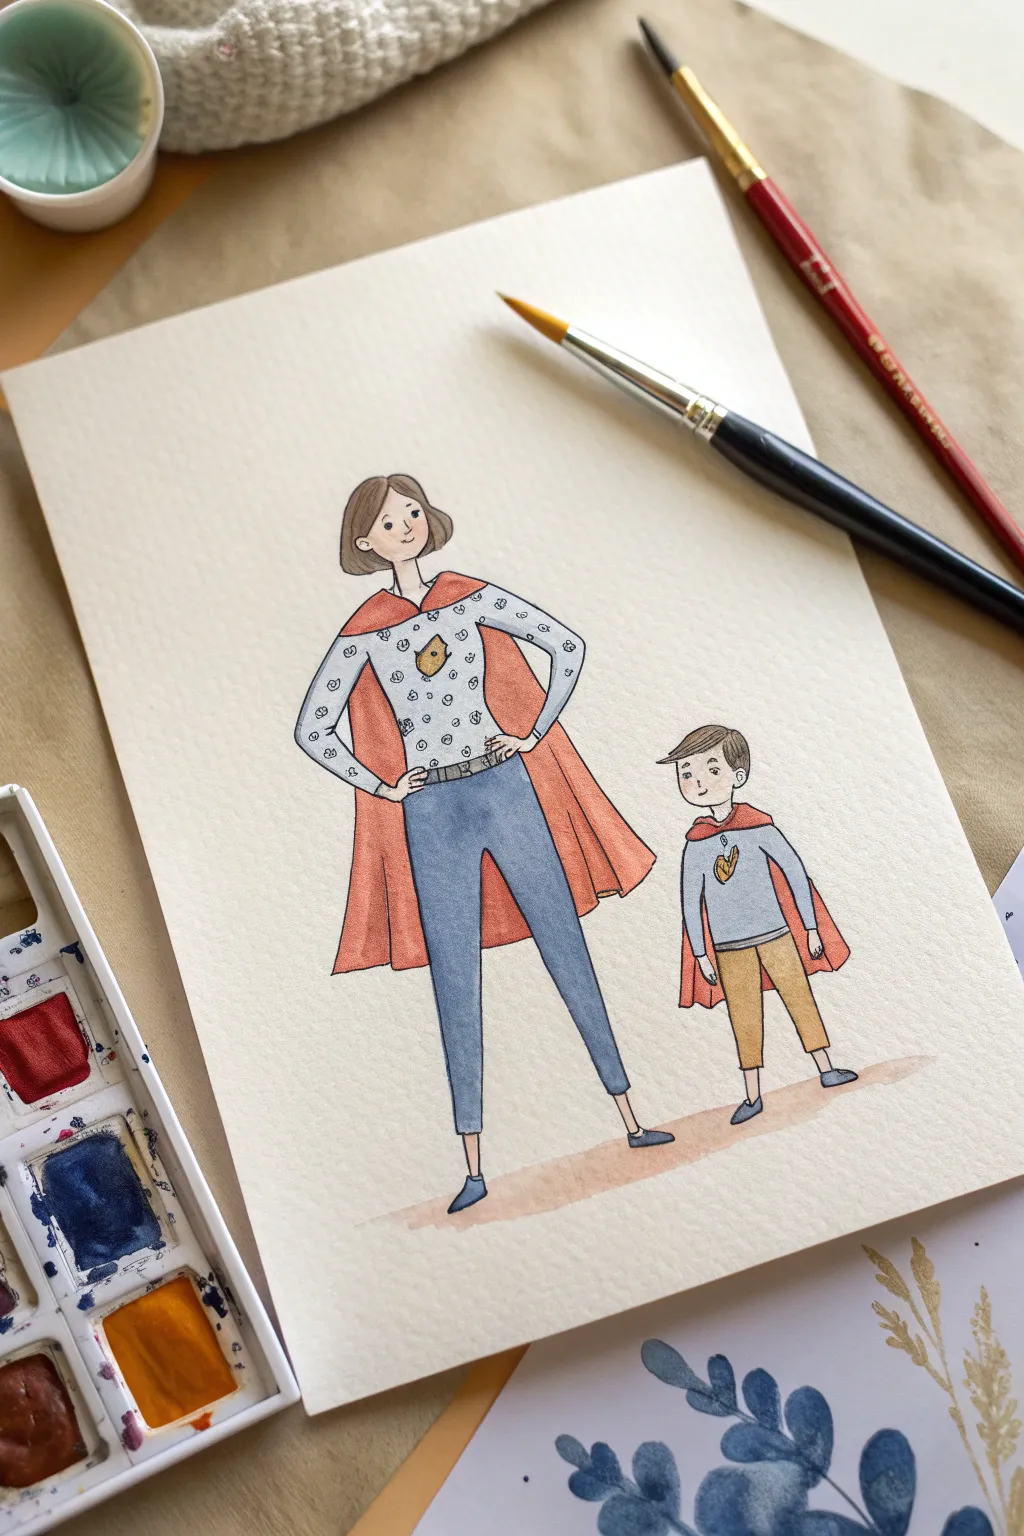
Celebrate the quiet strength of parenting with this charming watercolor illustration features a mother and son donning matching capes. The style is gentle and simplified, using clean pen lines and soft watercolor washes to create a heartwarming display of teamwork.
Step-by-Step
Materials
- Cold press watercolor paper (A4 or similar)
- Pencil and eraser
- Waterproof fine liner pen (black or dark brown, 0.3mm)
- Watercolor paint set
- Round watercolor brushes (size 2 and size 6)
- Mixing palette
- Jar of clean water
- Paper towel
Step 1: Sketching the Dynamic Duo
-
Map out proportions:
Begin lightly with a pencil. Draw a tall oval for the mother’s head and a smaller circle for the son’s head, positioning the boy to her right side, reaching about waist height. -
Sketch the mother’s pose:
Draw the mother’s body in a confident ‘power pose.’ Her hands should be on her hips, elbows out. Sketch slim legs slightly apart for stability and add a simple bob haircut. -
Sketch the son’s pose:
Outline the boy’s body standing straight with arms at his sides. Add simple shorts and a t-shirt, and give him a short haircut with a slight side sweep. -
Add the capes and details:
Draw large, flowing capes for both figures. The mom’s cape should drape behind her arms, while the boy’s hangs straight back. Add small shield emblems to their chests. -
Refine the facial features:
Keep the faces minimal. Use simple dots for eyes, small curved lines for noses, and gentle smiles. Simplicity is key to this illustrative style.
Step 2: Inking the Outline
-
Trace with fine liner:
Take your waterproof fine liner and carefully trace over your pencil lines. Use confident, continuous strokes rather than sketchy, broken ones. -
Add texture details:
While inking, add tiny circles or small shapes to the mother’s shirt for a pattern. Draw the belt details and the hems of the clothes. -
Erase pencil marks:
Wait for the ink to become completely dry—I like to give it an extra minute just to be safe—then gently erase all underlying graphite sketches.
Ink Smearing?
If your pen smears when painting, switch to a Pigma Micron or generic permanent marker. Always test your pen on a scrap paper with water before starting the main piece.
Step 3: Painting with Watercolors
-
Paint skin tones:
Mix a very watery pale peach or brown. Using the size 6 brush, lightly wash in the faces, necks, and hands. Let this dry completely. -
Color the hair:
Mix a light brown. Paint the mother’s hair and the boy’s hair. You can drop in a slightly darker brown while it’s still damp to add subtle depth. -
Paint the capes:
Mix a vibrant coral or soft red. Fill in both capes. Since the areas are larger, work quickly so the paint doesn’t dry with hard edges in the middle. -
Fill the clothing base:
Use a diluted blue-grey for the mother’s pants and the boy’s shirt. Use a mustard yellow or ochre for the boy’s pants. -
Add the chest emblems:
Using your smallest brush (size 2), carefully paint the chest emblems gold or yellow. Be precise here to stay inside the tiny lines. -
Detail the mother’s shirt:
If painting around the pattern is too hard, you can wash the whole shirt in very pale grey, or leave it white and just let the ink texture define it. -
Paint the shoes:
Color the shoes in dark blue or grey. Keep the paint fairly opaque here for a solid grounding look.
Personalize It
Change the hair colors and styles to match your own family. You can also swap the chest emblems for initials—like ‘M’ for mom and the child’s first initial.
Step 4: Final Touches and Shadows
-
Add clothing shadows:
Once the base layers are dry, mix slightly darker versions of your clothing colors. Paint thin lines along the inseams of pants and under the arms to create dimension. -
Deepen the cape folds:
Add a second layer of red paint to the ‘inside’ folds of the capes to make them look like they are draping heavily. -
Ground the figures:
Mix a very watery, transparent brown or warm grey. Paint a loose, organic shape under their feet to represent the ground shadow.
Once the shadow dries, you have a sweet tribute to the superhero work of parenting ready to frame


Watercolor Wash With Line Drawing
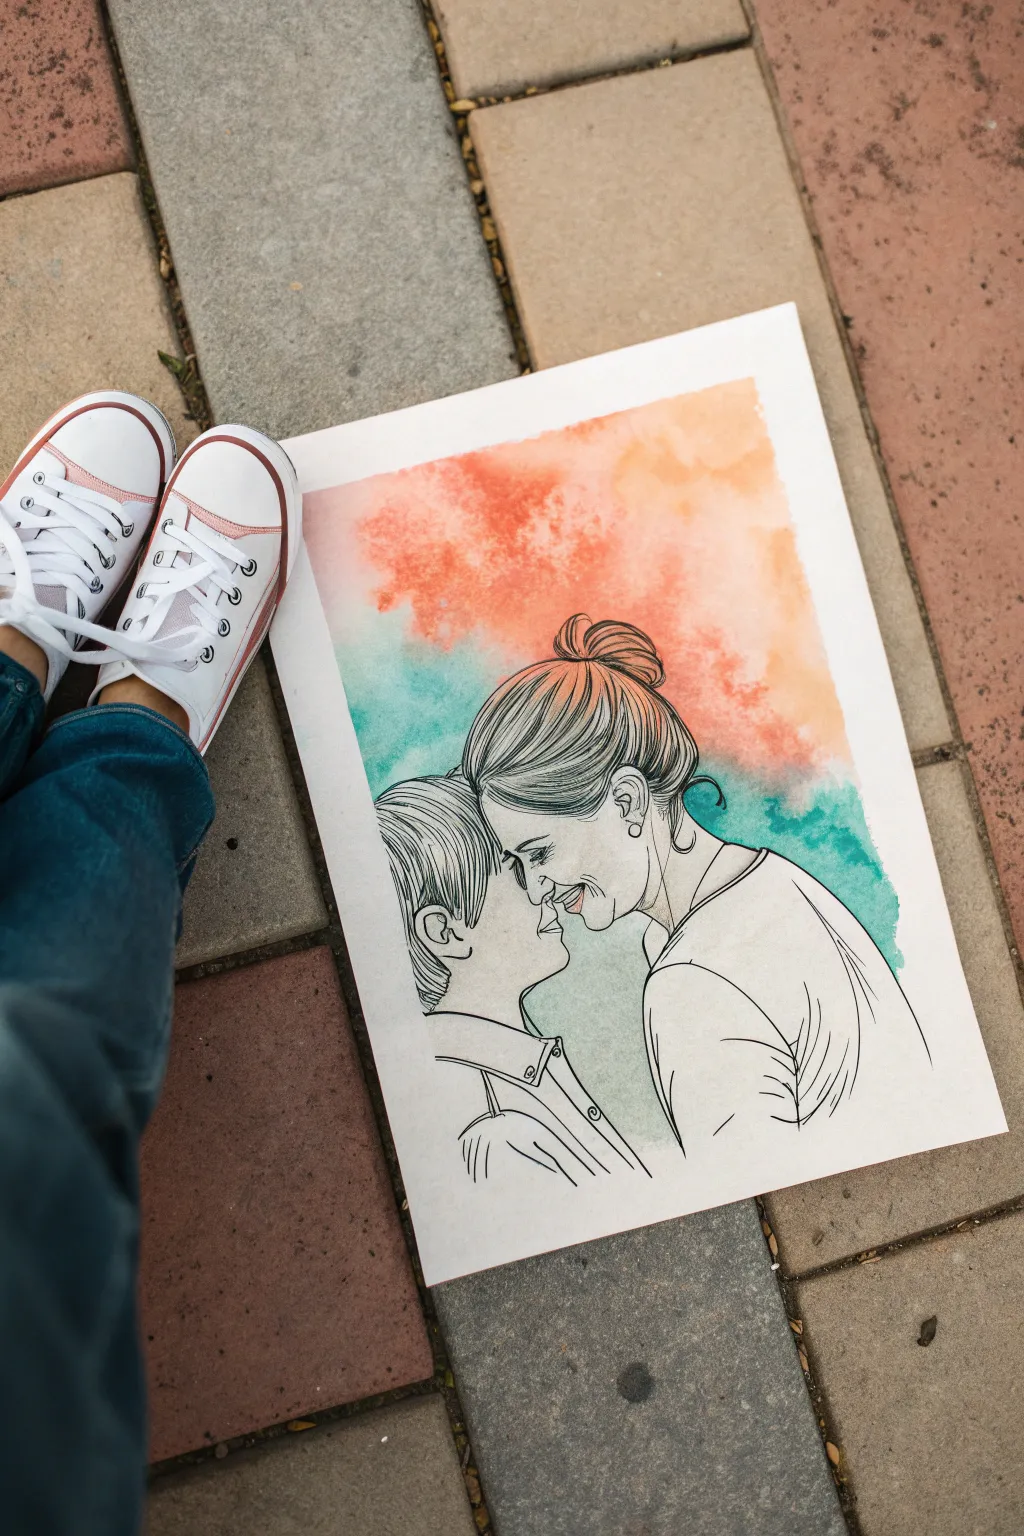
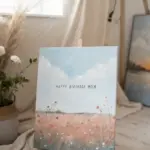
This emotive project combines the freedom of loosely applied watercolor washes with the precision of fine-line ink illustration. The result is a tender keepsake that captures a moment of connection between mother and son against a vibrant, dreamy backdrop.
Step-by-Step
Materials
- Cold-press watercolor paper (140lb/300gsm)
- Watercolor paints (coral/peach and teal/aqua)
- Round watercolor brushes (size 8 or 10)
- Black waterproof fine liner pens (0.1, 0.3, and 0.5 sizes)
- Graphite pencil (HB or 2H)
- Kneaded eraser
- Masking tape
- Reference photo of two profiles
Step 1: Preparation & Sketching
-
Secure the paper:
Begin by taping down all four edges of your watercolor paper to a hard board or table surface using masking tape. This prevents the paper from buckling when you add water. -
Establish the composition:
Lightly sketch the outlines of the mother and son profiles using your pencil. Focus on placing the foreheads touching slightly below the center of the page to leave room for the colorful ‘cloud’ above. -
Refine the features:
Go back over your initial shapes to define the noses, chins, and hairlines. Keep these pencil lines extremely faint, as you only need them as a guide for later inking. -
Double-check placement:
Before moving to paint, ensure the proportions feel right and the connection point between the two figures looks natural.
Ink Smart
Test your pens on a scrap piece of watercolor paper first. Smooth paper allows for cleaner lines, while rougher textures can make pens skip, creating a rustic look.
Step 2: The Watercolor Wash
-
Wet the background area:
Dip your large round brush in clean water and paint a loose, organic shape above and behind the heads. It doesn’t need to be perfect; irregular edges add character. -
Drop in warm tones:
Load your brush with a watery mix of coral or peach paint. Gently touch the wet paper at the top right, letting the pigment bloom and spread naturally downward. -
Introduce cool tones:
While the paper is still damp, pick up your teal or aqua paint. Apply this to the lower left area behind the son’s head, allowing it to meet the coral color in the middle. -
Create a gradient:
Where the two colors meet, use a clean, damp brush to encourage them to blend softly without creating mud. Tilt the board slightly if you want the colors to run into each other more. -
Soften the edges:
If the outer edges of your color wash look too harsh, trace them with a clean, wet brush to fade the color out into the white paper. -
Allow to dry completely:
This is crucial: do not touch the paper until it is bone dry. I usually wait at least 30 minutes or use a hairdryer on a low setting to speed things up.
Step 3: Inking the Details
-
Outline the main profiles:
Switch to your medium-sized waterproof pen (0.3). Carefully trace the main silhouette lines of the faces, necks, and shoulders. -
Define the hair flow:
Using long, sweeping strokes, draw the strands of the mother’s hair, following the curve of the bun. Do the same for the son’s shorter hair, paying attention to the direction of growth. -
Add facial details:
Switch to your finest pen (0.1). Add delicate details like the eyelashes, the curve of the nostril, and the smile lines. Tread lightly here; less is often more. -
Create shading with hatching:
Use parallel lines (hatching) to create shadows under the chin, behind the ears, and in the depths of the hair. This adds volume and prevents the figures from looking flat. -
Detail the clothing:
Draw the collars and shirt seams. Use slightly thicker lines (0.5) for the outer contours of the clothing to give them weight. -
Final clean up:
Once you are certain the ink is 100% dry, take your kneaded eraser and gently list any visible pencil lines. -
Remove the tape:
Peel the masking tape away slowly at a 45-degree angle to reveal your crisp white border.
Make It Personal
Incorporate subtle floral doodles into the hair or shirt patterns, matching the flowers to the specific birth months of the mother and child.
Now you have a timeless, hand-drawn portrait celebrating a beautiful bond.
Galaxy Silhouette Bond

Capture the infinite bond between mother and son with this breathtaking galaxy silhouette painting. Using watercolor wet-on-wet techniques, you will create a vibrant, nebulous sky that serves as the perfect backdrop for a touching shadow portrait.
Step-by-Step Guide
Materials
- High-quality watercolor paper (cold press, at least 300gsm)
- Masking tape or painter’s tape
- Watercolor paints (Indigo, Prussian Blue, Violet, Magenta, Turquoise)
- Black acrylic paint or black gouache (for opacity)
- White gouache or white gel pen
- Large flat wash brush
- Medium round brush
- Fine detail brush (size 0 or 00)
- Two jars of water
- Paper towels
- Pencil and eraser
- Hairdryer (optional for speeding up drying)
Step 1: Preparing the Galaxy Base
-
Secure Your Paper:
Begin by taping down all four edges of your watercolor paper to a hard board or table. This creates a clean white border and prevents buckling when the paper gets wet. -
Sketch the Outline:
Very lightly sketch the horizon line and the silhouettes of the mother and son. Keep these lines faint as they are just a guide for where the galaxy sky needs to end. -
Wet the Sky:
Using your large flat brush, apply clean water to the entire sky area, stopping right at the horizon line. The paper should be glisten with a sheen but not have puddles. -
Apply the NebuIa Colors:
While the paper is wet, drop in patches of Magenta and Violet diagonally across the page. Let the colors bloom and spread naturally into the wet paper. -
Deepen the Night Sky:
Surround the pink and purple areas with Prussian Blue and Turquoise. Work quickly while the paper is still damp to encourage soft transitions between the colors. -
Add the Darkest Depths:
Load your brush with Indigo or a very dark blue mix. Apply this to the top corners and the outer edges of the sky to create a vignette effect that draws the eye inward. -
Blend Softly:
If hard edges form between colors, clean your brush, dry it slightly on a paper towel, and gently feather the edges to smooth them out. -
Let it Dry:
Allow the background to dry completely. The paper must be bone dry before the next steps, or the stars and silhouettes will bleed.
Starry Control
Cover the bottom silhouette area with a scrap piece of paper while flicking paint for the stars. This keeps the ground area clean and saves you from having to paint over white specks later.
Step 2: Creating the Stars
-
Prepare the Spatter:
Dilute a small amount of white gouache with water until it reaches a milky consistency. It needs to be fluid but opaque. -
Flick the Stars:
Load a medium brush with the white mixture. Tap the handle of the brush against another brush handle over the painting to sprinkle fine dots across the sky. -
Concentrate the Clusters:
Add a few more sprinkles near the pink nebula section to suggest a dense cluster of stars, often called the Milky Way effect. -
Paint Major Stars:
Using your finest detail brush and undiluted white gouache, manually paint a few larger, brighter stars. Add cross-shapes to a select few to make them twinkle.
Step 3: Painting the Silhouettes
-
Outline the Figures:
Switch to black acrylic paint or gouache for maximum opacity. Using the fine brush, carefully outline the mother and son figures based on your initial pencil sketch. -
Fill the Shapes:
Fill in the bodies with solid black. Ensure the paint is thick enough so the galaxy background doesn’t show through the figures. -
Refine the Details:
Pay close attention to small details like the hair texture, the joined hands, and the clothing folds. I like to use the very tip of the brush for wispy hair strands. -
Paint the Ground:
Fill in the ground area below the horizon line with solid black, merging it seamlessly with the feet of the figures. -
Add Grass Texture:
While the black ground is wet or after it dries, use the fine brush to flick small, upward strokes along the horizon line to simulate grass blades. -
Final White Dots:
For a magical touch, create a few tiny white dots near the grass to look like fireflies or low-hanging stars. -
Reveal the Border:
Once the painting is 100% dry, slowly and carefully peel away the masking tape at a 45-degree angle to reveal the crisp white frame.
Custom Constellations
Personalize the night sky by arranging the larger painted stars to match the zodiac signs of the mother and child hidden within the galaxy.
Frame this cosmic portrait to create a timeless keepsake that celebrates your unique bond


Have a question or want to share your own experience? I'd love to hear from you in the comments below!