
If you’ve been craving fresh mountain drawing ideas, I’ve got you covered with sketches that feel doable but still look impressive. Let’s play with peaks, textures, and a few mood-setting details so your mountains start looking rugged, spacious, and totally yours.
Classic Jagged Mountain Range
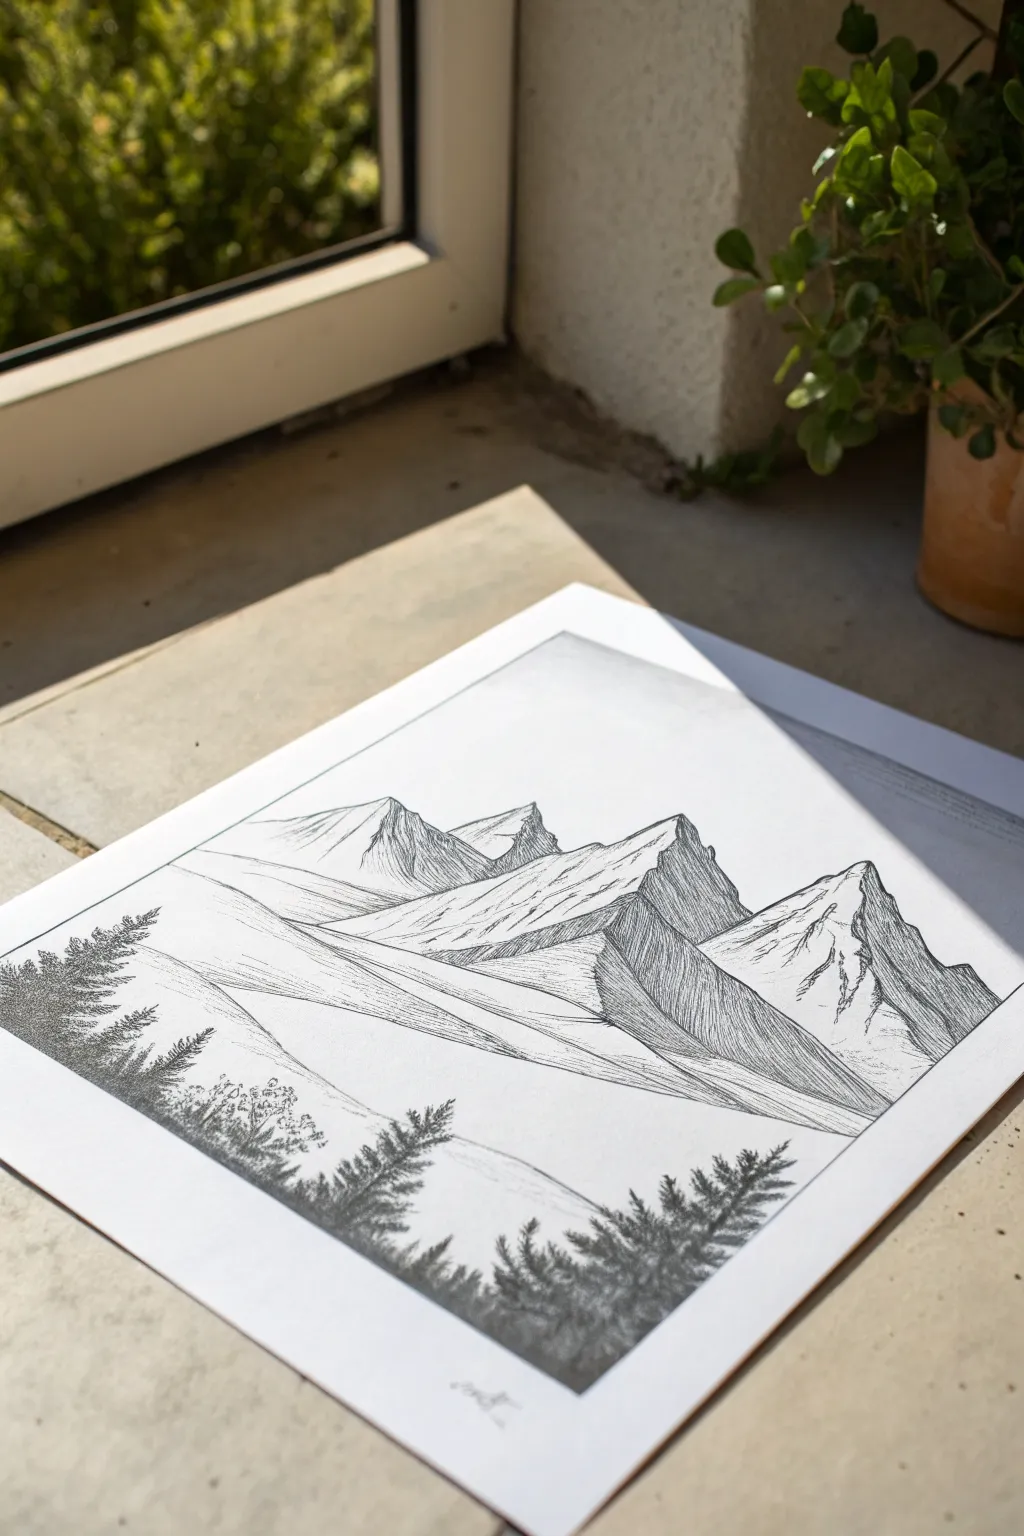
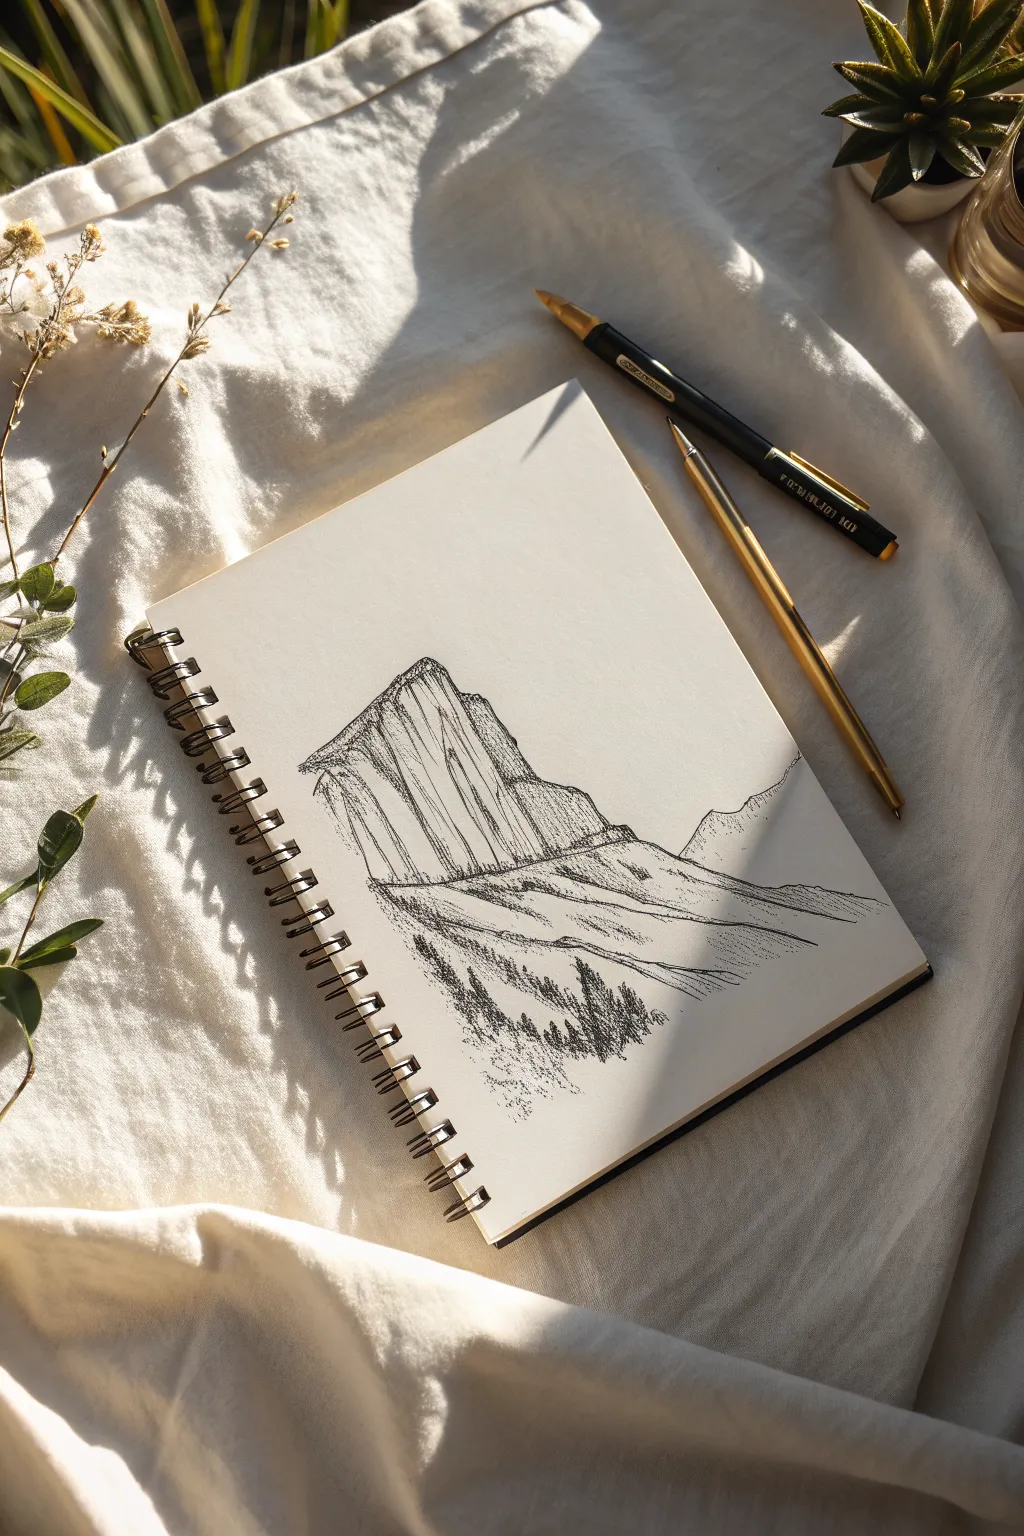
This striking black and white landscape captures the raw beauty of jagged mountain peaks rising above a quiet tree line. Using precise hatching techniques and high-contrast ink work, you will create a sense of depth and scale that feels both serene and majestic.
Detailed Instructions
Materials
- Smooth bristol board or heavyweight drawing paper
- HB graphite pencil
- Kneaded eraser
- Fine liner pens (sizes 0.05, 0.1, 0.3, and 0.5)
- Ruler or straight edge
Step 1: Sketching the Framework
-
Establish the horizon:
Begin by lightly drawing a rectangular border on your paper to frame the composition. Inside this frame, lightly sketch a low horizon line about one-third of the up from the bottom. -
Outline the peaks:
Sketch the primary mountain shapes using your HB pencil. Focus on triangular, jagged forms. Create three main peaks: a smaller one on the left, a central dominant peak, and a rugged peak on the right. -
Define the ridgelines:
Draw jagged lines down the center of each mountain peak to separate the light side from the shadow side. Since the light is coming from the left, these ridgelines should be irregular and craggy. -
Map the foreground:
Lightly sketch the placement of the foreground trees. Indicate their general triangular shapes at the bottom corners, creating a natural ‘V’ shape that leads the crams the viewer’s eye toward the mountains.
Step 2: Inking the Mountains
-
Outline with precision:
Using a 0.3 pen, go over your pencil lines for the mountain outlines. Keep your hand steady but allow for slight wobbles to mimic natural rock formations. -
Start the shading:
Switch to a 0.1 pen to begin shading the shadowed sides of the mountains (the right faces). Use tight, vertical hatching lines that follow the slope of the rock face. -
Deepen the shadows:
Layer cross-hatching over the vertical lines on the darkest parts of the mountains, specifically near the base and deep crevices, to add weight and solidity. -
Detail the sunlit faces:
On the left, sunlit faces of the mountains, use very sparse, broken lines with a 0.05 pen. These faint scratches suggest texture without darkening the area, keeping it bright. -
Add geological texture:
Draw flowing, parallel lines along the lower slopes of the mountains to suggest scree or glacial flow. These lines should curve gently downwards, following the topography.
Ink Smearing?
Wait at least 15 minutes before erasing pencil lines. If you’re left-handed, place a scrap piece of paper under your hand as a guard while drawing to prevent smudging wet ink.
Step 3: Developing the Foreground
-
Establish tree trunks:
Using a 0.3 pen, draw thin vertical lines for the trunks of the fir trees in the immediate foreground. Make the ones at the bottom edge taller to simulate perspective. -
Create pine textures:
Use a scribbling or stippling motion with a 0.5 pen to build up the foliage of the trees. Start narrow at the top and flare out wider towards the bottom of each tree. -
Control the density:
Make the trees at the very bottom corners dense and almost solid black. As you move slightly inward and upward, let the branches become more distinct and less blocky. -
Add mid-ground vegetation:
Sketch slightly smaller, less detailed tree shapes behind the main foreground trees using a 0.1 pen. This layer pushes the main trees forward and adds depth. -
Introduce scrubby details:
On the left side, near the trees, add some small, circular scribbles and short vertical dashes to represent wild bushes or scrub brush.
Add Atmosphere
To create a misty morning effect, replace the hard lines at the base of the mountains with stippling (dots). This softness mimics fog settling in the valley floor.
Step 4: Final Touches
-
Clean up guidelines:
Once the ink is completely dry—give it a few minutes to be safe—gently erase all remaining graphite pencil lines with your kneaded eraser. -
Reinforce the frame:
Use a ruler and your 0.5 pen to go over the rectangular border one last time, ensuring a crisp, clean edge that contains the artwork. -
Balance the values:
Step back and assess the contrast. If the shadowed side of the mountain looks too light compared to the trees, add another layer of hatching with a 0.05 pen. -
Add signature:
Sign your work discreetly at the bottom center or corner with a fine pen to complete the piece.
Now you have a crisp, timeless mountain scene ready to display or gift


Simple Triangle-to-Peak Practice Sheet
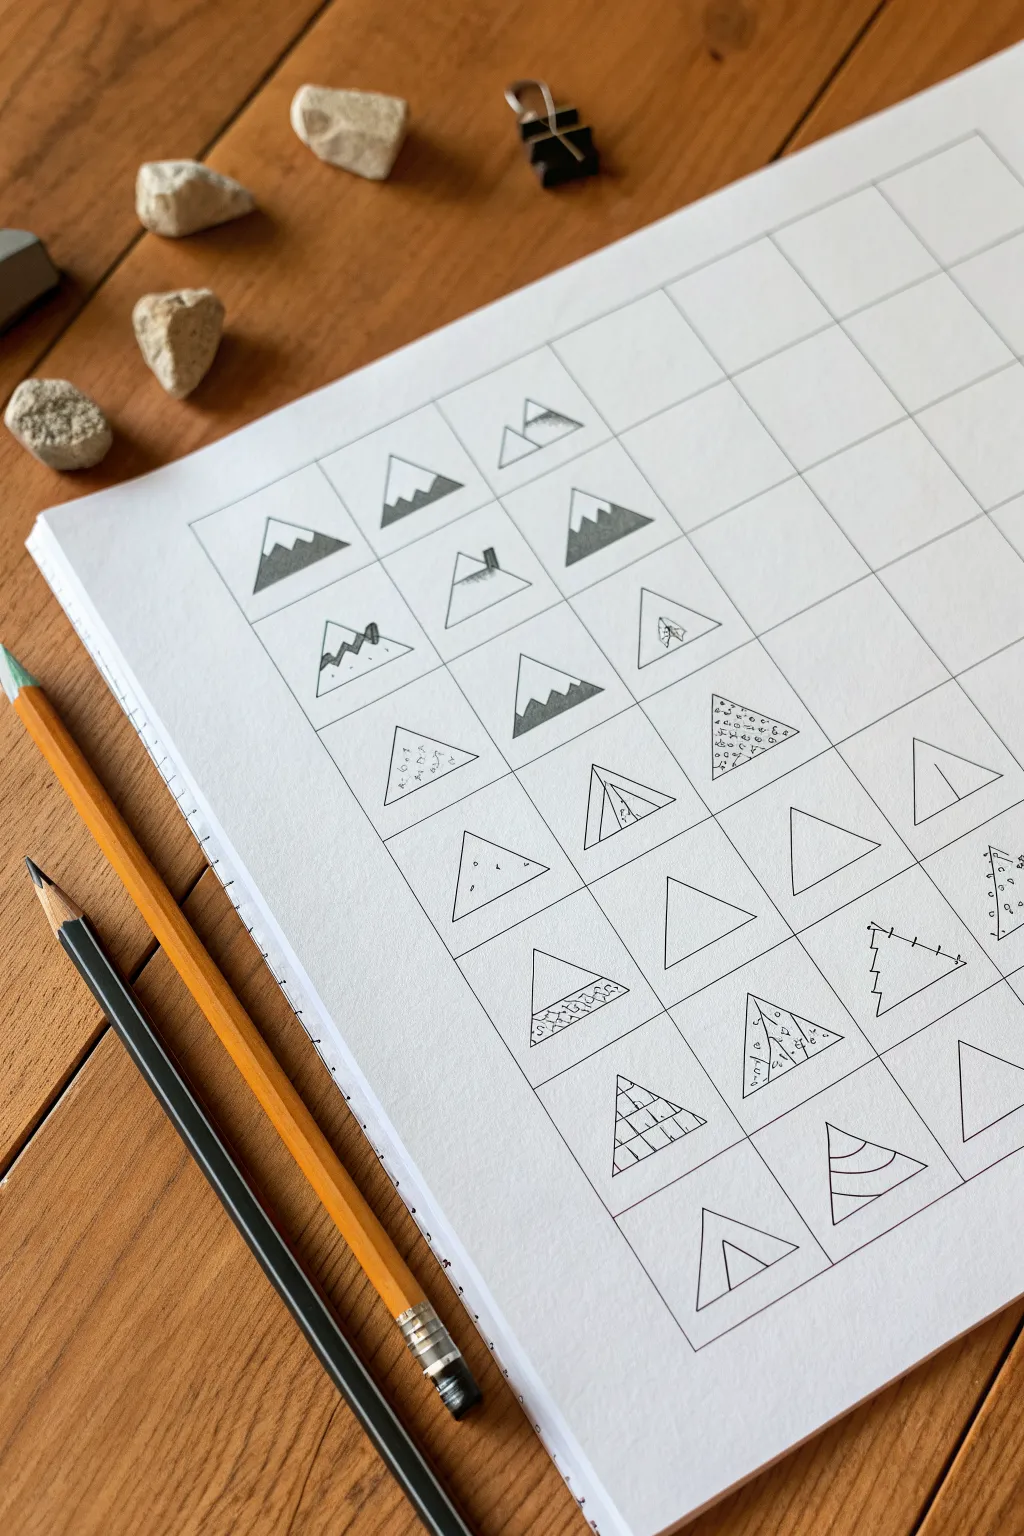
This structured exercise transforms simple geometric shapes into a diverse array of mountain peaks, offering a perfect way to explore line work and shading. The grid layout encourages experimentation, allowing you to test varied textures and hatching techniques side-by-side in a clean, organized format.
Step-by-Step Tutorial
Materials
- White sketchbook paper or heavy cardstock
- Ruler or straightedge
- Pencil (HB or 2B recommended)
- Fine-liner pen (optional, for final outlines)
- Eraser
Step 1: Setting the Grid
-
Measure the Perimeter:
Begin by deciding the overall size of your workspace. Use your ruler to measure a large rectangle on your paper, leaving a consistent margin of about one inch from the edges to keep the layout neat. -
Mark Grid Intervals:
Along the top and side of your rectangle, make small tick marks at equal intervals. For this project, squares roughly 1.5 to 2 inches wide work perfectly—large enough for detail but small enough to fill quickly. -
Draw the Grid Lines:
Connect your tick marks horizontally and vertically using the ruler. Keep your pencil pressure very light here, as you want these lines to be subtle guides rather than dominant features of the artwork.
Step 2: Drafting the Foundations
-
Sketch Base Triangles:
In the squares you wish to fill, draw a simple equilateral or isosceles triangle. Vary the height and width slightly between boxes to keep the practice interesting, but ensure the base sits on the bottom line of the grid square. -
Add Secondary Peaks:
For some of the squares, draw a smaller triangle overlapping or sitting behind the main one. This creates depth and mimics a mountain range rather than a solitary peak.
Smudge Control
Place a scrap piece of paper under your drawing hand while you work. This prevents the graphite from smearing across the clean grid lines.
Step 3: Adding Topography & Texture
-
Snowcaps and Jagged Lines:
Start defining the character of each mountain. For snowy peaks, draw a jagged, zig-zag line about a third of the way down from the peak. I usually vary the angles here to make the snow line look organic and uneven. -
Solid Shading:
Select a few triangles to act as silhouettes or high-contrast styles. Using the side of your pencil lead, fill in the bottom section of these mountains completely, leaving the snowcap pure white. -
Stippling Texture:
In a fresh triangle, try a stippling technique. Instead of solid shading, use the tip of your pencil to create a cluster of small dots on one side of the mountain, simulating rocky debris or gravel. -
Linear Hatching:
Fill another triangle with vertical or diagonal stripes. This geometric approach creates a stylized, modern look. -
Cross-Hatching Shadows:
To suggest a shadow side, draw diagonal lines in one direction, then cross them with lines in the opposite direction. Apply this to just the right or left half of a triangle to simulate a light source. -
Scribble Texture:
Loosen up your hand for this one. Fill the lower portion of a mountain with tight, controlled scribbles. This mimics rough vegetation or distant forests. -
Geometric Patterns:
Try drawing smaller triangles inside the larger one, or horizontal bands. These abstract designs turn the mountain shape into a graphical icon. -
Curved Contour Lines:
Draw curved arch shapes starting from the bottom corners, stacking them upward. This creates a topographical map effect or a stylized hill appearance.
Go Pen & Ink
Once the pencil drafts are done, trace over the mountains with a 0.5mm waterproof fine-liner pen, then erase all pencil marks for a crisp, professional illustration finish.
Step 4: Refining and Cleaning
-
Darken Key Lines:
Review your grid. Go back over the main outline of the triangles with slightly more pressure to make the shapes pop against the grid background. -
Clean Up Edges:
Use your eraser to tidy up any sketches that wandered outside the grid squares. If you have smudge marks from shading, now is the time to carefully lift them. -
Final Contrast Check:
Look at the page as a whole. If the shaded areas look too grey, go back in and press harder to deepen the graphite blacks for better contrast against the white paper.
Now you have a reference sheet of mountain styles ready to use in your next landscape drawing

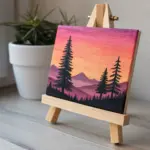


Minimalist Single Peak Silhouette
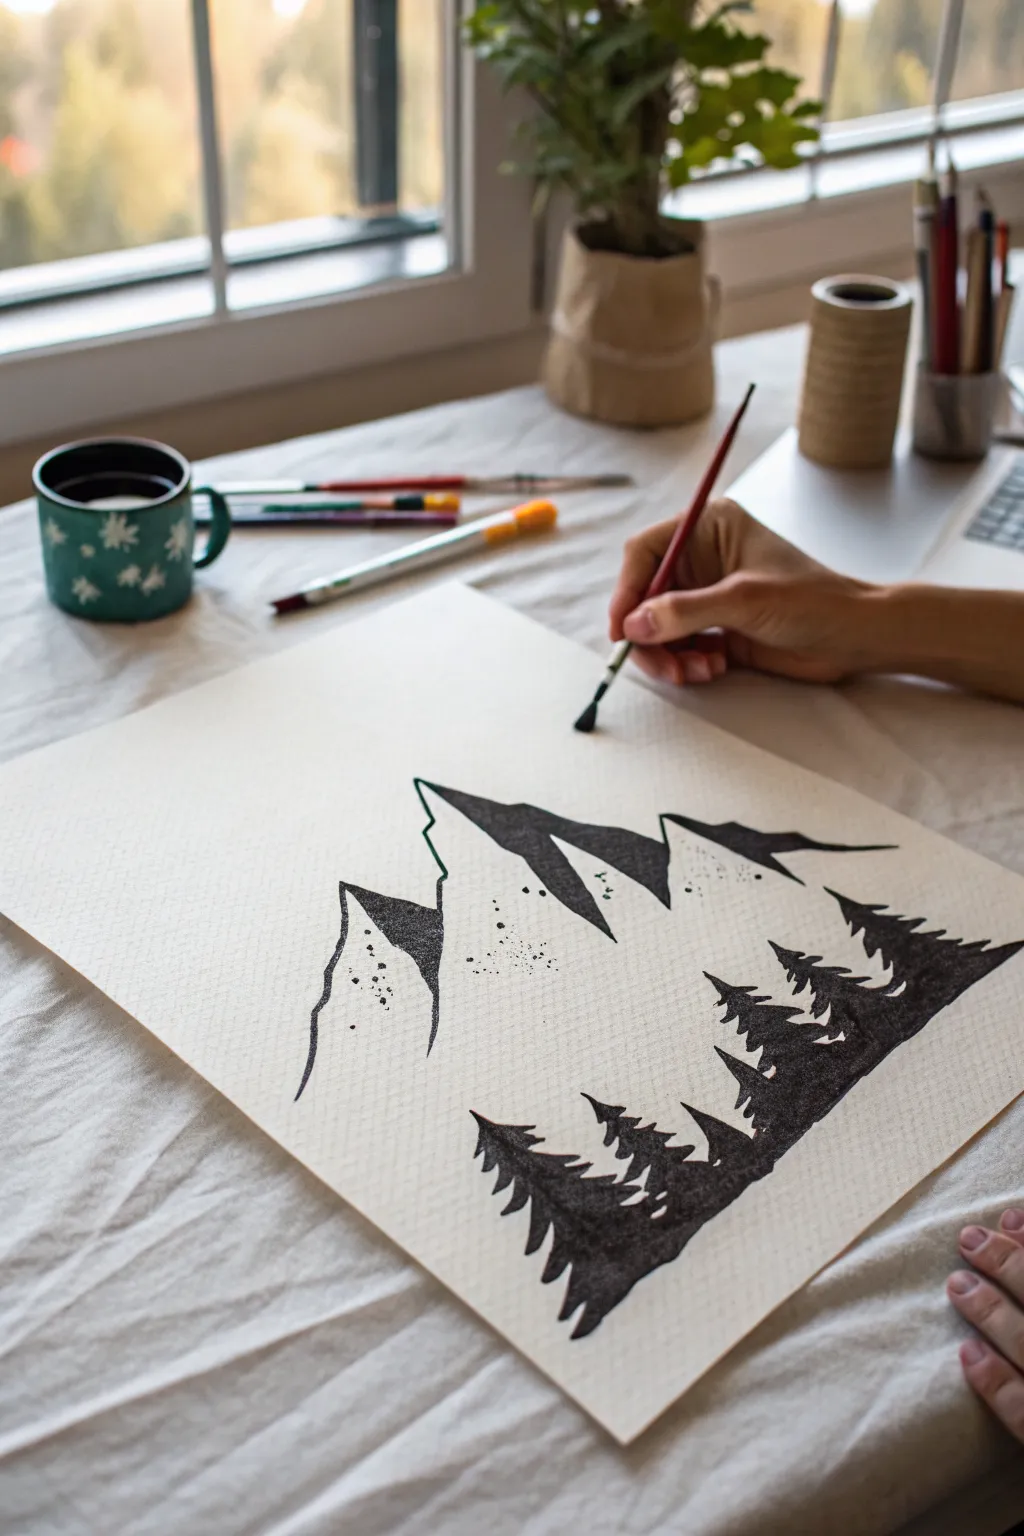
Capture the stark beauty of an alpine landscape with this minimalist black-and-white illustration. Using high-contrast silhouettes and intentional negative space, you’ll create a striking mountain scene that balances rugged peaks with dense, shadowed forests.
Step-by-Step
Materials
- Heavyweight textured paper (watercolor or mixed media paper, cold press)
- Black India ink or liquid watercolor
- Medium round brush (size 6 or 8)
- Fine liner brush or rigger brush
- Pencil (HB or 2H)
- Kneaded eraser
- Water cup and paper towels
Step 1: Sketching the Foundations
-
Establish the horizon line:
Begin by lightly tracing a dynamic, uneven line across the lower third of your paper to determine where the foreground forest will sit. This doesn’t need to be straight; a slight slope adds interest. -
Outline the main peaks:
Sketch the silhouette of the central mountain range. Focus on creating jagged, asymmetrical triangles rather than perfect pyramids to mimic actual geological formations. -
Mark the shadow zones:
Lightly draw lines down the center or side of your mountain peaks to distinguish where the deep shadows will fall versus the illuminated snowy sides. -
Plan the tree line:
Sketch rough vertical guidelines in the foreground where your tallest pine trees will stand, ensuring they vary in height for a natural look.
Ink Bleeding?
If ink feathers into the paper, your brush is too wet or the paper quality is low. Switch to a thicker hot-press watercolor paper and use less water on your brush for crisper lines.
Step 2: Inking the Mountains
-
Load your brush:
Dip your medium round brush into the black ink, wiping the excess on the rim so the bristles imply a point but hold plenty of pigment. -
Define the shadowed slopes:
Starting from the peak of your main mountain, paint the shadowed side with confident downward strokes. I find that leaving the edge slightly ragged creates a rocky texture. -
Add texture to the light side:
Clean your brush slightly so it’s drier, then drag it very lightly over the ‘lit’ side of the mountain. This dry-brush technique suggests craggy rocks peeking through snow. -
Create the rocky outline:
Use the very tip of the brush to outline the steep, unshaded side of the mountain with a thin, broken line. A broken line looks more organic than a solid, heavy wall. -
Splatter details:
Dip a toothbrush or stiff brush in ink and gently flick tiny specks near the mountain base to represent scree or distant debris.
Make It Moody
Dilute your ink with water to create a grey wash. Use this to paint a faint, misty mountain range behind the main peaks for atmospheric perspective.
Step 3: Cultivating the Forest
-
Start the pine tops:
Switch to your fine liner brush for precision. At the top of your foreground hill, paint delicate vertical lines to serve as the trunks of the highest trees. -
Foliage technique:
Using a zigzag or tapping motion, paint the branches starting narrow at the top and widening as you move down the trunk. -
Fill the dense forest:
As you move lower into the foreground mass, switch back to the larger round brush. Fill in the bottom area with solid black ink, merging the individual tree bases into a single dark shadow. -
Create canopy separation:
On the upper edge of the forest silhouette, ensure individual tree tips remain distinct against the white background to maintain the illusion of a forest. -
Add mid-ground trees:
Paint a few smaller, less detailed tree shapes slightly behind the main foreground layer to create depth between the forest and the mountain base. -
Clean up edges:
Refine the edges of your pine trees with the fine brush, adding tiny stray branches to break up any areas that look too smooth or rounded.
Step 4: Final Touches
-
Evaluate contrast:
Step back and look at the balance of black and white. If the mountain feels too light, darken the shadow side with a second layer of ink. -
Erase guidelines:
Once the ink is completely bone-dry—give it extra time just to be safe—gently dab the kneaded eraser over the paper to lift any remaining pencil marks.
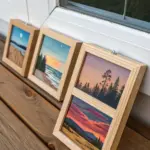
Frame your monochromatic masterpiece in a simple black frame to emphasize the stark contrast


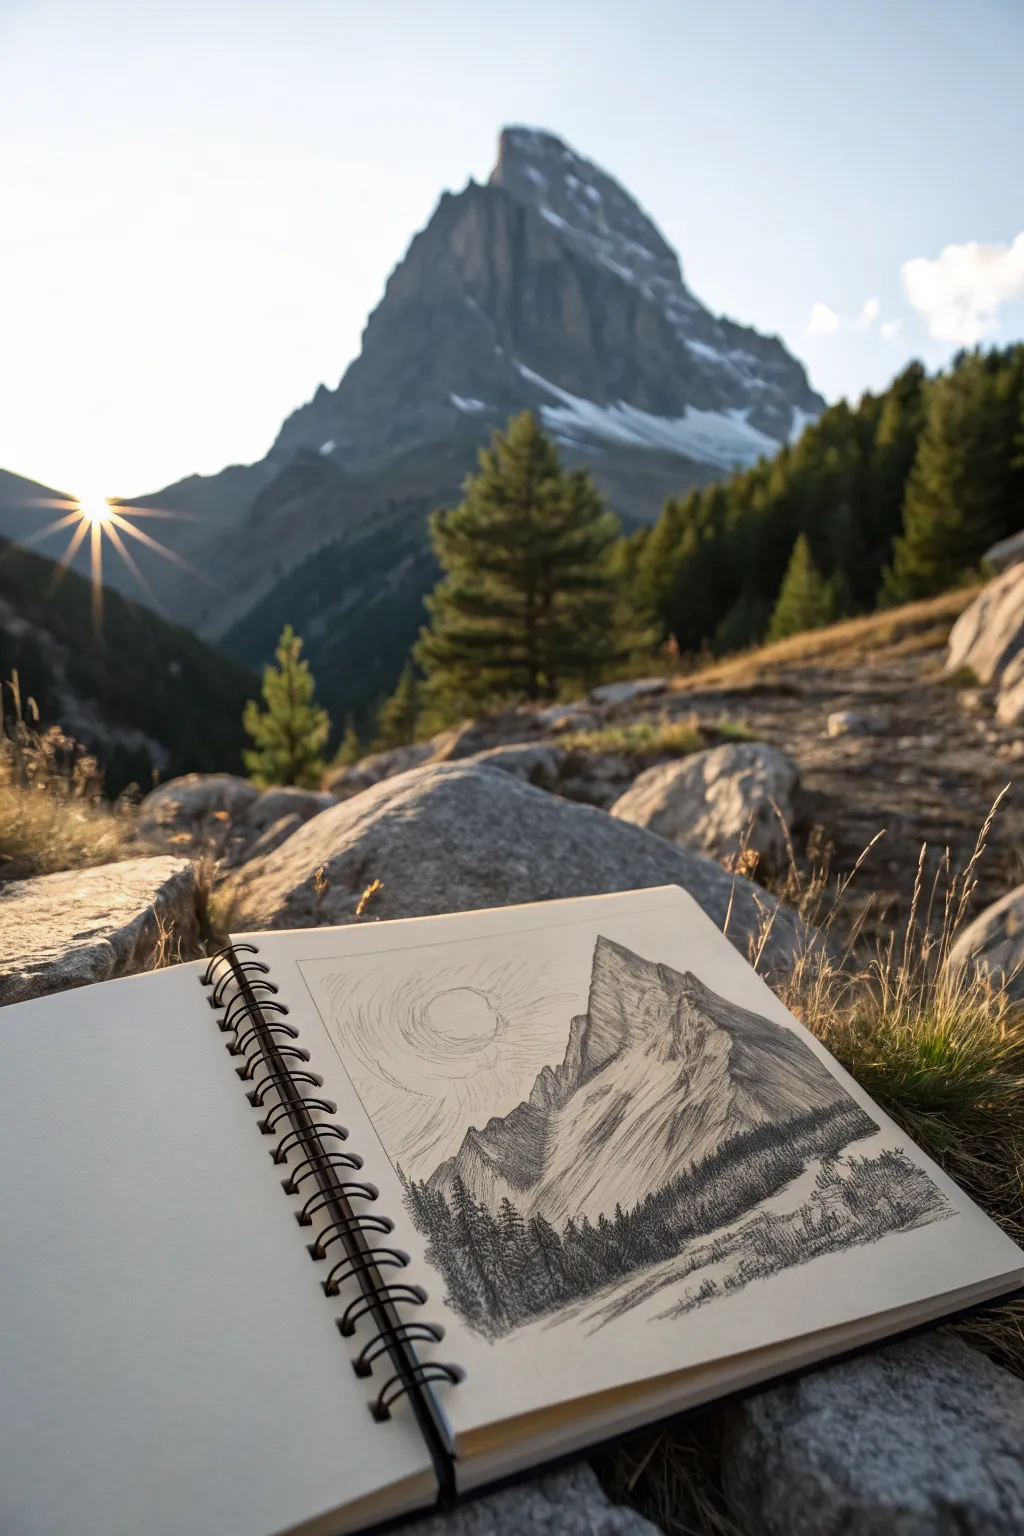
Snow-Capped Peaks With Negative Space
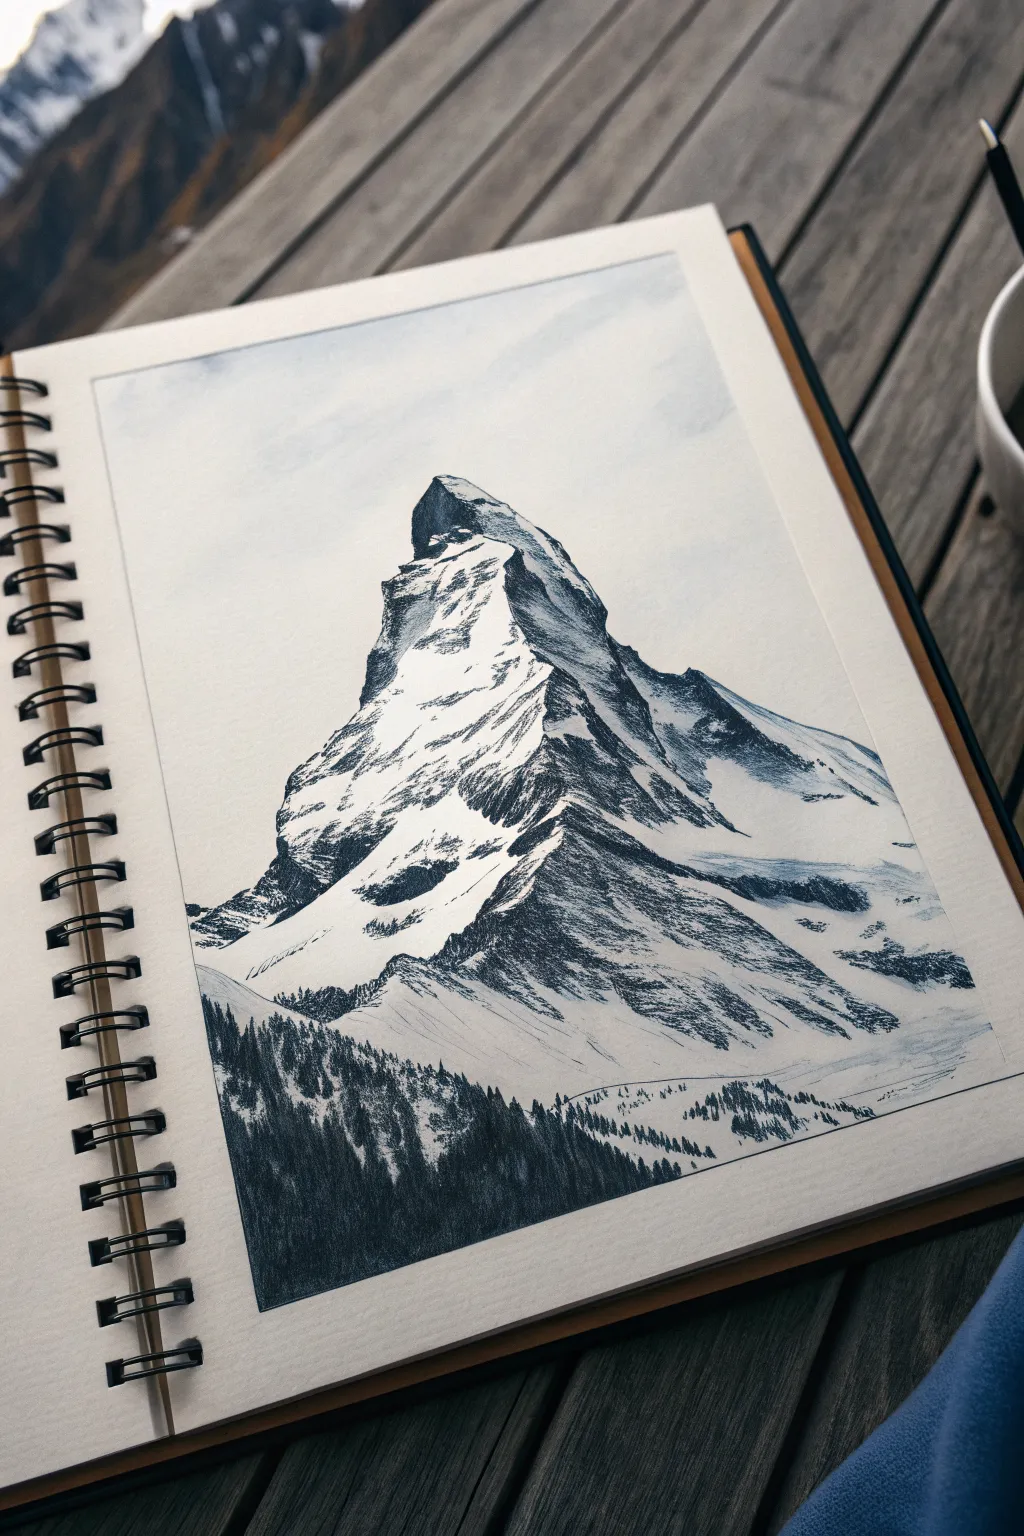
This striking drawing captures the majesty of an alpine peak by letting the paper itself do half the work. Using dense, dark shading to define rock faces and forests creates a brilliant contrast that makes the blank spaces read as blindingly bright snow.
How-To Guide
Materials
- Spiral-bound sketchbook with smooth heavyweight paper (approx. 180gsm)
- Fountain pen with dark blue-black ink OR
- Fine liner pens (0.1mm, 0.3mm, 0.5mm) in dark blue or black
- HB Graphite pencil (for under-drawing)
- Kneaded eraser
- Reference photo of the Matterhorn or similar peak
Step 1: Drafting the Peak
-
Establish the horizon:
Begin by lightly sketching a faint horizon line about one-third of the way up from the bottom of your page. This won’t be a straight line, but rather a guide for where the mountain’s base meets the foreground slopes. -
Outline the silhouette:
Using your HB pencil with very light pressure, map out the main triangular shape of the mountain. The peak in the example has a distinct, slightly hooked summit, pulling to the left. -
Map the shadow shapes:
Look at your reference and identify where the rock faces are exposed. Lightly sketch the boundaries between the bright snow and the dark rock. Do not shade anything yet; just draw the ‘islands’ of rock. -
Sketch the ridge lines:
Draw the jagged lines that separate the sunlit face from the shadowed face. This main ridge running down the center-right is crucial for giving the mountain its three-dimensional volume.
Ink Flow Tip
If using a fountain pen, hold it near the end of the barrel for the loose, scratchy rock textures, and closer to the nib for the precise tree details.
Step 2: Inking the Rock Faces
-
Start from the summit:
Switch to your medium-width pen (0.3mm) or fountain pen. Begin inking the very tip of the peak. Use short, vertical hatching strokes to create the texture of the vertical rock face. -
Build the right-side shadow:
The right side of the mountain is in deep shadow. Fill this area largely with dense cross-hatching, but leave small, horizontal slivers of white paper exposed to represent snow clinging to ledges. -
texture the sunlit face:
On the left (sunlit) face, be much more sparse with your ink. Use broken, jagged lines to suggest craggy rock protruding through the snow, keeping the strokes thin and directional. -
Mind the negative space:
As you move down the mountain, clearly define the edges of the snowfields. The white paper is your snow; only draw the shadows and the rock. This requires resisting the urge to outline the snow itself. -
Intensify the contrast:
Where the snow meets a dark rock ledge, make the ink particularly dark. This high contrast is what makes the snow look bright.
Level Up: Atmospheric Depth
Use a diluted grey ink wash or a grey marker just on the distant mountain side (the right face) to make it look farther away than the crisp foreground trees.
Step 3: The Forest Foreground
-
Outline the treeline:
At the base of the drawing, draft the jagged upper limit of the pine forest. This should slope upwards from left to right, creating a frame for the mountain base. -
Detail individual tree tops:
Using your finest pen (0.1mm), draw the tiny, triangular spikes of individual pine trees along the very top edge of the forest mass. Vary their heights slightly for realism. -
Fill the forest mass:
For the body of the forest, switch to a broader pen or press harder with your fountain pen. Use tight, vertical scribbling or dense hatching. I find this creates a nice texture that looks like dense foliage without drawing every needle. -
Fade the background trees:
On the right side where the trees are further away or sparse, use lighter, separated strokes. Let the forest fade into small dots and dashes as it recedes into the distance. -
Connect forest and mountain:
Add a few faint, horizontal lines between the forest and the mountain base to suggest a glacier or flat valley floor, grounding the scene.
Step 4: Refinement
-
Erase pencil guides:
Once the ink is completely dry (give it a few minutes to be safe), gently run your kneaded eraser over the page to lift all the initial graphite lines. -
Deepen the darkest values:
Step back and squint at your drawing. Go back in with your thickest pen or largest nib to add a second layer of ink to the deepest crevices of the rock and the bottom of the forest.
Your finished piece now holds the silent power of the high alps, captured simply through shadow and light
BRUSH GUIDE
The Right Brush for Every Stroke
From clean lines to bold texture — master brush choice, stroke control, and essential techniques.
Explore the Full Guide
Atmospheric Perspective Layered Ridges

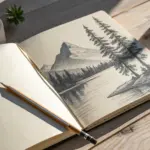
Capture the moody atmosphere of a mountain range directly from life with this double-page landscape study. Using soft graphite shading and flowing lines, you will create a sense of depth that mirrors the vastness of the peaks before you.
Step-by-Step Guide
Materials
- Hardbound sketchbook (A5 or similar size)
- Graphite pencils (HB, 2B, 4B)
- Kneaded eraser
- Paper blending stump or tissue
- Pencil sharpener
Step 1: Planning Composition
-
Assess the Horizon:
Sit comfortably with your sketchbook open flat. Look at your scene and identify where the sea meets the sky or the base of the mountains. Lightly sketch a very faint horizontal line across both pages about one-third of the way up from the bottom to establish this dominant horizon. -
Block in Major Shapes:
Using an HB pencil with a light touch, outline the basic triangles and overlapping mounds of the mountain ranges. Don’t worry about details yet; just focus on getting the scale right so the tallest peak dominates the center-left page. -
Extend Across the Gutter:
Ensure your mountain lines flow continuously across the book’s center binding (the gutter). Treat the two pages as a single panoramic canvas rather than two separate drawings.
Step 2: Shading and Texture
-
Establish the Sky:
For the moody sky, turn your pencil on its side to create broad, soft strokes. Keep this area light and airy, avoiding hard edges. -
Define the Background Peaks:
Switch to a 2B pencil for the distant mountains. Shade the shadowed sides of the peaks with diagonal hatching marks. Keep the pressure moderate to push these mountains back into the distance. -
Darken the Mid-Ground:
Move to the closer mountain range on the right page. Press harder with the 2B pencil to create steeper contrast. Use vertical strokes to mimic the look of cliff faces and rocky drops. -
Add Foreground Texture:
On the bottom right page, near the corner, sketch the immediate foreground vegetation. Use short, scribbly marks with a 4B pencil to represent shrubbery and rough grass. -
Create Water Reflections:
Where the water sits in the valley, use horizontal sweeping strokes. Leave some paper white to suggest light reflecting off the surface.
Smudged Page?
Graphite spreads easily in sketchbooks. Place a piece of scrap paper under your drawing hand to prevent dragging your palm through your fresh shading.
Step 3: Refining Details
-
Sharpen the Peaks:
Go back over the very tips of the mountains with a freshly sharpened HB pencil. A crisp, dark outline on the ridge creates a strong silhouette against the sky. -
Blend for Atmosphere:
Take your blending stump or a tissue and gently smudge the shading on the most distant mountains. This softens the grain of the paper and creates an ‘atmospheric perspective’ effect, making them look misty. -
Intensify Shadows:
Identify the darkest crevices and valleys. Use the 4B pencil to lay down deep blacks in these areas, anchoring the drawing and giving the landscape volume. -
Add Scale Indicators:
Draw tiny, faint vertical lines on the distant slopes to suggest distant trees or texture, helping to communicate just how massive the mountains are. -
Sketch the Lower Left:
On the bottom left page, sketch a rounded, dark mound to represent a nearby rock or hillock. Use curved hatching lines to give it a 3D form, contrasting it against the flat water behind it. -
Final Contrast Check:
Stand back or squint at your drawing. I like to check if the foreground is significantly darker than the background; if not, add one last layer of 4B shading to the closest elements. -
Clean Up:
Use the kneaded eraser to lift off any smudges from the sky area or the white water highlights, keeping the light areas crisp.
Atmospheric Depth
Remember the rule of thumb: things get lighter and less detailed the further away they are. Keep your darkest marks strictly in the foreground.
Close your sketchbook knowing you have captured a fleeting moment of the landscape forever
Pine Tree Foreground for Scale
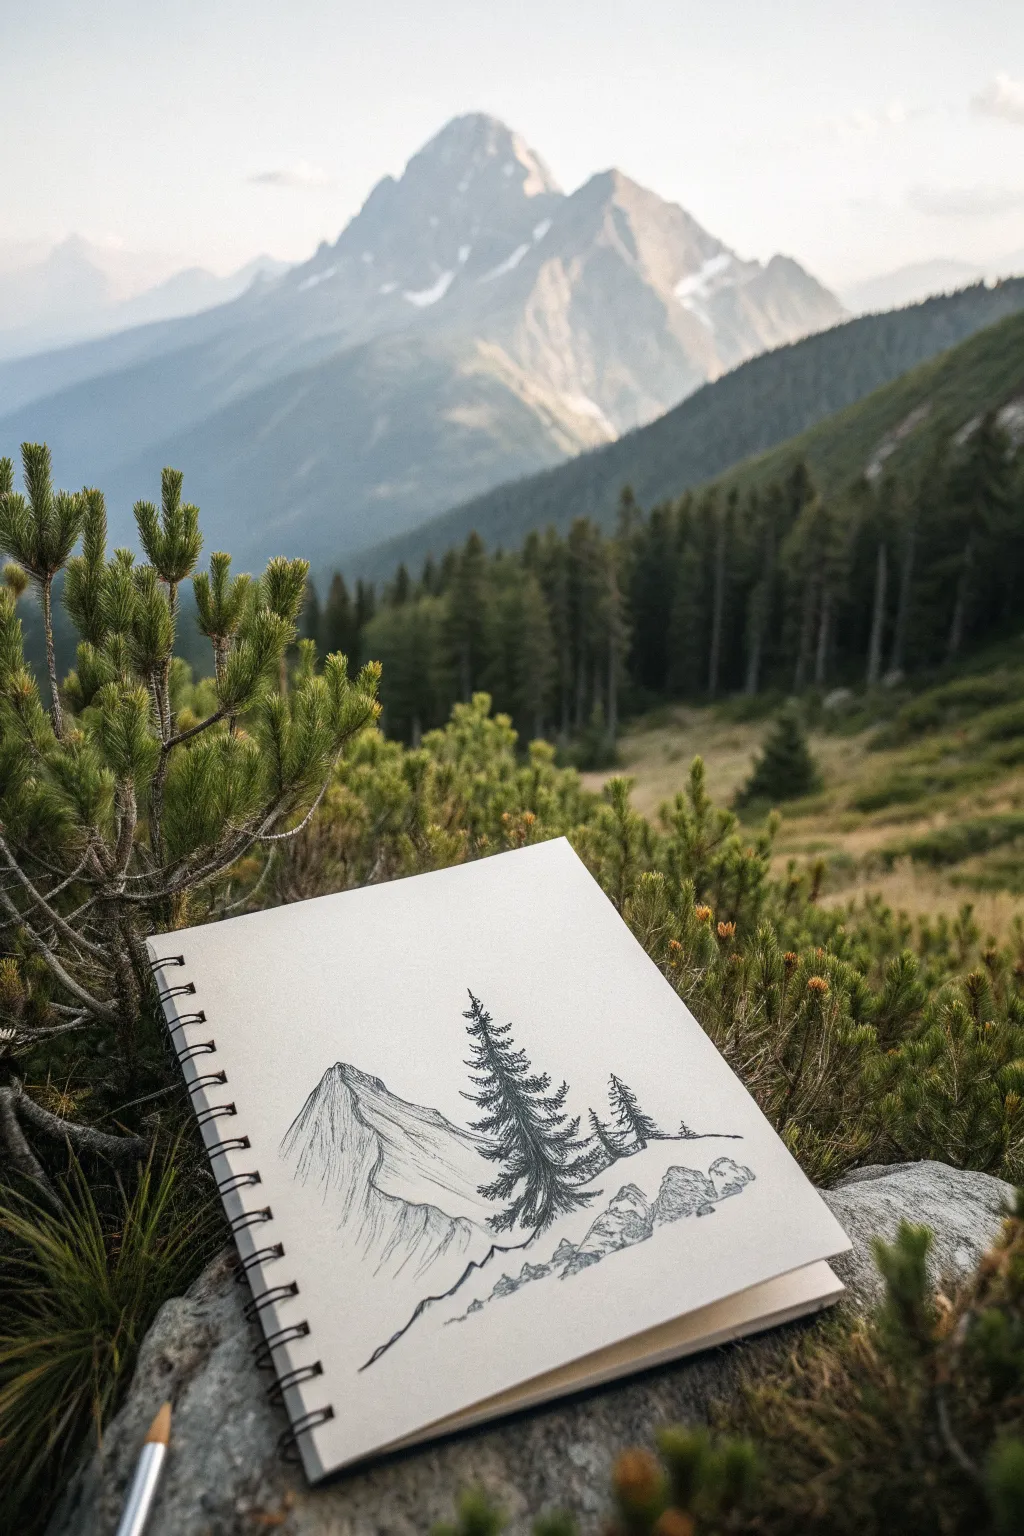
Capture the serene majesty of the mountains with this minimalist pen and ink sketch featuring a prominent pine tree to add depth and scale. This project uses simple hatching techniques to create texture and contrast, making it perfect for an on-location sketching session or a cozy afternoon at home.
How-To Guide
Materials
- Sketchbook with smooth, heavy paper
- HB pencil for preliminary sketching
- Kneaded eraser
- Fine liner pens (sizes 0.1, 0.3, and 0.5)
- Small blending stump (optional)
Step 1: Laying the Foundations
-
Define the horizon:
Start lightly with your HB pencil. Draw a gentle, uneven line across the lower third of the page to represent the rocky foreground where the viewer is ‘standing’. -
Outline the peak:
Left of center, sketch a large, triangular mountain peak. Keep the lines jagged and irregular to mimic natural rock formations, letting the right side slope down more gradually than the steep left face. -
Place the trees:
Indicate the position of the main pine tree with a vertical line in the foreground, right of center. Add a shorter vertical line to its right for a smaller companion tree, ensuring the base sits lower on the page to show perspective. -
Sketch the rocks:
Loosely draw a cluster of rounded and angular shapes at the bottom right corner to form boulders in the immediate foreground.
Smudged Ink?
If your hand smudges fresh ink, place a scrap piece of paper under your drawing hand as a guard sheet while you work on detailed areas.
Step 2: Inking the Trees
-
Start the main trunk:
Switch to a 0.5 pen. Draw the trunk of the large pine, making it thicker at the base and tapering near the top. Don’t draw a straight line; use short, broken strokes for a bark-like texture. -
Build the branches:
Starting near the top, use short, quick scribbling motions to create the needles. The branches should angle slightly downward and get wider as you move down the tree. -
Create density:
Go back over the center of the tree near the trunk with denser scribbles. I usually darken this area significantly to make the outer branches feel lighter and more airy by comparison. -
Ink the smaller trees:
Repeat the process for the smaller tree to the right, using slightly fewer details to imply distance. Add a tiny, distant tree silhouette on the far right ridge for scale.
Varied Line Weight
Use the 0.5 pen for foreground elements like the main tree and rocks, and the 0.1 pen for the distant mountain to enhance atmospheric depth.
Step 3: Structuring the Mountain
-
Outline the ridge:
Using a 0.3 pen, trace over your pencil mountain outline. Make the ridge line distinct but broken in places to suggest snow or light hitting the edge. -
Define the facets:
Draw faint lines coming down from the peak to divide the mountain into different faces. This establishes where the light and shadow will fall. -
Apply basic shading:
With a 0.1 pen, use vertical hatching lines on the shadowed side of the mountain (the left face in this composition). Keep your lines parallel and closely spaced. -
Add cross-hatching:
Deepen the darkest crevices of the mountain by adding a second layer of hatching lines at a diagonal angle. This creates contrast against the white paper that represents snow.
Step 4: Foreground Details
-
Texture the rocks:
Use the 0.3 pen to outline the boulders in the foreground. Add stippling (tiny dots) and irregular cracks to give them a granite-like texture. -
Connect the scene:
Draw a unified jagged line connecting the base of the mountain to the foreground rocks, suggesting a rugged trail or ridge. -
Final touches:
Add a few stray grass blades near the rocks and beneath the trees using quick, upward flicks of your 0.1 pen. -
Clean up:
Once the ink is completely dry—give it a full minute—gently erase the underlying pencil structure to reveal the crisp black lines.
Now you have a timeless mountain landscape that brings the fresh alpine air right to your page

PENCIL GUIDE
Understanding Pencil Grades from H to B
From first sketch to finished drawing — learn pencil grades, line control, and shading techniques.
Explore the Full Guide
Winding River Leading to the Mountains
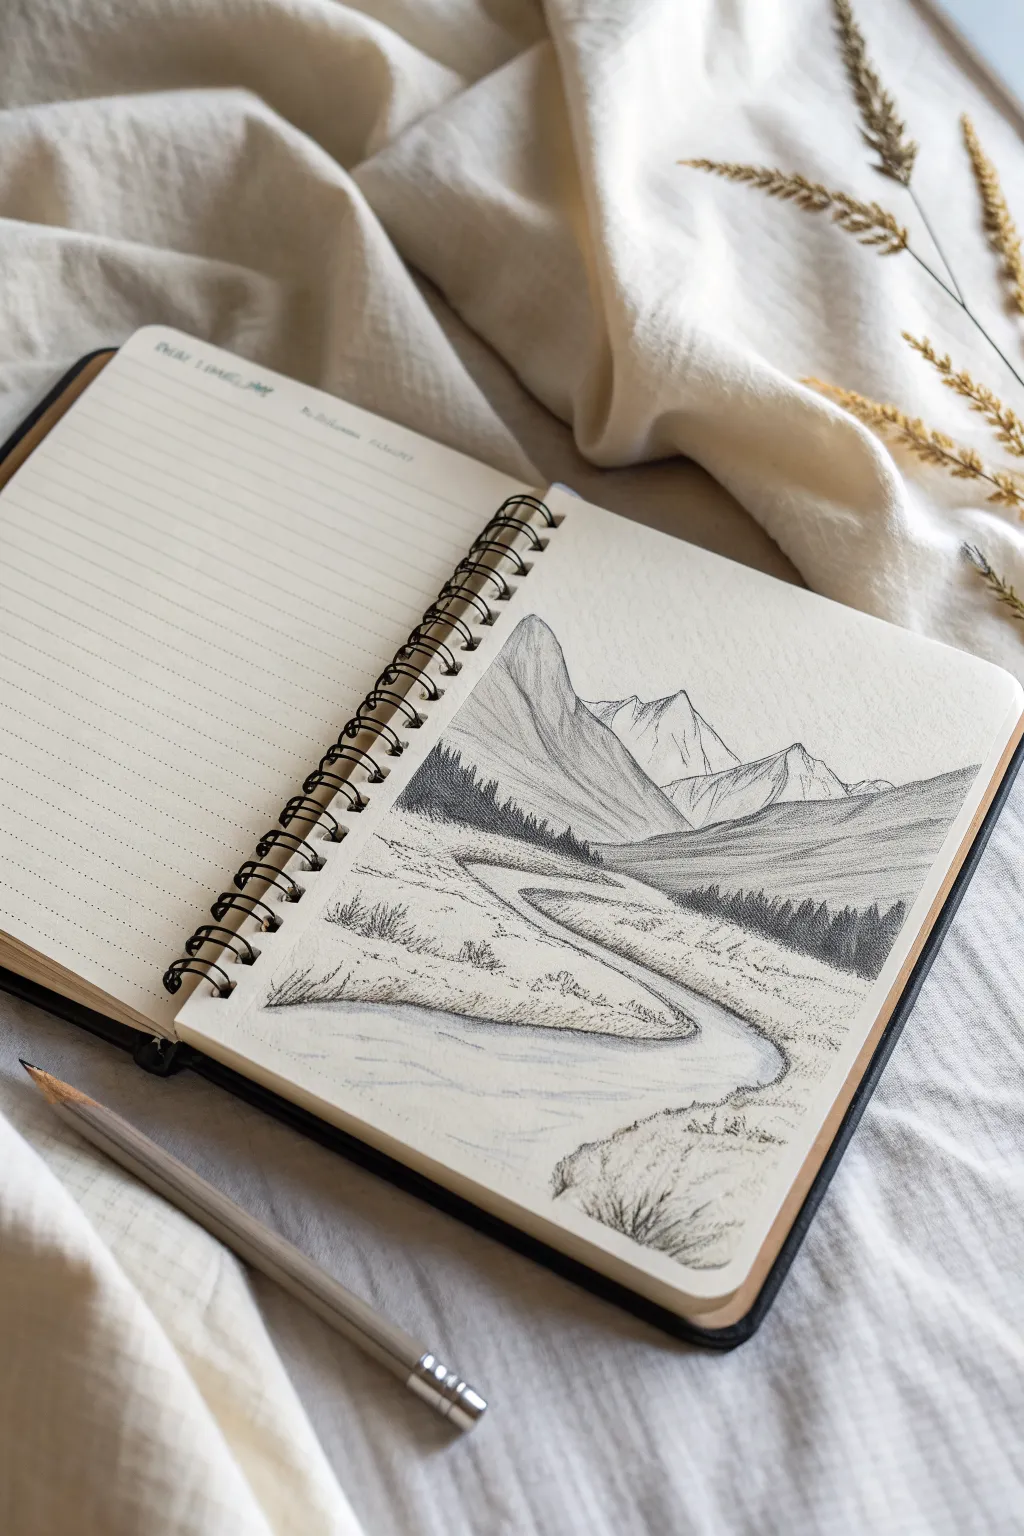
This serene pencil sketch captures the depth of a valley floor leading up to rugged peaks, using perspective to draw the viewer’s eye through the scene. It combines soft shading techniques with crisp linework to create distinct textures for water, grass, and stone.
Step-by-Step Tutorial
Materials
- Spiral-bound sketchbook with smooth or vellum surface paper
- Graphite pencils (HB for sketching, 2B and 4B for shading)
- Mechanical pencil (0.5mm) for fine details
- Kneadable eraser
- Blending stump or tortillon (optional)
Step 1: Laying the Composition
-
Establish the Horizon:
Begin by lightly sketching a horizontal line roughly one-third of the way up the page. This doesn’t need to be perfectly straight, as it represents the base of your main mountain range. -
Draft the Mountains:
Draw the outlines of three main peaks. Make the central peak the tallest and most jagged. Add a swooping slope on the left side that cuts in front of the distant peaks to establish the mid-ground valley wall. -
Map the River:
Sketch the river’s path. Start narrow near the base of the mountains and widen the lines significantly as they curve toward the bottom right corner of the page. This ‘S’ curve is crucial for depth. -
Outline the Riverbanks:
Lightly define the raised banks along the river. I find it helpful to draw slightly erratic lines here to suggest uneven, grassy terrain rather than distinct, paved edges.
Clean Edges Trick
Place a scrap piece of paper under your drawing hand while you work. This prevents your palm from smudging your pencil lines and keeps the white space in your landscape crisp and clean.
Step 2: Shading the Mountains
-
Define the Light Source:
Decide that your light is coming from the right. This means the left sides of your mountain peaks will be in shadow. -
Shade the Left Peak:
Using the side of a 2B pencil, shade the large left-hand slope. Keep the strokes directional, following the downward slant of the mountain face to suggest geological striations. -
Detail the Distant Peaks:
For the background mountains, use lighter shading. Leave the right-facing facets of the peaks mostly white to represent bright highlights or snow, contrasting sharply with the shadowed areas. -
Refine the Ridges:
Go back over the ridge lines—the spines where the mountains meet the sky—with a sharper HB pencil to give them a crisp, jagged silhouette.
Creative Twist
Use a white gel pen to add highlights back into the dark pine trees or to create sparkling reflections on the river water for a mixed-media effect.
Step 3: Adding Texture and Foliage
-
Block in the Forest:
Along the base of the mountains and the receding valley hills, sketch a dark, dense strip. This represents the distant pine forest. -
detail the Trees:
Switch to a 4B pencil to darken this forest strip. Instead of drawing individual trees, use short, vertical scribbles to create a jagged top edge that implies treetops. Make the trees on the right side of the river distinct and dark to anchor the mid-ground. -
Texture the Valley Floor:
Using an HB pencil, add very light, horizontal shading across the flat plains. Keep this minimal to make the area feel open and expansive. -
Create Grassy Banks:
On the immediate banks of the winding river, add clusters of short, upward flicks. These marks simulate tufts of tall grass and bushes.
Step 4: Water and Final Touches
-
Shade the Water:
The river reflects the sky, so it should be lighter than the grass. Use horizontal strokes with a very light touch, leaving some areas purely white to suggest glimmering motion. -
Darken the River Edges:
Deepen the shading right where the water meets the bank. This shadow lifts the bank up visually, making the river look recessed into the landscape. -
Foreground Details:
In the bottom right corner (the closest point to the viewer), sketch a few larger, more detailed shrubs or rocks. This reinforces the scale difference between the foreground and the distant mountains. -
Review Contrast:
Step back and check your values. If the mountains blend too much into the sky, darken the shadowed sides slightly more to make them pop.
Enjoy the peaceful process of bringing this quiet valley to life on your page
Mountain Pass Trail Into the Distance
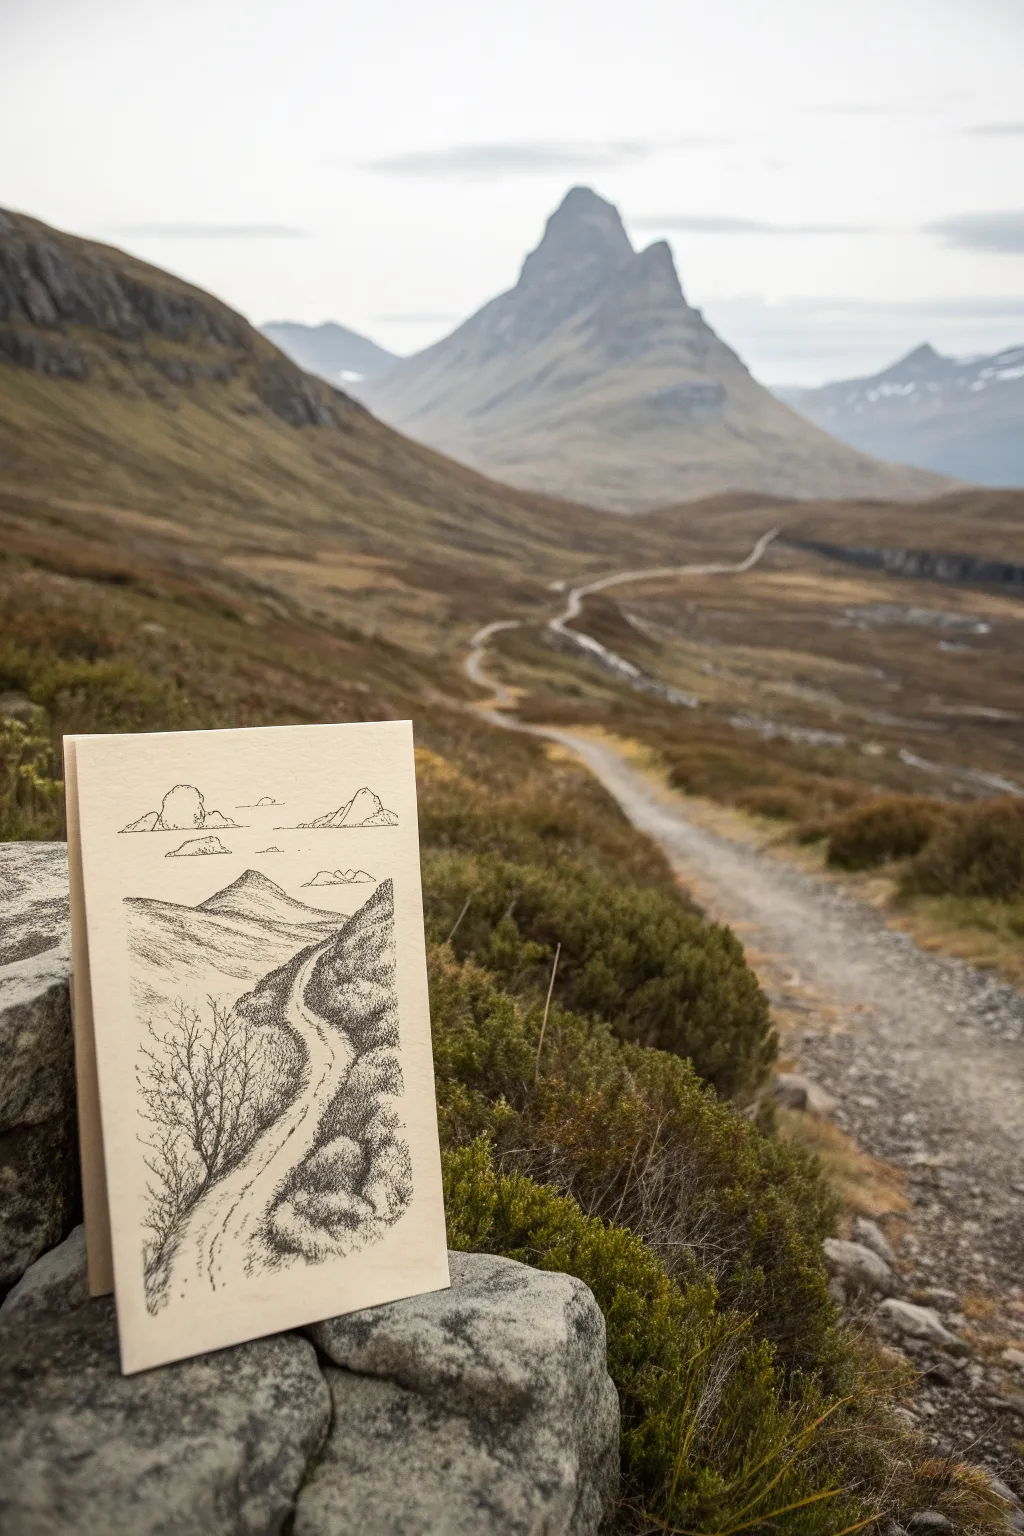
Capture the serene beauty of a highland trail with this detailed pen and ink landscape. This project focuses on texture and perspective, using simple hatching techniques to create depth between the foreground foliage and distant peaks.
Step-by-Step Tutorial
Materials
- Cream or off-white cardstock (A6 or greeting card size)
- Fine liner pens (sizes 0.1, 0.3, and 0.5)
- HB pencil
- Kneaded eraser
- Ruler (optional)
Step 1: Planning the Composition
-
Establish the horizon:
Begin by lightly sketching a horizontal line with your pencil a little above the center of the page. This doesn’t need to be perfectly straight, as it represents distant hills. -
Outline the main peak:
Draw the central mountain shape rising from the horizon line. Keep the peak slightly left of center, sloping gently down to the right to mirror the real landscape. -
Map the winding path:
Sketch two converging lines to create the trail. Start wide at the bottom left corner and curve it inward, narrowing significantly as it winds toward the central mountain to establish perspective.
Ink Smearing?
If you are left-handed, work from right to left to avoid smudging wet ink. Alternatively, rest your hand on a clean scrap piece of paper while drawing.
Step 2: Inking the Landscape
-
Define the horizon:
Switch to a 0.3 pen to ink the main mountain outlines. Use a slightly shaky, organic line rather than a straight edge to mimic the rugged terrain. -
Draw the clouds:
Use the 0.3 pen to outline the distinctive, stylized cloud shapes floating above the peaks. Keep the bottoms flat and the tops rounded and puffy. -
Ink the path edges:
Go over your pencil lines for the path. Break the line occasionally rather than making it solid; this suggests grass and rocks encroaching on the dirt trail. -
Add foreground hills:
Outline the rolling hills on either side of the path in the foreground. These should overlap the base of the distant mountain to create layers of depth.
Add Watercolor
Once the ink is waterproof-dry, add a light wash of watercolor. Use diluted ochre for the path and a pale slate blue for the mountains.
Step 3: Adding Texture and Detail
-
Hatch the distant mountain:
Using your finest 0.1 pen, add horizontal hatching lines across the main mountain face. Keep the lines closer together on the shadowed side (usually the left) to create form. -
Texture the mid-ground:
On the hills just behind the path, use short, diagonal dashes. This technique suggests rough grass or heather without drawing every individual blade. -
Create the dark foreground:
Switch to the 0.5 pen for the immediate foreground on the right side. Use dense stippling (dots) and scribbled textures to represent thick bushes and rocks. -
Draw the leafless tree:
On the left side of the foreground, sketch a bare, spindly bush or small tree using the 0.3 pen. Let the branches reach up and outward, overlapping the distant hills. -
Detail the path:
Add very sparse, broken lines down the center of the path with the 0.1 pen to suggest tyre tracks or foot traffic. Keep this subtle so the path remains the lightest part of the drawing. -
Shade the clouds:
Add tiny clusters of dots or very light hatching to the underside of the clouds to give them volume and weight.
Step 4: Finishing Touches
-
Deepen contrast:
Look at the darkest areas in the foreground bushes. Go back in with the 0.5 pen and add more ink to increase the contrast against the white path. -
Erase pencil guides:
Wait at least five minutes to ensure the ink is completely dry. Gently rub the kneaded eraser over the entire drawing to lift the initial graphite sketch. -
Refine edges:
If any lines look too abrupt after erasing, soften them by adding a few tiny dots or broken lines to connect the elements visually.
Now you have a charming, hand-drawn keepsake of a mountain adventure ready to display or send to a friend


Moonrise Over Twin Peaks
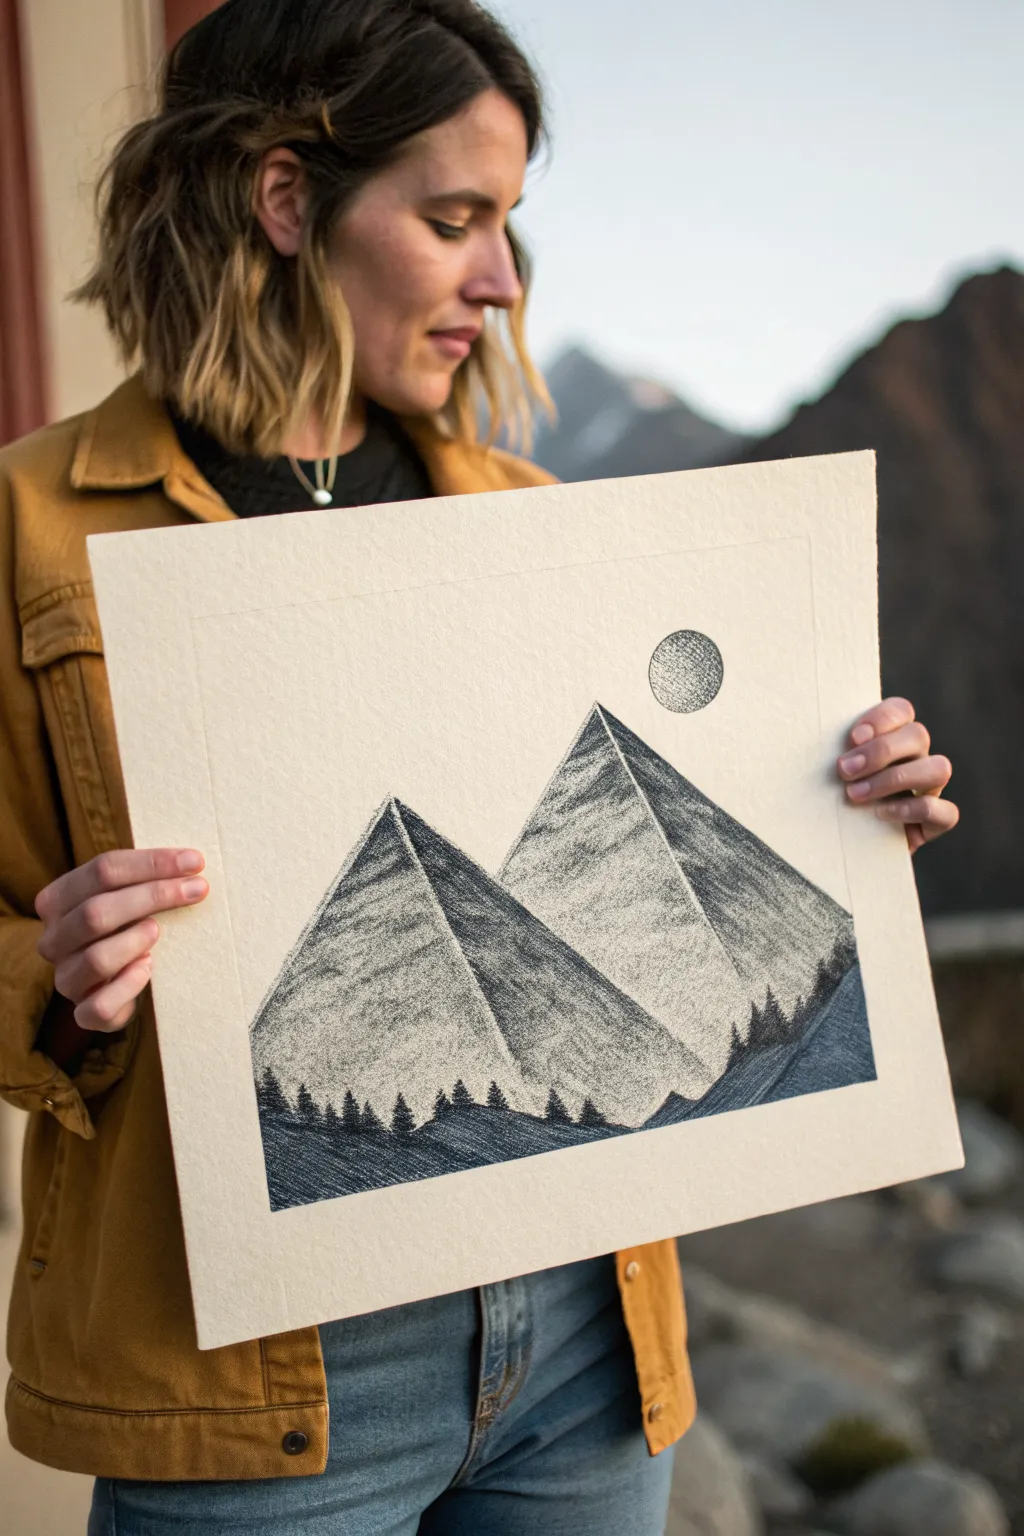
This striking monochromatic landscape combines sharp geometric forms with organic textures to create a moody, minimalist mountain scene. Using high-contrast shading techniques, you’ll capture the drama of moonlight hitting jagged peaks.
Step-by-Step
Materials
- Large square heavyweight drawing paper (bristol or mixed media)
- Graphite pencils (HB, 2B, 6B)
- Charcoal pencils or sticks (medium and soft)
- Ruler or straight edge
- Compass or circular object for tracing
- Kneaded eraser
- Blending stump or tortillon
- Workable fixative spray
Step 1: Drafting the Composition
-
Establish the horizon:
Begin by lightly marking a horizontal guide about one-fifth of the way up from the bottom of your paper. This will serve as the base for your foreground treeline later. -
Map the peaks:
Using your ruler and an HB pencil, draw two large, overlapping triangles. The left peak should be slightly shorter and positioned forward, while the right peak towers behind it, its right slope extending off the page edge. -
Define the light source:
Decide exactly where your light is coming from—in this case, the upper right. Lightly draw a vertical line down the center of each triangle to separate the sunlit face from the shadowed face. -
Place the moon:
Use a compass or trace a small circular object to place the moon in the upper right quadrant, floating just above the slope of the larger mountain.
Step 2: Developing Texture and Value
-
Shade the lit faces:
Start with the right-hand side of each mountain triangle (the faces catching the moonlight). Use a 2B pencil or hard charcoal to shade these areas lightly. Keep your strokes diagonal and uniform, mirroring the slope of the mountain. -
Darken the shadowed faces:
Switch to a darker 6B pencil or soft charcoal for the left-hand faces of the mountains. Apply heavy pressure to create a deep, solid contrast against the lighter faces, establishing the pyramid-like geometry. -
Add stone texture:
Return to the lighter faces and scumble texture over them using the side of your charcoal stick. Let the paper’s tooth show through to simulate rough granite. -
Refine the edges:
Use your ruler again to darken and crisp up the outer edges of the triangles. A sharp, clean outline is crucial for that modern, geometric look. -
Detail the moon:
Fill in the moon circle with a stippling technique or very tight cross-hatching. Aim for a mid-tone grey that stands out against the white sky but isn’t as dark as the mountain shadows.
Keep it Clean
Place a scrap sheet of paper under your drawing hand. Charcoal smudges easily, and this barrier protects your crisp white sky from accidental fingerprints.
Step 3: Foreground and Finishing Touches
-
Sketch the treeline:
Along the bottom horizon line you established earlier, sketch a jagged, uneven line to represent the tops of distant trees in the foreground valley. -
Fill the forest:
I like to use my darkest charcoal here to anchor the drawing. Fill the entire bottom section below your jagged line with solid black, moving your hand horizontally to suggest dense forest. -
Add individual pines:
Using a sharpened charcoal pencil, draw tiny vertical spikes and triangular tree shapes emerging from the solid black mass. Vary their heights to make the forest feel natural and organic. -
Create distinct trees:
On the far right slope where the mountain meets the foreground, add a few larger, distinct pine tree silhouettes climbing slightly up the hill. -
Blend selectively:
Use a blending stump to soften the transition between the dark forest and the base of the mountains, creating a subtle misty effect in the valley. -
Clean up:
Take your kneaded eraser and firmly press it around the outside of the moon and the sharp peaks to lift any stray charcoal dust, ensuring the white paper remains pristine.
Add a Constellation
Use a white gel pen or gouache strictly in the dark shadow side of the mountains to add tiny specks, creating a surreal ‘stars in the mountain’ effect.
Mist the final piece with fixative to ensure your deep blacks don’t smudge while framing
Storm Clouds and Rain Streaks
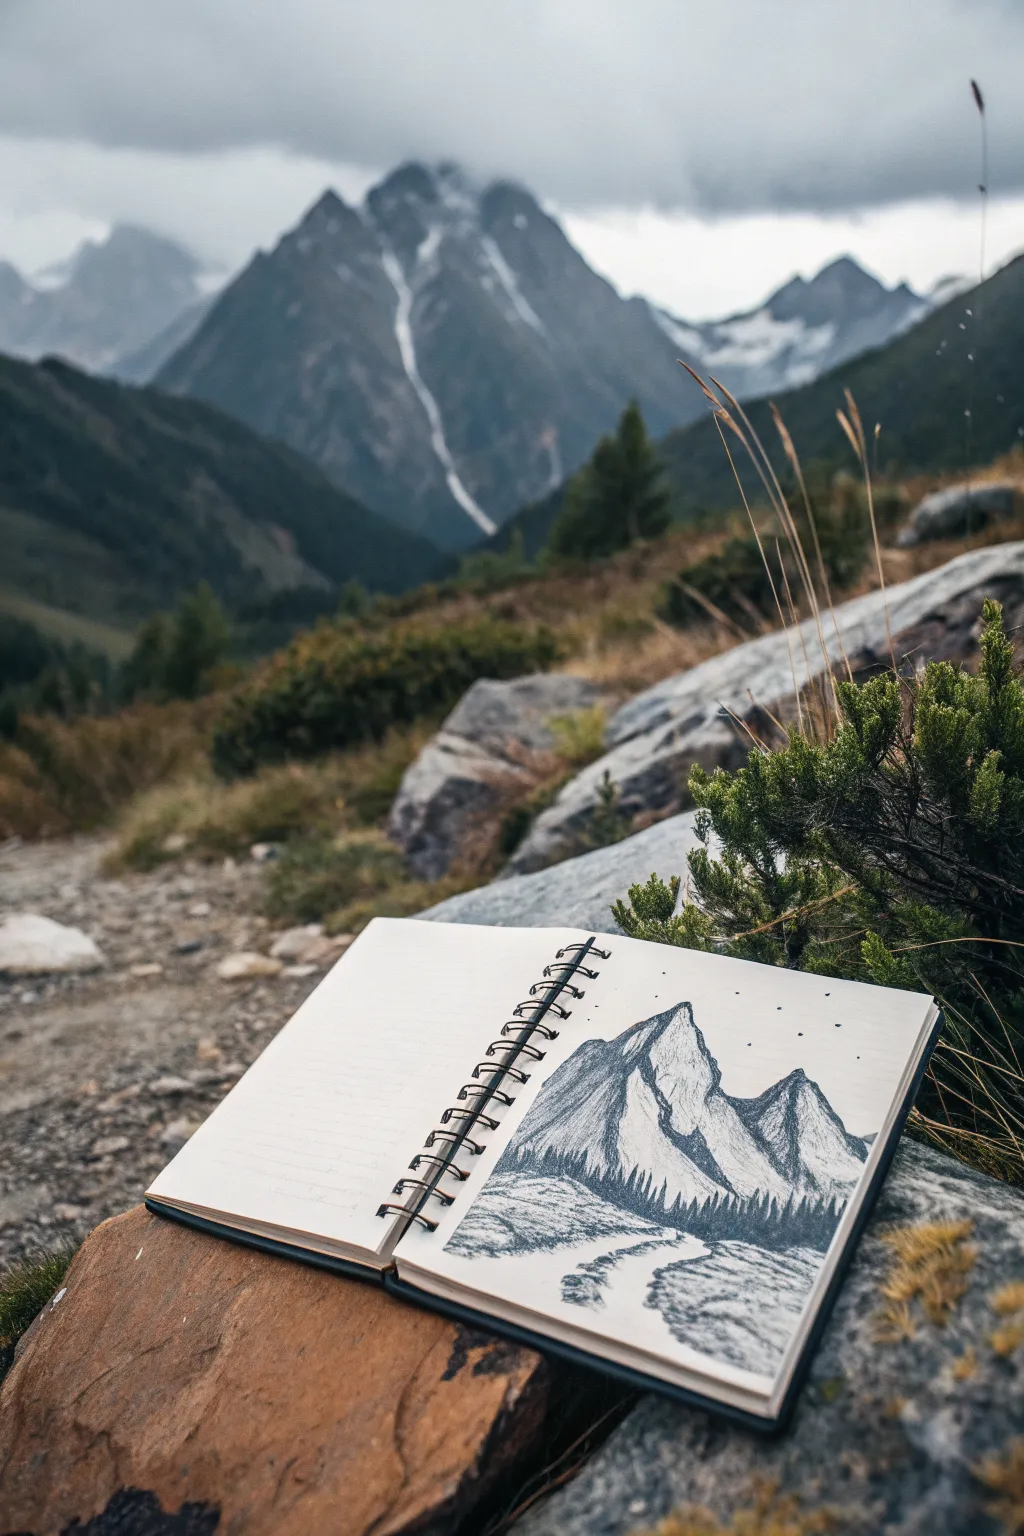
Capture the rugged spirit of an alpine landscape directly in your sketchbook with this high-contrast monochromatic study. This project focuses on using texture and value to differentiate between looming peaks, dense evergreen forests, and a rushing river.
Step-by-Step
Materials
- Spiral-bound sketchbook (heavyweight paper recommended)
- Set of graphite pencils (HB, 2B, 4B, 6B)
- Charcoal pencil (optional, for darkest darks)
- Kneaded eraser
- Blending stump or tortillon
- Fine-point mechanical pencil
Step 1: Laying the Foundations
-
Define the horizon:
Start by lightly sketching a horizontal line about a third of the way up from the bottom of the page to establish where the mountains meet the valley floor. -
Outline the peaks:
Using an HB pencil, draw the jagged triangular outlines of three main peaks. Make the central peak the tallest and broadest, with slightly smaller, sharper peaks flanking it on the right. -
Map the ridges:
Draw jagged lines down the center of each mountain face to define the ridges. These lines separate the lit side from the shadowed side, giving the mountains immediate three-dimensionality. -
Sketch the river path:
At the bottom of the page, lightly sketch a winding s-curve shape that starts narrow near the mountain base and widens as it flows toward the bottom edge, creating a sense of perspective.
Don’t Over-blend
Resist using your finger to smudge the mountains. Keeping the pencil strokes visible and rough mimics the texture of rock far better than smooth shading.
Step 2: Building the Mountains
-
Shadow the peaks:
Switch to a 2B or 4B pencil. On the right-hand side of each ridge line you drew earlier, fill in the rock faces with firm, vertical shading strokes to create deep shadows. -
Texture the light side:
On the left (lit) side of the peaks, use lighter, shorter hatch marks. don’t fill it in completely; leave plenty of white paper showing to represent snow or bright reflected light. -
Deepen the crevices:
Go back into the shadowed areas with your 6B pencil. Press harder in the deepest nooks and crannies of the rock face to add contrast and drama. -
Add craggy details:
Use a sharp mechanical pencil to add erratic, jagged lines along the ridge tops and down the slopes, mimicking the fractured texture of alpine rock.
Step 3: Forest and Foreground
-
Establish the tree line:
At the base of the mountains, use a 6B or charcoal pencil to create a dark, solid band. Use short, vertical up-and-down strokes to simulate the tips of distant pine trees. -
Vary tree heights:
Make the top edge of this dark band uneven. Some trees should stand taller than others to break up the silhouette and make the forest look organic. -
Darken the forest mass:
Fill in the body of the forest solidly black or very dark grey. This high-contrast band anchors the drawing and pushes the lighter gray mountains into the distance. -
Outline the river banks:
Refine the edges of your river or path using a 4B pencil. Use horizontal, scribbly strokes along the banks to suggest grassy or rocky textures. -
Texture the water flow:
Inside the river outline, use light horizontal strokes with an HB pencil. keep these strokes loose and intentionally uneven to suggest the movement of rushing water. -
Add foreground rocks:
In the immediate foreground near the bottom corners, sketch a few rough, angular shapes to represent boulders, shading their right sides for consistency.
Mist Effect
Use a clean eraser to lightly rub out the bottom edge of the tree line where it meets the ground. This creates a soft, misty fog effect.
Step 4: Final Atmosphere
-
Add sky elements:
In the open sky area above the peaks, adding a few tiny dots or specks can represent birds or distant falling debris, adding life to the empty space. -
Clean up highlights:
Take your kneaded eraser and dab it on the ‘snowy’ sides of the mountains to lift off any smudges, ensuring the highlights are crisp and bright. -
Final contrast check:
I always do one last pass with the darkest pencil, reinforcing the separation between the white snow and the dark rock ridges to ensure the drawing pops.
Now you have a rugged mountain vista preserved in your sketchbook, ready to remind you of the wild outdoors.
Split-Light Shading: Sun Side vs. Shadow Side
Capture the dramatic interplay of light and shadow on a rugged mountain peak using graphite pencils. This sketch focuses on cross-hatching and tonal values to differentiate the sun-drenched slopes from the deeply shadowed crags, all set within an open sketchbook for a classic plein air feel.
How-To Guide
Materials
- Spiral-bound sketchbook (heavyweight cartridge paper)
- Set of graphite pencils (HB, 2B, 4B, 6B)
- Kneadable eraser
- Pencil sharpener or craft knife
- Blending stump (optional)
Step 1: Planning and Outlining
-
Rough Composition:
With an HB pencil held loosely, lightly map out the main triangular shape of the mountain peak. Position it slightly off-center to the right, leaving room on the left for the sun element. -
Define the Ridgeline:
Draw the jagged edge of the main ridge that descends from the summit. This line is crucial as it separates the lit face from the shadowed face. -
Sketch Foreground Elements:
Indicate the treeline at the base of the mountain with a rough, wavy horizontal line. Below that, lightly sketch the path of the stream or river. -
Sun Placement:
On the upper left, lightly draw a circle for the sun. Sketch simple radiating lines extending outward to indicate the light source direction.
Step 2: Shading the Mountain
-
Mapping Shadow Shapes:
Look closely at the rock faces. Lightly outline the specific patches of rock that fall into deep shadow versus those hitting the light. -
Base Layer for Shadows:
Using a 2B pencil, apply a light, even layer of diagonal hatching to the entire shadow side of the mountain (the left face of the main peak). -
Deepening the Crags:
Switch to a 4B pencil. Go back into the shadow side and darken specific crevices and steep drop-offs. Use vertical strokes here to suggest the downward pull of gravity on the cliffs. -
The Lit Side:
On the right-hand face (the sun side), use very sparse, light hatching with the HB pencil. Leave large areas of white paper showing to represent bright sunlight hitting snow or pale rock. -
Texture and Strata:
Add subtle, flowing lines across the lit face to suggest geological strata. These lines should curve slightly to follow the form of the mountain, wrapping around its volume.
Directional Strokes
Make your pencil strokes follow the slope of the terrain. If a rock face tilts down, hatch downward. This ‘sculpts’ the mountain on the flat paper.
Step 3: Adding the Landscape Details
-
blocking in the Treeline:
Use a 4B or 6B pencil to create the dark forest belt. Use short, vertical, scribbling motions to mimic the texture of pine trees packed closely together. -
Varying Tree Heights:
Ensure the top edge of your treeline is uneven. Let some individual ‘spikes’ rise higher than others to look like natural tree tops rather than a solid wall. -
Foreground Vegetation:
Below the forest, sketch lighter, grassy textures near the riverbank. Use quick, upward flicks of the pencil. -
Defining the River:
Strengthen the banks of the stream. Add a few horizontal lines within the water shape to suggest surface reflection and flow.
Muddy Shadows?
If shadows look grey and shiny instead of deep, you’ve overworked the graphite. Dab gently with a kneadable eraser to lift some pigment, then re-apply darks crisply.
Step 4: Final Touches and Atmosphere
-
Enhancing Contrast:
Take your darkest pencil (6B) and revisit the deepest shadows in the mountain crevices and the base of the trees. This high contrast makes the drawing pop. -
Sun Rays:
Extend the sun rays slightly, ensuring they pass behind the mountain peak to push the mountain into the foreground. -
Sky texture:
Add very faint, swirling circular motions around the sun to suggest atmospheric haze, keeping it much lighter than the mountain itself. -
Clean Up:
Use your kneadable eraser to lift out any graphite smudges from the sky area or the bright highlights on the mountain face.
Now you have a dynamic landscape sketch that perfectly captures the feeling of a mountain sunrise
Strata Lines for Rocky Texture
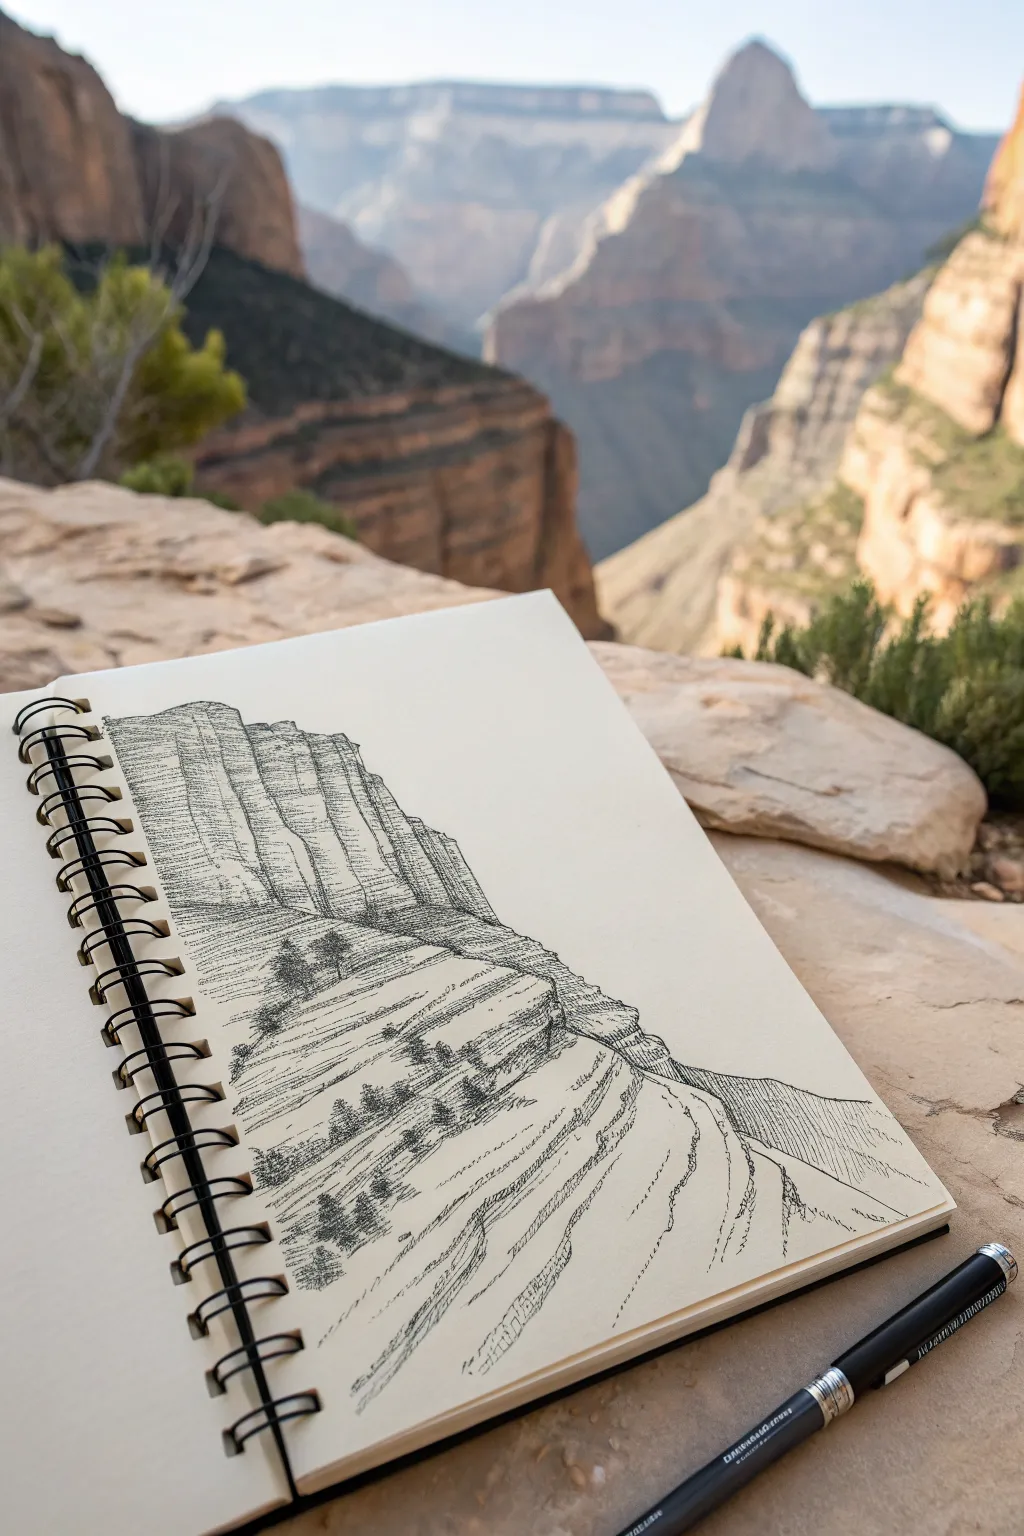
Capture the majestic layers of canyon rock formations using simple hatching and fine lines. This pen-and-ink sketch focuses on the rhythmic horizontal striations that define sedimentary cliffs.
Step-by-Step
Materials
- Spiral-bound sketchbook (medium weight paper)
- Black fineliner pen (0.3mm or 0.5mm)
- Graphite pencil (HB or H)
- Kneaded eraser
Step 1: Sketching the Framework
-
Establish the horizon:
Begin by lightly sketching a diagonal slope rising from the bottom right to the middle left of your page. This will be the base of your canyon wall. -
Outline the main mass:
Draw the vertical boundaries of the cliff face. Create a tall, blocky shape on the left side that tapers down as it moves right, mimicking the eroding rock formations. -
Divide the layers:
Use your pencil to lightly map out the major horizontal divisions. Rock formations like this are sedimentary, so think of them as stacks of uneven pancakes sitting on top of each other. -
Block in vegetation:
Mark small, rough circles or triangles where the trees and shrubs will cling to the slopes. These should be mostly on the lower, sloped sections rather than the sheer vertical cliff face.
Step 2: Inking the Structure
-
Define the main cliff edge:
Take your fineliner and carefully trace the top silhouette of the cliff. Allow your hand to wobble slightly to create a natural, jagged rock edge rather than a perfectly straight line. -
Draw vertical fissures:
On the tall, vertical section of the cliff, draw long, slightly broken vertical lines. These represent the cracks and cleavage planes in the heavy rock face. -
Add horizontal strata:
Cross the vertical lines with horizontal bands. These shouldn’t be solid lines; instead, use short, dashed strokes to suggest the layering of the stone without outlining every single brick. -
Texture the slope:
Move down to the sloped area below the cliff. Here, change your stroke direction to follow the angle of the hill, using long, flowing lines that curve slightly downwards to show the contour of the land.
Uneven Lines?
Don’t panic if your strata lines wobble. In nature, rock layers are rarely perfect. A ‘mistake’ often looks like a natural fissure or eroded section once you add surrounding texture
Step 3: Detailing and Depth
-
Hatching for shadow:
Identify the shadow side of your ridge. Use closer, denser hatching marks on the vertical crevices to push them back in space. -
Ink the vegetation:
Fill in your pencil marks for the trees. Use tiny, scribbled loops or short, upward dashes to create the texture of pine needles or scrub brush. Make the trees darker than the rock to help them stand out. -
Create rock debris:
add small dots and tiny irregular shapes near the base of the cliff and around the trees to suggest fallen scree and loose rocks. -
Refine the foreground:
In the immediate foreground (bottom right), use very sparse, broken lines. Leaving white space here suggests light hitting the nearest rocks and keeps the focus on the cliff structure. -
Add gentle wash lines:
For the layered bands running horizontally across the slope, use very light, broken lines. I find that lifting the pen frequently prevents these lines from looking like rigid stripes. -
Deepen the contrast:
Go back to your darkest areas—under the lip of rock ledges and firmly behind trees—and restate the shadows with a second layer of cross-hatching. -
Erase pencil guides:
Once the ink is completely dry (give it a few minutes to be safe), gently use a kneaded eraser to lift away the initial graphite structure, leaving a crisp ink drawing.
Add Atmospheric Depth
To make distant canyon walls recede, use a thinner pen nib (like a 0.1mm) and fewer details. Keep the boldest, darkest lines for the closest rock formations
Now you have a geological study that captures the enduring stillness of the canyon
Contour Map Style Mountains
Capture the rugged beauty of an alpine range using nothing but fine lines and patience. This project focuses on building texture and depth through carefully controlled hatching techniques, resulting in a minimalist yet striking black and white illustration.
Step-by-Step Tutorial
Materials
- High-quality mixed media or Bristol paper (smooth surface)
- HB or 2H graphite pencil
- Kneaded eraser
- Fine liner pens (sizes 0.05, 0.1, and 0.3mm)
- Ruler (optional for horizon checks)
Step 1: Sketching the Skeleton
-
Establish the horizon:
Begin by lightly marking a baseline for your composition about one-third of the way up from the bottom of the page. This doesn’t need to be a straight line, but rather the lowest point where your foreground trees will eventually sit. -
Draft the main peak:
Using your HB pencil, lightly sketch the triangular shape of the central mountain peak. Avoid perfect symmetry; give the summit a slightly jagged, wind-worn look that leans towards the right. -
Add supporting ridges:
Draw the ridge lines cascading down from the main peak. Imagine a spine running down the mountain, splitting into smaller spurs. These lines define the distinct faces of the mountain—one side in light, the other in shadow. -
Layer the foreground mountains:
Sketch two smaller, overlapping mountain shapes in front of the main peak. These should be lower and wider, creating a sense of distance between the viewer and the summit. -
Block in the foreground elements:
Lightly outline a rocky outcrop on the bottom right and varying heights for a treeline along the bottom edge. Keep these shapes loose for now.
Pro Tip: Line Weight Matters
Use your thickest pen (0.3mm) solely for the outermost silhouette and the nearest rocks. This ‘atmospheric perspective’ trick instantly makes the background mountains look further away.
Step 2: Inking the Outlines
-
Trace the silhouette:
Switch to your 0.3mm fine liner. Go over the main exterior outline of the mountains with a confident, slightly shaky hand. This added ‘jitter’ mimics the natural irregularity of rock. -
Define the major ridges:
Ink the primary internal ridgelines that separate the mountain faces. These lines act as barriers for your shading later, so ensure they connect cleanly to the peaks and valleys. -
Erase pencil guides:
Once the main ink lines are completely dry, gently gently lift the graphite sketch with your kneaded eraser. I find that leaving the page clean at this stage helps you see the contrast better.
Level Up: Golden Hour
Instead of black on white, try drawing this on warm-toned tan or grey paper. Use a white gel pen to add highlights on the sunny side of the ridges for a stunning topographical effect.
Step 3: Applying Texture and Shading
-
Start the hatching:
Using a 0.05mm pen, begin hatching on the shadowed side of the highest peak. Use long, parallel diagonal lines. Keep your spacing consistent to create a uniform grey tone. -
Contour the slopes:
For the sunlit faces, use broken, shorter lines that follow the downward slope of the terrain. These lines shouldn’t be as dense as the shadow side; let plenty of white paper show through. -
Deepen the crevices:
Where two ridges meet or a valley forms, go back in with a 0.1mm pen and add cross-hatching (lines going in the opposite direction). This darkens the deepest pockets of the mountain. -
Texture the rock faces:
On steep vertical sections near the summit, use erratic, jagged vertical strokes instead of smooth diagonals. This suggests craggy, exposed cliff faces. -
Detail the foreground peaks:
Repeat the hatching process on the lower mountains. To push them visually forward, you can make the texture slightly simpler and less dense than the main peak, relying on clean lines.
Step 4: Grounding the Scene
-
Stipple the rocky outcrop:
Move to the rocky formation on the bottom right. Instead of lines, use dense stippling (dots) and scribbly circular motions with the 0.3mm pen to create a rough, heavy texture distinct from the mountains. -
Draw the tree trunks:
Along the bottom edge, draw faint vertical lines to mark the center of your pine trees. -
Flesh out the foliage:
Using quick, downward flicking motions starting from the top of each tree trunk, create the pine branches. Keep the tops pointy and widen the base. -
Vary tree density:
Make the trees overlap slightly. Fill in the gaps between the trees with solid black ink to create a dense forest floor, creating a strong anchor for the composition. -
Final assessment:
Step back and look for areas that feel too light. You might need to add a few more hatching lines to the shadowed side of the main peak to increase the contrast before calling it done.
Now you have a serene mountain landscape that captures the grandeur of the outdoors right on your desk
Circular Mountain Vignette Badge
This crisp, minimalist design frames a rugged mountain landscape within a perfect circle, combining bold ink lines with subtle metallic accents. It captures the serene feeling of the outdoors in a format that works beautifully as a logo, a journal header, or a standalone mini-print.
Detailed Instructions
Materials
- Sketchbook with heavy, textured paper (mixed media or watercolor)
- Circle template or compass
- Pencil (HB or 2B)
- Eraser
- Fine liner pen (Black, 0.3mm and 0.5mm)
- Copper or rust-orange gel pen or metallic marker
Step 1: Setting the Scene
-
Draw the boundary:
Start by lightly tracing a perfect circle in the center of your page using a compass or a circular object like a jar lid. This will be the container for your entire landscape. -
Establish the horizon:
About one-third of the way up from the bottom of the circle, sketch a slightly curved line for the foreground hill where the trees will stand. This doesn’t need to be perfectly straight; a little waviness adds organic character. -
Draft the peaks:
Sketch two main mountain peaks rising from behind the foreground hill. Make the peak on the left slightly shorter and sharper, while the right peak can be taller and broader. Connect them with a jagged ridge line. -
Position the celestial body:
Place a smaller circle in the upper center sky, nestled between the two peaks. Ensure it has enough breathing room from the outer border.
Step 2: Inking the Landscape
-
Outline the frame:
Using your 0.5mm black fine liner, carefully trace over your main circle border. Go slowly to keep the line weight consistent and smooth. -
Define the mountains:
Ink the main outlines of your mountain peaks. Use confident, jagged strokes to emphasize the rocky texture. Don’t worry if your hand shakes slightly; it adds to the craggy look. -
Form the foreground:
Ink the rolling hill line in the foreground. This line separates the distant mountains from the dark, shadowy earth below. -
Draw the trees:
Switch to a 0.3mm pen for finer details. Draw five to six stylized evergreen trees along the foreground curve. Start with a vertical trunk line, then add downward-slanting zigzag strokes for branches, getting wider at the base. -
Vary tree heights:
To create depth, make the trees on the right side slightly taller and the ones on the left smaller, mimicking perspective.
Uneven Circle?
If your hand-drawn circle feels wobbly, thicken the line weight intentionally. A bolder border often masks imperfections better than a thin, shaky one.
Step 3: Adding Texture and Color
-
Detail the peaks:
On the mountain peaks, draw thin, broken vertical lines coming down from the ridge. These suggest cliffs and ravines. -
Solidify the base:
Using your thicker black pen or a brush pen, fill in the entire bottom section below the tree line with solid black ink. This creates a high-contrast silhouette effect. -
Apply metallic accents:
Take your copper or metallic orange pen and color in the sun/moon completely. I find a stippling motion creates a nice texture here rather than flat coloring. -
Highlight the slopes:
Use the same copper pen to add shadow lines on the right side of the mountain peaks. Draw these parallel to your black detail lines to suggest the sun hitting the rock face. -
Add stars:
In the open sky area, draw a few tiny four-pointed stars and a couple of simple dots. Keep them sparse to maintain the clean, minimalist aesthetic. -
Review and clean:
Wait at least five minutes for all ink to dry completely to avoid smearing. Once dry, gently erase all visible pencil sketches.
Use Watercolor
Instead of metallic pens, use a wash of diluted coffee or watercolor paint for the sun and mountain shadows to give the piece a softer, rustic vibe.
Enjoy the calming process of filling in those dark contrasting spaces and creating your tiny world
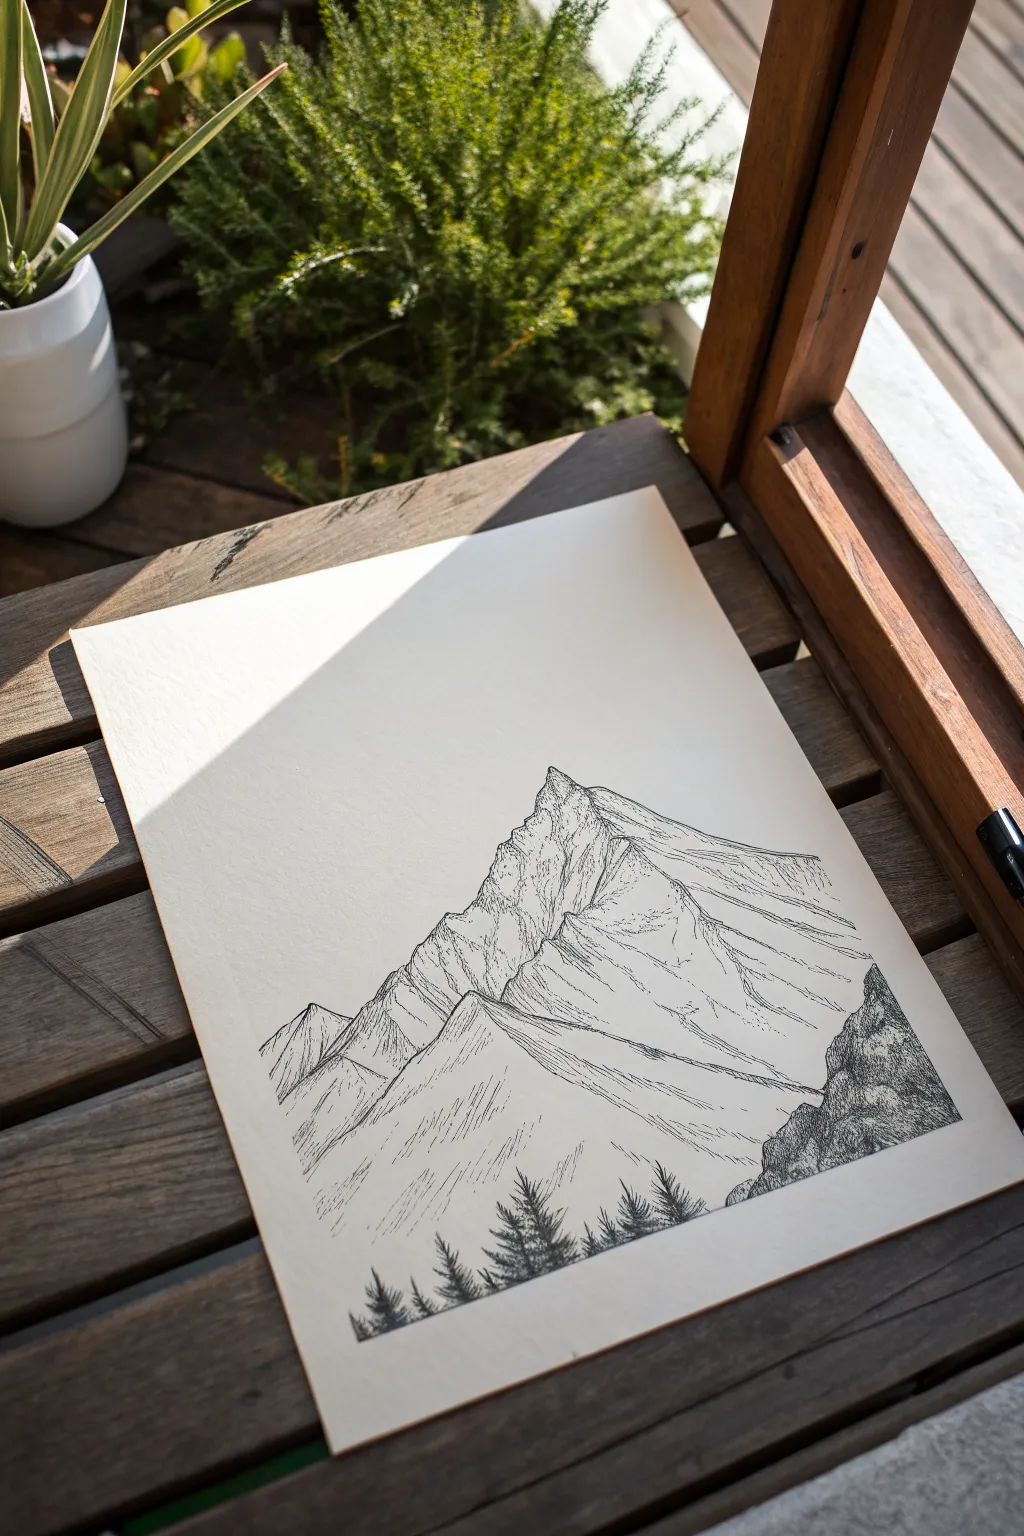
Mountain Shards Sweeping Upward
Capture the raw, geometric beauty of mountain peaks with this striking ink drawing that focuses on sharp angles and sweeping geological lines. Using simple hatching techniques and definitive shapes, you’ll build dramatic, shard-like mountains grounded by a dark, textured forest base.
Step-by-Step
Materials
- Sketchbook with smooth, heavy paper (mixed media or bristol)
- HB or 2H graphite pencil (for initial layout)
- Kneaded eraser
- Fine liner pens (sizes 0.1, 0.3, and 0.5)
- Ruler (optional, for guide lines)
Step 1: Planning the Peaks
-
Light scaffolding:
Begin with your graphite pencil. Very lightly sketch three main triangular forms rising from the bottom third of the page. Make the central peak the tallest and sharpest. -
Define the shards:
Within those triangles, draw angled vertical lines to represent the ridgelines. These should look like sharp ‘shards’ of rock leaning against each other. -
Establish the horizon:
Draw a faint horizontal guideline near the bottom of your mountains where the treeline will eventually sit. This grounds your composition. -
Map the striations:
Lightly sketch sweeping diagonal curves across the faces of the mountains. These will guide your ink work later to show the geological strata.
Directional Stroking
Always pull your pen strokes in the direction gravity would pull debris. This makes the mountain look stable and heavy rather than floating.
Step 2: Inking the Structure
-
Main outlines:
Switch to your 0.5 fine liner. Confidently trace the outer silhouette of the mountain peaks. Keep the lines somewhat jagged and angular rather than smooth. -
Internal ridges:
Ink the major vertical separators between the rock faces. Think of these as the ‘spines’ of the mountain. -
Erase guidelines:
Once the main ink lines are completely dry, gently erase the pencil scaffolding so you have a clean slate for texturing.
Step 3: Creating Texture and Volume
-
Cross-hatching the shadows:
Identify a light source (coming from the right in this example). Using a 0.1 or 0.3 pen, apply dense cross-hatching to the left-facing planes of the jagged peaks. -
Building darkness:
Layer the cross-hatching closer together near the spine of the ridges to create deep contrast and emphasize the sharp angle. -
Geological sweeping:
On the sun-lit faces (the larger, right-facing slopes), use long, continuous lines that follow the diagonal curves you mapped earlier. I prefer to keep these lines thin and evenly spaced. -
Varying line weight:
Use the 0.1 pen for these geological striations to make them feel lighter than the heavy shadow outlines. -
Secondary shadows:
Add small patches of vertical hatching in the crevices where the sweeping lines meet the ridges, suggesting depth and uneven terrain.
Uneven Hatching?
If your parallel lines get messy, don’t panic. Add a second layer of perpendicular hatching over the top to turn the texture into a shadow block instead.
Step 4: Grounding the Scene
-
Treeline silhouette:
Switch back to the 0.5 pen. At the base of the mountains, start stippling and scribbling small, vertical, jagged shapes to represent pine trees. -
Creating density:
Make the trees closest to the bottom edge very dark and dense. You don’t need to draw individual branches; just the suggestion of pointed tops is enough. -
Fading upward:
As the trees move slightly up the slope into the mountain base, space them out slightly to show thinning vegetation. -
Final contrast check:
Look at the overall balance. If the shadow side of the mountain feels too light compared to the black trees, go back in with diagonal hatching to deepen the values.
Now you have a dynamic mountain study that feels both modern and geologically rugged
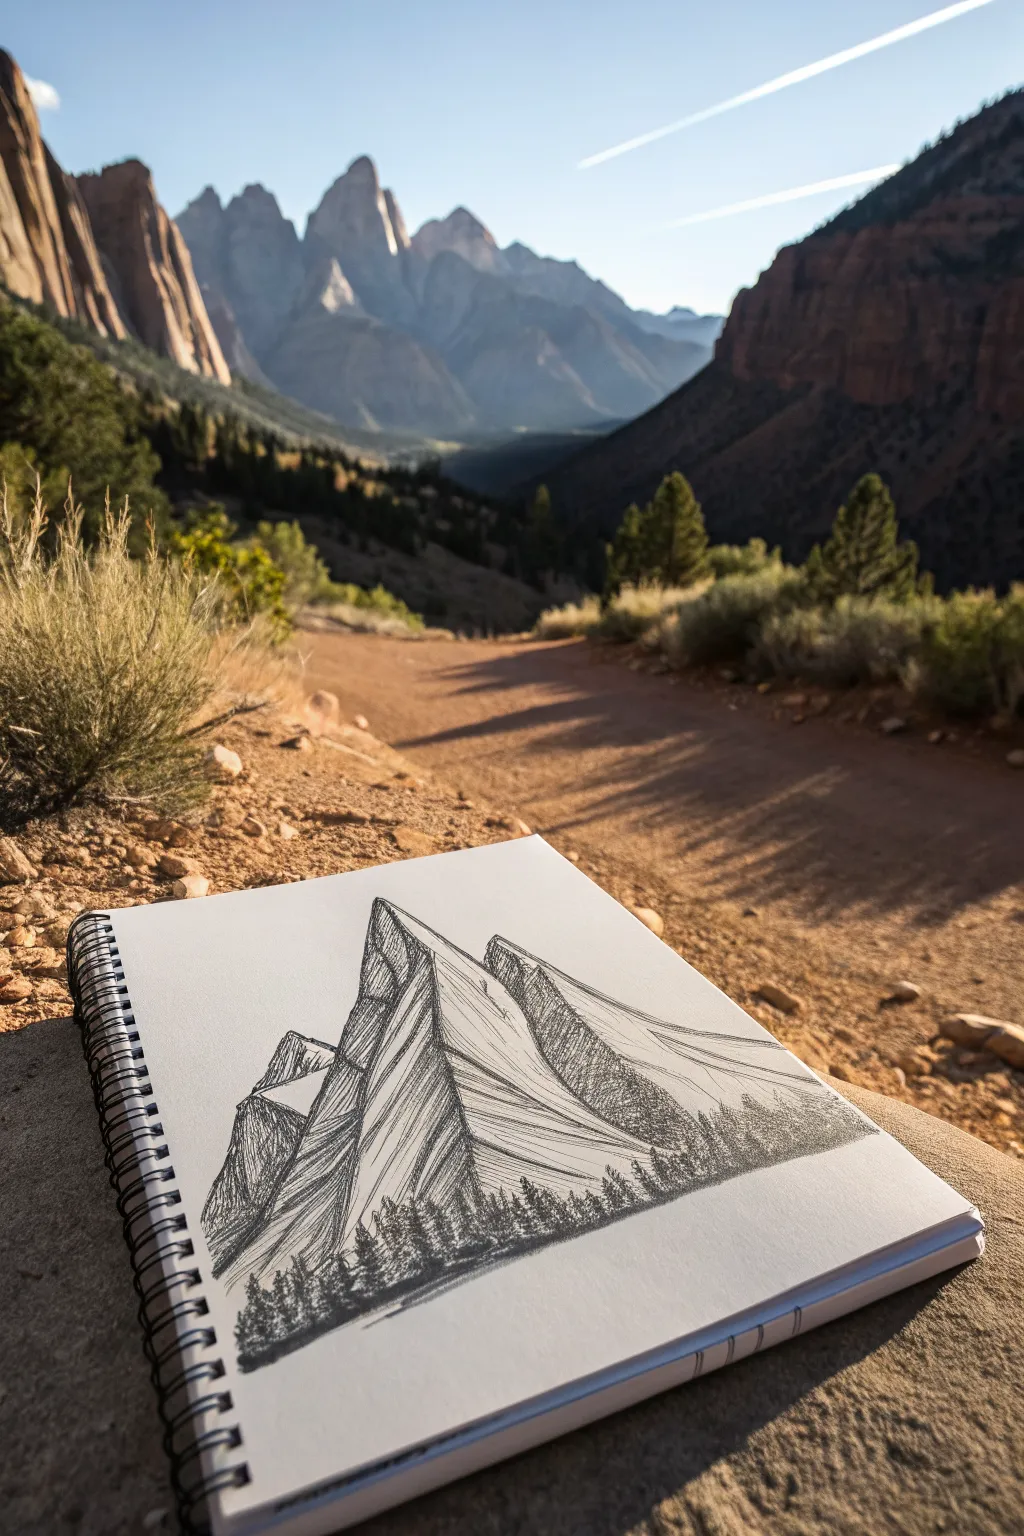
Scoop-Cut Craggy Summit Shapes

This striking pen and ink study captures the raw energy of a jagged mountain summit rising sharply above a dense tree line. Using simple hatching techniques and sharp angles, you’ll create a dramatic sense of altitude and rocky texture on a clean, vertical page.
Step-by-Step Guide
Materials
- High-quality cartridge paper or bristol board (A5 or similar size)
- Fine liner pens (sizes 0.1, 0.3, and 0.5)
- HB or 2H pencil for sketching
- Soft gum eraser
- Ruler (optional for horizon guides)
Step 1: Planning the Summit Structure
-
Establish the horizon:
Begin by lightly tracing a horizontal line near the bottom quarter of your page. This will serve as the base where your forest will eventually sit, giving the mountain plenty of room to soar upwards. -
Rough in the peak:
Using your pencil, sketch a steep, triangular shape rising from the center. Instead of a perfect triangle, let the peak lean slightly to the right, creating a sense of movement. -
Carve the scoops:
Define the distinct ‘scoop-cut’ characteristic by drawing deep, diagonal ridges running down from the central spine. Think of these as glacier-carved valleys that split the mountain face into sharply angled facets. -
Refine the outline:
Go over your pencil sketch to sharpen the jagged edges of the silhouette. Make sure the left side feels slightly steeper and the right side pushes out with secondary sub-peaks.
Step 2: Inking the Mountain Texture
-
Establish light direction:
Decide that the light is coming from the left. This means the right-facing slopes of every ridge will be in shadow. I like to mark these shadow zones lightly with a pencil ‘x’ so I don’t lose track later. -
Outline in ink:
Switch to your 0.3 pen and confidently trace the main silhouette and the major internal ridgelines. Keep your lines varying in weight—press slightly harder on the shadowed (right) side of ridges. -
Start the hatching:
Using a 0.1 pen, begin hatching the shadowed facets. Use tight, diagonal parallel lines. The closer the lines, the darker the shadow will appear. -
Cross-hatching for depth:
On the deepest crevices and the far right side of the mountain, add a layer of perpendicular lines over your initial hatching. This cross-hatching creates the darkest values and adds contrasting volume. -
Texture the lit slopes:
For the sunlit left-facing slopes, use very sparse, broken lines. Vertical scratches mimicking falling rock or striations work best here, keeping the paper mostly white. -
Detail the peak:
At the very tip of the summit, ensure your lines are sharp and crisp. A little extra contrast right at the top draws the viewer’s eye upward immediately.
Ink Smearing?
Work from top to bottom (or left to right if you’re right-handed) to avoid dragging your hand through wet ink. Place a scrap piece of paper under your drawing hand as a shield.
Step 3: The Forest Base
-
Plant the first trees:
Switch to a 0.5 pen for bolder strokes. Along your bottom guide line, start drawing small, vertical zigzag shapes to represent pine trees. Vary their heights significantly to avoid a uniform ‘fence’ look. -
Build density:
Fill in the gaps between your distinct trees with solid black ink or very tight scribbles. This suggests a dense, impenetrable forest deep in the valley. -
Layer the forest:
Create depth by drawing a second, shorter row of tree tops slightly visible behind the first row. This tiny detail makes the forest feel like a thick carpet rather than a single line. -
Connect mountain to ground:
Use the 0.1 pen to draw faint vertical lines fading from the bottom of the rocky mountain into the tops of the trees. This integrates the two elements so the mountain doesn’t look like it’s floating. -
Clean up:
Wait at least ten minutes for the ink to fully cure. Once safe, gently erase all underlying pencil guides to leave a crisp, high-contrast illustration.
Level Up: Atmospheric Fog
Leave a small horizontal band of white space between the bottom of the mountain and the top of the trees. This negative space creates the illusion of low-hanging mist or fog.
Step back and admire the stark contrast between your sharp, geological peaks and the organic forest line below
Ink-Style Crosshatching for Cliff Faces
Capture the stark beauty of a sheer cliff face using precise ink lines and strategic hatching. This monochrome study focuses on the dramatic interplay of light and shadow, mimicking the grandeur of iconic peaks like Half Dome.
Step-by-Step Tutorial
Materials
- Spiral-bound sketchbook (heavyweight paper preferred)
- Fine liner pen (0.1 or 0.3mm)
- Brush pen or thicker marker (optional for darkest shadows)
- Graphite pencil (HB or 2H)
- Soft eraser
- Reference photo of a cliff face
Step 1: Drafting the Foundations
-
Establish the horizon:
Start by lightly penciling a low, uneven horizon line about one-third of the way up from the bottom of your page to ground the massive vertical shape. -
Outline the peak’s silhouette:
Sketch the main shape of the mountain. For a structure like this, create a sharp, rounded dome on the left that drops off vertically, transitioning into a sloping ridgeline moving toward the right. -
Define the vertical fractures:
Lightly draw vertical guidelines down the face of the cliff. These aren’t just straight lines; let them wobble slightly to mimic natural geological fissures and rock columns. -
Map shadow areas:
Identify where your light source is coming from (in this case, the left). Gently outline the areas on the right side of the cliff face and the base that will be in deep shadow.
Step 2: Inking the Structure
-
Commit to the outline:
Using your fine liner, go over your pencil silhouette. Use a slightly broken or jittery line for the rocks at the base to suggest rubble, but keep the top ridge relatively smooth. -
Draw primary vertical striations:
Ink the main vertical cracks you sketched earlier. Start your pen pressure light at the top of the cliff and increase it slightly as you move down, implying weight and depth. -
Detailed rock texturing:
Add smaller, shorter vertical dashes between your main lines. These suggest the rough, weathered texture of granite without overwhelming the drawing.
Sunlight Tip
Photograph your drawing in natural ‘golden hour’ sunlight with dramatic shadows falling across the paper to mimic the aesthetic presentation of the reference image.
Step 3: Shading and Crosshatching
-
Initial hatching layer:
Begin shading the shadow side of the mountain using strict vertical hatching lines. Keep them closely spaced to create a mid-tone grey value. -
Crosshatching for depth:
On the darkest crevices and the far right slope, lay down a second set of diagonal hatching lines over the vertical ones. This crosshatching builds contrast and defines the three-dimensional form. -
Define the foreground slope:
Sketch horizontal, slightly curved lines sweeping across the base of the mountain. These lines should contour the land, showing how the scree slope flows away from the cliff. -
Add vegetation texture:
In the bottom foreground, use a scribbling or stippling motion to create the look of pine trees. I find that quick, upward flicking motions work best to suggest tree tops without drawing every needle. -
Darken the treeline:
Go back into the base of your trees with denser ink strokes. High contrast here pushes the mountain back, creating a sense of massive scale. -
Refine the shadows:
Look at the main cliff face again. Deepen the shadows in the deepest vertical cracks by adding one more layer of fine hatching, making the rock face pop.
Level Up
Use a diluted grey ink wash or watercolor for the shadows instead of crosshatching. This creates a softer, more atmospheric look while keeping the line work sharp.
Step 4: Final Touches
-
Distant peaks:
Draw a simple, single line representing a distant mountain range to the right. Keep this line thin and minimal to ensure it looks far away compared to the main subject. -
Erase pencil guides:
Wait at least five minutes to ensure the ink is completely dry, then gently erase all visible pencil marks to clean up the page. -
Check balance:
Step back and assess your values. If the mountain feels too flat, add a few random dots or ‘stippling’ near the top ridge to add granite grit texture.
Now you have a striking geological study that captures the monumental spirit of the mountains
Stippled Granite Texture Study
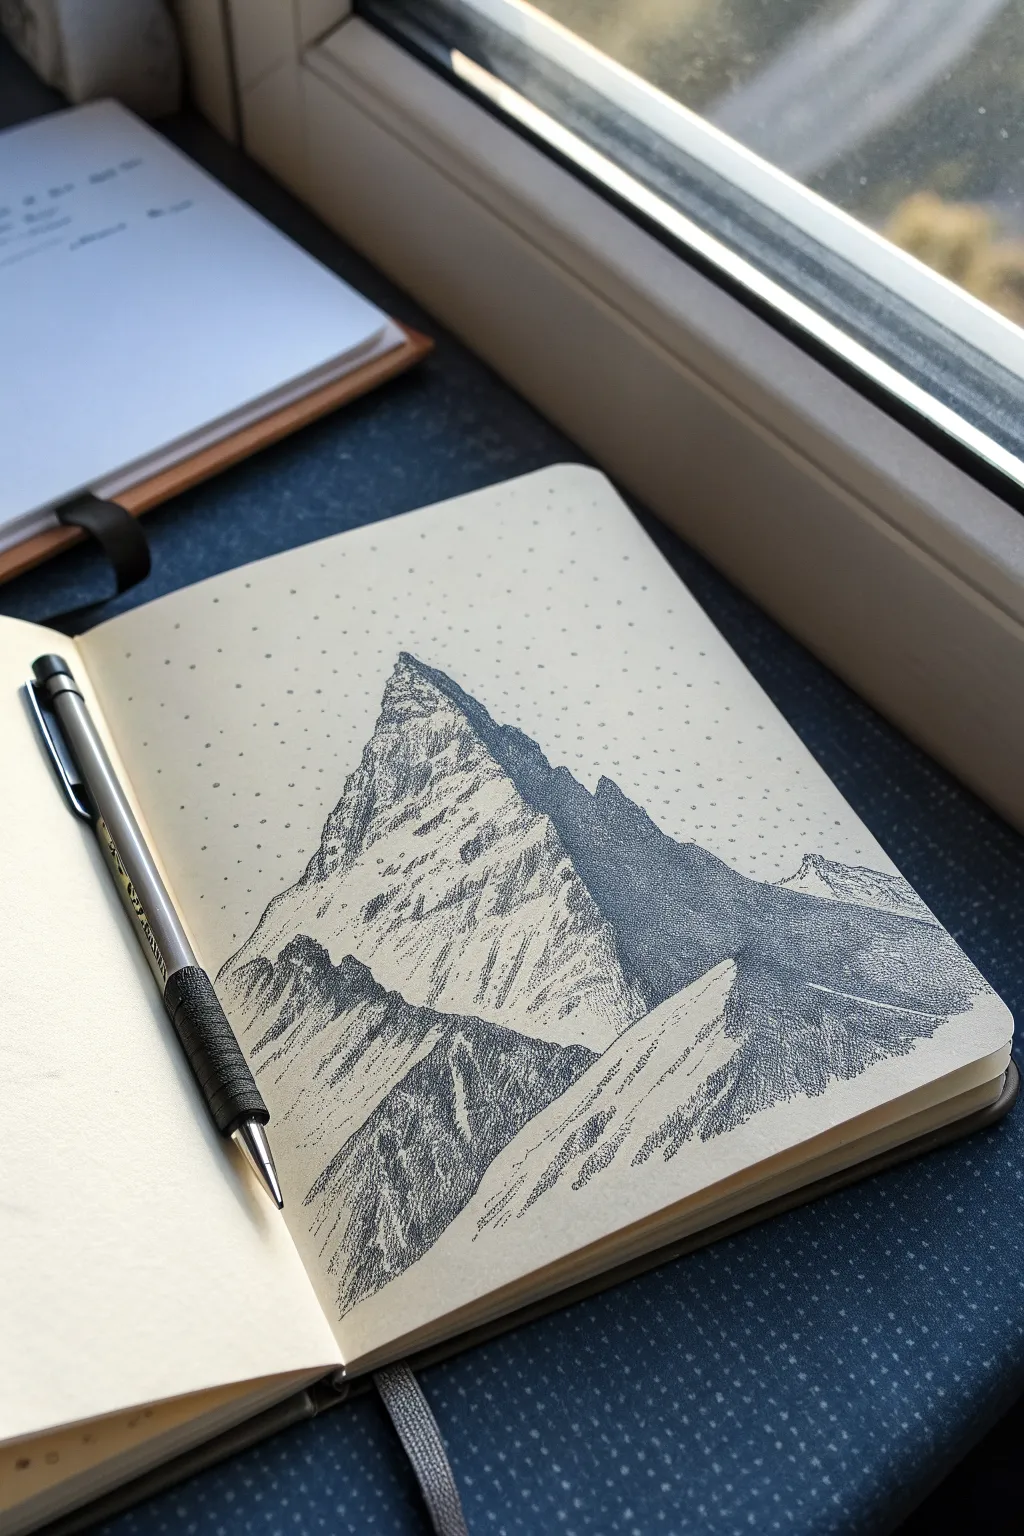
This majestic peak study relies on the patience of stippling to build deep, realistic granite textures against a dotted journal page. The high-contrast technique uses thousands of tiny ink dots to mimic the craggy, snow-dusted surface of a mountain like the Matterhorn.
How-To Guide
Materials
- Dotted or blank journal (cream or off-white paper preferred)
- Fine liner pen (0.1mm or 0.3mm)
- Pencil (HB or 2H)
- Kneadable eraser
- Ruler (optional, for horizon lines)
Step 1: Structural Outline
-
Establish the peak:
Begin by sketching the primary triangle of the mountain with your pencil. Place the apex slightly off-center to the left for a dynamic composition, ensuring the main ridgeline drops steeply to the right. -
Define the faces:
Draw a jagged, irregular line down the center of your triangle to separate the sunlit face (left) from the shadowed face (right). This line should zigzag to suggest protruding rocks. -
Add foreground ridges:
Sketch a lower, secondary ridge in the foreground on the left side, and a sloping snowy bank on the bottom right. These overlapping shapes create depth. -
Map the snow:
Lightly outline the patches where snow clings to the rock face. On the left (light) side, these will be large negative spaces; on the right (shadow) side, they will be small slivers.
Step 2: Inking the Shadows
-
Outline the silhouette:
Switch to your fine liner pen. Tracing your pencil lines, ink the outer jagged silhouette of the mountain. Keep your hand loose to ensure the rock edge looks natural and fractured, not smooth. -
Base stippling:
Start on the main shadow face (the right side of the peak). Begin placing dots relatively far apart to establish the area. Avoid solid lines here; let the density of dots define the form. -
Deepen the darks:
Increase the density of dots significantly on the right-hand face. I find it helpful to work in small clusters, creating almost solid black areas near the central ridge and fading slightly toward the outer edge. -
Cross-hatching texture:
For the darkest crevices in the shadow side, overlay your stippling with very fine, short hatching lines. This mixed-media approach mimics the rough grain of granite better than dots alone. -
Define the foreground ridge:
Move to the bottom-left foreground mountain. Ink the jagged top edge, then fill the body of this ridge with dense, dark stippling to separate it visually from the lighter main peak behind it.
Ink Smearing?
If you are left-handed or notice smudging, place a piece of scrap paper under your drawing hand. Work from the top of the mountain downward to prevent your hand from dragging through fresh ink.
Step 3: Defining the Light
-
Light side texture:
On the left face of the main peak, use a much lighter touch. Apply sparse stippling only in the areas that represent exposed rock, leaving the paper white for snow. -
Directional flow:
Arrange your dots and short dash marks on the light side in diagonal bands. This suggests the geological strata of the mountain slanting upwards. -
The snowy slope:
For the bottom right slope, use extremely minimal markings. A few broken lines along the top edge are enough to suggest the contour of a snowbank. -
Connecting the ridges:
Ensure the transition between the dark foreground simply fades into the white paper before hitting the main peak, creating a sense of mist or distance between the two landmasses.
Add Drama
Make the lighting more dramatic by using a 0.05mm pen for the distant snowy side and a thicker 0.5mm pen for the deepest shadows in the foreground. This creates instant atmospheric perspective.
Step 4: Atmosphere and Finish
-
Atmospheric particles:
To give the sky texture without drawing clouds, scatter very sparse dots around the peak. Keep them random and light to suggest falling snow or dust in the air. -
Refine the edges:
Go back to the central dividing line of the mountain. Make sure the dark side meets the light side with a very sharp, crisp contrast using extra dots right at the boundary. -
Erase guidelines:
Wait at least 15 minutes for the ink to cure completely. Gently erase all underlying pencil sketch lines with your kneadable eraser. -
Final assessment:
Step back and look for balance. If the shadow side looks too grey rather than black, layer another pass of stippling to weigh it down.
The finished piece captures the timeless solidity of the mountains using nothing but delicate points of ink
Surreal Cutaway Mountain With Hidden World
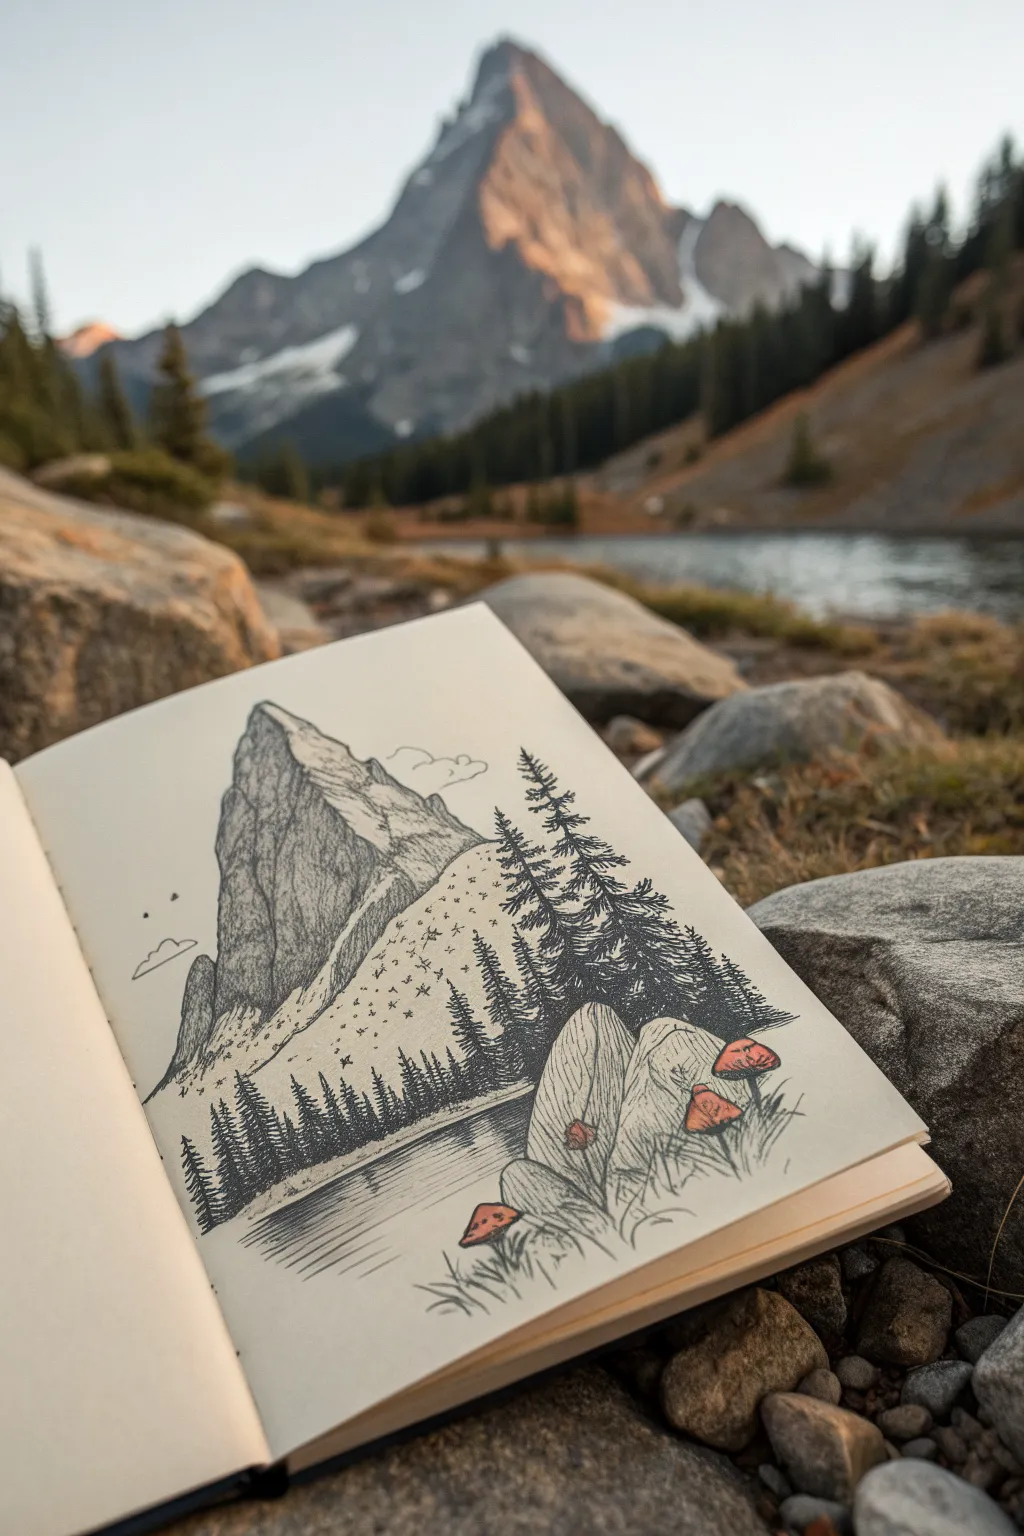
Capture the majestic solitude of a mountain landscape right in your sketchbook with this detailed ink illustration. Using stippling for texture and bold lines for contrast, you’ll recreate a scene featuring a towering peak, a reflective lake, and a whimsical foreground of mushrooms.
Detailed Instructions
Materials
- Sketchbook with smooth, heavy paper (min 120gsm)
- HB graphite pencil
- Kneadable eraser
- Fine liner pens (sizes 0.05, 0.1, 0.3, and 0.5)
- Orange or terracotta colored pencil or marker
- Ruler (optional)
Step 1: Penciling the Layout
-
Establish the Horizon:
Begin by lightly drawing a horizontal line across the lower third of your page to separate the lake from the land. This anchors your entire composition. -
Outline the Peak:
Sketch the main triangular shape of the mountain. Don’t make the lines too straight; give the edges a jagged, rocky quality that leans slightly to the left, mimicking a natural summit. -
Define the Tree Line:
Draw faint vertical guidelines where the forest will sit. You want a dense cluster of trees on the right side that tapers off into smaller trees as it moves toward the left of the drawing. -
Place Foreground Elements:
In the bottom right corner, sketch two or three large, rounded boulder shapes. Add small cap-shapes peeking out from the grass to represent the mushrooms.
Ink Control Pro Tip
Always pull the pen toward your hand when drawing jagged rocks. It gives you more control over the jittery line quality than pushing the pen away.
Step 2: Inking the Mountain
-
Outline with Confidence:
Switch to your 0.3 pen and trace the mountain’s outline. Use shaky, deliberate strokes to emphasize the rough granite texture. -
Add Cracks and Fissures:
Draw vertical lines running down the face of the mountain. These shouldn’t be perfect; break the lines up to suggest deep crevices and rock formations. -
Texture with Stippling:
Using a 0.05 or 0.1 pen, add density to the shadowed side of the mountain (the left side in this reference). Use tight clusters of dots (stippling) and short hatch marks to create a grey value without coloring it in solid black. -
Detail the Base:
Where the mountain meets the tree line, use sparse black specks and tiny ‘v’ shapes to simulate scree and distant rocks rolling down the slope.
Smudge Alert
If you are left-handed, place a scrap piece of paper under your hand as you traverse the page to prevent smearing wet ink across the clean sky area.
Step 3: Forest and Lake
-
Inking the Tall Pines:
Start with the largest trees on the right using a 0.5 pen for darkness. Draw a straight vertical trunk, then use a zigzag motion to create the boughs, getting wider at the bottom. -
Fill the Tree Line:
Work your way left, making the trees progressively shorter and thinner. For the distant trees, simple vertical lines with tiny horizontal dashes are enough to suggest the form. -
Create the Reflection:
In the lake area, sketch horizontal lines directly underneath the trees and mountain base. Keep these lines sketchy and broken to look like ripples. -
Darken the Water:
Using a 0.1 pen, add closer, denser horizontal hatching near the shoreline to show the depth of the reflection, fading out as you move lower on the page.
Step 4: Foreground Details
-
Inking the Boulders:
Outline the foreground rocks with your 0.3 pen. Add some vertical contour lines to show their rounded shape, similar to topographic lines. -
Drawing the Grass:
Add quick, upward flicks of lines around the base of the rocks and mushrooms to create tufts of tall grass. -
Coloring the Mushrooms:
outline the mushroom caps and stems. Add small dots for texture on the caps. -
Pop of Color:
I usually like to save color for the end; take your orange pencil or marker and carefully fill in just the mushroom caps. This contrast makes the monochrome drawing pop. -
Final Cleanup:
Wait at least 15 minutes for the ink to fully cure, then gently erase all your initial pencil guidelines to leave a crisp, clean illustration.
Close your sketchbook knowing you’ve preserved a piece of the wilderness in ink


Have a question or want to share your own experience? I'd love to hear from you in the comments below!