If you love drawing mushrooms but want them to feel a little unsettling, mushroom weirdcore is such a fun rabbit hole to fall into. I like mixing cozy forest shapes with surreal body-horror details—especially eyes—until the whole sketch feels like a half-remembered dream.
Eyeball Spots on a Toadstool Cap
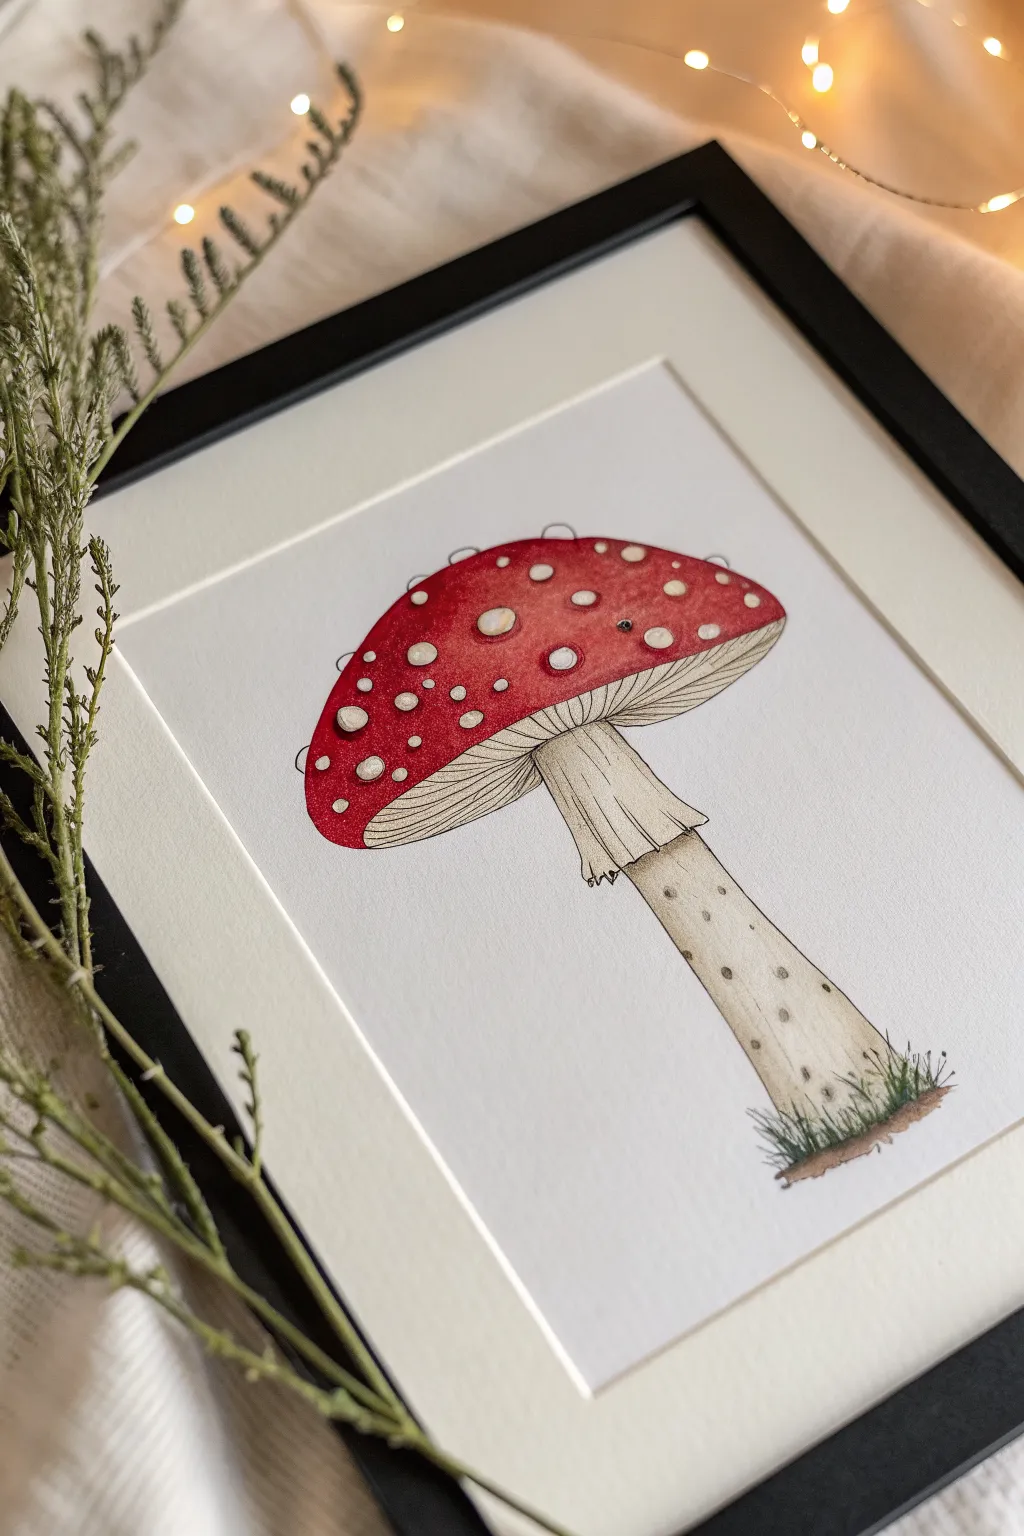
Capture the magic of the forest floor with this charming illustration of a classic Fly Agaric mushroom. Using a blend of fine ink outlining and delicate watercolor washes, you’ll create a piece that feels both biological and fairytale-like.
Step-by-Step Tutorial
Materials
- Hot press watercolor paper (smooth texture)
- Waterproof fine liner pens (sizes 005, 01, and 03)
- Watercolor paints (Alizarin Crimson, Burnt Umber, Yellow Ochre, Sap Green)
- Small round watercolor brushes (size 2 and 4)
- White gouache or white gel pen
- HB pencil and good quality eraser
- Ruler
- Black frame with matting
Step 1: Sketching the Structure
-
Define the cap shape:
Start with a light pencil sketch. Draw a wide, flattened semi-circle for the mushroom cap. It shouldn’t be a perfect dome; let it have a slight, natural unevenness. -
Add the stem and skirt:
Draft the stem coming down from the center of the cap. About a third of the way down the stem, sketch a ruffled ‘skirt’ or annulus that flares out slightly. -
Detail the gills:
Lightly draw curved lines radiating from the stem outward toward the edge of the cap to represent the gills underneath. -
Place the distinctive spots:
Sketch various sizes of irregular circles across the top of the cap. These will remain white, so placement is key. Make them slightly raised or bumpy. -
Ground the mushroom:
Add a small patch of earth and a few blades of grass at the very base of the stem to anchor your subject.
Clean Edges Trick
To keep the white spots pristine while painting the red cap, apply a tiny dot of masking fluid on each spot first. Rub it off after the paint dries.
Step 2: Inking the Outline
-
Outline the main form:
Using a size 01 waterproof pen, carefully trace over your pencil lines for the cap, stem, and main skirt shape. -
Refine the gills:
Switch to a finer 005 pen for the gills. Draw fine, closely spaced lines that curve with the perspective of the underside of the cap. -
Texture the stem:
Add vertical striation lines to the stem using the 005 pen. These should be broken lines rather than solid ones to suggest texture. -
Erase pencil marks:
Wait until the ink is completely dry—I usually give it at least ten minutes to be safe—then gently erase all visible pencil lines.
Step 3: Adding Color Washes
-
Paint the red cap:
Mix a vibrant red using Alizarin Crimson. Carefully paint around the white spots you sketched. The paint should be saturated but transparent. -
Deepen the shadows:
While the red is still slightly damp, drop a tiny bit of darker red or brown near the bottom edge of the cap to create roundness and volume. -
Wash the stem:
Dilute a mix of Yellow Ochre and a touch of Burnt Umber until it is a very pale beige. Wash this over the stem and the underside gills, keeping it light. -
Shadow the skirt:
Add a slightly darker version of your beige mix under the skirt ruffle to show where it casts a shadow on the stem. -
Paint the earth:
Use Burnt Umber for the dirt patch at the bottom, and touches of Sap Green for the grass blades. Use short, flicking brushstrokes for the grass.
Make it Surround Sound
Instead of regular spots, draw tiny pupils inside the white circles on the cap to create the subtle ‘eyeball’ weirdcore effect mentioned in the theme.
Step 4: Finishing Details
-
Detail the spots:
Once the red paint is dry, use a very dilute brown to add tiny shadows to the bottom/right side of each white spot, making them look three-dimensional. -
Add stem speckles:
Dip a fine brush or pen into light brown paint/ink and add small stippled dots to the lower portion of the stem for realistic texture. -
Texturize the grass:
Go back in with your 005 pen and add scribbly, loose ink lines over the dried green paint to define the grass clumps. -
Final highlights:
If you lost any crisp whiteness on the spots, touch them up with white gouache or a gel pen to make them pop against the red. -
Frame your work:
Place your finished, dry piece into a clean white mat and a simple black frame to give it a scientific specimen look.
Hang your mushroom illustration in a cozy corner to add a touch of forest mystery to your room

Single Cyclops Eye in the Stem
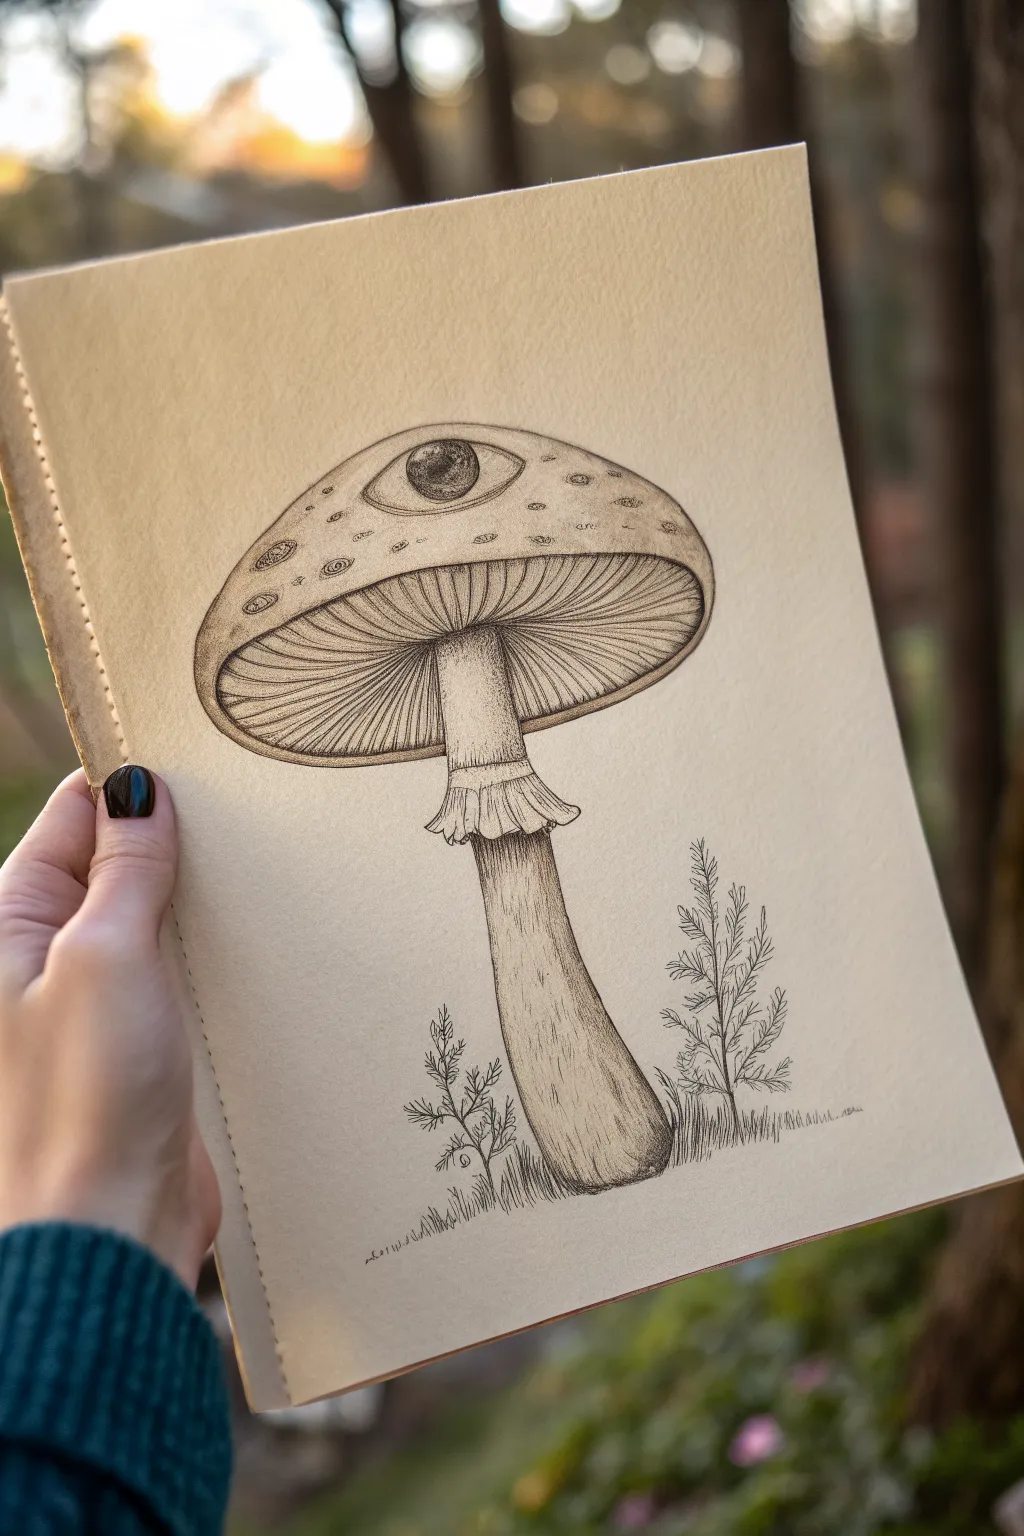
This eerie yet elegant drawing combines the organic textures of nature with a surreal twist: a single, watchful eye embedded in a mushroom cap. Using precise pen work, you’ll create a piece that feels like a vintage botanical illustration pulled from a dream.
How-To Guide
Materials
- Tan or toned mixed media paper (smooth texture preferred)
- Fine liner pens (sizes 005, 01, 03, and 05)
- 2H or HB pencil
- Kneaded eraser
- Ruler (optional for reference lines)
Step 1: Penciling the Framework
-
Map the cap shape:
Start with a light pencil sketch. Draw a wide, flattened dome shape for the top of the mushroom cap, ensuring it has a slight curve downward at the edges. -
Draw the gills and stem:
Beneath the cap, sketch an ellipse to represent the underside where the gills reside. From the center of this ellipse, extend a sturdy stem downwards, thickening slightly at the base. -
Sketch the eye:
In the upper center of the cap, sketch an almond-shaped eye. Add a circle for the iris and a smaller circle for the pupil, placing it slightly off-center for a realistic gaze. -
Add the annulus and foliage:
Draw the ‘skirt’ or annulus around the upper part of the stem using wavy, organic lines. Lightly sketch two small fern-like plants at the base of the stem to ground the composition.
Step 2: Inking the Outlines
-
Define the main contours:
Using an 03 pen, carefully trace your pencil outlines. Use a steady hand for the cap and stem, but allow your line to be slightly imperfect and organic for the skirt and ground foliage. -
Detail the eye:
Switch to an 01 pen for the eye. Outline the lids, adding a double line for the upper lid crease. Careful inking here is crucial as it’s the focal point. -
Create the gill structure:
With the 01 pen, draw lines radiating from the stem to the edge of the cap’s underside. These lines should curve slightly with the perspective of the mushroom.
Smudge Alert
Ink smearing is heartbreaking. Place a clean scrap of paper under your drawing hand to protect finished areas from skin oils and accidental smudges while you work.
Step 3: Shading and Texture
-
Stipple the iris:
Using your finest 005 pen, fill the iris with tiny stippled dots. Densify the dots near the pupil and the top of the iris to create depth and a shadow from the eyelid. -
Fill the pupil:
Color in the pupil solidly with an 05 pen, leaving a tiny white circle as a highlight to make the eye look wet and alive. -
Texture the cap:
Add small, irregular circles and spots across the cap’s surface using the 01 pen. Fill these spots with loose, spiraling scribbles or cross-hatching to distinguish them from the smooth skin. -
Shade the cap form:
Use very fine hatching (parallel lines) along the bottom edge of the cap and around the eye socket to give the mushroom volume and roundness. -
Deepen the gills:
Go back into the gills with the 005 pen. Add shorter, darker lines near the stem and the outer rim to simulate the deep shadows between the thin gill membranes. -
Shade the stem:
Use vertical hatching lines running up the stem. I prefer to keep the center of the stem mostly clear of ink to act as a cylindrical highlight. -
Detail the skirt:
Add fold lines to the annulus (skirt) using the 01 pen. Use short, downward strokes to show the shadow cast by the skirt onto the stem below.
Pro Tip: Gill Geometry
Don’t draw straight lines for gills. Curve them slightly like parenthesis—(( ))—to match the roundness of the cap. This small curve sells the 3D effect instantly.
Step 4: Final Touches
-
Ink the foliage:
Trace the fern-like plants at the base with short, quick strokes to mimic pine needles or grass blades. Keep this texture sharp and spiky. -
Ground the subject:
Add a bed of short vertical hatch marks underneath the mushroom and plants to suggest grass and shadow, ensuring the mushroom doesn’t look like it’s floating. -
Erase and assess:
Once the ink is completely dry (give it a few minutes), gently erase all underlying pencil sketch lines with your kneaded eraser. -
Refine the contrast:
Step back and look at the drawing. If the eye or the underside of the cap needs more punch, carefully add another layer of stippling or fine hatching to deepen the blacks.
Now you have a wonderfully weird botanical study that perfectly balances the natural with the supernatural


Dripping Ink, Melting Gills
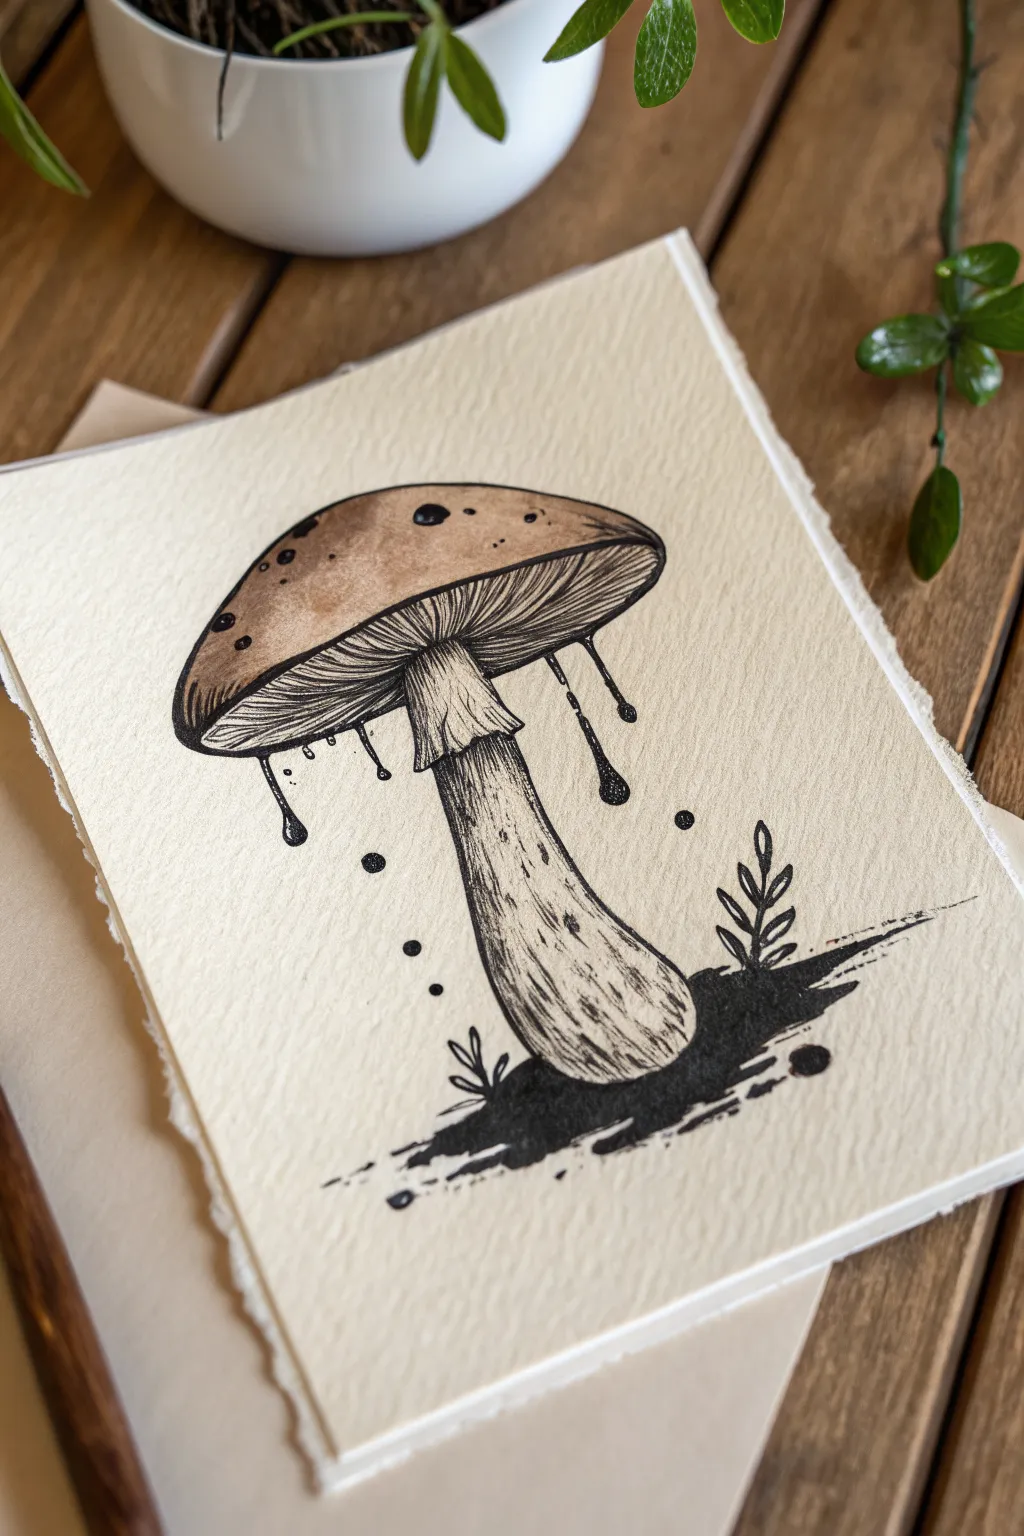
This moody, weirdcore-inspired illustration features a classic toadstool cap that seems to be melting into dark droplets. It combines precise linework with soft brown washes on textured paper for an organic, slightly surreal finish.
Step-by-Step Tutorial
Materials
- Cold-press watercolor paper (300 gsm)
- Waterproof fine liner pens (sizes 0.1, 0.3, and 0.5)
- Brown watercolor paint (burnt umber or sepia)
- Black ink or gouache
- Small round watercolor brush (size 2 or 4)
- Pencil (HB or H)
- Kneaded eraser
Step 1: Sketching the Structure
-
Outline the cap:
Start lightly with your pencil. Near the top third of your paper, draw a broad, flattened dome shape for the mushroom cap. Keep the bottom edge slightly curved, drooping down at the sides. -
Add the stem:
Drawing downwards from the center of the cap, sketch a sturdy stem. Make it flare out slightly at the base where it meets the ground, giving it a solid foundation. -
Indicate the skirt:
Just below the cap on the stem, draw a jagged, irregular ring to represent the annulus or ‘skirt’ of the mushroom. It should look a bit tattered. -
Sketch the dripping details:
Lightly mark where your ‘ink drips’ will fall. Draw vertical lines descending from the rim of the cap, ending in teardrop shapes. Scattering a few floating droplets adds a nice suspended-in-time effect.
Ink Smearing?
Since this combines ink and water, ensure your fine liners are 100% waterproof. If not, do the watercolor wash first, let it dry completely, and then ink over top.
Step 2: Inking the Lines
-
Ink the main contours:
Switch to your 0.5 fine liner. Carefully go over the outer edge of the mushroom cap and the main lines of the stem. Don’t worry about making the line perfectly smooth; a little wobble adds character. -
Detail the gills:
Using a thinner 0.1 pen, draw the gills underneath the cap. These should run from the stem outward to the edge of the cap. Keep the lines close together and follow the curve of the mushroom. -
Texture the stem:
With the 0.1 or 0.3 pen, add vertical hatching lines along the stem to create a fibrous texture. Concentrate these lines on the sides to suggest rounded volume. -
Solidify the drips:
Use the 0.5 pen to outline and fill in the teardrop shapes falling from the cap. Make them solid black for high contrast against the paper. -
Create the ground:
At the base, draw a pooled, messy shadow. Use jagged, horizontal scribbles to imply dirt or ink spilling onto the floor.
Step 3: Adding Color and Tone
-
Prepare the brown wash:
Dilute a small amount of burnt umber watercolor with plenty of water. You want a transparent, tea-stained look. -
Paint the cap:
Gently apply the brown wash to the mushroom cap. Leave a few tiny spots unpainted near the top for highlights if you wish, or lift color later. -
Deepen the shading:
While the first layer is still slightly damp, drop a more concentrated bit of brown paint along the left edge and bottom rim of the cap. Let it bleed slightly for a natural gradient. -
Texture the cap:
Once the watercolor is dry, use your fine liner to add stippling (tiny dots) or small spots on the cap to mimic fungal textures. -
Enhance the shadows:
I like to use a very diluted black ink or gray wash to add shadow under the skirt and on the shaded side of the stem, reinforcing the 3D form.
Uneven Washes
To avoid hard edges in your watercolor cap, pre-wet the area with clean water before dropping in the brown paint. This creates a soft, diffused bloom.
Step 4: Final Weirdcore Touches
-
Add floating elements:
Draw small, solid black circles floating around the stem and drips. This ‘anti-gravity’ effect is key to the weirdcore aesthetic. -
Draw simple foliage:
To the right of the base, sketch a simple, stylized sprig of leaves using solid black ink. Keep it graphic and flat compared to the textured mushroom. -
Darken the base:
Go back to the ground shadow with your blackest ink or gouache. Make the center pitch black, fading out into broken lines at the edges. -
Clean up:
Wait until absolutely everything is dry—touch it lightly with the back of a finger to check. Then, gently erase any remaining pencil marks.
Now you have a wonderfully surreal mushroom piece ready to frame or scan for your digital art projects

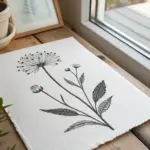
Floating Scribble Eyes Around the Mushroom
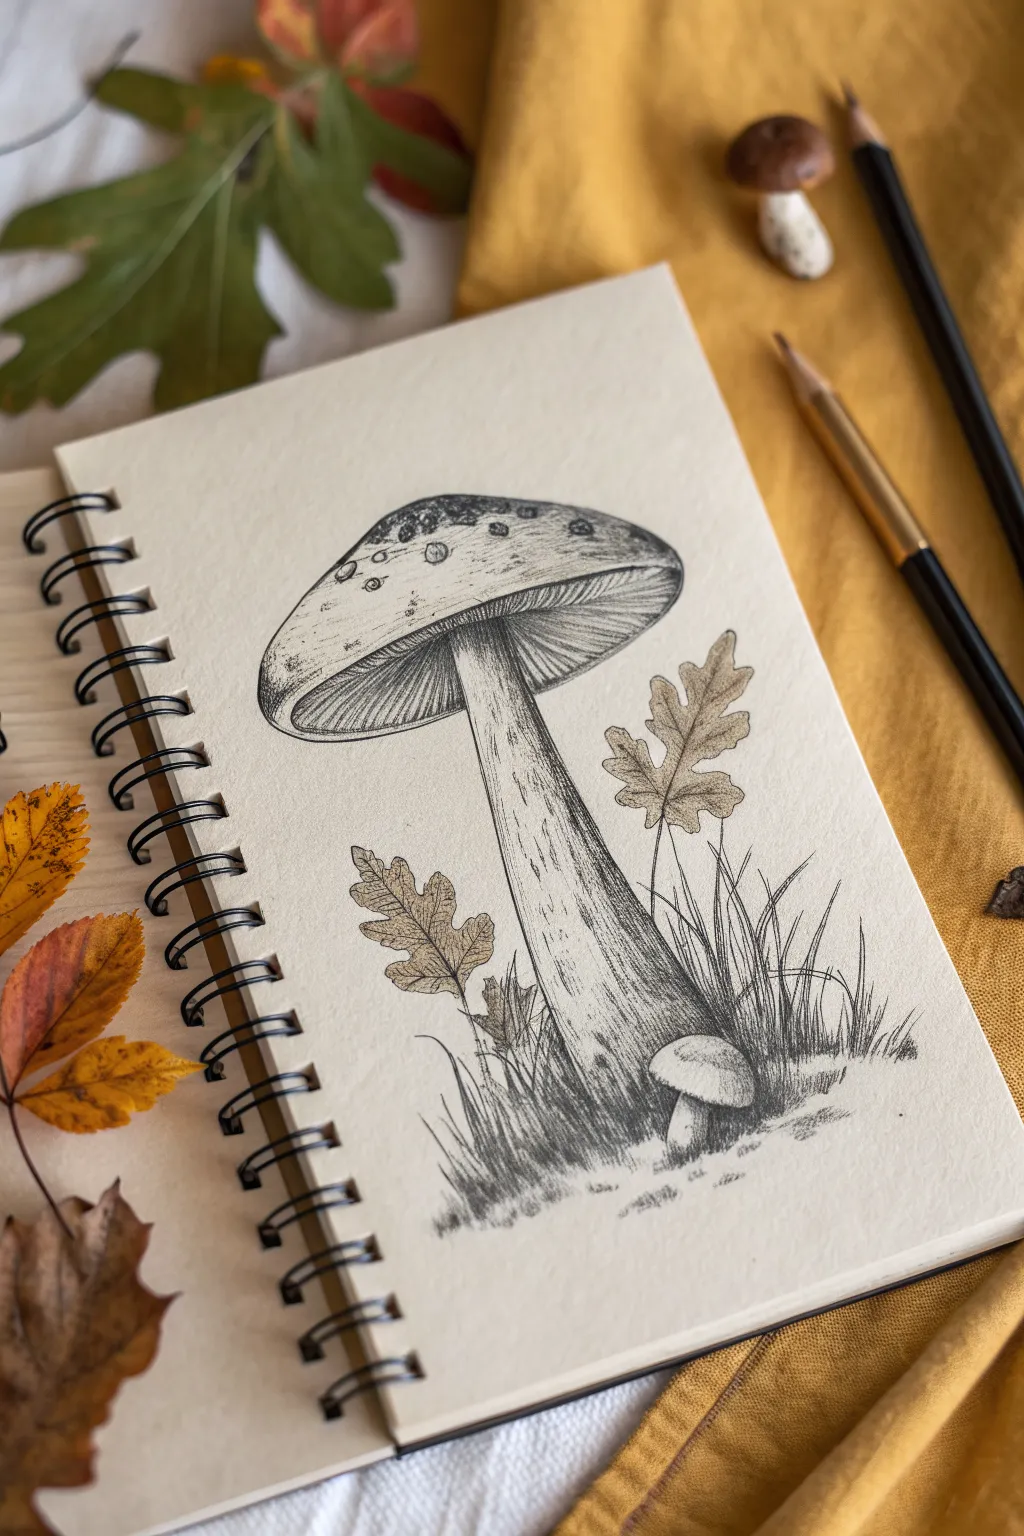
This intricate pen and ink drawing captures the quiet beauty of forest fungi amidst falling oak leaves. With careful hatching and stippling techniques, you’ll create a textured, realistic composition that feels plucked straight from a naturalist’s field diary.
How-To Guide
Materials
- Smooth sketchbook paper (cream or off-white)
- Graphite pencil (HB or 2H)
- Kneaded eraser
- Fine liner pens (sizes 0.05, 0.1, 0.3, and 0.5)
- Reference photo of a Bolete or similar mushroom
Step 1: Pencil Structure
-
Sketch the primary axis:
Begin by lightly drawing a vertical line slightly off-center to act as the stem’s axis. Curve it gently near the bottom to suggest organic growth. -
Outline the cap:
At the top of your axis, sketch a wide, flattened dome shape for the mushroom cap. Add a secondary curved line underneath to verify the perspective and thickness of the rim. -
Define the stem:
Draw the sides of the stem, tapering it slightly as it moves upward toward the cap. Make the base somewhat bulbous where it meets the ground. -
Add nature elements:
Lightly sketch the shapes of fallen oak leaves floating on either side of the stem, and add a small ‘baby’ mushroom nestled at the base of the large one. -
Block in the ground:
Use loose, quick pencil strokes to indicate where clumps of grass and moss will sit around the base, grounding your subject.
Ink Control Pro Tip
Always pull the pen towards you when hatching, rather than pushing it away. This gives you more control over the pressure and creates tapering lines that look more natural.
Step 2: Inking the Forms
-
Outline the main mushroom:
Using a 0.3 pen, trace your pencil lines for the mushroom cap and stem. Keep the line weight varied—slightly broken or thinner on the light-hitting side (top left) and thicker on the shadowed side. -
Detail the gills:
Switch to a 0.05 or 0.1 pen. Carefully draw the gills under the cap, radiating from the stem outward to the rim. These lines should be very fine and close together. -
Texture the cap:
Add small, irregular circular patches on top of the cap using a 0.1 pen to suggest texture or scales. Use stippling (dots) to shade around these patches. -
Shade the stem:
Using vertical hatching lines, shade the stem. Curve your strokes to match the cylindrical form. Concentrate the lines on the right side and near the top, leaving the center relatively white for a highlight. -
Refine the stem texture:
I like to add tiny, broken vertical dashes scattered across the lighter parts of the stem to give it a fibrous, realistic look without overwhelming the drawing.
Step 3: Foliage and Environment
-
Outline the leaves:
Ink the jagged edges of the oak leaves with a 0.1 pen. Don’t make the outline perfect; brittle, dry leaves have wavy, irregular edges. -
Vein the leaves:
Draw the central vein of the leaf, then add branching veins. Use very light stippling or faint hatching between veins to show that the leaf has dried and curled. -
Ink the grass:
Using quick, upward flicking motions with a 0.1 pen, ink the grass blades at the base. Vary the lengths and angles so they look wild rather than manicured. -
Anchor the base:
Darken the area where the stem meets the ground using cross-hatching or heavy stippling. This deep shadow creates weight and prevents the mushroom from looking like it’s floating. -
Shade the small mushroom:
Use minimal lines for the small mushroom to keep it looking delicate. A little shading under its cap is usually enough. -
Clean up:
Once the ink is completely dry—give it a few minutes—gently erase all underlying pencil marks with your kneaded eraser. -
Final contrast:
Step back and assess drawings. Use a 0.5 pen to deepen the darkest shadows under the cap and at the very bottom of the grass clumps to make the image pop.
Level Up: Aged Paper
Before drawing, lightly stain your paper with diluted coffee or tea and let it dry flat. This creates an antique, botanical field-guide aesthetic that matches the subject perfectly.
Enjoy the satisfaction of seeing your forest floor scene come to life on the page

PENCIL GUIDE
Understanding Pencil Grades from H to B
From first sketch to finished drawing — learn pencil grades, line control, and shading techniques.
Explore the Full Guide
Glassy, Reflective Eyeball Cap
This project captures the delicate textures of the forest floor with a naturalistic study of an Amanita mushroom. Using watercolor washes and fine ink details on textured paper creates a vintage botanical illustration feel that fits perfectly into cottagecore or nature-inspired decor.
Step-by-Step
Materials
- Cold press watercolor paper (300 gsm)
- Pencil (HB or H for light sketching)
- Kneaded eraser
- Watercolors (Burnt Umber, Yellow Ochre, Sepia, Sap Green)
- Fine liner pen (Brown or Sepia, 0.1mm – 0.3mm)
- Round watercolor brushes (Size 2 and 4)
- Masking fluid (optional)
- Paper towel
Step 1: Sketching the Foundations
-
Draft the basic shapes:
Begin by lightly sketching the mushroom cap as a wide oval. Draw a vertical cylinder for the stem intersecting the middle, slightly wider at the base than at the top. -
Refine the cap:
Curve the top line of the cap to give it volume and add the inner ellipse where the gills will be visible. This perspective is slightly from below. -
Detail the stem and skirt:
Sketch the ‘skirt’ or ring just below the cap. Add a slightly jagged, uneven texture to the base of the stem to suggest where it meets the earth. -
Clean up:
Use your kneaded eraser to lift off heavy graphite, leaving only the faintest guidelines for your paint.
Keep it Organic
Don’t worry about shaky hands during the inking phase. A slightly wavering or broken line actually looks more natural for botanical subjects than a perfect, smooth vector-style line.
Step 2: Layering the Wash
-
First wash on the cap:
Mix a very watery wash of Yellow Ochre and a touch of Burnt Umber. Apply this pale beige tone over the entire cap area, leaving small, irregular white spots unpainted if you want natural white variegation. -
Define the stem:
Paint the stem with a diluted mix of Sepia and water. Keep the center of the stem lighter to create a cylindrical 3D highlight, darkening the edges slightly. -
Deepen the cap color:
Once the first layer is semi-dry, drop a slightly more concentrated Burnt Umber into the top edge of the cap and the right side to establish a light source coming from the top left. -
Underneath the cap:
Paint the underside area (where gills will be) a very pale, cool grey-brown. This serves as a shadow base. -
Grounding the subject:
Mix Sap Green with a little brown and paint a small, loose patch of ground at the base of the stem. Add a few upward strokes to suggest blades of grass.
Step 3: Adding Texture and Detail
-
Painting the gills:
Using your smallest brush (size 2), paint very thin, radiating lines on the underside of the cap using a translucent brown mix. Start from the stem and pull outward toward the cap edge. -
Texture on the stem:
Use a dry-brush technique with a darker brown mix to stipple texture onto the lower part of the stem, mimicking the rough surface of a wild mushroom. -
Shadows and depth:
Add a darker wash of Sepia right under the cap rim where it meets the stem to create a deep shadow. -
Let it dry completely:
Ensure the paper is bone dry before picking up your pen, otherwise the ink will bleed into the paper fibers.
Vintage Paper Hack
Dip the edges of your finished, dry paper into strong black tea or coffee and let it dry. This stains the deckled edges, instantly giving your art an aged, scientific specimen look.
Step 4: Ink Outline and Finishing
-
Outline the cap:
Using a brown fine liner, trace the outer edge of the cap. I prefer to use a broken, organic line rather than a perfect curve to keep it looking natural. -
Define the gills:
Draw very fine lines over your painted gills. Vary the pressure so some lines are darker than others, which adds realistic depth. -
Stem texture:
Add small, jagged tick marks along the sides of the stem to represent the ‘shaggy’ texture. Concentrate these near the base and the ring. -
Detailing the skirt:
Outline the skirt under the cap with delicate loose lines, ensuring it looks thin and membrane-like. -
Final grass accents:
Ink the small blades of grass at the base. You can add a heavy shadow at the very bottom of the stem to firmly plant the mushroom on the ground.
Once the ink is set, you have a charming woodland study ready to frame or gift
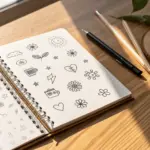
Patchwork Cap Made of Eye Panels
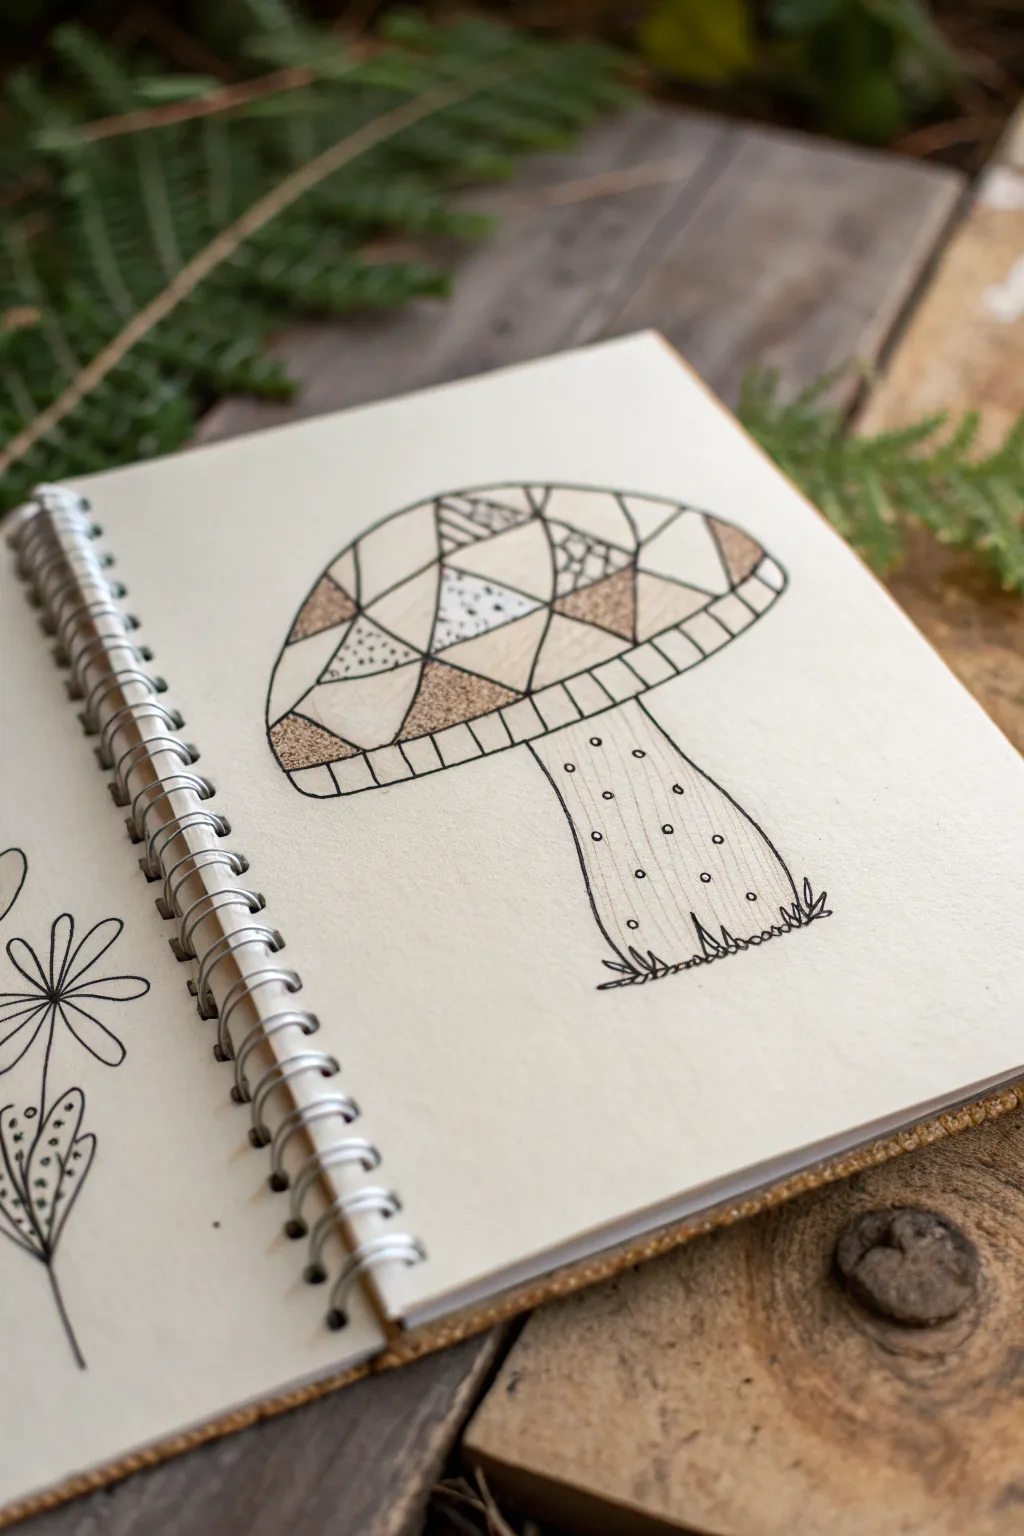
This charming sketchbook project features a singular mushroom with a cap composed of intricate geometric shards. The design relies on clean fineliner work and subtle stippling to create texture without needing color, resulting in a minimalist yet detailed botanical study.
Detailed Instructions
Materials
- Spiral-bound sketchbook with smooth, heavyweight paper
- Pencil (HB or 2B)
- Kneaded eraser
- Fine liner pen (01 or 03 size, black ink)
- Ultra-fine liner pen (005 size, black ink)
Step 1: Sketching the Framework
-
Outline the Cap:
Begin lightly in pencil by drawing a large semi-circle. This doesn’t need to be perfectly round; a slightly flattened top gives it a more organic feel. -
Draw the Stem:
Extend two lines downward from the center of the cap’s base. Widen them slightly as they reach the bottom to create a sturdy-looking stalk. -
Add the Underside:
Connect the two ends of your cap semicircle with a slightly curved line, then draw another parallel curved line just below it. This creates the rim or gills area of the mushroom. -
Ground the Subject:
Sketch a jagged, uneven line at the very bottom of the stem to represent grass or soil, giving the mushroom a place to stand.
Ink Smearing?
If you are left-handed or your pen is particularly juicy, place a scrap piece of paper under your hand as you draw to prevent dragging wet ink across the page.
Step 2: Creating the Patchwork Design
-
Divide the Cap Space:
Inside the main cap shape, draw random intersecting straight lines. These should create a variety of triangles and irregular polygons, like a stained glass window. -
Ink the Outlines:
Switch to your 03 or 01 fineliner. Trace over your main pencil outlines first—the cap shape, the stem, and the ground line. -
Ink the Internal Grid:
Carefully ink over the geometric lines within the cap. Keep your hand steady to ensure the intersections look sharp and clean. -
Vertical Gill Lines:
In the narrow band you created at the bottom of the cap (the rim), draw evenly spaced vertical lines. These represent the mushroom’s gills.
Add Dimension
Use a light gray alcohol marker or a diluted ink wash to add faint shadows to one side of the stem and under the cap for a pop of 3D realism.
Step 3: Texturing and Detailing
-
Selected Stippling:
Choose a few specific geometric shards in the cap to fill with texture. For some, use dense stippling (tiny dots) to create a darker, shaded value. -
Internal Patterns:
In other shards, add sparse dots or tiny parallel lines. Leaving some shards completely blank is crucial for contrast. -
Stem Texture:
Use your finest pen (005) to draw thin, vertical striations on the stem. These lines should be broken and faint, not solid stripes. -
Adding Pores:
Scatter small rings or circles across the stem to mimic natural textures or pores. Keep them random in placement and size. -
Ground Details:
Refine the grass at the base by adding small V-shaped tufts and scribbly lines to suggest messy forest floor debris. -
Clean Up:
Wait at least five to ten minutes for the ink to dry completely. I usually use this time to grab a drink, because rushing this step always leads to smudges. Once dry, erase all pencil marks with the kneaded eraser.
Now you have a unique, patterned fungal study ready to be surrounded by more woodland sketches
BRUSH GUIDE
The Right Brush for Every Stroke
From clean lines to bold texture — master brush choice, stroke control, and essential techniques.
Explore the Full Guide
Mushroom With Human Lashes
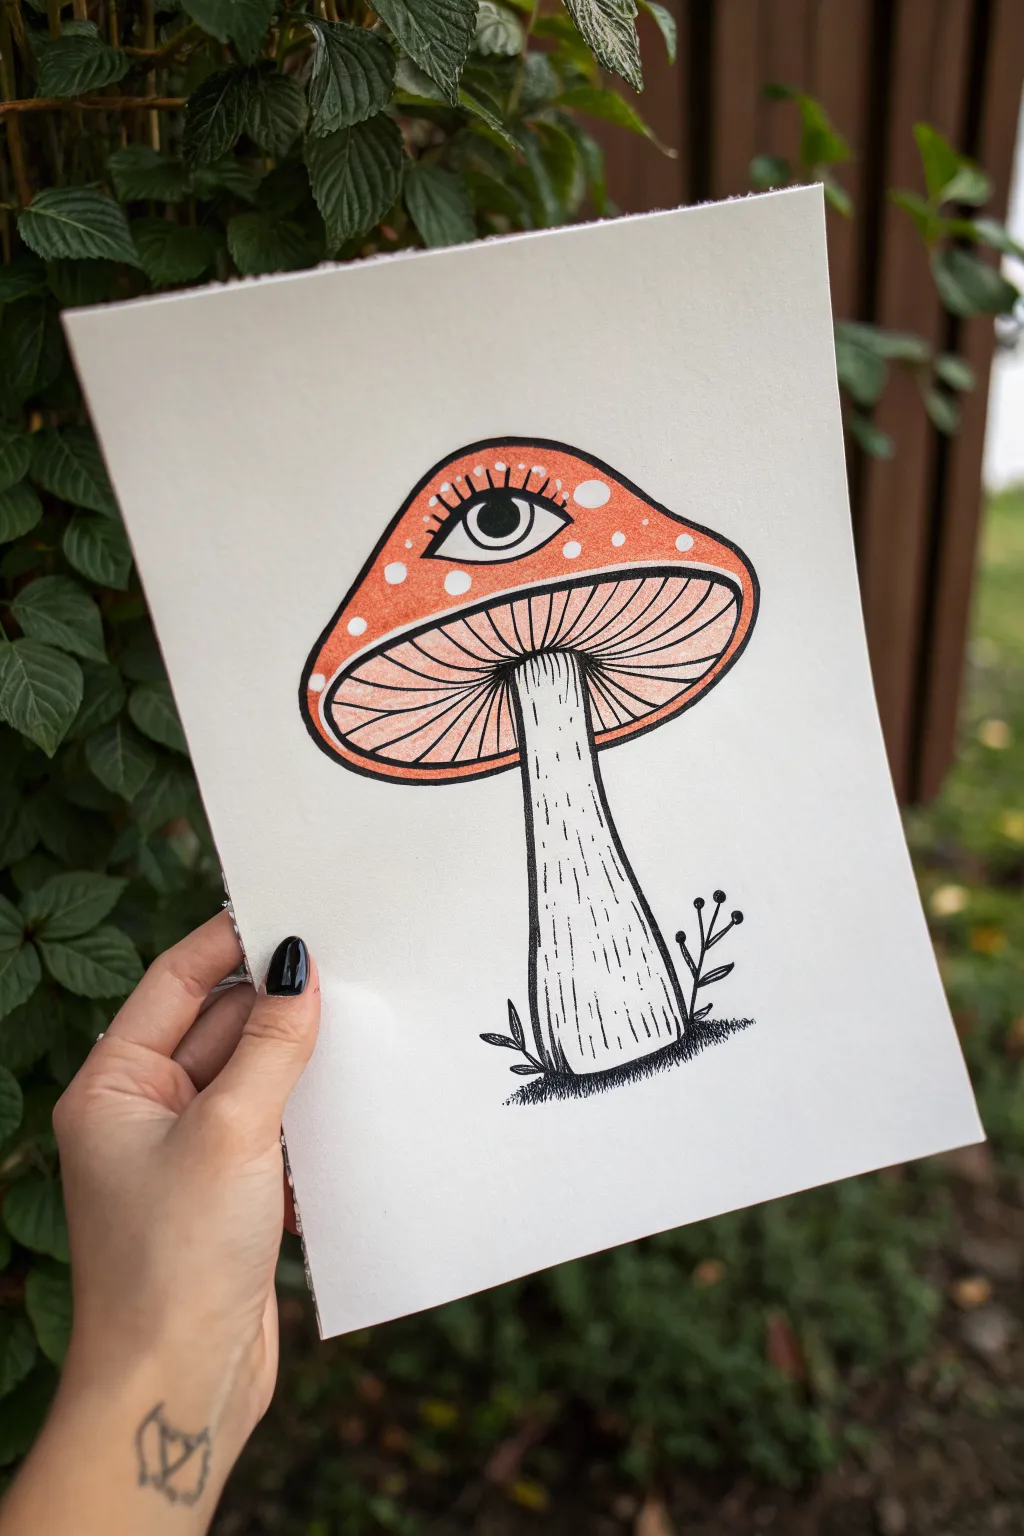
This whimsical drawing merges the organic shape of a classic mushroom with surreal, weirdcore imagery by planting a watchful eye right on the cap. The high-contrast black ink against the soft orange fill creates a striking graphic look suitable for sketchbooks or wall art.
How-To Guide
Materials
- Heavyweight drawing paper or cardstock (white)
- Pencil (HB or 2B)
- Eraser
- Fine liner pen (0.5mm, black)
- Fine liner pen (0.1mm or 0.3mm, black)
- Orange alcohol marker or colored pencil
- White gel pen (optional for highlights)
Step 1: Planning the Shapes
-
Sketch the cap:
Start by lightly sketching a wide, curved dome shape for the top of the mushroom cap. Draw a predominantly flat line connecting the bottom edges, but curve it slightly upward at the corners to give it volume. -
Add the underside:
Below the cap, draw a second curved line mirroring the top dome but inverted, creating an oval-like opening for the mushroom’s gills. -
Draw the stem:
Sketch a sturdy stem descending from the center of the underside. Make it slightly wider at the base than at the top, giving it a grounded feel. -
Place the eye:
On the left side of the mushroom cap, sketch a classic almond eye shape. It should be large enough to be a focal point but leave room for spots around it. -
Mark the spots:
Lightly draw several circles of varying sizes scattered across the rest of the cap to represent the classic toadstool spots.
Uneven marker coverage?
If using alcohol markers, work in small circular motions rather than long stripes. This keeps the ink wet longer, allowing it to blend seamlessly.
Step 2: Inking the Outlines
-
Outline the main form:
Using your 0.5mm fine liner, trace over your pencil lines for the outer contour of the mushroom cap and the stem. Use a steady hand to create a smooth, continuous line. -
Ink the eye:
Carefully outline the eye shape on the cap. Draw a perfect circle for the iris inside, floating in the center. -
Create the lashes:
This is the signature detail. Draw thick, curved lashes extending upward from the top eyelid line. Space them out evenly for a distinctive, illustrative look. -
Detail the pupil:
Fill in the pupil with solid black, leaving a tiny white circle as a highlight to make the eye look alive. -
Ink the gills:
Switch to a thinner pen (0.1mm or 0.3mm) for the underside. Draw lines radiating from the stem connection point out toward the rim of the cap. These lines don’t need to be perfectly straight; a little wobble adds organic texture.
Pop that pupil
Make the white highlight in the pupil slightly larger than you think you need. It adds a glassy, surreal effect that really sells the weirdcore vibe.
Step 3: Adding Color and Texture
-
Color the cap:
Use your orange marker or colored pencil to fill in the main area of the cap. Carefully work around the circular spots and the eye itself—these should remain the white of the paper. -
Shade the underside:
Add a very light wash of orange or use light pencil strokes on the gills (underside) of the mushroom. This area should be significantly paler than the bright orange cap. -
Texture the stem:
Using the thinner pen again, draw vertical, broken lines down the length of the stem. Concentration these lines slightly more on the sides to suggest roundness and shadow. -
Ground the mushroom:
At the base of the stem, use short, scribbled hatching strokes to create a patch of dark earth or shadow. This anchors the drawing so it doesn’t feel like it’s floating. -
Add foliage details:
Draw tiny sprigs of leaves or small budding plants emerging from the dark scribbles at the base. Keep these simple and silhouetted. -
Refine the spots:
If your coloring went over the lines a bit, you can use a white gel pen to crisp up the edges of the white spots on the cap. -
Deepen contrasts:
Go back over the main outline with the thicker pen if needed to ensure the outer silhouette is bold and separates clearly from the inner details. -
Clean up:
Once the ink is completely dry, gently erase any remaining pencil sketches to leave a clean, professional finish.
You have now created a wonderfully surreal piece of art that stares right back at you
Spindly Walking Mushroom Legs
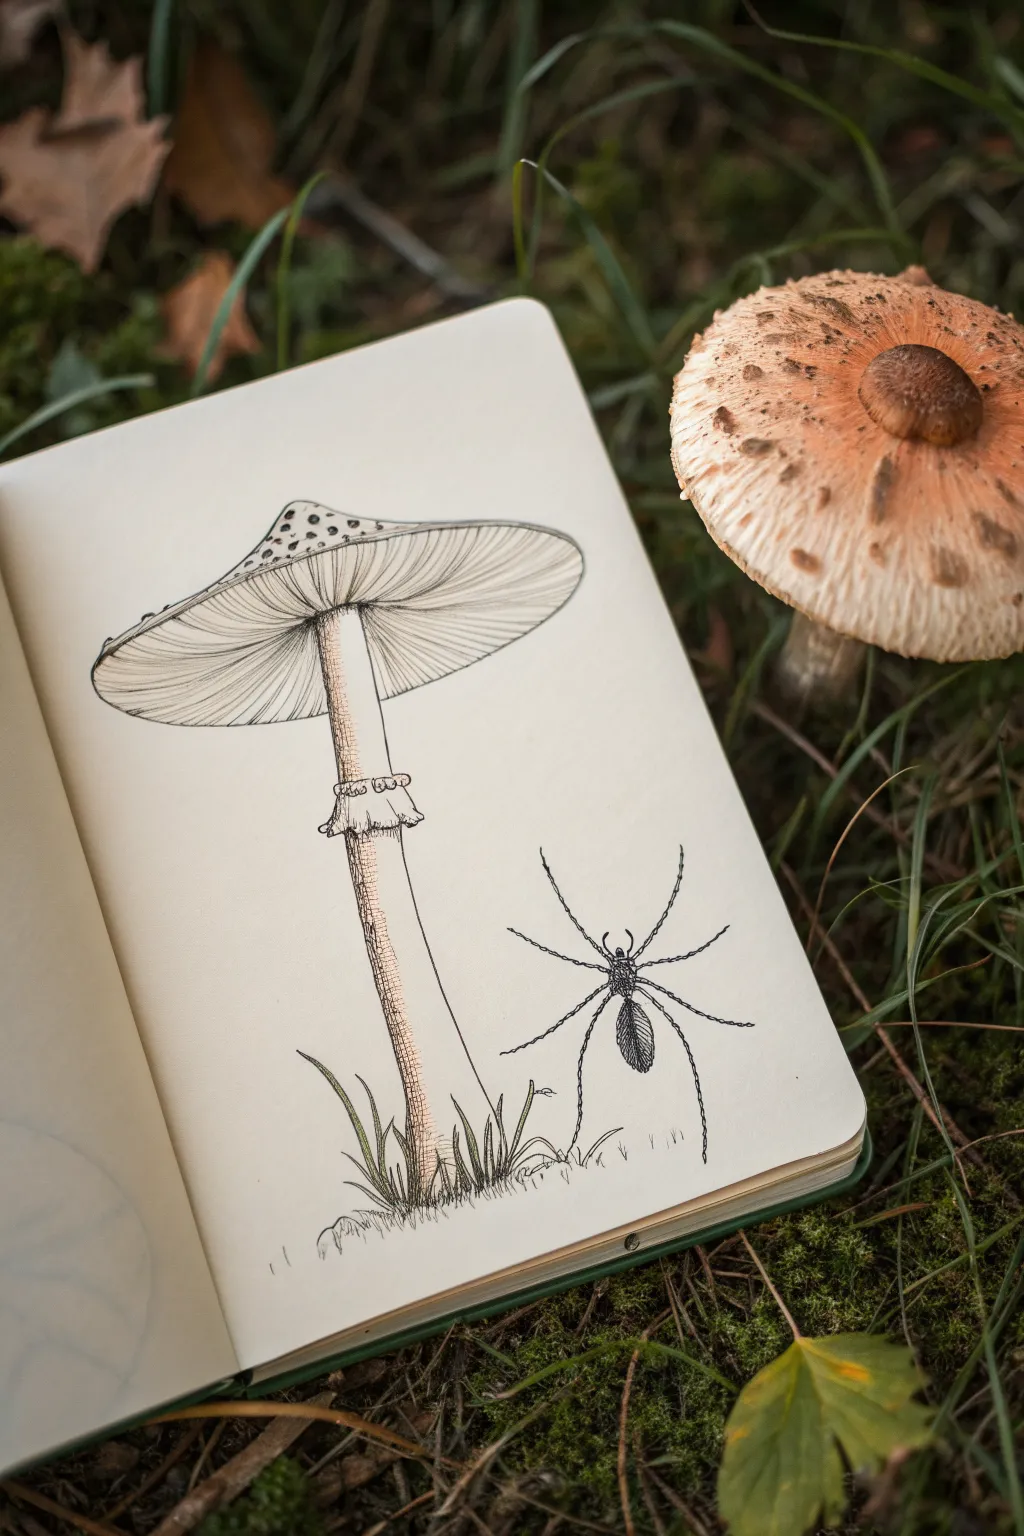
This delicate line drawing captures the elegance of a tall parasol mushroom alongside a spindly-legged arachnid companion. Using precise hatching and stippling techniques, you will create a scientific-style illustration that feels plucked right from a Victorian naturalist’s field journal.
Detailed Instructions
Materials
- Smooth heavyweight sketchbook paper (hot press finish preferred)
- Pencil (HB or H for sketching)
- Fine liner pens (sizes 0.05, 0.1, and 0.3mm)
- Kneadable eraser
- Ruler (optional)
- Small brush and diluted brown ink or watercolor (optional for shading)
Step 1: Structural Sketching
-
Establish the height:
Begin by lightly drawing a long, slightly curved vertical line to serve as the central axis for the mushroom stem. This ensures your mushroom stands tall without leaning too much. -
Outline the cap:
At the top of your axis, sketch a wide, shallow ellipse or umbrella shape. Add a small bump or ‘umbo’ at the very center peak of the cap. -
Define the stem and ring:
Thicken the central axis into a slender tube. About one-third of the way down from the cap, sketch the loose, skirt-like ring (annulus) that circles the stem. -
Place the spider:
To the right of the stem near the base, sketch a small oval for the spider’s body and a smaller circle for the head segment. Lightly map out eight long, angular legs radiating outward. -
Ground the scene:
Sketch a few jagged blades of grass intersecting the base of the mushroom stem to give the subject a sense of place.
Wobbly Lines?
Don’t panic if your lines aren’t perfectly straight. Organic subjects like mushrooms benefit from shaky lines; it adds natural texture and realism.
Step 2: Inking the Mushroom
-
Outline the cap edge:
Switch to your 0.1mm pen. Carefully trace the outer rim of the mushroom cap, keeping the line slightly broken or textured rather than perfectly smooth. -
Draw the gills:
Using the 0.05mm pen, draw fine lines radiating from the center of the underside toward the outer rim. These lines should curve slightly to follow the umbrella shape. -
Texture the top:
Add small stippled dots or tiny irregular shapes on the top peak of the cap to mimic the scales often found on parasol mushrooms. -
Detail the skirt:
Ink the ring around the stem with a slightly wavy line, adding vertical folds to show it hanging loosely. -
Shade the stem:
I prefer using vertical hatching lines along the left side of the stem to create roundness. Keep the right side largely white to represent a highlight. -
Cross-hatching details:
Deepen the shadows under the skirt and at the very base of the stem using tighter cross-hatching marks.
Step 3: The Spider & Grass
-
Ink the spider body:
Use the 0.3mm pen to outline and fill the spider’s abdomen and cephalothorax. Leave tiny specks of white to suggest a shiny carapace. -
Draw the legs:
Switch back to the 0.1mm pen for the legs. Draw them with distinct joints, making the segments nearer the body slightly thicker than the tips. -
Add leg texture:
Make the legs look hairy or segmented by adding tiny, short dashes along their length rather than drawing solid continuous lines. -
Ink the grass:
Outline the grass blades at the base with quick, upward strokes. Add a few scratched lines for dirt around the root area. -
Connect the elements:
Ensure the mushroom stem appears behind the grass blades by stopping your ink lines where the grass overlaps.
Level Up: Field Notes
Add handwritten scientific labels or ‘observation notes’ in cursive ink script around the drawing to enhance the naturalist journal aesthetic.
Step 4: Final Touches
-
Clean up sketch lines:
Wait until the ink is completely dry to the touch, then gently roll your kneadable eraser over the drawing to lift all graphite guidelines. -
Refine contrast:
Look at the gills again; if they look too pale, add a second layer of very fine hatching near the center stem connection. -
Optional wash:
If desired, apply a barely-there wash of diluted brown ink or watercolor to the shadowed side of the stem for a vintage feel.
Close your sketchbook knowing you have preserved a quiet moment of nature in permanent ink


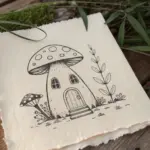
Mushroom Creature With Little Hands
This charming project combines botanical illustration with a touch of weirdcore fantasy, featuring a classic toadstool that has sprouted tiny hands and a face. Using fine liners and delicate washes of color, you’ll create a sketchbook page that feels both vintage and surreal.
How-To Guide
Materials
- Heavyweight sketchbook paper (mixed media or smooth watercolor paper)
- Pencil (HB or H for light sketching)
- Kneaded eraser
- Waterproof fineliner pens (black, sizes 0.1, 0.3, and 0.5)
- Watercolor paints (pans or tubes)
- Small round watercolor brush (size 2 or 4)
- White gel pen or gouache (optional for highlights)
Step 1: Planning the Structure
-
Establish the ground line:
Begin by lightly penciling a soft, uneven slope near the bottom of your page to represent the forest floor. This anchors the drawing so the mushroom doesn’t feel like it’s floating. -
Draft the mushroom cap:
Sketch a large, wide dome shape in the upper third of the page. Imagine it as a slightly flattened umbrella, making underneath curves visible to show perspective. -
Add the stalk:
Draw the stem coming down from the center of the cap. Instead of straight lines, use slightly wavy, organic strokes that widen at the base like a tree trunk. -
Sketch the ‘weirdcore’ elements:
Near the base of the stalk, lightly pencil in two tiny, circular windows or eyes. Just below them, add small, nubby arms or hands reaching out, giving the mushroom its creature-like quality.
Uneven Wash?
If your watercolor dries with hard edges (blooms), soften them with a clean, slightly damp brush while the paint is still workable, or embrace the texture for a rustic look.
Step 2: Inking the Details
-
Outline the cap:
Switch to your 0.3 fineliner. Trace the outer edge of the cap, breaking the line occasionally for a more natural textur. Draw the small, uneven spots on top of the cap. -
Draw the gills:
Underneath the cap, use a 0.1 fineliner to draw very fine, close lines radiating from the stem to the rim. These are the gills; keep your hand steady and let the lines curve slightly with the form. -
Texture the stem:
Use vertical, broken lines to create a fibrous texture on the stalk. Concentrate more lines right under the cap skirt (annulus) to suggest shadow. -
Define the face and hands:
Carefully ink the tiny circular features and the little hands on the stalk. You can add tiny dots around them to make them look embedded in the mushroom flesh. -
Add surrounding flora:
Draw thin, spindly stems rising up on either side of the mushroom using your finest pen. Add tiny leaves or buds to these weeds to frame the main subject. -
Ground the subject:
Use short, grassy strokes at the base of the stem to simulate moss and grass tufts, blending the mushroom into the ground line you sketched earlier.
Step 3: Adding Color Washes
-
Base coat the cap:
Mix a watery rusty-red or terracotta watercolor. Apply this to the mushroom cap, carefully painting around the white spots so they remain the color of the paper. -
Deepen the red:
While the first layer is still slightly damp, drop a more concentrated red or brown into the left side and top edge of the cap to create volume and shadow. -
Shadow the gills:
Mix a very diluted grey-brown wash. Gently paint the gill area under the cap, keeping it lighter toward the edges and darker near the stem. -
Tint the stem:
Use a pale ochre or cream wash for the stalk. I find that keeping the center of the stalk almost white makes it look more rounded and dimensional. -
Paint the ground:
Apply a loose wash of earthy greens and browns to the ground area. Let the colors bleed into each other slightly to mimic the softness of moss and dirt. -
Enhance the little features:
Add a tiny dot of darker brown or red to the ‘eyes’ and hands on the stem to make them pop out against the pale stalk.
Pro Tip: Pen Choice
Make absolutely sure your fineliner is waterproof before painting. Test it on a scrap paper with water; if it bleeds, do the ink work *after* the paint dries instead.
Step 4: Final Touches
-
Reinforce shadows:
Once the paint is fully dry, use your 0.1 pen to add cross-hatching to the darkest areas, typically under the cap skirt and at the very base of the stem. -
Brighten the spots:
If you accidentally painted over the cap spots, or if they look too dull, use a white gel pen to reclaim those bright white highlights. -
Splatter texture:
Load your brush with watery brown paint and gently tap it over the bottom section of the drawing to create a gritty, earthy texture on the ground. -
Clean up:
Wait for everything to be bone dry, then gently erase any visible pencil lines to leave a crisp, clean illustration.
Now you have a whimsical, slightly strange botanical study tucked away in your sketchbook.
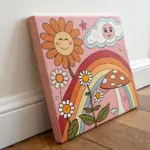
Mushroom Bouquet Growing From a Head
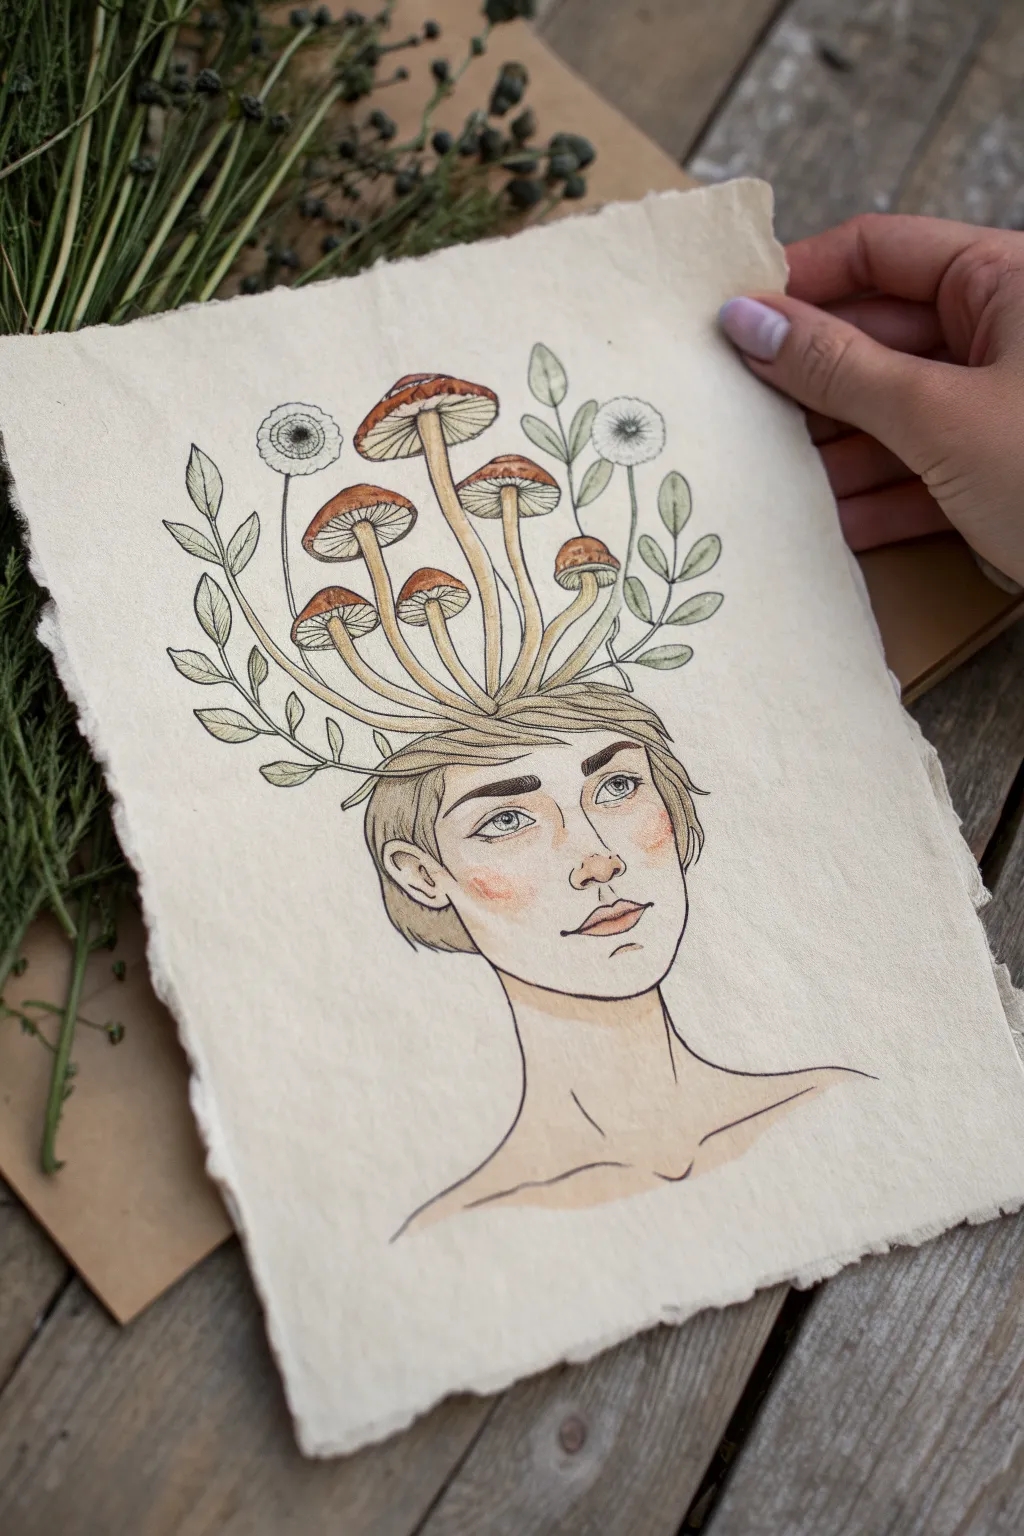
Blend botanical studies with surreal portraiture in this delicate mixed-media piece. Featuring a calm face sprouting a crown of mushrooms and foliage, this artwork plays with themes of nature reclaiming the self.
Step-by-Step Guide
Materials
- Heavyweight, cold-pressed watercolor paper (deckled edge optional)
- Fine-point technical pens (0.1mm and 0.5mm, black)
- H or HB pencil for sketching
- Kneaded eraser
- Watercolor paints or watercolor pan set
- Small round watercolor brushes (sizes 2 and 4)
- Jar of clean water
- Paper towels
Step 1: Planning and Sketching
-
Map the Composition:
Begin with a very faint pencil sketch. Place an oval for the head in the lower center third of the paper, leaving ample room above for the extensive mushroom bouquet. -
Draft the Facial Features:
Sketch the face in a three-quarter view. Focus on large, expressive eyes looking slightly upward and a soft, neutral mouth. Keep lines light so they don’t groove the paper. -
Outline Hair and Neck:
Draw a short, pixie-style haircut. Instead of closing the top of the head completely, sketch the hair parting as the base where the stems will emerge. Add a slender neck and hint of collarbones below. -
Grow the Mushrooms:
Sketch varying heights of mushroom stems rising directly from the bangs and scalp. Vary the cap sizes—some broad and flat, others small and button-like—to create a balanced bouquet shape. -
Add Foliage Accents:
Intersperse the mushrooms with simple, leafy stems and dandelion-like seed heads. These should curve outward, framing the central mushroom cluster.
Step 2: Inking the Lines
-
Ink the Face:
Using your 0.1mm pen, carefully trace the facial features. Use broken or thinner lines for the nose bridge and lips to keep the expression soft. -
Define the Hair:
Ink the hair with sweeping strokes that follow the direction of growth. Allow the lines to merge seamlessly into the base of the mushroom stems. -
Outline Vegetation:
Switch to a slightly bolder 0.3mm or 0.5mm pen for the mushroom caps and main stems if you want them to pop, or stick to the 0.1mm for a delicate look. Add gills under the caps with fine, repetitive lines. -
Erase Guidelines:
Wait until the ink is completely dry to the touch to avoid smearing. Gently rub a kneaded eraser over the entire drawing to lift all graphite marks.
Deckled Edge Effect
To mimic the handmade paper look, fold your watercolor paper, wet the crease with a brush, and gently tear it along a ruler while damp.
Step 3: Adding Color
-
Paint Skin Tones:
Mix a very dilute wash of pale beige or peach. Apply this lightly to the face and neck, leaving the eyes and highlights on the nose white. -
Add Facial Warmth:
While the first layer is slightly damp, add a touch of diluted red or coral to the cheeks, nose, and lips for a natural flush. -
Color the Hair:
Paint the hair with a light sandy brown. I like to keep this wash uneven to suggest texture and highlights. -
Detail the Mushrooms:
Use burnt sienna or rust tones for the mushroom caps. Apply the color more heavily at the center of the caps and fade it out toward the edges. -
Stem Shadows:
Run a very pale yellow-ochre wash down one side of the mushroom stems to give them cylindrical volume without making them too dark. -
Leafy Greens:
Paint the leaves with a muted olive green. Keep the color faint and transparent to match the vintage aesthetic of the piece. -
Final Eye Details:
Use a tiny brush to add a pale blue or grey to the irises, being careful to preserve the white highlight. -
Contour Reinforcement:
Once everything is bone dry, if any lines were washed out, gently re-state them with your finest pen, particularly around the eyes and mushroom gills.
Vintage Patina
For an aged, weirdcore vibe, use a light wash of diluted tea or coffee over the empty background areas once the drawing is fully dry.
Your surreal botanical portrait is now ready to be framed or gifted
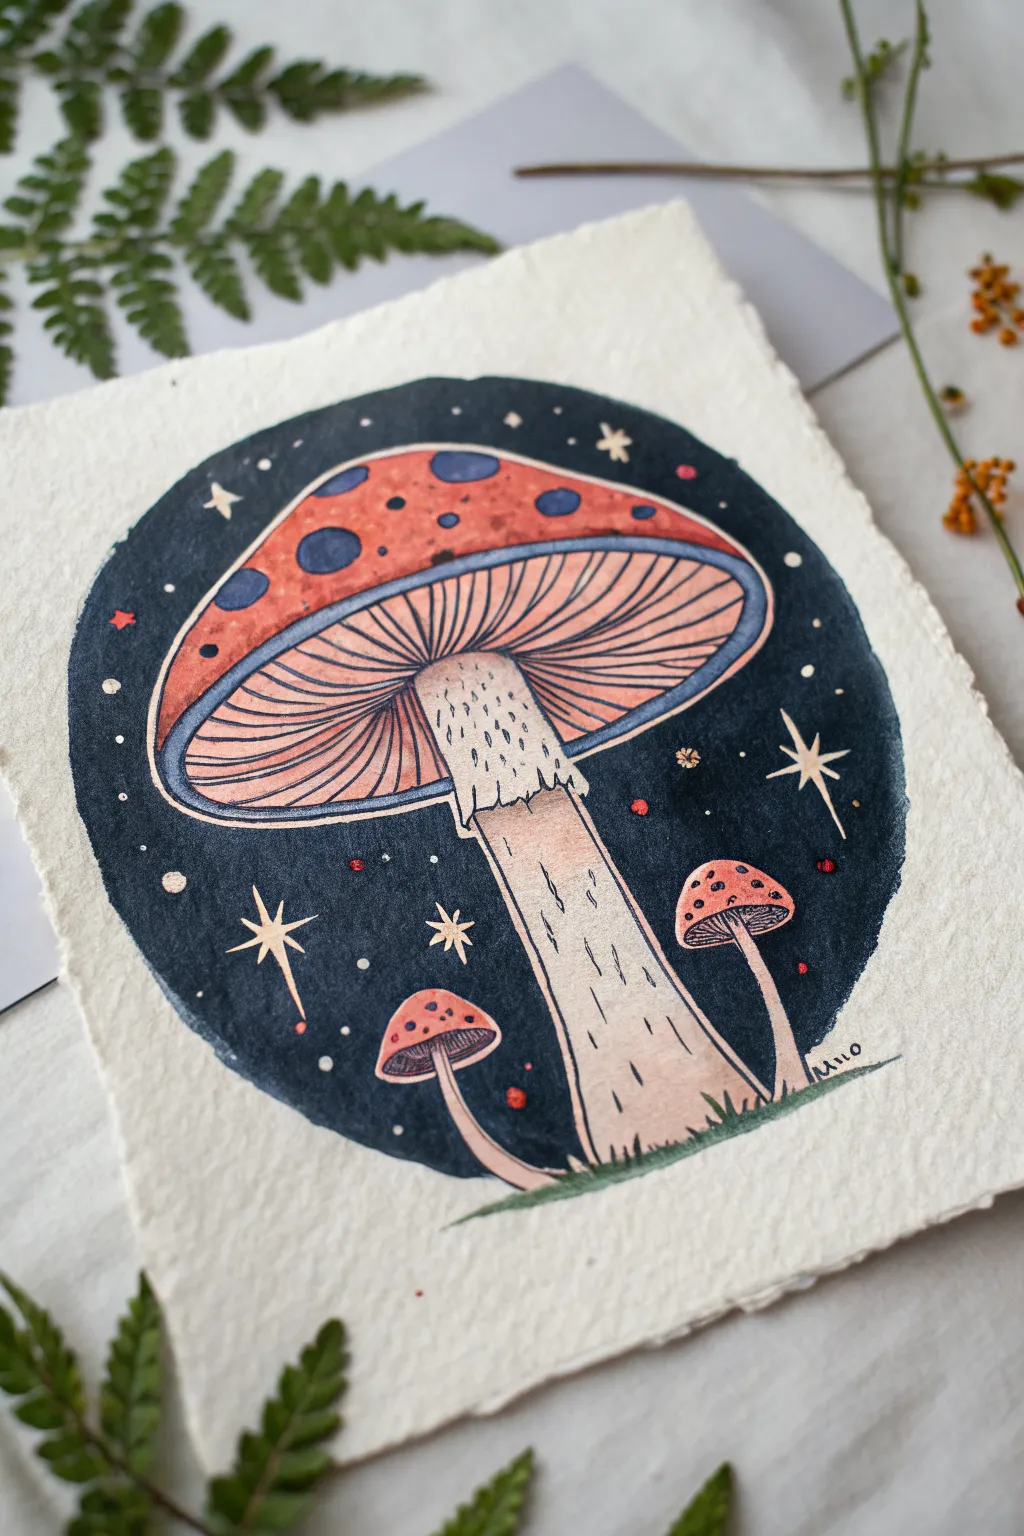
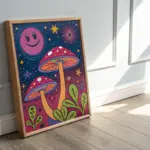
Mirror-Symmetry Mushroom Totem

This striking illustration combines folk art charm with surreal symmetry, featuring a towering stack of stylized mushrooms in a limited red and blue palette. The design evokes a vintage screen-printed look with its clean lines, patterned details, and bold graphic impact.
Detailed Instructions
Materials
- High-quality cream or off-white cardstock (A3 or 11×17 size)
- Red ink pen (fine liner, 0.5mm)
- Blue ink pen (fine liner, 0.5mm)
- Red marker or brush pen (for filling)
- Blue marker or brush pen (for filling)
- Pencil (HB or 2B)
- Soft eraser
- Ruler
- Compass or circle template
Step 1: Drafting the Structure
-
Establish the centerline:
Begin by lightly drawing a vertical line down the center of your paper using a ruler. This is crucial for maintaining the totem-like balance of the main mushroom stack. -
Sketch the primary caps:
Near the top third, use your compass or freehand to sketch a large, wide curve for the top mushroom cap. Just below it, draw a slightly wider, matching curve for the second large cap. They should feel like umbrellas stacked on top of each other. -
Draw the central stem:
Connect the two large caps with a sturdy central stem. Extend this stem all the way down to the bottom quarter of the page, widening it slightly as it reaches the ground to create a solid base. -
Add satellite mushrooms:
On the left and right sides of the main stem’s base, sketch two smaller mushrooms on each side. Vary their heights slightly—perhaps a taller one behind a shorter one—to create depth. -
Ground the composition:
Sketch jagged, grass-like shapes at the very bottom where the stems meet the ‘ground.’ This anchors your floating totem to the earth.
Clean Lines
To mimic the look of a screen print, try to keep a tiny gap of white paper between where your red and blue inks meet. This ‘trapping’ gap makes colors pop.
Step 2: Inking the Blue Elements
-
Outline the stems:
Switch to your blue fine liner. Carefully ink the outlines of the main central stem and the smaller side stems. Keep your hand steady for crisp, clean lines. -
Detail the main stem pattern:
Inside the long central stem, draw scalloped or wave-like patterns stacked vertically. These resemble simplified gills or bark textures. -
Fill the blue areas:
Using your blue marker, fill in the bottom sections of the stem patterns and the small connector pieces between the large caps. Leave thin negative space lines to define the shapes. -
Create the grass:
Ink the jagged grass blades at the bottom with solid blue. Make the strokes sharp and upward-pointing to contrast with the roundness of the mushrooms. -
Add cap details:
Draw the ‘eye’ spots on the mushroom caps. These are circles or ovals. Ink the inner pupils of these spots with solid blue.
Step 3: Inking the Red Elements
-
Outline the caps:
Switch to your red fine liner. Trace the large curved outlines of all the mushroom caps, including the two big central ones and the four smaller side ones. -
Create the heavy rims:
Thicken the outline on the top curve of each cap to create a bold, decorative band. Inside this band, draw a row of tiny, repetitive circles or dots for a textured look. -
Draw the gills:
Underneath each cap, draw fine red lines radiating from the stem outward to the rim. These represent the mushroom imagery’s gills and add delicate detail. -
Pattern the cap surfaces:
On the red surface of the caps (around the blue eye spots), draw curved segments or patches. Fill these patches with red stippling (tiny dots) or solid red ink, leaving thin white borders around the blue spots. -
Refine the small mushrooms:
Repeat the red detailing on the four smaller mushrooms: heavy dotted rims, radiating gills, and red patterned tops.
Vintage Vibe
Instead of bright white paper, use a coffee-stained or speckled oatmeal paper. The warm background instantly makes the red and blue palette feel nostalgic.
Step 4: Final Touches
-
Erase pencil lines:
Wait until you are certain the ink is completely dry—I usually give it an extra five minutes just to be safe. Gently erase all the structural pencil markings. -
Check contrast:
Look for areas where the red or blue fill needs to be more solid. Go over any patchy areas with your markers to ensure a bold, print-like finish. -
Add final stippling:
If any white areas look too empty, add a few tiny dots of red or blue ink to suggest texture without overcrowding the design.
Step back and admire your surreal botanical totem, ready to frame or gift
Rainbow Iris on a Monochrome Sketch
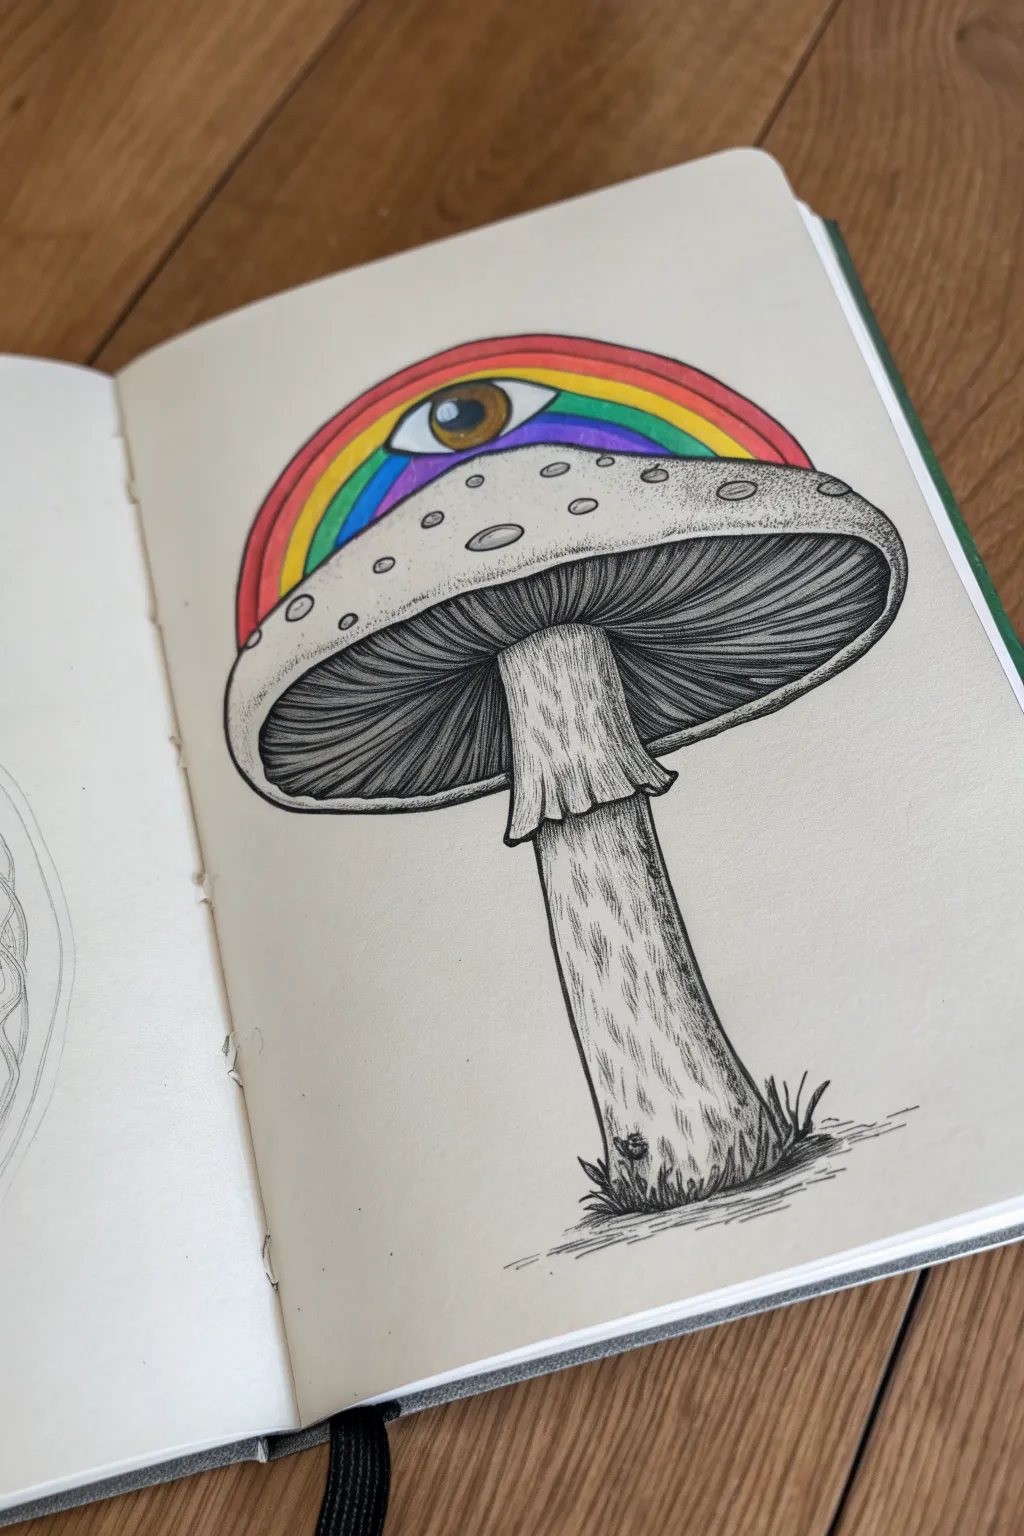
Blend surrealism with botanical illustration in this striking mushroom drawing. By combining detailed monochrome ink work with a vibrant pop of rainbow color, you’ll create a weirdcore masterpiece that jumps off the page.
Step-by-Step Guide
Materials
- Sketchbook with smooth, heavyweight paper
- HB graphite pencil
- Kneaded eraser
- Fine liner pens (sizes 0.05, 0.1, and 0.5 mm)
- Alcohol-based markers or colored pencils (Rainbow colors + brown/hazel)
- White gel pen (optional)
Step 1: Drafting the Structure
-
Sketch the cap shape:
Begin with a light pencil sketch. Draw a large, semi-circular dome shape for the mushroom cap. Leave the very top edge slightly flattened where the rainbow will eventually sit. -
Add the stem:
Extend a thick stalk downwards from the center of the cap. Make the base slightly wider and add a skirt-like ring (annulus) about a third of the way down the stem. -
Define the rainbow arch:
Draw an arched shape protruding from the top of the mushroom cap. Divide this arch into six or seven evenly spaced bands for your rainbow colors. -
Place the eye:
In the center of the rainbow arch, sketch a realistic eye shape. I find it easiest to draw the circle for the iris first, then shape the eyelids around it. -
Detail the gills:
Lightly sketch the underside of the cap, indicating the direction of the gills radiating from the stem to the cap’s edge.
Step 2: Inking the Monochrome Base
-
Outline the mushroom:
Using a 0.5mm fineliner, firmly outline the main shapes of the mushroom cap, the skirt, and the stem. Do not outline the rainbow or eye yet. -
Texture the stem:
Switch to a 0.1mm pen. Add vertical textural lines down the stem to mimic fibrous bark. Keep these lines broken and organic rather than straight rulers. -
Draw the gills:
With a fine 0.05mm or 0.1mm pen, draw the gills under the cap. Start near the stem and stroke outward. Pack the lines close together to create deep shadows. -
Add stippling details:
On the top surface of the mushroom cap (below the rainbow), add small spots or ‘warts’. Use stippling (tiny dots) to shade around these spots to give them dimension. -
Enhance shadows:
Darken the underside of the skirt and the very bottom of the stem where it meets the ground. Add some grass spikes at the base to ground the object.
Uneven Gills?
If your gill lines get messy or cross over, don’t erase. Just darken the area slightly. Nature is imperfect, and deeper shadows often hide small mistakes wonderfully.
Step 3: Adding the Color Pop
-
Outline the color zones:
Carefully ink the outlines of the rainbow bands and the eye using a 0.1mm pen. Be precise here so the colors don’t bleed visually. -
Color the iris:
Color the iris with layers of hazel or brown. Leave a small white circle for the highlight, or add it later with a white gel pen. Fill the pupil in solid black. -
Fill the rainbow:
Starting from the outer band, fill in the colors: red, orange, yellow, green, blue, indigo/violet. Saturate the paper well for a bold look. -
Shade the eyeball:
Use a very light grey marker or pencil to add shadow to the corners of the ‘white’ of the eye, giving it rounded volume. -
Final clean up:
Once the ink is fully dry, erase any visible pencil sketch lines. Strengthen any black lines that might have faded next to the bright colors.
Make it Glossy
Use a white gel pen to add sharp highlights to the iris and the corner of the eye. This ‘wet’ look makes the surreal eye element much more unsettling and realistic.
Now you have a surreal piece of art that perfectly balances sketch work with vibrant color
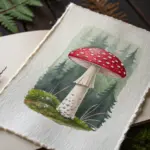
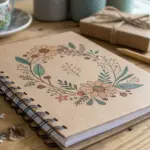
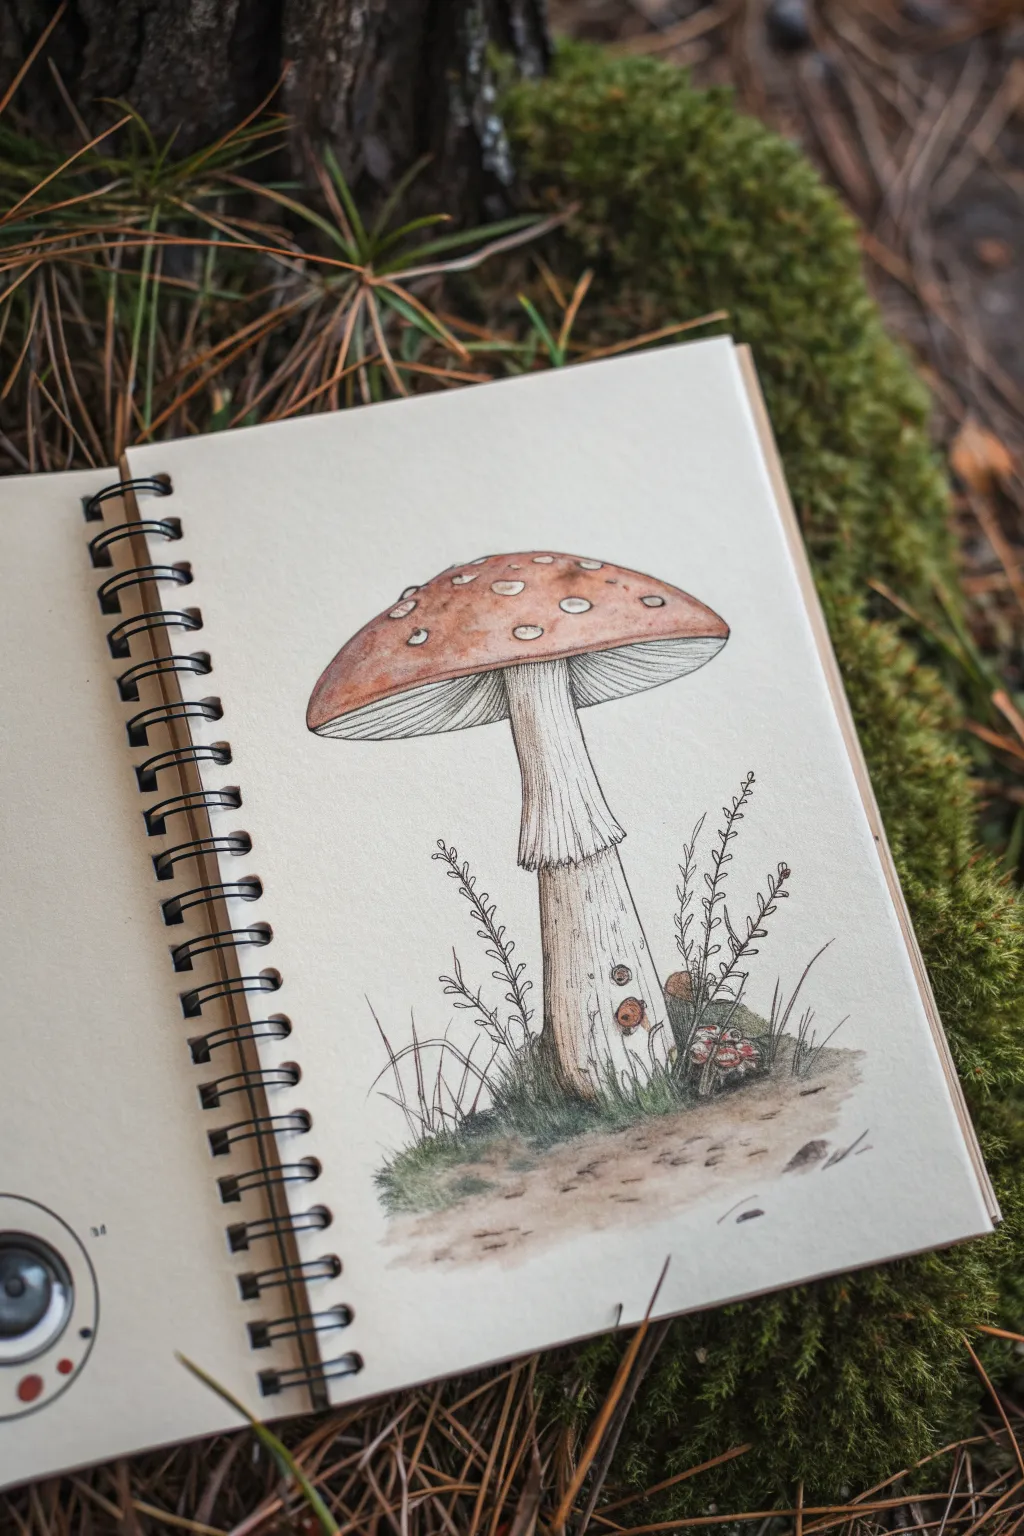
Mushroom Ring With Watching Caps
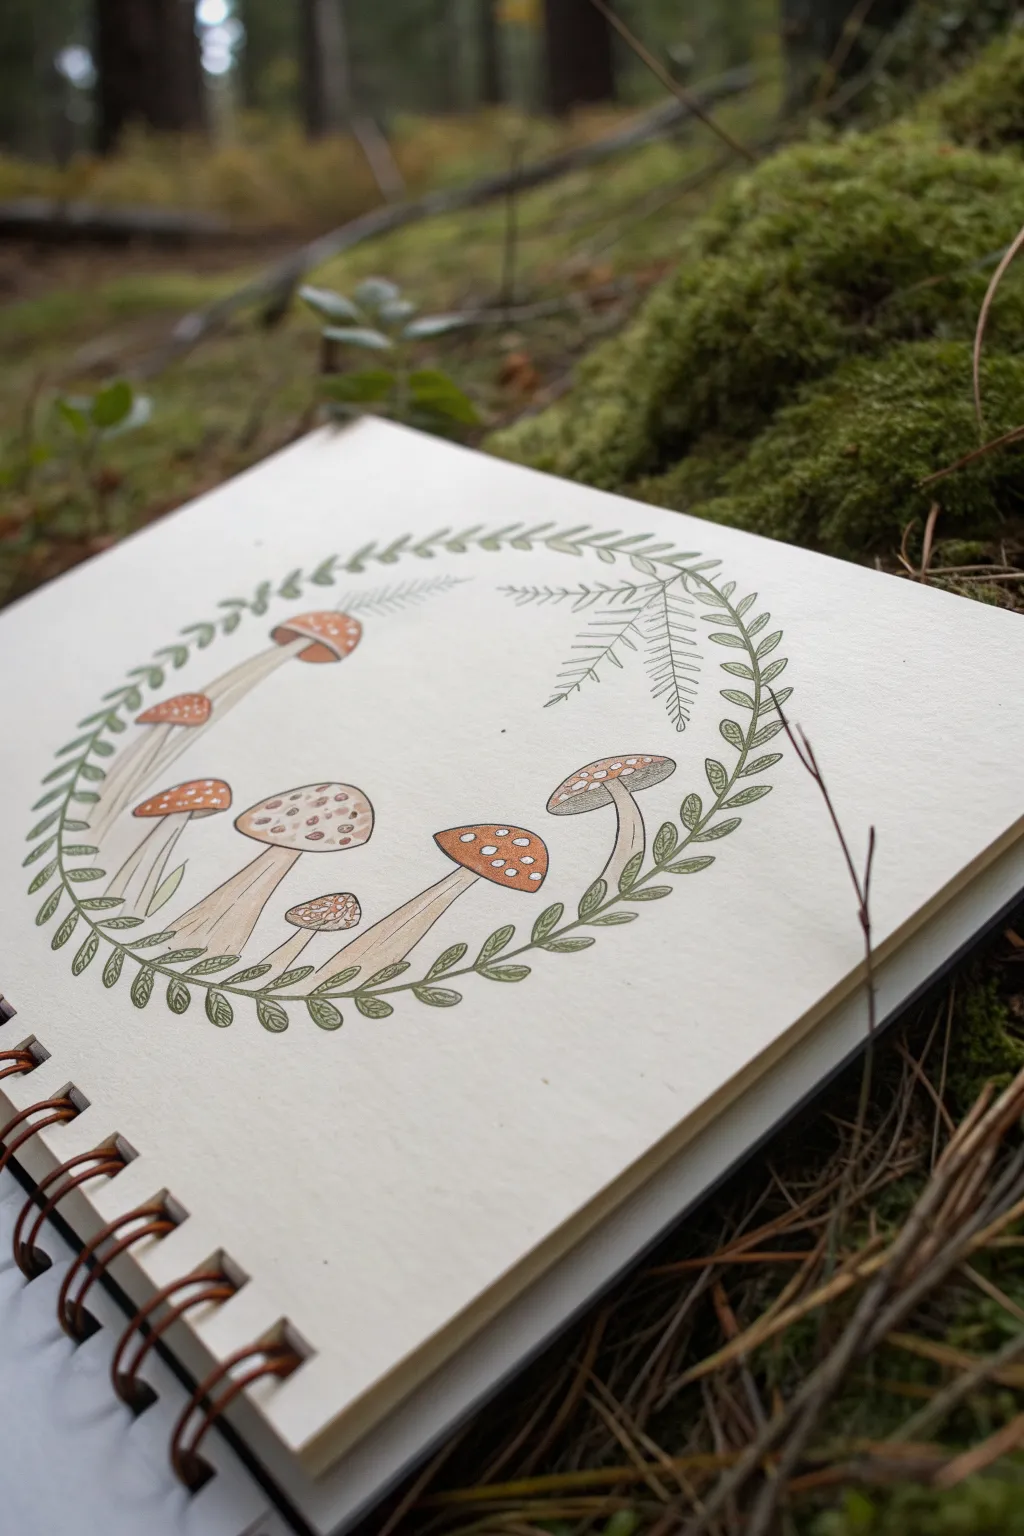
Capture the magic of the forest floor with this delicate illustration featuring a circle of rust-colored mushrooms framed by leafy vines. The soft earth tones and fine linework create a vintage botanical feel perfect for sketching in nature.
Step-by-Step Tutorial
Materials
- Heavyweight sketchbook (cream or off-white paper recommended)
- Pencil (HB or 2H for sketching)
- Kneaded eraser
- Fine liner pens (0.1mm and 0.3mm in black or sepia)
- Colored pencils or watercolor pencils (rust, beige, olive green)
- Ruler (optional)
Step 1: Planning and Sketching
-
Establish the circle:
Start by lightly drawing a large circle in the center of your page to serve as the guide for your wreath. If you struggle with freehand circles, gently trace a bowl or use a compass. -
Rough in the mushrooms:
Sketch the basic shapes of five to seven mushrooms along the bottom half of the circle’s interior. Vary their heights and angles—some should stand tall, while others can be short buttons tucked in between. -
Define the caps:
Refine the mushroom caps, giving them rounded, slightly flattened tops. Draw the stems extending downward, making sure they curve slightly to follow the flow of the composition. -
Sketch the foliage:
Along the original circular guide line, lightly sketch a continuous vine stem. Add small, paired leaf shapes extending from this vine, creating a laurel-like frame that encases the mushrooms. -
Add fern details:
In the open space at the top right of the circle, sketch a few delicate fern fronds dipping inward. This breaks the perfect symmetry and adds organic interest.
Uneven Ink Lines?
If your pen lines are shaky, embrace it. Go over the line again loosely to create a messy, sketchy style. This ‘nervous line’ technique adds character and fits the weirdcore aesthetic perfectly.
Step 2: Inking the Lines
-
Outline the caps:
Using a 0.3mm fine liner, carefully ink the outlines of the mushroom caps. Keep your hand relaxed to allow for slight wobbles that mimic natural organic forms. -
Detail the stems:
Switch to a finer 0.1mm pen to ink the stems. Add tiny vertical striations or lines near the top of the stems to suggest texture and shadow. -
Ink the wreath:
Trace over your leafy vine sketch with the 0.3mm pen. For the fern fronds, use short, quick strokes with the 0.1mm pen to keep them looking airy and light. -
Add cap spots:
Draw small, irregular circles or ovals on the mushroom caps. These don’t need to be perfect; irregular shapes look more realistic. -
Erase guidelines:
Once the ink is completely dry—I usually wait at least five minutes to be safe—gently erase all your pencil marks with a kneaded eraser.
Glow Up
Make the drawing mystical by adding tiny dots of gold ink or gel pen around the mushroom caps to mimic floating spores or magical dust catching the light.
Step 3: Adding Color
-
Base layer for caps:
Take a rust or terracotta colored pencil and lightly shade the mushroom caps. Leave the spots you drew earlier uncolored (or color them a very pale cream). -
Deepen the cap tones:
Go back over the edges and bottoms of the caps with the same rust pencil, pressing slightly harder to create dimension and roundness. -
Color the stems:
Use a beige or warm grey pencil to shade the stems. Focus the color on the sides of the stems, leaving the center lighter to act as a highlight. -
Greenery base:
Fill in the leaves of the wreath using an olive green pencil. Apply the color lightly at first to ensure an even coat. -
Shade the leaves:
Use a darker green or add a touch of brown to the base of each small leaf where it meets the vine. This adds depth to the wreath. -
Fern accents:
Very lightly trace the fern frond lines with a green pencil. These should remain subtle compared to the bold wreath leaves. -
Final texture check:
Look closely at your drawing. If the mushroom spots look too stark white, gently glaze them with a cream or very light brown pencil to soften the contrast.
Now you have a charming woodland illustration enclosed in your sketchbook ready for your next nature adventure
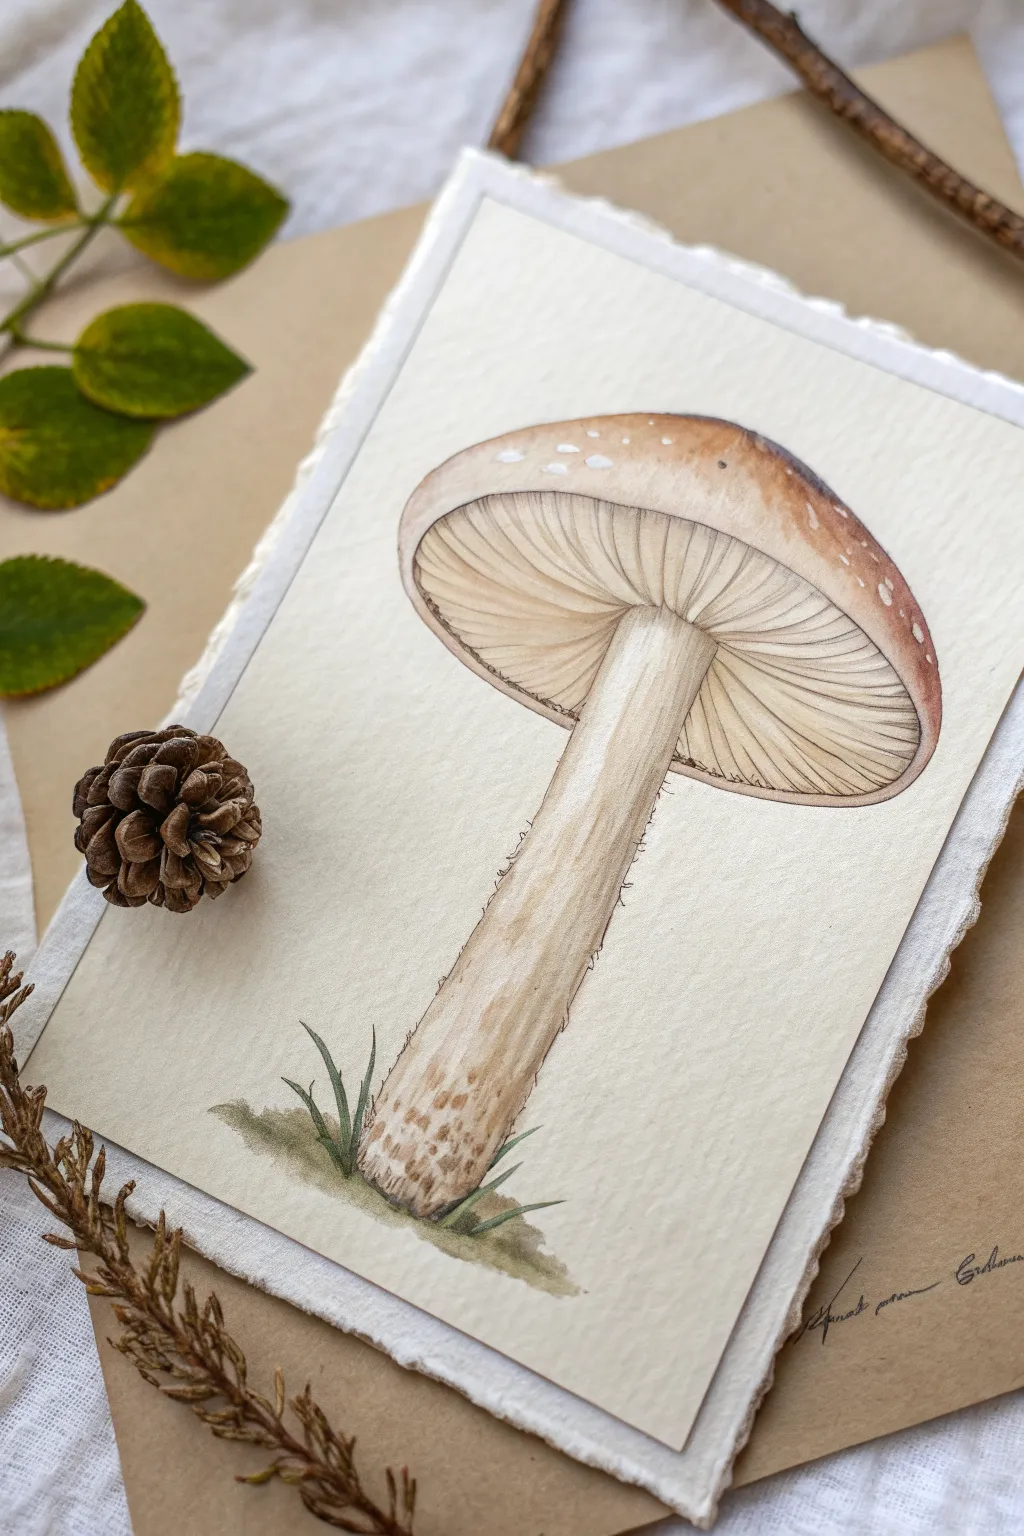
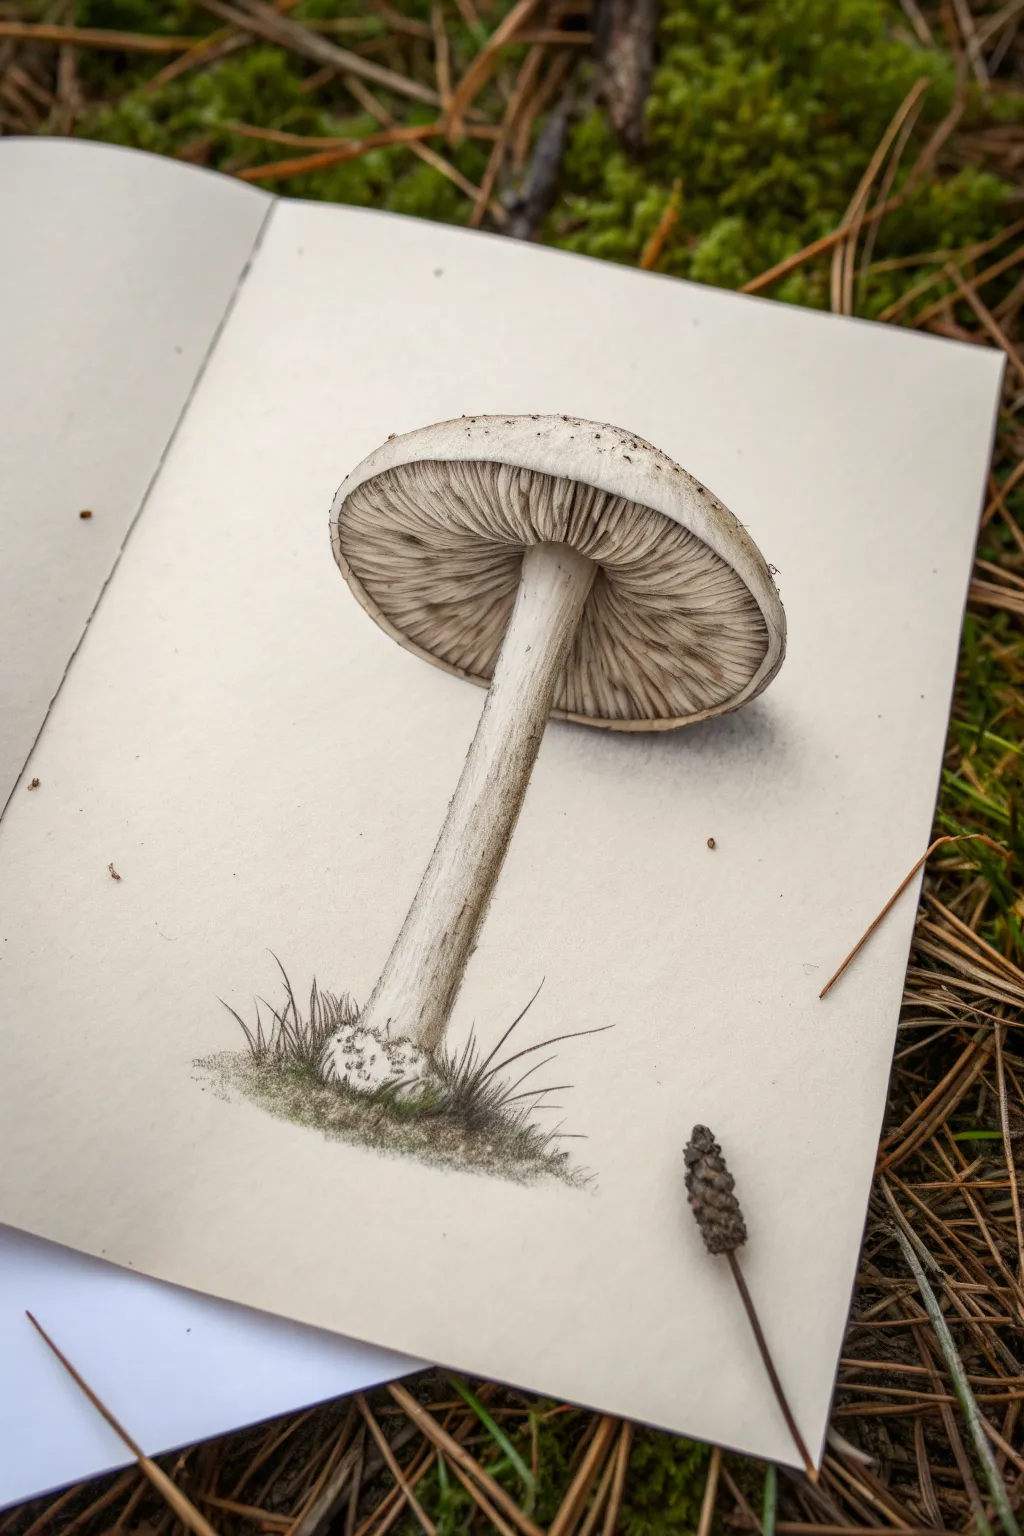
Split-Cap Mushroom With Teeth and Eyes
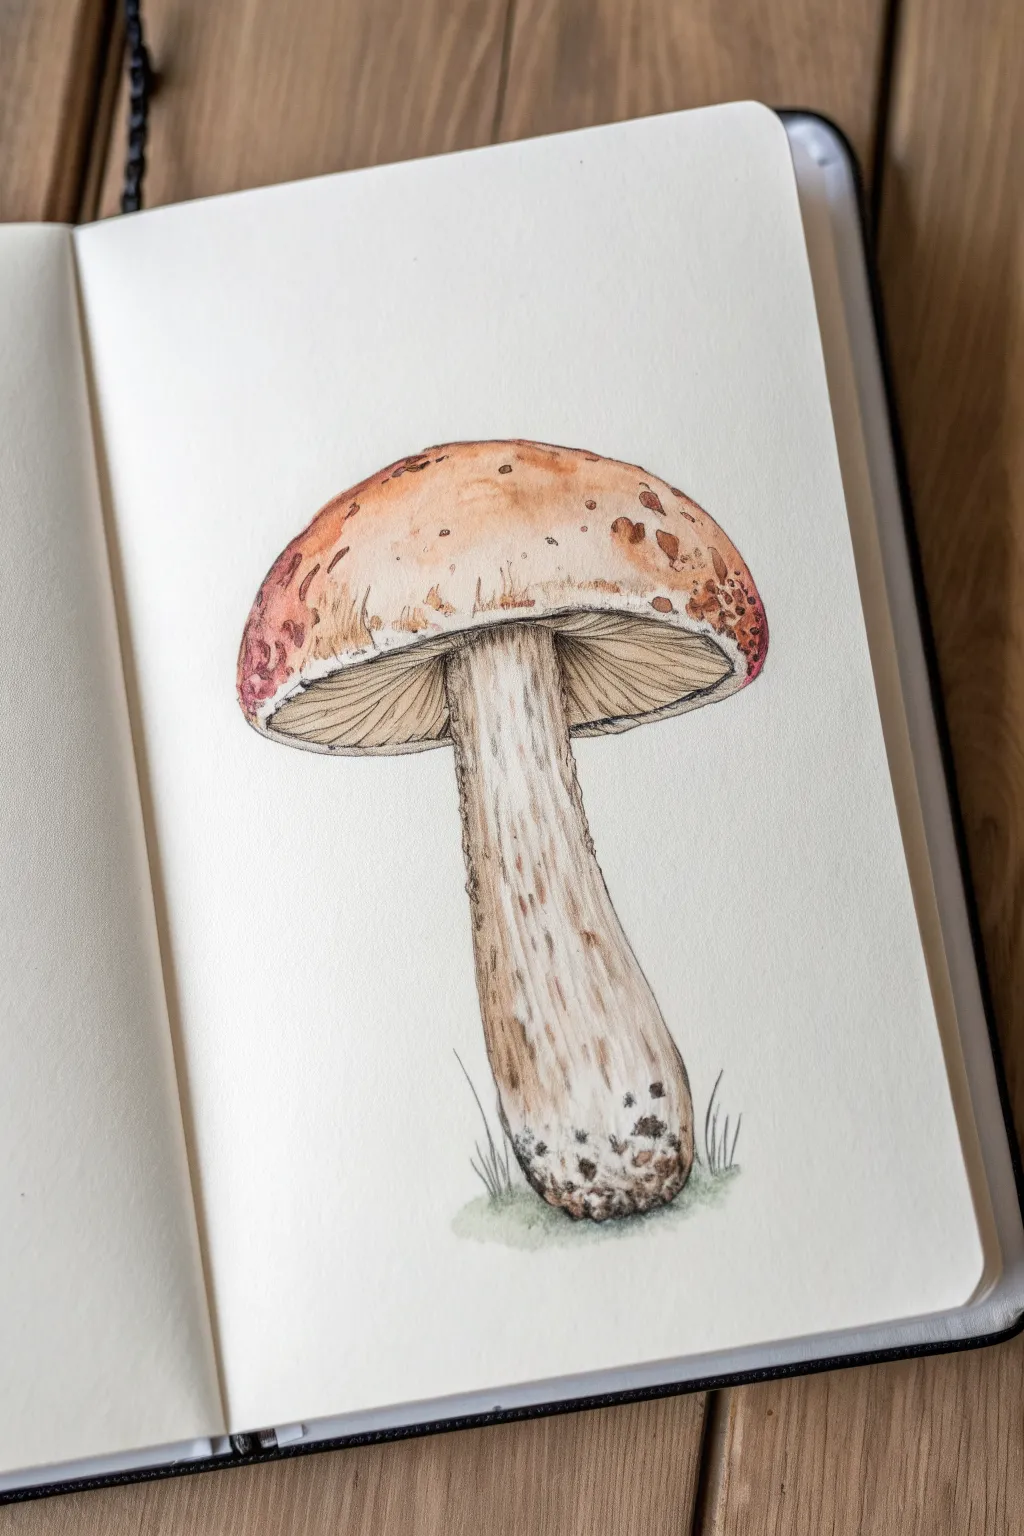
Capture the earthy charm of a lone mushroom standing tall in a sketchbook with this delicate watercolor and ink tutorial. You will create a piece that balances scientific accuracy with artistic warmth, featuring soft washes of brown and crisp, textured line work.
Step-by-Step Guide
Materials
- Heavyweight watercolor paper or sketchbook (cold press preferred)
- Pencil (HB or 2H)
- Kneaded eraser
- Waterproof fineliner pens (sizes 0.1 and 0.3)
- Watercolor paints (Burnt Sienna, Yellow Ochre, Sepia, Sap Green)
- Round watercolor brushes (size 4 and 8)
- Water cup and paper towels
- White gel pen (optional)
Step 1: Initial Sketching
-
Establish the Basic Shapes:
Begin lightly with your pencil. Draw a wide, slightly flattened dome shape for the cap near the top third of your page. Just below the center of the cap, drop a vertical line to mark the stem’s axis, then sketch a thick, cylindrical stem that widens significantly at the base. -
Refine the Outline:
Soften the edges of the cap, making the rim slightly uneven to look organic. Curve the connection where the stem meets the cap, indicating the volume of the spongey underside. -
Add Textural Guides:
Lightly mark areas on the stem where you want striations or texture. Sketch a few small patches of grass at the very base of the stem to ground the subject. -
Clean Up the Sketch:
Use your kneaded eraser to roll over the drawing, lifting up excess graphite so the lines are barely visible before you start painting. This prevents dirtying your watercolor washes later.
Step 2: Watercolor Application
-
First Wash – The Stem:
Mix a very watery, pale wash of Sepia and a touch of Burnt Sienna. Apply this loosely to the stem, leaving some vertical streaks of white paper showing through to act as highlights. -
Base Color – The Cap:
While the stem dries, load your size 8 brush with a mix of Burnt Sienna and Yellow Ochre. Paint the cap, starting darker near the top and adding more water as you move toward the rim for a gradient effect. -
Shadowing the Underside:
Mix a diluted Sepia tone. Paint the underside of the cap (the pores/gills area) with a curved stroke that follows the shape of the brim, keeping it distinct from the cap skin color. -
Deepening Values:
Once the first layers are dry to the touch, mix a stronger concentration of Burnt Sienna. Dab this onto the top of the cap and the edges to create roundness and volume. -
Adding Stem Texture:
Using a smaller brush (size 4) and a semi-dry mix of Sepia, create vertical, broken streaks on the stem to simulate the fibrous texture. Focus these darker marks near the base and directly under the cap shadow. -
Diffused Grass Effect:
Dilute a tiny amount of Sap Green with water. Just under the base of the mushroom, tap in a cloudy, soft area of green. Don’t worry about painting individual blades yet; just create a ground shadow.
Muddy Colors?
If your brown washes look muddy, you likely overworked the paper while it was wet. Let layers dry completely before adding new ones to keep colors crisp.
Step 3: Ink Detailing
-
Outline the Cap:
Switch to your 0.1 fineliner. Trace the outer edge of the cap with a broken, organic line. Don’t make it a perfect arc; let your hand wobble slightly to suggest the bumpy texture of the mushroom skin. -
Define the Gills:
Underneath the cap, draw fine, curved lines radiating from the stem outward to the rim. I find it helps to lift the pen at the end of each stroke to keep the lines looking delicate and not too heavy. -
Detail the Stem:
Use the pen to add vertical hatching along the stem. Focus on the shadowed side (usually the right or left, depending on your light source) and leave the center relatively open. -
Create Base Texture:
At the bulbous base of the stem, create a stippled or reticulated pattern using small dots and squiggles to show the dirt and darker texture often found on harvested mushrooms. -
Add Cap Imperfections:
Draw small, irregular spots or blemishes on the top of the cap using stippling. This gives the mushroom character and makes it look wild rather than plastic. -
Ink the Grass:
Finally, use quick, upward flicking motions with the pen to draw thin blades of grass emerging from the green watercolor wash you applied earlier.
Ink Movement
Vary your pen pressure. Press harder on the shadowed side of the stem and lighter on the lit side to give the drawing instant 3D volume without extra shading.
Close your sketchbook knowing you’ve preserved a little piece of the forest floor on paper
Glitchy Outline, Double-Drawn Mushroom
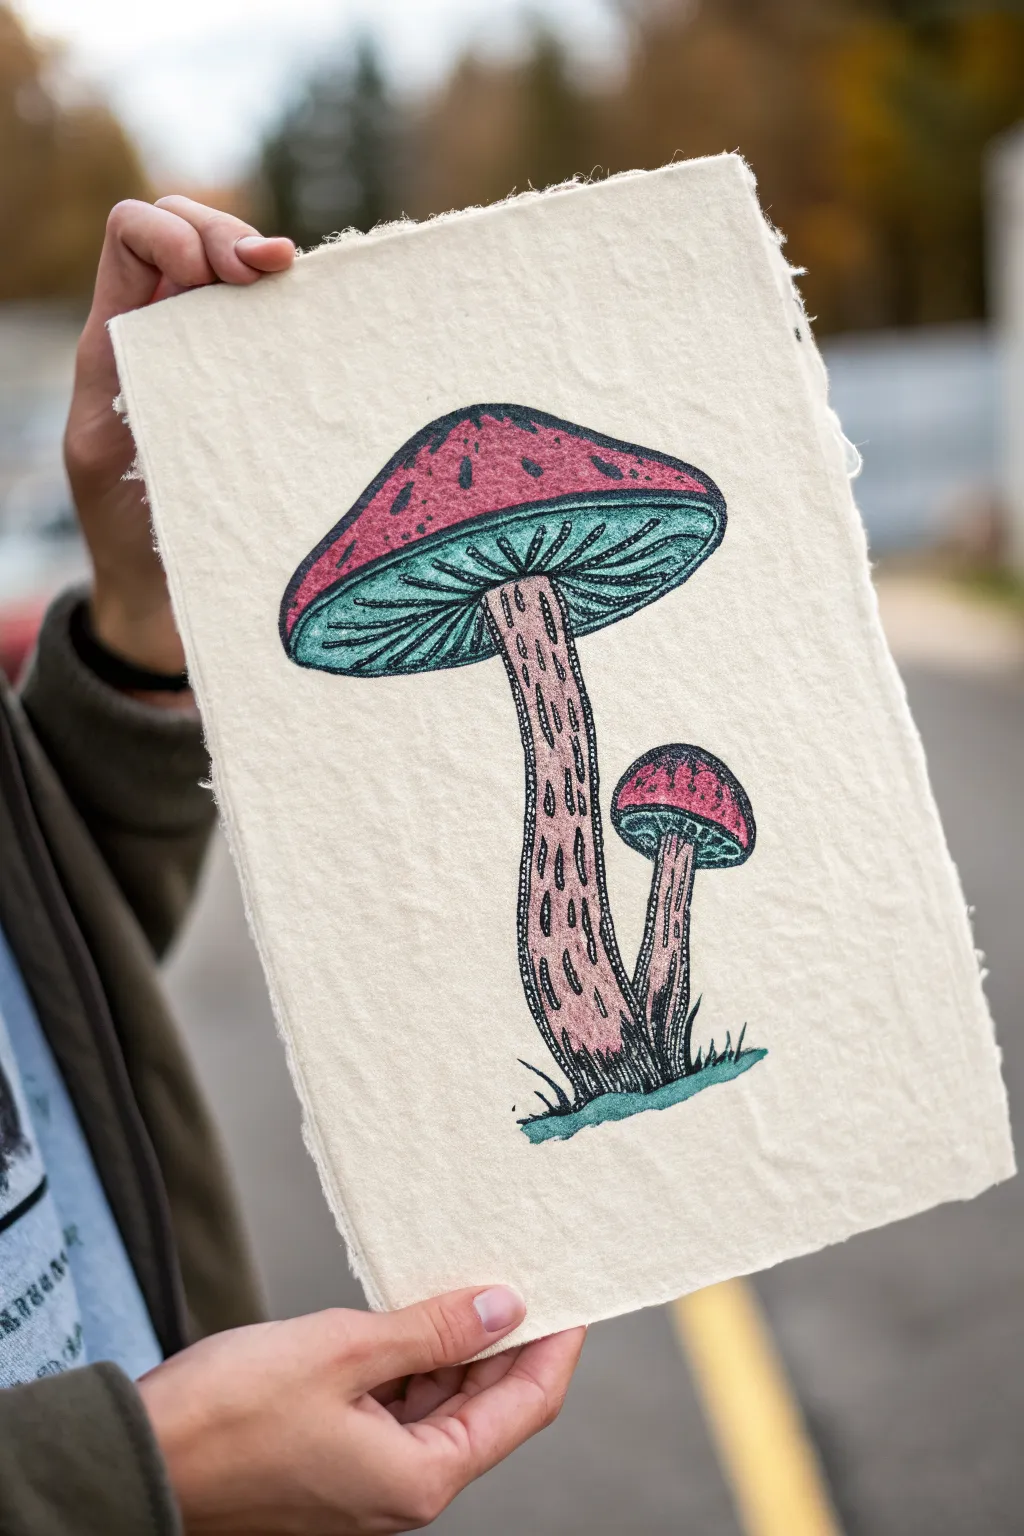
Capture a rustic woodland vibe with this striking mushroom illustration, featuring contrasting stippled textures and bold color blocking on rough-edged paper. The project combines the charm of handmade surfaces with the precision of ink detailing for a piece that feels both organic and graphic.
How-To Guide
Materials
- Heavyweight handmade paper (deckle edge recommended, white or cream)
- Pencil (HB or 2B)
- Black drawing ink or fine-point pigment liners (0.3mm and 0.5mm)
- Watercolor paints or colored ink (Magenta/Crimson and Teal/Turquoise)
- Small round watercolor brush (size 2 or 4)
- Kneaded eraser
- Water container
- Paper towel
Step 1: Sketching the Foundations
-
Position the main shape:
Center your composition by lightly sketching a large, broad mushroom cap near the top third of the paper. Keep the general shape like an umbrella, slightly flattened at the peak. -
Add the stem:
Draw the stem emerging from the center of the cap, curving slightly to the left as it reaches the bottom. Make the base wider than the top where it meets the cap. -
Include the companion:
To the right of the main stem, sketch a smaller, second mushroom. This one should nestle just under the larger cap’s edge without touching it, mimicking the larger shape but on a reduced scale. -
Define the gills:
Lightly trace the curved underside of both caps. Draw radiating lines from the stem connection point outward to the cap’s edge to indicate where the gills will be.
Bleed Control
Handmade paper is thirsty! Test your ink on a scrap piece first. If it feathers too much, spray the paper with a workable fixative or hairspray before inking.
Step 2: Applying Color Washes
-
Paint the caps:
Load your brush with a diluted magenta or crimson watercolor. Carefully fill in the top surface of both mushroom caps. The textured paper will absorb the paint unevenly, which is perfect for this look. -
Paint the gills and ground:
Clean your brush and switch to the teal or turquoise color. Paint the undersides of the caps (the gill area) and create a small, abstract patch of ground at the base of the stems. -
Add stem tone:
Mix a very watery wash of the magenta with a tiny touch of brown or simply use dirty water to give the stems a faint, fleshy pink hue. Don’t worry about being perfectly even. -
Let it dry completely:
This is crucial. Wait until the paper is bone dry and cool to the touch before moving to ink work to prevent bleeding.
Uneven Texture?
If the rough paper makes it hard to draw smooth lines, switch to a brush pen or a dip pen, which can ride over the bumps better than a fine felt tip.
Step 3: Inking and Detailing
-
Outline the caps:
Using a 0.5mm pen or ink, trace the outer contour of the pink caps. Use a slightly broken or jittery line to match the rough texture of the paper. -
Define the gills:
Draw the radiating lines on the teal underside. Make these lines thickest near the cap edge and tapering thinner as they reach the stem. -
Connect the gills:
Add small, horizontal scalloped lines between the tips of the gill lines at the outer edge to create a unified rim for the underside. -
Black out details:
Depending on your preference, you can choose to color in specific spots on the cap for high contrast or add small dark spots for texture. -
Outline the stems:
Trace the vertical lines of the stems. Instead of straight lines, let your hand wobble slightly to create an organic, growing feel. -
Stipple the stems:
This is the most detailed part. Use your 0.3mm pen to create vertical rows of dashes, dots, and small ovals down the length of the stems. I find grouping them in vertical ‘veins’ looks best. -
Ground the image:
Add small, jagged grass-like strokes rising from the teal patch at the bottom, overlapping the base of the stems slightly to settle them. -
Final touches:
Assess the drawing for contrast. If the gills need more depth, go back in and thicken the black lines between the teal sections.
Once the ink is fully set, erase any visible pencil marks to reveal your crisp, graphic illustration
X-Ray Cutaway of Eyes in the Mycelium
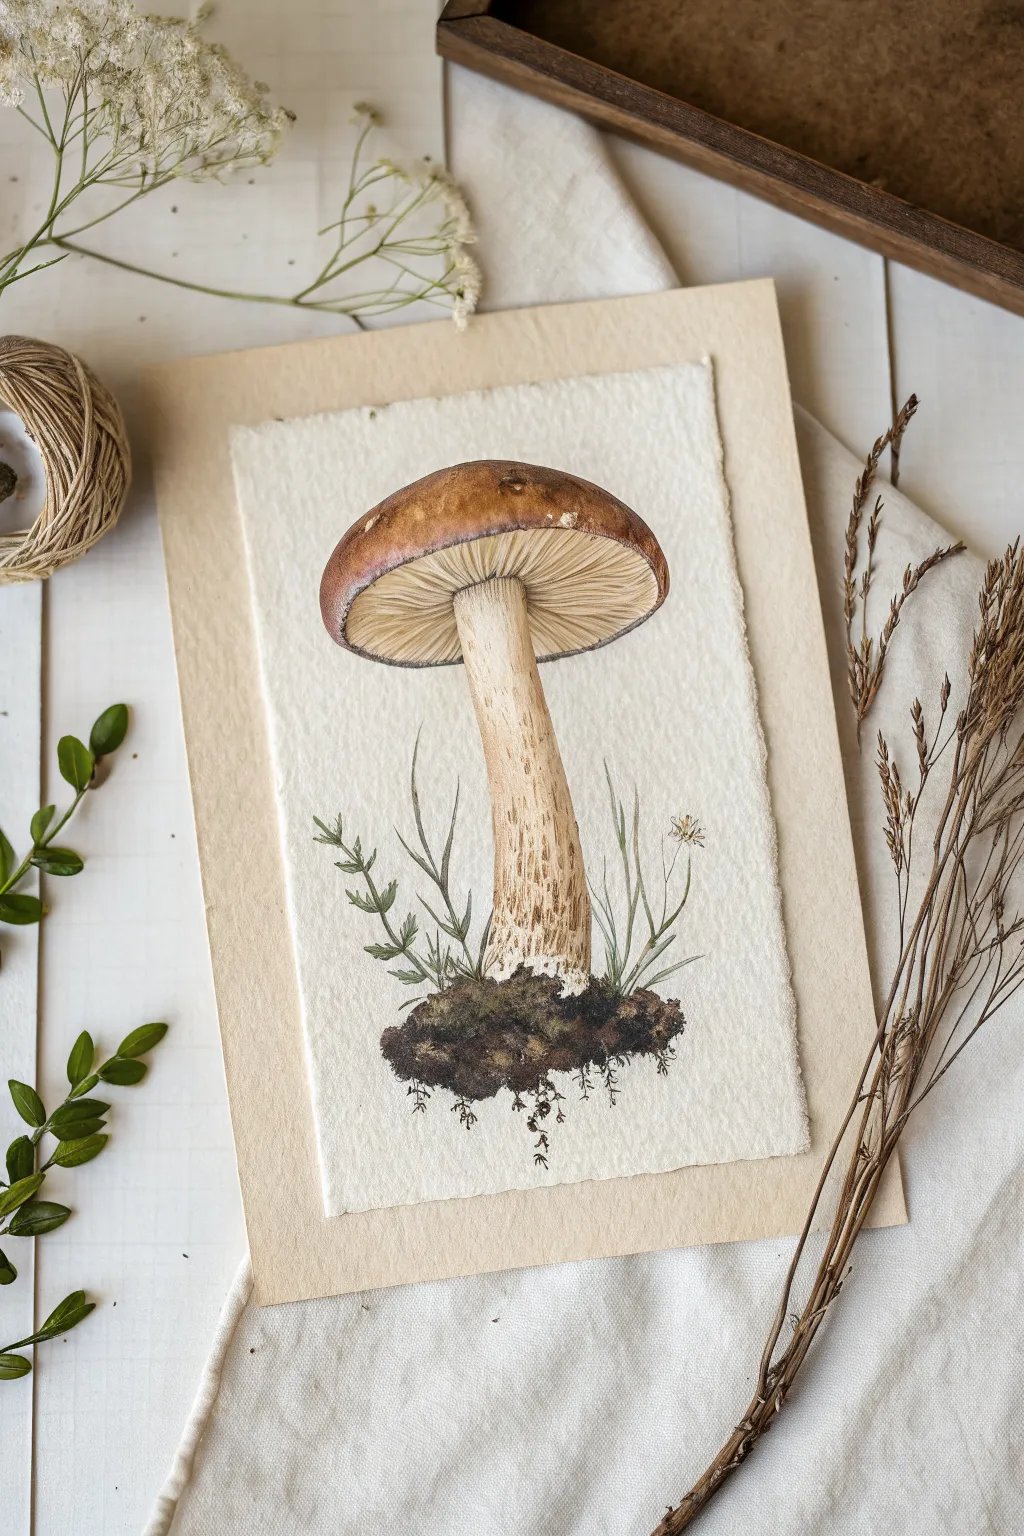
This project creates a charmingly rustic art piece featuring a detailed watercolor mushroom illustration on hand-torn paper. By mounting the artwork on a contrasting backing board, you achieve a dimensional, framed effect perfect for botanical decor.
Step-by-Step
Materials
- Cold press watercolor paper (300 gsm)
- Tan mixed media or kraft backing board
- Watercolor paints (burnt sienna, raw umber, yellow ochre, sap green, sepia)
- Fine liner pigment pens (0.1, 0.3, 0.5 sizes, dark brown or black)
- Round watercolor brushes (size 2, 4, 6)
- Pencil (HB or 2H)
- Kneadable eraser
- Metal ruler
- Water cups
- Paper towels
- Craft glue or double-sided tape
Step 1: Preparation and Sketching
-
Prepare the paper:
Begin by tearing a rectangular piece of watercolor paper to roughly 5×7 inches. Create a deckled edge by creasing the paper firmly and carefully ripping it against a straight edge or ruler for that rustic, fibrous look. -
Outline the cap:
Using your HB pencil, lightly sketch the broad, convex shape of the mushroom cap near the top third of the paper. Keep the lines faint so they don’t show through the paint later. -
Draw the stem:
Sketch a thick, sturdy stem extending downwards from the center of the cap. Curve it slightly to give it an organic feel, widening it just a bit at the base. -
Add the gills and skirt:
Draw faint lines radiating from the stem top to the cap edge to indicate the gills or pores. Indicate where the stem meets the cap with a slight curve. -
Sketch the base details:
At the bottom of the stem, sketch a clump of moss, soil, and small grass blades. Add tiny root-like structures hanging down to ground the subject.
Step 2: Watercolor Application
-
Base wash for the cap:
Mix a watery wash of burnt sienna and yellow ochre. Apply this to the cap, letting the colors bleed slightly into each other while wet. Leave a small sliver of white paper unpainted near the top left for a natural highlight. -
Deepen cap shadows:
While the cap is still damp, drop in concentrated sepia or raw umber along the bottom edge and right side to create volume and roundness. -
Paint the stem:
Use a very pale wash of yellow ochre and a tiny touch of brown for the stem. Keep this layer light, as texture will be added later. Leave the very bottom of the stem slightly lighter. -
Underpainting the gills:
Apply a pale, creamy beige mix under the cap where the gills are located. Let this dry completely before adding fine details. -
Paint the earthy base:
Dab a mix of sap green and sepia onto the mossy base. Use a stippling motion with your brush to create a rumbled, dirt-like texture. -
Add greenery:
With a fine brush (size 2), paint the grass blades using varied shades of sap green. Keep the strokes quick and upward-flicking for a natural appearance.
Uneven Edges?
If your torn paper edges look too messy or white, lightly brush the very edge with a diluted tea stain or brown paint to make it look aged.
Step 3: Inking and Definition
-
Outline the cap:
Once the paint is bone dry, use a 0.3 pen to outline the cap. Break the line occasionally—don’t make it a solid, heavy wire—to keep it looking delicate. -
Detail the gills:
Using your finest 0.1 pen, draw thin, closely spaced lines radiating from the stem to the cap edge. These define the spore-bearing surface. -
Texture the stem:
Add vertical, broken lines down the length of the stem using the 0.1 pen. I prefer to cluster these markings near the sides to enhance the cylindrical form. -
Define the base:
Use the 0.5 pen to darken the shadows in the dirt clump. Draw tiny scribbles for soil crumbs and distinct lines for the grass blades. -
Add hanging roots:
Draw fine, dangling root hairs extending below the dirt clump with the 0.1 pen. This ‘floating island’ effect adds whimsy to the botanical study.
Add Some Magic
Splatter tiny dots of white gouache or gold ink around the base of the mushroom to create a magical ‘spore cloud’ or distinct weirdcore vibe.
Step 4: Mounting and Finishing
-
Final paint touches:
Look over the piece. If the ink looks too stark, glaze over it gently with a very diluted brown watercolor to soften the lines. -
Prepare the backing board:
Cut your tan backing board so that it provides a generous border around your watercolor paper (about 1 to 1.5 inches regarding the border width). -
Mount the artwork:
Apply a small amount of craft glue or double-sided tape to the center back of your watercolor paper. Press it firmly onto the center of the tan board. -
Flatten the piece:
Place a clean sheet of paper over the artwork and weigh it down with a heavy book for an hour to ensure the glue sets flat without warping.
Now you have a beautifully mounted botanical study ready to be framed or gifted.
Mushroom With Too Many Stems
This clever drawing project plays with perspective to create a trompe-l’œil effect where the mushroom cap appears to lift right off the paper. Using masterful shading and subtle cast shadows, you will create a realistic specimen that blurs the line between art and reality.
Step-by-Step Tutorial
Materials
- High-quality sketchbook (cream or heavy cartridge paper)
- Graphite pencils (HB, 2B, 4B)
- Fine liner pens (sepia or dark brown, 0.1mm)
- Colored pencils (warm grey, earthy ochre, dark brown)
- Blending stump or tortillon
- Kneaded eraser
Step 1: Structural Layout
-
Positioning the Subject:
Begin by lightly marking the placement of your mushroom on the page with an HB pencil. Place the base near the bottom third, allowing the stem to reach upward towards the top center. -
Drafting the Cap Angle:
Draw an oval for the mushroom cap, tiling it so the underside is visible. This perspective is crucial for the 3D illusion later. Ensure the oval is distinct from the stem, creating a sharp angle where they meet. -
Outlining the Stem:
Sketch the stem extending downwards from the center of your cap oval. Taper it slightly so it is wider at the base than at the neck. -
Adding the Bulbous Base:
At the very bottom, draw a rough, rounded bulb shape where the mushroom meets the ground. Keep your lines loose here to suggest an organic texture.
Step 2: Detailed Rendering
-
Defining the Gills:
Using a sharp 2B pencil, start drawing the gills on the underside of the cap. These lines should radiate from the stem connection point out to the rim of the cap. -
Layering Gill Texture:
Add diversity to the gill lines; some should be dark and deep, while others are faint. I like to interrupt the lines occasionally to show the fragile nature of the gills. -
Texturing the Stem:
Switch to a vertical hatching motion to texture the stem. Use lighter strokes in the center and darker strokes on the sides to create cylindrical volume. -
Sepia Ink Details:
Take your 0.1mm sepia fineliner and selectively go over the darkest shadow areas of the gills and the texture on the stem. This adds a sharpness that graphite alone can’t achieve.
Shadow Realism
Keep the drop shadow behind the cap slightly lighter than the shadows on the mushroom itself. This subtle difference tricks the eye into seeing space.
Step 3: Creating the Illusion
-
Shadow Mapping:
Identify exactly where the cap would cast a shadow onto the paper if it were real. This shadow needs to fall behind and to the right of the cap. -
Rendering the Drop Shadow:
Using a 4B pencil or soft grey colored pencil, shade a soft, diffused shadow on the paper directly beneath the rim of the cap. Keep the edges of this shadow soft, unlike the crisp edge of the mushroom itself. -
Grounding the Base:
At the base bulb, use quick, upward strokes to draw grass and moss. Incorporate some green and brown colored pencils here to ground the drawing in reality. -
Adding Debris:
Scatter tiny dots and specks of dirt around the base and on the cap using the fineliner to mimic soil particles.
Go Surreal
Draw tiny ladders or doors on the stem to lean into the ‘weirdcore’ aesthetic and suggest a tiny civilization lives there.
Step 4: Final Refinements
-
Highlighting the Cap:
Use a kneaded eraser to lift pigment from the top rim of the cap. This bright highlight reinforces the separation from the ‘paper’ underneath. -
Deepening Values:
Go back in with your darkest graphite or brown pencil to deepen the crevice where the stem meets the cap. High contrast here is essential for depth. -
Softening Transitions:
Use a blending stump to gently smooth the graphite on the shadowed side of the stem, but leave the texture of the gills crisp. -
Cleaning Edges:
Check the outer contour of the mushroom cap. Ensure it is crisp and clean against the white paper to maximize the cutout effect.
Step back and view your drawing from an angle to see the 3D effect really pop
Mushroom Shadow That Doesn’t Match
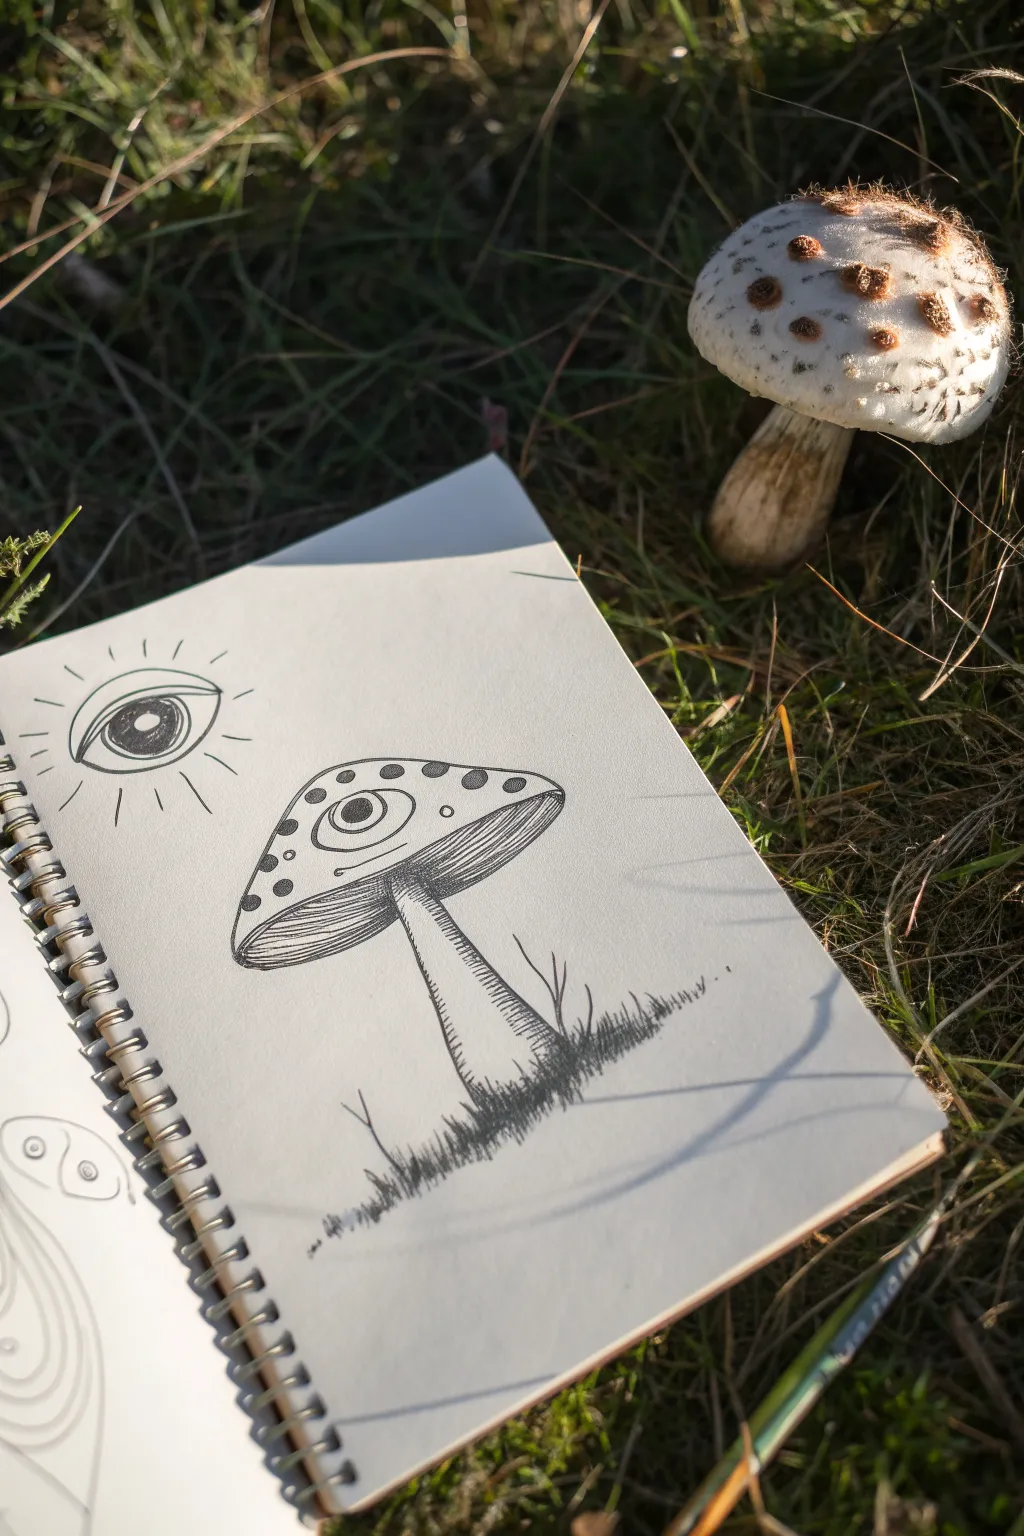
This weirdcore sketch blends botanical illustration with surrealist elements by placing a watchful eye on a traditional mushroom cap. The crisp ink lines and deliberate stippling create a look that feels like a field guide from another dimension.
Step-by-Step
Materials
- Spiral-bound sketchbook with smooth paper
- Graphite pencil (HB or 2B)
- Fine liner pen (0.1mm or 0.2mm for details)
- Medium liner pen (0.5mm for outlines)
- Kneaded eraser
Step 1: Penciling the Foundations
-
Sketch the mushroom cap:
Begin by drawing a wide, rounded triangle shape for the cap. Keep the bottom edge slightly curved upward to show the volume of the mushroom. -
Add the stem:
Extend a sturdy stem downwards from the center of the cap. Let it flare out slightly at the base where it meets the ground, giving it a solid foundation. -
Place the main eye:
In the upper-left center of the cap, sketch an almond-shaped eye opening. Draw a large, round iris and pupil inside, looking directly at the viewer. -
Outline the floating eye:
To the top left of the mushroom, draw a separate, hovering eye. Add a circle around it to suggest a sun or celestial body, and lightly mark rays radiating outward. -
Refine the shapes:
Before inking, go over your pencil lines to ensure the curves are smooth. Add small circles on the mushroom cap for the spots, avoiding the eye area.
Step 2: Inking the Subject
-
Line the mushroom cap:
Using your 0.5mm pen, trace the outer contour of the mushroom cap. Keep the line steady but organic; nature rarely has perfect geometrical lines. -
Detail the spots:
Outline the circular spots on the cap. Fill in the space around the spots with small, deliberate dots (stippling) or tiny dashes to give the cap texture without coloring it solid black. -
Ink the cap eye:
Switch to a 0.1mm or 0.2mm pen. Carefully outline the eye on the cap. Add a few creases above and below the lids to make it feel embedded in the fungal flesh. -
Draw the gills:
Underneath the cap rim, draw fine, closely spaced lines curving from the stem toward the edge of the cap. I like to curve them slightly to emphasize the concave shape. -
Texture the stem:
Use short horizontal hatch lines along the sides of the stem to create roundness. Keep the center of the stem mostly clear to act as a highlight.
Ink Smearing?
If your hand smudges ink, place a scrap piece of paper under your drawing hand. Work from left to right (if right-handed) to keep your palm off fresh lines.
Step 3: Atmosphere and Grounding
-
Ink the celestial eye:
Outline the hovering eye in the sky. Draw the pupil and iris clearly, perhaps leaving a tiny white dot for a reflection. -
Add the rays:
Draw simple, straight lines radiating from the celestial eye. Vary their lengths slightly, alternating between short and long strokes for a dynamic look. -
Create the grass foundation:
At the base of the mushroom stem, use quick, upward flicking motions with your pen to create grass blades. Cluster them thickly right under the stem. -
Extend the ground:
Continue these grass flicks outward to the left and right, making them sparser as they move away from the mushroom to fade out the scene. -
Define the shadows:
Add heavier hatching or stippling at the very bottom of the stem where it meets the grass to anchor the object firmly to the ground. -
Erase and assess:
Wait for the ink to dry completely to avoid smearing. Gently rub the kneaded eraser over the entire drawing to lift the original pencil sketches. -
Final touches:
Check your contrast. If the gills or the pupil need to be darker, go back in with your fine liner to deepen those values.
Add a Twist
Try drawing a shadow for the mushroom that doesn’t match its shape—perhaps the shadow of a hand or a tall building—to heighten the weirdcore vibe.
Now you have a surreal little study that stares right back at you from the page
Fungal Portal With Eyes as Stars

This project combines the rustic charm of botanical illustration with a touch of cosmic surrealism, featuring a vibrant red mushroom set against a deep, starry night sky. Using a mix of watercolor and fine ink details on textured paper creates a magical, storybook aesthetic perfect for wall art or handmade cards.
How-To Guide
Materials
- Heavyweight cold press watercolor paper (deckle edge optional)
- Watercolor paints (Indigo/Payne’s Grey, Scarlet Red, Ultramarine Blue, Burnt Umber, Yellow Ochre)
- Waterproof fine liner pens (0.1mm and 0.3mm, black)
- White gouache or white gel pen
- Round watercolor brushes (sizes 2 and 6)
- Pencil and eraser
- Compass or circular object for tracing
- Masking fluid (optional)
Step 1: Planning and Sketching
-
Define the boundaries:
Start by lightly tracing a circle in the center of your paper using a compass or by tracing a bowl. This will be the window into your starry night. -
Draft the main mushroom:
Drawing lightly with pencil, place the large mushroom slightly off-center. Sketch a broad, flatter cap and a thick, slightly curved stem that extends all the way to the bottom edge of the circle. -
Add detail elements:
Sketch the gills underneath the cap as radiating lines. Add the ragged ‘skirt’ (annulus) on the stem just below the cap. -
Incorporate smaller companions:
Draw two smaller, younger mushrooms on either side of the main stem. Make their caps more rounded and button-like to add variety to the composition. -
Mark the spots:
Before painting, lightly sketch the random circular spots on the mushroom caps so you remember to reserve those areas or paint them a different color later.
Step 2: Painting the Subjects
-
Base layer for the stems:
Mix a very watery wash of Burnt Umber and a touch of Scarlet. Paint the stems of all three mushrooms, keeping the wash pale to represent the creamy stalk texture. -
Cap coloration:
Load your brush with vibrant Scarlet Red. Carefully paint the caps of the mushrooms, painting around the spots you sketched earlier. -
Fill the spots:
Once the red is completely dry, fill in the spots on the main cap with a diluted Indigo or Ultramarine Blue to create a weirdcore contrast. -
Under-cap shadows:
For the gill area underneath the main cap, use a wash of pale reddish-pink. Let it dry, then add thin lines of darker red-brown to suggest the depth of the gills. -
Grounding the scene:
Paint a thin strip of green or jagged grass shapes at the very bottom of the circle where the mushrooms emerge, giving them a foundation.
Uneven Background?
If your dark background dries with ‘cauliflower’ blooms, don’t panic. Wait for it to dry 100%, then apply a second layer of paint with a soft brush to even out the tone.
Step 3: The Cosmic Background
-
Prepare the dark wash:
Mix a concentrated amount of Indigo or Payne’s Grey. You want this to be opaque and deep, so use less water than usual. -
Fill the void:
Carefully paint around your mushrooms, filling the rest of the circle with the dark blue mix. Work wet edge to wet edge to avoid harsh streaks in the background. -
Refine the edges:
Use your smaller size 2 brush to get crisp lines right up against the mushroom stems and caps. The contrast between the dark background and pale stems is crucial. -
Let it cure:
Allow the background to dry completely. If the paper feels cold to the touch, it’s still damp inside.
Gold Leaf Magic
Make the portal truly magical by applying small touches of gold leaf or metallic gold watercolor to the larger stars or the spots on the mushroom cap.
Step 4: Inking and Details
-
Outline the forms:
Using a 0.3mm waterproof pen, outline the main shapes of the mushrooms. Keep the line weight fairly consistent but allow for slight breaks to feel organic. -
Texture the stems:
Switch to a 0.1mm pen. Add vertical, broken dashed lines up and down the stems to simulate the fibrous texture of mushroom stalks. -
Define the gills:
Draw fine, radiating lines from the stem to the edge of the cap on the underside. I like to curb these lines slightly to show the dimensional volume of the cap. -
Add the stars:
Using white gouache or a gel pen, dot the dark background with small stars. Draw a few larger four-pointed stars to create that ‘sparkle’ effect. -
Final highlights:
Add tiny white highlights to the red caps and the blue spots to make them look moist and dimensional. Sign your work near the grass line.
Once the final ink lines are dry, you can display your cosmic fungal portal in a floating frame to show off the paper’s edge


Have a question or want to share your own experience? I'd love to hear from you in the comments below!