Whenever I need a subject that practically draws itself with movement, I reach for an octopus—those swoopy tentacles are pure magic. Here are some of my favorite octopus art ideas, starting with the classics and sliding into the weirder, more imaginative stuff once you’re warmed up.
Classic Watercolor Octopus
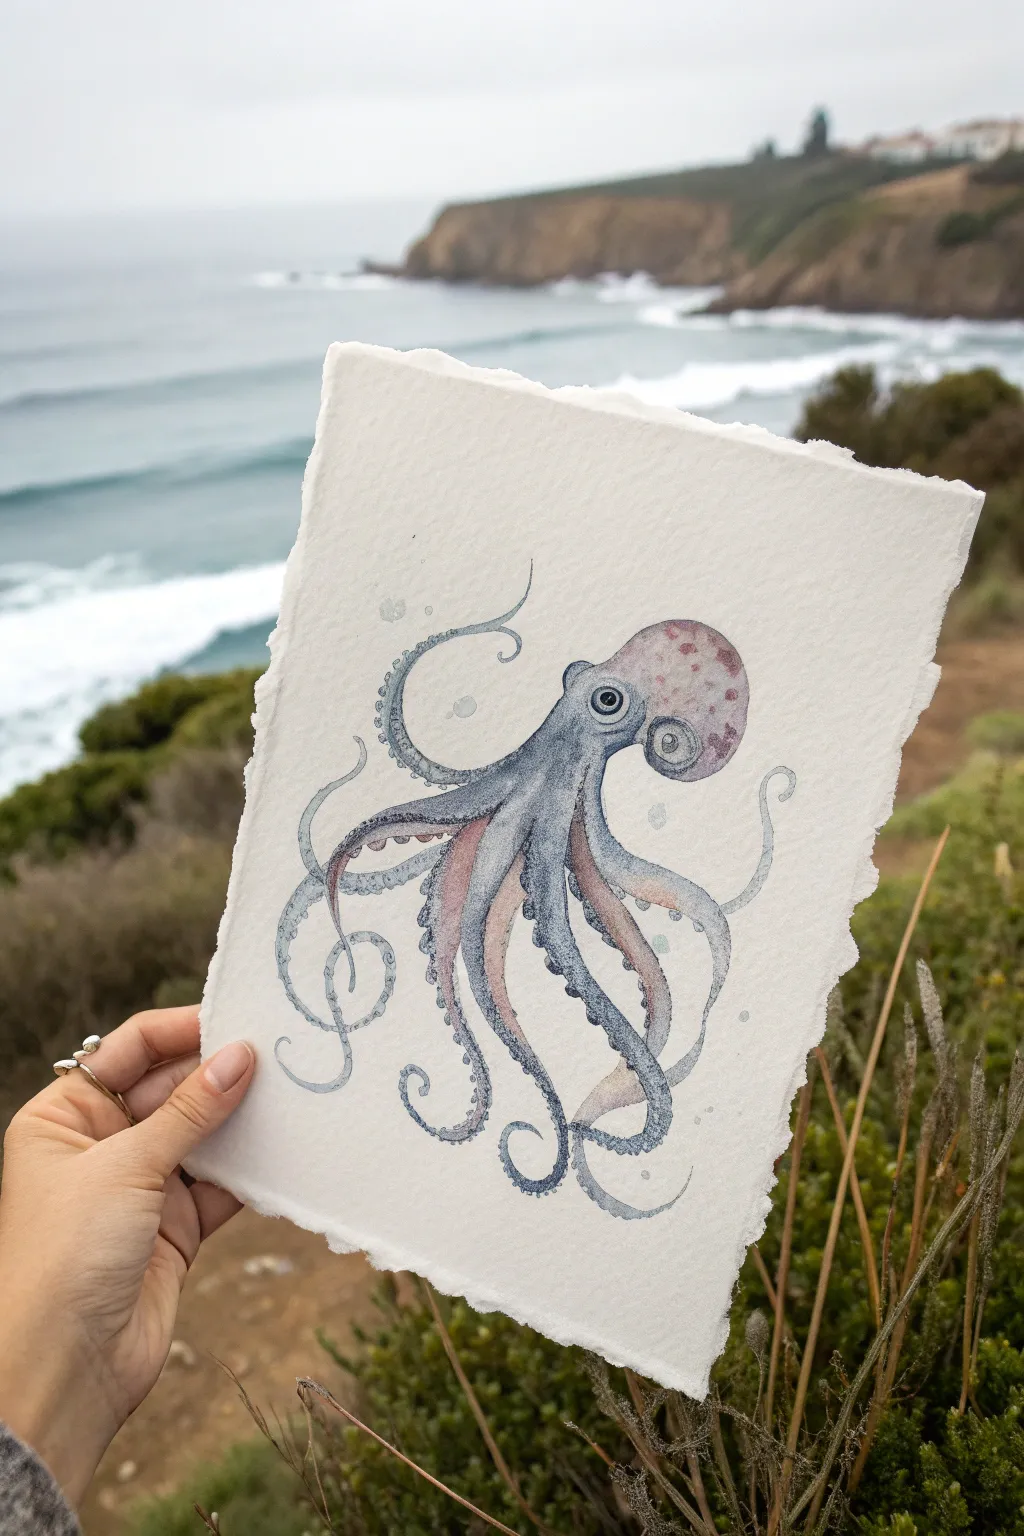
Capture the fluid elegance of the sea with this delicate watercolor octopus study. The project combines soft, wet-into-wet blending with precise dry brush detailing on beautiful deckle-edge paper.
How-To Guide
Materials
- Heavyweight cold press watercolor paper (deckle edge optional)
- Watercolor paints: Payne’s Grey, Indigo, French Ultramarine, Burnt Sienna, Alizarin Crimson
- Pointed round brushes (size 6 for washes, size 0 or 1 for details)
- Pencil (HB or H)
- Kneaded eraser
- Two jars of water
- Paper towels
Step 1: Sketching the Form
-
Outline the head:
Start by lightly sketching the mantle (the head) as a rounded, bulbous shape near the top right of your paper. -
Map the eyes:
Add the prominent eye socket just below the mantle. Draw the eye large and round with a distinct pupil to give it that intelligent, observant look. -
Draw the arms:
Sketch the eight arms flowing outwards. Ensure they overlap and curl naturally rather than sticking straight out. I like to vary the curvature, making some loop back on themselves for movement. -
Refine the suckers:
Lightly indicate the underside of the arms where the suckers will go. You don’t need to draw every single circle yet, just the path they follow. -
Lighten the linework:
Roll your kneaded eraser over the entire sketch. You want the graphite to be barely visible so it doesn’t dirty the watercolor transparency later.
Step 2: Base Layers & Washes
-
Mix the grey-blue:
Create a watery mix of Payne’s Grey and a touch of Indigo. It should be transparent and light. -
First wash on the body:
Paint the main body and the top surfaces of the arms with this pale wash. Leave the eye plain white for now. -
Add warmth:
While the first wash is still damp, drop in a very dilute mix of Alizarin Crimson and Burnt Sienna near the top of the head and the webbing between the arms. -
Soften the blend:
Use a clean, damp brush to gently blend the pink tones into the blue-grey, avoiding hard edges. -
Underside wash:
Paint the undersides of the tentacles with a very pale, warm pinkish-grey wash. Let everything dry completely before moving on.
Edge Control
To get the soft speckling on the head, try flicking the bristles of a toothbrush loaded with paint for a natural, organic splatter effect.
Step 3: Detailing & Texture
-
Deepen the shadows:
Mix a stronger, less watery consistency of Indigo. Paint the shadowed areas where the arms overlap or curl under the body. -
Texture the head:
Using a stippling motion with the tip of your brush, add small dots of reddish-brown to the top of the head to mimic skin texture. -
Paint the eye:
Carefully paint the pupil dark grey or black, leaving a tiny spot of white paper for the highlight. Paint the iris a pale yellow-grey. -
Define the suckers:
Switch to your smallest brush. Use the dark blue-grey mix to outline the small circles of the suckers on the underside of the arms. -
Add sucker depth:
Paint a small crescent shadow inside each sucker cup to make them look concave and three-dimensional. -
Enhance the skin:
Use a ‘dry brush’ technique with the Indigo mix to drag distinct texture lines along the top of the arms. -
Final contrast:
Go back in with your darkest pigment (nearly undiluted Payne’s Grey) and sharpen the deepest crevices between the arms. -
Bubble accents:
Paint a few faint, hollow circles around the octopus using very watery blue paint to suggest underwater bubbles and atmosphere.
Artistic Display
If you couldn’t find deckle-edge paper, tear the edges of your finished dry painting against a ruler to create that rustic, torn look manually.
Now you have a serene ocean creature ready to be framed or gifted to a sea lover

Realistic Pencil Octopus Study
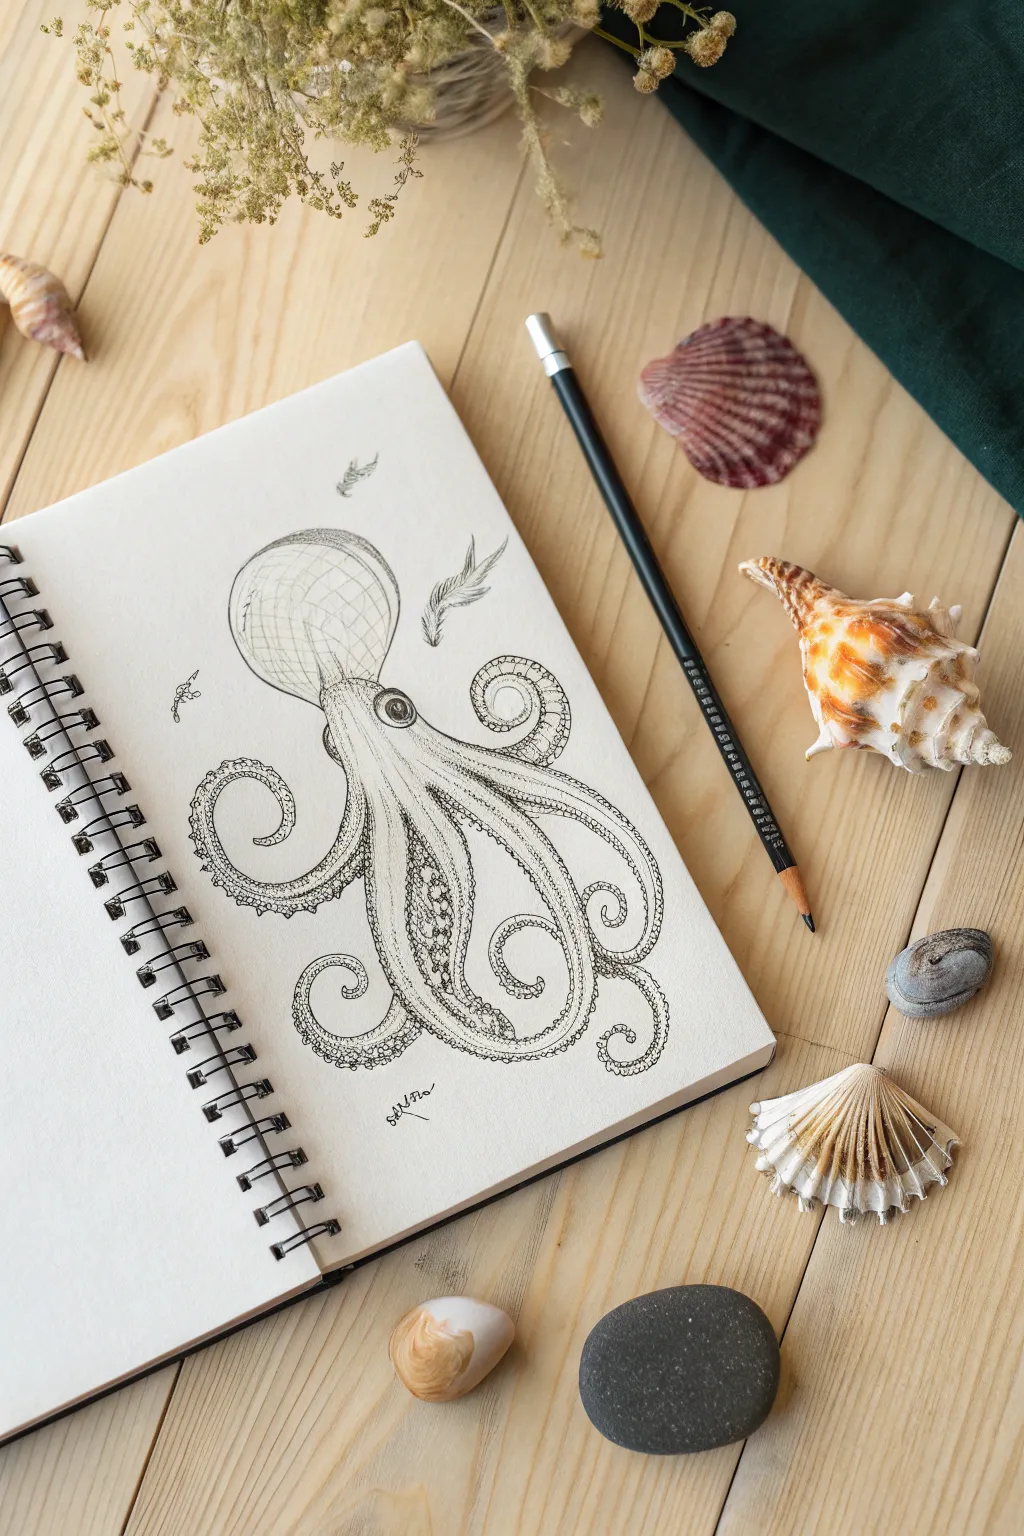
Capture the fluid movement of the ocean’s most intelligent invertebrate with this detailed pen and ink study. By combining confident contour lines with patient stippling, you’ll create a textured, scientifically-inspired illustration that pops off the page.
Step-by-Step Tutorial
Materials
- Spiral-bound sketchbook (heavyweight paper, smooth or vellum surface)
- H or HB graphite pencil (for sketching)
- Kneadable eraser
- Fine liner pens (sizes 0.05, 0.1, and 0.3mm)
- Reference photo of a common octopus
Step 1: Conceptual Sketching
-
Establish the composition:
Begin with your HB pencil, using very light pressure. Draw a large, slightly tilted oval for the mantle (head) in the upper center of your page to anchor the composition. -
Map the eye placement:
Locate the syphon and eye area just below the mantle. Draw a small circle for the eye, ensuring it is prominent, as this will be the focal point of the character. -
Gesture draw the tentacles:
From the central body mass, sketch eight flowing lines to represent the spine of each arm. Create dynamic curves—looping some backward and curling others inward—to suggest movement and fluidity. -
Flesh out the arms:
Thicken the gesture lines into full tentacle shapes. They should be widest near the beak (center) and taper down to delicate points at the ends. -
Refine the outline:
Go over your sketch to finalize the shapes, erasing any messy construction lines. This is the time to ensure the proportions feel correct before committing to ink.
Ink Smudge Savior
If you accidentally smudge wet ink, don’t erase! Turn the smudge into a shadow or part of the aquatic environment by adding more stippling around it to blend it in naturally.
Step 2: Inking the Contours
-
Outline the main form:
Using a 0.3mm fine liner, carefully trace the outer silhouette of the mantle and the arms. Keep your hand steady to produce clean, biological-style lines. -
Detail the eye:
Switch to a 0.1mm pen for the eye. outline the pupil and iris carefully, leaving a tiny white highlight uninked to give the creature life. -
Add suction cups:
Along the visible undersides of the curling tentacles, draw small ovals for the suction cups. They should get progressively smaller as they move toward the arm tips. -
Depicting skin folds:
Use the 0.1mm pen to draw thin, broken lines connecting the arms near the mouth area, suggesting the webbing and loose skin found on octopuses.
Step 3: Texturing and Shading
-
Stippling the shadows:
This is where patience is key. Using the 0.05mm pen, begin applying tiny dots (stippling) to the areas of deepest shadow—usually under the arms and beneath the mantle’s overhang. -
Building gradient transitions:
Cluster dots densely in dark areas and spread them out as you move toward the highlights. This gradient effect creates the illusion of roundness on the cylindrical arms. -
Texture the mantle:
Draw very faint, cross-hatched lines or sparse stippling on the top of the head to give it a slightly rougher texture compared to the smooth arms. -
Darkening the eye features:
Fill in the pupil with solid black ink. Add dense stippling around the rim of the eye to make it look recessed and three-dimensional. -
Enhancing the suckers:
Add a small dot or tiny crescent line inside each suction cup to show depth. I like to keep the tops of the suckers white to show where the light hits them. -
Final contrast check:
Step back and squint at your drawing. Use the 0.3mm pen to thicken the darkest crevices where the tentacles overlap, reinforcing the separation between limbs. -
Cleanup:
Once you are certain the ink is completely dry, gently erase all remaining pencil guidelines to reveal a crisp, clean illustration.
Oceanic Ephemera
Enhance the composition by drawing small, floating elements like tiny feathers, bubbles, or seaweed fragments around the octopus to give a sense of water currents.
Now you have a stunning piece of marine art that captures the mysterious elegance of the deep sea


Easy Acrylic Octopus With Big Tentacles
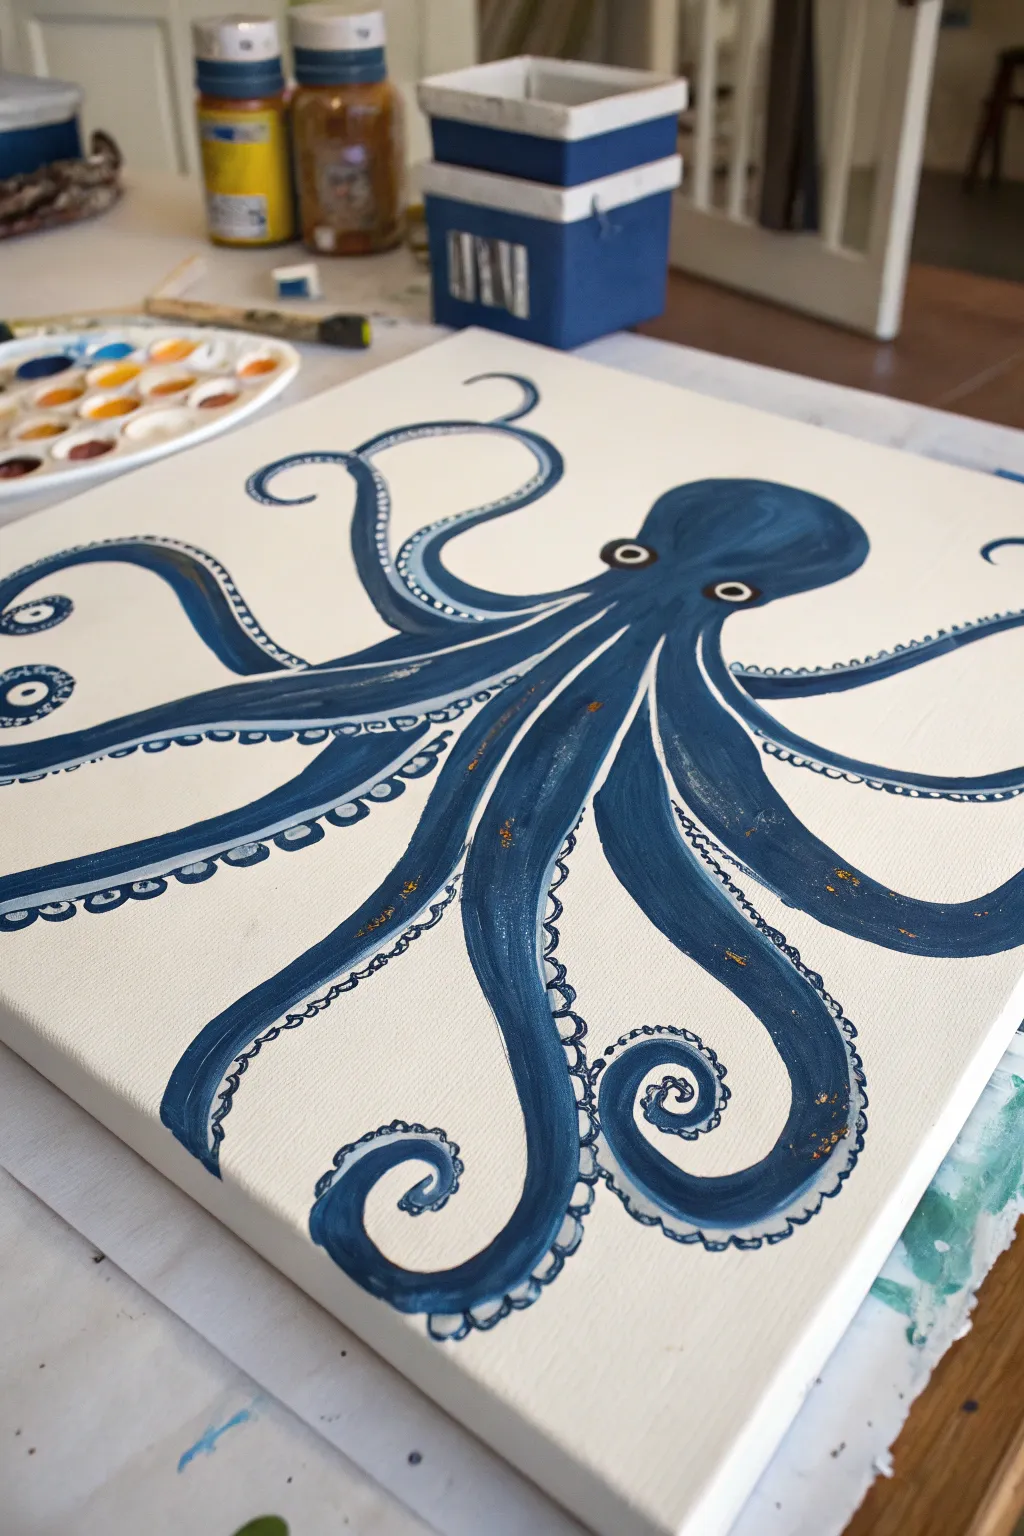
This striking acrylic painting features a deep blue octopus with elegant, fluid tentacles set against a crisp white background. The stylized design uses bold brushstrokes and simple circular details to create a modern, nautical artwork perfect for beginners.
Step-by-Step Guide
Materials
- Square stretched canvas (approx. 12×12 inches)
- White acrylic paint (Titanium White) or gesso
- Navy blue acrylic paint (Ultramarine or Prussian Blue)
- Lighter blue acrylic paint (Cerulean or mix Navy with White)
- Gold or metallic copper acrylic paint (optional for accents)
- Flat brush (medium width)
- Round brush (small/fine tip for details)
- Pencil and eraser
- Palette for mixing
- Jar of water and paper towels
Step 1: Preparation & Sketching
-
Prime the canvas:
Begin by applying an even coat of white acrylic paint or gesso to your entire canvas to ensure a smooth, bright surface. Let this dry completely before moving on. -
Outline the head:
Using a light pencil, sketch a rounded bulb shapes for the octopus’s head (mantle) slightly off-center near the top middle of the canvas. -
Determine tentacle flow:
Draw eight flowing lines radiating from the base of the head. Curve some tentacles upwards, some downwards, and curl the ends of others into spirals to create dynamic movement. -
Thicken the sketch:
Go back over your single lines and add thickness to each tentacle, making them wider near the head and tapering them down to clumsy points or curls at the ends.
Smooth Operator
To get super smooth tentacles without brush marks, mix a drop or two of water into your acrylic paint to improve its flow before applying.
Step 2: Blocking in Color
-
Paint the main body:
Load your medium flat brush with your darkest navy blue paint. Fill in the head shape first, establishing the central anchor of your painting. -
Fill the tentacles:
Continue painting down the length of each tentacle with the navy blue. Use long, smooth strokes that follow the curve of the limb to simulate the texture of the skin. -
Refine the edges:
Switch to a smaller round brush to sharpen the edges of the tentacles and carefully define the tight spiral curls at the tips. -
Let the base coat dry:
Allow the blue paint to dry fully. This is crucial so future layers don’t muddy the crisp dark blue color.
Step 3: Adding Highlights & Depth
-
Create a highlight mix:
Mix a small amount of white into your navy blue to create a medium-toned blue, or use a straight cerulean blue. -
Apply streaks:
Using a relatively dry brush, paint thin, streaky lines along the center and upper curves of the tentacles and head. This mimics light reflecting off a wet surface. -
Add metallic accents:
If you are using gold or copper paint, lightly dab tiny flecks randomly along the darkest parts of the tentacles for a bit of shimmer.
Wobbly Lines?
If your tentacle edges look shaky, wait for them to dry, then use white paint to cut back into the shape and clean up the silhouette.
Step 4: Detailing the Face & Suckers
-
Paint the eyes:
Near the base of the head, paint two small white circles. Once dry, add a black or dark blue dot in the center of each for the pupil. -
Outline the eye rims:
Use a very fine brush to add a thin rim of copper or light brown around the white of the eyes to make them pop. -
Start the suckers:
Along the bottom edge of the tentacles (usually the inner curve), paint a row of small, open circles using white or very pale blue paint. -
Vary sucker sizes:
Keep the circles larger near the head and gradually make them tiny dots as you reach the tips of the tentacles. -
Finalize outlines:
I like to take my thinnest brush with dark blue paint and very lightly outline the white suckers to define them against the white background.
Hang your new maritime masterpiece in a bathroom or hallway for a splash of ocean charm


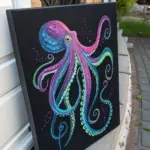
Rainbow Octopus Paint Play
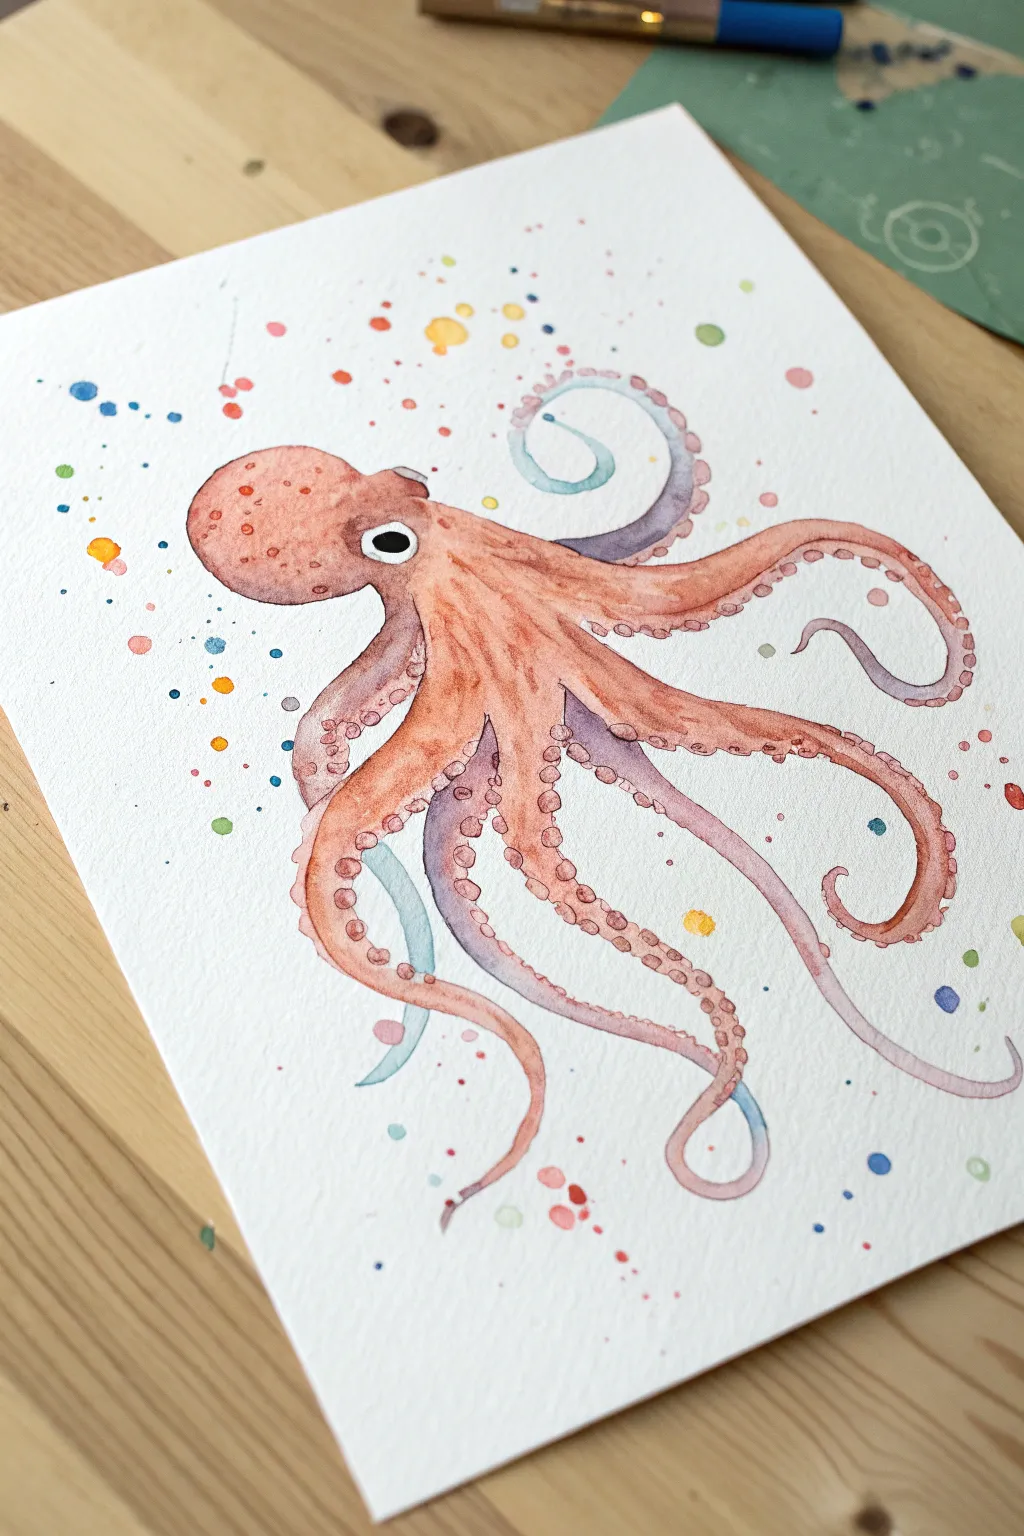
Dive into painting this charming octopus, featuring a blend of warm corals and cool purples brought to life with playful splatter effects. This watercolor project balances detailed tentacle work with loose, artistic splashes for a vibrant ocean-inspired piece.
How-To Guide
Materials
- Cold press watercolor paper (300 gsm)
- Watercolor paints (Coral/Orange, Purple, Teal, Blue, Yellow)
- Round brushes (sizes 2, 4, and 6)
- Pencil and eraser
- Water jars
- Paper towels
- White gouache or gel pen (optional for eye highlights)
Step 1: Sketching the Outline
-
Draw the mantle:
Begin by lightly sketching the octopus’s head (the mantle) in the upper left quadrant. Aim for a rounded, bulbous shape that tapers slightly where it meets the tentacles. -
Add the eye:
Place a prominent circle for the eye near the base of the head. Draw a smaller circle inside for the pupil, leaving a tiny spot white for the highlight. -
Flow the tentacles:
Sketch out eight tentacles flowing from the center. Create movement by curving some upwards and curling others down. Don’t worry about perfect symmetry; natural, fluid curves look best. -
Detail the suckers:
Along the underside of each tentacle curve, draw small, evenly spaced circles or ovals to represent the suckers. These should get smaller as they reach the tentacle tips.
Muddy colors?
If your purple and orange blend into brown mud on the tentacles, let the orange layer dry completely before glazing the purple shadow layer over it instead of mixing wet-on-wet.
Step 2: Applying the Base Wash
-
Wet-on-wet start:
Using your size 6 brush, dampen the head area with clean water. Drop in a watery mix of coral or warm orange paint, letting it bloom naturally across the damp paper. -
Adding dimension:
While the head is still damp, dab a slightly more concentrated orange or reddish-brown near the top and bottom edges to create volume and roundness. -
Painting the arms:
Move to the tentacles. Paint the main body of the arms with your coral mix, but as you move toward the tips or the shadowed undersides, drop in touches of purple or teal while the paint is wet to create soft gradients. -
Underside shadows:
For the tentacles that twist to reveal their underside, use a cooler purple wash to distinguish the bottom surface from the orange top surface.
Step 3: Defining Details
-
Wait for drying:
Ensure the first layer is completely dry before proceeding. If the paper is cool to the touch, it is still wet. -
Deepen the eye:
Fill the pupil with black or deep indigo paint, carefully preserving the white catchlight you sketched earlier. -
Painting suckers:
Switch to a size 2 brush. Mix a reddish-purple hue and carefully paint the negative space around the suction cups, or paint the cups themselves with a watery mix and outline them with the darker shade. -
Skin texture:
I like to add texture to the head by stippling small dots of concentrated orange and brown paint onto the dry surface. Vaping the pressure creates a natural, bumpy skin look. -
Enhancing contrast:
Mix a darker purple-brown and paint thin, decisive lines in the crevices where the tentacles meet the body to separate the individual arms.
Pop those suckers
For extra definition, use a tiny dab of white gouache on the top edge of each suction cup once dry. It creates an instant 3D highlight effect.
Step 4: Final Touches
-
The splatter technique:
Load a wet brush with watered-down blue, teal, orange, and yellow paint. Ideally use one color at a time. -
Applying splashes:
Hold the brush over the painting and tap the handle firmly with another brush or your finger. Let the droplets fall randomly around the octopus to create a watery atmosphere. -
Controlling the spread:
If a splatter lands somewhere you don’t want, quickly dab it up with a clean corner of a paper towel. -
Final dry:
Allow the entire piece to dry flat so the splatters don’t run.
Now you have a lively, colorful cephalopod ready to brighten up any wall.
BRUSH GUIDE
The Right Brush for Every Stroke
From clean lines to bold texture — master brush choice, stroke control, and essential techniques.
Explore the Full Guide
Minimal One-Line Octopus
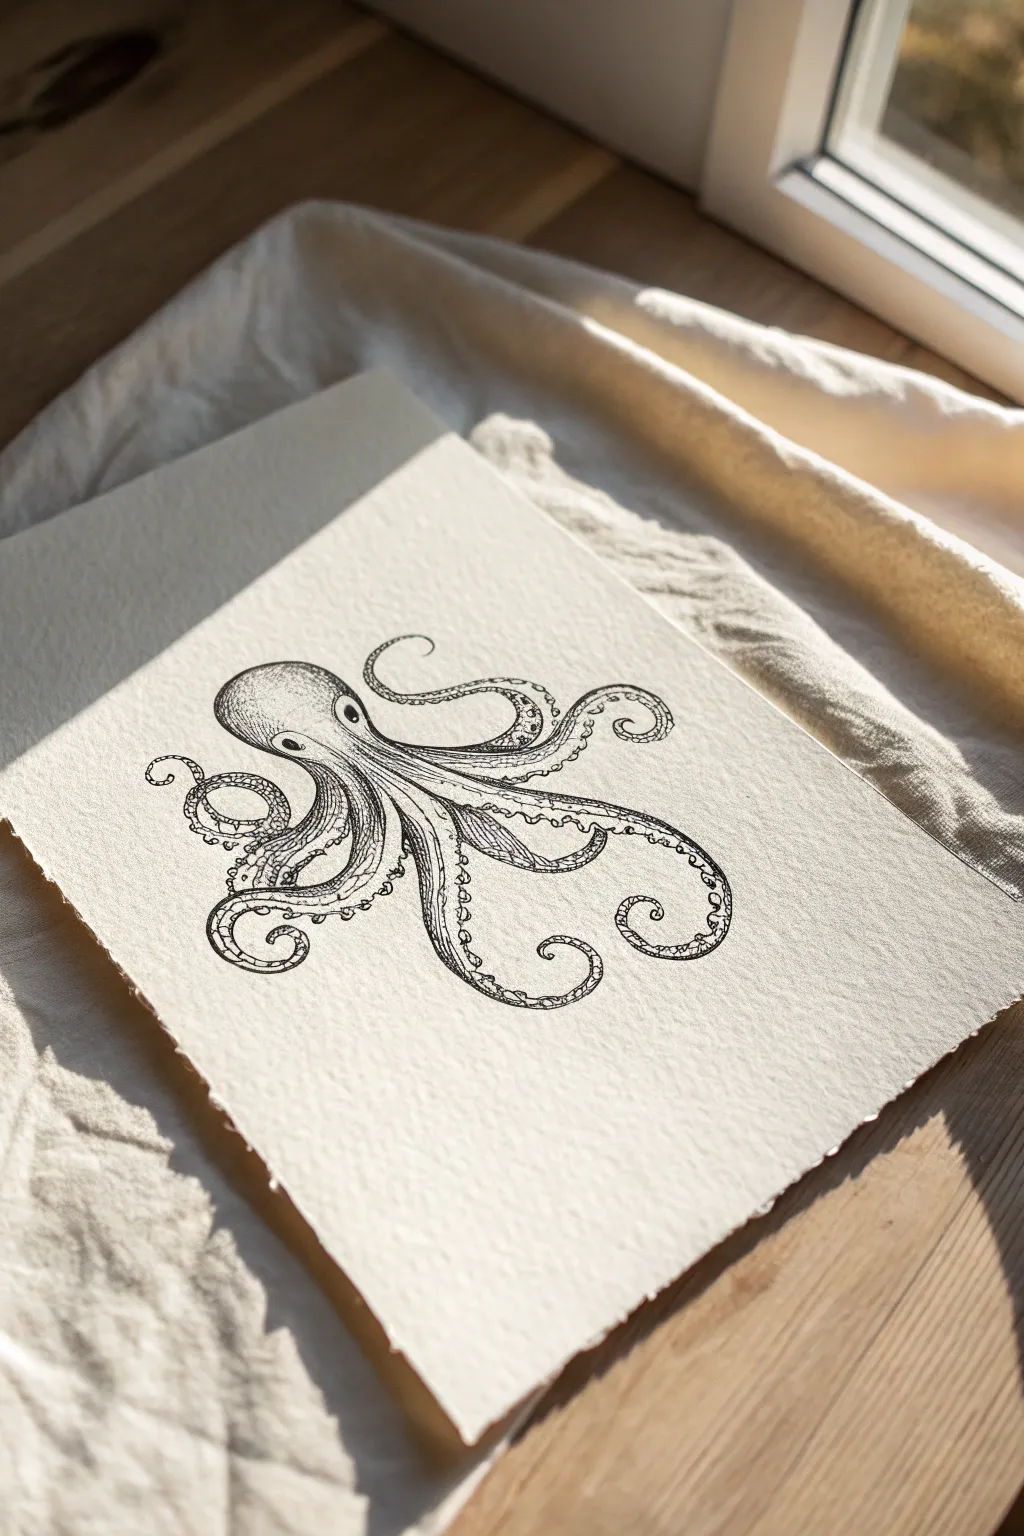
Capture the fluid movement of the ocean with this detailed ink illustration on beautiful deckled paper. The combination of fine stippling and textured cotton rag paper gives this piece a timeless, classical field-study aesthetic.
Detailed Instructions
Materials
- Heavyweight cotton rag paper (approx. 300gsm) with deckled edges
- Fine liner pens (sizes 005, 01, 03, and 05)
- Graphite pencil (HB or 2H)
- Kneaded eraser
- Reference image of an octopus
Step 1: Sketching the Form
-
Establish the head:
Begin lightly with your pencil. Near the upper-left center of the page, draw an oval shape for the mantle (the head). Tilt it slightly to the right to suggest movement. -
Position the eyes:
Sketch two small circles for the eyes. The one closer to the viewer should be larger and more prominent, situated just where the head meets the tentacle base. -
Plot primary tentacles:
Draw flowing guide lines for the eight arms. I like to start with the front three arms curling inward to establish the composition’s center. -
Add secondary tentacles:
Sketch the remaining arms radiating outward and backward. Ensure they curve and loop gracefully—avoid stiff, straight lines. Let some overlap others to create depth. -
Refine the outlines:
Go back over your guide lines and thicken the tentacles, tapering them to fine points at the ends. Sketch the webbing between the arms near the mouth area.
Step 2: Initial Inking
-
Outline distinct shapes:
Switch to an 03 fine liner. Carefully trace the main outline of the head and the outer edges of the tentacles. Keep your hand steady but allow the paper’s texture to influence the line quality slightly. -
Define the eyes:
Use an 05 pen to fill in the pupils, leaving a tiny white highlight in each eye to give it life and dimension. -
Draw the suction cups:
Using an 01 pen, draw small ovals along the underside of the visible tentacles. Start large near the base and make them progressively smaller toward the tips. -
Add skin texture marks:
With the 005 pen, add tiny, sparse dots and small dashed lines along the top of the head to suggest the bumpy texture of octopus skin.
Ink Bleeding Control
Rag paper is absorbent. Test your pen on a scrap piece first. If ink feathers too much, sketch faster with lighter pressure or switch to a pigment liner specifically marked as waterproof and archival.
Step 3: Shading and Detail
-
Stipple the head shadow:
Use the stippling technique (massed dots) with the 01 pen to shade the underside of the head. Concentrate the dots heavily near the bottom edge and fade them out as you move up. -
Hatch the tentacles:
On the shadowed side of each tentacle, use fine, curved hatching lines that follow the contour of the arm. This emphasizes the cylindrical shape. -
Detail the suckers:
Add tiny C-shaped curves inside the suction cups to give them depth. Use the smallest pen (005) for this to keep it delicate. -
Deepen the contrasts:
Identify where tentacles overlap. Use the 03 pen to darken the shadow cast by the top tentacle onto the one beneath it, separating the forms clearly. -
Create surface pattering:
Add small, irregular circular patterns along the top ridges of the arms using the 005 pen. These simulate the chromatophores on the skin. -
Final texture check:
Look for areas that feel too flat. Add very light stippling to the mid-tones of the tentacles to meaningful soften the transition between the white paper and the black ink shadows.
Natural Flow
To make tentacles look fluid, rotate the paper constantly while drawing. Pulling the pen toward your body usually creates smoother, more natural curves than pushing it away.
Step 4: Finishing Touches
-
Erase pencil marks:
Wait until the ink is completely dry—give it a solid 10 minutes. Then, gently roll the kneaded eraser over the drawing to lift graphic lines without damaging the paper surface. -
Deckle edge check:
If your paper didn’t come with deckled edges, you can carefully tear the edges against a ruler now to create that soft, fibrous border shown in the image.
Now you have a stunning piece of marine art that looks like it came straight from a vintage naturalist’s journal
Ink Wash Octopus Silhouette
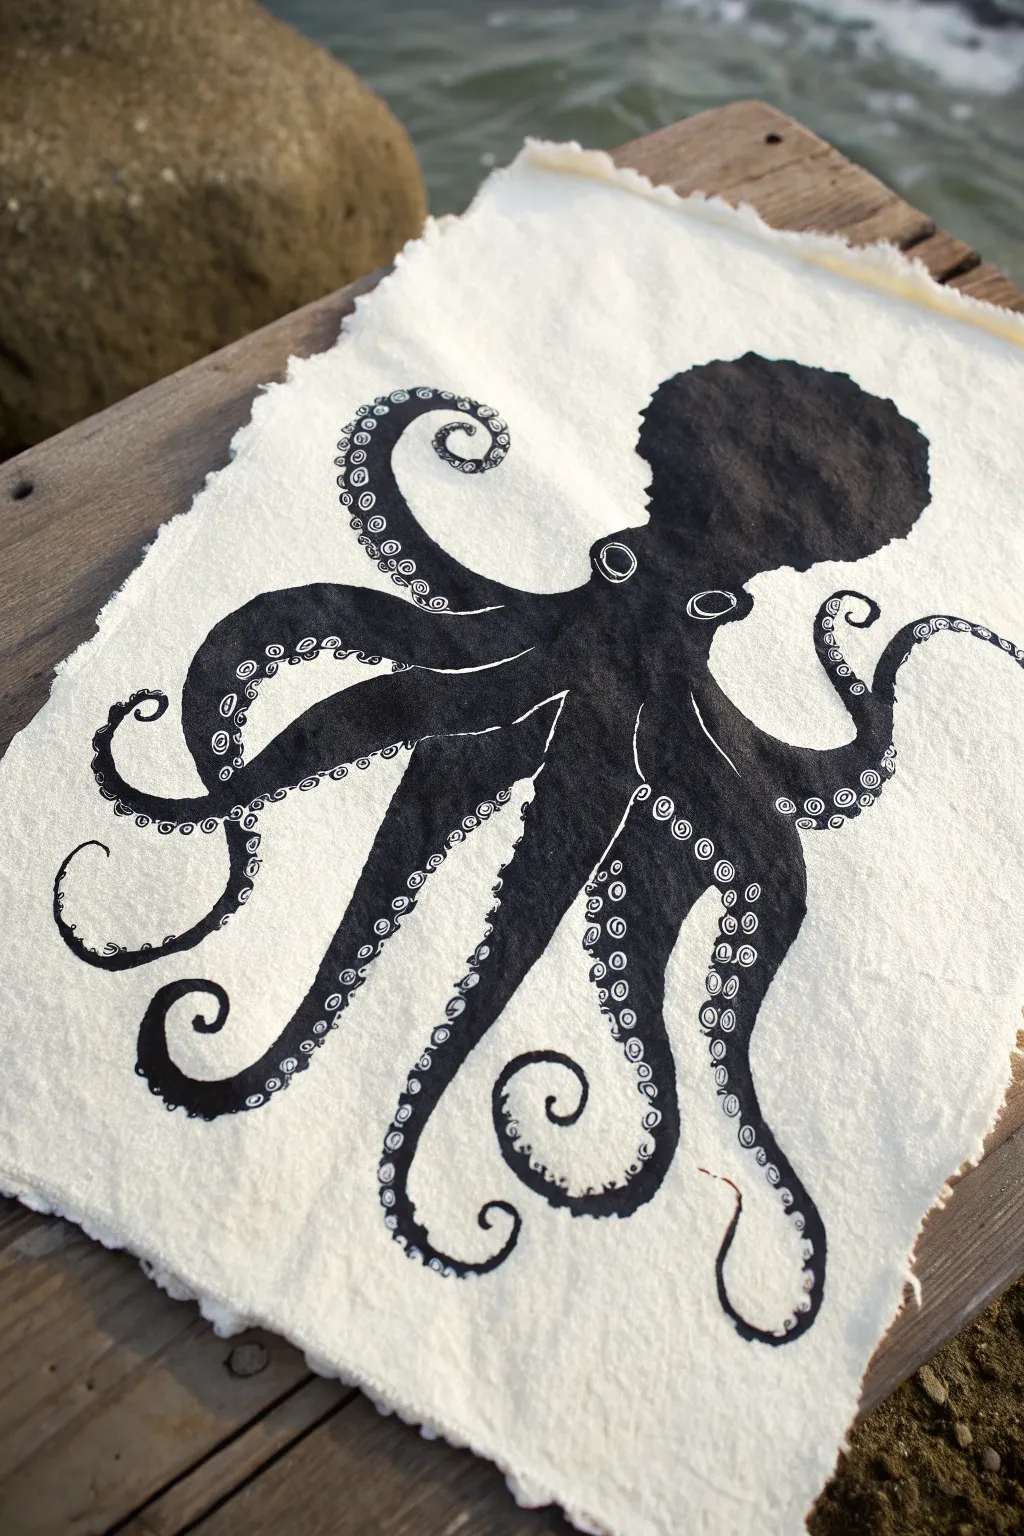
Capture the mysterious elegance of the deep sea with this striking high-contrast octopus illustration. Using dense black ink on beautifully textured handmade paper creates a piece that feels both organic and modern.
Step-by-Step Guide
Materials
- Heavyweight handmade cotton paper (deckle edge recommended)
- Black India ink or high-flow black acrylic ink
- Round watercolor brushes (sizes 4 and 6)
- Fine-point white gel pen or white acrylic paint pen (0.7mm)
- Pencil (HB or lighter)
- Kneaded eraser
- Reference image of an octopus
- Paper towels
- Water cup
Step 1: Planning and Sketching
-
Paper Preparation:
Lay your handmade paper on a flat, clean surface. Because this paper is often textured and absorbent, tape the corners down slightly with painter’s tape to prevent it from shifting while you sketch. -
Basic Shapes:
Start by lightly sketching a large, rounded bulbous shape near the top right third of the paper for the octopus’s mantle (head). Keep your pencil pressure extremely light so you don’t indent the soft paper. -
Mapping the Limbs:
Draw flowing guide lines extending from the base of the head to establish where the eight tentacles will go. Aim for a mix of curves—some spiraling inward, others stretching out—to create a sense of movement. -
Refining the Tentacles:
Flesh out the tentacles around your guide lines. Make them thicker near the body and taper them down to delicate points at the ends. -
Finalizing the Outline:
Clarify the connection points where the arms meet the central body. Sketch two small circles for the eyes just below the mantle. Once satisfied, use your kneaded eraser to gently lift up any stray or dark graphite lines, leaving just a faint ghost image.
Ink Control Pro-Tip
Handmade paper is thristy! Test your ink consistency on a scrap piece first. If it bleeds too fast, thicken it slightly or work with a drier brush to keep edges sharp.
Step 2: Inking the Silhouette
-
Outlining with Ink:
Dip your size 4 round brush into the black India ink. Carefully trace the outer perimeter of your pencil sketch. I find it helpful to rotate the paper as I work to keep my hand at a comfortable angle. -
Filling the Mantle:
Switch to the larger size 6 brush for the main body section. Load it with ink and fill in the head shape. Allow the natural texture of the paper to show through slightly; don’t overwork the paper or it might pill. -
Filling the Arms:
Work your way down each tentacle, filling them with solid black. Be careful near the tips; switch back to the smaller brush to ensure the points remain sharp and crisp. -
Leaving Negative Space:
When you reach the eye area, carefully paint around two small circular shapes to define the eyes. Leave a tiny sliver of white paper between overlapping tentacles if they cross, which helps define which limb is on top. -
Smoothing Edges:
Go back over the silhouette’s edges. If the paper’s texture made the lines jagged, smooth them out with the tip of your small brush for a clean, graphic look. -
Drying Time:
Let the ink dry completely. Handmade paper holds moisture longer than standard paper, so give it at least 30-45 minutes. It must be bone dry before the next step.
Step 3: Adding Details
-
Detailing the Eyes:
Using your white gel pen or paint pen, draw a definitive ring around the blank spaces you left for the eyes to make them pop against the black surroundings. -
Starting the Suckers:
Begin adding the suction cups on the underside of the tentacles using the white pen. Start with small, simple circles near the tips of the arms. -
Building Texture:
As you move toward the thicker parts of the tentacles, make the circles (suckers) larger. Draw small dots or swirls inside the larger circles to give them depth and an organic appearance. -
Defining Body Contours:
Add thin white lines to suggest folds or separation where the tentacles join the body. These highlights act as ‘reverse shading’ to give form to the black silhouette. -
Final Touches:
Review the composition. If any white details look too faint against the dark ink, go over them a second time to ensure crisp, high contrast.
Level Up: Gold Leaf
Instead of a white pen for the suckers, use a glue pen and apply small dots of gold leaf. The metallic shine against the matte black ink looks incredibly luxurious.
Frame your marine masterpiece in a floating glass frame to show off those beautiful deckled edges.

PENCIL GUIDE
Understanding Pencil Grades from H to B
From first sketch to finished drawing — learn pencil grades, line control, and shading techniques.
Explore the Full Guide
Patterned Octopus With Decorative Skin
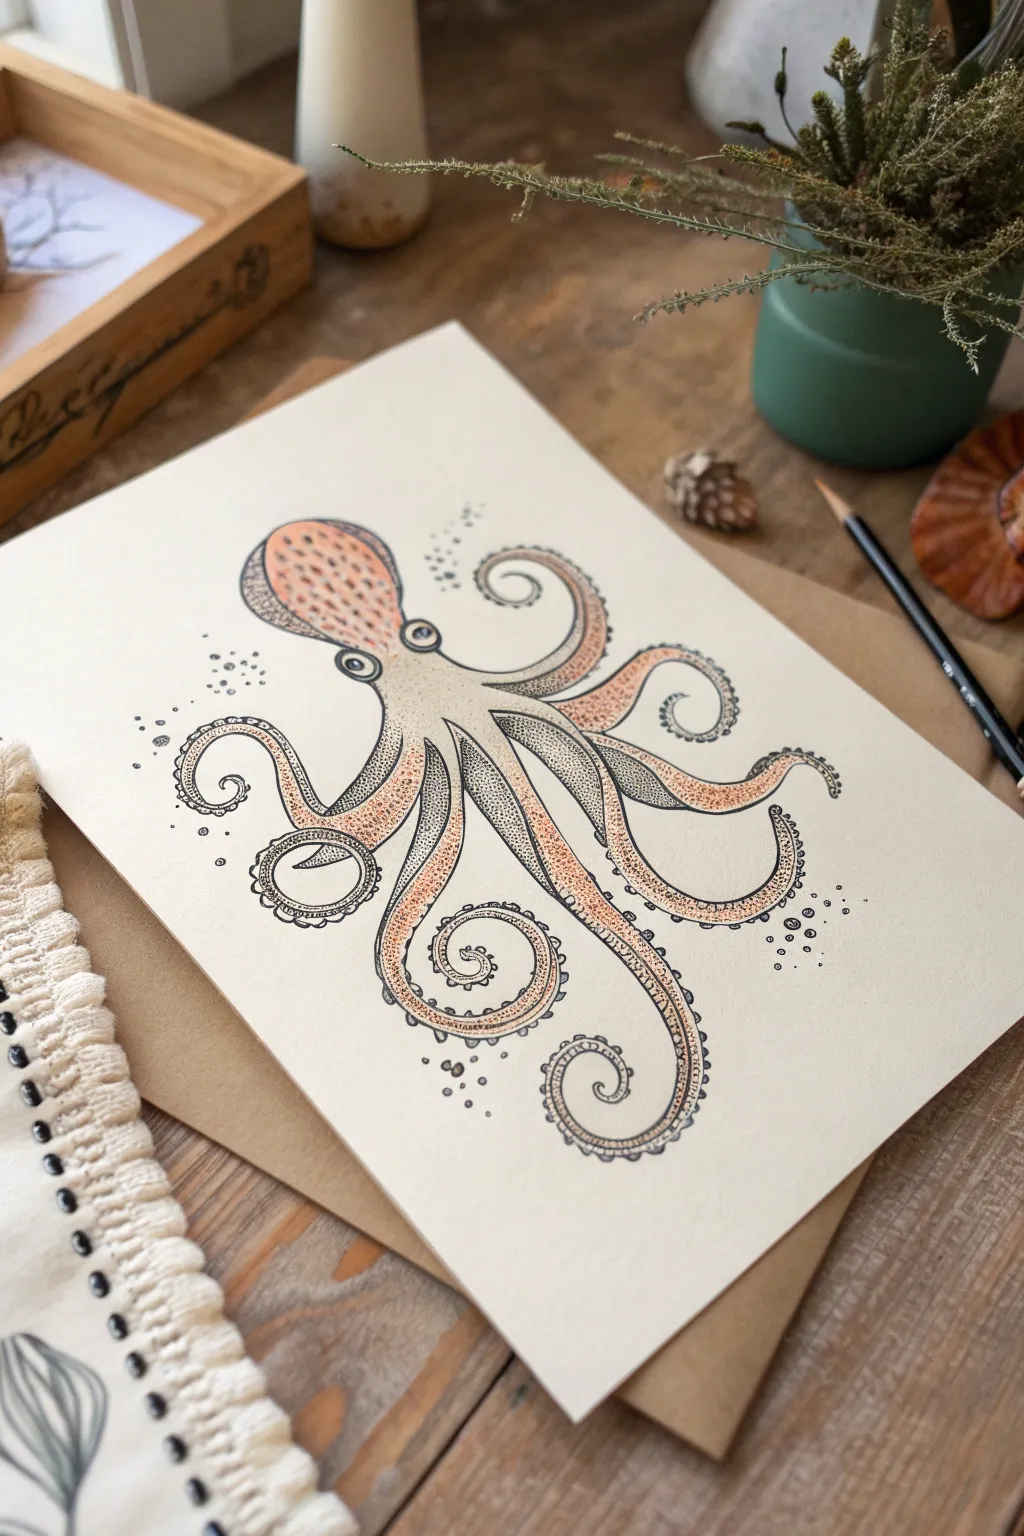
This elegant illustration combines flowing line art with meticulous stippling to create a textured octopus with vintage charm. The soft peach and orange tones contrast beautifully against the intricate black ink details on cream paper.
Step-by-Step Tutorial
Materials
- Cream or off-white mixed media paper (heavyweight, approx. 180-250 gsm)
- HB or 2H graphite pencil for sketching
- Kneaded eraser
- Fine liner pens (black, sizes 0.1, 0.3, and 0.5)
- Black brush pen or bold marker
- Sanguine or peach colored pencil (soft-core preferred)
- Light brown colored pencil
Step 1: Planning the Anatomy
-
Head Placement:
Begin by lightly sketching an elongated balloon shape near the upper center of your page to form the octopus’s mantle (head). Keep the top slightly flatter and the bottom tapering inward. -
Eye Positioning:
Draw two distinct circles at the base of the mantle where the tentacles will emerge. The left eye should be visible in profile, while the right eye sits more front-facing. -
Tentacle Flow:
Sketch eight long, curving lines radiating from below the eyes. Creates a sense of movement by curling the ends into spirals—some tight, some loose. -
Tentacle Thickness:
Flesh out the tentacles by drawing lines on either side of your guide curves. Taper them from a thick base near the head to fine, pointed tips at the spiral ends.
Stippling Patience
Don’t tap the pen too hard when stippling, or you’ll blunt the nib. Use a gentle, rhythmic vertical tapping motion for crisp, round dots.
Step 2: Inking the Outline
-
Initial Inking:
Using a 0.3 fine liner, carefully trace over your pencil sketch. Focus on smooth, continuous lines for the tentacles to maintain that fluid, underwater feel. -
Clean Up:
Once the ink is completely dry, gently erase all graphite guidelines with your kneaded eraser to leave a clean slate. -
Adding Suckers:
Along the underside of each tentacle, draw small, evenly spaced circles for the suckers. As the tentacles taper, make the circles progressively smaller until they are just tiny dots. -
Eye Detail:
Draw a smaller circle inside each eye for the pupil. Use a 0.5 pen to fill in the pupil, leaving a tiny white speck for a highlight.
Coffee Stain Effect
For an antique field-journal look, lightly dab a tea bag or diluted coffee wash over the paper before you start drawing and let it dry fully.
Step 3: Adding Color & Texture
-
Base Color:
Take your sanguine or peach colored pencil and shade the top surface of the mantle and the upper side of the tentacles. Apply light pressure for a soft, washed look. -
Gradients:
Layer a light brown pencil over the peach areas, particularly near the edges of the mantle and the base of the arms, to create subtle dimension. -
Stippling the Mantle:
Switch to your 0.1 fine liner. Begin adding tiny dots (stippling) over the colored areas of the head. Cluster the dots densely near the edges for shadow and spread them out toward the center for highlights. -
Texturing the Arms:
Continue stippling along the colored upper sides of the tentacles. I find it effective to keep the dots denser near the center line of the arm and fade them out toward the edges. -
Decorative Spots:
On the mantle, draw a few larger, decorative oval shapes using the 0.3 pen. Fill these with a slightly darker stippling pattern than the surrounding skin.
Step 4: Refining Contrast
-
Darkening Underbellies:
Using a 0.05 or 0.1 pen, add very dense stipling or hatching to the underside of the tentacles (the area between the suckers). This separates the top of the arm from the bottom. -
Defining Suckers:
Add a small C-shaped curve or dot inside each sucker circle to give them depth, making them look like cups rather than flat rings. -
Outer Line Weight:
Go back over the main outer contour of the entire octopus with a 0.5 pen. This thicker line weight helps the subject pop off the page. -
Atmospheric Bubbles:
Scatter groups of small circles around the octopus, varying their sizes. Add tiny stippled dots around them to suggest movement in the water.
Step back and admire the rhythmic movement of your sea creature
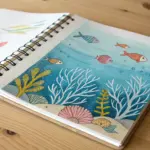
Cute Cartoon Octopus Character
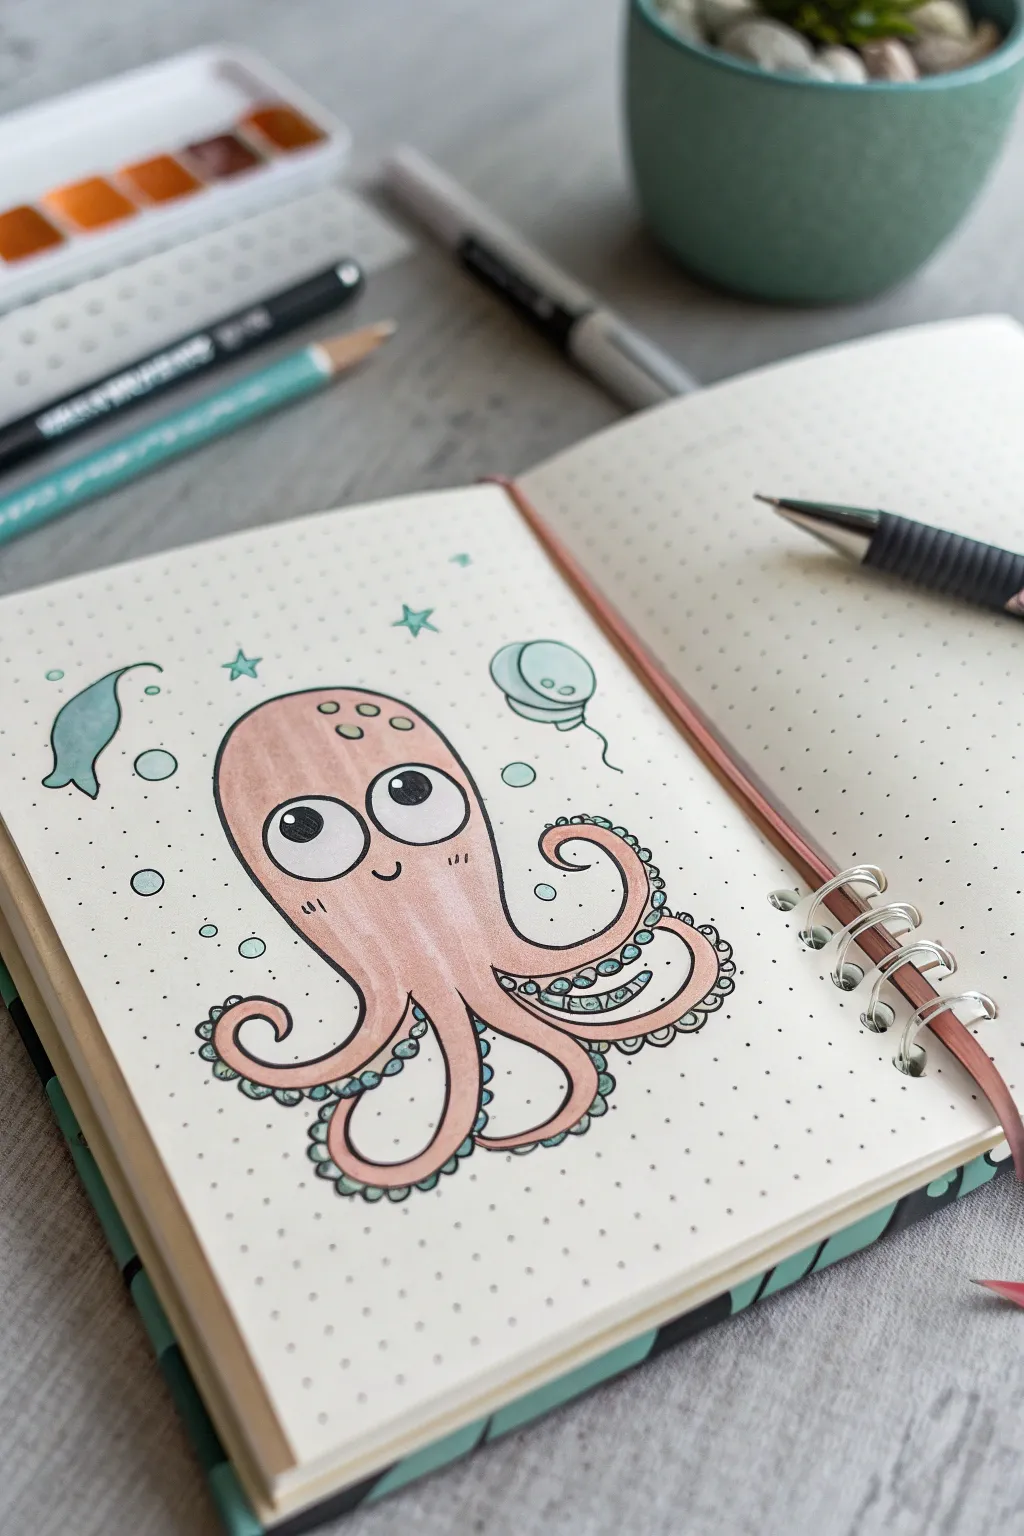
Bring your journal pages to life with this adorable, wide-eyed octopus character swimming through a sea of bubbles. This project combines simple line art with soft marker shading for a charming, cartoony finish.
Step-by-Step
Materials
- Dotted grid notebook or journal
- Pencil (HB or H)
- Eraser
- Fine liner pen (black, 0.3mm or 0.5mm)
- Alcohol markers or brush pens (Salmon/Pink, Teal/Light Blue)
- White gel pen (optional, for highlights)
Step 1: Sketching the Outline
-
Map the head shape:
Start near the center of your page. Lightly sketch a large, inverted ‘U’ shape for the octopus’s head. It should be taller than it is wide, resembling a elongated gumdrop. -
Draft the eyes:
Inside the head shape, draw two large circles that touch each other in the middle. Place them slightly higher than the vertical center of the head. Add smaller circles inside for the pupils, looking up and to the left. -
Draw the first tentacles:
Extend lines down from the bottom of the ‘U’ shape. Create the two central tentacles first, curving them inward slightly like a handlebar mustache. -
Add side tentacles:
Sketch additional tentacles branching out from the sides. Curl the tips upward into spirals for a classic cartoon look. Aim for about 6-8 visible tentacles in total. -
Sketch the background elements:
Draw small circles of varying sizes floating around the octopus for bubbles. On the left, add a simple fish shape, and on the right, sketch a balloon floating up on a string.
Ink Smearing?
If your black fineliner smudges when you color over it, let the ink cure for at least 15 minutes before erasing pencil lines or adding marker. Or, switch to a waterproof archival pen.
Step 2: Inking the Lines
-
Trace the main lines:
Using your black fine liner, carefully go over your pencil sketch. Start with the eyes to ensure they remain the focal point. -
Detailed tentacle work:
Trace the tentacles, making sure the curves are smooth. When inking the underside of the curled tentacles, draw small scallops or bumps to indicate where the suckers will go. -
Add facial expression:
Fill in the pupils with black, leaving a tiny white dot in each for a sparkle. Draw a small, simple ‘u’ shape between the eyes for a smiling mouth and add three tiny hatch marks on the cheeks for blush. -
Ink the surroundings:
Outline the bubbles, the small fish, stars, and the balloon. Erase all pencil marks completely once the ink is dry.
Creative Twist
Give your octopus a distinct personality by adding accessories like a tiny top hat, a monocle, or a bow tie. You can also change the bubble shapes to hearts for a Valentine theme.
Step 3: Coloring and Shading
-
Base color for the body:
Use a salmon or soft pink marker to fill in the octopus’s head and the top side of the tentacles. Apply the color in long, vertical strokes to mimic the curvature of the head. -
Color the details:
Switch to a teal or light blue marker. Carefully color the underside of the tentacles (the suction cup areas). Use this same teal color for the fish, the balloon, and the stars. -
Add texture spots:
With the teal marker or a slightly darker green, draw small circles on the octopus’s forehead and on the tentacles to represent skin texture or spots. -
Shade the body:
Using a second layer of the pink marker, or a slightly darker pink shade, add shadows to the sides of the head and under the tentacles to give the drawing dimension. -
Highlight the form:
I like to leave a strip of the paper uncolored or use a white gel pen to add a vertical highlight on the center of the forehead, making the head look round and shiny. -
Final background touches:
Color in the bubbles with a very pale blue or just outline the inner edge with the teal marker to make them look transparent.
Now you have a cheerful underwater friend to brighten up your weekly spread or doodle page


Cozy Octopus With Books
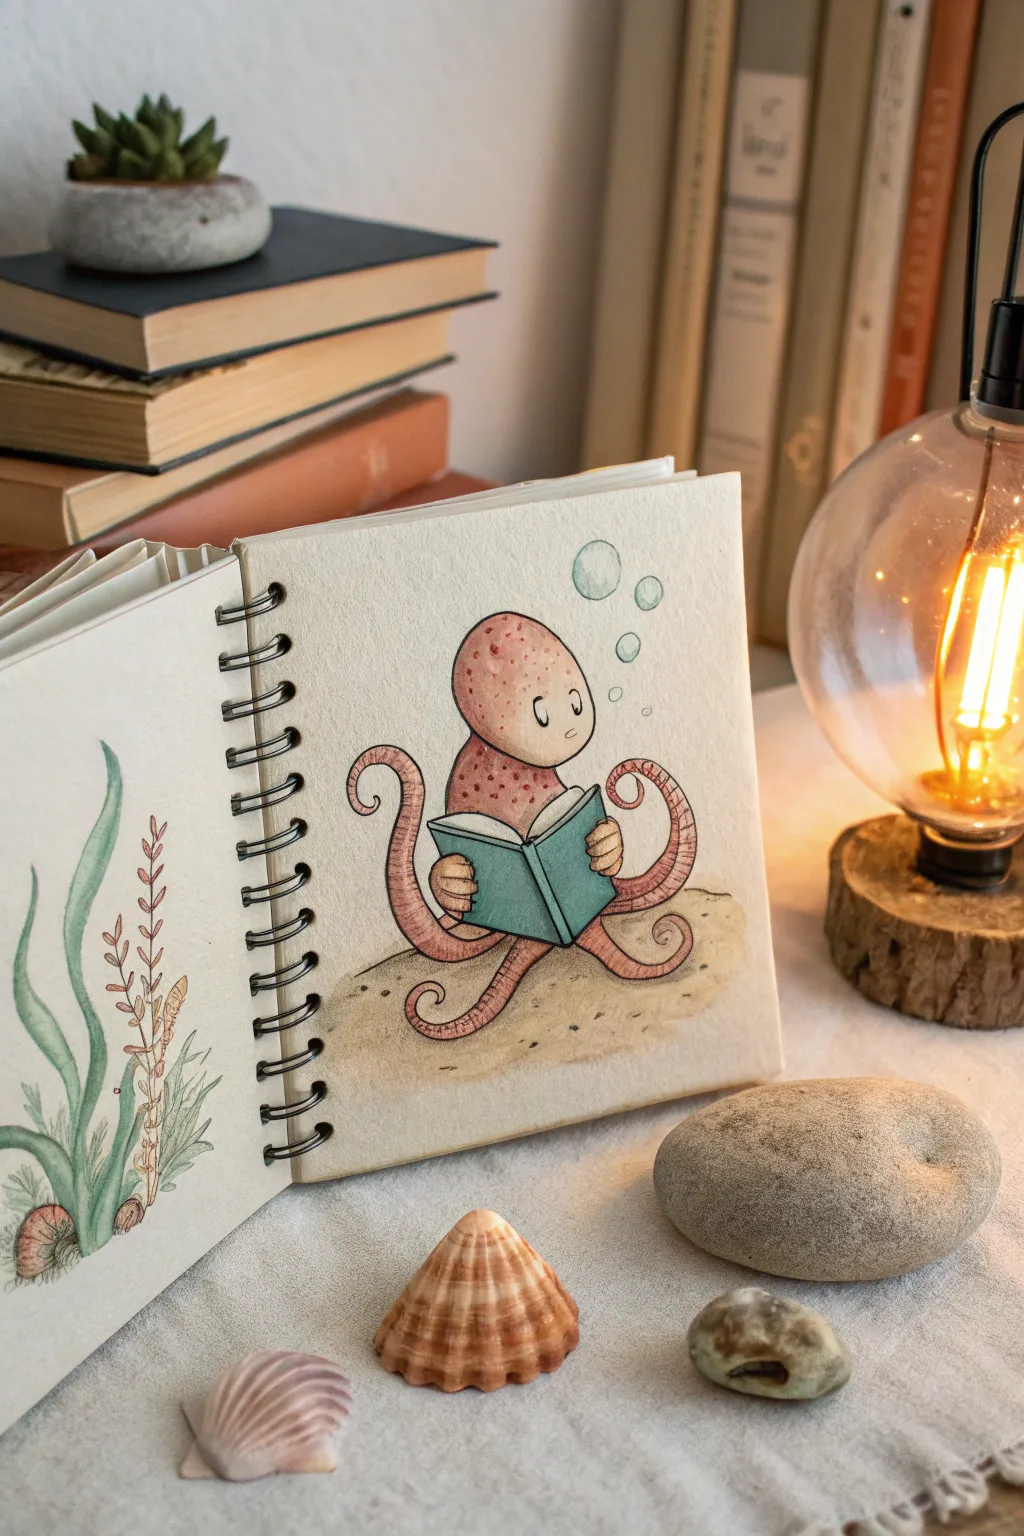
This charming illustration captures a cozy moment beneath the waves featuring a studious octopus engrossed in a blue book. Using watercolors and fine ink lines, you’ll create a soft, textured character that feels right at home in a sketchbook.
Step-by-Step
Materials
- Sketchbook with mixed media or watercolor paper (cream or off-white preferred)
- H or HB pencil for initial sketching
- Kneaded eraser
- Waterproof fine liner pens (black, sizes 01 and 03)
- Watercolor paints (Red oxide, burnt sienna, cerulean blue, yellow ochre, sepia)
- Round watercolor brushes (sizes 2 and 4)
- White gel pen (optional for highlights)
- Clean water and paper towels
Step 1: Sketching the Character
-
Map out the head:
Start by drawing a large, rounded oval shape for the octopus’s head. Keep it slightly wider at the bottom than the top, almost like an inverted lightbulb shape. -
Add the book:
Position an open book directly below the head. Draw two rectangles angled outward for the pages and a central spine. Make sure the book covers overlap slightly with where the tentacles will start. -
Draft the tentacles:
Sketch four visible tentacles extending from beneath the head. Draw two curling upwards on either side of the head, and two resting on the ‘ground’ to support the body. Keep the lines fluid and curved. -
Refine the pose:
Position the two front tentacles so they appear to be holding the book covers. You only need to draw simple rounded shapes for the ‘hands’ gripping the edges. -
Draw facial features:
Inside the head shape, place two simple oval eyes relatively low on the face. Add small eyebrows above them for an expression of concentration. -
Add bubbles:
Sketch three or four circles of varying sizes floating upward to the right of the octopus to suggest an underwater setting.
Fixing Muddy Watercolors
If colors bleed into each other, let the paper dry completely. Then, gently lift the unwanted paint with a damp, clean brush and dab with a paper towel.
Step 2: Inking the outlines
-
Outline the main shapes:
Using a 03 waterproof fineliner, carefully trace over your pencil lines for the octopus’s head, tentacles, and the book. Keep your hand steady but allow for slight line variation to maintain a hand-drawn feel. -
Add texture lines:
Switch to a thinner 01 pen. Draw the horizontal lines across the underside of the tentacles to represent the suction cups or segments. These should curve with the shape of the limb. -
Ink the environment:
Outline the floating bubbles and draw a faint, broken horizon line behind the octopus to indicate the sandy ground. -
Erase pencil marks:
Wait until the ink is completely dry to avoid smudging. Gently rub a kneaded eraser over the entire drawing to lift the graphing lines.
Step 3: Watercolor application
-
Base coat for the octopus:
Mix a watery wash of red oxide or burnt sienna. Paint the entire head and upper side of the tentacles. I prefer to keep this wash quite pale initially. -
Paint the book:
While the octopus dries, use a cerulean blue or teal mixture to paint the cover of the book. Leave the pages unpainted or use a very diluted gray for shadow. -
Add shading:
Once the first layer is dry, use a slightly more concentrated red/brown mix. Add shadows under the ‘chin’ where the head meets the body and along the bottom edges of the tentacles to create volume. -
Texture the skin:
Using a small brush and the concentrated red mix, stipple small dots onto the top of the head and the upper parts of the tentacles to create a speckled skin texture. -
Paint the sand:
Mix yellow ochre with a touch of sepia. Paint a loose wash under the octopus for the sand. While wet, drop in a few pinpricks of darker brown for pebbles.
Add a Seaweed Border
Frame your octopus by drawing wavy seaweed stalks on the left or right page margin using green washes and loose ink lines to enhance the deep-sea vibe.
Step 4: Final Details
-
Color the bubbles:
Use a very faint wash of your blue paint to color the bottom half of the bubbles, leaving the top white for a transparent effect. -
Deepen contrasts:
Go back in with your 01 pen if any lines were washed out, or darken the eyes with black ink, leaving tiny white spots for glint. -
Optional highlights:
If you have a white gel pen, add tiny highlights to the domed head or the top of the dark book spine to make them look wet or shiny.
Close your sketchbook and let the paint fully set, knowing you’ve created a peaceful little reading companion.
Symmetrical Mandala Octopus

Capture the enigmatic beauty of the deep sea with this intricate octopus mandala drawn on rustic kraft paper. The warm brown tones of the paper perfectly complement the sepia ink work, creating a vintage, nautical aesthetic that feels both organic and structured.
Detailed Instructions
Materials
- Spiral-bound kraft paper sketchbook
- Pencil (HB or 2B)
- Eraser
- Compass
- Ruler
- Fine liner pens (sepia or dark brown, sizes 0.1, 0.3, and 0.5)
- White gel pen (optional for highlights)
Step 1: Setting the Structure
-
Establish the boundary:
Begin by finding the center of your page. Use your compass to draw a large circle that fills most of the page’s width, leaving about an inch of margin. -
Divide the circle:
Using a ruler, lightly draw vertical and horizontal diameter lines through the center point. Then, divide each quadrant in half again to create eight equal pie-slice sections. These guidelines are crucial for symmetry. -
Outline the body:
In the upper center section, sketch a bulbous oval shape for the octopus’s head (mantle). Just below this, sketch the area where the eyes and beak will sit.
Ink Smudge Rescue
If you smudge the ink, turn the mistake into a feature by stippling over it to create a ‘shadow’ or adding a new small bubble or coral shape to cover the accident.
Step 2: Drafting the Tentacles
-
Map the flow:
Lightly sketch the path for eight tentacles. Aim for a symmetrical arrangement where the limbs curl and spiral to fill the circular boundary found in step 1. Let the top two curve upward, the side ones outward, and the bottom ones downward to create a balanced composition. -
Thicken the limbs:
Flesh out the single lines into full tentacle shapes, tapering them as they reach their tips. Make sure the curves are smooth and fluid. -
Sketch circular motifs:
In the negative spaces between the tentacles, sketch four smaller circles near the outer edges (top left, top right, bottom left, bottom right) to serve as secondary mandala elements.
Step 3: Inking the Outline
-
Start the permanent lines:
Switch to your 0.5mm sepia fineliner. Carefully trace the main outline of the octopus’s head and the general shape of the tentacles. -
Define the eyes:
Draw the two large eyes prominently in the center. Give them a dark pupil but leave a small white highlight to make them look alive. -
Outer decorative border:
Ink the main outer circle. Instead of a solid line, create a pattern of small dots or tiny beads along the edge to soften the border.
Gold Leaf Accent
Apply tiny touches of liquid gold leaf or metallic gold ink to the center of the eyes and the mandala circles to give the artwork a luxurious, illuminated look.
Step 4: Detailing and Patterning
-
Head patterns:
Using the 0.3mm pen, fill the octopus’s head with a floral or paisley-inspired doodle pattern. I like to start with a central flower shape and radiate outwards. -
Drawing suckers:
Along the underside of each tentacle, draw two rows of small circles to represent suckers. Start larger near the body and make them tiny as you reach the tips. -
Stippling texture:
Switch to the 0.1mm pen to add shading. Use stippling (tiny dots) along the edges of the tentacles and head to create roundness and depth. -
Adding texture to tentacles:
Draw faint, curved lines across the top surface of the tentacles to suggest skin texture and movement. -
Refining the secondary circles:
Return to the four small circles in the background. Fill them with concentric patterns—dots within rings or tiny radiating lines—turning them into mini-mandalas. -
Botanical accents:
Draw simple leaf or starburst shapes situated at the very top, bottom, left, and right cardinal points of the large circle, connecting the design to the outer edge.
Step 5: Finishing Touches
-
Erase pencil marks:
Wait until the ink is completely dry to avoid smudging. Gently erase all the pencil guidelines and structural sketches. -
Deepen the shadows:
Take your 0.5mm pen and darken the deepest crevices where the tentacles overlap to make the centerpiece pop. -
Optional highlights:
If you have a white gel pen, add tiny dots to the center of the suckers or the highest point of the head for a bit of contrast against the brown paper.
Enjoy the meditative process of filling in the intricate details of your marine masterpiece
Octopus Triptych Tentacle Stretch
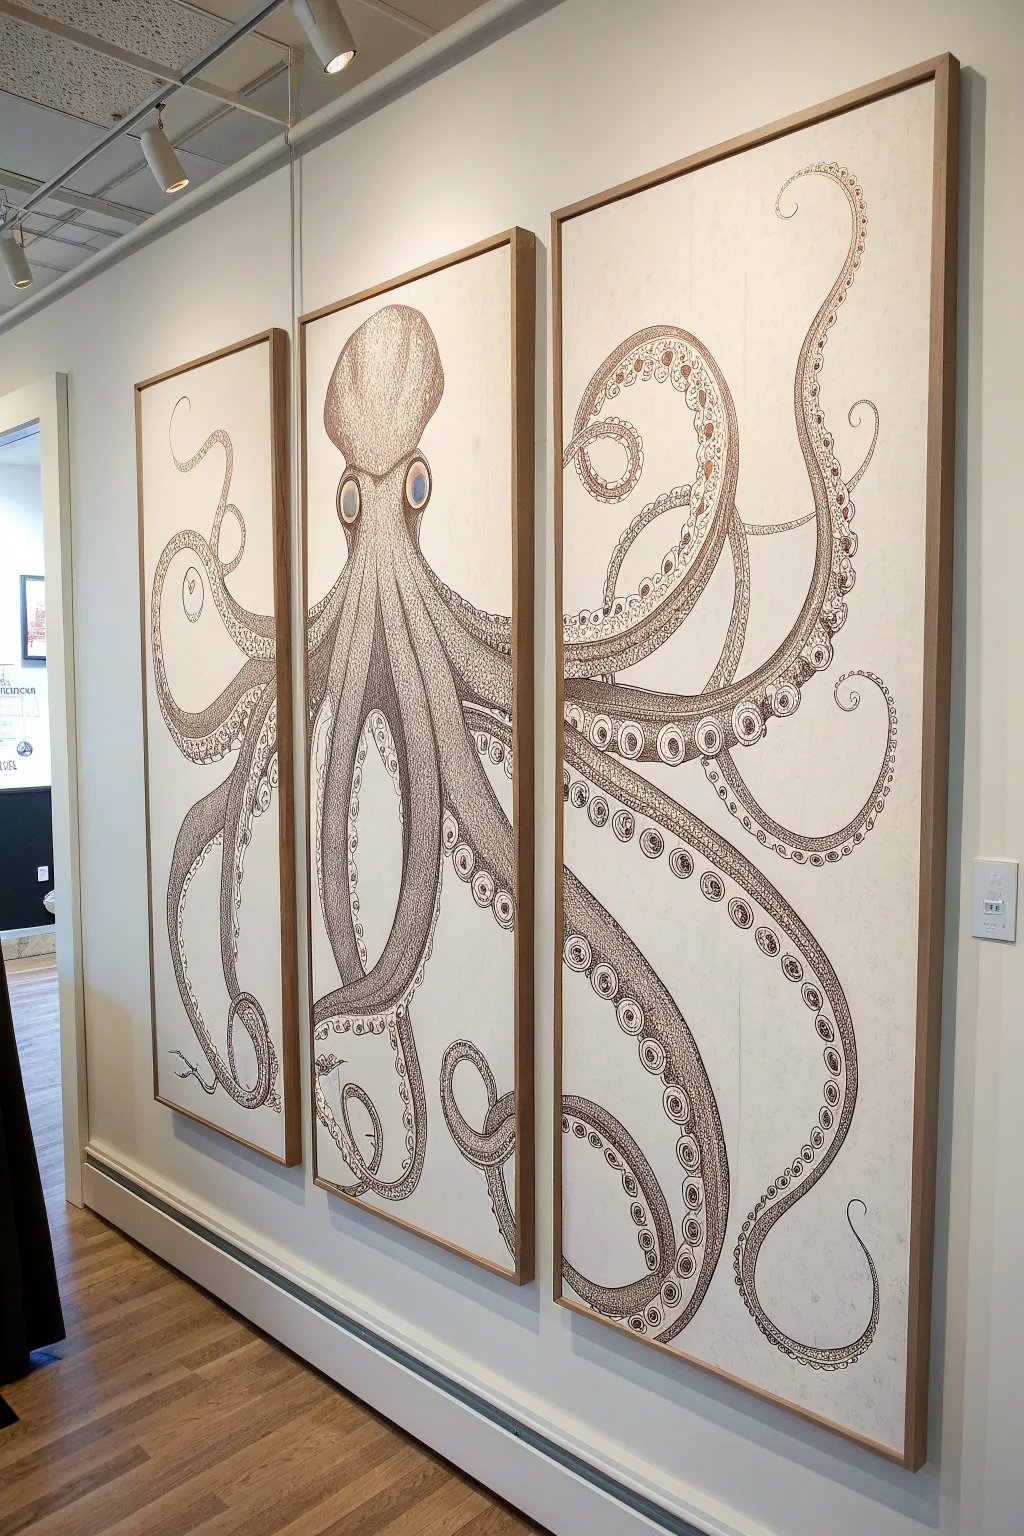
Transform a large blank wall into a sophisticated gallery display with this impressive three-panel octopus illustration. Using fine-point pens and a stippling technique, you’ll create a cohesive, vintage-style scientific drawing that seamlessly stretches across three separate canvases.
Step-by-Step
Materials
- 3 large vertical canvases (e.g., 24×48 inches) or birch wood panels
- Gesso primer (off-white or cream tint)
- Wide flat brush or foam roller
- Pencil (HB or lighter) and large eraser
- Archival ink artist pens (Black and Sepia/Dark Brown) in various nib sizes (0.3mm to 1.0mm)
- Ruler or yardstick
- Digital projector (optional but recommended for scale)
- Reference image of an octopus
- 3 gallery-style floating frames (light wood finish)
- Acrylic matte varnish spray
Step 1: Preparation and Layout
-
Prime the Surface:
Begin by coating all three canvases with a tinted gesso. Mix a tiny drop of yellow ochre or raw sienna into white gesso to achieve that vintage, aged-paper cream color. Apply two coats with a foam roller for a smooth, paper-like texture, sanding lightly between coats if necessary. -
Arrange the Triptych:
Lay your three dry canvases on the floor side-by-side, leaving a 1-2 inch gap between them to simulate how they will hang on the wall. This gap is crucial; you will draw ‘through’ the gap so the image aligns perfectly when hung. -
Project or Sketch the Outline:
If you have a projector, cast your octopus reference image across the entire three-panel setup. Trace the main body (mantle) on the center panel and let the tentacles flow dramatically outward onto the side panels. If sketching freehand, I find it helpful to use a grid method to keep proportions correct across the breaks. -
Refine the Pencil Lines:
Strengthen your initial sketch with clean, confident pencil lines. define the bulbous head, the large eyes on the center panel, and the twisting curves of the tentacles. Pay special attention to where the arms enter and exit each frame, ensuring the curves look continuous to the eye.
Fixing Alignment Issues
If a tentacle doesn’t line up perfectly after hanging, use a small piece of painter’s tape to mark the wall where the line *should* correspond, then adjust your hanging hardware up or down slightly.
Step 2: Inking the Outline
-
Establish the Main Contours:
Using a thicker sepia or dark brown pen (around 0.8mm or 1.0mm), trace over your final pencil lines. Start with the head and main body contours. Keep your hand steady, but allow for slight organic variations in line weight to mimic a natural biological specimen. -
Define the Suckers:
Work through the underside of the tentacles to draw the rows of suction cups. These are essentially ovals and circles that get progressively smaller toward the tentacle tips. Group them in pairs or distinct rows depending on your specific octopus species reference. -
Draft the Eyes:
Carefully outline the eyes on the center panel. These are the focal point, so take your time getting the shape right. Leave a small, distinctive white circle within the pupil area to represent a highlight or reflection.
Add Subtle Color
For a ‘level up,’ use a watercolor wash in very vivid, diluted teal or rust orange over specific areas like the suction cups before sealing. This adds a pop of biological illustration realism.
Step 3: Shading and texture
-
Start the Stippling Process:
Switch to a finer pen (0.3mm or 0.5mm). Begin shading the darker areas of the octopus—usually the underside of the arms and the shadows beneath the head—using stippling (thousands of tiny dots). The closer the dots, the darker the shadow. -
Add Linear Texture:
On the smoother upper surfaces of the tentacles and head, use short, directional hatching lines that follow the curve of the body. This helps distinctively round out the form, making the octopus look three-dimensional rather than flat. -
Detail the Suckers:
Add depth to each individual suction cup. Use a C-shaped curve of stippling on the inner side of each ring to create a cup-like depression. This repetitive task takes time, but it builds incredible realism. -
Layer the Tones:
Go back over your stippled and hatched areas. Layer more ink dots over the deepest shadows, particularly where tentacles overlap one another. I like to step back every ten minutes to ensure the contrast is balanced across all three panels. -
Refine the Eyes:
Fill in the pupils with dense, dark brown ink, being careful to preserve that white highlight. Use lighter stippling on the iris to give it a glassy, dimensional look.
Step 4: Finishing Touches
-
Clean Up:
Once you are certain the ink is completely dry (give it at least an hour), gently erase all remaining pencil marks. Use a kneaded eraser to avoid damaging the painted surface. -
Seal the Artwork:
Take the panels outside or to a well-ventilated area. Spray them evenly with a matte archival varnish. This protects the ink from fading and ensures the faux-paper background stays clean. -
Frame and Hang:
Install the canvases into simple light wood floating frames. When hanging them, remember to recreate the specific gap distance you used during the sketching phase so the tentacles align perfectly visually.
Step back and admire how the negative space between the frames makes your sprawling octopus feel even more alive and dynamic on the wall
Recycled Mosaic Octopus Collage
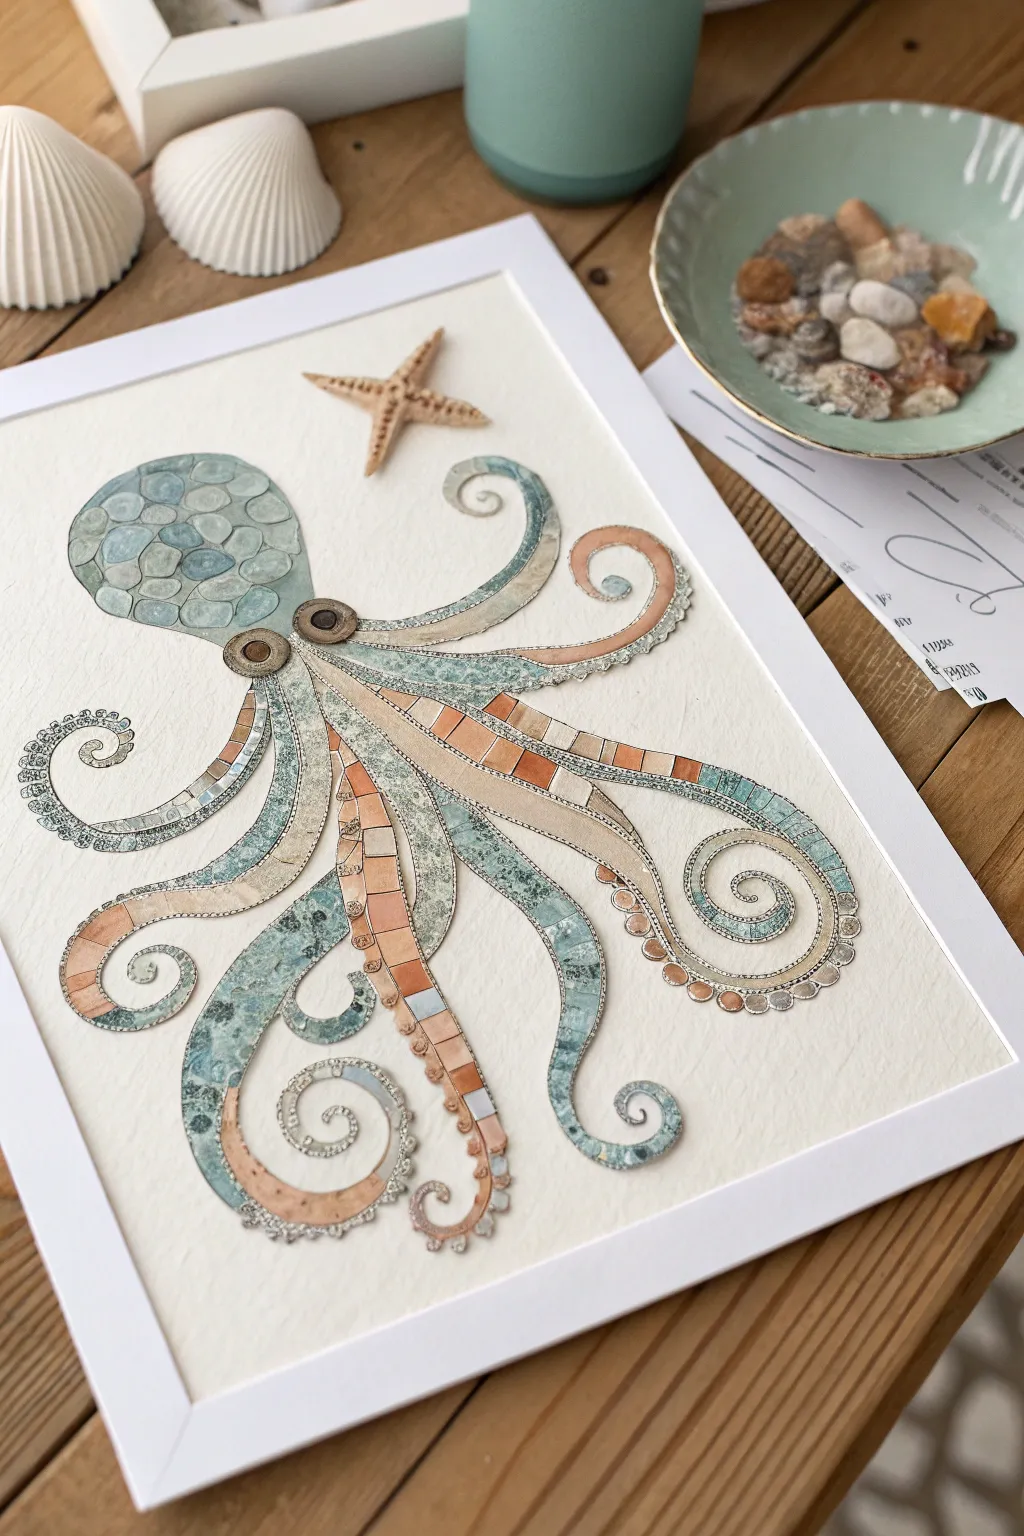
This stunning mixed-media collage captures the beauty of sea glass and ceramic tiles without the weight, using clever paper techniques and texturing. The design features swirling tentacles composed of intricate mosaic patterns in soothing teals, soft corals, and sandy beiges, all crowned with a genuine starfish for a 3D effect.
Detailed Instructions
Materials
- Heavyweight watercolor paper or cardstock (11×14 inches)
- Patterned scrapbooking paper (shades of teal, blue, beige, and rust)
- Textured specialty paper (tweed or linen finish)
- Sharp detail scissors or craft knife
- Pencil and eraser
- Sea glass paint or transparent watercolor glazes
- Fine-point black ink pen (archival)
- White gel pen
- Metallic silver or pewter paint pen
- Mod Podge or craft glue
- Small dried starfish
- Two vintage buttons or dark wooden beads (for eyes)
- White frame
Step 1: Preparation and Sketching
-
Draft the outline:
Begin by lightly sketching the octopus shape onto your heavyweight watercolor paper. Start with a bulbous head (mantle) at the top left and let eight wavy tentacles flow outward and downward, ensuring they curl elegantly at the ends. -
Define the sections:
dividing the head into small, irregular rounded shapes to mimic sea glass pebbles. For the tentacles, draw a central dividing line down each one to separate the ‘sucker’ side from the smooth skin side. -
Select your palette:
Gather your patterned and textured papers. Sort them into three groups: cool tones (teals/blues) for the skin, warm tones (peach/beige) for the undersides, and neutral textures for the head mosaic.
Sticky Situation?
If your paper warps from the glue, place the artwork under a heavy book between two sheets of wax paper overnight. This flattens the fibers without crushing your 3D button eyes.
Step 2: Creating the Mosaic Head
-
Cut the ‘stones’:
Using your cool-toned paper scraps, cut out small, rounded pebble shapes that match the sections you sketched on the octopus’s head. Vary the sizes slightly for a natural look. -
Apply the first layer:
Glue these paper pebbles onto the head area, leaving tiny gaps between them to represent the grout lines found in mosaics. -
Add transparency:
To achieve that sea glass look, lightly glaze over specific paper pebbles with a diluted teal watercolor or sea glass paint. This unifies the different paper patterns. -
Highlight the pebbles:
Once dry, use a white gel pen to add small curved reflection lines on the top right of each ‘stone’ to make them look dimensional and glossy.
Dimension Tip
For extra pop, use foam adhesive squares under a few of the tentacle tips or the main head section. This lifts the paper slightly off the background, mimicking real tile thickness.
Step 3: Constructing the Tentacles
-
Cut tentacle strips:
For the upper ‘skin’ of the tentacles, cut long, tapering curved strips from your textured teal and blue papers. I find it easiest to trace the sketch onto tracing paper first to use as a cutting template. -
Create the underside segments:
Cut small rectangular or trapezoidal pieces from the peach and beige papers. These will form the segmented, sucker-lined underside of the arms. -
Assemble the arms:
Glue the long teal strips in place first. Then, carefully glue the peach segments side-by-side along the corresponding curves, following the flow of your sketch. -
Detail the suckers:
On the wider parts of the peach segments, sketch small circles using your fine-point black pen. Add a tiny dot in the center of each circle to define the suckers. -
Outline for definition:
Go over the outer edges of the entire octopus with the fine-point black pen. Use a specialized ‘broken line’ or stippling technique in some areas to suggest a rough, organic texture.
Step 4: Embellishing and Finishing
-
Add metallic trims:
Using the silver or pewter paint pen, carefully draw a thin border between the teal skin and the peach underside on every tentacle. Add tiny decorative dots of silver along the very tips of the curls. -
Attach the eyes:
Glue the two vintage buttons or dark wooden beads securely at the base of the head where the tentacles converge. These add an immediate focal point and personality. -
Create texture depth:
Use a very dry brush with a tiny amount of white acrylic paint to scumble over the textured teal paper, enhancing the ‘woven’ or stony appearance. -
Mount the starfish:
Apply a strong craft glue to the back of your small dried starfish and position it in the upper right quadrant of the paper, balancing the composition. -
Clean up edges:
Erase any visible pencil lines that weren’t covered by paper or ink. Check for any loose paper edges and secure them with a dab of glue. -
Frame the artwork:
Place the finished collage into a white frame. If the starfish is too thick for glass, display the piece in a shadow box or simply remove the glass for a tactile displays.
Hang your beautiful seascape collage and enjoy the calming ocean vibes it brings to your space
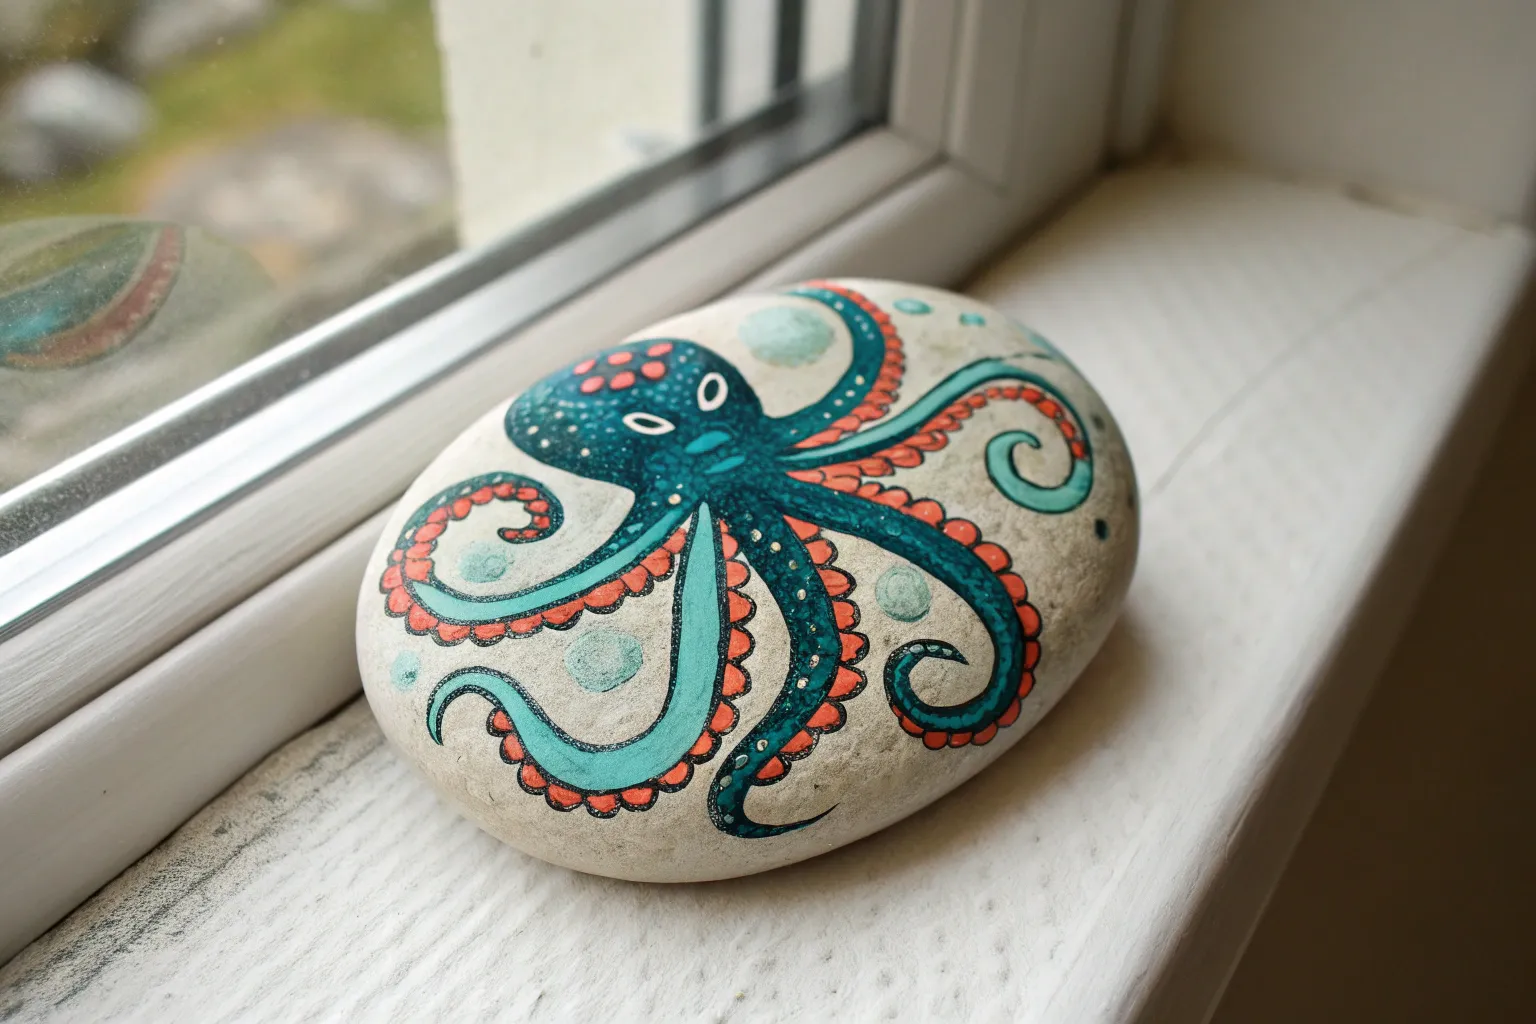
Painted Rock Octopus Mini
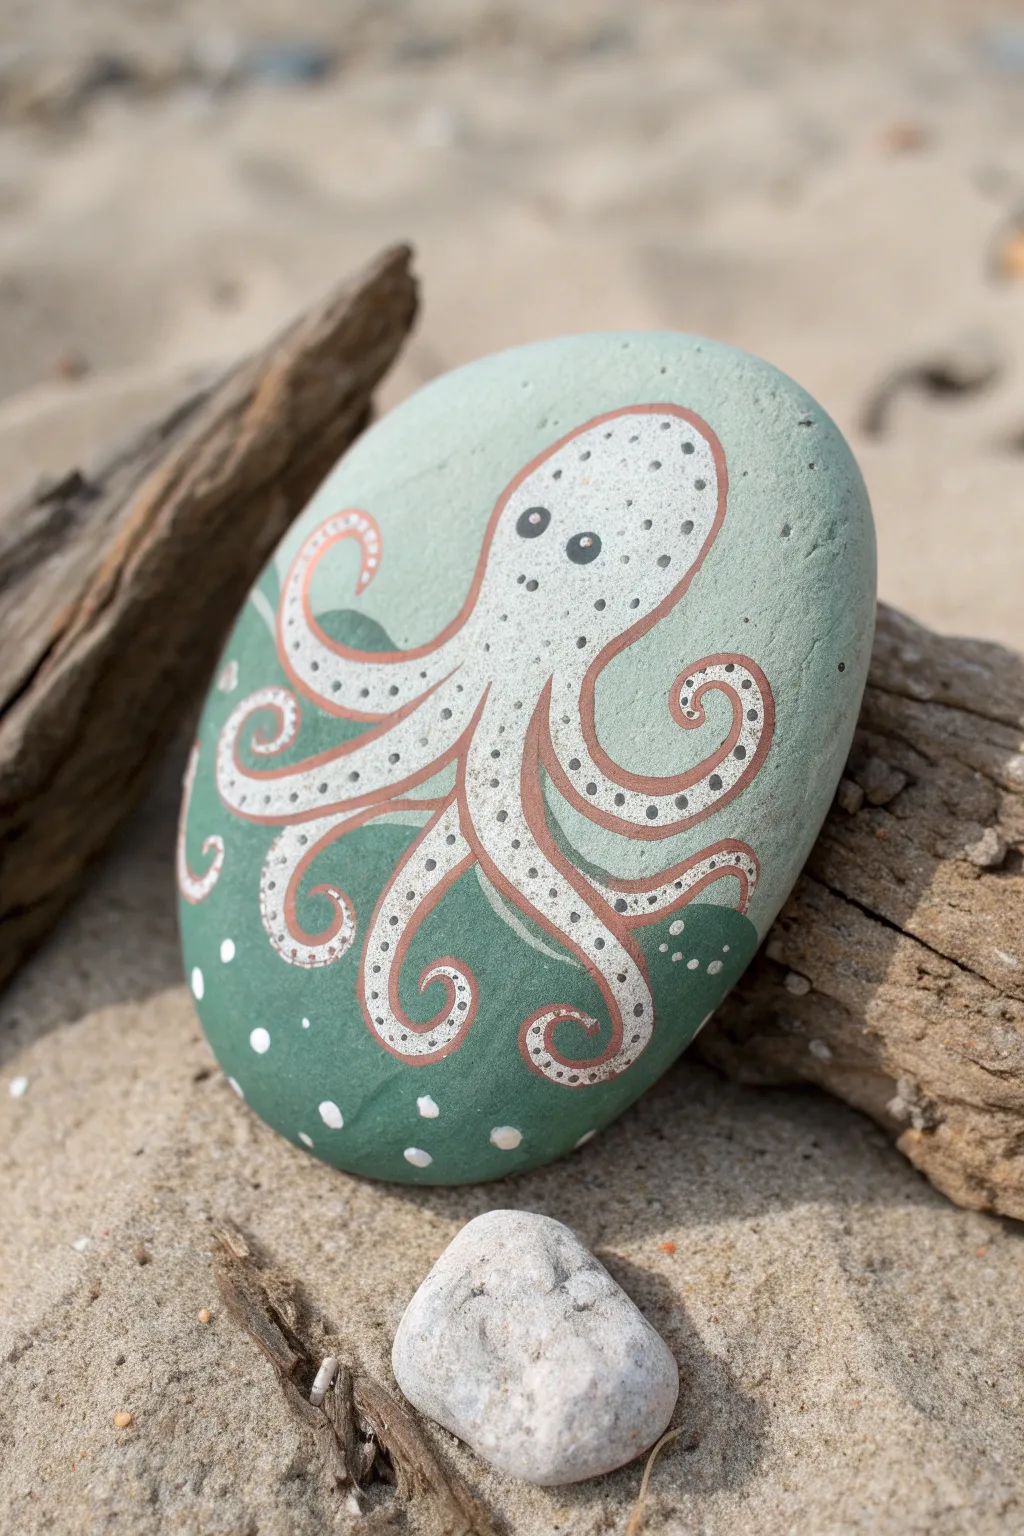
Capture the whimsy of tide pools with this elegantly simple rock painting project. Using a soothing palette of seafoam greens and crisp white, you’ll create a stylized cephalopod that fits perfectly in the palm of your hand.
Step-by-Step Tutorial
Materials
- Smooth, oval-shaped river rock (cleaned and dried)
- Acrylic paint: Mint Green (light), Teal or Forest Green (dark), Titanium White, Copper or Metallic Brown
- Fine detail brushes (sizes 0 and 00)
- Medium flat brush (for base coating)
- Dotting tool or toothpick
- Pencil (HB or lighter)
- Matte or satin varnish (optional spray or brush-on)
Step 1: Setting the Scene
-
Clean Your Canvas:
Begin by scrubbing your rock with warm soapy water and letting it dry completely. A clean surface ensures the paint adheres properly and doesn’t flake off later. -
Base Coat Application:
Using your medium flat brush, mix the Mint Green with a tiny touch of White to create a very pale, chalky seafoam color. Paint the entire top surface of the stone. You might need two coats for full opacity, letting each dry in between. -
Create the Depth:
Once the pale base is bone dry, mix your darker Teal or Forest Green with a little of the base color to harmonize them. Paint a curved, wave-like shape across the bottom half of the rock. -
Soft Gradient:
Use a darker version of that teal to paint a second, smaller wave shape nestled near the bottom right edge. This layering mimics the depth of ocean water.
Paint Consistency
For smooth outlines, mix your acrylic paint with a drop of water or flow medium until it has the consistency of ink. This prevents clumping.
Step 2: Drafting the Design
-
Sketch the Head:
With a light pencil touch, draw a smooth, rounded bulb shape near the top right of the stone for the octopus’s mantle (head). Keep the lines faint so they don’t show through the lighter paint. -
Flowing Tentacles:
Sketch eight curving arms radiating from the base of the head. Spiraling the tips into little curls adds a classic artistic feel. Make sure the arms overlap the boundary between the light and dark background zones. -
Painting the Body White:
Using a size 0 brush and Titanium White, carefully fill in the entire octopus shape. This will likely require two thin coats to cover the dark green background sections cleanly.
Step 3: Adding Definition
-
Outline Work:
Load a size 00 detail brush with thinned Copper or Metallic Brown paint. I find that adding a tiny drop of water helps the paint flow smoothly for long lines. Outline the entire white shape of the octopus. -
Inner Details:
Use the same copper color to draw separation lines where the tentacles meet the body, ensuring each arm looks distinct. -
The Eyes:
Paint two small circles for eyes using a dark grey or black. Place them fairly wide apart on the head fto give it a cute, curious expression. -
Eye Highlights:
Dip the very tip of a toothpick into white paint and add a tiny sparkle dot to each eye once the black is dry.
Glow Up
Use glow-in-the-dark acrylic paint for the white bubbles and the octopus body to make your creature illuminate when the lights go out.
Step 4: Texture and Stippling
-
Body Stippling:
Dip a toothpick or small dotting tool into your dark grey or black paint. Add a cluster of tiny dots on top of the octopus head, concentrating them like freckles. -
Tentacle Suckers:
Switch back to your Copper/Brown paint and the dotting tool. Add a row of small dots running down the center of each white tentacle to represent the suckers. -
Sea Bubbles:
Using the handle end of a paintbrush or a larger dotting tool, dip into white paint and place scattered dots in the dark green water sections to create bubbles and interest. -
Tiny Bubbles:
Use a smaller tool to add tinier white speckles around the large bubbles for variety. -
Final Protection:
Allow the stone to cure for at least 24 hours. Once fully dry, apply a coat of matte or satin varnish to protect your miniature masterpiece from the elements.
Place your finished stone in a garden pot or on a sunny windowsill where its seaside charm can shine.


Have a question or want to share your own experience? I'd love to hear from you in the comments below!