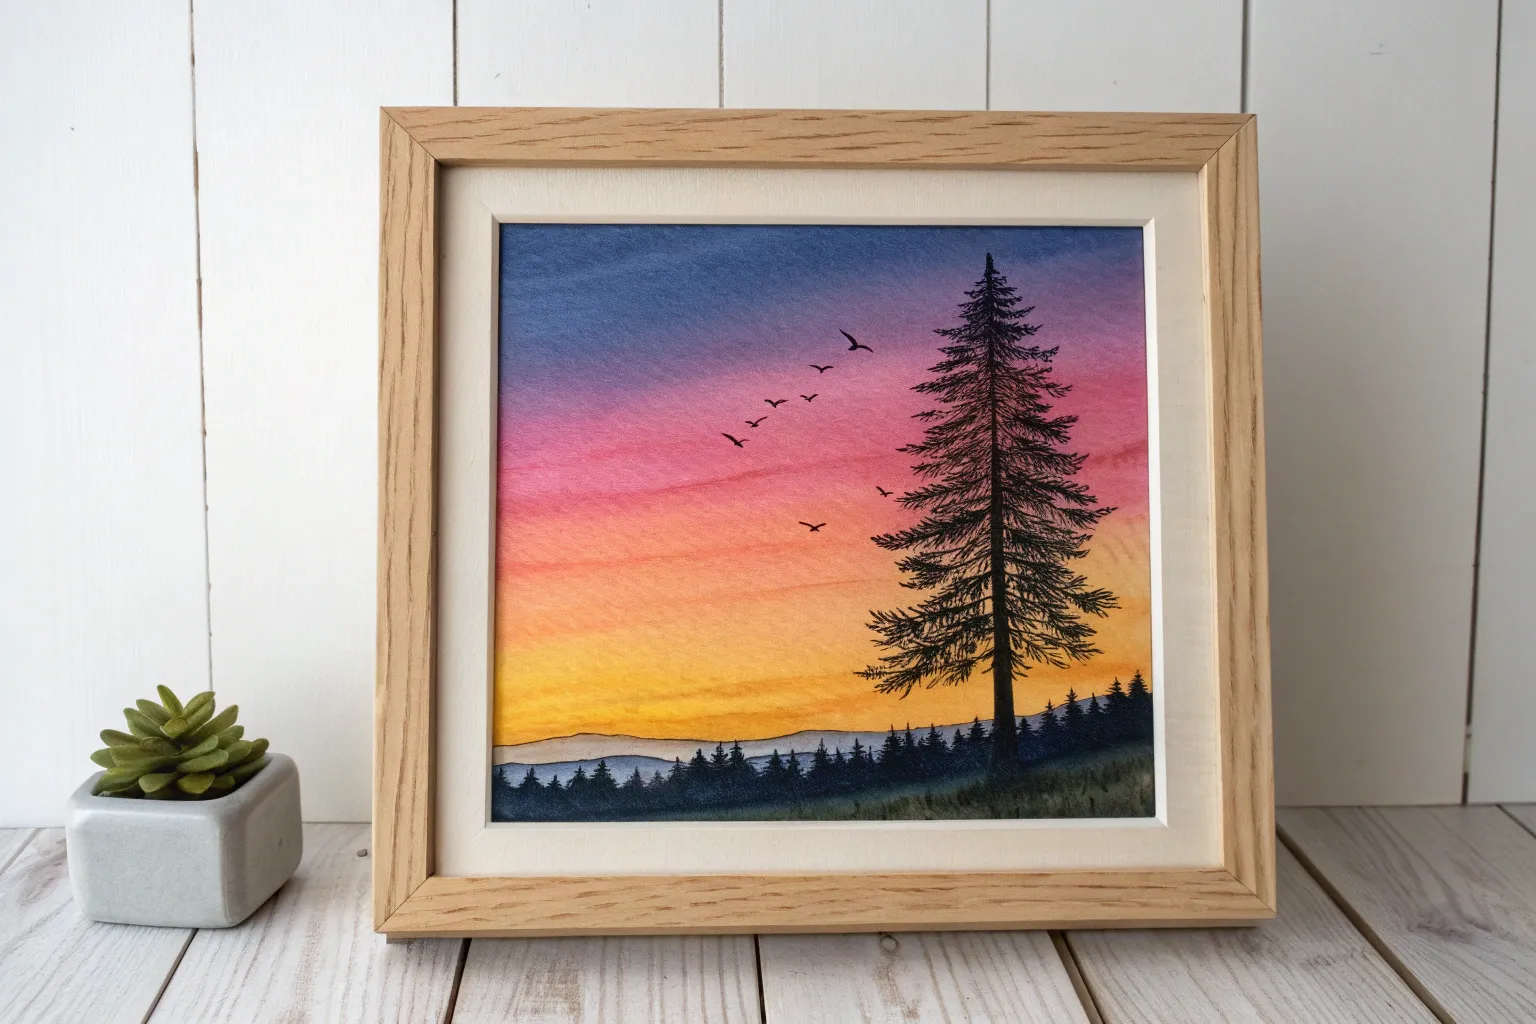
There’s something so satisfying about laying down a juicy sunset gradient and then popping a bold black silhouette right on top. These ideas are all about strong shapes, simple details, and that glowing end-of-day drama you can paint in one cozy session.
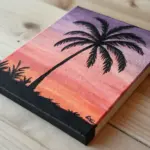
Classic Palm Tree Beach Silhouette
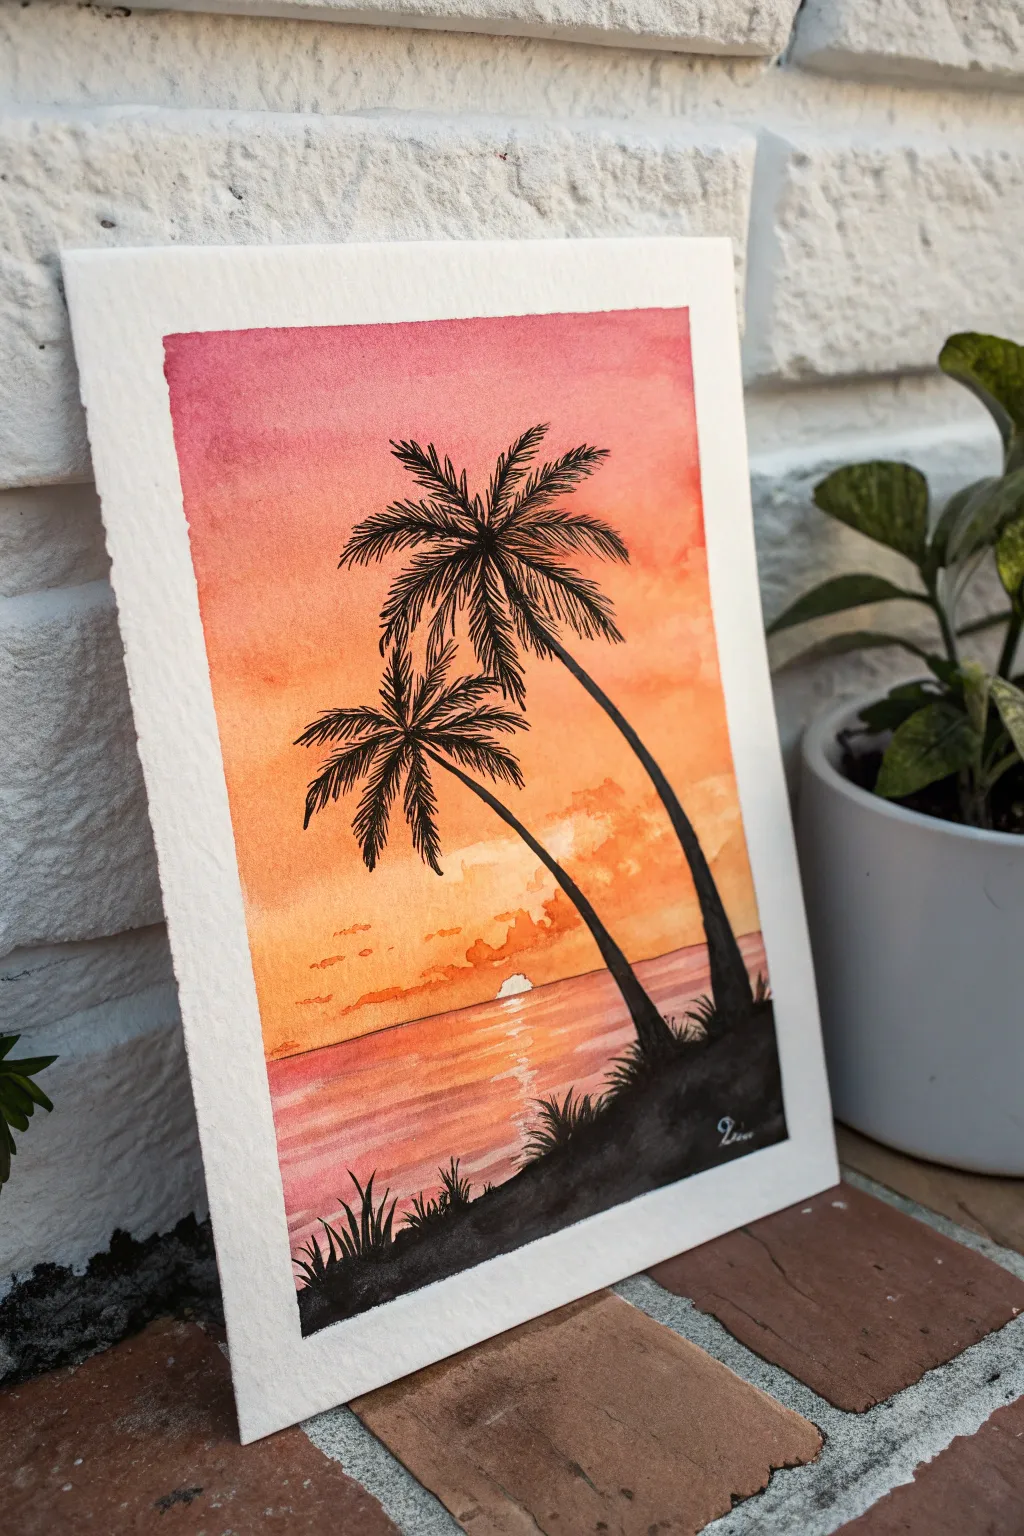
Capture the warmth of a tropical evening with this vibrant watercolor and ink silhouette painting. The smooth gradient of pinks and oranges sets a stunning backdrop for the crisp, stark black palm trees swaying in the breeze.
Detailed Instructions
Materials
- Cold-press watercolor paper (300 gsm)
- Painter’s tape or masking tape
- Watercolors (Alizarin Crimson, Cadmium Orange, Cadmium Yellow, maybe a touch of Purple)
- Black India ink or black gouache paint
- Large flat brush or wash brush
- Fine detail brush (size 0 or 1)
- Clean water jar and paper towels
- Pencil (optional)
Step 1: Setting the Scene
-
Tape the edges:
Begin by securing your watercolor paper to a board or table using painter’s tape. Create a crisp border by pressing the tape down firmly along all four edges; this also prevents the paper from buckling when wet. -
Wet the paper:
With a large clean brush, apply a generous even coat of clean water across the entire upper two-thirds of the paper where the sky will be. The paper should glisten but not have standing puddles.
Step 2: Painting the Sky
-
Starting the gradient:
Load your brush with a watery mix of Alizarin Crimson or a cool pink. Paint a horizontal band across the top of the paper, letting the wet surface help the pigment spread downward slightly. -
Transition to orange:
Clean your brush quickly and pick up a vibrant orange. Apply this directly below the pink, slightly overlapping the two colors so they bleed together softly. Tilt the paper if needed to help them merge. -
Adding the glow:
Near the horizon line (about a third up from the bottom), switch to a bright yellow. Blend this up into the orange to create the brightest part of the sunset. -
Creating cloud textures:
While the sky is still damp, dab in a slightly more concentrated orange or reddish-orange near the horizon to suggest fluffy, distant clouds catching the light. Don’t overwork this; let the water do the work. -
Defining the horizon:
Leave a tiny sliver of white paper unpainted in the center of the horizon line to represent the setting sun peaking through. -
Dry completely:
This is crucial: Let the sky dry completely before moving on. The paper must be bone dry to prevent the horizon line from bleeding.
Tape Removal Tip
To prevent tearing your watercolor paper, heat the painter’s tape gently with a hair dryer for a few seconds before peeling it off. This softens the adhesive.
Step 3: The Water and Horizon
-
Painting the sea:
Re-wet the bottom section of the paper below your horizon line. Mirror the sky colors, but in reverse order: start with the pinks at the top (horizon) and fade into softer oranges towards the bottom. -
Water ripples:
While the water area is wet, use a slightly drier brush with darker pink or purple to paint horizontal streaks. These suggest gentle waves reflecting the sunset. -
Sun reflection:
Use a dry brush technique or lift color with a thirsty brush directly below the white sun shape to create a vertical path of glistening light on the water. -
Second drying phase:
Allow the entire painting to dry fully again. If the paper feels cool to the touch, it is still wet inside.
Level Up: Starry Night
After the sky is dry but before painting the trees, use an old toothbrush to flick tiny specks of white gouache into the upper pink section for faint evening stars.
Step 4: The Silhouette
-
Sketching placement:
Lightly sketch the curve of the shoreline and the main trunk lines of the palm trees with a pencil. Keep the lines faint so they don’t show through the final ink. -
Blocking the ground:
Using black India ink or gouache, fill in the bottom right corner to form the landmass. Make the edge jagged and uneven to simulate grass and earth texture. -
Grass details:
With your smallest brush, flick upward quickly from the black ground mass to create sharp, thin blades of grass. -
Tree trunks:
Paint the trunks of the palm trees. They should be thicker at the base and taper as they curve upward. I find it helpful to use a single, confident stroke for the smoothest curve. -
Palm fronds structure:
For the palm leaves, start by painting the central spine of each frond radiating from the top of the trunk. Imagine a firework exploding shape. -
Adding leaves:
Using quick, short strokes, pull the brush away from the spine of each frond to create the individual leaves. Vary the direction slightly to look natural and windswept. -
Finishing touches:
Add a few small birds in the distance using tiny ‘v’ or tick shapes with the tip of your detailed brush. -
Remove tape:
Once the black ink is totally dry, slowly peel away the painter’s tape at a 45-degree angle to reveal your clean, crisp borders.
Frame your tropical masterpiece and enjoy the warmth it brings to your space


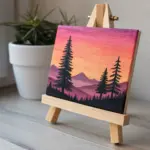

Mountain Range at Dusk
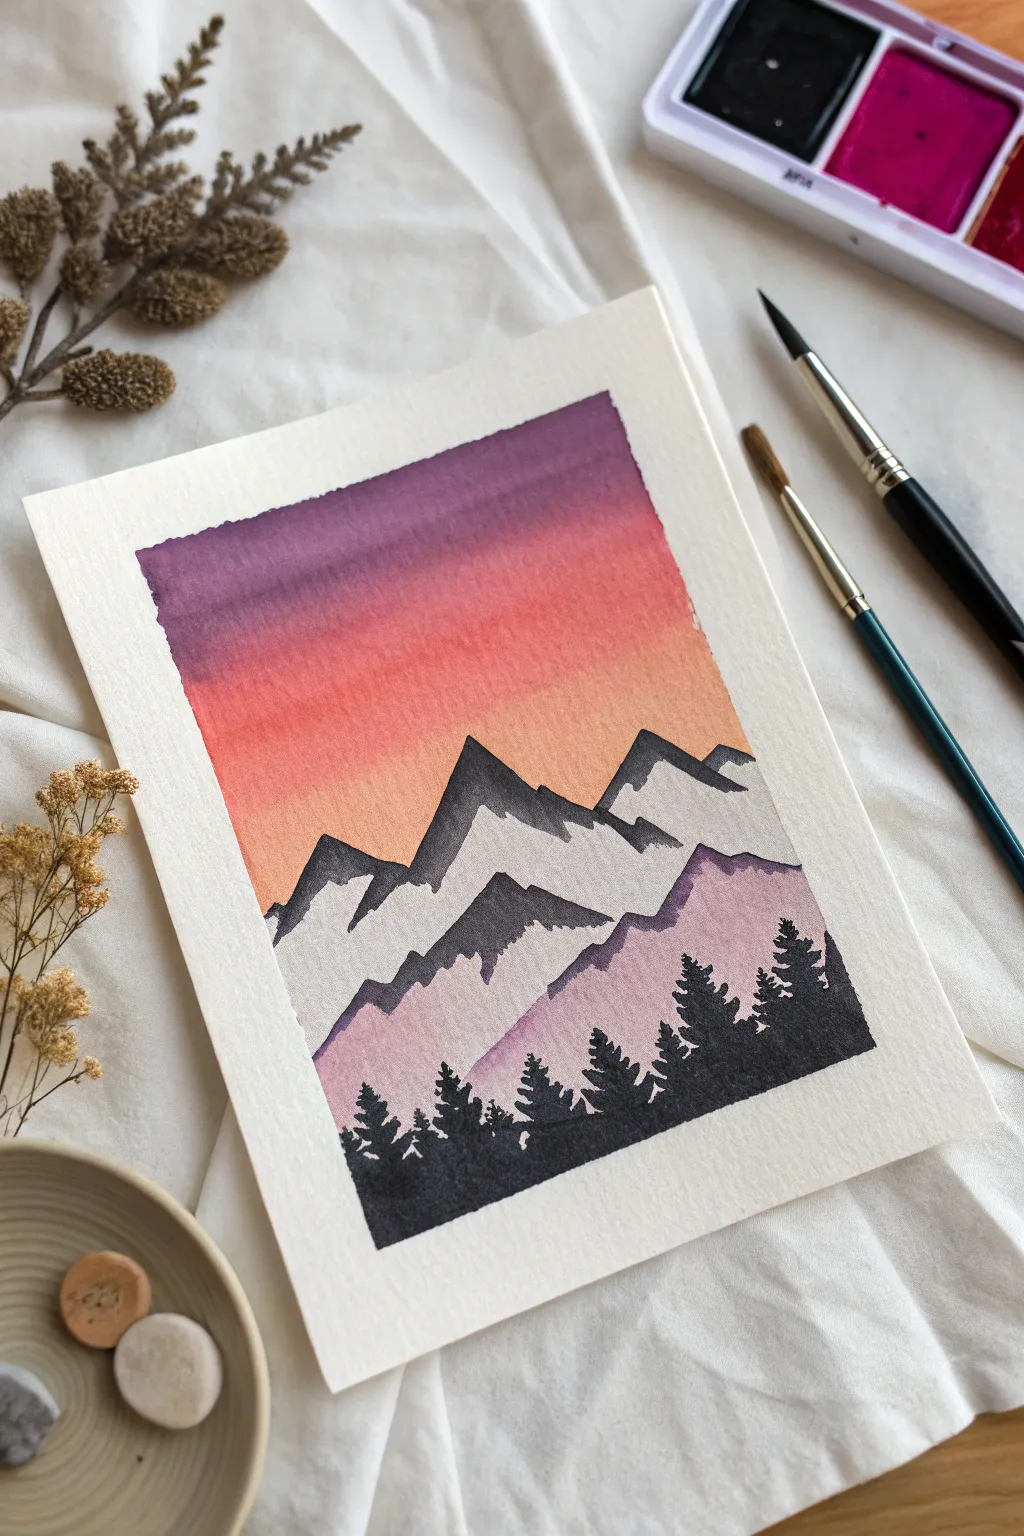
Capture the serene transition from day to night with this layered mountain watercolour landscape. Using wet-on-wet blending for the sky and crisp silhouettes for the foreground, you’ll create depth that draws the eye straight into a peaceful dusk scene.
Step-by-Step
Materials
- Cold press watercolor paper (300 gsm recommended)
- Masking tape
- Watercolor paints (Purple, Orange, Crimson, Payne’s Grey, Black)
- Flat wash brush (approx. 1 inch)
- Medium round brush (size 6-8)
- Small liner or round brush (size 0-2)
- Two jars of water (one clean, one dirty)
- Paper towels
- Pencil (HB or H)
- Eraser
Step 1: Preparation & Sketching
-
Tape the edges:
Secure your cold press paper to a flat, hard surface using masking tape. Aim for a neat, even border, as this will create the crisp white frame seen in the finished piece. -
Sketch the mountain layers:
Lightly sketch the outlines of your mountain ranges. Draw a high range in the middle and a lower, overlapping range below it. Keep your pencil marks faint so they don’t show through later. -
Define the snowline:
Within the top mountain range, sketch zigzagging lines to demarcate where the snowcaps will end and the rocky shadows begin. This ‘white space’ is crucial.
Bleeding Colors?
If your sky colors are bleeding too uncontrollably into the mountains, your paper is too wet. Wait a minute for the sheen to dull, or blot the mountain area with a dry tissue.
Step 2: Painting the Sunset Sky
-
Pre-wet the sky area:
Using clean water and your flat brush, wet the entire sky area down to the top edge of the highest mountains. The paper should be glisten, but not hold puddles. -
Apply the purple gradient:
Load your brush with a deep purple mix. Apply it across the very top of the sky, letting the wet paper help the pigment spread downwards slightly. -
Transition to warm tones:
Rinse your brush and pick up a vibrant orange or coral color. Paint this below the purple, allowing the two colors to meet and bleed together naturally while the paper is still damp. -
Fade to horizon:
As you move closer to the mountain peaks, dilute the orange with a little water to create a soft, glowing horizon line. Let this sky layer dry completely before moving on.
Pro Tip: Atmospheric Depth
Make your mountains lighter as they get further away. The foreground trees should be pitch black, the middle mountains soft purple, and the distant peaks faint grey.
Step 3: Creating the Mountains
-
Paint the top mountain shadows:
Mix a diluted grey color (Payne’s Grey works well). Using a round brush, paint the ‘shadow’ side of the highest mountains, carefully painting around the white areas you sketched earlier to preserve the snowy peaks. -
Add texture to the rock:
While the grey is still wet, you can drop in slightly darker pigment near the ridges to create contrast and dimensions within the rock face. -
Paint the middle range base:
For the lower mountain range, mix a soft lavender or diluted purple-grey. Paint this entire section, overlapping the bottom of the grey mountains slightly if the first layer is dry. -
Emphasize the ridge line:
Add a strip of slightly darker purple along the top edge of this lower range to separate it visually from the white snow of the range behind it. Let all mountain layers dry thoroughly.
Step 4: Foreground Silhouettes
-
Mix a dense black:
Prepare a very concentrated black or dark Payne’s Grey. Unlike the previous layers, this paint should have very little water so it remains opaque. -
Establish the tree line:
Paint a solid, undulating block of black at the very bottom of the page to act as the ground and base for your forest. -
Paint tree trunks:
Using your smallest brush, pull fine vertical lines upward from the black base. Vary the heights to make the forest look natural. -
Add pine branches:
Starting from the top of each trunk, use tiny tapping or stippling motions to create pine branches. Widen your strokes as you move down the trunk to create the classic conical tree shape. -
Refine the details:
Fill in any gaps near the bottom to make the forest feel dense, but keep the tops of the trees delicate and sharp against the pastel mountains. -
Final reveal:
Wait until the painting represents bone-dry paper. Carefully peel away the masking tape at a 45-degree angle to reveal your clean edges.
Now you have a tranquil mountain landscape perfect for a greeting card or wall art frame


Lake Reflection Mirror Scene
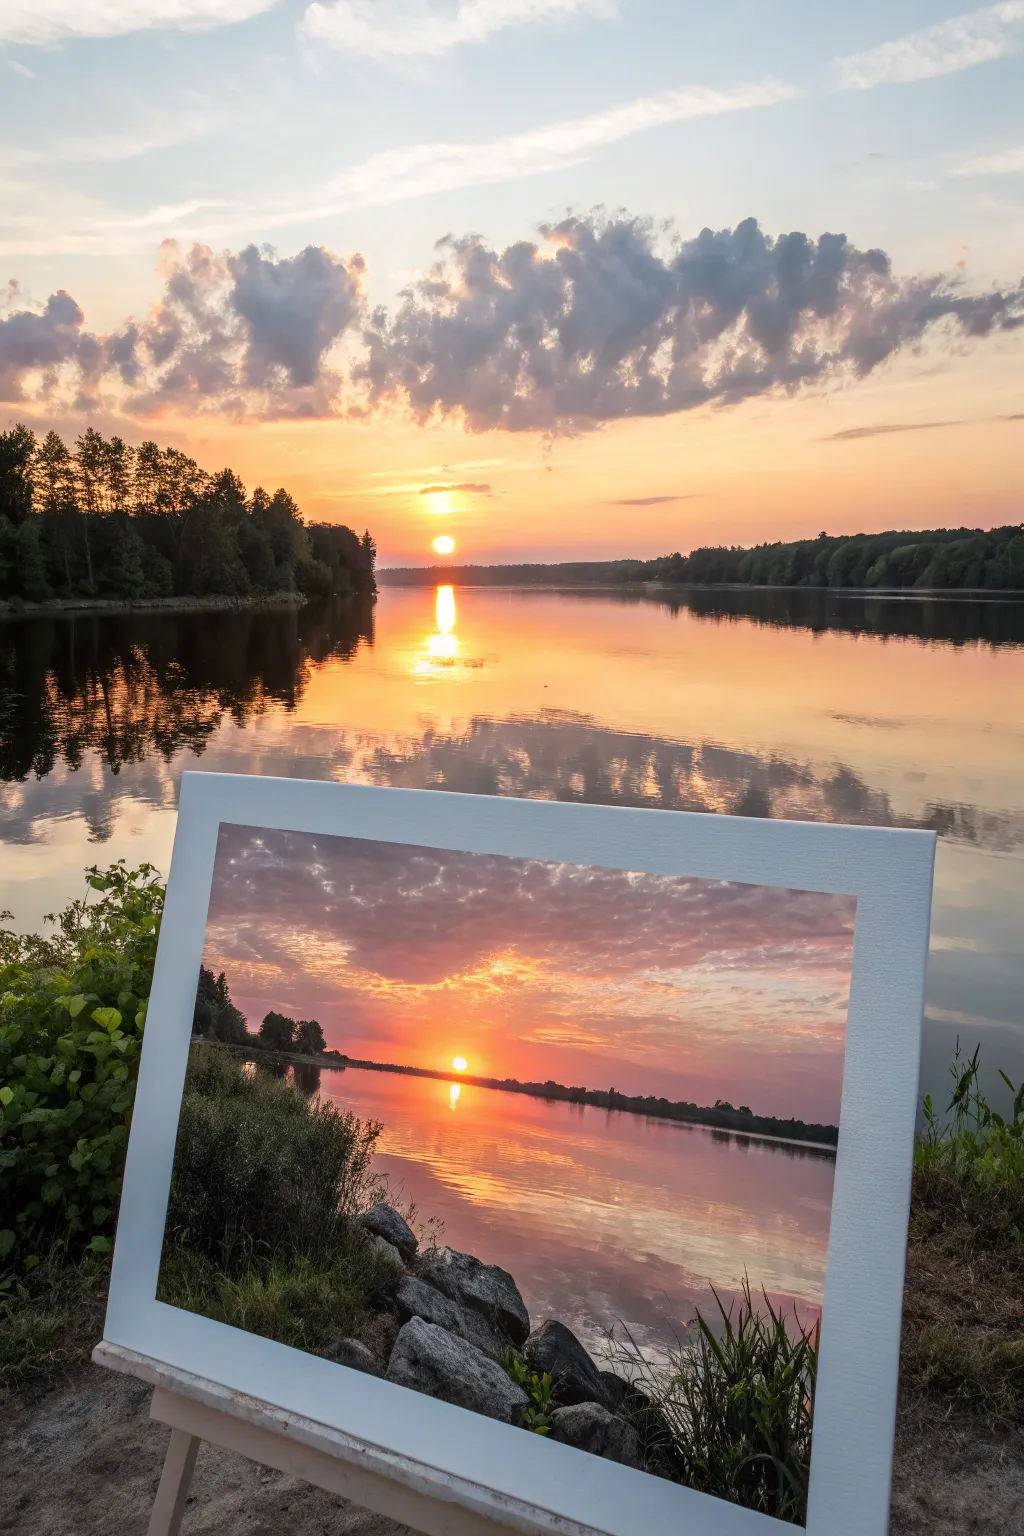
Capture the serene beauty of a lakeside sunset with this acrylic painting project that focuses on warm gradients and realistic water reflections. By framing a vibrant sky against dark silhouettes, you’ll create a stunning window into a peaceful evening moment.
Step-by-Step Guide
Materials
- Stretched canvas (16×20 inches or similar)
- Acrylic paints: Titanium White, Cadmium Yellow, Orange, Alizarin Crimson, Burnt Sienna, Payne’s Grey, Mars Black
- Large flat brush (1-2 inch) for blending
- Medium filbert brush
- Small round detail brush
- Palette knife (optional for texture)
- Water container and paper towels
- White or light grey frame (optional, for final display)
Step 1: Setting the Sky and Horizon
-
Establish the horizon line:
Measure about one-third of the way up from the bottom of your canvas. Lightly draw a straight horizontal line across the surface using a ruler or a steady hand to separate the sky from the water. -
Begin the sky gradient:
Mix Titanium White with a touch of Cadmium Yellow. Using a large flat brush, paint the area just above the horizon line where the sun will sit, keeping it bright and luminous. -
Add warmth upwards:
While the yellow is still wet, introduce a small amount of Orange onto your brush. Blend this into the yellow moving upward, creating a seamless transition into warmer tones. -
Deepen the upper sky:
Mix Alizarin Crimson with a hint of Payne’s Grey to create a dusky purple-grey. Paint the top third of the sky with this mixture, blending it down into the orange section to mimic evening clouds rolling in. -
Create cloud textures:
Switch to a medium filbert brush. Using the purple-grey mix and pure white, dab irregular, horizontal cloud shapes across the mid-to-upper sky. Keep the edges soft to suggest movement.
Wet-on-Wet Blending
Keep a misting spray bottle handy. A light spritz keeps acrylics wet longer, allowing you to blend that perfect sunset gradient without the paint drying too fast.
Step 2: Painting the Water Reflection
-
Mirror the sky colors:
Clean your large flat brush thoroughly. Recreate the sky gradient in reverse below the horizon line, starting with the purple-grey at the very bottom and moving up to orange and then yellow near the horizon. -
Add reflection distortion:
Before the water paint dries completely, use a clean, dry brush to gently sweep horizontally across the surface. This blurs the colors slightly, simulating the movement of water. -
Paint the sun and sun path:
Mix pure Titanium White with a tiny dot of Yellow. Paint a small, distinct circle just above the horizon for the sun. Below it, in the water, create a vertical column of horizontal jagged dashes to represent the sun’s reflection glittering on ripples. -
Intensify the glow:
Glaze a very thin, watery layer of pure bright Yellow over the area immediately surrounding the sun to make it appear radiant.
Step 3: Adding Landscape Silhouettes
-
Block in the distant tree line:
Mix Mars Black with a touch of Burnt Sienna for a warm, dark hue. Using the tip of a medium brush, dab a low, jagged line of trees right along the horizon. Vary the heights to make it look natural. -
Paint the foreground shoreline:
On the bottom left corner, paint a larger, more detailed sloping bank using the black mixture. This establishes your foreground perspective. -
Detail the foreground foliage:
Switch to a small round brush. Stipple (tap repeatedly) along the top edge of your foreground bank to create the texture of tall grass and bushes silhouetted against the light. -
Add foreground rocks:
Along the water’s edge in the foreground, paint rounded rock shapes. Highlight the top edges of these rocks with a mix of grey and purple to show the reflected ambient light. -
Insert grass blades:
Use your smallest detail brush or a liner brush with thinned black paint to flick quick, upward strokes in the foreground corner, creating individual tall blades of grass. -
Add water ripples:
I like to use a very fine brush with a mix of the sky pink and white to paint thin, sharp horizontal lines over the dark reflection areas, suggesting gentle waves catching the light.
Add a Frame
To fully mimic the reference photo’s aesthetic, mount your finished canvas in a wide, flat white frame. The high contrast makes the sunset colors pop vibrantly.
Step back and admire how the dark silhouettes amplify the warmth of your painted sunset

Pine Forest Edge Silhouette
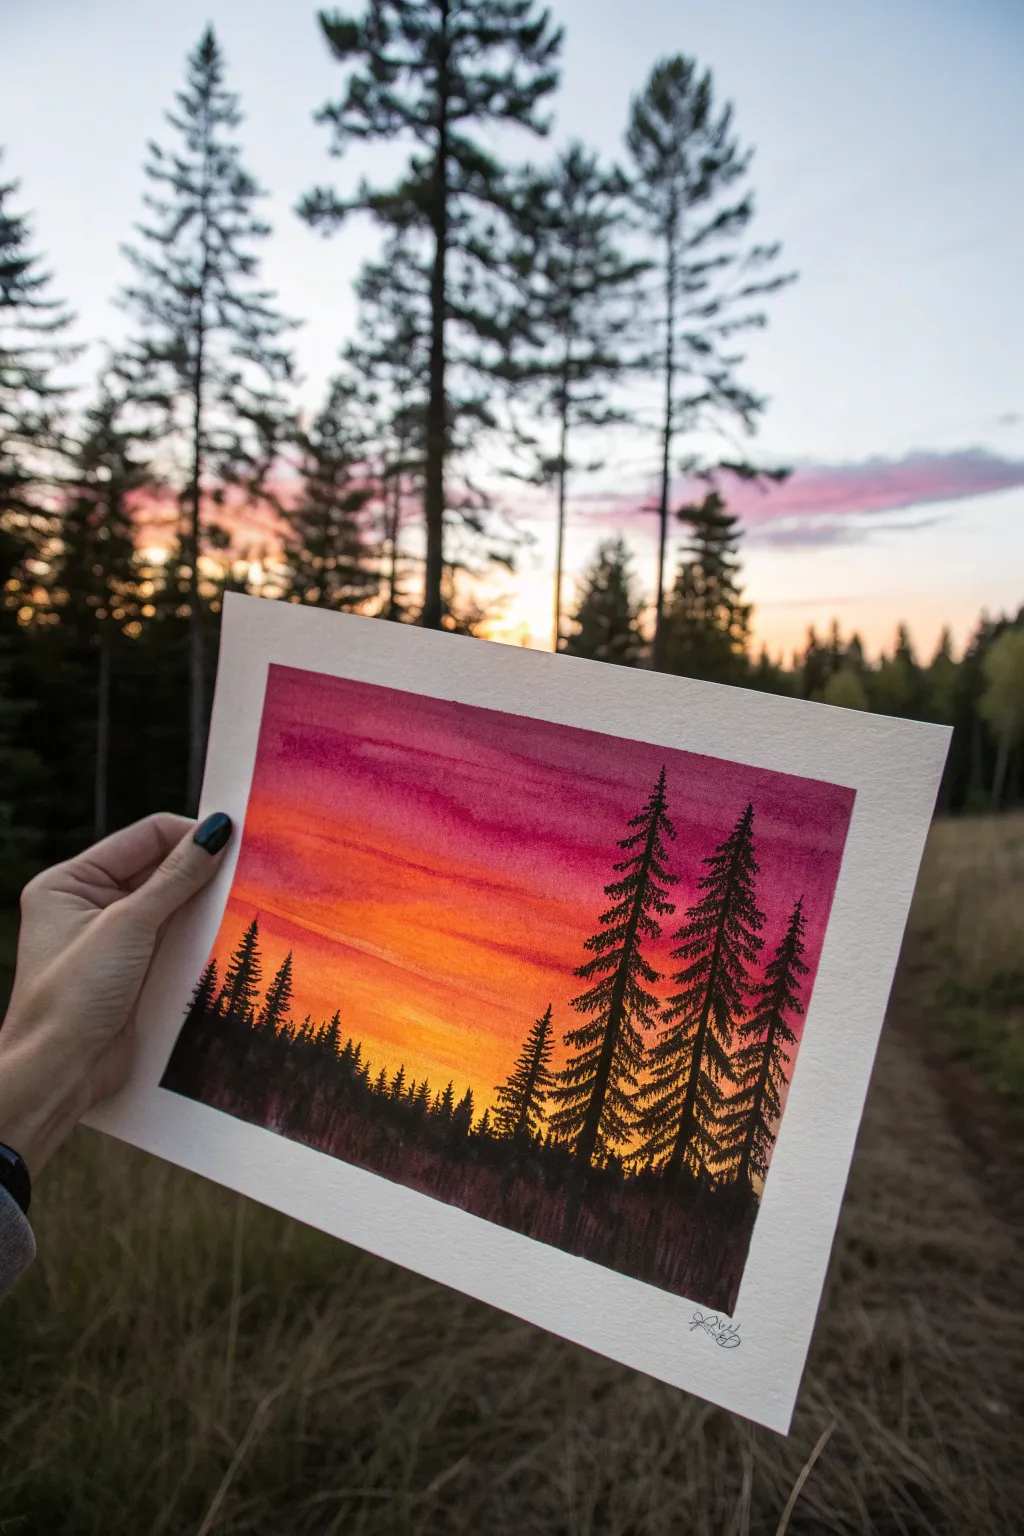
Capture the magic of twilight with this vibrant watercolor project that contrasts a glowing, warm sky against the stark beauty of a pine forest silhouette. The wet-on-wet technique creates a seamless blend of sunset hues, providing the perfect dramatic backdrop for crisp, detailed trees.
Step-by-Step
Materials
- Cold press watercolor paper (140lb/300gsm)
- Masking tape or painter’s tape
- Watercolor paints (Alizarin Crimson, Cadmium Yellow, Orange, Burnt Umber)
- Black ink or highly pigmented black watercolor/gouache
- Large flat wash brush (3/4 inch or 1 inch)
- Small round detail brush (size 0 or 1)
- Medium round brush (size 6 or 8)
- Jar of clean water
- Paper towels
- Pencil (optional)
Step 1: Creating the Glowing Sky
-
Prepare your canvas:
Tape down all four edges of your watercolor paper to a sturdy board or table. This creates a clean white border and prevents the paper from buckling significantly when we add water. -
Wet the paper:
Using your large flat wash brush and clean water, apply an even coat of water across the entire upper three-quarters of the paper. You want a consistent sheen, but not puddles. -
Start with the warmth:
Load your medium round brush with a vibrant yellow. Paint horizontal strokes across the lower-middle section of the sky area, leaving the very bottom third of the paper empty for the ground. -
Introduce orange hues:
Mix a bright orange and apply it directly above the yellow while the paper is still wet. Allow the colors to bleed slightly into each other for a natural transition. -
Add the twilight purples:
Further up the page, introduce a mix of Alizarin Crimson and a touch of blue or purple. Paint horizontal strokes across the top third, letting it blend downward into the orange. -
Deepen the upper sky:
To create depth, add a slightly more concentrated layer of the purple/crimson mix at the very top edge. I like to tilt the board slightly to help gravity pull the darker pigment down just a bit. -
Create distinct clouds:
While the wash is still damp but losing its sheen, use a thirsty (slightly dried) brush to lift out a few horizontal streaks in the purple area, or dab in a slightly darker purple line to suggest wispy clouds. -
Let it dry completely:
This is crucial. Before moving to the silhouettes, the background must be bone dry. Use a hairdryer on a low setting if you are impatient, but air drying is safest.
Clean Lines
If your paint bleeds under the tape, use a slightly damp, stiff brush to gently scrub away the unwanted pigment, then blot with a tissue.
Step 2: Painting the Silhouettes
-
Establish the horizon:
Switch to your black ink or dense black watercolor. Paint a solid, uneven horizon line along the bottom of the paper, covering the white space you left earlier. Vary the height slightly to simulate uneven ground. -
Draft the tree trunks:
Using your smallest detail brush (size 0 or 1), paint thin vertical lines rising from the ground. Make a few taller ones on the right side for the prominent foreground trees, and shorter ones on the left. -
Form the tree tops:
Start at the very tip of your tallest tree line. Dab the tip of the brush gently to create a pointed, narrow top. -
Build the branches:
Work your way down the trunk using a zig-zag motion. Keep the branches very narrow at the top and gradually widen your strokes as you descend. -
Add texture to the branches:
Don’t make the trees perfect triangles. Leave gaps between branches and make some uneven to mimic natural growth. A shaky hand actually helps here. -
Paint the background forest:
On the left side, paint a denser cluster of shorter trees. You don’t need as much detail here; simply suggesting the jagged tops and filling in the mass with solid black works well. -
Ground the trees:
Where the tree trunks meet the black ground, add some vertical grass-like strokes to blend the transition and add texture to the forest floor. -
Final touches:
Step back and assess your composition. If a tree looks too sparse, add a few extra branches. Add your signature in the bottom corner with a fine liner pen. -
Reveal the border:
Once the black ink is fully dry, slowly and carefully peel away the tape at a 45-degree angle to reveal your crisp white edges.
Starry Night
Once the sky is dry but before painting trees, flick a stiff toothbrush loaded with white gouache to create a field of stars.
Now you have a stunning sunset landscape that brings the peacefulness of the outdoors right into your home
BRUSH GUIDE
The Right Brush for Every Stroke
From clean lines to bold texture — master brush choice, stroke control, and essential techniques.
Explore the Full Guide
Simple City Skyline at Sunset
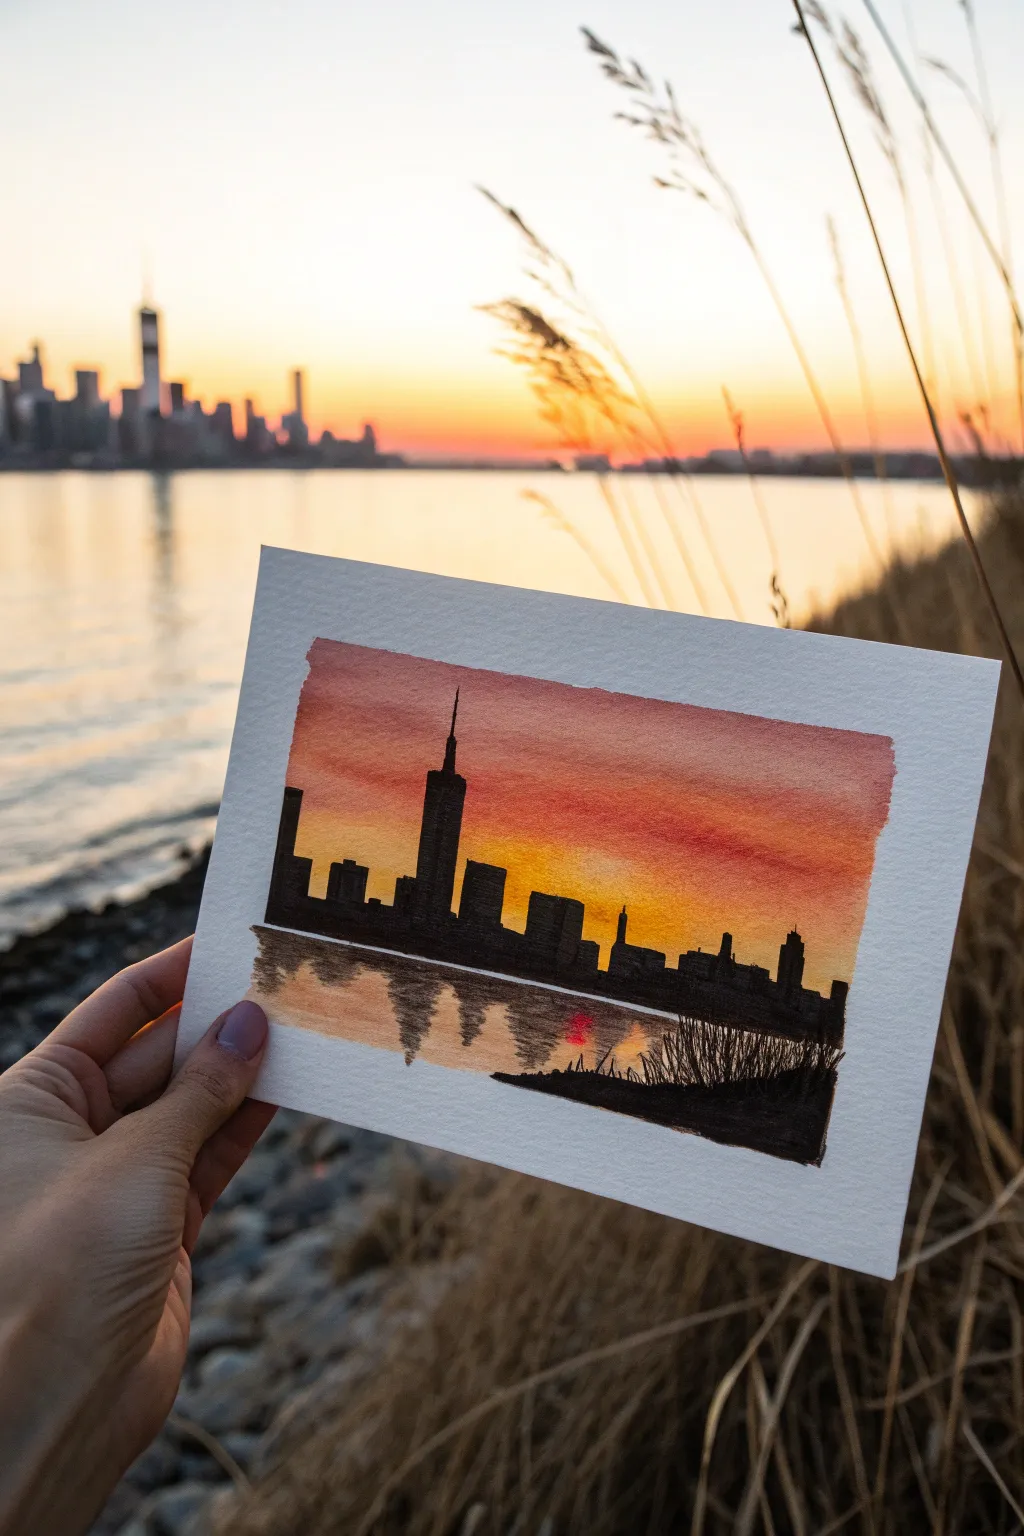
Capture the magic of golden hour with this vibrant watercolor skyline. By blending warm gradients for the sky and sharp, dark silhouettes for the buildings, you’ll recreate the dramatic contrast of a city falling into evening.
Detailed Instructions
Materials
- Cold-press watercolor paper (approx. 5×7 inches)
- Painter’s tape or masking tape
- Watercolor paints (Alizarin Crimson, Cadmium Orange, Cadmium Yellow, Payne’s Grey or Lamp Black)
- Flat wash brush (3/4 inch)
- Round brush (size 4 or 6)
- Fine detail brush (size 0 or 1)
- Clean water and paper towels
- Pencil and eraser
Step 1: Setting the Scene
-
Prepare your paper:
Begin by taping down all four edges of your watercolor paper to a hard board or table. This creates that crisp, clean white border seen in the photo and prevents the paper from buckling when wet. -
Sketch the horizon:
Using a pencil, lightly draw a straight horizontal line about one-third of the way up from the bottom of the paper. This separates the water reflection from the sky. -
Outline the skyline:
Very faintly sketch the tops of the buildings above your horizon line. You don’t need details, just the varying heights and the distinct spire of the tallest tower to guide your painting later.
Pro Tip: Testing Opacity
For the black silhouettes, test your paint on a scrap paper first. If you can see the white paper through the black paint, add less water and more pigment for a solid look.
Step 2: Painting the Sky
-
Wet the sky area:
With your flat brush, apply clean water to the sky portion of the paper, stopping exactly at the horizon line. The paper should be glisten, but not form puddles. -
Apply the top gradient:
Load your brush with a watery mix of Alizarin Crimson. Paint a horizontal stroke across the very top of the sky, letting the pigment bleed downward slightly. -
Blend in orange:
Rinse your brush and pick up Cadmium Orange. Apply this directly below the red, slightly overlapping so the wet edges merge softly together. -
Add the yellow horizon:
Finish the sky by painting Cadmium Yellow right above the horizon line. I find blending this upward into the orange creates that glowing sunset effect. -
Let it dry completely:
Wait until the sky is bone dry. This is crucial; if the sky is damp, your crisp building silhouettes will bloom and blur.
Step 3: Painting the Silhouette
-
Mix your darks:
Create a thick, saturated mixture of Payne’s Grey or Lamp Black. Ideally, you want a consistency like heavy cream so it’s opaque. -
Paint the tallest tower:
Using your medium round brush, paint the main body of the tallest skyscraper. Switch to your fine detail brush to carefully pull the paint upward for the needle-thin spire. -
Fill in the skyline:
Continue painting the other buildings along the horizon line using the black paint. Vary the heights and widths to make it look like a natural city block. -
Square off the edges:
Use the tip of your flat brush or a steady hand with the round brush to ensure the tops of the buildings are squared off and architectural, rather than rounded lumps. -
Anchor the buildings:
Ensure the bottom of your buildings meets the pencil horizon line perfectly straight. It’s okay if it overlaps slightly into the water area, as we will darken that next.
Troubleshooting: Blooms
If cauliflower-like blooms appear in your sky, it means you added water to drying paint. Don’t touch it! Let it dry completely, you can call them clouds later.
Step 4: Reflections & Foreground
-
Start the water reflection:
Clean your water. Wet the area below the skyline. While it’s wet, brush in a mirrored version of your sky colors—yellow near the horizon, fading into soft orange and red. -
Add dark reflections:
Once the water background is semi-dry (damp but not soaking), take your diluted gray paint and lightly drag vertical strokes downward beneath the buildings to mimic shadows on the water. -
Weave the ripples:
Using horizontal, zigzag motions with a dry-ish brush, break up those vertical shadows to look like gentle waves distorting the reflection. -
Paint the foreground bank:
Load your brush with thick black paint again. On the bottom right corner, paint a solid, organic shape representing the riverbank or shoreline. -
Add grass details:
With your finest detail brush, flick quick, upward strokes from the black riverbank to create the look of tall reeds or grasses silhouetted in the foreground. -
The final reveal:
Allow the entire painting to dry for several hours. Once dry, carefully peel away the painter’s tape at a 45-degree angle to reveal your crisp white border.
Frame your miniature masterpiece or prop it up against a window to see how it complements the real sunset view
Sailboat on the Horizon
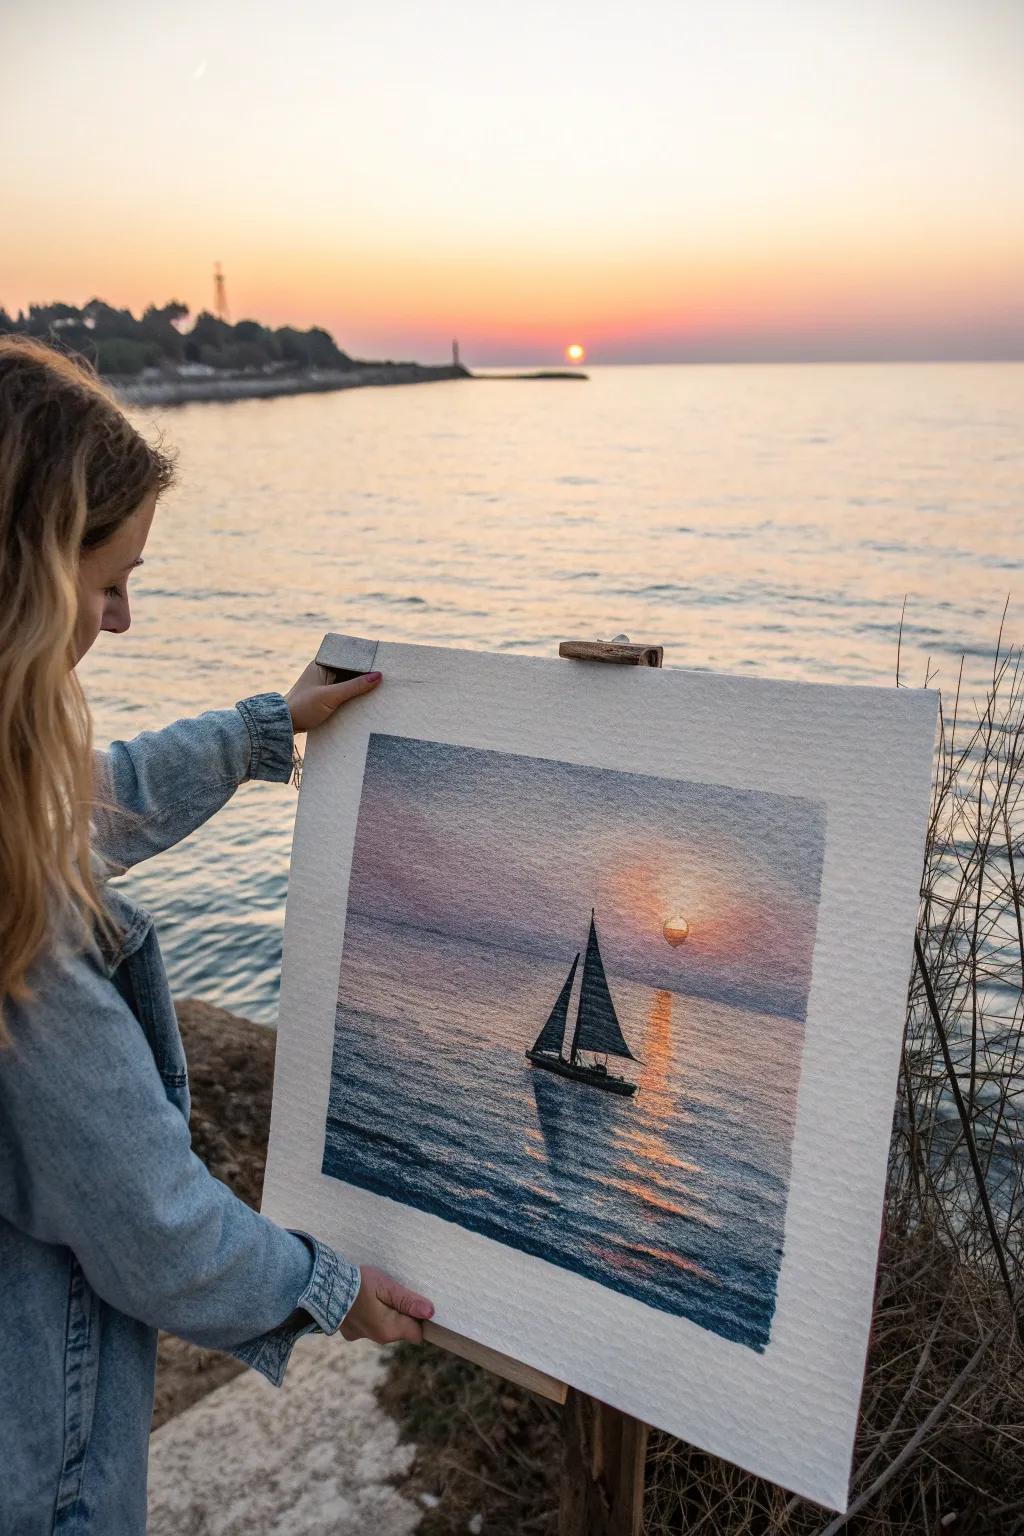
Capture the serene beauty of a sailboat drifting into the sunset with this radiant painting project. Using soft gradients for the sky and textured strokes for the water, you will create a glowing, navigational masterpiece.
Step-by-Step Tutorial
Materials
- Square canvas panel or heavy-weight cold press watercolor paper (approx. 12×12 inches)
- Acrylic paints (Titanium White, Cadmium Yellow, Orange, Alizarin Crimson, Ultramarine Blue, Phthalo Blue, Lamp Black)
- Set of brushes: 1-inch flat wash, medium filbert, lush round brush, fine liner
- Palette knife (optional for mixing)
- Water container and paper towels
- Painter’s tape and easel board
- Pencil for sketching
Step 1: Sky Gradient
-
Prepare the surface:
Tape your paper or canvas board to a backing board to keep it flat and create a crisp white border. If you’re using paper, ensure it’s heavy enough to handle layers of paint without buckling. -
Establish the horizon:
Using a ruler and a light pencil touch, draw a straight horizon line about one-third of the way up from the bottom of the canvas. This keeps the focus on the vast sky. -
Mix sky colors:
Prepare a gradient palette: deep purple-blue (Ultramarine + Crimson), a soft violet, a vibrant pink-orange, and a bright yellow-white for the sun area. -
Paint the upper sky:
Start at the very top with your darkest blue-purple mix. Use a damp flat brush and long horizontal strokes, smoothing out the paint to avoid heavy ridges. -
Blend downwards:
While the top is still wet, introduce the violet tone, blending it seamlessly into the blue above. Work your way down, transitioning into pinks and finally the yellow-orange near the horizon. -
Add the sun’s glow:
In the lower right center of the sky, paint a small, diffused circle of pure white mixed with a tiny dot of yellow. Soften the edges with a dry brush so it glows rather than looking like a sticker.
Step 2: Painting the Sea
-
Base ocean layer:
Below the horizon line, apply a mix of Phthalo Blue and a touch of black. The water should be darker than the sky to create depth. -
Create the sun path:
While the blue base is wet, take your yellow-orange mix and stroke it vertically directly beneath the sun. Use a zig-zag motion to mimic light catching the waves. -
Texture the water:
Switch to a smaller filbert brush. Using slightly darker blue, add short, horizontal dashes across the water surface to suggest ripples and movement. -
Refine the reflection:
I like to go back over the sun’s reflection with a few varying tones of orange and white. Keep the brightest white highlights strictly in the vertical center of the reflection path.
Clean Horizon Pro-Tip
Place a strip of painter’s tape directly on the horizon line while painting the sky. Remove it to paint the sea. This guarantees a razor-sharp division between air and water.
Step 3: The Silhouette
-
Sketch the boat:
Once the background is completely dry, lightly pencil in the shape of the sailboat. Place it slightly off-center to the left to balance the composition against the sun. -
Paint the hull:
Using a small round brush and black paint (you can mix in a little blue to make it less stark), fill in the hull of the boat. Keep the bottom edge fairly straight where it meets the water. -
Raising the masts:
Switch to your fine liner brush. Paint the vertical mast with a steady hand. It should be thinner at the top. -
Fill the sails:
Paint the triangular sails. Since they are backlit, they will be mostly dark, but you can dry-brush a tiny bit of dark grey in the center to suggest the fabric’s transparency. -
Add rigging details:
Use the very tip of your liner brush to add thin lines for ropes and rigging. Don’t overdo it—just a few suggestions of lines are enough. -
Shadow on the water:
Paint a dark, wavy reflection directly beneath the boat. This shadow should break up and become more rippled as it moves away from the hull. -
Final highlights:
Add a few tiny sparkles of white on the water right near the boat’s shadow to show where the hull breaks the surface tension. -
Reveal the border:
Once absolutely everything is dry, carefully peel away the painter’s tape at a 45-degree angle to reveal your clean edges.
Level Up: Texture
Mix a gel medium or modeling paste into your white paint for the sun reflection. This adds physical ridges that will catch the actual room light, making the glitter effect real.
Step back and admire how the warm light of your painted sun brings peaceful energy to the room

PENCIL GUIDE
Understanding Pencil Grades from H to B
From first sketch to finished drawing — learn pencil grades, line control, and shading techniques.
Explore the Full Guide
Birds Flying Across the Sun
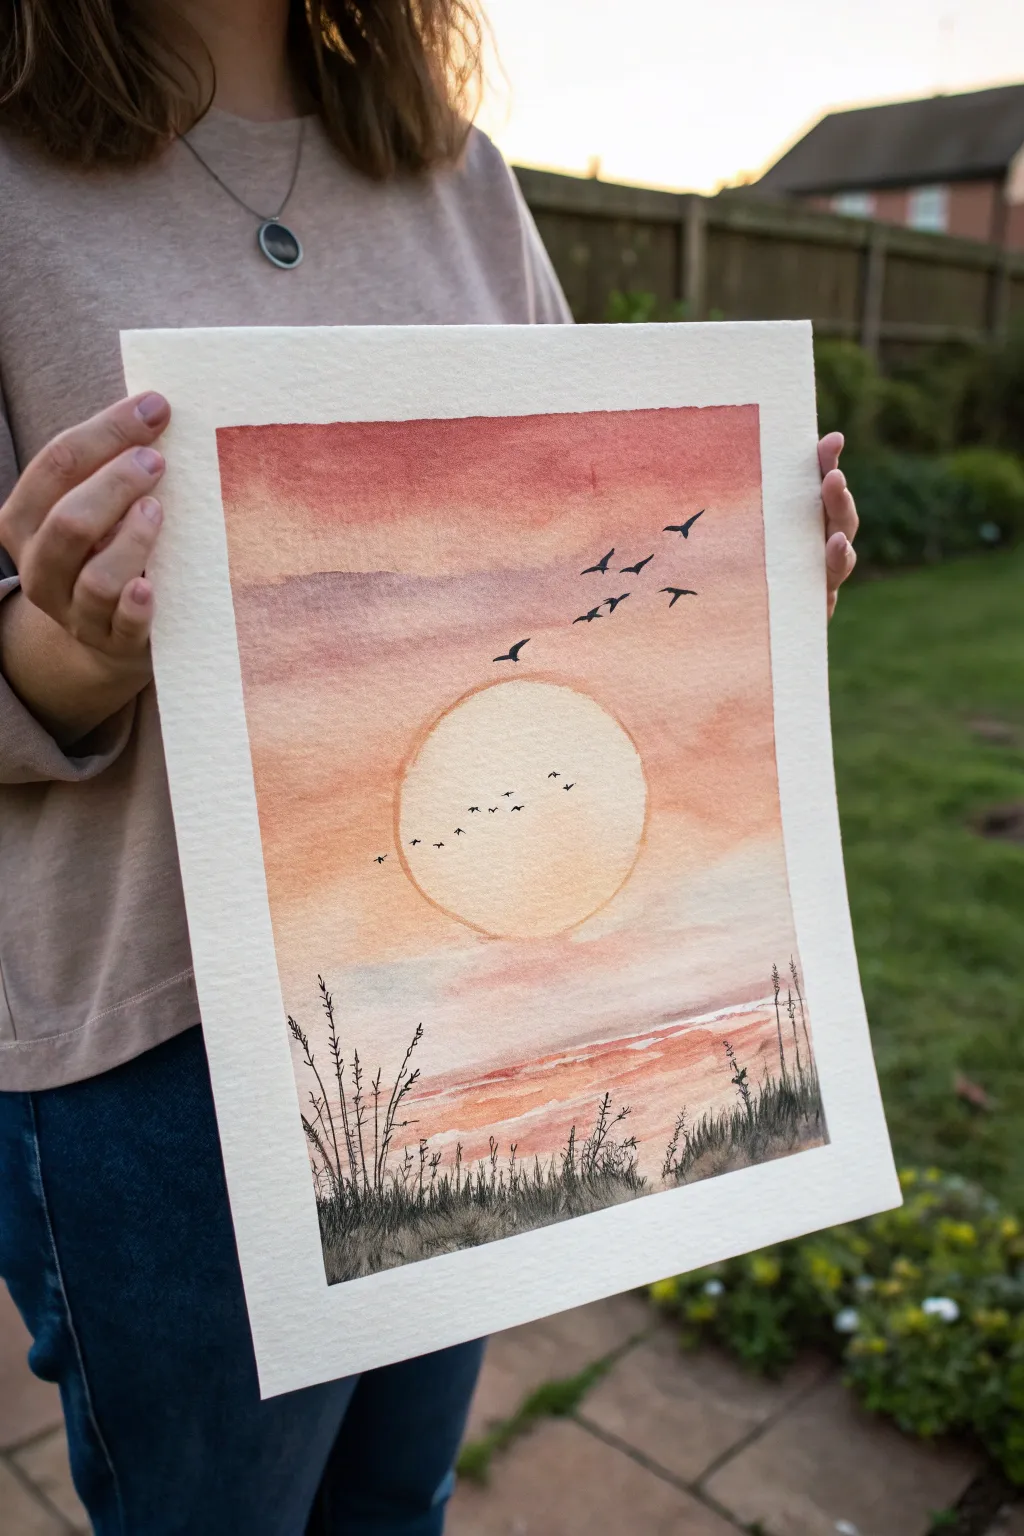
Capture the serene beauty of birds in flight against a glowing warm sky with this watercolor project. Using wet-on-wet techniques, you’ll create a soft, radiant backdrop that perfectly frames the crisp, dark silhouettes of distant birds and grassy dunes.
Step-by-Step
Materials
- Cold press watercolor paper (A3 or A4 recommended)
- Watercolor paints (Cadmium Red, Alizarin Crimson, Yellow Ochre, Burnt Umber, Payne’s Gray or Black)
- Masking tape
- Pencil and a circular object (like a bowl) for tracing
- Round brushes (large size 10-12 for washes, small size 0-2 for details)
- Jar of clean water
- Paper towels
- Palette for mixing
Step 1: Setting the Scene
-
Secure your paper:
Begin by taping down all four edges of your watercolor paper to a board or table with masking tape. This creates a crisp border and prevents the paper from buckling when we apply heavy water washes. -
Map out the sun:
Place your circular object slightly below the center of the page. Trace around it lightly with a pencil to define the sun’s position. This area will remain largely unpainted until the very end to keep it glowing.
Step 2: Painting the Sky
-
Wet the sky area:
Using your large round brush, apply clean water to the entire sky area, working around the pencil circle of the sun. The paper should be glistening but not forming puddles. -
Apply the first wash:
Mix a diluted wash of Yellow Ochre and a touch of Cadmium Red. Brush this gently around the sun’s perimeter, letting the color bleed outward into the wet paper for a soft glow. -
Deepen the sky tones:
While the paper is still damp, mix a stronger orange using Cadmium Red and Yellow. Apply this to the top third of the painting, using horizontal strokes. Let the pigment drift down naturally. -
Add dusky clouds:
Mix a hint of Alizarin Crimson with a tiny bit of Burnt Umber or purple for a dusky rose color. While the orange layer is still slightly wet, sweep in a horizontal band of clouds across the upper middle section. -
Soften the sun:
Clean your brush and dampen the inside of the sun circle slightly. wash a very pale, watery yellow over the sun area so it isn’t stark white, blending the edges just a tiny bit into the surrounding sky. -
Initial drying time:
Allow this sky layer to dry completely. The paper must be bone dry before proceed to the next step to prevent the paint from blooming.
Sun Glow Tip
To make the sun really pop, lightly lift a bit of color from the sky right around the pencil circle with a clean, damp brush or paper towel before it dries.
Step 3: Creating the Horizon
-
Paint the water:
Below the horizon line, wet the paper again. Mirror the sky colors by applying horizontal strokes of the orange and red mix, leaving some white paper showing to represent ripples or reflections. -
Define the dunes:
Mix a darker, earthy tone using Burnt Umber and a touch of Crimson. Paint the bottom inch of the paper with uneven, undulating strokes to create the base of the grassy dunes. -
Let it dry:
I like to take a break here and let the bottom section dry thoroughly. If you continue too soon, the sharp details of the grass will blur into the water.
Fixing Hard Edges
If your sky dries with harsh lines instead of a smooth gradient, re-wet the area slightly with clear water and gently soften the edge with a clean brush.
Step 4: Silhouettes and Details
-
Paint the flock:
Switch to your smallest detail brush. Mix a concentrated dark color using Payne’s Gray or Black; avoid using pure black straight from the tube as it can look flat. -
Detail the large birds:
Paint the larger birds in the upper right quadrant. Use a ‘V’ or ‘M’ shape, varying the wing positions. Some should glide with wings flat, others flapping with wings up. -
Add distant birds:
Inside the sun circle, paint a line of tiny, distant birds. Make these much smaller than the upper flock to create a sense of depth and perspective. -
Start the grass layer:
Using the same dark mixture, paint fine, vertical lines springing up from the bottom dune area. Use quick, flicking motions with the tip of your brush to taper the blades of grass. -
Add botanical variation:
Intersperse the straight grass blades with some textured plants. Add small dots or tiny branches near the tops of some stalks to resemble sea oats or wildflowers in silhouette. -
Final touches:
Review your silhouettes. If any areas look too transparent, carefully go over them with a second layer of the dark mix once the first is dry. -
Reveal the border:
Once the painting is 100% dry, gently peel away the masking tape at a 45-degree angle to reveal your clean, crisp white border.
Now step back and admire the peaceful evening atmosphere you’ve captured on paper.
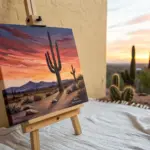
Desert Cactus Sunset Silhouette
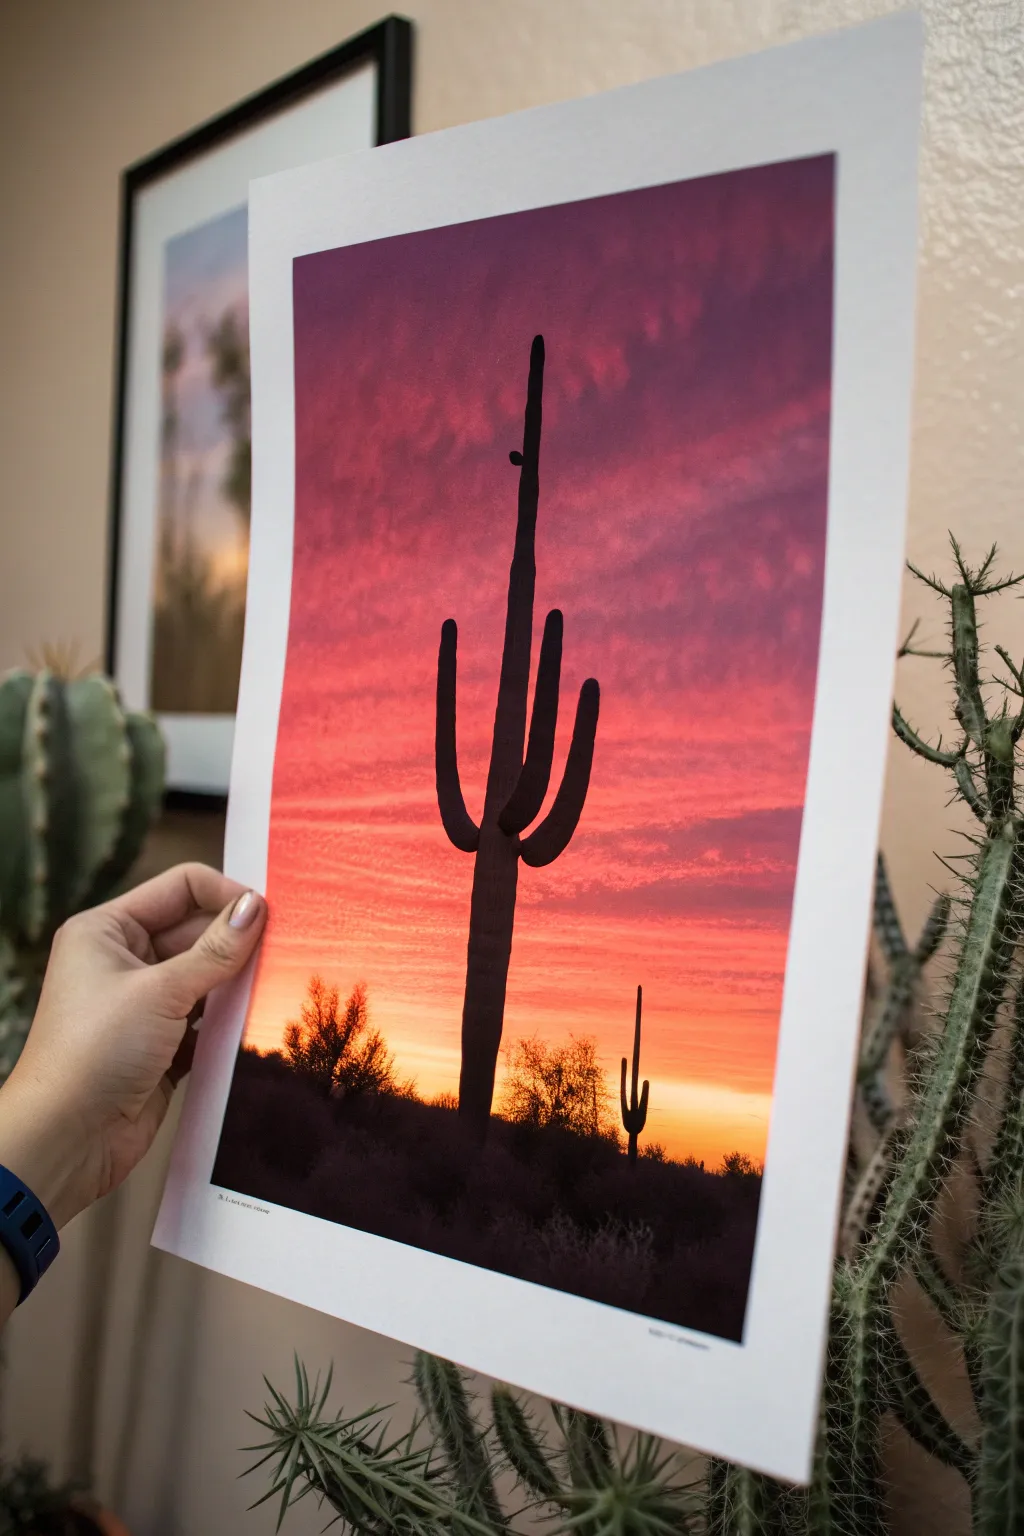
Capture the blazing beauty of an Arizona evening with this stunning silhouette painting. By blending rich purples into fiery oranges, you’ll create a dramatic backdrop for the iconic Saguaro cactus shape.
Step-by-Step Guide
Materials
- Heavyweight watercolor paper or mixed media paper
- Acrylic paints (Deep violet, magenta, cadmium orange, cadmium yellow, titanium white, mars black)
- Wide flat brush for background blending
- Medium round brush
- Small liner brush for details
- Masking tape
- Palette
- Cup of water and paper towels
Step 1: Painting the Sky Gradient
-
Prepare the surface:
Begin by taping down the edges of your paper to a work surface or board. This keeps the paper flat while it’s wet and creates a crisp, professional white border around your finished painting. -
Mix the deepest violet:
On your palette, mix a deep violet with just a touch of black if needed to darken it. Using your wide flat brush, paint a solid horizontal band across the top quarter of your paper. -
Transition to magenta:
Without cleaning your brush thoroughly, dip into magenta paint. Apply this directly below the violet, overlapping the wet edges slightly. Use broad, horizontal strokes to blend the boundary where the two colors meet. -
Create the orange band:
Clean your brush well. Pick up your cadmium orange and apply a band below the magenta. Work quickly while the paint is still damp to encourage a smooth gradient transition between the pinkish-red tones and the orange. -
Finish with yellow:
For the horizon line, mix yellow with a tiny amount of white to make it opaque and bright. Paint the bottom section of the sky, blending it upward into the orange band until you have a seamless sunset spectrum. -
Add cloud texture:
While the sky is still slightly tacky but not wet, use a dry, scruffy brush with a tiny amount of magenta or light violet. Gently dab and scumble horizontal streaks across the upper sky to mimic soft, wispy clouds.
Step 2: Creating the Silhouette
-
Dry completely:
Ensure the background is 100% dry before proceeding. If the paint is wet, your sharp black silhouette will bleed into the sky. -
Block in the ground:
Switch to pure black paint and a medium round brush. Paint an uneven, undulating line across the very bottom of the paper to represent the desert floor. Fill in everything below this line with solid black. -
Sketch the main cactus:
Using a small brush and diluted black paint (almost like ink), lightly sketch the vertical line of your main cactus. Position it slightly off-center for a better composition. -
Thicken the trunk:
Load your medium brush with undiluted black paint. Go over your sketch line, thickening the trunk. It should be slightly wider at the bottom and taper very subtly toward the top. -
Add primary arms:
Paint the classic ‘arms’ of the Saguaro. Start the curve from the trunk, go out, and curve sharply upward. I find it helps to look at a reference photo to get the organic, slightly quirky shapes of real cactus arms. -
Smooth the connections:
Refine the points where the arms meet the trunk. These joints should be curved and smooth, not sharp angles, to mimic the fleshy growth of the plant. -
Paint distant vegetation:
Along the horizon line, create small, irregular bumpy shapes to represent distant bushes or a smaller cactus in the background. Keep these shapes distinct but connected to your ground layer. -
Detail the foreground:
Using your smallest liner brush, flick tiny, quick strokes upward from the ground layer. This creates the illusion of scrubby desert grass and adds texture to the bottom of the painting. -
Final touches:
check for any opaque spots in your black silhouette; apply a second coat of black if the sunset colors are showing through the cactus. -
Reveal the border:
Once the painting is completely dry, slowly peel away the masking tape at a 45-degree angle to reveal your clean white edges.
Smooth Blends
If your acrylics are drying too fast to blend creating hard lines, mix in a drop of acrylic retarder or slow-drying medium to keep the paint workable longer.
Make It Glossy
Once fully dry, apply a coat of high-gloss varnish over the entire piece. It deepens the black silhouette and makes the sunset colors look like a photograph.
Frame this piece behind glass to enhance the contrast between the velvety black cactus and the glowing sky


Lone Tree and Swing Silhouette
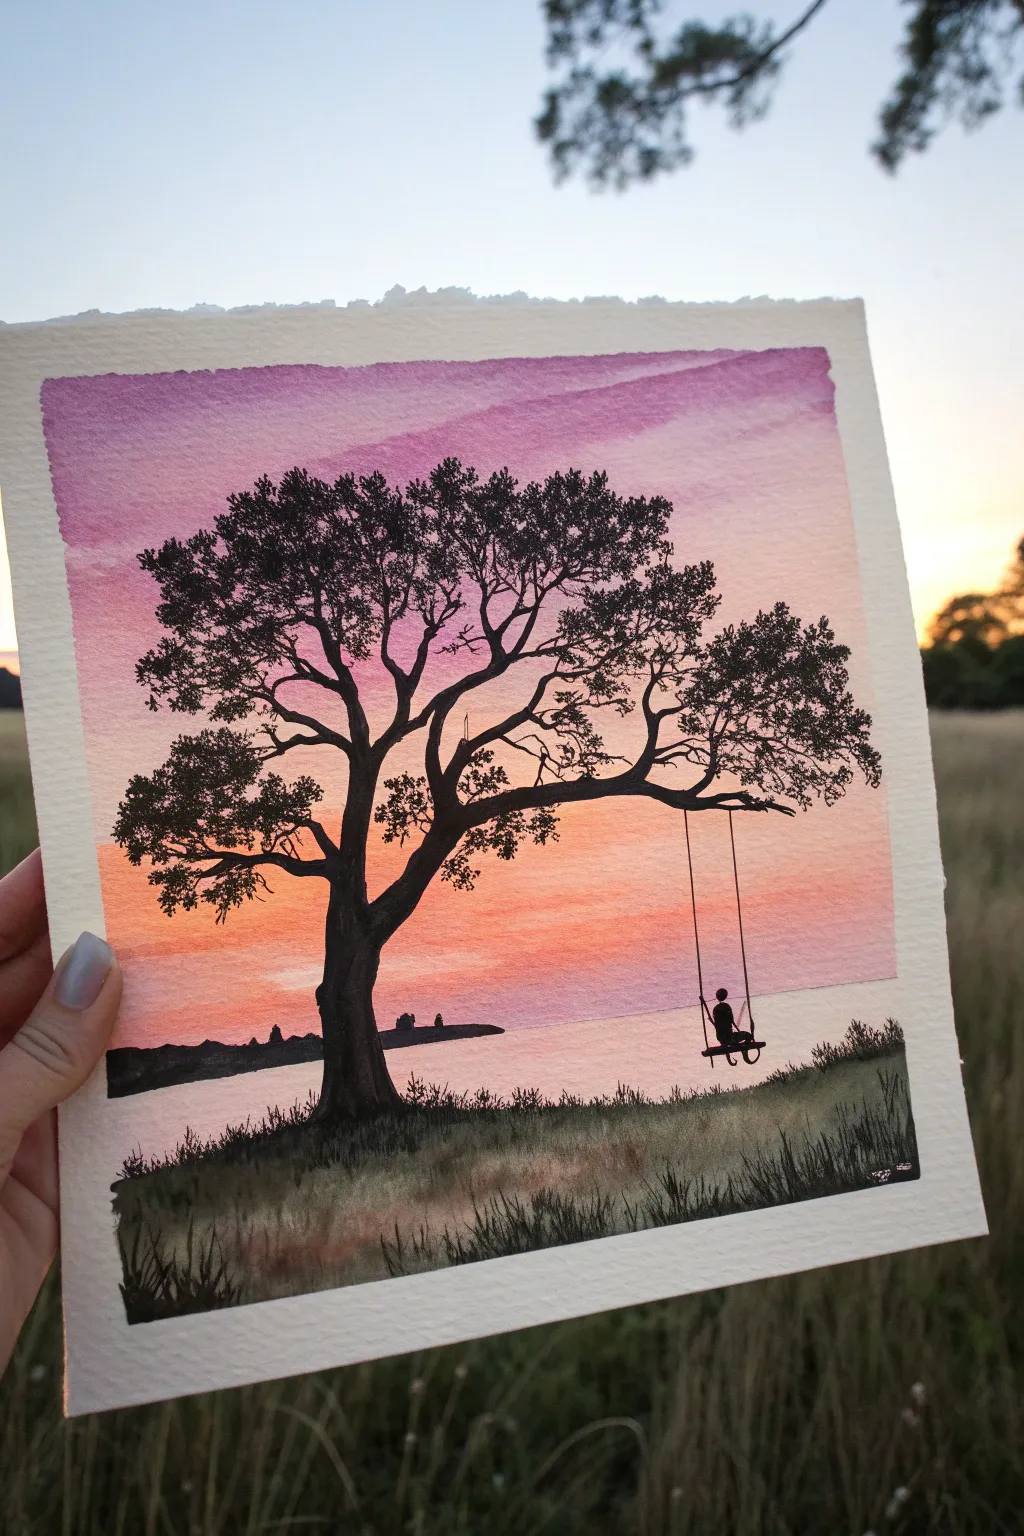
Capture the serene beauty of dusk with this vibrant watercolor project featuring a striking black silhouette against a gradient sky. This piece combines wet-on-wet blending techniques with precise brushwork to create a nostalgic and peaceful scene.
Detailed Instructions
Materials
- Cold press watercolor paper (square format)
- Masking tape
- Watercolor paints (Purple, Magenta, Orange, Yellow)
- Black gouache or India ink
- Flat wash brush (1/2 inch or larger)
- Round brushes (sizes 2, 4, and 0 for details)
- Two jars of water
- Paper towels
- Pencil and eraser
Step 1: Painting the Sunset Sky
-
Prepare the paper:
Begin by taping down all four edges of your watercolor paper to a board. This creates a crisp white border and prevents the paper from buckling when wet. -
Sketch the horizon:
Lightly sketch a low horizon line about one-third of the way up from the bottom. This will separate your grassy foreground from the water and sky. -
Wet the sky area:
Using your large flat brush and clean water, thoroughly wet the paper from the top edge down to the horizon line. The paper should glisten but not have puddles. -
Apply the purple layer:
Load your brush with a watery mix of purple. Paint horizontal strokes across the top third of the sky, letting the pigment flow naturally on the wet surface. -
Blend in magenta:
While the purple is still wet, introduce a magenta or pink hue immediately below it. Allow the colors to bleed together slightly to create a soft transition. -
Add the golden glow:
Rinse your brush and pick up a warm orange or golden yellow. Paint the lower section of the sky down to the horizon line, blending it upward into the pinks. -
Paint the water reflection:
With a diluted wash of specific light purple or pink, paint the area below the horizon line. Keep this very pale to represent the reflection of the sky on the water. -
Dry completely:
Let this background layer dry completely. I prefer to wait an extra few minutes just to be safe, as painting the black silhouette on damp paper will cause fuzzy edges.
Step 2: Creating the Silhouette
-
Outline the tree trunk:
Using a size 4 round brush and black gouache (or very concentrated watercolor), paint the main trunk of the tree on the left side. Make the base wider and irregular where it meets the ground. -
Branch out:
Extend the main branches upward and outward. Use a ‘y’ shape approach, splitting thicker branches into thinner ones as you move away from the trunk. -
Add foliage texture:
Switch to a smaller brush or use the side of your round brush. Stipple small, irregular clusters of black leaves at the ends of the branches to form the canopy. -
Paint the heavy branch:
ensure one strong branch extends horizontally to the right side of the composition. This will support the swing. -
Define the horizon details:
Using the tip of a small brush, paint a distant shoreline along the horizon line with tiny bumps to suggest faraway trees or landmasses. -
Create the foreground grass:
Paint the grassy hill in the immediate foreground with a slightly watered-down black or dark green-black mix. Use upward flicking motions to create the texture of tall grass blades. -
Deepen the foreground shadows:
Go back over the bottom-most edge of the artwork with pure black to ground the image and add depth to the hill.
Fixing “Blooms”
If water drops create cauliflower-like ‘blooms’ in the sky, don’t scrub. Wait for it to dry, then gently glaze over the area with a slightly damp brush to smooth it out.
Step 3: Adding the Swing
-
Draw the ropes:
Using your finest brush (size 0) or a fine-liner pen, draw two vertical lines dropping down from the horizontal branch. Keep your hand steady for straight lines. -
Paint the seat and figure:
Paint a small horizontal line for the seat connecting the ropes. Carefully add a tiny silhouette of a person sitting on the swing. -
Final touches:
Check the balance of the tree. Add a few stray leaves or thin twigs if the canopy looks too sparse, then remove the tape carefully.
Add Some sparkle
Once fully dry, splatter tiny specks of white gouache or white ink across the top purple section of the sky to create the illusion of early evening stars emerging.
Peel off the tape to reveal your crisp edges and enjoy the peaceful evening mood you’ve created
Lighthouse Beam at Sunset
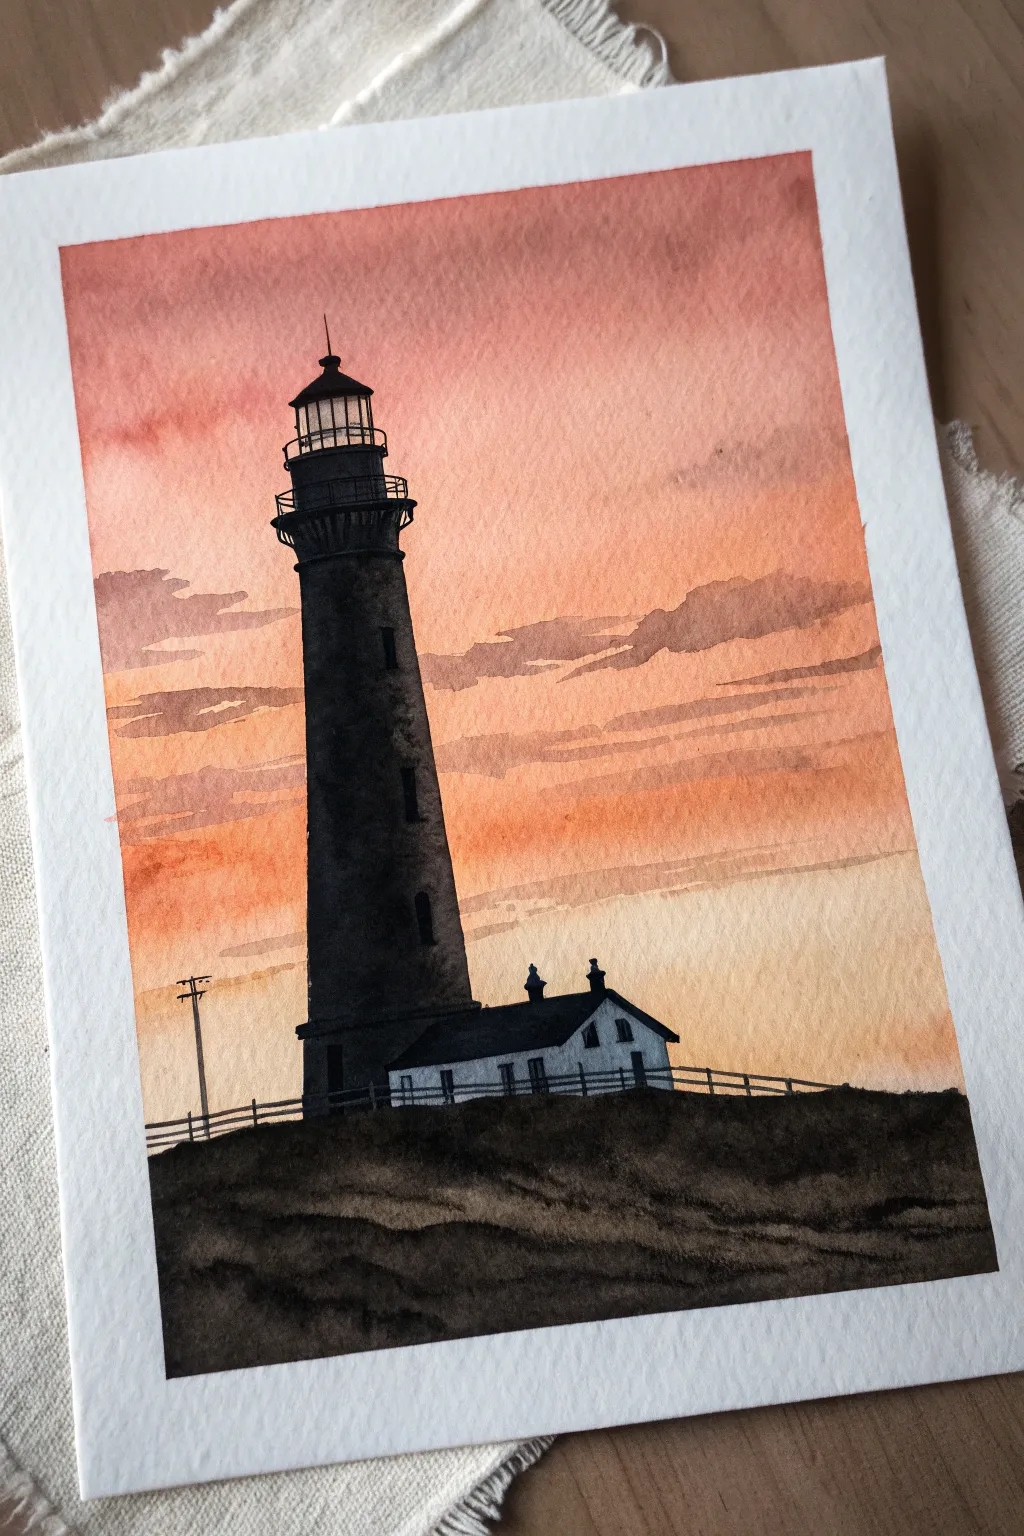
This arresting watercolor piece captures a towering lighthouse in stark silhouette against a warm, gradient sunset. The project balances precise architectural details with a loose, wash-based sky to create a serene coastal atmosphere.
Step-by-Step Tutorial
Materials
- Cold press watercolor paper (140lb/300gsm)
- Pencil (HB or similar) and eraser
- Masking tape
- Watercolor paints: Peach, Vermillion, Burnt Sienna, Payne’s Gray, Lamp Black
- Round brushes: Size 10 or 12 (for washes), Size 4 or 6 (for shapes), Size 0 or 1 (for details)
- Jar of clean water
- Paper towels
- White gouache or gel pen (optional for small highlights)
Step 1: Preparation and Sketching
-
Secure the Paper:
Begin by taping down all four edges of your watercolor paper to a hard board or table. This creates a crisp white border and prevents the paper from buckling during the wet wash stages. -
Establish the Horizon:
With an HB pencil, lightly draw the horizon line about a quarter of the way up from the bottom of the page. This doesn’t need to be perfectly straight, as it represents uneven ground. -
Outline the Lighthouse:
Sketch the lighthouse tower starting from the ground up on the left-center side. The tower should taper slightly as it goes up. Add the lantern room detail at the very top, ensuring the proportions feel tall and elegant. -
Add the Keeper’s House:
Draw the small house attached to the base of the lighthouse. Include the roofline, two small chimneys, and the basic rectangular shapes for windows, keeping the pencil lines light so they disappear later.
Bleeding Edges?
If your black silhouette bleeds into the sky, the background wasn’t dry enough. Let it dry completely, then carefully reshape the edge with thick, opaque black paint to cover the fuzziness.
Step 2: Painting the Sky
-
Wet the Sky Area:
Using your largest round brush, apply clean water to the entire sky area, stopping just short of the lighthouse and house sketch lines. The paper should glisten but not have standing puddles. -
Apply the Warm Glow:
While the paper is wet, load your brush with a watery mix of peach or light orange paint. Apply this broadly across the bottom half of the sky, letting it diffuse naturally. -
Deepen the Gradient:
Toward the top of the paper, introduce a stronger vermillion or reddish-orange tone. Blend this downward into the peach color so there is a seamless transition from darker top to lighter bottom. -
Create Cloud Streaks:
I like to mix a very diluted purple or brownish-red at this stage. While the sky is still damp (but not soaking), drag horizontal streaks across the sunset to suggest cloud layers. Let the edges soften. -
Add Textured Clouds:
Mix a slightly thicker consistency of reddish-brown. Using the side of your brush, dab in some defined cloud shapes near the horizon and midway up the sky, allowing the texture of the paper to show through slightly. -
Let it Dry Completely:
This is crucial: allow the sky layer to bone dry. If you paint the black silhouette while the sky is damp, the black paint will bleed into your sunset.
Make it Glow
To make the lighthouse operational, leave the lantern glass area unpainted or white. Once dry, wash a tiny bit of bright yellow over just that spot for a lit-lamp effect.
Step 3: The Silhouette and Foreground
-
Base Layer for the Tower:
Mix a dark grey using Payne’s Gray and a touch of Burnt Sienna. Fill in the main body of the lighthouse tower. It doesn’t need to be solid black yet; some texture is good. -
Darken the Silhouette:
Once the first layer settles, go over the lighthouse with Lamp Black or a very saturated Payne’s Gray. Focus on making the right side slightly darker to suggest subtle shadowing. -
Detail the Lantern Room:
Switch to your smallest brush (size 0 or 1). Carefully paint the fine railings, the cap, and the intricate metalwork at the top of the lighthouse. Use pure black for sharp contrast against the sky. -
Paint the House:
Fill in the roof of the keeper’s house with solid black. For the walls of the house, use a very light grey or diluted blue-grey so it appears white but in shadow. Paint the windows solid black. -
Create the Foreground:
Mix a heavy amount of black with dark brown. Paint the uneven ground in the foreground using sweeping, horizontal strokes to mimic grassy dunes or rough terrain. -
Add Foreground Texture:
While the foreground creates a solid base, add a few dry-brush strokes of pure black over the top to suggest ridges and texture in the earth.
Step 4: Final Details
-
Install the Fence:
Using your finest brush, draw the delicate fence running along the ridge line. Keep the posts thin and vertical, with the rails following the curve of the hill. -
Add the Utility Pole:
On the far left, create the silhouette of the wooden utility pole. Add the tiny crossbar at the top. These small scale indicators add immense realism to the scene. -
Final Inspection:
Check for any white gaps between the lighthouse and sky. Carefully fill them in with your smallest brush if needed. -
The Reveal:
Once the painting is 100% dry to the touch, slowly peel away the masking tape at a 45-degree angle to reveal your clean white border.
Frame your new seascape in a simple black frame to let those sunset colors really shine
Pier Posts and Boardwalk Silhouette
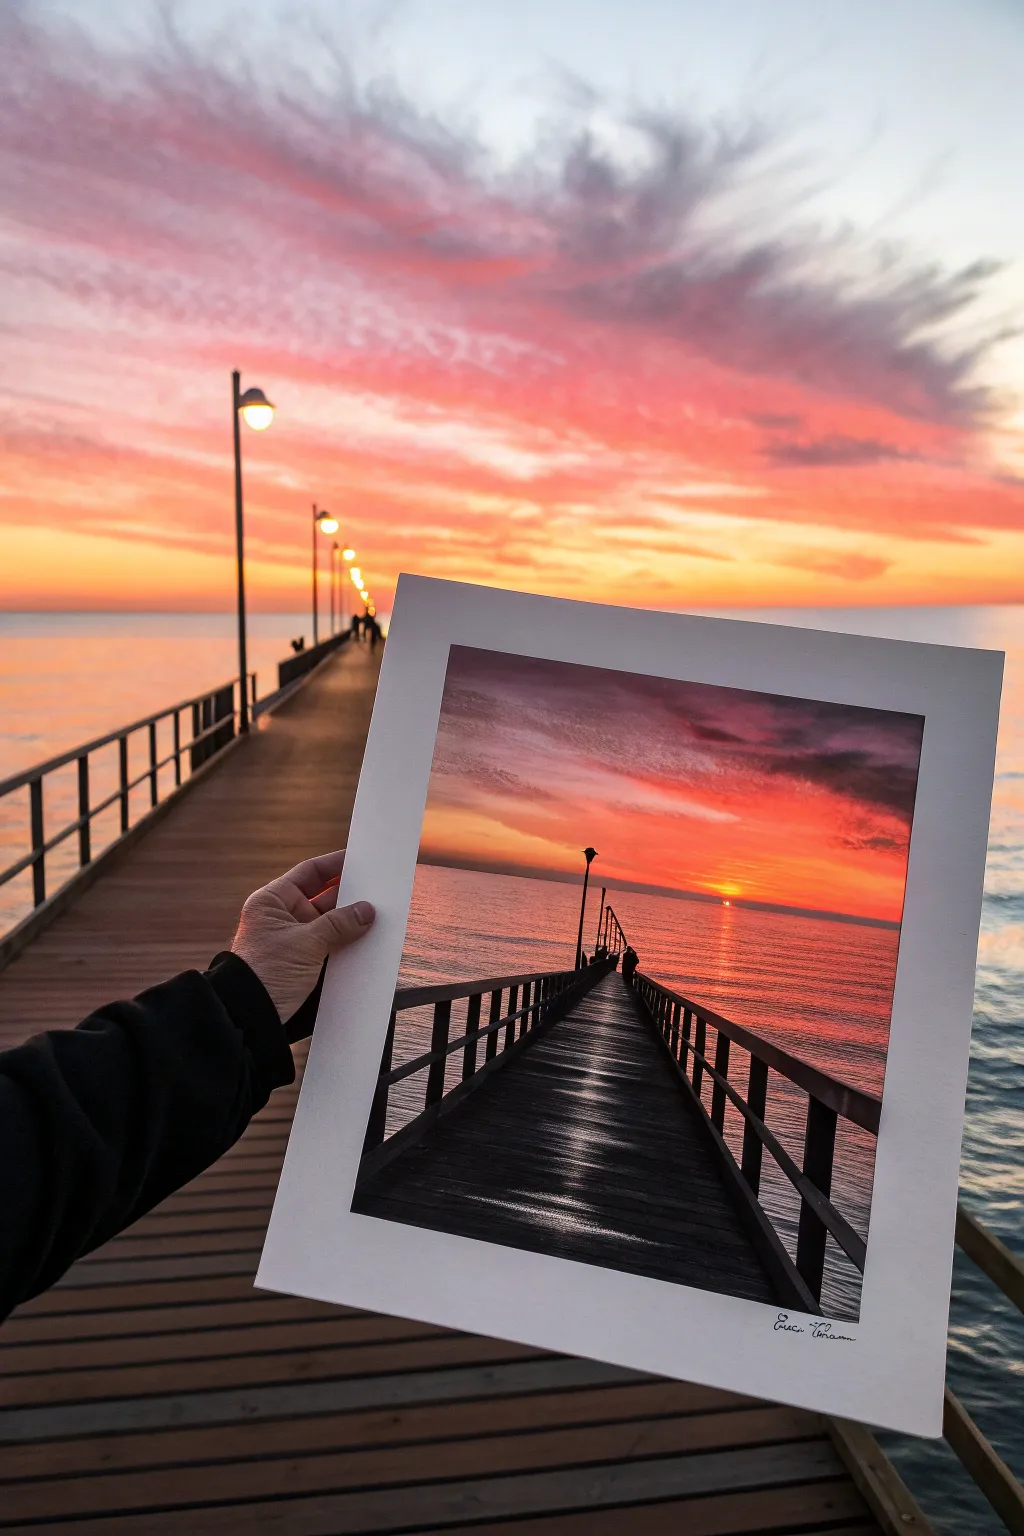
Capture the infinite feeling of a boardwalk stretching into a fiery horizon with this dramatic acrylic painting project. You will learn to blend a vibrant gradient sky and contrast it with crisp, architectural silhouettes to create depth and atmosphere.
How-To Guide
Materials
- Square canvas or heavy watercolor paper (e.g., 10×10 inches)
- Acrylic paints: Titanium White, Cadmium Yellow, Cadmium Orange, Alizarin Crimson, Dioxazine Purple, Mars Black
- Flat shader brushes (1 inch and 1/2 inch)
- Round detail brush (size 1 or 0)
- Ruler or straight edge
- Painter’s tape
- Cup of water and paper towels
- Palette or mixing plate
- Pencil
Step 1: Setting the Scene
-
Prepare the canvas:
If you want a clean white border like the reference image, tape off a one-inch border around your canvas or paper using artist’s tape. Press the edges down firmly to prevent paint bleed. -
Establish the horizon:
Using a ruler and a very light pencil touch, draw a horizontal line roughly one-third of the way up from the bottom of the painting area. This separates the sky from the sea. -
Sketch the perspective lines:
Mark a vanishing point on your horizon line, slightly off-center to the right. Use your ruler to draw two diagonal lines radiating from the bottom corners toward this point to form the edges of the pier.
Muddy Gradient?
If your sky colors turn brown while blending, wipe your brush clean between color switches. Don’t over-mix purple and yellow directly on the canvas.
Step 2: Painting the Sky and Sea
-
Start the sunset gradient:
Mix a vibrant red using Alizarin Crimson and a touch of Orange. Using your large flat brush, paint horizontal strokes starting near the top edge, blending downward. -
Blend the mid-tones:
While the red is still wet, introduce Cadmium Orange below it. Blend the two colors where they meet using long, smooth horizontal strokes to create a seamless transition. -
Add the horizon glow:
Mix Cadmium Yellow with a tiny bit of White. Apply this right above the horizon line, blending it upward into the orange. This creates the intense light source where the sun is setting. -
Paint the upper clouds:
For the darker clouds at the very top, mix a bit of Dioxazine Purple into your crimson. Use the corner of your brush to scumble in soft, irregular cloud shapes over the red layer while it’s still slightly tacky. -
Create the water base:
Reflect the sky colors into the water area below the horizon. Use a slightly muted version of the sky gradient—purple-reds at the bottom corners, transitioning to orange-reds near the horizon line. -
Add light ripples:
Using a smaller flat brush and the yellow-white mixture, paint thin, broken horizontal lines across the water surface, concentrating them in the center to suggest the sun’s reflection.
Steady Horizons
To keep the water line perfectly straight, lay a strip of tape along the horizon line while painting the sky, then move it up to paint the sea.
Step 3: Constructing the Silhouette
-
Block in the pier deck:
Load your medium flat brush with Mars Black. Fill in the triangular shape of the pier floor you sketched earlier. Ensure the edges are sharp and clean. -
Texture the wood:
While the black is drying, mix a dark grey (black with a tiny drop of white). Use a dry brush technique to drag faint vertical lines down the pier deck, simulating wood planks reflecting the sky’s light. -
Paint the railing posts:
Using your ruler and a round detail brush loaded with black, paint vertical posts along the perspective lines of the pier. Remember that posts get shorter and closer together as they approach the horizon. -
Connect the railings:
Carefully paint the horizontal railing bars connecting the posts. Use the ruler again to ensure these lines angle correctly toward the vanishing point. -
Add the lamp posts:
Paint a few taller vertical lines for lamp posts. Locate one prominently on the left side and a smaller one further down on the right. Top them with small geometric shapes for the lamps. -
Include figures:
With the finest point of your detail brush, paint tiny silhouettes of people walking near the end of the pier. Simple shapes work best here—a small oval for a head and a simple tapered line for the body.
Step 4: Final Details
-
Define the sun:
Place a tiny, pure white dot right on the horizon line in the center of the yellow glow to represent the sun just before it dips away. -
Highlight the pier:
I like to add very subtle highlights to the wet wood. Use a watered-down grey to add thin streaks on the pier deck that align with the sun’s position. -
Remove the tape:
Once the painting is completely dry, slowly peel away the painter’s tape at a 45-degree angle to reveal your crisp white border.
Sign your name in the clean white border for a professional gallery finish
Bridge Arch Sunset Silhouette
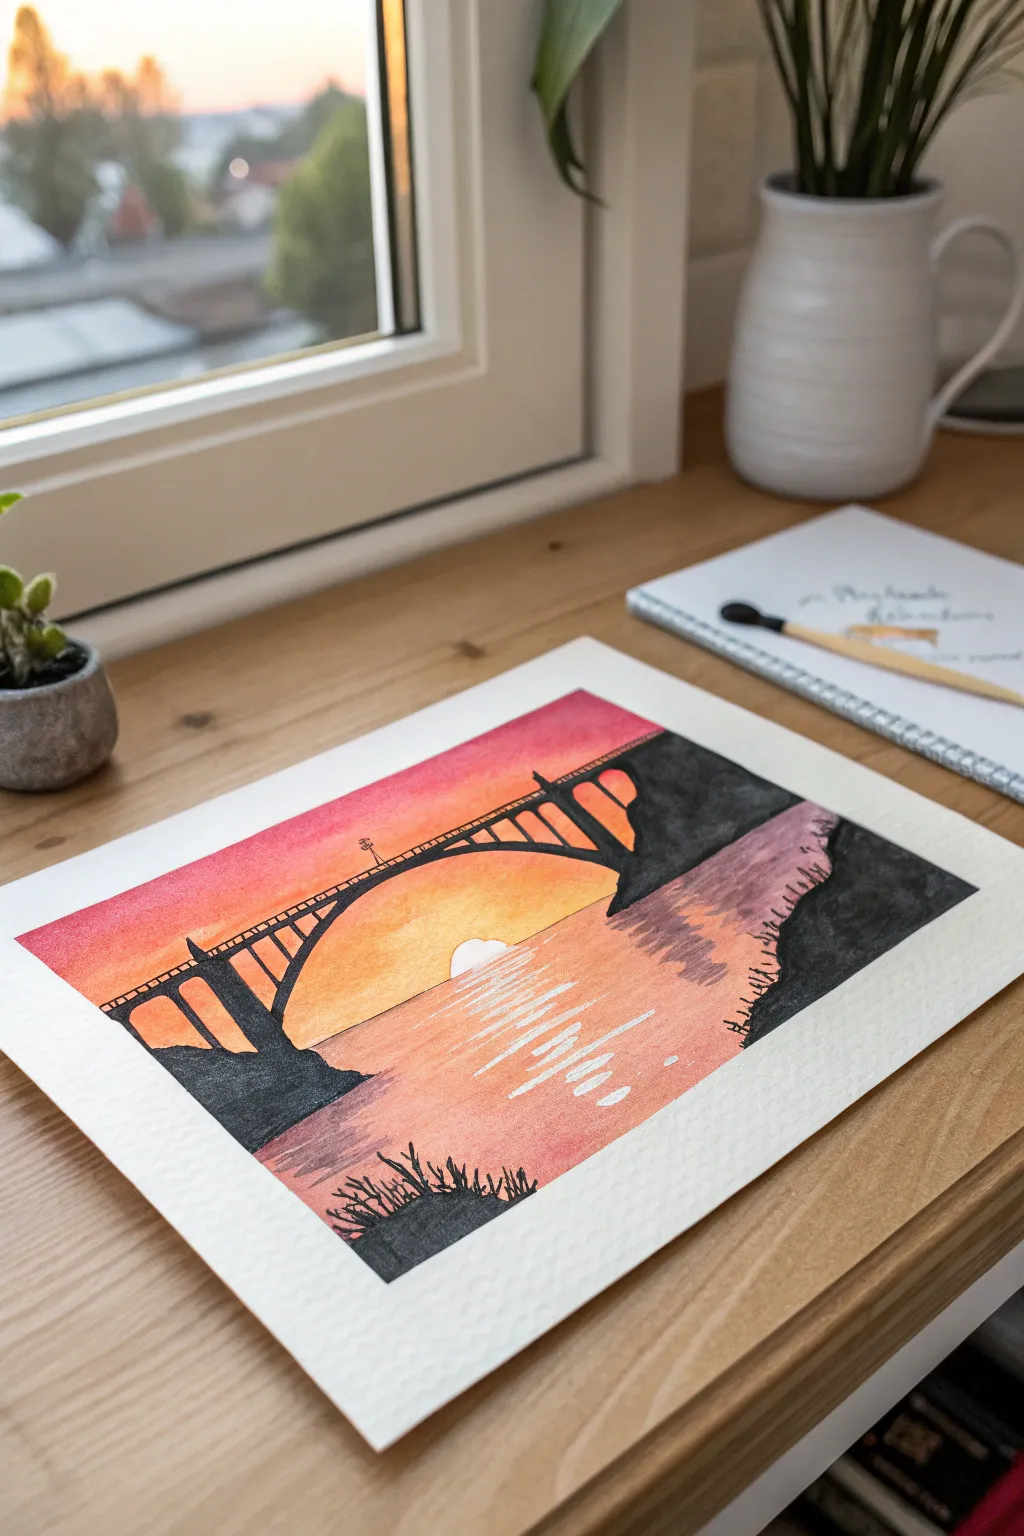
Capture the dramatic contrast of a California-style coastal sunset with this vibrant watercolor project. You will paint a warm, glowing gradient sky and then layer crisp black silhouettes over the top for a striking graphical effect.
Detailed Instructions
Materials
- Cold press watercolor paper (300 gsm)
- Watercolor paints (Cadmium Yellow, Alizarin Crimson, Burnt Sienna, Payne’s Gray or Black)
- Masking tape
- Flat wash brush (¾ inch or 1 inch)
- Round detail brush (size 2 or 4)
- White gouache or white gel pen
- Pencil and eraser
- Paper towels
- Cup of clean water
Step 1: Setting the Scene: The Sketch
-
Tape the edges:
Secure your watercolor paper to your workspace using masking tape. This creates that clean white border seen in the reference and keeps the paper flat while it’s wet. -
Outline the horizon:
Using a pencil, lightly draw a horizontal line about one-third of the way up the paper to establish where the sky meets the water. -
Sketch the major masses:
Lightly outline distinct shapes for the two cliff sides on the left and right. Connect them with a simple arch shape for the bridge, but don’t worry about drawing the railings or vertical supports yet.
Step 2: painting the Background: Sky and Water
-
Wet the sky:
Dip your clean flat brush in water and evenly wet the paper above the horizon line. You want it damp, but not puddling. -
Apply the sun glow:
Load your brush with Cadmium Yellow. Start painting a semi-circle shape right in the center of the horizon line for the setting sun, then brush outwards to create a bright yellow core. -
Blend in the pinks:
Mix a diluted Alizarin Crimson. While the yellow is still wet, start painting from the top edge of the paper downwards, letting the red meet the yellow and blend naturally into orange. -
Intensify the twilight:
Add a touch of Burnt Sienna or more crimson to the very top corners to deepen the sky color as it moves away from the sun. -
Paint the water base:
Moving below the horizon, replicate the sky’s colors in reverse on the water. Start with yellow near the horizon (leaving a small dry spot for the sun reflection if you wish) and blend into pinks towards the bottom. -
Add water texture:
While the water area is still slightly damp, use a smaller brush to add horizontal streaks of slightly darker pink or purple near the edges to suggest gentle ripples. -
Let it dry completely:
This is crucial. The paper must be bone dry before you add the black silhouettes, or the black paint will bleed into your beautiful sunset. I usually check the temperature with the back of my hand; if it feels cool, it’s still wet.
Solid Silhouettes
For the blackest silhouettes, watercolor often dries lighter. Consider using black gouache or waterproof black ink for the bridge to get true opacity.
Step 3: Adding the Silhouette: The Bridge
-
Mix your black:
Prepare a rich, opaque dark color using Payne’s Gray mixed with very little water, or use a solid black watercolor. It needs to be thick enough to cover the sunset background completely. -
Paint the cliffs:
Using a round brush, fill in the rock formations on the left and right sides. Keep the edges nearest the water slightly ragged to look like natural rock face. -
Define the bridge arch:
Carefully paint the main sweeping arch connecting the two cliffs. Use the tip of your round brush to keep the line smooth and consistent. -
Add vertical supports:
Paint the vertical pillars extending upwards from the arch to the road deck. Notice how they get taller as they move away from the center of the arch. -
Create the railing details:
Paint the straight flat line across the top for the road. Then, use the very tip of your smallest brush to make tiny vertical hash marks along the top edge to resemble the safety railing. -
Foreground foliage:
At the very bottom foreground, use quick, upward flicking motions to paint grass blades and small bushes in silhouette.
Make It 3D
Add tiny birds in the distance with a 005 fine liner pen, or highlight the top edge of the bridge railing with white gel pen for a rim-light effect.
Step 4: Final Touches: Highlights
-
Sun reflection:
Using white gouache or a white gel pen, draw horizontal zig-zag lines in the water directly beneath the sun. Make them wider near the bottom and narrower as they approach the sun. -
Enhance the sun:
If your painted sun lost its crispness, you can add a small semi-circle of white gouache right at the horizon line to make the sun look blindingly bright. -
Remove tape:
Once everything is absolutely dry, peel the masking tape away slowly at a 45-degree angle to reveal your crisp white frame.
Step back and enjoy the peaceful warmth radiating from your personal coastal sunset.
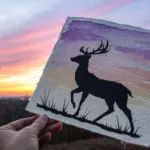
Wildlife on a Ridge Silhouette
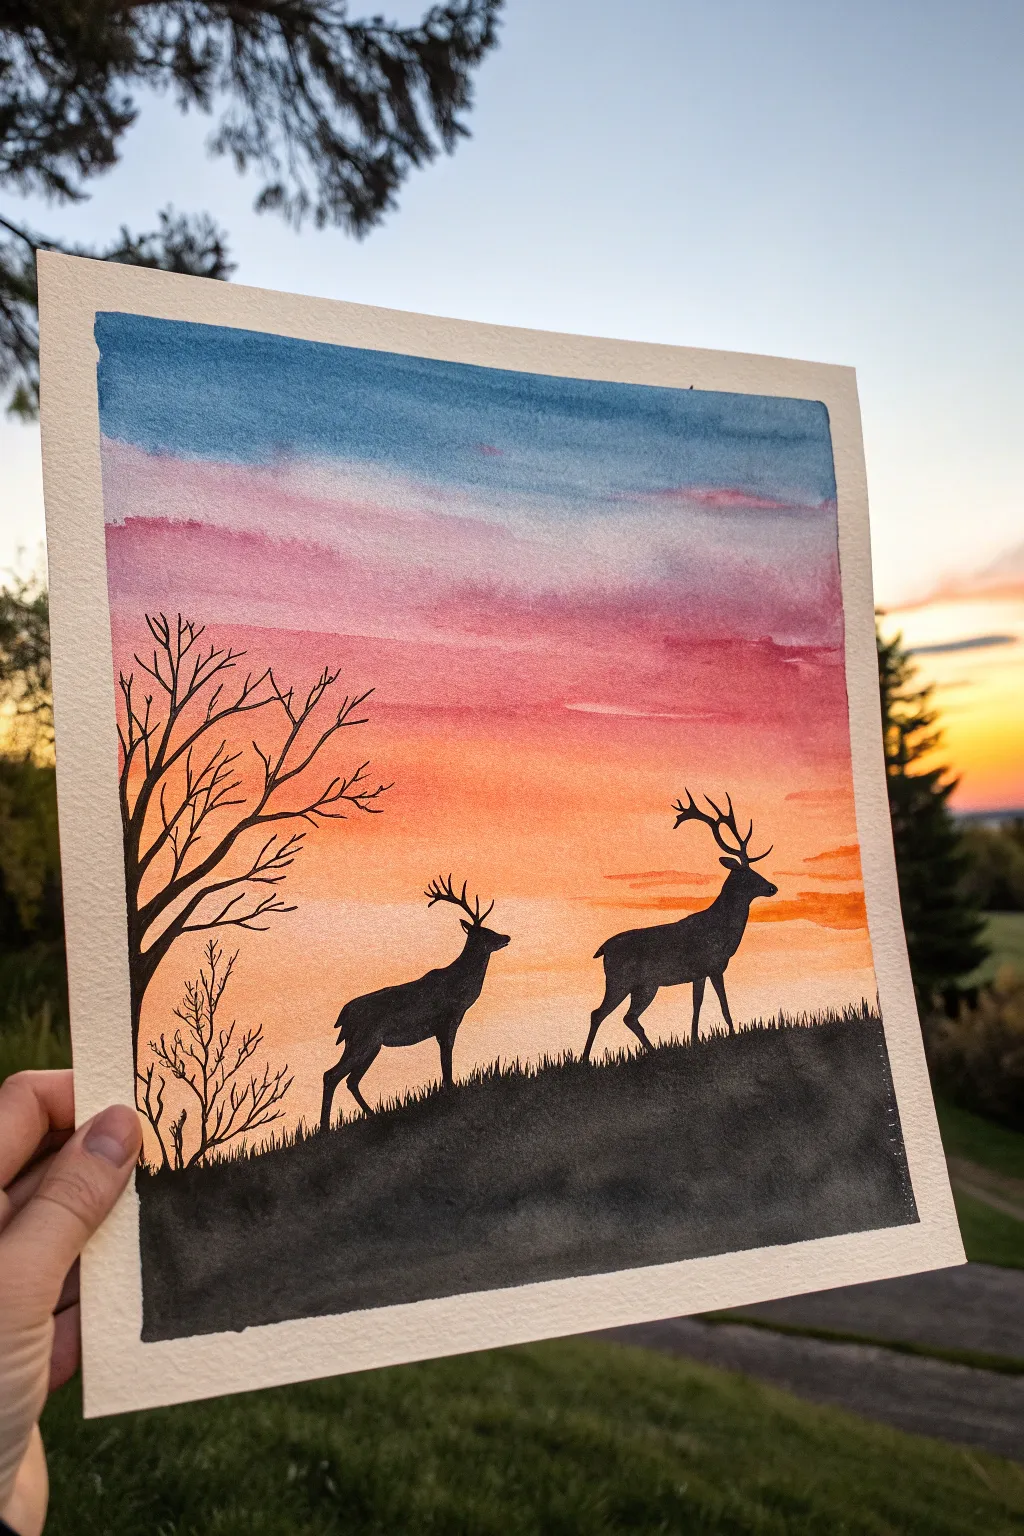
Capture the serene beauty of wildlife at dusk with this vibrant watercolor silhouette painting. You will learn to blend a seamless sunset gradient and layer striking black details to create a high-contrast, atmospheric scene.
How-To Guide
Materials
- Cold press watercolor paper (140lb/300gsm recommended)
- Watercolor paints (Indigo, Alizarin Crimson, Cadmium Red, Cadmium Yellow)
- Black ink or black gouache for silhouettes
- Painter’s tape or masking tape
- Flat wash brush (large)
- Round brush (size 6 or 8) for blending
- Fine liner or detail brush (size 0 or 1)
- Clean water and jar
- Paper towels
- Pencil and eraser
Step 1: Painting the Sky Gradient
-
Prepare your canvas:
Begin by taping down all four edges of your watercolor paper to a board or table. This creates that crisp white border seen in the final piece and prevents the paper from buckling when wet. -
Wet the paper:
Using your large flat brush, apply a generous coat of clean water across the entire sky area, stopping about a third of the way up from the bottom where the hill will be. The paper should be glisten, but not form puddles. -
Apply the blue sky:
Load your brush with a watery mix of Indigo or a deep blue. Paint a horizontal stripe across the very top of the paper, letting the wet-on-wet technique soften the bottom edge of the blue naturally. -
Transition to pink:
Clean your brush quickly and pick up Alizarin Crimson or a cool pink. Paint just below the blue, allowing the colors to touch and bleed slightly. Don’t overwork the boundary or you might get purple mud. -
Add the warm glow:
Switch to a vibrant orange or mix Cadmium Red with a little Yellow. Apply this band below the pink, pulling the color downward. The gradients should look like horizontal streaks, mimicking cloud layers. -
Finish with yellow light:
At the bottom of the sky section (near the horizon line), apply your lightest yellow. Blend it gently upward into the orange to create a glowing horizon effect. -
Dry thoroughly:
This is crucial: let the painting dry completely before moving on. The paper must be bone-dry and flat, otherwise, the sharp black silhouettes we add next will bleed into the sky.
Clean Lines Tip
If your hand is shaky for fine details like antlers, try using a black waterproof fineliner pen instead of a brush for better control.
Step 2: Adding the Silhouettes
-
Sketch the outline:
Lightly sketch the slope of the hill, the two deer, and the main branches of the tree using a pencil. Keep the lines faint so they don’t show through later. -
Paint the hill base:
Using black ink or thick black gouache, fill in the bottom hill section. Start with the solid mass at the bottom to establish your ground. -
Create grass texture:
Along the top edge of the hill, use a smaller brush to flick tiny, upward strokes. This creates the illusion of grass blades catching the dying light. -
Outline the deer:
Switch to your fine liner brush. carefully outline the bodies of the two deer. Pay close attention to the shape of their necks and the muscle definition in the legs. -
Fill the deer:
Fill in the bodies with solid black. Ensure the opacity is high; if it looks streaky, wait for it to dry and add a second coat of black. -
Detail the antlers:
With a very steady hand and your smallest brush, paint the antlers. Use just the tip of the brush to keep the lines delicate and sharp. -
Draw the main tree trunk:
On the left side, paint the thick trunk of the tree rising from the hill. Taper the trunk as it goes higher. -
Add branches:
Extend branches outward from the trunk. Remember that trees grow thinner as they extend outward; press harder at the base of a branch and lift off for the tips. -
Paint finer twigs:
Add smaller twigs to the main branches and a small bush near the base of the tree for balance. These tiny details add realism to the silhouette. -
Reveal the border:
Once the black ink is fully dry, slowly peel away the painter’s tape at a 45-degree angle to reveal your crisp, clean edges.
Golden Hour Glow
Leave tiny slivers of white paper or light yellow paint on the edges of the deer/tree that face the sun to create a backlit ‘rim light’ effect.
Now you have a stunning, high-contrast landscape ready to frame or gift
Bamboo or Tall Grass Close-Up Silhouette
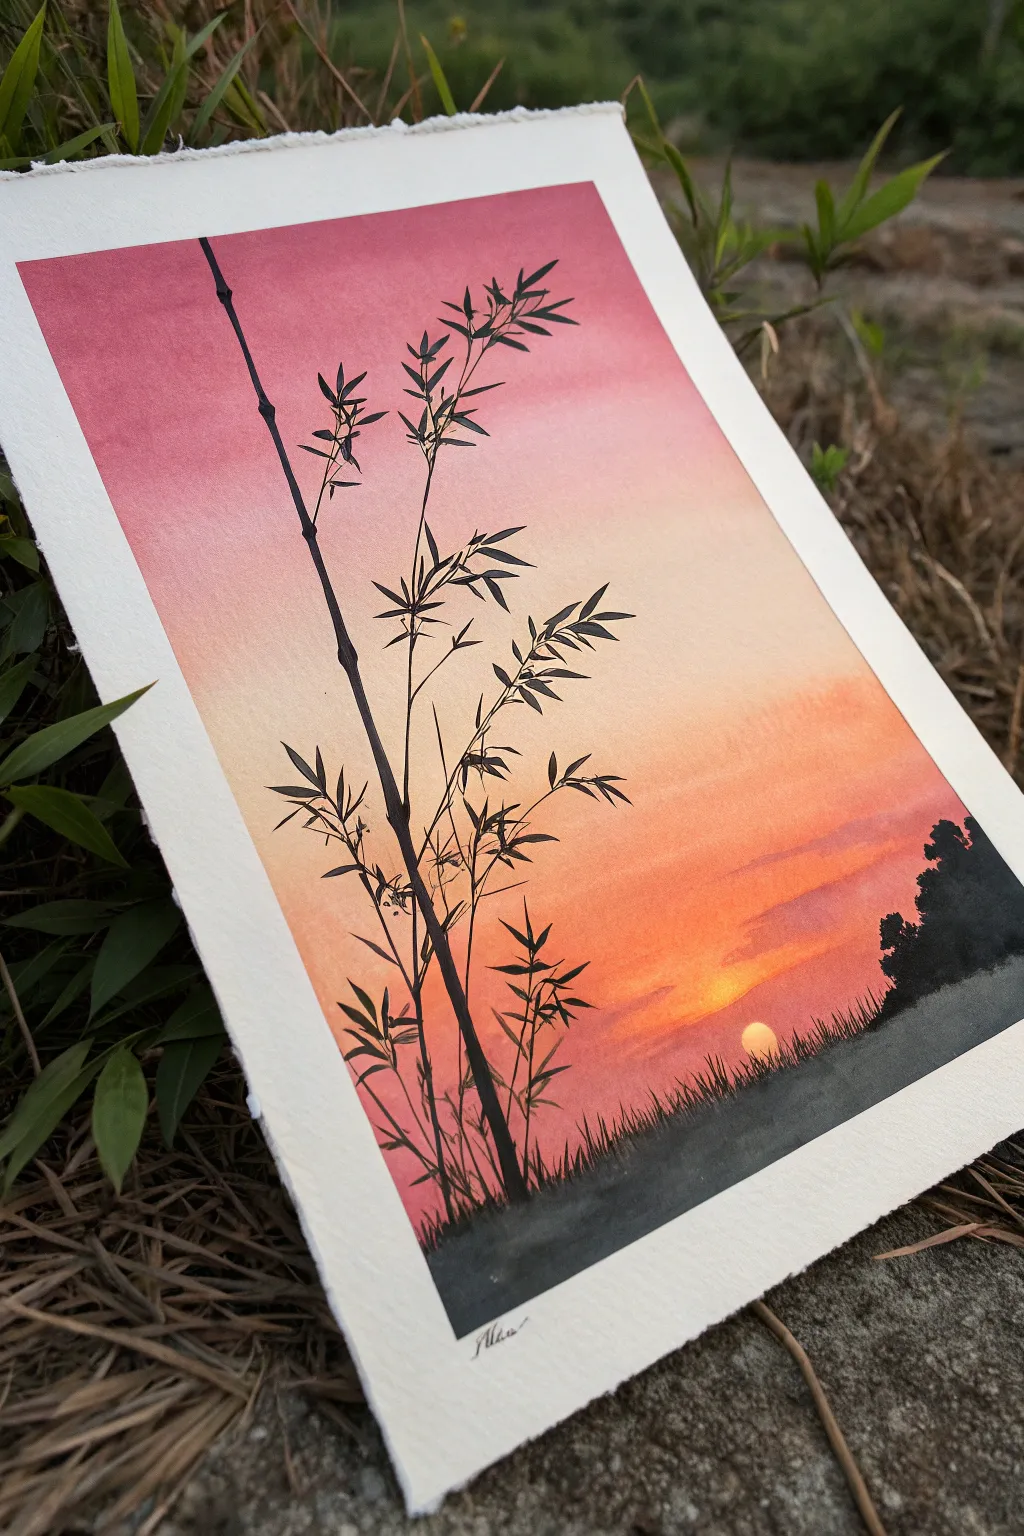
Capture the serene beauty of twilight with this stunning watercolor project, featuring a vibrant gradient sky and delicate bamboo silhouettes. The stark contrast between the bright, warm background and the crisp, dark foreground creates a peaceful and striking composition.
Step-by-Step Tutorial
Materials
- Cold-pressed watercolor paper (300 gsm)
- Watercolor paints (Alizarin Crimson, Cadmium Yellow, Orange, Gamboge, Black)
- Flat wash brush (1 inch)
- Round brush (size 6)
- Fine liner or rigger brush (size 0 or 1)
- Masking tape
- Clean water jar
- Paper towels
- Pencil (HB)
Step 1: Preparation and Base Layer
-
Tape the Edges:
Begin by securing your watercolor paper to a board or table using masking tape. This prevents the paper from buckling when wet and gives you clean, crisp borders later. -
Wet the Paper:
Using your large flat wash brush and clean water, dampen the entire surface of the paper evenly. You want a glisten, not puddles, to prepare for the wet-on-wet technique. -
Apply the Pink Top:
Load your flat brush with a watery mix of Alizarin Crimson or a cool pink. Paint horizontal strokes across the top third of the paper, letting the color naturally diffuse downwards. -
Blend in the Orange:
While the pink is still wet, clean your brush slightly and pick up orange paint. Apply this to the middle section of the paper, gently blending it upward into the pink to create a seamless transition. -
Add the Yellow Glow:
Switch to Cadmium Yellow or a warm Gamboge for the bottom third. Paint horizontal strokes, blending slightly with the orange above, but leave the very bottom area lighter to represent the brightest part of the sunset near the horizon. -
Create the Setting Sun:
While the yellow paint is still damp but not soaking, lift a small circle of paint out near the bottom right using a clean, thirsty brush or paper towel tip to suggest the sun, or paint around a small circle if you haven’t covered it yet. -
Dry Completely:
Wait for the background wash to dry completely. This is crucial—if the paper is damp, the sharp silhouette lines we add next will bleed and become fuzzy.
Clean Lines
For the sharpest bamboo leaves, ensure your black paint has an ink-like consistency. Too much water makes it transparent; too little makes it drag.
Step 2: Painting the Backdrop
-
Sketch the Horizon:
Lightly sketch a low, uneven horizon line with a pencil. You can also faintly mark where the main bamboo stalks will rise to guide your composition. -
Paint the Distant Trees:
Mix a dark grey (black diluted with a touch of blue or brown). Using the round brush, paint a jagged tree line on the right side of the horizon. Keep the shapes organic and slightly uneven. -
Ground the Horizon:
Fill in the ground area below the horizon line with black paint. I usually switch to a thicker consistency here to ensure complete opacity and solid coverage. -
Add Grassy Texture:
While the black ground is wet, use the tip of your brush to flick tiny, upward strokes along the horizon line, simulating tall grasses catching the last light.
Golden Hour Glow
Add a wash of very dilute yellow over the bottom of the black grass silhouette once dry to make it look like the sun is illuminating the mist.
Step 3: Bamboo and Details
-
Main Bamboo Stalks:
Switch to your fine liner or rigger brush loaded with concentrated black paint. Paint the main bamboo stalks starting from the bottom upward. Remember that bamboo grows in segments, so life your brush slightly between sections to create the nodes. -
Vary stalk Thickness:
Make the main stalk thicker at the bottom and gradually thinner as it reaches the top. Add a second, slightly thinner stalk crossing behind or beside the first for depth. -
Add Branches:
From the nodes (the joints of the bamboo), paint thin, angular branches extending outward. Keep your wrist loose to get sharp, natural-looking angles. -
Paint the Leaves:
Using the tip of the round brush or liner, press down and lift quickly to create the classic lance-shaped bamboo leaves. Group them in clusters of three or five at the ends of the branches. -
Balance the Silhouette:
Step back and assess the composition. Add smaller clusters of leaves or tiny twigs to fill empty spaces, ensuring the silhouette interacts nicely with the gradient background. -
Final Touches:
Once the black ink is fully dry, you can sign your work at the bottom. Carefully peel off the masking tape at a 45-degree angle to reveal your clean edges.
Enjoy the peaceful atmosphere your new painting brings to the room
Twilight Fade With First Stars
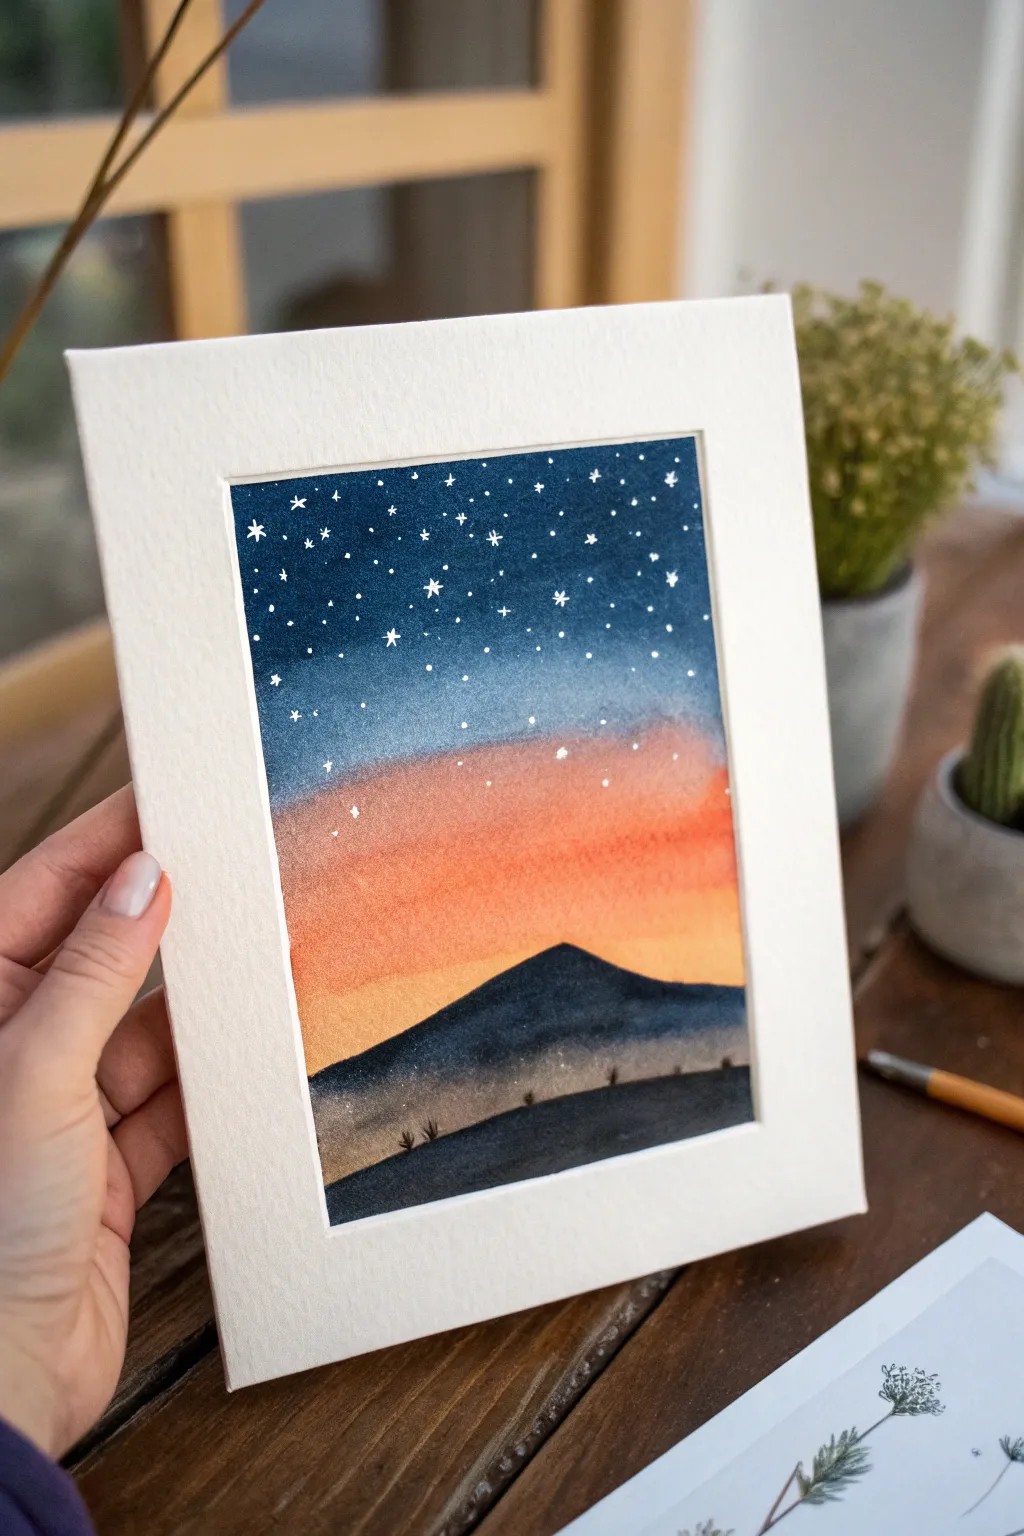
This ethereal watercolor project captures the quiet moment when the first stars appear over a fading sunset. The smooth gradient from deep indigo into warm orange creates a stunning backdrop for simple, majestic mountain silhouettes.
Step-by-Step Guide
Materials
- Cold-press watercolor paper (300gsm/140lb)
- Painter’s tape or masking tape
- Watercolor paints (Indigo, Prussian Blue, Burnt Sienna, Cadmium Orange)
- Round watercolor brushes (Size 8 or 10 for washes, Size 2 or 0 for details)
- White gel pen or opaque white gouache
- Two jars of water (clean and dirty)
- Paper towels
- Pencil (HB or 2B)
- White mat board for framing (optional)
Step 1: Creating the Sky
-
Prepare the canvas:
Tape down all four edges of your watercolor paper to a board or table. This creates a clean white border and prevents the paper from buckling significantly while wet. -
Sketch the horizon:
Lightly sketch a single, simple triangle shape for the main mountain peak about one-third of the way up from the bottom. Add a gentle curve below it for the foreground hill. -
Wet the sky area:
Using your larger round brush, brush clean water over the entire sky area, stopping just above your pencil line for the mountain. The paper should be glisten, but not hold puddles. -
Apply the orange glow:
Mix a diluted wash of Cadmium Orange. Paint a horizontal band just above the mountain line, letting the wet paper help the pigment spread softly upwards. -
Deepen the sunset:
While the orange is still wet, add a touch of Burnt Sienna to the bottom edge of the orange band to create warmth and depth near the horizon. -
Introduce the blue:
Load your brush with Prussian Blue. Start painting from the very top of the paper, moving downward with horizontal strokes. -
Blend the gradient:
As you move down the paper, gradually dilute the blue paint with water. Stop just before you touch the orange section; I like to let the two colors bleed naturally into each other in the damp middle zone rather than force-mixing them, which can create mud. -
Darken the zenith:
While the top is still wet, drop in concentrated Indigo right along the upper edge to create the appearance of deep space. -
Let it dry completely:
This is crucial. The sky must be bone dry before you paint the mountains, or the dark paint will bleed up into your beautiful sunset. Waiting 15-20 minutes or using a hairdryer on low heat is recommended.
Clean Edges Trick
Before painting, run a bone folder or credit card firmly over the edge of your painter’s tape. This seals the gap and prevents paint from seeping under.
Step 2: Painting the Silhouette & Stars
-
Paint the main mountain:
Mix a strong, creamy consistency of Indigo with a tiny touch of Burnt Sienna to create a dark, muted slate blue. Fill in the mountain shape you sketched earlier. -
Add atmospheric perspective:
While the bottom of the mountain shape is wet, dab it with a clean, damp brush or paper towel to lift a little color, making the base look slightly misty and lighter than the peak. -
Paint the foreground hill:
Once the main mountain is dry, use pure, concentrated Indigo to paint the foreground hill. This should be the darkest element in the painting to create depth. -
Detail the ridge:
Using your smallest brush (size 0 or 2), paint tiny vertical strokes along the ridge of the foreground hill to suggest distant scrub brush or cacti. -
Add the stars:
Once the sky is completely dry, use a white gel pen. Make small dots in the blue area, varying their spacing. Add a few tiny ‘cross’ shapes to represent twinkling stars. -
Review the star placement:
Cluster a few stars together to hint at constellations, but keep the orange horizon area mostly clear to mimic realistic twilight visibility. -
Reveal the border:
Carefully peel away the masking tape at a 45-degree angle to reveal your crisp, clean edges. -
Add the final touch:
This project looks best when finished with a white mat, which amplifies the contrast of the dark night sky.
Level Up: Silver Linings
Mix a tiny bit of silver metallic watercolor or ink into your star paint. It won’t show much in photos, but in person, the stars will shimmer.
Place your finished piece in a frame or display it on a stand to enjoy the peaceful transition from day to night
Cut-Paper Style Layered Silhouettes
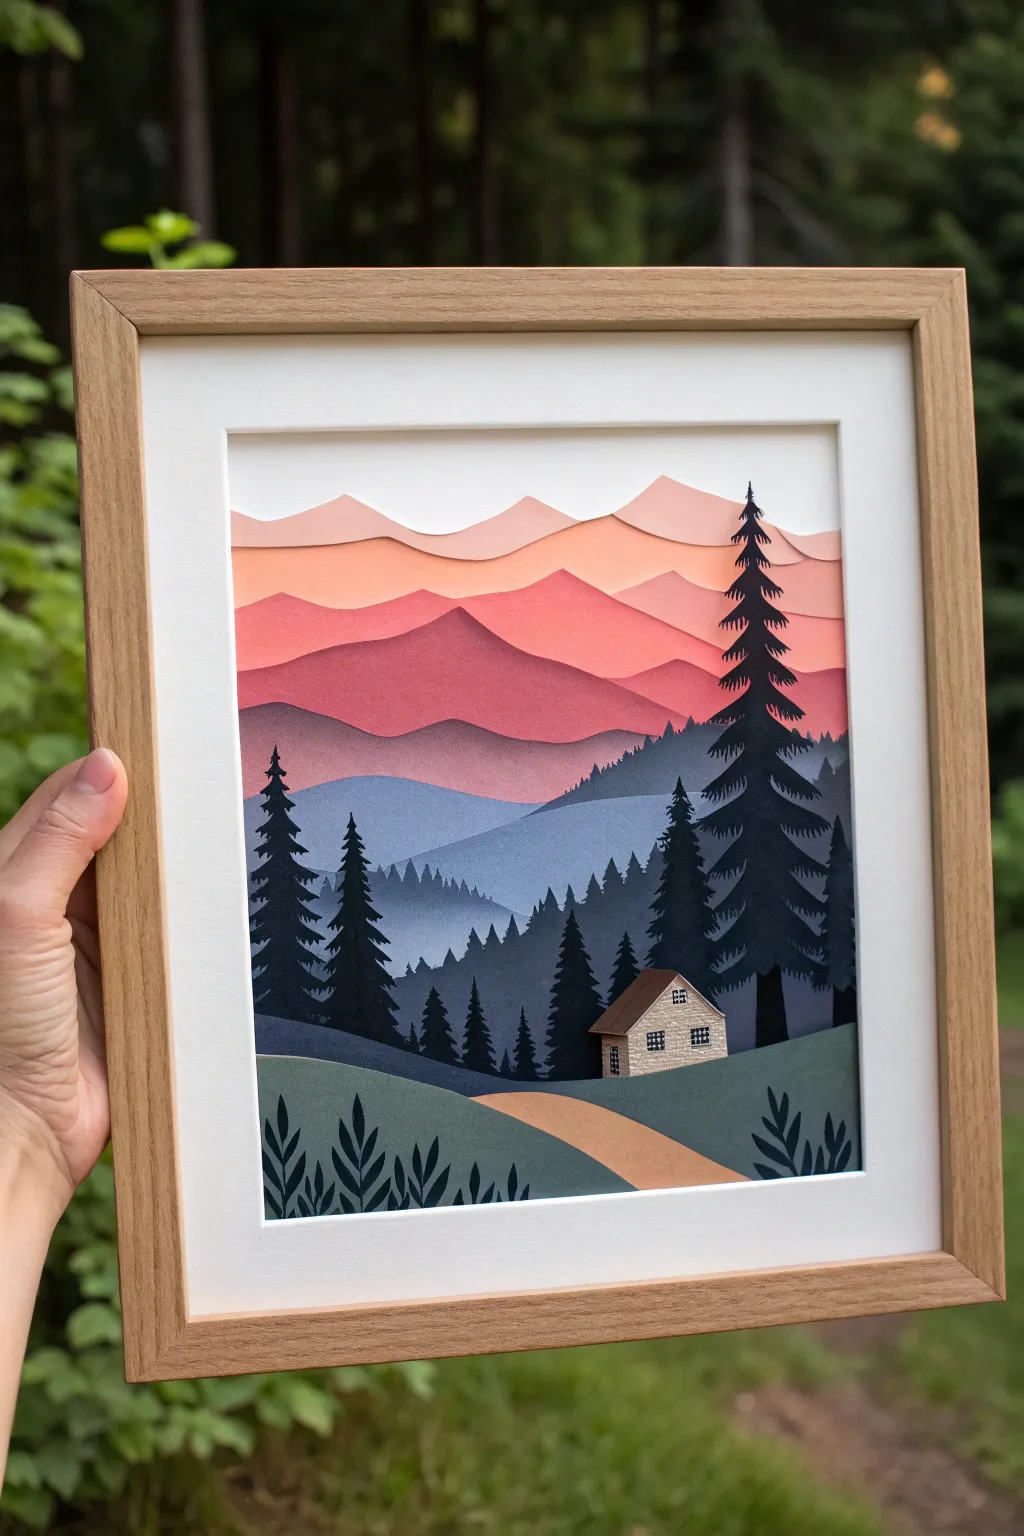
Capture the serene beauty of a mountain dusk with this intricate layered paper art project. By stacking sheets of cardstock in varying shades, you’ll create a stunning sense of depth and a vibrant, dimensional landscape.
Step-by-Step Tutorial
Materials
- Cardstock paper (shades of pink, orange, purple, blue, green, and dark charcoal)
- Deep shadow box frame (8×10 or similar)
- Precision craft knife (X-Acto)
- Self-healing cutting mat
- Foam adhesive squares or tape (varying thicknesses)
- Pencil and eraser
- Ruler
- Fine-tip glue pen
- White gel pen or fine white paint marker
- Smooth white backing paper
Step 1: Designing the Layers
-
Sketch your composition:
Start by sketching your full landscape on a plain piece of paper the size of your frame. Plan for 6-8 distinct layers: sky at the back, rolling mountains in the middle, and detailed hills and trees in the foreground. Number them 1 (front) to 8 (back). -
Create templates:
Trace the outline of each individual layer onto separate sheets of tracing paper or copy paper. Remember that each layer needs to extend to the bottom and sides of the frame to be hidden behind the layer in front of it. -
Select your palette:
Choose your cardstock gradient. Use light peach and soft pinks for the distant sky and mountain peaks, transitioning into deeper magentas, purples, and finally dark blues and greens for the foreground elements.
Sticky Situation
If small details like tree tips won’t stick with tape, use a tiny dab of clear drying craft glue. Hold it with tweezers for 30s until set to prevent lifting.
Step 2: Cutting the Background and Mountains
-
Cut the sky layers:
Begin with the very back layer, which will just be a solid sheet of your lightest sky color (white or very pale peach). Then, cut the 2-3 layers of distant mountains from pink and orange cardstock. These should have soft, rolling organic curves. -
Cut the middle mountains:
For the mid-range mountains, use your purple or deep magenta cardstock. Cut more defined peaks here to suggest rugged terrain. I like to keep the edges very clean for a sharp silhouette. -
Create the blue hills:
Cut the next layer from a muted slate blue. This layer represents the fading distance before the forest, so keep the shapes relatively simple but distinct from the mountains behind.
Lit from Within
Place a thin string of battery-operated LED fairy lights between the very last two layers (the back mountains) to give your sunset a real glowing effect.
Step 3: Detailing the Forest to Foreground
-
Cut the forest silhouette:
Using a dark charcoal or midnight blue cardstock, carefully cut the silhouette of the pine forest. This involves intricate cutting for the tree tops; use a fresh blade to get sharp points on the trees. -
Craft the large pine tree:
Cut the prominent large pine tree on the right side from dark paper. Take your time with the branches—small, jagged cuts create the best needle texture. Save the trunk for a stable base. -
Construct the tiny house:
Cut the main shape of the house from beige or light brown paper. Cut a separate roof piece from a slightly darker shade. Use a fine-tip black pen to draw the window grids and a white gel pen to add texture lines to the siding. -
Assemble the foreground hill:
Cut the bottom-most foreground layer from a deep sage or forest green. Include cut-outs for the fern-like plants on the left and right bottom corners. Cut a separate swooping shape from tan paper for the path. -
Attach path and details:
Glue the tan path directly onto the green foreground layer using a glue pen. Adhere the tiny house behind one of the foreground hill curves, ensuring it peeks out naturally.
Step 4: Assembly and Framing
-
Prepare the spacers:
Cut plenty of foam adhesive squares. For a deep effect, you may need to stack two squares on top of each other for the front layers, and use single squares for the distant mountains. -
Stack from back to front:
Place your solid sky layer down first. Apply foam tape to the back of the second layer (distant mountains) and adhere it over the sky. Continue stacking layer by layer, aligning the outer edges perfectly. -
Secure the delicate trees:
For the detailed tree layer, place tiny pieces of foam tape behind the wider parts of the trees. If the tips are unsupported, use a tiny dot of glue to secure them to the layer behind so they don’t curl. -
Final clean up:
Check for any stray pencil marks and erase them gently. Use compressed air or a soft brush to remove any paper dust from your layers. -
Frame the artwork:
Clean the inside of the shadow box glass thoroughly. Place your stacked paper block into the frame and secure the backing board tightly to press everything in place.
Hang your finished piece where the light can catch the layers and enjoy your handmade view
Double-Exposure Sunset Silhouette Portrait
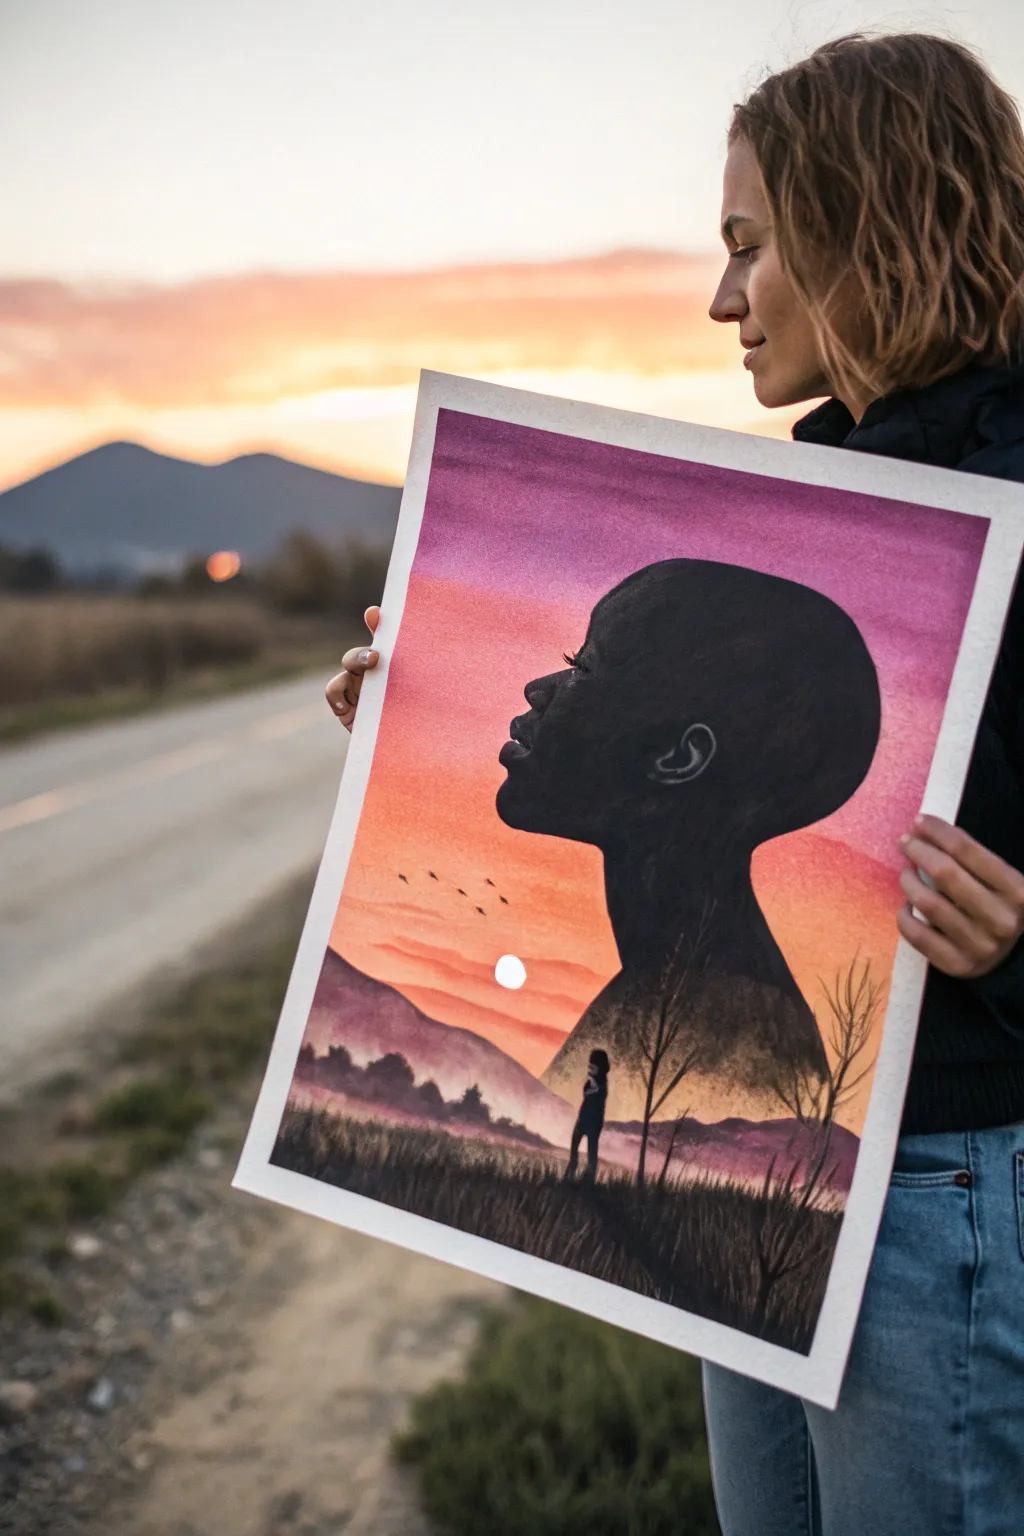
Merge portraiture and landscape art with this stunning double-exposure painting that places a serene sunset inside a powerful silhouette. The vibrant gradient sky contrasts beautifully with the deep blacks, creating a piece that feels both grounded and ethereal.
How-To Guide
Materials
- High-quality watercolor paper (cold press, heavy weight)
- Watercolor paints (magenta, purple, orange, yellow)
- Black acrylic paint or black gouache
- Pencil for sketching
- Masking fluid (optional but helpful)
- Medium flat watercolor brush
- Fine detail acrylic brush
- Palette for mixing
- Water cups and paper towels
- Reference photo for profile silhouette
Step 1: Setting the Sky
-
Sketch the Outline:
Begin by lightly sketching the large profile of a woman’s head and shoulders on your paper. Keep the lines very faint; you just need a guide for where the background ends and the subject begins. -
Prepare the Gradient Colors:
Mix your watercolor washes. You’ll need a rich purple for the top, transitioning into magenta, then a warm orange, and finally a soft yellow near the horizon line. -
Wet the Paper:
Using clean water and a flat brush, wet the entire area of the sky—both inside and outside the silhouette sketch. This wet-on-wet technique allows for a seamless blend. -
Paint the Upper Sky:
Start at the very top edge with your purple wash. Apply broad horizontal strokes, letting the color bleed slightly downward. -
Blend the Transition:
While the purple is still wet, introduce the magenta just below it. Overlap the strokes gently so the colors merge without creating a hard line. -
Add the Sunset Glow:
Continue downward with your orange wash, and finish with the yellow near where the horizon will be. Let the colors naturally diffuse. -
Lift the Sun:
While the paint is still damp, use a dry, clean brush or a small piece of paper towel to lift a small circle of paint near the horizon line to create the white sun. Alternatively, you can paint around this spot if you sketched it earlier.
Clean Edges
For the crispest silhouette edge, outline the profile with a fine liner pen before filling the rest with paint. This acts as a barrier and keeps your brushstrokes neat.
Step 2: Creating the Landscape
-
Define the Horizon:
Once the sky is tacky but almost dry, mix a diluted purple-grey watercolor. Paint faint, rolling hills across the lower third of the paper to establish distant mountains. -
Paint Mid-ground Hills:
Mix a slightly darker, more saturated purple. Paint a second layer of hills in front of the first set, adding a bit more definition to create depth. -
Darken the Foreground:
At the very bottom of the painting, use a very concentrated dark purple or diluted black to paint the grassy field foundation. -
Add Texture:
While the foreground is damp, drop in hints of black to suggest uneven terrain and shadows in the grass. -
Dry Completely:
Allow the entire piece to dry completely. The paper must be bone-dry before moving to the acrylic stage to prevent bleeding.
Step 3: The Double Exposure Silhouette
-
Block in the Profile:
Switch to opaque black acrylic or gouache. Carefully paint the main silhouette of the face, neck, and head. Follow your pencil lines precisely. -
Fade the Neck:
As you paint down the neck, stop abruptly where the landscape begins. Instead of a solid line, feather the black paint out so it seems to dissolve into the distant mountains. -
Detail the Face:
Using your finest brush and a tiny amount of white or grey mixed with black, add subtle highlights to define the ear, eye lashes, and lips. This subtle detailing gives the silhouette dimension. -
Paint the Foreground Grass:
Back at the bottom of the page, use solid black acrylic to paint individual blades of tall grass rising up from the bottom edge. Vary the height and direction for realism. -
Add Trees and Foliage:
Paint thin, bare branches reaching up from the grass, overlapping the landscape background. Let some branches reach high enough to touch the neck area of the silhouette. -
Insert the Tiny Figure:
Paint a small, full-body silhouette of a person standing in the grass field. Keep this figure small to emphasize the scale of the larger profile. -
Final Birds:
Add tiny V-shapes in the distance for birds flying across the sunset, bridging the gap between the profile face and the open sky.
Level Up: Cosmic Touch
Add stars to the darkening purple section of the sky by flicking a stiff toothbrush loaded with white acrylic paint for a starry night transition effect.
Step back and admire how the two worlds merge into one emotional masterpiece


Have a question or want to share your own experience? I'd love to hear from you in the comments below!