Thanksgiving finger painting is my favorite kind of holiday art because it’s equal parts messy play and meaningful keepsake. With a few fall colors and your hands, you can turn simple prints into turkeys, pumpkins, and cozy autumn scenes in minutes.
Turkey “Thankful For” Handprint Page
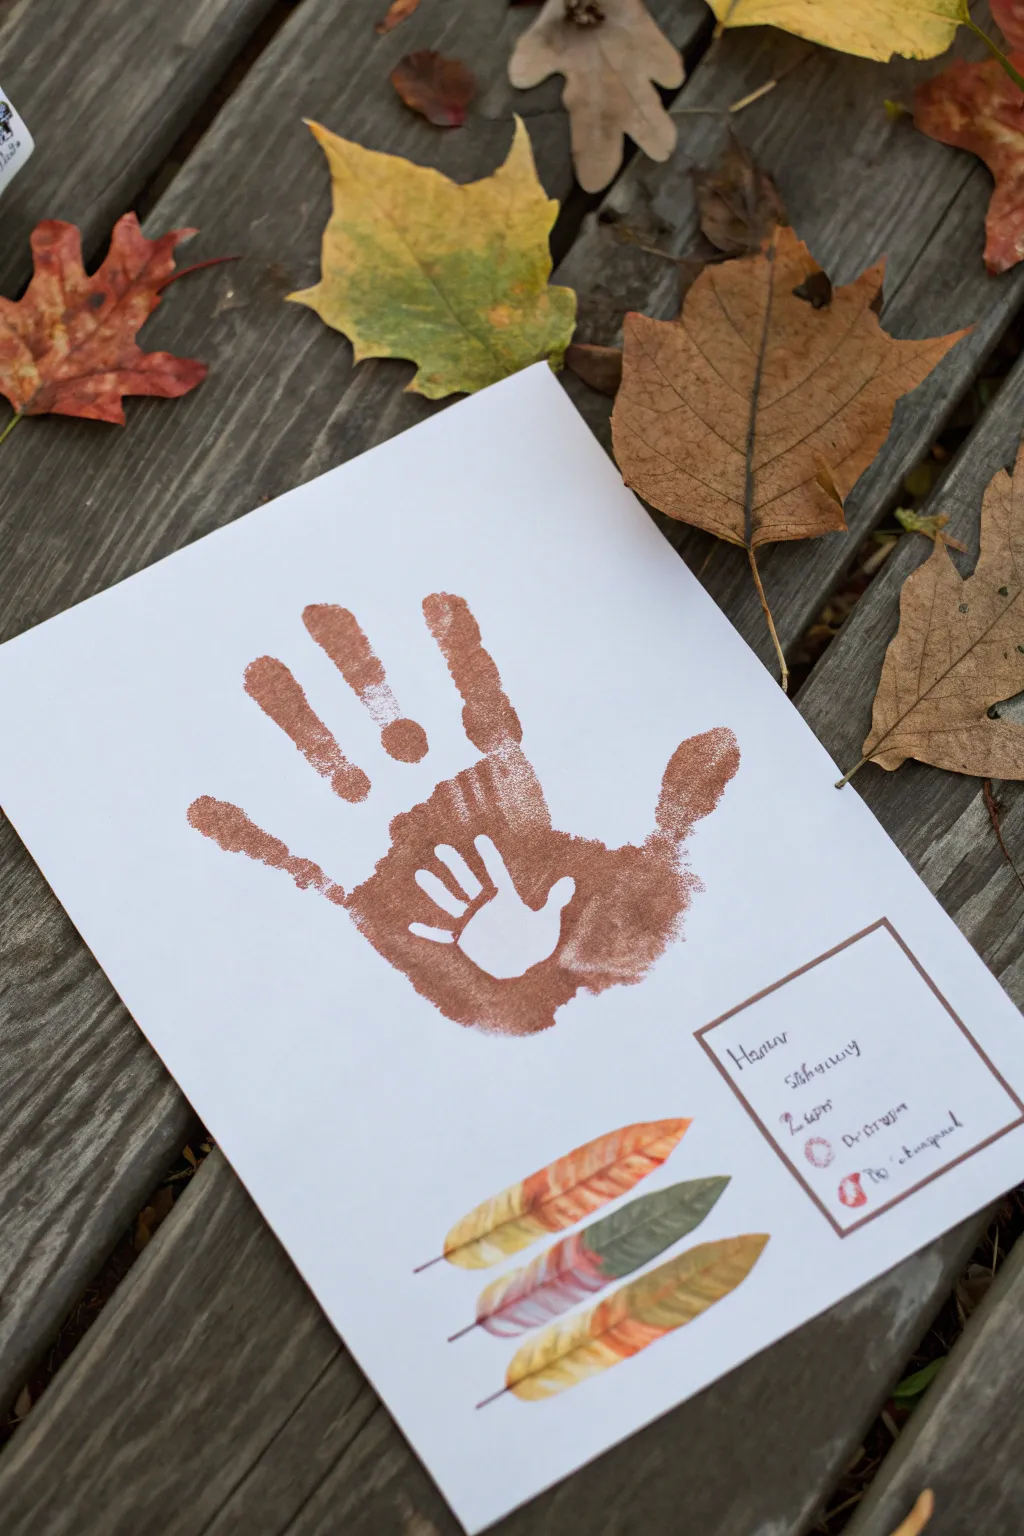
This heartwarming project captures the bond between parent and child by nesting a tiny handprint inside a larger one. Using warm brown tones and decorative feathers, it creates a keepsake perfect for Thanksgiving or a fall memory book.
Step-by-Step Guide
Materials
- White cardstock or heavy construction paper
- Washable brown craft paint (acrylic or tempera)
- Removable adhesive vinyl or contact paper (for the stencil)
- Scissors or craft knife
- Paintbrush or foam sponge
- Watercolor paints (orange, red, green, yellow)
- Fine-tip black marker or pen
- Pencil
Step 1: Creating the Negative Space Stencil
-
Trace the small hand:
Begin by gently tracing the child’s hand onto the backing of the adhesive vinyl or contact paper using a pencil. Make sure the fingers are spread slightly apart. -
Cut out the shape:
Carefully cut around the traced hand shape. You want the positive hand shape itself, which will act as a sticker to block the paint. -
Position the sticker:
Peel off the backing and stick the vinyl hand into the center of the adult’s palm. Press down firmly on all the edges, especially the fingertips, to prevent paint from seeping underneath.
Crisp Edges
Paint bleeding under the stencil? Ensure the adhesive vinyl is pressed down very firmly. Remove the stencil while paint is tacky, not bone dry, to avoid chipping edges.
Step 2: Applying the Large Handprint
-
Prepare the paint:
Squeeze a generous amount of brown washable paint onto a palette or paper plate. You want a consistency that is thick enough to be opaque but spreads easily. -
Coat the adult hand:
Using a sponge or large brush, paint the entire palm and fingers of the adult’s hand. Paint directly over the vinyl sticker that is currently stuck to the palm. -
Make the impression:
Press the painted hand firmly onto the center of the white cardstock. Keep the fingers spread wide to mimic turkey feathers. -
Lift and clean:
Lift the hand straight up to avoid smearing. Wash the paint off the adult’s hand immediately. -
Reveal the surprise:
Once the paint on the paper is tacky but not fully dry, carefully use tweezers or a fingernail to peel away the vinyl sticker, revealing the white child’s handprint inside the brown palm. -
Let it dry completely:
Set the paper aside until the brown paint is completely dry to the touch.
Date It!
Don’t forget to write the year and the child’s age in small print on the back or bottom corner. These hands grow fast, and you’ll want to remember exactly when this was made.
Step 3: Painting the Feathers
-
Sketch feather outlines:
Lightly sketch three feather shapes near the bottom right corner of the paper using a pencil. -
Mix feather colors:
Prepare your watercolors. You’ll want a wash of orange, a muted red, and a soft olive green to match the autumnal theme. -
Paint the first feather:
Fill the top feather shape with varying shades of orange and yellow, letting the colors bleed slightly into each other for a natural look. -
Paint the middle feather:
Color the middle feather with touches of red and purple tones. Keep the paint somewhat translucent. -
Paint the bottom feather:
Use the olive green and yellow mix for the final feather. I find that keeping strokes loose helps them look wispy and realistic.
Step 4: Adding Final Details
-
Draw the text box:
Using a ruler and a brown or dark red marker, draw a simple square frame in the bottom right corner, partially overlapping the painted feathers. -
Write the message:
Inside the box, use a fine-tip black pen to write ‘Happy Thanksgiving’ or a list of things you are thankful for. -
Add detail lines:
Once the watercolor feathers are dry, use a very fine pen to add a central quill line and small diagonal strokes to define the feather barbs. -
Erase pencil marks:
Check that all paint is fully dry, then gently erase any visible pencil lines from your initial sketches.
Display your beautiful dual handprint art alongside some fall leaves for a truly seasonal touch

Thumbprint Turkey Parade
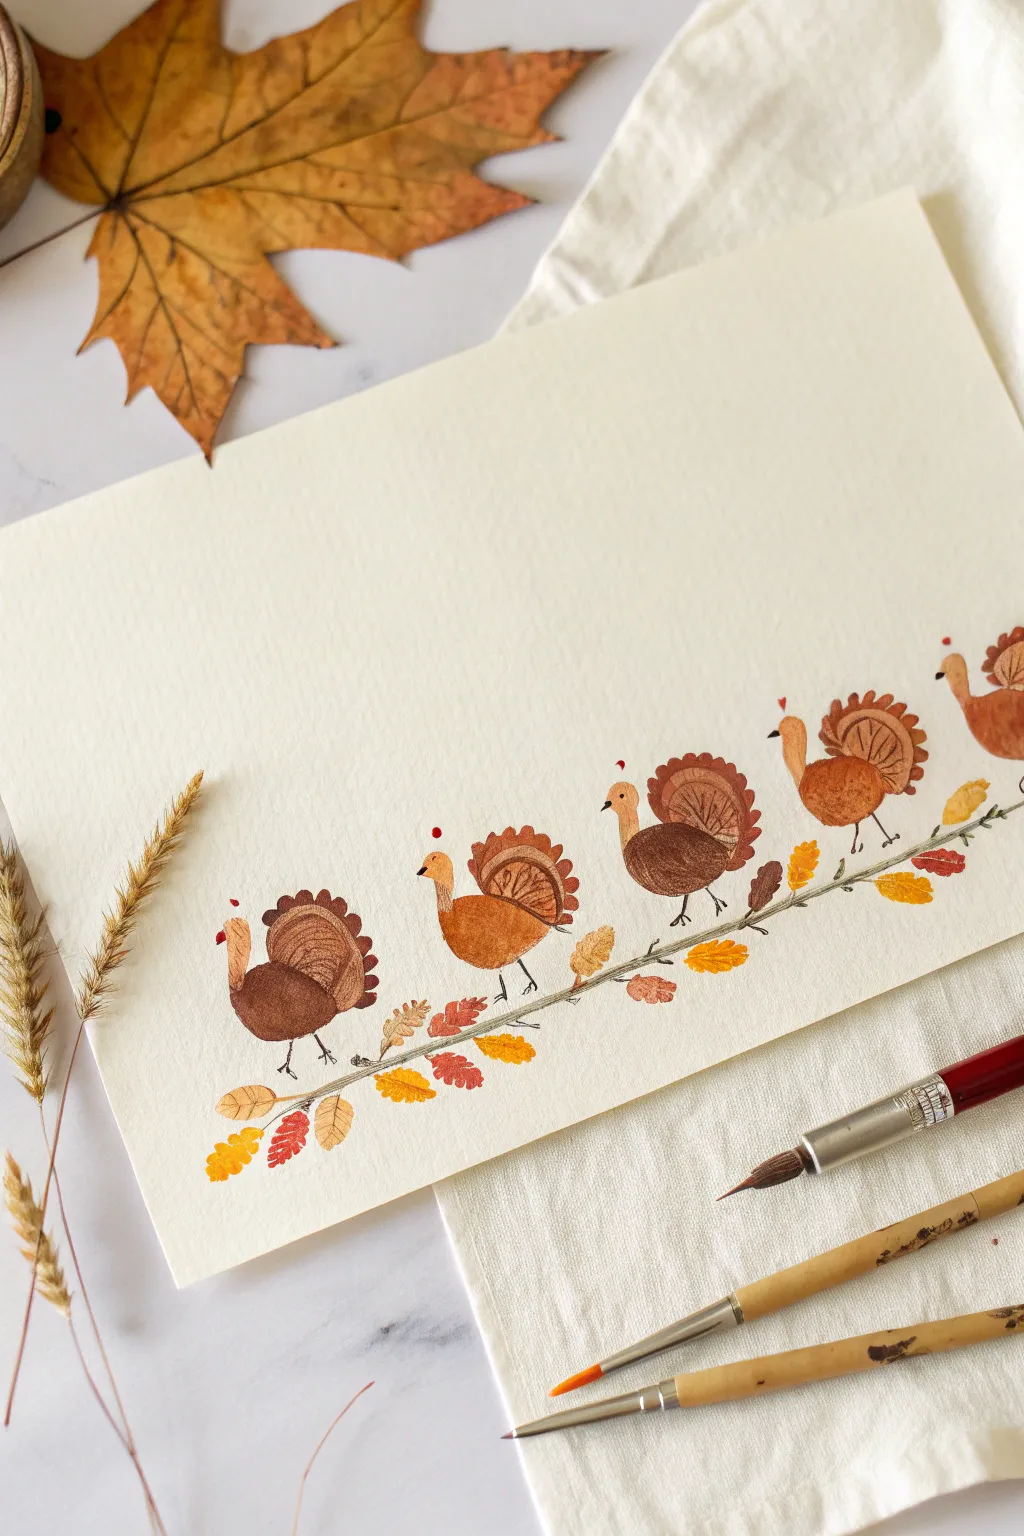
This charming project combines the playful simplicity of fingerprint art with delicate illustrative details, creating a sophisticated yet adorable Thanksgiving decoration. The result is a whimsical procession of marching turkeys that feels both handmade and refined.
How-To Guide
Materials
- High-quality watercolor paper (cold press)
- Brown, rust, and orange watercolor paints or ink pads
- Fine-point black ink pen (0.1 or 0.05 mm)
- Small round watercolor brush (size 2 or 4)
- Red fine-point marker or paint
- Pencil (optional for guidelines)
- Palette for mixing paint
Step 1: Setting the Scene
-
Prepare the paper:
Start with a clean sheet of watercolor paper. Since the turkeys march across the bottom, mentally mark out the lower third of your page where the action will happen. -
Sketch the ground line:
Using a light pencil or very diluted grey-brown paint, draw a faint, slightly uneven horizontal line across the page. This will serve as the branch or path your turkeys will walk on. Keep it organic—nature rarely has perfectly straight lines.
Pro Tip: Fingerprint Texture
Don’t overload your finger with paint. A thinner layer preserves the unique ridges of the fingerprint, which adds wonderful natural texture to the feathers.
Step 2: Creating the Flocks
-
Mix your brown tones:
Prepare two shades of brown on your palette: a deeper, chocolate brown for the turkey bodies and a lighter, rust-colored brown or ochre for their heads and necks. -
Stamp the bodies:
Dip your thumb into the darker brown paint (not too wet, or you’ll lose the print texture) or press onto an ink pad. Stamp oval shapes periodically along your ground line, angling them slightly forward as if the turkeys are leaning into their walk. -
Add the heads:
Using your index finger and the lighter brown/ochre shade, press a smaller print overlapping the top front of each body print. If doing this with children, their pinky fingers create the perfect proportion for the heads. -
Paint the tails:
With a small brush and the darker brown shade, paint a fan shape at the back of each body. Scallop the top edge of the fan to mimic feathers. I like to leave a tiny gap between the body print and the tail to keep the shapes distinct. -
Detail the tail feathers:
While the tail paint is still slightly damp but not wet, use a slightly darker pigment to paint curved lines radiating from the center of the tail fan, giving the feathers dimension. -
Let it dry completely:
It is crucial to let all the paint dry fully before moving on to ink work. If the paper is cool to the touch, it’s still wet.
Level Up: Name Cards
Create individual cards with just one turkey per card. Write a guest’s name on the line following the turkey to make adorable custom place settings.
Step 3: Fine Details
-
Draw the legs:
Using your fine-point black pen, draw thin, spindly legs for each turkey. Add three small toes at the bottom of each leg, positioning them so they look like they are gripping the branch line. -
Add facial features:
Carefully draw a tiny dot for the eye on the lighter head print. Then, draw a small, triangular beak pointing forward. -
Add the snoods:
With a red marker or a tiny dab of red paint, add the ‘snood’ (the fleshy red part) hanging over the top of the beak for a pop of color. -
Wing details:
Go back to the body print with your pen and sketch a simple, curved wing outline on the side of the body to define the turkey’s form further.
Step 4: Atmospheric Touches
-
Paint the leaves:
Load your brush with autumn yellows, oranges, and reds. Paint small, simple leaf shapes scattering along the ground line and falling between the turkeys. -
Texture the branch:
Strengthen your initial ground line with a fine brush and grey-brown paint, letting it weave through the turkey legs and connecting the fallen leaves. -
Leaf details:
Once the colorful leaves are dry, use your black pen to add very subtle veins or stems to a few of them, anchoring them to the scene.
Now you have a festive, handcrafted row of turkeys ready to march across your mantelpiece or dinner table

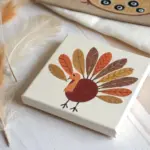
Turkey Faces With Goofy Expressions
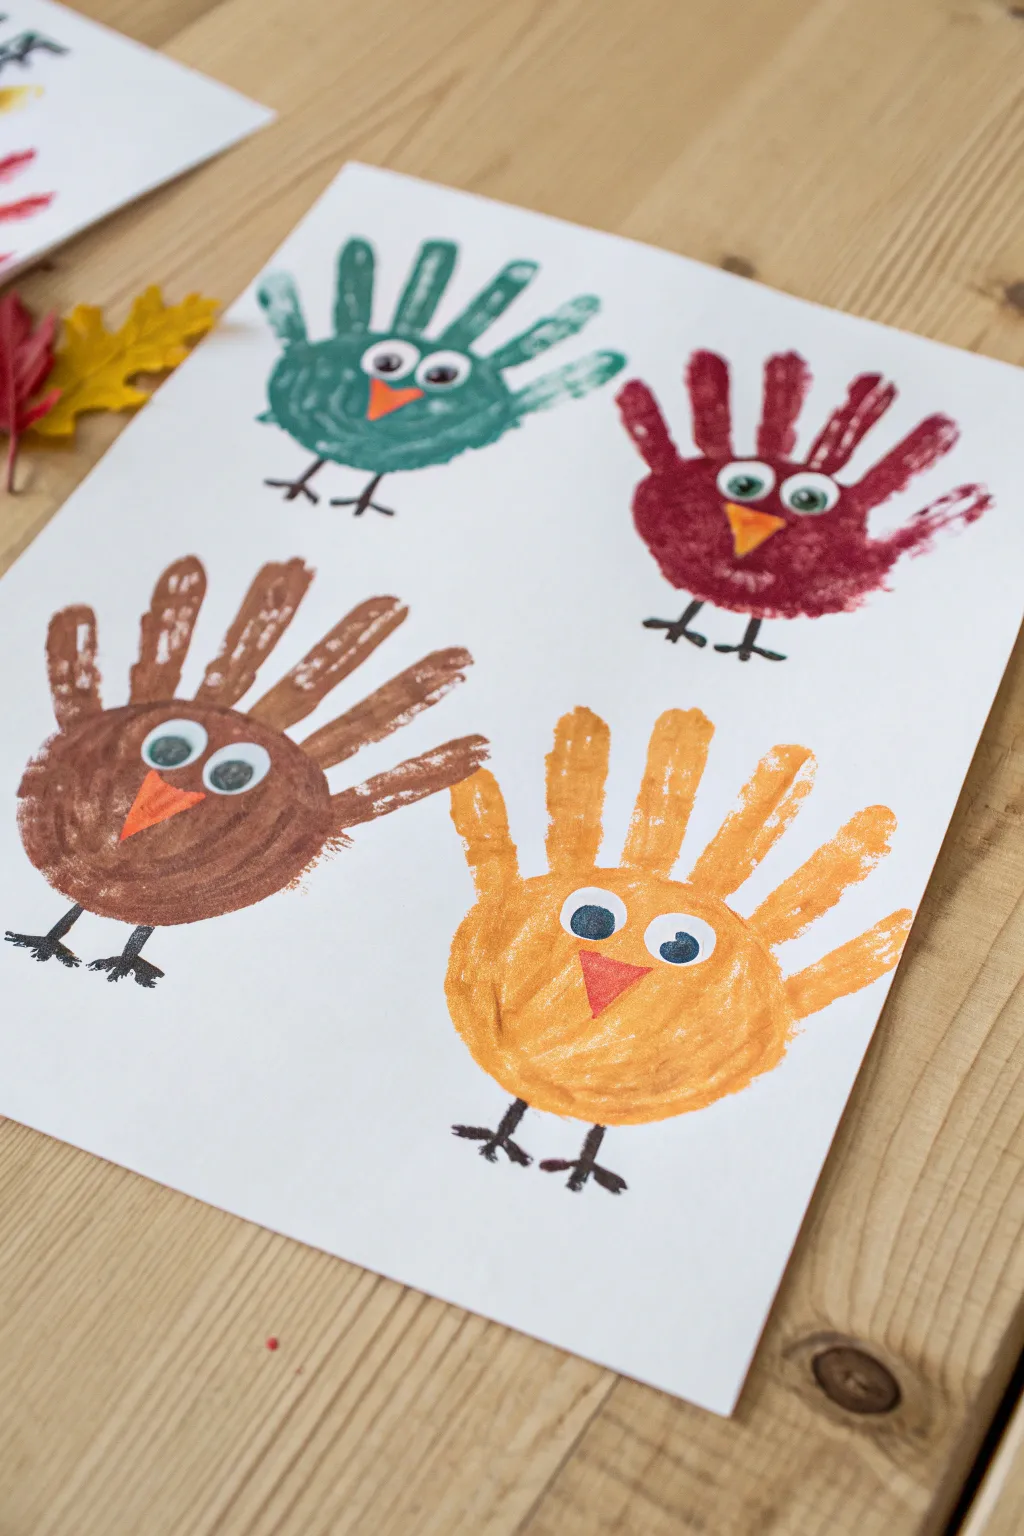
Transform a simple sheet of paper into a colorful flock of gobblers using the classic handprint technique. This charming project features four distinct turkeys, each with its own personality and goofy expression, making it a perfect keepsake for the Thanksgiving season.
Detailed Instructions
Materials
- White cardstock or heavy construction paper
- Washable craft paint (teal/green, maroon, brown, orange)
- Small or medium paintbrush
- Black fine-tip marker or Sharpie
- Orange construction paper
- Googly eyes (various sizes)
- Glue stick or liquid school glue
- Scissors
- Paper towels or wipes for cleanup
Step 1: The Handprints
-
Prepare the Teal Turkey:
Begin by painting the palm and four fingers of a hand with teal or dark green paint. You can skip painting the thumb, as these turkeys use the palm as the body and the four fingers as feathers. Ensure the coat of paint is thick enough to be opaque but not so globby that it slides. -
Print the First Bird:
Press the painted hand firmly onto the top left corner of your white paper. Keep the fingers slightly spread to show off the plumage. Lift the hand straight up to avoid smudging. -
Clean Up for Color Two:
Wipe the hand thoroughly with a wet paper towel or wash it quickly. It is crucial to have a clean surface before switching colors so the hues don’t muddy. -
Create the Maroon Turkey:
Apply maroon or deep red paint to the palm and four fingers. Position this print in the top right corner of the paper, mirroring the first one if desired, or just placing it alongside. -
The Brown Turkey:
After cleaning the hand again, coat it in a classic turkey brown. Press this handprint into the bottom left section of the paper. I find that rotating the paper slightly can make it easier for little hands to reach different quadrants without smearing wet paint. -
The Orange Turkey:
Finally, paint the hand with a bright pumpkin orange. Stamp this final turkey in the bottom right corner to complete your flock of four. -
Drying Time:
Set the paper aside to dry completely. The paint needs to be fully set before you add the faces, or the glue won’t stick and the marker might bleed.
Smudge Control
If a hand slides while printing, turn the smudge into extra feathers using a small paintbrush, or wipe it quickly with a damp cloth while wet.
Step 2: Details & Expressions
-
Cut the Beaks:
While the paint dries, take a small scrap of orange construction paper. Cut out four small triangles for the beaks. Varying the sizes or making some isosceles and some equilateral adds character. -
Attach the Eyes:
Once the paint is dry to the touch, apply small dots of glue to the back of your googly eyes. Stick a pair onto the ‘palm’ area of each handprint. Using different sizes—like one big eye and one small eye—instantly creates that goofy, surprised expression. -
Glue the Beaks:
Place a glue dot on the back of each paper triangle. Position the beak right below the eyes, pointing downward. You can tilt them slightly straight or crooked depending on the look you want. -
Draw the Legs:
Using a black fine-tip marker, draw two stick legs coming down from the bottom of the palm on each turkey. -
Add Feet:
At the bottom of each stick leg, draw three small lines branching out to create the turkey talons or feet. -
Check for Gaps:
If any handprints had light spots where the palm didn’t touch the paper fully, you can leave them for a rustic look or use a brush with a tiny bit of matching paint to gently fill in the center of the body.
Pro Tip: Eye Placement
Place the eyes lower on the palm than you think you should. This leaves room for the ‘feathers’ (fingers) to look distinct from the head.
Display your colorful flock on the fridge or frame it for a festive decoration that captures this moment in time


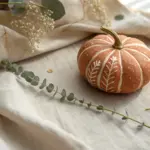
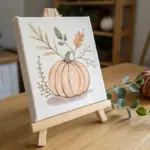
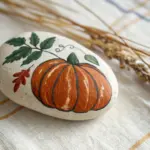
Pumpkin Patch Fingerprint Scene
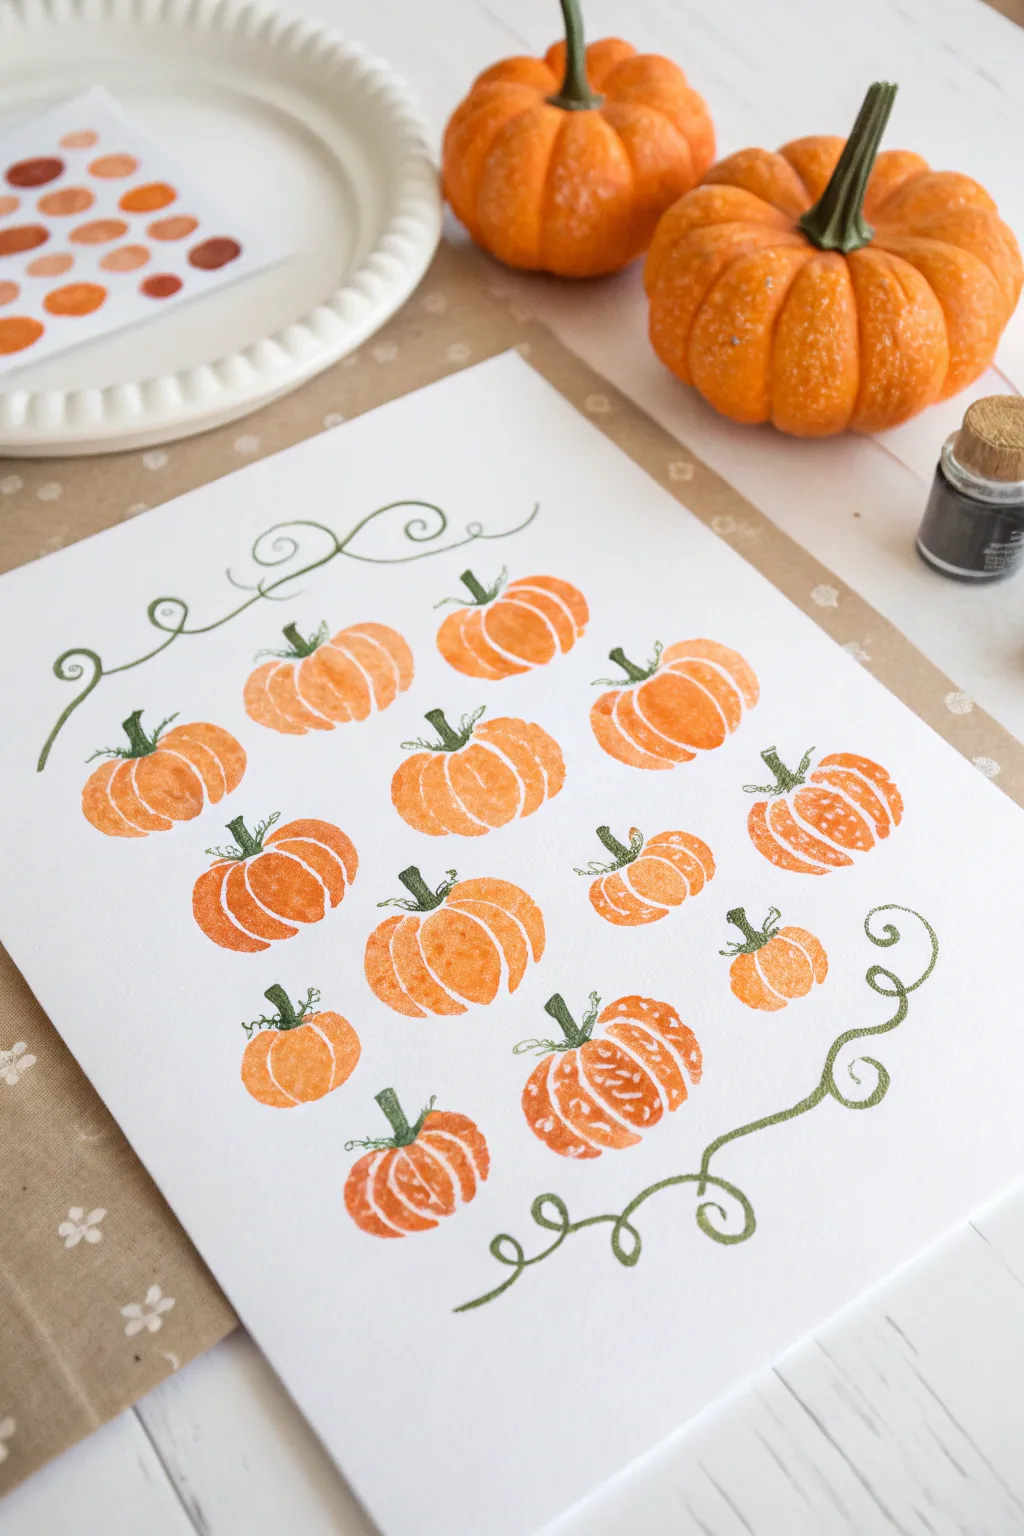
Using just your fingertips and a few simple strokes of a pen, transform ordinary orange paint into a charming field of pumpkins. This project combines the messy fun of finger painting with delicate line work for a sophisticated, frame-worthy result.
Step-by-Step
Materials
- White cardstock or heavy watercolor paper
- Orange tempera or acrylic craft paint (in a small dish or palette)
- Green fine-tip marker or felt-tip pen
- Piece of scrap paper (for test prints)
- Paper towels or damp cloth (for clean up)
- Optional: Brown ink pad or paint (for darker orange variation)
Step 1: Creating the Pumpkin Bodies
-
Prepare your palette:
Squeeze a small amount of orange paint onto a dish. You want a shallow pool of paint so your finger gets coated evenly but not glommed with excess pigment. -
Test your technique:
Press your thumb or index finger into the paint, then tap it once on scrap paper to remove the heaviest layer. Press firmly onto the scrap paper again to see the texture; you want that speckled, organic look rather than a solid blob. -
Start the center pumpkin:
On your main cardstock, press your painted thumb down near the middle of the paper. This will act as the central lobe of your first pumpkin. -
Add side lobes:
Re-ink your finger lightly and press down again slightly to the left and right of your first print, angling your finger inward so the prints overlap at the top. This creates the rounded, segmented shape of a pumpkin. -
Vary sizes and angles:
Move to a new spot on the paper and repeat the process. Try using your pinky finger for smaller pumpkins and your thumb for the fat, round ones. -
Create a scattered composition:
Continue adding pumpkins across the page. Aim for a loose, random arrangement rather than perfect rows to make the patch feel natural. -
Mix shades (Optional):
If you want depth, dab your painted finger onto a brown ink pad or mix a tiny dot of brown into your orange paint for a few pumpkins. This adds a lovely autumnal variety. -
Dry completely:
Before moving to the ink stage, let the paint dry fully. Wet paint will ruin your marker tip instantly, so be patient here.
Smudged Prints?
If a print smudges, turn it into a ‘rotten’ pumpkin by adding extra scribbly texture with your pen later, or simply cover it with a larger pumpkin overlap.
Step 2: Adding Vines and Details
-
Draw the stems:
Using your green fine-tip marker, draw a short, sturdy stem emerging from the top center of each orange cluster. Keep the tops of the stems slightly flat or jagged like a cut vine. -
Outline the segments:
Very lightly sketch curved vertical lines over the orange paint to define the pumpkin ribs. Follow the natural curves of your fingerprints. -
Add the calyx:
At the base of the stem, add tiny little spikes or leaves where the stem meets the fruit to make it look realistic. -
Draw the top vine:
Starting at the top left corner, draw a long, sweeping vine line that curves gently across the top of the page. It doesn’t need to touch any pumpkins; it frames the scene. -
Add curly tendrils:
Along this top vine, add loops and curls (like the letter ‘e’ or loose spirals) branching off the main line. -
Draw the bottom vine:
Repeat the process at the bottom right corner, drawing a vine that curves upwards to cradle the composition. -
Connect a few pumpkins:
For a few select pumpkins, draw a thin, curly line extending from their stem to mimic a tendril reaching out into the patch. -
Check balance:
Step back and look at your artwork. If a spot looks too empty, draw a loose, unattached curly vine in that gap to fill the visual space.
Add Metallic Flair
Once the green ink is dry, use a gold gel pen to trace over just the curly tendrils. It adds a subtle, festive shimmer suitable for Thanksgiving decor.
Now you have a harvest-ready masterpiece that captures the unique texture of autumn perfectly
BRUSH GUIDE
The Right Brush for Every Stroke
From clean lines to bold texture — master brush choice, stroke control, and essential techniques.
Explore the Full Guide
Cranberry Fingerprint Wreath
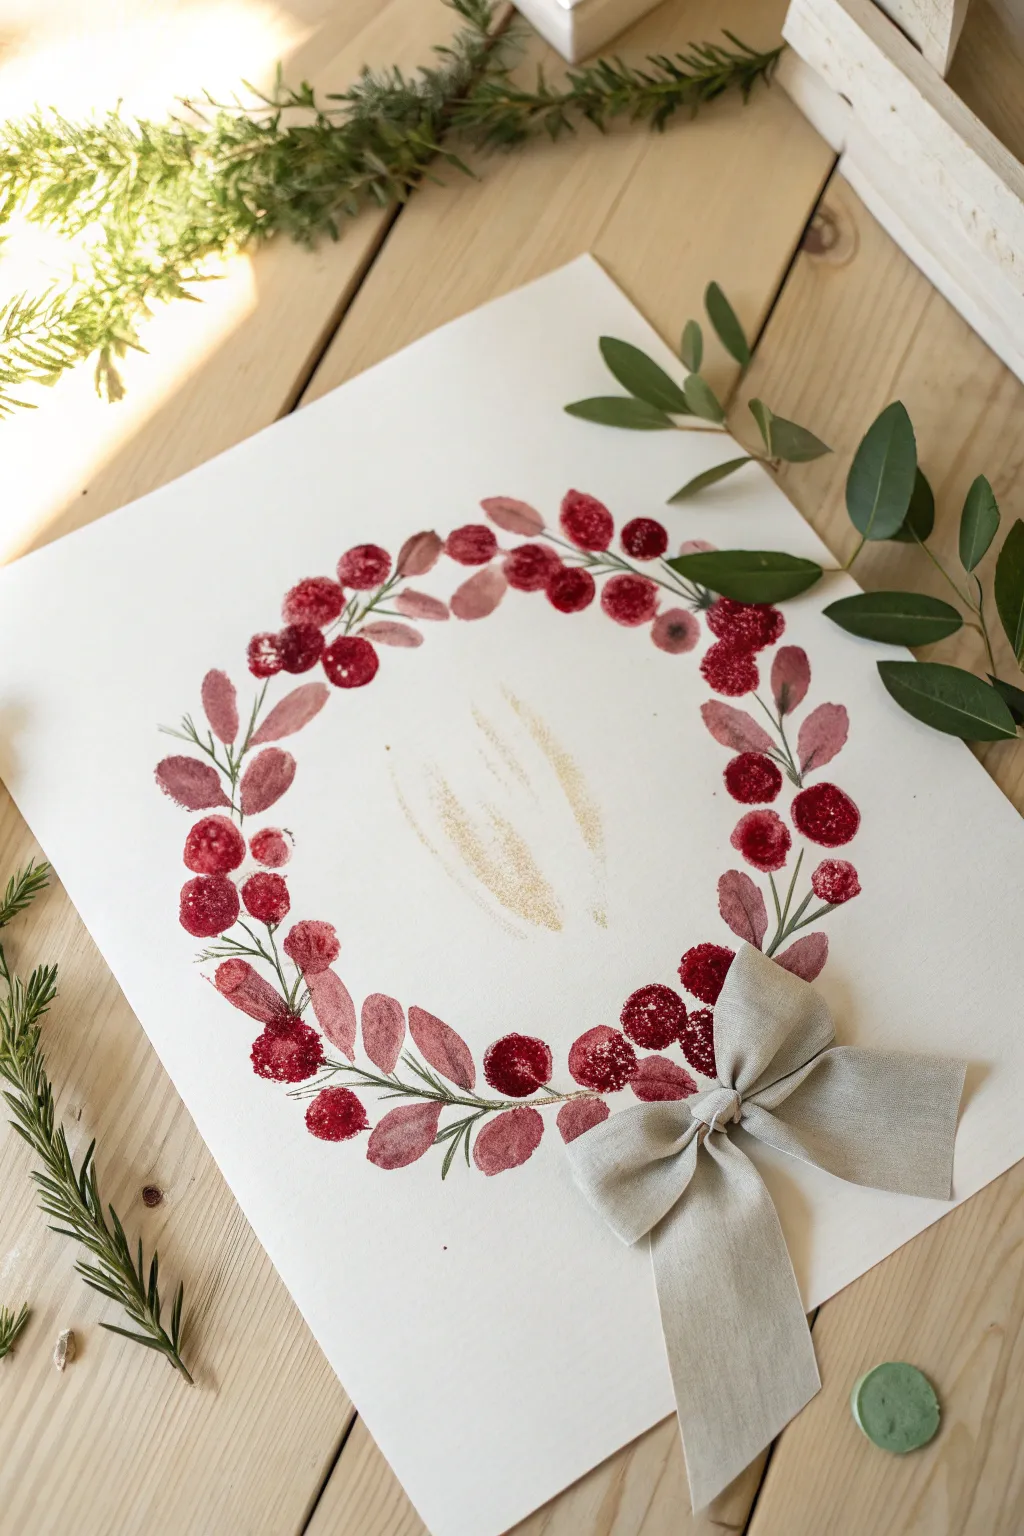
This elegant wreath combines the simple joy of finger painting with delicate brushwork to create a sophisticated piece suitable for framing. The texture of the fingerprints gives the cranberries a realistic, organic feel that contrasts beautifully with the soft watercolor leaves.
Step-by-Step Guide
Materials
- Heavyweight watercolor paper (cold press recommended)
- Red acrylic paint or heavy body watercolor (crimson and deep red)
- Muted rose or dusty pink watercolor paint
- Olive green watercolor paint or fine liner pen
- Gold watercolor paint or gold ink
- Small round paintbrush (size 2 or 4)
- Fine liner brush (size 0 or 00)
- Small palette for mixing
- Paper towels
- Wide gray linen ribbon (about 1 inch wide)
- Hot glue gun or strong craft glue
Step 1: Planning and Foundation
-
Mark the circle:
Begin by lightly tracing a circle on your watercolor paper using a pencil and a round object like a dinner plate. Keep this line very faint so it can be erased later. -
Add the gold center:
Mix a small amount of gold watercolor or ink. Using a dry brush technique or your finger, gently smudge two or three distinct, vertical streaks in the very center of the wreath circle. Allow this to dry completely.
Clean Prints
If your fingerprints look like solid blobs, your paint is too wet. Blot your finger on a paper towel after dipping it to remove excess moisture before printing.
Step 2: Creating the Foliage
-
Paint the stems:
Using your fine liner brush and olive green paint, draw a thin, broken circular vine following your pencil guide. Keep the line irregular and natural rather than perfect. -
Add connecting twigs:
From the main vine, extend small, short twigs outward and inward. These will serve as anchors for your leaves and berries. -
Mix the leaf color:
Prepare a watery wash of muted rose or dusty pink watercolor. You want this to be semi-transparent to contrast with the opaque berries later. -
Paint the leaves:
Using the small round brush, paint almond-shaped leaves attached to some of the twigs. Vary the saturation by adding more water to some leaves and more pigment to others. -
Add variation:
While some leaves are still damp, I like to drop in a tiny touch of darker red at the base of the leaf to add depth. Let all the leaves dry fully before moving on.
Layering Pro Tip
Don’t be afraid to let a fingerprint overlap a painted leaf slightly. This overlap creates depth and makes the wreath look lush and tangled.
Step 3: Adding the Cranberries
-
Prepare the finger paint:
Squeeze a dime-sized amount of deep red acrylic or heavy body watercolor onto your palette. It needs to be thick enough to hold texture. -
Test your print:
Dip your index finger into the paint and dab it on a scrap piece of paper first to ensure you don’t have too much gloopy paint. -
Apply the berries:
Press your finger firmly onto the paper around the wreath line, clustering berries in groups of two or three. The natural ridges of your fingerprint will mimic the texture of a cranberry skin. -
Vary the sizes:
For smaller berries, use your pinky finger or just the very tip of your index finger. Leave some gaps on the stem for visual balance. -
Add texture details:
Once the fingerprints are dry, use a very dry brush with a darker red to stipple a tiny bit of shadow on one side of a few berries to make them look rounder. -
Connect the berries:
Go back in with your fine liner brush and green paint to draw tiny stems connecting your new fingerprint berries to the main vine. -
Refine the stems:
Add a few wispy, pine-needle-like strokes in green near the berries to fill in any empty whitespace.
Step 4: Finishing Touches
-
Prepare the bow:
Cut a length of gray linen ribbon. Tie it into a neat bow, ensuring the loops are even and the tails hang down naturally. Trim the ends of the tails at an angle. -
Attach the bow:
Apply a dot of hot glue to the back of the bow’s knot. Isolate a spot on the bottom right of your wreath where the foliage is slightly sparse. -
Secure and set:
Press the bow firmly onto the paper. Gently manipulate the tails so one hangs straight and the other curves slightly. -
Final check:
Erase any visible pencil lines from your initial circle guide, being careful not to smudge the paint.
Hang your artwork in a simple wooden frame to complement the rustic elegance of the design
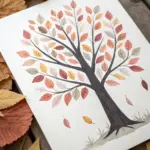
Thanksgiving Tree With Fingerprint Leaves

Capture the beauty of autumn foliage using nothing but paint and your own fingertips with this vibrant tree project. It creates a stunning keepsake that celebrates the season with personalized touches, featuring both detailed leaf work and playful handprints.
Step-by-Step Tutorial
Materials
- Large sheet of sturdy white cardstock or watercolor paper
- Brown acrylic or tempera paint (for the trunk)
- Fall-colored washable paints (red, orange, yellow, maroon)
- Green washable paint
- Medium paintbrush
- Small piece of natural sea sponge or a stiff stenciling brush
- Paper palette or paper plate for mixing colors
- Paper towels and water cup
Step 1: Painting the Structure
-
Outline the trunk:
Begin by painting the main trunk of the tree in brown, starting wider at the bottom and gently tapering as you move upward toward the center of the paper. -
Add main branches:
Extend four to five thick branches outward from the top of the trunk, letting them reach toward the upper corners of your page. -
Create smaller twigs:
Using the tip of your brush, paint finer offshoot branches connected to the main ones to give the tree a full, realistic skeletal structure. -
Texture the bark:
While the brown paint is still slightly wet, I like to streak in a tiny bit of darker brown or black to give the wood a rough, bark-like texture. -
Let the structure dry:
Allow the painted tree trunk and branches to dry completely so your fingerprints won’t smudge the brown lines later.
Step 2: adding the Foliage
-
Prepare your palette:
Squeeze out quarter-sized dollops of your red, orange, yellow, and maroon paints onto a paper plate. -
Start with yellow prints:
Dip your index finger into the yellow paint and press it firmly along the branches, spacing them out to leave room for other colors. -
Layer with orange:
Clean your finger, then switch to orange paint, adding prints near the yellow ones and occasionally overlapping slightly for depth. -
Add deep reds:
Use the red and maroon paints to fill in the remaining gaps on the branches, ensuring the tree looks lush and full of autumn color. -
Create falling leaves:
Place a few stray fingerprints floating in the air beneath the branches to simulate leaves falling to the ground.
Print Precision
To get clear leaf shapes, press your finger down once and lift straight up. Don’t slide or twist your finger, or the print will smear.
Step 3: Ground Details & Personal Touches
-
Paint the ground:
Dip a small piece of natural sponge or a stiff brush into brown and yellow paint, then dab it along the bottom of the trunk to create a textured, grassy forest floor. -
Prepare for handprints:
Coat one hand (or a child’s hand) with a thin, even layer of red paint using a brush. -
stamp the red handprints:
Press the red-painted hand firmly onto the paper on either side of the tree trunk to create ‘turkey’ shapes or just decorative prints. -
Add a green handprint:
Clean the hand, apply green paint, and stamp another handprint near the tree for color variety. -
Final drying:
Set the artwork aside in a safe, flat place until all the thick layers of finger and handprints are completely dry to the touch.
Family Tree Twist
Have different family members use different colors for their fingerprints, turning the artwork into a visual representation of your family gathering.
Display your masterpiece this holiday season to bring the warmth of outdoors inside

PENCIL GUIDE
Understanding Pencil Grades from H to B
From first sketch to finished drawing — learn pencil grades, line control, and shading techniques.
Explore the Full Guide
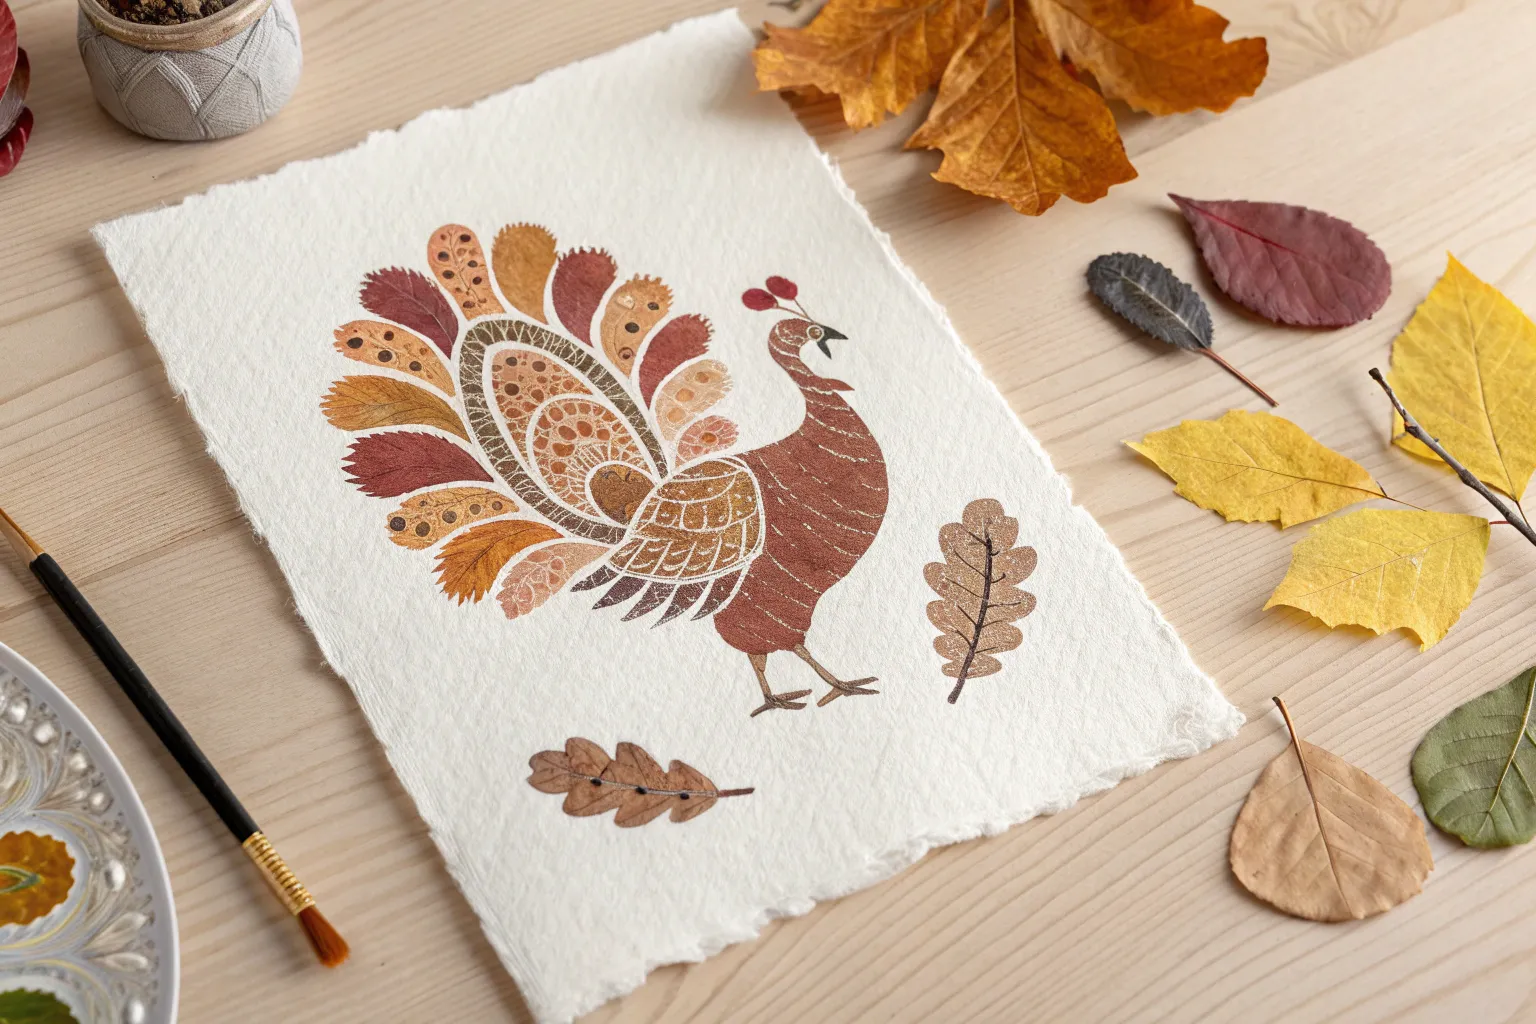
Gravy-and-Pie Color Mixing Turkey
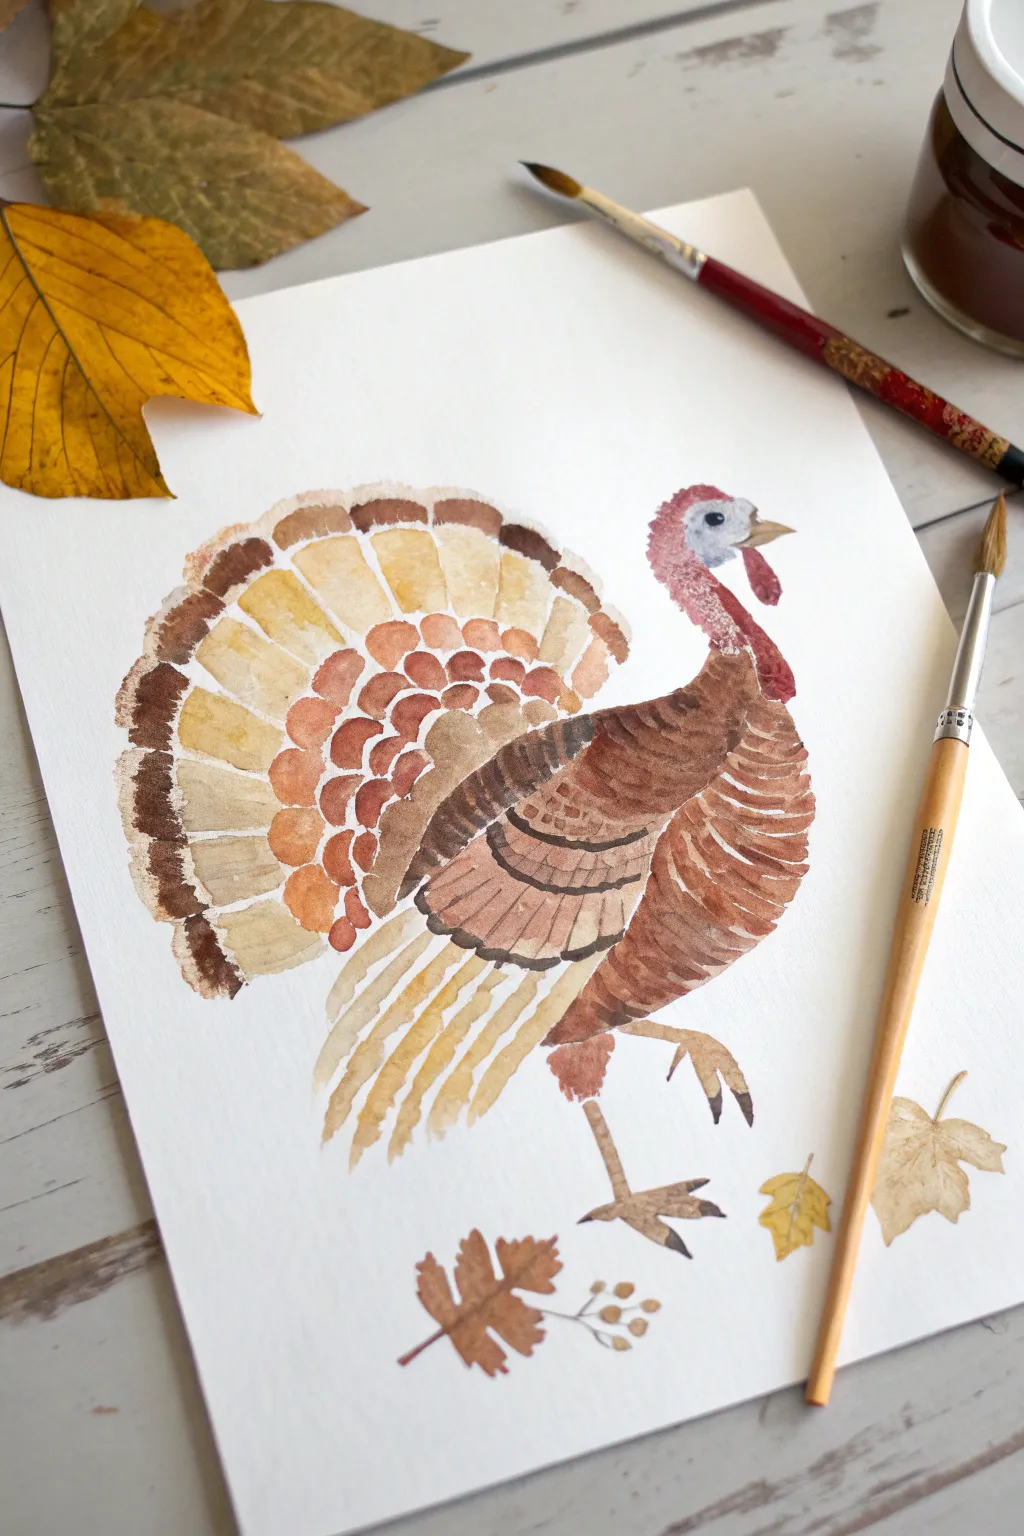
This whimsical turkey project focuses on exploring warm, autumnal color values rather than literal gravy or pie ingredients. By mixing varying shades of browns, ochres, and siennas, you will build a stylized bird with a lovely, segmented tail fan that celebrates the rich palette of Thanksgiving.
Step-by-Step Guide
Materials
- High-quality watercolor paper (cold press recommended)
- Watercolor paints (Burnt Sienna, Yellow Ochre, Burnt Umber, Alizarin Crimson)
- Round watercolor brushes (size 4 and size 2 for details)
- Pencil for light sketching
- Clean water jar
- Paper towel for blotting
Step 1: Sketching the Framework
-
Outline the body:
Begin by lightly sketching the main shape of the turkey’s body. Think of a rounded teardrop shape leaning slightly backward for the chest and neck. -
Map out the tail:
Draw large, curved lines fanning out behind the turkey. Break this fan shape into distinct bands or tiers—an inner circle of small scallops, a middle band of medium feathers, and an outer border of long rectangular feathers. -
Add the details:
Sketch a simple beak, the wattle (the fleshy part under the beak), and the legs. Keep the lines very faint so they don’t show through the transparent watercolor later.
Pro Tip: Palette Harmony
Mix all your turkey colors from the same 3 base tubes (red, yellow, brown). This creates a ‘limited palette’ look that guarantees all tones match perfectly.
Step 2: Painting the Body
-
Start with the head:
Mix a watery red using Alizarin Crimson and a touch of brown. Paint the wattle and the textured skin on the head. While it’s damp, dab in tiny dots of darker red to suggest the bumpy texture. -
Layer the chest feathers:
Using Burnt Sienna, paint the chest area. Instead of a flat wash, paint curved, overlapping strokes to mimic the look of layered feathers. Leave tiny slivers of white paper between some strokes to add definition. -
Define the wing:
Mix a darker brown (Burnt Umber) and paint the folded wing shape on the side of the body. Use the tip of your size 4 brush to create the striped texture on the primary flight feathers.
Step 3: Building the Tail Fan
-
Inner scalloped layer:
For the smallest feathers closest to the body, mix a warm orange-brown. Paint each small scallop individually, varying the amount of water on your brush so some are lighter and some are darker. -
Middle tail band:
Move to the next tier of feathers. Use a Yellow Ochre wash here. Paint broad, flat shapes that radiate outward. These should be lighter than the inner feathers to create contrast. -
Outer tail edge:
For the tips of the tail feathers, mix a deep, dark brown. Paint the very edges with a rough, dry-brush technique to make them look slightly frayed and feathery. -
Connect the bands:
Once the individual sections are dry, use a very diluted brown wash to verify they feel connected, painting thin lines between the tiers if needed to separate the ‘feathers’.
Troubleshooting: Bleeding Colors
If your tail feather sections are running into each other, you are working too fast. Let each ‘tier’ of the tail dry completely before painting the neighbor tier.
Step 4: Legs and Finishing Touches
-
Paint the legs:
Switch to your size 2 brush. Mix a pale, sandy brown for the legs and feet. Paint them with deliberate, straight strokes, adding small darker lines at the joints for knees and claws. -
Face details:
Carefully add the beak using Yellow Ochre. Use a tiny dot of black or dark blue for the eye, leaving a microscopic speck of white paper for the highlight. -
Scattered foliage:
I like to surround the bird with a few loose leaves. Paint simple maple or oak leaf shapes near the feet using the leftover paint on your palette. -
Final texture check:
Look over the turkey’s body. If any area looks too flat, use a nearly dry brush with dark brown paint to add subtle cross-hatching or stippling for extra texture.
Once the paint is fully dried, you can gently erase any visible pencil lines to leave a clean, crisp illustration ready for the holiday table
Turkey Feathers With Finger-Pulled Streaks
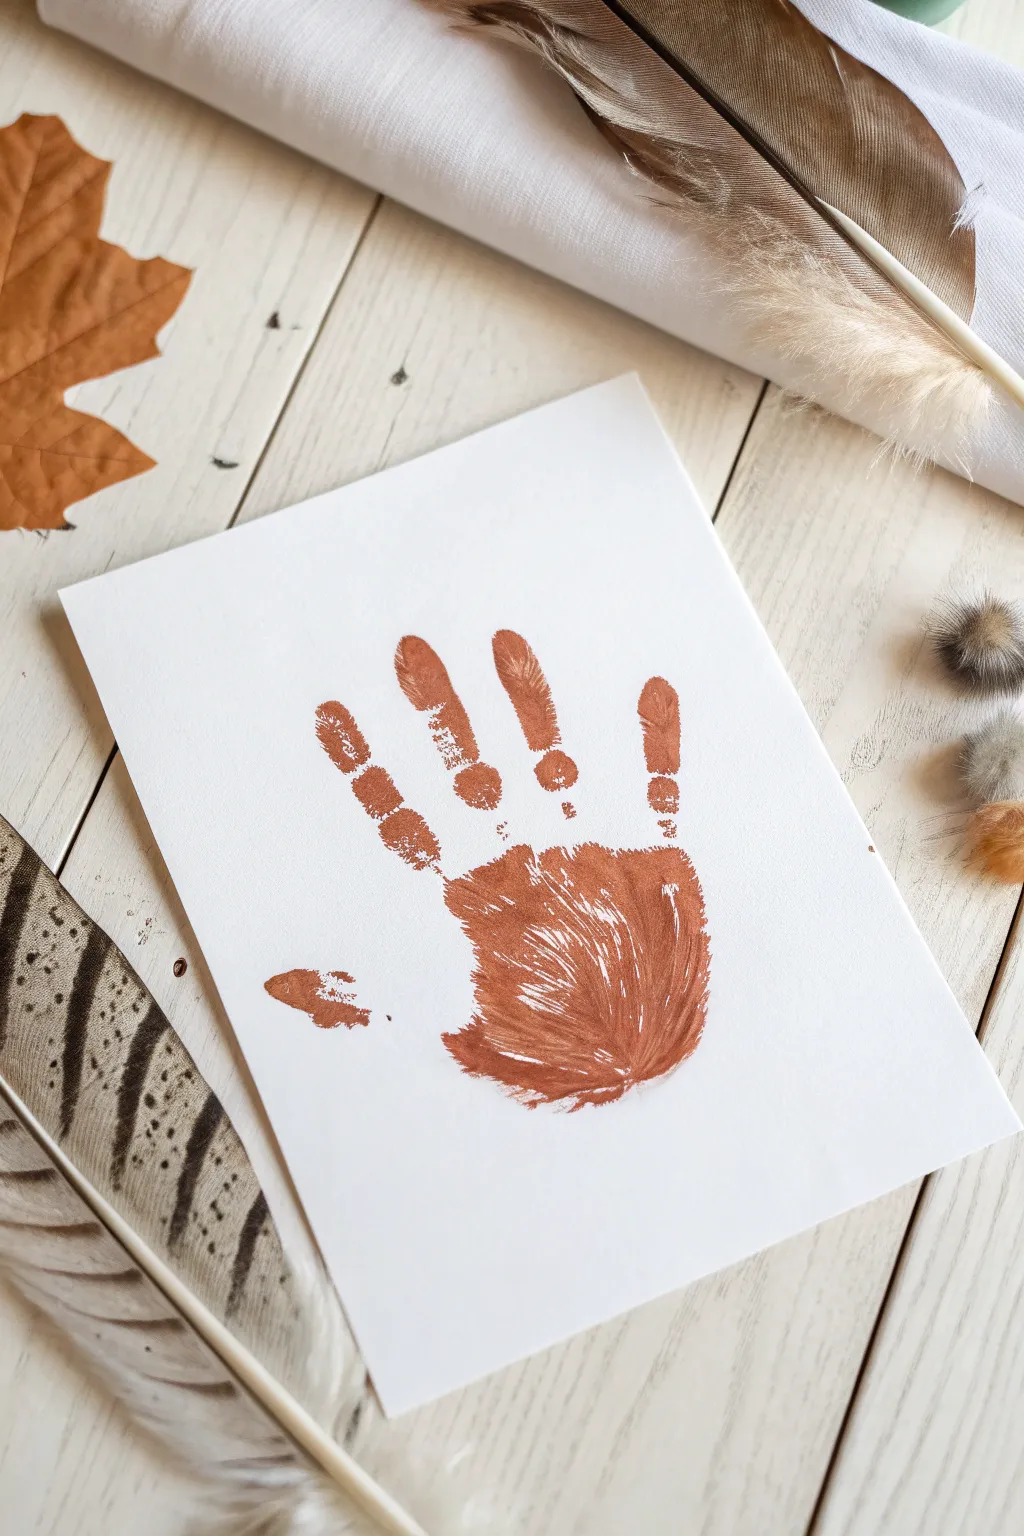
This unique twist on the classic handprint turkey uses a special brush technique to create a beautiful, feathery texture in the palm area. The result is a more sophisticated, organic look that captures the essence of ruffled plumage.
Detailed Instructions
Materials
- Heavyweight white cardstock or watercolor paper
- Brown acrylic or tempera paint (burnt sienna shade)
- Wide, flat paintbrush (1 inch)
- Small detail brush or toothpick (optional)
- Paper plate or palette
- Old towel for cleanup
Step 1: Preparation and Paint Application
-
Prepare your workspace:
Lay down a protective covering on your table. Have your paper ready and place a dollop of brown paint onto your palette or paper plate. -
Load the brush:
Dip your wide, flat paintbrush into the brown paint. You want a generous amount, but not so much that it’s dripping off the bristles. -
Paint the palm center:
Apply a thick layer of paint to the center of the palm of the hand being used. Don’t worry about perfection here; you just need a good base coat. -
Paint the fingers:
Continue painting up each finger (thumb through pinky). Ensure the fingertips are well-coated to get those nice, round prints at the top. -
Create the streaks:
Here is the trick for the texture: quickly run dry bristles or a slightly less saturated brush through the wet paint on the palm, sweeping from the wrist toward the fingers.
Dry Brush Secret
To get maximum texture, don’t overload the palm with paint. A thinner, drier layer creates better ‘feathery’ streaks when lifted.
Step 2: Printing and Texturing
-
Position the hand:
Hover the painted hand over the center of the cardstock. Splay the fingers comfortably apart—not too wide, but enough to show separation. -
Press down firmly:
Lower the hand onto the paper. Press down firmly on the center of the palm first to ensure that textured area makes contact. -
Secure the fingers:
Gently press each finger and the thumb down to the paper to ensure a clear print of the digits. -
Lift carefully:
Lift the hand straight up and away from the paper. Try not to drag it sideways, or you’ll smudge the crisp edges of the fingers. -
Assess the print:
Look at the palm area. The lifting motion combined with the initial streaks should have created a natural, feathery look where the paint pulled away. -
Enhance the texture:
If the palm looks too solid, you can take a small, dry brush and lightly feather the wet paint outward slightly while it is still tacky. -
Define the thumb:
The thumb print acts as the turkey’s head. If the print is faint, you can dab a tiny bit more paint there to solidify the shape. -
Let it dry completely:
Set the artwork aside in a safe place. Thick acrylic paint can take a little longer to dry, so give it at least 20-30 minutes.
Smudged edges?
If the finger edges smear, use a damp Q-tip to gently wipe away the excess paint while it’s wet to sharpen the silhouette.
Step 3: Optional Details
-
Add facial features:
Once fully dry, you could add an eye, beak, and wattle to the thumb, but leaving it as a simple silhouette creates a lovely rustic look. -
Flatten the paper:
If the moisture from the paint buckled the paper slightly, place the dry artwork under a heavy book for a few hours to flatten it back out.
Now you have a beautifully textured piece of fall art that captures a moment in time


Turkey Silhouette Sunset Finger Paint

Capture the warmth of an autumn evening with this elegant mixed-media piece that combines a soft, finger-painted sun with a crisp ink silhouette. The finished artwork has a charming, rustic quality thanks to the textured paper and deckled edges, perfect for a sophisticated Thanksgiving greeting.
How-To Guide
Materials
- Heavyweight cold-press watercolor paper (300gsm)
- Ruler (metal preferred)
- Water
- Small paintbrush
- Watercolor paints (Yellow, Orange, Red)
- Black waterproof ink or a very fine black archival pen (0.3mm or 0.5mm)
- Black brush pen or small rounded brush for filling
- Paper towels
Step 1: Preparing the Paper
-
Create the deckled edge:
Start by tearing your watercolor paper to size rather than cutting it. Wet a clean paintbrush with water and run a line along where you want the edge to be. -
Tear carefully:
Wait about 30 seconds for the water to soak in, then gently tear the paper along the wet line. This creates the soft, fuzzy ‘deckled’ edge seen in the photo.
Ink Bleeding?
If your black ink creates spiderwebs on the paper, the sun wasn’t dry enough. Wait longer or use a hairdryer on low heat to ensure the paper is crisp.
Step 2: Painting the Sunset
-
Mix your colors:
Prepare a small amount of yellow, orange, and reddish-brown watercolor on your palette. You want the paint to be moist but not overly watery. -
Finger paint the sun:
Dip your fingertip into the yellow paint first. Press it onto the bottom left area of the paper to start the sun shape. -
Blend the gradient:
While the yellow is still wet, dip a clean finger into the orange paint and gently dab it over the top/middle of your yellow circle, blending downwards. -
Add the horizon line:
Use the reddish-brown tone on your finger to create the bottom edge of the sun, creating a gradient from dark at the bottom to light at the top. -
Let it dry completely:
This is crucial. The paper must be bone dry before you add the ink, or the black lines will bleed into the sunset.
Add Some Shimmer
Once the watercolor is dry, lightly brush a tiny bit of gold metallic watercolor over the top edge of the sun for a glowing effect.
Step 3: Drawing the Turkey
-
Outline the head:
Using your fine black pen, sketch the small head and beak of the turkey. Keep the lines delicate. -
Draft the neck:
Draw a slender, curved neck extending down from the head. I find it helpful to look at the negative space to get the curve right. -
Outline the body:
Sketch a large oval shape for the main body, ensuring it overlaps slightly with your painted sun. -
Sketch the tail:
Draw the tail feathers extending back and down. Don’t fill them in yet; just engage the outer shape with jagged, feather-like strokes. -
Add the legs:
Draw two thin legs. One should be slightly forward and the other back to show movement. Make the feet look like they are walking on the same ground line as the sun.
Step 4: filling and Detailing
-
Fill the silhouette:
Switch to your black brush pen or a small brush with black ink. Carefully fill in the body, neck, and head solid black. -
Texture the feathers:
For the tail and wing area, use scratchy, fine lines to create texture rather than a solid block of black. Let some of the white paper peek through to suggest individual feathers. -
Add grass details:
Using your finest pen, draw tiny, vertical grass blades along the bottom of the sun and around the turkey’s feet to ground the figure. -
Sign your work:
Add your signature or a small handwritten date in the bottom right corner using the fine pen.
Now you have a captured a peaceful sunset moment to share with guests or keep for yourself
Harvest Basket Fingerprint Collage
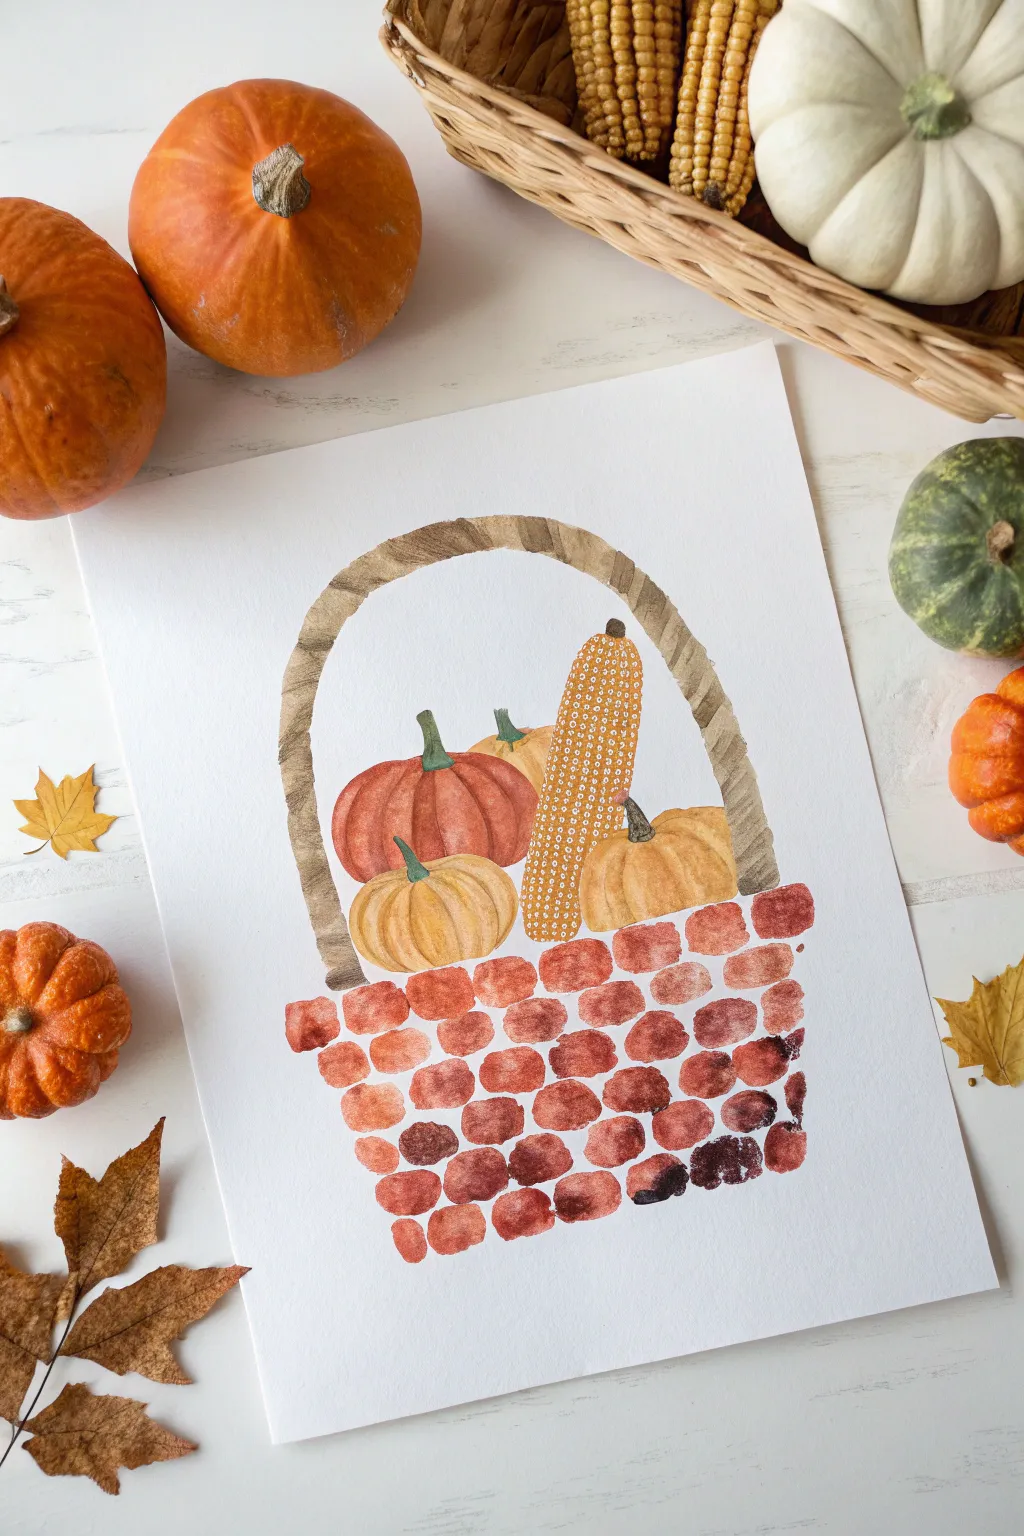
Celebrate the season’s bounty with this charming mixed-media project that turns simple fingerprints into a woven basket texture. The combination of tactile thumbprinting and gentle watercolor painting creates a warm, rustic centerpiece perfect for autumn decor.
Step-by-Step
Materials
- Heavyweight watercolor paper or mixed media paper
- Watercolor paints (shades of orange, brown, yellow, and green)
- Small round paintbrush (size 4 or 6)
- Fine liner brush (size 0 or 1)
- Pencil for light sketching
- Palette for mixing paint
- Paper towels
- Water cup
Step 1: Painting the Basket’s Contents
-
Sketch the outline:
Begin by lightly sketching the basic shapes of your composition. Draw a large oval shape for the basket opening, a curved handle arching overhead, and simple outlines for three pumpkins and a cob of corn nestled inside. Keep your pencil pressure very light so the graphite doesn’t show through the watercolor later. -
Paint the center pumpkin:
Start with the large central pumpkin. Mix a reddish-orange hue and paint the segments, leaving tiny gaps of white space between the ribs to give it dimension. I like to layer a slightly darker orange near the bottom for shadow. -
Add the yellow pumpkins:
For the front and partially hidden back pumpkins, use a warm ochre or mustard yellow. Apply the paint in curved strokes that follow the roundness of the vegetable, again leaving small highlights to suggest form. -
Paint the corn cob:
Block in the tall corn cob shape with a pale yellow wash. While it’s still damp, you can drop in hints of darker yellow to suggest texture, but don’t worry about the kernels just yet. -
Add stems and greenery:
Using a mossy green color, carefully paint the stems of the pumpkins. Use the tip of your brush to create the squared-off tops.
Varied Texture Trick
Don’t clean your finger perfectly between color changes. Letting a little dark brown mix with the tan on your skin creates a beautiful, marbled effect on the basket weave.
Step 2: Creating the Fingerprint Weave
-
Prepare your palette:
Mix three distinct shades of brown paint on your palette: a light tan, a medium reddish-brown, and a deep chocolate brown. The paint should be thick enough to hold a shape but wet enough to transfer easily. -
Test your prints:
Dip your index finger or thumb into the medium brown paint first. Press it onto a scrap piece of paper to check the consistency; you want a textured, organic oval shape, not a solid blob of color. -
Start the top row:
Begin the basket texture immediately below your painted pumpkins. Press your painted finger onto the paper to create a horizontal row of ‘bricks’ or weave marks. Leave small white gaps between each print. -
Build the texture downward:
Create the second row of fingerprints, staggering them slightly like a brick wall if possible. Dip your finger into different shades of brown occasionally to create a varied, natural woven look. -
Fill the basket shape:
Continue thumbprinting downward, tapering the rows inward slightly as you reach the bottom of the basket to create a rounded base shape. Don’t worry if the edges are a bit uneven; it adds to the rustic charm. -
Dry completely:
Before moving on to the handle or details, let the fingerprint section dry completely. This usually takes about 10-15 minutes, ensuring you don’t smudge your beautiful weave.
Smudged Prints?
If a fingerprint smudges or loses definition, wait for it to dry completely. Then, use a fine brush with a slightly darker shade to paint small definition lines over the smudge.
Step 3: Refining Details
-
Paint the handle:
Using your round brush and a medium brown paint, create the handle. Instead of one smooth line, use short, angled brushstrokes that wrap around the arch, mimicking strips of wood or wicker. -
Detail the corn:
Now that the yellow corn base is dry, use your fine liner brush with white gouache or undiluted white watercolor. Dot tiny rows of kernels all over the cob to give it that distinctive texture. -
Add pumpkin shadows:
Mix a diluted brown or deep orange wash. Carefully glaze this color at the very bottom of the pumpkins where they meet the basket rim to settle them into the scene. -
Touch up the weave:
Evaluate your fingerprint basket. If some prints look too light, you can glaze over them with a brush, or dab a little extra dark brown paint into the crevices between prints to deepen the contrast.
Step back and admire your handiwork—a cozy, textured harvest scene that captures the warmth of autumn


Have a question or want to share your own experience? I'd love to hear from you in the comments below!