If you’re craving easy paintings to draw ideas that look amazing without a ton of technical stress, you’re going to love these simple, satisfying prompts. I lean hard on gradients, silhouettes, and simple geometric shapes here because they give you that “wow” look fast.
Sunset Gradient Sky
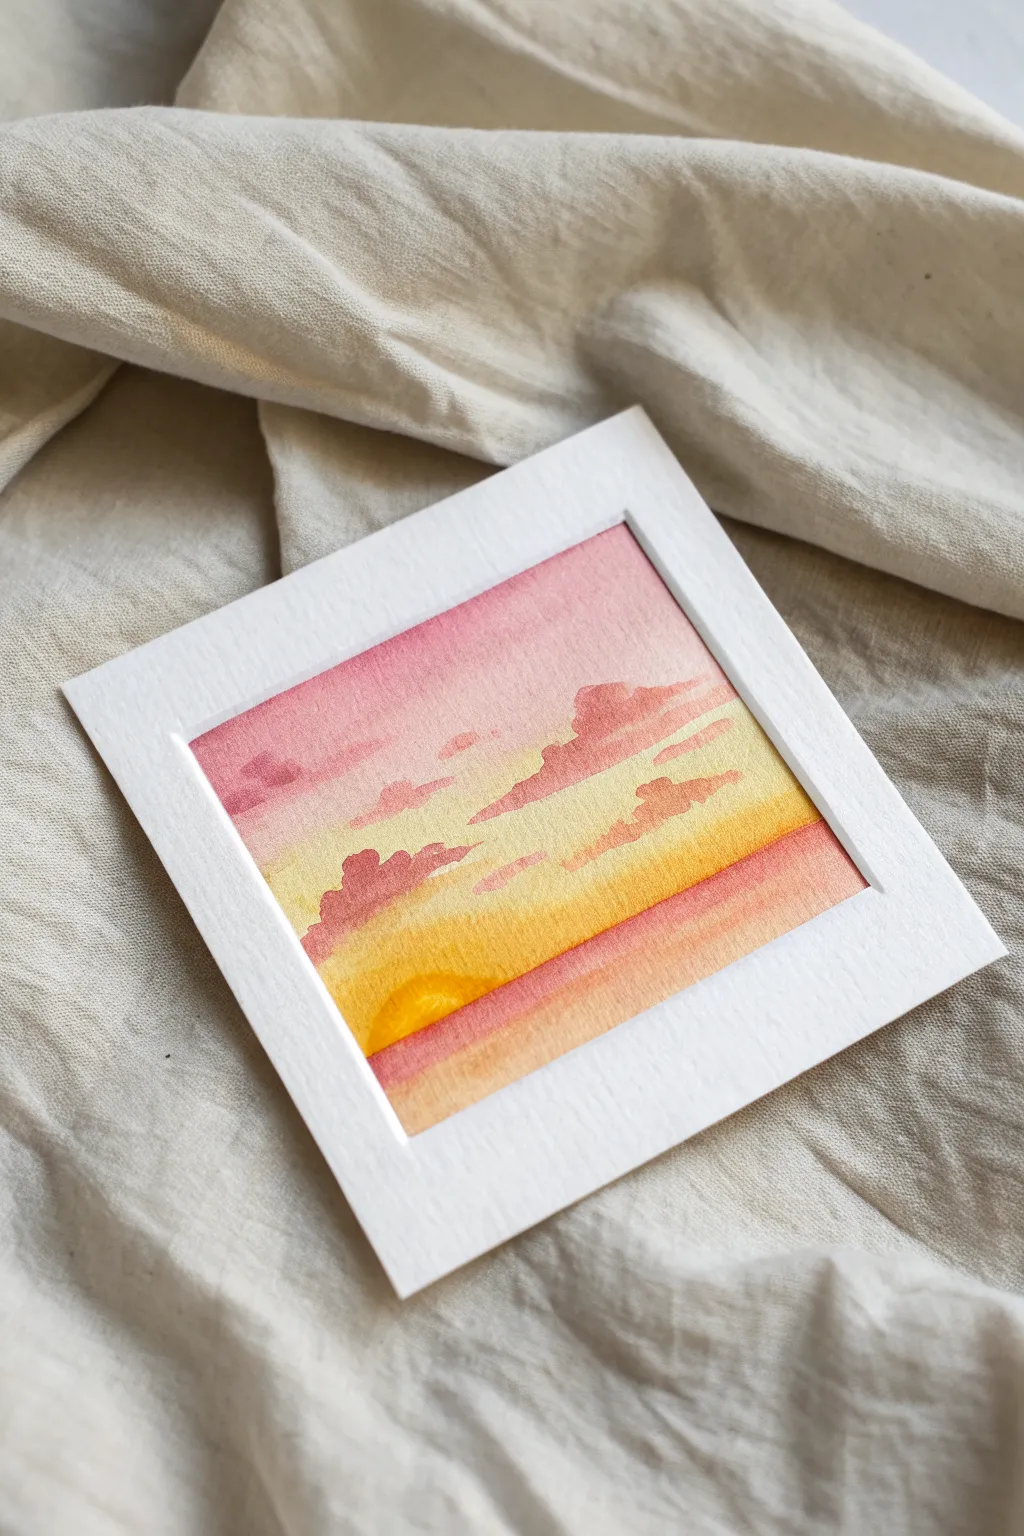
Capture the fleeting beauty of dusk with this gentle watercolor gradient painting. This project focuses on soft transitions between warm pinks and golden yellows to create a peaceful, dreamy sky that fits right in the palm of your hand.
Step-by-Step Guide
Materials
- Cold press watercolor paper (cut to a 4×4 inch square or similar)
- Watercolor paints (Alizarin Crimson, Cadmium Yellow, Lemon Yellow)
- Flat shader brush (size 6 or 8)
- Round detail brush (size 2 or 4)
- Painter’s tape or washi tape
- Clean water jar
- Paper towels
- Pencil and eraser (optional for sketching horizon)
Step 1: Preparation & Sky Gradient
-
Border masking:
Begin by taping down all four edges of your small paper square onto a hard board or table. This creates that crisp white border seen in the final piece and keeps the paper from buckling. -
Pre-wetting the sky:
Load your flat brush with clean water and gently brush over the top two-thirds of the paper where the sky will be. You want the paper damp precisely so the colors will bloom, but not soaking wet with puddles. -
The first pink wash:
Dilute some Alizarin Crimson to a soft, rosy pink. Using your flat brush, apply horizontal strokes starting at the very top edge, letting the color naturally fade as you move almost halfway down. -
Introducing yellow:
Clean your brush thoroughly. Pick up a mix of Lemon Yellow and Cadmium Yellow. Start painting from the middle section upwards, meeting the bottom of the pink area while the paper is still damp. -
Creating the orange blend:
Where the yellow meets the pink, gently brush back and forth horizontally. The colors will mix on the paper to create a soft, peach-orange transition zone. Avoid overworking this area to keep the colors fresh. -
Let it breathe:
Allow this initial sky gradient to dry completely. If you touch it now, you might lift the paint or create unwanted textures.
Step 2: Horizon & Water
-
Painting the water base:
Once the sky is dry, wet the bottom third of the paper with clean water. Apply a wash of your diluted Alizarin Crimson, perhaps slightly stronger than the sky tone, to represent the water. -
Darkening the horizon:
While the water area is still wet, drop a slightly more concentrated red-orange mix right along the horizon line. Let it bleed downwards naturally to suggest depth. -
The sun shape:
Once the water layer is semi-dry (damp but no sheen), use your round brush with concentrated Cadmium Yellow to paint a half-circle sun peeking over the horizon line on the left side. -
Sun reflection:
Immediately soften the bottom edge of the sun into the water below with a clean, damp brush, creating a subtle glowing reflection. -
Full dry:
Wait for the entire painting to be bone dry before moving to the final details.
Pro Tip: Radiant Sun
To make the sun glow, lift a tiny bit of color from the center of the yellow semi-circle using a thirsty brush or paper towel while it’s still damp.
Step 3: Clouds & Final Touches
-
Mixing cloud color:
Mix a slightly darker, muted mauve color. I like to use the Alizarin Crimson with just a tiny touch of blue or brown to grey it down slightly. -
Painting upper clouds:
Using the round brush, paint organic, horizontal cloud shapes in the pink section of the sky. Keep the edges purely horizontal but vary the thickness to make them look natural. -
Lower clouds:
Add a few smaller, flatter cloud streaks in the yellow section. Use a lighter hand here; these clouds are further away and catching more light. -
Softening edges:
If a cloud looks too harsh, quickly run a clean, damp brush along its top edge to soften it into the background sky. -
The reveal:
Once you are certain the paint is 100% dry, slowly peel away the tape at a 45-degree angle. This reveals the satisfying, clean white frame around your miniature masterpiece.
Troubleshooting: Blooms
If cauliflower-like blooms appear in your sky, it means you added water to drying paint. Let the layer dry fully, then glaze over it to smooth it out.
Now you have a warm, glowing sunset to brighten up even the smallest corner of your room
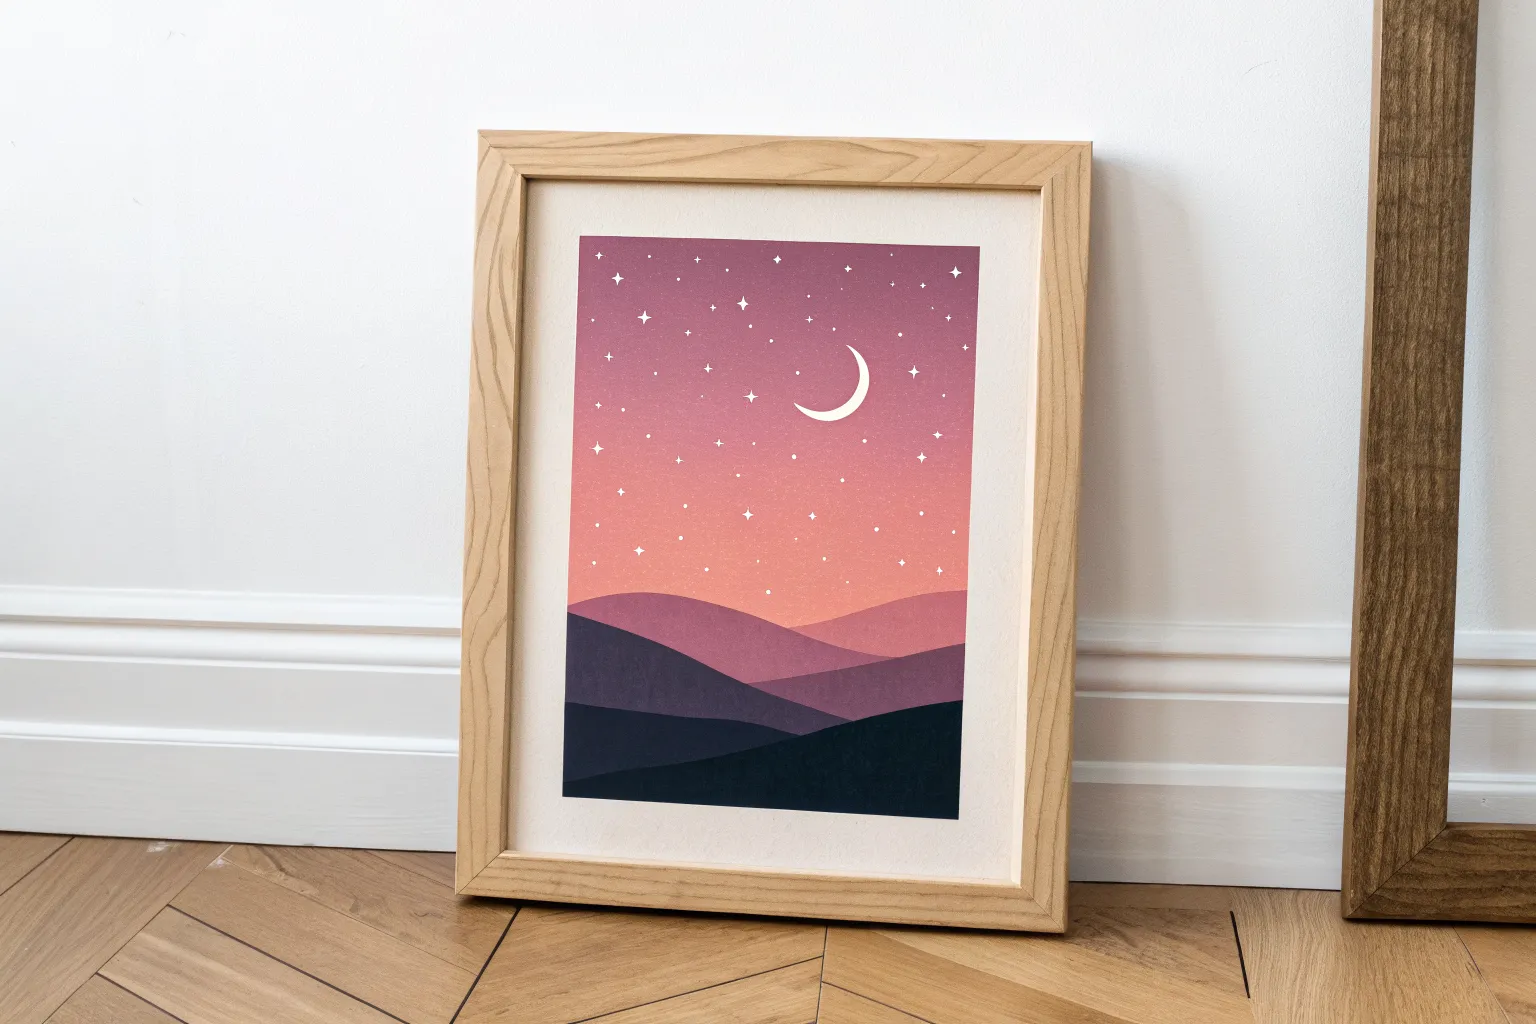
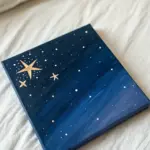
Moon and Starry Night Wash
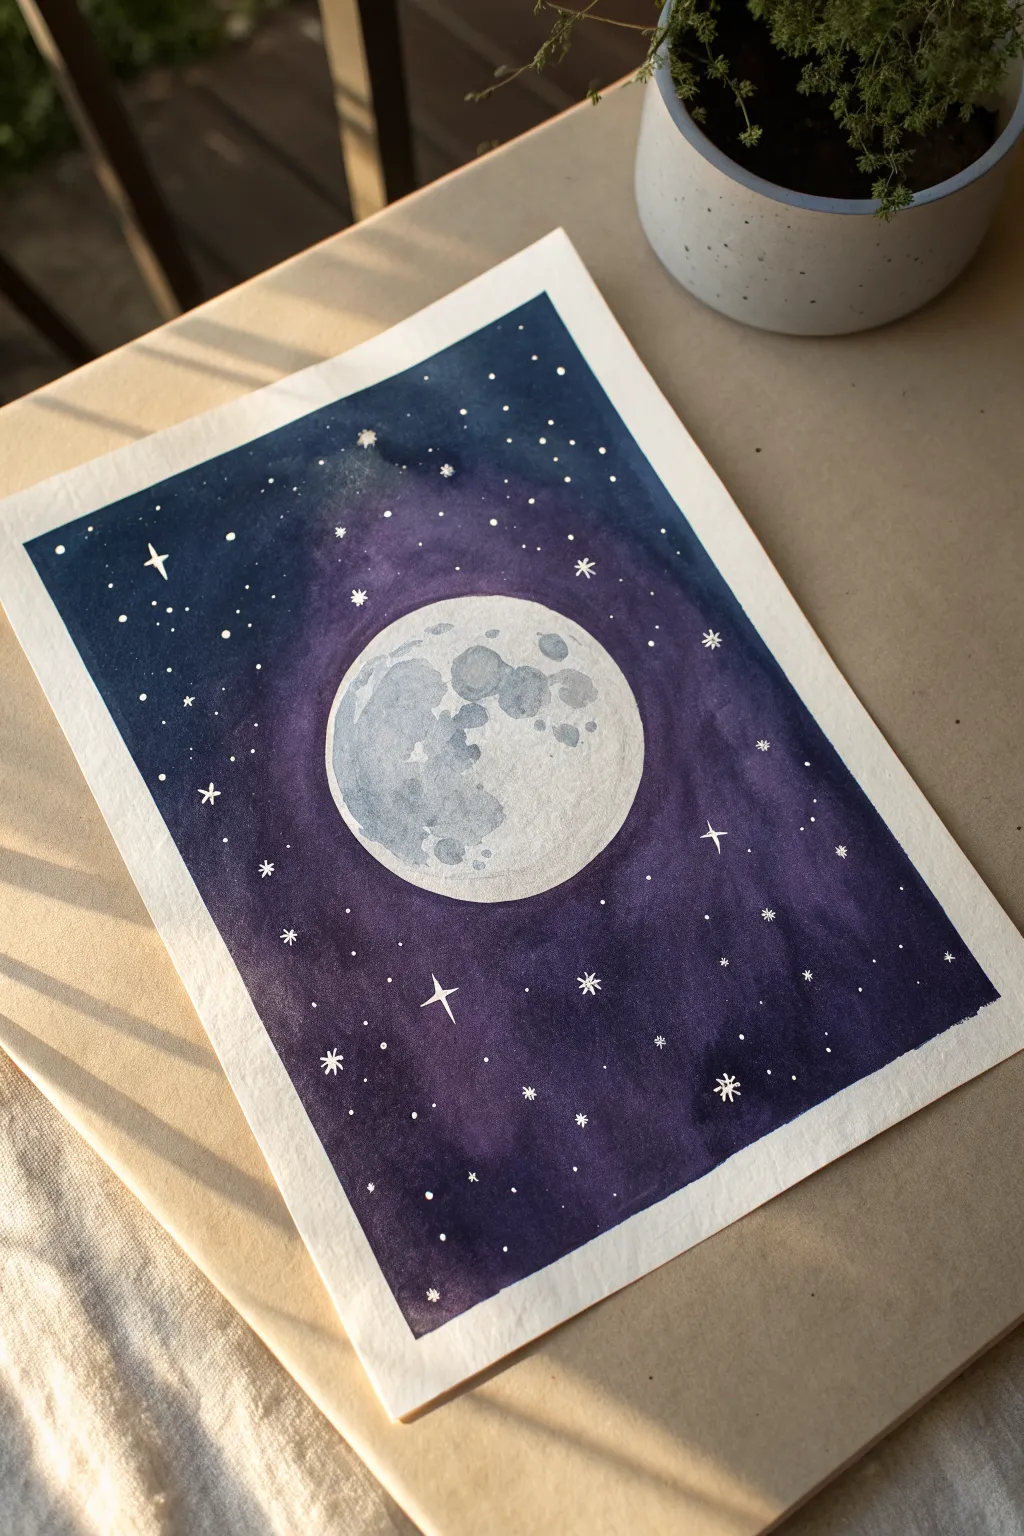
Capture the magic of a silent night sky with this striking watercolor project featuring a luminous, detailed moon. The deep indigo and violet wash creates a dramatic backdrop for twinkling stars, making this an enchanting piece for any wall.
Detailed Instructions
Materials
- Watercolor paper (cold press, 300gsm)
- Masking tape or painter’s tape
- Compass or a round object (like a bowl) for tracing
- Pencil and eraser
- Watercolor paints (Indigo, Violet/Purple, Payne’s Grey)
- Masking fluid (drawing gum)
- Round brushes (sizes 4, 8, and a fine detail brush)
- White gel pen or whitewash (gouache)
- Palette and water jars
Step 1: Preparation & Masking
-
Border Prep:
Begin by taping down all four edges of your watercolor paper to a board or table. Press the tape firmly to ensure clean, crisp borders later. -
Trace the Moon:
Use a compass or trace around a circular object to draw a large moon in the center of your paper. Keep your pencil lines very light so they don’t show through the paint later. -
Protect the Moon:
Apply masking fluid carefully inside the circle of the moon. This is crucial as it preserves the white of the paper while you paint the dark sky. Make sure the fluid goes right up to the pencil line. -
Dry Completely:
Allow the masking fluid to dry entirely before moving on. It should feel rubbery and not tacky to the touch.
Step 2: The Night Sky Wash
-
Pre-wet the Sky:
Apply clean water to the paper area surrounding the masked moon. This ‘wet-on-wet’ technique helps the colors blend seamlessly. -
Apply the Base Layer:
Load a larger brush with a vibrant purple or violet watercolor. Drop this color onto the wet paper, focusing mainly around the moon to create a glowing halo effect. -
Deepen the Darkness:
While the paper is still damp, mix a strong Indigo or dark blue. Apply this to the outer edges and corners of the paper, blending it inward toward the violet sections. -
Blend the Transitions:
Use a clean, damp brush to soften the transition between the deep blue edges and the violet center. I find that tilting the paper slightly helps the gravity do some of the blending work for you. -
Second Layer (Optional):
If the sky dries too light, let it dry completely, re-wet it gently, and add another layer of indigo to the corners for maximum contrast. -
Let it Dry:
Wait for the background sky to create a bone-dry surface. This prevents smearing when you remove the mask.
Uneven Blending?
If you get ‘blooms’ or uneven drying in the sky, don’t panic. These imperfections often look like nebulae. You can glaze over them with a light wash of dark blue once dry to smooth it out.
Step 3: Painting the Moon
-
Reveal the Moon:
Gently rub off the masking fluid with your finger or a rubber cement pickup tool to reveal the stark white circle. -
Base Moon Shadow:
Dilute Payne’s Grey with plenty of water to create a very pale, watery grey. Paint irregular, organic shapes on the left side of the moon to represent the larger craters or ‘maria’. -
Add Texture:
While the first grey layer is still slightly damp, drop in slightly darker, more concentrated grey into parts of the craters to add depth and texture. -
Soften Edges:
Use a clean, damp brush to soften the edges of the grey shapes so they don’t look like hard cutouts, but rather natural shadows on the lunar surface.
Add Magic
Splatter diluted white gouache or acrylic ink by tapping a loaded brush over the paper. This creates a natural, clustered star field effect that looks deeper than just drawing dots.
Step 4: Stars & Finishing Touches
-
Tiny Stars:
Using a white gel pen or opaque white gouache on a fine brush, dot small stars scattered throughout the dark sky. -
Shining Stars:
Select a few random spots to draw slightly larger, cross-shaped stars to mimic twinkling light. -
Final Contrast:
Review the moon; if it feels too stark against the sky, you can lightly glaze a very pale blue over the shadowed areas. -
The Reveal:
Once the entire painting is completely dry, slowly peel away the masking tape at a 45-degree angle to reveal your clean white border.
Now you have a serene piece of the cosmos captured right on your desk, ready to frame or gift


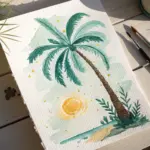
Easy Pastel Clouds
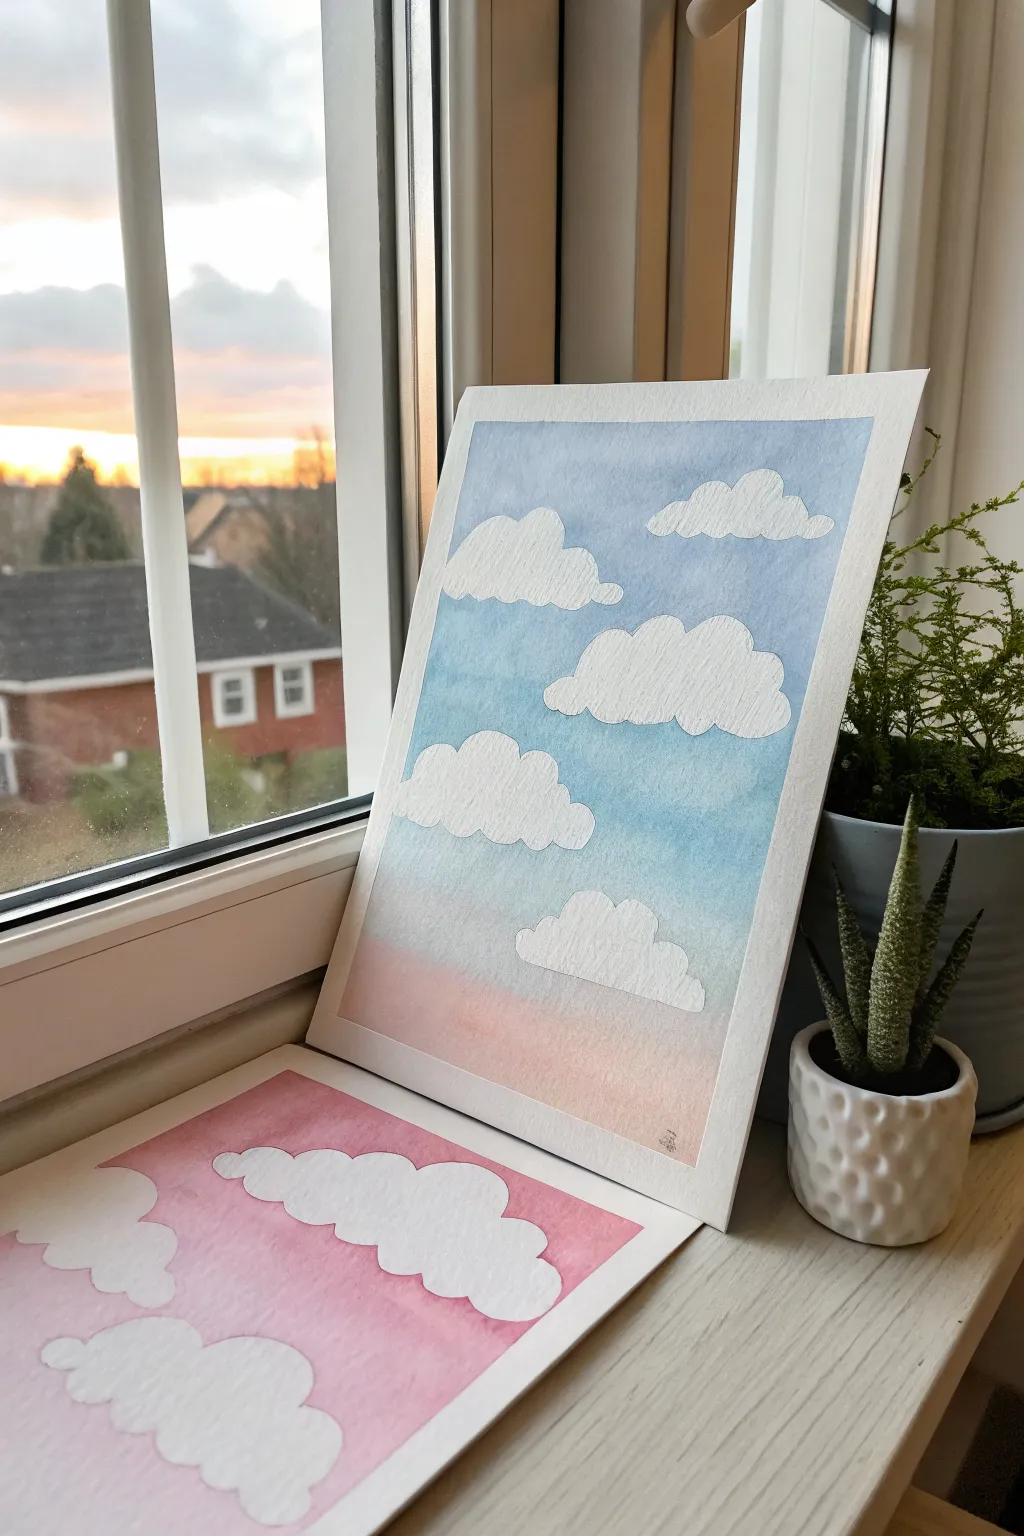
Capture the serenity of a sunset through these soft, dreamy watercolor cloud studies. By using a simple masking technique, you can create fluffy, crisp white clouds floating against a gradient sky that transitions from warm pinks to cool blues.
Step-by-Step Tutorial
Materials
- Cold press watercolor paper (300 gsm recommended)
- Masking fluid (drawing gum)
- Old paintbrush or silicone applicator for masking fluid
- Watercolor paints (Cerulean Blue, Rose Madder or Opera Pink)
- Large flat wash brush
- Medium round brush
- Masking tape
- Paper towels
- Jar of clean water
Step 1: Preparation and Masking
-
Secure the paper:
Start by taping down your watercolor paper to a board or table using masking tape along all four edges. This creates a clean white border and helps prevent the paper from buckling when wet. -
Sketch the clouds:
Lightly sketch the outlines of several fluffy clouds using a pencil. Keep the shapes organic and varied, placing some near the top and others floating lower down. -
Prepare for masking:
Before opening your masking fluid, dip your brush into a little dish soap. This coats the bristles and protects them from getting ruined by the gummy fluid. -
Apply masking fluid:
Carefully fill in the cloud shapes with masking fluid. Make sure you cover the entire inside of the cloud shape, not just the outline, to preserve the white paper underneath. -
Let it cure:
Wait for the masking fluid to dry completely. It should feel rubbery and not tacky to the touch. Patience is key here, as wet fluid can ruin your brushes and smear the paper.
Sticky Situation?
If masking fluid tears your paper upon removal, it wasn’t fully dry or the paper is too soft. Next time, wait longer or try a higher quality 100% cotton paper.
Step 2: Painting the Sky Gradient
-
Pre-wet the paper:
Using your large flat brush and clean water, gently wet the entire surface of the paper over the dried masking fluid. This ‘wet-on-wet’ technique helps colors blend seamlessly. -
Mix the sky blue:
While the paper is damp, load your brush with a diluted Cerulean Blue. The color should be light and airy, perfect for a high daytime sky. -
Begin the top wash:
Start painting at the very top of the paper, moving your brush horizontally back and forth. Let the blue fade naturally as you work your way down towards the middle of the page. -
Mix the sunset pink:
Clean your brush thoroughly and pick up a soft pink shade, like Rose Madder. Keep it watery and translucent to avoid a heavy look. -
Paint the horizon:
Start painting from the bottom of the paper, working upwards with the pink wash. Allow the color to be slightly stronger at the base and fade out as it climbs. -
Blend the transition:
Where the fading blue meets the rising pink in the middle, use a clean, slightly damp brush to gently merge them. They might create a soft violet hue, which adds a lovely natural touch to the sky. -
Add variance:
While the paint is still wet, I like to drop in just a tiny bit more pigment at the very top (blue) and very bottom (pink) to deepen the gradient intensity. -
Dry properly:
Allow the entire painting to dry completely. The paper must be bone dry before the next step, or you risk tearing the surface.
Step 3: Review and Finish
-
Remove masking fluid:
Once dry, gently rub your finger or a rubber cement pickup eraser over the cloud shapes to peel away the masking fluid. You will reveal stark white paper underneath. -
Soften the edges:
If the white clouds look too sharp against the sky, take a clean, damp brush and very gently scrub a few edges to soften them, though the crisp look is often part of the charm. -
Add cloud shadows:
Mix a very faint, watery purple-grey. Paint small shadows along the bottom curves of the white clouds to give them volume and fluffiness. -
Peel the tape:
Slowly peel away the masking tape from the edges. Pull the tape away from the center of the painting at a 45-degree angle to ensure a clean tear-free border. -
Sign your work:
Add your initials or signature in the bottom corner using a fine liner or a small brush with concentrated paint.
Evening Glow
Try reversing the gradient for a sunrise effect, putting yellow at the bottom and purple at the top, or paint the clouds with faint orange shadows instead of grey.
Now you have a serene piece of sky art ready to brighten up any windowsill or wall

Mountains in Simple Layers
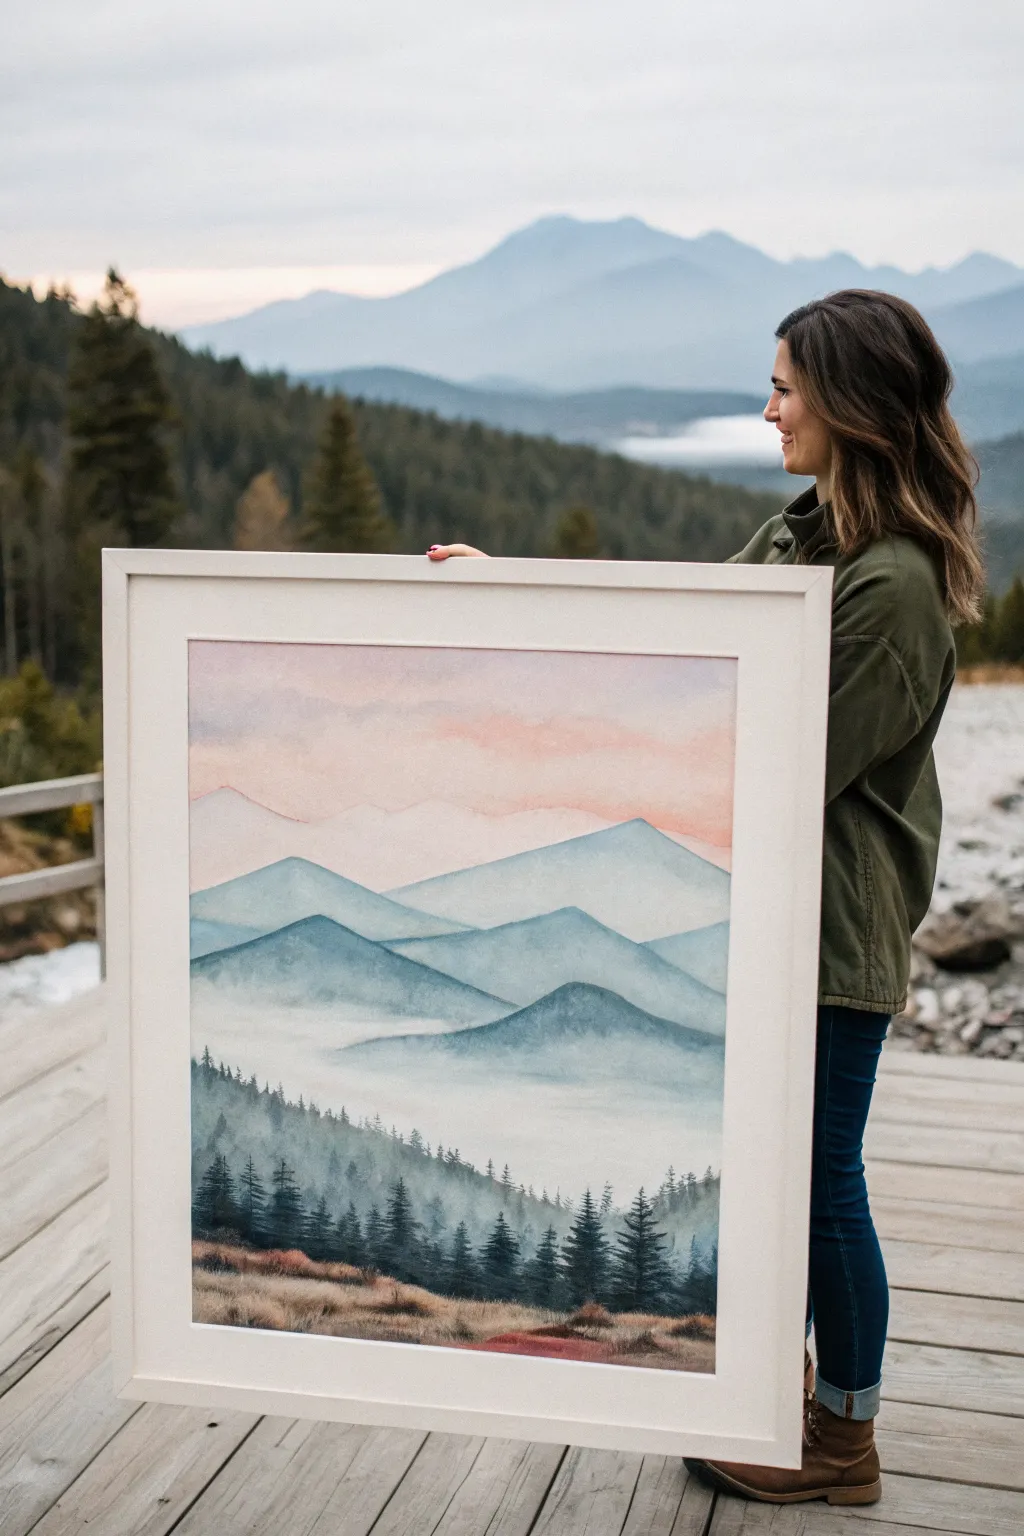
Capture the serene beauty of a mountain range fading into the distance with this atmospheric watercolor layering project. By building up washes from light to dark, you’ll create a convincing sense of depth that draws the viewer right into the foggy valley.
Step-by-Step Guide
Materials
- Large sheet of cold-press watercolor paper (300gsm or heavier)
- Watercolor paints (Indigo, Payne’s Grey, Burnt Sienna, Alizarin Crimson, Sap Green)
- Large flat wash brush (1-2 inch)
- Round brushes (sizes 6 and 10)
- Small fine-liner brush (size 0 or 1)
- Masking tape
- jar of clean water
- Paper towels
- Mixing palette
- Hairdryer (optional, for speeding up drying)
Step 1: Setting the Atmosphere
-
Prepare your surface:
Tape down all four edges of your watercolor paper to a board. This prevents the paper from buckling when we apply heavy water washes later. -
Mix the sky gradient:
Prepare a very watery mix of Alizarin Crimson with a tiny touch of Burnt Sienna for a soft peach tone. In a separate well, mix a faint, watery blue using Indigo. -
Apply the sky wash:
Using your large flat brush, wet the top third of the paper with clean water. Drop in the blue at the very top, blending it downward into the peach tone near the horizon line to mimic a sunset glow. -
Adding distant peaks:
While the sky is still damp (but not soaking), use a dilute mix of the peach and blue to paint faint, ghostly mountain shapes in the distance. The soft edges will make them look far away. -
Let it dry completely:
Wait until the paper is bone dry. If the paper feels cool to the touch, it is still wet. Use a hairdryer on a low setting if you need to speed this up.
Fixing Hard Edges
If your fog gradations dry with hard lines, wet a clean brush and gently scrub the edge to reactivate the paint, then blot with a tissue to soften it back into mist.
Step 2: Building the Middle Ground
-
Mix a mountain blue:
Create a stronger, but still transparent, wash of Indigo and Payne’s Grey. You want a cool, slate-blue color. -
First distinct range:
Paint a mountain ridge roughly one-third of the way down the page. Use the side of your round brush to create jagged, organic peaks. -
Create the fog effect:
Immediately after painting the ridge edge, rinse your brush and use clean water to soften the bottom edge of the mountain shape, fading the paint into nothingness as you move down the paper. -
Layering the second range:
Once dry, mix a slightly darker, more opaque version of your blue. Paint another mountain range slightly lower than the first, overlapping the faded bottom of the previous layer. -
Repeat the fade:
Again, use clean water to drag the pigment downwards, creating a seamless gradient from the dark peak into a white misty valley bottom. -
Third range depth:
Add a third, darker layer of mountains below the previous ones. I like to make this one more detailed, perhaps hinting at ravines or slopes with uneven brushstrokes.
Golden Hour Glow
Glaze a very thin, transparent layer of yellow ochre over the ‘mist’ sections after everything is dry to give the fog a warm, morning sunlight effect.
Step 3: Foreground and Details
-
Mix foreground greens:
Combine Indigo with Sap Green to create a deep, shadowed forest green. It should be much thicker and less watery than your sky mixes. -
Paint the tree line slope:
Paint a sloping hill shape near the bottom of the paper. Unlike the blue mountains, keep this solid and dark, without fading the bottom edge out. -
Add individual pines:
Switch to your smaller round brush. Along the top ridge of this dark green hill, paint vertical lines for tree trunks. -
Texture the trees:
Using the tip of the brush, stipple small horizontal dashes growing wider as you move down each trunk to create the pine branches. -
Foreground grasses:
Mix Burnt Sienna with a little green for an earthy brown. Paint the very bottom of the page with rough texture to represent dried grass fields. -
Final details:
Use your fine-liner brush with dark brown paint to add tiny wispy grasses flicking upward in the immediate foreground to anchor the scene.
Once framed, this serene landscape will bring a breath of fresh mountain air to any room.
BRUSH GUIDE
The Right Brush for Every Stroke
From clean lines to bold texture — master brush choice, stroke control, and essential techniques.
Explore the Full Guide
Ocean Horizon With Moon Path
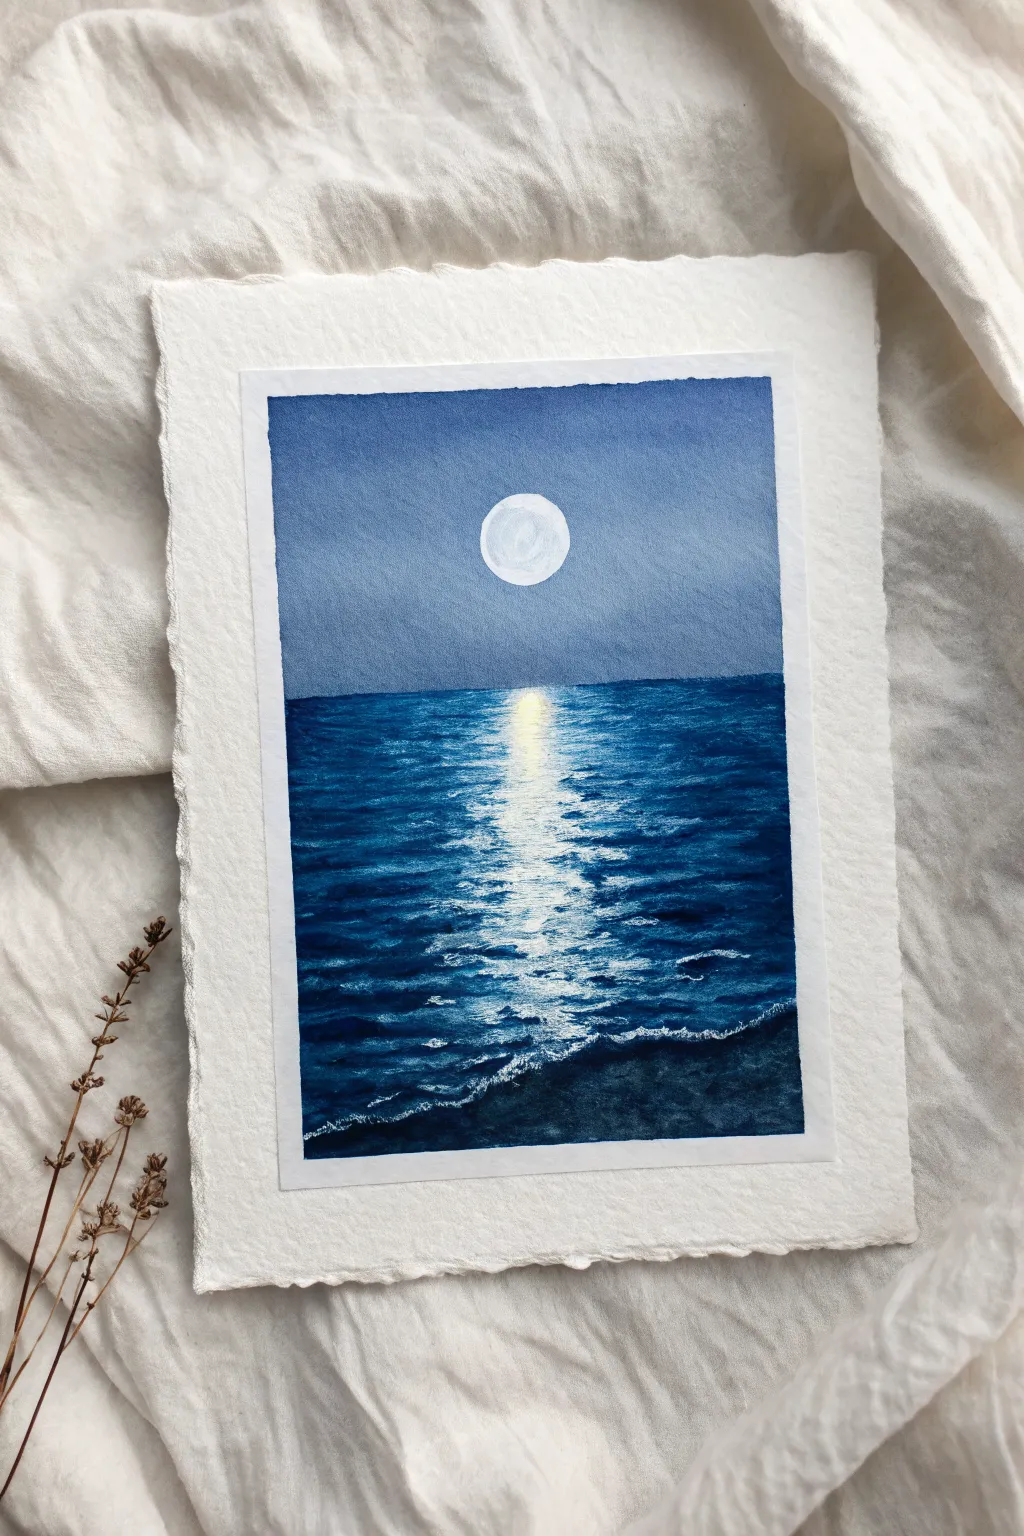
Capture the serenity of a moonlit night with this atmospheric painting that focuses on the shimmering play of light across dark waves. Using a simple color palette, you’ll create a glowing horizon that looks peaceful and profound.
How-To Guide
Materials
- Watercolor paper (cold press, 300gsm/140lb)
- Painter’s tape or washi tape (optional, for clean edges)
- Watercolor or gouache paints (Indigo, Prussian Blue, Titanium White, Black)
- Flat shader brush (size 10 or 12)
- Round detail brushes (size 2 and 4)
- Small liner brush or rigger brush
- Two jars of water
- Paper towels
- White gouache or white gel pen (for highlights)
Step 1: Setting the Scene
-
Prepare your surface:
Begin by taping down the edges of your watercolor paper to a board or table. This creates that crisp, clean white border seen in the example and prevents the paper from buckling when wet. -
Sketch the horizon:
With a very light pencil, draw a horizontal line slightly below the center of the page to separate the sky from the ocean. Then, trace a small circle (about the size of a dime) in the upper center for the moon. -
Mix the sky gradient:
Prepare a wash of indigo mixed with a touch of white to create a dusty, muted blue. The sky needs to be smooth, so ensure you have enough paint mixed before you start.
Uneven Wash?
If your sky dries with weird ‘blooms’ or watermarks, you used too much water. Wait for it to dry, then go over it with a slightly thicker opacity paint like gouache to smooth it out.
Step 2: Painting the Sky
-
Paint around the moon:
Carefully paint around your pencil circle with the Indigo mix. It’s crucial to keep the paper inside the circle pristine white. -
Fill the sky:
Using your flat brush, fill the rest of the sky area with horizontal strokes. Start from the top with a slightly darker blue and add a tiny bit more water as you move down toward the horizon line to create a subtle fade. -
Dry completely:
Let this layer dry fully. The horizon line needs to be sharp, so the sky cannot be wet when you start the ocean.
Step 3: Creating the Ocean Base
-
Mix deep ocean colors:
Mix a strong, dark color using Prussian Blue and a small dot of Black. You want a deep, midnight blue that contrasts heavily with the lighter sky. -
Block in the water:
Using the flat brush, paint horizontal strokes below the horizon line. Leave vertical gaps directly under the moon where the reflection will go. -
Establish the reflection zone:
In the center path under the moon, use a much lighter, watered-down version of your blue. Use rough, broken horizontal strokes here to suggest movement, leaving plenty of white paper showing through for the brightest sparkles.
Make it Shine
For a magical finish, use metallic silver or pearlescent watercolor for the moon and the brightest reflected ripples. It will catch the light beautifully when viewed from an angle.
Step 4: Adding Depth and Waves
-
Darken the edges:
While the blue is still workable, drop darker Indigo or Black paint into the far left and right corners of the water. This vignette effect draws the eye toward the center light. -
Refine wave shapes:
Switch to a size 4 round brush. Paint thin, undulating dark lines across the lighter center path to show the shadows of the waves interrupting the light. -
Paint the foreground:
At the very bottom of the paper, use your darkest blue-black mix to create larger, softer wave shapes. This foreground area should be quite dark to ground the composition. -
Soften the horizon:
Ensure the horizon line is straight but not razor-sharp; you can run a barely damp brush along it to soften the edge slightly so it recedes into the distance.
Step 5: Highlights and Details
-
Clean up the moon:
Paint the moon with opaque Titanium White gouache. Add a tiny drop of pale grey to one side of the moon to give it spherical dimension so it doesn’t look like a flat sticker. -
Add the ‘glitter’:
Using thick white gouache (or a white gel pen) and your smallest brush, dot intense highlights down the center of the water path. Group them densely nearest the horizon. -
Highlight wave crests:
Add thin, horizontal white lines on the tops of the waves in the foreground. Keep these lines broken and organic, not straight. -
Intensify the glow:
If the moon reflection looks too stark, you can glaze a very watery yellow or warm white over the central reflection path to warm it up slightly. -
Final dry and reveal:
Wait for every layer to be bone dry. Then, slowly peel back your tape at a 45-degree angle to reveal those satisfying crisp edges.
Frame this serene nightscape in a simple white mat to let those deep blues really pop
Pine Tree Line Silhouette
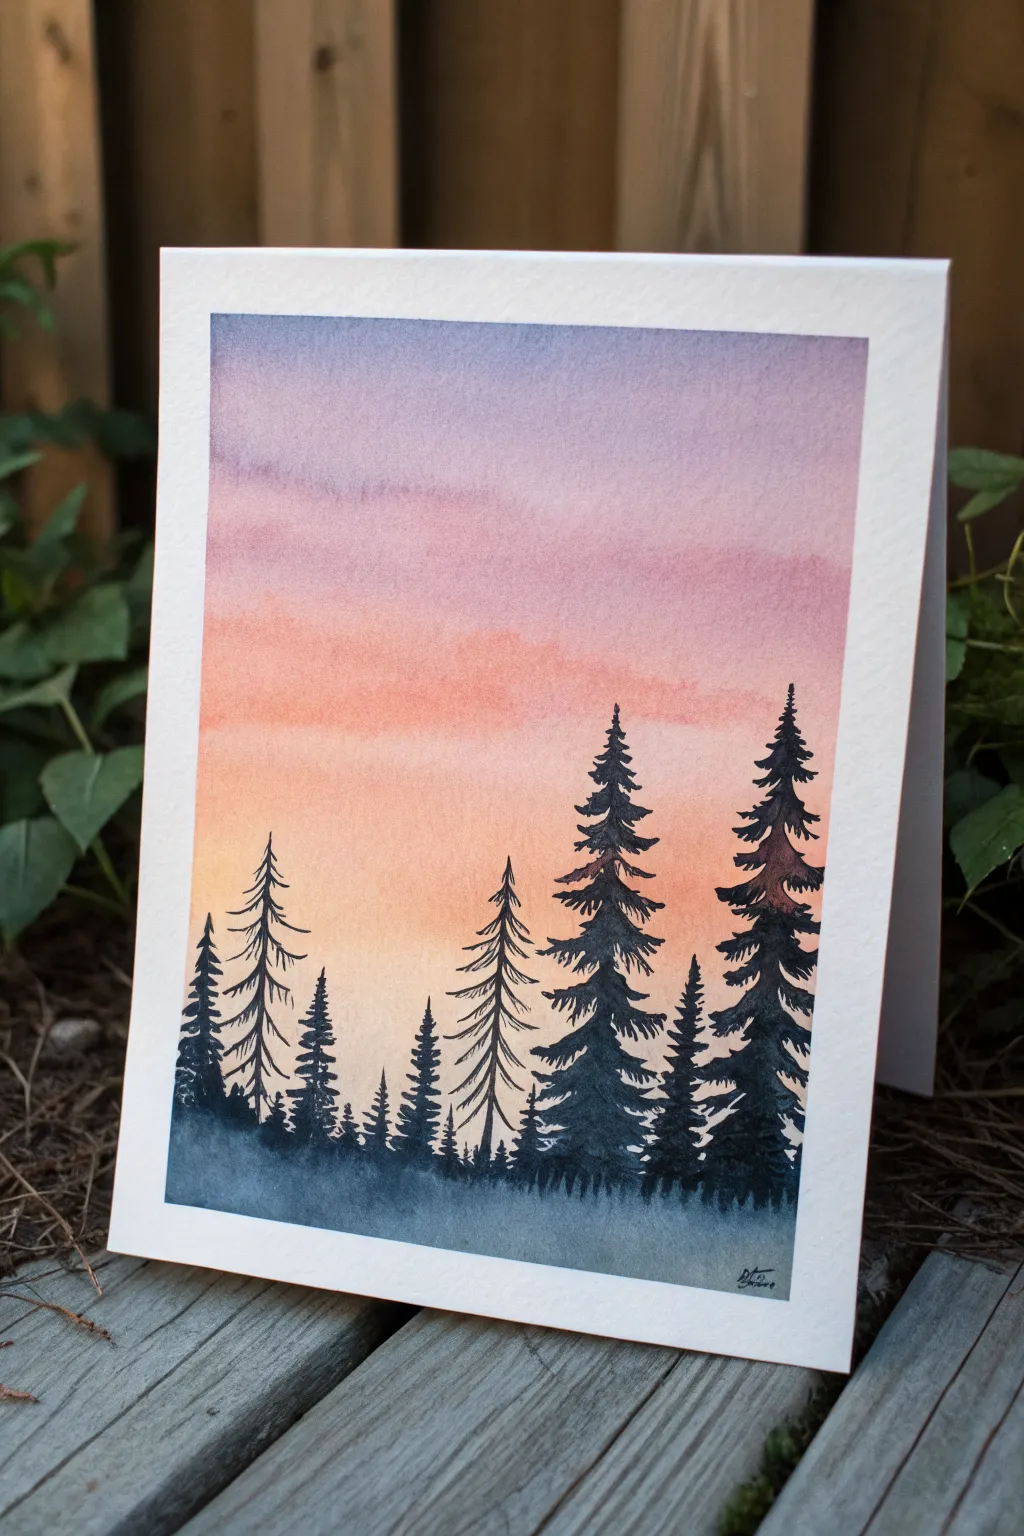
Capture the serene beauty of twilight with this atmospheric watercolor forest scene. The soft gradient of a fading sunset provides the perfect backdrop for crisp, majestic pine silhouettes.
Step-by-Step Guide
Materials
- Watercolor paper (cold press recommended)
- Masking tape
- Watercolor paints (Purple/Violet, Rose/Pink, Orange, warm Yellow, Paynes Gray or Black)
- Flat wash brush (approx. 3/4 inch)
- Round brush (size 4 or 6 for trees)
- Fine liner brush (optional for details)
- Jar of clean water
- Paper towels
- Drawing board or hard surface
Step 1: Painting the Sunset Sky
-
Prep your surface:
Begin by taping down all four edges of your watercolor paper to a hard board using masking tape. This creates a clean white border and prevents the paper from buckling when wet. -
Wet the paper:
Using your large flat brush and clean water, apply an even coat of water over the entire paper surface. You want it to be glistening but not forming puddles. -
Start the gradient:
Load your brush with a diluted violet or purple paint. Apply this to the very top section of the paper, using horizontal strokes to let the color bleed softly downwards. -
Add the middle tones:
Clean your brush slightly and pick up a rose or pink shade. Apply this directly below the purple, blending the edges gently where the two colors meet while the paper is still wet. -
Warming up the horizon:
Move to an orange hue, painting horizontal strokes below the pink section. Finally, transition into a warm, pale yellow near the bottom third of the paper, fading it out toward the bottom edge. -
Refine the blend:
If I notice any harsh lines, I like to use a clean, slightly damp brush to gently sweep back and forth horizontally to smooth out the transition between colors. -
Let it dry completely:
This step is crucial. Allow the background wash to dry completely until the paper is flat and warm to the touch. Painting trees on damp paper will cause them to blur.
Step 2: Creating the Pine Silhouettes
-
Mix the silhouette color:
Create a very dark, saturated mix for the trees. Using Payne’s Gray or mixing black with a touch of blue gives a deep, rich shadow color that isn’t as flat as pure black. -
Draft the tall trees:
Switch to a size 4 or 6 round brush. Start by painting a thin vertical line for the trunk of your first large pine tree on the right side. Don’t make it perfectly straight; a little wobble looks more natural. -
Build the branches:
Starting from the top of the trunk, make small dabbing motions to create the pine needles. Keep the top narrow and gradually widen your strokes as you move down the tree. -
Adding variety:
Create a second tall tree next to the first one. Vary the height and the density of the branches so they don’t look like identical stamps. -
Painting the left side:
Move to the left side of the paper and paint a grouping of slightly shorter, thinner pine trees. Use a lighter touch here to simulate trees that might be slightly further away or younger. -
Fill the middle ground:
Paint smaller, sparser trees in the center gap. These should be shorter than the main trees on the sides to create a nice compositional valley shape. -
Anchor the forest floor:
Once all your trees are placed, use the dark paint to fill in the bottom area, connecting all the tree bases. I like to keep the top edge of this ground layer uneven and grassy-looking. -
Creating depth:
While the ground layer is still slightly wet, drop in a tiny bit more water or diluted pigment at the very bottom edge to create a misty, soft-focus effect at the base. -
Final details:
Use a fine liner brush or the very tip of your round brush to add tiny stray branches sticking out from the main trees or a few dead snags for realism.
Branch technique
Use the side of your round brush for lower branches. Press down and flick outward slightly to mimic the heavy, drooping shape of older pine boughs.
Step 3: Finishing Touches
-
Review and dry:
Let the tree layer dry completely. Check if the black looks solid; if it dried too light, you can carefully paint a second layer over the trunk areas. -
Reveal the border:
Once the painting is 100% dry, slowly peel off the masking tape. Pull the tape away from the paper at a 45-degree angle to ensure a crisp, clean edge. -
Sign your work:
Add your signature in a corner using a fine pen or a small brush with dark paint.
Starry night twist
Before painting the trees, splatter a tiny amount of opaque white gouache or acrylic onto the dry sky to instantly turn this sunset into a starry evening scene.
Enjoy the peaceful atmosphere your new forest landscape brings to the room

PENCIL GUIDE
Understanding Pencil Grades from H to B
From first sketch to finished drawing — learn pencil grades, line control, and shading techniques.
Explore the Full Guide
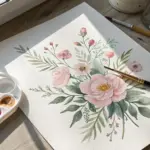
Tulip Trio in a Jar

Capture the delicate grace of spring with this soft watercolor painting of three tulips resting in a simple glass jar. The loose, translucent layers of paint combined with fine ink outlines create an illustration that feels both vintage and freshly picked.
Detailed Instructions
Materials
- Cold press watercolor paper (A5 or A4 size)
- Watercolor paints (Peach, Rose Madder, Sap Green, Cobalt Blue like colors)
- Round watercolor brushes (Size 4 and Size 0 or 00 for details)
- Fine liner pen (0.1 or 0.3mm waterproof, dark grey or brown)
- Pencil (HB) and eraser
- Jar of clean water
- Paper towels
- Washi tape (optional, for securing paper)
Step 1: Sketching the Composition
-
Outline the jar:
Begin by lightly sketching the outline of a simple mason jar in the lower center of your paper. Draw the oval opening, the curved shoulders, and the cylinder body, keeping your pencil lines extremely faint so they disappear under the paint later. -
Position the stems:
Draw three distinct stems rising from the bottom of the jar. Allow them to curve slightly for a natural look, crossing over each other inside the glass to show depth. -
Add the flower heads:
Top each stem with a tulip shape. These should be egg-shaped cups, slightly closed. Make the center one face forward, while the outer two angle gently outward. -
Include leaves:
Sketch a few long, tapering leaves. Place one large one curving out from the jar rim on the right, and a smaller partial leaf on the left. You can also sketch a detached leaf resting on the table surface for an artistic touch.
Wet-on-Wet Technique
To get that soft gradient on the petals, pre-wet the flower shape with clean water first. Drop the pigment in and tilt the paper to let gravity blend it for you.
Step 2: Painting the Flowers
-
First wash for petals:
Mix a watery, pale peach color. Paint the entire shape of the tulip heads with this light wash. While it’s still wet, drop in a slightly stronger rose or pink tone at the bottom of the petals and let it bleed upward naturally. -
Adding petal definition:
Once the first layer is barely damp, not soaking, use a slightly more concentrated mix of the rose color to define the separation between individual petals. This creates a soft, shadowed effect. -
Deepening the color:
Wait for the flowers to dry mostly, then add a final glaze of warm pink or light red to the very tips and edges of the petals to give them volume.
Step 3: Stems and Greenery
-
Painting the stems:
Using a size 4 brush, load up a Sap Green mix. Paint the stems with a steady hand. I find it helpful to pull the brush from the flower downward toward the jar for a smoother line. -
Translucency effect:
When painting the parts of the stems inside the jar, dilute your green paint significantly with water. This shift in value creates the illusion that the stems are behind glass and submerged in water. -
Painting the leaves:
Fill in the leaf shapes with your main green mix. While wet, drop a tiny bit of blue into the shadowed areas (like under the fold of a leaf) to create a cooler, deeper green tone.
Make it a Gift
Paint this design on folded heavy cardstock to create a beautiful, handmade greeting card perfect for Mother’s Day or a spring birthday.
Step 4: The Glass Jar
-
Glass tinting:
Prepare a very watery, pale blue wash (like Cobalt or Cerulean). Paint broad, loose strokes on the sides of the jar, leaving the center mostly white to represent the reflection of light. -
Water line:
Paint a slightly darker blue oval inside the jar to indicate the water level. Ensure this line breaks where the stems pass through it. -
Glass details:
Use a darker blue-grey mix to add thin lines around the rim and the bottom curve of the jar. Keep these lines broken and fluid rather than outlining the whole thing perfectly. -
Shadow pooling:
Paint a watery shadow pooling at the base of the jar using a mix of your glass blue and a touch of the green. Let this wash manipulate freely to look like a cast shadow on a table.
Step 5: Inking and Finishing
-
Wait for drying:
Ensure the paper is bone dry before touching it with a pen. If the paper is cool to the touch, it is still wet. -
Outline the petals:
Using your fine liner pen, trace the petals with a loose, sketchy hand. Don’t close every line; leaving small gaps makes the illustration feel airy and modern. -
Define the stems and jar:
Add ink lines to the stems and the jar structure. Add a few extra scribbly lines around the jar’s neck threads to emphasize the texture. -
White highlights:
If you have a white gel pen or gouache, add tiny dots or lines on the jar’s shoulder and the wettest look of the petals for a final pop of shine.
Sign your artwork near the bottom and enjoy the effortless charm of your floral creation
Rainbow With Soft Blends

Capture the gentle charm of this muted, earth-toned rainbow using simple watercolor techniques on textured paper. This project emphasizes soft blends and imperfect lines to create a comforting, organic piece perfect for a nursery or cozy corner.
How-To Guide
Materials
- Cold press watercolor paper (300gsm for texture)
- Watercolor paints (terracotta, peach/beige, mustard yellow, sage green, blue-grey)
- Round watercolor brush (size 6 or 8)
- Pencil (HB or lighter)
- Eraser
- Jar of clean water
- Paper towel
Step 1: Sketching the Arches
-
Mark the center:
Begin by lightly finding the horizontal center of your paper. Make a tiny dot where you want the highest point of the rainbow to be, usually slightly above the vertical center of the page. -
Sketch the outer arch:
Using a very light hand, draw the outermost arch shape. Don’t worry about using a compass; a hand-drawn curve adds character. Aim for a distinct horseshoe shape rather than a perfect semi-circle. -
Add inner guidelines:
Lightly sketch three more concentric arches inside the first one. Leave a small gap between each line to serve as the white space between your painted bands. -
Place the clouds:
At the bottom of the rainbow legs, sketch two simple, fluffy cloud shapes. Position them so the cloud tops overlap slightly with the bottom of the rainbow legs. -
Lighten the lines:
Take your eraser and gently dab (don’t rub) over your pencil lines. You want them to be barely visible guides so the graphite doesn’t muddy your watercolor paint later.
Step 2: Painting the Rainbow
-
Mix the terracotta:
Create a muted rust or terracotta color. If you only have bright red or orange, mix in a tiny touch of brown or green to desaturate it. -
Paint the first arch:
Load your brush with the terracotta mix and paint the outermost arch. Use a confident stroke, allowing the bristle texture to show slightly at the edges for a rustic look. -
Mix the peach tone:
Rinse your brush thoroughly. Mix a soft peach or beige color. You can achieve this by watering down orange and adding a touch of white or yellow ochre. -
Paint the second arch:
Carefully paint the second arch, maintaining a thin, consistent gap of white paper between this band and the terracotta one. I find it helps to rotate the paper as I curve the brush around. -
Mix the mustard yellow:
Prepare a mustard yellow shade. Avoid bright lemon yellow; aim for something earthy like yellow ochre or raw sienna. -
Paint the third arch:
Apply the mustard color to the third band. If the paint pools slightly at the bottom, dab it gently with a dry clean brush or paper towel. -
Mix the sage green:
Create a muted green color. Sage green is best made by mixing green with a little grey or a touch of red to knock back the brightness. -
Paint the final arch:
Fill in the smallest, innermost arch with your sage green mix. Ensure the bottom of this arch aligns horizontally with the others.
Wet Edge Control
Keep a paper towel in your non-painting hand. If a puddle forms at the end of a brushstroke, quickly touch the corner of the towel to the wet spot to soak up excess water.
Step 3: Adding the Clouds
-
Prepare the blue-grey:
Mix a watery blue-grey color. It should be transparent enough that it feels airy, not heavy. -
Paint the left cloud:
Fill in the left cloud shape. Let the wet paint touch the dry bottom edges of the rainbow arches slightly; if the rainbow is dry, the colors won’t bleed, creating a clean overlap. -
Paint the right cloud:
Repeat the process for the right cloud. Try to keep the paint consistency watery to encourage that beautiful watercolor texture as it dries. -
Final drying:
Let the entire piece dry completely flat. If the paper buckles slightly, you can place it under a heavy book once it is 100% dry to flatten it out.
Add Metallic Magic
Once the painting is bone dry, use gold watercolor or a metallic pen to add tiny dots or stars in the white spaces between the arches for a touch of sparkle.
Now you have a serene piece of art ready to frame or gift


Hot Air Balloon Silhouettes
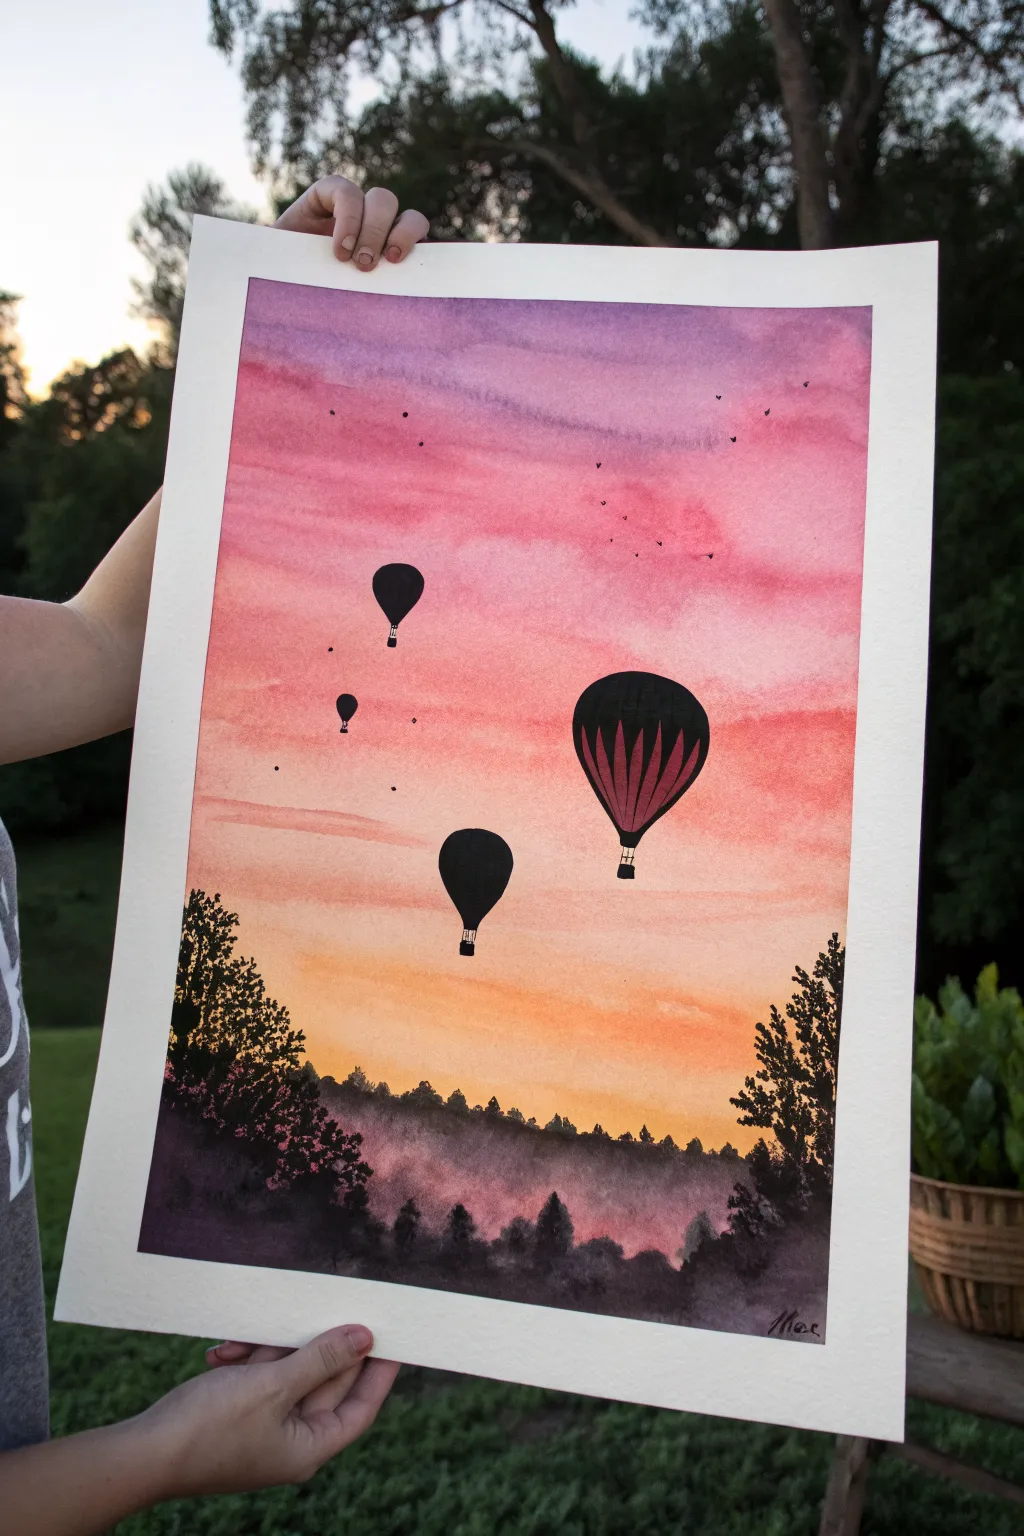
This captivating watercolor piece blends a vibrant, gradient sunset with crisp silhouettes for a dreamy effect. The high-contrast black shapes against the soft pink and purple sky create a stunning sense of depth and atmosphere.
Detailed Instructions
Materials
- Watercolor paper (cold press, heavy weight)
- Watercolor paints (purple, pink, orange, yellow, black)
- Masking tape
- Flat wash brush (large)
- Round brushes (flats and rounds, varied sizes)
- Black ink or gouache (for opaque silhouettes)
- Pencil
- Clean water cups
- Paper towels
Step 1: Preparation & Sky Wash
-
Secure the paper:
Begin by taping down all four edges of your watercolor paper to a board or table with masking tape. This creates that clean white border and prevents the paper from buckling when wet. -
Sketch lightly:
Very faintly sketch the placement of your hot air balloons and the horizon line for the trees. Keep these lines minimal, as usually watercolor is transparent and pencil can show through. -
Pre-wet the sky:
Using your large flat brush and clean water, apply an even coat of water to the entire sky area, stopping just above where your tree line will be. The paper should be glisten, but not hold puddles. -
Apply the purple:
Load your brush with a diluted purple paint. Start at the very top of the paper and sweep across horizontally, letting the color bleed naturally downward into the wet paper. -
Blend in pinks:
While the purple is still wet, pick up a vibrant pink shade. Apply this just below the purple, brushing back and forth to encourage the colors to merge seamlessly without hard lines. -
Add warmth with orange:
Continue moving down the page, introducing a soft orange tone beneath the pink. This transition mimics the warm glow of the setting sun. -
Finish with yellow:
Near the bottom of the sky (just above the future treeline), blend in a pale yellow or light orange. This should be the lightest part of your painting. -
Create cloud textures:
While the wash is still damp, you can gently dab in slightly more concentrated pink or purple pigment in horizontal streaks to suggest soft cloud layers. Let these diffuse naturally. -
Dry completely:
This is crucial: allow the background wash to dry 100%. If you touch the paper and it feels cool, it’s still wet. I like to use a hairdryer on a low setting to speed this up.
Uneven Sky?
If your sky dries with “cauliflower” blooms, it means you added water to a drying section. Embrace it as cloud texture, or gently glaze over it once fully dry.
Step 2: Adding the Silhouettes
-
Paint the distant trees:
Mix a watery, dark purple-grey color. Paint the misty, distant tree line right at the horizon. Because the paint is diluted, these trees will look farther away and foggy. -
Paint the foreground trees:
Once the mist layer is dry, use opaque black paint (or very concentrated watercolor) to paint the sharp, dark trees in the foreground. Use a dabbing motion with a round brush to mimic leaf textures. -
Outline the balloons:
Switch to a small, detail round brush and your opaque black medium. Carefully outline the shapes of the hot air balloons based on your initial sketch. -
Fill the balloons:
Fill in the balloon shapes with solid black. For the largest balloon, leave faint vertical strips unpainted if you want to suggest fabric panels, or paint it solid and layer a dark red glaze over it later. -
Add varying sizes:
Ensure you paint balloons of different sizes—larger ones appearing closer and tiny specks for those far away. This creates perspective. -
Detail the baskets:
Use your finest brush to paint the delicate lines connecting the balloons to their baskets. Keep the baskets simple and small rectangular shapes. -
Paint the birds:
Using the very tip of your smallest brush, add tiny ‘V’ or check-mark shapes in the sky to represent a flock of birds flying in the distance. -
Final touches:
Check your foreground trees for density. If the watercolor dried too light, add a second layer of black to ensure they remain a true silhouette against the bright sky. -
Reveal the border:
Once the painting is completely bone-dry, slowly peel away the masking tape at a 45-degree angle alongside the paper to reveal your crisp white edges.
Use Gouache for Black
Watercolor dries lighter than it looks wet. For truly pitch-black silhouettes, use black Gouache or India Ink instead of black watercolor paint.
Now you have a serene twilight scene ready to frame or gift
Umbrella Figure From Behind

Capture a moody, atmospheric moment with this watercolor painting of a solitary figure walking in the rain. Using simple washes and strong silhouettes, you will create a piece that feels both contemplative and striking.
Step-by-Step
Materials
- Cold press watercolor paper (300 gsm)
- Watercolor paints (Payne’s Grey, Lamp Black, Indigo, Burnt Umber)
- White gouache or white gel pen
- Round brushes (sizes 2, 6, and 10)
- Masking tape
- Pencil (HB)
- Ruler
- Jar of water and paper towels
Step 1: Preparation and Sketching
-
Secure the paper:
Tape down all four edges of your watercolor paper to a board or table with masking tape. This creates a clean white border and prevents the paper from buckling when wet. -
Sketch the horizon:
Using your ruler, lightly draw a horizon line about one-third of the way up from the bottom of the page. -
Outline the figure:
Lightly sketch the silhouette of the man in the center. Start with the oval shape of the umbrella, then draw the head and the long, rectangular shape of the trench coat extending down to the feet. -
Refine the details:
Add subtle details to your sketch, such as the collar of the coat, the hand gripping the handle, and the folds in the fabric. Keep these lines faint to avoid them showing through the paint later.
Step 2: Painting the Atmosphere
-
Prepare the sky wash:
Mix a very watery, pale grey wash using a touch of Payne’s Grey and plenty of water. You want this to be transparent and airy. -
Paint the background:
Apply the pale grey wash over the entire sky area, carefully painting around the figure and umbrella. Bring the wash down to the horizon line. -
Add distant hills:
While the sky is still slightly damp near the horizon, paint a soft, uneven band of light grey-blue to suggest distant hills or water. Let this layer dry completely. -
Paint the ground:
Mix a darker, muddy grey using Payne’s Grey and a little Burnt Umber. Apply this to the ground area below the horizon, using horizontal strokes to simulate uneven terrain. Let it dry.
Rain Direction
Make all your rain streaks angle slightly in the same direction (e.g., top-right to bottom-left). This implies wind and makes the weather look more dynamic than straight lines.
Step 3: The Figure and Coat
-
Base coat for the figure:
Mix a strong, dark grey using Lamp Black and Indigo. Paint the entire coat shape. I like to keep the paint slightly uneven here to suggest the texture of heavy wool fabric. -
Paint the umbrella:
Using almost pure black paint, fill in the umbrella shape. Make the edges crisp. Leave a tiny sliver of white paper or use lighter grey on the top curve to show where the light hits the wet fabric. -
Add shadows and depth:
Once the coat’s base layer is dry, use a smaller brush with concentrated black to paint the darker shadows: the fold down the back, under the collar, and the deep creases near the hem. -
Define the legs and shoes:
Paint the trousers and shoes in solid black, ensuring the feet are grounded firmly on the painted earth.
Accidental Blobs?
If you drop dark paint where you don’t want it, quickly dab it with a clean paper towel corner. Don’t rub, or you’ll push the pigment into the paper fibers.
Step 4: Rain and Finishing Touches
-
Darken the foreground:
Add another layer of dark grey wash to the very bottom of the painting to create a vignette effect, drawing the eye upward toward the figure. -
Add grass details:
Using your smallest brush (size 0 or 2) and black paint, flick tiny, quick upward strokes along the hill’s edge to create silhouetted grass blades. -
Create the rain:
Load a fine brush or white gel pen with opaque white. Draw thin, broken vertical lines across the sky and overlaying parts of the dark coat to simulate falling rain. -
Highlight the coat:
Add tiny white strokes on the shoulders and the top of the umbrella to represent rain hitting and glistening on the surfaces. -
Review and seal:
Step back to check your contrast. If the rain looks too subtle, add a few more distinct white streaks. Once fully dry, carefully peel off the masking tape to reveal the crisp border.
Now you have a serene, reflective piece of art ready to be framed or gifted
Cozy String Lights at Night
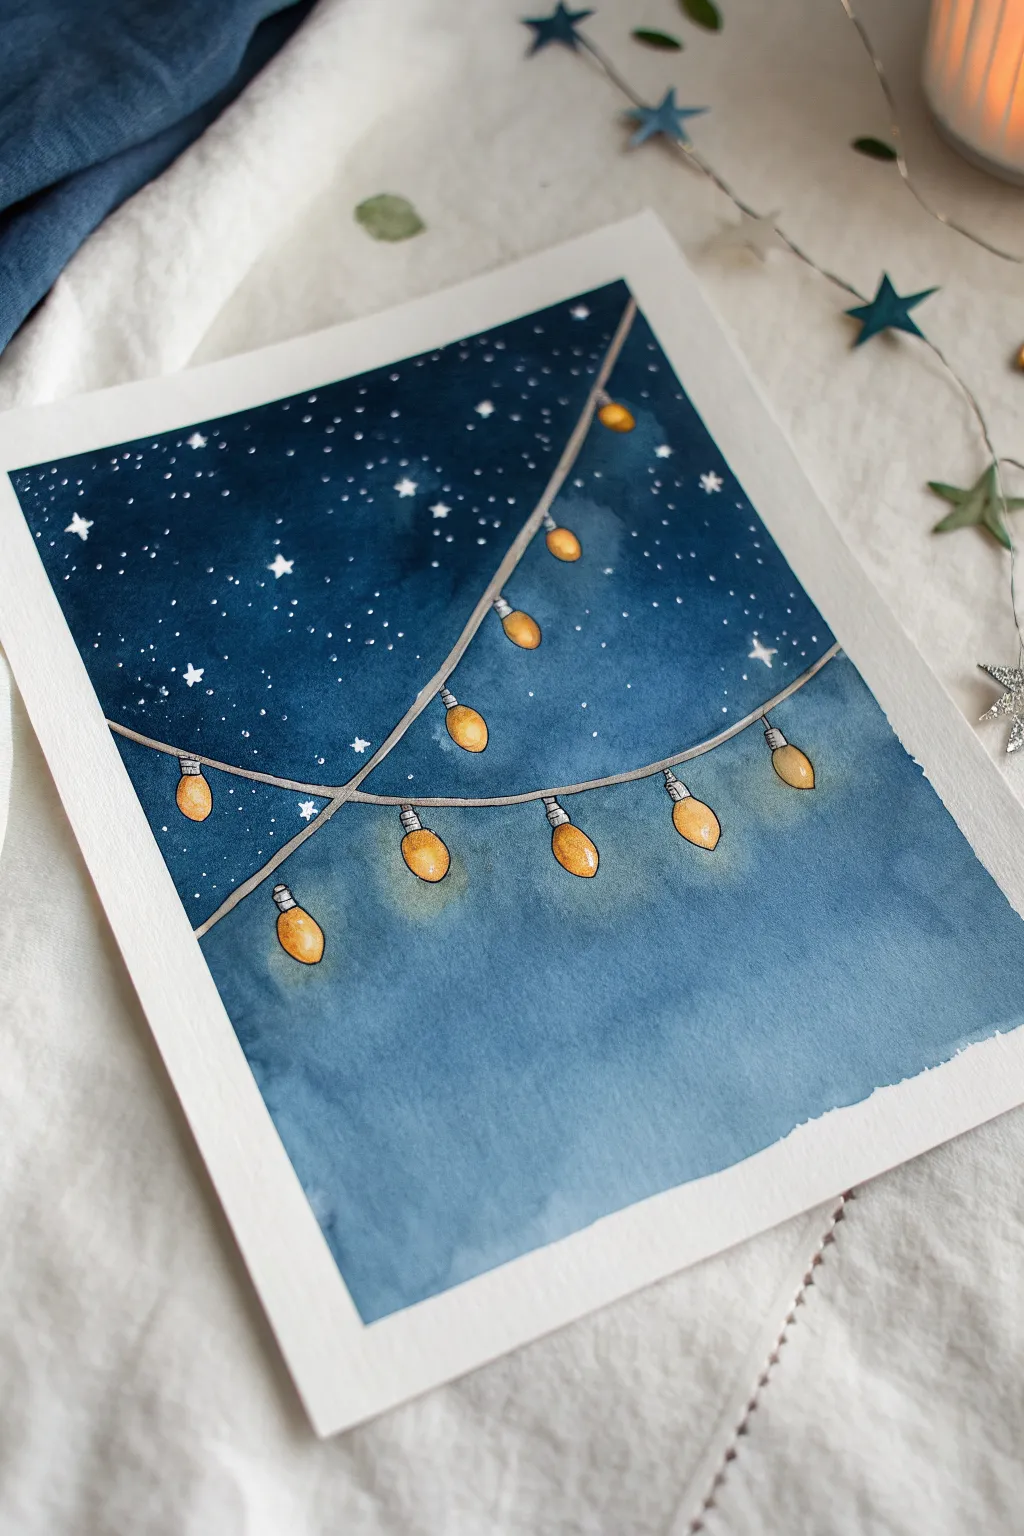
This charming watercolor study combines a deep, gradient night sky with the warm glow of festival lights. It’s an exercise in creating contrast and atmosphere, transforming a simple sheet of paper into a cozy evening scene.
Step-by-Step Tutorial
Materials
- Watercolor paper (140lb/300gsm cold press recommended)
- Watercolor paints (Indigo, Phthalo Blue, Burnt Sienna, Yellow Ocher, Cadmium Yellow)
- White opacity: White Gouache or White Gel Pen
- Masking fluid (optional but helpful)
- Fine liner pen (Gray or dilute black ink)
- Round brushes (large size 10-12, medium size 6, small detail brush size 0-2)
- Painter’s tape
- Pencil and eraser
Step 1: Preparation & Sketching
-
Tape the edges:
Begin by taping down all four edges of your watercolor paper to a board or table. This creates that crisp white border seen in the final piece and keeps the paper flat while it gets wet. -
Sketch the strands:
Lightly sketch two or three swooping lines across the paper to represent the wires. Allow them to overlap naturally, creating a relaxed drape. -
Position the bulbs:
Sketch simple tear-drop shapes hanging from the wire lines at intervals. Make sure they dangle vertically, regardless of the angle of the wire. -
Protect the lights:
If you have masking fluid, apply it carefully over the light bulb shapes. If you don’t have masking fluid, you will need to paint very carefully around these shapes in the next steps to keep the paper white.
Uneven Wash?
If your sky dries with hard lines (blooms), don’t panic. Gently re-wet the area with a damp brush to soften edges, or embrace the texture—it often looks like clouds in a night sky.
Step 2: Creating the Night Sky
-
Wet the sky:
Using your largest clean brush, apply clean water to the entire sky area, avoiding the masked or sketched bulbs. -
Start with the base blue:
While the paper is glistening wet, drop in a wash of Phthalo Blue. Start near the bottom where the sky is lighter and work upwards. -
Deepen the darkness:
Mix a strong Indigo or dark blue. Drop this concentrated pigment into the sheer wet top half of the painting. Let the dark paint bleed naturally downward into the lighter blue. -
Create texture:
While the wash is still wet, you can tap in extra dark blue or even a touch of black at the very top corners to vignette the scene and create depth. -
Add background stars:
Before the wash completely dries, you can splatter microscopic droplets of clean water or white gouache to create nebulous, distant stars (optional). Let the background dry completely.
Make It Magical
Mix a tiny amount of iridescent or metallic watercolor medium into your yellow bulb paint. When the light hits your painting, the bulbs will have a genuine shimmer.
Step 3: Painting the Lights
-
Remove masking:
If you used masking fluid, ensure the paper is bone dry, then gently rub it off with your finger or a rubber pickup tool to reveal the pristine white paper shape. -
Base glow:
Dilute Cadmium Yellow with plenty of water. Paint a very pale, watery circle around the outside of each bulb shape, diffusing it into the blue sky to create a soft halo effect. -
First bulb layer:
Paint the entire bulb shape with a light wash of Yellow Ocher. Keep it translucent so the light feels bright. -
Adding shadow:
While the bulb is damp, drop a tiny amount of Burnt Sienna or orange into one side or the bottom of the bulb to give it roundness and dimension. -
Paint the sockets:
Use a mix of gray or diluted black to paint the small rectangular socket at the top of each bulb, connecting it to the wire.
Step 4: Stars & Details
-
Draw the wires:
Using a fine liner pen or a very small brush with gray paint, trace over your pencil lines for the wires. A broken or slightly wobbly line often looks more organic. -
Big stars:
With opaque white gouache or a white gel pen, draw distinct stars. Vary them between simple dots and four-pointed sparkles. -
Splatter stars:
Load a toothbrush or stiff brush with white paint and flick fine speckles over the top, darker section of the sky for a galaxy effect. -
Highlighting bulbs:
Add a tiny dot/dash of white to the brightest part of each yellow bulb to simulate the reflection on glass. -
Final reveal:
Once absolutely everything is dry, slowly peel away the painter’s tape at a 45-degree angle to reveal your crisp borders.
Hang this piece somewhere you need a little extra warmth and enjoy the eternal glow of your painted evening
Minimal City Skyline Silhouette
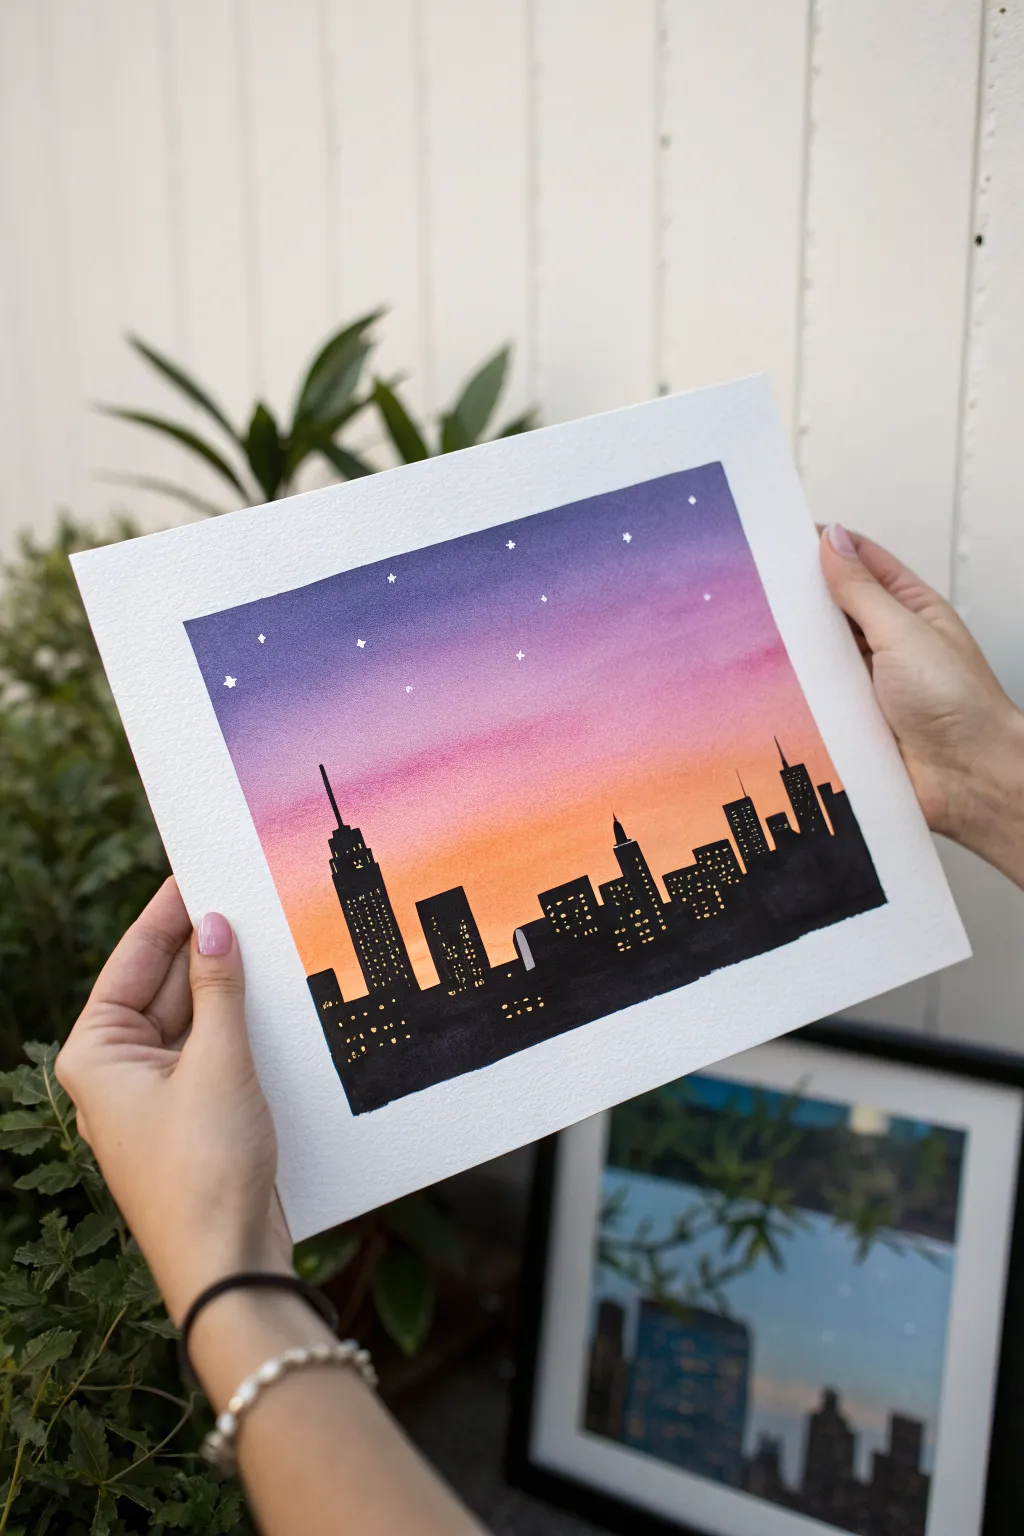
Capture the magic of twilight in the city with this vibrant watercolor project. By combining a dreamy gradient sky with crisp black silhouettes, you’ll create a striking piece of art that looks impressive but is surprisingly simple to achieve.
How-To Guide
Materials
- Cold press watercolor paper (300gsm suggested)
- Painter’s tape or masking tape
- Watercolor paints (Purple, Pink, Orange)
- Black acrylic paint or black gouache
- Flat wash brush (1/2 inch or larger)
- Small round detail brush (size 0 or 1)
- White gel pen or fine white paint marker
- Cup of water and paper towels
- Pencil and ruler
Step 1: Setting the Scene
-
Tape details:
Begin by taping down all four edges of your watercolor paper to a hard board or your work surface. This creates that clean, crisp white border you see in the final piece and prevents the paper from buckling when wet. -
Base sketch:
Lightly sketch a horizontal line near the bottom third of the paper to mark where your buildings will sit. Don’t press too hard; you just need a faint guide. -
Wet the sky:
Using your large flat brush and clean water, apply an even coat of water to the ‘sky’ area of the paper, stopping just below your pencil line. The paper should be glistering, but not swimming in puddles.
Clean Lines Secret
To prevent paint bleeding under the tape, run a fingernail firmly along the tape edge to seal it tight before you start painting.
Step 2: Painting the Gradient Sky
-
Applying purple:
Load your brush with a deep purple watercolor. Apply this across the very top of your wet paper using horizontal strokes. -
Adding pink:
Clean your brush quickly and pick up a vibrant pink or magenta. Paint a strip directly below the purple while the paper is still wet, letting the colors touch and bleed together naturally. -
Blending orange:
Rinse again and move to a bright orange. Apply this band below the pink, bringing it down toward the horizon line. -
Softening transitions:
With a clean, slightly damp brush, gently run your brush back and forth horizontally between the color bands to smooth out the gradient. We want a seamless transition from night to sunset. -
Total drying time:
This is crucial: Let the sky dry completely. If the paper feels cool to the touch, it’s still damp. Paint will bleed if you rush this step, so maybe grab a snack while you wait.
Fixing Ugly Blooms
If ‘cauliflower’ textures appear in the sky, it means you added water to drying paint. Don’t touch it! Let it dry, they often look like clouds anyway.
Step 3: Building the City
-
Outline the skyline:
Once dry, use a pencil to lightly sketch the jagged outline of your buildings. Include skyscrapers of varying heights—like one tall distinct building (resembling the Empire State Building) and shorter blocky ones. -
Fill the silhouette:
Switch to your black acrylic paint or gouache. Use a medium or small brush to fill in the entire area below your sketched skyline. Acrylic is opaque, so it will cover the watercolor background perfectly. -
Sharp edges:
Use your smallest detail brush to refine the tops of the buildings. Add tiny antennas or spires to the tallest structures to give them realistic scale. -
Cleanup:
Check the bottom edge of your silhouette for uneven spots and fill them in solidly with black.
Step 4: Illuminating the Night
-
Windows preparation:
Ensure the black paint is 100% dry before proceeding. Wet paint will ruin your white or yellow markers instantly. -
Adding lights:
Using a fine-tip brush with yellow paint, or a yellow paint pen, tap tiny dots and small squares onto the black buildings to represent lit windows. Group them irregularly; not every window needs to be lit. -
Starry sky:
Take your white gel pen or a fine brush with white gouache and add small stars in the purple section of the sky. -
Star details:
Make a few stars slightly larger ‘cross’ shapes to look like twinkling distant suns, and keep others as simple dots. -
The reveal:
Wait until everything is dry, then slowly peel away the painter’s tape at a 45-degree angle to reveal your clean white borders.
Frame your vibrant cityscape or gift it to someone who loves the city lights
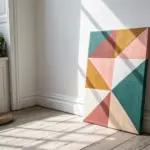
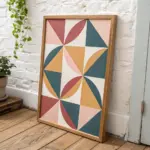
Tape-Masked Geometric Blocks
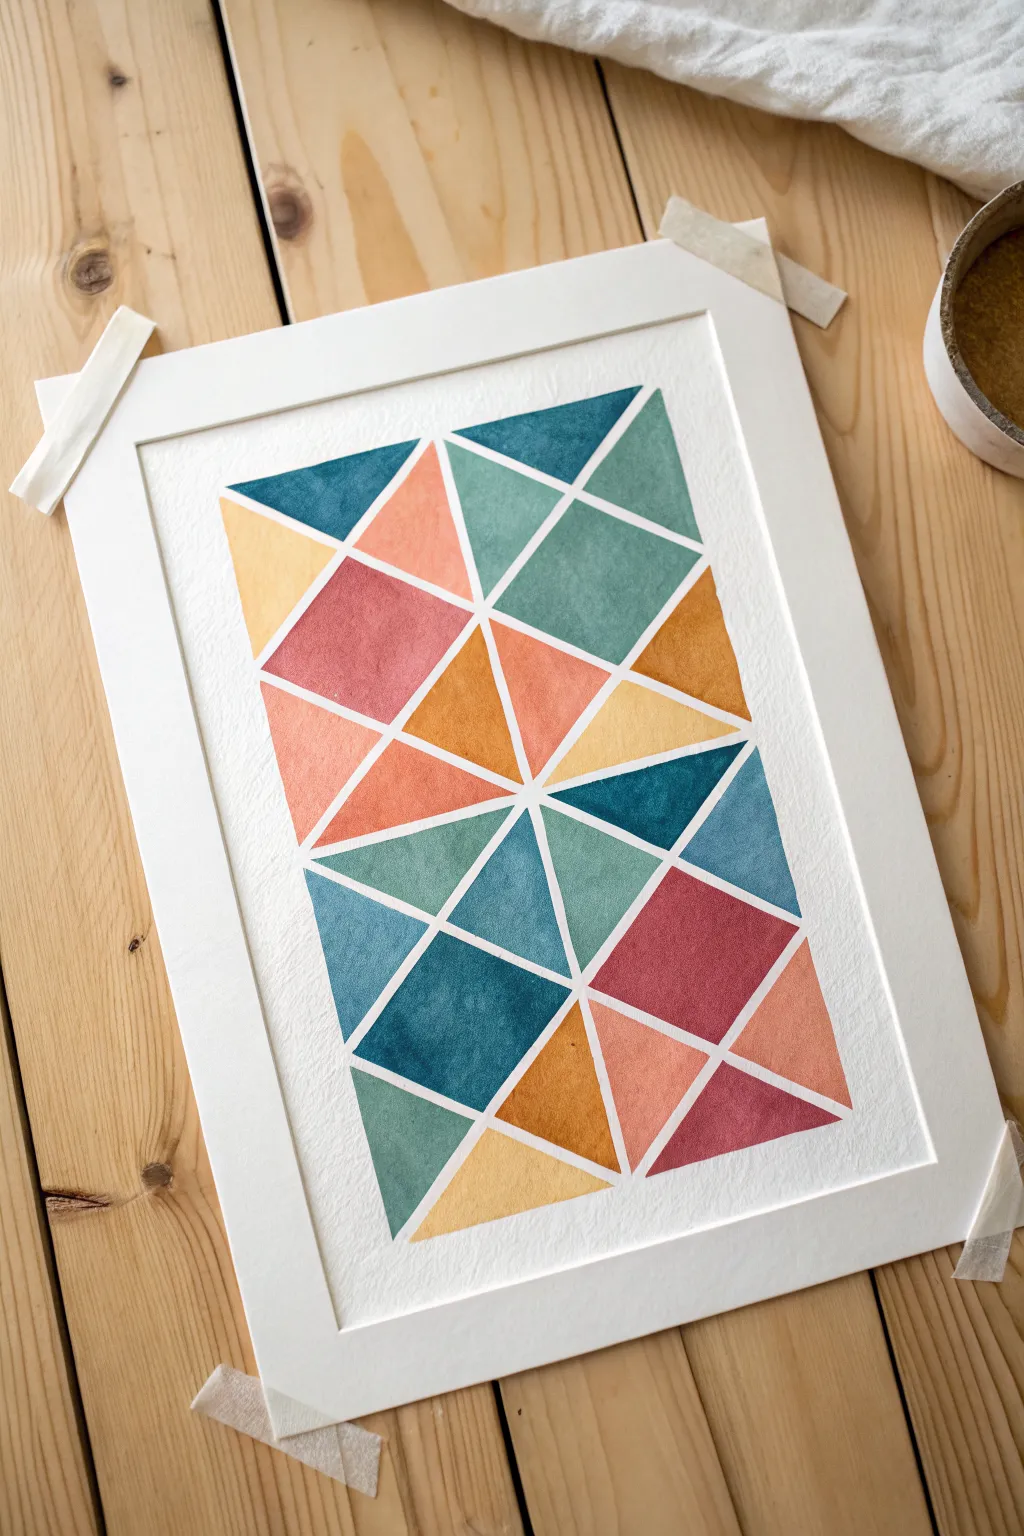
This project creates a stunning stained-glass effect using nothing but tape and watercolors. By masking off a geometric grid before you paint, you’ll reveal crisp, professional-looking white lines that make the vibrant colors pop.
Step-by-Step Guide
Materials
- Cold press watercolor paper (approx. 9×12 inches)
- Painter’s tape or drafting tape (1/4 inch width is ideal)
- Watercolor paint set
- Soft round watercolor brush (size 6 or 8)
- Jar of clean water
- Paper towels
- Pencil
- Ruler
- Masonite board or smooth workspace surface
Step 1: Preparation and Masking
-
Secure the paper:
Begin by taping your watercolor paper down to a flat board or your table surface. Use wider tape along the four outer edges to create a clean white border frame once finished. -
Plan the geometry:
Lightly sketch a few intersecting diagonal lines across the paper with a pencil and ruler. You don’t need a complex drawing, just a few guide points to help you visualize where the tape will go. -
Apply the main tape lines:
Cut strips of your thinner painter’s tape or drafting tape. Lay down three to four long strips across the paper at varying angles to create large initial sections. -
Subdivide the shapes:
Within the large sections you just made, add shorter strips of tape to connect the main lines. This breaks the big shapes into smaller triangles and quadrilaterals. -
Create starbursts:
Try intersecting three or four pieces of tape at a single central point. This creates dynamic ‘starburst’ patterns that look great when colored in. -
Seal the edges:
Once your design is laid out, run a bone folder or the back of your fingernail firmly over every piece of tape. This step is crucial to prevent paint from seeping underneath and ruining your crisp lines.
Use Washi Tape
Using standard painter’s tape? Stick it to your pants or shirt first to remove some tackiness. This prevents the tape from ripping your watercolor paper upon removal.
Step 2: Painting the Shapes
-
Select your palette:
Choose 4-6 colors for a cohesive look. I find that mixing a cool teal, a warm ochre, a dusty rose, and a deep blue creates a nice modern balance. -
Paint the first block:
Load your brush with wet paint and fill in one of the geometric shapes. Focus on keeping the color concentrated, as watercolor dries lighter. -
Vary the saturation:
As you move to adjacent shapes, try using more water to dilute the pigment for a translucent look, or less water for bold, opaque coverage. -
Distribute colors evenly:
Don’t put two shapes of the exact same color right next to each other. Hop around the paper, filling in all your teal sections first, then switching to pink, and so on. -
Create texture:
While a shape is still wet, you can drop in a tiny bit of a darker shade or a different color to create a soft, blooming gradient within that specific block. -
Let it dry completely:
This is the hardest part—waiting. Allow the painting to dry fastidiously. If the paper feels cool to the touch, it is still damp.
Bleeding Lines?
If paint bled under the tape, wait for it to dry fully. Then, take a small flat brush with white gouache or opaque acrylic and carefully paint over the bleed to tidy up the line.
Step 3: The Reveal
-
Check dryness again:
Seriously, ensure the paint is bone dry. Removing tape from damp paper will tear the surface. -
Peel the inner tape:
Start with the masking tape inside the design. Peel it slowly at a sharp 45-degree angle, pulling away from the painted area rather than straight up. -
Remove the border:
Finally, remove the tape securing the paper to the table. This reveals that crisp outer border that frames the artwork professionally. -
Erase pencil marks:
If any pencil guide lines are visible in the white spaces between the colored blocks, gently erase them with a white plastic eraser.
Hang your geometric masterpiece in a spot that needs a splash of modern color
Mandala in a Simple Circle
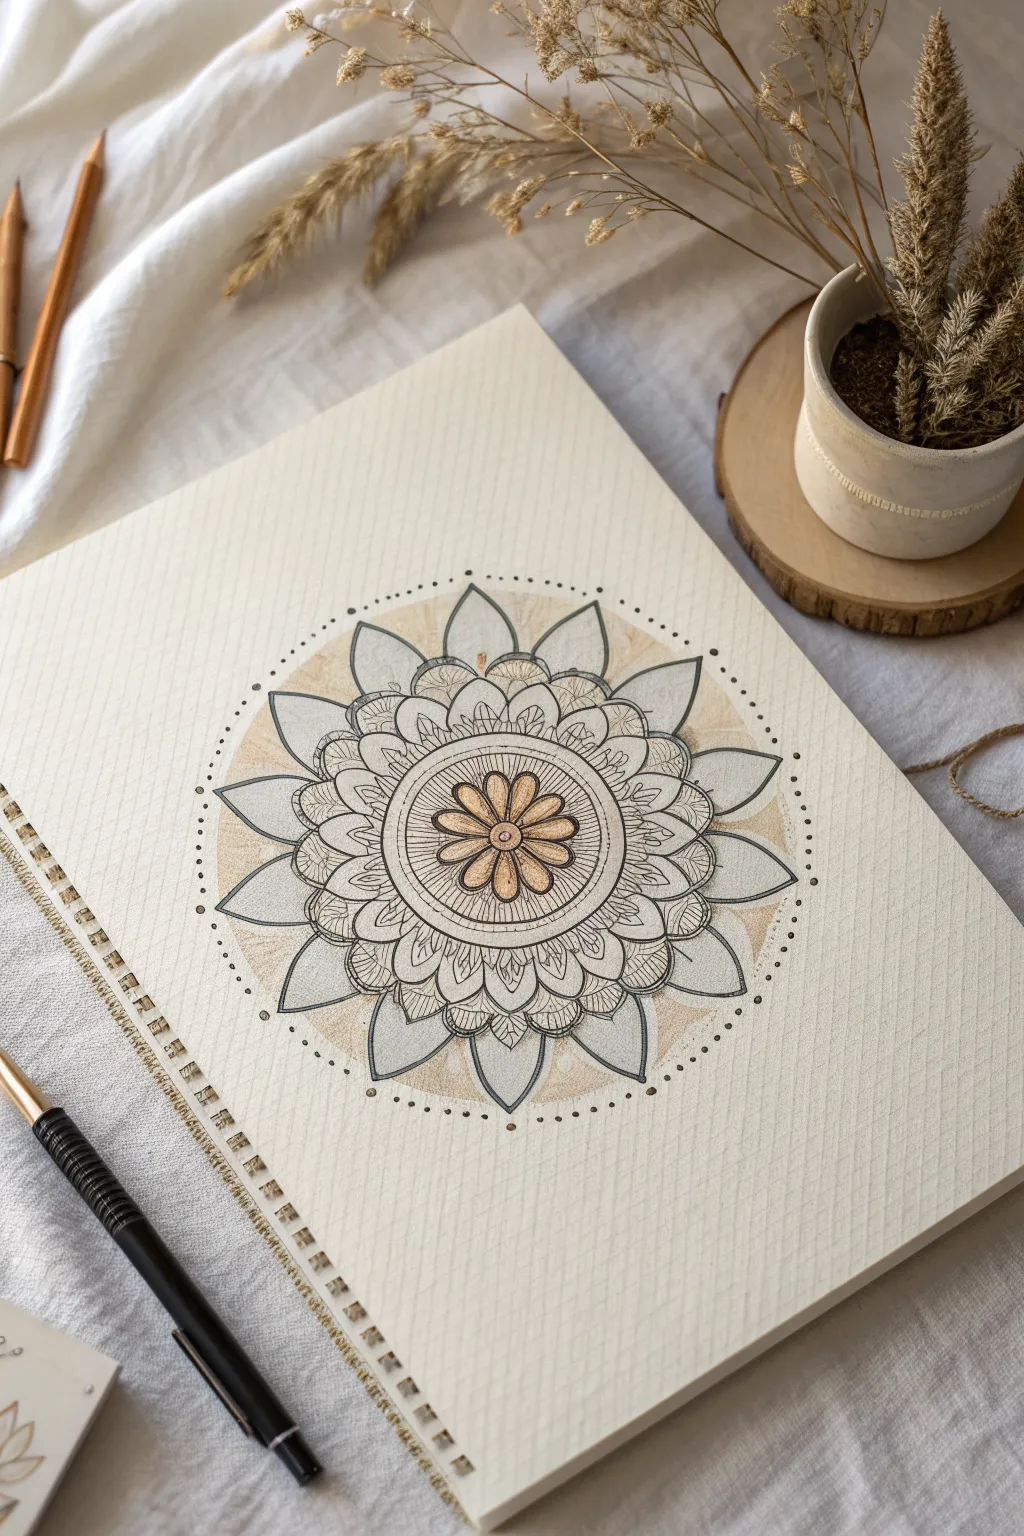
Embrace mindfulness with this grounding mandala design that balances precise geometry with organic petal shapes. The combination of intricate ink lines and soft, earthy washes creates a piece that feels both structured and soothingly natural.
Detailed Instructions
Materials
- Spiral-bound sketchbook (heavyweight mixed-media paper recommended)
- Pencil (HB or 2H)
- Eraser
- Compass
- Protractor (optional, for spacing markers)
- Fine liner pens (black, varying widths like 0.1, 0.3, and 0.5mm)
- Watercolor paints or diluted ink (warm ochre, light gray, beige)
- Small round paintbrush (size 2 or 4)
Step 1: Setting the Foundations
-
Find the center:
Begin by marking the absolute center of your page lightly with a pencil. This small dot will anchor your entire design, so take a moment to measure it carefully. -
Draw concentric circles:
Using your compass, draw a series of light concentric circles expanding outward from your center point. You’ll need a very small center circle, a slightly larger one for the flower core, a middle band for intricate details, and a large outer boundary for the main petals. -
Mark your sections:
Lightly divide your circle into equal wedges. For this twelve-petal design, think of a clock face and mark the 12 positions, drawing light guidelines from the center to the edge to help keep symmetry later.
Step 2: Drawing the Core
-
Sketch the central flower:
Start sketching the innermost flower petals. Within the second smallest circle, draw eight simple, rounded petals originating from the center dot. Keep your pencil pressure light. -
Create the middle ring:
Moving to the next band outward, sketch a series of small, scalloped humps or ‘U’ shapes around the central flower. This creates a textured border essential for that layered mandala look. -
Add detail bands:
Between your scalloped ring and the outer petal ring, draw two very close concentric circles. Inside this narrow track, sketch tiny, repetitive geometric shapes like triangles or simple lines to create a visual break.
Steady Hand Trick
Rest your wrist on a scrap piece of paper while drawing. This prevents skin oils from smudging your pencil lines and keeps your hand movement smooth.
Step 3: Expanding the Design
-
Refine the large petals:
On your largest guide circle, sketch twelve large, pointed petals. Use your ‘clock face’ guidelines to ensure the tip of each petal aligns perfectly with your spacing markers. -
Layer secondary petals:
Behind the primary twelve petals, peek in a second layer of slightly wider, blunter petals. This depth makes the mandala feel like a blooming lotus rather than a flat drawing. -
Add the dotted border:
Just outside the tips of your largest petals, lightly sketch a final circle. Along this line, create evenly spaced small circles or dots to frame the entire composition.
Uneven Petals?
If your petals look lopsided, don’t erase everything. Add an extra outline or ‘aura’ line around all of them; the added visual weight often hides slight asymmetry.
Step 4: Inking and Coloring
-
Outline the central bloom:
Switch to a 0.5mm fine liner. Carefully trace your central eight-petal flower. I usually rotate the notebook as I draw to keep my hand angle consistent and comfortable. -
Ink the intricate details:
Use a finer 0.1mm or 0.3mm pen for the delicate scalloped rings and the geometric bands. The thinner line weight here adds wonderful contrast against the bolder main petals. -
Outline outer petals and border:
Go back to a thicker pen to trace the large outer petals, giving them definition. Carefully dot your outer border with ink, keeping the spacing rhythmic and even. -
Erase pencil guides:
Wait until the ink is completely dry—give it a few extra minutes to be safe—then gently erase all your pencil circles and guidelines to reveal the clean line art. -
Apply the central wash:
Mix a very watery, warm ochre or tan paint. Gently fill in the central eight petals. Keep the paint transparent enough that the paper texture still shows through. -
Paint the gray accents:
Using a diluted warm gray or slate blue, paint the distinct large petals. Try to keep the color slightly concentrated at the base of the petal and fading toward the tip for a gradient effect. -
Add warmth to the background:
Mix a pale beige wash and apply it to the negative space between the large petals. This subtle background color ties the whole piece together without overpowering the line work.
Now, take a step back and admire the balance and calm your new creation brings to the page
Split Sun and Moon Half-and-Half
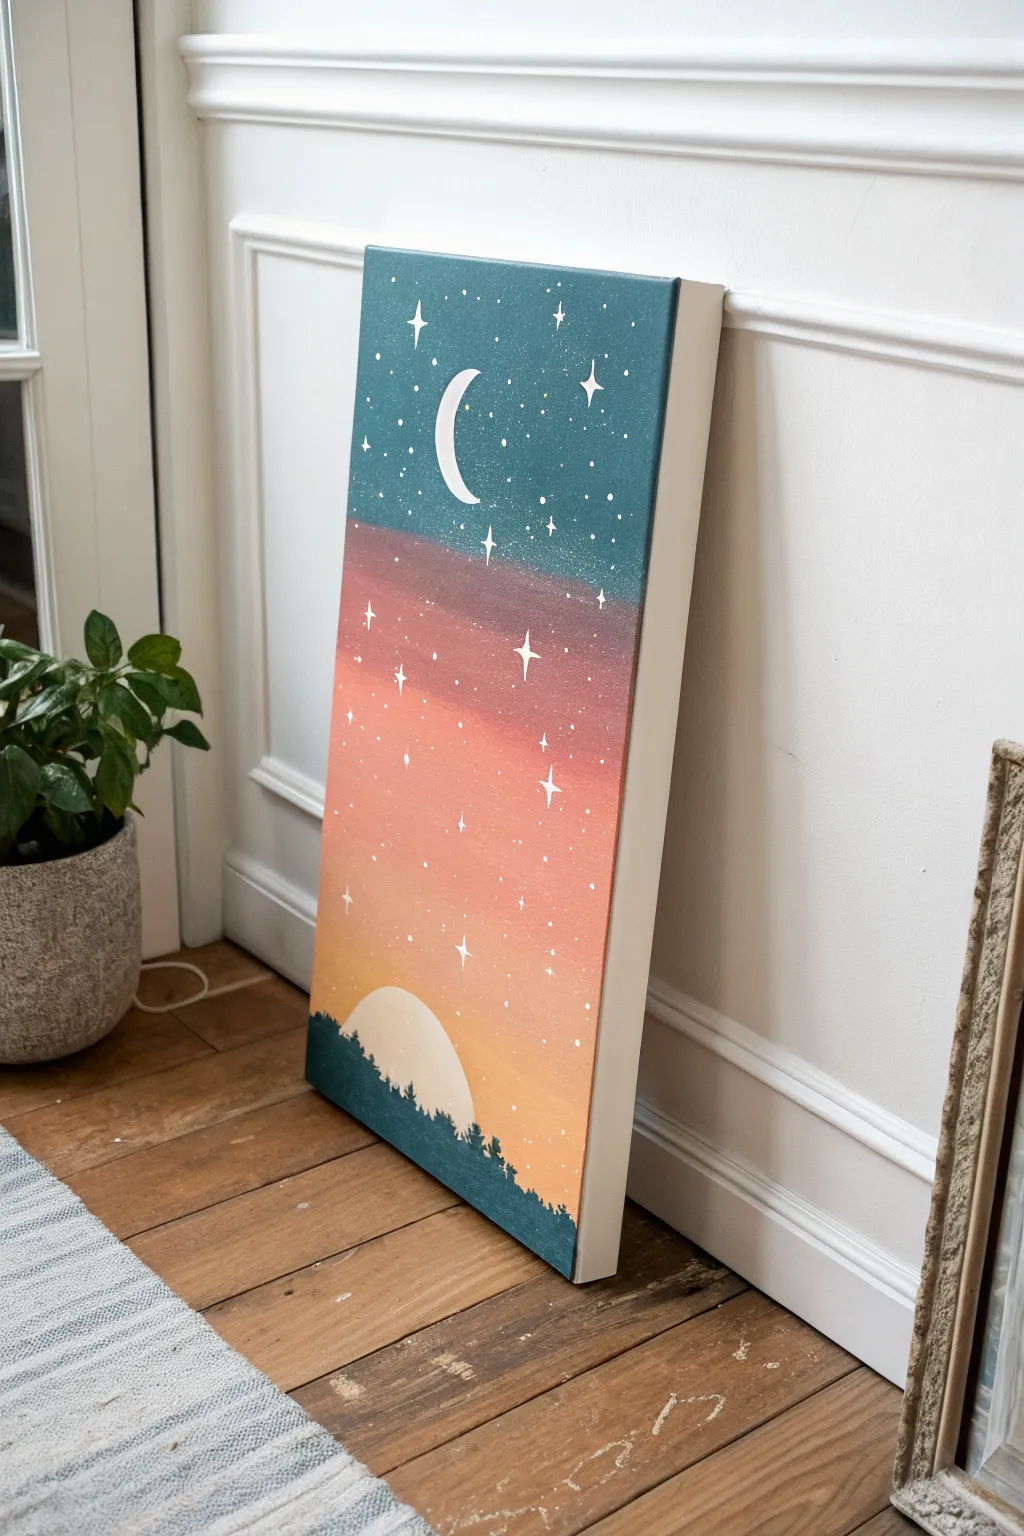
This striking vertical canvas captures the beauty of two worlds, blending a starry night sky with a warm, glowing sunset. The split composition creates a modern, graphic look that’s perfect for beginners wanting to practice gradients and simple silhouettes.
Step-by-Step
Materials
- Rectangular stretched canvas (long vertical format preferred)
- Acrylic paints (Teal/Dark Blue, White, Deep Red/Burgundy, Coral/Peach, Yellow-Orange, Forest Green)
- Wide flat brush (1-2 inches)
- Medium flat brush
- Small round detail brush (size 0 or 1)
- Painter’s tape or masking tape
- Palette or paper plate
- Cup of water and paper towels
Step 1: Prepping the Horizon
-
Tape the Divide:
Visualize where you want the sky to transition. Place a horizontal strip of painter’s tape across the upper third of the canvas to create a crisp line between the night sky and the sunset area. -
Seal the Edge:
Press the tape down firmly, especially along the bottom edge where you will be painting first. A quick transparent layer of matte medium or a tiny bit of white paint along the tape edge can help prevent bleeding, though simple pressure usually works well enough.
Bleeding Tape Lines?
If paint leaked under the tape, don’t panic. Wait for it to dry, then paint a thin, straight line of white or metallic gold over the seam to turn the mistake into a decorative border.
Step 2: Painting the Sunset (Bottom Section)
-
Mix Your Sunset Gradient:
Prepare three colors on your palette: a deep burgundy or reddish-purple, a warm coral or salmon, and a bright yellow-orange. You will need enough paint to cover the larger bottom section. -
Apply the Darkest Tone:
Using your wide flat brush, paint a strip of the deep burgundy horizontally right below the tape line. This creates the dusky transition zone. -
Blend in the Coral:
While the burgundy is still wet, paint the middle section with your coral paint. Work your brush back and forth where the two colors meet to create a seamless ombre effect. -
Finish with Yellow:
Paint the bottom portion of the canvas with the bright yellow-orange. Blend it upward into the coral layer until the transition looks smooth and soft. -
Let it Dry:
Allow the sunset gradient to dry completely before touching the tape. Acrylics dry quickly, so this should only take about 15-20 minutes.
Step 3: Painting the Night Sky (Top Section)
-
Remove and Re-Tape:
Carefully peel off the painter’s tape. Once the sunset paint is fully cured, place a new strip of tape over the *painted* sunset edge to protect it while you work on the night sky. -
create the Night Background:
Mix a dark teal or petrol blue color. Using a clean wide brush, paint the entire top section with this rich, cool tone. I find two coats often give a more velvety, solid finish. -
Add Texture (Optional):
While the blue is slightly wet, you can dab a tiny bit of lighter blue or white in random spots and soften it for a subtle atmospheric texture, though a flat color looks great too. -
Reveal the Split:
Remove the second strip of tape immediately while the night sky paint is still slightly wet to ensure a clean line without peeling up dried acrylic skin.
Level Up: Metallic Magic
Replace the white stars with metallic gold or silver paint. It catches the light beautifully and adds an elegant shimmer that contrasts with the matte background colors.
Step 4: Celestial Details
-
Paint the Crescent Moon:
Using your small round brush and pure white paint, carefully draw a crescent moon shape in the center of the dark teal section. -
Add North Stars:
Paint a few large four-pointed stars (‘north stars’) in the night sky. Start with a vertical line, cross it with a horizontal one, and curve the inner corners slightly for a sparkles effect. -
Create a Starry Field:
Dip an old toothbrush or stiff brush in watered-down white paint. Flick the bristles with your thumb to spray tiny speckles across the blue section. Be careful not to splatter the sunset area. -
Add Sunset Stars:
To tie the image together, paint a few white four-pointed stars and dots in the sunset section as well, suggesting the first stars of the evening appearing.
Step 5: The Setting Sun and Finish
-
Paint the Sun Silhouette:
At the very bottom of the canvas, mix a pale creamy yellow or off-white. Paint a semicircle rising from the bottom edge, representing the setting sun. -
Block in the Forest:
Mix a dark forest green with a tiny bit of black or blue to make a deep shadow color. Paint an uneven, bumpy line along the bottom edge, partially covering the sun you just painted. -
detail the Trees:
Use the tip of your small brush to tap tiny upward vertical strokes along the bumpy line. This mimics the look of pine tree tops silhouetted against the light. -
Final Touches:
Check your edges. If the tape lines need sharpening, use a tiny brush to touch up the divide. Paint the sides of the canvas to match the front for a finished, gallery-ready look.
Hang your finished piece where it can remind you that beauty exists in both the bright days and the quiet nights


Have a question or want to share your own experience? I'd love to hear from you in the comments below!