If you’ve ever wanted quick flower doodles that still feel charming, you’re going to have so much fun with these. I’m sharing my favorite flower doodle ideas you can mix, match, and repeat anytime your page needs a little bloom.
The Classic Five-Petal Flower Doodle
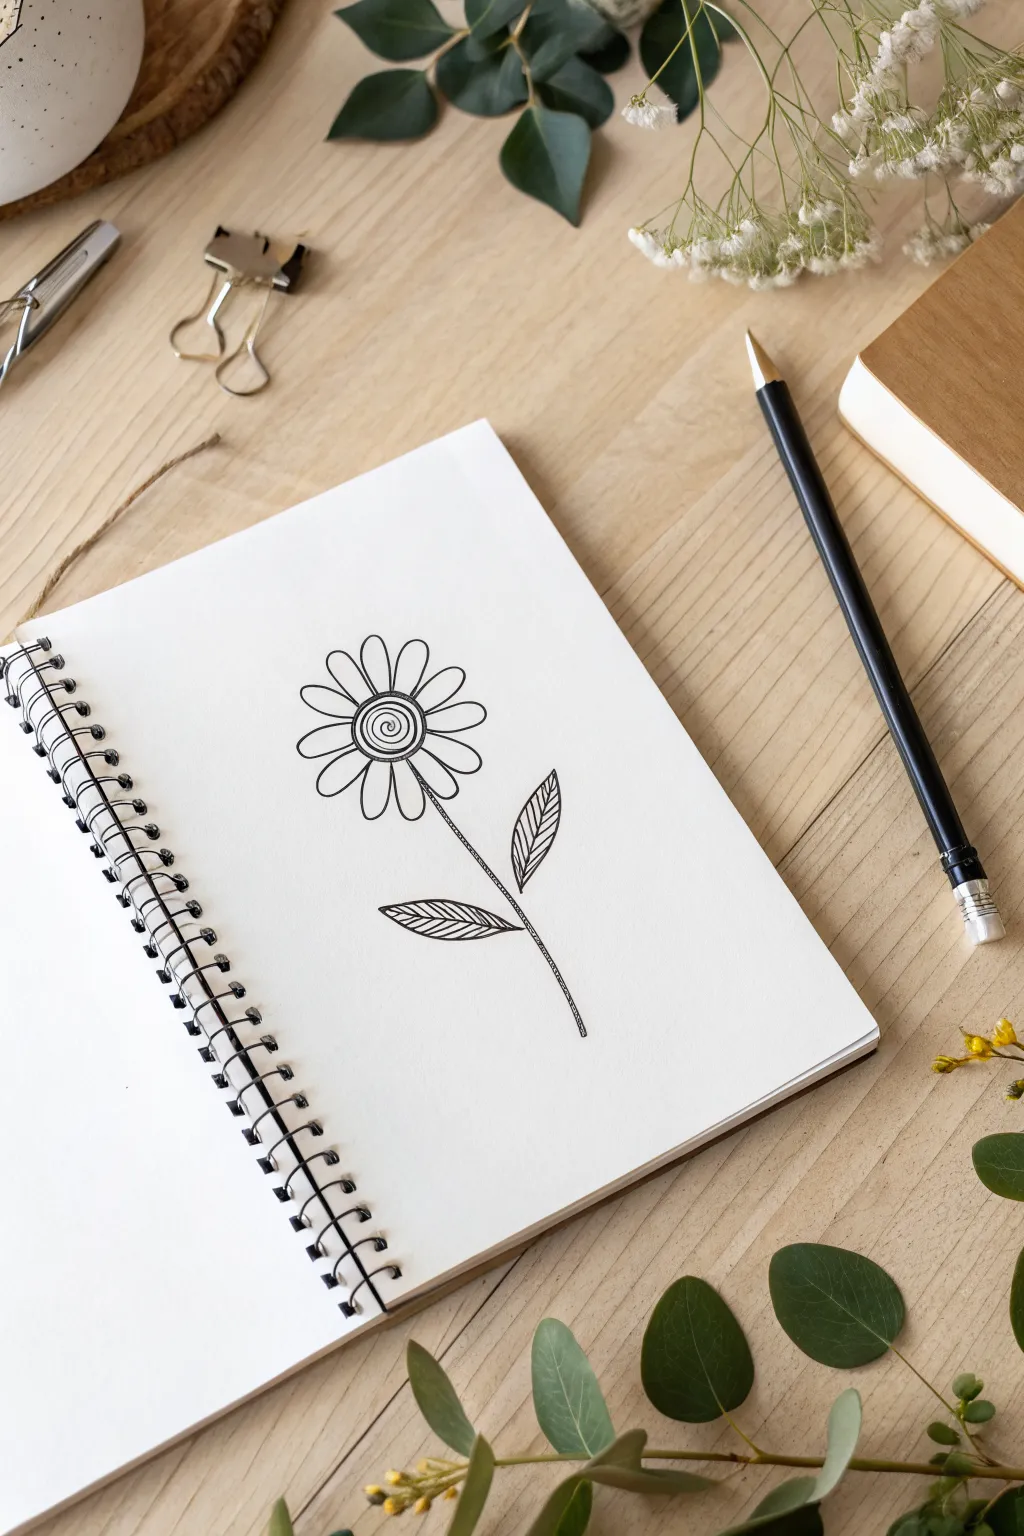
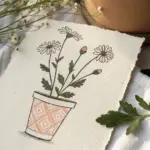
This charming doodle captures the simple elegance of a daisy with a playful twist, focusing on clean lines and organic shapes. It features a mesmerizing spiral center surrounded by radiating petals and leaf details that bring a touch of nature to your notebook page.
Detailed Instructions
Materials
- Spiral-bound sketchbook or drawing paper
- Fine liner pen (0.5mm or 0.8mm black)
- Pencil (HB or H)
- Eraser
- Ruler (optional)
Step 1: Drafting the Structure
-
Sketch the center:
Begin by lightly sketching a medium-sized circle in the middle of your page with your pencil. This will serve as the boundary for the flower’s center. -
Outline the petals:
Draw elongated oval shapes radiating outward from your central circle. Aim for about 12 to 14 petals, keeping them roughly the same length but allowing for slight natural variations in width. -
Draw the stem:
From the bottom of the flower head, sketch a single, slightly curved line extending downward. It should feel loose and organic, not perfectly straight. -
Add leaf placements:
Mark two positions on the stem for the leaves. Sketch a leaf shape on the left side lower down, and another on the right side slightly higher up.
Step 2: Inking the Details
-
Create the spiral core:
Switch to your fine liner pen. Starting from the very dead center of your circle, draw a tight spiral that slowly expands outward until it nearly touches the edge of your pencil circle. -
Define the center border:
Draw a bold circle around your spiral to containerize it. I like to re-trace this line once to give it a slightly thicker, more deliberate weight. -
Ink the primary petals:
drawing over your pencil guides, ink the petals. Make sure the base of each petal touches the outer edge of the center circle. -
Add petal overlap:
If there are gaps between your main petals, draw small, partial arch shapes between them to suggest a second layer of petals behind the first. -
Add petal details:
Draw a short, straight line starting from the center and extending about a third of the way up into the middle of each petal to give them dimension. -
Ink the stem:
Go over your stem line with the pen. For a textured look like the example, you can use short, connected sketch strokes rather than one long continuous sweep.
Steady Hands
Rest the side of your palm on a scrap piece of paper while drawing. This prevents hand oils from getting on the page and keeps your lines steadier.
Step 3: Leaf Textures and Finishing
-
Outline the leaves:
Ink the outer shape of both leaves, ensuring they connect smoothly to the main stem. -
Draw central veins:
Draw a straight line down the center of each leaf, from the stem connection to the tip. -
Add leaf hatching:
Fill the leaves with diagonal hatching lines. On the left side of the vein, draw diagonal lines angling up; on the right side, mirror them or keep the same angle for a stylized look. -
Refine lines:
Check your drawing for any lines that need strengthening. The center circle often looks best with the boldest line weight. -
Erase guidelines:
Wait at least five minutes for the ink to fully dry. Gently erase all visible pencil marks, being careful not to smudge the fresh ink.
Add Pop
Use a light grey marker to add simple shadows on one side of the stem and under the petals to make the doodle lift off the page.
Now you have a striking botanical doodle ready to decorate your journal or stationery


Sweet Daisy Heads With Dot Centers
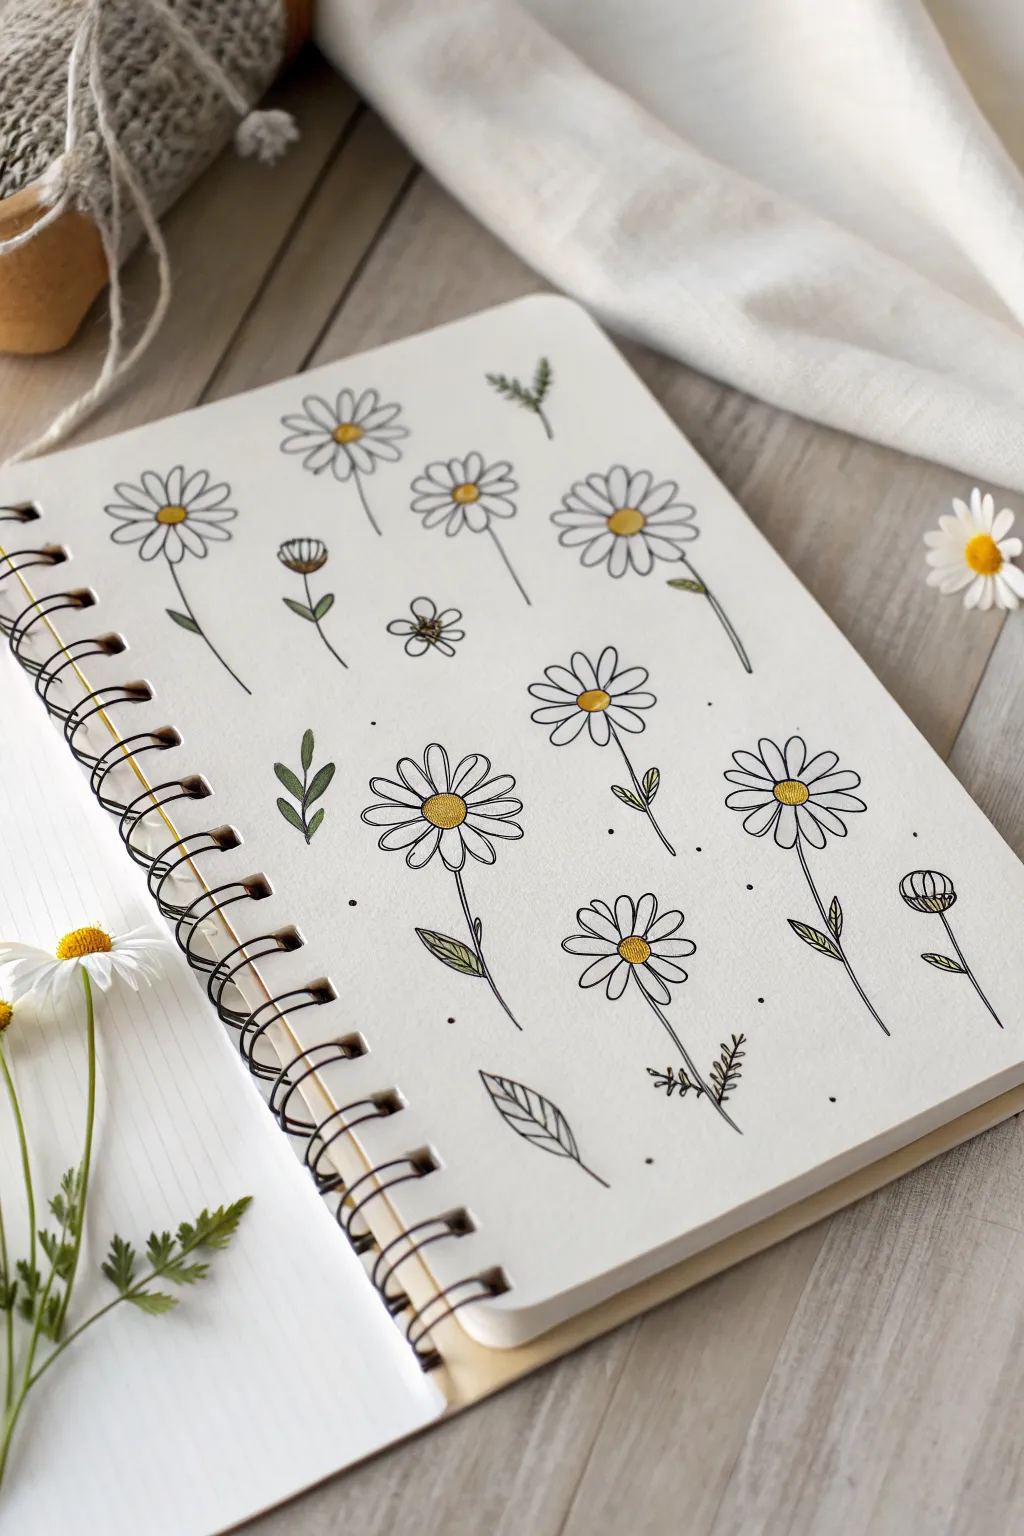
Fill a sketchbook page with this cheerful collection of simple daisy variations, mixing different stem lengths and angles for a botanical study feel. This project relies on clean black fineliner work and soft touches of color to create a fresh, minimalistic aesthetic.
Step-by-Step Tutorial
Materials
- Spiral-bound sketchbook (smooth paper preferred)
- Black fineliner pen (0.3mm or 0.5mm)
- Yellow alcohol marker or colored pencil
- Olive green alcohol marker or colored pencil
- Pencil and eraser (optional for sketching)
Step 1: Drawing the Daisy Heads
-
Start the centers:
Begin by drawing small circles scattered across your page. Leave plenty of white space between them to accommodate the petals and stems later. Vary the sizes slightly for a natural look. -
Add center details:
Inside each circle, draw a simple cross-hatched grid or a series of tiny dots. This texture mimics the disc florets of a real flower. -
Draft the petals:
Draw long, narrow loops radiating outward from the center circles. I like to make my petals slightly irregular—some slightly shorter or curved—to avoid them looking too stiff. -
Create angled views:
For a few flowers, draw the center as an oval instead of a circle. When adding petals, make the ones at the ‘top’ much shorter and the ones at the ‘bottom’ longer to create the illusion that the flower is facing upward or sideways. -
Draw buds:
Include a couple of flower buds by drawing a semi-circle cup shape. Instead of open petals, draw a tight cluster of lines peeking out of the top to represent closed petals. -
Refine the outlines:
Review your petals and ensure the lines connect cleanly to the center. If you sketched with pencil first, go over everything with your fineliner now.
Step 2: Adding Stems and Foliage
-
drop the stems:
Draw thin, single lines extending down from your flower heads. vary the curvature; let some be straight and others gently swaying to the left or right. -
Vary stem lengths:
Keep some stems short and others quite long to create a pleasing rhythm across the page layout. -
Add simple leaves:
On selected stems, draw small, almond-shaped leaves. Keep them simple—just a small loop attached to the main line. -
Draw detailed leaves:
For visual interest, pick two or three stems and add more complex foliage. Draw a leaf outline with a center vein, then add diagonal hatching inside one half of the leaf for shading. -
Include loose greenery:
Fill a few empty gaps on the page with standalone springs or tiny leaves that aren’t attached to a flower head, acting as filler. -
Add grounding dots:
Using the tip of your pen, place tiny stippling dots randomly around the stems. This adds a bit of whimsy and texture to the white space.
Wobbly Lines?
Don’t stress about perfect circles or straight stems. In nature, flowers are organic and irregular. Emphasize the wobble—it adds charm to the doodle style.
Step 3: Color and Final Touches
-
Color the centers:
Take your yellow marker or pencil and fill in the circular centers. A quick, somewhat loose application looks best here rather than perfect coloring-in. -
Shade the centers based on depth:
For the angled flowers (the ovals), concentrate the yellow at the bottom of the oval to enhance the perspective. -
Tint the leaves:
Use an olive green shade to color the leaves and the stems. If using a marker, one quick stroke per leaf prevents the paper from becoming oversaturated. -
Highlight buds:
Add a touch of green to the base cup of your flower buds, leaving the top ‘petal’ section white or barely tinted. -
Erase guidelines:
Once the ink is completely dry (give it a few minutes if you used gel pens), gently erase any visible pencil sketches to leave a clean finish.
Level Up: Depth
Use a light grey marker to add a tiny shadow under one side of each petal. This subtle drop shadow makes the white petals pop off the page.
Now you have a refreshing botanical page filled with sunny personalities, ready to brighten your sketchbook


Tulips in Side View and Front View
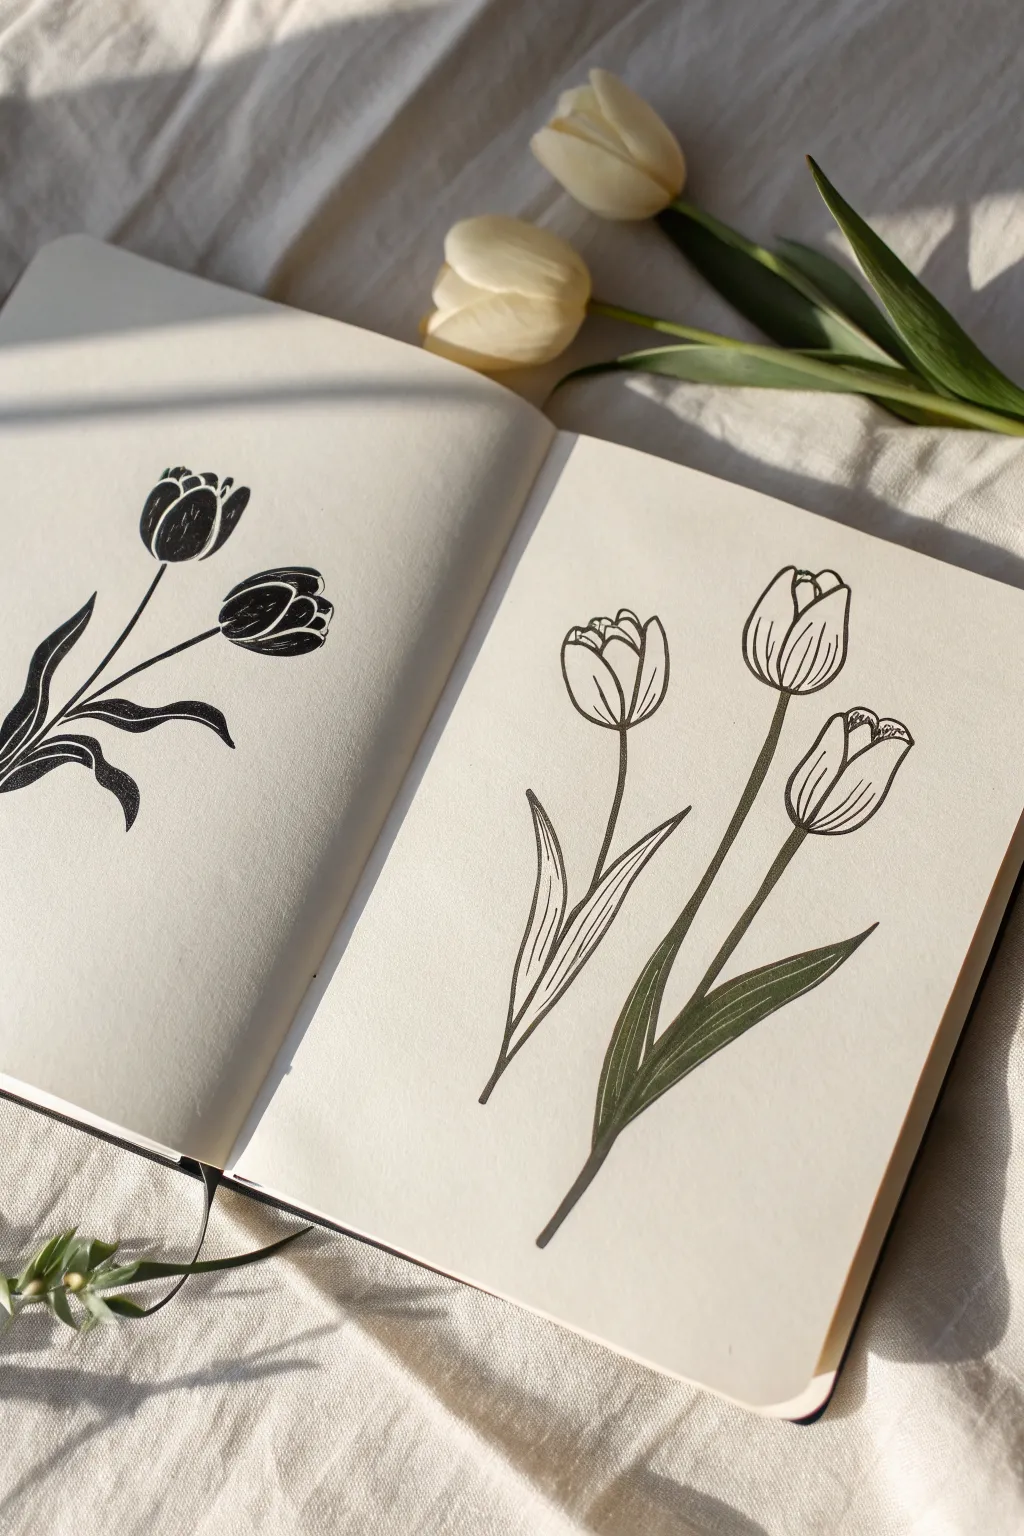
This project explores tulips through two distinct artistic lenses on a single spread: bold silhouette block-printing style on the left and delicate linework with solid accents on the right. The contrast creates a beautiful botanical study perfect for practicing shape and form.
How-To Guide
Materials
- Sketchbook with smooth, heavy-weight paper
- Pencil (HB or 2H)
- Kneaded eraser
- Fine liner pen (01 or 03 size, black)
- Thick marker or brush pen (black)
- Dark olive green marker or brush pen
Step 1: Planning the Layout
-
Sketch the spines:
Begin by lightly sketching the central stems for both pages. On the left, draw two curving lines originating from the bottom left corner. On the right, draw three stems rising from the bottom center, fanning out slightly. -
Block in flower shapes:
At the top of each stem, loosely sketch ovals to represent the tulip heads. vary the angles—some facing straight up, others tilting to the side. -
Add leaf guidelines:
Draw long, flowing curves for the leaves. Tulips have broad, tapering leaves that wrap around the stem. Place them low on the stems to ground the composition.
Ink Bleeding?
If your black marker bleeds through the paper, place a scrap sheet behind the page while working. You can also glue a fresh sheet onto the back of the finished page to hide any ghosting.
Step 2: The Silhouette Page (Left)
-
Define the silhouette petals:
Using your pencil sketch as a guide, refine the outline of the flower heads. Give them the classic cup shape, but ensure there are small gaps between petal segments to mimic a woodblock print look. -
Outline stems and leaves:
Thicken the stem lines into solid shapes. Outline the leaves with smooth, continuous curves that taper to a sharp point. -
Fill with black:
Take your thick black marker or brush pen and fill in the entire left-page illustration. Work slowly near the edges to keep them crisp. Leave tiny slivers of white paper between overlapping petals to define the form.
Step 3: The Line Art Page (Right)
-
Draw the main stem lines:
Switch to your fine liner pen for the right page. Ink the stems first, keeping the lines clean and singular. -
Detail the flower heads:
Ink the tulip heads using fine lines. Instead of filling them in, draw the individual petals. Some petals should overlap, and you can add subtle vertical striations to suggest texture. -
Add petal curves:
For the front-most tulips, ensure you draw the ‘U’ shape of the front petal clearly, with the side petals tucking behind it. -
Draw the separated leaf:
On the far left of this cluster, draw a single leaf that is separate from the main group. Draw the outline first, then add a center vein line. -
Ink leaf veins:
Inside that separated leaf, draw delicate, closely spaced parallel lines running along the length of the leaf to create texture without solid color. -
Color the solid leaves:
For the main cluster on the right, switch to your dark olive green marker. Carefully fill in the stems and the large leaves attached to them. -
Add texture to solid leaves:
Once the green ink is dry, use a white gel pen or a very fine black liner (depending on your marker opacity) to add subtle vein lines over the solid color for depth. -
Erase pencil marks:
Wait until all ink is completely dry—I usually give it at least five minutes to be safe. Gently run your kneaded eraser over the entire spread to remove the graphite guidelines.
Add Dimension
On the line-art page (right), use a light grey marker to add a simple shadow line along the right side of the flower heads. This makes the doodle pop off the page.
Now you have a striking botanical study that balances heavy contrast with delicate details


Easy Rose Bud Spirals
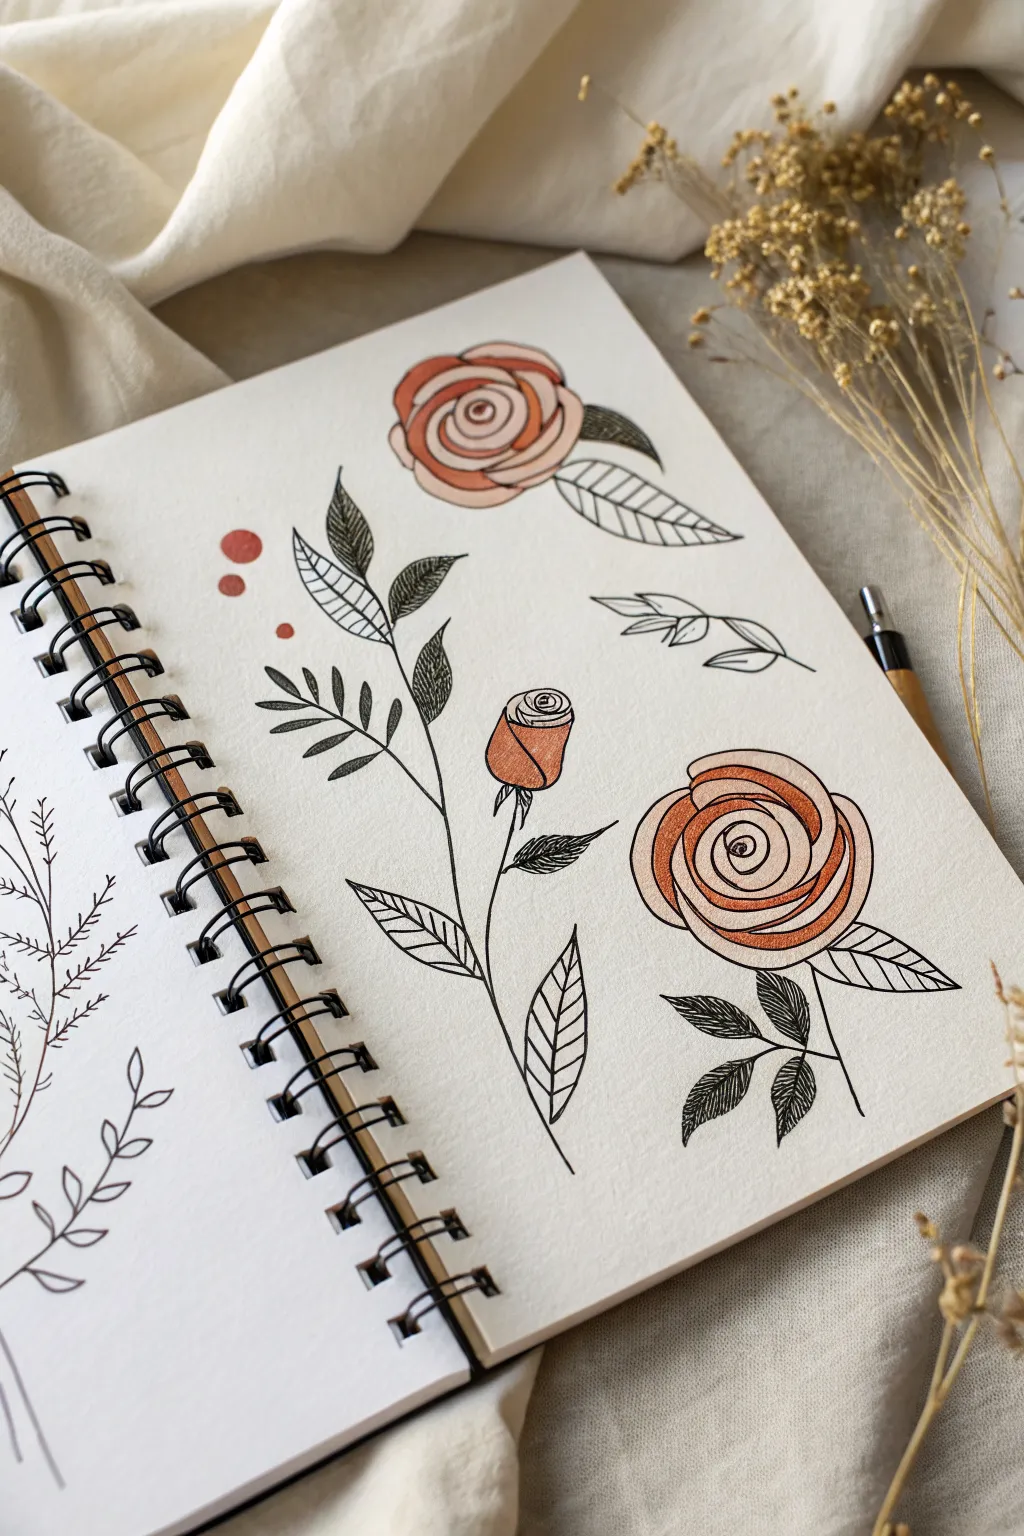
These charming rose doodles combine bold ink lines with soft, warm coloring for a look that is both graphic and delicate. The technique uses simple concentric curves and spirals to create the illusion of blooming petals without getting bogged down in complex anatomy.
Step-by-Step Guide
Materials
- Sketchbook with heavy paper
- Fine liner pen (black, 0.3mm or 0.5mm)
- Colored pencils (terra cotta, peach, and blush pink)
- Pencil for sketching (optional)
- Eraser
Step 1: Drawing the Main Blooms
-
Start the center spiral:
Begin with the large rose at the bottom right. Draw a tight, small spiral in the center of your page to form the heart of the flower. -
Add first petal layers:
Draw curved lines hugging the center spiral. These should look like parentheses shapes () that overlap slightly, getting progressively larger as they move outward. -
Expand the bloom:
Continue adding wider, bowl-shaped curves around the existing petals. Vary the starting and ending points of each curve so the petals look staggered, not perfectly aligned. -
Repeat for the top rose:
Create a second, slightly smaller rose near the top center of the page using the same spiral-and-curve technique, perhaps angling loop slightly differently for variety. -
Draw the rosebud:
Between the two open roses, draw a tight rosebud. Start with a small, flattened oval for the top, drawing a spiral inside it, and then draw a U-shape cup beneath it to hold the bud.
Step 2: Adding Foliage
-
Outline the stems:
Draw thin, single lines extending downwards from your flowers. For the central stem, add a few branches extending to the left and right. -
Sketch leaf shapes:
Add pointed, almond-shaped leaves to the stems. Group them in pairs or threes for a natural look. -
Detail the veins:
Draw a central line down the middle of each leaf. I find that keeping this line slightly curved adds a sense of movement to the foliage. -
Add texture to leaves:
Select specific leaves to darken. Fill these chosen leaves with tight, diagonal hatching lines using your black pen to create a dark, textured contrast against the white paper. -
Create distinct leaf styles:
For the stem on the far left, draw smaller, more fern-like leaves that are just simple loops or dashes, contrasting with the detailed rose leaves. -
Add decorative elements:
Draw a few floating leaves near the top rose and distinct, striped leaves near the center. You can stripe these with horizontal lines for a different texture. -
Incorporate dots:
Add a cluster of three small circles near the left side of the page to balance the composition.
Uneven Petals?
Perfect symmetry kills the natural look. If your petals look lopsided, embrace it—real roses are organic and rarely perfect circles. Just add a larger outer petal to balance the visual weight.
Step 3: Coloring and Finishing
-
Base layer of color:
Using a peach or light blush colored pencil, gently fill in the petals of the roses. Keep the pressure light to allow the paper texture to show through. -
Add depth with shading:
Take a terra cotta or darker orange pencil and shade the inner corners of the petals where they overlap. This creates a shadow effect that makes the bloom look three-dimensional. -
Color the rosebud:
Fill the cup of the rosebud with the darker terra cotta color, pressing firmly to make it pop against the lighter petals of the open flowers. -
Color the dots:
Fill in the three floating circles on the left with the terra cotta pencil to tie the color palette together across the page. -
Assess contrast:
Check your black lines. If the colored pencil has waxed over them, gently re-trace the most important outlines to ensure they remain crisp and black.
Level Up: Metallic Pop
Use a gold gel pen or metallic watercolor paint on just the edges of the petals or the leaf veins. It catches the light beautiful when you turn the page.
Now you have a page full of elegant blooms that look complex but were built from simple shapes

PENCIL GUIDE
Understanding Pencil Grades from H to B
From first sketch to finished drawing — learn pencil grades, line control, and shading techniques.
Explore the Full Guide
Sunflowers With Petal Rings
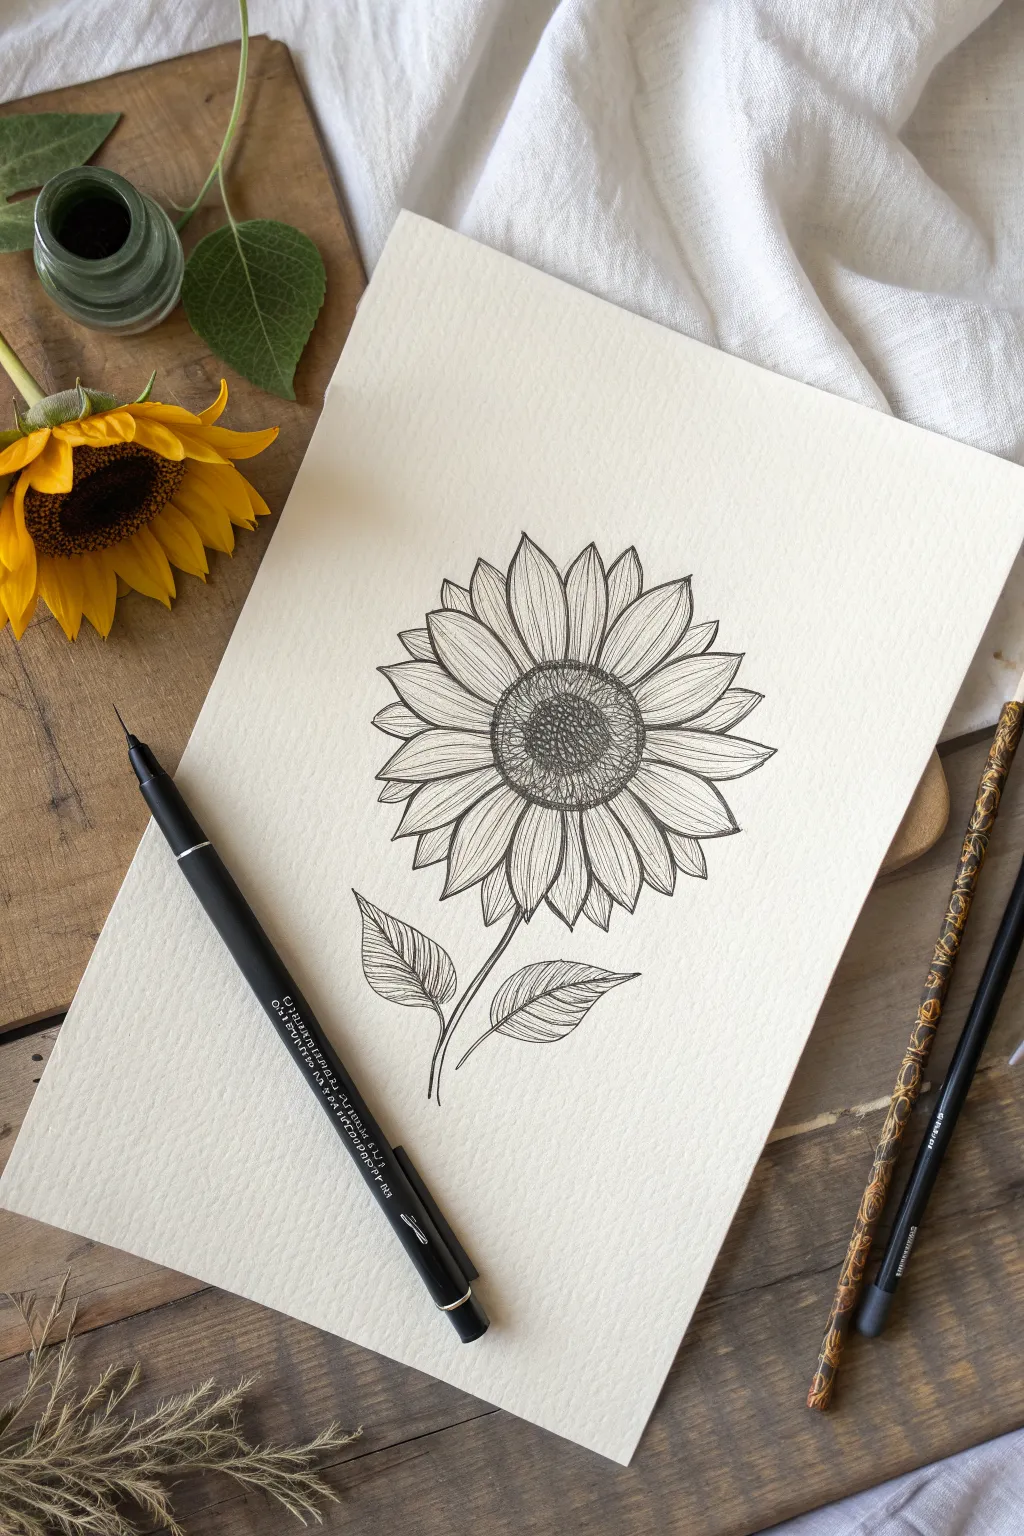
This project captures the rustic charm of a sunflower using only black ink on textured paper. The focus is on creating depth through precise line work, hatching, and stippling, resulting in a botanical illustration that feels both scientific and whimsical.
Step-by-Step Tutorial
Materials
- Textured cream or off-white drawing paper (medium tooth)
- Black fine liner pen (0.1mm or 0.3mm nib)
- Graphite pencil (HB for sketching)
- Kneaded eraser
- Ruler (optional)
Step 1: Drafting the Structure
-
Establish the center:
Begin by lightly sketching a perfect circle in the upper-middle section of your paper with your pencil. This will become the seed head of the sunflower. -
Define the inner rings:
Inside your main circle, sketch a slightly smaller concentric circle. This creates a border for the seed texture separate from the outer edge where petals attach. -
Draft the petal layer:
Sketch a larger, phantom circle around the center to guide the tips of your petals. This ensures your flower stays symmetrical and doesn’t become lopsided. -
Sketch the primary petals:
Draw the first layer of petals radiating from the center. Make them elongated teardrop shapes that touch, but don’t overlap yet. Let the tips come to gentle points. -
Add background petals:
Fill in the gaps between the primary petals with triangle-shaped peaks to represent the second layer of petals behind the first. -
Place the stem and leaves:
Draw a slightly curved single line for the stem extending downward. Add two leaf shapes branching off near the bottom—one facing left, one facing right.
Wobbly Lines?
If your hand shakes, embrace it! Organic matter isn’t perfect. Slightly jittery lines actually make the flower petals look more natural and less like a computer graphic.
Step 2: Inking the Outlines
-
Outline the center:
Switch to your fine liner pen. Carefully trace the two concentric circles of the flower center used in your draft. -
Define the petals:
Go over your petal sketches with confident strokes. For a more organic look, allow the lines to wobble ever so slightly rather than being perfectly rigid. -
Trace stem and leaves:
In the stem and leaf outlines. Notice how the stem connects directly to the base of the flower head. -
Erase pencil guides:
Once the ink is completely dry (give it a few minutes to be safe), gently lift away all graphite marks with your kneaded eraser.
Step 3: Adding Texture and Detail
-
Stipple the core:
In the very center circle, use a stippling technique (tiny dots). Pack the dots densely near the edges and leave the middle slightly lighter to create a domed 3D effect. -
Hatch the seed ring:
For the ring surrounding the core, use short, tight cross-hatching lines. This differentiates the texture from the stippled center. -
Detail the petals:
Draw a central vein down the middle of each petal. Then, add fine, curved hatching lines radiating from the base of each petal upward to mimic the floral texture. -
Deepen petal shadows:
Add extra hatching specifically where the back petals tuck behind the front ones. I like to make these lines darker to push those petals into the background. -
Texture the leaves:
Draw a central vein for each leaf. Add closely spaced, curved lines branching from the vein to the leaf edge to simulate the leaf’s ribbed surface. -
Final stem details:
Add a few vertical lines running down the length of the stem to give it a fibrous, woody appearance.
Pro Tip: Line Weight
Go over the outermost edges of the petals a second time to thicken the line slightly. This ‘line weight’ separates the flower from the background instantly.
Step back and admire your detailed botanical ink drawing.
Lavender Sprigs Made of Tiny Ovals
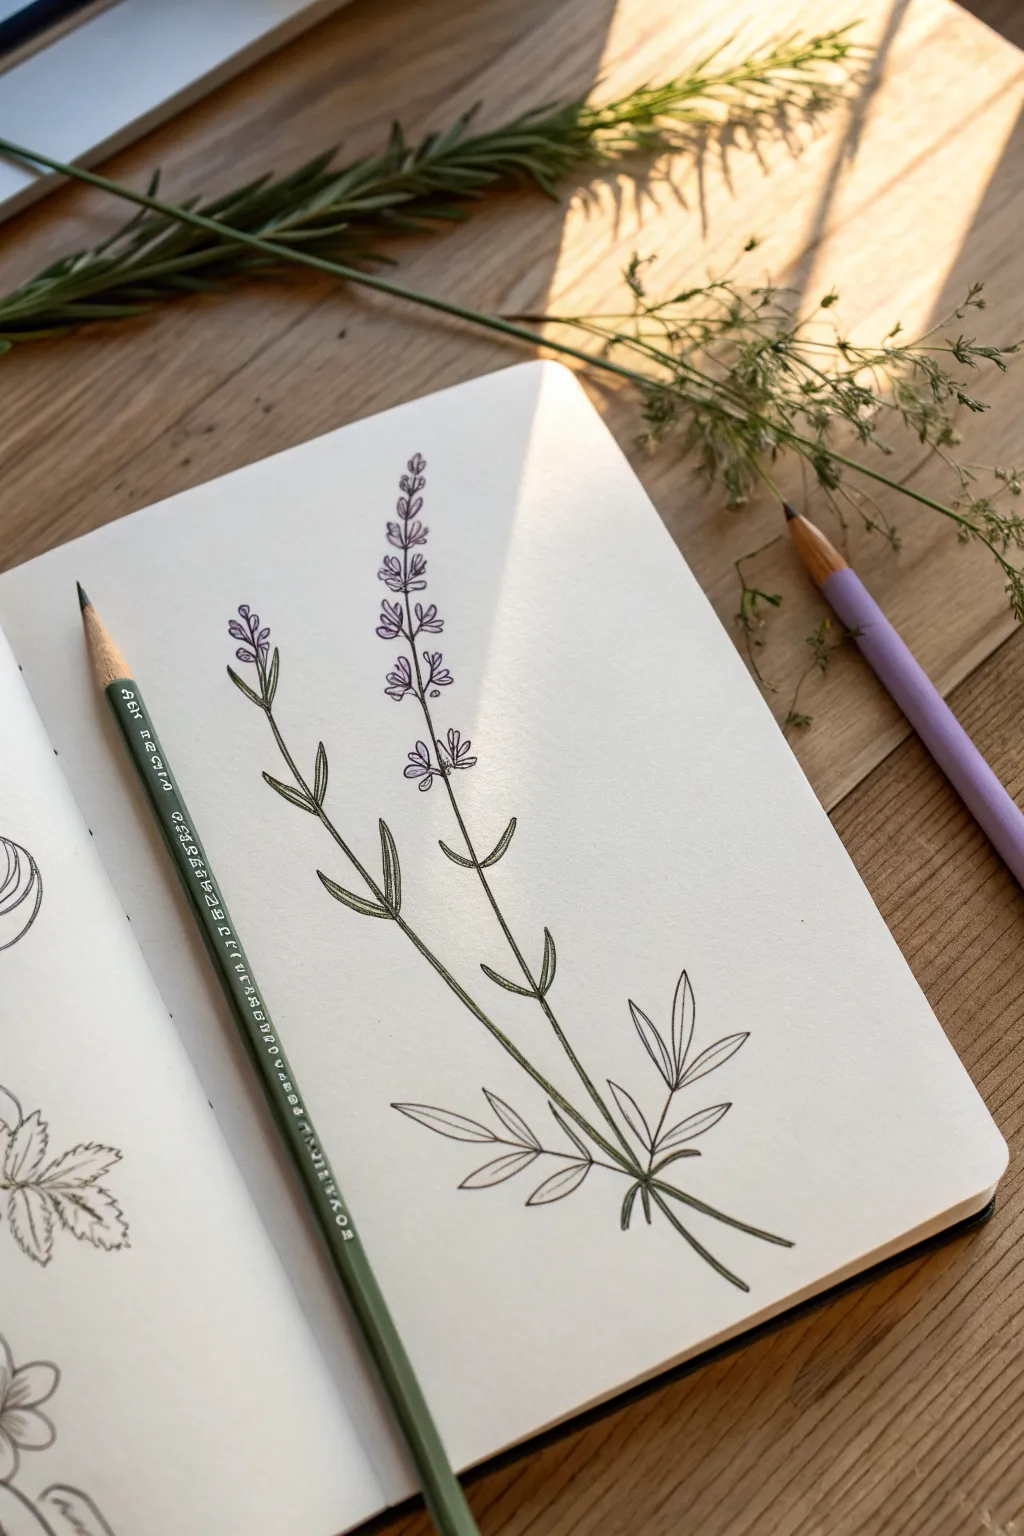
Capture the gentle beauty of lavender with this elegant doodle that combines fine line work with soft touches of color. The vertical composition and sparse leaves give it a botanical illustration feel that looks lovely in any journal margin.
Step-by-Step Guide
Materials
- Sketchbook with smooth paper
- Fine liner pen (Black, 0.1mm or 0.3mm)
- Colored pencil (Sage Green)
- Colored pencil (Lavender/Light Purple)
- Graphite pencil (HB for initial sketch)
- Eraser
Step 1: Stems and Structure
-
Establish the main lines:
Begin by lightly drawing two long, slender stems using your graphite pencil. Make one stem slightly taller and standing straight, while the second stem leans gently to the left, crossing behind the first one near the bottom. -
Add lower leaf positions:
Mark the spots where the leaves will sprout. Focus on the lower third of the stems for the larger foliage, drawing simple lines radiating outward from a central point where the stems intersect. -
Mark floral sections:
On the upper half of each stem, make tiny tick marks to indicate where the flower clusters will sit. Leave small gaps between these marks, as lavender flowers grow in separated whorls up the stem.
Uneven Spacing?
Real lavender grows in irregular gaps. If your flower clusters look too perfectly spaced, add a tiny, rogue bud or small leaf in the gaps to break up the symmetry.
Step 2: Inking the Details
-
Ink the stems:
Switch to your fine liner pen. Carefully trace over your pencil stems, keeping the lines very thin. I like to lift the pen slightly where leaves or flowers will attach to keep the look organic. -
Draw basal leaves:
At the base where the stems cross, draw the larger leaves. Create narrow, lance-shaped leaves that point outward. Add a central vein line down the middle of each leaf for dimension. -
Add stem leaves:
Moving up the stem, add pairs of smaller, thinner leaves. These should be much more slender than the bottom ones, curling slightly upwards and embracing the stem. -
Create flower buds:
Start the flowers at the top. Instead of simple ovals, draw tiny, teardrop-shaped petals clustered together. Arrange them in tiers, with 3-5 tiny petals in each cluster. -
Build the flower spike:
Continue down the stem, drawing these clusters at your marked intervals. As you go lower, make the clusters slightly larger and more spread out. The tip of the stem should end with a small, tight group of buds. -
Refine the line work:
Go back over your leaves and stems. If any lines look too perfect, add a tiny wobble or a second, broken line next to the stem to suggest texture. Let the ink dry completely. -
Erase guidelines:
Once you are sure the ink is dry, gently erase all the underlying graphite sketch marks to reveal a clean, crisp outline.
Step 3: Soft Coloring
-
Layer the green base:
Take your sage green pencil. Lightly shade the stems and leaves. Apply very little pressure; you want a translucent, airy look rather than a solid block of color. -
Shade the leaves:
Press slightly harder with the green pencil on the underside of the leaves and near the stem joints. This slight gradient adds depth without needing a darker pencil. -
Color the blooms:
Using the lavender pencil, gently fill in the flower clusters. Keep the coloring loose—it’s okay if you go slightly outside the lines or leave some white space within the petals. -
Deepen the floral tones:
Add a second pass of purple just at the base of each flower cluster. This mimics the shadow where the petals attach to the stem and makes the tiny blooms pop. -
Final touches:
Review your drawing. If the green stems feel too faint against the bright paper, I sometimes go over them once more with the pencil to ensure they anchor the drawing effectively.
Scented Art
Try using watercolor pencils! After drawing, lightly brush over the purple areas with a wet brush for a painterly effect, or use a tiny bit of real lavender oil on the page.
Enjoy the calm feeling of having created your own little botanical garden on the page
BRUSH GUIDE
The Right Brush for Every Stroke
From clean lines to bold texture — master brush choice, stroke control, and essential techniques.
Explore the Full Guide
Cherry Blossom Clusters on a Branch
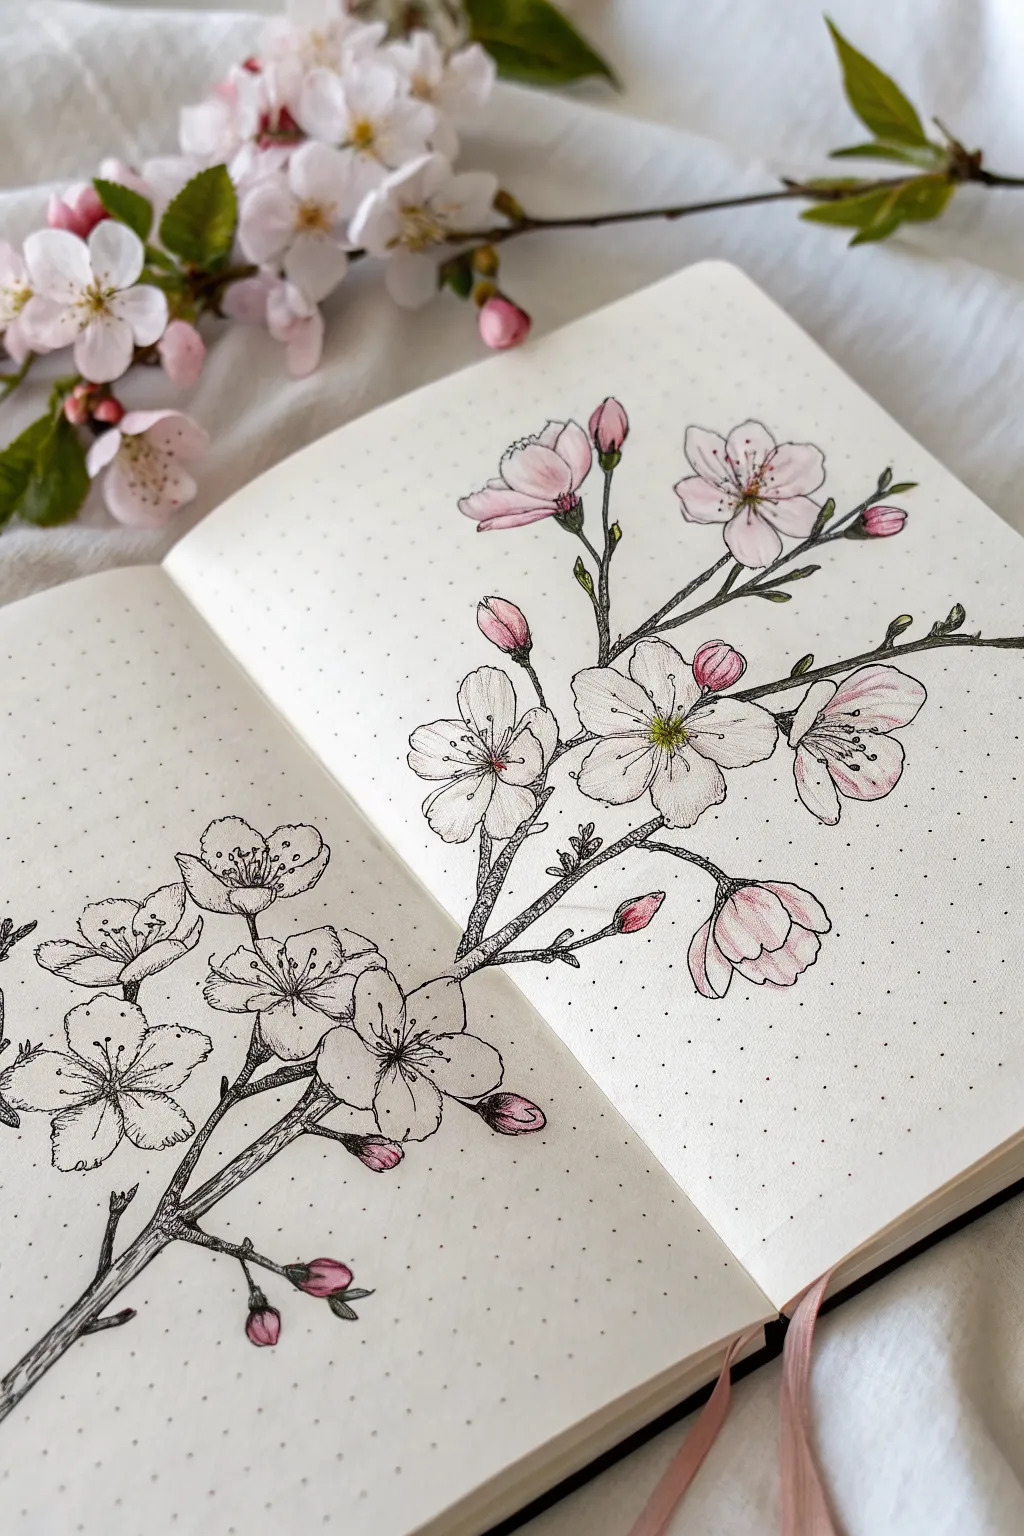
Capture the delicate beauty of spring with this sprawling cherry blossom illustration that spans across two pages of your journal. This tutorial guides you through sketching a realistic branch structure and adorning it with detailed clusters of blooms, transitioning from crisp ink lines to soft watercolor washes.
Step-by-Step Tutorial
Materials
- Dotted bullet journal or sketchbook
- HB pencil
- Kneaded eraser
- Fine liner pens (0.05, 0.1, and 0.3 sizes)
- Watercolor paints or water-based brush markers (pale pink, deep pink, yellow-green, brown)
- Small round watercolor brush (size 2 or 4)
- White gel pen (optional for highlights)
Step 1: Drafting the Layout
-
Establish the main branch:
Begin with your pencil to lightly sketch the primary branch. Start from the bottom left corner of the left page and draw a diagonal line that extends upwards across the spine and onto the right page. Let the line have a few gentle kinks and bends to look natural, rather than perfectly straight. -
Add secondary twigs:
Branching off from your main line, sketch several smaller twigs in different directions. Keep them relatively short and jagged. Place a few pointing upwards and others extending outwards to fill the negative space on the right page. -
Position the main flowers:
Sketch circles or ovals lightly where you want your open blossoms to sit. Group them in clusters of two or three on the branch ends, ensuring you have a nice balance between the left and right pages. -
Sketch the buds:
In the spaces between the open flowers and at the very tips of the twigs, draw small teardrop shapes to represent unbloomed buds. These add variety and realism to the composition.
Natural Petal Flow
Don’t draw every flower facing straight forward. Draw some as ovals or side-views to show them turning away, which creates a more realistic cluster.
Step 2: Refining the Sketch
-
Draw petal shapes:
Inside your guide circles, sketch the five petals of the cherry blossoms. Give the petals slightly notched tips—a characteristic heart-like shape common to cherry blossoms. -
Add centers and stamens:
Mark the center of each open flower. Sketch fine, radiating lines for the stamens, topped with tiny dots for the anthers. Don’t worry about being perfect; variation makes it look organic. -
Refine the wood texture:
Go back over your branch lines. Thicken the base of the branch and add little bumps or ‘nodes’ where the smaller twigs split off. This makes the wood look aged and sturdy.
Step 3: Inking the Outline
-
Outline the petals:
Switch to your 0.1 fine liner. carefully trace the petals. Use a broken line technique—lifting your pen slightly—on the curved edges to make the petals feel soft and delicate rather than rigid. -
Ink the branch structure:
Use a slightly thicker 0.3 pen for the branches. Create a textured look by using short, erratic strokes along the length of the wood to simulate bark, rather than a single solid line. -
Detail the centers:
With your finest 0.05 pen, ink the delicate stamens in the center of the flowers. Draw tiny circles for the anthers, keeping your hand light so the center doesn’t become a black blob. -
Erase pencil marks:
Wait until the ink is completely dry to prevent smudging. I usually give it a full 5 minutes before gently removing all underlying pencil sketches with your kneaded eraser.
Falling Petals
Draw singular petals floating in the empty space around the branch or resting on the bottom of the page to simulate a gentle breeze shaking the blooms loose.
Step 4: Adding Form and texture
-
Stipple the centers:
Using the 0.05 pen, add tiny stippling dots around the very center of the flowers, radiating outward slightly. This creates depth and shadows where the petals meet the center. -
Texture the petals:
Add very faint, curved lines extending from the center of the petal outward. These lines suggest the delicate veins and curvature of the flower. -
Add bark details:
Darken the underside of the main branches with hatched lines or more dense stippling to create a sense of volume and shadow. This grounds drawings and makes the branch look 3D.
Step 5: Coloring (Right Page Only)
-
Base wash for flowers:
To achieve the style in the image, we will only color the right side. Dilute a pale pink watercolor or marker ink. Apply a very light wash to the petals, leaving some white space near the edges for highlights. -
Deepen the pinks:
While the base is still slightly damp, drop a deeper pink color into the centers of the flowers and the tips of the closed buds. Let the pigment bleed outward naturally. -
Color the centers:
Add a tiny touch of yellow-green chartreuse to the very center star of the open blossoms. This adds a fresh, spring-like contrast to the pink. -
Tint the branches:
Use a diluted brown or grey-brown to color the branches on the right page. Keep it translucent so your ink texture still shows through clearly. -
Final highlights:
Once dry, you can use a white gel pen to add tiny dots to the anthers or the edges of the buds to make them pop against the pink.
Now you have a stunning botanical spread that transitions beautifully from sketch to color
Lily Petals With Long Stamens
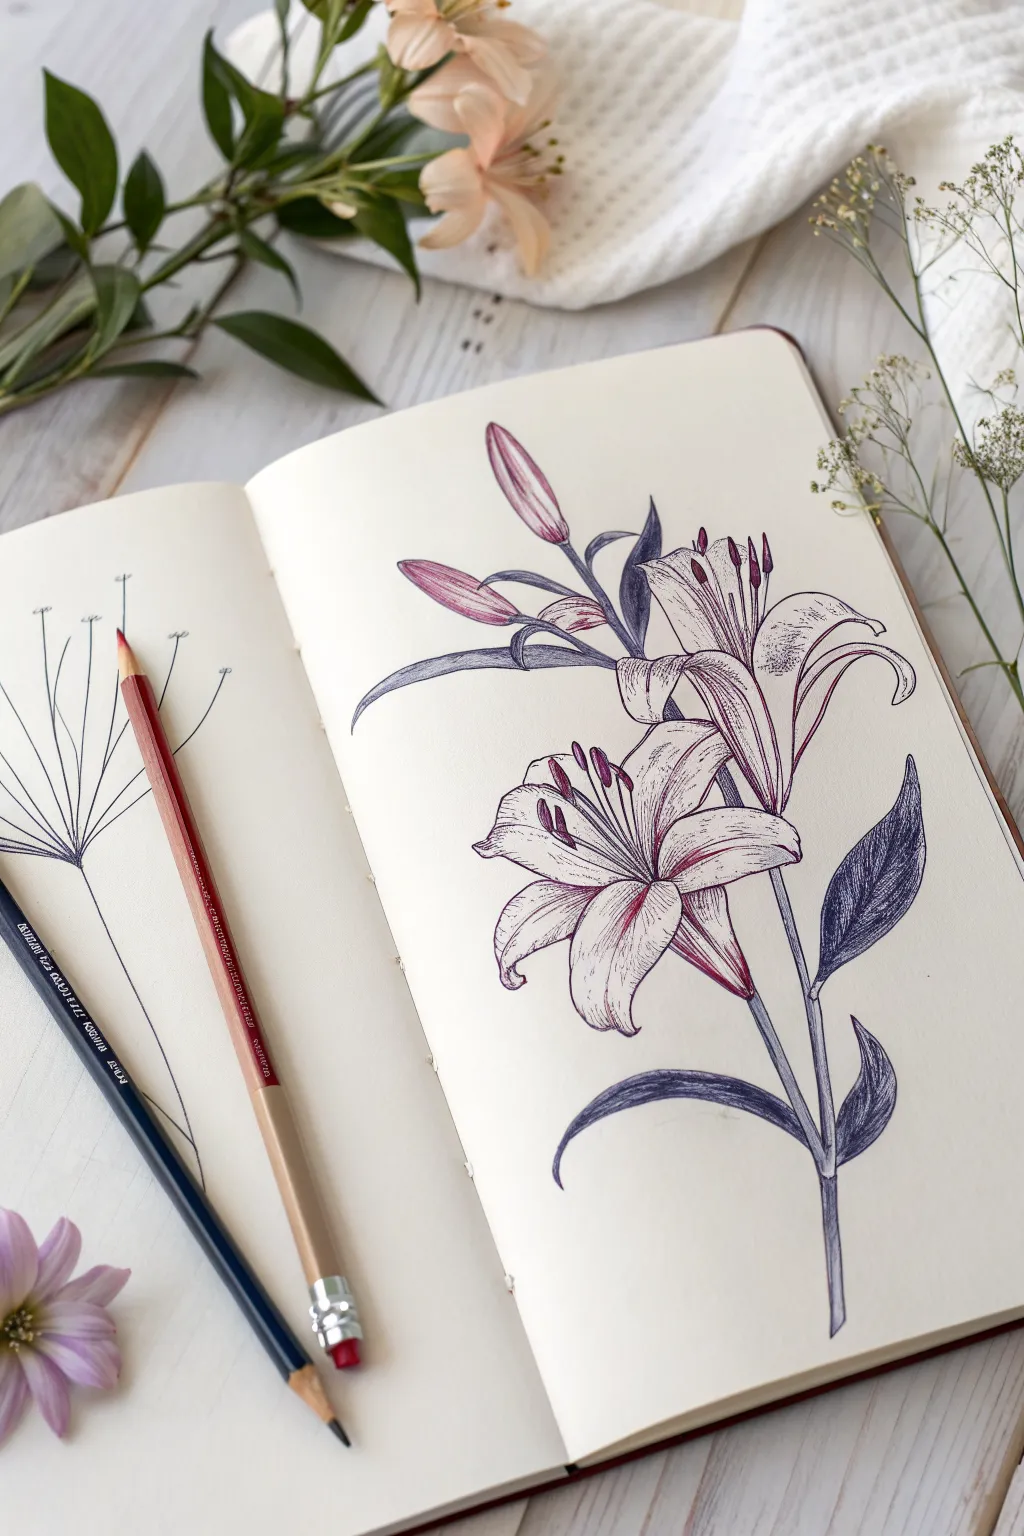
Capture the graceful curve of lily petals using a limited palette of deep violet and muted red. This sketchbook study combines precise line work with soft shading to create a vintage botanical illustration feel.
Detailed Instructions
Materials
- Sketchbook with smooth, off-white paper
- Pencil (HB for sketching)
- Eraser
- Fine liner pen (Dark purple or blue-black, 0.3mm)
- Colored pencil (Muted red or dusty rose)
- Colored pencil (Deepindigo or violet-blue)
Step 1: Basic Structure
-
Establish the Stem Line:
Begin by lightly sketching a single, long curved line that will serve as the main stem. Allow it to curve gently to the right as it moves upward, giving the flower a natural, organic posture. -
Position the Blossoms:
Mark the locations for your two open flowers. Place a large circle shape for the lower bloom and a slightly smaller, tilted oval above it for the second bloom. Add two small, slender teardrop shapes near the top left for the closed buds. -
Sketch the Petal Guidelines:
Inside your flower circles, draw six radiating lines from the center. Lily petals generally have three inner petals and three outer sepals, but for sketching, think of them as a six-pointed star shape with curved tips.
Uneven Shading?
If pencil strokes look too scratchy, use a colorless blender pencil or a clean cotton swab to smooth the pigment into the paper tooth for a creamy finish.
Step 2: Drawing the Forms
-
Outline the Petals:
Using your pencil, flesh out the petals around your guidelines. The petals should be wide in the middle and taper to a soft point. For the top flower, curve the petals backward slightly to show perspective. -
Draw the Buds:
Refine the teardrop shapes into tight buds. Add a central seam down the middle of each bud to show where the petals are folded together. -
Add Stamens and Leaves:
Sketch long, sweeping curves coming from the center of each open flower. Add small, oval-shaped anthers at the ends. Then, draw broad, lance-shaped leaves attaching to the main stem, curving outward. -
Clean Up the Sketch:
Once satisfied with the composition, use your eraser to lighten the graphite lines until they are just barely visible. This prevents the graphite from muddying your colored pencil later.
Level Up: Dew Drops
Use a white gel pen to add tiny, singular dots on the darkest parts of the leaves or petals to simulate morning dew catching the light.
Step 3: Inking and Coloring
-
Outline with Dark Pencil:
Take your deep indigo or violet-blue pencil. sharpen it to a fine point. carefully trace the outlines of the petals, leaves, and stems. Keep the pressure moderate—dark enough to define the shape, but not harsh. -
Shade the Stems and Leaves:
Using the same dark blue-violet pencil, shade the leaves and stems. Apply more pressure near the base of the leaves and where the stem is shadowed, fading to a lighter touch toward the tips to create volume. -
Texture the Petals:
Lightly shade the outer edges of the petals with the blue-violet pencil. Use short, hatching strokes that follow the curve of the petal to suggest a slight ruffled texture. -
Introduce the Red Tone:
Switch to your muted red or dusty rose pencil. Focus this color in the center of the petals, radiating outward. I find it helpful to start at the flower’s throat and flick the pencil outward to blend it into the white paper. -
Detail the Petal Centers:
Draw the central vein of each petal using the red pencil. Make this line distinct but not too thick. Add small speckles or dots near the center of the flower for that classic lily texture. -
Color the Buds:
Apply the red tone to the tips of the closed buds, blending it down into the purple base. This gradient gives the buds a realistic, unripe appearance. -
Define the Anthers:
Color the small oval anthers at the ends of the stamens with a heavy hand using the red pencil. Outline them with the dark violet to make them pop against the petals. -
Final Contrast:
Return with your dark violet pencil for a final pass. Deepen the shadows where petals overlap and reinforce the connection points between the stem and the flowers to ground the image.
Now you have a botanical study that looks effortless yet refined


Poppies With Wavy Cup Petals
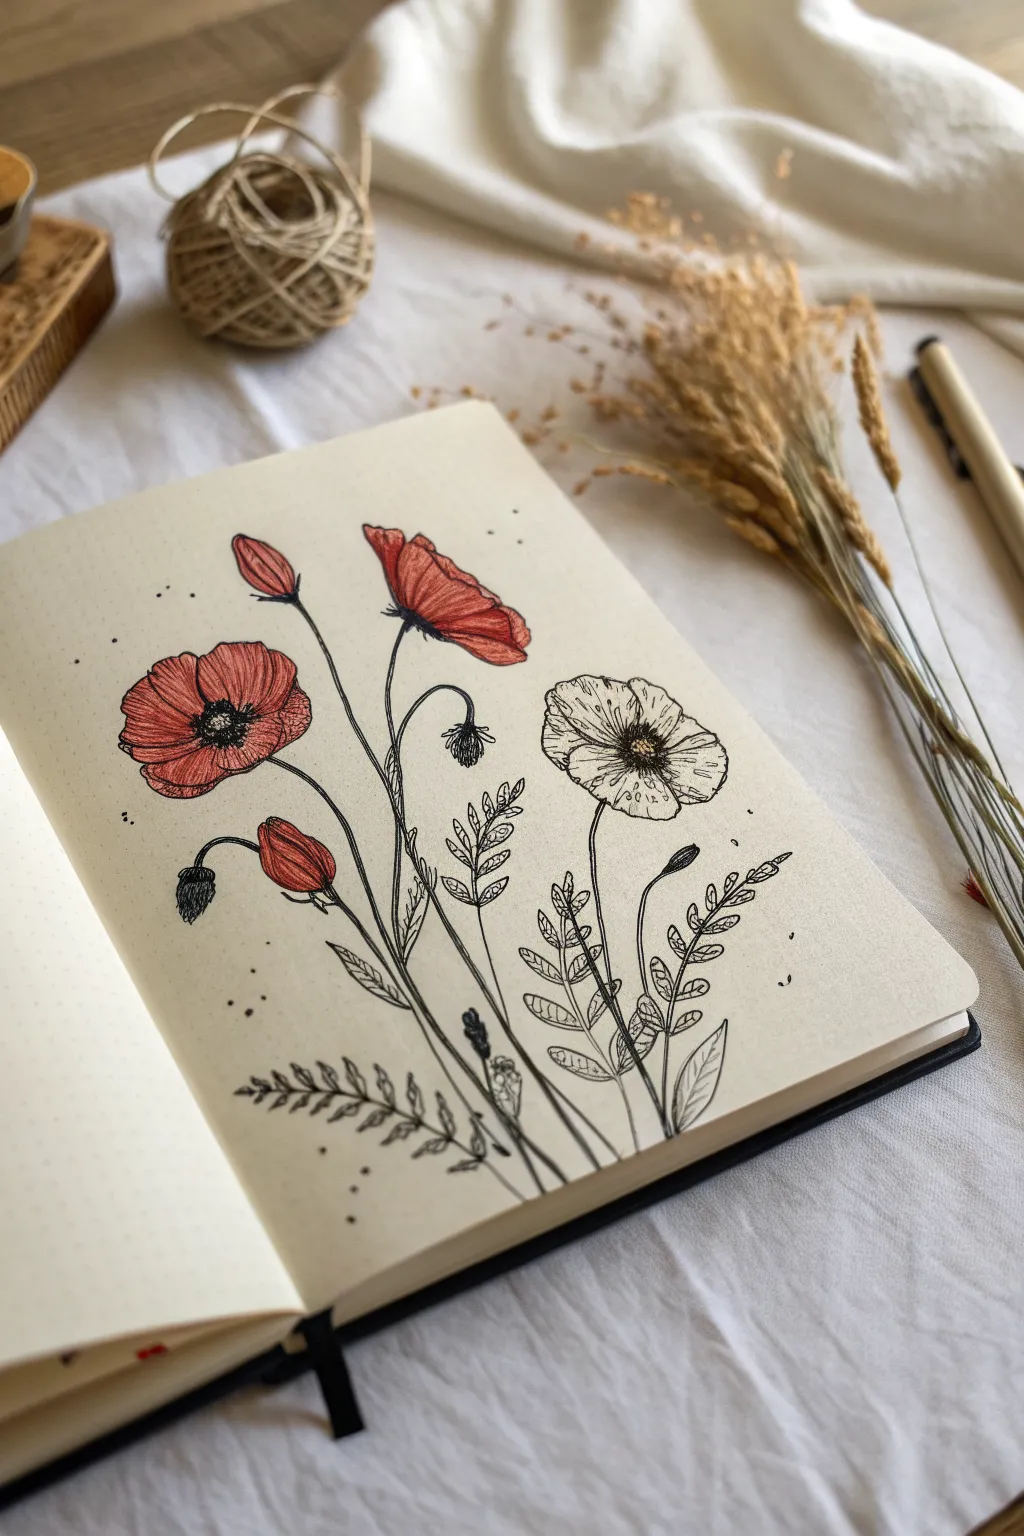
Capture the delicate flutter of poppy petals with this elegant sketchbook doodle that combines fine liner precision with soft pencil shading. This semi-colored composition balances vibrant blooms with monochrome botanical studies for a timeless, scientific illustration feel.
Step-by-Step Guide
Materials
- Dotted or plain sketchbook paper (creamy tone preferred)
- Fine liner pens (sizes 0.1, 0.3, and 0.5)
- Graphite pencil (HB or 2B) for sketching
- Red colored pencil (warm, scarlet tone)
- Eraser
- Optional: White gel pen for highlights
Step 1: Sketching the Composition
-
Map out the stems:
Begin lightly with your pencil. Draw three main curving lines originating from the bottom center, fanning out slightly as they rise. These will be your primary flower stems. -
Position the blooms:
At the top of the left and central stems, sketch loose, oval-like shapes to mark where the large open flowers will sit. On the far right stem, sketch a similar shape but keep it slightly lower. -
Add bud placements:
Sketch smaller teardrop shapes on shorter offshoot stems. Place one facing upward near the top left, one drooping downward in the center, and a closed bud lower down on the left side. -
Refine the petal shapes:
For the open blooms, define the petals. Give them wavy, uneven edges that look like crinkled tissue paper. The center of the flower should look like a small bowl or cup.
Petal Perfection
To make the petals look realistic, ensure your hatching lines curve with the shape of the petal, rather than just going straight up and down.
Step 2: Inking the Blooms
-
Outline the petals:
Switch to a 0.3 fine liner. Trace your pencil lines for the petals, intentionally making the line slightly shaky or broken in places to mimic the delicate texture of poppy petals. -
Draw the centers:
In the center of the open flowers, draw a small, dark circle surrounded by tiny stamens. Use quick, short strokes radiating outward from the black center. -
Ink the stems and buds:
Go over the stems with a smooth, confident stroke. For the drooping bud, add small textured lines to show the fuzzy sepals protecting the flower. -
Detail the uncolored flower:
For the white flower on the right, use a 0.1 pen to add very fine lines radiating from the center toward the petal edges. These lines act as shading and texture without needing color.
Step 3: Adding Foliage
-
Sketch the leaves:
Poppy leaves are deeply lobed and fern-like. Draw elongated leaves branching from the lower parts of the stems, featuring many small, jagged segments. -
Ink the leaves:
Outline your leaf sketches with the 0.3 pen. Don’t worry about perfect symmetry; nature is rarely perfect. -
Add internal leaf veins:
Draw a central vein through each leaf segment. You can leave them open or add tiny hatching marks on one side of the vein to suggest depth. -
Erase pencil marks:
Once the ink is completely dry, gently erase all underlying graphite sketches to clean up the page.
Try a Wash
Instead of colored pencils, try a light watercolor wash for the red petals. The transparency of watercolor mimics the paper-thin nature of poppies perfectly.
Step 4: Coloring and Texture
-
Apply base color:
Take your red colored pencil and lightly fill in the two open flowers on the left and the closed red buds. Leave the petals near the outer edges slightly lighter. -
Build color intensity:
Press harder with the red pencil near the center of the flower and where petals overlap. This gradient creates a cupped, dimensional effect. -
Add ink texture over color:
Using the 0.1 fine liner, draw delicate shading lines *over* the red coloring. Follow the curve of the petals, flicking the pen from the center outwards. -
Darken the centers:
Use the 0.5 pen to deepen the very center of the red poppies, ensuring the black provides a high contrast against the red. -
Scatter pollen dots:
Dot the area immediately surrounding the black centers to represent pollen grains. -
Final touches:
Add a few stray specks or dots floating around the upper petals to add a bit of atmospheric movement to the composition.
Step back and admire how the mix of vibrant red and stark black ink brings your botanical garden to life on the page
Lotus Flowers From Layered U-Shapes
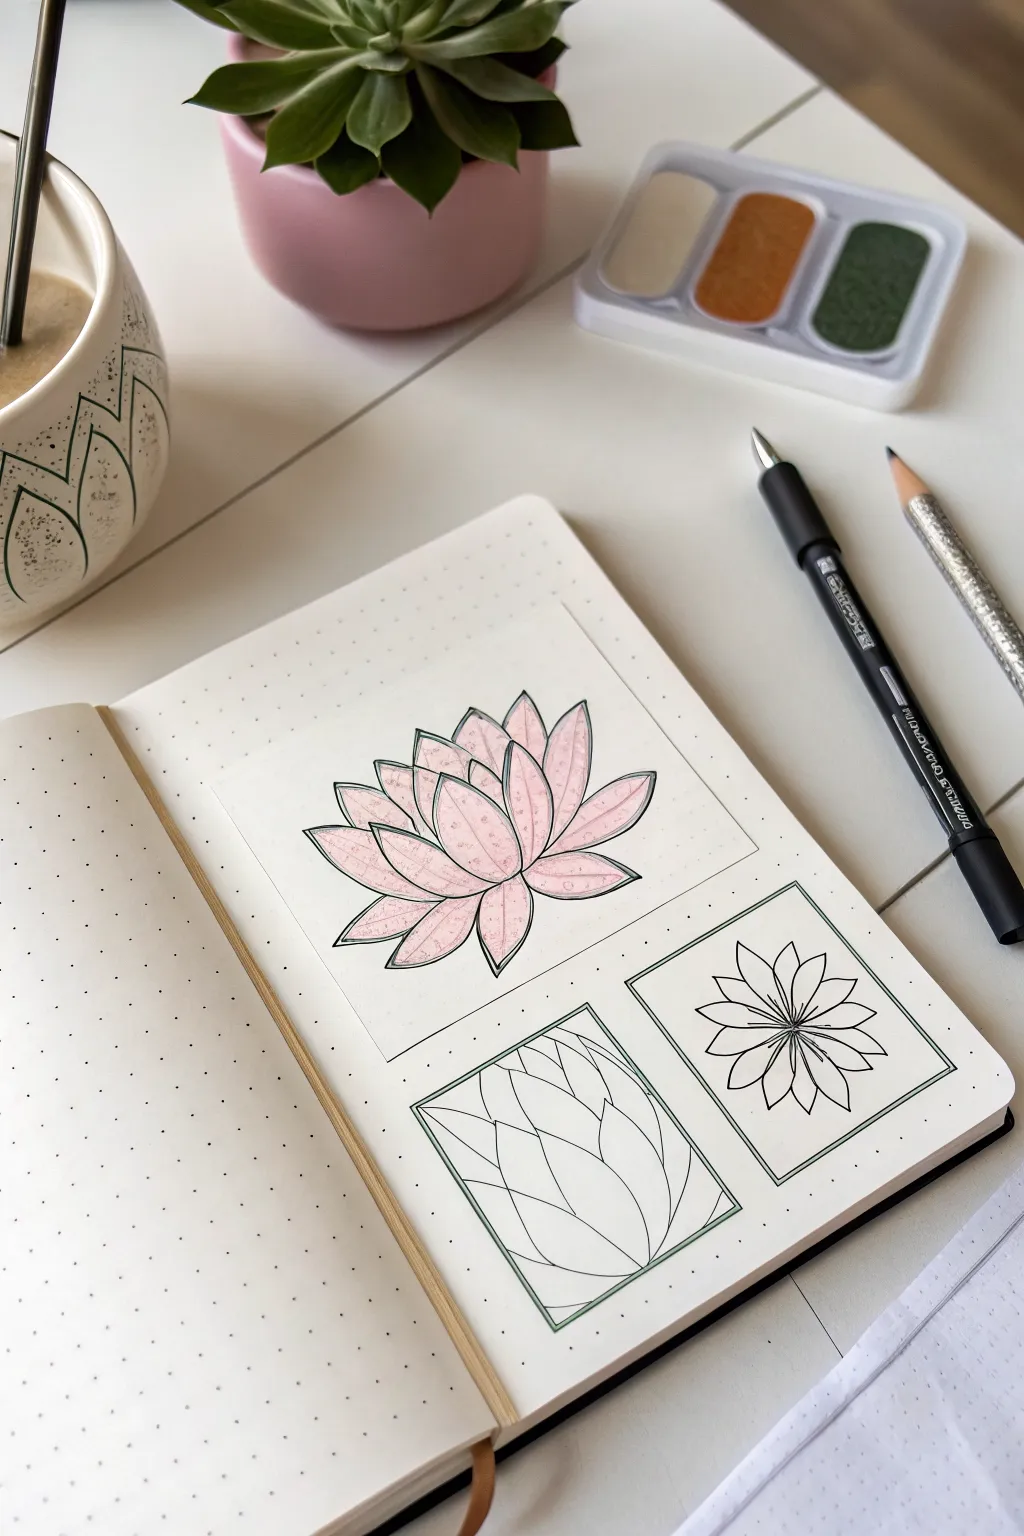
Master the art of drawing a balanced lotus flower by breaking it down into simple geometric components. This tutorial guides you through constructing the flower from basic U-shapes and radial lines before adding delicate watercolor details.
How-To Guide
Materials
- Dotted bullet journal or mixed media paper
- Fine liner pen (black, waterproof, approx 0.3mm)
- Pencil (HB or H)
- Eraser
- Ruler
- Watercolor paints (Pink and Green)
- Small round watercolor brush (size 2 or 4)
Step 1: Planning the Layout
-
Define the frames:
Using your ruler and pen, draw three rectangular frames on your dotted paper. The largest frame should be at the top, roughly square or slightly landscape, to house the finished flower. Draw two smaller, vertical rectangular frames below it for practice sketches. -
Establish the center line:
In the bottom-left frame, lightly sketch a vertical centerline using a pencil. This will keep your U-shapes symmetrical. -
Stack the U-shapes:
Draw three layered ‘U’ shapes in the bottom-left frame. Start with a wide, shallow U at the bottom. Above that, draw a slightly taller, narrower U. Finally, place a tall, narrow semi-oval or U-shape at the very top. These act as the skeleton for your petals. -
Practice radial guides:
In the bottom-right frame, practice a different approach. Draw a small circle in the center. From this center point, draw 8 to 10 straight lines radiating outward like wheel spokes. Sketch petal tips connecting these spokes to visualize petal placement.
Uneven Petals?
If your flower looks lopsided, turn your sketchbook upside down. Viewing the shape inverted makes symmetry issues obvious so you can fix the sketch before inking.
Step 2: Drawing the Main Lotus
-
Sketch the central petal:
Moving to the large top frame, start with the central petal. Draw an almond shape standing vertically in the center of your frame. The top point should be sharp, while the bottom can be slightly rounded. -
Add the first layer:
Sketch two petals flanking the center one. These should curve outward slightly, hugging the bottom of the central petal, resembling the sides of a tulip. -
Expand the width:
Add another pair of petals outside the previous ones. Make these wider and angled more horizontally, creating that classic open lotus shape. -
Complete the base:
Sketch the final, lowest layer of petals. These should be wide and flat, barely peaking out from underneath the previous layer, anchoring the flower. -
Ink the outline:
Once happy with your pencil sketch, carefully trace over the petal lines with your black fine liner. Ensure your lines are crisp and connect cleanly at the points. -
Add detail lines:
Draw a faint, vertical line down the center of each petal using the fine liner. This vein line gives the petals dimension and direction. -
Create the aura:
Draw a secondary outline around the entire flower shape, leaving a small gap (about 1-2mm) between the petal edge and this new line. This ‘aura’ creates a sticker-like effect. -
Clean up:
Wait for the ink to dry completely to avoid smudging, then gently erase all visible pencil marks.
Step 3: Adding Color
-
Prepare the pink wash:
Mix a watery, pale pink watercolor. I prefer to test the opacity on a scrap piece of paper first to ensure the black lines will show through clearly. -
Paint the petals:
Fill in the petals with the pink wash. Don’t worry about staying perfectly inside the lines; a loose, painterly style adds charm to a doodle. -
Add texture:
While the pink paint is still slightly damp, dab a few tiny spots of more concentrated pink near the base of the petals to create a subtle gradient or speckled texture. -
Highlight the aura:
Using a very pale, watery green or grey, carefully paint the narrow gap between the petal outline and the outer ‘aura’ line you drew earlier. This separates the flower from the background. -
Dry and admire:
Let the paint dry completely before closing your journal. The finished effect should look soft and layered.
Paper Buckling Tip
Since bullet journal paper is often thin, use very little water. Blot your brush on a paper towel before painting to keep the wash ‘dry’ and prevent the page from warping.
Now you have a serene floral centerpiece ready for your next weekly spread
Peonies as Puffy Petal Clouds
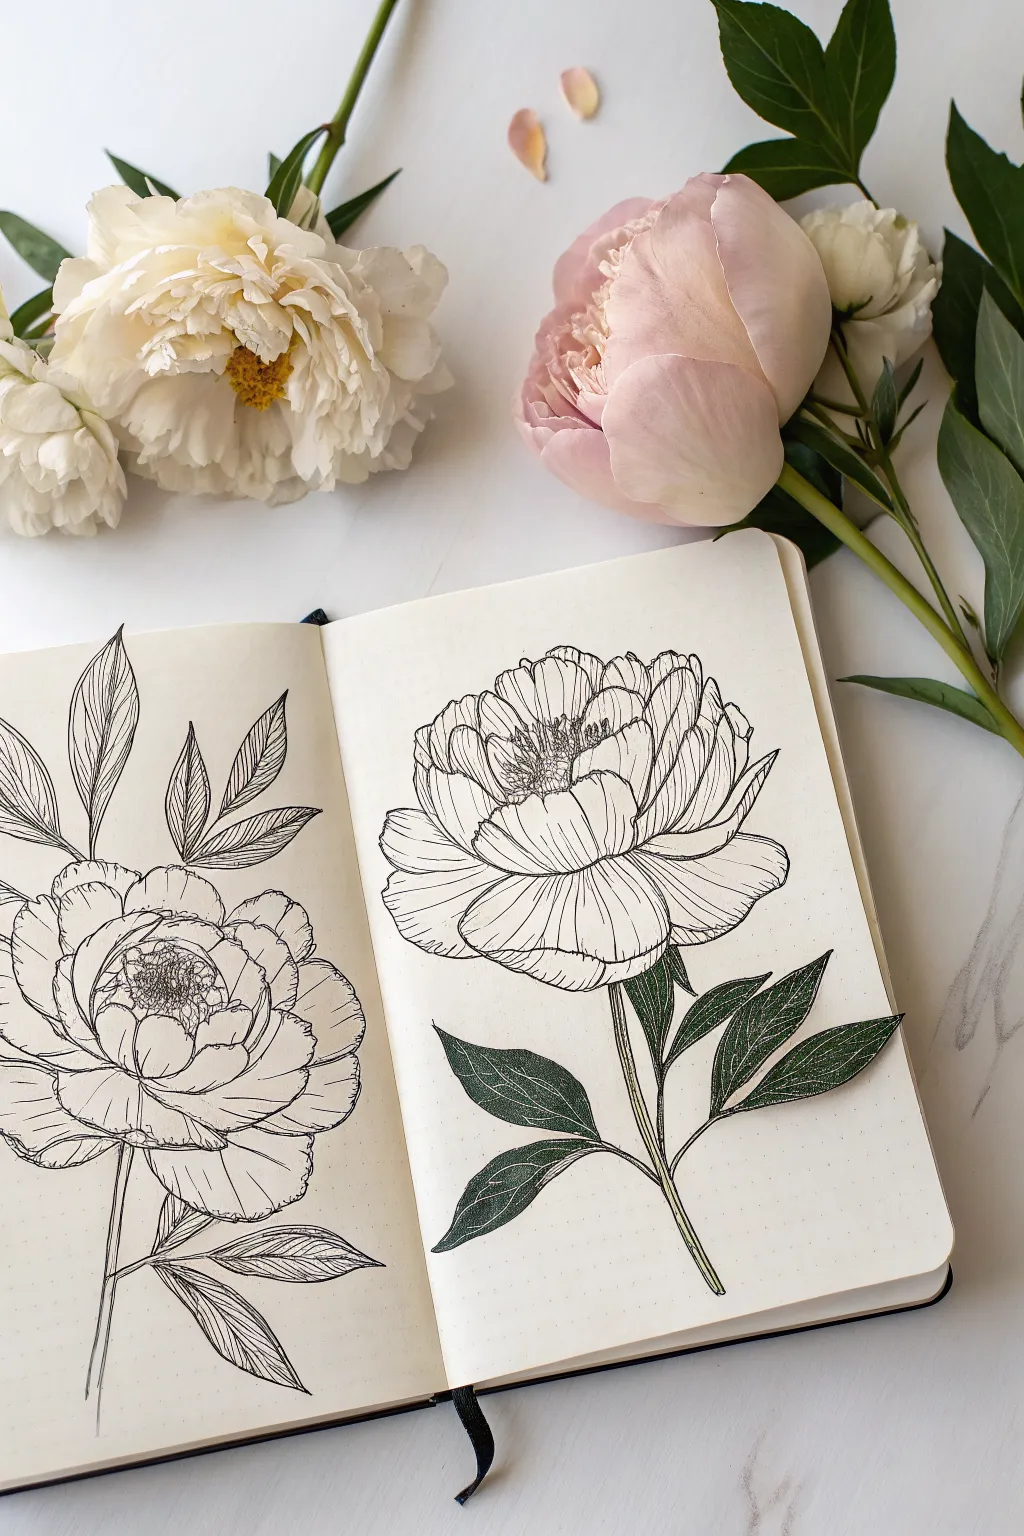
Capture the lush, layered beauty of peonies in your sketchbook by combining intricate ink linework with a touch of botanical realism. This spread features two blooming peonies—one purely linear and one accented with deep green leaves—creating a beautiful study in contrast and texture.
Step-by-Step Guide
Materials
- Dot grid notebook or sketchbook
- Fine liner pens (sizes 005, 01, and 03)
- Pencil (HB or 2H)
- Kneadable eraser
- Deep green marker or colored pencil
- White gel pen (optional for leaf veins)
Step 1: Drafting the Shapes
-
Map out the composition:
Start by lightly sketching the placement of your two flowers with a pencil. Place the left peony lower on the page, facing slightly upward, and the right peony higher up, facing directly forward. Use large, loose circles to define the overall size of the blooms. -
Establish the centers:
Inside your large circles, draw smaller, rough ovals to mark the dense center of the flowers where the stamens will go. This helps anchor the petals radiating outward. -
Sketch the primary petals:
draw large, cup-shaped curves around the center oval to form the inner bowl of petals. For the outer petals, draw wider, flatter curves that extend to the edge of your initial guide circle. -
Add stem and leaf structure:
Draw single lines extending downward from the base of each flower for stems. Sketch simple almond shapes for the leaves, attaching them to the stems in groups of three or opposite pairs.
Step 2: Inking the Blooms
-
Detail the stamens:
Switch to your finest pen (005). In the center oval, draw tiny, tightly packed filaments topped with small textured tops. Keep these dense to create a focal point. -
Outline the inner petals:
Using an 01 pen, trace your pencil lines for the petals closest to the center. Give the edges a slightly jagged, organic wiggle rather than a perfect smooth curve to mimic real petals. -
Create the outer layers:
Continue outlining the larger outer petals. Allow some petals to overlap others, stopping your line where one petal disappears behind another to create depth. -
Add petal texture:
With the 005 pen again, draw very fine, vertical striations or contour lines on each petal. Start from the base of the petal and flick the pen upward, fading out before reaching the tip. This mimics the delicate veins of a peony. -
Refine the contour shading:
Add extra hatching lines in the deepest folds where petals overlap. This shadow work makes the flower look three-dimensional and ‘puffy’ rather than flat.
Natural Imperfection
Don’t make your petals perfect semi-circles. Add small dips, ruffles, or uneven edges to the tops of the petals. Real peonies have crinkled, soft edges.
Step 3: Leaves & Contrast
-
Ink the left-page leaves:
For the left flower, we’re keeping it strictly black and white. Outline the leaves with an 01 pen, adding a central vein. Draw diagonal lines mirroring the leaf shape to fill them with texture without coloring them in solid. -
Outline the right-page leaves:
For the right flower, outline the leaves cleanly with your 03 pen for a slightly bolder edge, preparing them for color. -
Color the right leaves:
Use a deep green marker or colored pencil to fill in the leaves on the right page. Apply the color evenly, pressing harder near the stem and veins for natural shadowing. -
Add veins to the colored leaves:
Once the green ink is dry, use a fine liner (or a white gel pen for high contrast) to draw the central vein and branching veins over the green color. -
Final stem work:
Thicken the stem lines slightly. On the right flower, carefully color the stem green, leaving a tiny sliver of white on one side to act as a highlight. -
Clean up sketch lines:
Wait at least 10 minutes to ensure all ink is totally dry. Gently erase all visible pencil marks with your kneadable eraser to reveal the crisp illustration.
Collage It Up
Draw the colored leaves on separate cardstock, cut them out precisely, and glue them onto the page. This adds a literal 3D layer and exciting shadow effects.
Now you have a stunning botanical spread that balances technical line art with a pop of vivid color.
Anemones With Bold Dark Centers

These striking anemones feature wide, rounded petals and distinctively dark, textured centers that pop off the page. The combination of delicate linework and soft, washed colors creates a beautiful botanical study perfect for any bullet journal spread.
Detailed Instructions
Materials
- A5 Dot grid notebook or watercolor paper
- Pencil (HB or lighter) and eraser
- Black waterproof fine liner pen (01 and 03 sizes)
- Watercolor paints or water-based brush markers (salmon pink, soft blue, sage green)
- Small round paintbrush (size 2 or 4)
- Water cup and paper towel
Step 1: Drafting the Composition
-
Sketch the flower placement:
Start by lightly sketching four large circles in pencil to represent the flower heads. Place two near the top (one center-left, one right), one lower down on the right, and one peeking out on the left side. -
Define the centers:
Inside each large circle, draw a smaller circle roughly the size of a dime to mark the dark center of the anemone. -
Add stem lines:
Draw long, gently curving lines extending downward from each flower head, making sure they cross and flow naturally towards the bottom of the page. -
Sketch petal shapes:
Around the centers, sketch wide, heart-shaped or rounded petals. Anemones typically have 5-7 distinct petals that overlap slightly.
Ink Smearing?
If your black lines bleed when you paint, your pen isn’t waterproof. Test it first! If needed, do the coloring phase first, let it dry, and then do the inking on top.
Step 2: Inking the Outlines
-
Outline the petals:
Using the 01 fine liner, trace over your pencil lines for the petals. Keep the lines slightly imperfect and organic rather than rigid. -
Draw the stems and buds:
Ink the long stems. Add two small, teardrop-shaped buds branching off the main stems—one near the top right pink flower and one near the lower pink flower. -
Add leaves:
Draw the jagged, parsley-like leaves on the lower stems. These leaves are deeply lobed and textured. -
Detail the centers:
With the 03 pen, fill the very center of the flowers with dense black ink. Surround this solid dot with a ring of tiny, dense stippling dots. -
Add stamens:
Draw fine, short lines radiating from the black center into the petals. Top each line with a tiny black dot to create the anemone’s signature dark eye. -
Erase pencil marks:
Wait for the ink to dry completely to avoid smudging, then gently erase all visible pencil sketches.
Try This Twist
Instead of leaving one flower white, use a very pale gray brush pen to add shadow to the petals, making it look like a white flower rather than just an outline.
Step 3: Adding Color
-
Paint the salmon flowers:
Using a diluted salmon pink watercolor or marker, fill in the top-left and bottom-right flowers. Keep the color sheer so the paper texture shows through. -
Paint the blue flower:
Color the top-right flower with a soft, muted blue. Leave the flower on the left uncolored for a stylish contrast. -
Color the leaves:
Use a sage green to fill in the jagged leaves and the small sepals at the base of the buds. -
Add subtle shading:
Once the base layer is dry, add a tiny bit more pigment near the center of the petals to create depth where they meet the stem.
Step 4: Finishing Touches
-
Refine the stamens:
If painting faded your black lines, use the 01 pen to re-darken the stamen dots to ensure maximum contrast. -
Add texture dots:
Sprinkle a few tiny black dots on the colored petals near the center to simulate pollen or surface texture. -
Detail the leaves:
Draw a central vein line down the middle of each green leaf using your fine liner.
Now you have a gorgeous floral spread ready to brighten up your week
Dandelion Puff and Blowing Seeds
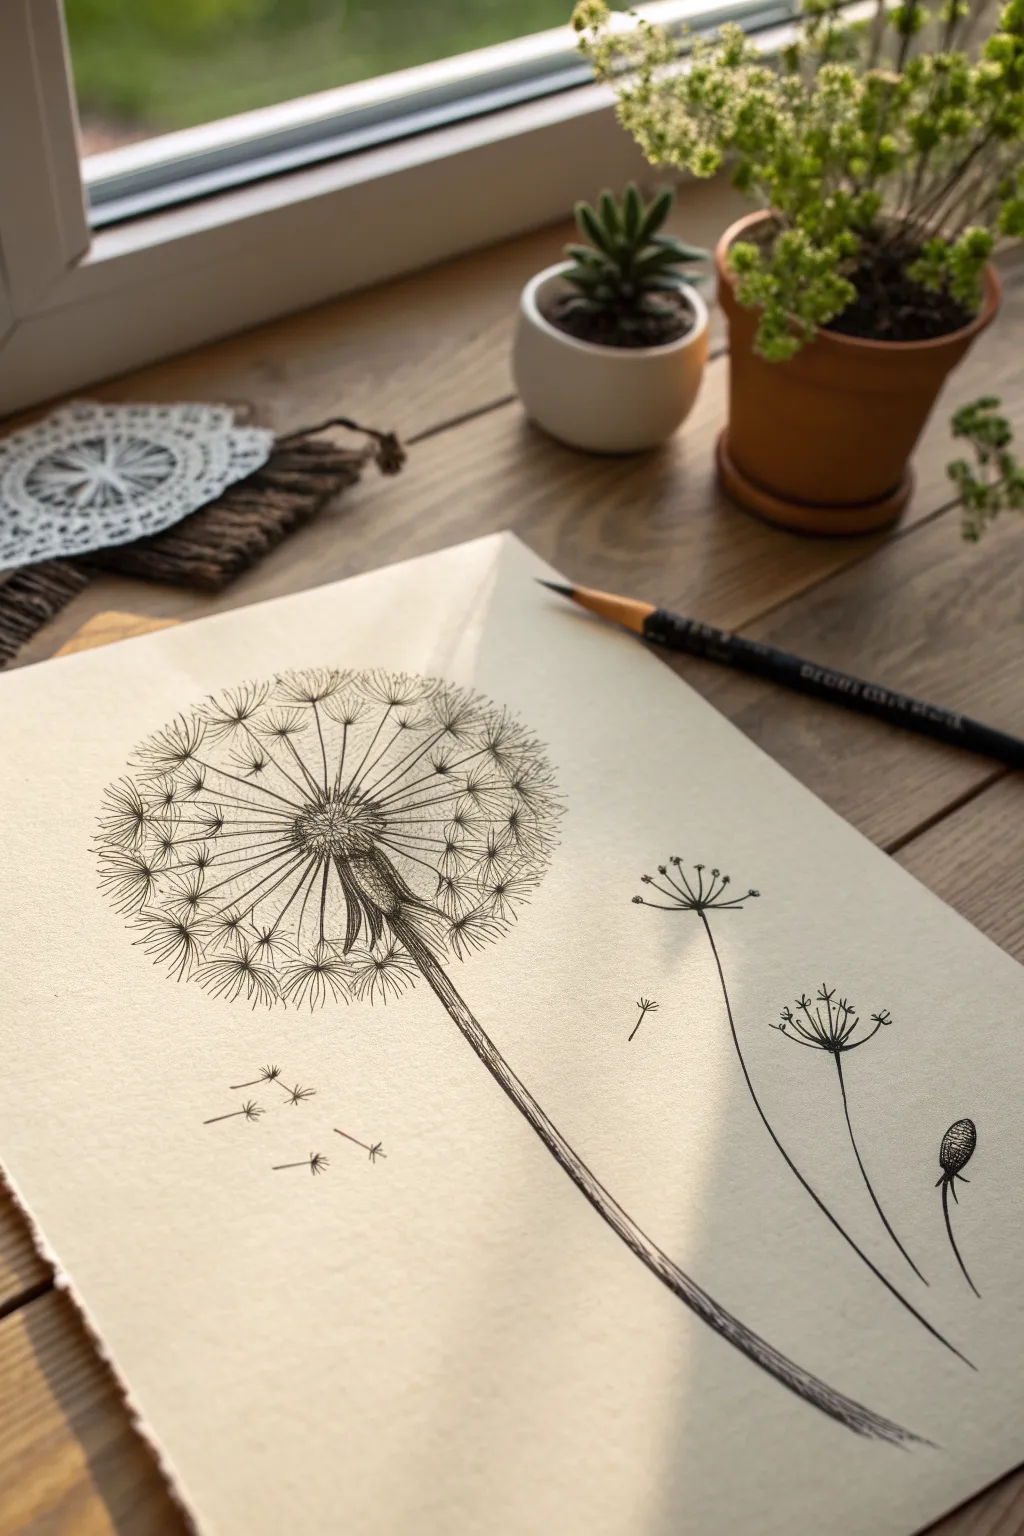
Capture the delicate, airy nature of a dandelion seed head with this detailed pen and ink study. The fine lines and radial composition create a striking yet minimalist piece that celebrates the beauty of common wildflowers.
Detailed Instructions
Materials
- Cream or off-white textured drawing paper (heavyweight)
- Fine liner pens (sizes 0.05, 0.1, and 0.3)
- Graphite pencil (HB or 2H)
- Soft kneadable eraser
- Ruler (optional)
Step 1: Planning the Composition
-
Establish the stem line:
Begin by lightly sketching a long, gently curved line with your pencil starting from the bottom right-third of the paper and arching up toward the left center. This will be the main dandelion stem. -
Mark the seed head center:
At the top of your stem line, draw a small oval. This represents the receptacle where all the seeds attach. Keep this pencil sketch very faint so it doesn’t show later. -
Define the outer boundary:
Lightly sketch a large circle around that center point to define how big your puffball will be. This guide helps ensure your dandelion stays round and doesn’t get lopsided as you draw. -
Sketch the companion flowers:
To the right of the main stem, lightly plot out the positions for the two smaller, simpler flower stalks and the single bud at the bottom right to balance the composition.
Fixing the Circle
If your dandelion looks too oval or wonky, just add a few ‘stray’ floating seeds on the shorter side to visually drag the eye outward and balance the shape.
Step 2: Inking the Dandelion Core
-
Draw the receptacle texture:
Switch to your 0.1 fine liner. Start stippling and drawing tiny textures in the center oval you sketched. Use small dots and short, hatched lines to create a rough, textured look for the seed base. -
Add the bracts:
Draw the small, leaf-like bracts hanging down from the base of the flower head. Use slightly heavier lines here to show they have more substance than the fluffy seeds. -
Create the main spokes:
Using the 0.05 pen for delicate lines, draw straight lines radiating outward from the center oval toward your outer circle guide. Don’t draw them all equal length; let some be shorter to create depth. -
Thicken the stem:
Use a 0.3 pen to outline the main long stem. Add vertical hatching lines running down the length of it to simulate the fibrous texture of a plant stalk, focusing darker lines on one side for shadow.
Step 3: Creating the Fluff
-
Draw the seed parachutes:
At the end of each radiating spoke line, draw a tiny ‘V’ or ‘U’ shape. From these shapes, flick out 3-5 tiny, whispy lines to create the individual pappus (the fluff). -
Layer the seeds:
Work your way around the sphere. I find it helpful to rotate the paper as I go to keep my hand position consistent. Make sure the seeds overlap slightly to look natural and full. -
Add floating seeds:
Draw three or four individual seeds detached from the main head, floating to the left. Draw the tiny dry seed pod first, then a thin stem, and finally the little umbrella of fluff on top. -
Refine the density:
Go back into the main puffball and add more radiating lines in the background. Make these lines slightly lighter or broken to show they are behind the front layer of seeds.
Add Watercolor
For a mixed-media look, drop a very faint wash of watercolor (paynes gray or sepia) over the stem area only, letting it bleed slightly outside the lines.
Step 4: Drawing the Companion Plants
-
Ink the side stems:
Using the 0.1 pen, trace over your pencil sketches for the smaller plants on the right. Keep these lines clean and simple to contrast with the busy dandelion. -
Detail the umbels:
For the two taller side flowers, draw small, umbrella-like spokes radiating from a central point, topped with tiny dots or circles to represent minuscule blooms. -
Draw the bud:
For the bottom-right bud, draw a tightly cross-hatched oval shape. Add a small stem connecting it downward, giving it a closed, textured appearance. -
Erase guidelines:
Wait for the ink to be completely dry—give it a few extra minutes just to be safe. Then, gently erase all your initial pencil circles and guide lines.
Now you have a serene botanical sketch that perfectly captures the fleeting beauty of nature.
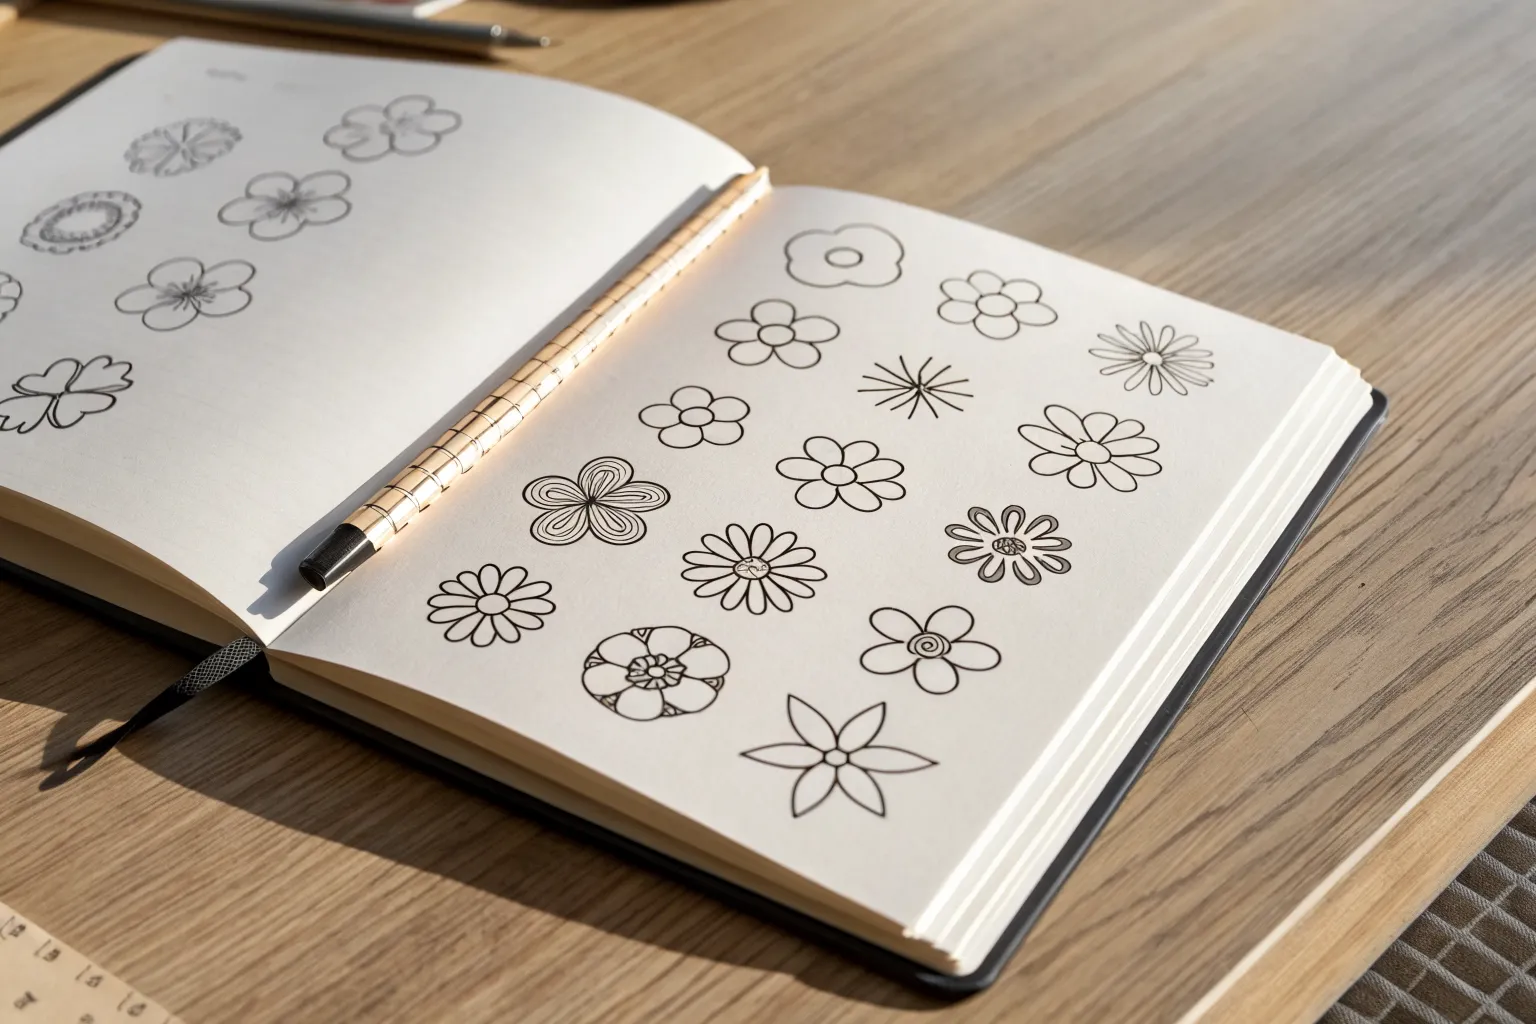
Tiny Filler Flowers for Empty Spaces
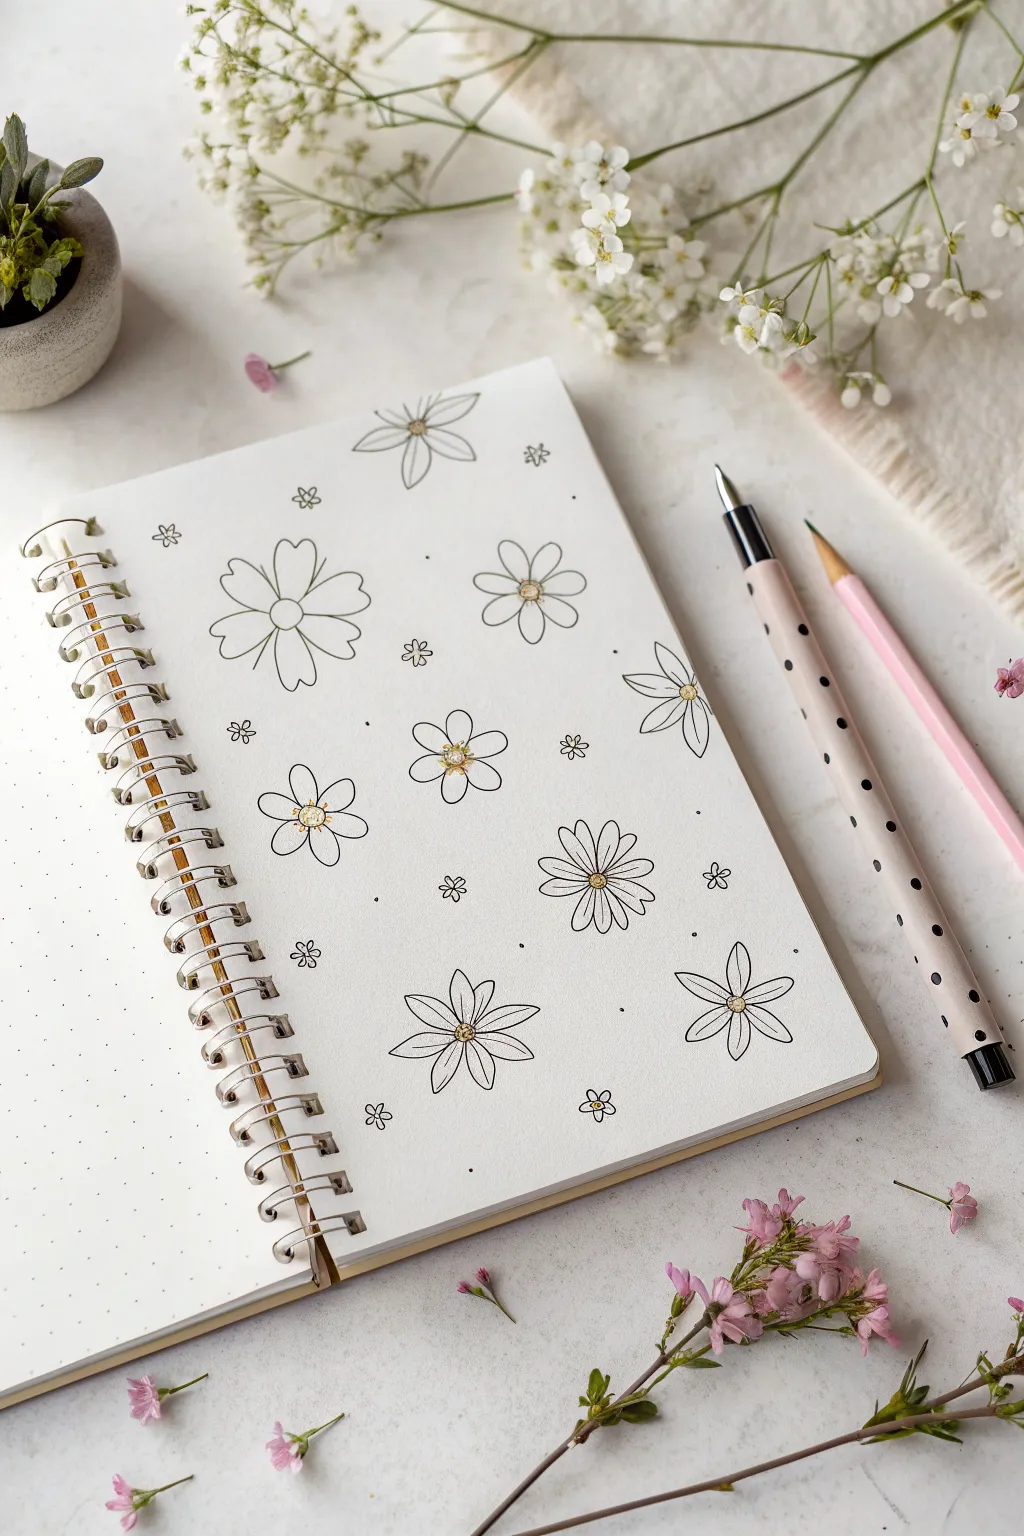
Transform a simple notebook page into a botanical garden with this collection of minimalist flower doodles. This project focuses on balance and spacing, using a variety of petal shapes to fill a page with charming line art designs.
Step-by-Step Tutorial
Materials
- Spiral-bound notebook with dot grid paper
- Fine-point black fineliner pen (0.3mm or 0.5mm)
- Gold or yellow gel pen (or metallic marker)
- Pencil (HB or lighter)
- Eraser
Step 1: Planning the Layout
-
Map out the main flowers:
Start by lightly sketching small circles in pencil scattered across the page. These will serve as the centers for your largest flowers. Aim for an uneven, organic distribution rather than perfect rows. -
Sketch the large petals:
Around your main circles, lightly pencil in the petal shapes. Vary the styles: give some flowers five wide, rounded petals, while others can have six or eight thinner, pointed petals. -
Add medium-sized fillers:
Identify the larger gaps between your main blooms. Sketch in slightly smaller flowers here, perhaps trying a simple daisy shape with oval petals to contrast with the others. -
Check the balance:
Step back and look at your composition. If there are large empty voids, lightly mark spots for tiny filler flowers, but leave plenty of negative space for a clean look.
Step 2: Inking the Blooms
-
Outline the flower centers:
Using your black fineliner, carefully trace over the small center circles you sketched. Keep your hand steady but don’t worry if they aren’t perfect circles; a little wobble adds charm. -
Ink the rounded petals:
Select the flowers with wide, rounded petals first. Draw the petals, starting from the center circle and curving out and back. Make sure the petals touch or slightly overlap at the center. -
Define the pointed petals:
Move on to the flowers with sharper petals. For these, I like to use a slightly quicker stroke to get a crisp point at the tip of each petal. -
Draw the daisy shapes:
Ink the medium-sized flowers. For these simple daisy shapes, ensure the petals radiate evenly. You can add a small line down the center of some petals for extra dimension. -
Add petal details:
Go back to your largest blooms. Draw a single, short line extending from the center circle into the middle of each petal. This simple detail adds depth and makes them look more floral.
Uneven spacing?
If a gap looks awkward, don’t force a flower. Draw a small cluster of floating leaves or a simple bee outline to fill the void without overcrowding.
Step 3: Adding Micro-Fillers and Details
-
Draw tiny five-petal flowers:
In the smaller gaps you identified earlier, draw tiny flowers directly with the pen. These don’t need distinct centers; just create five small loops connecting in the middle. -
Scatter micro-dots:
To break up the white space further, gently tap the tip of your pen to create random clusters of 2-3 tiny dots around the distinctive flowers. This mimics pollen or seeds. -
Erase pencil lines:
Wait a few minutes to ensure the ink is completely dry to avoid smearing. Gently erase all your underlying pencil sketches to reveal the crisp black lines. -
Add golden centers:
Take your gold or yellow gel pen and color in the centers of the medium and large flowers. You can fill them solidly or use a stippling motion for texture. -
Highlight the tiny fillers:
For the smallest, five-petal filler flowers, add just a single tiny dot of gold in the very center to tie the whole page together.
Add some sparkle
Use a clear glitter gel pen over the black ink lines of just one flower type. It adds a subtle texture shift that catches the light beautifully.
You now have a wonderfully whimsical page of floral doodles ready to brighten your journal
Simple Flower Stems With Leaf Variations
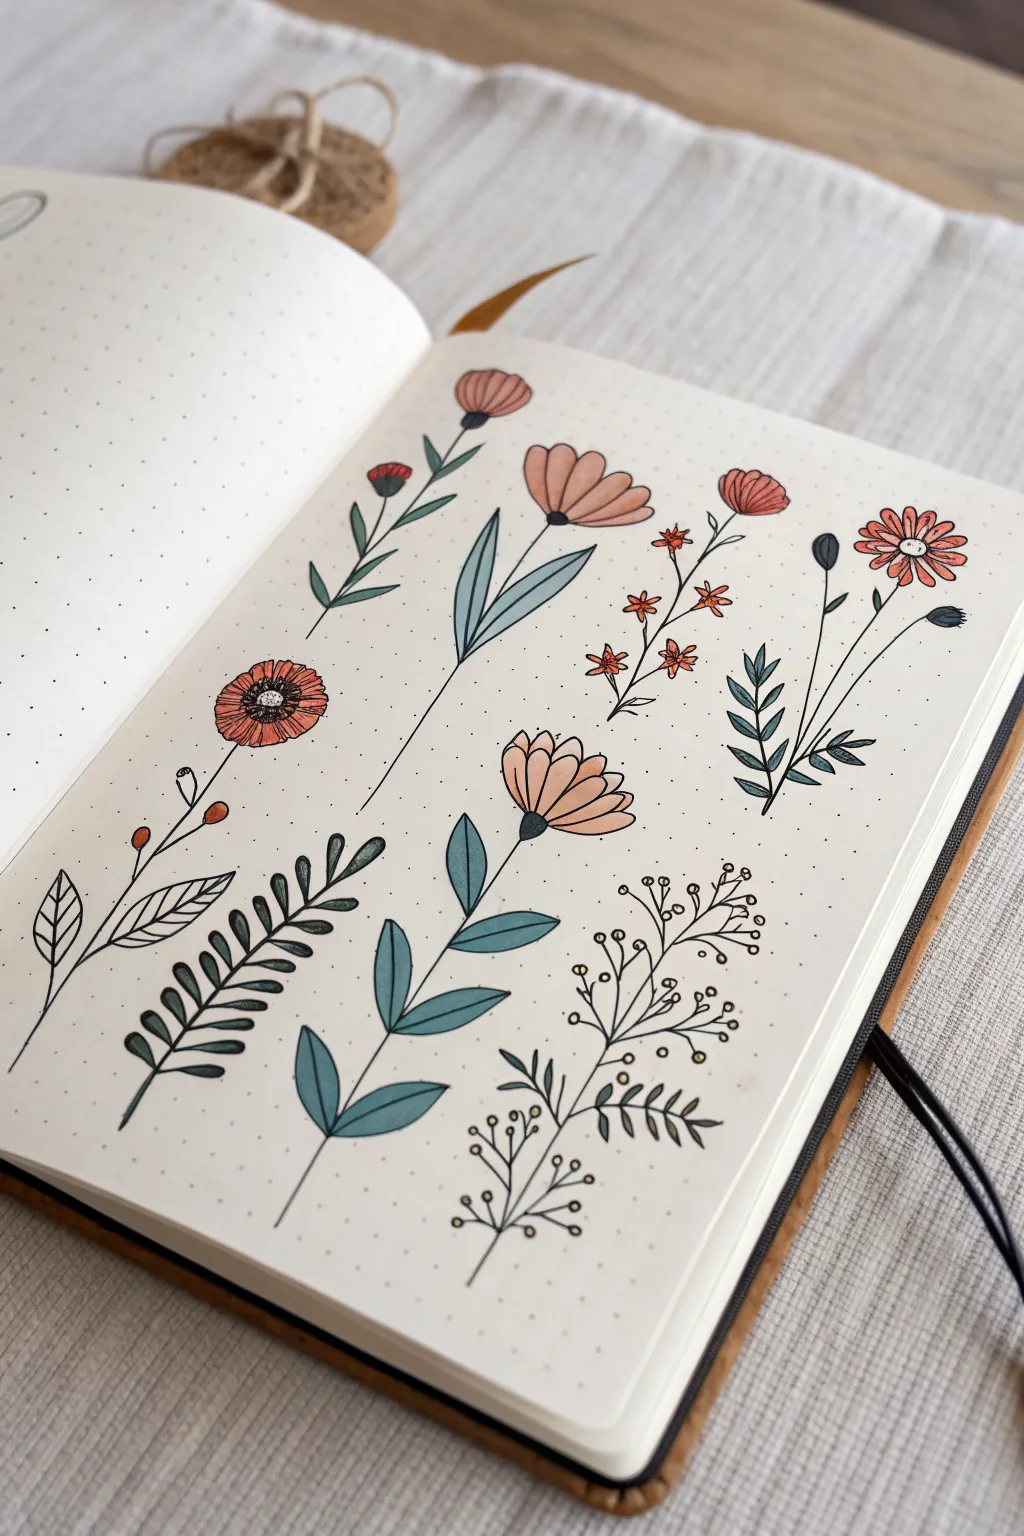
Transform a blank page into a delicate botanical study with this collection of nine distinct flower stems. The muted palette of terracotta, sage green, and soft teal gives the spread a cozy, vintage journal aesthetic that looks beautiful on dot grid paper.
Detailed Instructions
Materials
- Dotted grid notebook or journal
- Fine liner pen (black, 0.3mm or 0.5mm)
- Pencil (HB) and eraser
- Muted colored markers (terracotta/peach, sage green, teal/blue-grey)
- Optional: Ruler for spacing
Step 1: Planning the Layout
-
Visualize the grid:
Visualize your page divided into three invisible columns and roughly three rows. This will help you space out the nine flower stems evenly without them feeling too rigid. -
Sketch the spines:
Using a pencil and a very light touch, draw nine vertical, slightly curved lines to act as the central stems for your flowers. Vary the heights slightly to create a natural, organic look.
Keep it Organic
Don’t strive for perfect symmetry. Flowers in nature are rarely perfectly straight. Let your stems curve slightly to the left or right to give them movement and life.
Step 2: Drawing the Base Flowers
-
Top left: Tiny Bud:
Start with the top-left flower. Draw a small, half-circle cup shape for the bud and add two simple, rounded leaves branching off the stem near the top. -
Top center: Large Petal Flower:
Move to the top middle. Sketch a U-shaped base, then fan out four or five large, rounded petals. Down the stem, add two large, elongated leaves that point upward. -
Top right: Daisy Cluster:
For the top right, draw a small daisy-like flower with a round center. Next to it, draw a tall, thin stem topped with a simple oval bud creates height variation. -
Middle left: Textured Bloom:
In the middle row on the left, draw a textured, circular flower. Create a dark center, a ring of small dots, and then a ring of tightly packed, short petals. Keep the stem simple. -
Middle right: Branching Sprig:
Draw the middle-right flower as a branching wildflower. Instead of one bloom, draw small off-shoot branches ending in tiny five-petal star flowers. -
Bottom center: Fan Flower:
For the prominent central flower in the bottom half, draw a semi-circle base and add distinct, separate petals fanning out. Add pairs of large, teal-colored leaves down the stem.
Step 3: Adding Leaf Variations
-
Creating the Fern:
On the bottom left, focus entirely on foliage. Draw a fern-like stem where the leaves are small ovals that run closely parallel all the way down the spine. -
Leafy sprig:
For the flower on the far right (middle row), add pairs of small, pointed leaves that stack neatly up the stem. -
Delicate filler foliage:
Finally, in the bottom right corner, draw a very delicate, branching plant. Instead of petals, draw tiny circles at the tips of the branches to represent berries or buds.
Ink Smearing?
If your black outlines smear when you highlight over them, switch your order of operations: lay down the colored marker shapes first, let them dry, and then draw the black outlines on top.
Step 4: Inking and Coloring
-
Inking the outlines:
Once you are happy with your pencil sketches, trace over all the lines with your black fine liner. Don’t worry if lines aren’t perfectly straight; the wobble adds charm. -
Erase guidelines:
Wait a moment for the ink to set completely to avoid smudging, then gently erase all your pencil marks. -
Applying muted florals:
Take your terracotta or peach marker. Color in the petals of the top-left bud, top-center flower, the textured bloom, and the fan flower. -
Painting the greens:
Switch to your sage or teal marker. Color the large leaves on the central stems and the bottom fern. Leave the delicate branching stems (like the bottom right) uncolored for contrast. -
Adding final details:
Use the fine liner again to add tiny details over the color, like the veins in the large leaves or the stamen lines inside the open flower petals.
Now you have a stunning botanical reference page ready to inspire your future journal themes
Flower Doodle Grid Practice Page
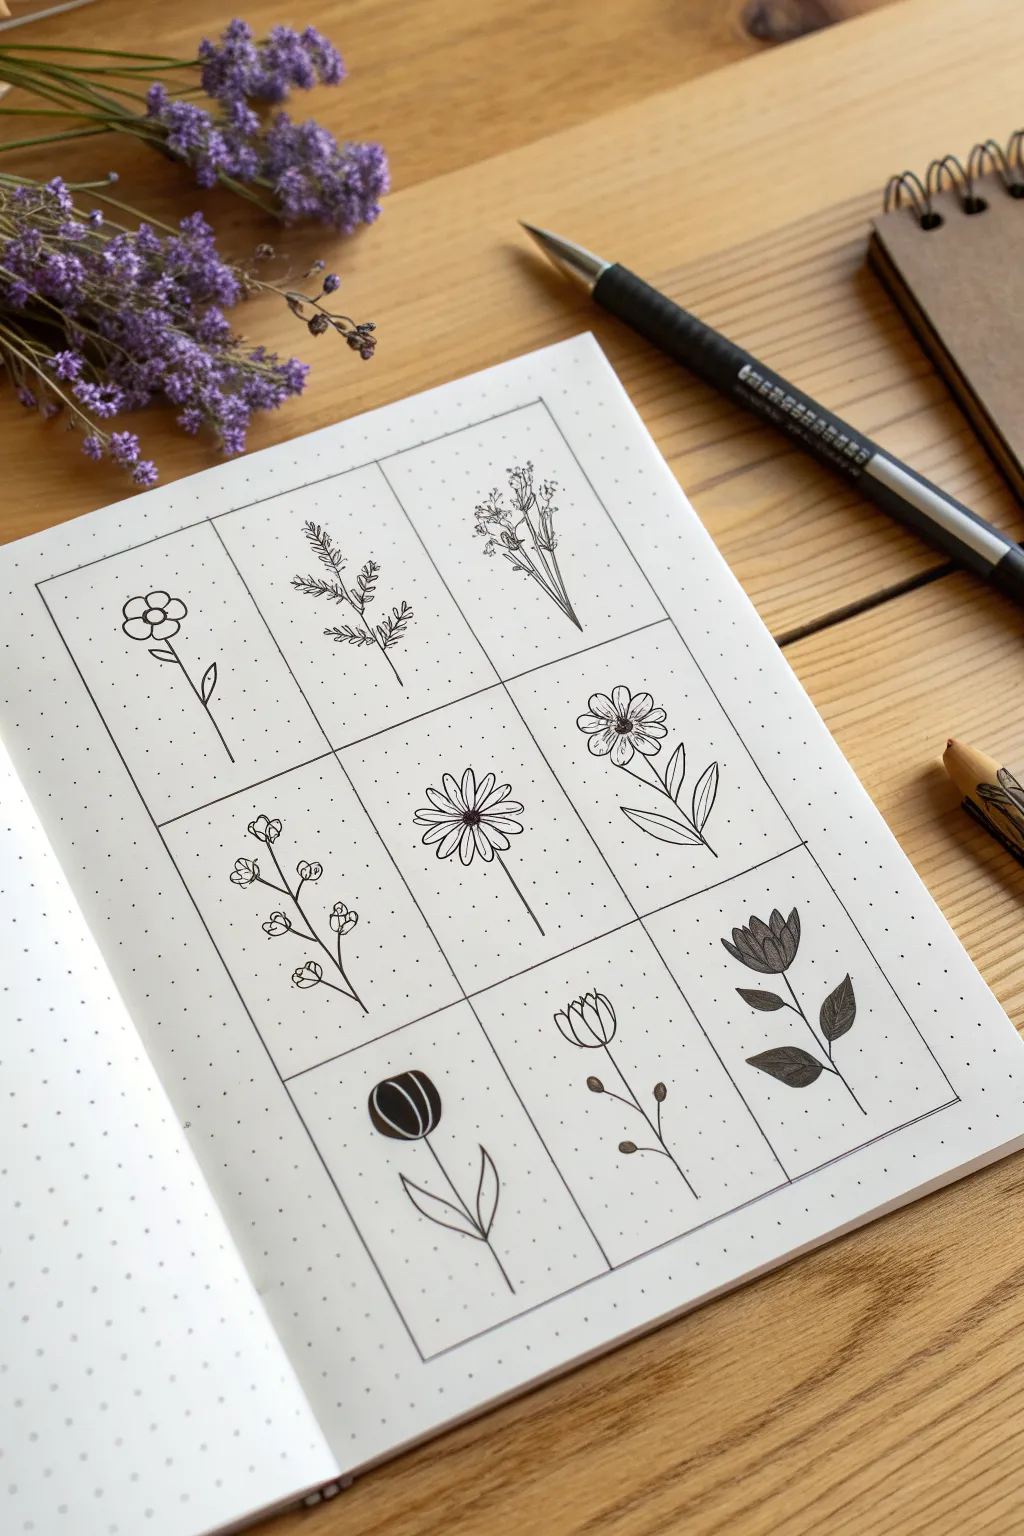
This structured practice page is a fantastic way to refine your floral drawing skills by breaking them down into manageable, bite-sized compositions. With just a grid and a fineliner, you can explore nine varying textures and petal shapes in one cohesive spread.
Step-by-Step
Materials
- Dotted or grid notebook (A5 size recommended)
- Black fineliner (0.3mm or 0.5mm)
- Ruler
- Pencil
- Eraser
Step 1: Setting the Structure
-
Draft the grid:
Begin by using your ruler and pencil to mark out a large 3×3 grid on your page. Aim for nine equal rectangles. If you are using a standard A5 dot grid journal, a size of about 6×8 dots per box usually works well to fill the page evenly. -
Ink the borders:
Once you are happy with the spacing, carefully trace over your pencil lines with the black fineliner to create the permanent grid. Let the ink dry for a moment, then gently erase the underlying pencil marks to keep the page clean.
Uneven Grid?
If your grid lines are shaky, don’t worry. Go over them one more time to thicken the border intentionally. A bolder frame often hides small wiggles and makes the delicate flowers pop more.
Step 2: Doodling the Top Row
-
Simple 5-petal flower:
In the top-left box, draw a small circle near the center-left. Surround it with five rounded petals. Draw a straight stem downwards and add a single, simple leaf on the right side. -
Leafy sprig:
For the middle box, draw a thin, slightly curved central stem. Starting from the bottom, add small, spiky leaves branching off in pairs. As you move up, make the leaves smaller to create a tapered fern-like effect. -
Wildflower cluster:
In the top-right box, draw three clustered stems branching from a single point at the bottom. Top them with tiny, irregular shapes to mimic buds or baby’s breath, keeping the linework loose and sketchy.
Step 3: Doodling the Middle Row
-
Budding branch:
In the left middle box, draw a curved stem that leans slightly right. Instead of open flowers, draw small, cup-shaped buds attached by tiny stems. Add detail by drawing a small ‘x’ or dot inside the opening of each bud. -
Classic Daisy:
Center a small circle in the middle box. draw long, narrow oval petals radiating outward. Try to keep them somewhat uniform in length. Finish with a straight vertical stem. -
Zinnia style bloom:
In the right box, start with a textured center made of tiny dots. Draw short, wide petals around it. Add a stem and two large, pointed leaves at the base, drawing a line down the center of each leaf for the vein.
Level Up: Add Color
Use a single pastel highlighter or watercolor brush pen to add a background shape (like a circle or blob) behind each flower. This adds depth without needing to color the flowers precisely.
Step 4: Doodling the Bottom Row
-
Contrasting Tulip:
In the bottom-left, draw a U-shape for the tulip head. Draw a curved line across the top to close it, then fill the bloom in solid black, leaving two thin white lines to suggest petal separation. Add a stem and two curved leaves at the base. -
Cup flower:
For the middle box, draw a U-shape again, but keep it open at the top. Draw three zig-zag spikes to close the top edge. Add a thin stem and draw two small, filled-in ovals on the sides for leaves. -
Dark petal bloom:
In the final box, draw a flower head with pointed petals, shading them carefully with vertical lines to make them appear dark gray or black. Add a stem and two distinct leaves, filling the leaves with close diagonal lines for texture. -
Final clean up:
Look over the entire grid. Erase any remaining pencil sketches and use your fineliner to thicken any grid lines that look uneven.
Now you have a charming reference sheet to look back on whenever you need doodling inspiration
Trackers Decorated With Mini Flower Doodles
This clean and elegant bullet journal spread combines functional monthly tracking with charming wildflower illustrations. The dotted grid layout makes it easy to keep lines straight while the floral accents add a touch of organic beauty to your planning routine.
Step-by-Step Tutorial
Materials
- A5 dotted notebook or bullet journal
- Fine liner pen (black, 0.3mm or 0.5mm)
- Pencil
- Eraser
- Ruler (preferably clear)
Step 1: Drafting the Grid Structure
-
Map out the month:
Begin by counting the horizontal and vertical dots on your page. Calculate the size needed for a standard monthly calendar grid (usually 5 or 6 rows deep and 7 columns wide). -
Mark corner points:
Using a pencil, lightly mark the four corners of your main calendar box on the right-hand page. Leave enough margin at the top for headers. -
Create the columns:
Divide the width by seven to determine the width of each daily box. Make small tick marks with your pencil to indicate where the vertical lines will go. -
Create the rows:
Divide the height by the number of weeks in the month (usually 5 or 6). Mark these horizontal intervals lightly. -
Extend to the left page:
Repeat this measuring process on the left-hand page if you are doing a two-page spread, or use the left page for notes and goals with a simpler column structure as seen in the reference.
Step 2: Inking the Layout
-
Draw the main lines:
Take your fine liner pen and ruler. Carefully trace over your pencil marks to create the permanent grid. I prefer to draw all vertical lines first, let them dry for a moment, and then do the horizontal lines to avoid smudging. -
Add the days of the week:
At the top of each column on the right page, write the days of the week. Use a simple, small serif font to match the minimalist aesthetic. -
Draw the header:
Above the grid, write the month name in a slightly larger, decorative script or serif font. -
Number the days:
In the top left or right corner of each daily box, write the numerical date using a very small, neat print.
Ink Confidence
Test your pen on a back page first. Some dotted journals have coated paper that makes ink dry slower, leading to hand smudges.
Step 3: Adding Floral Doodles
-
Sketch flower placement:
Look for empty spaces in your layout, such as the bottom margin or unused boxes at the end of the month. lightly sketch circle centers for your flowers. -
Draw simple petals:
For the daisy-style flowers, draw 5-6 teardrop shapes radiating from a central circle. Keep the lines somewhat loose to feel organic. -
Add stems and leaves:
Draw thin, single-line stems extending donward. Add small leaves in pairs along the stem as shown in the bottom left of the example. -
Create varied foliage:
Mix in some leafy branches without blooms. Draw a central curved line, then add small oval leaves alternating up the sides. -
Ink the doodles:
Go over your floral sketches with your fine liner. Don’t worry about being perfectly geometric; the charm lies in the hand-drawn look. -
Add tiny details:
Draw tiny floating petals or small dots around the flowers to fill negative space and add texture. -
Erase guidelines:
Wait until the ink is completely dry—give it a few minutes to be safe—then gently erase all remaining pencil lines for a crisp finish.
Seasonal Switch
Swap the daisies for holly in winter, maple leaves in autumn, or tulips in spring to keep your monthly theme relevant.
Now you have a beautifully organized month ready to be filled with plans and memories
Floral Wreaths and Circle Frames
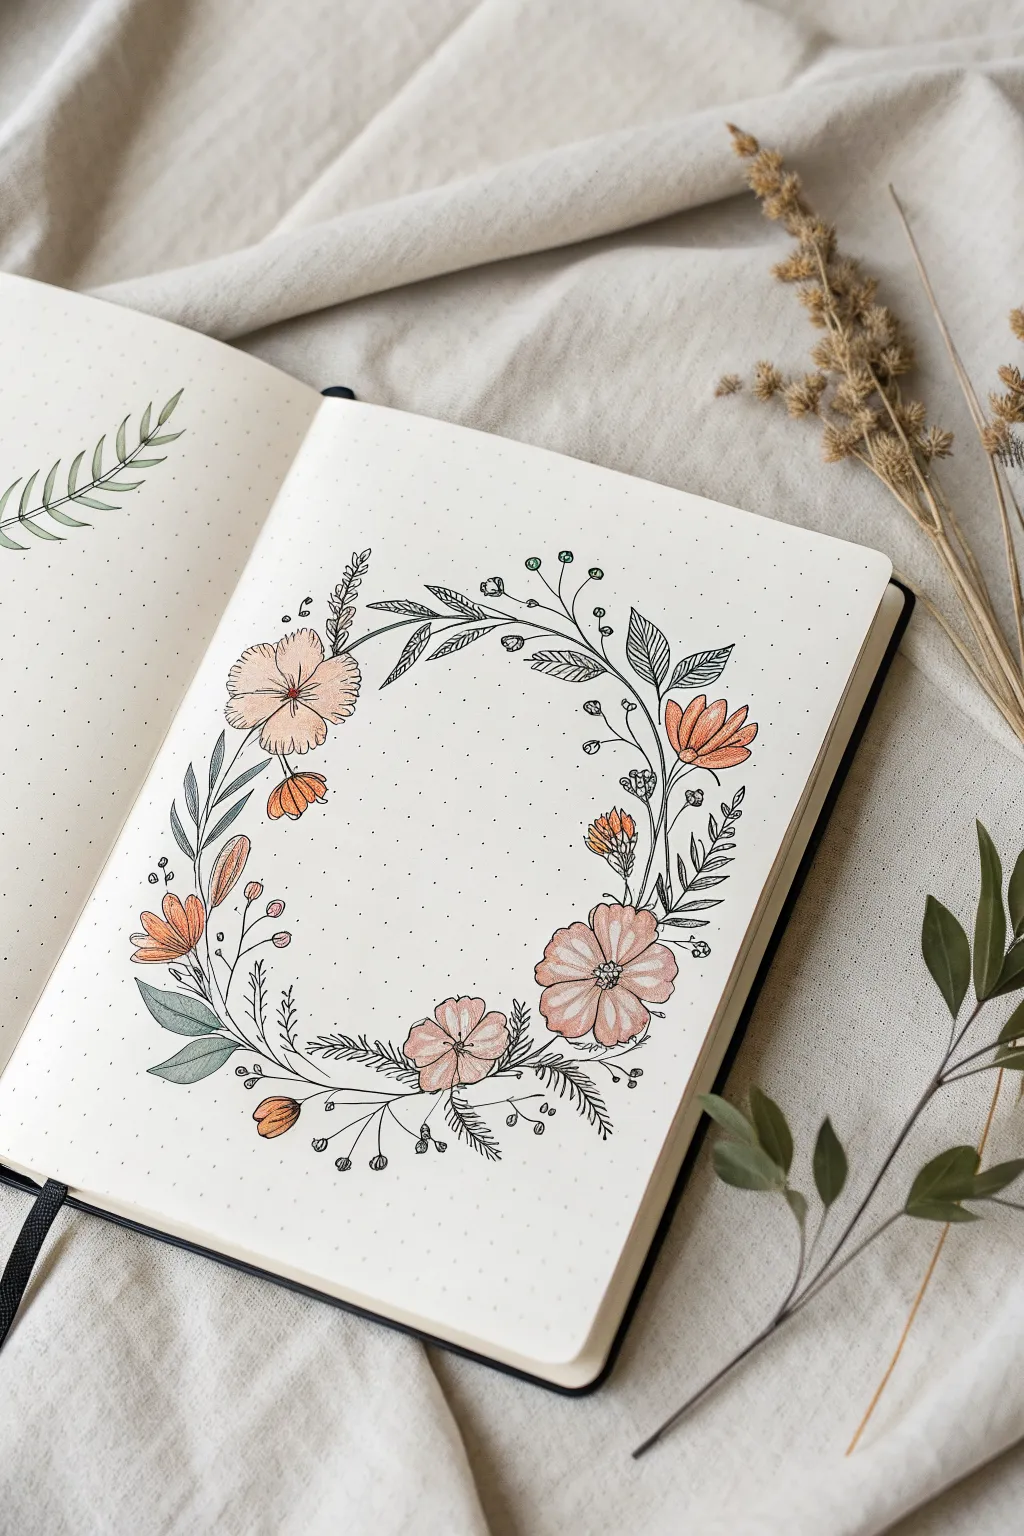
This delicate floral wreath combines fine-line ink doodles with soft washes of peach and sage green for a whimsical, nature-inspired frame. It’s the perfect centerpiece for a bullet journal title page or a framing element for a favorite quote.
Detailed Instructions
Materials
- Dotted bullet journal or sketchbook paper
- Pencil (HB or H)
- Eraser (kneaded preferred)
- Fine liner pens (sizes 005, 01, and 03)
- Colored pencils or alcohol markers (peach, coral, sage green)
- Compass or round object for tracing
Step 1: Planning the Structure
-
Establish the Foundation:
Begin by lightly tracing a circle in the center of your page using a compass or a round object as a guide. This will be the skeleton for your wreath. -
Mark Anchor Points:
Visualize the wreath as a clock face. Lightly sketch small circles at the 10 o’clock, 4 o’clock, and 5 o’clock positions to mark where the largest main flowers will sit.
Step 2: Drawing the Main Florals
-
Sketch the Large Blooms:
Using your pencil, sketch the three main flowers at your anchor points. Draw five or six rounded petals radiating from a central disk for each one. -
Add Secondary Blooms:
Sketch slightly smaller, tulip-shaped or half-open buds around the 2 o’clock and 8 o’clock positions to create balance without perfect symmetry. -
Create the Stem Structure:
Lightly draw the main curving stems that connect these flowers, following the curvature of your original circle guide but allowing them to weave naturally rather than perfectly tracing the line.
Natural Flow Pro-Tip
Don’t make your wreath perfectly circular. Let leaves and stems poke firmly outside the boundary line and into the center to create a wild, organic wildflower look.
Step 3: Inking the Outline
-
Outline the Petals:
Switch to an 01 fine liner. Carefully go over your pencil lines for the flower petals. Use a slightly shaky or broken line intentionally to give the petals a delicate, organic feel. -
Detail the Centers:
Draw small clusters of circles or stippled dots in the center of the open flowers. Add tiny lines radiating outward from the center into the petals to show texture. -
Ink the Stems:
Trace the main connecting stems. I like to thicken the line slightly on the downward curves to add a bit of calligraphic weight.
Ink Smearing?
If your fine liner smears when erasing, switch to a pigment-based liner like a Micron or wait a full 15 minutes before erasing. Test your eraser on a hidden page corner first.
Step 4: Adding Foliage & Filler
-
Draw Large Leaves:
Add pairs of larger, pointed leaves near the main blooms, particularly at the top right and bottom left. Draw a central vein in each leaf and add angled hatching lines for shading. -
Incorporate Fern Fronds:
Tuck small fern-like sprigs (lines with tiny, angled dashes) into the empty spaces, especially near the bottom of the wreath. -
Add Berry Sprigs:
Draw thin, branching stems topped with small circles to represent berries or buds. Place these at the outer edges to break up the round silhouette. -
Fill the Gaps:
Look for empty patches along the circle and add tiny clusters of dots or miniature wild grasses to make the wreath look lush and full. -
Erase Guidelines:
Once the ink is completely dry—wait at least five minutes to be safe—gently erase all your pencil marks and the original circle guide.
Step 5: Adding Color
-
Color the Blooms:
Using a peach or soft coral colored pencil, color the flower petals. Apply more pressure near the center of the flower for a darker tone and fade out to white at the tips for a gradient effect. -
Shade the Buds:
Color the smaller, closed buds with a deeper orange or terracotta tone to make them pop against the lighter open flowers. -
Tint the Leaves:
Use a sage green pencil for the larger leaves. Unlike the detailed shading on the flowers, keep the leaf coloring light and airy, perhaps leaving some white space. -
Highlight the Berries:
Add a tiny touch of green or teal to the small berry circles, but keep them very subtle so they don’t distract from the peach blooms. -
Final Contrast Check:
If any lines got lost under the color, gently re-trace them with your 005 pen to bring back the crispness of the illustration.
You now have a beautiful, hand-drawn frame ready to hold your monthly goals or favorite memory
Jars, Vases, and Potted Flower Doodles
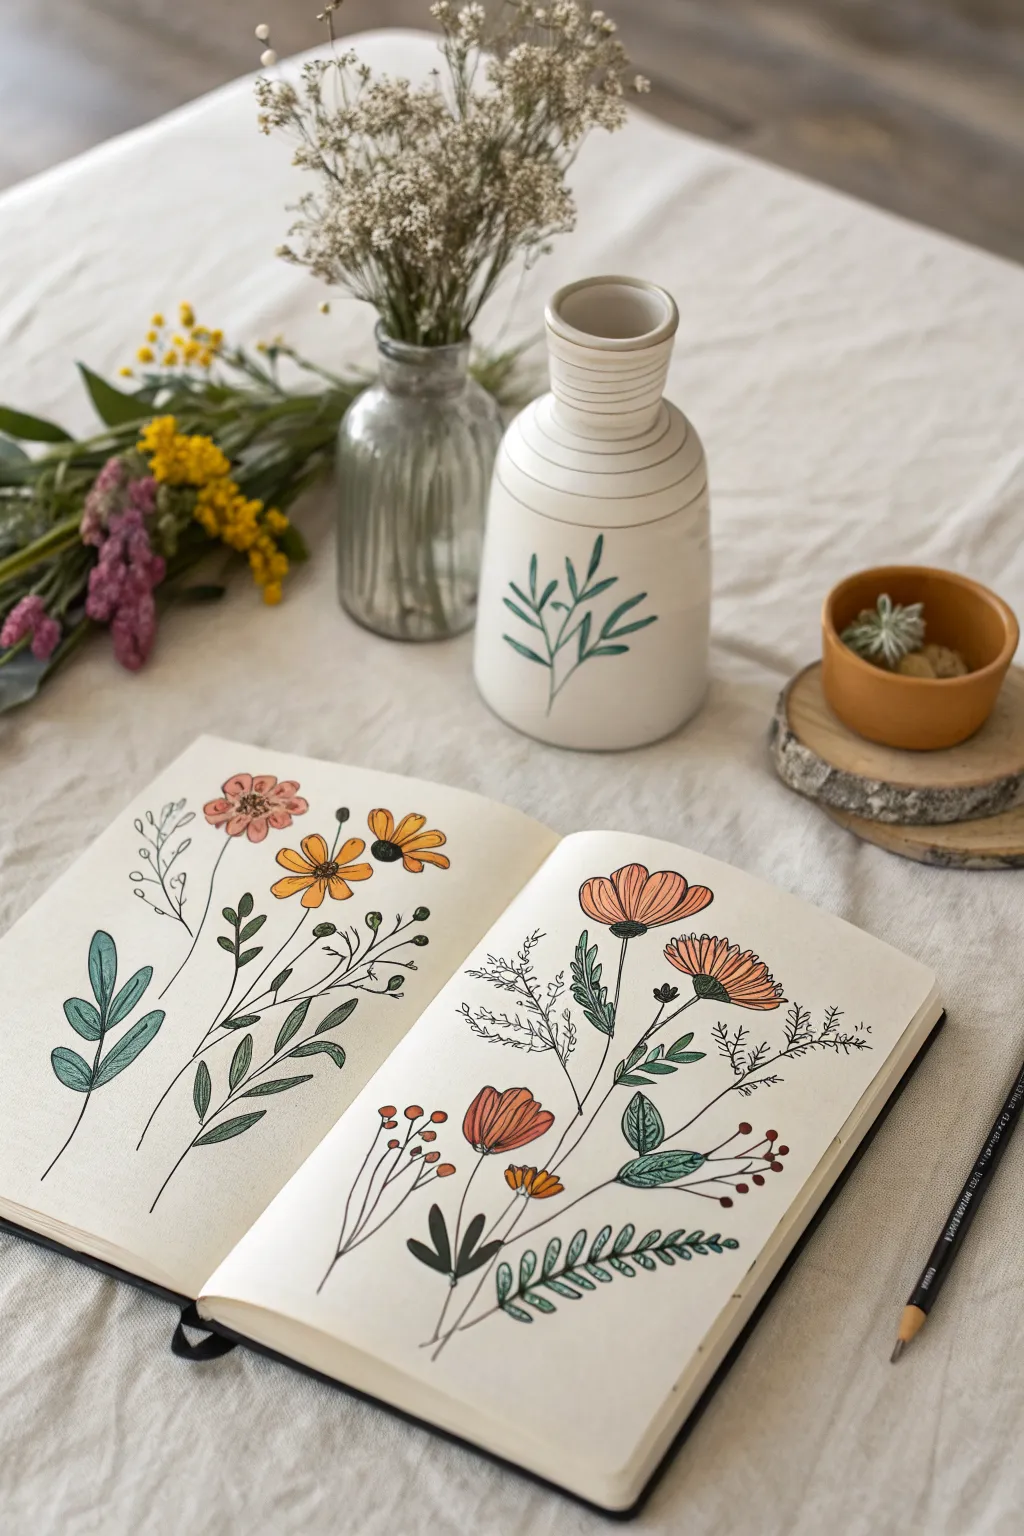
Capture the delicate beauty of a wildflower meadow with this charming sketchbook spread featuring an array of drawn stems and blooms. The project combines fine line work with soft splashes of color to create a breezy, organic feel perfect for your art journal.
Step-by-Step Guide
Materials
- Sketchbook with cream or white paper
- Fine liner pen (black, 0.3mm or 0.5mm)
- Pencil (HB for sketching)
- Eraser
- Colored markers or colored pencils (coral, yellow-orange, sage green, deep green)
- Ruler (optional)
Step 1: Planning and Layout
-
Lightly sketch the stems:
Begin by sketching the main stem lines lightly with your HB pencil. On the left page, draw three main vertical curves radiating upward. On the right page, plan for four distinct plant groupings, varying their heights to create a natural, unforced composition. -
Block in flower shapes:
At the top of your pencil stems, lightly sketch circles and ovals to represent where the flower heads will go. Don’t worry about petals yet; just establish the size and placement. -
Mark leaf positions:
Along the stems, make small tick marks or light leaf shapes to indicate where the greenery will sit. This helps ensure your composition feels balanced before you commit to ink.
Step 2: Inking the Left Page
-
Draw the central coneflower:
Starting with the middle stem on the left page, use your fine liner to draw the petals of the orange flowers. Give them slightly ragged edges for a natural look, and dot the centers to create texture. -
Add the leafy stem:
For the leftmost plant, draw a sturdy stem and add substantial, oval-shaped leaves in pairs. Draw a line down the center of each leaf for definition. -
Create the delicate pink flower:
On the far left stem, draw a simple five-petal flower head. Keep the lines loose. Add a smaller, wispy branch with tiny leaves next to it for contrast. -
Detail the fern-like fronds:
Between the main flowers, add finer, fern-like sprigs. Use quick, short strokes to mimic the feathery texture of wild grasses.
Smudge Prevention
Ink smearing is the enemy! Place a scrap piece of paper under your drawing hand as you work to protect the pencil sketch and fresh ink from oils or friction smears.
Step 3: Inking the Right Page
-
Ink the large poppies:
Focus on the large blooms on the right page. Draw wide, cup-shaped petals with vertical lines inside to suggest folds or texture. Make the centers dark and prominent. -
Add the berry sprigs:
Near the bottom left of this page, draw thin stems branching out into small clusters of circles for berries. I usually group these in threes or fours. -
Draw the textured leaves:
For the bottom-right plant, draw a long stem with many small, paired leaves, resembling a fern or vetch plant. Be patient here; repetitive leaf shapes create a lovely rhythm. -
Sketch the filler foliage:
Fill in the background gaps with tall, thin stems topped with tiny, branching details to look like dried baby’s breath or wildflowers. -
Erase pencil guides:
Once the ink is completely dry—give it a few minutes to be safe—gently erase all your pencil sketches to reveal the clean line art.
Level Up: Layering
After the marker ink dries, use colored pencils in a slightly darker shade to add shadows at the base of the petals and leaves for added depth and realism.
Step 4: Adding Color
-
Color the main blooms:
Select a coral or soft pink marker. Fill in the poppy-like flowers and the small round flower on the left page. You don’t need to fill every white speck; a little white space keeps it airy. -
Add yellow highlights:
Use a yellow-orange marker for the daisy-like flowers on the left and the small bud centers on the right. This warm tone brings sunshine to the spread. -
Shade the leaves:
Using a sage green or muted teal, color the larger leaves. For the fern-like leaves on the bottom right, try coloring only half of each tiny leaf for a stylized, graphical effect. -
Detail the berries:
Color the small berry clusters with a reddish-orange hue. This small pop of red helps guide the eye across the bottom of the page. -
Final touches:
Review your drawing. If any stems look too thin or disconnected, carefully thicken the lines with your pen. Add tiny dots around the flower heads for pollen or extra texture.
Close your sketchbook knowing you’ve preserved a little piece of a summer garden on paper
Continuous-Line and Abstract Flower Doodles
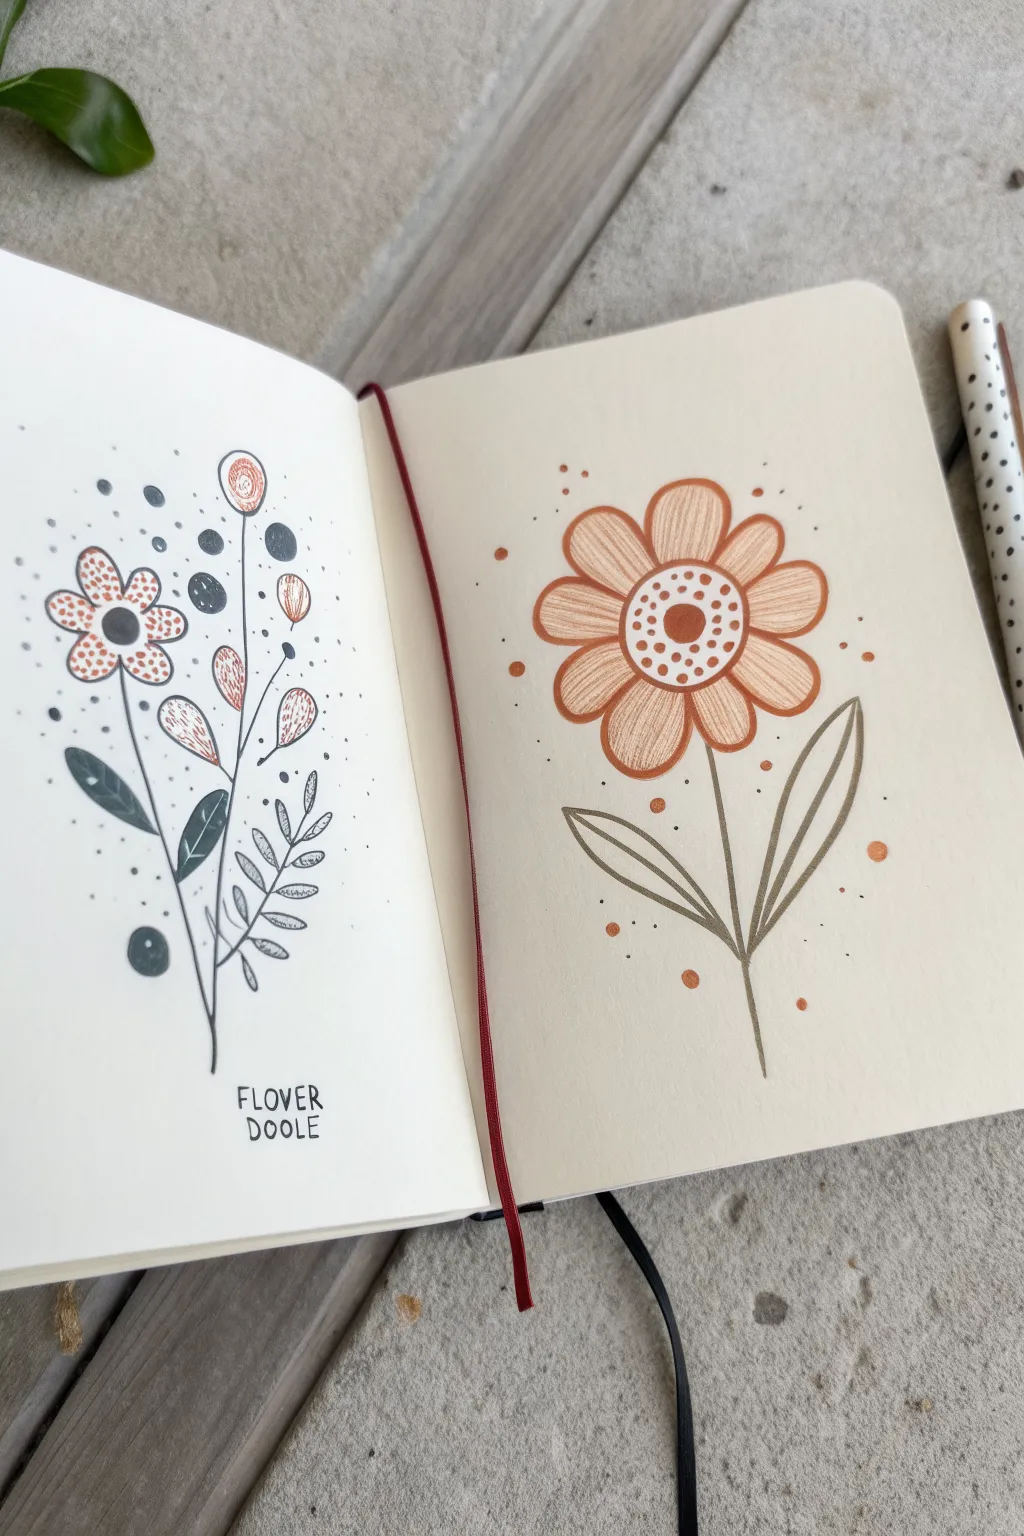
These charming flower doodles combine bold outlines with delicate textures to create a playful, folk-art aesthetic ideal for journaling. One page features a delicate wildflower sprig with varied leaf shapes, while the other showcases a warm, statement daisy with radiating petals.
How-To Guide
Materials
- Cream or off-white sketchbook paper
- Fine-liner pen (black, 0.3mm or 0.5mm)
- Medium-tip marker or brush pen (burnt orange/terracotta)
- Medium-tip marker or brush pen (muted teal/dark grey-blue)
- Pencil and eraser (optional for sketching)
Step 1: The Wildflower Sprig (Left Page)
-
Draw the main stem:
Start near the bottom center of the page and draw a slightly curved, vertical line upward for your stem. Towards the top, let it branch off into two thinner forks. -
Draft the primary flower:
On the left fork, draw a five-petaled flower shape. Keep the petals rounded and distinct. Add a solid black circle in the center. -
Add texture to the petals:
Using your orange marker, fill the petals with tiny, dense stippled dots. Leave a tiny bit of white space near the edges for a lighter feel. -
Create floating buds:
Draw three circles of varying sizes around the upper right of the stem. Draw a thin line connecting each to the main stem. Give the largest circle a spiral center with your orange marker. -
Draw the lower leaves:
Near the base of the stem, draw two large, oval-shaped leaves. Use your dark teal marker to color the left leaf solid. For the right leaf, draw an outline and subtle vein details instead of filling it in. -
Add upper foliage:
Midway up the stem, draw two smaller tear-drop shapes. Fill these with rough, diagonal orange hatching lines to create contrast against the teal below. -
Sketch the fern leaf:
Branching out to the right side near the bottom, draw a curved line with many small, oval leaflets attached, resembling a fern frond. Keep this in black ink for a illustrative look. -
Embellish with dots:
Sprinkle small black dots and slightly larger grey or teal circles randomly around the entire floral arrangement to act as ‘pollen’ or decorative confetti. -
Lettering:
At the very bottom, write ‘FLOWER’ and ‘DOODLE’ stacked on top of each other in a simple, all-caps sans-serif to label your sketch.
Uneven Ink Flow?
If your stippling or hatching looks messy, slow down. Lift the pen completely between dots to prevent bleeding, and use light pressure for consistent line weights.
Step 2: The Retro Daisy (Right Page)
-
Outline the center:
On the right page, draw a medium-sized circle in the center of the paper. Inside this, draw a smaller solid orange circle. -
Decorate the disk:
Between the inner orange dot and the outer circle rim, add a ring of small open circles. This creates a detailed flower center. -
Draw the petal shapes:
Sketch eight to ten large, rounded petals radiating from the center. Try to keep them somewhat symmetrical, but don’t worry about perfection; organic shapes look better here. -
Shade the petals:
I like to use a hatching technique here. Take your orange pen and draw fine lines starting from the center of the flower and fading out about halfway up each petal. -
Add the stem:
Draw a straight, thin line extending downward from the bottom petals. Keep it simple to let the flower head be the star. -
Draw the leaves:
Add two large, elongated leaves near the bottom of the stem, one on each side. Draw a central vein down the middle of each leaf. -
Final leaf details:
Using a grey or muted brown tone, carefully trace over the leaf outlines to give them a softer look compared to the crisp black ink of the flower center. -
Add atmospheric dots:
Finish the piece by scattering tiny orange dots of varying sizes around the petals and leaves, focusing on the negative space to frame the illustration.
Add Dimension
Use a white gel pen to add tiny highlights on the dark teal leaves or the center of the orange flower for a pop of brightness.
Close your sketchbook and enjoy the cheerful spread you’ve created

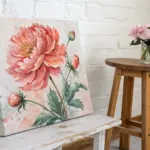
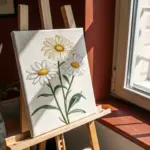
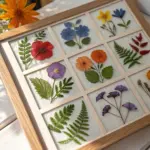
Have a question or want to share your own experience? I'd love to hear from you in the comments below!