
I love how scratchboard gives you that instant high-contrast magic—dark, dramatic backgrounds with bright lines that feel super satisfying to reveal. If you’re brand new, these easy ideas stick to bold shapes, simple linework, and repeatable marks so you can relax and enjoy the scratching.
Butterfly Silhouette With Simple Wing Patterns
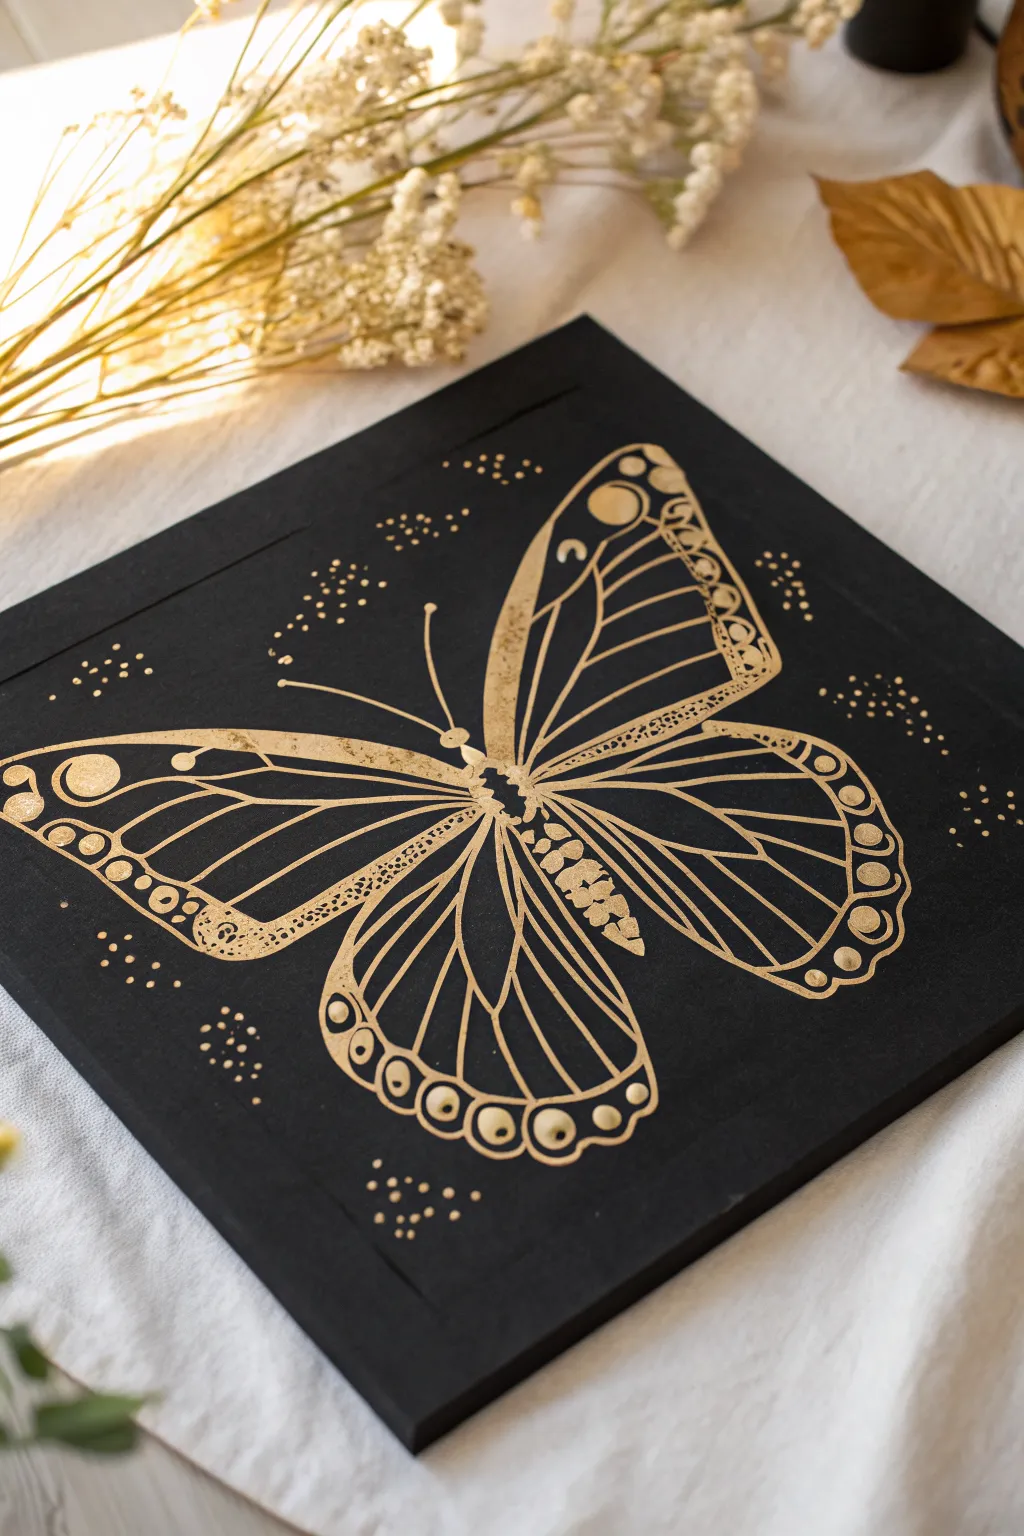
Capture the delicate beauty of a butterfly with this striking scratchboard project that uses negative space to bold effect. The high contrast between the matte black surface and the metallic gold underlayer makes even simple lines look incredibly elegant.
Step-by-Step Tutorial
Materials
- Gold scratchboard paper (black coating over gold foil) or DIY scratchboard
- Scratchboard tool set (scratch knife, stylus)
- White transfer paper or graphite paper
- Pencil (HB or H)
- Ruler
- Reference photo or butterfly stencil
- Soft brush (for sweeping away dust)
- Painter’s tape
Step 1: Planning Your Composition
-
Prepare your workspace:
Set up in a well-lit area. Scratchboard work requires good visibility to ensure your lines are precise. Tape the corners of your scratchboard to your working surface to prevent it from sliding around. -
Create or transfer the design:
If you aren’t confident sketching freehand, print a simple butterfly outline. Place white transfer paper between the printout and the black board. Trace the main outlines—the body, antennae, and the four wing sections—using light pressure with a pencil. -
Refine the sketch:
Lift the transfer paper to check your lines. You should see faint grey lines on the black surface. If any lines are missing, carefully realign and trace again. -
Plan the patterns:
Before scratching, lightly sketch the internal wing patterns with your pencil directly on the black surface. Map out the long veins in the wings and the circular border designs along the edges.
Keep it Clean
Place a piece of clean scrap paper under your drawing hand while you work. This protects the matte black surface from hand oils and prevents accidental nail scratches.
Step 2: Scratching the Main Structure
-
Outline the wings:
Using a standard scratch knife or a sharp stylus, gently scratch along your transferred perimeter lines. Keep your pressure consistent to reveal a bright, clean gold line. -
Define the body:
Scratch the central body of the butterfly. Instead of one solid block, use small, choppy strokes or stippling (dots) to give the thorax and abdomen a fuzzy, textured appearance. -
Add the antennae:
For the antennae, use a swift, confident stroke to prevent shakiness. Add a small dot at the tip of each one. -
Carve the primary veins:
Working from the body outward, scratch the long, curved veins inside the upper and lower wings. These lines shouldn’t be perfectly straight; let them curve naturally with the shape of the wing.
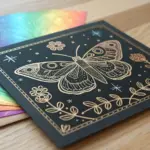
Level Up: Cosmic Wings
Instead of plain gold, try using a rainbow or holographic scratchboard underneath. The changing colors will give your butterfly a psychedelic, celestial vibe.
Step 3: Adding Decorative Details
-
Create the wing borders:
Scratch a second line parallel to the outer edge of the wings to create a thick border channel. This frames the inner patterns beautifully. -
Add the circles:
Inside the wing borders and at the tips of the upper wings, scratch small circles. You can outline them first and then gently scrape away the gold inside if you want them solid filled. -
Detail the lower wing edges:
Along the bottom edge of the lower wings, scratch a series of semi-circles or scallops. Inside each scallop, place a small gold dot for a jewelry-like effect. -
Thickening connecting lines:
Go back over the main structural lines where the wings attach to the body. Thicken these areas slightly to give the butterfly more visual weight and stability. -
Texture the upper wing border:
For the thick border on the top wing, use a stippling technique. Poke the surface repeatedly with the tip of your tool to create a condensed cluster of tiny dots, adding grit and texture.
Step 4: Final Touches
-
Clean your surface:
Use a soft brush to sweep away all the black scratch dust. Avoid using your hand, as oils from your skin can smudge the matte black surface. -
Add atmospheric sparkles:
To make the butterfly feel magical, add clusters of dots floating around the wings. Group them in loose clouds of varying sizes—some tiny pinpricks and some larger distinct dots. -
Assess the contrast:
Stand back and look at your piece. If any gold areas look dull, gently go over them again to make sure you’ve fully removed the black coating. -
Review line weights:
I like to finalize the piece by varying my line weights. Make the outer silhouette slightly bolder than the intricate interior veins to help the shape pop.
Now step back and admire how the light catches the gold reveal to bring your butterfly to life


Sunflower With Bold Petals
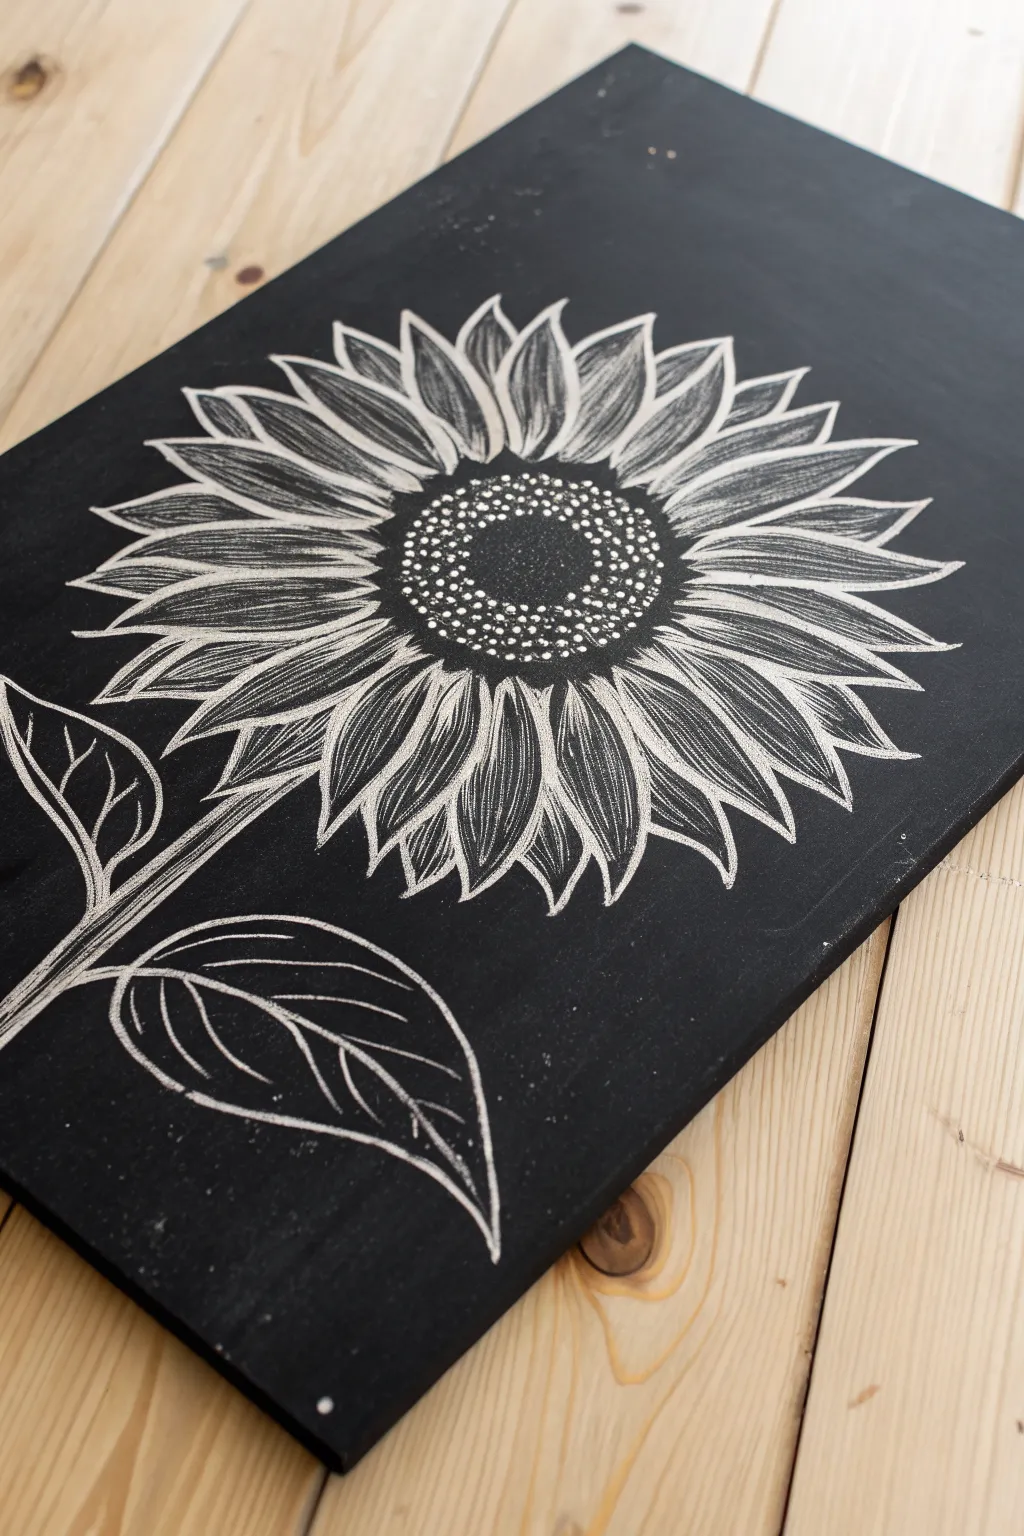
This striking project captures the organic beauty of a sunflower using high contrast and simple line work. By scratching away the black surface, you’ll reveal bright petals and detailed seeds for a dramatic, graphic look.
Step-by-Step Guide
Materials
- Black scratchboard sheet (8×10 or similar size)
- Scratchboard tool set (specifically a standard scratch knife and distinct liner)
- Graphite transfer paper (white or light grey)
- Pencil (HB or 2H)
- Artist tape or masking tape
- Soft brush or drafting brush (for sweeping away debris)
- Reference photo or sketch of a sunflower
Step 1: Preparation and Outline
-
Prepare your workspace:
Set up a clean, flat surface with good lighting. Scratchboard creates fine dust, so having a designated area is helpful. Place your scratchboard sheet black-side up. -
Create or select a design:
Sketch a simple sunflower design on a separate piece of paper. Focus on a large central disc surrounded by two layers of petals. Add a slightly curved stem and two large leaves at the bottom. -
Transfer the design:
Place the transfer paper (chalky side down) onto the scratchboard, then tape your sketch on top. Gently trace the main outlines of the petals, center, and leaves with a pencil. Don’t press too hard to avoid indented grooves. -
Check the transfer:
Lift one corner of your sketch to ensure the faint white lines are transferring to the black surface. They should be just visible enough to guide your scratching.
Oops! Made a mistake?
Did you scratch where you shouldn’t have? You can fix small errors by carefully reapplying black India ink with a fine brush over the mistake. Let it dry completely before re-scratching.
Step 2: Scratching the Center
-
Outline the center:
Using a fine-point scratch tool, carefully scratch the circular outline of the flower’s center. Keep your hand steady and pull the tool towards you for better control. -
Create the seed texture:
Inside the center circle, use a stippling technique. Gently press the tip of your tool down to create small white dots. Group them densely near the outer edge of the center circle. -
Refine the inner ring:
As you move toward the very middle of the flower center, space the dots out slightly. This variation in density creates a sense of depth and dimension. -
Add highlights:
Pick a few seeds to highlight by scratching slightly larger or brighter dots, giving the impression of light catching the texture.
Go for the Gold
For a stunning twist, try using a gold foil scratchboard instead of white. The underlying layer will shine metallic gold when scratched, giving your sunflower a warm, sun-drenched glow.
Step 3: Petals and Leaves
-
Outline the petals:
Begin scratching the outlines of the petals. Start from the center and sweep outward to the tip of each petal. The petals should have pointed tips and overlap slightly. -
Add petal veins:
Inside each petal shape, add internal texture lines. I find it effective to draw long, sweeping lines that follow the curve of the petal, leaving some black space between them for contrast. -
Layer the petals:
If you have ‘back’ petals (petals that look like they are behind the main ones), scratch their outlines now. Keep the internal shading simpler on these to push them visually into the background. -
Scratch the stem:
Create the stem using two parallel lines extending from the bottom of the flower head. Fill the space between them with vertical textured strokes to mimic fibrous plant material. -
Outline the leaves:
Scratch the broad shapes of the leaves attached to the stem. Give them a nice, organic curve. -
Detail the leaf veins:
Draw a central vein down the middle of each leaf. Branch smaller veins off from the center toward the leaf edges. -
Shade the leaves:
Add directional hatching marks inside the leaf sections. Ensure these marks follow the visual flow of the leaf surface to make them look curved rather than flat.
Step 4: Final Touches
-
Clean surface:
Use your soft brush to gently sweep away all the black scratchings and dust. Do not use your hand, as oils from your skin can smudge the board. -
Evaluate contrast:
Step back and look at your piece. If certain areas look too dark, go back and add more hatch marks or thicken the existing white lines to brighten them up. -
Seal the artwork (optional):
To protect the delicate scratched surface, you can lightly spray the finished piece with a spray fixative designed for scratchboard or dry media.
Now you have a bold botanical illustration ready to display
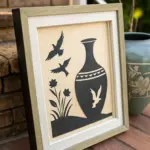

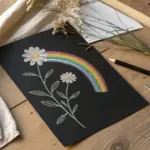
Easy Vine Border Doodles
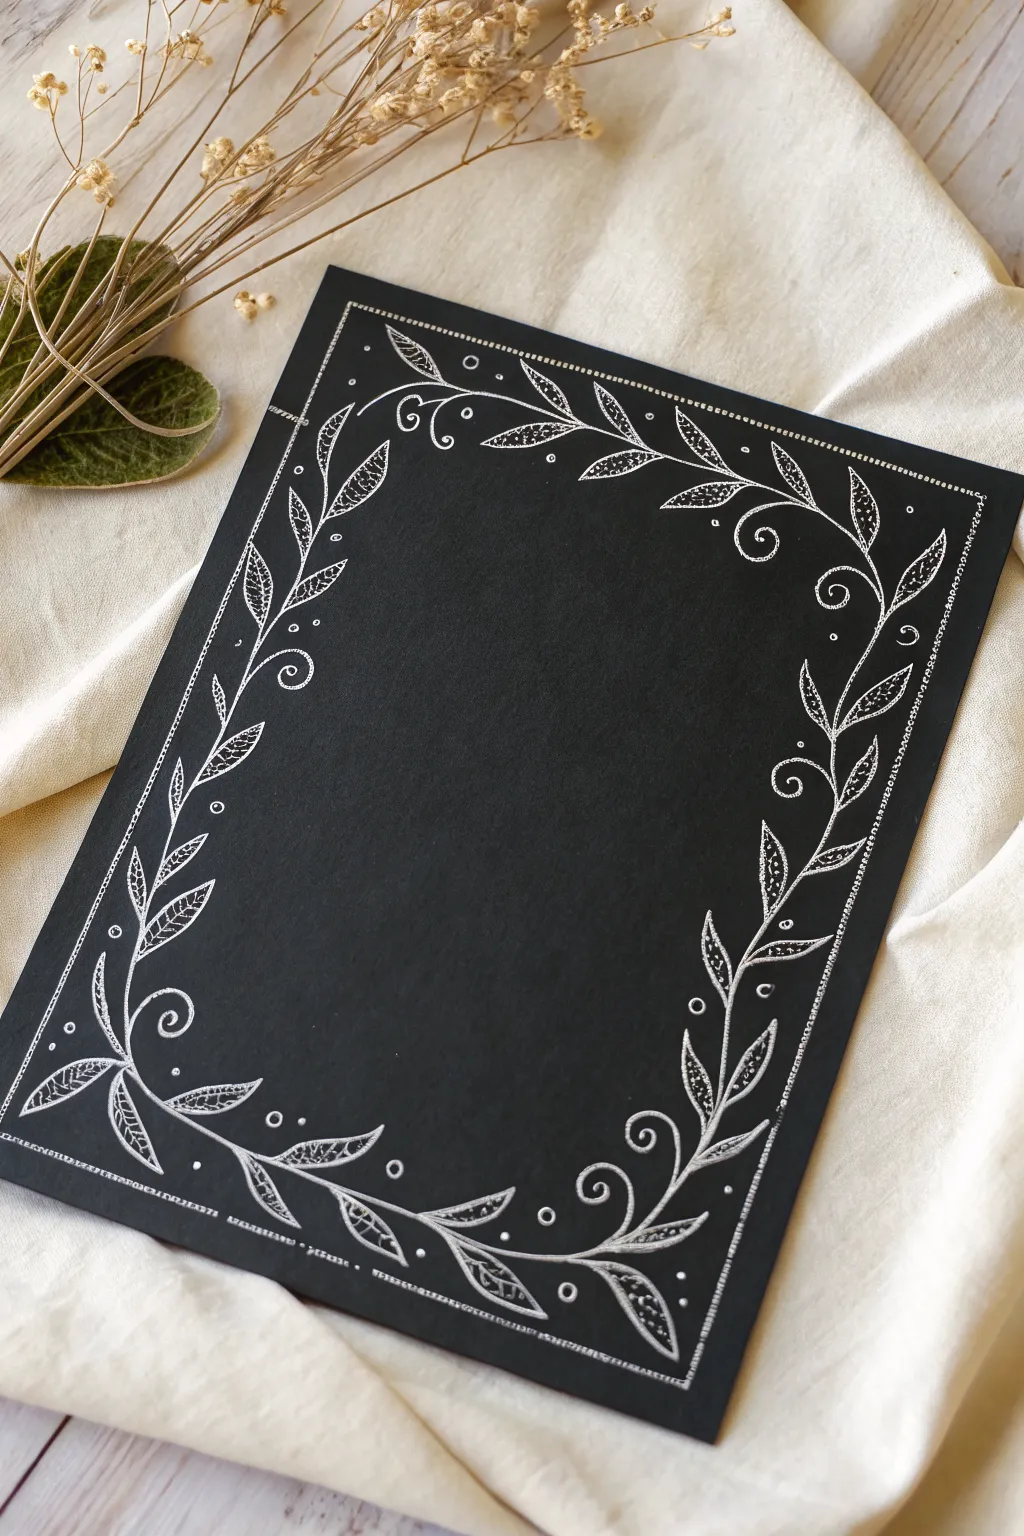
This classic vine border transforms a plain black scratchboard into an elegant frame suitable for calligraphy or a central illustration. The high-contrast white lines on the matte black surface create a sophisticated look that is deceptively simple to achieve.
Step-by-Step Guide
Materials
- Black scratchboard sheet (approx. 5×7 or 8×10 inches)
- Scratch knife holder with standard cutter nib
- Scratchboard micro-knife or fine-point stylus (optional for dots)
- Ruler
- White transfer paper or soft white pastel pencil (for sketching)
- Soft brush (for sweeping away dust)
Step 1: Planning and Guidelines
-
Establish the outer boundary:
Begin by deciding how wide you want your border to be. Use a ruler and your transfer paper or a very light touch with a pastel pencil to mark a rectangle about half an inch from the edge of your board. -
Sketch the vine path:
Lightly sketch a flowing, wavy line inside your rectangular guide. This line doesn’t need to be perfectly continuous; think of it as four separate S-curves that meet at the corners or gently overlap. -
Place the leaves:
Along your wavy vine stem, mark the positions for your leaves. Use alternating placement—one on the left, then one on the right—to create a balanced, natural rhythm. -
Add the flourish details:
Sketch in the large spiral curls (tendrils) at the corners and occasionally along the sides. These swirls should fill the negative space between the leaves.
Step 2: Scratching the Main Design
-
Outline the stems:
Using your standard scratch knife, carefully trace over your sketched vine stems. Apply medium pressure to get a clean, solid white line. Always pull the tool towards you for better control. -
Define the leaf shapes:
scratch the outline of each leaf. Aim for a simple almond or teardrop shape, tapering to a sharp point at the end. -
Create the leaf veins:
Inside each leaf outline, draw a central vein line running from the base almost to the tip. This adds structure to your foliage. -
Texture the leaves:
This is the most time-consuming but rewarding part. Using tiny, short flicks or stippling (dots), fill in the interior of the leaves. Don’t scratch it completely white; leave some black showing to suggest texture and depth. -
Execute the curls:
Carefully scratch the spiral tendrils you sketched earlier. Rotate your paper as you work on these curves so your hand creates a natural arc without awkward wrist angles.
Fixing Slips
If you scratch a line incorrectly, don’t panic. Use a black permanent marker or special scratchboard repair ink to cover the mistake, let it dry completely, and re-scratch.
Step 3: Adding Decorative Accents
-
Add the outer dotted border:
Go back to your initial rectangular ruler guide. Instead of a solid line, create a border of small, evenly spaced dots or tiny dashes all the way around the artwork. -
Incorporate floating circles:
Throughout the design, identify empty black spaces near the vines. Scratch small, open circles here to add whimsy and fill the composition. -
Add solid dots:
Intersperse solid white dots (stippling) near the open circles and around the leaf tips. This variation in dot style creates visual interest. -
Refine the line weight:
Look at your main vine stems again. I like to thicken the line slightly where the stems curve or join a leaf, giving the vine a more organic, weighted feel. -
Clean and polish:
Use your soft brush to gently sweep away all the black scratch dust. If any sketch lines are still visible, gently erase them or wipe them away with a soft, dry cloth.
Control Your Curves
Always pull the scratch tool towards you, never push it away. Rotate the actual board constantly so you are always pulling the knife in a comfortable, downward direction.
Now you have a beautifully framed space ready for a quote or central drawing.


Cat Face Close-Up With Whiskers
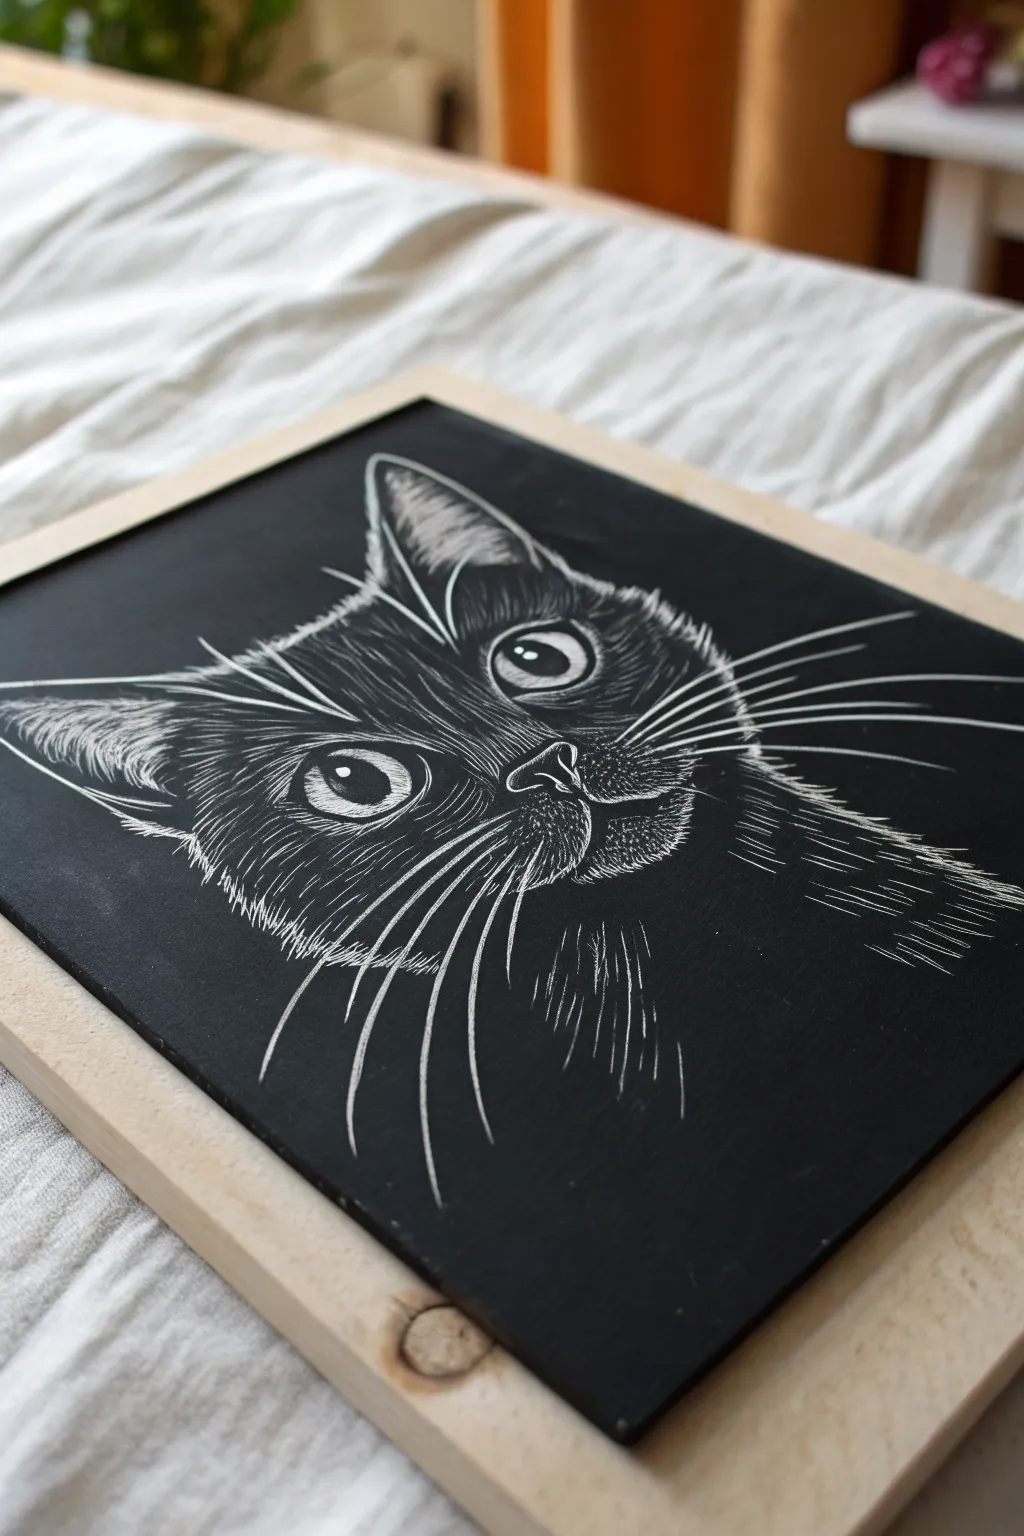
Capture the intense gaze of a curious cat with this striking scratchboard project that focuses on fur texture and prominent whiskers. The high contrast of white lines against a deep black background makes the eyes pop and gives the fur a realistic, touchable quality.
Step-by-Step
Materials
- Black scratchboard sheet (8×10 or 5×7 inches)
- Scratch knife holder with varied nibs (pointed and curved)
- White transfer paper or white chalk
- Ballpoint pen or stylus
- Reference photo of a cat face
- Soft brush or drafting brush (for removing debris)
- Fine grit steel wool (optional for softening)
- Workable fixative spray (optional)
Step 1: Preparation and Outline
-
Prepare your reference:
Start by selecting a reference photo that matches the composition: a close-up of a cat’s face angled slightly to the side. Crop your image to focus specifically on the eyes, nose, and the spread of whiskers just like the example. -
Transfer the guide:
Place your reference photo on top of the scratchboard with a sheet of white transfer paper sandwiched in between. Use a stylus or ballpoint pen to trace the main outlines: the ears, the large oval eyes, the nose triangle, and the general shape of the head. -
Mark key features:
Don’t scratch any fur yet. Instead, lightly mark the pupils within the eyes and trace single guidelines for where the major whisker groups will eventually go. Lifting the paper occasionally helps ensure your lines are visible but faint.
Oops! Too much white?
Make a mistake? Don’t panic. You can repair over-scratched areas by carefully painting over them with a small brush and India ink. Let it dry completely, and it’s like a fresh canvas.
Step 2: The Eyes and Nose
-
Outline the eyes:
Using a standard pointed scratch tool, carefully scratch the outline of the eyes. Keep this line relatively thin and clean. Outline the pupils in the center. -
Add eye highlights:
Scratch a small, crisp circle or shape in the upper section of each pupil to create the ‘catchlight.’ This instantly brings the cat to life. Gently scratch the iris area around the pupil, using tiny stippling dots or very short lines to create depth, leaving the pupil pitch black. -
Define the nose:
Outline the nose shape. Use small, curved hatching strokes on the top of the nose bridge to suggest short fur. Keep the nostrils dark, only highlighting the upper rim of the nostril opennings.
Step 3: Fur Texture
-
Start the forehead:
Switch to a curved blade if you have one, or use the side of your pointed tool. Begin scratching the fur on the forehead between the ears. Use short, upward strokes that flick outward at the end to taper the hair. -
Work on the ears:
For the ears, follow the direction of growth. The fur on the outer crisp edge should be very short and bright. Inside the ear, use longer, sweeping strokes to show the fluffier tufts. I find it helps to rotate the board constantly to get the right angle for your hand. -
Create cheek volume:
Move down to the cheeks. The strokes here should curve outward from the nose towards the ears. Vary your pressure—press harder for bright white highlights on the cheekbones, and lighter for the shadowed areas. -
Detail the muzzle:
The muzzle area (where whiskers grow) needs short, distinct dots or tiny dashes. This texture differentiates the skin of the whisker pads from the surrounding fur. -
Blend the neck:
Scratch downward strokes for the neck and chest area. Let these lines fade out into the black background at the bottom, creating a vignette effect rather than a hard stopping line.
Level Up: Color Tinting
Once finished, use scratchboard inks or watered-down watercolors to gently tint the eyes green or amber. The color will stick to the exposed clay but won’t show on the black surface.
Step 4: Whiskers and Finishing Touches
-
Plan the whiskers:
Look at where you traced your whisker guides. Ensure the path is clear. Whiskers require confidence because they are long, continuous strokes. -
Commit to the stroke:
Take a deep breath and use a smooth, fast motion to scratch the long whiskers extending from the muzzle. Press firmly at the base and lift your hand slightly as you reach the tip to make the line taper off. -
Add eyebrow whiskers:
Don’t forget the longer, thinner hairs above the eyes. These should be slightly more delicate than the muzzle whiskers. -
Clean up debris:
Use your soft brush to sweep away all the black scrapings. Check the contrast; if the face needs to be brighter, go back over the highlighted areas (like the forehead and cheeks) with more strokes to increase the ‘white’ value. -
Refine edges:
Use a fine point tool to add tiny stray hairs breaking the outline of the ears and head. This prevents the cat from looking like a cutout and makes it look soft.
Display your scratchboard art on a small easel or frame it without glass to show off the unique texture you created
BRUSH GUIDE
The Right Brush for Every Stroke
From clean lines to bold texture — master brush choice, stroke control, and essential techniques.
Explore the Full Guide
Owl Eyes and Feather Dots
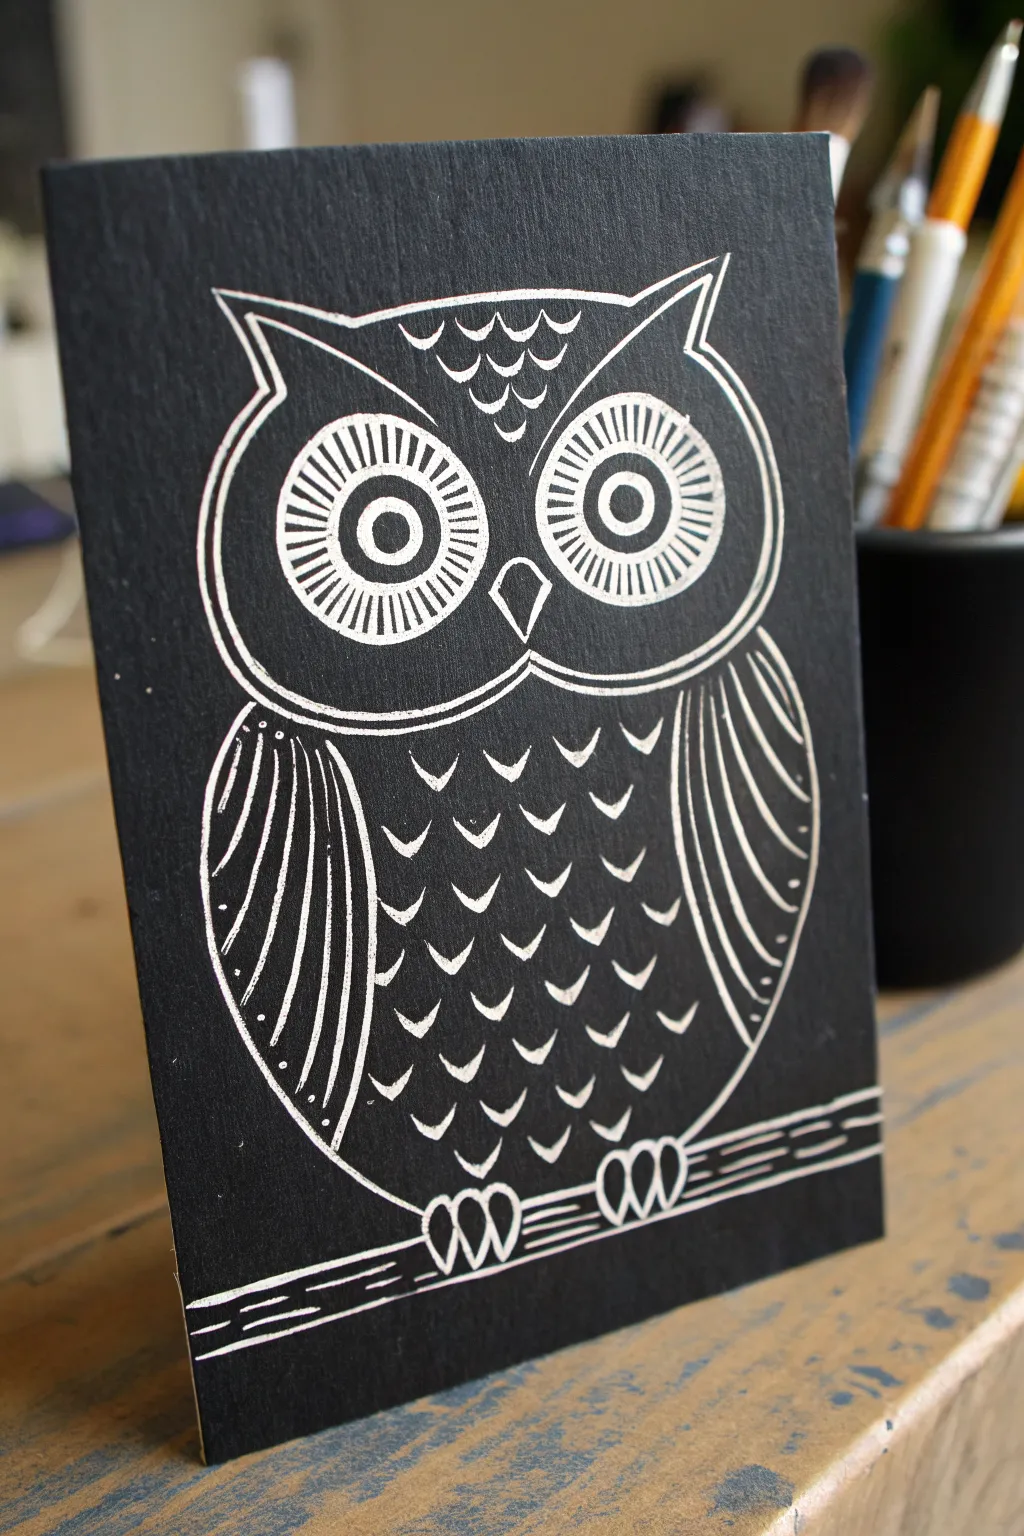
This striking scratchboard project transforms a simple black surface into a bright, high-contrast owl illustration using clean lines and repetitive patterns. It is an ideal starting point for beginners to practice pressure control and steady hand movements.
Step-by-Step Tutorial
Materials
- Black scratchboard paper or Ampersand scratchbord (5×7 inch)
- Scratch knife holder with a standard pointed nib
- Soft brush (for sweeping away dust)
- Graphite transfer paper
- Pencil and eraser
- Reference sketch or template
- Ruler (optional)
Step 1: Planning and Outlining
-
Sketch your design:
Begin by drawing your owl design on a separate piece of thin paper to create a template. Focus on the main shapes: a large oval for the body, a wider oval for the face, and pronounced ears. -
Transfer the image:
Place graphite transfer paper (shiny side down) onto your black scratchboard, then tape your sketch on top. Gently trace over your main outlines with a pencil to leave a faint grey guideline on the black surface. -
Outline the head:
Using your scratch tool with a standard pointed nib, carefully scratch the main outline of the owl’s head. Include the sharp, curved ear tufts and the wide ‘U’ shape that defines the bottom of the face. -
Define the body:
Continue the outline downward to create the large oval body shape. Ensure the lines connect smoothly with the head, leaving space at the bottom for the feet.
Scratch Repair
Make a mistake? Don’t panic. You can re-ink small areas with a black permanent marker or India ink. Let it dry completely, and you can scratch right over it again.
Step 2: Creating the Focal Points
-
Outline the eyes:
Inside the face area, scratch two large, perfect circles for the outer edges of the eyes. Inside each of these, scratch a smaller circle for the pupils. -
Detail the irises:
To create the striking iris effect, scratch straight, radiating lines from the pupil outward to the edge of the eye circle. Keep your spacing consistent to make the eyes pop. -
Add the beak:
Right between the eyes, scratch a small, inverted triangle with curved sides to form the beak. Leave the center black to give it dimension. -
Forehead texture:
Fill the space on the forehead (between the ears) with rows of small, downward-facing semicircles or scallops. This mimics the texture of small feathers.
Step 3: Feathers and Wings
-
Outline the wings:
Draw large, curved shapes on either side of the body to define the wings. They should hug the sides of the owl’s torso. -
Stripe the wings:
Fill the wing shapes with long, vertical curved lines. I try to follow the contour of the wing’s outer edge to make the volume look rounded. -
Chest feathers: Row one:
Starting just under the chin, scratch a row of small ‘V’ or ‘U’ shapes. These floating shapes suggest breast feathers without needing full outlines. -
Chest feathers: Continuing rows:
Work your way down the owl’s belly, adding row after row of these small markings. Stagger them like bricks so they don’t look too grid-like. -
Add highlights:
Go back over your wing lines or face outline to thicken the strokes slightly if you want bolder contrast. Variable line weight can add visual interest.
Sharper Lines
Rotate your board, not your hand. Turning the paper allows you to pull the scratch tool deeply towards you, which gives you far more control than pushing away.
Step 4: The Perch
-
Draw the feet:
At the bottom of the body, scratch two sets of claws. Each foot is made of three simple loops or ovals that extend downward. -
Create the branch:
Scratch two parallel horizontal lines passing underneath the feet to form the branch. Add a few short, horizontal dashes inside the branch to suggest wood grain texture. -
Clean up:
Use your soft brush to sweep away all the black scratching dust. If you see any stray graphite lines from your transfer, gently lift them with a kneaded eraser.
Display your charming owl on a small easel or frame it without glass to show off the unique texture
Simple Fish With Scale Rows
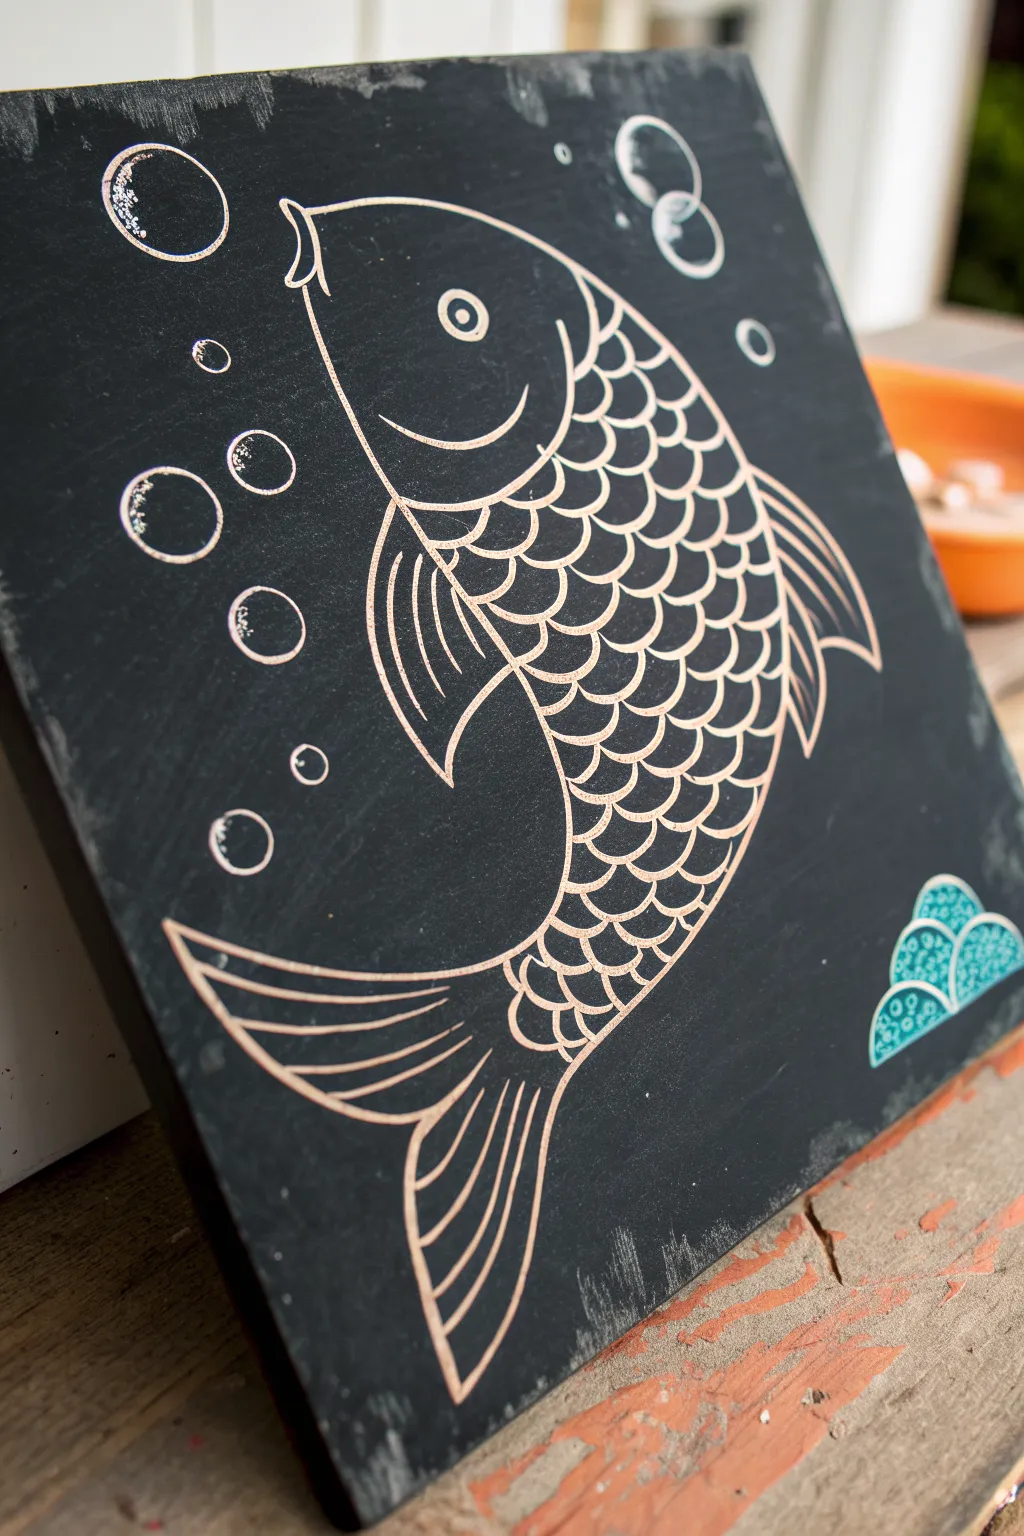
This striking project transforms a simple fish outline into an elegant piece of art using rhythmic, repetitive patterns. The contrast between the dark surface and the metallic copper scratch marks creates a sophisticated look that is surprisingly easy for beginners to master.
Detailed Instructions
Materials
- Black scratchboard sheet (approx. 8×8 inches)
- Scratch tool (standard nib)
- Transfer paper (wax-free meant for dark surfaces)
- Pencil for sketching/transferring
- Ruler
- Soft brush (for sweeping away dust)
- Reference sketch of fish outline
- Optional: Metallic blue or teal paint pen/colored scratch ink
Step 1: Planning and Outlining
-
Prepare your surface:
Begin with a clean, dust-free scratchboard panel. If you are using a slate-style board like the one in the photo, ensure it is firmly placed on a non-slip surface. -
Sketch or trace the shape:
Lightly sketch the basic fish silhouette directly onto the board using a very soft pencil, or use transfer paper to trace your design. Focus only on the main outline: the body, the tail fins, and the head shape. -
Start with the head:
Using your scratch tool with a medium pressure, trace over the curve of the fish’s head. Create a smooth, confident arc that separates the face from the scale section. -
Define the eye and mouth:
Scratch a small circle for the eye, adding a tiny dot in the center for the pupil. For the mouth, scratch a simple upward-curved line to give the fish a gentle expression. -
Outline the body:
Carefully scratch the remaining perimeter of the fish’s body, connecting the head line down to the tail. Keep your lines steady; usually, pulling the tool toward you offers better control than pushing it away.
Oops! Lines too jagged?
If your curves look shaky, you might be moving too slowly. Try scratching with faster, more confident strokes, and rotate the board so your hand always pulls the tool at a comfortable angle.
Step 2: Creating the Scales
-
Begin the first row:
Starting immediately behind the head line, scratch a vertical row of small ‘U’ shapes. Each ‘U’ should touch its neighbor, creating a scalloped edge. -
Offset the second row:
Start the second column of scales. Position the bottom of each new ‘U’ so it lands in the dip between the two scales in the previous row, similar to laying bricks. -
Continue the pattern:
Repeat this pattern row by row, working your way horizontally toward the tail. As the fish’s body narrows, slightly reduce the size of your ‘U’ shapes to fit the changing proportions naturally. -
Fill the body:
Maintain a consistent line thickness as you fill the entire body section. It’s okay if the scales aren’t perfectly identical; slight organic variations add character to the piece. -
Check for gaps:
Pause to brush away the scratch dust. Look for any broken lines in your scale pattern and gently reconnect them to ensure a solid mesh.
Level Up: Depth Effect
To make the fish look more 3D, lightly cross-hatch or stipple the bottom edge of each individual scale. This creates a shadow effect, making the scales appear layered.
Step 3: Adding Fins and Details
-
Draw the dorsal fin:
Sketch the top fin shape first, then fill it with lines. Instead of scales, scratch parallel curved lines that follow the sweep of the fin to simulate ribbing. -
Add the pectoral fin:
Create the side fin situated on the body scales. Outline a triangular shape and fill it with similar sweeping lines to match the dorsal fin style. -
Detail the tail:
Outline the large tail fins. Fill these with long, elegant strokes that fan out from the base of the tail to the tips, mimicking the flexible structure of a fish tail. -
Add bubbles:
In the empty space around the head, scratch several circles of varying sizes. Don’t outline them completely; leave small gaps in the circle line to look like light reflecting on bubbles. -
Create the bottom wave:
At the bottom right corner, scratch a cluster of three small, mounded shapes inside a single outline to represent waves or coral. -
Add texture to the wave:
Fill these mound shapes with tiny, tight circles or stippling dots. This textural contrast distinguishes the environment from the fish itself. -
Optional color accent:
If desired, carefully apply a metallic blue or teal ink/paint pen over the wave pattern area to create a pop of color against the monochromatic design. -
Final clean up:
Use your soft brush one last time to remove all debris. Inspect your lines and deepen any scratch marks that look too faint compared to the rest.
Display your shimmering aquatic friend prominently on a shelf or mounted on the wall to verify your new scratching skills

PENCIL GUIDE
Understanding Pencil Grades from H to B
From first sketch to finished drawing — learn pencil grades, line control, and shading techniques.
Explore the Full Guide
Feather With Long Curved Lines
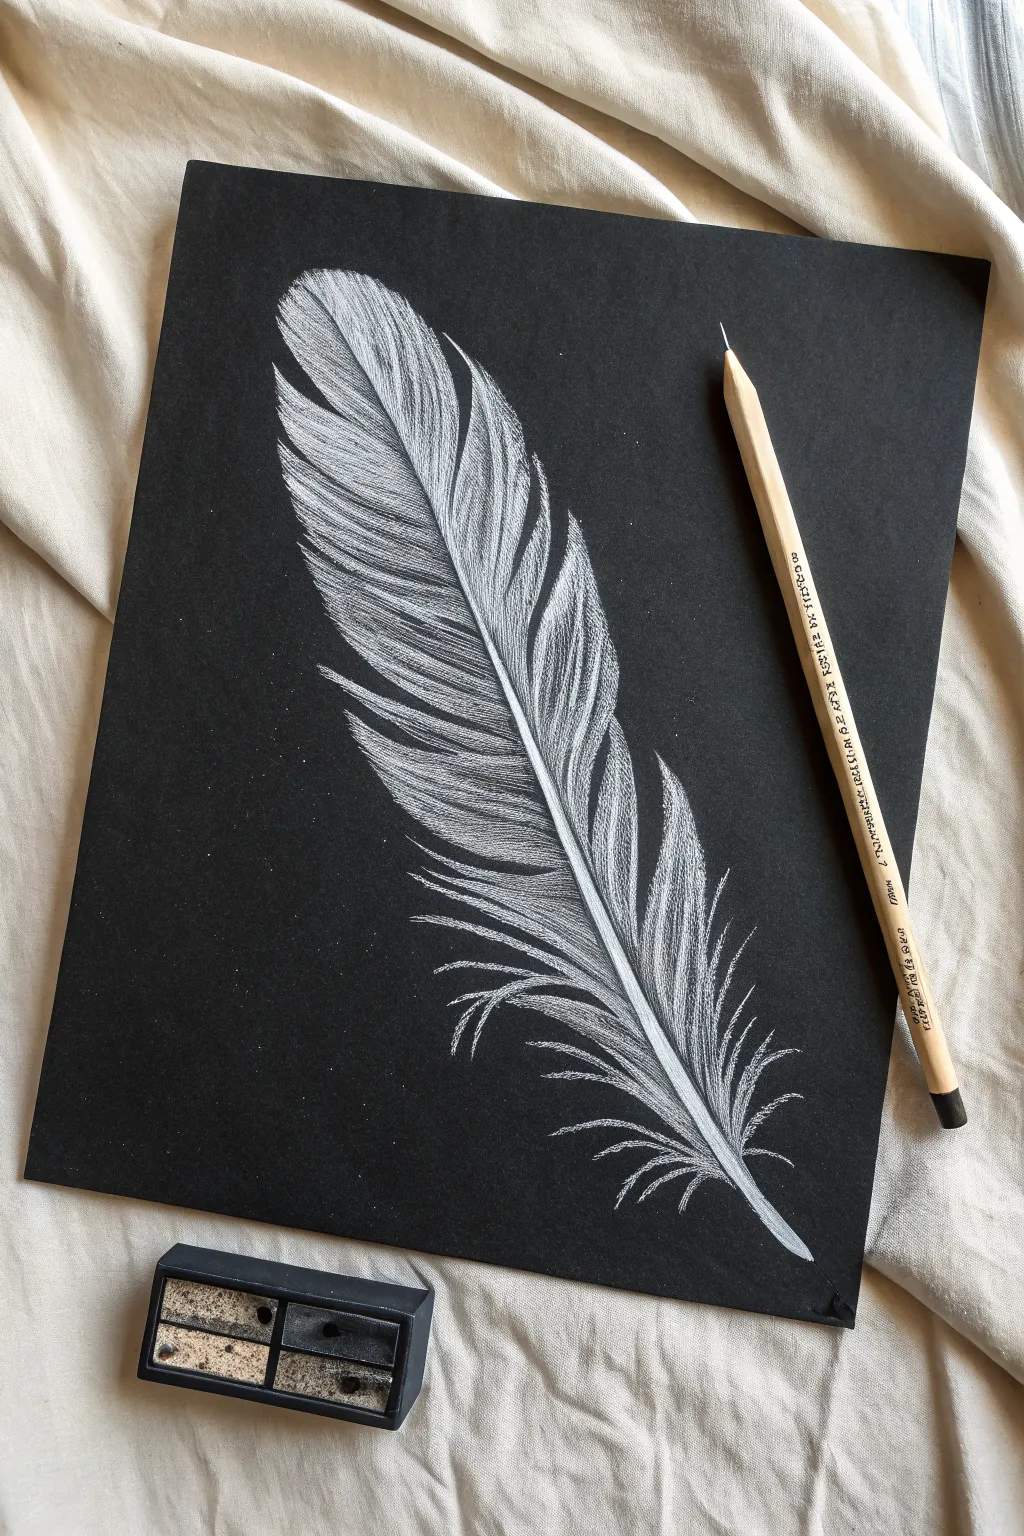
This elegant project captures the delicate texture of a white feather against a stark black background. By using fundamental scratching techniques, you’ll create soft curves and fine barbs that make the feather appear to float right off the page.
Step-by-Step Tutorial
Materials
- Scratchboard black coating sheet
- Scratch tool (knife or needle tip)
- White transfer paper or soft white pastel pencil (for sketching)
- Soft brush (for sweeping away dust)
- Referene photo of a feather
Step 1: Outlining the Form
-
Establish the curve:
Begin by lightly marking the central shaft (rachis) of the feather. Start from the bottom right and curve gently upward toward the top left. This central line anchors the entire piece. -
Map the silhouette:
Lightly sketch the outer ellipse shape of the feather using your pastel pencil or by barely grazing the surface with your tool. Keep the top rounded and taper the bottom. -
Scratch the spine:
Go back to your central shaft line. Use your scratch tool to solidify this line, making it slightly thicker at the base and tapering it to a razor-thin point at the tip. Don’t make it a solid white line; leave it slightly broken.
Tip: Keep it Sharp
Dull tools crush the surface rather than cutting it. Rotate your scratching tool frequently or sharpen it with sandpaper to ensure crisp, clean white lines.
Step 2: Creating Texture
-
Understand the direction:
Before scratching, observe how feather barbs grow. They extend outward and upward from the central shaft. Your scratches must follow this diagonal growth pattern. -
Start the lower barbs:
Begin on the left side near the bottom. Use short, quick strokes that flick outward from the shaft. Lift your tool at the end of each stroke to create a tapered, hair-like end. -
Build the density:
Continue moving up the left side. Group your strokes closely together near the shaft to create a brighter white area, which suggests the thicker part of the feather. -
Allow for separation:
As you move outward toward the edge of the feather, space your strokes out slightly. This lets the black background show through, creating the illusion of delicate transparency. -
Mirror the right side:
Repeat this process on the right side of the shaft. Remember that the barbs on this side should curve outward to the right. I find rotating the paper helps me maintain a natural hand motion here.
Step 3: Adding Realism and Detail
-
create breaks:
Feathers are rarely perfect. Pick two or three spots along the edge to intentionally skip scratching or angle the strokes differently. This simulates ‘splits’ in the feather vane. -
Refine the tip:
At the very top of the feather, shorten your strokes significantly. The barbs here are tighter and curve inward slightly to form the rounded peak. -
Fluff the base:
Move down to the bottom quill area. Instead of organized straight lines, use wilder, curved, and crisscrossing strokes to create the soft, downy ‘after-feather’ texture found at the base. -
Brighten highlights:
Look at your reference. Locate the areas where the light hits the curve of the feather (usually the middle of the vane). Go back over these areas with more strokes to increase the brightness/value. -
Clean up:
Use your soft brush to gently sweep away all the scratched-off dust. Check your contrast and add a few stray, wispy hairs floating near the bottom for a final touch of realism.
Level Up: Shadow Play
Try scratching a faint, blurry copy of the feather shape slightly offset below the real one. This creates a drop shadow effect, adding 3D depth.
Enjoy the striking simplicity of your high-contrast feather artwork
Mountain Ridge and Pine Tree Silhouettes
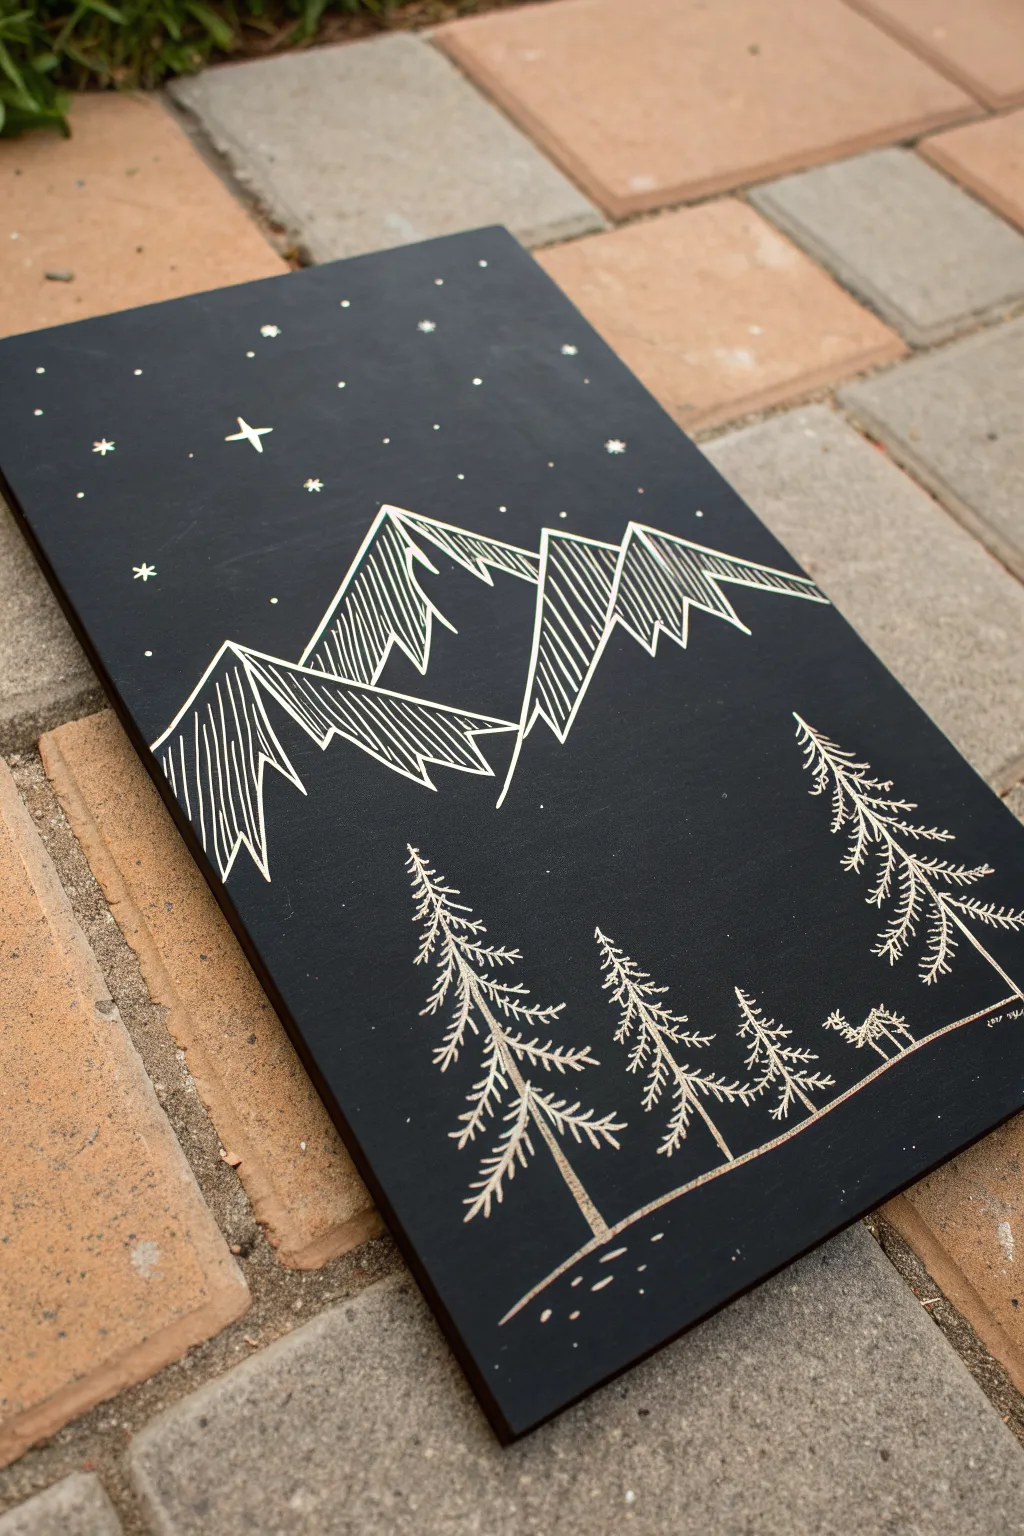
This striking scratchboard project combines bold geometric mountain forms with delicate organic tree details. The high contrast of white lines against a matte black background perfectly captures the peaceful stillness of a starry night in the wilderness.
Step-by-Step
Materials
- Scratchboard sheet (clay-coated board with black ink top layer)
- Scratchboard tool set (specifically a fine-point scribe and a wider scratching knife)
- White transfer paper or white chalk (for sketching)
- Pencil (HB or H)
- Ruler
- Soft brush or drafting brush (to remove dust)
Step 1: Planning and Sketching
-
Prepare the composition:
Visualize your layout by dividing the board into three horizontal zones: the foreground for trees, the middle ground for the mountain range, and the upper section for the sky. -
Outline the mountains:
Using white transfer paper or very light chalk marks, sketch the jagged peaks of the mountains. Create three main peaks, with the central one being slightly taller and overlapping the others to create depth. -
Define the light source:
Decide that your light is coming from the upper right. Mark light guidelines on the right-hand slopes of each mountain peak; these are the areas that will receive the most texture. -
Place the foreground:
Lightly draw a curved horizon line near the bottom of the board. Sketch vertical stick figures to represent the placement of the four pine trees—two smaller ones in the center and two larger ones flanking the sides.
Step 2: Scratching the Mountains
-
Outline the peaks:
Using a fine-point scratch tool, carefully scratch the solid white outlines of your mountain peaks. Keep the lines crisp and straight, using a ruler if you are shaky, though a hand-drawn look adds character. -
Start the shading:
On the first mountain peak, begin scratching vertical hatch lines on the right-hand slopes. These lines should run parallel to each other but vary slightly in length to create a jagged, rocky texture. -
Vary the line weight:
As you move to the central peak, press slightly harder on your tool for the shading lines. I find this creates brighter white lines that make the central mountain pop forward visually. -
Shadow side details:
On the left-hand slopes (the shadowed sides), add very sparse, thin lines just to define the form. Leave these areas mostly black to create strong contrast against the illuminated sides. -
Refine the edges:
Go back over the upper ridges of the mountains to thicken the outline slightly where the light hits directly. This ‘rim lighting’ effect helps distinct shapes stand out against the sky. -
Clean up dust:
Periodically brush away the black scratch dust with your soft brush. Never wipe with your hand, as the oils from your skin can damage the black ink surface.
Clean Lines Pro-Tip
Keep a piece of scrap paper under your drawing hand while you work. This prevents oils from your hand transferring to the matte black surface and leaving visible smudges.
Step 3: Adding the Forest and Sky
-
Establish the ground:
Scratch the curved ground line at the bottom. Add a few small horizontal dashes beneath it to suggest uneven terrain or fallen pine needles. -
Create tree trunks:
Scratch straight vertical lines for the tree trunks. Make the trunk slightly thicker at the base and taper it to a razor-thin point at the top. -
Start the branches:
Beginning at the top of the tree, scratch downward-curving branches. Use short, feathery flicking motions to mimic the texture of pine needles. -
Build tree volume:
Work your way down the trunk, making the branches progressively wider. Leave gaps between layers of branches so the black background shows through; this prevents the trees from looking like solid blobs. -
Detail the large trees:
For the larger trees on the right and left, add extra texture to the branches by cross-hatching slightly, giving them a denser appearance than the smaller, distant trees. -
Add a small critter:
If you are feeling adventurous, scratch a tiny, simple silhouette of an animal, like a deer or fox, standing near the right-hand tree line for a lively touch. -
Create main stars:
In the sky, use the tip of a craft knife to gently pick out a few larger stars. Create a four-point ‘twinkle’ star by scratching a small cross shape for the brightest celestial body. -
Fill the galaxy:
Fill the rest of the sky with tiny pin-prick dots. Cluster them slightly in diagonal bands to suggest the Milky Way, rather than spacing them out perfectly evenly. -
Final clean and seal:
Give the piece a final thorough dusting. If you wish to preserve it, you can spray a very light coat of fixative, though this is optional for display.
Level Up: Color Tinting
Once scratching is done, use scratchboard inks or watered-down acrylics to glaze the mountains. A wash of pale blue or purple adds a cold, wintry atmosphere.
Step back and admire how the simple lines create a vast, illuminated landscape


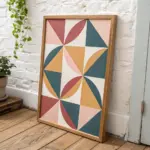
Heart With Floral Fill Patterns
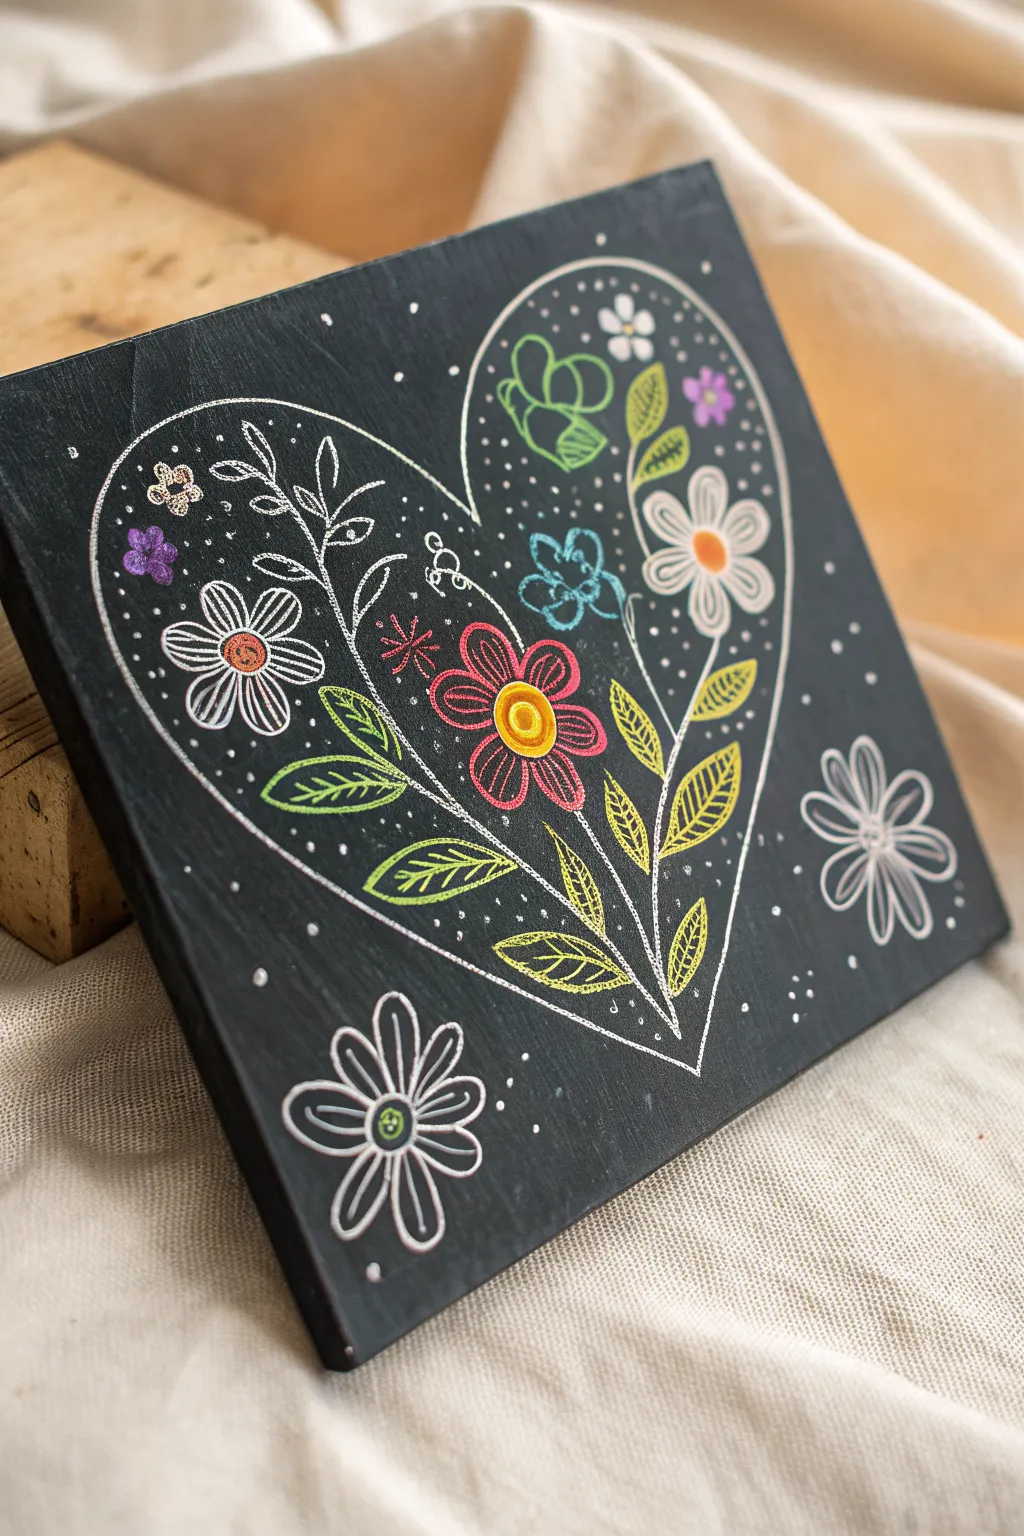
This charming project features a whimsical heart shape bursting with botanical doodles. The high contrast of bright colors against a matte black background mimics the look of classic scratchboard art, creating a delightful folk-art aesthetic.
How-To Guide
Materials
- Small square canvas or wooden art board (approx. 6×6 or 8×8 inches)
- Black acrylic paint or blackboard paint
- Flat paintbrush (1 inch)
- White gel pen or fine-tip white paint marker
- Colored paint markers (Posca-style) or gel pens in pink, yellow, green, blue, and purple
- Pencil (HB or 2B)
- Tracing paper (optional)
- Ruler
Step 1: Preparing the Base
-
Coat the surface:
Begin by painting your canvas or wooden board with a solid coat of black acrylic paint. If the first coat looks streaky once dry, apply a second layer to ensure a deep, opaque black background. -
Let it cure:
Allow the black paint to dry completely. It must be bone dry so your pencil sketch doesn’t smudge the paint surface.
Oops! Ink smudged?
If you smear wet ink on the black base, wait for it to dry completely, then paint over the mistake with a touch of black paint. Redraw the line once corrected.
Step 2: Sketching the Design
-
Draw the heart outline:
Using a pencil, lightly sketch a large heart in the center of the board. Aim to leave about an inch of negative space around the edges. -
Add central stems:
Sketch the main structural lines inside the heart. Draw two curving stems rising from the bottom tip of the heart, fanning outward toward the top lobes. -
Draft the main flowers:
Place your largest flower shapes first. Draw a prominent daisy-like flower in the center, and two slightly smaller ones on the right and left sides to balance the composition. -
Fill with foliage:
Lightly sketch leaf shapes along the main stems. Vary the sizes, placing smaller leaves near the top and larger ones near the bottom. -
Add floating elements:
Draw two additional large flower outlines outside the heart—one in the bottom left corner and one on the right edge—to frame the central design.
Step 3: Applying Color
-
Color the central flower:
Using a pink paint marker or gel pen, trace and fill the petals of the central flower. Add a bright yellow center. -
Detail the side flowers:
Use white for the flower on the left with an orange center. For the flower on the right, use white with an orange center as well to create symmetry. -
Execute the greenery:
Switch to green markers. Trace the leaves you sketched earlier. Instead of filling them in solid, use hatching lines or veins inside the leaves to mimic scratchboard texture. -
Add accent blooms:
Fill in the smaller accent flowers scattered near the top of the heart using purple, blue, and light green markers.
Try Metallic Shine
Swap the standard colored markers for metallic gold, silver, or bronze pens. This creates a stunning contrast that looks like real etched metal scratchboard.
Step 4: Refining and Outlining
-
Outline the heart:
Deepen the heart shape by tracing over your pencil outline with the white gel pen or fine marker. Use a slightly sketchy, double-line effect for a hand-drawn look. -
Define the stems:
Trace the main stems inside the heart with white to make them pop against the black background. -
Outline the colored elements:
Go over your colored flowers and leaves with fine white or silver lines if they need more definition. This helps separate the colors from the dark background. -
Outer flower details:
Trace the loose flowers outside the heart with white ink. Add small green dots in the center of the bottom-left flower for extra detail.
Step 5: Final Touches
-
Add stippling:
Using your white pen, add tiny dots (stippling) inside the heart shape, filling the empty spaces between the flowers and leaves. This creates texture and density. -
Create external atmosphere:
Add a few scattered white dots around the outside of the heart to give the piece a magical, floating quality. -
Erase guidelines:
Once you are absolutely certain all ink and marker is dry, gently erase any visible pencil marks.
Display your botanical heart art on a small easel or shelf to add a handmade touch to your decor


Have a question or want to share your own experience? I'd love to hear from you in the comments below!