I’m obsessed with how airbrush painting can make a beginner piece look instantly polished—those soft gradients and glowy transitions do so much of the heavy lifting. Here are my favorite easy ideas that keep the drawing simple and let the airbrush create the drama.
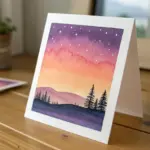
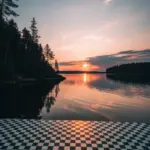
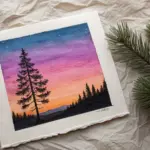
Sunset Gradient With Tree Silhouette
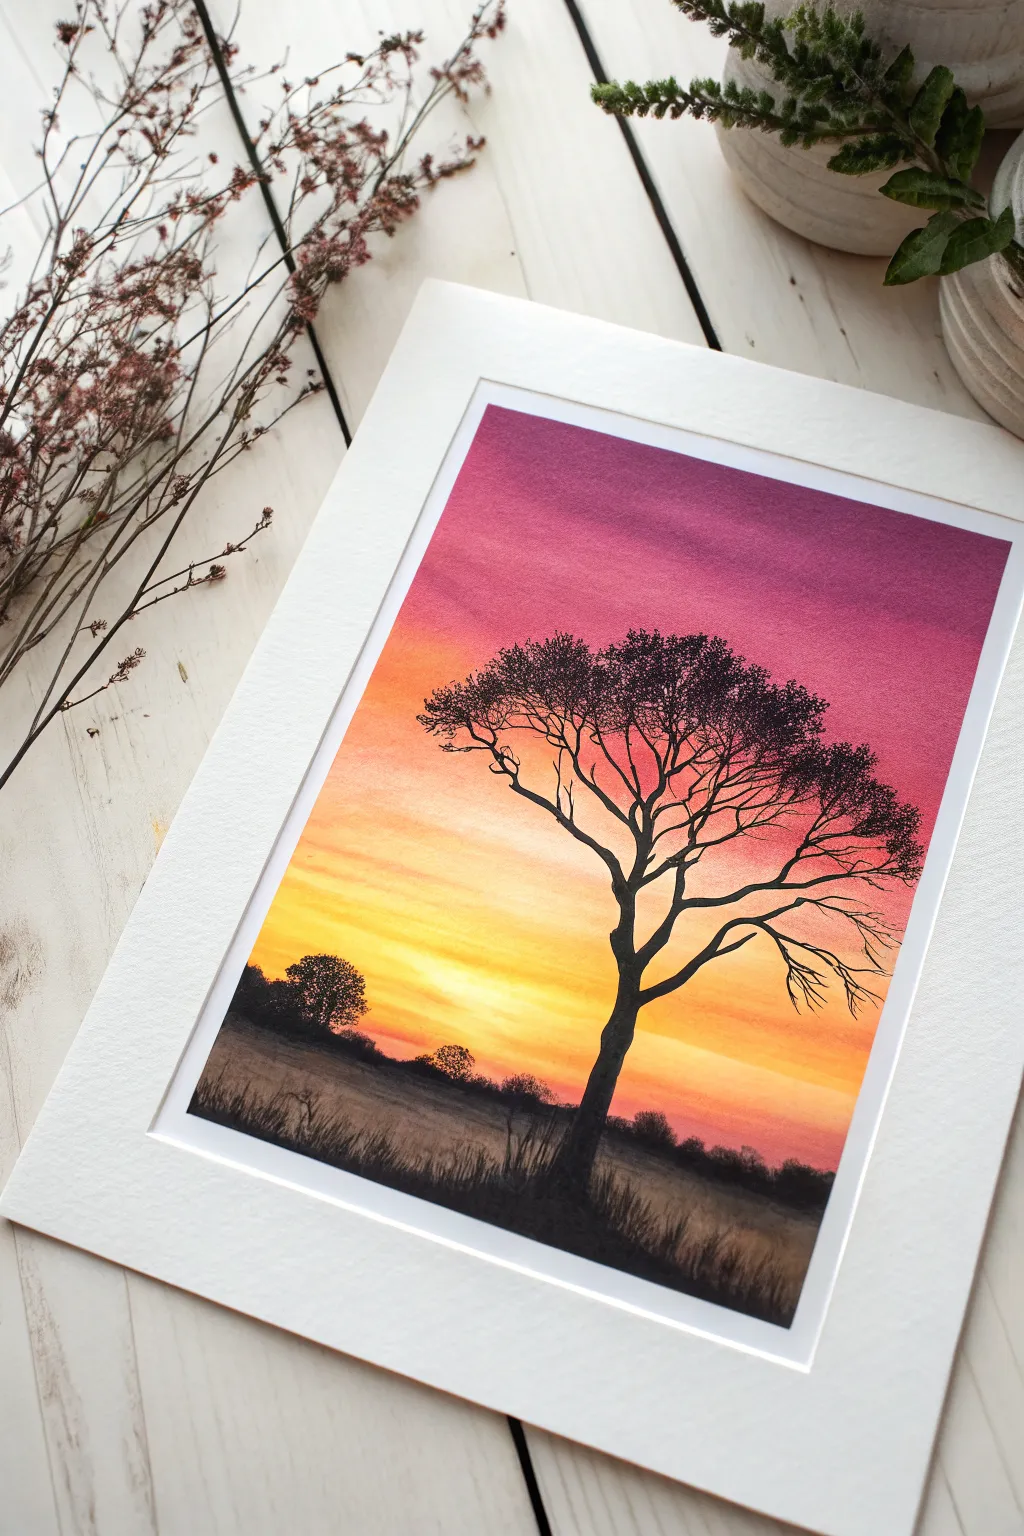
Capture the breathtaking transition of a vivid sunset with this beginner-friendly airbrush project. You’ll master smooth color gradients, moving from rich magenta to glowing yellow, before anchoring the scene with a striking black silhouette.
Detailed Instructions
Materials
- Airbrush gun and compressor
- Airbrush-ready acrylic paints (Magenta/Purple, Orange, Yellow, White, Black)
- Heavyweight bristol board or airbrush paper
- Masking tape or frustration-free painter’s tape
- Frisket film (optional but recommended for sharp horizons)
- Small detail paintbrush (size 0 or 00)
- Easel or backing board
- Cleaning pot and water
Step 1: Setting the Stage
-
Prepare your surface:
Secure your paper to a sturdy backing board using masking tape on all four edges. This creates a clean white border when peeled away later and prevents the paper from buckling under the spray. -
Establish the horizon:
Decide where your ground line will be—approximately the bottom third of the paper works well. Apply a strip of masking tape or frisket film horizontally across this line to protect the bottom area while you paint the sky. -
Check your pressure:
Before spraying, do a quick test on scrap paper. You want a consistent mist, usually around 20-30 PSI, to ensure your gradients come out velvety smooth rather than speckled.
Clean Color Blend
Always spray light to dark (Yellow -> Orange -> Purple). If you spray yellow over purple, it can turn muddy brown. Let the lighter color dry slightly before overlapping.
Step 2: Spraying the Sunset Gradient
-
Start with bright yellow:
Load your airbrush with a vibrant, opaque yellow. Spray a horizontal band just above your masked horizon line. Don’t worry about going too high yet; just get a solid, glowing base near the horizon. -
Add a white hotspot:
While the yellow is still workable, lightly mist a tiny amount of white right in the center of the yellow band, closest to the horizon. This creates that blinding ‘sun dipping down’ effect. -
Transition to orange:
Clean your cup and switch to orange. Start spraying above the yellow section, slightly overlapping the top edge of the yellow to create a soft blend. Keep your hand moving horizontally to avoid streaks. -
Introduce the magenta:
Now load a deep magenta or purple. Spray the top third of the paper, working your way down toward the orange. I allow the overspray to drift lightly onto the orange to create those intermediate dusky red tones naturally. -
Create wispy clouds:
With the magenta still in the cup, restrict the trigger flow deeply. Make very faint, quick horizontal passes across the yellow and orange zones to suggest faint, distant cloud streaks breaking up the light. -
Let the sky cure:
Wait for the sky gradient to be completely dry to the touch. If you proceed too soon, the masking tape removal could lift the paint.
Unwanted Spatter?
If the airbrush spits dots, your needle tip might have dry paint buildup. Keep a damp cotton swab or sponge handy to frequently wipe the needle tip while you work.
Step 3: Creating the Foreground
-
Reveal the ground:
Gently peel away the masking tape cover you placed on the horizon line. You should have a sharp, clean line separating your colorful sky from the white paper below. -
Mask the sky:
Depending on your steady hand, you can now place a piece of paper or masking tape strictly over the sky area, aligning it with the horizon, to protect your beautiful gradient from black overspray. -
Spray the base layer:
Load black paint. Lightly mist the ground area. You don’t want a solid black void; keep it somewhat translucent near the bottom edge to suggest grassy texture or mist, becoming darker near the horizon line. -
Remove all masks:
Take off the sky protection mask. Now you have your background layers fully established.
Step 4: Silhouetting the Details
-
Draft the tree structure:
Using your airbrush on a very fine setting—or switching to a detail paintbrush if you prefer more control—paint the main trunk of the tree off-center. Make the trunk slightly wavy to look organic, not like a telephone pole. -
Branching out:
Extend primary branches upward and outward. Typically, trees widen as they go up. Ensure the branches taper, getting thinner as they move away from the trunk. -
Adding fine twigs:
Switch to a size 00 paintbrush for this step. Add the delicate, spider-web-like twigs at the ends of the branches. These fine details obscure the sky and add realism. -
Create foliage clusters:
Stipple (dot repeatedly) the brush with black paint at the ends of the twigs to create the appearance of leaves. Don’t make it a solid block; leave gaps so the sunset colors peek through the leaves. -
Ground the tree:
At the base of the trunk, use the brush to flick small, upward strokes. This simulates tall grass growing around the roots and anchors the tree to the ground. -
Distance details:
Paint a few small, bumpy shapes along the horizon line in the distance to represent faraway bushes or trees. Keep them much smaller than your main tree to establish scale. -
Final reveal:
Once everything is perfectly dry, peel off the perimeter tape to reveal your crisp white border, instantly matting the image.
Mount your finished piece behind a mat board to really make those sunset colors pop against the silhouette.
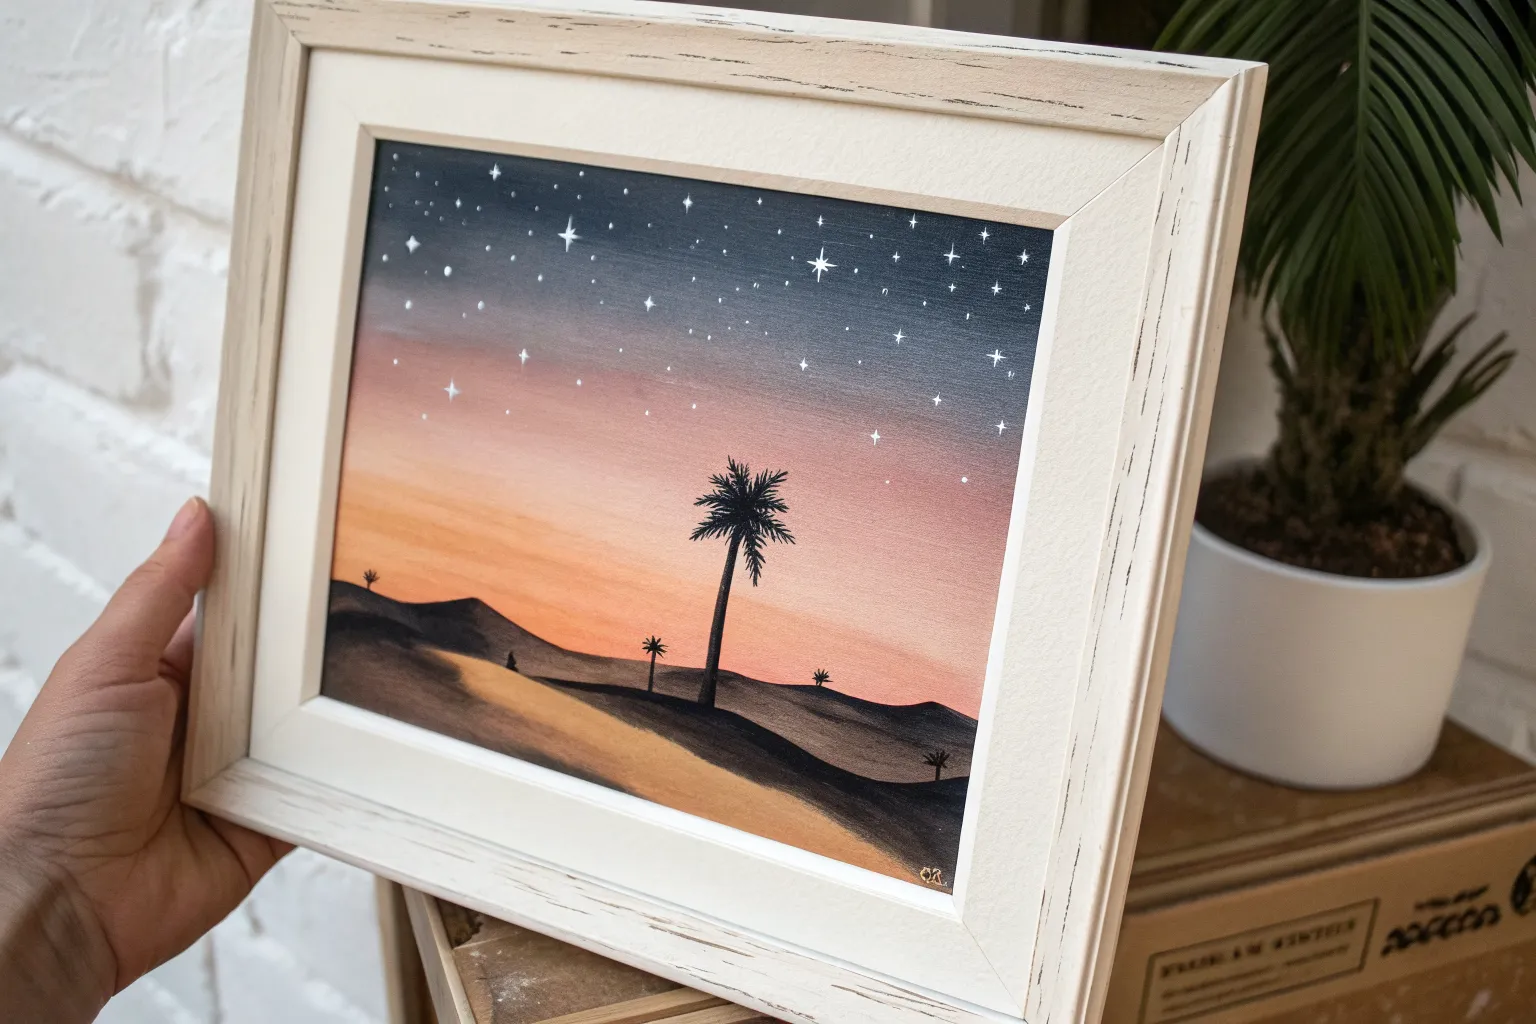
Starry Night With Mountain Silhouette
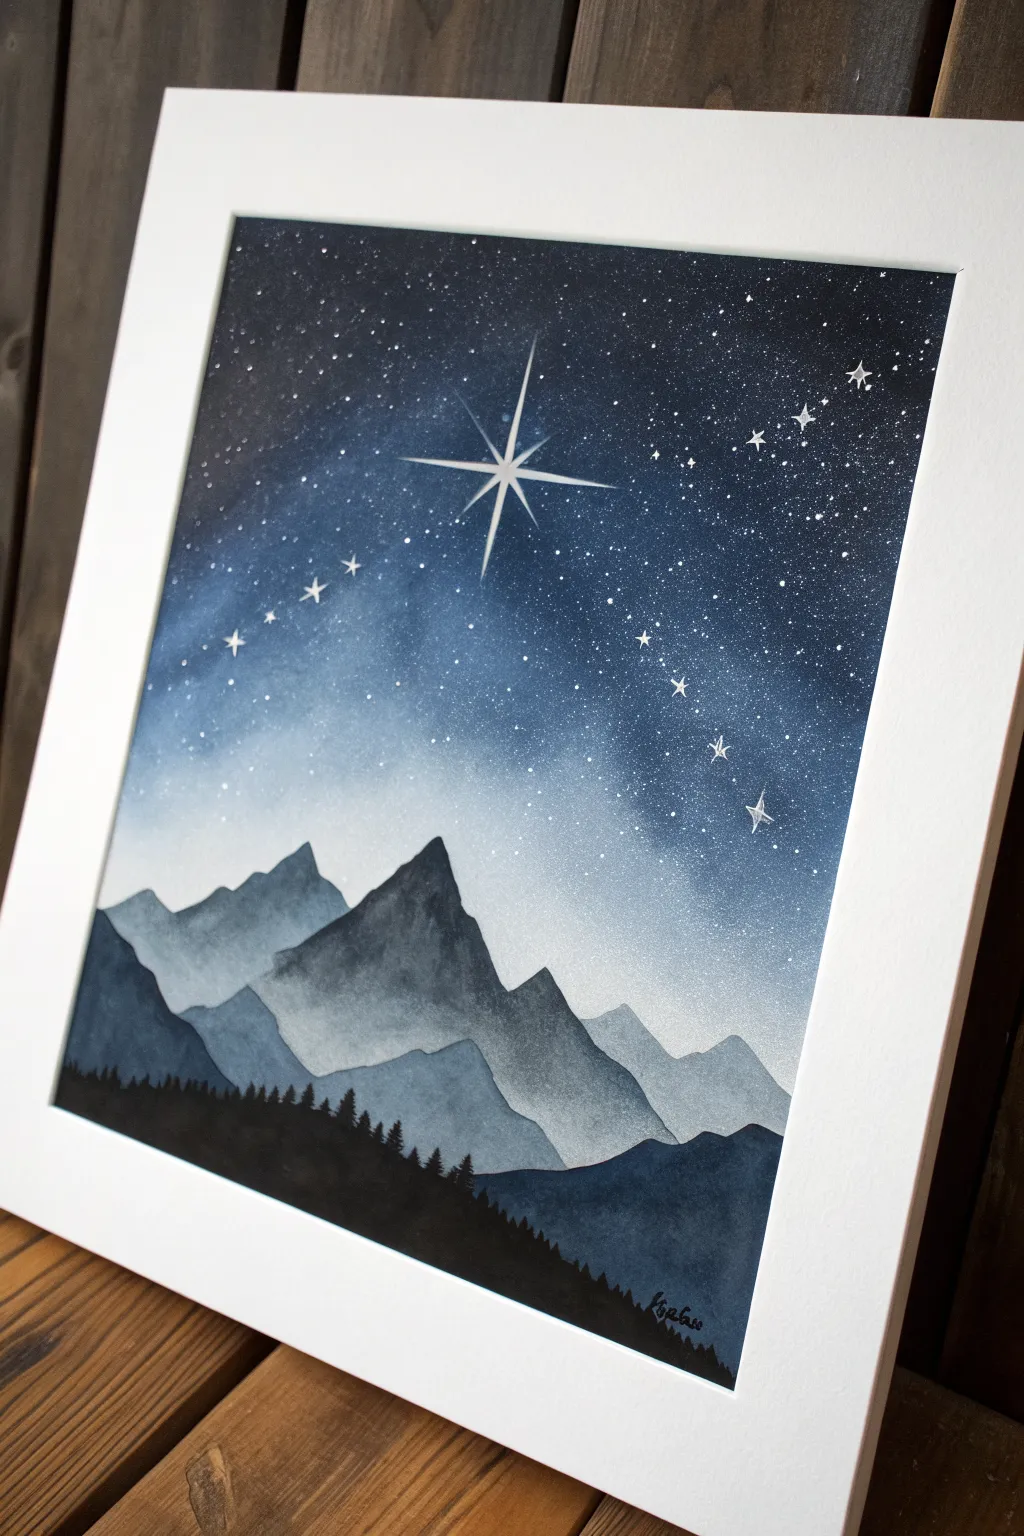
Capture the serene beauty of a crisp mountain night with this layered airbrush project. You will build depth using simple stencils and gradients to create glowing peaks under a brilliant north star.
How-To Guide
Materials
- Airbrush gun and compressor
- Acrylic airbrush paints (black, white, indigo, ultramarine blue, phthalo blue)
- Heavyweight mixed media paper or watercolor paper
- Acetate sheets or heavy cardstock (for homemade stencils)
- Hobby knife and cutting mat
- Masking tape
- Fine detail paintbrush (size 0 or 00)
- White gel pen or white acrylic ink
- Old toothbrush (optional for stars)
- Easel or backing board
Step 1: Preparation and Stencils
-
Paper Setup:
Secure your paper to your backing board using masking tape along the edges. This creates a clean white border for framing later and keeps the paper flat while you work. -
Cut Mountain Stencils:
Tear or cut uneven, jagged edges across your cardstock or acetate to create mountain profiles. You will need about three different profiles: one for distant peaks, one for the mid-range, and one for the foreground. -
Cut Forest Stencil (Optional):
While you can freehand the trees later, cutting a stencil with tiny tree-top spikes can help establish the initial tree line shape. Alternatively, plan to paint this layer entirely by hand.
Step 2: The Night Sky
-
Base Gradient:
Load your airbrush with white paint. Lightly mist the center area where the horizon will meet the sky to create a glow. This ensures the mountains stand out against a luminous background. -
Start the Blue:
Switch to a light blue mix (white + phthalo). Spray from the top corners downwards, fading out as you reach the white horizon glow. Keep your strokes horizontal and smooth. -
Deepen the Night:
Add ultramarine blue to your cup. Work the top half of the painting again, darkening the zenith of the sky. The gradient should transition from deep blue at the top to nearly white at the mountain line. -
Midnight Corners:
Mix a small amount of black or indigo into your blue. Carefully darken the very top corners and edges to create a vignette effect, drawing the eye toward the center brightness.
Overspray Issues?
If paint drifts under your torn paper stencils, use a repositionable spray adhesive heavily on the back of the stencil to keep a tight seal against the paper.
Step 3: Layering the Landscape
-
First Mountain Range:
Place your ‘distant peaks’ stencil about midway down the page. Using a very light grey-blue mix, spray lightly over the top edge of the stencil. The mist should catch the edge, defining the shape without filling the whole area solidly. -
Second Mountain Range:
Once the first layer is dry, move a new stencil profile slightly lower. Darken your paint mix with more blue and a touch of grey. Spray these peaks, ensuring they overlap the previous layer to build depth. -
Third Mountain Range:
Position your final mountain stencil below the second. Use a deeper slate blue color. Spray the edge, letting the color fade slightly as it moves downward into what will become the forest base. -
Foreground Hills:
Remove the mountain stencils. At the very bottom, spray a solid, dark distinct hill shape using a mix of indigo and black. This provides the ground for your silhouette forest.
Pro Tip: Glowing Stars
Before painting the bright white center of the North Star, mist a tiny, faint circle of white airbrush paint in that spot to create a hazy, glowing halo effect.
Step 4: Stars and Details
-
Splatter Stars:
Cover your mountain layers with a piece of paper to protect them. Load a toothbrush or stiff brush with white paint, run your thumb over the bristles, and flicker tiny droplets over the dark sky area. -
Paint the Forest:
Using black acrylic and a detail brush (or a very fine airbrush nozzle if you have great control), paint the pine tree silhouettes along the bottom black hill. Vary heights and make the tops pointy for realism. -
The North Star:
With a fine brush or white gel pen, draw the prominent distinct star in the upper center. Create a central cross with long vertical and horizontal lines, then add smaller diagonal rays between them. -
Star Clusters:
I like to hand-paint a few larger, glimmering stars or distinct constellations using the gel pen or white ink to complement the splattered background stars. -
Final Reveal:
Allow everything to dry completely. Carefully peel away the masking tape to reveal the crisp white border that frames your starry landscape.
Frame your piece behind glass to protect the delicate surface and enjoy the tranquil atmosphere you’ve created


Easy Galaxy Nebula Clouds
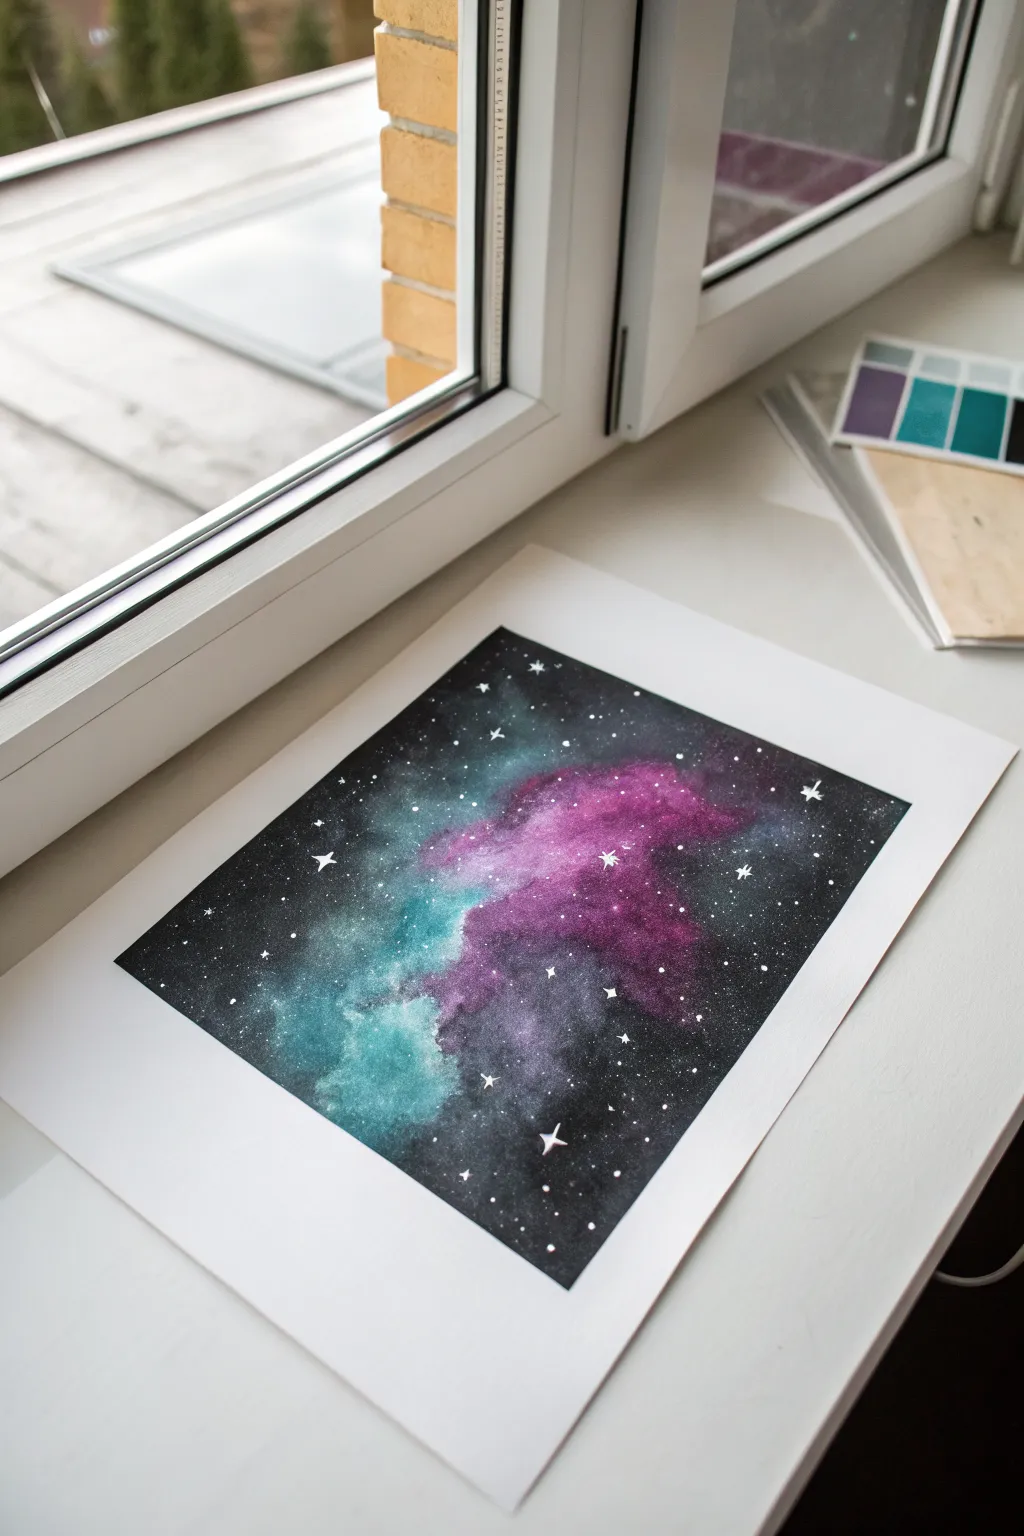
Capture the magic of deep space with this stunning yet simple nebula cloud project. Using basic masking and layering techniques, you’ll create a vibrant cosmic scene featuring ethereal teal and magenta clouds drifting through a star-filled void.
Detailed Instructions
Materials
- Airbrush kit (double-action preferred)
- Acrylic airbrush paints (Opaque Black, Phthalo Turquoise, Quinacridone Magenta, Titanium White)
- Heavyweight mixed media or watercolor paper (taped down)
- Masking tape or painter’s tape
- Frisket film or loose paper scraps for torn-edge masking
- Old toothbrush or stiff bristle brush
- Fine detail paintbrush (size 0 or 00)
- Cleaning jar and water
Step 1: Setting the Stage
-
Prepare your canvas:
Secure your heavyweight paper to a flat surface using masking tape on all four sides. This creates that crisp, professional white border seen in the example image and prevents the paper from buckling under layers of paint. -
Define the layout:
Visualize where your nebula cloud will flow. In this piece, it runs diagonally from the bottom-left to the center-right. You don’t need to sketch it, just keep this flow in mind.
Fixing Overspray
Accidentally sprayed black over your bright colors? Don’t panic. Let it dry, then gently mist a layer of white over the black area, let that dry, and re-apply your teal or magenta on top.
Step 2: Building the Nebula Core
-
Apply the first color cloud:
Load your airbrush with the teal/turquoise color. Keeping the airbrush about 4-6 inches away from the paper, spray a soft, cloudy shape in the bottom left area. Use circular motions to keep the edges diffuse. -
Add the magenta accents:
Clean your cup and switch to the magenta paint. Spray this color next to and slightly overlapping the teal section, moving towards the center. The overlap will create a nice purple transition. -
Intensify the core:
Go back over the very centers of your color clouds with a second, more focused layer. Bring the airbrush closer (2-3 inches) to make the color more opaque and vibrant in the middle. -
Create texture with masking:
Tear a piece of scrap paper to create a jagged, organic edge. Hold this loosely over parts of your colored clouds and spray a light mist of white or a lighter version of your base colors over the edge. This mimics the dimensional folds of gas clouds.
Step 3: The Deep Space Background
-
Prepare opaque black:
Load a generous amount of opaque black into your airbrush. You want this to be solid and dark to contrast with the bright nebula. -
Outline the nebula:
Start spraying the black around the outer edges of your colored clouds. Be careful not to cover your work completely; instead, gently ‘cut in’ to the color to shape the clouds. -
Refine the edges:
Spray closer to the colored areas to sharpen the boundary between the nebula and space, but leave some areas soft to look like fading gas. -
Fill the void:
Fill in the remaining white areas of the paper with solid black until you have a deep, uniform background surrounding your nebula. -
Darken the cloud shadows:
Lightly mist a tiny amount of black over some internal parts of the teal and magenta clouds to create pockets of shadow and depth within the nebula itself.
Level Up: Planetoids
Before spraying the black background, place a coin or circular cutout on the paper. Spray black over it, then remove to reveal a sharp, perfectly round planet silhouette against the void.
Step 4: Starlight and Details
-
Mix star paint:
Dilute a small amount of white acrylic paint with water on a palette until it is the consistency of ink or heavy cream. -
Splatter background stars:
Dip an old toothbrush into the diluted white paint. Point it at the paper and run your thumb across the bristles to flick a fine mist of stars across the entire image. -
Paint major stars:
Using your fine detail brush and undiluted white paint, hand-paint a few larger, specific stars. Place them randomly to avoid patterns. -
Add starbursts:
Choose 3-5 of the larger dots you just painted. Carefully paint four points extending from the center of each to create a classic ‘twinkle’ starburst effect. -
Final highlights:
Look for the brightest parts of your nebula clouds. Use the detail brush to add tiny, subtle white dots or lines on the very edges of the clouds to suggest light catching the gas. -
The reveal:
Allow the painting to dry deeply for at least 30 minutes. Gently peel back the perimeter tape at a sharp 45-degree angle to reveal your clean white border.
Frame this cosmic creation and enjoy the view of deep space right from your room


Tropical Beach Color Bands

Capture the magic of twilight with this vibrant beach scene that layers distinct bands of color to create a stunning gradient sky. This project combines soft, blended washes with crisp silhouetted details for a classic tropical look.
Step-by-Step Guide
Materials
- Watercolor paper (cold press, 300gsm recommended)
- Watercolor paints (Cerulean Blue, Rose Madder/Alizarin Crimson, Cadmium Orange, Viridian Green, Burnt Umber or Black)
- Masking tape (for clean borders)
- Flat wash brush (large)
- Round brush (size 4 or 6)
- Fine detail brush (size 0 or 1)
- White gouache or white gel pen
- Paper towels
- Two jars of water
Step 1: Setting the Sky
-
Prepare the canvas:
Tape down all four edges of your watercolor paper to a board or table. Press the tape down firmly to ensure crisp white borders later. -
Wet the sky area:
Using your large flat brush and clean water, apply a gentle wash to the top two-thirds of the paper where the sky will be. The paper should be damp but not pooling. -
Apply the blue band:
Load your flat brush with a light wash of Cerulean Blue. Paint a horizontal band across the very top of the paper, letting the wet surface help pull the color down slightly. -
Add the pink layer:
Rinse your brush thoroughly. Mix a soft Rose Madder or pink hue and paint a band directly below the blue. Allow the edges to touch and bleed slightly into the blue for a soft transition. -
Create the sunset glow:
Rinse again and pick up Cadmium Orange. Paint the lowest band of the sky, blending it upwards into the pink while keeping the color most intense near the imaginary horizon line. -
Let it dry:
Allow the sky gradient to dry completely before moving on. The paper must be bone-dry so the horizon line remains sharp.
Bleeding Colors?
If your horizon line is bleeding into the sky, the sky wash wasn’t fully dry. Use a hair dryer on a low setting to ensure the paper is bone-dry between major sections.
Step 2: The Ocean and Shore
-
Paint the ocean base:
Define a straight horizon line where the orange sky ends. Paint a band of turquoise (mix Viridian Green and Cerulean Blue) for the water, getting lighter and more transparent as you approach the bottom right corner. -
Add wave depth:
While the ocean layer is still damp, drop in slightly darker teal horizontal streaks to suggest depth and movement in the water. -
Paint the sand:
Mix a very diluted wash of Burnt Umber or a sandy beige. Fill in the bottom right corner, curving the edge where it meets the water to create the shoreline. -
Texture the beach:
While the sand wash is wet, add tiny speckles of darker brown by tapping your brush handle to simulate sand texture. -
Create sea foam lines:
Once the ocean layer is totally dry, use white gouache or a white gel pen to draw wavy, organic lines along the shoreline and parallel in the water to create breaking waves.
Step 3: Silhouette Details
-
Sketch the palm tree:
Using a very light pencil touch, sketch the curve of the palm trunk starting from the grassy corner and leaning towards the ocean. -
Paint the trunk:
Mix a concentrated dark color (Dark Green mixed with Black or Burnt Umber). Use your round brush to paint the trunk, making it thicker at the base and tapering near the top. -
Add palm frond spines:
From the top of the trunk, paint several curved lines radiating outward to serve as the central spines for the palm leaves. -
Detail the leaves:
Using your fine detail brush, flick quick, short strokes downward from each spine to create the feathery palm leaves. Vary the direction slightly for a natural, wind-blown look. -
Paint the grassy foreground:
At the base of the tree, use the same dark mixture to paint clumps of tall grass. Use quick, upward flicking motions to keep the tips sharp and tapered. -
Final touches:
Add a tiny silhouette of a distant sailboat on the horizon line for scale. Once everything is dry, carefully peel off the masking tape to reveal the frame.
Make It Sparkle
For a magical touch, lightly splatter clean water or salt onto the wet ocean paint before it dries. This creates unique bloom textures that look like sun glinting on waves.
Frame this piece against a window to let the natural light enhance those beautiful translucent layers
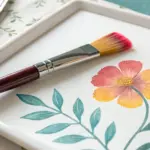
BRUSH GUIDE
The Right Brush for Every Stroke
From clean lines to bold texture — master brush choice, stroke control, and essential techniques.
Explore the Full Guide
Simple Ocean Fade and Horizon
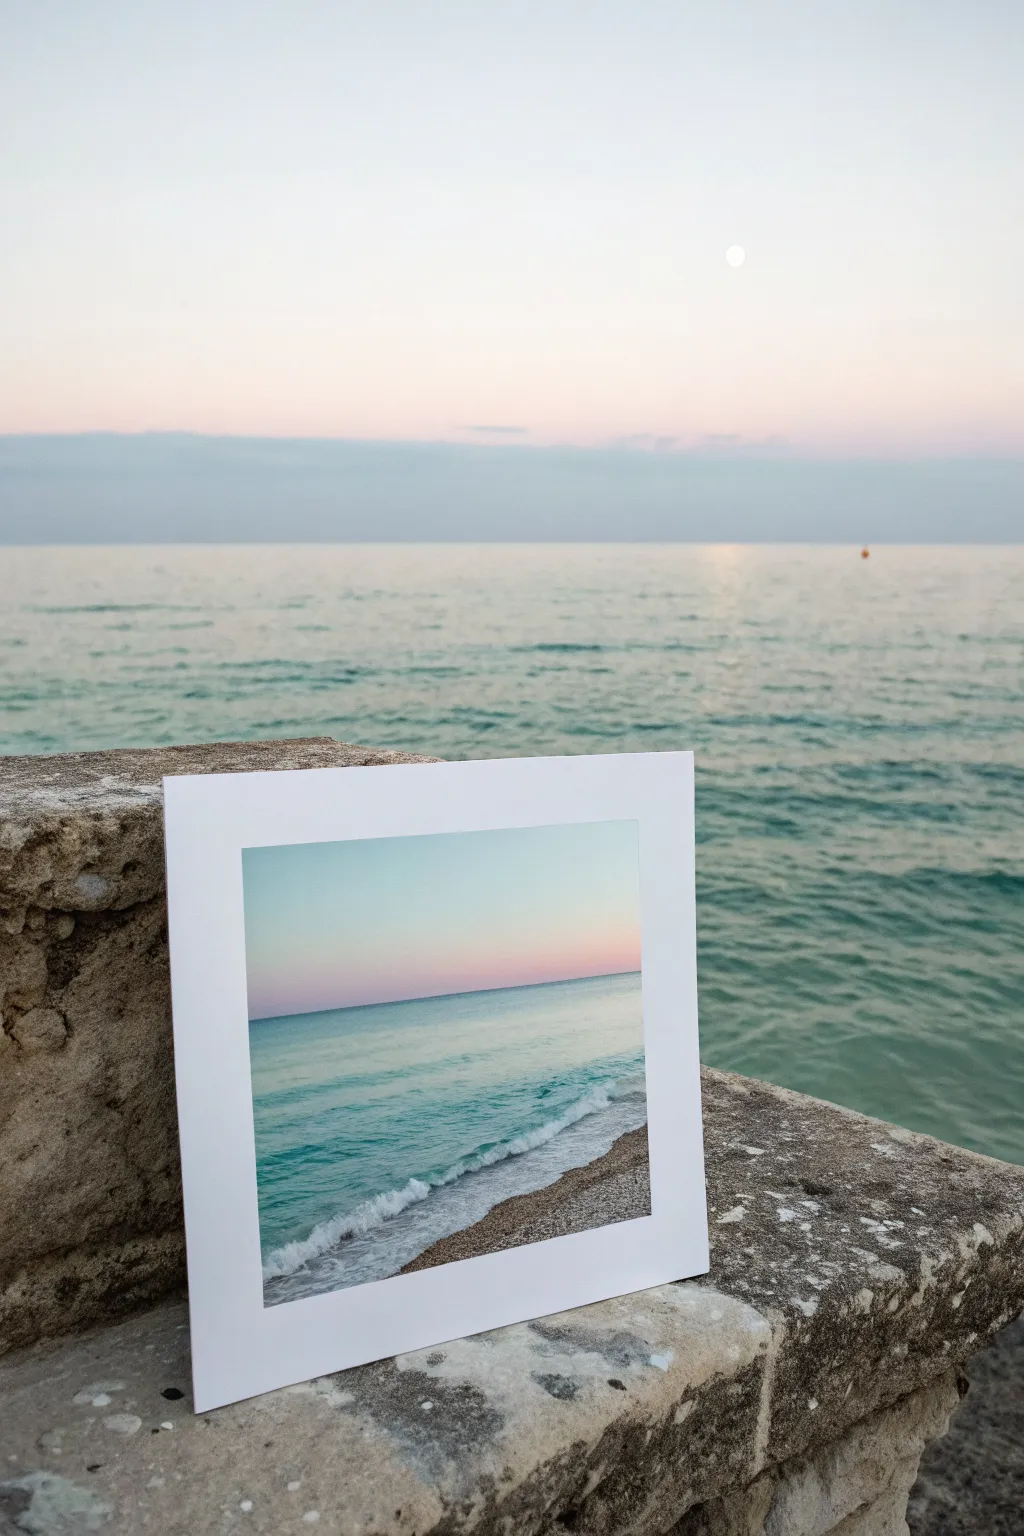
Capture the tranquil beauty of a coastal sunset with this soft, gradient-style airbrush painting. By layering translucent mists of color, you’ll create a seamless transition from a pastel sky to turquoise waves washing onto the shore.
Step-by-Step Guide
Materials
- Airbrush kit (compressor and gun)
- Acrylic airbrush paints (Pale Pink, Light Blue, Turquoise, White, Sand/Beige)
- Heavyweight mixed media paper or airbrush paper
- Masking tape or Frisket film
- White mat board frame
- Reference photo of a horizon
- Cardboard or scrap paper for testing spray
- Easel or flat working surface
Step 1: Setting the Sky
-
Prepare your surface:
Begin by taping down your paper to a sturdy board to prevent warping. Mask off the edges cleanly if you want a crisp white border, or plan to mount it behind a mat frame later like the example. -
Establish the horizon line:
Place a strip of masking tape or a straight piece of paper horizontally across the lower third of your paper. This will protect the water area while you paint the sky. -
Spray the upper sky:
Load your airbrush with a very light blue. holding the gun about 6-8 inches away, spray the very top of the paper, fading out as you move downward. -
Add the sunset glow:
Switch to a pale pink color. Spray this just above the horizon tape line, letting it mist upward into the blue to create a soft purple transition area. -
Blend the transition:
If the transition looks too harsh, I like to lightly mist a little white or transparent extender over the meeting point of the pink and blue to soften the gradient. -
Remove the horizon mask:
Carefully peel away the masking tape to reveal the clean, sharp horizon line. Ensure the sky paint is dry first to avoid smudging.
Horizon Hacking
Use ‘frisket film’ instead of masking tape for the horizon. It has a lower tack adhesive so it won’t rip your paper when removed, keeping that crucial line razor sharp.
Step 2: Painting the Ocean
-
Mask the sky:
Now, apply masking tape or a paper shield over the dry sky area, aligning it perfectly with your existing horizon line to protect your sunset gradient. -
Lay the deep water:
Using a turquoise or teal color, spray firmly just below the horizon line. This should be the darkest part of your water to indicate depth and distance. -
Fade toward the shore:
As you spray lower down the page, pull back on the trigger less or move the gun further away to lighten the application, letting the white of the paper show through slightly. -
Create the shoreline:
Switch to a sand or beige tone. Spray the bottom right corner in a diagonal sweeping motion where the beach meets the water. -
Remove the sky mask:
Gently remove the tape covering the sky. You should now have a distinct, sharp line separating the pinkish sky from the deep blue ocean.
Sputtering Paint?
If your airbrush starts spitting dots, your paint is likely too thick or the pressure is too low. Thin the paint to a milk-like consistency and slightly increase PSI.
Step 3: Detailing the Waves
-
Mix an opaque white:
Clean your airbrush thoroughly and load it with opaque white paint. Test the spray on scrap paper to ensure it’s not sputtering. -
Define the wave break:
Hold the airbrush closer to the paper for a finer line. Spray a wiggly, organic line where the blue water meets the sandy beach area. -
Add sea foam:
Spray small bursts or dots of white behind the main wave line to simulate foaming water. Keep the pressure low to avoid spider-webbing the paint. -
Soften the beach transition:
Lightly mist a very transparent layer of sand color over the bottom edge of the white foam to make the water look like it is wetting the sand. -
Final touches:
Step back and assess your gradient. If the horizon line needs sharpening, use a colored pencil or fine brush to tidy up the edge lightly. -
Mount and frame:
Once fully dry, center your painting behind the white mat frame and secure it with tape from the back to complete the gallery-style presentation.
Now you have a peaceful ocean view that brings a breath of fresh air to any room
Northern Lights Over Pine Line
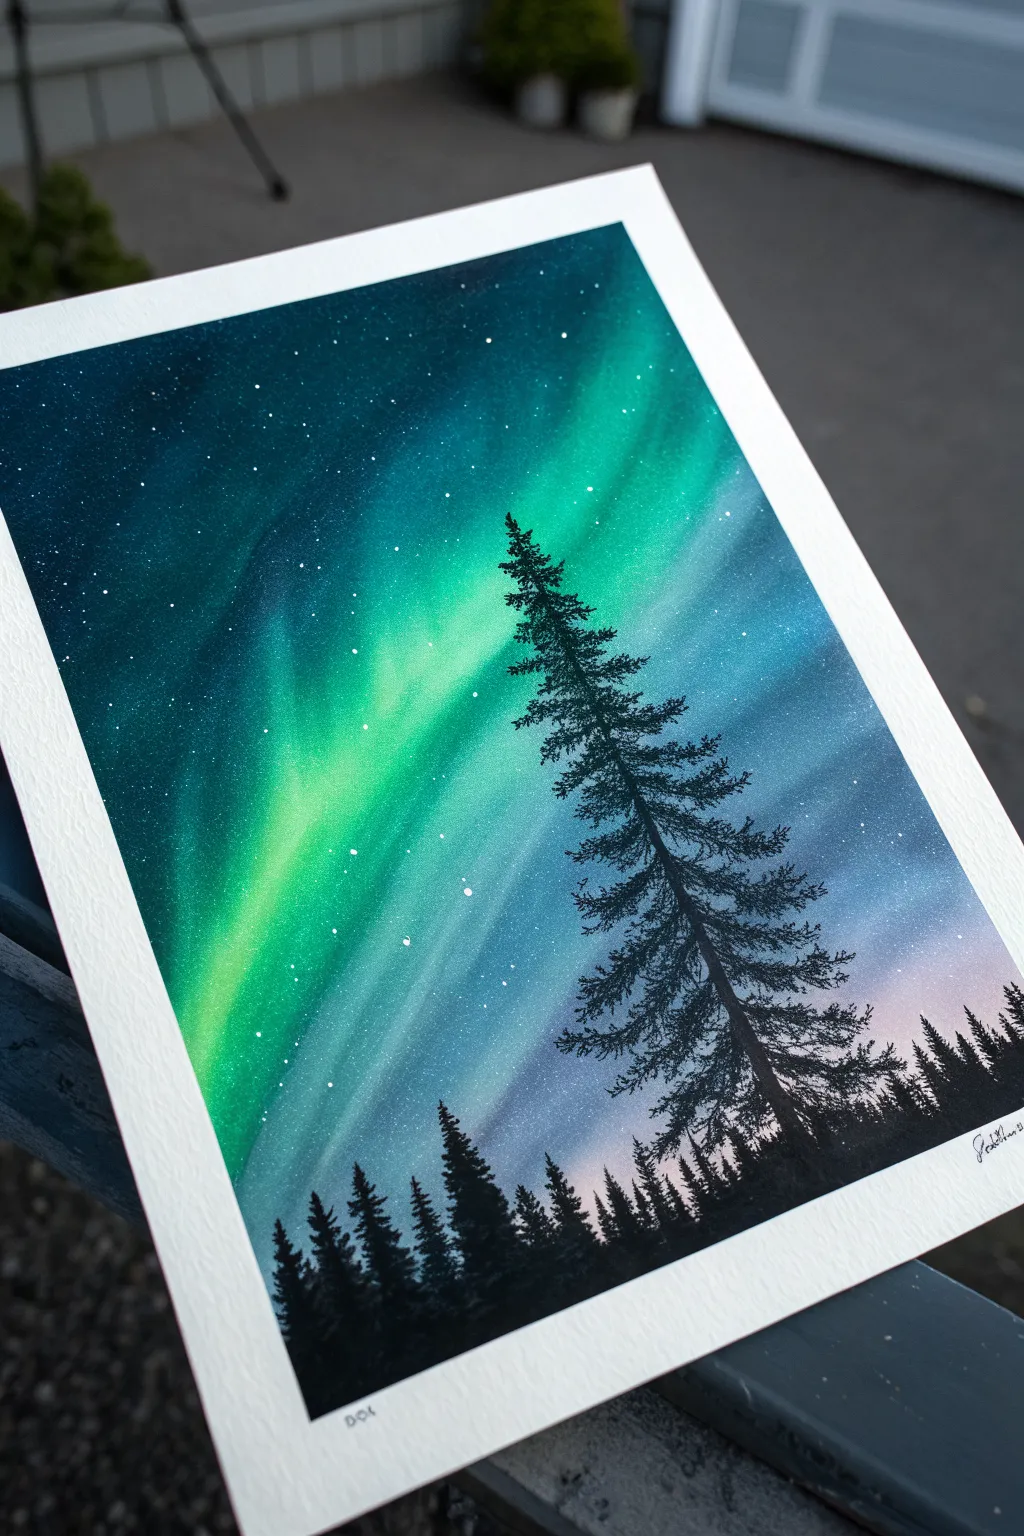
Capture the ethereal glow of the Northern Lights dancing above a crisp pine forest silhouette. This project combines smooth, airbrushed gradients with sharp details to create a stunning night sky landscape.
Step-by-Step Tutorial
Materials
- High-quality watercolor paper or bristol board
- Masking tape
- Airbrush set with compressor
- Acrylic airbrush paints (black, opaque white, phthalo blue, teal, violet, light pink)
- Fine liner brush or detail paintbrush
- Old toothbrush (optional for stars)
- Clean water for rinsing
- Paper towels
Step 1: Setting the Stage
-
Secure Your Canvas:
Tape down all four edges of your paper to a flat, rigid surface using masking tape. This creates a clean white border and prevents the paper from buckling under the paint application. -
Establish the Horizon:
Decide where your tree line will be. Keep the bottom third of the paper mentally reserved for the forest, leaving the top two-thirds open for your sky to take center stage.
Starry Control
Test your refined ‘star flicking’ technique on a scrap paper first. Too much water on the brush creates blobs; a drier brush creates fine, distant mist.
Step 2: Creating the Aurora Sky
-
Base Glow:
Load your airbrush with a very light pink or pale violet. Lightly spray a horizontal band just above where the trees will sit, fading it upwards. This suggests the faint atmospheric glow near the horizon. -
Primary Aurora Green:
Switch to a vibrant teal or bright emerald green. Spray distinct, diagonal bands starting from the middle-left and sweeping upwards towards the top right. Vary the pressure to create areas of intense concentration and softer, diffused edges. -
Deepening the Sky:
Using a phthalo blue or deep navy, spray the upper corners and the spaces between your green aurora bands. Be careful not to completely overspray the green; you want to create contrast between the dark night sky and the glowing lights. -
Blending the Transitions:
With a clean airbrush cup, lightly mist over the edges where colors meet to soften the transition. The goal is a seamless, misty gradient that looks like light shifting in the atmosphere. -
Adding Contrast:
Go back in with your darkest blue or a touch of black mixed with blue. darken the very top corners of the paper to frame the composition and make the central lights pop.
Step 3: The Starfield
-
Creating Stars:
Once the background is dry, load a stiff brush or an old toothbrush with opaque white paint diluted slightly with water. Flick the bristles to spatter tiny white dots across the blue and green sections. -
Adding Major Stars:
Use a fine liner brush or a toothpick dipped in opaque white to carefully place a few larger, brighter stars in the darker blue areas for variety.
Double Exposure Effect
Use a cardboard cutout of a bear or wolf instead of a tree. Airbrush around the stencil to leave the animal shape filled with the galaxy pattern.
Step 4: Painting the Forest
-
Horizon Line:
Switch to solid black paint. Using your airbrush or a paintbrush, fill in the very bottom strip of the paper to establish the ground. -
Distant Trees:
Using a small brush, paint short, vertical strokes along the horizon line to create the appearance of a dense, distant forest. varying the heights slightly makes it look natural. -
The Hero Tree: Trunk:
Identify the spot for your main focal point—the large pine tree. Paint a thin, straight vertical line extending well into the sky area to serve as the trunk. -
The Hero Tree: Top Branches:
Starting at the very top of the trunk, paint tiny, downward-sloping branches. Keep them narrow and sparse at the apex. -
The Hero Tree: Building Volume:
Work your way down the trunk, making the branches wider and denser as you descend. Use a stippling motion with your brush to mimic the texture of pine needles. -
Filling the Silhouette:
Continue painting branches until you reach the bottom, blending the base of the tree into the dark forest floor. I find that leaving small gaps of sky showing through the branches makes the tree look much more realistic.
Step 5: Finishing Touches
-
Final Adjustments:
Check your blacks. If the tree looks patchy, add a second coat of black to ensure a solid, opaque silhouette against the bright sky. -
The Reveal:
Wait for everything to be completely bone dry. Carefully peel away the masking tape at a 45-degree angle to reveal your crisp white border.
Step back and admire your own personal slice of the arctic night sky

PENCIL GUIDE
Understanding Pencil Grades from H to B
From first sketch to finished drawing — learn pencil grades, line control, and shading techniques.
Explore the Full Guide
Misty Forest Layers
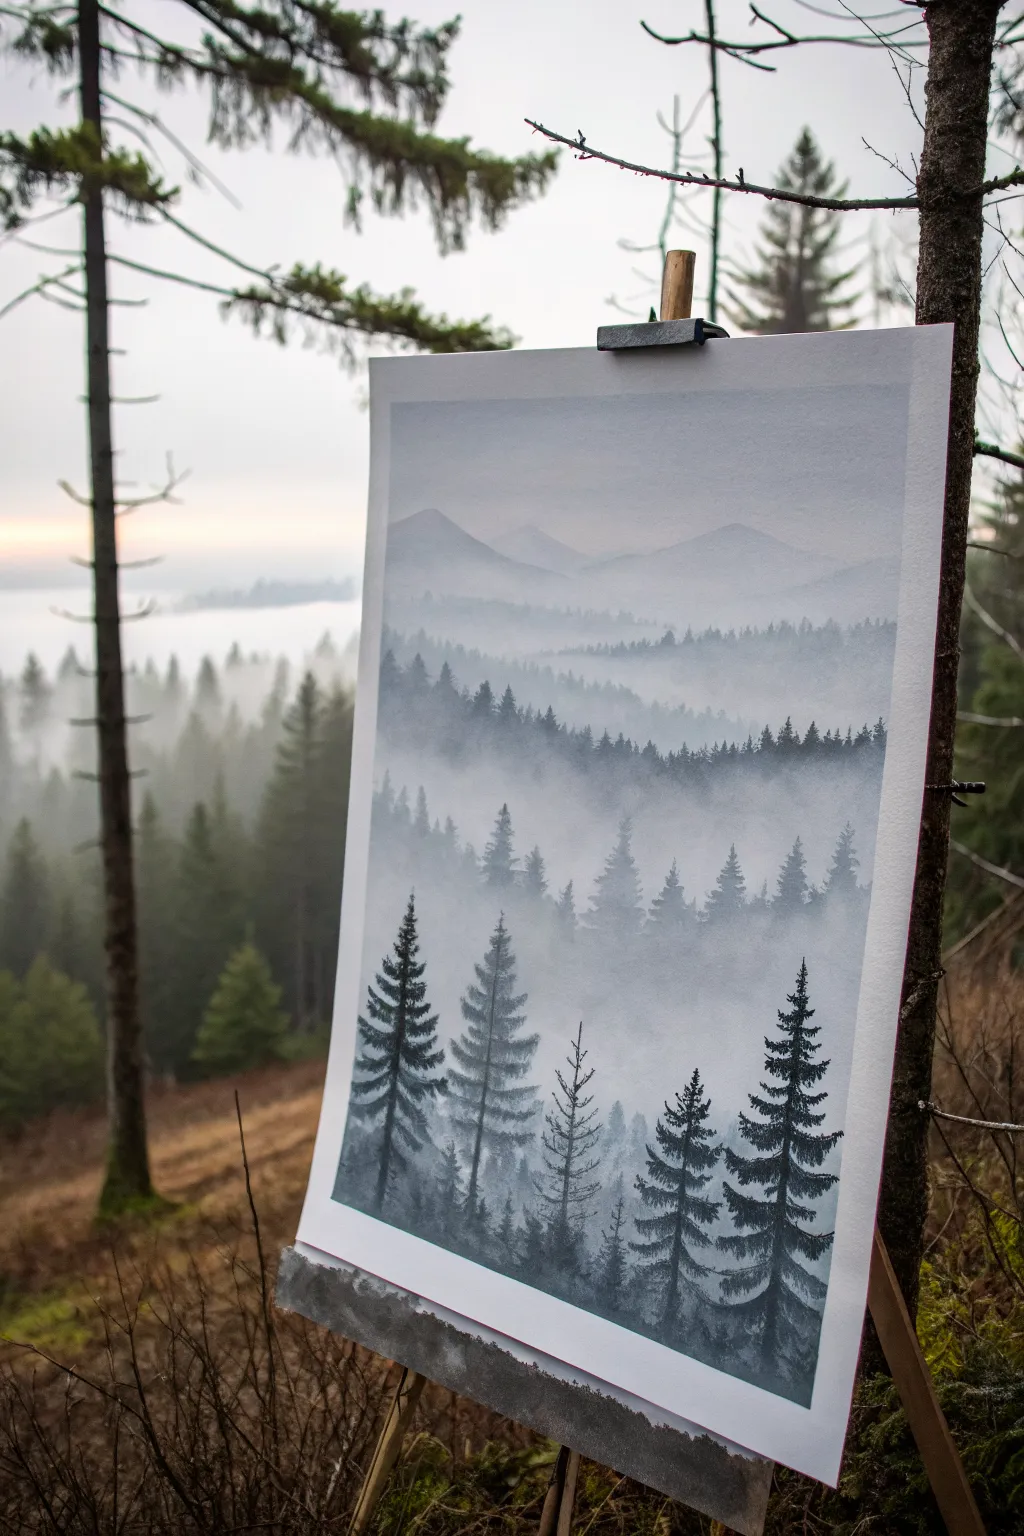
Capture the serene beauty of a foggy mountain landscape with this atmospheric airbrush project. You will build depth layer by layer, starting from distant, pale peaks and moving forward to dark, detailed pine trees.
Detailed Instructions
Materials
- Airbrush kit (double action preferred)
- Airbrush paints (Opaque White, Paynes Grey, Black, Prussian Blue)
- Heavyweight bristol board or airbrush paper
- Frisket film or masking tape
- X-Acto knife or cutting tool
- Easel or backing board
- Paper towels for cleaning
Step 1: Setting the Atmosphere
-
Prepare the Mix:
Begin by mixing a very pale grey-blue tone. Combine a drop of Prussian Blue and a touch of Paynes Grey into a large amount of Opaque White. The consistency should be like skim milk. -
Base Gradient:
Spray a smooth, even gradient from the top of the paper down to about the halfway mark. This will represent the sky and the furthest atmospheric haze. Keep it light and airy. -
First Mountain Range:
Tear a piece of paper or cardstock to create a jagged, uneven edge. This will act as a loose stencil for your furthest mountains. -
Spraying the Distant Peaks:
Hold the torn paper stencil against the canvas, slightly above the center. Lightly spray over the edge using your pale grey-blue mix. Keep the spray very faint—these mountains should barely be visible.
Step 2: Building Depth with Layers
-
Darkening the Mix:
Add a few more drops of Paynes Grey to your airbrush cup to slightly darken the color value for the next layer. -
Second Ridge Layer:
Move your torn paper stencil down about an inch or two. You can rotate it or tear a new edge to vary the shape. Spray along this new edge, allowing the color to fade out as it goes downwards into the mist. -
Creating the Haze:
Between layers, if the transition looks too sharp, lightly mist pure white or a very thinned pale grey over the bottom of the mountain sections to push them back into the fog. -
Mid-Ground Trees:
As you move lower on the paper, darken your paint mix further with more Paynes Grey. Instead of just a torn edge, use a stencil or freehand gentle vertical strokes to suggest the tops of distant pine forests peeking through the fog. -
Establishing the Treeline:
Create a distinct ridge in the lower third of the painting. Spray this layer darker than the previous ones, ensuring the tops of the trees are somewhat defined but the bottoms still fade into a misty white at their base.
Paint Spattering?
If your airbrush spits large droplets, your needle might be dirty or paint too thick. Clean the tip with a cotton swab soaked in cleaner, then test spray on a scrap paper.
Step 3: Detailing the Foreground
-
Prepare for Details:
Switch to a near-black color. Mix Black with a little Paynes Grey to keep it cool-toned. Adjust your airbrush pressure (PSI) lower for better control over fine lines. -
Central Trunk Technique:
Start with the tallest foreground trees. For each tree, spray a thin vertical line to act as the trunk guide. Don’t make it a solid straight line; allow for some natural variation. -
Adding Branches:
Using short, controlled bursts, spray horizontal branches extending from the trunk. Start narrow at the top and widen the span of the branches as you move down the tree. -
Defining Texture:
Go back over the main foreground trees and add density to the branches. Use a ‘dagger stroke’ motion—start with the trigger pulled back for paint, then release as you flick the brush outward to create sharp pine needles. -
Grounding the Trees:
Spray the darkened base of the foreground trees to anchor them. I often add a little extra mist of white right at the very bottom of the trunks to suggest ground fog wrapping around the roots. -
Final Adjustments:
Step back and assess the values. If the foreground doesn’t pop enough, go over the closest trees one last time with pure black to maximize the contrast against the misty background.
Softer Mists
Hold the torn paper stencil slightly away from the canvas (lifted about 1/4 inch) while spraying. This creates a softer, unfocused edge perfect for distant foggy ridges.
Once the final layer of mist dries, you will have a moody landscape full of depth and silence
City Skyline at Dusk
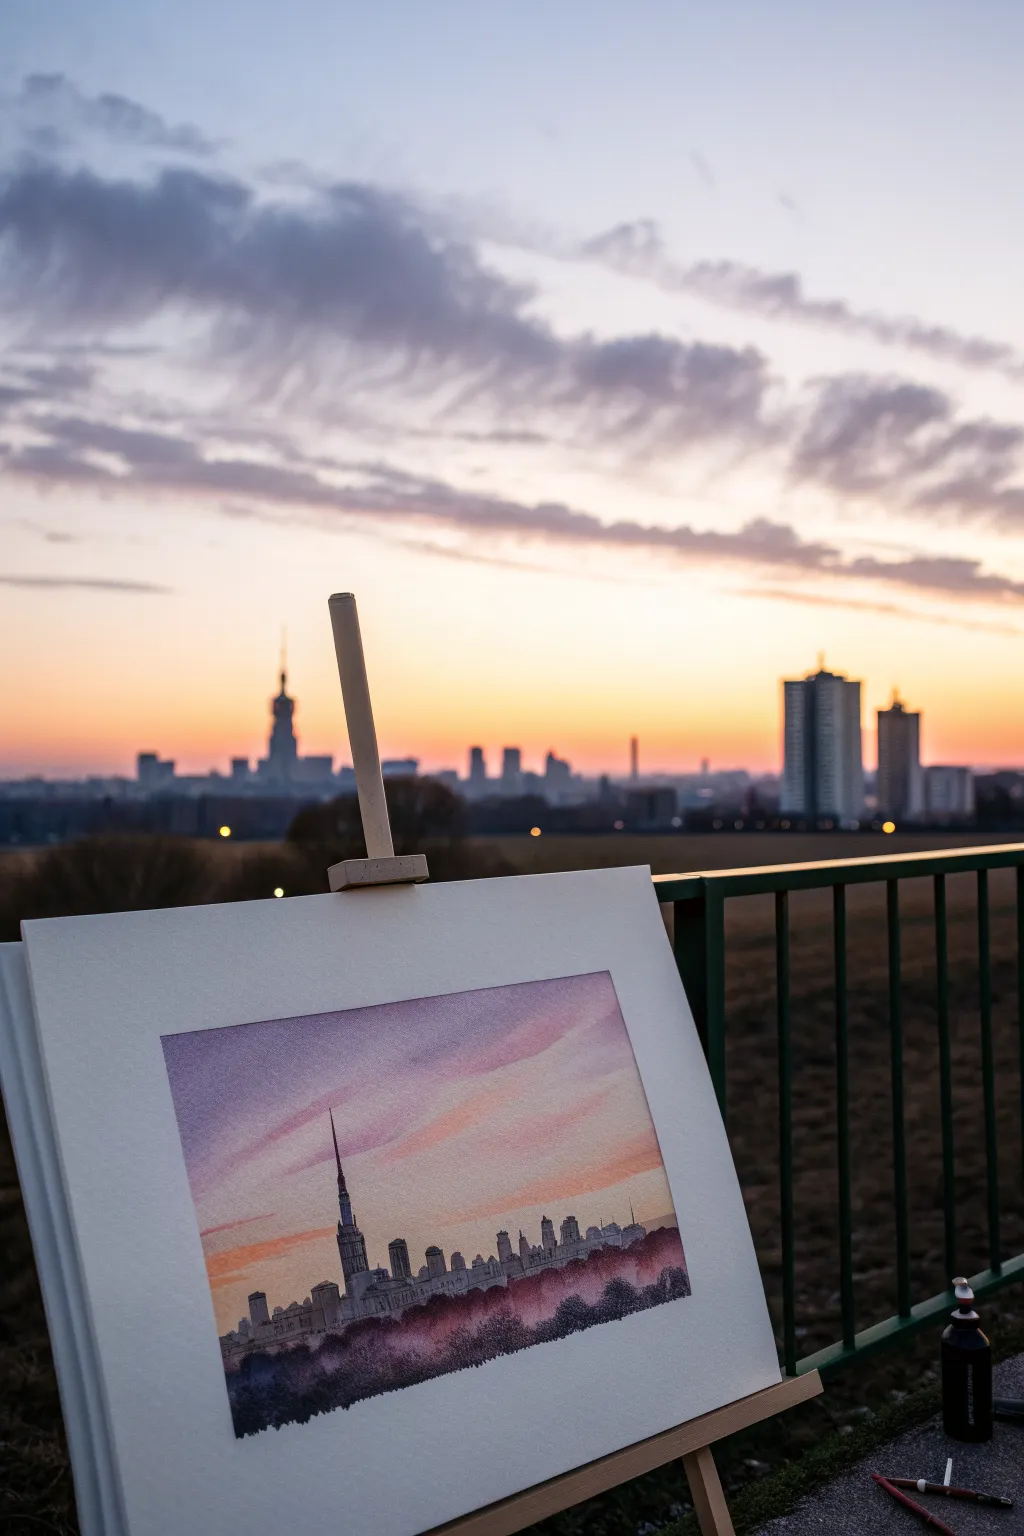
Capture the romantic gradient of a city at sunset with this atmospheric project. Blending soft airbrushed skies with crisp architectural silhouettes creates a stunning contrast that brings an urban evening to life on your canvas.
Step-by-Step
Materials
- High-quality watercolor paper or illustration board
- Airbrush kit with dual-action gun
- Airbrush acrylic inks (pink, violet, orange, light blue)
- Black technical drawing pen or fine liner (0.3mm and 0.5mm)
- Masking fluid or frisket film
- X-Acto knife or craft blade
- Reference photo of a city skyline
- Low-tack masking tape
- Easel or flat workspace
Step 1: Preparation and Masking
-
Prepare your surface:
Begin by taping down the edges of your paper to a board to create a clean white border and prevent buckling. Ensure the surface is free of dust before starting. -
Sketch the horizon:
Lightly sketch the outline of your chosen cityscape near the bottom third of the paper. Keep it simple; you just need the main shapes of the buildings. -
Mask the city:
Apply masking fluid or cut a frisket film mask to cover the entire city area below the horizon line. This protects the buildings while we work on the sky. -
Double-check edges:
Preserve those crisp lines by running a burnishing tool or your fingernail over the edge of the mask or tape to ensure no paint creeps underneath.
Step 2: Airbrushing the Sky
-
Base layer of pink:
Load your airbrush with a diluted soft pink. Spray horizontally across the middle of the sky area, keeping the strokes light and airy to establish the glow. -
Introduce orange hues:
While the pink is still fresh, switch to a warm orange tone. Spray this just above the masked city line to mimic the sun’s fading heat near the horizon. -
Add violet depth:
Move higher up the paper with a violet or purple shade. Blend this downward into the pink layer to create the transition into the darker evening sky. -
Create cloud streaks:
I like to lower the air pressure slightly here to draw soft, diagonal streaks of violet across the pink areas, simulating windswept clouds. -
Top gradient:
Finish the very top of the sky with a light blue or indigo, blending it seamlessly into the purple to frame the upper edge of the composition.
Cloud Control
To get those wispy cloud edges, hold a torn piece of paper a few inches above the surface while spraying to create soft, semi-defined shadows.
Step 3: Refining the Cityscape
-
Remove the mask:
Wait until the sky is completely dry. Gently peel away the masking fluid or frisket film to reveal the stark white paper of the buildings below. -
Outline the architecture:
Using a fine liner pen, carefully trace the outlines of the skyscrapers. Use a ruler for vertical lines on taller towers to keep them looking structural. -
Add window details:
Stipple tiny dots or short dashes within the buildings to suggest lit windows. Vary the density; clusters of dots create the look of busy office blocks. -
Fill the darker shapes:
Identify the shaded sides of the buildings and use a very light wash of gray ink or diluted black paint to fill them in, giving the structures 3D volume.
Overspray Issues?
If paint dusted onto the white buildings despite the mask, gently use a white ink gel pen or dense gouache to touch up and reclaim the highlights.
Step 4: Final Atmosphere
-
Establish the foreground:
At the very bottom of the paper, use the airbrush with a dark violet or black to create a blurry, out-of-focus tree line or ground shadow. -
Blend the base:
Soften the top edge of this dark foreground so it merges gently with the bottom of the buildings, anchoring the city. -
Final inspection:
Step back to view the gradients. If the buildings feel too detached, add a tiny glazing of yellow over the window areas to warm them up.
Peel off the border tape to reveal your crisp, colorful evening window


Hot Air Balloons in a Sunrise Sky
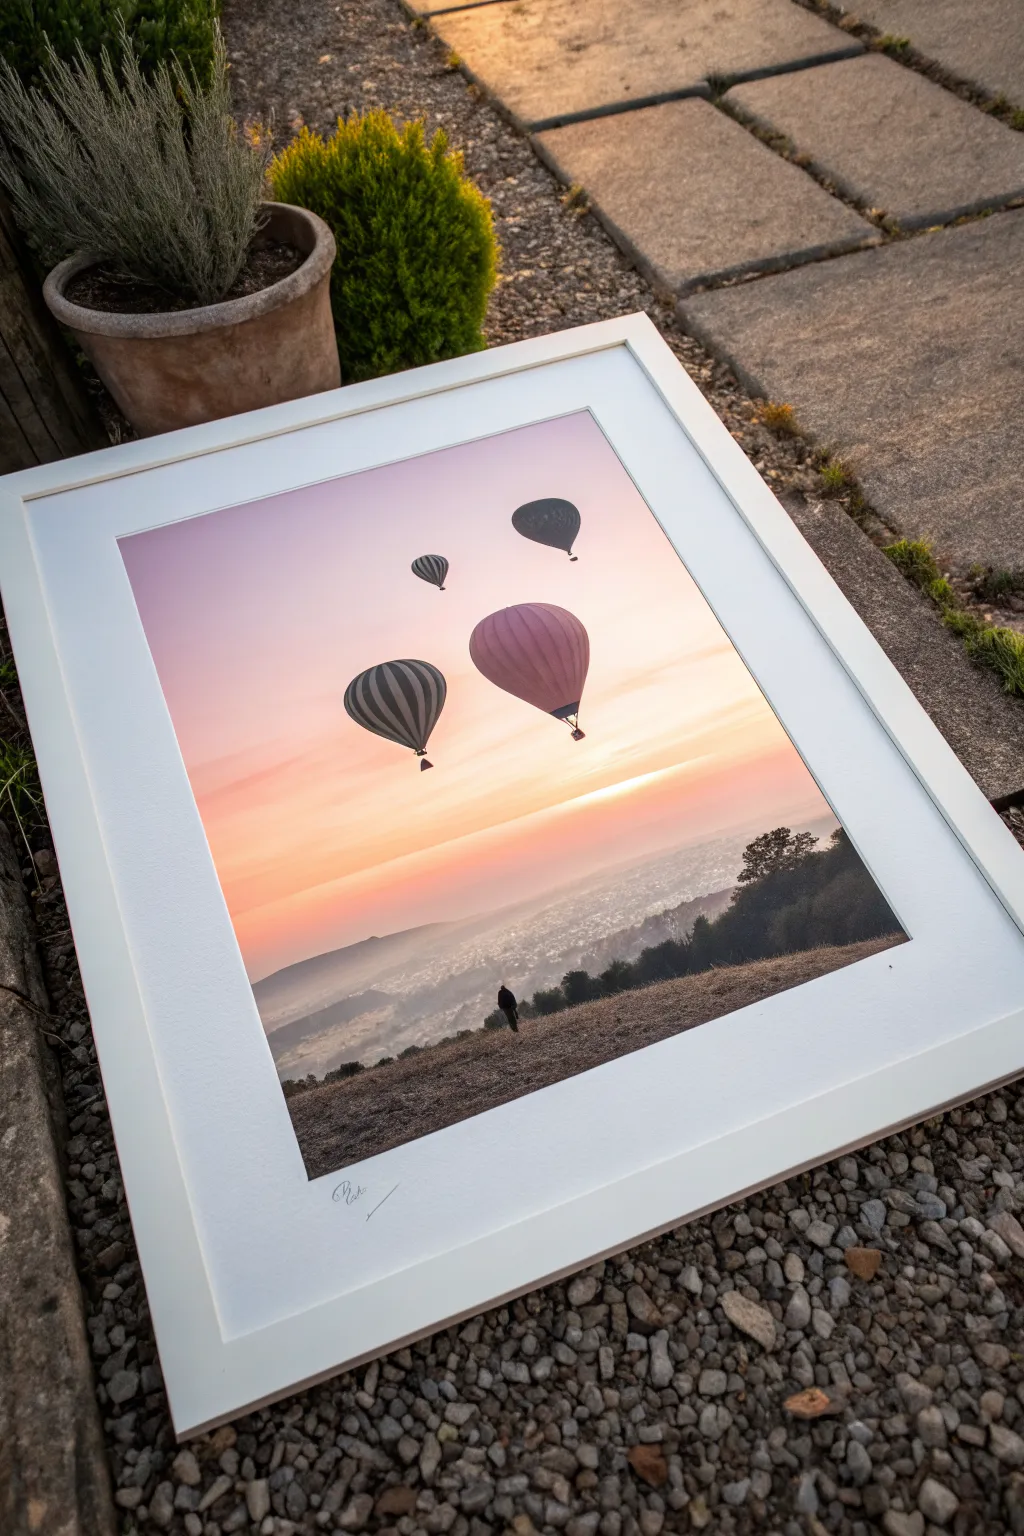
Capture the breathtaking tranquility of a morning flight with this radiant airbrush project, featuring silhouetted balloons against a glowing horizon. The soft gradients and high-contrast foreground create a professional-looking depth that is surprisingly achievable for beginners.
Step-by-Step Guide
Materials
- Airbrush kit (double action preferred)
- Acrylic airbrush paints (White, Lemon Yellow, Orange, Magenta, Violet, Black)
- Hot press watercolor paper or smooth Bristol board
- Frisket film or masking tape
- Hobby knife (X-Acto)
- Cutting mat
- Reference photo of balloons
- Easel or backing board
Step 1: Planning and Masking
-
Prepare the surface:
Secure your paper to a backing board using masking tape on all four edges. This creates a clean white border and prevents the paper from buckling under the moisture of the paint. -
Sketch the layout:
Lightly sketch the horizon line about one-third up from the bottom. Determine where your four balloons will float, varying their sizes to create distance perspective. -
Mask the balloons:
Apply frisket film over the sky area where the balloons will be. Trace your balloon sketches carefully with a hobby knife and peel away the surplus film, leaving only the balloon shapes covered to protect the white paper. -
Mask the foreground:
Cover the entire land area below the horizon line with paper or tape. You want a sharp, clean line separating the sky from the distant hills.
Soft Edges Pro-Tip
For distant mountains without hard lines, lift your torn paper mask slightly off the surface while spraying to create a soft, misty edge.
Step 2: Painting the Sky Gradient
-
Create the horizon glow:
Load your airbrush with opaque white mixed with a touch of lemon yellow. Spray horizontally right along the masked horizon line to establish the brightest light source. -
Add warmth:
Switch to a pure yellow or light orange. Spray a band just above the white glow, blending upwards gently. Keep the airbrush moving smoothly from left to right to avoid pooling. -
Introduce the pinks:
Clean your cup and load a soft magenta. Start spraying from the top of the paper, fading it out as you reach the yellow band to create a seamless orange transition. -
Deepen the upper sky:
Mix a small amount of violet into your magenta. Airbrush the very top corners of the sky to create a rich, early-morning atmosphere. -
Add cloud streaks:
Using a torn piece of paper as a loose shield, hold it slightly off the surface in the orange zone and spray lightly with white or light yellow to create soft, horizontal cloud striations.
Level Up: Texture
Use a splatter cap or lower your air pressure significantly to spit tiny dots of paint on the foreground hill for realistic grit and grass texture.
Step 3: The Landscape
-
Reveal the land:
Once the sky is fully dry, remove the masking from the bottom foreground area. Now, mask off the painted sky you just finished to protect it. -
Paint distant hills:
Mix a hazy purple-grey color. Spray the furthest hills lightly, keeping them misty and low-contrast to push them into the background. -
Define the mid-ground:
Darken your mix with a little black or dark blue. Use a torn paper stencil to define the edge of the closer hills, spraying the edge sharply but fading the color out as you move down. -
Create the foreground texture:
For the closest hill in the immediate foreground, use a dark, almost black mixture. Hold the airbrush close to create a splatter texture or stipple effect that mimics grassy terrain.
Step 4: Detailing the Balloons
-
Unmask the balloons:
Carefully peel the frisket film off the balloon shapes. You should have bright white silhouettes against your colorful sky. -
Base coat the balloons:
Using a very fine nozzle setting, lightly mist the balloons with colors reflecting the light—pinks and oranges on the sun-facing side, and cooler tones on the shadow side. -
Add stripes and volume:
I like to use a simple paper shield to mask vertical stripes on the balloons. Spray darker tones along the edges of the sphere to make them look 3D and round. -
Paint the baskets:
Switch to black paint and a detail brush (or very fine airbrush spray) to add the small baskets hanging below each balloon. -
Final touches:
Add a tiny silhouette of a person standing on the hill if desired, using black paint. Sign your work in the bottom white border for that gallery finish.
Peel off your border tape to reveal the crisp edges and enjoy your serene morning landscape
Stenciled Planets and Rings
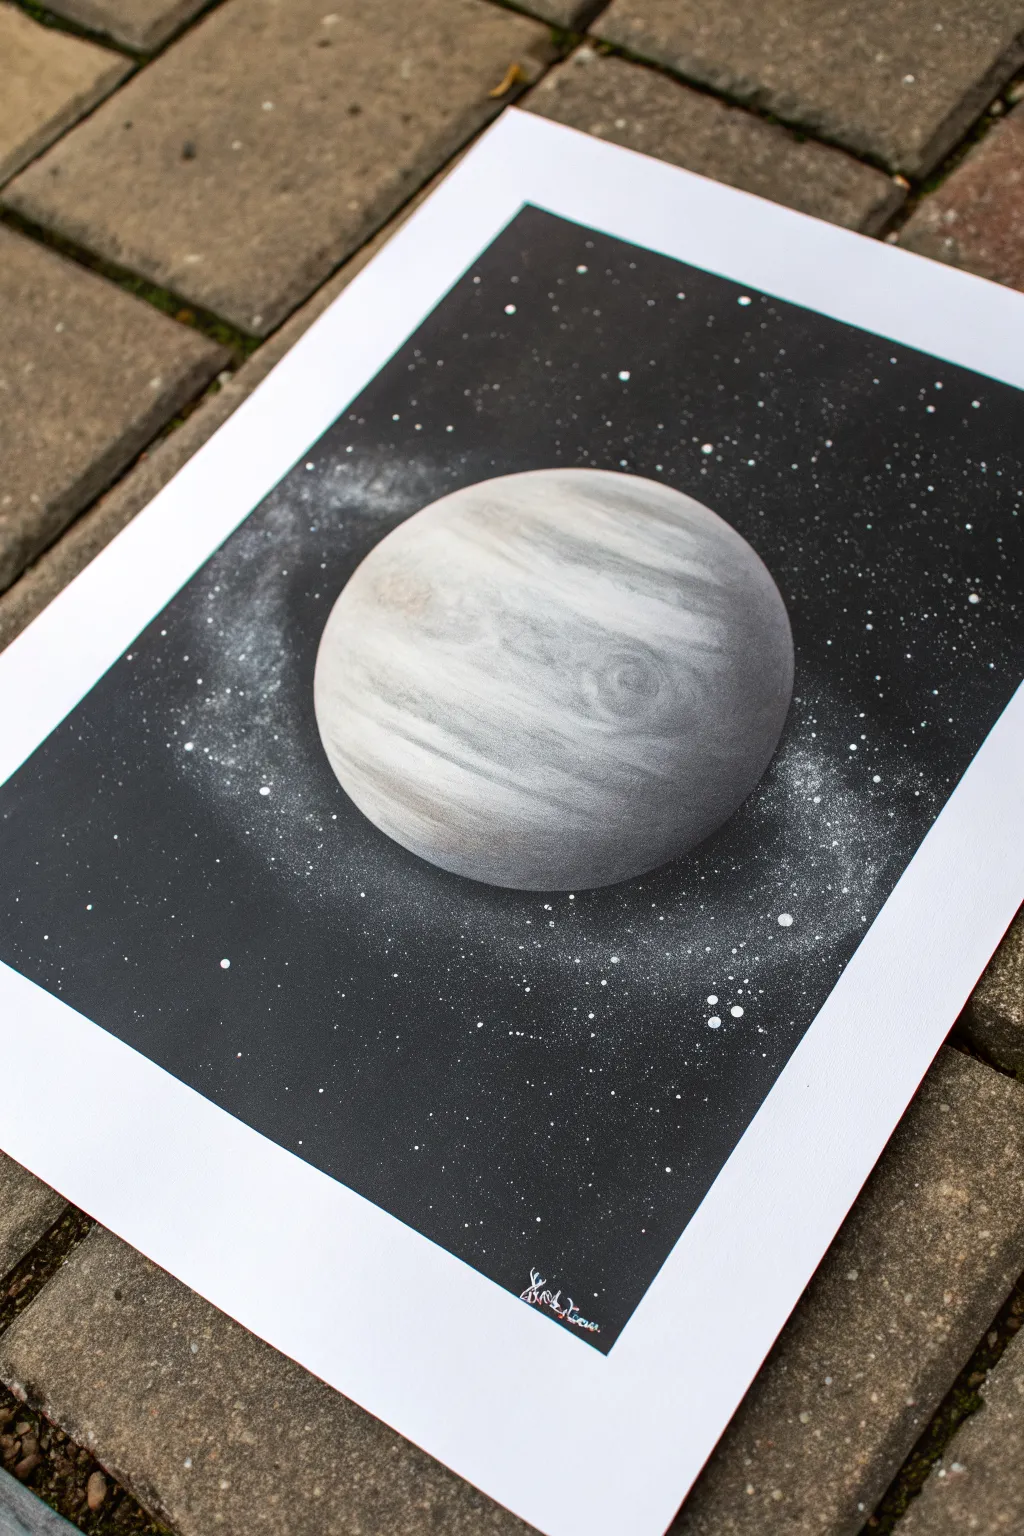
Create a stunning, realistic gas giant floating in the depths of space using simple stencil techniques and careful layering. This monochromatic masterpiece relies on soft transitions and texture to give the planet a spherical, three-dimensional feel against a stark black void.
Step-by-Step
Materials
- Airbrush set with compressor
- Acrylic airbrush paints (Black, White, Grey/Sepia optional)
- Thick bristol board or airbrush paper
- Circular stencil (plastic or cut from acetate/stiff card)
- Newsprint or scrap paper for texture
- White gel pen or stiff toothbrush (for stars)
- Masking fluid or masking tape
- Paper weights or coins
Step 1: Setting the Stage
-
Prepare your surface:
Begin with a clean sheet of high-quality bristol board or airbrush paper. Ensure it is taped down flat to prevent warping when the paint is applied. -
Position the planet:
Place your circular stencil exactly where you want the planet to be. If you are using a positive mask (a circle cut out of paper), keep it aside for later; right now, you need the negative space (the hole). -
Anchor the stencil:
Use weights or small pieces of rolled tape underneath the edges of your stencil to keep it perfectly flat against the paper. This prevents ‘underspray’ which ruins crisp edges.
Step 2: Painting the Planet Surface
-
Base layer shading:
With the stencil in place, lightly mist white paint across the entire circular area. Keep it translucent; you don’t need solid coverage yet. -
Creating the curved shadow:
To give the sphere volume, spray a soft crescent of black or dark grey along the bottom-right curve of the circle. This establishes the shadow side of the planet. -
Texturing with paper:
Crumple a piece of newsprint or magazine paper into a loose ball, then flatten it slightly. This is my favorite tool for organic textures. -
Applying the texture:
Hold the crumpled paper over the wet paint inside the stencil circle and lightly spray a darker grey or diluted black over the edge of the paper. Move the paper around to create random, cloud-like patterns. -
Adding the bands:
Tear a strip of paper to create a jagged, uneven edge. Hold this torn edge across the planet horizontally and spray a light mist of grey over it. Repeat this at different latitudes to mimic Jupiter’s gas bands. -
Softening the features:
Mist a very thin layer of white over the entire planet again to push the dark textures back and make them look like they are beneath the atmosphere. -
Highlighting the curve:
Spray a concentrated burst of pure white along the top-left edge of the circle. This creates the ‘hot spot’ where the sun hits the planet, reinforcing the 3D effect.
Sticky Situation
If your stencil lifts paint when removed, wait longer for the base layers to cure, or stick the tape to your clothes first to reduce its tackiness.
Step 3: The Deep Space Background
-
Mask the planet:
Once the planet is dry, cover it precisely with the positive circle mask (the cutout circle that matches your stencil size). Weight it down so it doesn’t shift. -
Fill the void:
Spray the entire background with solid black. Work in even passes to ensure a deep, opaque coverage without soaking the paper. -
Planetary glow:
Before the black is fully opaque near the planet, you can leave a very faint, misty halo around the masked circle to suggest an atmosphere, though a sharp edge works well too. -
Creating the galactic haze:
Take your white paint and dilute it slightly. Spray a very faint, sweeping curve of white mist across the black background, behind the planet, to create a Milky Way effect. -
Adding distant stars:
Load a stiff brush or toothbrush with white paint. Run your thumb across the bristles to flick tiny specks of paint onto the black background. -
Adding bright stars:
For the brighter, more prominent stars, use the airbrush to spray tiny dots, or dot them in manually with a white gel pen for precision. -
The reveal:
Carefully lift off the circle mask covering the planet. Do this slowly to ensure no paint bridges peel off with it. -
Final touches:
Inspect the edge of the planet. If the black background looks too harsh against the planet, you can mist a tiny amount of white glow on the black area just touching the light side of the planet.
Cosmic Colors
Try misting a transparent layer of interference blue or purple over the shadows before unmasking. It adds a subtle, sci-fi shimmer to the darkness.
Hang your new celestial creation on the wall and enjoy the view of your personal solar system
Negative Space Leaf With Soft Background
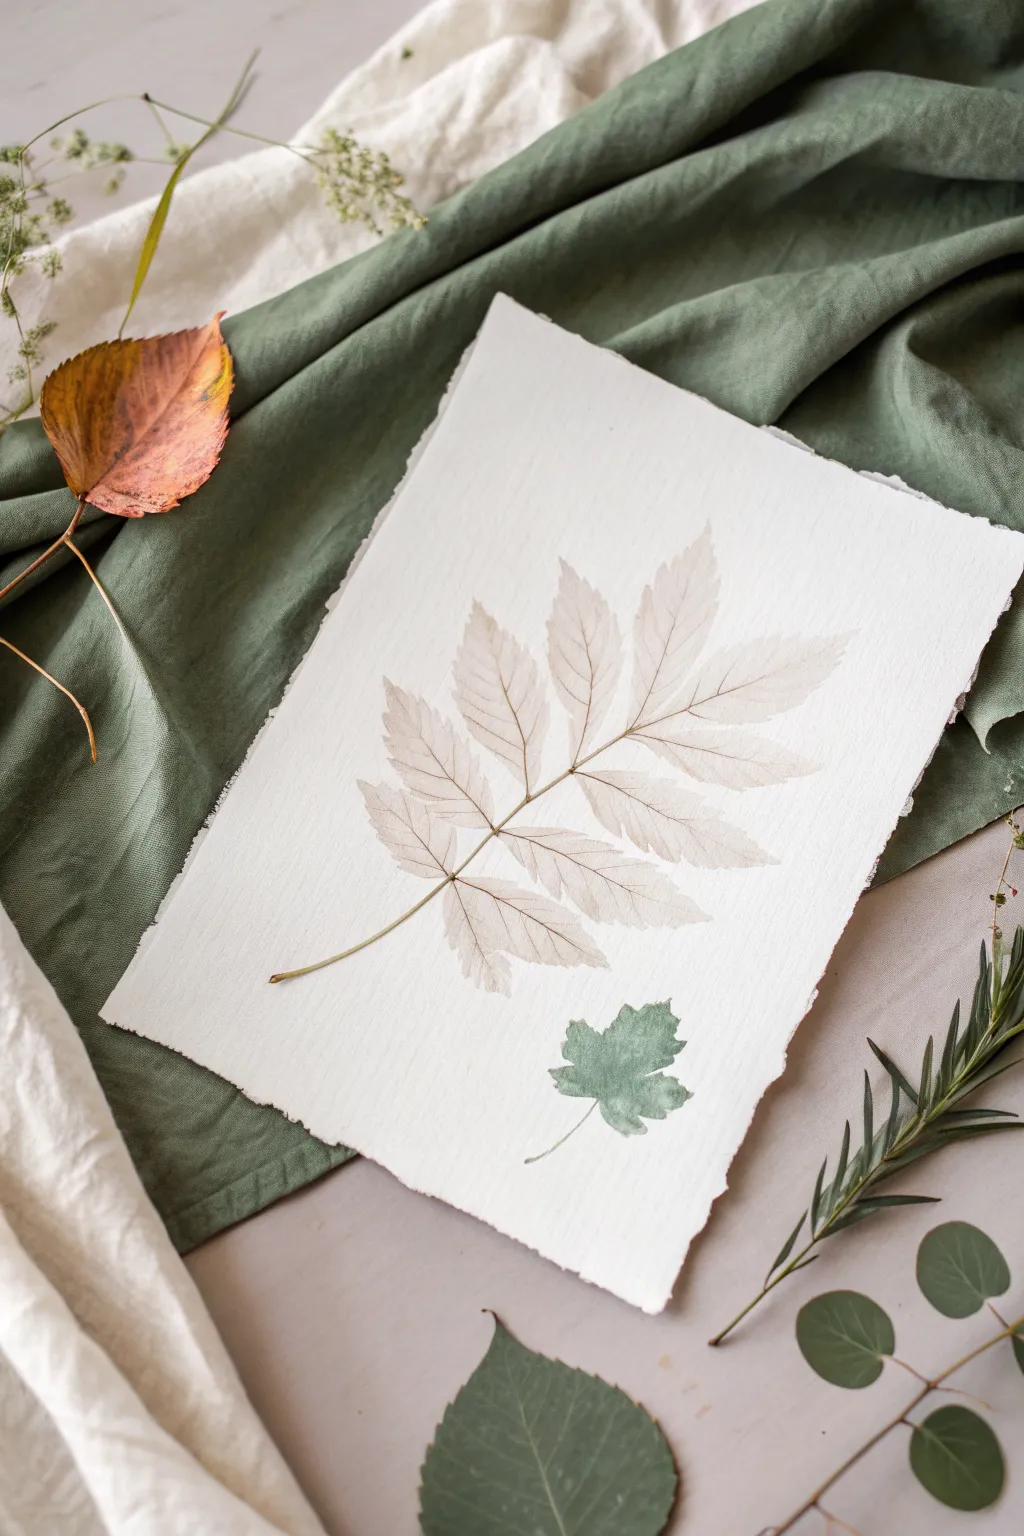
Capture the delicate, skeletal beauty of nature with this subtle airbrush technique that mimics a fossilized imprint. By using real botanical elements as masking stencils, you’ll create a whisper-soft composition on textured paper that feels both modern and timeless.
Step-by-Step
Materials
- Heavyweight cold-press watercolor paper with deckled edges
- Airbrush gun and compressor
- Airbrush medium or flow improver
- Acrylic ink or high-flow acrylics (Sepia, Burnt Umber, Sage Green)
- Fresh or pressed leaves with prominent veins (Ash or Walnut leaves work well)
- Repositionable spray adhesive
- Tweezers
- Scrap paper for testing
Step 1: Preparation and Arrangement
-
Select your canvas:
Choose a high-quality watercolor paper. For this specific look, tearing the edges against a ruler or using pre-deckled paper adds wonderful, rustic character. -
Prepare the botanical stencil:
Select a leaf that is relatively flat. If your leaf is fresh and curly, press it under a heavy book for an hour to flatten it out, ensuring sharper edges during spraying. -
Apply adhesive:
Take your leaf outside or into a well-ventilated box. Lightly mist the *back* side with repositionable spray adhesive. You want it tacky, not soaking wet. -
Position the main subject:
Gently place the large leaf diagonally across your paper. Press down firmly on all the edges and the stem to ensure a tight seal against the paper texture. -
Add the secondary element:
Repeat the process with a smaller, differently shaped leaf (like a small maple or ivy) and place it lower in the composition for balance.
Paint Bleeding Under Leaf?
If paint crept under the edges, your spray angle was too low. Always spray directly from above (90 degrees) or slightly away from the leaf edge, never toward it.
Step 2: Airbrushing the Ghost Layer
-
Mix the sepia tone:
In your airbrush cup, mix a drop of Sepia ink with plenty of airbrush medium. You want a very transparent, tea-stained wash, not an opaque color. -
Test the flow:
Spray onto scrap paper first. Adjust your pressure so you get a fine, misty veil rather than heavy speckles. -
Spray the outline:
Gently spray *over* the edges of the large leaf, aiming slightly inwards from the paper towards the leaf center. This defines the silhouette. -
Soften the background:
Extend the spray lightly outward into the negative space of the paper, fading it out to nothing so there are no harsh lines. -
Switch colors:
Clean your cup briefly and switch to a very dilute Sage Green. I prefer to keep this color mix extremely watery. -
Spray the smaller leaf:
Apply the green mist over the smaller leaf stencil. Focus on the edges to make the shape pop against the white paper.
Step 3: Revealing and Detailing
-
Let it set:
Allow the paint to dry for about 5-10 minutes. It needs to be dry to the touch so you don’t smudge it during removal. -
Remove the masks:
Using tweezers, grab the very tip of the leaf stem. Peal it back slowly and carefully to reveal the crisp white paper underneath. -
The reverse stencil trick:
To get the vein details inside the white space, we will use the leaf itself as a stamp. Take the leaf you just removed, which now has overspray on it. -
Ink the veins:
Lightly mist the textured/veiny side of the leaf with a slightly darker Brown or Sepia airbrush color. -
Press the print:
Carefully place the leaf back into the white negative space, inked side down. Place a clean sheet of scrap paper over it and rub gently with your hand. -
Final reveal:
Lift the leaf again. You should now have a faint, delicate impression of the veins inside the white silhouette, completing the ghostly look.
Make It Look Aged
For a vintage botanical look, mist the entire paper very lightly with a highly diluted yellow ochre before starting the leaf stenciling process.
Once the ink is fully dry, frame this delicate botanical study behind glass to preserve its gentle details
Easy Animal Silhouette on a Gradient
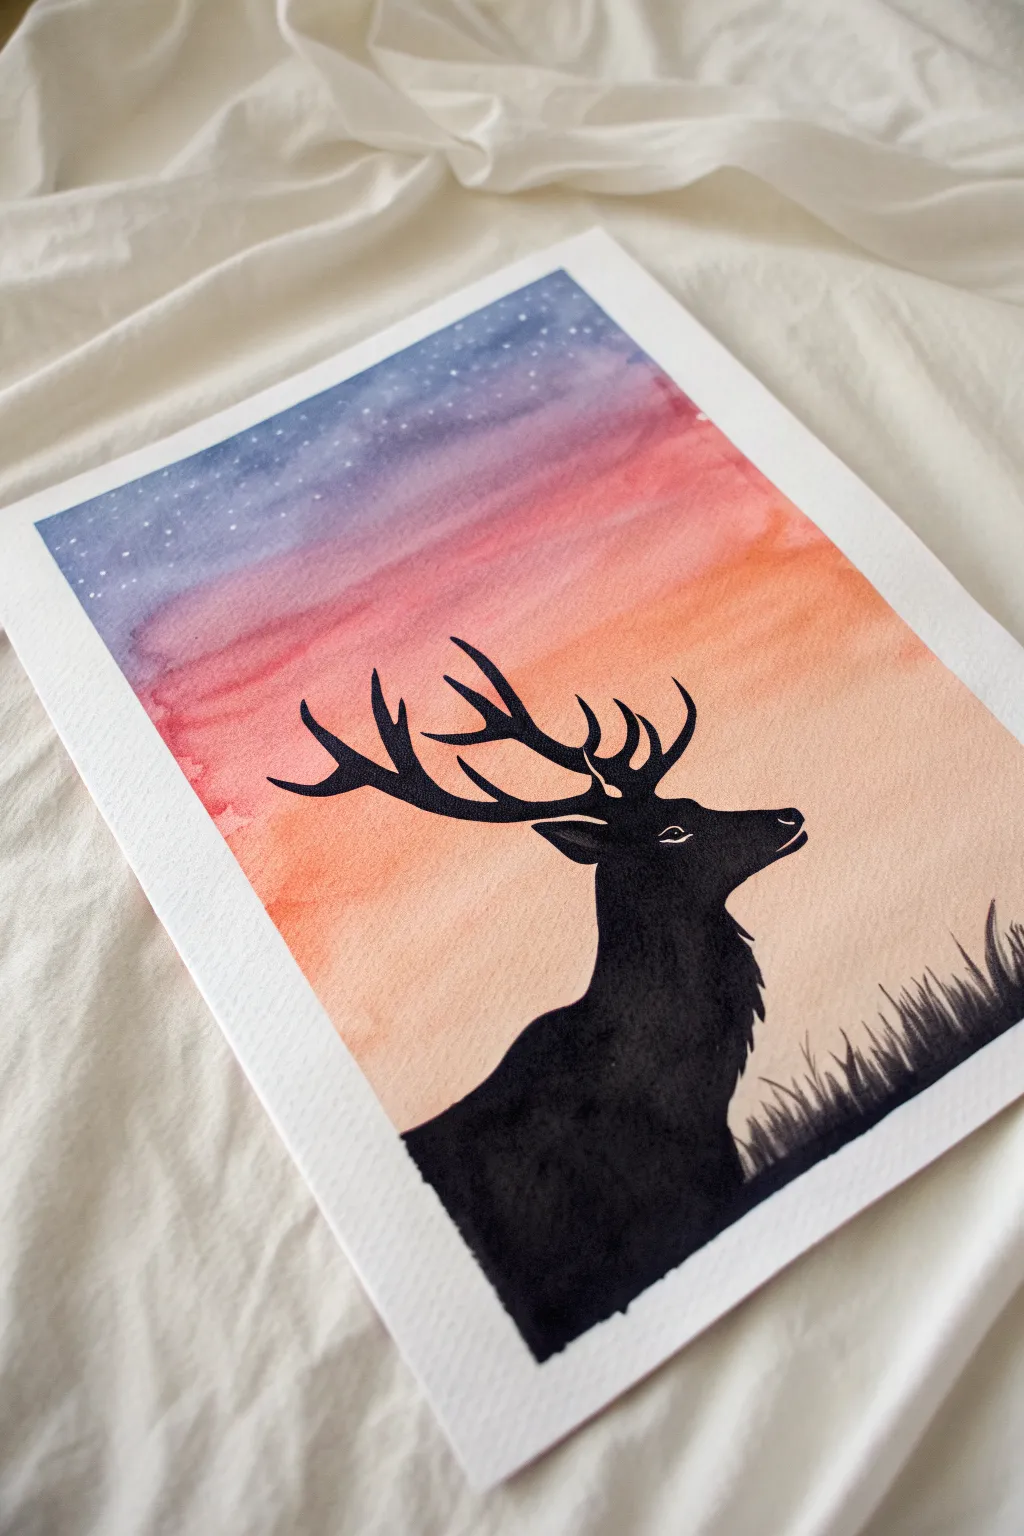
Capture the serene beauty of twilight with this striking silhouette project. By blending a dreamy, star-speckled gradient sky with a crisp animal outline, you’ll create a piece that looks incredibly professional yet requires simple techniques to achieve.
Detailed Instructions
Materials
- Heavyweight watercolor paper or mixed media paper (300gsm recommended)
- Airbrush kit (with compressor)
- Airbrush acrylic paint: Navy Blue, Purple, Magenta or Pink, Orange, Peach/Light Orange
- Liquid masking fluid (drawing gum) and old brush
- Masking tape or painter’s tape
- Hobby knife (X-Acto)
- Black acrylic paint or black India ink
- Fine liner brush (size 0 or 00)
- Small flat shader brush
- White gouache or white gel pen
- Paper towels and water cup
Step 1: Preparation & Masking
-
Secure the paper:
Begin by taping down all four edges of your watercolor paper to a sturdy board or your work surface. This prevents the paper from buckling when wet and gives you that satisfying crisp white border at the end. -
Sketch the outline:
Lightly sketch the outline of the deer’s head, neck, and antlers with a pencil. You don’t need to fill it in yet; just get the shape right. If you aren’t comfortable drawing freehand, you can cut a stencil from cardstock or transfer a printed image. -
Apply masking fluid:
Using an old brush (one you don’t mind ruining, as masking fluid is tough to clean), fill in the entire deer shape with liquid masking fluid. Be careful to get clean edges on the antlers. -
Dry completely:
Allow the masking fluid to dry thoroughly. It should turn yellowish and feel rubbery to the touch. Do not airbrush until this is 100% dry.
Fixing Overspray
If airbrush paint bleeds under your tape, use opaque white gouache to touch up the borders. It covers mistakes perfectly and restores that crisp edge.
Step 2: Airbrushing the Sky
-
Start with the lightest tone:
Load your airbrush with the Peach or Light Orange color. Spray the bottom third of the paper, keeping the coverage smooth and even. -
Introduce the mid-tones:
Clean the cup briefly and switch to your bold Orange. Blend this into the top of the peach section, moving upward to create a transition zone. -
Layering the sunset:
Switch to Magenta or Pink. Spray across the middle of the paper, overlapping slightly with the orange to create a warm coral hue where they meet. -
Deepening the sky:
Move to Purple. Apply this above the pink layer. I like to keep my strokes horizontal here to mimic the stratification of the atmosphere. -
The night sky:
Finish the very top of the gradient with Navy Blue. Fade it down into the purple for a deep, rich twilight effect. Let the paint dry completely before moving on. -
Adding stars:
Dip a stiffer brush or toothbrush into watered-down white gouache. Gently flick the bristles to spatter tiny stars over the purple and blue sections of the sky.
Step 3: The Silhouette & Details
-
Remove the mask:
Once the sky is bone-dry, gently rub the masking fluid with your finger or a rubber cement pickup tool to peel it away, revealing the stark white paper underneath. -
Paint the base black:
Using your flat shader brush and opaque black acrylic or ink, fill in the main body of the deer. Ensure the black is solid and not streaky. -
Refine the antlers:
Switch to your fine liner brush. Carefully paint the antlers, sharpening the points and smoothing out any jagged edges left by the masking fluid. -
Adding texture:
Use the tip of the fine brush to add small, jagged strokes along the deer’s neck and chest to simulate fur texture, rather than a perfectly smooth line. -
Paint the grass:
At the bottom right corner, use quick, upward flicking motions with the black paint to create blades of grass overlapping the bottom of the deer. -
The eye detail:
With a white gel pen or a tiny dot of white gouache, add the small eye slit and a highlight on the nose to give the animal life. -
Final reveal:
Wait for the black paint to dry completely, then slowly peel away the masking tape from the edges at a 45-degree angle to reveal your clean frame.
Add a Galaxy Twist
Mix a tiny drop of iridescent medium into your top blue layer for a subtle shimmer, or paint a faint white ‘Milky Way’ band before splattering your stars.
Now you have a stunning, high-contrast piece of art that perfectly balances vibrant color with bold simplicity.
Textured Background With Airbrushed Glow
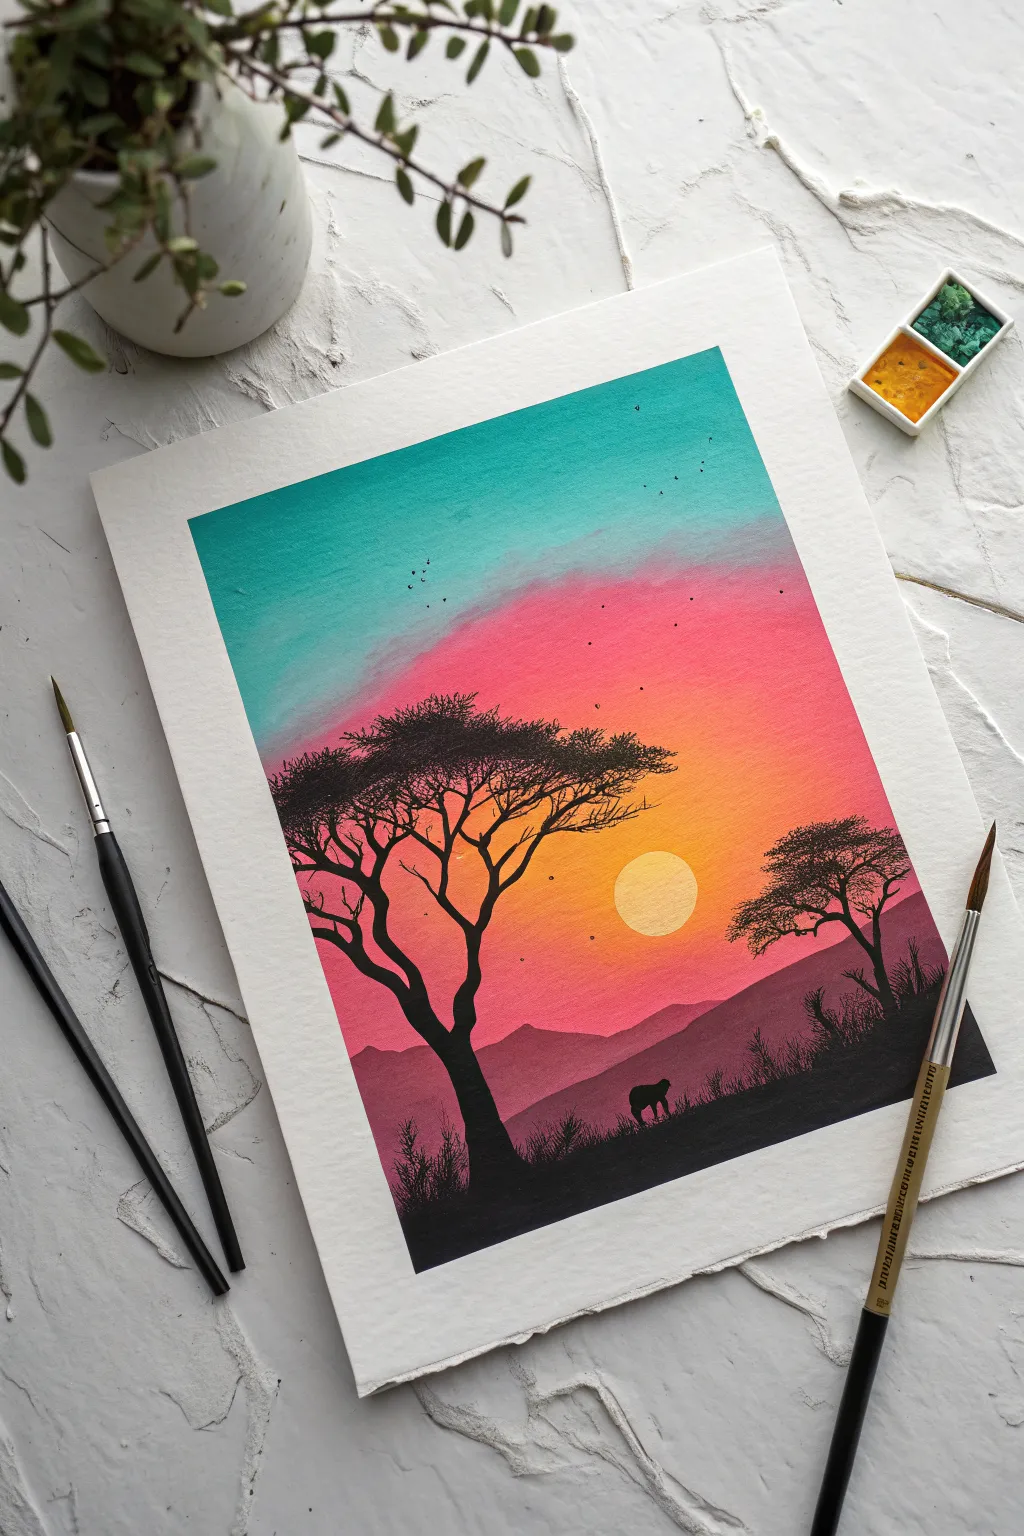
This striking project captures the serene beauty of the African plains with a vibrant, glowing gradient sky and stark black silhouettes. It’s a perfect exercise for practicing smooth airbrush blends and mastering stencil or freehand masking techniques.
How-To Guide
Materials
- Heavyweight watercolor paper or mixed media art board
- Airbrush set with compressor
- Acrylic airbrush paints (Turquoise, Magenta/Hot Pink, Orange, Yellow, Black, White)
- Frisket film or masking tape
- Hobby knife (e.g., X-Acto)
- Circle template or a coin (for masking the sun)
- Paintbrushes (fine liner and small round)
- Paper towels
- Easel or flat working surface
Step 1: Setting the Sky Gradient
-
Prepare the canvas:
Tape down your watercolor paper to a board to prevent warping and create a clean white border around the edge. -
Mask the sun:
Cut a perfect circle from frisket film or painter’s tape and place it strictly in the lower-middle right section where you want your sun to sit. Press the edges down firmly. -
Start with turquoise:
Load your airbrush with turquoise paint. Start spraying at the very top of the paper, moving horizontally back and forth to create a solid band of color that fades out as you move down about one-third of the page. -
Apply the pink transition:
Clean your airbrush cup and switch to magenta or hot pink. Start spraying below the turquoise, allowing the top edge of the pink to mist lightly over the bottom of the turquoise to create a soft purplish blend. -
Add the orange glow:
Switch to orange paint. Spray the area below the pink, intensifying the color around where the sun mask is placed. Let this fade softly into the pink area above. -
Finish with yellow highlights:
For the area immediately surrounding the masked sun, mist a small amount of yellow to create a localized glow before the orange takes over.
Step 2: Creating the Landscape
-
Establish the distant mountains:
Once the sky is dry, use a piece of torn paper or a custom-cut stencil to mask off the horizon line. With a dark purple or diluted black, lightly airbrush the first layer of distant mountains. -
Layer the hills:
Move your mask down slightly and spray a darker, more opaque layer of black or deep violet to create the mid-ground hills. This creates atmospheric perspective. -
Paint the foreground:
Remove all landscape masks. Using solid black paint, airbrush or hand-paint the bottom strip of the paper to create the solid ground in the immediate foreground which will anchor your scene. -
Reveal the sun:
Carefully peel away the circle mask you applied in the beginning. Usually, sticking with the white of the paper is brightest, but you can lightly mist it with yellow if you want a warmer sun.
Uneven Gradients?
If your sky bands look stripey, hold the airbrush further back (6-8 inches) and apply thinner layers. I find letting layers dry completely between colors prevents muddying.
Step 3: Detailed Silhouettes
-
Draft the main tree:
Switch to a fine detail paintbrush and black acrylic paint. Outline the trunk of a large acacia tree on the left side, making the base wide and tapering as it goes up. -
Branch out:
Paint the characteristic flat-topped branches of the acacia. Use shaky, organic strokes for the smaller twigs to make them look natural and weathered. -
Add foliage texture:
Stipple the paintbrush on top of the branches to create the dense, flat clusters of leaves typical of savanna trees. Keep the silhouette solid and dark. -
Add the secondary tree:
Paint a smaller, slightly more distant tree on the right side of the canvas to balance the composition, following the same trunk and branch method. -
Create the elephant:
In the valley between the hills, carefully paint the small silhouette of an elephant. Focus on the distinct shape of the rounded back and trunk to make it recognizable even at a small scale. -
Detail the grass:
Using your finest liner brush, flick quick, upward strokes along the bottom black foreground to simulate tall savanna grasses. -
Paint the birds:
Add a flock of tiny visible ‘v’ shapes or dots in the upper sky, varying their sizes to suggest they are flying at different distances. -
Final touches:
Check for any light spots in your black silhouettes and touch them up to ensure they are opaque against the bright sunset.
Level Up: Texture
Splatter opaque white paint lightly over the sky using a toothbrush before removing the masks to create a starry night transition effect.
Peel off your border tape carefully to reveal a crisp edge that frames your glowing savanna masterpiece

Have a question or want to share your own experience? I'd love to hear from you in the comments below!