
When I want something festive fast, Easter chalk art is my go-to because it looks adorable even with super simple shapes. Grab a board or some pavement and let’s make bunnies and eggs that feel playful, sweet, and totally doable.
Simple Easter Bunny Face Outline
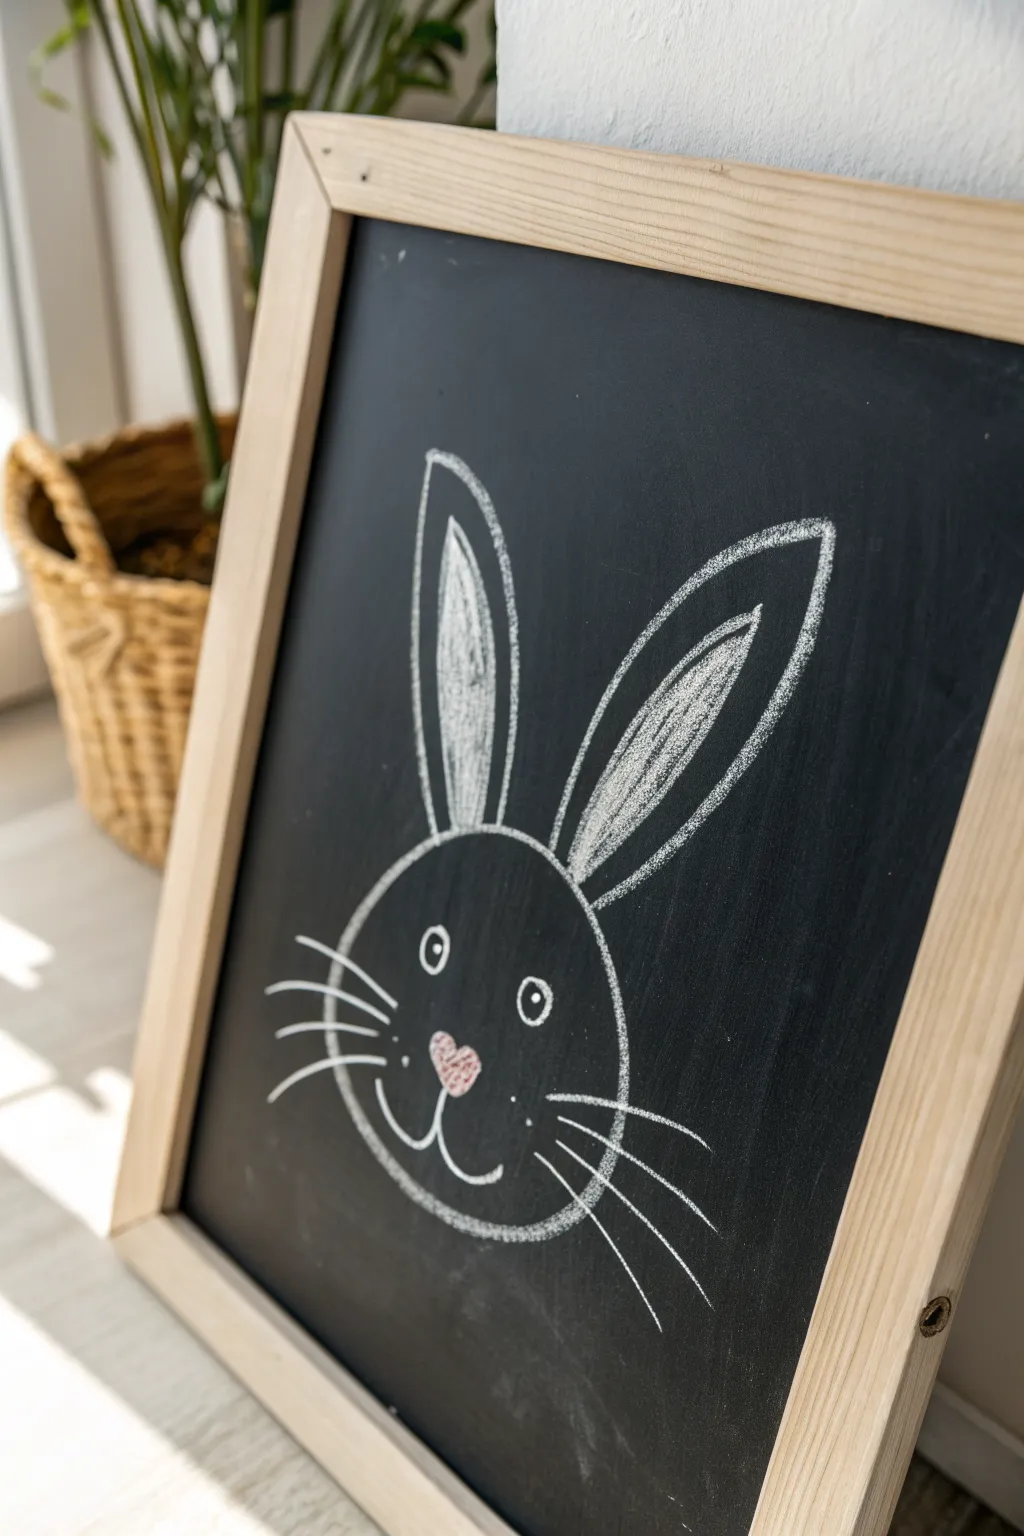
Bring a touch of minimalist charm to your Easter decor with this sweet and simple chalkboard bunny. The clean white lines against the dark slate create a striking contrast, while a tiny pop of pink adds just the right amount of character to the nose.
Step-by-Step Tutorial
Materials
- Framed chalkboard (any size)
- White chalk stick (or chalk marker for cleaner lines)
- Pink chalk stick or pastel
- Soft cloth or chalkboard eraser
- Cotton swab (optional, for blending)
Step 1: Setting the Foundation
-
Clean surface:
Begin with a freshly cleaned slate. Wipe down your chalkboard with a damp cloth to remove any old dust or grease, ensuring the surface is perfectly matte black once dry. -
Draw the head shape:
Start by drawing a large, slightly flattened circle in the lower-middle portion of the board. This doesn’t need to be perfectly round; a slightly organic, oval shape gives the bunny more character. -
First ear outline:
From the top left of your circle, draw a long, tall loop extending upward. Curve it slightly outward and then bring it back down to meet the head, creating a classic bunny ear shape. -
Second ear outline:
Repeat this process on the right side, though you can angle this ear slightly differently—perhaps tilting it further to the right—to give the bunny a playful, inquisitive look. -
Inner ear detail:
Inside the left ear loop, draw a smaller, identical shape that mirrors the outer line. Leave a clear gap of black space between the two lines. -
Repeat inner detail:
Do the same for the right ear, drawing a smaller loop inside the main outline. Try to keep the spacing consistent with the first ear.
Chalk Not Bright?
If your lines look dim, try dipping the tip of your chalk in water for 5 seconds before drawing. It applies wet but dries opaque and brilliant white.
Step 2: Filing In and Refining
-
Fill the inner ears:
Take your white chalk and gently shade inside the smaller inner ear loops. Use diagonal strokes or a scribbling motion to fill them in completely with white. -
Thicken the outlines:
Go back over your main head circle and the outer ear lines. Press a little harder this time to make the white lines bold and bright against the black background. -
Clean up smudges:
If your hand rested on the board while drawing, use a dry fingertip or cloth corner to quickly wipe away any accidental smudges outside the main lines.
Add a Bow Tie
Draw a simple bow tie or flower collar directly under the chin using pastel colors like blue or yellow to customize your bunny for spring.
Step 3: Adding the Face
-
Draw the eyes:
In the upper half of the head circle, draw two small circles for the eyes. Space them widely apart to enhance the cute factor. -
Add pupils:
Place a solid dot in the center of each eye circle. I like to press the chalk tip and twist it slightly to get a nice round dot. -
Create the nose:
Just below the midpoint between the eyes, draw a small, upside-down triangle with softened corners. This will be the nose. -
Color the nose:
Using your pink chalk or pastel, carefully color in the nose triangle. This subtle splash of color really brings the drawing to life. -
Draw the mouth:
Starting from the bottom point of the nose, draw a short vertical line down, then curve it upward to the left like a ‘J’ shape. Then, draw a matching curve upward to the right to complete the mouth anchor. -
Add whiskers (left):
On the left cheek area, draw three distinct lines fanning outward. Vary their lengths slightly, with the middle whisker often being the longest. -
Add whiskers (right):
Mirror this on the right cheek with three more fanning lines. Quick, confident strokes work best here to keep the whisker ends sharp and tapered. -
Freckle details:
Finally, add three tiny dots on each cheek, just between the nose and the start of the whiskers, for a sweet finishing texture.
Step back and enjoy your adorable, hand-drawn Easter greeting


Easy Easter Egg Doodle Patterns
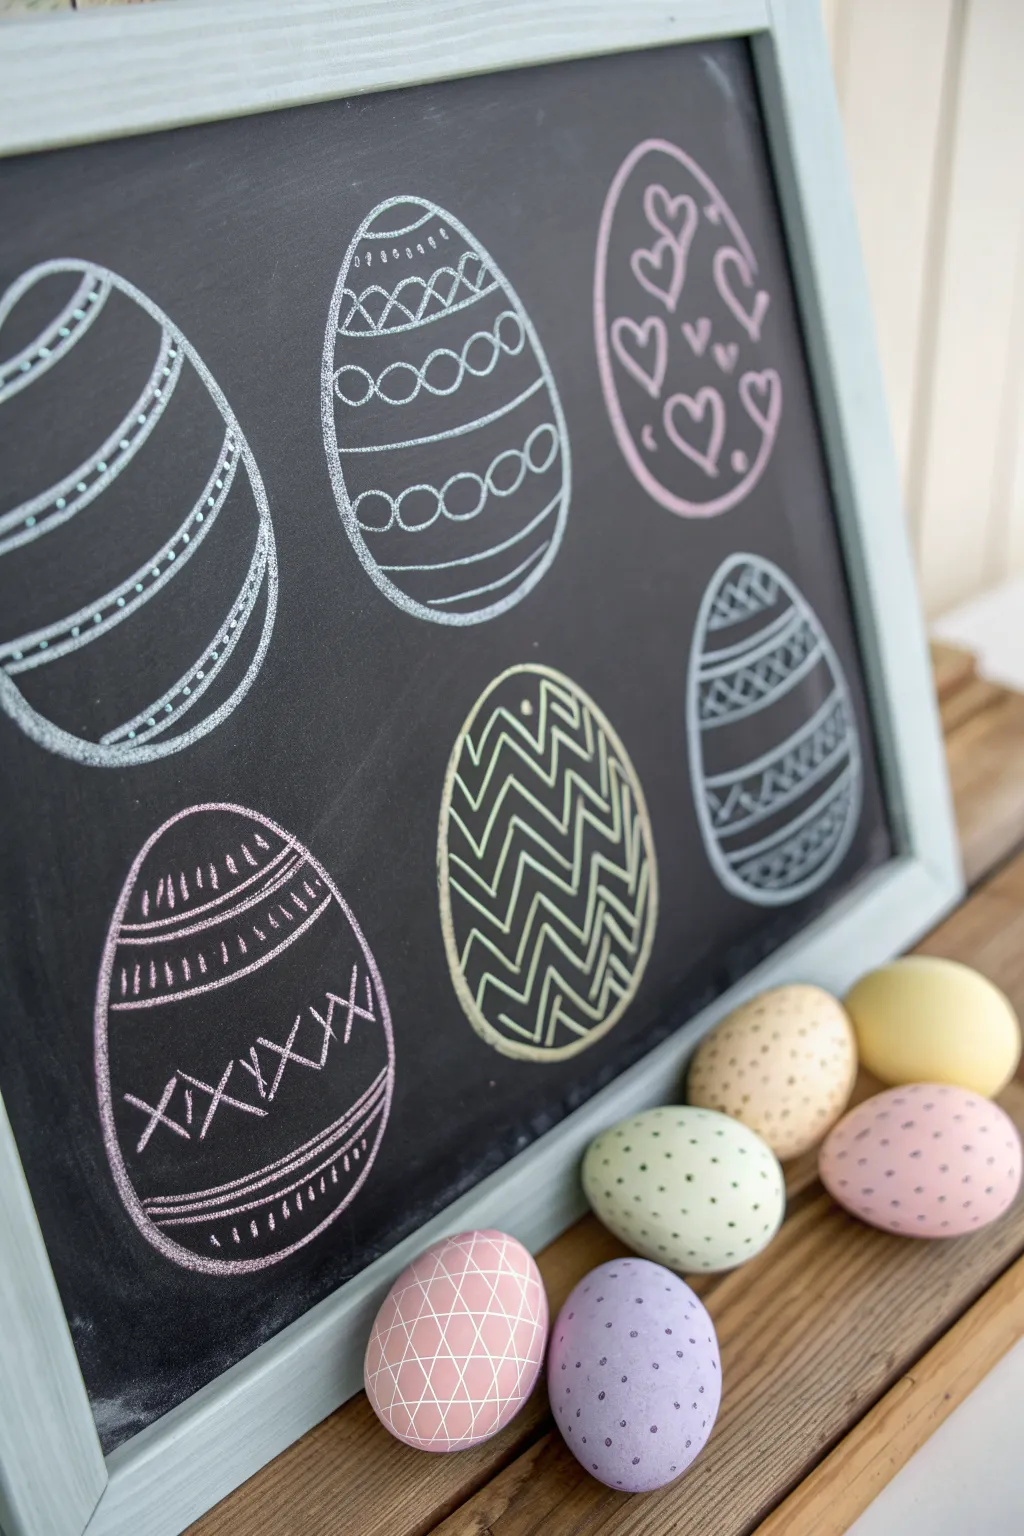
Bring a festive touch to your home with this charming chalkboard display featuring six distinct Easter egg designs. The soft, pastel-like chalk lines against the dark background create a cozy, hand-drawn aesthetic that pairs perfectly with real decorated eggs.
How-To Guide
Materials
- Framed chalkboard (medium size)
- White or pastel chalk markers (fine tip)
- Standard stick chalk (optional, for sketching)
- Damp cloth or microfiber towel
- Ruler (optional)
- Cotton swabs (for cleanup)
Step 1: Planning and Outline
-
Clean surface:
Begin by ensuring your chalkboard surface is completely clean and dry. Wipe away any old dust with a damp cloth and let it air dry to prevent smudging your new design. -
Sketch placement:
Visualize a grid of six even spaces on your board—two rows of three. Using a stick of chalk very lightly, mark faint dots where the center of each egg will go to ensure balanced spacing. -
Draw egg outlines:
carefully draw six oval egg shapes. Aim for them to be roughly the same size, slightly wider at the bottom and narrower at the top. Don’t worry if they aren’t perfect ovals; the hand-drawn look adds character.
Sharper Lines
Keep a pencil sharpener handy if using standard chalk. A sharp tip allows for much more intricate patterns like the tiny dots inside the double lines.
Step 2: Top Row Designs
-
create the dotted stripe egg:
For the top-left egg, draw three sets of double curved lines across the width of the oval. Inside the narrow space between each set of double lines, add a row of small, evenly spaced dots. -
Design the geometric band egg:
Move to the top-center egg. Draw horizontal bands dividing the egg into four sections. Fill the second section from the top with a zig-zag line, and the third from the top with a row of touching circles. -
Add simple stripes:
Finish the center egg by adding simple, solid curved lines in the remaining top and bottom sections to frame the patterned bands. -
Draw the heart egg:
For the top-right egg, use a pink-tinted chalk or marker if available, or stick to white. Draw scattered hearts of various sizes and orientations floating inside the oval outline. Fill gaps with tiny ‘v’ shapes or dots for texture.
Step 3: Bottom Row Designs
-
Detail the tribal pattern egg:
On the bottom-left egg, draw two horizontal bands near the top and two near the bottom. Fill the the top bands with vertical hatch marks. -
Add cross-hatching:
In the large central space of the bottom-left egg, draw a row of large ‘X’ shapes. Connect the tips of the X’s with a horizontal line running through the center. -
Create the zig-zag egg:
For the bottom-center egg, I find it easiest to start with a single vertical line down the center. Then, fill the entire egg with tight, repetitive zig-zag patterns (chevron style) running from top to bottom. -
Outline the basket weave egg:
Finally, for the bottom-right egg, draw three thick horizontal bands. Inside these bands, draw angled slash marks. Alternate the direction of the slashes for each band (left-leaning, then right-leaning, etc.) to mimic a weave.
Add Pop
Use colored chalk markers for specific details. Make every other stripe a pastel blue or pink to coordinate with real dyed eggs placed nearby.
Step 4: Finishing touches
-
Refine lines:
Go back over your main outlines with your chalk marker to thicken them and make them pop against the black background. -
Clean up edges:
Use a slightly damp cotton swab to erase any stray marks, smudge lines, or the initial spacing dots you made in step two. -
Set the scene:
Place your finished chalkboard on a shelf or mantel and arrange real decorated eggs in front of it to complete the festive display.
Enjoy your custom hand-drawn Easter decor piece


Big, Centered Happy Easter Lettering
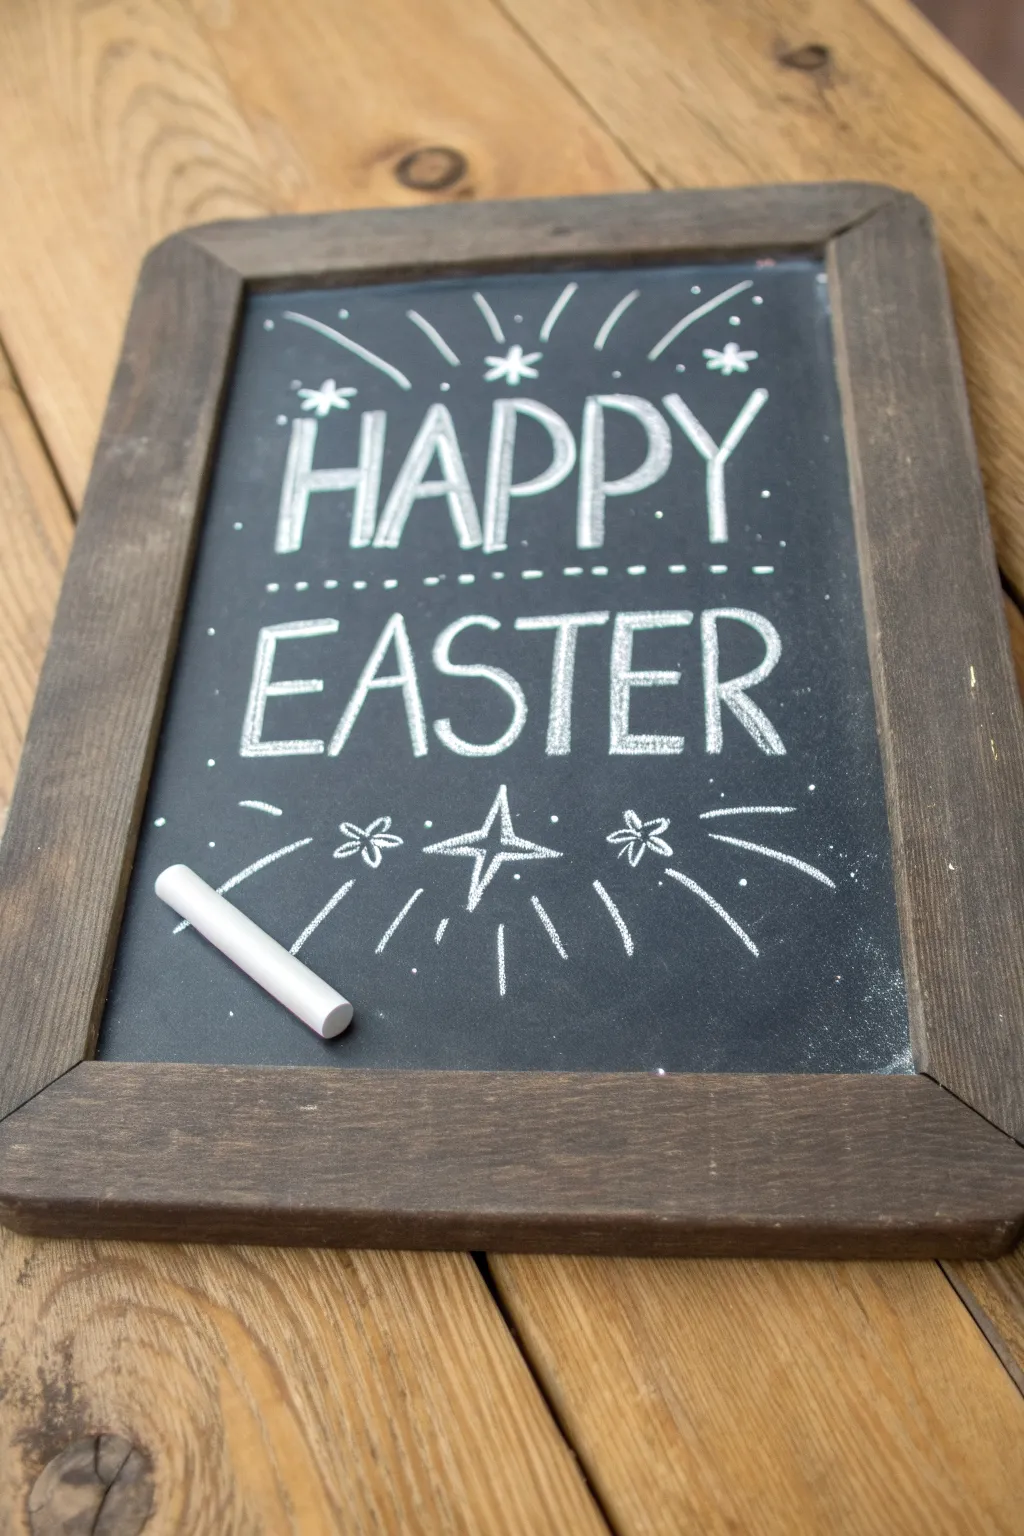
This rustic chalkboard design brings a festive touch to your home with bold, clean lettering and charming starburst accents. It’s a perfect beginner-friendly project that relies on simple block letters to create a high-impact Easter greeting.
Step-by-Step
Materials
- Small blackboard with wooden frame (approx. 8×10 or 11×14 inches)
- White stick chalk (standard classroom chalk)
- Pencil sharpener (handheld) or sandpaper
- Cotton swab or Q-tip
- Damp cloth
- Ruler
Step 1: Preparing the Surface
-
Season the board:
Before starting your lettering, take a piece of chalk and turn it on its side, rubbing it over the entire chalkboard surface. -
Wipe it down:
Use a dry cloth or paper towel to wipe the chalk away. This leaves a dusty, gray film that prevents ‘ghosting’ (where your first lines get permanently etched in) and gives the board that nice vintage look. -
Sharpen your tool:
For crisp lettering, sharpen the tip of your stick chalk using a handheld pencil sharpener. If the chalk is too soft, you can rub the tip against sandpaper to create a chiseled edge.
Chalk Sharpness Hack
Keep a piece of sandpaper taped to your table while working. Rub your chalk against it frequently to maintain a sharp point without breaking the stick.
Step 2: Drafting the Layout
-
Mark guidelines:
Using a ruler and very light pressure, draw a horizontal line roughly one-third of the way down the board for the bottom of the word ‘HAPPY’. -
Add the second baseline:
Draw another horizontal guide roughly two-thirds down the board for the bottom of the word ‘EASTER’. This ensures your text stays straight. -
Rough sketching:
Lightly sketch the skeleton of the letters. Don’t press hard yet. Center ‘HAPPY’ on the top line and ‘EASTER’ on the bottom line. I find it helpful to draw the middle letters first (the first ‘P’ and the ‘T’) to ensure perfect centering.
Add Dimension
Add a simple drop shadow to the right side of every letter stroke using gray pastel or by lightly smudging the chalk to make the words pop off the board.
Step 3: Creating the Typography
-
Thicken the strokes:
Go back over your skeleton letters and convert them into block letters. Do this by adding a second line parallel to your first strokes to create shape and weight. -
Fill the letters:
Instead of coloring them in solidly, use a hatching technique. Draw short, diagonal or horizontal lines inside the block letters to fill them in loosely. This creates a charming, textured variety. -
Refine the edges:
Pressing firmly with a freshly sharpened chalk tip, outline each letter one last time to make the white really pop against the black background. -
Add the divider:
Draw a dashed line between the two words. Keep the dashes evenly spaced to separate the phrases clearly.
Step 4: Adding Decorative Flourishes
-
Top embellishments:
Above the word ‘HAPPY’, draw three small asterisks or stars spaced out horizontally. -
Radiating lines:
Draw curved lines shooting upward and outward from the stars, like fireworks or sun rays. Vary the lengths—some short, some long—for a dynamic feel. -
Bottom starburst:
Below the word ‘EASTER’, draw a larger, four-point star in the center. The vertical and horizontal lines should be longest. -
Side flowers:
Flank the central star with two smaller, five-petal flowers or star shapes. -
Bottom rays:
Mirror the top design by drawing curved lines radiating downward and outward from the bottom central star design. -
Final dots:
Sprinkle small dots randomly around the perimeter of the words and near the rays to add a bit of magical sparkle. -
Clean up:
Use a damp cotton swab or Q-tip to erase your initial guidelines and sharpen up any smudged edges on your lettering.
Now you have a charming, hand-lettered sign ready to greet your Easter guests
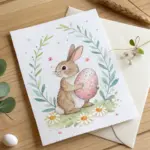

Bunny and Wreath Chalkboard Combo
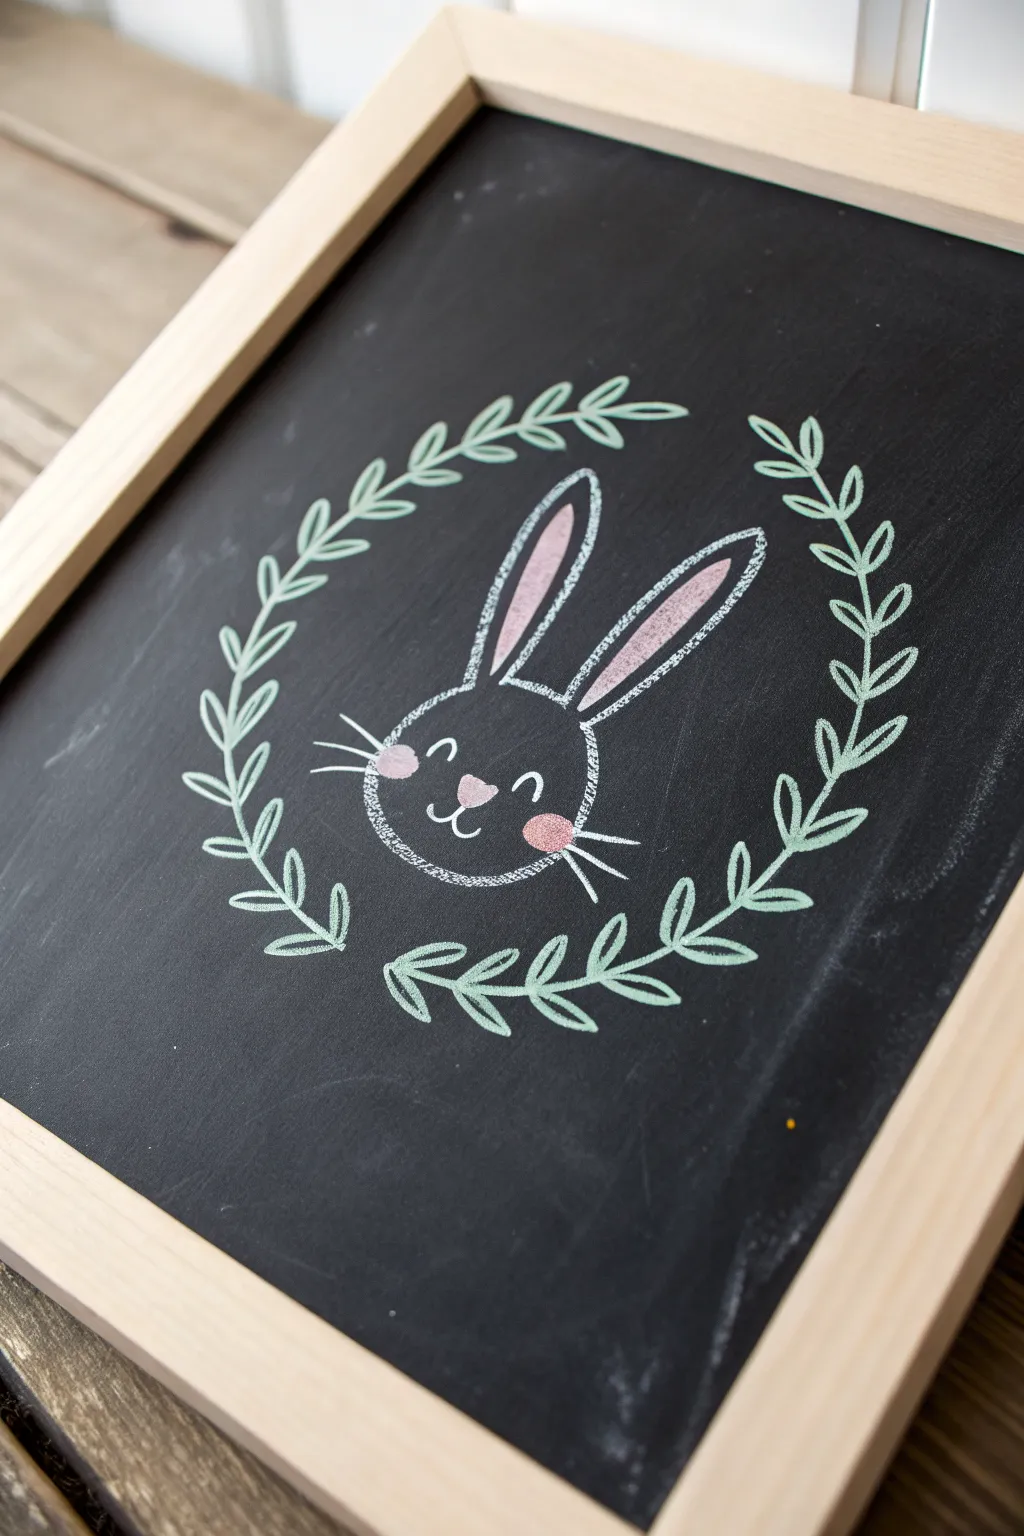
Celebrate Easter with this charming chalkboard design featuring a smiling bunny nestled inside a delicate laurel wreath. The soft pastel pink accents bring a warm touch to the crisp white chalk lines, making it a perfect seasonal decoration for your home.
Detailed Instructions
Materials
- Small framed chalkboard
- White standard chalk stick (sharpened) or chalk marker (fine tip)
- Mint green or light sage chalk marker
- Soft pink chalk stick or pastel chalk
- Microfiber cloth or chalk eraser
- Cotton swabs (Q-tips)
- Pencil sharpener (if using stick chalk)
Step 1: Setting the Scene
-
Clean the Slate:
Begin with a perfectly clean surface. Wipe down your chalkboard with a damp microfiber cloth to remove any dust or old chalk residue, then let it dry specifically until it’s completely matte. -
Mark the Sizing:
Lightly visualize where the center of your board is. You want the bunny face to occupy the center, with about two inches of breathing room on the sides for the wreath.
Sharpen Up
Use a standard pencil sharpener on your stick chalk to get needle-point precision. It keeps the bunny whiskers and stems looking professional and crisp.
Step 2: Drawing the Bunny
-
Outline the Head:
Using your white chalk, draw a simple semi-oval shape for the bottom of the bunny’s head. Imagine drawing a wide letter ‘U’ but slightly flattened at the bottom. -
Close the Shape:
Connect the top of the ‘U’ with a gently curved line arching over the top, creating a soft, rounded face shape. -
First Ear Outline:
Starting from the top left of the head, draw a long, tall oval shape extending upward and slightly outward for the left ear. -
Second Ear Outline:
Repeat this on the right side, angling the second ear slightly to the right so they look perky and alert. -
Inner Ear Detail:
Grab your pink chalk stick. Draw a smaller, solid pink oval inside each white ear outline to broaden the color, leaving a small gap between the pink and white lines. -
Refining the Ears:
If the pink chalk smudged outside the lines, use a clean cotton swab to tidy up the edges for a crisp look. -
Adding the Face:
Draw two small, upward-curving arcs for closed, happy eyes. Place them widely apart for a cuter expression. -
Nose and Mouth:
Draw a small inverted triangle with rounded corners in pink for the nose. Below it, draw a standard anchor shape (a ‘J’ and a backwards ‘J’ connected) for the mouth. -
Rosy Cheeks:
Use the side of your pink chalk to create soft, circular blush marks on the cheeks. I like to smudge these slightly with a fingertip to make them look soft and powdery. -
Whiskers:
Finish the bunny by adding three straight, crisp white lines flicking outward from each cheek area.
Step 3: Creating the Wreath
-
Base Circle Guide:
Switch to your green chalk marker or stick. Lightly sketch a very faint circle around the bunny head to serve as a guide for your wreath shape. Keep it roughly an inch away from the ear tips. -
Draw the Stem:
Trace over your guide circle with a distinct line, but leave a small gap at the very top and very bottom so the two branches don’t touch. -
Leaves – Phase One:
Starting at the bottom center, draw small, simple leaf shapes (like grains of rice) alternating on the left and right sides of the stem. -
Leaves – Phase Two:
Continue adding leaves as you move upward along the curve. Angle the leaves so they point towards the top of the chalkboard. -
Mirror the Design:
Repeat the leaf pattern on the other side of the wreath, again starting from the bottom and working your way up to the top opening. -
Detailing the Leaves:
If you want extra depth, draw a tiny line down the center of each larger leaf to suggest a vein. -
Final Cleanup:
Use a slightly damp cotton swab to erase any stray chalk dust or guidelines that are still visible, especially around the bunny’s face.
Add a Bow
Draw a small gingham or polka-dot bow tie at the bottom center of the wreath where the branches meet to add a pop of color.
Set your finished chalkboard on a mantle or shelf to bring a smile to anyone who walks by
BRUSH GUIDE
The Right Brush for Every Stroke
From clean lines to bold texture — master brush choice, stroke control, and essential techniques.
Explore the Full Guide
Bunny Ears Peeking Over a Border
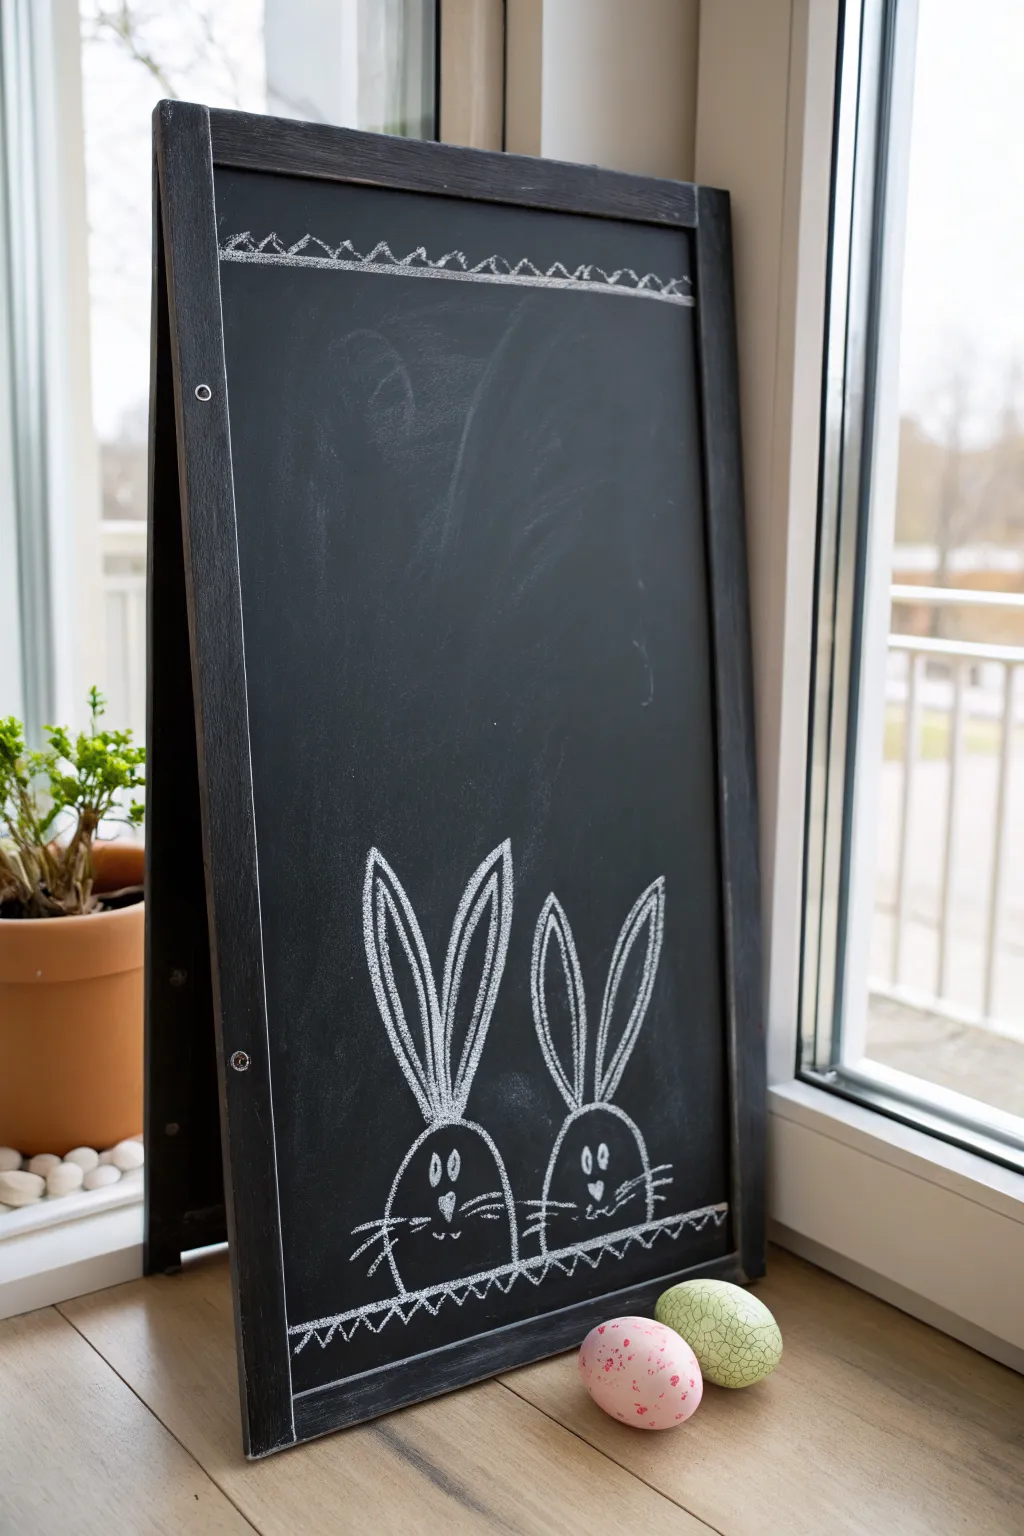
This charming chalkboard display features a pair of whimsical bunnies peeking out from the bottom of the frame, perfect for greeting guests or brightening a corner. The design relies on simple geometric shapes and bold white lines to create a playful, high-contrast Easter decoration.
Step-by-Step Tutorial
Materials
- Standing chalkboard easel or large framed chalkboard
- White chalk stick or chalk marker (medium tip)
- Damp cloth or paper towel
- Ruler (optional)
- Cotton swabs (Q-tips) for erasing small details
Step 1: Preparation & Top Border
-
Clean surface:
Begin by wiping down your chalkboard surface with a damp cloth to remove any old dust or markings. Let it dry completely so your new lines are crisp and bright. -
Draw top guideline:
About two inches from the top edge of the board, lightly sketch a horizontal line spanning the full width. This will serve as the base for your decorative border. -
Add zigzag pattern:
Draw a continuous zigzag line just above your horizontal guideline. Aim for even triangles, but don’t worry about perfection; a hand-drawn look adds character. -
Fill the triangles:
Shade in the negative space below the zigzag line, creating a row of solid white triangles sitting on your base line. This creates a festive bunting effect.
Chalk Dust Control
If your chalk lines look dusty or faint, dip the tip of your chalk stick in water for 5 seconds before drawing. This creates a paste-like line that dries bright white.
Step 2: Drawing the Bunnies
-
Position the base line:
Near the bottom of the board, draw a horizontal line spanning the width, similar to the one at the top. Leave enough space below it to repeat the decorative border later. -
Outline the first head:
Draw an upside-down ‘U’ shape resting on the bottom line on the left side. This forms the first bunny’s head. Keep it relatively short and rounded. -
Add the ears:
Extend two long, pointed ovals upward from the top of the head. Make them tall—almost three times the height of the head—for a classic bunny silhouette. -
Detail the inner ears:
Draw smaller, identical oval shapes inside the ears you just created. These inner lines add depth and define the ear structure. -
Draw the second bunny:
Repeat the head and ear shapes for a second bunny to the right of the first. I find leaning the ears slightly in different directions makes them look more natural. -
Create the faces:
Inside each head shape, draw two small ovals for eyes and color them in solid white. -
Add noses and mouths:
Draw a small heart shape for the nose below the eyes. From the bottom point of the heart, draw a small ‘w’ shape for the mouth. -
Whiskers:
Add three quick horizontal dashes on each cheek for whiskers, extending outward past the face outline.
Step 3: Finishing Touches
-
Bottom border:
Create the bottom border by drawing a zigzag line below the bunnies’ baseline, mirroring the pattern you created at the top. -
Smudge grass texture:
Using your finger or a dry cloth, gently smudge short vertical strokes upward from the very bottom of the board to simulate grass blades underneath the bunnies. -
Clean up:
Use a damp cotton swab to sharpen the points of the ears or erase any stray chalk dust around the eyes. -
Final check:
Step back and assess your drawing. Re-trace any main outlines that look faint to ensure the white pops against the dark background.
Add Some Color
Use colored chalk to tint the inner ears pink or make the noses pastel. You can rub the color with your finger to blend it softly with the white outline.
Now you have an adorable, welcoming display ready for the holiday season
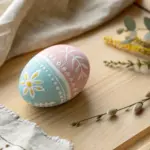
Fast Easter Lily and Egg Pairing
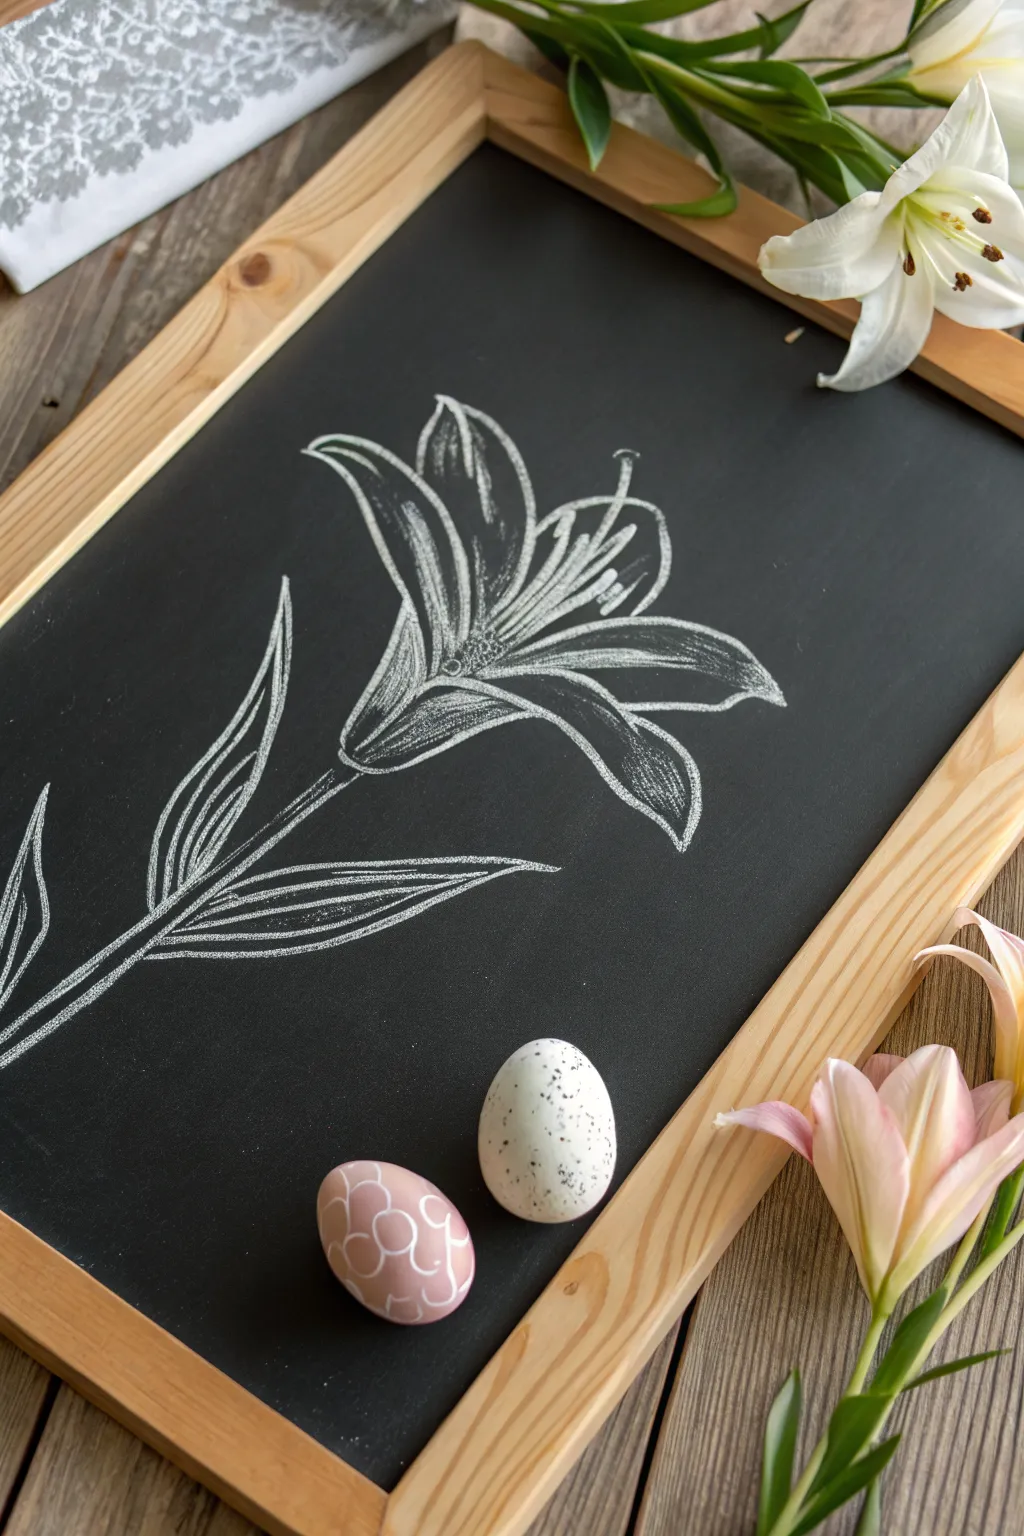
Capture the delicate beauty of spring with this sophisticated yet simple chalkboard art project. By combining a classic white lily sketch with decorative eggs, you’ll create a gorgeous centerpiece that perfectly balances rustic charm and Easter elegance.
Step-by-Step Guide
Materials
- Framed chalkboard (medium size)
- White artist’s chalk or chalk marker (fine and broad tips)
- Damp cloth or sponge
- Cotton swabs (Q-tips)
- Two decorative Easter eggs (one speckled, one patterned)
- Fixative spray (optional)
Step 1: Drafting the Stem and Leaves
-
Establish the main line:
Begin by drawing a long, gentle diagonal line starting from the bottom left corner, reaching up toward the center right. This serves as the primary stem for your lily. -
Sketch the lower leaf:
Near the bottom of your stem, draw a long, slender leaf extending outward to the left. Keep the lines smooth and slightly curved to mimic organic movement. -
Add the upper leaf:
About halfway up the stem, add a second leaf pointing in the same direction but angled slightly higher than the first. This leaf should be slightly larger and broader than the bottom one. -
Suggest leaf veins:
Inside each leaf outline, lightly sketch 2-3 interior lines following the curve of the leaf shape. These don’t need to be perfect; they just add texture and dimension.
Step 2: Constructing the Lily Bloom
-
Outline the central trumpet:
At the top of your stem, draw a deep, trumpet-like shape opening upwards. Think of it as a funnel that widens significantly at the mouth. -
Draw the main petals:
Extend large, curving petals outward from the rim of your trumpet shape. A standard lily has six petals, so aim for three main ones facing you and three peeking from behind. -
Refine the petal tips:
Go back over your petal outlines and give the tips a slight curl or twist. This small detail is what gives the lily its characteristic graceful appearance. -
Add depth lines:
Inside each petal, draw sweeping lines that follow the petal’s length from the center outward. I find that varying the pressure here creates a nice mix of thick and thin lines for shading.
Smudge Control
Is your hand smearing your work? Place a clean sheet of paper under your drawing hand as you work across the board to keep the chalk lines crisp and your skin clean
Step 3: Detailing and Refining
-
Create the stamen:
Draw several long, curved lines extending from the very center of the flower bloom. Add small oval shapes at the tips to represent the anthers. -
Thicken the outlines:
Retrace the main outer lines of the flower and leaves with a bit more pressure to make the image pop against the black background. -
Clean up edges:
Use a damp cotton swab to carefully erase any stray smudge marks or drafting lines you don’t need, sharpening the edges of your drawing. -
Smudge for shadow:
Use your fingertip to lightly smudge the chalk inside the deepest part of the flower trumpet. This subtle gray tone adds immediate depth without needing extra tools.
Level Up: 3D Pollen
Use a tiny dash of yellow or orange soft pastel just on the tips of the stamen (the anthers). This single pop of color brings the whole monochrome drawing to life
Step 4: Styling the Scene
-
Position the board:
Place your finished chalkboard flat on a table or lean it against a wall where you intend to display it. -
Place the speckled egg:
Take a white or cream egg with dark speckles and rest it on the lower right corner of the wooden frame or the board surface itself. -
Add the patterned egg:
Place a second egg—perhaps a soft pink one with white loop patterns—right next to the speckled egg creating a cute cluster. -
Optional: Fresh flowers:
For the full effect, lay a few stems of real lilies near the top right corner of the frame to mirror your drawing.
Enjoy your sophisticated Easter display that brings a touch of artistic flair to the holiday

PENCIL GUIDE
Understanding Pencil Grades from H to B
From first sketch to finished drawing — learn pencil grades, line control, and shading techniques.
Explore the Full Guide
Egg Hunt Arrow Sign on a Chalkboard
This rustic chalkboard sign is the perfect way to direct excited egg hunters toward their prize. With a bold central arrow and charming little egg doodles, it’s a quick project that adds a festive touch to your Easter celebration.
Step-by-Step Tutorial
Materials
- Small framed chalkboard (freestanding or easel style)
- White classic chalk stick or white chalk marker (fine to medium tip)
- Damp cloth or paper towel
- Cotton swabs (Q-tips)
- Ruler (optional)
- Pencil (optional)
Step 1: Planning and Centerpiece
-
Surface Preparation:
Begin by ensuring your chalkboard surface is completely clean and dry. If it’s a brand new board, you might want to season it first by rubbing the side of a chalk stick over the entire surface and wiping it off—this prevents ‘ghosting’ later on. -
Locate the Middle:
Find the approximate vertical center of your board. This is where your arrow will live, so you want to ensure there is enough space above and below for the decorative eggs. -
Draft the Arrow Shaft:
Draw two parallel horizontal lines across the middle of the board. They should span about two-thirds of the board’s width, starting from the left side. -
Close the Tail:
Connect the two lines on the left side with a straight vertical line to close off the back of the arrow. -
Form the Arrowhead:
On the right side, draw a large ‘V’ shape turned sideways. The points of the V should extend wider than your parallel lines, creating a classic pointer shape. Connect the ends of your shaft lines to the back of the V. -
Refine the Lines:
Go over your arrow outline one more time to thicken the lines slightly, making sure the white pops against the dark background.
Step 2: Lettering
-
Spacing the Text:
Visualize the words ‘EGG HUNT’ inside the arrow. You want them centered comfortably. I sometimes use a faint pencil mark to tap out the spacing before committing with chalk. -
Write ‘EGG’:
In the left half of the arrow shaft, print the word ‘EGG’ in capital letters. Use a simple, sans-serif style similar to handwriting for a casual look. -
Write ‘HUNT’:
Follow immediately with ‘HUNT’, ensuring the spacing between the two words feels natural. The text should stop before the arrow begins to flare out.
Clean Lines Hack
Use a damp cotton swab (Q-tip) like an eraser. It’s perfect for sharpening the edges of your letters or fixing a wobbly arrow line without ruining the whole drawing.
Step 3: Decorative Accents
-
Top Row Eggs:
Draw three oval egg shapes in the empty space above the arrow. Space them out evenly so they arch slightly over the design. -
Bottom Row Eggs:
Repeat this process below the arrow with three more egg ovals, mirroring the placement of the top row. -
Design: Zig-Zags:
Decorate the top-left and bottom-middle eggs with a simple zig-zag cracked pattern across their centers. -
Design: Scallops:
For the top-middle and bottom-left eggs, draw a scalloped or wavy line across the center to create a different cracked shell look. -
Design: Stripes:
Finish the remaining two eggs (top-right and bottom-right) by drawing two diagonal stripes across them.
Level Up: Color Pop
Instead of plain white, use pastel chalk markers (pink, blue, yellow) for the decorative eggs to make the sign more vibrant and festive for the holiday.
Step 4: Cleanup and Finish
-
Sharpen Edges:
Use a slightly damp cotton swab to clean up any smudges or to sharpen the corners of your arrow and letters. -
Final Dusting:
Blow away any loose chalk dust. If you used a chalk marker, let it dry completely for about five minutes to prevent smearing when you move the sign.
Now place your sign outside or near the entrance to start the festivities
Bunny Footprints Trail to an Egg

Capture the whimsy of the Easter Bunny’s arrival with this charming chalkboard display featuring delicately drawn paw prints. The trail leads the eye right to a colorful prize, making it a perfect decorative accent for a window ledge or entryway.
Step-by-Step
Materials
- Small framed chalkboard (approx. 11×14 inches)
- White creativity chalk or chalk marker
- Damp paper towel or microfiber cloth
- Cotton swabs (Q-tips)
- Decorated Easter egg (real or craft)
- Optional: White acrylic paint (for frame decoration)
Step 1: Preparing the Board
-
Clean surface:
Begin by wiping down your chalkboard surface with a damp cloth to remove any dust or old markings. A clean slate is essential for sharp, crisp lines. -
Dry completely:
Allow the board to air dry completely. Chalk markers can bleed on damp surfaces, and traditional chalk won’t lay down smoothly if there’s moisture remaining. -
Plan the path:
Visualize a gentle curve for your footprint path. The prints should start near the bottom left and curve upwards toward the top right, simulating a natural walking pattern.
Chalk It Up
Soak your chalk stick in water for 30 seconds before drawing. This creates a paint-like consistency that dries ultra-bright and doesn’t create dust.
Step 2: Drawing the Bunny Prints
-
Draw the first pad:
Starting at the bottom left, draw the main pad of the paw print. This is roughly a rounded triangular shape, pointing slightly upwards. -
Add the toes:
Above the main pad, draw three smaller, elongated ovals for the toes. These should splay out slightly, like gentle flower petals. -
Fill in the shapes:
Use your chalk to fill in the outlines of the pads and toes completely. If using standard chalk, press firmly to get a solid white color. -
Smudge for texture:
I like to gently tap the filled areas with my fingertip to soften the chalk lines. This gives the print a slightly dusty, realistic texture rather than a perfect geometric look. -
Start the sequence:
Move up and to the right for the second print. Offset it slightly to simulate a left-right stepping motion. -
Continue the trail:
Repeat the process for a total of four to five prints, ascending the board. Make sure the prints get slightly smaller as they go up to create a subtle sense of perspective. -
Refine edges:
Use a damp cotton swab to clean up any smudges or jagged edges around your paw prints to make them pop against the black background.
Color Pop
Instead of plain white, match the chalk color of the footprints to one of the accent colors on your Easter egg for a cohesive design theme.
Step 3: Decorating the Frame
-
Dot the sides:
On the wooden frame, use your chalk (or white acrylic paint for permanence) to create clusters of small dots. -
Create flower clusters:
Group these dots into sets of four or five to resemble tiny abstract flowers. Space these clusters evenly along the side rails of the frame. -
Add top accents:
Along the top horizontal rail, create slightly larger, looser clusters that look almost like snowflakes or dandelion puffs. -
Bottom corners:
Don’t forget to add a few dot details near the bottom corners to balance the design visually.
Step 4: Final Assembly
-
Position the board:
Lean the finished chalkboard against a window or wall where the light catches the white chalk. -
Place the prize:
Set your decorated Easter egg at the base of the chalkboard, near the starting footprint. This completes the story that the bunny just hopped by and left a treat.
Step back and enjoy the simple magic of your bunny trail scene


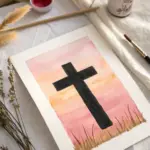
Negative Space Bunny With Chalk Glow
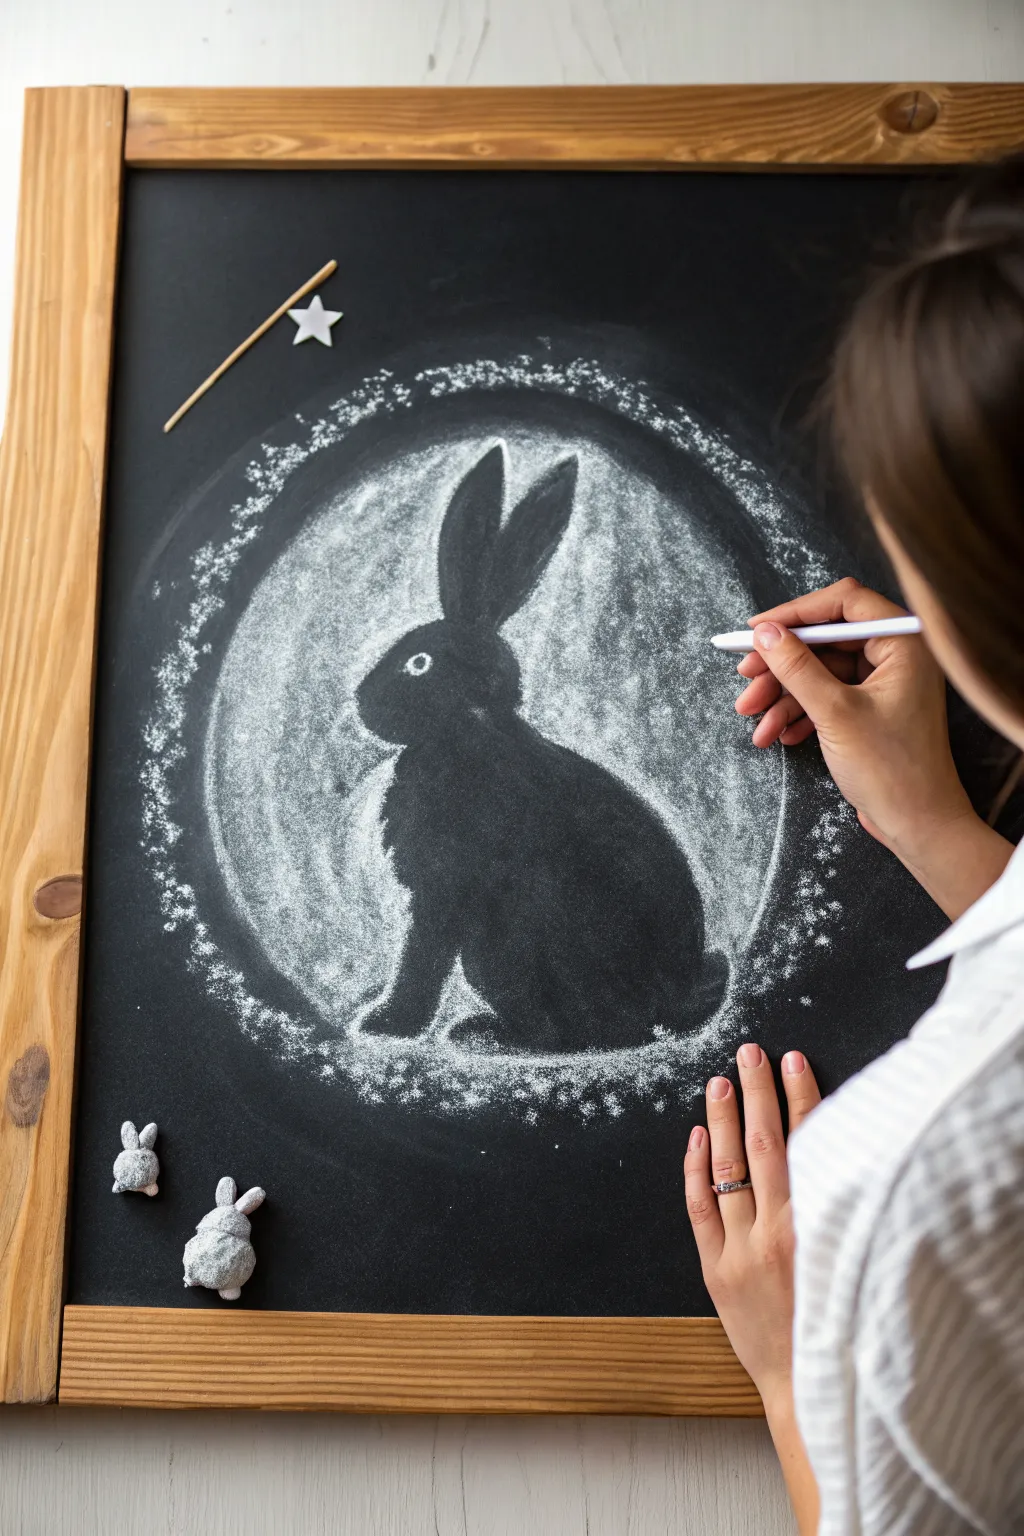
This striking chalkboard project uses negative space to create a bold, black bunny surrounded by a glowing halo of white chalk. It is a deceptively simple technique that creates a dramatic, high-contrast effect perfect for Easter decor.
How-To Guide
Materials
- Large chalkboard
- Thick white chalk stick or pastel
- White pastel pencil or charcoal pencil (for details)
- Plain paper (for the stencil)
- Pencil
- Scissors
- Masking tape or painter’s tape
- Small cloth or tissue (for blending)
- Decorative star wand (optional prop)
- Small bunny figurines (optional props)
Step 1: Preparation & Outline
-
Prepare the stencil:
Begin by drawing a simple bunny profile on a sheet of plain paper. Focus on distinct features like tall ears and a rounded tail. If you aren’t confident drawing freehand, print a bunny silhouette from the internet. -
Cut the shape:
Carefully cut out your bunny drawing. For this project, you need the paper cutout of the bunny itself, not the hole in the paper. Make sure the edges are smooth. -
Position the stencil:
Place your paper bunny in the center of your chalkboard. Use small loops of masking tape on the back of the paper to secure it firmly to the board so it doesn’t shift while you work.
Keep it Clean
Keep a damp microfiber cloth handy. If your hand smudges the black silhouette area while you are coloring the background, wipe it immediately to maintain the high contrast.
Step 2: Creating the Glow
-
Chalk the edge:
Take your thick white chalk and begin drawing heavily around the immediate perimeter of your paper stencil. Ensure you are overlapping the edge of the paper slightly to get a crisp line later. -
Smudge outward:
Using your finger or a soft cloth, firmly smudge the chalk you just applied, pulling the pigment outward away from the stencil. This creates the initial ‘burst’ of light. -
Build the background:
Continue adding chalk in a circular/oval area around the bunny. Vary your pressure to create texture; some areas should be densely white, while others can be more wispy. -
Layer the texture:
Go back over the glowing area with the side of your chalk stick to create broad, sweeping strokes. This adds depth and makes the background look like a misty moon.
Step 3: Refining the Form
-
Create the halo ring:
Draw an outer ring around your main glow using the tip of the chalk. This doesn’t need to be a perfect circle; a slightly organic oval adds character. -
Add ‘sparkle’ dust:
Tap the chalk repeatedly or make small stippling dots around the outer edge of the circle to create a magical, sparkly dust effect. -
Remove the stencil:
Carefully peel up your paper bunny stencil. Lift it straight up to avoid smearing chalk dust into the black negative space you’ve preserved. -
Clean up edges:
If any chalk dust drifted into the black bunny shape, use a clean, slightly damp cotton swab or corner of a cloth to wipe it away, keeping the black silhouette pitch dark.
Add Dimension
Use grey pastel for the outer edges of the glow before fading to black. This creates a softer, more realistic gradient than just using white chalk alone.
Step 4: Final Details
-
Define the bottom:
Use your chalk to ground the bunny, adding a little extra ‘snow’ or mist near the paws and tail so the figure doesn’t look like it is floating. -
Add the eye:
Using a sharp white pastel pencil or the very corner of a chalk stick, draw a small circle for the eye. Add a tiny dot in the center to serve as the pupil. -
Highlight the fur:
I like to gently sketch just a few tiny stray hairs along the bunny’s back or ears where the light would hit, softening the transition between black and white. -
Enhance the outer ring:
Add a few heavier distinct dots or ‘stars’ to the outer ring of the design to enhance the celestial feeling. -
Final dusting:
Blow away any loose, unwanted dust from the board, being careful not to inhale right over your work.
Step back and admire how the simple silhouette jumps off the board with that misty glow
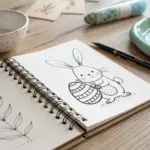
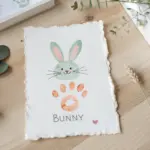
Easy Template Transfer for Bunny and Text
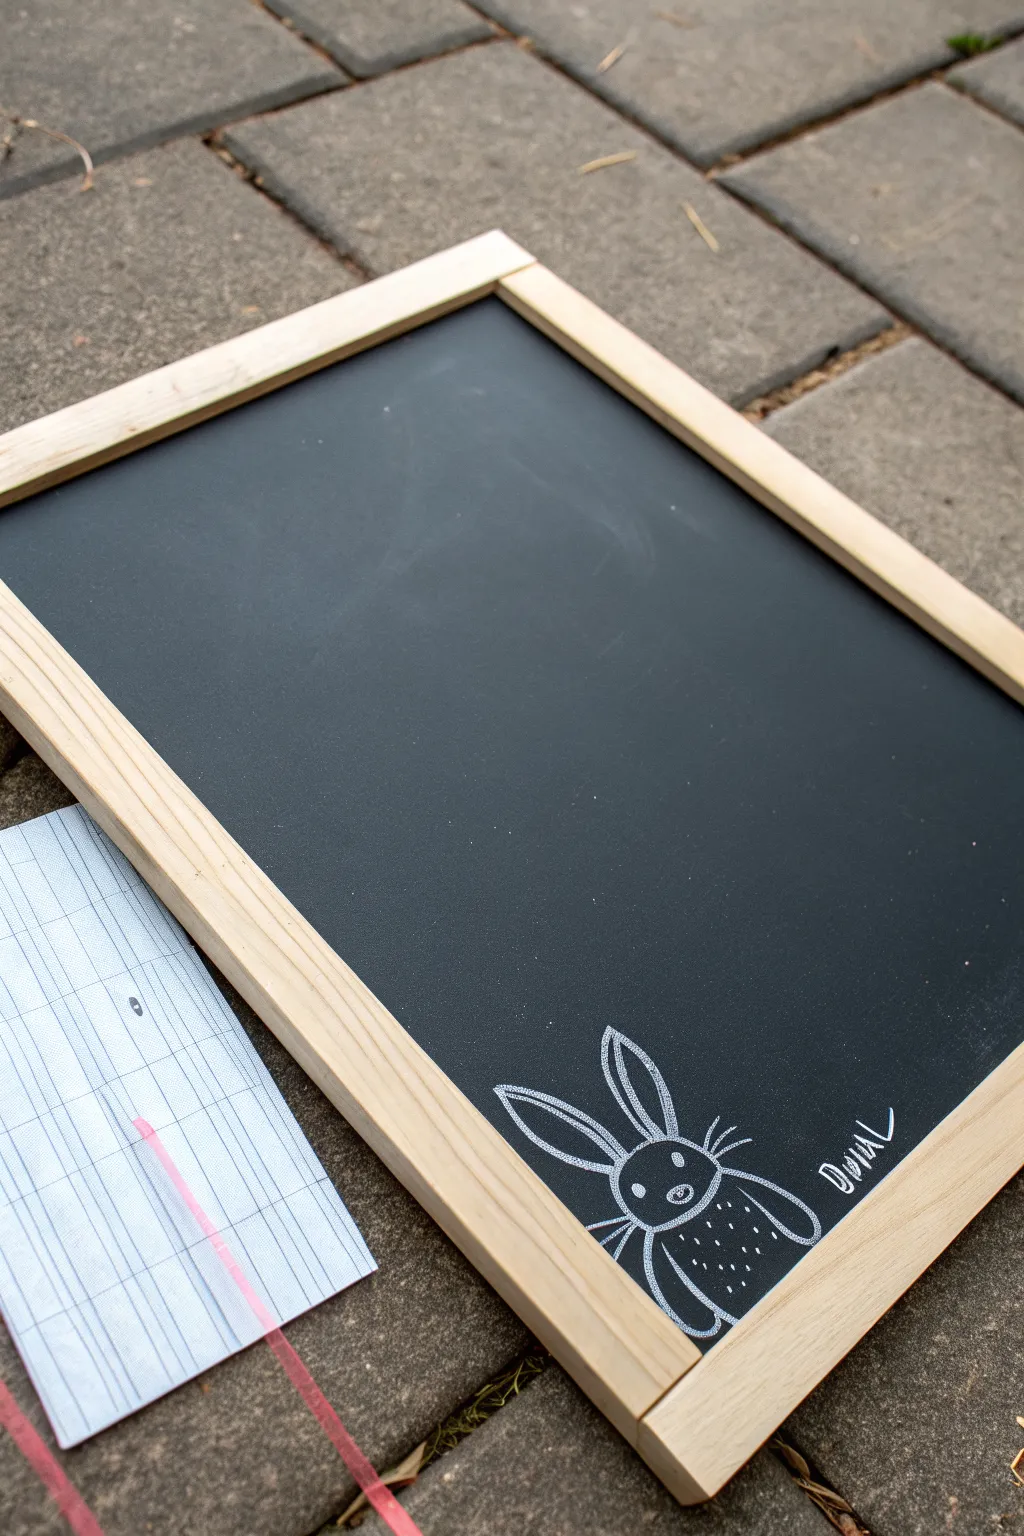
Learn a foolproof technique for transferring a cute bunny design onto a chalkboard surface without needing perfect freehand skills. This method uses a simple paper rubric transfer to create crisp, clean lines that look professionally drawn.
Step-by-Step
Materials
- Small wooden-framed chalkboard
- Lined paper or notebook paper
- Soft lead pencil (2B or softer)
- White liquid chalk marker or sharpened white chalk stick
- Ballpoint pen or hard pencil (for tracing)
- Painter’s tape or washi tape
- Ruler (optional)
- Damp cloth or cotton swab (for cleanup)
Step 1: Preparing the Template
-
Draft the design:
Start by drawing your bunny design on a piece of lined paper. Focus on simple shapes: an oval for the head, long loops for ears, and a rounded body. -
Refine the details:
Add the facial features like wide-set eyes, a small nose, and whiskers. Don’t forget to sketch out the body texture details, like little dashes for fur. -
Add your signature:
If you want to include a name or word like ‘Easter’ or your signature, write it clearly next to the bunny illustration. -
Create the transfer layer:
Flip your paper over. Using your soft lead pencil (I like using the side of the lead to cover more ground), scribble heavily over the back of the area where you drew your design. -
Check coverage:
Hold the paper up to a light source to ensure you have completely covered the back of every line of your drawing with graphite.
Smudge Patrol
If your hand keeps smudging the graphite during the transfer, place a clean scrap piece of paper under your palm as a hand-rest while you trace.
Step 2: Transferring and Tracing
-
Position the template:
Place your paper onto the chalkboard surface with the drawing side facing up and the graphite side against the board. Position the bunny in the bottom right corner for a pleasing composition. -
Secure the paper:
Use small pieces of painter’s tape or washi tape to hold the paper firmly in place so it doesn’t shift while you work. -
Trace the outline:
With a ballpoint pen or a hard pencil, trace over your original drawing with firm pressure. This pushes the graphite from the back of the paper onto the chalkboard. -
Check the transfer:
Carefully lift one corner of the paper to peek underneath. You should see a faint grey outline of your bunny on the black surface. -
Remove the template:
Once you’ve traced every line, whisker, and letter, completely remove the paper template.
Step 3: Inking the Chalk Art
-
Trace with chalk:
Take your white chalk marker or sharpened chalk stick and carefully go over the faint graphite transfer lines. -
Start with the ears:
Outline the long ears first, using double lines to give them definition and depth. -
Define the face:
Draw the oval head shape, then carefully fill in the eyes and nose. For the whiskers, use quick, light strokes that taper outward. -
Body details:
Outline the body shape. Instead of coloring it in solid, use small stippled dots or short dashes to mimic the texture of fur, just like in the reference image. -
Lettering touch-up:
Go over your signature or text. Try to keep the line weight consistent with the drawing for a unified look. -
Clean up edges:
If any graphite smudge lines are still visible outside your chalk lines, use a slightly damp cotton swab to gently wipe them away.
Chalk Pen Trick
Store your chalk markers horizontally. Before use, shake vigorously and press the tip on scrap paper to get opaque, bright white lines.
Now you have a charming, hand-drawn decoration ready to display for the holiday season
Sidewalk Bunny in an Egg Mural
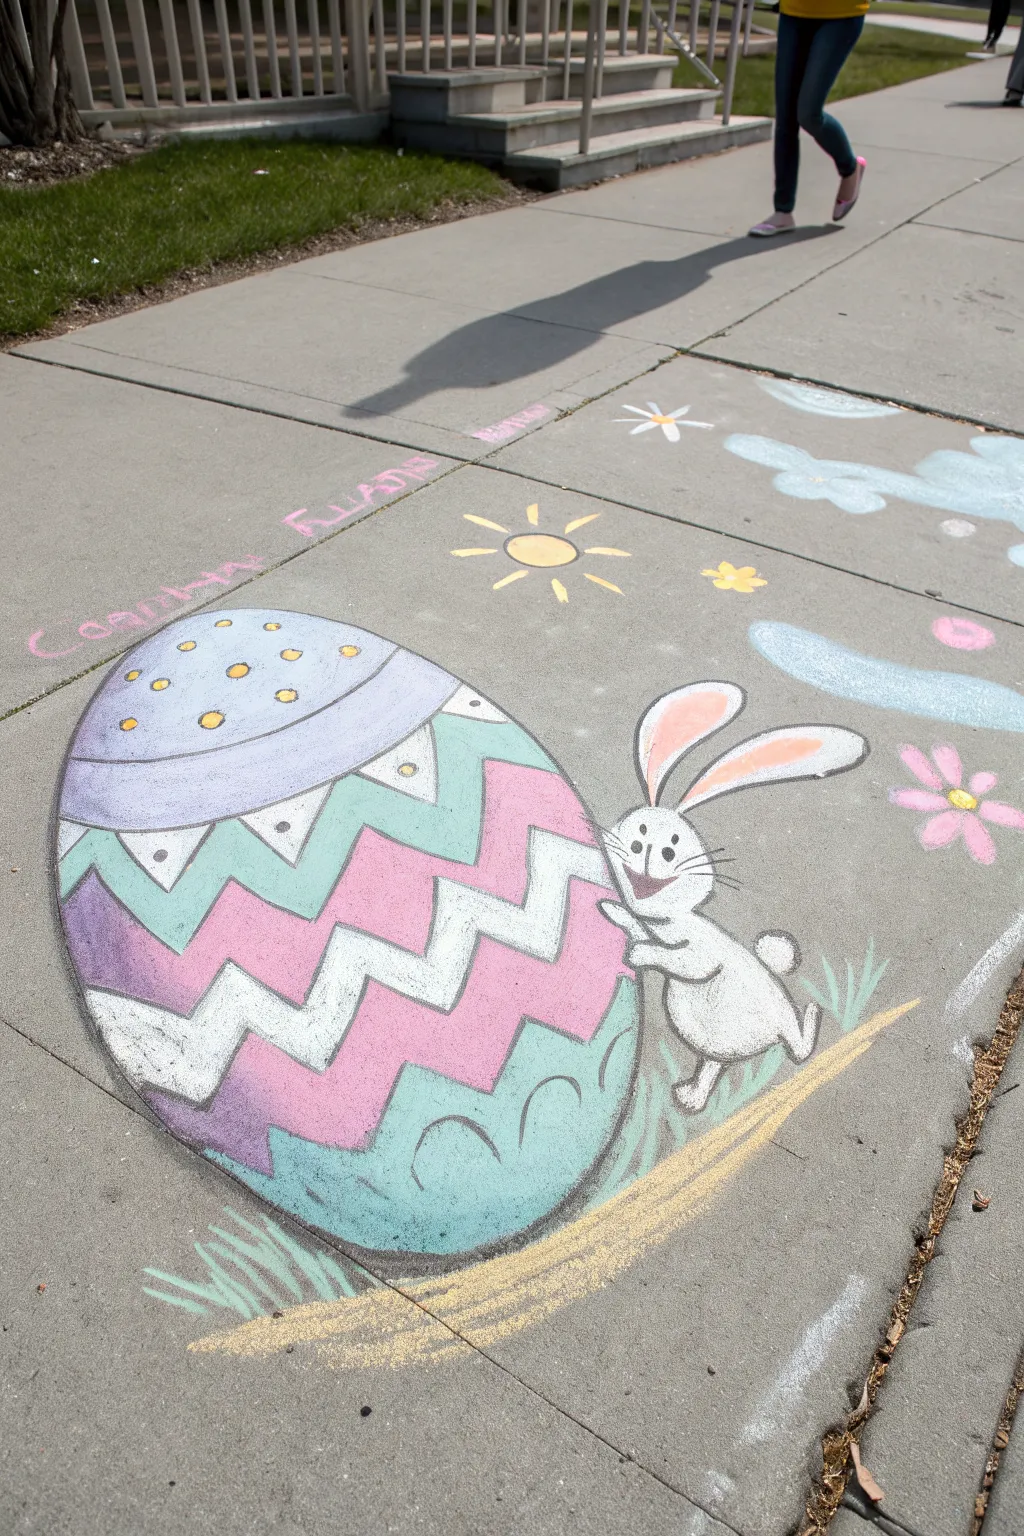
Transform a plain concrete square into a cheerful Easter scene featuring a massive decorated egg and a playful bunny friend. This sidewalk chalk design uses bold, bright colors and simple geometric patterns to create an impactful piece of street art.
Step-by-Step Guide
Materials
- Sidewalk chalk (jumbo size)
- Blending sponge or old rag
- Charcoal stick or black chalk for outlining
- Knee pads (optional but recommended)
- Small cup of water (for vibrant details)
- Broom (to prep surface)
Step 1: Preparation & Basic Sketching
-
Prepare the canvas:
Start by sweeping the sidewalk square thoroughly to remove loose dirt and pebbles, ensuring your chalk stick grips the concrete smoothly. -
Outline the egg shape:
Using a light color or thin white chalk, draw a very large oval that fills the left two-thirds of your workspace. Tilt it slightly to the left for a dynamic look. -
Sketch the bunny:
On the right side of the egg, lightly sketch the bunny’s head as a circle, adding two long ears pointing up and back. Add a small oval body and a fluffy tail peeking out. -
Divide the egg patterns:
Draw faint curved lines across the egg to separate your sections. You’ll need a top cap, a zig-zag band area, a middle wave, and a bottom section.
Make It Pop
For the brightest white on the bunny, dip the tip of your white chalk in water for 10 seconds before drawing. It dries incredibly opaque!
Step 2: Coloring the Egg
-
Fill the top section:
Color the very top cap of the egg with a soft purple chalk. Use the side of the chalk stick for broad coverage. -
Blend the purple:
Take your sponge or rag and rub the purple chalk into the concrete pores to create a smooth, solid finish. -
Create the zig-zags:
Below the purple cap, fill a band with teal or light blue. Leave a jagged white zig-zag stripe empty for now, or color around it. -
Add the pink waves:
In the middle section, lay down a thick layer of pink chalk. Draw a white zig-zag line through the middle of this pink section to create a striped effect. -
Color the base:
Fill the bottom-most section of the egg with the same teal color used earlier. I find repeating colors helps balance the design. -
Smooth everything out:
Use your blending tool to rub in the teal and pink sections, being careful not to smear colors across the white zig-zag lines.
Smudge Control
Work from the center of the drawing outward, or top to bottom. This prevents your hands and knees from smearing the parts you’ve already finished.
Step 3: Bringing the Bunny to Life
-
Whiten the fur:
Color the bunny’s head, body, and tail densely with white chalk. Apply extra pressure here so the bunny stands out against the grey concrete. -
Detail the ears:
Fill the inner parts of the long ears with a soft pink chalk, leaving a white border around the edges. -
Add facial features:
Using black charcoal or dark chalk, draw two oval eyes, a small nose, a smiling mouth, and three whiskers on the cheek. -
Define the paws:
Draw simple lines to separate the paws resting on the egg, making it look like the bunny is hugging or pushing it.
Step 4: Final Details & Background
-
Outline the main shapes:
Go over the outer edge of the huge egg and the bunny with a sharp black chalk line to make the cartoon pop. -
Decorate the egg top:
Add yellow dots to the purple top cap of the egg for extra texture. -
Add highlights:
Draw faint white curves or semi-circles at the bottom of the teal section to suggest roundness and volume. -
Ground the scene:
Sketch some yellow ground or straw beneath the egg and bunny, adding simple green spikes for grass blades near the base. -
Fill the sky:
Finish by drawing a yellow sun, some simple cloud shapes, and a floating flower or two in the remaining empty space around the main figures.
Step back and admire how this giant egg transforms your walkway into a festive spring celebration
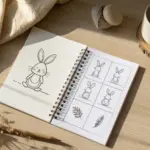
Interactive Name-on-an-Egg Chalkboard Display
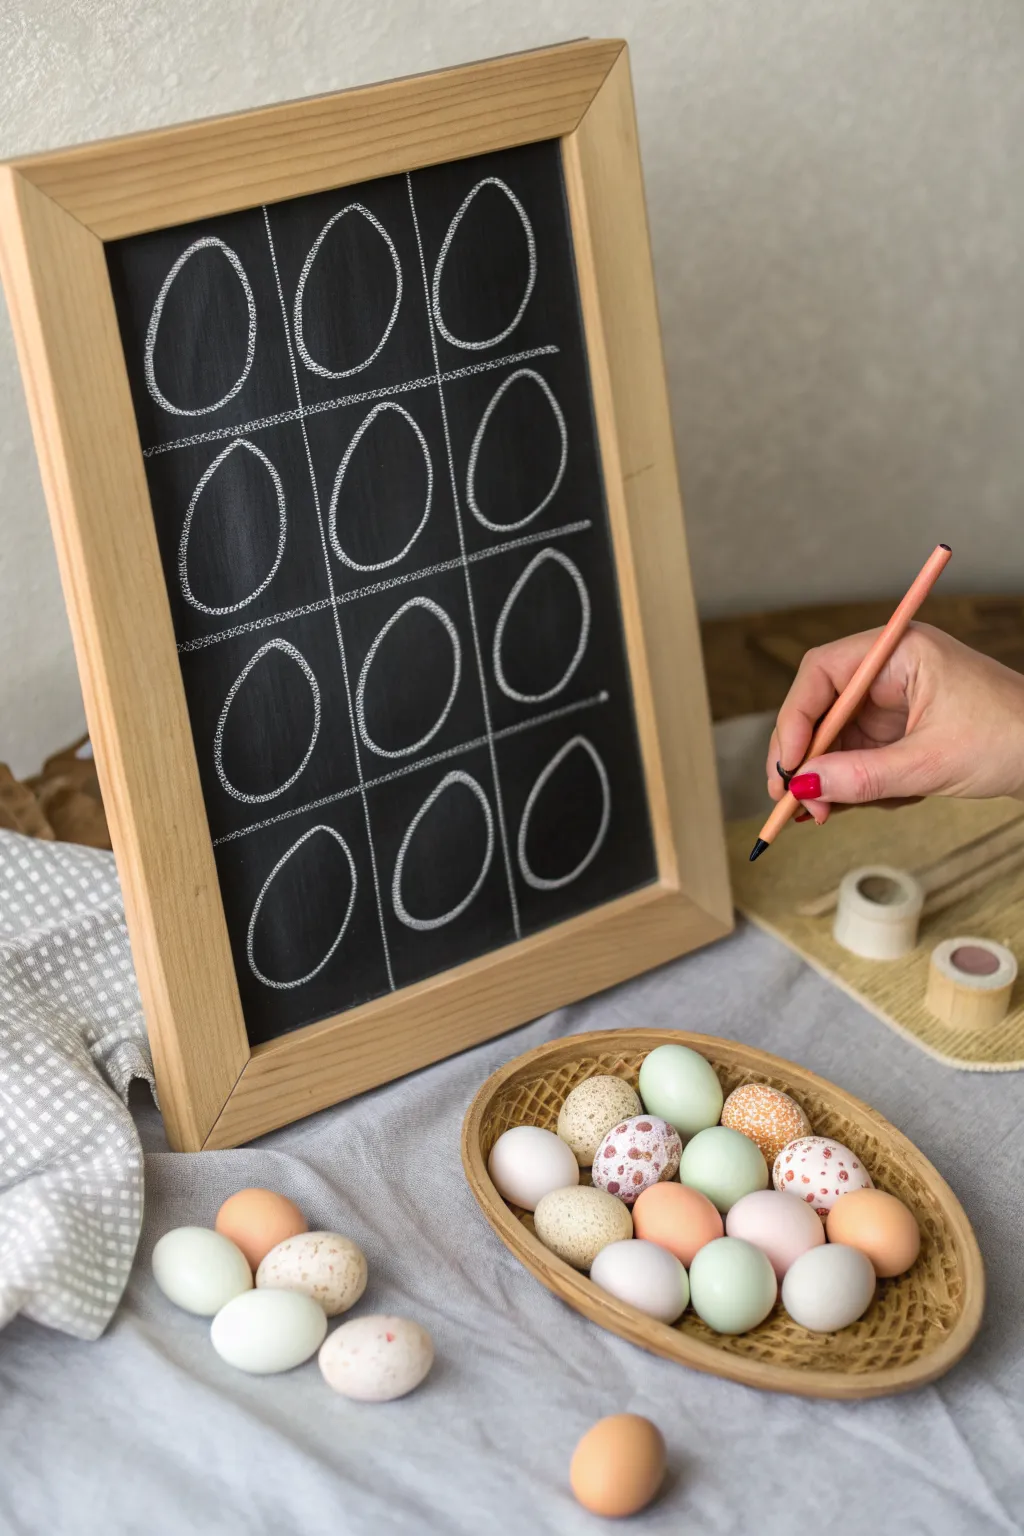
Transform a simple chalkboard into a festive, interactive grid perfect for Easter countdowns or organizing an egg hunt. This clean, minimalist design relies on the charm of hand-drawn repetition and pairs beautifully with natural decor.
Step-by-Step Tutorial
Materials
- Small to medium chalkboard with a wooden frame
- White pastel chalk pencil or fine-tip chalk marker
- Ruler or straight edge
- Damp microfiber cloth
- Cotton swabs (for cleanup)
- Pencil sharpener (if using pastel pencil)
Step 1: Preparing the Grid
-
Clean the surface:
Begin by wiping down your chalkboard surface with a damp microfiber cloth to remove any dust or old chalk residue, ensuring a crisp black background for your drawing. -
Measure the area:
Measure the width and height of the writable blackboard space to determine your column and row spacing. -
Plan calculations:
Divide the width by three and the height by four to create a uniform 3×4 grid layout. Mark these intervals lightly with tiny dots on the edges of the board. -
Draw vertical guides:
Using your ruler and the white pastel pencil, draw two vertical lines connecting your top and bottom marks. Use a very light touch here; you want a faint dashed or dotted line texture rather than a solid, heavy stroke. -
Draw horizontal guides:
Repeat the process horizontally, drawing three lines across the board to create twelve distinct rectangular quadrants. -
Refine the lines:
Go back over your grid lines to ensure they are visible but delicate. I find that purposefully breaking the line slightly creates a charming ‘stitched’ look that feels less rigid than a solid ruler line.
Grid Stability
If you struggle with freehand straight lines, use a piece of cardstock as a drawing guide instead of a ruler to prevent smudging underneath.
Step 2: Drawing the Eggs
-
Practice the shape:
Before committing to the board, practice drawing an egg shape on a scrap of paper. Aim for a distinct oval that is slightly wider at the bottom and tapered at the top. -
Start the first oval:
Begin in the top left quadrant. Place the tip of your pastel pencil near the top center of the box, leaving about a half-inch of breathing room from the grid line. -
Draw the curve:
Draw the egg using short, sketchy strokes rather than one continuous line. This sketchy technique adds texture and makes it easier to correct shape imbalances as you go. -
Complete the first row:
Continue to the next two boxes in the top row, trying to keep the egg sizes roughly consistent. Don’t worry about perfection; slight variations add to the hand-drawn appeal. -
Check consistency:
Step back to look at your first row. If one egg looks significantly smaller or tilted, gently erase it with a damp cotton swab and redraw. -
Fill the middle rows:
Work your way down the board, filling the middle two rows. Try to center each egg within its specific grid box to maintain visual balance. -
Draw the final row:
Complete the bottom row of eggs. Since this is often the most visible part of a standing frame, take your time to ensure the bottoms of the ovals are nicely rounded. -
Sharpen your tool:
If your line work is becoming too thick or fuzzy, sharpen your pastel pencil to get that crisp, defined edge back for the final details. -
Add final definition:
Go over any areas where the chalk looks too faint. A second pass on the curves can make the white pop against the black background. -
Clean up smudges:
Use a dry cotton swab to gently lift away any accidental finger smudges or chalk dust that settled outside the lines.
Uneven Ovals
Draw a faint vertical ‘spine’ line down the center of each box first. Use this axis to mirror the left and right curves of your egg for better symmetry.
Now you have a structured canvas ready to be filled with names, dates, or countdown numbers for your celebration


Have a question or want to share your own experience? I'd love to hear from you in the comments below!