
If you’re just getting started with watercolor pencils, the quickest wins come from tiny projects that lean into blending instead of perfect drawing. Here are my favorite beginner easy ideas that look impressive fast, even if you’re still figuring out how much water is “too much.”
Simple Sunset Strip With Two Colors
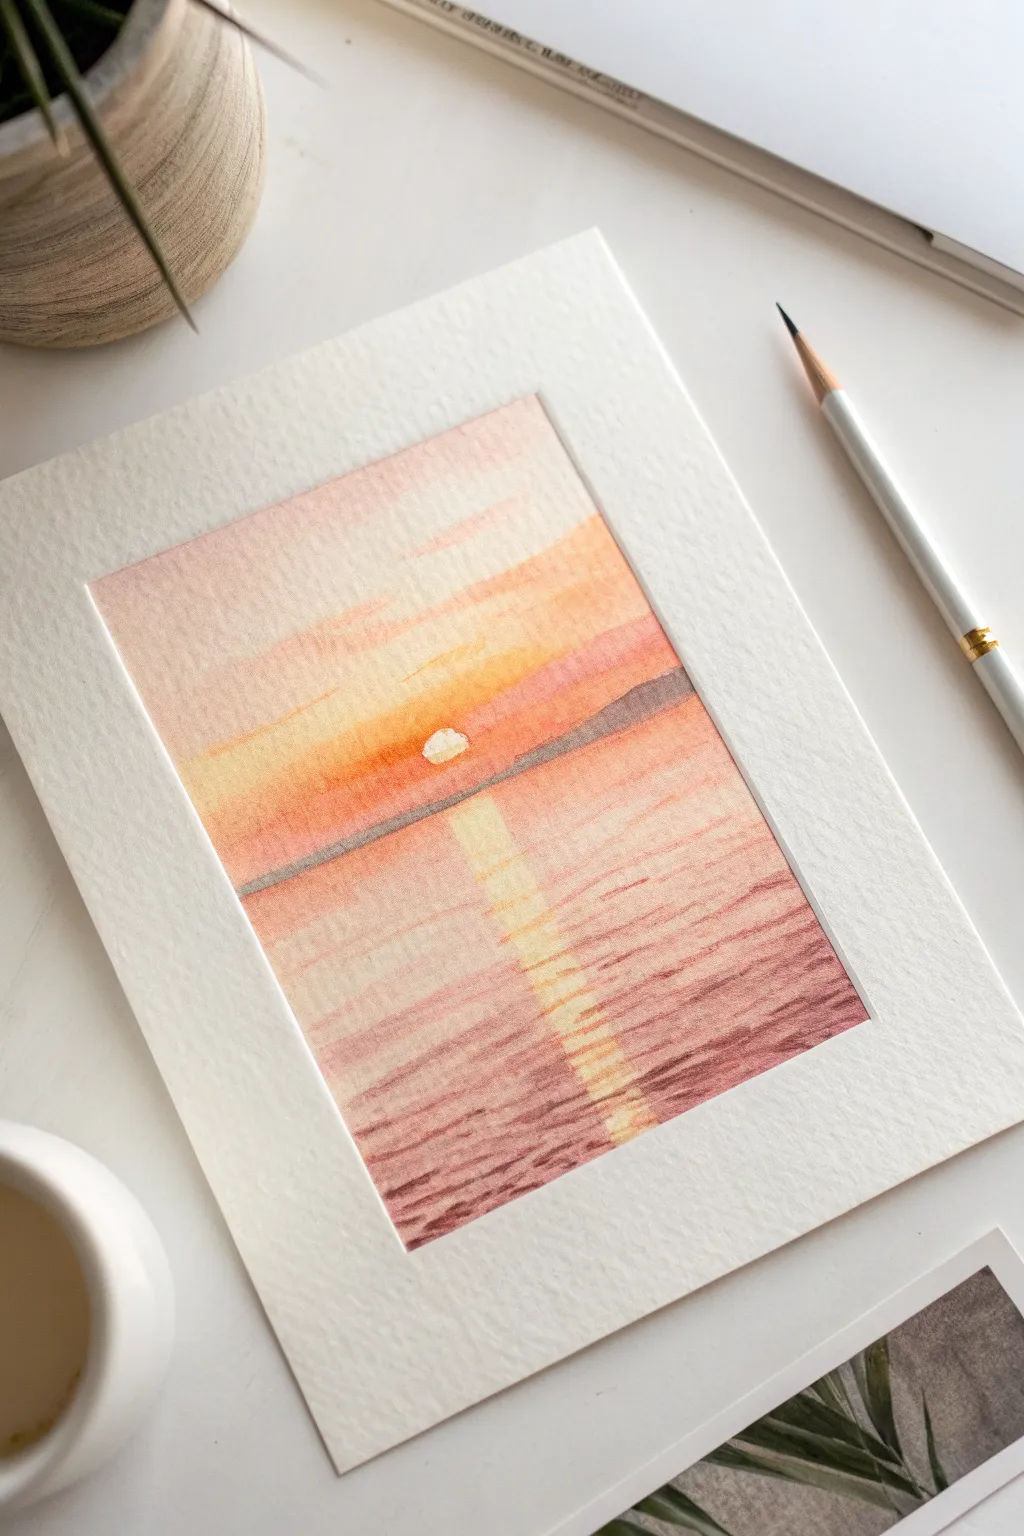
Capture the magic of golden hour with this soft, glowing seascape that requires only a handful of colors. By using the precision of watercolor pencils, you’ll create a shimmering path of light across the water while keeping the horizon crisp and controlled.
How-To Guide
Materials
- Watercolor paper (cold press creates nice texture)
- Masking tape or painter’s tape
- Watercolor pencils (Orange, Red-Orange, Deep Red/Brown, Dark Grey/Purple)
- Soft round brush (size 6 or 8)
- Clean water
- Paper towel
- White gel pen or gouache (optional)
Step 1: Preparation and Sketching
-
Tape the borders:
Begin by taping down all four edges of your watercolor paper to a board or table. Press the edges of the tape firmly to ensure clean, crisp white borders when you remove it later. -
Establish the horizon:
Lightly draw a horizontal line across the center of the paper using a ruler and a light pencil. This separates the sky from the sea. Don’t press too hard; you want this line to disappear under the pigment. -
Mark the sun:
Just above the center of your horizon line, draw a small semicircle for the setting sun. We will keep this area white to represent the brightest light source. -
Outline the reflection:
Lightly sketch a vertical column descending from the sun into the water area. This guide will help you remember to keep the sun’s reflection lighter than the surrounding water.
Muddy Waters?
If your reflection looks dirty, you likely dragged dark pigment into the center. Always paint light-to-dark, rinsing your brush often to keep the yellow zone pure.
Step 2: Coloring the Sky
-
Lay down the base orange:
Using your orange watercolor pencil, shade the area immediately around the sun and just above the horizon line. Apply the pencil lightly to keep the texture visible. -
Add pink tones:
move upward into the sky with a red-orange or light red pencil. Blend this slightly into the top edge of your yellow-orange section, coloring horizontally. -
Define the clouds:
Use the side of your pencil to create soft, horizontal streaks in the upper sky with a muted purple or brownish-red. These will become wispy clouds once activated with water. -
Activate the sky:
Wet your round brush with clean water. Starting from the lightest area near the sun (be careful not to paint over the white sun itself), brush outward and upward. Let the colors bleed softly into each other.
Step 3: Creating the Horizon and Water
-
Darken the horizon:
While the sky dries, take a dark grey or deep purple pencil and draw a thin, distinct mountain line right on top of your horizon pencil mark. Make it slightly thicker on the edges and thinner toward the sun. -
Color the water base:
Switch back to your orange and red-orange pencils. Color the water area, but skip the vertical column you marked for the reflection. Keep your strokes horizontal to mimic waves. -
Deepen the water tones:
At the bottom corners of the paper, use your deep red or brownish-purple pencil to add weight and depth to the foreground water. This creates a sense of perspective. -
Fill the reflection:
Very lightly shade the central reflection column with yellow or light orange. Do not color it solid; leave gaps of white paper to make the water look like it is sparkling. -
Activate the water:
Clean your brush thoroughly. Paint the water section with horizontal strokes, starting with the light reflection in the center. I like to work from the center outward to avoid dragging dark pigments into the bright center.
Pop the Reflection
For an intense glow, wet the center reflection area first with clean water, then drop in intense yellow pigment from the tip of your pencil while it’s damp.
Step 4: Final Details
-
Strengthen the ripples:
Once the paper is completely dry, use a sharpened dark red or brown pencil to draw thin, horizontal lines over the water. Focus these near the bottom and sides to suggest wave ripples. -
Add sun sparkle:
Draw very fine horizontal lines across the central reflection column using the orange pencil. This breaks up the light and makes it look disjointed by waves. -
Refine the sun:
If you accidentally got paint in the sun area, you can reclaim the highlight with a tiny dot of white gouache or a white gel pen. -
Reveal the painting:
Wait until the paper is bone dry. Slowly peel away the masking tape at a 45-degree angle, pulling away from the artwork to prevent tearing.
Step back and admire the peaceful atmosphere you have created with just a few pencils and water


Easy Galaxy Night Sky Clouds
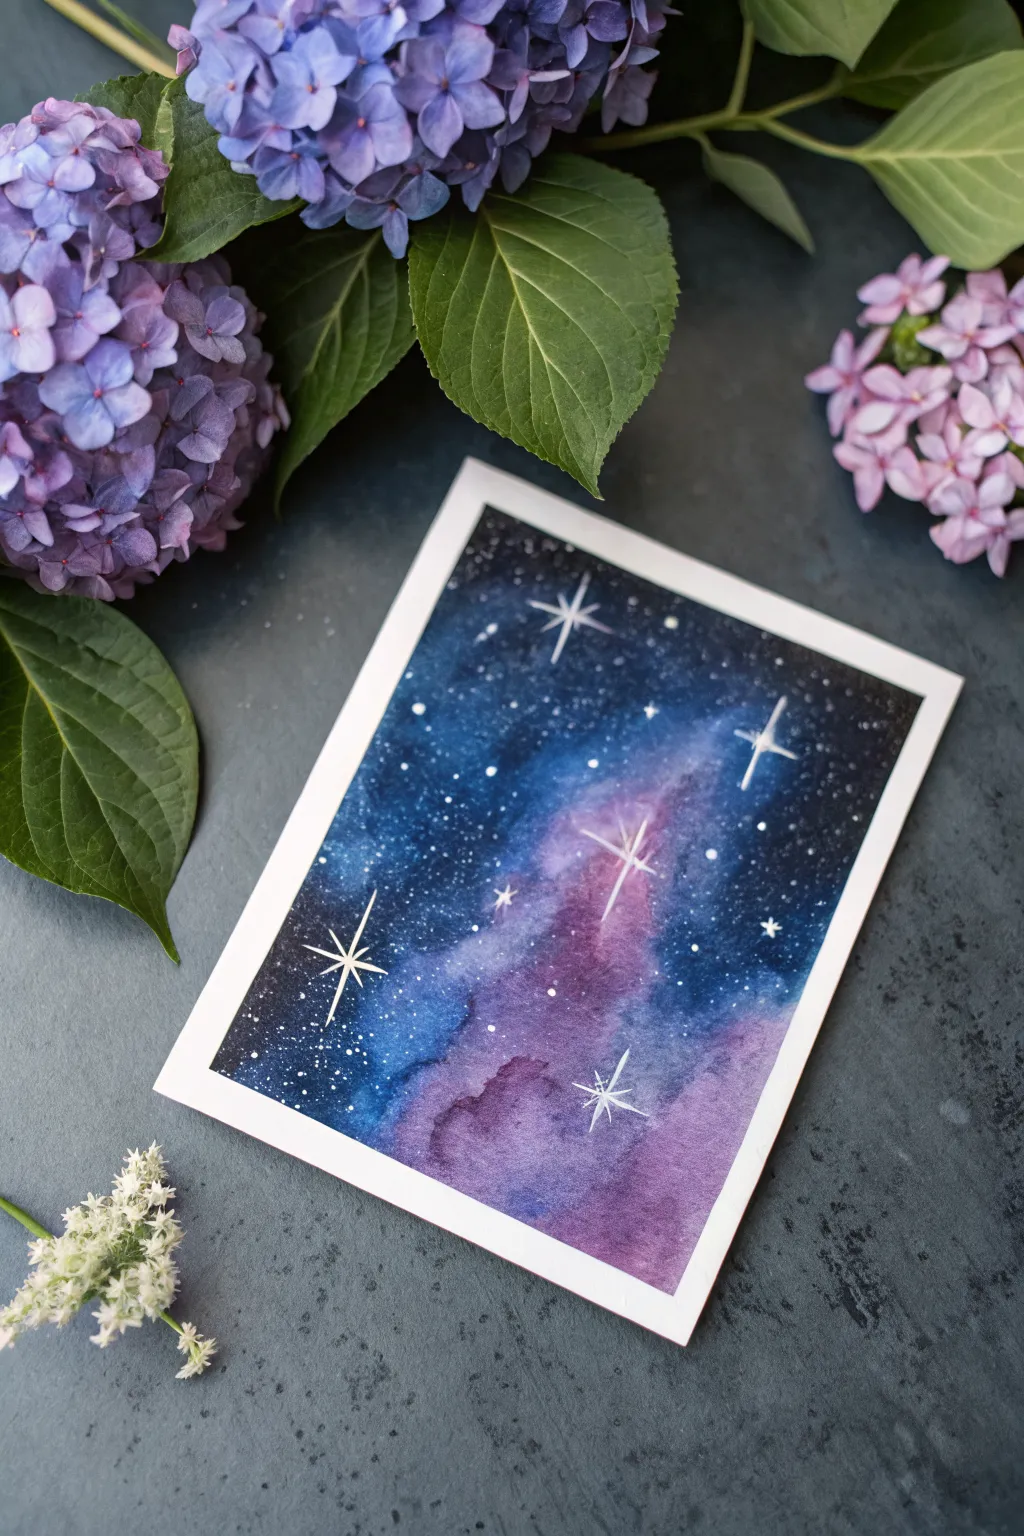
Capture the magic of the universe with this enchanting watercolor galaxy painting. Swirling blends of deep indigo, violet, and bright white stars create a dreamy night sky that looks far more complex than it actually is.
Step-by-Step Tutorial
Materials
- Watercolor paper (cold press, 300 gsm)
- Watercolor paints (Indigo, Prussian Blue, Violet, Magenta, Black)
- White opacity medium (white gouache, white ink, or white gel pen)
- Flat wash brush (large)
- Round brush (size 4 or 6)
- Fine detail brush (size 0 or 1)
- Masking tape
- Jar of clean water
- Paper towels
- Old toothbrush (optional for splattering)
Step 1: Preparation & First Wash
-
Secure the paper:
Begin by taping down all four edges of your watercolor paper to a board or table. This creates that crisp white border seen in the final piece and prevents the paper from buckling when wet. -
Wet the surface:
Using your large flat brush, apply a layer of clean water across the entire area inside the tape. The paper should be glistening but not forming puddles. -
Lay the foundation:
While the paper is still wet, drop in patches of your lightest colors first. Start with a diluted magenta or violet in the center-right area, letting the water carry the pigment organically. -
Introduce blues:
Load your round brush with Prussian Blue or a bright mid-tone blue. Paint around the pinkish areas, allowing the edges to touch and bleed slightly into one another for a soft, cloudy effect.
Starry Splatter Tip
Cover the areas you want to keep paint-free with a scrap piece of paper before splattering the white stars to control where they land.
Step 2: Deepening the Galaxy
-
Add depth:
Switch to a darker Indigo or mix a bit of black into your blue. Apply this darker shade to the corners and edges of the paper, creating a vignette that draws the eye toward the colorful center. -
Intensify colors:
While everything is still damp, drop more concentrated pigment into color areas that look too pale. The wet-on-wet technique will keep the blends smooth. -
Create texture:
If I want a bit of texture, I sometimes lift a little color with a thirsty, clean brush or a dab of paper towel to create lighter ‘cloud’ formations within the nebula. -
Let it dry completely:
This is crucial. Allow the paper to dry until it is flat and room temperature to the touch. You can use a hair dryer on a low setting if you are impatient.
Step 3: Adding the Stars
-
Prepare the stars:
Mix a small amount of white gouache or white ink with a tiny drop of water. You want a creamy consistency that flows easily but is fully opaque. -
Splatter the background:
Dip an old toothbrush or a stiff brush into the white mixture. Run your thumb across the bristles to flick tiny speckles onto the dark painting. These are your finest, most distant stars. -
Paint medium stars:
Using your finest detail brush or a white gel pen, manually dot a few slightly larger stars randomly across the sky to create variety in size. -
Draft the major stars:
Select 3 to 5 spots for your brightest ‘hero’ stars. Using the detail brush and white gouache, paint a small vertical line. -
Complete the cross shape:
Paint a horizontal line crossing through the vertical one. Make the lines taper at the ends so they look like rays of light rather than stiff plus signs. -
Add the center glow:
Carefully add a tiny extra diagonal cross in the center of your largest star to make it twinkle more intensely. -
Review and refine:
Step back and look at the balance. Add a few more tiny dots around the big stars to cluster them slightly, which looks more natural. -
The reveal:
Once the white paint is totally dry, slowly peel away the masking tape at a 45-degree angle to reveal your crisp, clean borders.
Add planetary flair
While the background is wet, sprinkle a pinch of salt onto the dark paint. When it dries and you brush it off, it creates stunning starburst textures.
Frame your personal slice of the cosmos or gift it to a stargazer who needs a little wonder on their wall


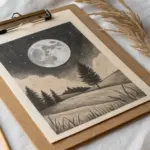
Mountain Silhouette Over a Soft Wash
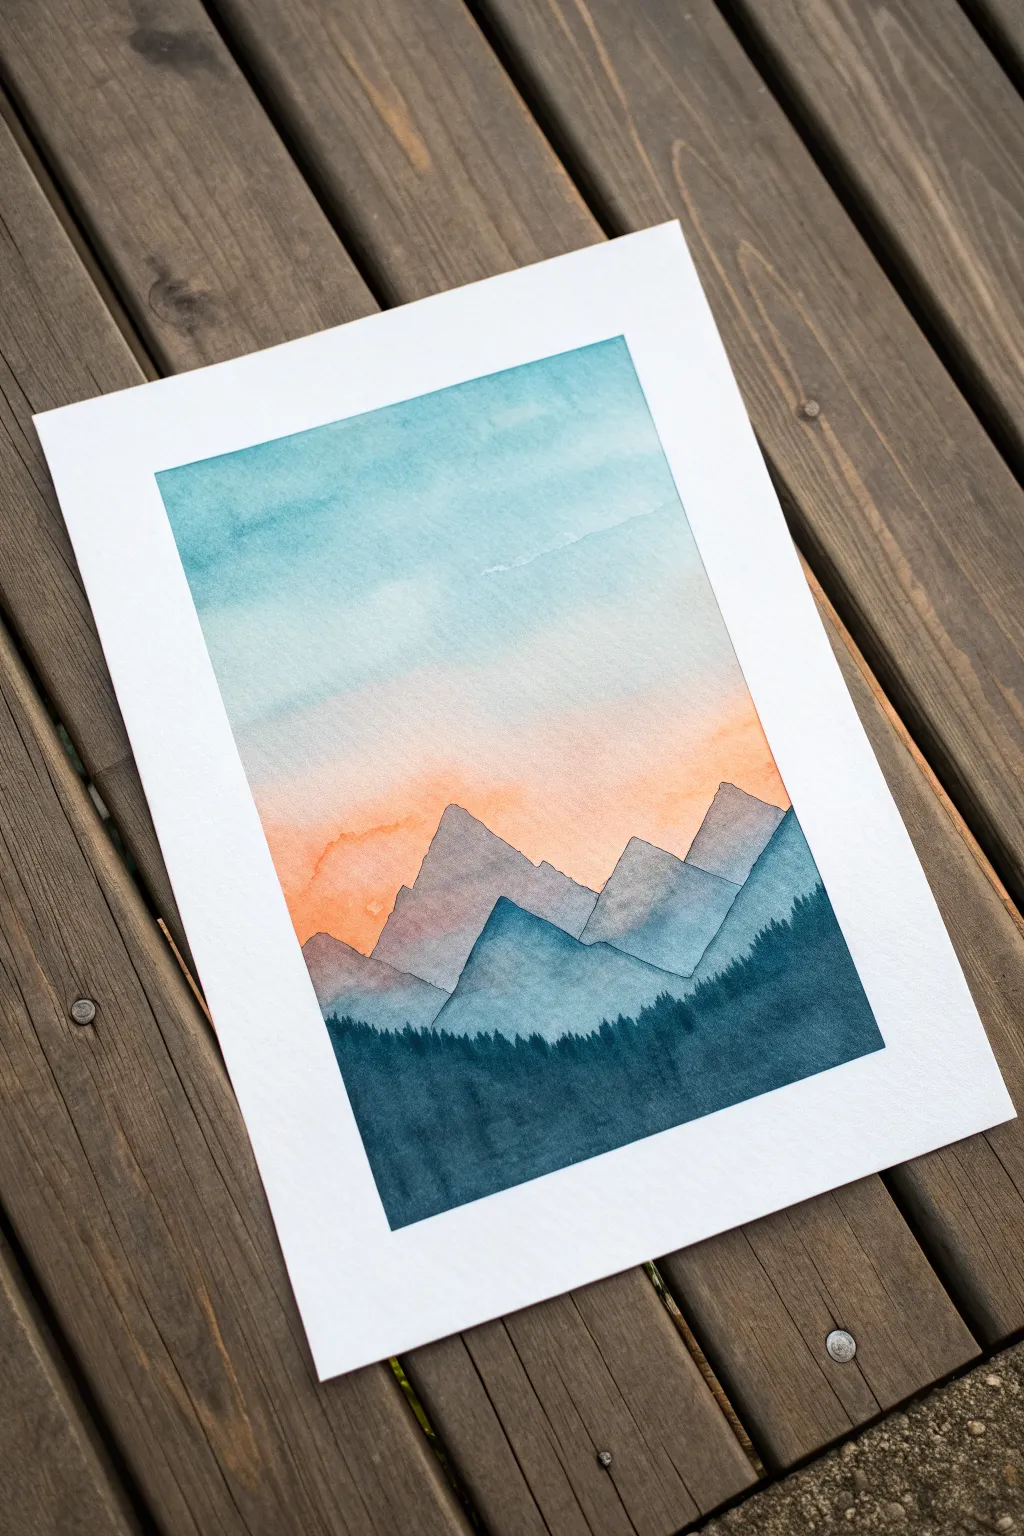
Capture the serene beauty of a mountain sunrise with this layered watercolor landscape. By combining a soft, blended sky wash with sharp, geometric mountain silhouettes, you’ll create depth and atmosphere in a few simple stages.
How-To Guide
Materials
- Watercolor paper (cold press, at least 140lb/300gsm)
- Watercolor paints (phthalo blue, indigo, Payne’s grey, cadmium orange or peach)
- Flat wash brush (large)
- Round brush (size 6 or 8)
- Detail brush (size 0 or 2)
- Masking tape
- Clean water jar
- Paper towels
- Pencil and eraser
Step 1: Setting the Sky
-
Prepare the paper:
Begin by taping down all four edges of your watercolor paper to a board or table. This creates that crisp white border seen in the example and prevents buckling. -
Wet the sky area:
With a large clean flat brush, apply a generous coat of clean water to the upper two-thirds of the paper, stopping just below the midline. -
Apply the upper sky:
Load your brush with a watered-down phthalo blue or turquoise. Start at the very top edge and paint horizontally, letting the color naturally diffuse downwards into the wet paper. -
Blend the mid-sky:
Rinse your brush slightly so it’s lighter, and pull the blue wash further down, fading it out as you approach the middle of the paper. -
Add the sunset glow:
While the paper is still damp (wet-on-wet), pick up a soft peach or diluted orange color. Apply this below the blue, letting the two zones gently touch and blend without turning muddy. -
Let it dry completely:
This is crucial; the sky must be bone dry before you touch it with the mountains, or the sharp lines will bleed. Use a hairdryer if you’re impatient.
Wet-on-Wet Magic
Work quickly on the sky layer. If the paper starts drying mid-gradient, you’ll get hard water lines. Keep the surface sheeny but not puddling.
Step 2: Layering the Mountains
-
Sketch the peaks:
Very lightly sketch the outline of your mountain ranges with a pencil. I usually draw three layers: a distant range, a middle range, and a foreground. -
Paint the furthest range:
Mix a very watery, pale blue-grey. Paint the mountain range furthest in the back (the one overlapping the sunset). Keep the color sheer so the orange glow peeks through slightly. -
Dry the first layer:
Allow this first mountain layer to dry completely before starting the next one. -
Paint the middle range:
Create a slightly darker, more saturated mix of blue-grey or slate. Paint the second range of peaked mountains below the first, overlapping the dried layer. -
Define the ridges:
While painting this middle layer, ensure the top edge is crisp and sharp against the paler mountains behind it. Let this layer dry. -
Paint the foreground peak:
Mix an even darker shade adding a touch of indigo or violet. Paint the final, largest mountain shape that sits just above the treeline.
Step 3: The Forest Silhouette
-
Mix the darkest color:
Prepare a rich, deep mix for the forest. Combine indigo and Payne’s grey with very little water to get an intense, dark value. -
Paint the forest wash:
Fill in the bottom rectangular area with this dark wash, but stop just short of the ‘tops’ of the trees. -
Detail the treetops:
Switch to your smallest detail brush. Using the same dark paint, create tiny vertical strokes along the top edge of the wet wash to suggest uneven pine tree tops. -
Refine the silhouette:
Vary the height of these tiny strokes—some taller, some shorter—to make the forest look organic rather than uniform. -
Final drying and reveal:
Let the entire painting dry thoroughly. Once cool to the touch, slowly peel away the masking tape at a 45-degree angle to reveal your crisp borders.
Adding Stars
Before removing the tape, flick a toothbrush loaded with white gouache or acrylic over the top blue section for a starry night effect.
Now you have a tranquil mountain scene perfect for framing or gifting
Pine Tree Line Against a Color Fade
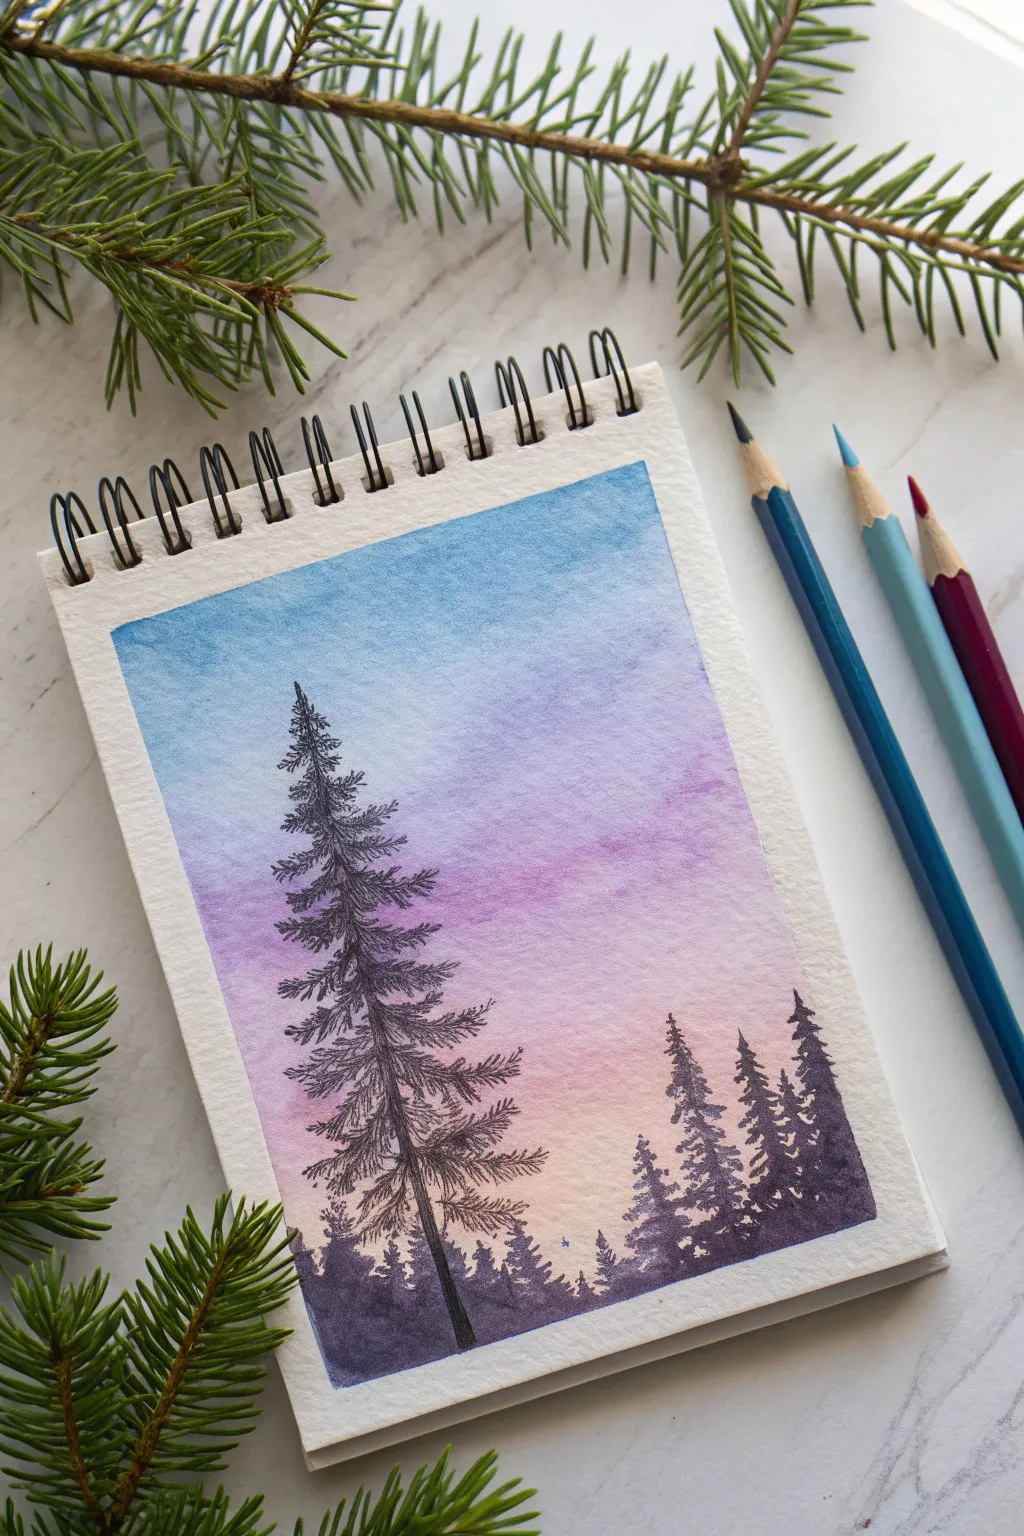
Capture the serene beauty of twilight with this atmospheric landscape sketch that blends soft watercolor gradients with crisp ink details. Using watercolor pencils makes achieving that smooth transition from blue to purple surprisingly simple, creating a perfect backdrop for towering pine silhouettes.
Step-by-Step Guide
Materials
- Watercolor paper sketchbook (spiral bound suggested)
- Watercolor pencils (light blue, purple, magenta/pink)
- Fine liner pen (black, waterproof, size 01 or 03)
- Water brush or soft round paintbrush
- Clean water cup
- Paper towel
- Washi tape or masking tape (optional for borders)
Step 1: Creating the Sky Base
-
Establish the blue zone:
Start at the very top of your page with a light blue watercolor pencil. Shade horizontally with even, medium pressure, covering about the top third of your rectangular composition area. -
Transition to purple:
Below the blue, pick up a purple watercolor pencil. Begin shading lightly into the bottom edge of the blue section to encourage blending later, then press a bit harder as you work your way down the middle third of the page. -
Add the twilight glow:
For the bottom third, switch to a magenta or light pink watercolor pencil. Gently blend this into the bottom of the purple area and fade it out toward the bottom, leaving the very lowest horizon line extremely light or even white. -
Activate the watercolor:
Dip your brush in clean water. Starting at the very top (the lightest blue area), brush horizontally back and forth across the page. Work your way downward, cleaning your brush slightly between color zones to keep the yellow-pink area distinct from the dark blue. -
Refine the blend:
I like to use a slightly damp brush to gently scrub the transition lines where blue meets purple and purple meets pink. The goal is a seamless, seamless gradient without harsh stripes. Let the paper dry completely before moving on.
Step 2: Sketching the Main Tree
-
Draft the trunk line:
Once the background is bone-dry, take your black fine liner pen. Draw a thin, slightly wavering vertical line on the left side of the page, occupying nearly the full height of the painted area. This guides your main tree. -
Start the treetop:
At the very peak of your line, draw tiny, jagged scribbles. These should be very narrow at the top and gradually begin to widen as you move down, representing the youngest branches. -
Build the upper branches:
Continue moving down the trunk. Use quick, loose zigzag motions for the branches. Angle the strokes slightly downward to mimic the weight of pine boughs. -
Flesh out the middle section:
As you reach the middle of the tree, make your horizontal scribbles wider. Leave small gaps between branch layers so the beautiful sky gradient peeks through the foliage. -
Anchor the base:
Near the bottom, make the branches their widest. Don’t worry about perfect symmetry; nature is imperfect. Darken the central trunk slightly more in this lower section to show stability.
Keep Colors Clean
Always paint from light to dark (top to bottom usually) or clean your brush between color zones. Dragging the dark blue pigment into the pale pink horizon will muddy the sunset effect.
Step 3: Adding the Horizon Forest
-
Establish the ground level:
At the bottom of the page, use your pen to color in a solid, undulating shape across the entire width. This silhouetted ground connects the base of your main tree to the rest of the scene. -
Draw background trees:
On the right side of the page, sketch three or four smaller pine trees rising from the ground level. Keep these much shorter than the main tree to create a sense of depth and distance. -
Vary the heights:
Make the tree furthest to the right slightly taller, and the ones closer to the center smaller. Use the same jagged, zigzag technique, but keep the details distinctive and less intricate than the main subject. -
Fill the gaps:
Between the main left tree and the right-side cluster, add tiny triangular spikes along the horizon line. These suggest a distant forest line far in the background. -
Detail the texture:
Go back over your main tree and add a few extra dark scribbles on the underside of the larger branches. This adds volume and makes the silhouette look denser against the light sky. -
Final touches:
If you want a tiny hint of magic, add a singular, tiny cross-shape or dot in the pink area of the sky to represent the first evening star. Remove any tape carefully if you used it.
Starry Night Upgrade
Before drawing the trees, flick a stiff toothbrush dipped in white gouache or white ink over the dry sky. This creates a stunning field of stars behind your silhouettes.
Now you have a peaceful forest landscape that captures the quiet beauty of dusk
BRUSH GUIDE
The Right Brush for Every Stroke
From clean lines to bold texture — master brush choice, stroke control, and essential techniques.
Explore the Full Guide
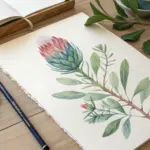
Three Loose Wildflowers, No Perfection Needed
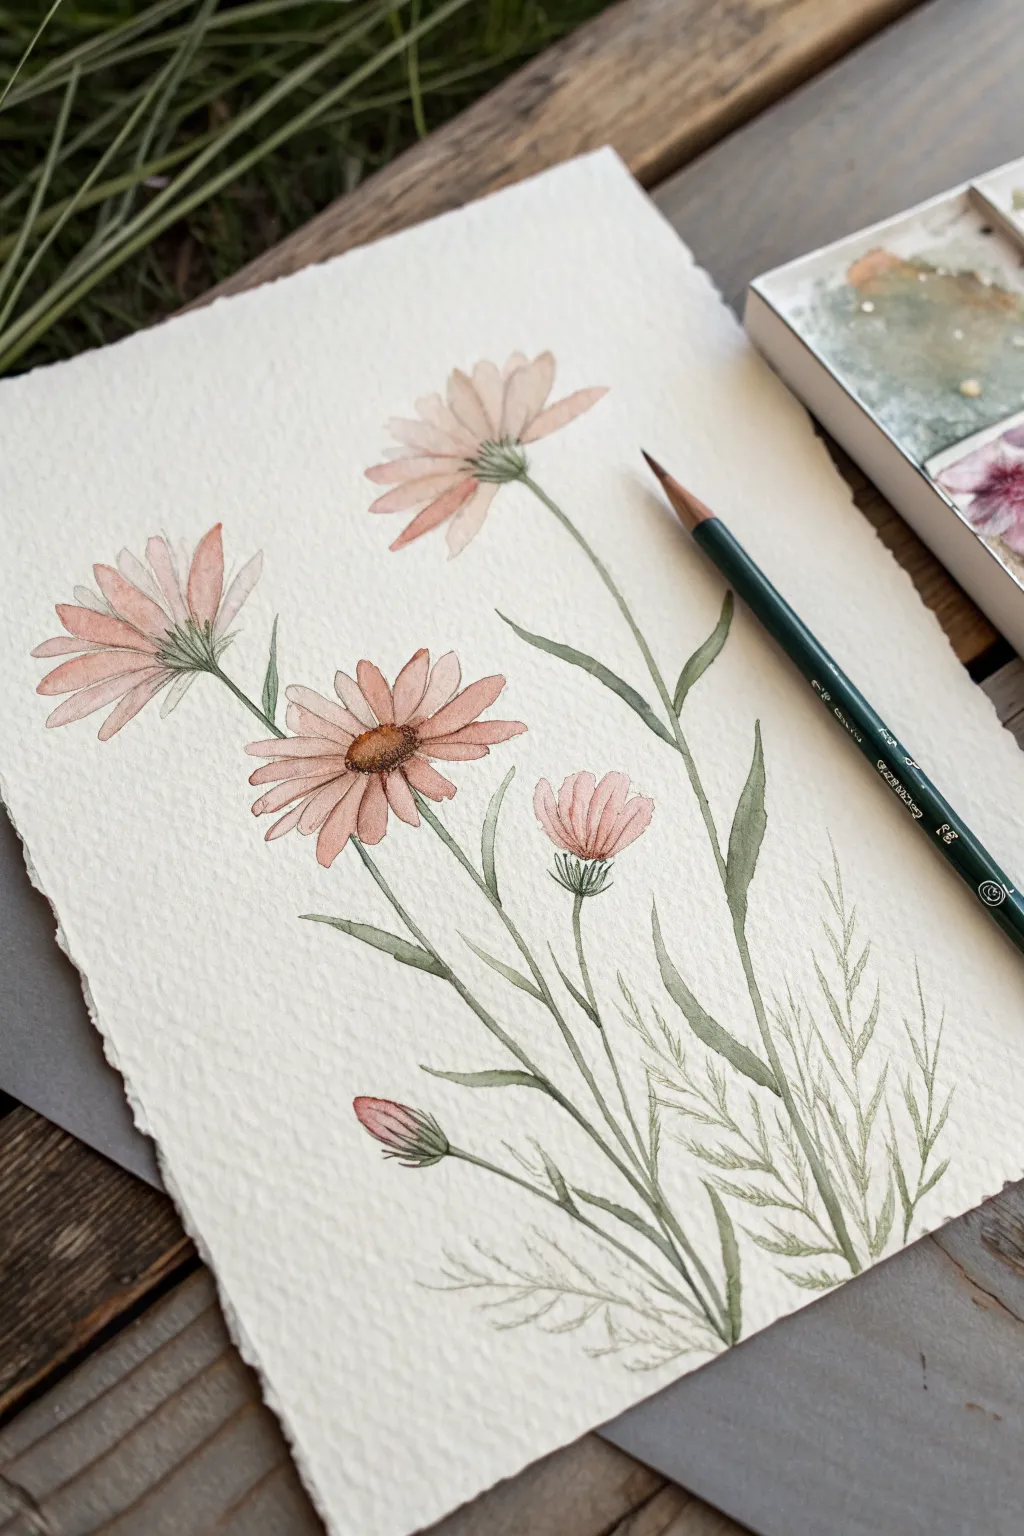
Capture the delicate nature of wildflowers with this approachable project that embraces soft lines and gentle washes. This piece focuses on three main pink blooms and feathery foliage, using the unique blending properties of watercolor pencils to create a dreamy, finished look.
Step-by-Step Tutorial
Materials
- Cold-press watercolor paper (300gsm/140lb)
- Watercolor pencils (Salmon pink, coral, olive green, sap green, brown)
- Small round synthetic watercolor brush (size 2 or 4)
- Cup of clean water
- Paper towel
- Pencil sharpener
Step 1: Sketching the Blooms
-
Light Outline:
Begin by lightly sketching the general placement of your three main flowers using a salmon pink watercolor pencil. Don’t press hard; just mark circles where the blooms will live to establish your composition. -
Petal Definition:
Refine the shapes by drawing individual petals radiating from the centers. Keep them imperfect and varied in width to mimic nature. Draw the top flower facing upward, the middle flower fully open facing you, and the left flower angled slightly away. -
Adding Color Depth:
Using a coral or slightly darker pink pencil, gently shade the inner third of each petal near the flower’s center. This adds instant dimension without needing complex mixing. -
Drawing the Bud:
Near the bottom left, sketch a small, tight bud shape using your pink pencil, encasing the bottom of it with a few strokes of olive green for the sepal.
Step 2: Stems and Foliage
-
Main Stems:
Switch to your olive green pencil. Draw long, slightly curved stems connecting each flower head to the bottom of the page. Let the lines be graceful rather than ruler-straight. -
Sepals and Centers:
Add the green sepals (the little leaves directly under the petals) on the angled flowers. For the main open flower, sketch a textured, oval center using a brown pencil. -
Leaf details:
Draw slender, lance-shaped leaves branching off the main stems. Keep your pencil sharp for these finer details. -
Feathery Texture:
At the very bottom right, use a lighter sap green pencil to sketch very wispy, fern-like strokes. This creates the illusion of grass or filler greenery surrounding the main plant.
Clean Colors
Always activate your lighter colors (the petals) before the darker ones (stems and leaves). If you drag green paint into the pink petals, it can make the flower look muddy.
Step 3: Activating with Water
-
First Wet Pass:
Dip your size 4 brush into clean water and blot it slightly on a paper towel so it is damp, not dripping. Gently brush over the pink petals, working from the pale outer edges inward toward the darker center. -
Blending Gradients:
As you touch the water to the pigment, the pencil lines will dissolve into paint. Allow the darker pigment near the center to bleed slightly outward for a soft gradient. -
Activating Colors:
Rinse your brush thoroughly, then activate the green stems. Use a steady hand and long strokes to turn the pencil lines into smooth, painted stalks. -
Flower Centers:
Carefully dab water onto the brown center of the main flower. If you want more definition, I like to touch the wet paper lightly with the tip of the pencil to deposit intense dots of color.
Splatter Effect
For a looser, more artistic vibe, flick a wet brush against the tip of your green pencil over the paper to create tiny organic speckles around the base of the stems.
Step 4: Assuming Contrast
-
Enhancing Shadows:
Once the paper is completely bone-dry, take your sharpest coral or brown pencil and redraw delicate lines between the petals to separate them visually. -
Deepening Greens:
Go back over the shadowed side of the stems with the olive green pencil to add weight and roundness to the plant. -
Grass Texture:
Lightly trace over your wispy grass lines again with a dry pencil. Leave these dry rather than activating them with water to create a lovely contrast in texture against the soft, painted blooms. -
Final Check:
Step back and assess your composition. If any area looks too pale, lightly shade over it with dry pencil for a mixed-media effect that highlights the texture of the paper.
Enjoy the peaceful process of watching your pencil sketches transform into fluid watercolor art
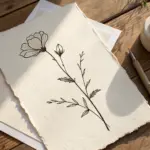
Single Rose With a Soft No-Line Look
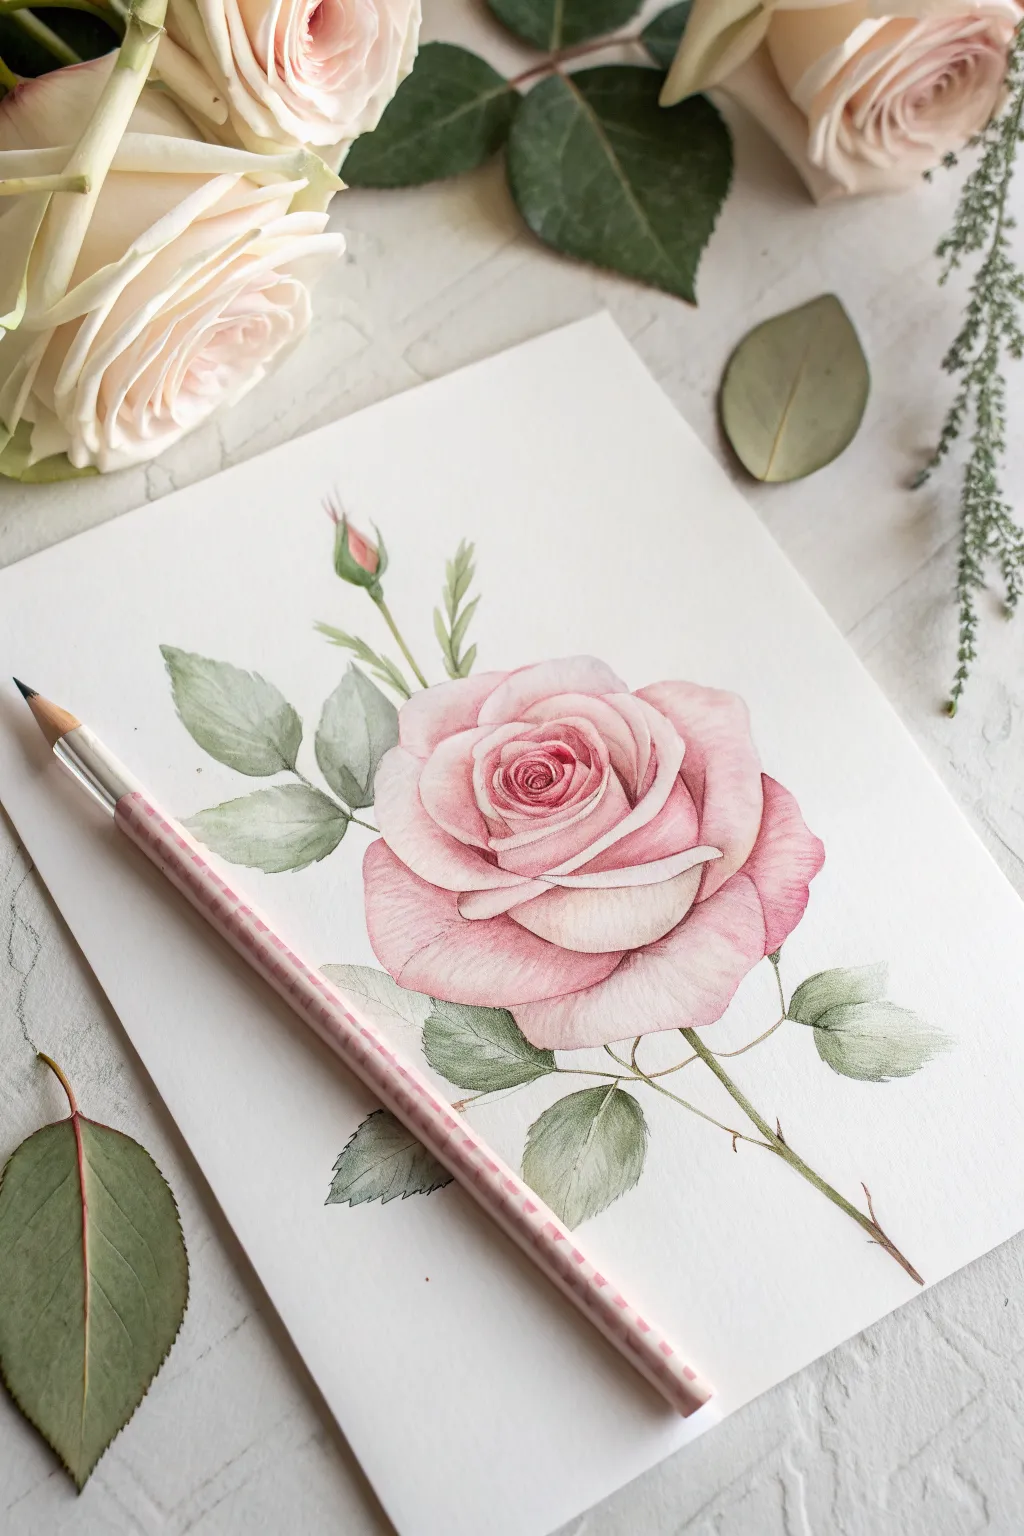
Capture the delicate beauty of a blooming rose using the gentle precision of watercolor pencils. This project focuses on achieving a no-line look, where edges are defined by color transitions rather than harsh outlines, creating a dreamy, botanical illustration style.
How-To Guide
Materials
- Hot press watercolor paper (smooth texture is key)
- Set of watercolor pencils (specifically: blush pink, deep rose, crimson, sap green, olive green, brown)
- Graphite pencil (hard, like H or 2H)
- Kneadable eraser
- Fine-point water brush or small round paintbrush (size 2 or 4)
- Clean water jar
- Paper towel
Step 1: Sketching the Structure
-
Map the center:
Begin by lightly drawing a tight spiral in the center of your page with your H pencil. This will be the heart of the rose where the petals are most tightly packed. -
Add unfolding petals:
Around the spiral, sketch overlapping, cup-shaped curves that get larger as they move outward. Pay attention to the way the outer petals fold backward slightly at the rims. -
Stem and leaves:
Draw a slender, slightly curved stem extending downward. Add three serrated leaves branching off the lower stem and a smaller, closed bud on a thin stem shooting up to the left of the main bloom. -
Lift the lines:
Gently roll your kneadable eraser over the entire sketch. You want the graphite lines to be barely visible—just faint guides so your final art doesn’t have grey outlines.
Clean Water Tip
Always rinse your brush thoroughly when switching between the pink flower and green leaves. Muddy water will turn your delicate rose petals brown.
Step 2: Layering the Bloom
-
Define the center:
Take your deep rose pencil and carefully color the darkest crevices of the central spiral. Apply moderate pressure here; these tight spaces need the most pigment depth. -
Mid-tone shading:
Switch to your blush pink pencil. Shade the middle of each petal, leaving the very edges of the petals white or extremely pale. This establishes the volume and curve of the flower. -
Shadows and depth:
Return to the deep rose or crimson pencil to add shading where petals overlap. Specifically, shade the base of each petal where it tucks underneath another. -
First wash:
Dip your fine brush in water and dampen it slightly on a paper towel—you don’t want a puddle. Gently touch the dark center and blend the pigment outward. Let the color fade into the white paper as you reach the petal edges. -
Refining edges:
While the paper is still slightly damp, you can lightly engage the crimson pencil tip directly onto the wet areas to intensify the darkest folds without harsh strokes.
Add Dew Drops
Create tiny dew drops by lifting a small circle of color with a clean wet brush, then adding a tiny shadow underneath and a white gel pen highlight on top.
Step 3: Leaves and Stem
-
Base green layer:
Color the leaves using a sap green pencil. Use a light hand for the main surface, but press harder along the central vein and near the stem connection. -
Adding gradients:
Layer olive green or a touch of brown on the lower half of the leaves and the shadow side of the stem. This earthy tone adds realism and stops the green from looking artificial. -
The rosebud:
Color the small bud with pink at the tip and green at the base (the sepals). Ensure the transition between pink and green is smooth. -
Activate the greens:
Use your damp brush to activate the green pigment. Paint from the lightest part of the leaf toward the dark veins. I find this helps keep the highlights clean and distinct.
Step 4: Final Details
-
Sharpening contrast:
Once the paper is fully dry, use a very sharp crimson pencil to redefine the separation between petals if they look too washed out. Keep the lines delicate. -
Leaf veins:
With a sharpened dark green or grey pencil, lightly draw the intricate vein details over the dried watercolor wash on the leaves. -
Thorns and stems:
Add tiny brown thorns to the stem using the very tip of your pencil. Soften them slightly with a barely-damp brush so they don’t look like stickers. -
Final smooth:
Check the outer petals. If the white edges look too abrupt, use a clean, barely damp brush to pull just a tiny whisper of pink from the mid-petal into the white highlight for a silky finish.
Now you have a timeless floral piece that looks soft enough to touch

PENCIL GUIDE
Understanding Pencil Grades from H to B
From first sketch to finished drawing — learn pencil grades, line control, and shading techniques.
Explore the Full Guide
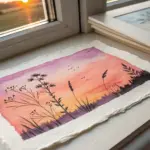
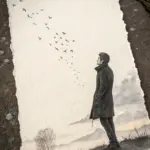
Bird on a Wire Silhouette Scene
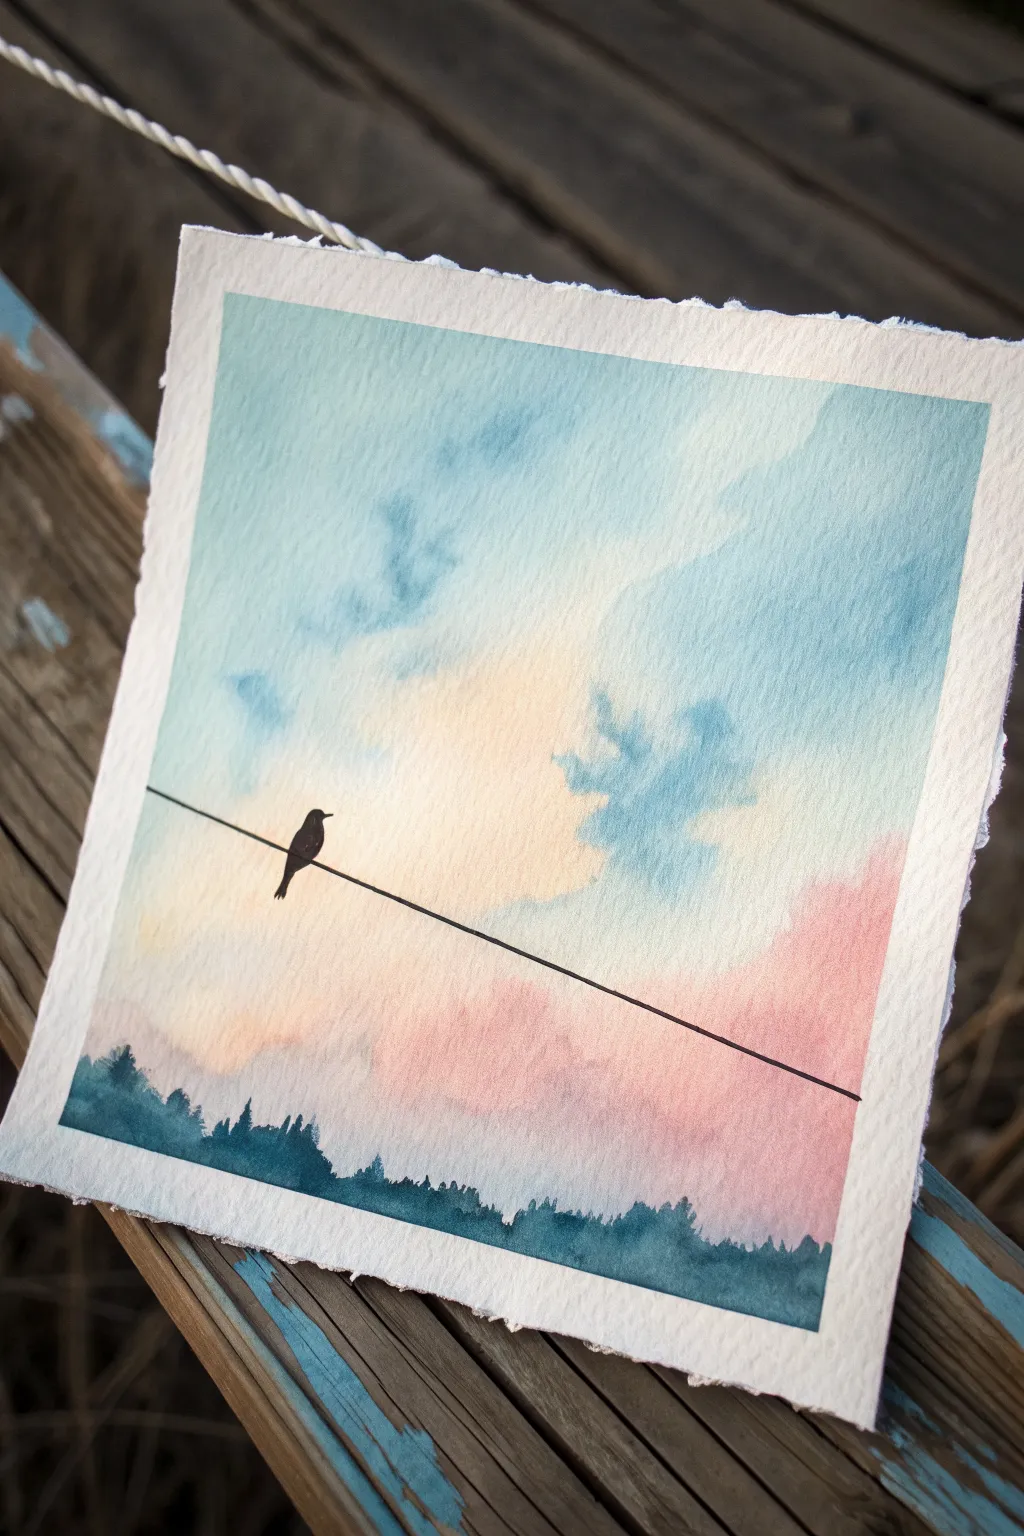
Capture the peaceful transition of day to night with this soft, dreamy landscape featuring a lone bird. Using watercolor pencils allows for a smooth, blended gradient sky that perfectly contrasts with the stark, crisp silhouette details.
Step-by-Step Tutorial
Materials
- Cold press watercolor paper (approx. 6×6 inches)
- Watercolor pencils (light blue, cerulean, pale lemon yellow, soft pink, magenta/red)
- Black waterproof fine liner pen (0.5mm or 0.8mm)
- Black watercolor pencil or marker (optional for larger silhouettes)
- Round watercolor brush (size 6 or 8)
- Cup of clean water
- Paper towel
- Masking tape (for clean edges)
- Ruler
Step 1: Creating the Sunset Gradient
-
Prepare your paper:
Begin by securing your watercolor paper to a flat surface with masking tape. This helps keep the paper flat when wet and creates a crisp border if desired, though the example shows an organic, un-taped edge. -
Sketch the sky layout:
Taking your sky blue watercolor pencil, very lightly sketch out where your clouds will be. Leave large negative spaces for the warmer sunset colors. -
Lay down the blue:
Color in the top corners and upper section with your light blue and cerulean pencils. Apply the pigment dry, scribbling lightly in a circular motion to avoid harsh lines. -
Add the warmth:
In the middle and lower sections, gently color with your pale lemon yellow, blending it slightly up toward the blue but leaving some white space between them to prevent green muddiness. -
Deepen the horizon:
Use your soft pink and magenta pencils near the bottom right and lower middle, layering them over the yellow slightly to create a peachy tone. -
Activate with water:
Dip your round brush into clean water. Starting at the top with the lightest blue, gently brush over your pencil marks to melt the pigment into paint. -
Blend the transition:
Rinse your brush thoroughly before moving to the yellow and pink sections. I find it helpful to use plenty of water here to let the colors bleed into each other naturally, creating soft, cloud-like shapes. -
Lift clouds:
While the paper is still damp, you can crumple a small corner of a paper towel and dab at the blue areas to lift pigment, creating fluffy white cloud textures. -
Let it dry:
Allow the background wash to dry completely. The paper must be bone-dry before adding the foreground details.
Muddy Sky Fix
If blue and yellow mix too much, you’ll get green. Keep a tiny strip of uncolored white paper between them before adding water; let the water bridge the gap gently.
Step 2: Adding the Silhouette Details
-
Establish the tree line:
Using a dark blue or indigo watercolor pencil, sketch a jagged, uneven horizon line at the very bottom of the paper to represent distant treetops. -
Fill the forest:
Color in the tree shapes heavily with the dark blue pencil. You want dense pigment here. -
Soften the trees:
Use a damp (not soaking) brush to activate the tree line. Pull the color upward slightly to create soft, misty tree tips, but keep the bottom solid. -
Dry again:
Wait for the tree line to dry fully. If you rush this steps, the crisp lines coming next will bleed. -
Draw the wire:
Place a ruler across the paper at a slight angle. Using your black fine liner pen, draw a single, steady line across the sky. -
Sketch the bird:
Lightly sketch the outline of a small bird sitting on the wire. Keep the shape simple—a tear-drop body with a small circle head and beak is perfect. -
Fill the silhouette:
Color inside your bird outline with the black pen. Ensure the ink is solid and opaque so no sky color shows through. -
Add tail details:
Flick the pen downward from the bird’s body to create a split tail that hangs below the wire. -
Deckle the edges (optional):
To mimic the handmade paper look in the example, you can carefully tear the edges of your paper against a ruler, or use deckle-edge scissors if available.
Pro Tip: Texture
For the tree line, try painting onto dry paper with a fairly dry brush. This ‘dry brush’ technique leaves jagged, natural edges that look just like distant pine trees.
Step back and admire the serene atmosphere you’ve captured in your miniature landscape
Tiny Cactus in a Simple Pot
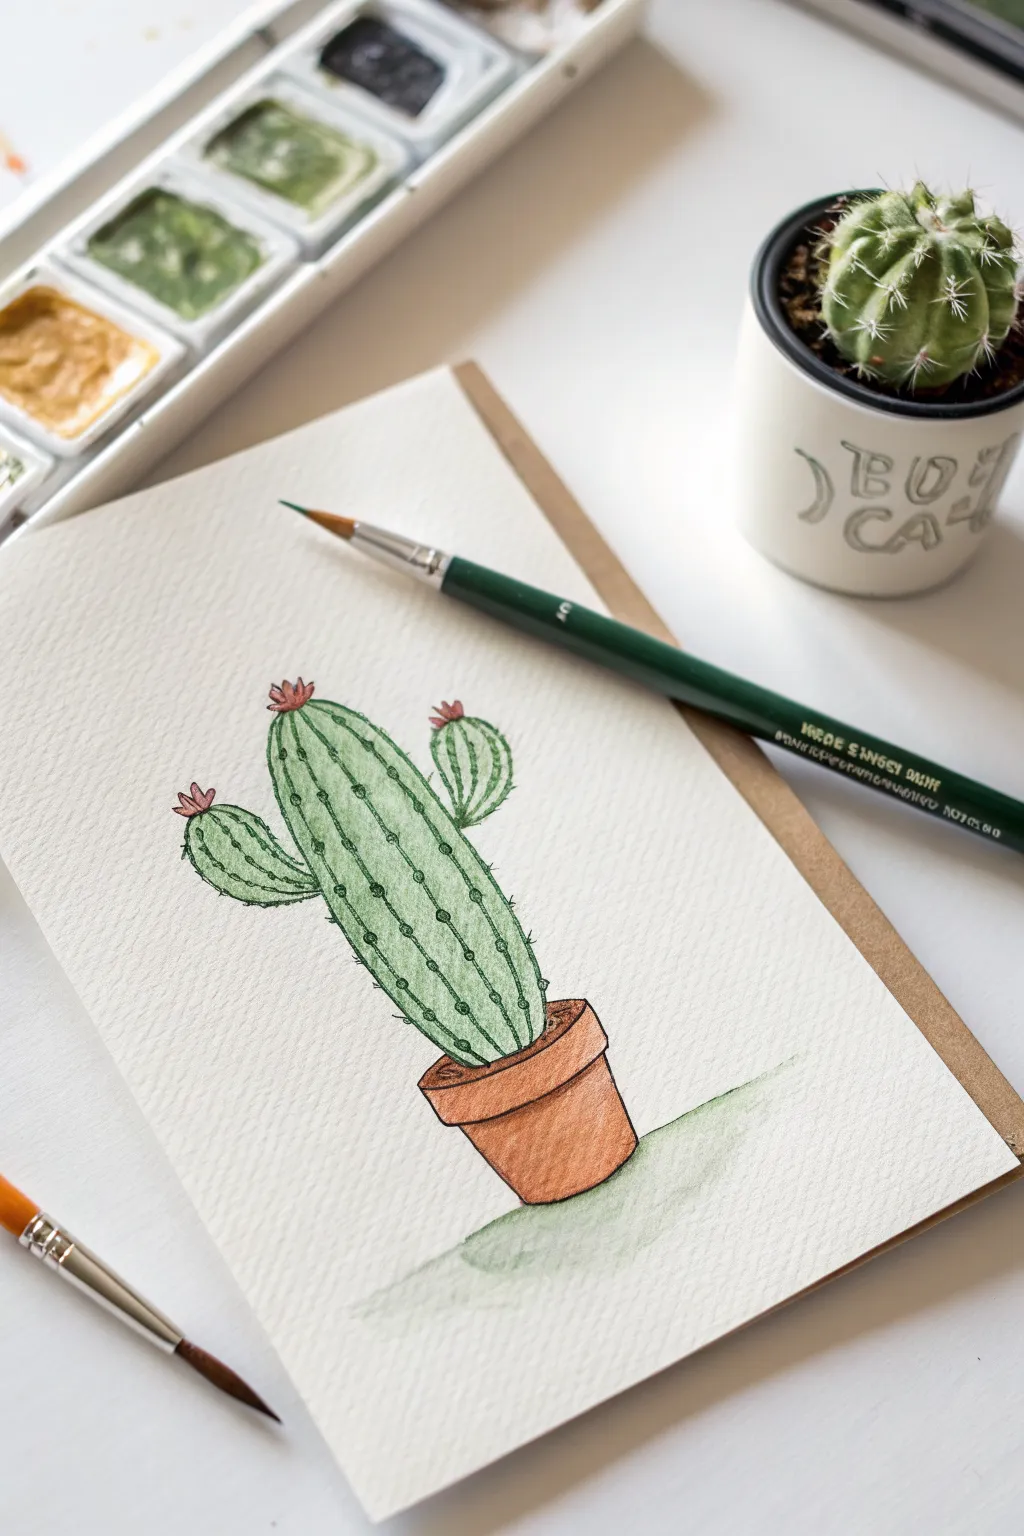
This charming illustration captures a classic saguaro-style cactus sitting comfortably in a simple terracotta pot, brought to life with gentle watercolor washes. The look is clean and illustrative, using ink outlines to define the shapes and watercolor pencils for soft, blendable shading.
Step-by-Step
Materials
- Cold-press watercolor paper (approx. 300 gsm)
- Watercolor pencils (Green, Dark Green, Terracotta/Burnt Sienna, Pink, Light Grey)
- Fine liner pen (black, waterproof, 0.3mm or 0.5mm)
- Round watercolor brush (size 4 or 6)
- Cup of clean water
- Pencil and eraser for sketching
Step 1: Sketching the Outline
-
Draw the pot shape:
Start near the bottom center of your paper. Sketch a simple cylinder that tapers slightly downward. Add a slightly wider rim at the top to create the classic flowerpot look. -
Outline the main stem:
Rising from the center of the pot, draw a tall, elongated oval shape for the main body of the cactus. It shouldn’t be perfectly straight; a slight curve adds character. -
Add the arms:
Sketch two smaller oval arms attaching to the main body. Place one lower on the left and one slightly higher on the right for a balanced composition, making sure they curve upward. -
Draw the ribs:
Lightly sketch vertical curved lines running from the top to the bottom of the cactus body and arms. These represent the ribs where the spines will grow. -
Sketch the flowers:
At the very tip of the main stem and the left arm, add small, spiky tufts to represent the blooming flowers.
Ink Confidence
Don’t worry if your ink lines feel shaky. A slightly wobbly line actually adds to the organic, prickly texture of a cactus better than a perfect straight edge.
Step 2: Inking the Details
-
Ink the main lines:
Using your waterproof fine liner, trace over your pencil sketch. Use short, broken strokes for the cactus outline to give it a slightly organic, textured feel rather than a rigid smooth line. -
Detail the spines:
Along the vertical rib lines you drew earlier, add small dots or tiny clusters of short dashes. These are the areoles where needles grow. -
Erase pencil marks:
Once the ink is completely dry (give it a minute or two to prevent smudging), gently erase all the underlying graphite sketch lines to leave a clean black-and-white drawing.
Creative Twist
Instead of pink flowers, try yellow or bright orange blooms. You can also paint a second tiny cactus next to it to create a little desert family.
Step 3: Adding Color
-
Color the cactus base:
Take a medium green watercolor pencil and lightly shade the entire cactus body. Don’t press too hard; you want a soft, wash-like effect later. -
Add dimension with dark green:
Using a darker green pencil, shade along the sides of the cactus and directly along the vertical rib lines. This creates volume and makes the ribs pop out. -
Color the pot:
Fill in the pot area with a terracotta or burnt sienna pencil. Apply more pigment on the right side and under the rim to suggest a shadow. -
Tint the flowers:
Lightly color the small flower tufts at the top with a soft pink pencil. -
Create a ground shadow:
Using a light grey or diluted green pencil, scribble a horizontal oval shape underneath the pot, extending slightly to the right.
Step 4: Activating with Water
-
Blend the cactus green:
Dip your round brush in clean water and blot off the excess. Gently paint over the green pencil markings, blending the light and dark greens together. Follow the curve of the cactus body with your brushstrokes. -
Wash the pot:
Rinse your brush, then activate the terracotta color on the pot. I usually start in the lighter area and pull the wet pigment toward the darker shadowed edge to keep the gradient smooth. -
Activate the flowers:
With a very clean brush tip, dab a tiny amount of water onto the pink flowers to brighten the color without spreading it too much. -
Soften the shadow:
Finally, wet the shadow area beneath the pot. Here, you want the edges to be quite soft, so feel free to drag the color out gently until it fades into the white of the paper.
Now you have a refreshing little succulent art piece that requires zero watering


Have a question or want to share your own experience? I'd love to hear from you in the comments below!