
When you’re bored in class, a tiny doodle in the corner of your notes can feel like a secret little break. I keep these easy doodles super quick and low-key, so you can draw them with just a pencil or pen and jump right back to your page.
Tiny Stars and Sparkles
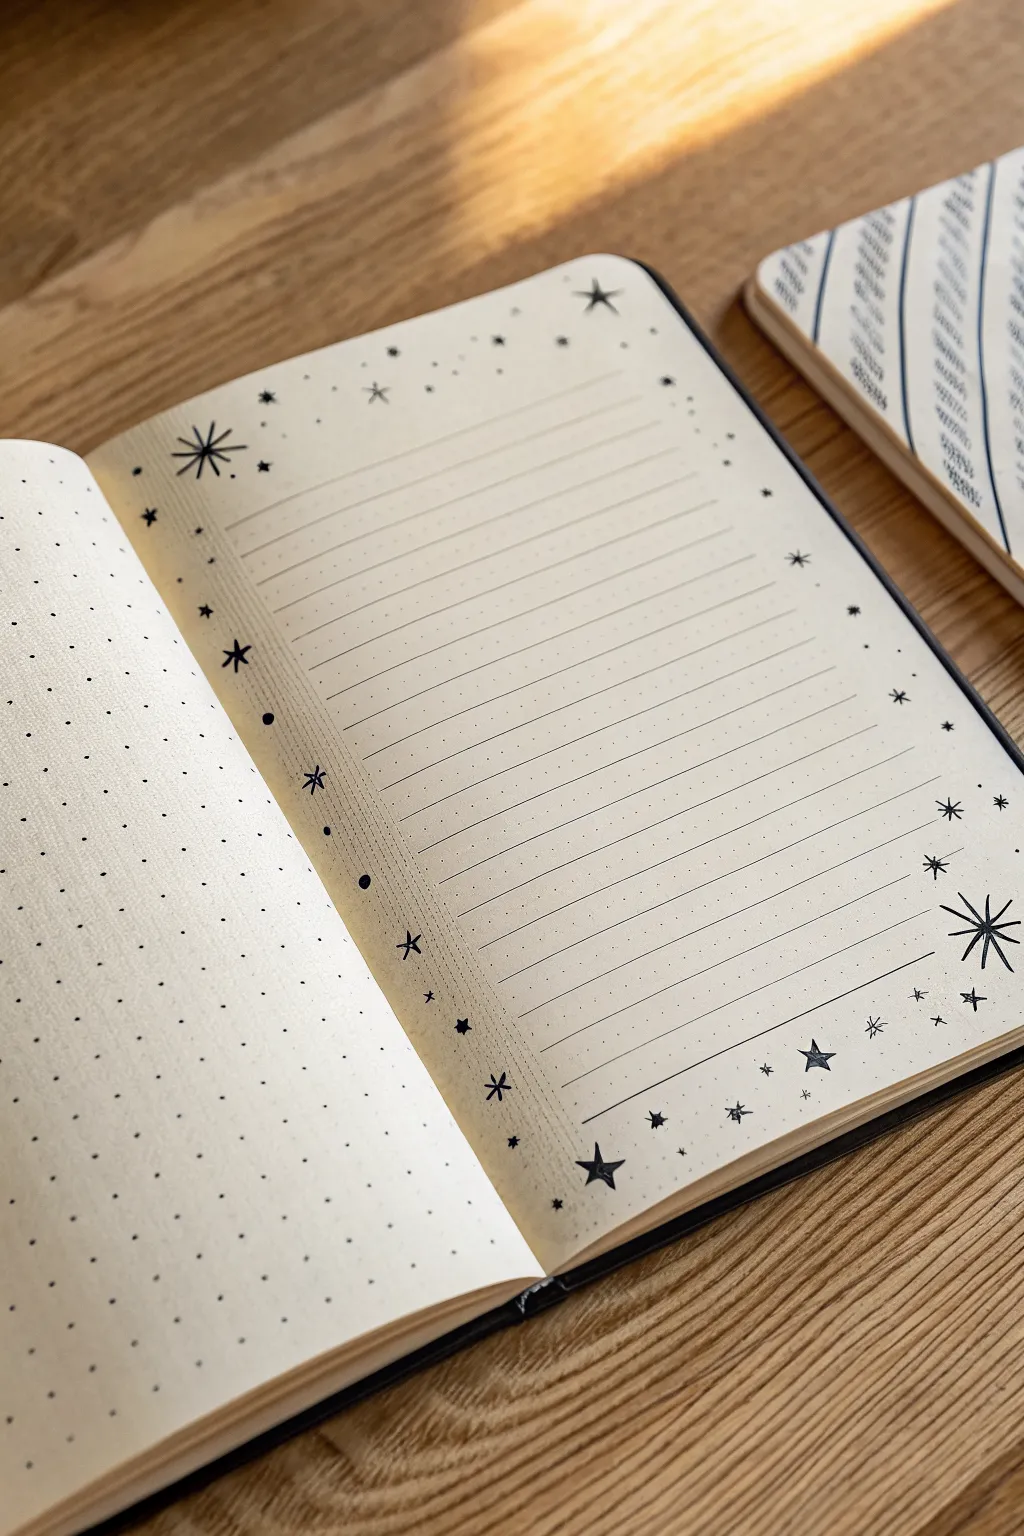
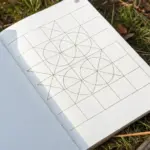
Transform a simple page of notes into a starry night sky with this delicate border design. Using just a black pen, you’ll create a mix of large stars, tiny twinkles, and dots that frame your writing space beautifully.
Step-by-Step Tutorial
Materials
- Dotted grid notebook or journal
- Black fine-liner pen (0.3mm or 0.5mm)
- Ruler (optional, for straight lines)
- Pencil and eraser (for sketching)
Step 1: Setting the Structure
-
Define the writing space:
Start by deciding how much space you want for your actual notes. Draw horizontal lines across the page, leaving about an inch of margin on the left, right, top, and bottom. You can use the dot grid as a guide to keep your lines perfectly straight and evenly spaced. -
Leave breathing room:
Ensure you stop your horizontal lines before they hit the edge of the paper. This empty negative space around the edges is where our star border will live.
Starry variation
Try mixing silver or gold gel pens into the border for the smaller dots. The metallic ink catches the light beautifully and makes the page look truly magical.
Step 2: Drawing the Major Stars
-
Place the anchor stars:
Choose 3 or 4 spots in the corners or along the sides to place your largest stars. These will be the focal points of the border. -
Draw an eight-point star:
For the largest star (like the one in the top left), draw a simple cross first. Then, draw a smaller ‘X’ through the middle. Extend the vertical and horizontal lines slightly longer than the diagonal ones for a classic twinkle shape. -
Add five-point stars:
Scattered around the border, draw a few classic five-point stars. I like to fill these in completely with black ink to give them visual weight and contrast against the delicate lines. -
Create four-point stars:
Draw a few medium-sized stars using a simple four-point diamond shape. These look like elongated diamonds and help bridge the gap between the huge stars and the tiny details.
Ink smearing?
If you’re left-handed or using a juicy pen, place a scrap piece of paper under your hand as a shield. Work from the top left corner down to the bottom right to avoid dragging your hand.
Step 3: Adding Delicate Details
-
Sprinkle in asterisks:
Draw simple asterisks (three intersecting lines) in the empty spaces. These represent distant, twinkling stars and are very quick to doodle. -
Add tiny cross stars:
Draw very small ‘plus sign’ shapes scattered randomly. These look like faint glimmers. -
Draw open stars:
Sketch a few small, outline-only five-point stars. Leaving them uncolored adds variety to the texture of the border. -
Apply the ‘dust’:
This is the most crucial step for the magical effect. Gently tap your pen to create tiny dots (stippling) all around the stars. Concentrate more dots near the star clusters and fewer as you move away. -
Vary dot density:
Make sure your dots aren’t uniform. Group two or three close together, then leave a larger gap. This irregularity mimics a real galaxy.
Step 4: Final Touches
-
Check balance:
Step back and look at the whole page. If one corner looks too empty, add a small five-point star or a cluster of dots to balance it out. -
Clean up:
If you used pencil guidelines for your text box area, gently erase them now, being careful not to smudge your fresh ink. -
Connect the theme:
Optionally, you can draw a very thin, faint line connecting some of the stars to the horizontal writing lines, anchoring the celestial border to your functional text area.
Now you have a whimsical space ready for your thoughts and daydreams

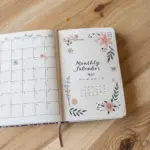
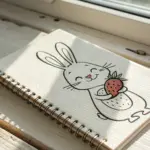
Hearts in Every Style

Transform the mundane margins of your class notes into a charming cascade of hearts with this simple yet effective doodling technique. The result is a clean, repetitive pattern that adds personality to any lined page without overwhelming your written work.
Step-by-Step Guide
Materials
- Lined notebook or journal (cream paper works lovely)
- Black ink fineliner pen or gel pen (0.5mm is ideal)
- Ballpoint pen (optional, for prop styling)
Step 1: Planning the Layout
-
Locate margin space:
Identify the left-hand margin guide on your lined paper. If your notebook doesn’t have a distinct vertical red line, visualize an imaginary line about an inch from the left edge where your bullet points would naturally start. -
Test your pen:
Scribble lightly on a scrap piece of paper to ensure your black gel pen or fineliner generates a smooth, consistent flow of ink, as uneven lines can disrupt the clean look of this doodle.
Step 2: Drawing the Base Hearts
-
Start at the top:
Begin with the very first line of the notebook page. Position your pen tip on the imaginary vertical margin line. -
Draw the left curve:
Create the left lobe of the heart by curving up and to the left, then swooping down to rest on the horizontal line below. The bottom point of the heart should touch the line perfectly. -
Draw the right curve:
Starting from the same top center point, mirror the motion on the right side. Curve up, out to the right, and swoop down to meet the left line at the bottom tip. -
Evaluate the size:
Check your first heart. Ideally, it should span exactly one line height—the top dip sits is near the top of the space, and the bottom point rests on the baseline. -
Skip a line:
Leave the horizontal line immediately below your first heart empty to create breathing room between the shapes. This negative space keeps the doodle looking tidy. -
Begin the second heart:
Move down to the next available line. Repeat the heart shape, aiming to keep the width and height consistent with the first one you drew.
Ink Flow Tip
Use a gel pen rather than a standard ballpoint. The liquid ink glides smoother on paper, making those curved tops of the hearts much rounder and easier to execute in one stroke.
Step 3: Creating the Cascade
-
Establish the rhythm:
Continue down the page, drawing a heart on every other line. I find that maintaining a steady drawing speed helps keep the curves smoother than drawing too slowly. -
Alignment check:
After every three or four hearts, pause to look at the vertical alignment. The center dips of the hearts should form a relatively straight vertical line down the page. -
Slight variations:
Don’t worry if every heart isn’t geometrically identical. The charm of hand-doodling lies in the slight quirks where one lobe might be slightly plumper than the other. -
Fill the page:
Continue this alternating pattern until you reach the bottom of the page. The final heart should rest near the last horizontal line. -
Refine connections:
If any of your heart tips didn’t fully connect at the bottom point, go back and carefully extend the lines until they meet for a sharp finish.
Level Up: Color Pop
Use a light pastel highlighter to color in every other heart, or draw shadows on one side of each heart using a grey marker for a mild 3D sticker effect.
Step 4: Optional Enhancements
-
Add a header:
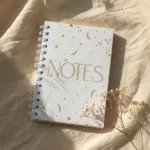
At the very top of the page, write a small title or date (like ‘Lover +’) in a cursive script similar to the reference image. -
Draw header lines:
Add a few short, horizontal dashes next to your header text to frame it and balance the composition at the top of the page. -
Style for display:
If you are setting this up for a photo, place a nice pen diagonally across the page, pointing toward the bottom right corner. -
Lighting check:
To mimic the warm, cozy vibe of the reference, place your notebook near soft lighting or fairy lights before snapping a picture.
Now you have a beautifully decorated page border that makes even simple note-taking feel like a creative endeavor


Expression Faces in Circles

Need a way to track your mood or just doodle away some boredom? These simple, expressive circular faces are perfect for filling a dot-grid journal page, practicing expressions, or creating your own custom sticker sheet.
Step-by-Step
Materials
- Dot-grid notebook or paper
- Pencil (HB or mechanical)
- Fine-liner pen (black, 0.3mm or 0.5mm)
- Circle stencil or a small round object (approx. 1 inch)
- Eraser
Step 1: Setting the Stage
-
Prepare your grid:
Open your dot-grid notebook to a fresh page. If you are using plain paper, you might want to lightly sketch a grid with a pencil and ruler to keep things organized, but the dots make spacing much easier. -
Draft the circles:
Using a circle stencil or tracing a small object like a bottle cap, lightly draw 16 circles in a 4×4 grid pattern using your pencil. Space them out evenly, leaving about half an inch between each circle.
Step 2: Drawing the Base Expressions
-
Inking the outlines:
Take your fine-liner pen and carefully trace over your penciled circles. Try to keep a steady hand for a clean line, but don’t worry if they aren’t perfect geometric circles—it adds charm. -
Start with happy faces:
Let’s begin with positivity. In the middle rows, draw two simple smiley faces. For one, use two dots for eyes and a wide U-shape for the mouth. For the other, add small curved lines underneath the eyes to show cheeks pushing up. -
The nervous face:
Find a circle on the right side. Draw two small dot eyes and a mouth that looks like a flattened oval with vertical lines inside (like a zipper or clenched teeth). Add two tiny curved eyebrows slanted upwards. -
The sad faces:
Pick a couple of spots for sadness. Draw a downward curved mouth for one. For a more expressive sad face, add slanted eyebrows that dip towards the center of the forehead. -
Surprise and shock:
Create a shocked expression by drawing wide, round eyes with tiny pupils and a small O-shaped mouth. For a milder surprise, just use simple dot eyes and a slightly open mouth.
Steady Hands
Can’t draw a perfect circle? Rotate the notebook—not your hand—as you draw the curve. This helps maintain a consistent arc without heavy stencils.
Step 3: Adding Personality & Detail
-
The grumpy look:
On the top row, draw a face with a flat line for a mouth and downward-slanting straight eyebrows. This creates an indifferent or grumpy vibe. -
Pure joy:
Near the bottom, create a laughing face. Draw two ‘greater than’ and ‘less than’ signs for squinted eyes (> <) and a large semi-circle mouth open wide. -
Confusion:
Draw a mouth that is a wavy line or a slightly crooked line. Keep the eyes simple dots, but maybe make one slightly larger than the other. -
The broken face:
For a unique twist, like the one in the bottom row, draw a circle that looks cracked or shattering, with squiggly lines radiating from the center and simple dot eyes looking dizzy. -
Adding texture:
Go back to a few faces and add small freckles or blush marks (little clusters of dots) under the eyes to give them more character. -
Sweat drops:
For the nervous or exhausted faces, add a tiny teardrop shape near the temple to represent a sweat drop. -
Directional glances:
Instead of centering the pupils, draw them looking to the far left or right inside the eye circles. This creates a side-eye or suspicious look.
Add Color
Use mild highlighters or colored pencils to fill in the faces. Yellow is classic, but try blue for sad faces or red for the angry ones to code them.
Step 4: Final Touches
-
Review and refine:
Look over your grid. If any lines look too thin, go over them again to thicken the stroke slightly. -
Erase guidelines:
Once the ink is completely dry (give it a good minute so it doesn’t smudge), gently erase the original pencil circles underneath your ink.
You now have a full range of emotions captured on one page ready to track your day
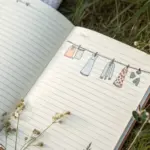
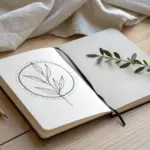
Easy Flower Minis
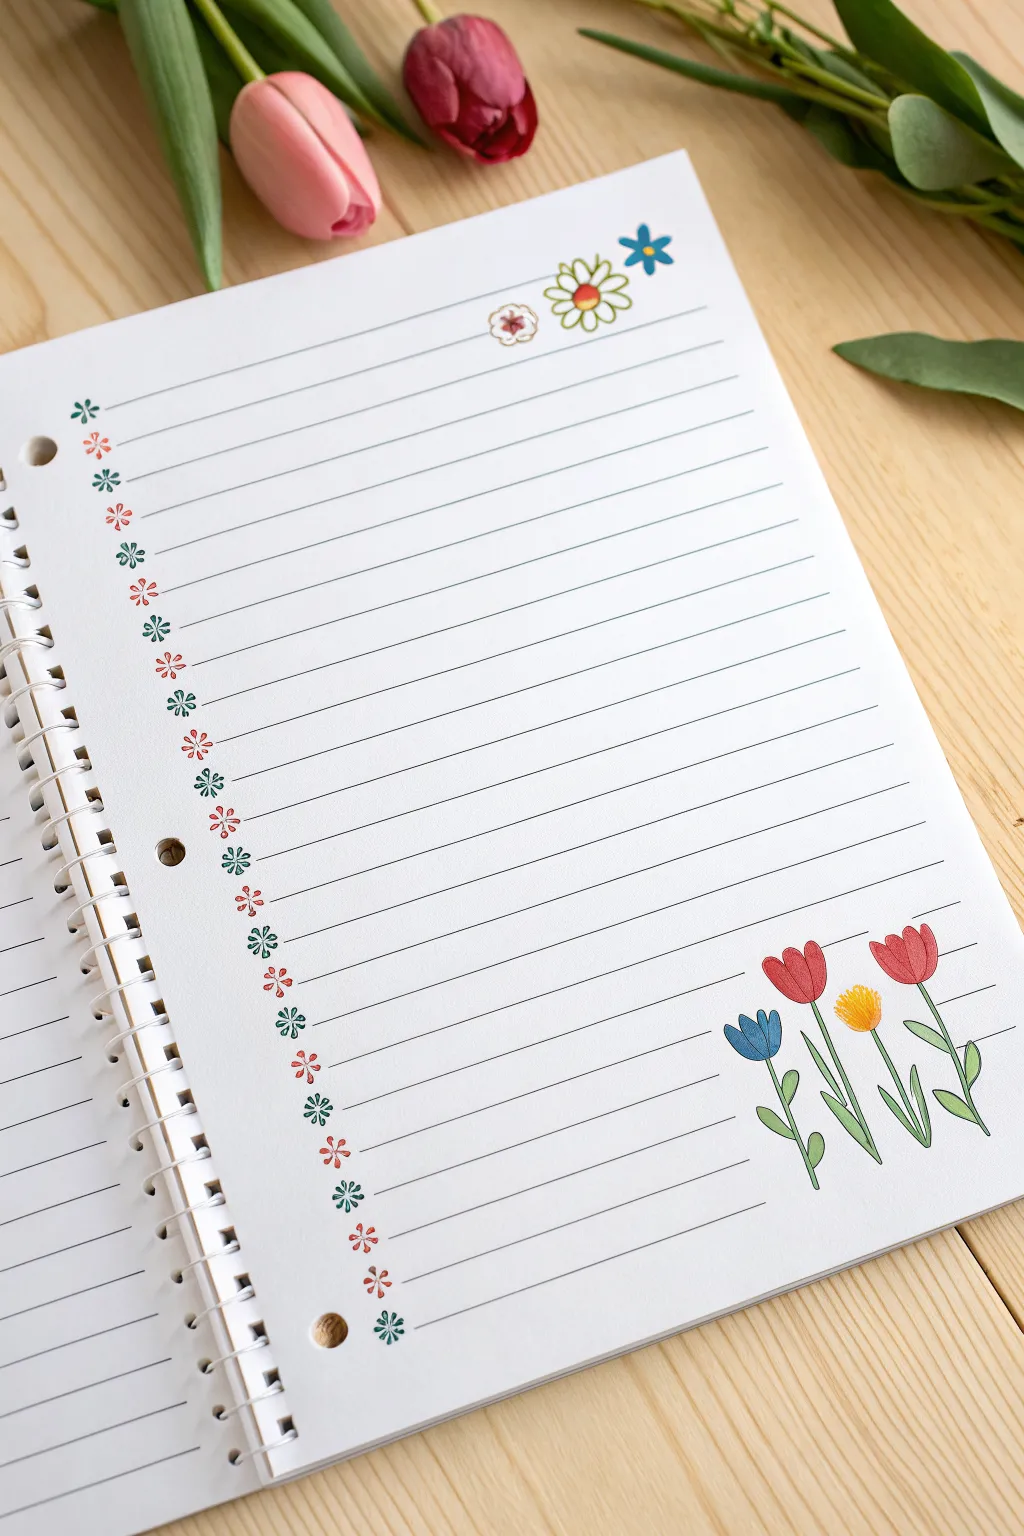
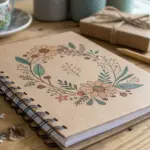
Transform a plain page of lined paper into a blooming garden with these simple, colorful doodles. This project features a delicate floral margin pattern and a lively tulip cluster that fits perfectly in any corner.
Step-by-Step Tutorial
Materials
- Lined spiral notebook paper
- Fine-point colored pens or markers (Green, Red, Blue, Yellow)
- Pencil (optional, for sketching phase)
- Eraser
Step 1: Creating the Margin Vine
-
Understand the pattern:
The left margin border is a repeating pattern of small floral asterisks. Notice that they alternate colors: one green, one red, creating a rhythmic look down the page. -
Start the first green flower:
Begin at the very top line of your margin. Using your green pen, draw a small ‘x’. Then, draw a vertical line through the center to create a six-pointed star shape or asterisk. -
Add dots to the petals:
At the end of each of the six lines you just drew, place a tiny dot. This softens the asterisk and makes it look more like a little flower. -
Draw the red flower:
Skip down to the next notebook line. Switch to your red pen and repeat the process: draw a six-pointed asterisk shape. -
Finish the red bloom:
Just like before, add tiny dots at the tip of each red line to complete the flower. -
Continue the pattern:
Work your way down the entire margin, alternating between green and red flowers on every single line until you reach the bottom hole punch.
Spacing Secrets
Use the notebook’s printed lines as your guide. Placing one margin flower exactly on each line keeps your pattern perfectly vertical without needing a ruler.
Step 2: Drawing the Header Accents
-
Position the top flowers:
In the top right corner of the page, above the top line, you will draw a small cluster of three different flowers. -
Draw the blue asterisk:
On the far right, draw a simple five-pointed blue asterisk. It should look like a simple star shape. -
Create the center daisy:
To the left of the blue star, draw a small red circle. Surround it with five white loops to create petals. Outline these petals in green. -
Add the tiny red flower:
To the left of the green daisy, draw a very small five-petaled flower shape in red with a white center.
Make it 3D
Use a slightly darker shade of marker to add tiny shadow lines on one side of each tulip cup and under the leaves to make them pop off the page.
Step 3: Sketching the Tulip Garden
-
Sketch the stems:
Move to the bottom right corner of the page. Using a green pen, draw four slightly curved lines growing upward from the bottom imaginary baseline. -
Draw the blue tulip head:
On the far left stem, draw a ‘U’ shape for the flower base. Add a ‘W’ shape on top to close it, creating the tulip petals. Color this in solid blue. -
Add the tall red tulip:
On the second stem (which should be slightly taller), draw a similar tulip shape in red. Make this one look a bit more open by curving the side petals slightly outward. -
Create the yellow dandelion:
On the third stem, draw a small, fluffy yellow oval. Use short, scratchy strokes to give it texture, rather than coloring it solid. -
Finish with the red tulip:
On the far right stem, draw another red tulip head, slightly tilted to the right. -
Add leaves:
Go back to your stems with the green pen. Draw long, almond-shaped leaves attached to the base of the stems. Make them curve naturally along the imaginary ground. -
Refine the stems:
Thicken the stems slightly if needed, ensuring they connect cleanly to the bottom of each flower head.
Now your notes have a lovely border that brightens up even the dullest subject

PENCIL GUIDE
Understanding Pencil Grades from H to B
From first sketch to finished drawing — learn pencil grades, line control, and shading techniques.
Explore the Full Guide
Clouds, Suns, and Raindrops
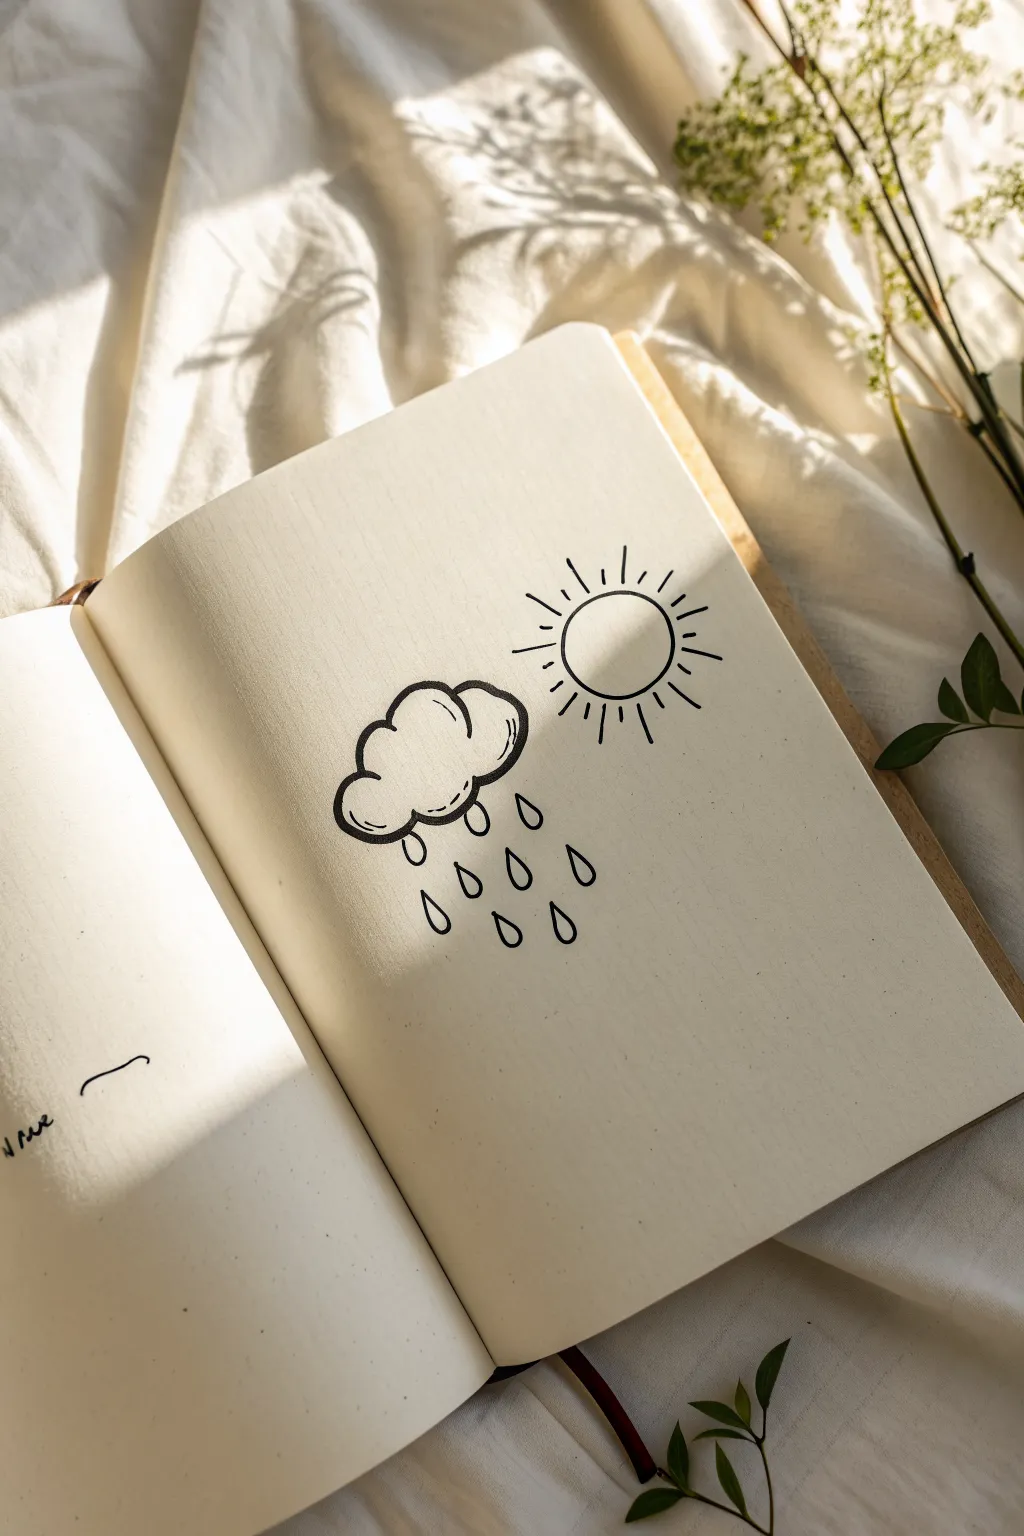
This charming little weather scene captures the best of both worlds with a fluffy rain cloud and a radiant sun side-by-side. The minimalist black ink style looks crisp on cream-colored paper and is perfectly simple for a quick creative break.
Step-by-Step Guide
Materials
- Fine-point black pen or liner (0.3mm or 0.5mm)
- Small sketchbook or notebook with unlined paper
- Pencil (optional, for sketching)
- Eraser
Step 1: Drawing the Cloud
-
Start the base:
Begin on the left side of your page by drawing the bottom edge of the cloud. Sketch a gentle, slightly wavy horizontal line that curves up at both ends to form the ‘corners’ of the cloud. -
Add fluffy curves:
Starting from the left corner, draw a series of connected semi-circles moving upwards and towards the right. Make the first hump medium-sized. -
Create the peak:
Draw the largest, tallest curve in the middle to give the cloud some nice volume. -
Close the shape:
Finish the cloud outline with a few smaller descending curves on the right side, connecting back down to the bottom wavy line you started with. -
Add volume lines:
Inside the cloud silhouette, add a second, thinner line specifically along the bottom curvy edge and the lower-left side. This creates a cartoon-like shadow effect. -
Detail the inside:
Draw a few small, broken curved lines inside the upper humps to suggest fluffiness and texture, keeping them sparse.
Keep it fluid
Don’t lift your pen too often when drawing the cloud bumps. A continuous, confident line often looks smoother than short, scratchy strokes.
Step 2: Adding the Rain
-
First drop:
Directly below the cloud, draw your first raindrop. Use a simple teardrop shape—pointed at the top and rounded at the bottom. -
Create a pattern:
Draw two more raindrops in this top row, spacing them somewhat evenly beneath the cloud’s belly. -
Stagger the second row:
Move slightly lower and draw a second row of raindrops. Position these drops in the gaps between the drops above, adhering to a brick-lay pattern. -
Finish the rain:
Add a final, third row of raindrops if you have space, keeping the teardrop shapes consistent in size.
Wobbly circles?
If you struggle with drawing a perfect sun circle, rotate the paper underneath your hand as you draw the curve, acting like a compass.
Step 3: Drawing the Sun
-
Position the sun:
Move to the upper right of the page, slightly higher than the cloud. Draw a clean, circular shape for the body of the sun. -
Check the spacing:
Ensure there is a little breathing room between the cloud and the sun so the elements don’t feel cramped. -
Draw primary rays:
Draw straight lines radiating outward from the circle. Start with the cardinal directions (top, bottom, left, right) to keep things symmetrical. -
Fill the gaps:
Add diagonal rays in between your primary lines. Aim to make these main rays roughly the same length. -
Add shorter rays:
In the spaces between the long rays, draw shorter tick marks floating slightly away from the circle’s edge. This variation gives the sun a bursting, energetic look.
Now you have a cheerful weather duo to brighten up your notes
Blob Cats and Dogs
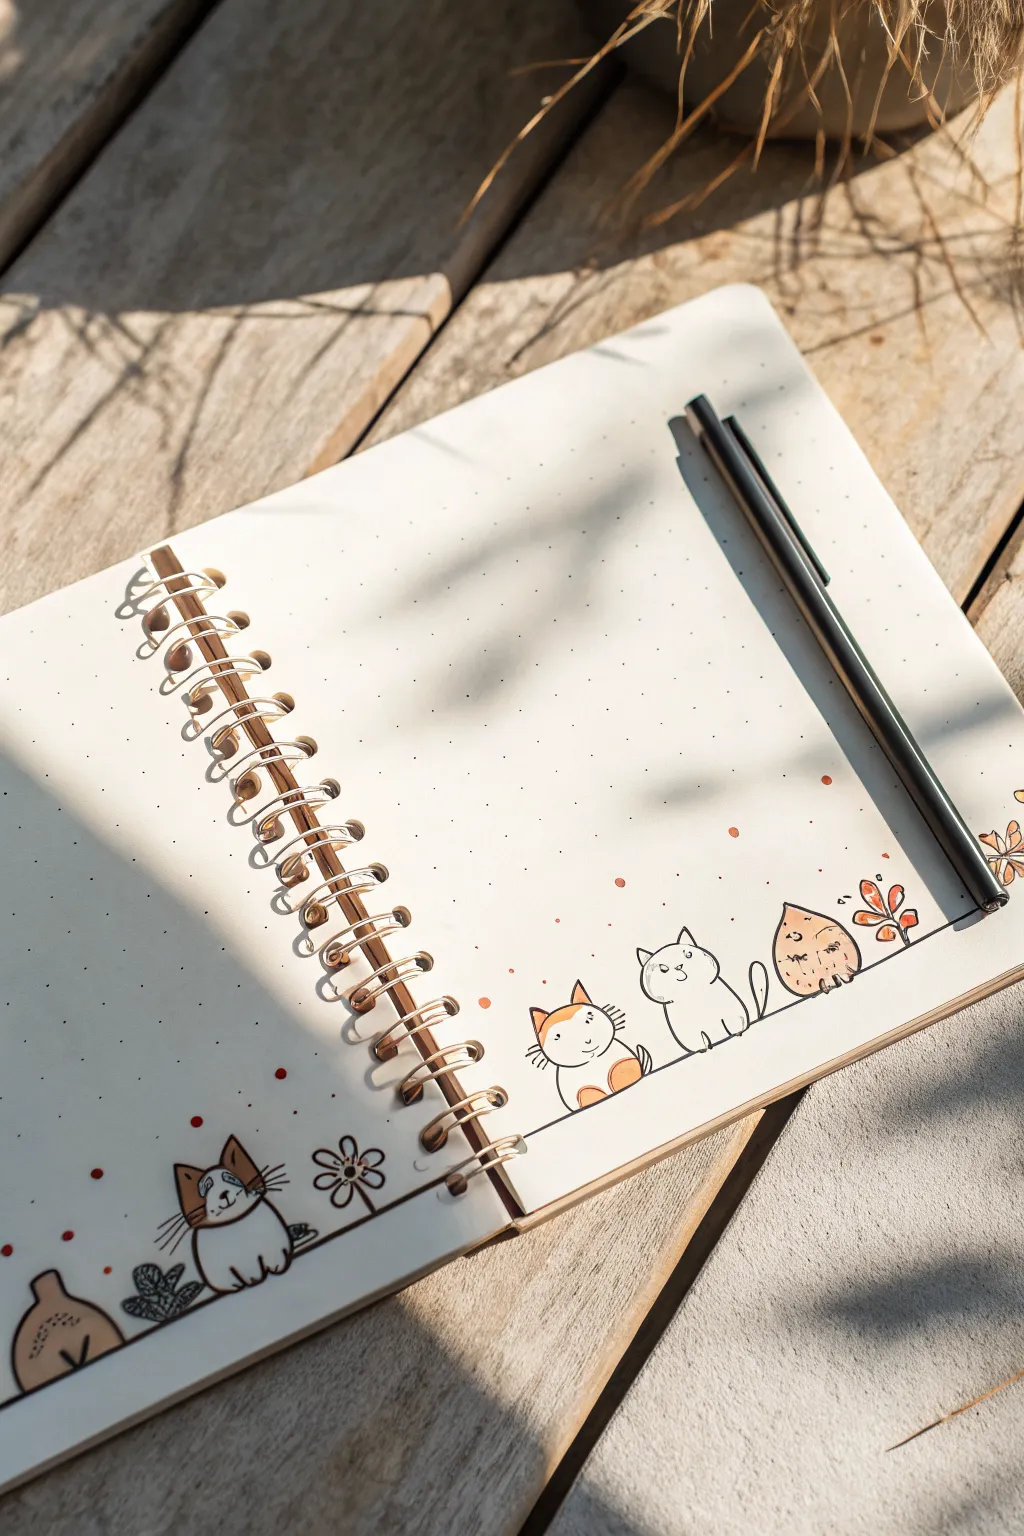
Turn the bottom edge of your notebook into a playful parade of cute characters with this simple doodle idea. Crisp black ink outlines meet soft touches of orange marker to create a warm, inviting scene perfect for a bullet journal spread.
Step-by-Step Tutorial
Materials
- Dotted or blank spiral notebook
- Fine-point black fineliner pen (0.3mm or 0.5mm)
- Orange creative marker or colored pencil
- Pencil and eraser (for sketching)
Step 1: Setting the Scene
-
Establish the ground line:
Open your notebook to a fresh spread. Using your black fineliner, draw a single, straight horizontal line across the bottom of both pages, leaving about an inch of space below it for your characters. -
Plan your placement:
Lightly sketch circles and ovals with a pencil to determine where each character will sit. Aim for three characters on the right page and two main elements on the left page to balance the composition.
Smudge Prevention
Wait at least two minutes after inking before you erase your pencil marks. Fineliners can smear easily on smooth notebook paper even if they look dry.
Step 2: Drawing the Right Page
-
Outline the first cat:
Starting from the left side of the right page, draw a rounded shape with two pointed ears. Add a simple curved tail to its left side. -
Add facial details:
Inside the head shape, draw two small dots for eyes and a tiny ‘w’ shape for the mouth. Give it three whiskers on each side of the face. -
Create the second cat:
Next to the first cat, draw a slightly taller, sitting cat. Draw a smooth outline for the back and head, adding pointed ears. Draw two vertical lines for front legs that rest on the ground line. -
Draw the third character:
To the right of the second cat, draw a round, teardrop-shaped creature (resembling a small bird or spirit). Give it closed, U-shaped eyes for a sleeping expression and tiny stick feet. -
Add floral accents:
Draw a small plant with three oval leaves on the far right edge of the page, growing upward from the ground line.
Creative Twist
Instead of orange, try using a pastel highlighter color like mint green or lavender to match your weekly spread’s theme.
Step 3: Drawing the Left Page
-
Draw the sitting cat:
On the left page, draw a sitting cat similar to the one on the right, but facing slightly towards the center. Include triangular ears and a curvy tail. -
Add head markings:
Draw patches around this cat’s eyes and ears to give it a distinct calico or spotted look. Add the whiskers and face details. -
Draw the corner element:
In the bottom left corner, draw a rounded, sack-like shape with a tied top, resembling a small bag or rock. Add a small flower next to the cat with five petals and a simple stem. -
Add scattered details:
In the empty space above the characters on the left page, draw tiny dots to simulate rain, dust motes, or just decorative texture.
Step 4: Adding Color & Finish
-
Erase pencil guides:
Once the ink is completely dry, gently erase all pencil sketches to reveal clean black lines. -
Color accents on the right:
Take your orange marker. Color the ears and a patch on the side of the first cat. For the teardrop creature, color its body but leave the face area white. -
Color accents on the left:
On the left page cat, fill in the patches around the ears and eyes with orange. Color the small flower center as well. -
Add atmospheric dots:
Using the orange marker, add several small, scattered dots floating above the characters on both pages to tie the color scheme together. -
Final check:
Review your drawing for any gaps in the lines. If desired, go over the bottom ground line once more to make it slightly bolder than the character outlines.
Now you have a charming little border that adds personality to your notes without taking up too much writing space
BRUSH GUIDE
The Right Brush for Every Stroke
From clean lines to bold texture — master brush choice, stroke control, and essential techniques.
Explore the Full Guide
Cute Little Ghosts
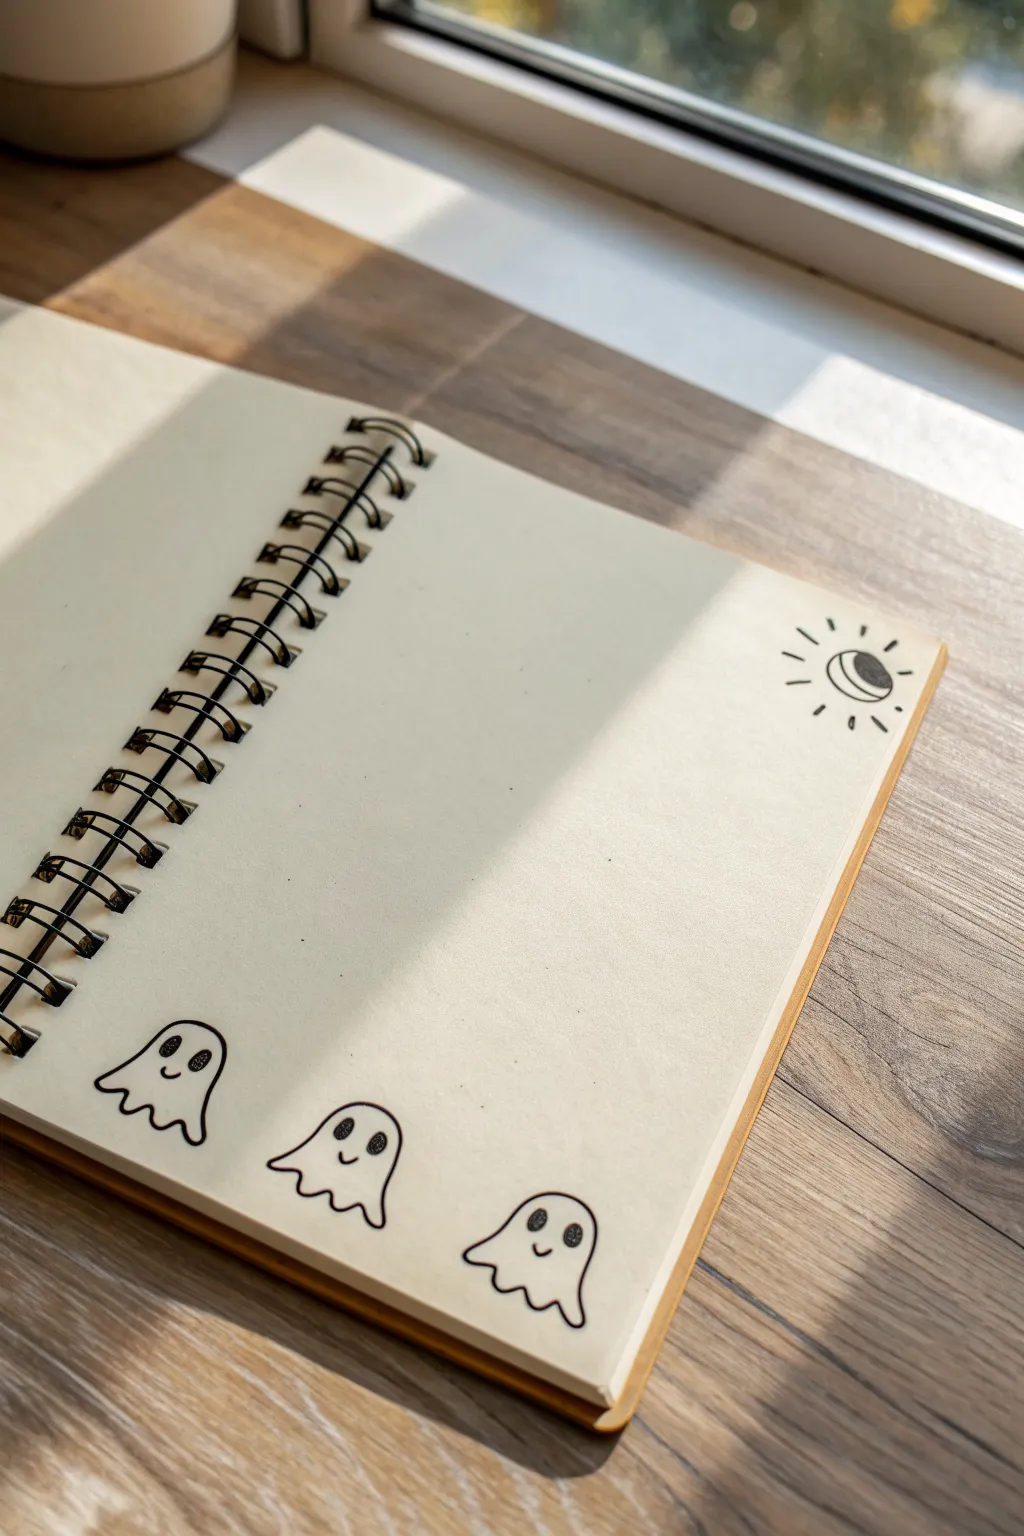
Transform the corner of your notebook page into a spooky-sweet scene with this charming doodle layout. It features a row of three playful ghosts floating along the bottom edge, balanced by a minimal celestial sun in the opposite corner.
Detailed Instructions
Materials
- Spiral-bound notebook (unlined or dot grid works best)
- Black fine-liner pen (0.5mm or 0.8mm)
- Pencil (optional for sketching)
- Eraser
Step 1: Drawing the Ghost Bodies
-
Position the first ghost:
Start near the bottom left corner of the page. Draw a smooth, upward arching curve to create the head of the first ghost. -
Create the wavy hem:
Continue the line down the left side, then curve it under to create a wavy bottom edge. The hem should have three distinct little scallops or bumps before curving back up the right side to meet the head. -
Add the second ghost:
Move slightly to the right, leaving a comfortable gap. Draw a second ghost shape similar to the first, perhaps making the head slightly rounder or the body a bit wider for variety. -
Draw the third ghost:
Position the final ghost to the right of the second one. Maintain similar spacing so they look like a little procession. Sketch the arching head and the wavy scalloped bottom just like the others.
Step 2: Adding Faces & Details
-
Draw eyes on the first ghost:
For the leftmost ghost, draw two medium-sized ovals for eyes. Fill them in completely with your black pen, leaving a tiny speck of white if you want a highlight, though solid black is classic. -
Give it a smile:
Place a tiny, simple ‘u’ shape between and slightly below the eyes to create a happy little smile. -
Detail the middle ghost:
Give the center ghost slightly larger oval eyes, filling them in solid black. Add a similar small smile, positioning it just a bit higher or lower to give it a unique expression. -
Finish the third ghost’s face:
For the rightmost ghost, draw the eyes and smile again. I like to tilt the eyes slightly inward on one ghost to make it look extra friendly. -
Refine the lines:
Go over the outer outlines of all three ghosts with your pen to slightly thicken the line weight, making them pop against the paper.
Uneven Ghosts?
Don’t stress about symmetry! Ghosts are amorphous spirits, so wobbly lines or uneven hems actually add to their floaty, supernatural character.
Step 3: Drawing the Corner Sun
-
Draw the central circle:
Move to the top right corner of the page. Draw a small, neat circle about the size of a dime. -
Add the crescent detail:
Inside the circle, draw a curved line to create a crescent moon shape within the sun face. Fill in the crescent shape solidly with black ink. -
Add the rays:
Draw short, straight lines radiating outward from the circle. Space them evenly around the circumference. -
Vary the ray lengths:
To make it more dynamic, you can alternate between slightly longer and shorter rays, or keep them uniform for a cleaner look. -
Clean up sketch lines:
If you used a pencil for the initial shapes, wait for the ink to dry completely, then gently erase any visible graphite marks.
Pro Tip: Line Weight
Use a thicker pen (0.8mm) for the ghost outlines and a finer tip (0.3mm) for their smiles and face details to add subtle depth.
Now you have a trio of friendly spirits to keep you company during class
Snack Doodles for Lunch Daydreams

Capture the feeling of a lazy lunch break with this charming notebook layout featuring a cheerful cloud header and a sweet cupcake footer. These simple, clean outlines are perfect for framing your notes without overwhelming the page.
Step-by-Step Guide
Materials
- Spiral-bound lined notebook
- Fine-point black drawing pen (0.5mm or 0.7mm)
- Red colored pencil or marker
- Pencil (optional, for sketching)
- Eraser
Step 1: Setting the Scene: The Header
-
Create the sun circle:
Start at the very top of your page, centered between the left and right margins. Draw a small, clean circle for the sun’s body, keeping it floating above the top notebook line. -
Add sun rays:
Draw four short, simple lines radiating outward from the circle—one at the top, bottom, left, and right. Then, add four smaller tick marks in between those main rays for a classic sunshine look. -
Draw the left cloud:
To the left of the sun, draw a fluffy cloud shape using a series of connected curved humps. Make the bottom line of the cloud slightly flatter to ground it, but keep the overall shape soft and billowy. -
Draw the right cloud:
Repeat the process on the right side of the sun. Try to make this cloud slightly different in shape from the first one so they look natural and hand-drawn rather than stamped. -
Connect with a horizon line:
Draw a straight, horizontal line extending from the left cloud toward the left paper edge. Do the same on the right side. This subtle detail frames the doodle area nicely.
Ink Smearing?
If your gel pen smears when erasing pencil lines, switch to a pigment liner or wait at least 15 minutes before erasing. A kneaded eraser lifts graphite gently without harsh rubbing.
Step 2: The Sweet Treat: The Footer
-
Outline the cupcake liner:
Jump down to the bottom right corner of your page. Draw an upside-down trapezoid shape—essentially a cup with slanted sides and a slightly curved bottom edge. -
Add volume to the liner:
Draw a second curved line just inside the top edge of your trapezoid to give the cup a bit of dimension and rim thickness. -
Texture the liner:
Draw several slanted lines inside the cup shape, angling them slightly inward as they go down. This mimics the folds of a paper cupcake liner. -
Draw the frosting base:
On top of the liner, draw a wide, soft curve that overhangs the cup slightly on both sides. This is the bottom layer of your frosting. -
Add the frosting dollop:
Above that base curve, draw a smaller, rounded mound to create the height of the cupcake. -
Top with a cherry:
Perch a small circle right on top of the frosting mound. Add a tiny curved stem flicking off to the side. -
Add floating hearts:
To the left of the cupcake, draw a cluster of four or five small hearts of varying sizes, floating upward like steam or scent lines.
Step 3: Finishing Touches
-
Clean up sketch lines:
If you started with pencil, gently erase your guide lines once the ink is completely dry to avoid smudging. -
Add a pop of color:
Using a red marker or colored pencil, carefully fill in the frosting area of the cupcake. I find leaving a tiny sliver of white space on one side creates a cute highlight effect. -
Color the cherry:
Fill in the cherry with the same red hue, making it slightly darker than the frosting if possible to distinguish the two elements. -
Review contrast:
Check your black lines. If the coloring washed them out, re-trace the outline of the frosting and cherry to make them pop again.
Make It Yours
Turn the sun into a moon and stars for a ‘night owl’ study session theme, or change the cupcake into a slice of pizza or a coffee mug depending on your craving.
Now you have a perfectly decorated page ready for your class notes or journal entry


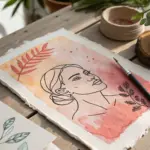
Moons and Mini Planets
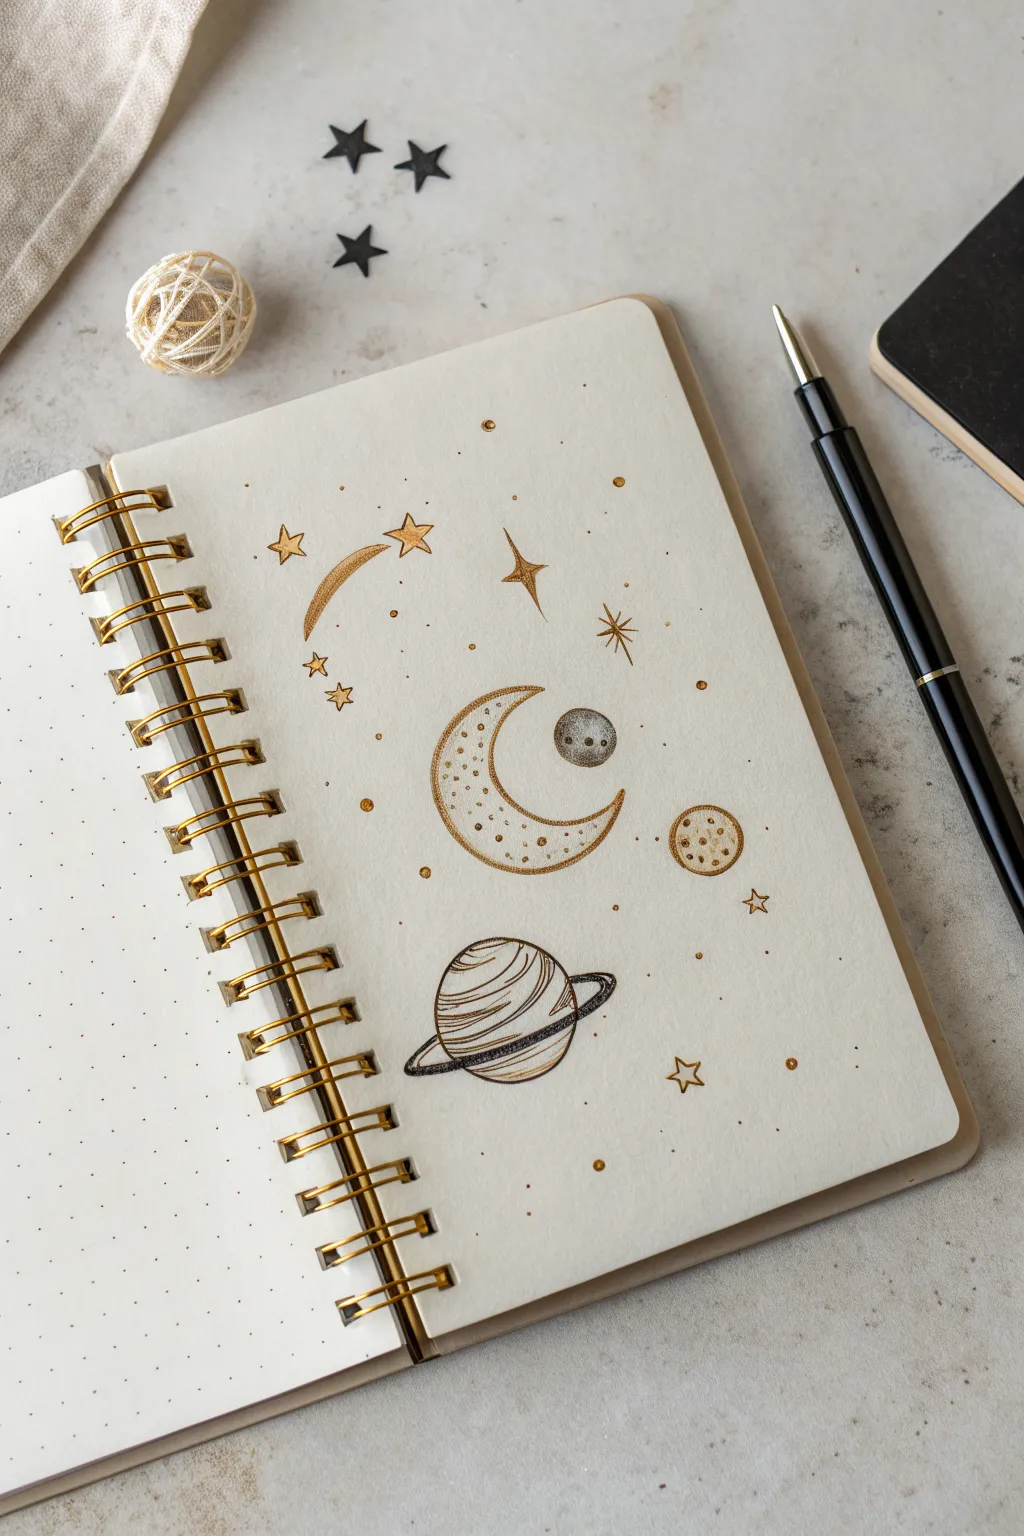
Transform a plain journal page into a starry expanse with this elegant combination of gold metallic ink and crisp black fineliners. The result is a minimalistic yet magical spread featuring shimmering moons, shooting stars, and a ringed planet.
Step-by-Step
Materials
- Dotted or blank journal (spiral bound preferred)
- Gold metallic gel pen or paint marker (fine tip)
- Black fineliner (0.3mm or 0.5mm)
- Pencil (HB or H)
- Eraser
Step 1: Setting the Scene: Stars & Shooting Stars
-
Sketch the layout:
Begin by lightly sketching the positions of your main elements with a pencil. Place a large crescent moon in the center, a ringed planet below it, and scatter a few star shapes to create a balanced composition. -
Draw the shooting star tail:
Using your gold pen, draw the curved tail of the shooting star in the upper left. Start thick at the star end and taper it off into a thin point, leaving the actual star shape empty for now. -
Outline the gold stars:
Switch to your black fineliner to outline the five-pointed star at the head of your gold tail. Repeat this for the other scattered stars, drawing clean, sharp points. -
Fill the star details:
Inside your black star outlines, carefully color the centers with gold ink. For the four-pointed ‘sparkle’ stars, draw the vertical and horizontal lines in gold first, then outline them thinly in black.
Step 2: The Crescent Moon
-
Outline the crescent:
With the gold pen, draw the large crescent moon shape in the center. I like to make the outer line slightly thicker than the inner curve to give it weight. -
Add texture dots:
Stipple the inside of the crescent moon with tiny gold dots. Concentrate the dots near the bottom and top tips, fading them out toward the middle for a gradient effect. -
Draw craters:
Add a few small open circles in gold within the crescent to represent craters. Keep them minimal to avoid overcrowding the design. -
Define the edge:
Take your black fineliner and very carefully trace the outer and inner edge of the gold crescent. This crisp black line makes the metallic ink pop against the cream paper.
Ink Smudge Rescue
If gold ink smudges, turn it into a ‘nebula’ or cluster of stars. Draw tiny dots over the mistake to disguise it as intentional texture.
Step 3: Planetary Details
-
Draw the small moon:
To the right of the crescent, draw a small circle with the black pen. Fill half of it with stippled black dots to create a shadow side, giving it dimension. -
Create the ringed planet:
Move to the bottom center. Draw a large circle in black ink for the planet’s body, then sketch an elliptical ring slicing through the middle. Erase the planet line that sits inside the front of the ring. -
Detail the planet surface:
Draw curved horizontal lines across the planet’s surface to simulate gas giant bands. Vary the spacing to make it look organic. -
Gold accents on the planet:
Use the gold pen to fill in alternate bands on the planet and color the ring. The contrast between the black lines and gold fill is key here. -
Add the third celestial body:
Draw a small circle to the right of the crescent moon. Outline it in gold, then add small gold crater circles inside. -
Define the third body:
Outline this gold circle with your black fineliner to match the style of the large crescent moon.
Cosmic Variation
Try using a white gel pen for highlights on the black sections of the planet or moon shadows to add extra depth and a 3D effect.
Step 4: Finishing Touches
-
Scatter space dust:
Using the gold pen, adhere tiny dots randomly throughout the empty spaces of the page. This ‘space dust’ ties the separate elements together. -
Add distant stars:
Draw tiny black circles or single dots interspersed with the gold dust to represent very distant stars. -
Wait and erase:
Allow the metallic ink to dry completely—it can smudge easily if wet. Once safe, gently erase any remaining visible pencil sketch lines.
Now you have a shimmering slice of the galaxy right in your notebook
Bubble Letters of Today’s Topic

Transform a boring class header into a mini masterpiece with this striped bubble letter design surrounded by festive sparks. The crisp blue lines and soft peach accents create a clean, collegiate look that pops right off the lined notebook paper.
Detailed Instructions
Materials
- Lined notebook
- Blue fineliner or gel pen (medium thickness)
- Light peach or orange colored pencil (or pastel highlighter)
Step 1: Drafting the Letter
-
Pencil Sketch:
Start by lightly sketching a large, blocky letter ‘B’ in pencil. Make it about 6-7 lines high on your notebook page so it becomes the main focal point. -
Create Dimension:
Add a 3D effect by sketching a second line slightly to the right and below your original letter shape. Connect the corners with short diagonal lines to create the side walls of the block letter. -
Ink the Outline:
Take your blue pen and firmly trace over your pencil sketch. Use a confident, steady hand to keep the lines clean, but don’t worry if they mimic the slight wobble of a hand-drawn doodle.
Ink Smearing?
If your gel pen smears when erasing pencil lines, wait longer for it to dry or place a scrap piece of paper under your hand while drawing to prevent natural oils from slowing down drying time.
Step 2: Adding Patterns
-
Diagonal Stripes:
Starting at the top left of the letter’s face, draw diagonal lines downwards towards the right. Space them evenly, about 2 millimeters apart. -
Fill the Face:
Continue these diagonal lines until the entire front face of the ‘B’ is filled with stripes. I find it helps to rotate the notebook slightly to get the angle just right. -
Shadow Sides:
For the 3D side panels (the ‘depth’ of the letter), draw vertical hatching lines instead of diagonal ones. This contrast helps distinguish the front from the sides. -
Erase Guidelines:
Once the ink is completely dry—give it a good minute so it doesn’t smudge—gently erase any visible pencil marks underneath.
Step 3: Decorating the Surroundings
-
Draw Star Bursts:
Scatter three or four ‘firework’ style bursts around the letter. Draw a small central dot, then flick short lines outward in a circle like the spokes of a wheel. -
Add Traditional Stars:
Draw a few classic five-pointed stars around the letter. Place them randomly: one near the top left, another on the right, and perhaps one below. -
Solid Star Accent:
Choose one star, like the one beneath the letter, and fill it in completely with your blue pen for a bold anchor point. -
Tiny Details:
Sprinkle in some very small dots or tiny asterisks (*) in the empty spaces to make the composition feel full and magical.
Pro Tip: Consistent Angles
Keep a ruler or the edge of another notebook handy to check your diagonal stripe angle periodically. Keeping the striping parallel makes the finished doodle look much more professional.
Step 4: Adding Color
-
Color the Five-Pointed Stars:
switch to your peach or light orange colored pencil. Gently fill in the open five-pointed stars you drew earlier. -
Highlight the Bursts:
Take the same colored pencil and trace over just a few of the radiating lines on your firework bursts to add a subtle pop of color. -
Letter Shadowing:
Very lightly shade the 3D side walls of the ‘B’ with the colored pencil. This enhances the depth without overpowering the blue ink.
Now you have a bold, festive initial that turns a standard page into a personal statement
Stick Figures Doing Class Things

Capture a playful moment on paper with this simple yet charming stick figure scene drawn on dot-grid pages. The minimalist black ink style focuses on three distinct elements: a pet walker, a figure with a box, and a cheerful flower, perfect for adding life to study notes.
Detailed Instructions
Materials
- Dot-grid notebook or journal
- Fine-tipped black pigment liner (0.5mm or 0.3mm)
- Pencil (optional for sketching)
- Eraser
Step 1: Setting the Scene: The Pet Walker
-
Draw the head and body:
Start on the left side of the page. Draw a simple, clean circle for the head, placing it about four or five dot-rows up from where you want the ground level to be. Draw a straight vertical line downward for the torso, followed by an inverted ‘V’ shape for legs, keeping the lines crisp and angular. -
Add arms and leash:
From the upper torso, draw two lines for arms. The left arm should extend downwards and slightly back, while the right arm reaches forward. Extend a thin line from the forward hand down to the ground to represent the leash. -
Illustrate the pet:
At the end of the leash line, sketch a small, dark blob shape. It doesn’t need to be anatomically perfect—just a rounded body, a tiny dot for a head, and four small nubs for legs creates the suggestion of a small dog or cat walking alongside. -
Ground the figure:
Draw a thin horizontal line underneath the figure’s feet and the pet to create a sense of ground, ensuring they aren’t floating in space.
Clean Lines
Use the dots as a grid to keep vertical lines straight without a ruler. It keeps the doodle looking organic but neat.
Step 2: The Figure and the Box
-
Position the second figure:
Move a few inches to the right. Draw another circle head, slightly larger than the first one if you like. For the body, draw a long, thin rectangle or ‘tube’ shape instead of a single line, giving this character slightly more volume. -
Detail the clothes:
Divide the tubular body near the bottom with a horizontal line to suggest pants cuffs. Add a diagonal line near the collar area to imply a shirt neckline. -
Draw the arms:
Add stick arms coming from the shoulder area. One hand can be placed near the waist, perhaps holding a small object like a phone or checking a watch, while the other hangs naturally. -
Add the box object:
To the right of this figure’s feet, draw a small cube or rectangular prism. Add a few horizontal lines across its front to resemble the slats of a crate or details on a small container. -
Connect to the ground:
Just as before, sketch a short horizontal line under the feet and the box to anchor them to the same invisible horizon line as the first figure.
Step 3: Finishing Touches: The Flower
-
Draw the stem:
Move further to the right corner of your composition. Draw a slightly curved vertical line rising from your imaginary ground level to serve as the main stem. -
Add leaves:
Along the stem, draw small tear-drop or oval shapes pairing off on either side. Keep these sketchy and loose rather than rigid. -
Bloom the flower:
At the top of the stem, create a cluster of small loops or circles to represent petals. You can make them irregular to mimic a wildflower look. -
Finalize:
Add a final ground line beneath the plant. I find it helpful to wait a minute for the ink to fully set, then gently erase any pencil guidelines if you used them.
Add Motion
Draw tiny ‘action lines’ or dashes near the feet or the dog’s tail to suggest walking movement or wagging.
Your page now has a lively little narrative unfolding across the dots
Spiral Doodles That Look 3D
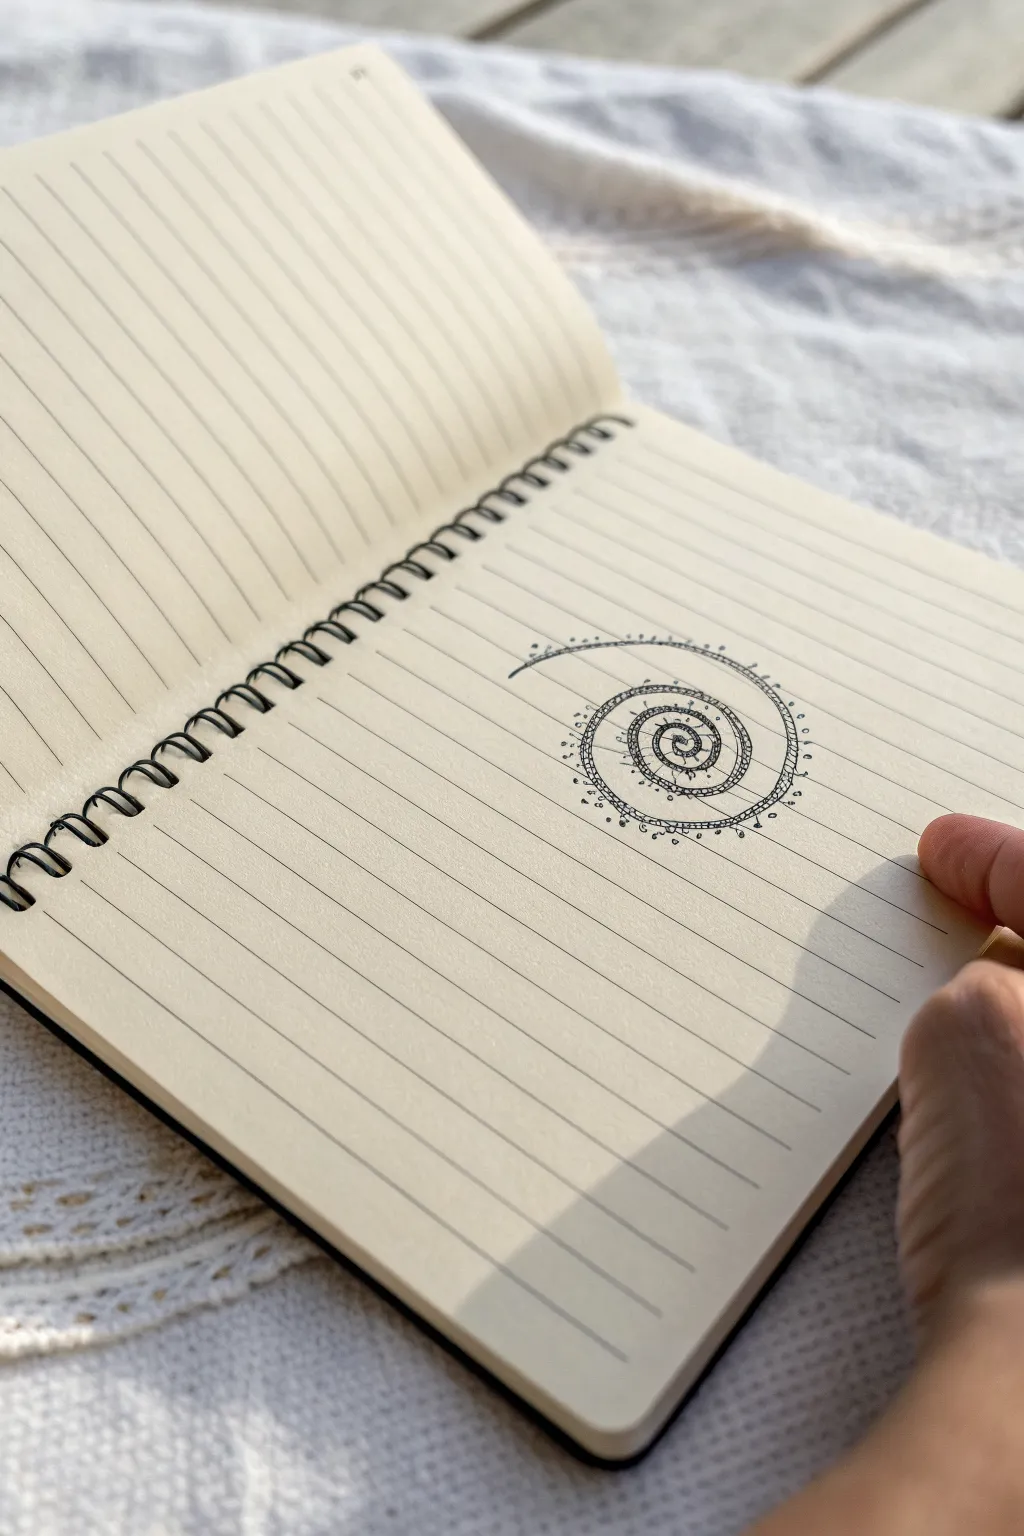
Transform a simple math-class spiral into a mesmerizing piece of art with just a few repetitive strokes. This doodle builds texture and depth by layering tiny circles and dashes along a continuous curved line, creating a design that feels detailed without requiring immense focus.
Step-by-Step
Materials
- Lined spiral notebook
- Fine-liner pen (black, 0.3mm or 0.5mm works best)
- Pencil (optional, for sketching)
Step 1: Drawing the Base
-
Start the center:
Begin in the middle of a blank area on your lined paper. place your pen tip down and draw a small, tight curve to initiate the spiral. -
Expand outward:
Continue the single continuous line, moving outward in a circular motion. Aim to keep the spacing between the rings relatively even, though slight variations add organic charm. -
Cross the lines:
As you draw, let the spiral grow until it spans across about 8 to 10 lines of the notebook paper. -
Finish the tail:
Allow the line to trail off naturally at the top left or right, extending slightly further out than the rest of the spiral’s shape.
Keep it Loose
Don’t stress about perfect circles. The little bumps look better when they vary slightly in shape, making the texture look organic like a vine.
Step 2: Adding Texture
-
Start the details:
Go back to the very center of your spiral where you started. On the outer side leading edge of the line, draw a tiny circle bump. -
Create a pattern:
Next to your tiny circle, draw two or three very small vertical dashes or dots. -
Alternate elements:
Repeat this pattern: one tiny open circle, followed by two or three dashes. I find this rhythm becomes meditative very quickly. -
Follow the curve:
Continue this alternating pattern along the entire length of the spiral line. -
Maintain orientation:
Make sure all your embellishments (the circles and dashes) are sticking ‘out’ or sitting on top of the spiral line, rather than hanging underneath it. -
Adjust size:
As the spiral gets wider toward the outer rings, you can make your little circles ever so slightly larger to match the scale.
Add Color
Use a highlighter or colored pencil to shade only the inside track of the spiral to make the embellished black lines pop off the page.
Step 3: Refining the Look
-
Add stray marks:
Review your spiral and look for areas that feel too empty. You can add tiny random dots floating just outside the line to suggest dust or energy. -
Connect the gaps:
If your main spiral line is shaky or broken in places, retrace just those segments lightly to solidify the curve. -
Thicken the start:
Return to the dead center of the spiral and slightly thicken the very first loop with a second pass of ink to give it a convincing anchor point. -
Vary the line weight:
To enhance the 3D effect, you can thicken the bottom edge of the tiny circles you drew, giving them a subtle shadow. -
Extend the tail:
Finishing up, add a few extra dashes trailing off the very end of the spiral line, so the design fades out rather than stopping abruptly.
Now you have a hypnotic pattern that turns a boring wait into a creative session
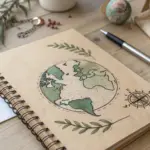
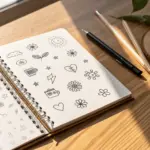
Page-Filling Tiny Icon Grid

Transform a blank page into a charming galaxy of tiny icons using nothing but a pen and the grid of your notebook. This relaxing pattern combines simple celestial shapes like stars and moons with cozy elements to create a satisfying, organized spread.
How-To Guide
Materials
- Dotted or grid notebook
- Fine-point black fineliner (0.3mm or 0.5mm)
- Pencil (optional, for planning layout)
Step 1: Setting the Structure
-
Observe the grid:
Start by looking at the natural grid of dots or lines in your notebook. This tutorial relies on using that existing structure to keep everything spaced evenly without needing a ruler. -
Plan the spacing style:
Decide on a loose checkerboard feel. You won’t be drawing on every single dot; instead, aim to leave about 2-3 grid squares empty between each small doodle to give the page room to breathe.
Step 2: Drawing the Primary Icons
-
Draw crescent moons:
Scatter 4-5 crescent moons across the page. Keep your lines clean and ensure the curves are smooth. Vary their orientation slightly so they aren’t all facing the same way. -
Add five-point stars:
Draw several classic five-point stars. These are the focal points of the pattern. Space them out so they don’t clutter near the moons. If you struggle with freehand stars, try the ‘connect the dots’ method using the notebook grid. -
Sketch open hearts:
In the spaces between stars and moons, draw simple, open heart shapes. Keep these roughly the same size as the stars to maintain visual balance across the page. -
Insert four-point stars:
Draw sharp, four-pointed sparkle shapes (like a diamond with curved sides). These work great for filling medium-sized gaps.
Uneven spacing?
If your doodles look cluttered, don’t erase! Turn the accidental cluster into a ‘constellation’ by connecting them with tiny dotted lines, then give the next doodle extra room.
Step 3: Adding Smaller celestial Details
-
Create twinkle stars:
Fill smaller gaps with simple crosses or ‘plus’ signs to represent distant twinkling stars. -
Draw tiny starbursts:
Add small asterisks (*) or starbursts with 6-8 lines meeting in a center point. These add texture and variety to the star shapes. -
Sprinkle miniature shapes:
Look for the tiny gaps remaining. Draw very, very small hearts or diamonds here. These should be significantly smaller than your primary shapes. -
Add floating dots:
To make the page feel like a starry sky, randomly place single dots throughout the empty white space. This connects the doodles together subtly.
Add a splash of color
Use a yellow highlighter to fill the stars, or a pale blue mildliner to add drop shadows to the moons and teacup for a subtle 3D effect.
Step 4: Feature Illustrations
-
Anchor with larger drawings:
In the bottom right corner, allocate space for slightly larger, more detailed illustrations to anchor the page. -
Draw the potted plant:
Sketch a simple pot shape with a grid pattern. Add a single stem rising up with small leaves or berries branching off. -
Add the coffee cup:
Next to the plant, draw a cute teacup or coffee mug on a saucer. Add a small oval inside for the liquid to give it depth. -
Draw a planet:
Nearby, draw a small circle to represent a planet. Fill it with tiny stars or craters to distinguish it from the moon doodles.
Step 5: Final Touches
-
Review the balance:
Take a step back and look at the overall spread. If you see any large empty white spaces, add a tiny cross or dot. -
Add motion lines:
Consider adding tiny ‘movement’ lines or extra sparkles near the cup or planet to make them pop. -
Clean up:
If you used any pencil guidelines for spacing, gently erase them now, being careful not to smudge your fresh ink.
Enjoy your beautifully organized galaxy of doodles
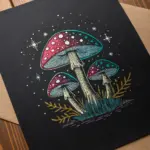
Tiny Worlds Inside Simple Shapes

Capture a tiny, mystical world within the glowing boundaries of a lightbulb in this whimsical line drawing. Using simple dotted paper as your guide, this doodle combines elements of nature and electricity for a surreal, dreamy effect.
Step-by-Step Tutorial
Materials
- Dotted Bullet Journal or Notebook
- Fine-point Black Pen (0.3mm or 0.5mm)
- Pencil
- Eraser
Step 1: Drafting the Shapes
-
Basic outline:
Start with a light pencil sketch to establish the bulb’s position. Draw a large circle in the center of your page, leaving the bottom open. -
Neck of the bulb:
From the open bottom of your circle, draw two lines curving slightly inward. Connect them with a rounded, convex line at the bottom to form the base shape. -
Internal structure:
Sketch a smaller, thinner oval shape inside the main bulb for the filament housing. It should look like an upside-down ‘U’ with a flat bottom. -
Landscape placement:
Below the bulb, lightly sketch a horizontal zig-zag line to map out where your mountain range will sit.
Wobbly Circles?
If you struggle to draw a clean circle for the bulb, trace a pill bottle cap or a small coin lightly in pencil first, then ink over it freehand.
Step 2: Inking the Lightbulb
-
Trace the bulb:
Switch to your black pen. Go over the main outer line of the lightbulb. Try to keep the line smooth and continuous, but don’t worry if it has a little hand-drawn character. -
Draw the base screws:
At the neck of the bulb, draw three or four slightly curved horizontal lines to create the threaded metal base. Add a small, darkened nub at the very bottom tip. -
Filament stem:
Draw the internal glass stem. Start from the base and draw two parallel lines going up into the center of the bulb. -
Filament details:
At the top of that stem, draw a small rectangle. Inside that, draw vertical hatching lines to represent the wire coil. Connect this to the main stem with thin wires. -
Glass reflection:
Add a small, curved line inside the left edge of the bulb to suggest the curvature of the glass.
Add Magic
Instead of black ink for the moon and stars, use a gold or silver gel pen to make the celestial elements shimmer against the paper.
Step 3: Creating the Scenery
-
Mountain peaks:
Beneath the floating bulb, ink the sharp, triangular peaks of the mountains. Make the one on the right slightly taller than the one on the left. -
Grounding lines:
Draw two long, horizontal lines underneath the mountains that extend to the right, giving the scene a sturdy base. -
Pine trees:
On the left side of the mountains, draw two pine trees. Start with a vertical line for the trunk, then use quick, downward zig-zag strokes for the branches. Make the front tree slightly lower than the back one. -
Background foliage:
Add two smaller, simpler pine tree shapes peeking out from behind the right side of the mountain range to balance the composition.
Step 4: Celestial Details
-
The moon:
Above and to the left of the bulb, draw a crescent moon shape. Fill it in completely with your black pen so it stands out boldly. -
Drawing stars:
Scatter several four-pointed stars around the bulb. Draw these by making a thin cross and then curving the inner corners inward. -
Tiny accents:
Fill the empty space with small circles, tiny dots, and little diamond shapes to create a starry night atmosphere. -
Radiance lines:
Draw short, straight lines radiating outward from the filament inside the bulb to simulate a glow. -
Review and erase:
Wait a moment for the ink to truly set, then gently erase all your initial pencil guidelines to reveal the crisp black doodle.
Now you have a serene little world captured on paper, perfect for decorating your journal margins
Have a question or want to share your own experience? I'd love to hear from you in the comments below!