If you’ve been craving easy flower drawing ideas that still look genuinely beautiful, I’ve got you. These are the kinds of simple shapes and little tricks I teach in my studio when you want quick wins without sacrificing style.
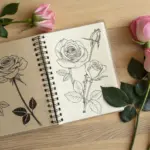
Simple Spiral Rose
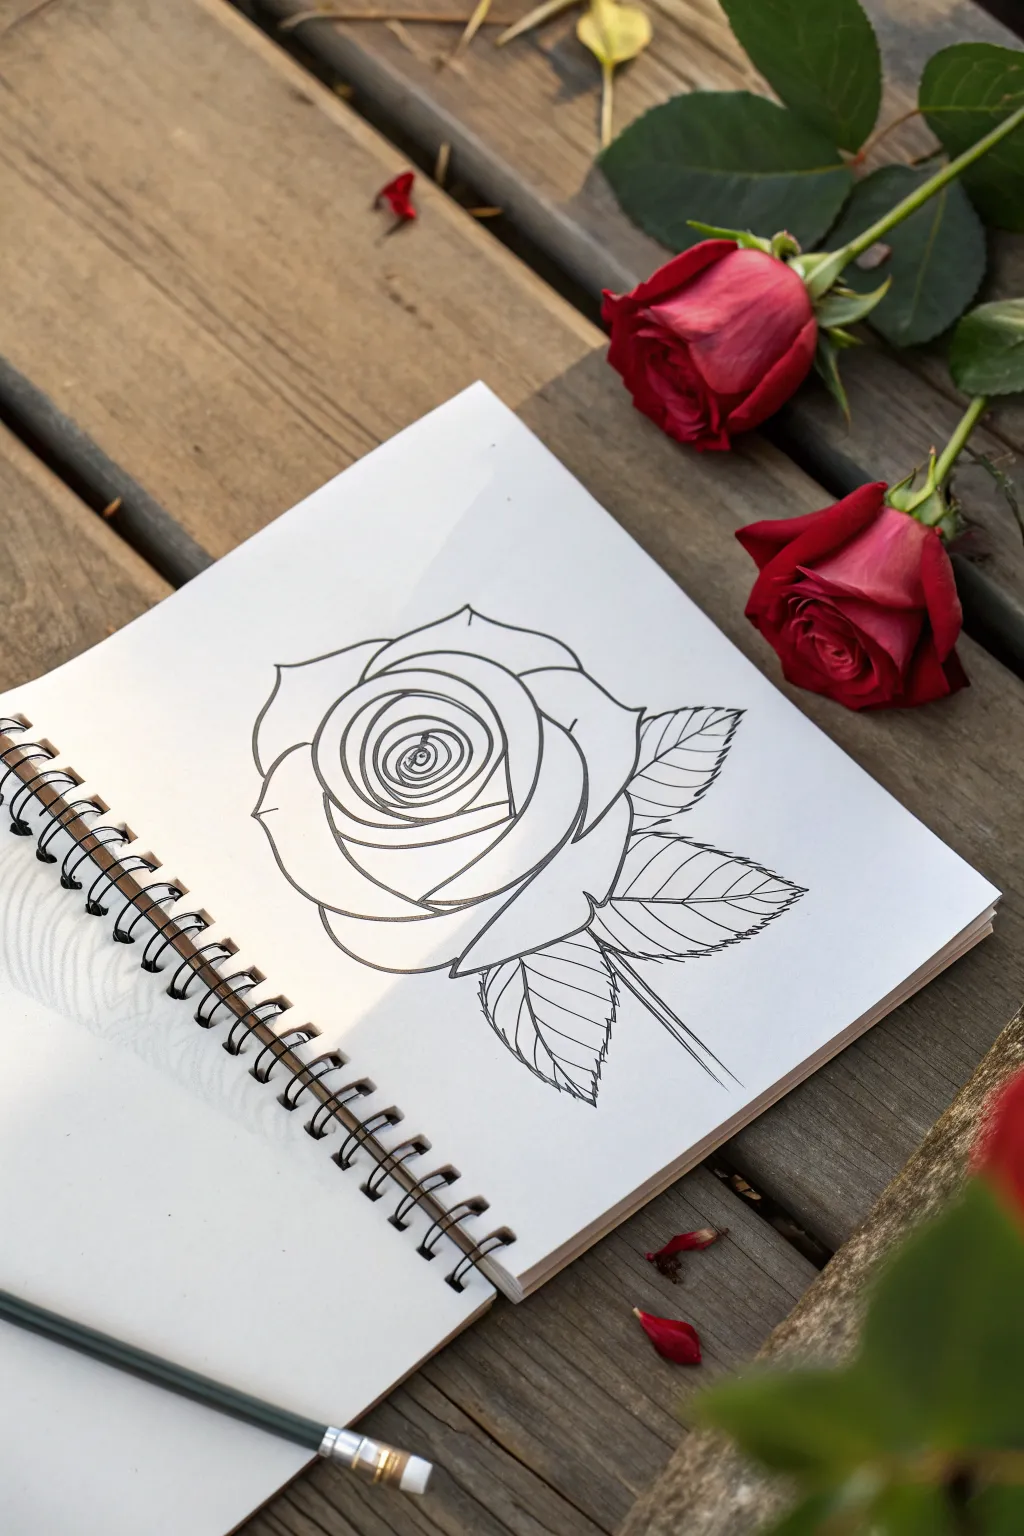
This elegant line drawing captures the classic beauty of a rose using clean, confident strokes and a spiraling technique. It is a perfect beginner project that looks deceptively complex, focusing on form and gentle curves to create depth.
Detailed Instructions
Materials
- Sketchbook or drawing paper (heavyweight preferred)
- HB or 2B graphite pencil
- Fine-liner pen (black, 0.5mm or 0.8mm)
- Eraser
- Ruler (optional, for stem alignment)
Step 1: Drafting the Core
-
Start the center:
Begin in the upper-middle area of your page. Draw a small, tight spiral or a ‘snail shell’ shape to represent the very center of the rose bud. -
Add first petals:
Draw a curved line that cups underneath the spiral, overlapping slightly with the previous line. -
Complete the inner bud:
Add another curved line on top, interlocking with the bottom one to close the shape of the central bud. -
Expand the layers:
Surround the bud with a slightly larger, curved petal shape on the left side, keeping the lines smooth and flowing. -
Balance the right:
Mirror this action on the right side with another petal that hugs the center formation.
Wobbly Lines?
If your spirals look shaky, try drawing from your shoulder rather than just your wrist. This creates smoother, more confident curves.
Step 2: Developing the Bloom
-
Draw outer petals:
Sketch larger, wider semi-circles around the existing bud. Make these shapes slightly irregular to mimic organic petals rather than perfect circles. -
Add petal dips:
At the top center of the outermost petals, create a small ‘V’ dip or a soft point to suggest the petal is folding over. -
Define the base:
Draw the largest, bowl-shaped petals at the very bottom of the flower head to give the rose a solid foundation. -
Check proportions:
Take a moment to step back and look at your sketch; the flower should look balanced and roughly circular overall.
Step 3: Stem and Foliage
-
Draw the stem:
From the center bottom of the flower, drop two parallel vertical lines down to create a straight, sturdy stem. -
Outline the leaves:
Sketch three leaf shapes emerging from the stem—two pointing right and one pointing slightly left. Use a teardrop shape as a guide. -
Add serrated edges:
Refine the leaf outlines by adding jagged, saw-tooth edges. This is crucial for making them look like rose leaves. -
Draw leaf veins:
Draw a central line through each leaf, then add smaller diagonal veins branching out toward the serrated edges.
Add Watercolor
Once the ink is dry, add a light wash of red watercolor over the petals and green for leaves. Use more pigment in the folds for shadows.
Step 4: Inking and Refining
-
Trace with pen:
Designate your main lines with the fine-liner pen. I find it helpful to rotate the sketchbook as I ink to keep my hand comfortable on the curves. -
Vary line weight:
Press slightly harder on the undersides of petals and leaves to create a thicker line, which adds instant shadow and dimension. -
Erase pencil marks:
Wait until the ink is completely dry to avoid smudging, then gently erase all the underlying graphite sketch lines. -
Final touches:
Assess the drawing for any gaps in your line work and close them up for a clean, professional finish.
Enjoy the elegant simplicity of your new botanical illustration

Classic Tulip With Overlapping Petals
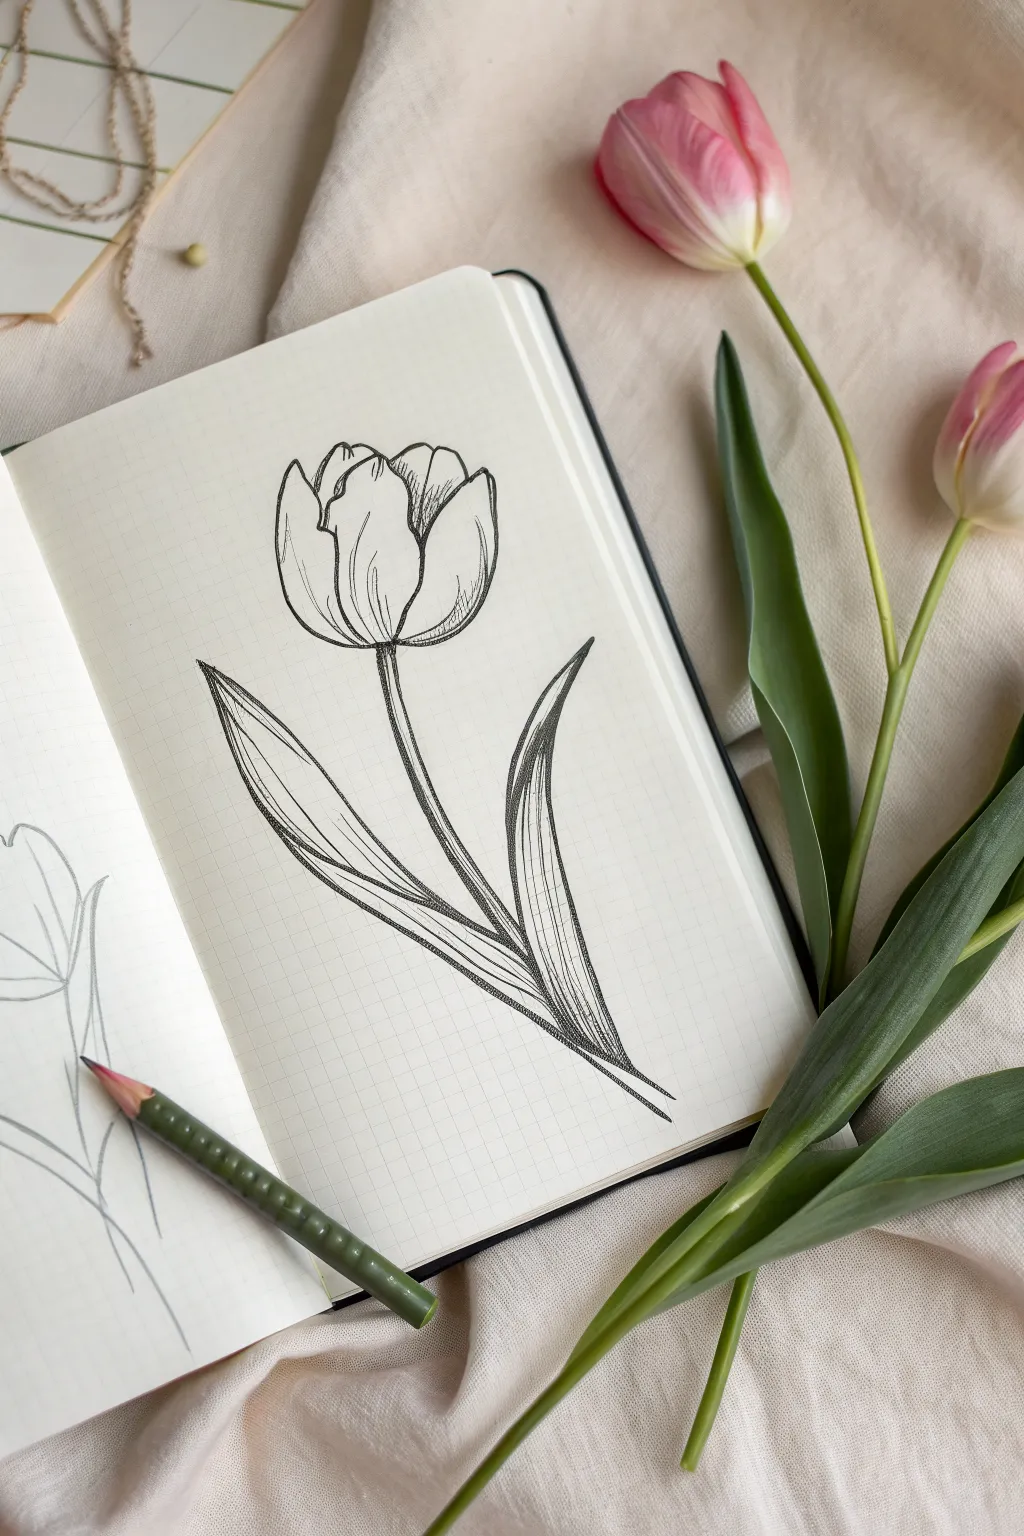
Learn to capture the graceful curve of a tulip using simple overlapping lines and gentle shading details. This sketch focuses on the flower’s natural cup shape and elongated leaves, creating a clean, botanical illustration perfect for your journal.
Step-by-Step Tutorial
Materials
- Grid or graph paper notebook
- Pencil (HB or 2B for sketching)
- Fine liner pen or sharp dark pencil for finishing
- Eraser
Step 1: Forming the Flower Head
-
Establish the base shape:
Start by lightly sketching a simple ‘U’ shape near the top center of your page. This will act as the cup of the tulip bloom. -
Draw the central petal:
Within that ‘U’ shape, draw the front-most petal. It should look like an inverted teardrop that doesn’t quite close at the top, slightly dipping in the center. -
Add side petals:
On the left side of the central petal, draw a curved line that wraps around and tucks behind it. Repeat this on the right side to create the illusion of overlapping layers. -
Create the back petals:
Peek two small, curved peaks emerging from behind the front petals at the very top. These represent the petals on the far side of the bloom. -
Refine the edges:
Go over your petal outlines, giving them a slight wobble or wave rather than a perfect geometric line to make them look organic.
Step 2: Stem and Leaves
-
Draw the stem:
From the very bottom center of the flower head, draw two parallel lines close together extending downward. Give the stem a gentle curve to the right for a natural posture. -
Outline the left leaf:
Start the left leaf low on the stem. Draw a long line reaching up and out to the left, then curve it back down to join the stem, creating a varied width. -
Add the right leaf:
Draw the second leaf on the right side, starting slightly higher up the stem. Make this one curve inward slightly, mimicking the movement of the stem. -
Detail the leaf fold:
For the left leaf, draw a line down the middle that hugs the outer curve. This creates a ‘folded’ look, showing both the inner and outer surface of the leaf.
Natural Flow
Don’t draw straight lines for the stem or leaves. S-curves and slight bends make the flower look alive rather than stiff.
Step 3: Shading and Definition
-
Add petal contours:
Using very light, short strokes, add shading lines at the base of the petals where they meet the stem. This gives the flower volume. -
Shade the upper petals:
Add tiny vertical hatch marks near the tips of the petals to suggest the texture and curve of the bloom. -
Texture the stem:
Darken the left side of the stem slightly to imply a shadow, making the stem look cylindrical rather than flat. -
Define the leaf veins:
Draw long, sweeping lines inside the leaves that follow the outer curve. I find that using lighter pressure here keeps the leaves from looking too heavy. -
Deepen the shadows:
Focus on the areas where plant parts overlap—like where a leaf crosses the stem or where petals touch. Add deeper hatching here for contrast. -
Finalize the outline:
Take your sharper pencil or fine liner and trace over your main structural lines with a confident hand, smoothing out any initial sketchiness.
Shaky Lines?
If your long lines are wobble, try ‘ghosting’ the motion with your hand in the air before committing the pencil to paper.
Enjoy the simple beauty of your botanical sketch as you turn the page to your next creation


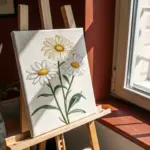
Cheerful Daisy With Oval Petals
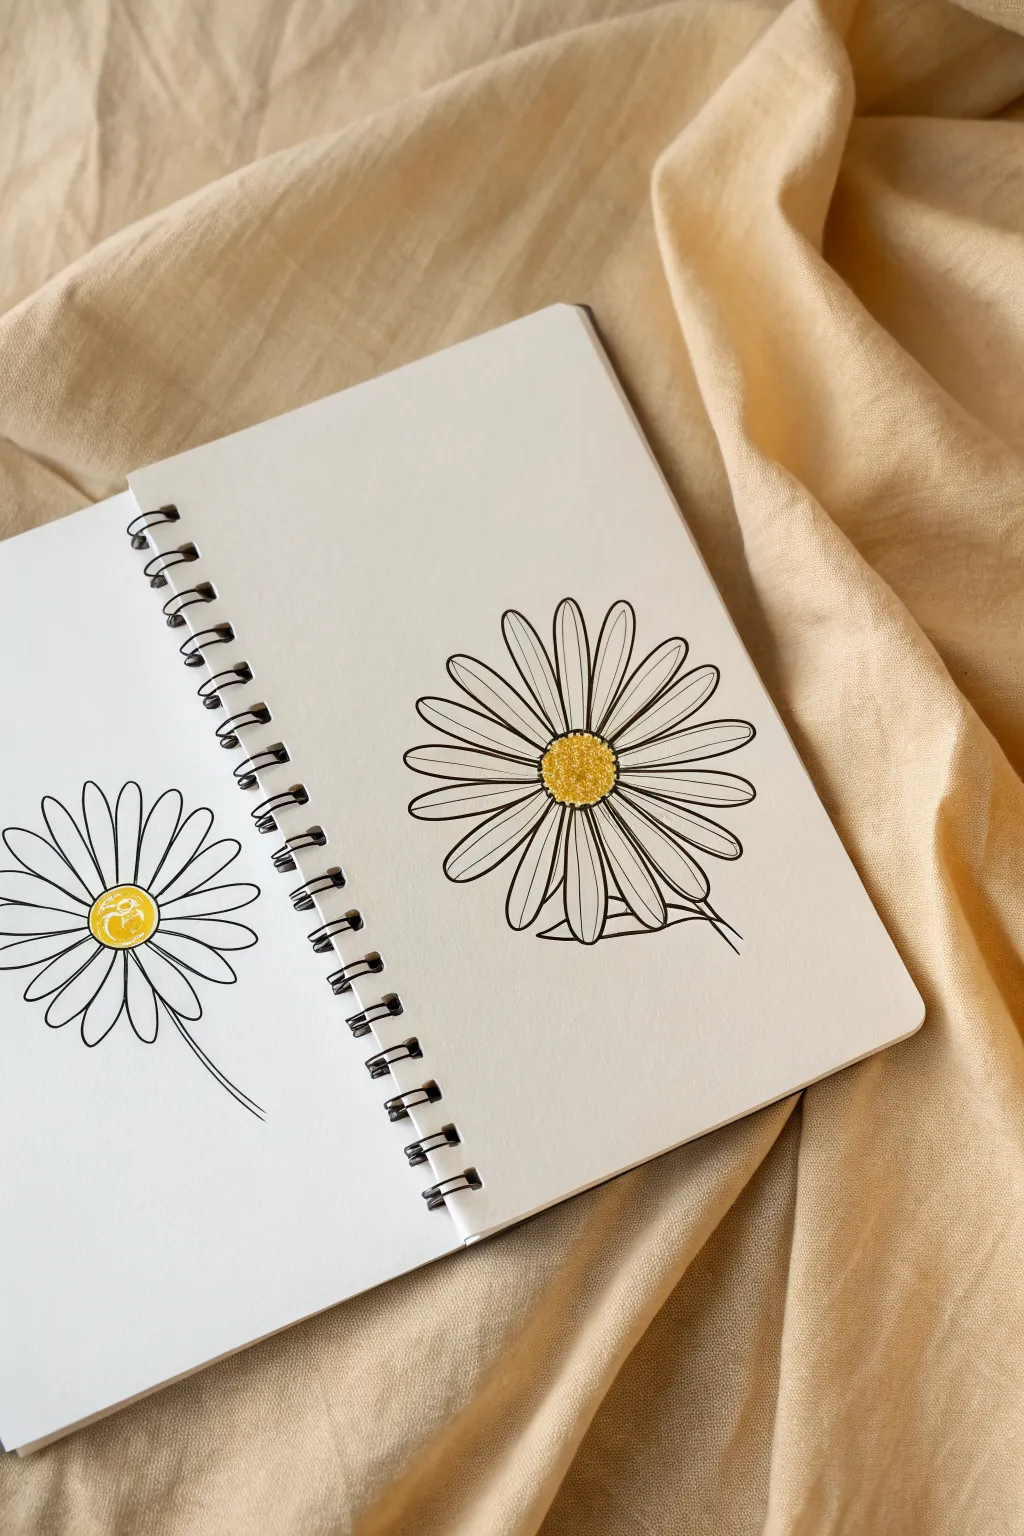
Capture the simple joy of a sunny day with this elegant daisy illustration. Featuring stark black ink outlines against a clean white page, the design is elevated by a textured, golden-yellow center that sparkles with life.
Step-by-Step Guide
Materials
- Spiral-bound sketchbook with smooth white paper
- Fine-point black drawing pen (0.3mm or 0.5mm)
- Yellow marker or colored pencil
- Gold glitter gel pen or metallic marker
- Pencil and eraser (for sketching)
Step 1: Sketching the Framework
-
Position the Center:
Start by lightly sketching a small, slightly flattened circle in the middle of your page with a pencil. This doesn’t need to be perfect; it just marks where the flower’s heart will live. -
Map the Petal Length:
Draw faint guidelines extending outward from the center circle to determine how long your petals will be. Keeping them relatively uniform helps, but natural variations make it look more organic. -
Draft the Petals:
Lightly sketch long, slender oval shapes for the petals. They should radiate from the center, some overlapping slightly. Aim for rounded tips at the outer edges and narrower bases where they meet the center.
Wobbly Lines?
If your hand shakes while outlining, don’t worry. Go over the line again lightly to thicken it purposefully. Varied line weight adds artistic character.
Step 2: Inking the Outlines
-
Outline the Center:
Using your black fine-point pen, carefully trace the central circle. Use a slightly bumpy or wavy line rather than a perfect circle to simulate the texture of the flower head. -
Ink the Front Petals:
Identify the petals that appear to be ‘on top’ or fully visible. Outline these first with confident strokes, starting from the center and curving out to the tip and back. -
Ink the Back Petals:
Fill in the gaps by outlining the petals that are tucked behind the front ones. Stop your lines wherever they intersect with a front petal to create depth. -
Add Dimension Lines:
Draw a single, thin line down the center of each petal. The line shouldn’t go all the way from base to tip; keep it floating in the middle to suggest the petal’s natural crease. -
Create the Stem:
Draw two parallel lines extending from underneath the bottom petals to form the stem. Keep the lines close together for a delicate look. -
Add a Leaf:
Sketch a simple, pointed leaf shape emerging from the side of the stem, adding a central vein line similar to the petals. -
Clean Up:
Once the ink is completely dry, gently erase all your initial pencil guidelines to reveal a crisp, clean illustration.
Step 3: Adding theGolden Core
-
Base Color:
Fill the center circle with a layer of yellow marker or colored pencil. This provides a bright underpainting for the texture. -
Apply Texture:
Using a gold glitter pen or a metallic yellow marker, dot the surface of the yellow center. I like to concentrate the dots near the bottom edge to create a shadow effect. -
Final Sparkle:
Add a few more dense stippling dots with the metallic pen across the whole center to give it that pollen-like, textured appearance.
Natural Petal Tip
Don’t make every petal perfectly straight. Curve a few tips slightly left or right to make the flower look like it’s gently swaying in a breeze.
Now you have a cheerful floral sketch brightening up your notebook page

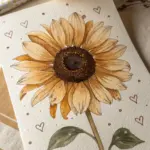
Easy Sunflower With Textured Center
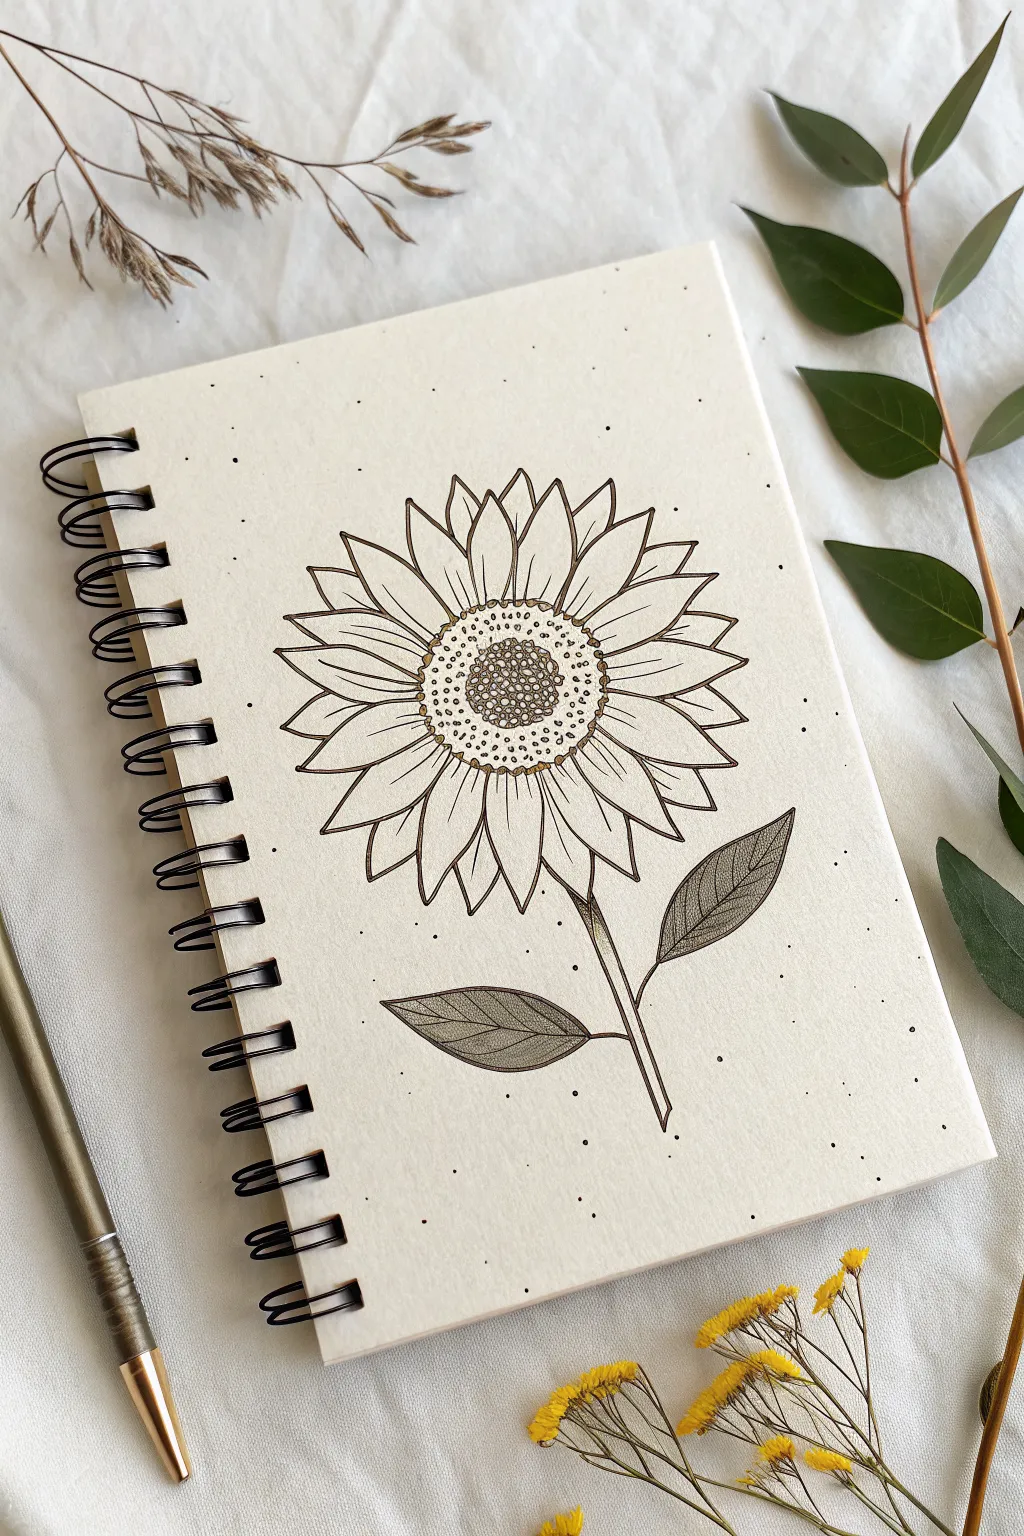
This project transforms a simple spiral notebook into a piece of botanical art featuring a delicately lined sunflower. The focal point is the textured seed head, surrounded by clean petals and subtle speckled details for a polished, organic look.
How-To Guide
Materials
- Spiral-bound sketchbook with cream or off-white paper
- Fine liner pens (sizes 005, 01, and 03)
- Pencil (HB or H)
- Quality eraser
- Ruler (optional, for spacing reference)
Step 1: Drawing the Base Structure
-
Sketch the center:
Begin by lightly sketching a medium-sized circle in the center of your page to represent the seed head. Inside this, sketch a slightly smaller concentric circle to define the inner darker zone. -
Mark petal guidelines:
Draw a large circle around the center to mark the outer tips of the petals. This ensures your flower stays symmetrical as you work. -
Draft the primary petals:
Using your pencil, sketch the first layer of petals. Start with simple leaf shapes that radiate from the center circle, spacing them evenly. Don’t worry about perfection; sunflowers are naturally a bit irregular. -
Add secondary petals:
Fill in the gaps between the primary petals by sketching the tips of a second layer peering out from behind. These should look like simple triangles. -
Outline the stem and leaves:
Draw a slightly curved line extending downward from the flower head for the stem. Add two leaf shapes attached to the stem, one on each side, positioning the right one slightly higher than the left.
Dotting Technique Pro-Tip
Hold the pen perfectly vertical when stippling the background dots. Angled dots look like dashes; vertical dots stay perfectly round and crisp.
Step 2: Inking the Center
-
Create the inner seeds:
Switch to your 03 pen. In the very center circle, draw small, tightly packed circles. Leave tiny gaps between them so the paper shows through. -
Texture the outer ring:
For the ring surrounding the central seeds, use a slightly lighter touch. Instead of full circles, use small dots and tiny ‘c’ shapes to create a transition texture. -
Define the boundary:
Draw a broken, dotted line around the very edge of the flower center where the petals begin. This soft border looks more natural than a solid hard line.
Step 3: Refining Petals and Leaves
-
Outline the front petals:
Using a 01 fine liner, carefully trace over your primary petal sketches. Give the tips a slight point and allow the lines to wobble very slightly for an organic feel. -
Detail the back petals:
Ink the secondary petals visible in the background. Stop your lines cleanly where they meet the front petals so they appear tucked behind. -
Add central petal veins:
Draw a single line down the center of each petal. Start from the center and flick the pen outward, lifting pressure near the tip so the line fades out naturally. -
Ink the stem:
Outline the stem with the 03 pen for a bold look. Add a few very short, vertical lines at the top of the stem where it connects to the flower head for shading. -
Structure the leaves:
Outline the two leaves with the 01 pen. Draw a central vein line down the middle of each leaf. -
Create leaf veins:
Using your finest 005 pen, draw very closely spaced diagonal lines inside the leaves. These should run from the center vein to the outer edge, mimicking intricate leaf skeleton texture.
Level Up: Gold Accents
Use a metallic gold gel pen or fine gold paint marker to add tiny dots to the seed center for a subtle shimmer that catches the light.
Step 4: Final Touches
-
Clean up the sketch:
Wait until the ink is completely dry to avoid smmudging. Gently erase all your underlying pencil guidelines. -
Add floating pollen:
Take the 005 pen again and gently stipple tiny dots randomly around the petals and the rest of the page. Concentrate them slightly denser near the center and disperse them further out. -
Final assessment:
Look at the center of the flower. If it needs more depth, add a few more black dots in the very middle to increase the contrast.
Enjoy the calming process of inking your detailed sunflower and filling that blank page
BRUSH GUIDE
The Right Brush for Every Stroke
From clean lines to bold texture — master brush choice, stroke control, and essential techniques.
Explore the Full Guide
Calla Lily With One Curved Line
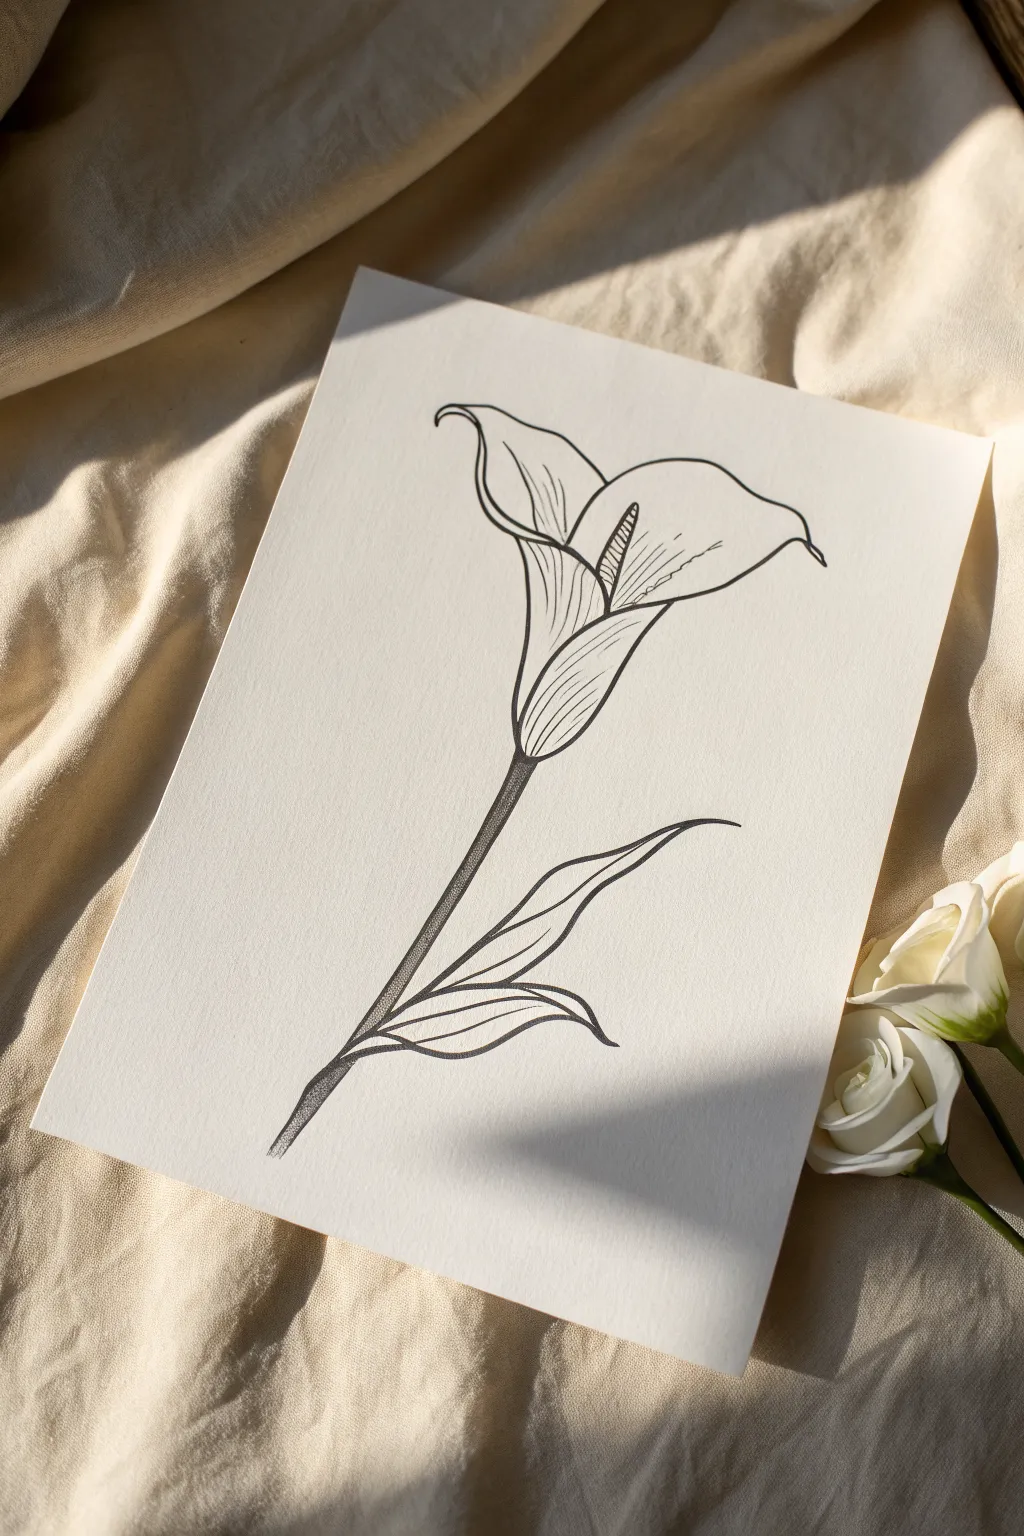
This project focuses on creating a sophisticated Calla Lily illustration using clean lines and subtle details. The result is a striking black-and-white botanical drawing that looks beautiful framed or as a card design.
Step-by-Step Guide
Materials
- High-quality textured art paper or cardstock (off-white or cream)
- Hard pencil (2H or H) for sketching
- Fine liner pens (0.1mm, 0.3mm, and 0.5mm)
- Kneadable eraser
- Ruler (optional for stem alignment)
Step 1: Conceptual Sketch
-
Establish the curve:
Begin with your hard pencil. Draw a long, gentle S-curve that acts as the spine of the flower. This line will eventually become the stem and the central vein of the lily. -
Outline the trumpet shape:
At the top of your curve, lightly sketch a wide ‘U’ shape that flares outwards. This forms the base of the flower’s signature trumpet structure. -
Define the petal peak:
Extend the right side of the ‘U’ upward and bring it to a gentle point, curving it slightly back down to meet the left side. It should look like a soft wave crashing. -
Add the spadix:
Inside the trumpet shape, sketch a small, phallic cylinder (the spadix) emerging from the center. Keep it simple for now; detail comes later. -
Draft the leaves:
Near the bottom third of the stem, sketch two long, lance-shaped leaves branching off to the right. Make them flow gracefully with the curve of the stem.
Step 2: Inking the Outlines
-
Trace the main petal:
Switch to your 0.5mm fine liner. Carefully trace the outer contour of the flower head. Use confident, single strokes rather than feathery ones to keep the look clean. -
Ink the stem:
Draw the stem using the 0.5mm pen. The stem should be thickest at the bottom and taper very slightly as it reaches the flower head. I like to do this in two parallel strokes. -
Outline the leaves:
Go over your pencil sketches for the leaves. Create a sharp point at the tips and let the lines curve naturally back toward the stem. -
Define the spadix:
Outline the central spadix shape. Keep specific attention on where the petal wraps around the base of it.
Uneven Lines?
If your long ink strokes feel shaky, try moving your entire arm from the shoulder, not just your wrist. This creates smoother, more confident curves.
Step 3: Detailing and Texturing
-
Add petal veins:
Using your 0.1mm fine liner, draw very delicate lines following the curve of the petal. These should start from the base and fan outward, breaking occasionally to look organic. -
Texture the spadix:
With the 0.1mm pen, add tiny, tight stippling dots or very small hatch marks on the spadix to give it a pollen-like texture. -
Shade the stem:
Switch to the 0.3mm pen. Instead of solid coloring, use tight, vertical hatching lines along one side of the stem to create emphasis and shadow. -
Refine the leaf veins:
Draw a central vein down each leaf. From there, add lighter, branching veins using the 0.1mm pen, keeping your hand very light. -
Deepen the shadows:
Identify where the petal overlaps itself or curves deeply. Add extra hatching lines in these nooks with the 0.3mm pen to create depth. -
Clean up:
Once the ink is completely dry, take your kneadable eraser and gently lift away all remaining graphite sketch lines.
Add a Splash
Make the lily pop by adding a very diluted wash of watercolor—pale yellow for the spadix and soft green for the stem—while keeping the petals white.
Now you have a timeless botanical illustration ready to be displayed
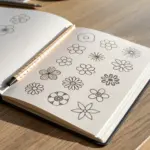
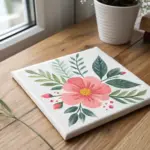
Five-Petal Wildflower Icons
Create a charming botanical reference guide in your journal with this grid of twelve distinct flower doodles. This clean, minimalist layout uses simple line work and selective coloring to turn basic shapes into a cohesive garden collection.
Step-by-Step Tutorial
Materials
- A5 Dot grid notebook or journal
- Fine liner pen (0.3mm or 0.5mm, black)
- Finer liner pen (0.1mm) for details
- Gold or yellow gel pen/marker
- Pencil and eraser
- Ruler
Step 1: Setting the Grid
-
Map out the structure:
Using a pencil and ruler, lightly mark out a large rectangle on your dot grid page. Divide this space into a grid of 12 equal squares—three across and four down. The dot grid makes counting spaces easy to keep them uniform. -
Ink the dividers:
Taking your 0.3mm fine liner, trace over your pencil grid lines. Instead of a solid line, use a dashed or ‘stitched’ stroke pattern to give the layout a soft, handmade feel. Leave the outer border unlinked or very faint if you prefer the open look shown.
Ink Smudge Rescue
Smudged a line? Turn the mistake into a falling petal or an extra leaf. For grid smudges, thicken the dashed line slightly to hide the error.
Step 2: Drawing the Top Row
-
Golden five-petal flower:
In the top-left box, draw a small circle center. Add five rounded petals radiating outward. Draw a stem curving down and add two simple leaves. Fill the petals with your gold marker, leaving the center white with small black dots. -
Dainty daisy:
For the middle box, draw a circle with a stippled (dotted) border. Add small, short petals all around it. Finish with a straight stem and two small leaves pointing upward. -
Tulip-style bloom:
In the top-right box, start with a U-shape for the flower base. Add petal details inside the U and a curved line for the back petal. Draw a straight stem and two large, smooth leaves that hug the stem.
Step 3: Drawing the Second Row
-
Round-petal posy:
Draw a larger center circle in the first box of the second row. Add five very round, almost circular petals. Color the center gold. Add a thin stem and simple leaves. -
Heart-leaf sprig:
In the middle box, draw three stems branching from a central point. At the end of each stem, draw a heart shape to clear, simplified leaves or petals. -
Black-center sun texture:
For the right box, draw a solid black circle. Add short, pointy triangular petals around it. Draw a stem and two solid black leaves—I like filling these in completely to balance the heavy visual weight of the center.
Level Up: Seasonal Colors
Swap the gold accent for pastel pink in spring or burnt orange in autumn to change the entire mood of the page without altering the drawings.
Step 4: Drawing the Third Row
-
Detailed thistle:
Draw a U-shape cup with vertical lines. Extending from the top, draw multiple thin, spiky petals. Add a stem and two curved leaves at the bottom. -
Classic white daisy:
Draw a medium center circle and color it gold. Add long, slightly separated petals around it. Draw a stem and two leaves that resemble the petals in shape. -
Silhouette sprigs:
Draw a main stem branching into two. At the end of one branch, draw a tiny five-petal flower with an open center; on the other, draw a solid black flower. Add small black leaves along the stem.
Step 5: Drawing the Bottom Row
-
Layered bloom:
Start with a U-shape. Draw three petals standing tall in the front, and peek two more petals appearing from behind. Give it a curved stem and wide leaves. -
Thin-petal cosmos:
Draw a tiny center with radiating lines. Add eight to ten long, oval petals. Draw a straight stem and two solid black leaves that point sharply upwards. -
Side-facing blossom:
Draw an oval center. Arrange petals around it so they look like a flat flower facing forward. Add a tiny solid black leaf halfway down the stem for contrast.
Step 6: Finishing Touches
-
Erase guidelines:
Once the ink is completely dry—give it a good few minutes to avoid smudges—gently erase the pencil grid lines underneath your dashed ink lines. -
Add final details:
Use your 0.1mm pen to add tiny details like veins in the leaves or extra texture dots in the flower centers where needed.
You now have a beautiful botanical index that proves simple shapes can create stunning variety

PENCIL GUIDE
Understanding Pencil Grades from H to B
From first sketch to finished drawing — learn pencil grades, line control, and shading techniques.
Explore the Full Guide
Cherry Blossom Branch Sprigs
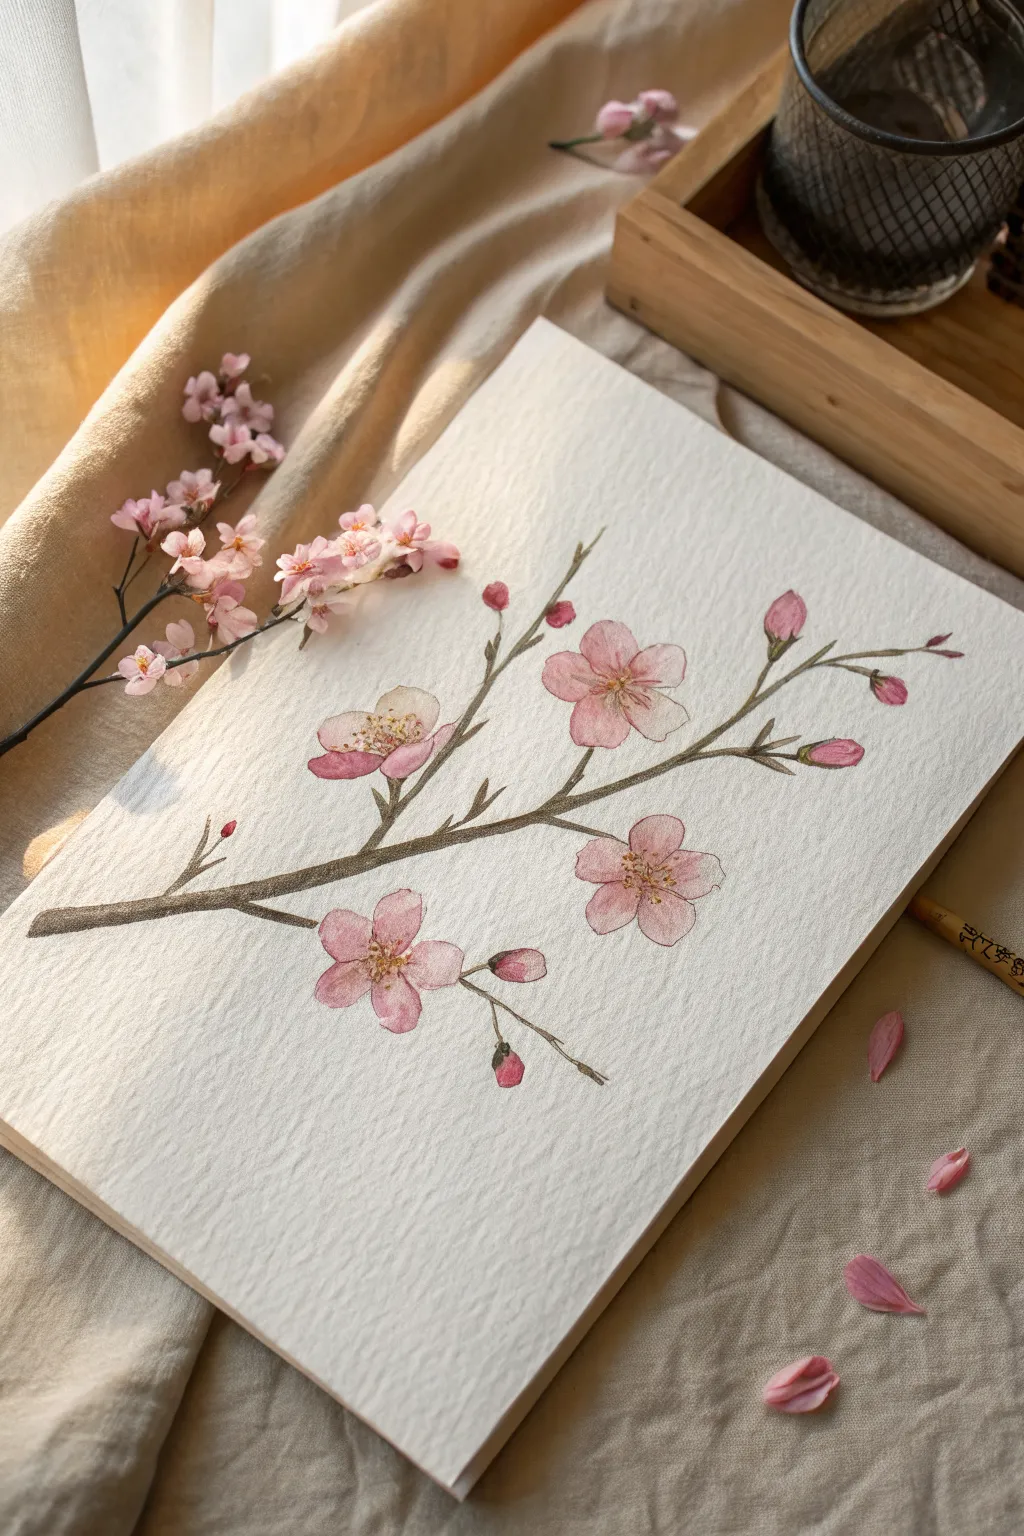
Capture the fleeting beauty of spring with this soft and elegant cherry blossom study. Using watercolor pencils or paints on textured paper creates a lovely, ethereal quality that brings the delicate petals to life.
How-To Guide
Materials
- Cold-press watercolor paper (300 gsm)
- HB or 2H graphite pencil for sketching
- Watercolor paints or watercolor pencils (colors: pink, rose madder, burnt umber, sap green, yellow ochre)
- Round watercolor brushes (sizes 2 and 4)
- Fine liner brush (size 0 or 00)
- Clean water jar
- Paper towels
- Kneaded eraser
Step 1: Planning the Composition
-
Lightly sketch the main branch:
Begin with your HB pencil, drawing a sweeping diagonal line from the bottom left upwards toward the right. This will be the main anchor for your composition. -
Add secondary twigs:
Branch off from the main line with smaller, thinner strokes. Remember that cherry blossom branches often have slightly jagged, angular turns rather than perfect curves. -
Mark flower positions:
Lightly sketch circles or ovals where your main open blooms will sit. Place them strategically: one near the bottom left, two in the center, and one toward the top right to create balance. -
Sketch the buds:
Add small teardrop shapes at the tips of the finer twigs. These will be your unopen buds, adding variety to the growth stages. -
Refine the petal shapes:
Inside your guide circles, draw the five petals characteristic of cherry blossoms. Give the petal edges a slight notch or irregularity so they look natural, not uniform. -
Clean up sketch lines:
Use a kneaded eraser to gently lift the darkest graphite lines until they are barely visible. We don’t want the pencil marks to show heavily through the transparent watercolor.
Water Control Woes?
If your watercolors are blooming uncontrollably/cauliflowering, your paper is too wet. Let the layer dry completely, then glaze over it with a slightly drier brush.
Step 2: Painting the Blooms
-
Base wash for petals:
Mix a very watery, pale pink. Using your size 4 brush, paint a light wash over the petals. I like to keep the edges slightly wet to encourage soft blending later. -
Add depth to the centers:
While the base wash is still slightly damp, drop a more concentrated rose or darker pink into the center of each flower. Let the pigment bleed naturally outward. -
Define individual petals:
Once the first layer is dry, use a slightly darker pink mix to outline or shadow the overlapping areas where one petal sits on top of another. -
Paint the buds:
Use a more saturated pink for the tight buds at the branch tips. These are usually darker than the open flowers because the petals are packed tightly together. -
Detail the stamens:
For the flower centers, mix a yellow ochre with a tiny touch of brown. Using the size 0 brush, paint fine, radiating lines from the center, topping each with a tiny dot for the anther.
Step 3: Painting the Branch
-
Base layer for wood:
Mix burnt umber with a touch of sap green to create a natural, earthy brown. Paint the main branch, varying the pressure to make the line thickness fluctuate organically. -
Add branch texture:
While the branch is damp, drop in pure burnt umber on the shadowed side (the bottom edge) to create volume and roundness. -
Connect flowers to stems:
Use your finest brush to paint the tiny green-brown stems (sepals) that hold the flowers to the main branch. These should be delicate and transition smoothly into the wood. -
Enhance branch details:
Once dry, use a ‘dry brush’ technique with darker brown to add faint horizontal markings or texture to the bark, typical of cherry trees.
Level Up: Petal Drift
Add movement to your piece by painting 2-3 single falling petals disconnected from the branch, as if a gentle breeze just blew past your artwork.
Step 4: Final Touches
-
Softening edges:
Inspect your petals; if any edges look too hard, use a clean, damp brush to gently scrub and soften the perimeter. -
Final highlights:
If you lost the white highlights in the flower centers, use a tiny dot of white gouache or a gel pen to bring back the crispness near the yellow stamens.
Step back and admire your gentle spring creation, perfect for a greeting card or framed wall art
Poppy With Paper-Thin Petals
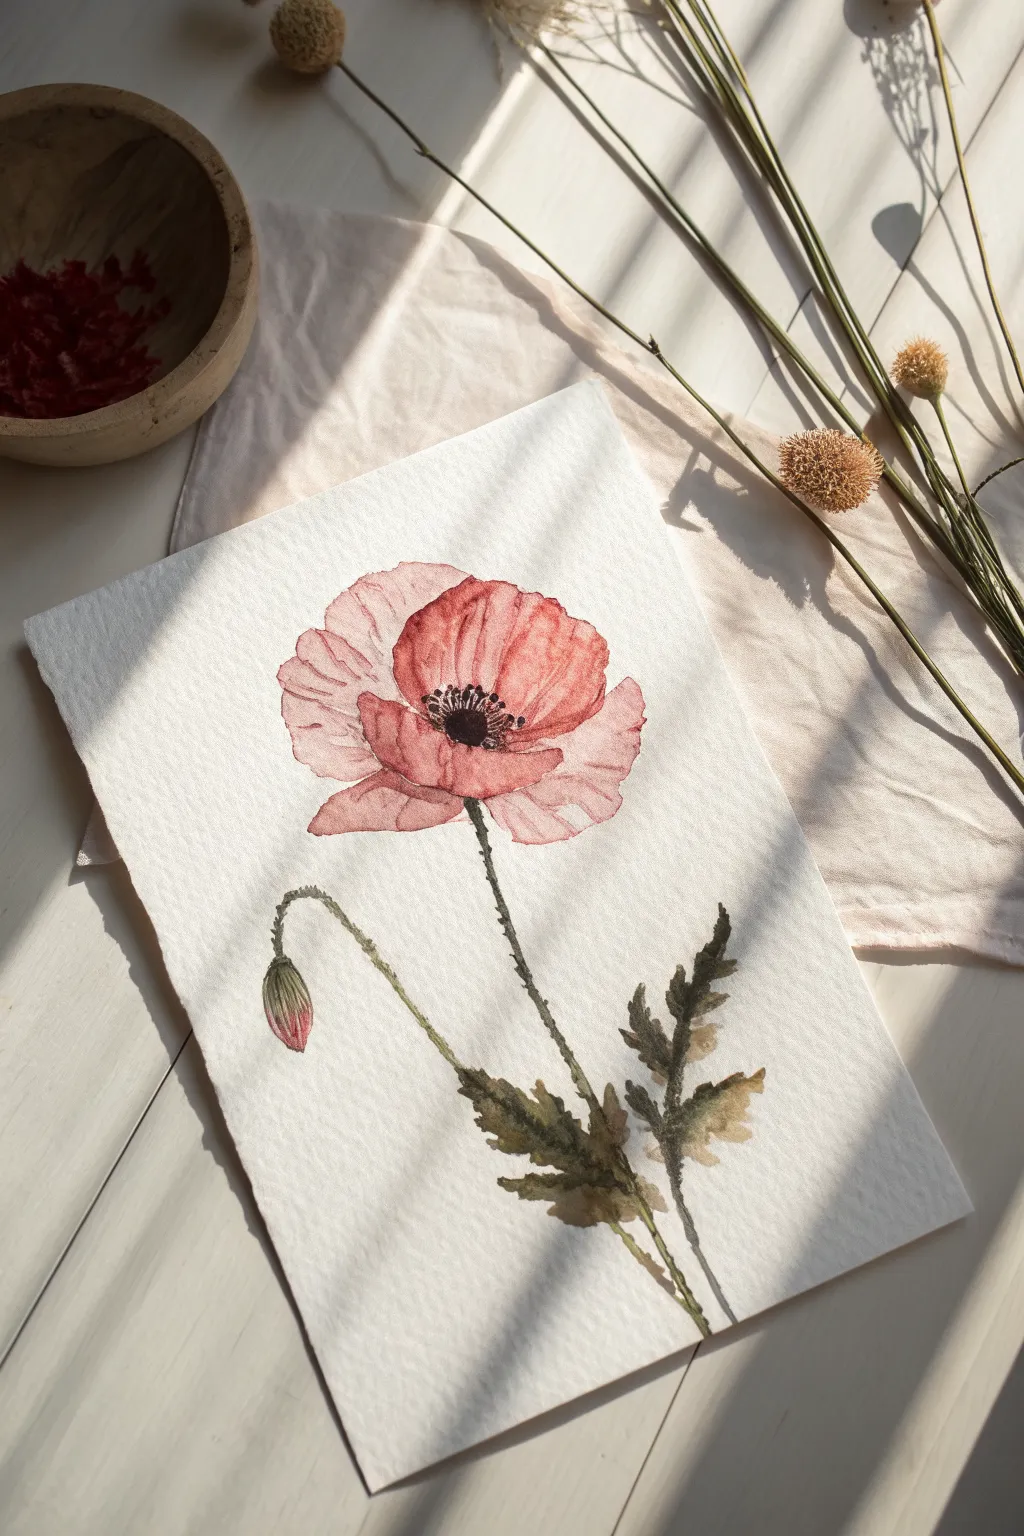
Capture the delicate translucency of a poppy flower with this gentle watercolor tutorial. You will learn to layer soft washes of color to achieve that crinkled, paper-thin petal effect, paired with earthy green foliage.
Step-by-Step
Materials
- Cold press watercolor paper (300 gsm)
- Round watercolor brushes (size 4 and 0)
- Watercolor paints (Alizarin Crimson, Sap Green, Burnt Umber, Payne’s Grey)
- Pencil (HB or 2H)
- Kneaded eraser
- Two jars of water
- Paper towel
Step 1: Sketching & First Wash
-
Light Outline:
Begin by lightly sketching the outline of the poppy flower. Draw a large, open cup shape for the main bloom, focusing on the irregular, wavy edges of the petals. Make sure the head is tilted slightly forward. -
Adding Stem and Bud:
Extend a long, slender stem curving downwards from the flower head. To the left, draw a secondary curved stem ending in a teardrop-shaped bud that faces downward. -
Refining the Leaves:
Sketch jagged, lobed leaves near the base of the stems. Keep your pencil lines very faint, lifting any excess graphite with a kneaded eraser so the lines won’t show through the translucent paint later. -
Petal Base Layer:
Mix a very watery wash of Alizarin Crimson. With your size 4 brush, paint the entire flower head shape. Keep this layer pale and wet, allowing the water to pool slightly in some areas to create natural texture. -
Softening Edges:
While the paint is still wet, use a clean, damp brush to lift a little pigment from the outer edges of the petals. This creates that characteristic soft, papery look. -
Defining Petals:
Once the first layer is semi-dry, use a slightly more concentrated red mix to define where the petals overlap. Paint negative shapes to suggest the separation between front and back petals.
Unwanted Blooms?
If you get ‘cauliflower’ blooms in your petals, use a barely damp brush to gently smooth the edges while wet, or embrace the texture as natural petal wrinkles.
Step 2: Deepening Color & Details
-
Creating Depth:
Mix a touch of Burnt Umber into your red to create a shadowed crimson. Apply this to the center of the flower where the petals meet, radiating outward to give the bloom a cupped appearance. -
Veins and Texture:
Switch to your size 0 brush. Using the same shadowed crimson mix, paint very fine, trembling lines radiating from the center of the petals to mimic the crinkled texture of poppy silk. -
The Dark Center:
For the poppy’s dramatic center, mix a dense Payne’s Grey or black. Paint a solid, rounded shape right in the middle, leaving tiny specks of white paper for highlights if possible. -
Stamen Ring:
Using the tip of the size 0 brush, dot tiny circles around the dark center to represent the pollen-laden stamens. I find it helpful to vary the pressure to make some dots larger than others. -
Painting the Bud:
Paint the drooping bud using a mix of Sap Green and a touch of red. Let the red show through slightly at the tip where the petals are about to burst open.
Step 3: Stems & Foliage
-
Stem Structure:
Load your brush with Sap Green mixed with a little Burnt Umber for an olive tone. Paint the main stem and the bud’s stem with a confident, thin line. Don’t make it perfectly straight; a little wobble looks more organic. -
Adding Foliage:
Paint the serrated leaves at the base using the olive green mix. Start from the stem and pull the brush outward to form the jagged points, keeping the tips sharp. -
Fuzzy Texture:
Poppy stems are hairy. Once the green stem is dry, take a fairly dry size 0 brush with dark green paint and add tiny, short strokes along the sides of the stem to suggest fine hairs. -
Leaf Variation:
Drop a little pure Burnt Umber into parts of the wet green leaves to suggest drying or shadowed areas. This variegation makes the botanical study look much more realistic. -
Final Contrast:
Assess your painting. If the center needs more punch, add a second layer of black to the very middle. Reinforce the darkest shadows under the petals to make the flower pop off the page.
Level Up: Splatter
Load a toothbrush with watery red paint and flick tiny speckles around the flower head. This adds energy and a loose, artistic vibe to the composition.
Let the paper dry completely before framing your delicate floral study.


Hydrangea Cluster Made of Tiny Blooms
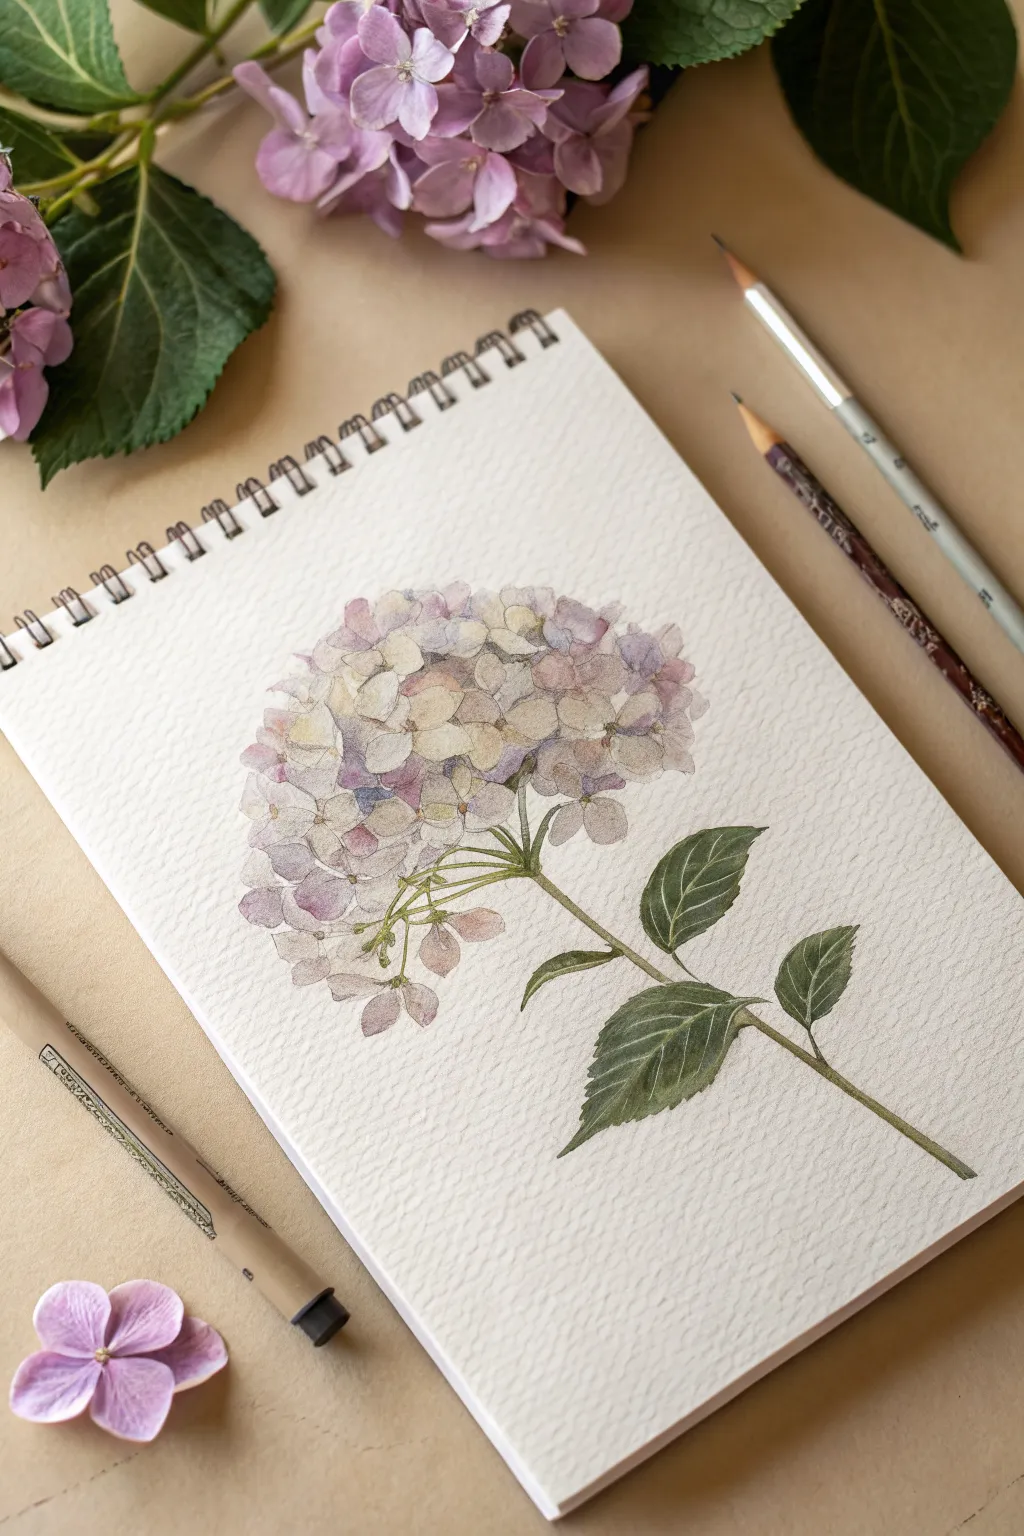
Capture the ethereal beauty of a hydrangea cluster with this soft, botanical watercolor study. By building up layers of tiny, individual blooms, you create a complex flower head that feels both realistic and wonderfully gentle.
Step-by-Step Tutorial
Materials
- Spiral-bound watercolor sketchbook (cold press paper texture)
- H or HB graphite pencil for outlining
- Watercolor paints (shades of lilac, dusty pink, cream, light blue, and olive green)
- Fine round brushes (sizes 0, 2, and 4)
- Micron or fine liner pen (brown or sepia, optional)
- Clean water and paper towel
Step 1: Sketching the Structure
-
Outline the main shape:
Begin by lightly drawing a large, rough circle or oval in the center of your page to define the overall size of the hydrangea head. Keep this line extremely faint. -
Draw individual florets:
Within your circle, start sketching the four-petaled florets. Don’t try to draw every single one perfectly; focus on the ones in the foreground and let the ones near the edges be less defined. -
Add the stem structure:
Draw the main stem extending downwards. Add small, branching stems connecting the main stalk to the bottom of the flower cluster, like the ribs of an umbrella. -
Sketch the leaves:
Add two to three large, serrated leaves attached to the main stem. Draw the central vein and faint side veins on each leaf to guide your painting later.
Step 2: First Wash and Petals
-
Mix your base colors:
Prepare watery puddles of very pale purple, dusty pink, and a hint of cream or yellow ochre. Hydrangeas are rarely just one flat color. -
Paint the first petals:
Using a size 4 brush, wet a few individual petals and drop in your palest colors. Let the pink and purple bleed into each other slightly on the paper. -
Build the cluster:
Continue painting florets, varying the color slightly for each one. Leave tiny gaps of white paper between some petals to keep the drawing fresh and distinct. -
Add depth to the back:
For the florets that appear ‘behind’ others, use a slightly cooler or darker diluted purple to push them into the background. -
Paint the centers:
While the petals are drying, use a very small dot of yellow-green or darker purple in the absolute center of the main florets.
Wet-on-Wet Magic
To get that soft, multicolored look on petals, dampen the paper first with clean water, then touch two different colors to the edges and let them mix naturally.
Step 3: Stems and Leaves
-
Base coat for greenery:
Mix a sap green with a touch of brown for an olive tone. Paint the main stem and the tiny branching stems under the flower head. -
Paint the leaves:
Fill in the leaf shapes with your green mix. I like to drop in a little extra dark green near the center vein while the paint is still wet to create volume. -
Define the veins:
Once the leaves are dry, lift out color with a damp stiff brush (or paint with a darker green) to create the pattern of the veins.
Make It Pop
Add a few ‘loose’ petals falling away from the main cluster or a small unbloomed bud for a more natural, organic composition.
Step 4: Refining Details
-
Deepen the shadows:
Mix a darker, more saturated violet. Use your smallest brush (size 0) to paint tiny shadows where petals overlap, defining the edges of the individual blooms. -
Enhance leaf visual texture:
Use fine strokes to emphasize the serrated edges of the leaves. Darken the stem where the leaves attach to add dimension. -
Optional pen outline:
If you want a clearer illustration style, use a very fine sepia pen to loosely outline some of the foreground petals and the leaves, but keep the lines broken and delicate. -
Final assessment:
Step back and look at the overall shape. If the flower head looks too flat, glaze a very watery cool blue or purple over the shadowed side of the entire sphere to round it out.
Now you have a timeless botanical piece that captures the fragile beauty of nature
Lavender Stems With Repeating Dashes
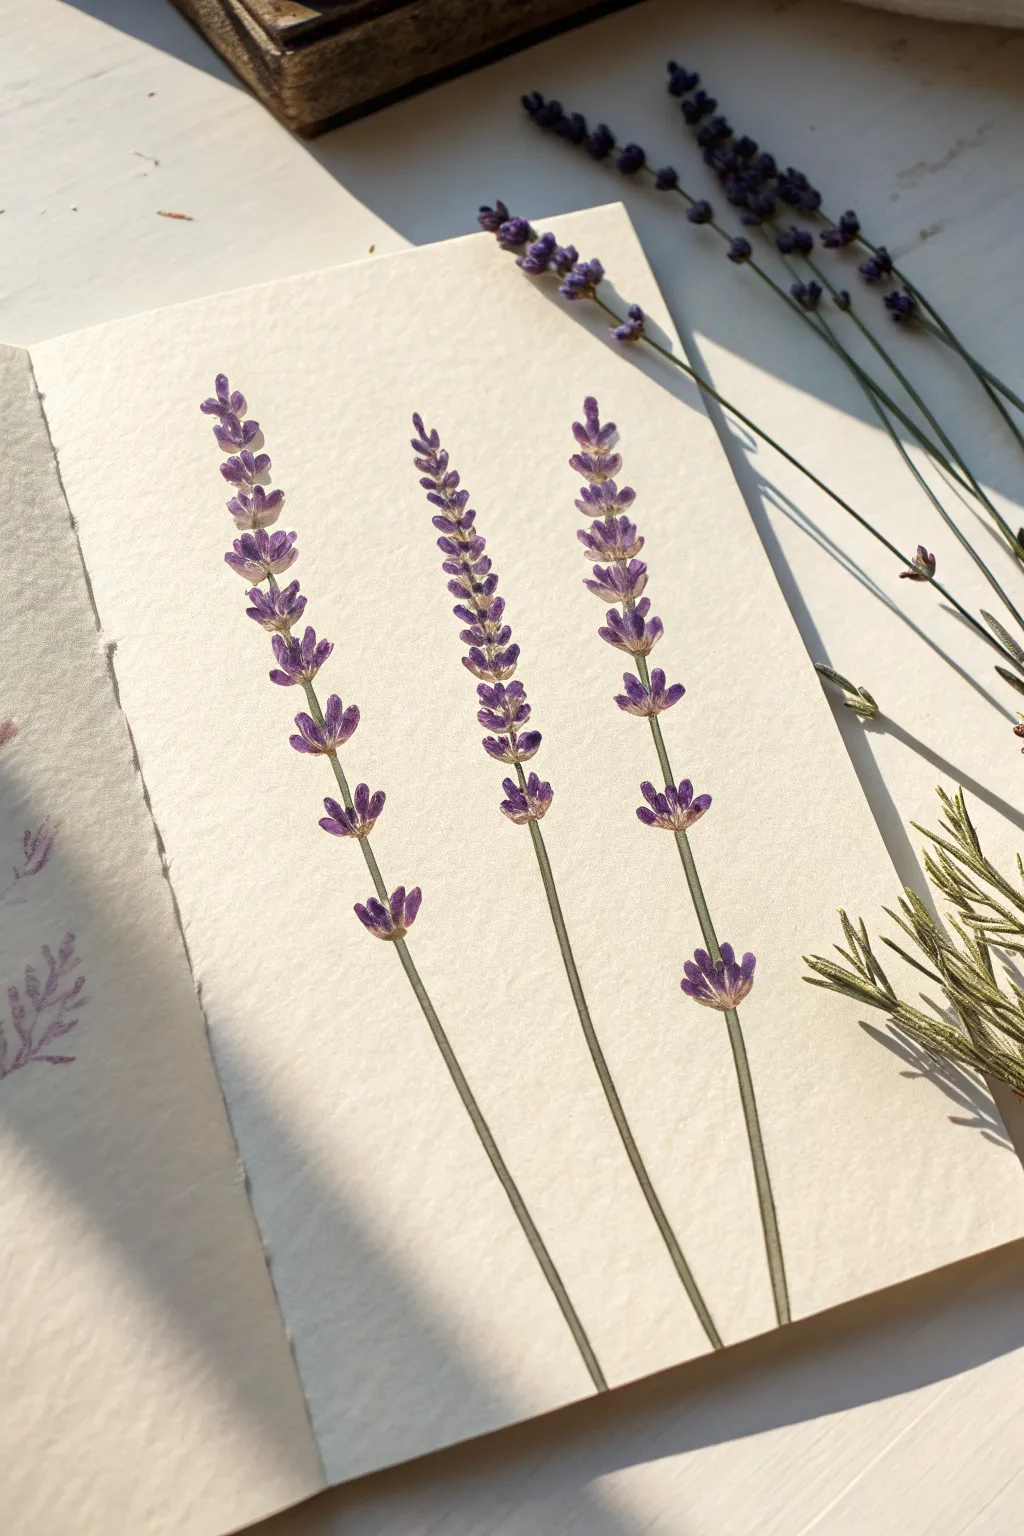
Capture the soothing essence of lavender with this simple watercolor study that focuses on rhythm and repetition. Using fine brushstrokes and a limited violet palette, you’ll create three elegant stems that dance across textured paper.
Step-by-Step Guide
Materials
- Cold press watercolor paper (fine texture)
- Small round watercolor brush (size 1 or 2)
- Watercolor paints: Violet/Purple, Ultramarine Blue, Sap Green, Burnt Umber
- Pencil (HB or H)
- Kneaded eraser
- Cup of water and paper towel
Step 1: Planning the Composition
-
Lightly sketch the stems:
Begin by drawing three faint, slightly curved lines with your pencil to establish the stems. Vary their heights slightly and tilt them away from each other so they fan out gently like a bouquet. -
Mark the flower clusters:
Lightly mark the top and bottom boundaries for where the purple flowers will go on each stem. Notice that the flowers cover the top third of the stem, but leave gaps between small clusters.
Brush Control Tip
For the crispest teardrop shapes, use a brush with a very sharp point (a ‘snap’ synthetic is great). Press down for width, then flick up for the tip.
Step 2: Painting the Stems
-
Mix olive green:
Mix Sap Green with a tiny touch of Burnt Umber and Violet to desaturate it. You want a realistic, muted olive green tone rather than a bright grassy shade. -
Execute the stem lines:
Load your brush and paint the main stems using a steady hand. Start from the bottom and pull upward, lifting pressure as you reach the flower section to make the line thinner. -
Add intermittent stems:
Continue the green line up through the flowering section, but break it up. Paint short, thin vertical dashes where the stem would peek through the purple buds.
Avoiding Blobs
If your purple dashes are bleeding into each other, you are working too wet. Let the paper dry completely between adjacent strokes or clusters.
Step 3: Creating the Flower Buds
-
Mix your base violet:
Create a rich lavender purple color. I like to mix a pre-made Violet with a bit of Ultramarine Blue to cool it down. -
The tear-drop stroke technique:
Practice the key stroke on scrap paper first: press the belly of the brush down and lift quickly to create a teardrop or small dash shape. -
Start the bottom clusters:
Beginning at the lowest mark on your left stem, paint a small ring of these tear-drop shapes angling outward from the stem. These form the first ‘whorl’ of flowers. -
Build upward:
Move up the stem, leaving a small gap of white space, and paint the next cluster. As you go higher, make the clusters slightly smaller and closer together. -
Vary the angles:
Ensure the little dashes angle roughly 45 degrees upward. The ones on the left side should point left, and the right side should point right. -
Cap the stem:
Finish the top of the stalk with a few very small, vertical dashes effectively crowning the stem. -
Repeat for all stems:
Apply this same clustering technique to the middle and right stems. Try to make the middle stem the tallest and most dense.
Step 4: Adding Depth and Detail
-
Mix a shadow color:
Take your violet mixture and add a tiny bit more blue and less water to create a darker, more concentrated purple. -
Apply base shadows:
While the first layer is dry, add tiny dots of this darker purple at the bottom of each individual flower bud where it connects to the stem. -
Connect the buds:
Using your green mix again, paint tiny, hair-thin lines connecting the floating purple buds back to the main stem if any look too detached. -
Add stem details:
Add tiny little ‘bracts’ (small leaf-like structures) right under each flower cluster using the tip of your brush and the green paint. -
Final assessment:
Step back and look at the overall balance. If any area looks too sparse, add a single tiny purple dash to fill the gap.
Once dry, erase any visible pencil marks to reveal your clean, botanical illustration
Coneflower With Droopy Petals
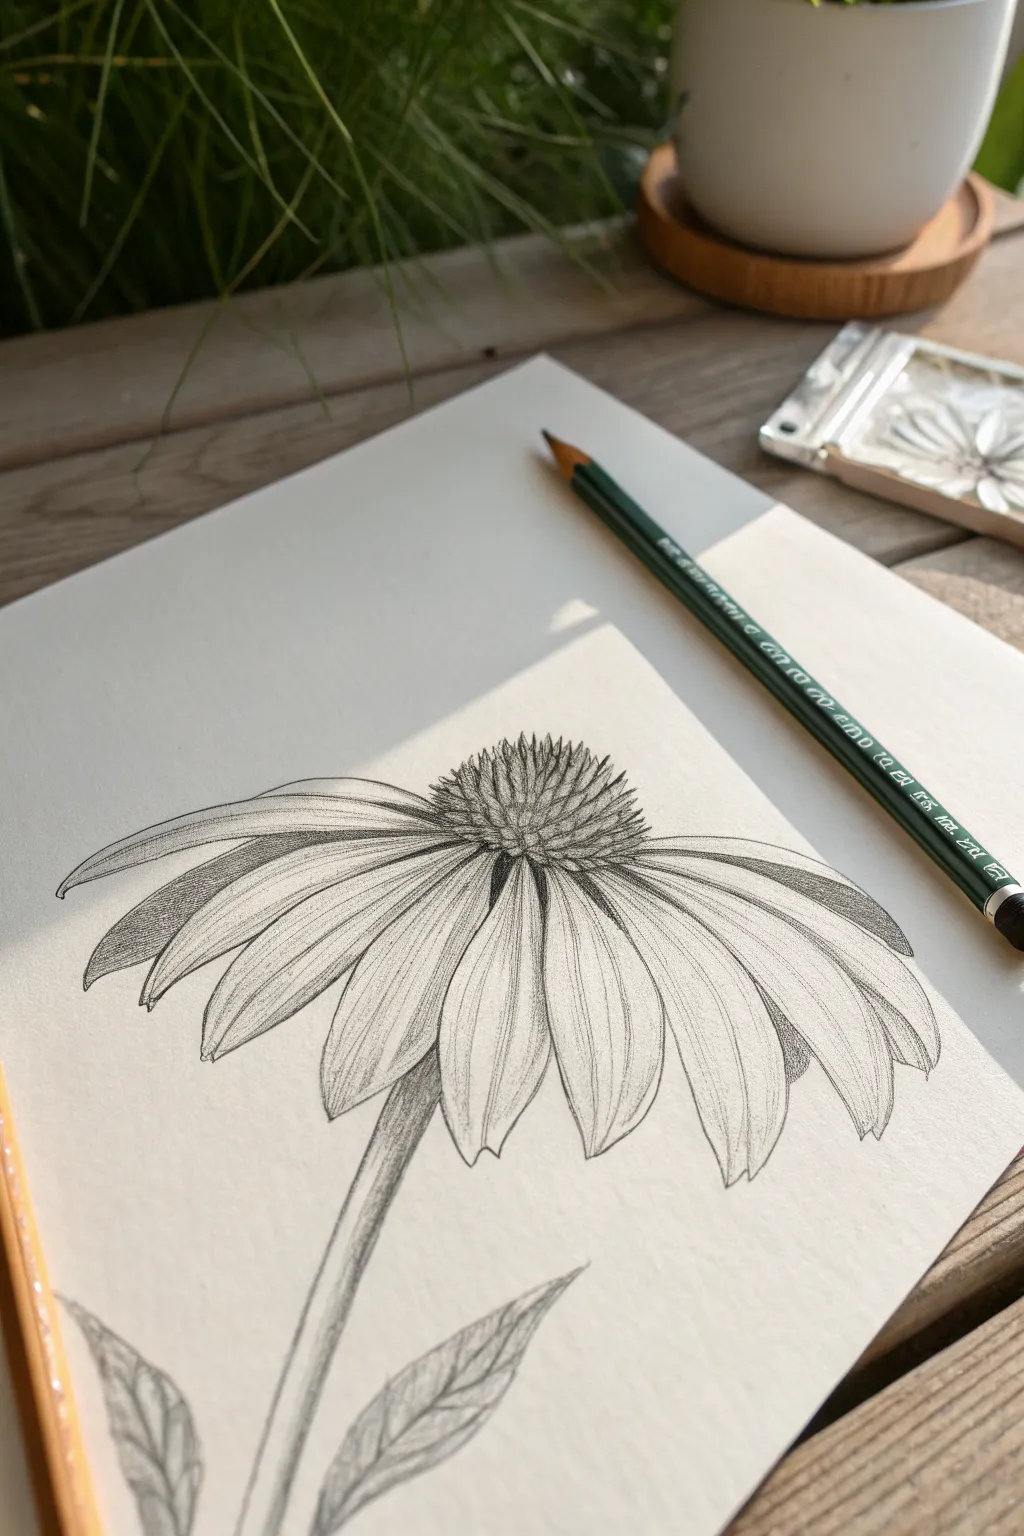
Capture the graceful slump of an Echinacea flower with this detailed pencil study. This project focuses on rendering organic textures and dramatic lighting using simple graphite techniques.
How-To Guide
Materials
- Sketchbook or drawing paper (medium tooth)
- HB pencil (for initial outlines)
- 2B or 4B pencil (for shading and depth)
- F or H pencil (for fine details)
- Kneaded eraser
- Pencil sharpener
Step 1: Structure & Outline
-
Place the Cone:
Start by lightly sketching a rounded mound shape near the center-top of your page. This will become the prickly center of the coneflower. Keep your lines faint so they can be easily adjusted. -
Establish the Stem:
Draw a long, slightly curved line extending downwards from beneath the cone. Add a second parallel line to give the stem thickness, keeping it slender but sturdy. -
Map the Petal Directions:
Sketch light guide lines radiating outward and downward from the base of the cone. Coneflower petals droop characteristically, so ensure these lines curve gently toward the ground rather than sticking straight out. -
Outline the Petals:
Using your guide lines, draw the distinct petal shapes. They should be long and elliptical, appearing broad in the middle and tapering to a notched or pointed tip. Allow some petals to overlap others for a natural look. -
Add Leaf Suggestions:
Near the bottom of the stem, sketch the outlines of two leaves. These should be lance-shaped and point upwards, countering the downward flow of the petals.
Step 2: Texture & Shadow
-
Detail the Cone Center:
Switch to a sharper pencil. Begin adding texture to the cone by drawing tiny, spike-like shapes. These should be denser and smaller near the top, getting slightly larger towards the base. -
Refine Petal Edges:
Go over your petal outlines with a more confident, darker stroke. Add small ridges or folds where the petals attach to the cone to show their volume. -
Add Petal Veins:
Draw faint, parallel lines running the length of each petal. I find that curving these lines slightly near the edges helps emphasize the convex shape of the petal surface. -
Shade Beneath the Petals:
Using a 2B pencil, add shading to the undersides of the petals and the areas where they overlap. This separation is crucial for creating depth. -
Darken the Cone Base:
Deepen the shadows right where the cone meets the petals. This high-contrast area acts as the focal point of the drawing.
Fixing Flat Petals
If petals look flat, curve your shading strokes. Instead of straight lines, use ‘C’ shaped hatch marks that wrap around the form of the petal.
Step 3: Finishing Touches
-
Texture the Stem:
Add vertical shading lines along one side of the stem to suggest a light source coming from the top left. This gives the stem roundness. -
Leaf Veining:
Draw a central vein in each leaf, then add smaller branching veins. Use diagonal hatching strokes to shade the leaves, keeping the side furthest from the light source darker. -
Enhance Contrast:
Take your darkest pencil (4B) and re-emphasize the darkest crevices between the cone spikes and the deepest shadows between petals. -
Clean Up:
Use a kneaded eraser to lift away any stray graphite smudge or remaining construction lines, leaving the white of the paper to act as your highlight.
Tint it Up
After sketching, use watercolor pencils to add a wash of purple to the petals and rusty orange to the cone for a mixed-media effect.
Enjoy the quiet elegance of your finished botanical study
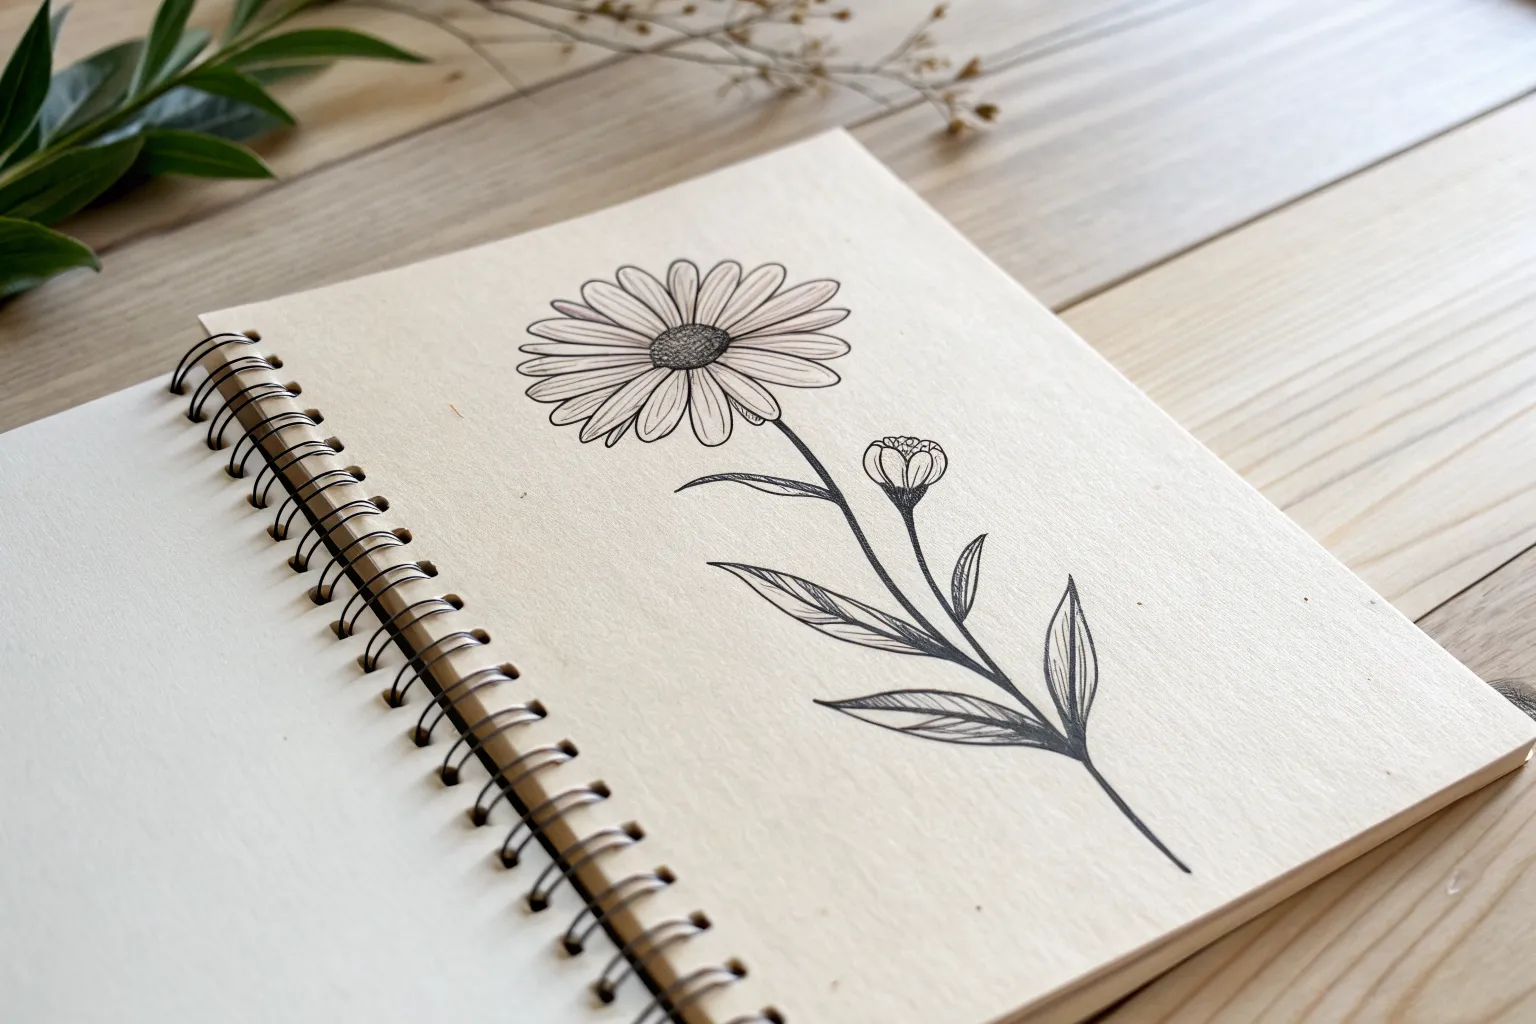
Minimal Buds and Leaves Study
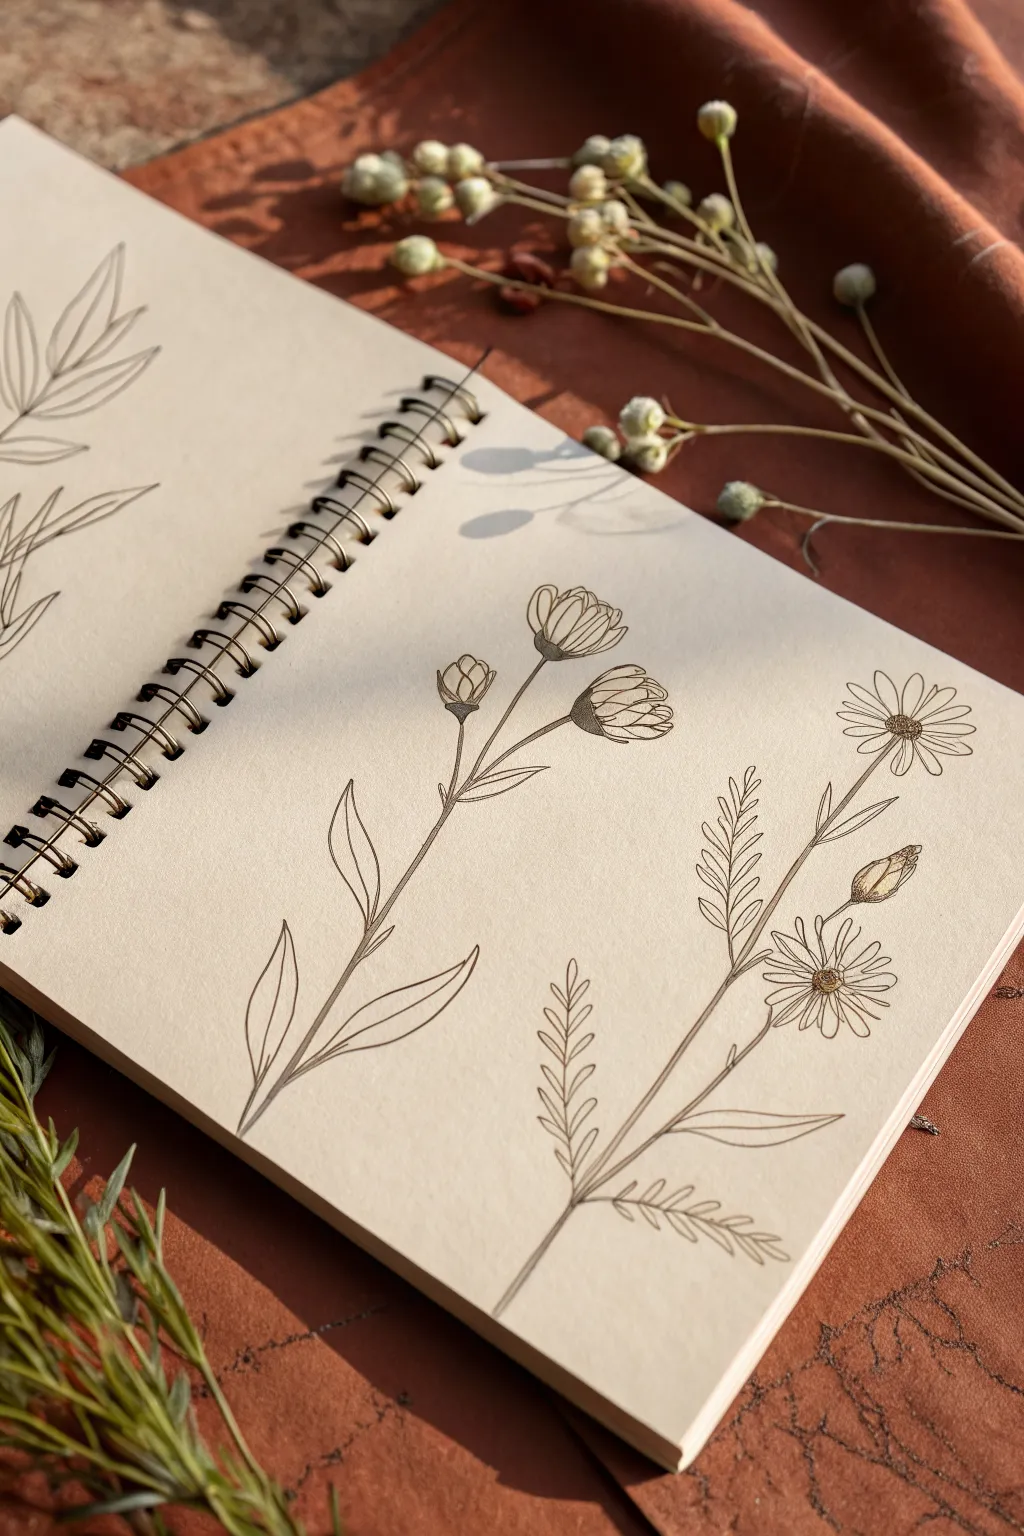
Capture the delicate essence of field flowers with this clean and sophisticated line drawing study. This project focuses on confident strokes and minimal shading to create an elegant botanical layout perfect for sketchbooks or journals.
Step-by-Step Tutorial
Materials
- Wire-bound sketchbook (cream or off-white paper preferred)
- Fine liner pens (sizes 0.1, 0.3, and 0.5)
- HB or 2H graphite pencil for sketching
- Soft kneading eraser
- Ruler (optional, for spacing)
Step 1: Planning Composition
-
Lightly sketch the stems:
Begin with your graphite pencil. Draw two long, gently curving lines to establish the main stems. The left stem should lean slightly to the right, and the right stem slightly to the left, creating a balanced V-shape composition on the page. -
Establish placement for the heads:
At the top of the left stem, sketch small ovals where the buds and blooms will sit. For the right stem, mark circles for the daisy-like heads and small ovals for the tight buds. -
Rough in the leaves:
Mark the positions of the leaves. For the left flower, indicate long, lance-shaped leaves near the base. For the right flower, sketch the spine of the fern-like leaves extending from the lower stem.
Wobbly Lines?
Don’t stress over shakes. If a stem line goes crooked, thicken it slightly to correct the curve, or turn the mistake into a small bump or node on the plant stem.
Step 2: Drawing the Left Stem (The Buds)
-
Outline the main bloom:
Switch to your 0.3 fine liner. Start with the largest bloom on the left stem. Draw the cup-shaped base first, using small, overlapping U-shapes for the sepals. -
Add the petals:
Draw the tightly packed petals emerging from the cup. Keep the lines curved inward to show the flower is not yet fully open. Use slightly broken lines at the tips for a natural look. -
Draw the smaller buds:
Move to the side shoots. Draw small, teardrop-shaped buds. Keep the sepal details at the bottom of each bud consistent with the main bloom. -
Ink the stem connection:
Connect the flower heads to the main stem. Use a confident, single stroke if possible, slightly thickening the line where the smaller stems join the main stalk. -
Detail the lance leaves:
Draw the long leaves at the base. Use two smooth curves that meet at a sharp point. Add a central vein line that doesn’t quite touch the leaf tip.
Step 3: Drawing the Right Stem (The Daisies)
-
Create the daisy centers:
On the right stem, draw the circular centers of the open flowers. Fill them with tiny stippling dots or a tight grid pattern to create texture. -
Draw the ray florets:
Extend long, narrow petals (ray florets) from the centers. Don’t make them perfectly uniform; let some overlap or twist slightly to add realism. -
Add the closed bud:
Ink the single closed bud on the side shoot. Use vertical lines to show the tightly wrapped petals. -
Draw the fern-like leaves:
This flower has compound leaves. Draw a central spine, then add small, serrated leaflets on either side. Keep your pen lifts quick to ensure the tips of the leaves remain sharp. -
Ink the main stalk:
Connect all elements on the right side with the main stem line, ensuring it feels continuous behind the leaves.
Pro Tip: Line Weight
Make the lines on the foreground petals slightly thicker than the background petals. This subtle weight difference instantly creates 3D depth.
Step 4: Refinement and Cleanup
-
Add subtle texture:
Using your 0.1 fine liner (the finest point), add very sparse shading. Focus on the base of the petals and the underside of the leaves where shadows would naturally fall. -
Strengthen key lines:
Switch to the 0.5 pen to selectively darken the main stems and the bottoms of the flower heads. This line weight variation adds depth and prevents the drawing from looking flat. -
Erase pencil marks:
Wait until the ink is completely dry—I usually give it a full five minutes to be safe. Gently roll the kneaded eraser over the page to lift the graphite without damaging the paper surface.
Close your sketchbook knowing you have captured a quiet moment of nature on the page
Flower in a Simple Pot
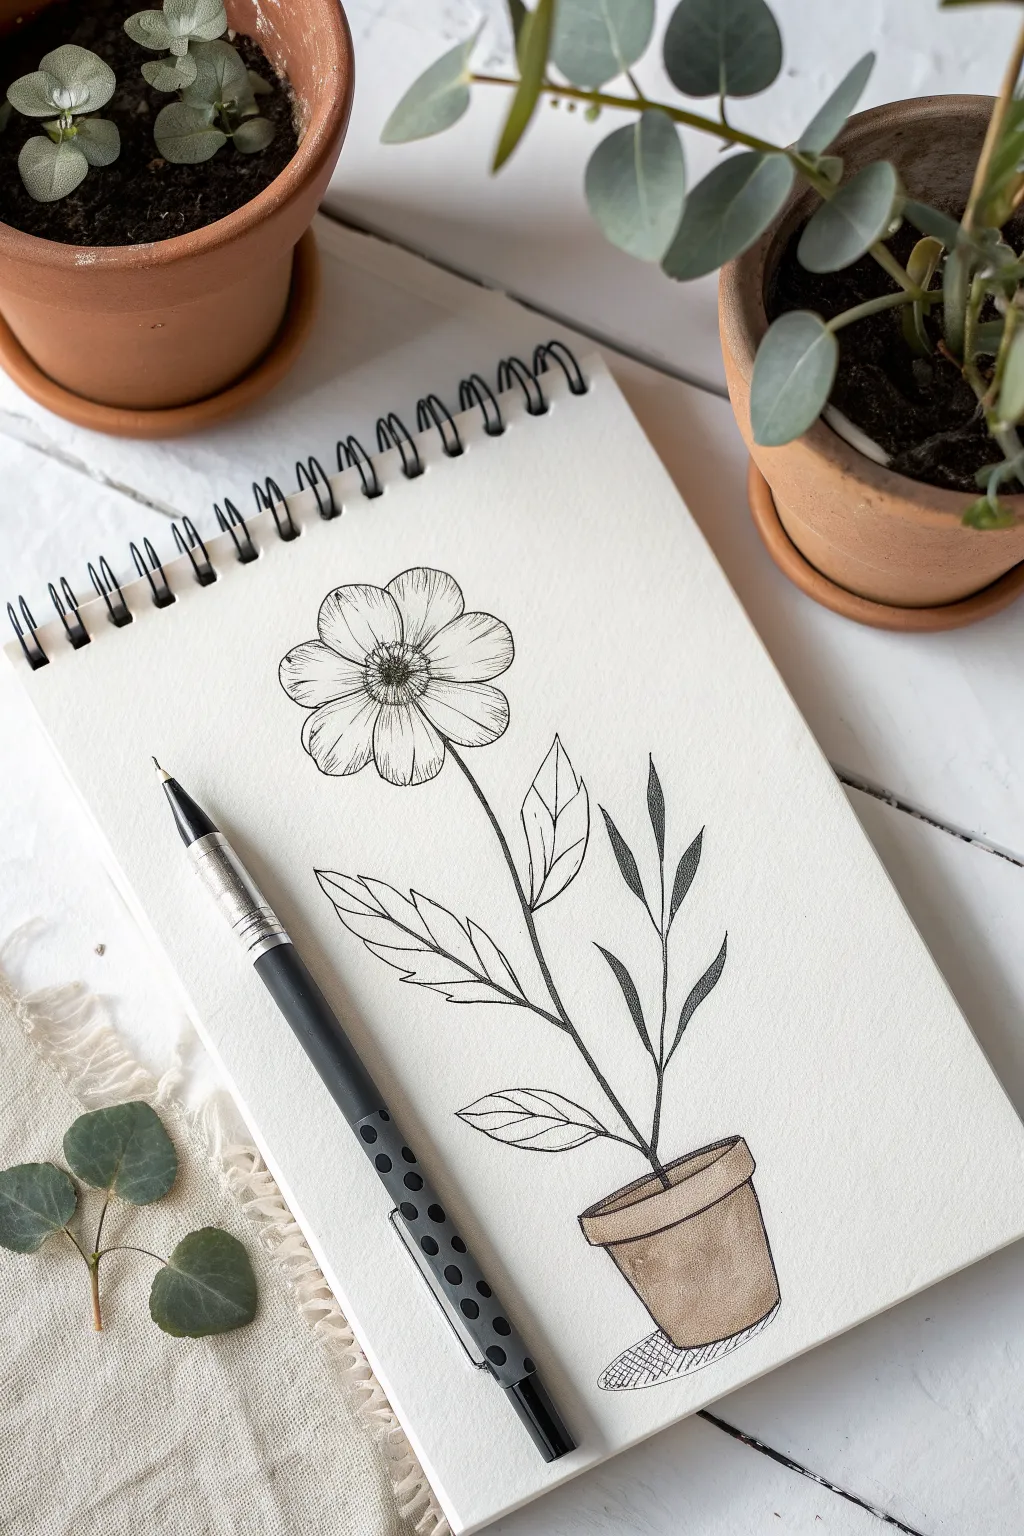
This elegant drawing combines clean ink lines with subtle shading to create a timeless botanical illustration. It captures the delicate details of petals and leaves while grounding the composition in a textured, earthy pot.
Step-by-Step Guide
Materials
- Spiral-bound sketchbook with textured paper
- Fine liner pen (black, 0.3mm or 0.5mm)
- Pencil (HB for sketching)
- Eraser
- Light brown watercolor or colored pencil (for the pot)
- Ruler (optional)
Step 1: Planning and Sketching
-
Mark the center:
Start lightly with your pencil. Gently mark a small circle where the flower head will be, roughly one-third down from the top of the page. -
Define the stem line:
Draw a single, slightly curved line descending from that circle almost to the bottom of the page. This is the spine of your plant. -
Block in the pot shape:
At the bottom of the stem line, sketch a simple trapezoid shape for the pot. Add a thin, horizontal oval on top to represent the rim. -
Sketch petal guidelines:
Draw a larger, faint circle around the center point you made earlier. This will help keep your flower petals evenly sized as you sketch them out.
Step 2: Drawing the Flower Head
-
Outline the center:
Switch to your fine liner pen. Draw the small center disk of the flower using tiny, stippled dots rather than a solid line to mimic pollen texture. -
Draw primary petals:
Ink the petals radiating outward. Make the edges slightly uneven and organic, rather than perfectly smooth ellipses. -
Add petal details:
Draw very fine lines inside each petal, radiating from the center outward. These linear texture marks give the petals dimension and form. -
Darken the center:
Go back to the flower center and add denser dots around the outer edge of the disk, creating a shadow that makes the center look slightly recessed.
Keep it Organic
Don’t worry about perfect symmetry. Nature isn’t perfect; slightly wobbling lines on the stem or uneven petals make the drawing feel more real and lively.
Step 3: Stem and Foliage
-
Ink the main stem:
Trace over your pencil stem line with the pen. Keep your hand loose to avoid a rigid, ruler-like look. -
Add left-side leaves:
Draw large, lance-shaped leaves branching off the lower left side. Add a central vein down the middle of each leaf. -
Detail the leaf texture:
Similar to the petals, use diagonal hatching lines inside the leaves to suggest veining and shadow. -
Add right-side foliage:
On the right side, draw thinner, more upright leaves. Fill these in with a stippled or dark hatching texture to contrast with the broader leaves on the left.
Ink Smearing?
If your ink smudges when erasing pencil lines, you aren’t waiting long enough. Test dryness by lightly touching a heavy ink area with a clean tissue first.
Step 4: The Pot and Finishing Touches
-
Outline the rim:
Draw the rim of the pot with a confident ink line, ensuring it slightly overlaps the top of the pot body. -
Define the pot body:
Ink the sides and bottom curve of the pot. Notice how the bottom curve should mirror the curve of the rim for proper perspective. -
Shadow underneath:
Using cross-hatching (crisscrossed lines), create a small cast shadow on the surface right below the pot to ground it. -
Color the pot:
Use a light brown colored pencil or a wash of watercolor to fill in the pot. Keep the color slightly uneven to suggest a terra cotta texture. -
Erase pencil marks:
Once the ink is completely dry—I usually wait at least five minutes to be safe—gently erase all your initial pencil guidelines.
You now have a charming botanical sketch that looks lovely in a journal or framed on a wall
Small Bouquet Tied With a Ribbon
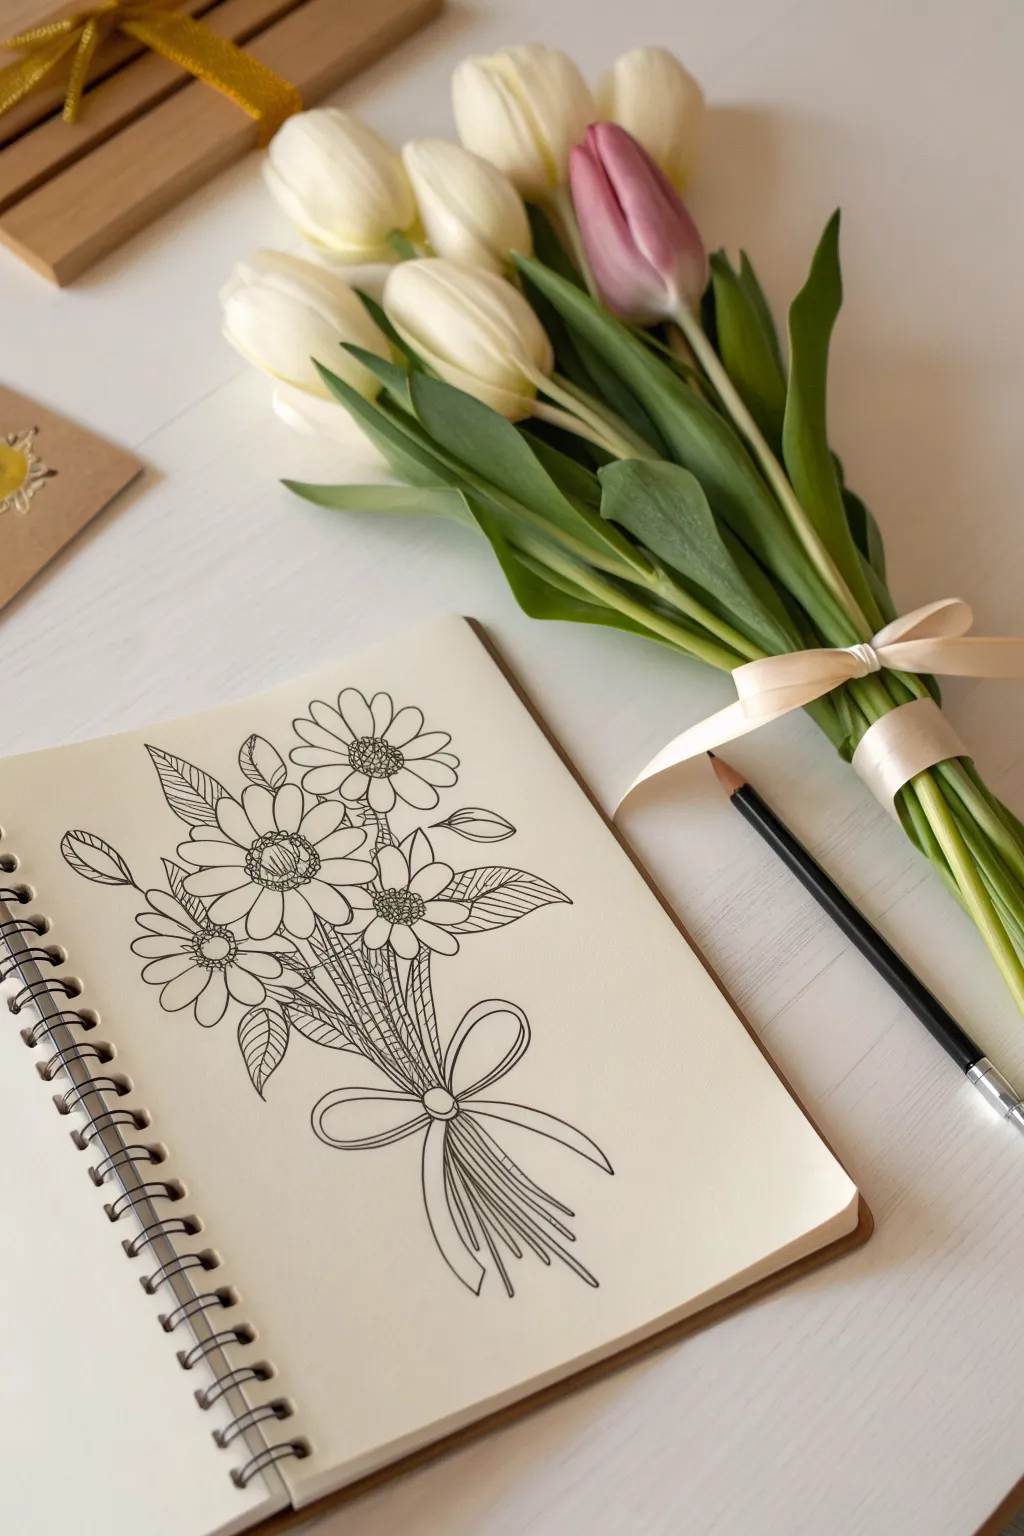
Capture the charm of a hand-picked gift with this delicate line art drawing featuring cheerful daisies tied together with a flowing ribbon. The clean black ink on cream paper creates a classic, botanical illustration style that is perfect for sketchbook journaling or greeting cards.
Step-by-Step
Materials
- Cream-colored sketchbook or drawing paper
- HB graphite pencil for sketching
- Kneaded eraser
- Fine liner pen (0.3mm or 0.5mm, black)
- Ultra-fine liner pen (0.05mm or 0.1mm, black)
- Ruler (optional)
Step 1: Planning the Composition
-
Outline the general shape:
Start by lightly sketching a loose, inverted tear-drop shape with your pencil to define the total area the bouquet will occupy. Draw a vertical centerline to help balance the arrangement. -
Place the flower heads:
Sketch three main circles near the top-center of your shape for the primary blooms. Position them slightly overlapping or at different angles to look natural rather than perfectly aligned. -
Add secondary blooms:
Draw two smaller circles tucked behind or below the main ones to represent the filler flowers peeking through. -
Draft the stems and bow:
Draw a bundle of lines converging at a single pinch point about two-thirds of the way down. Sketch a large, looped bow at this intersection, letting the ribbon tails flow downwards.
Step 2: Drawing the Flowers
-
Detail the flower centers:
Switch to your 0.3mm pen. Draw the round centers of the daisies first, keeping the edges slightly bumpy for texture rather than perfectly smooth circles. -
Draw the petals:
Add the petals radiating from the centers. Make the petals slightly irregular—some slightly twisted or overlapping—to give the flower life and movement. Ensure the tips are rounded. -
Ink the leaves:
Draw the leaves extending from the stems. Give them serrated or slightly jagged edges to mimic real foliage. Some leaves should point upward while lower ones might droop slightly. -
Define the ribbon:
Carefully outline the bow. Pay attention to how the ribbon folds over itself at the knot. Make the loops smooth and round, and ensure the trailing ends have a fluid, fabric-like drape. -
Complete the stems:
Draw the stems bundling together. Below the ribbon, the stems should flare out slightly as cut ends. Keep the lines close together to show density.
Wobbly Lines?
Don’t stress straight lines! Organic subjects like flowers benefit from imperfect strokes. If a line goes astray, thicken the one next to it to disguise the wobble as a shadow.
Step 3: Adding Texture and Detail
-
Erase pencil guides:
Once the main ink lines are dry, gently use your kneaded eraser to lift away all the graphite sketches, leaving a clean ink outline. -
Texture the centers:
Using the 0.05mm ultra-fine pen, fill the flower centers with tiny circles and stippling dots. Pack them denser near the bottom edge of the center to create a sense of depth. -
Shade the petals:
Add very short, fine flicking lines at the base of each petal where it meets the center. This slight hatching suggests the curve of the petal. -
Detail the leaves:
Draw a central vein in each leaf. Then, use fine hatching lines on one side of the leaf or along the veins to indicate shadows and form. -
Shade the ribbon:
Add contour lines inside the ribbon loops where the fabric curves. Use simple parallel lines to shade the inside of the knot and beneath the loops to make the bow pop forward. -
Texture the stems:
Add vertical hatching lines along the stems, particularly where they are bunched tightly together under the flowers and directly below the ribbon knot. This emphasizes the shadows in the recesses. -
Final assessment:
I like to step back here and look for any gaps. If a spot looks too empty, add a small extra leaf or a few simple lines to suggest a stem in the background.
Make it Pop
Use a white gel pen to add tiny highlights on the upper curves of the ribbon and the tips of the petals for a glossy, dimensional effect.
Enjoy the relaxing process of bringing this garden bundle to life on your page
Floral Wreath in a Circle
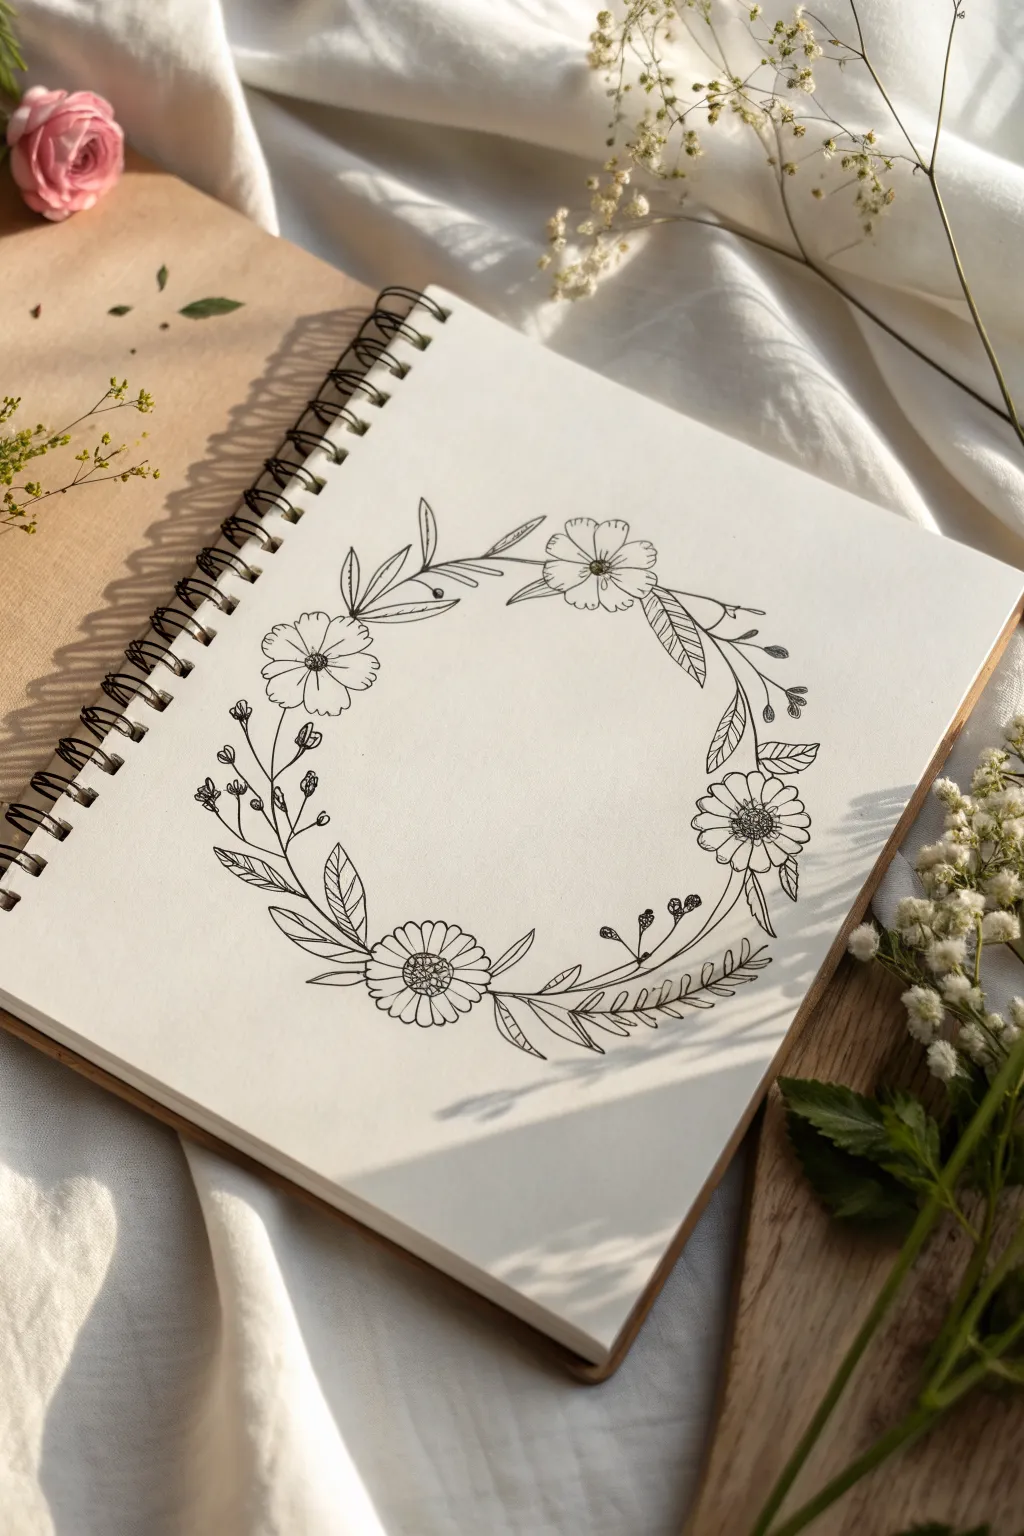
Capture the delicate beauty of nature with this simple fineliner illustration. This project guides you through creating a balanced, circular wreath composed of wildflowers and leaves, perfect for journal covers or greeting cards.
How-To Guide
Materials
- White sketchbook paper or cardstock
- Pencil (HB or 2B)
- Eraser (kneaded preferred)
- Compass or round object (bowl/lid) for tracing
- Fine liner pens (sizes 01, 03, and 05)
- Ruler (optional)
Step 1: Planning Structure
-
Draw the guideline:
Start by lightly sketching a perfect circle in the center of your page using a compass or by tracing a round object. This will serve as the spine of your wreath to keep everything symmetrical. -
Mark anchor points:
Lightly mark four points on the circle like a clock face (12, 3, 6, and 9 o’clock). This helps you space out the main flowers so the arrangement doesn’t feel lopsided later on.
Ink Control Secret
Pull the pen toward you rather than pushing it away when drawing long stems. This gives you steadier control over the curve and prevents the nib from skipping on the paper.
Step 2: Drafting the Main Blooms
-
Sketch the top flower:
Near the 1 o’clock position, lightly sketch a simple five-petaled flower facing outward. Keep the center clear for now. -
Add the left flower:
Around the 9 o’clock position, sketch a similar five-petaled flower, but tilt this one slightly so it looks like it’s facing toward the upper left corner of the page. -
Place the bottom flower:
At the bottom, slightly left of center (around 7 o’clock), draw a larger flower. Give this one a distinct center circle and slightly broader petals compared to the others. -
Draw the right-side flower:
Position the final main bloom near 4 o’clock. Drawing this one slightly smaller creates a nice variety in visual weight.
Step 3: Adding Foliage
-
Connect with stems:
Using your initial circle guideline, draw curving stems that connect your flowers. Let the stems weave naturally, sometimes overlapping the circle line. -
Draft large leaves:
Sketch paired, pointed leaves filling the gaps between the flowers. Aim to have them flow in a clockwise direction to create a sense of movement. -
Add filler sprigs:
Draw thin, branching sprigs extending outward from the main circle. Add tiny circles at the tips to represent buds or berries. -
Create variation:
In the gap on the upper left, sketch a distinct sprig with small, multi-petaled buds to break up the pattern of the larger leaves. -
Balance the layout:
Step back and look at your pencil sketch. If any area looks too empty, sketch in a few extra small leaves or a curling vine tendril.
Add a Splash of Color
Watercolor works beautifully here. Since the drawing is ink-heavy, try loose washes of sage green and dusty rose that spill slightly outside the lines for a modern look.
Step 4: Inking the Wreath
-
Outline the flowers:
Switch to your 03 or 05 fineliner. Carefully trace the petals of your main flowers. I like to make the lines slightly shaky or broken in places to give them an organic, hand-drawn feel. -
Detail the flower centers:
For the bottom flower, draw a grid or stipple pattern in the center disk. For the others, add small radiating lines from the center outward to clear define the petals. -
Ink the leaves:
Trace your leaf shapes. Add a central vein to each leaf, but don’t draw it all the way to the tip—stopping short keeps the look light and airy. -
Add leaf texture:
Using your thinnest pen (01), add delicate diagonal shading lines inside some of the larger leaves. Don’t fill them completely; just suggest shadow on one side. -
Ink the filler sprigs:
Trace the thin stems and berry sprigs. Color in the tiny buds or berries solidly with black ink to add contrast against the white petals. -
Thicken the main stems:
Go back over the main connecting stems of the wreath, thickening the lines slightly where shadows would naturally fall, such as where stems cross under a flower.
Step 5: Finishing Touches
-
Erase pencil lines:
Wait until the ink is completely dry to avoid smudging. Gently erase all your pencil guides, including the original circle. -
Assess and refine:
Look for any gaps. You can add tiny dots or extra little hatch marks with your 01 pen now to balance the composition without needing to draw whole new leaves.
Now you have a timeless floral illustration ready to frame or fill with your favorite quote
Mini Flower and Vine Border
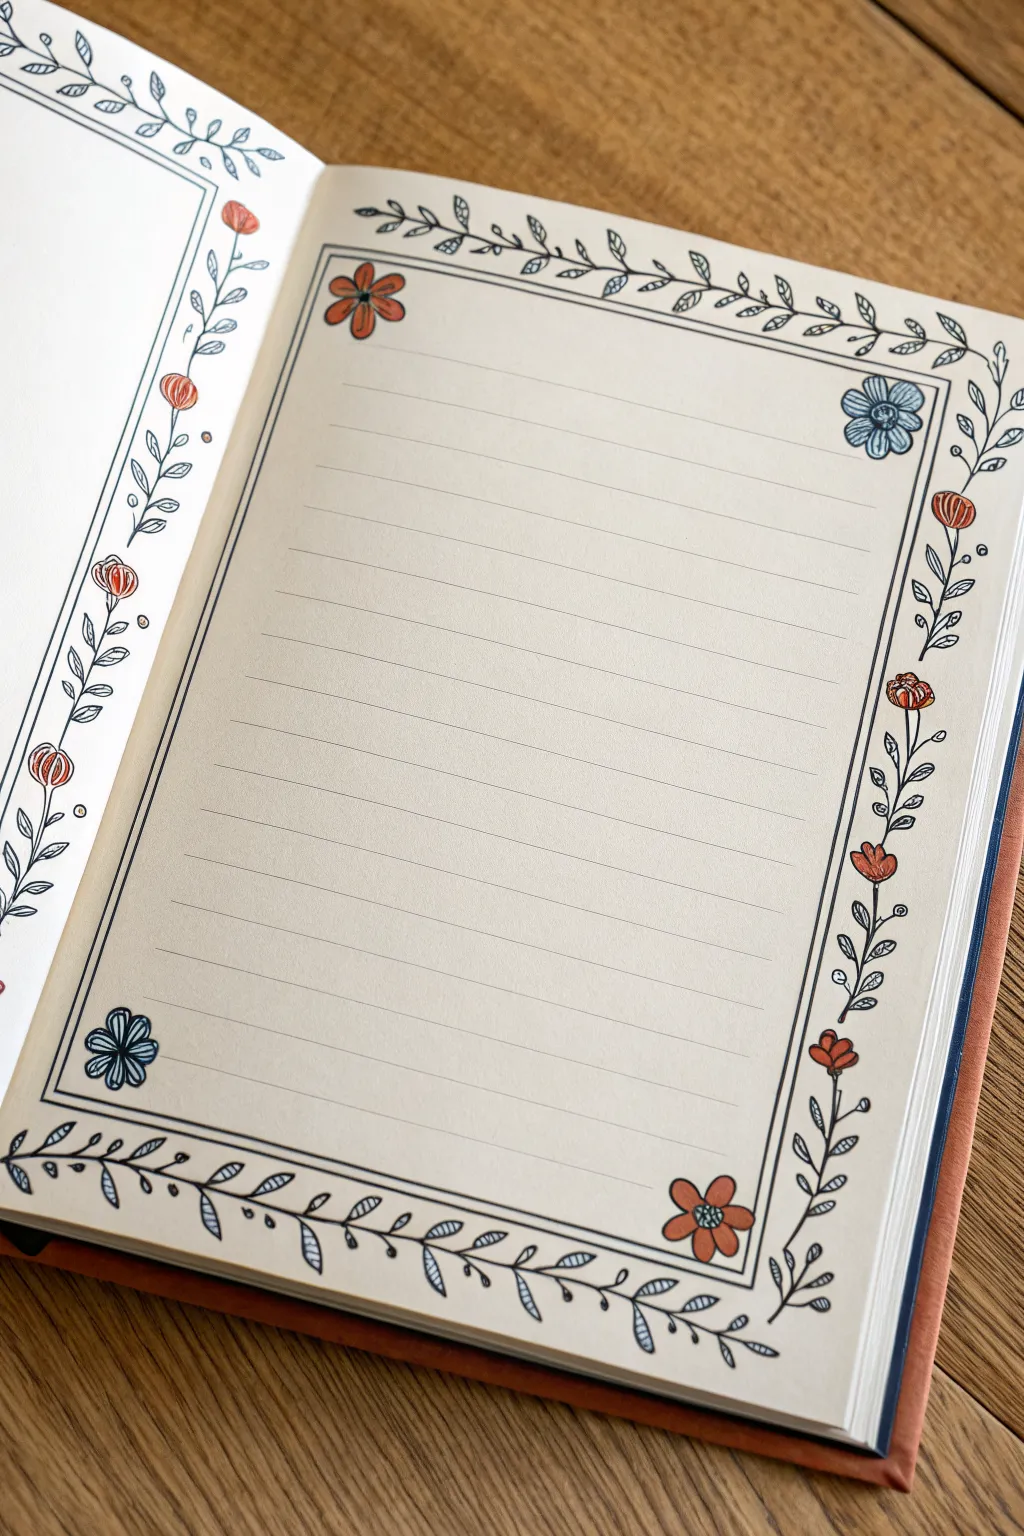
Transform a plain journal page into a charming writing space with this vine and blossom border. The design relies on simple, repeating leaf shapes and strategically placed colorful blooms to create a structured yet organic frame.
Step-by-Step Tutorial
Materials
- Journal or notebook (blank or lined)
- Ruler
- Fine liner pen (0.3mm or 0.5mm, black)
- Pencil (HB)
- Eraser
- Colored pencils or fine tip markers (rust red, teal blue)
Step 1: Setting the Structure
-
Measure margins:
Using your ruler and pencil, lightly mark a rectangular margin about 1 inch from the edge of your page. This will be the skeleton for your border design. -
Draw the main frame:
Go over your pencil guides with the black fine liner to create a solid double line. Draw the outer rectangle first, then add a second rectangle just inside it (about 2-3mm gap) to give the frame weight. -
Add writing lines:
If your paper is blank, use the ruler to draw evenly spaced horizontal lines inside the frame. Keep them light and thin, as they are for writing on later.
Wobbly Lines?
Don’t stress if your frame lines aren’t perfectly straight. Trace over them again loosely to create a deliberate ‘sketchy’ style that hides mistakes.
Step 2: Drafting the Flora
-
Sketch corner flowers:
With a pencil, lightly sketch a flower at opposite corners. Place a five-petaled flower in the top-left and bottom-right corners. -
Add contrasting blooms:
Sketch a different style of flower—perhaps a rounder, multi-layered one—in the top-right and bottom-left corners to create diagonal symmetry. -
Outline the vine path:
Lightly draw a wavy, meandering line connecting all the corner flowers. This line should weave in and out of the double-line frame you drew earlier, sometimes resting inside the page and sometimes outside.
Step 3: Inking the Vines
-
Ink the corner flowers:
Trace your corner flower sketches with the fine liner. Add detail to the centers, like small dots or stamen lines. -
Draw the vine stems:
Trace the wavy vine line. When the vine crosses the straight frame lines, just draw right over them; since the frame is background, the vine sits on ‘top’. -
Add the leaves:
Starting from one corner, work your way along the vine adding small pairs of leaves. Keep them simple—just small ovals with a center vein. -
Vary leaf placement:
For visual interest, flip the direction of the leaves occasionally or group them in threes near the corners. -
Insert side blossoms:
halfway down the vertical sides, draw a small tulip-shaped bud growing off the main vine. This breaks up the long straight sections.
Level Up: Metallic Pop
Use a gold or silver gel pen to fill within the double-line frame border or to add tiny dots in the center of your flowers for a touch of shine.
Step 4: Color and Final Touches
-
Erase guidelines:
Once the ink is completely dry, gently erase all remaining pencil marks to clean up the page. -
Color the red blooms:
Take your rust-red colored pencil. Fill in the petals of the top-left and bottom-right flowers, as well as the small side buds. -
Color the blue blooms:
Use the teal blue pencil to color the remaining two corner flowers. I find shading lightly at the tips and harder near the center adds lovely depth. -
Add accent leaves:
Select a few random leaves along the vine—maybe every fifth or sixth one—and gently shade them with the blue pencil to tie the color scheme together. -
Detail the buds:
Add tiny circles or dots floating near the side buds using your black pen to clear up any empty negative space.
Now you have a beautifully framed page ready for your favorite quotes or daily journaling
One-Line Continuous Flower Faces
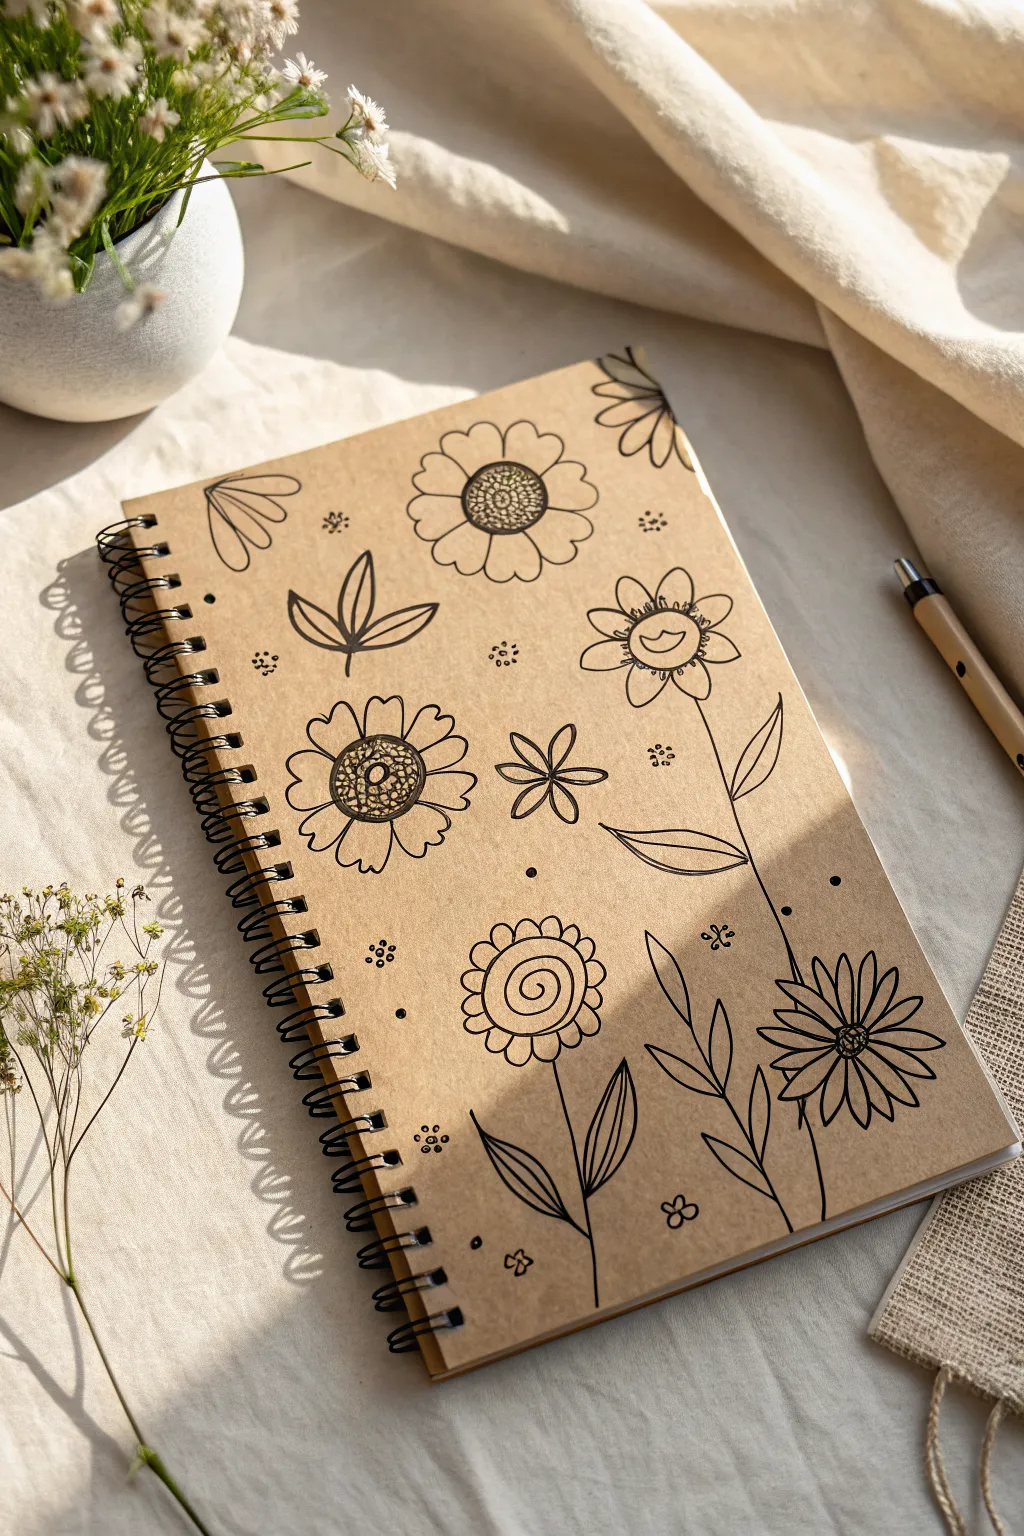
Transform a plain notebook into a personalized botanical sketchbook with these charming black ink doodles. Using the warm, rustic tone of Kraft paper as a background, these simple line drawings pop with a delightful, organic style.
How-To Guide
Materials
- Spiral-bound notebook with Kraft paper cover
- Fine liner pen (Black, 0.5mm or 0.8mm)
- Pencil (HB or lighter)
- Soft white eraser
- Scrap paper for practice
Step 1: Preparation & Layout
-
Clean surface:
Ensure the notebook cover is free of dust or oils. A quick wipe with a dry cloth helps the ink adhere better. -
Plan your placement:
Visualize where your main flowers will go. The design works best if you scatter larger blooms first—like the sunflower near the top center and the large daisy on the bottom right—before filling gaps with smaller elements. -
Light pencil sketch:
Very lightly sketch the positions of the flower centers using simple circles. Don’t press hard; Kraft paper can dent easily, and we want erase marks to be invisible later.
Ink Selection Tip
Test your pen on the back cover first! Some heavy markers can bleed through Kraft paper. A pigment liner or archival ink pen is usually safest.
Step 2: Drawing the Main Blooms
-
Top sunflower center:
Start with the large flower near the top center. Draw a circle for the center, then fill it with tiny, tight stippling dots to create a seeded texture. -
Sunflower petals:
Draw rounded, somewhat short petals radiating from that center. Keep the lines continuous and slightly imperfect for a hand-drawn feel. -
Zinnia outlines:
Move to the left side and draw the large zinnia-style flower. Create a double-circle center, then add two layers of petals—small inner ones and larger, slightly scalloped outer ones. -
Zinnia details:
Fill the inner circle of the zinnia with small scribbles or loops to distinguish it from the petals. -
Spiral rose:
toward the bottom center, draw a ‘lollipop’ spiral flower. Start with a swirl in the middle and add rounded, scalloped petals around the outside. -
Adding stems:
For the spiral flower and the bottom-right daisy, draw long, singular lines downward to create stems. Add simple leaf shapes attached directly to these stems.
Fixing Mistakes
Did a line go rogue? Turn the mistake into a new petal or add a leaf over it. Doodles interact nicely with ‘happy accidents’ so don’t restart.
Step 3: Line Quality & Fillers
-
Variety in petals:
Draw the flower on the right side with a whimsical, uneven center (like a smiling mouth shape). Give it widely spaced, rounded petals. -
Corner elements:
In the top right and top left corners, draw partial flowers peeking in from the edge. This makes the design feel expansive, as if the pattern continues beyond the cover. -
Leaf motifs:
Fill the empty space between the large flowers with standalone leaves. Try a three-leaf cluster near the top left, drawing a central stem with three attached oval shapes. -
Geometric flowers:
Draw a simple five-petaled, star-shaped flower in the middle right area to break up the rounder shapes.
Step 4: Final Details
-
Tiny fillers:
Look for empty pockets of negative space. Fill these with small clusters of three or four dots, or tiny four-petaled micro-flowers. -
Adding weight:
Go back over the centers of your main flowers. I like to thicken the lines slightly on just one side of the circles to add subtle dimension. -
Ink drying:
Let the ink sit for at least 15 minutes. Kraft paper is absorbent but can still smudge if you erase too soon. -
Erase pencil lines:
Gently erase your initial planning marks. Hold the notebook cover taut with one hand so the paper doesn’t buckle while you erase.
Enjoy using your custom-designed notebook for your daily journaling or sketches
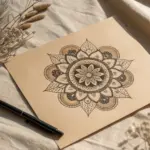
Geometric Petal Flower Mandalas
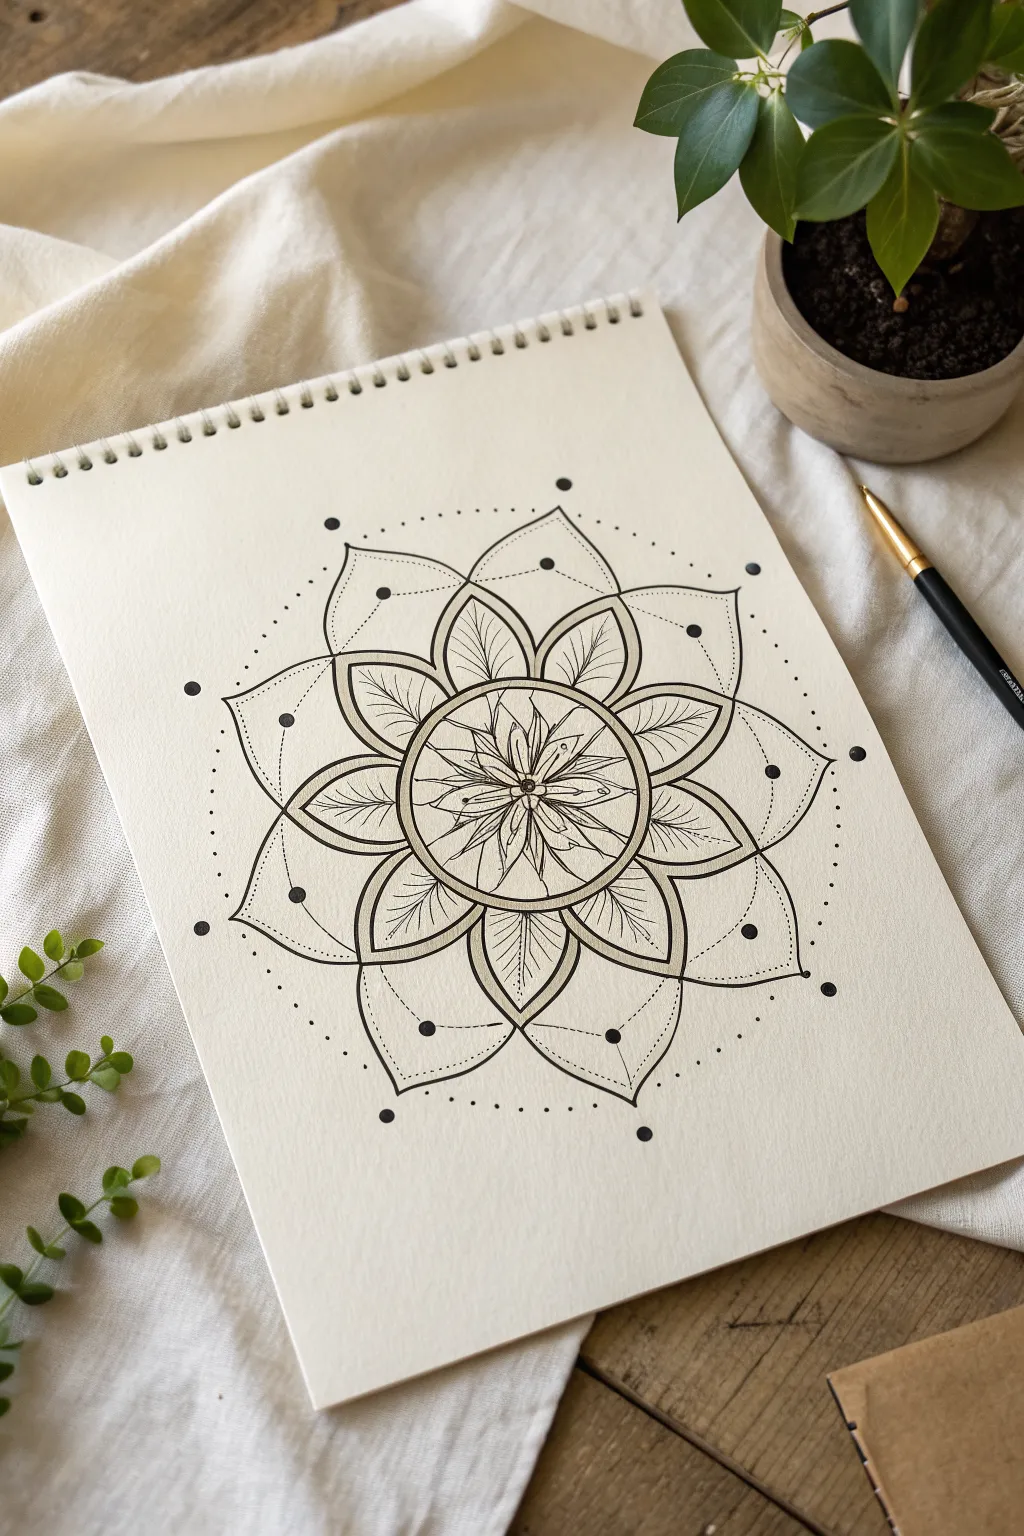
This elegant mandala combines the organic flow of nature with the balanced precision of geometry. By repeating simple leaf shapes and crisp lines, you’ll build a complex-looking design that is surprisingly relaxing to create.
Detailed Instructions
Materials
- Sketchbook with smooth, heavy paper
- Compass
- Protractor
- Pencil (HB or lighter)
- Eraser
- Fine liner pen (0.1mm or 0.2mm)
- Thicker fine liner pen (0.4mm or 0.5mm)
- Ruler
Step 1: Setting the Foundation
-
Find standard center:
Begin by marking the absolute center of your page with a pencil. Use your ruler to ensure equal distance from the edges. -
Draw guide circles:
Using your compass, draw three concentric circles lightly in pencil. The smallest will be the flower center, the middle one marks the tips of the inner petals, and the largest marks the outer points of the design. -
Divide the circle:
Use a protractor to divide your circle into 8 equal sections (every 45 degrees). Draw light straight lines through the center to mark these ‘slices’ extending to the outermost circle. -
Create the central flower:
Inside the smallest circle, sketch a small 8-petaled flower. The petals should be thin and pointed, radiating out from the very center point.
Ink Smear Prevention
Place a scrap piece of paper under your drawing hand while you work. This prevents oils from your skin transferring to the paper and stops you from accidentally smudging wet ink.
Step 2: Drawing the Main Structure
-
Draft the inner petals:
Draw eight large, rounded petals around the center flower. The base of each petal should touch the small central circle, and the tip should reach your middle guide circle. -
Add the outer layer:
Sketch a second layer of larger, pointed petals behind the first set. The tips of these should align with the divisional lines you drew earlier and reach the largest guide circle. -
Refine the outer shape:
These outer petals should look like broad, curving arrowheads or pointed arches. Give them a slight inward curve near the base to make them elegant. -
Ink the primary lines:
Take your slightly thicker fine liner (0.4mm) and trace over the main outline of the petals. Keep your hand steady and confident. -
Double the lines:
Carefully draw an inner border inside each of the main petals, creating a ‘double line’ effect. This adds instant depth to the drawing.
Step 3: Adding Details and Texture
-
Add leaf veining:
Switch to your thinnest fine liner (0.1mm). Inside the inner ring of rounded petals, draw a central spine line and delicate veins branching out, making them look like skeletal leaves. -
Texture the outer petals:
For the larger, outer pointed petals, draw a straight line from the tip down to the center. Then, add very faint vertical hatching lines to texture the ‘wings’ of the petal. -
Create the dot ring:
Draw huge, visible black dots on the tips of the 8 main outer petals. I find using the thicker pen here ensures the dots are perfectly round and filled. -
Connect the perimeter:
Using a very fine line, draw a graceful, shallow arc connecting the large black dots. This creates a scalloped border around the whole shape. -
Add the stippled halo:
Outside the scalloped border line, place tiny dots following the curve. Space them out further as you move away from the line to create a fading effect. -
Final decorative accents:
Add singular, larger black dots freely in the negative space between the petal tips to balance the composition. -
Erase guidelines:
Once the ink is completely dry—give it a few extra minutes to be safe—gently erase all your pencil circles and dividing lines to reveal the clean design.
Add Gold Accents
For a luxurious finish, use a gold gel pen or metallic watercolor paint to fill in the small central flower or trace over the leaf veins. It pops beautifully against black ink.
Now you have a stunning, symmetrical piece of botanical art ready to be framed or gifted.
Ink Flowers With Loose Color Wash
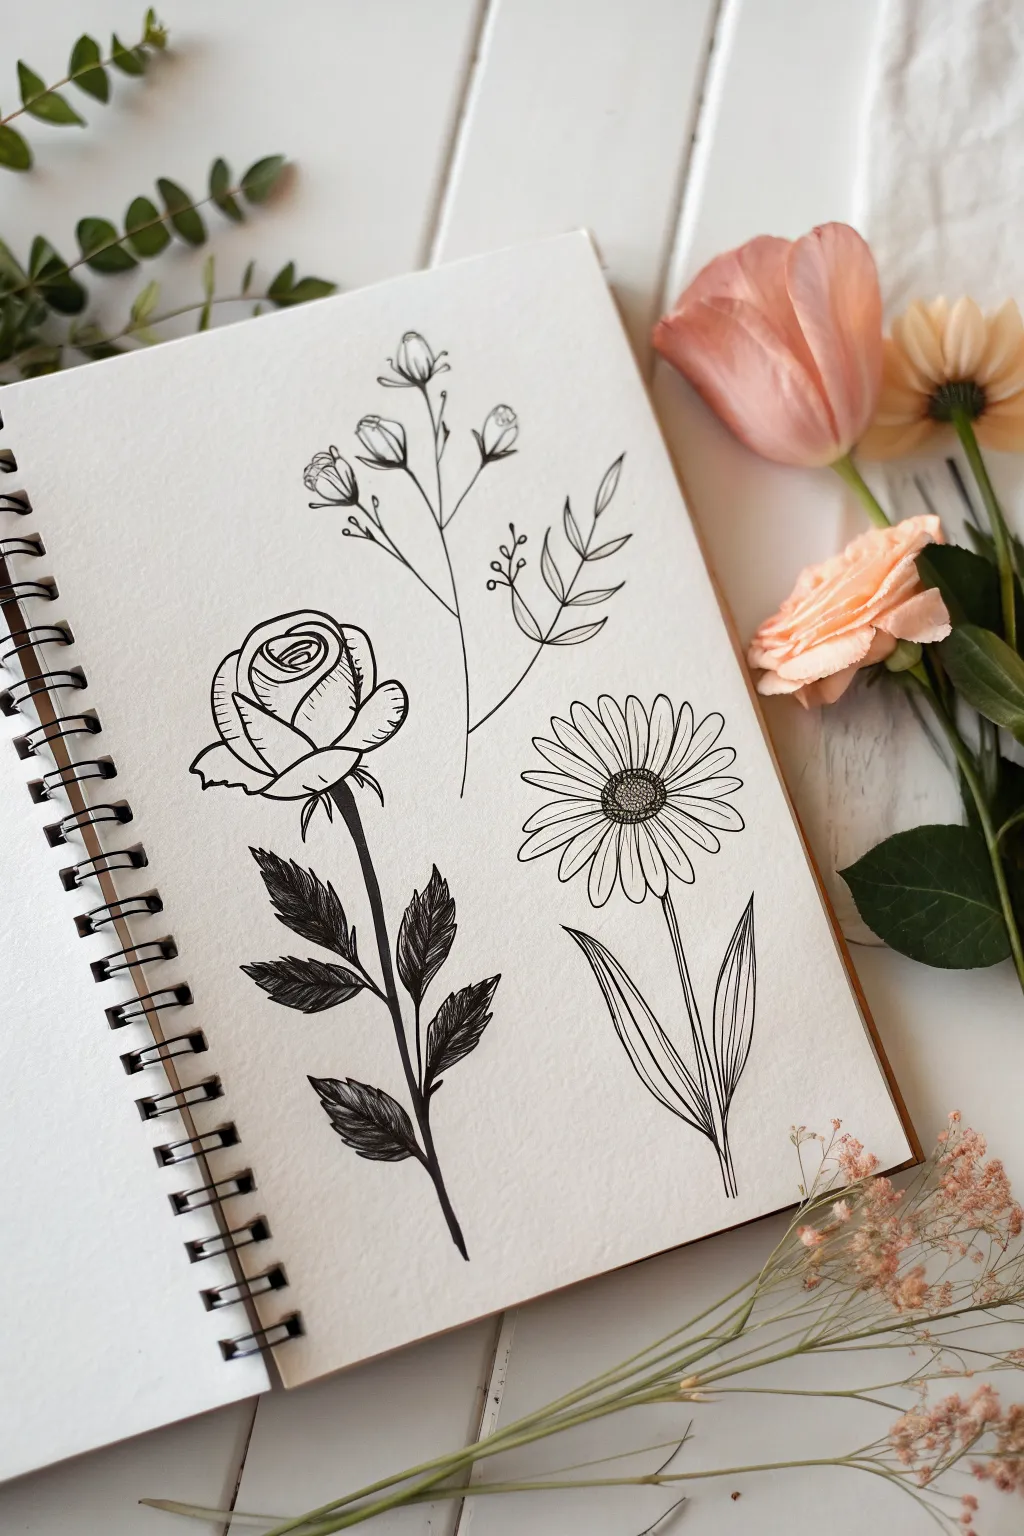
Capture the delicate beauty of botanical illustrations with this sketchbook study featuring three distinct flower varieties drawn in crisp black ink. This project focuses on clean linework and contrast, perfect for practicing different petal shapes and leaf textures.
Step-by-Step Guide
Materials
- Sketchbook with heavyweight paper (mixed media or smooth bristol)
- HB Graphite pencil
- Kneaded eraser
- Fine liner pens (sizes 01, 03, and 05)
- Black brush pen or broad marker
Step 1: Pencil Under-Sketching
-
Plan the composition:
Visualize the page layout. You’ll want the tall bud branch in the center-top, the rose on the bottom-left, and the daisy on the bottom-right. Lightly mark the stem lines for each to establish flow and spacing. -
Sketch the rose structure:
For the left flower, start with a loose spiral for the center of the rose. Draw a U-shape underneath it for the cup, and sketch overlapping, curved triangles radiating outward to suggest unfolding petals. -
Outline the wild branch:
In the upper center, sketch a main vertical stem that splits into smaller offshoots. Draw small teardrop shapes for the closed buds at the tips and simple, pointed ovals for the leaves on the lower right branch. -
Draft the daisy:
On the bottom right, draw an oval for the flower center. Sketch long, narrow petals radiating outward. Don’t worry about perfect symmetry; natural variation looks better.
Step 2: Inking the Rose
-
Define the rose center:
Using an 03 fine liner, trace over your spiral sketch. Use slightly broken lines rather than a continuous stroke to make the petals look soft and organic. -
Add petal details:
Outline the outer petals with the same pen. Add tiny, curved hatching lines on the inner curves of the petals to suggest shadow and depth. -
Draw the rose stem:
Draw the stem extending downward. Where the leaves attach, thicken the connection point slightly. -
Fill the rose leaves:
This is a high-contrast element. Outline the serrated rose leaves with your 03 pen. Instead of just outlining, use a brush pen or an 05 pen to densely hatch or fill the leaves dark, leaving tiny slivers of white for veins.
Fixing Wobbly Lines
If a stem line goes crooked, don’t restart. Thicken the line slightly to hide the wobble, or draw a second leaf or thorn over the mistake to cover it naturally.
Step 3: Inking the Wild Branch
-
Trace delicate stems:
Switch to your finest pen (01) for the upper middle branch. Keep the lines very thin and steady. -
Detail the buds:
Ink the small bud heads. Add three or four vertical lines inside each bud to show the separation of the sepals. -
Ink the simple leaves:
For the leafy section of this branch, outline the leaves simply. Draw a single center vein line in each, keeping them open and airy compared to the heavy rose leaves.
Add a Color Wash
Using watercolor, add a very loose, pale pink wash over the rose and a sheer yellow over the daisy. Let the color bleed outside the lines for an artistic look.
Step 4: Inking the Daisy
-
Texture the center:
Use the 01 pen to stipple (dot) the center of the daisy. Pack the dots tightly at the bottom edge for shadow and simpler circles near the top for highlights. -
Outline the petals:
Draw the long petals with the 03 pen. Add a single, quick flick line at the base of each petal (near the center) to show the crease where it attaches. -
Draw the leaves:
Sketch the long, lance-shaped leaves at the bottom. Draw multiple parallel veins running the length of the leaf to give it a ribbed texture.
Step 5: Final Touches
-
Erase pencil lines:
Wait until the ink is completely dry—I usually give it at least five full minutes to prevent smearing. Gently erase all graphite marks with a kneaded eraser. -
Evaluate contrast:
Look at the overall balance. If the rose leaves feel too heavy, you might thicken the outer line of the daisy slightly to balance the visual weight across the page.
Now you have a beautiful botanical study page ready for more details or colors
Mixed Flower Pattern Doodle Page
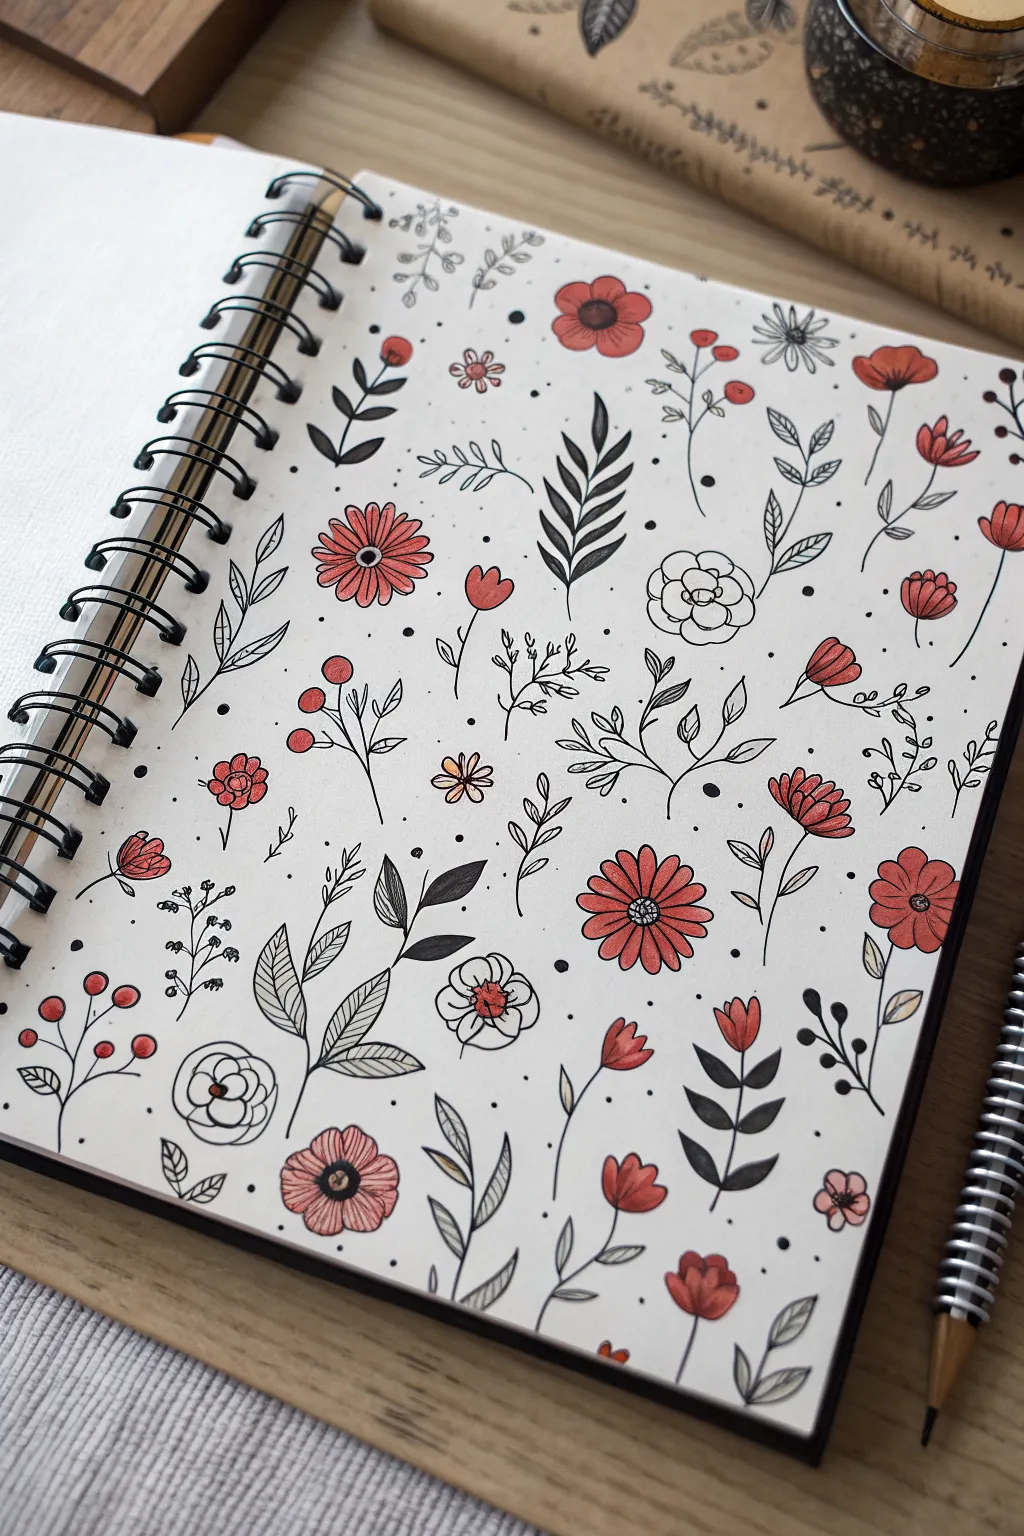
Fill an entire sketchbook page with this charming, scattered floral pattern that mixes black ink line work with pops of muted red. This project is perfect for practicing different flower shapes and creating a cohesive, wallpaper-style design without needing complex skills.
Detailed Instructions
Materials
- Acid-free sketchbook or drawing paper
- Fine liner pens (0.3mm and 0.5mm, black)
- Colored pencils or markers (muted red/coral)
- Pencil (HB or 2H for sketching)
- Kneaded eraser
Step 1: Planning the Layout
-
Establish the flow:
Visualize the page as a single canvas. The goal isn’t to draw lines or rows, but to scatter elements randomly. Lightly sketch a few small circles with your pencil across the page to mark where your largest main flowers will go, ensuring they are spaced far apart. -
Add secondary elements:
In the spaces between your main flower circles, lightly sketch direction lines for leaves and stems. Rotate your paper occasionally so the stems point in different directions, preventing the pattern from looking too stiff or uniform.
Spacing Pro-Tip
Work in a triangle formation. Draw three main flowers in a triangle layout first, then fill the space between them. Move to a new area and repeat to ensure even coverage.
Step 2: Drawing the Flowers
-
Inking the daisy shapes:
Start with the medium-sized, multi-petaled flowers (resembling daisies or zinnias). Draw a small center circle, then surround it with two layers of radiating petals using your fine liner. Don’t worry about perfect symmetry; slight wobbles add charm. -
Creating the simple blooms:
Locate the smaller circular guides you made. Draw simple five-petal flowers here. For the petals, start from the center and loop outwards and back in, keeping them rounded and open. -
Adding tulip shapes:
Draw several tulip-style blooms. These are essentially U-shapes with a jagged or wavy top line to suggest closed petals. Add a simple curved stem extending downward from the base of each. -
Drawing the side-view flowers:
Create variety by drawing ‘fan’ shaped flowers. These look like half-circles with petals radiating upward, sitting on a small cup-like base (sepal) attached to a stem. -
Sketching the poppies:
Include a few poppy-inspired shapes. Draw a loose, slightly wavy oval for the main petal, and tuck a smaller petal shape behind it. These should feel delicate and airy.
Step 3: Leaf and Filler Details
-
Solid black leaves:
Around some of the larger flowers, draw leaf shapes that are completely filled in with black ink. This high contrast anchors the page visually. Use a slightly thicker pen if you have one to make filling easier. -
Simple line leaves:
For the tulip and poppy stems, add thin, elegant leaves. Draw a simple center vein line, then outline the leaf shape around it, keeping the lines crisp and unconnected to the filling. -
Fern-style greenery:
Draw single stems with many small, repeating tear-drop shapes along both sides. I find these look best when they have a slight curve, as if swaying in the wind. -
Vines and sprigs:
Fill the larger empty gaps with sprigs. Draw a main stem that branches into two or three smaller lines, topping each with a tiny trio of leaves or dots.
Vintage Look
Use tan or kraft paper instead of white. The black ink will pop, and you can use a white gel pen to add highlights to the red petals for a dimensional, retro effect.
Step 4: Color and Final Touches
-
Choosing the palette:
Select a muted red or coral colored pencil. The beauty of this design lies in its limited palette, so stick to just this one color family plus black. -
Coloring the petals:
Gently shade the petals of your daisy, tulip, and five-petal flowers. Apply more pressure near the center of the flower and fade out slightly toward the edges for a soft, gradient effect. -
Adding colored accents:
Don’t color everything. Leave the white or outline-only flowers (like the roses) completely uncolored for balance. Color only the small berries or buds on your filler sprigs. -
The dot confetti:
Look for awkward white spaces that feel too empty. Using your finest pen, add tiny black dots (stippling) in clusters of two or three. This acts like confetti to tie the whole composition together. -
Clean up:
Wait at least 15 minutes to ensure the ink is totally dry, especially if you used a heavy flow pen for the leaves. Gently erase any remaining pencil guidelines with your kneaded eraser.
You now have a beautifully patterned page that looks complex but was built one simple doodle at a time


Have a question or want to share your own experience? I'd love to hear from you in the comments below!