When you’re hunting for fish painting images ideas, the best ones make you feel that swooshy underwater motion and those punchy, shiny colors right away. I pulled together a mix of classic koi fish and tropical fish looks plus some playful twists, so you can pick what fits your mood and skill level.
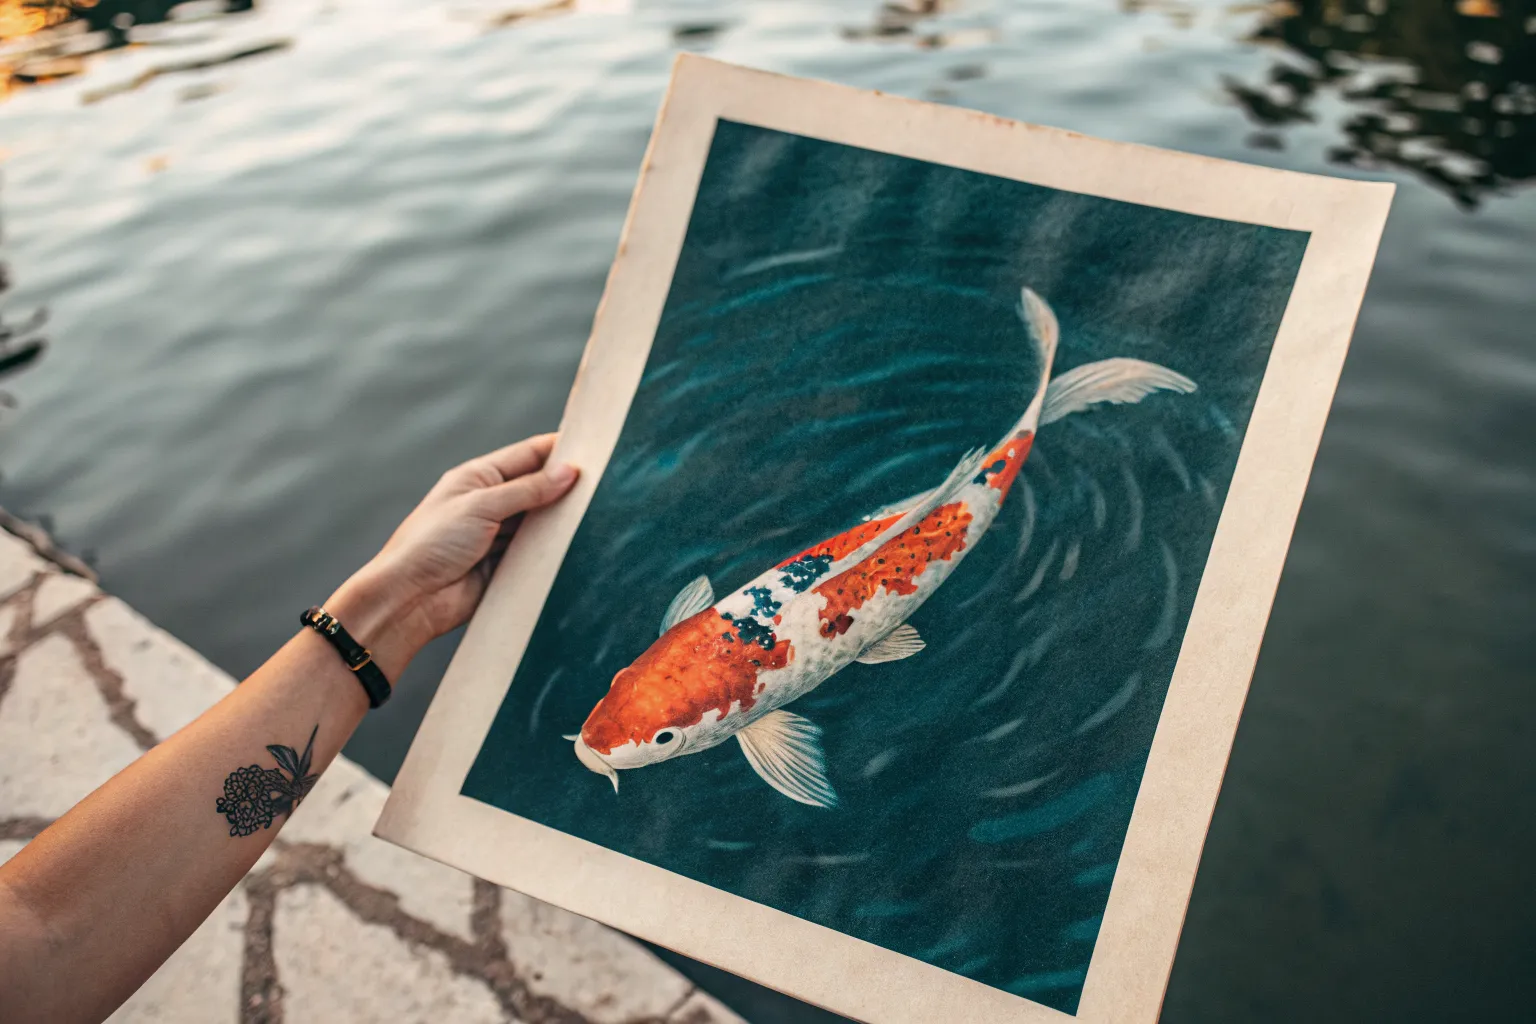
Top-Down Koi Pond View
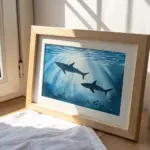
This peaceful watercolor project captures the graceful movement of koi swimming in deep blue water. You will learn to layer rich washes for the pond and preserve delicate whites for the fish, creating a calming piece of art perfect for framing.
Step-by-Step
Materials
- Cold press watercolor paper (300 gsm)
- Watercolor paints (Indigo, Phthalo Blue, Orange, vermilion, Paynes Gray, Sap Green)
- Masking fluid
- Round brushes (sizes 2, 6, and 10)
- Pencil and eraser
- Palette for mixing
- Jar of clean water
- White gouache or gel pen (optional for highlights)
Step 1: Sketching and Masking
-
Draft the composition:
Begin by lightly sketching the outline of two curved koi fish swimming in a circular motion. Add three large lily pads at the corners and a small lotus bud near the bottom. -
Mark the water ripples:
Draw faint, concentric circular lines around the fish to indicate where the water ripples will be lighter. These don’t need to be perfect circles; organic curves look more natural. -
Protect the whites:
Shake your masking fluid well. Using an old brush or a silicon applicator, apply masking fluid over the entire body of both fish, the lily pads, and the flower. This step is crucial so you can paint the dark water freely. -
Mask the ripples:
Carefully paint thin lines of masking fluid along your ripple sketches. Vary the thickness slightly to make the water movement look dynamic. Let the fluid dry completely before touching the paper.
Clean Edges Only
If your masking fluid tears the paper upon removal, your paper was likely still damp or the fluid was old. Ensure paper is 100% dry and remove fluid gently.
Step 2: Painting the Deep Water
-
Mix the water color:
Create a rich, deep blue using a mix of Indigo and Phthalo Blue. I like to add a tiny touch of Green to give it that murky pond depth. -
Apply the first wash:
Paint the entire background area, going right over the masked shapes. Use a large brush (size 10) and plenty of water to ensure the wash is even. It will look messy over the mask, but don’t worry. -
Deepen the shadows:
While the paper is still slightly damp, drop in more concentrated Indigo or Paynes Gray into the corners and around where the fish bodies would be to create depth. -
Let it dry completely:
Wait until the paper is bone dry. If you touch it and it feels cool, it’s not ready. Patience here prevents the paper from tearing later. -
Remove the mask:
Gently rub your finger or a rubber cement pickup tool over the masking fluid to peel it away, revealing the pristine white paper underneath.
Metallic Magic
Mix a tiny amount of gold watercolor or metallic powder into your orange paint for the fish scales. It creates a subtle shimmer that mimics real fish scales.
Step 3: Bringing the Koi to Life
-
Paint the base shadows:
Mix a very watery grey using a dot of Paynes Gray and lots of water. Lightly shade the sides of the fish bodies and fins to give them roundness, keeping the tops of their backs white. -
Add the orange markings:
Using a vibrant Orange or Vermilion, paint the classic koi patterns. Drop the color onto the fish’s back and head, letting it bleed purely into the white areas or slightly overlapping your grey shading. -
Detail the fins:
Switch to your smallest brush (size 2). Use a slightly darker grey mix to paint fine lines on the tail and pectoral fins to suggest the delicate bones. -
Paint the eyes:
Use concentrated black or Indigo to paint the small, round eyes on the sides of the head. Leave a tiny speck of white paper for a highlight, or add it later with white gel pen.
Step 4: Plants and Final Touches
-
Color the lily pads:
Mix Sap Green with a little yellow for a fresh leaf color. Paint the lily pads, keeping the wash slightly uneven to suggest texture. -
Add leaf veins:
Once the green is dry, use a fine liner or your small brush with a lighter green (or white gouache) to draw the radiating veins on the lily pads. -
Paint the lotus bud:
Use a soft pink or diluted red for the small flower bud near the bottom, blending it gently so the tips of the petals are darker. -
Refine the ripples:
The white lines left by the mask might look too stark. Soften some of the edges with a clean, damp brush to make them look like natural light reflections on water. -
Add subtle underwater plants:
Using a diluted blue-green, paint faint, shadowy reed shapes in the background water. These should look transparent and distant, not sharp. -
Final assessment:
Step back and see if the water needs more depth. You can glaze a very thin layer of blue over the whole background (avoiding the fish) if the water looks too pale.
Once dry, frame your pond scene to bring a moment of tranquility to any room.

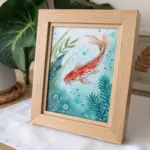
Single Koi With Bold Patterns
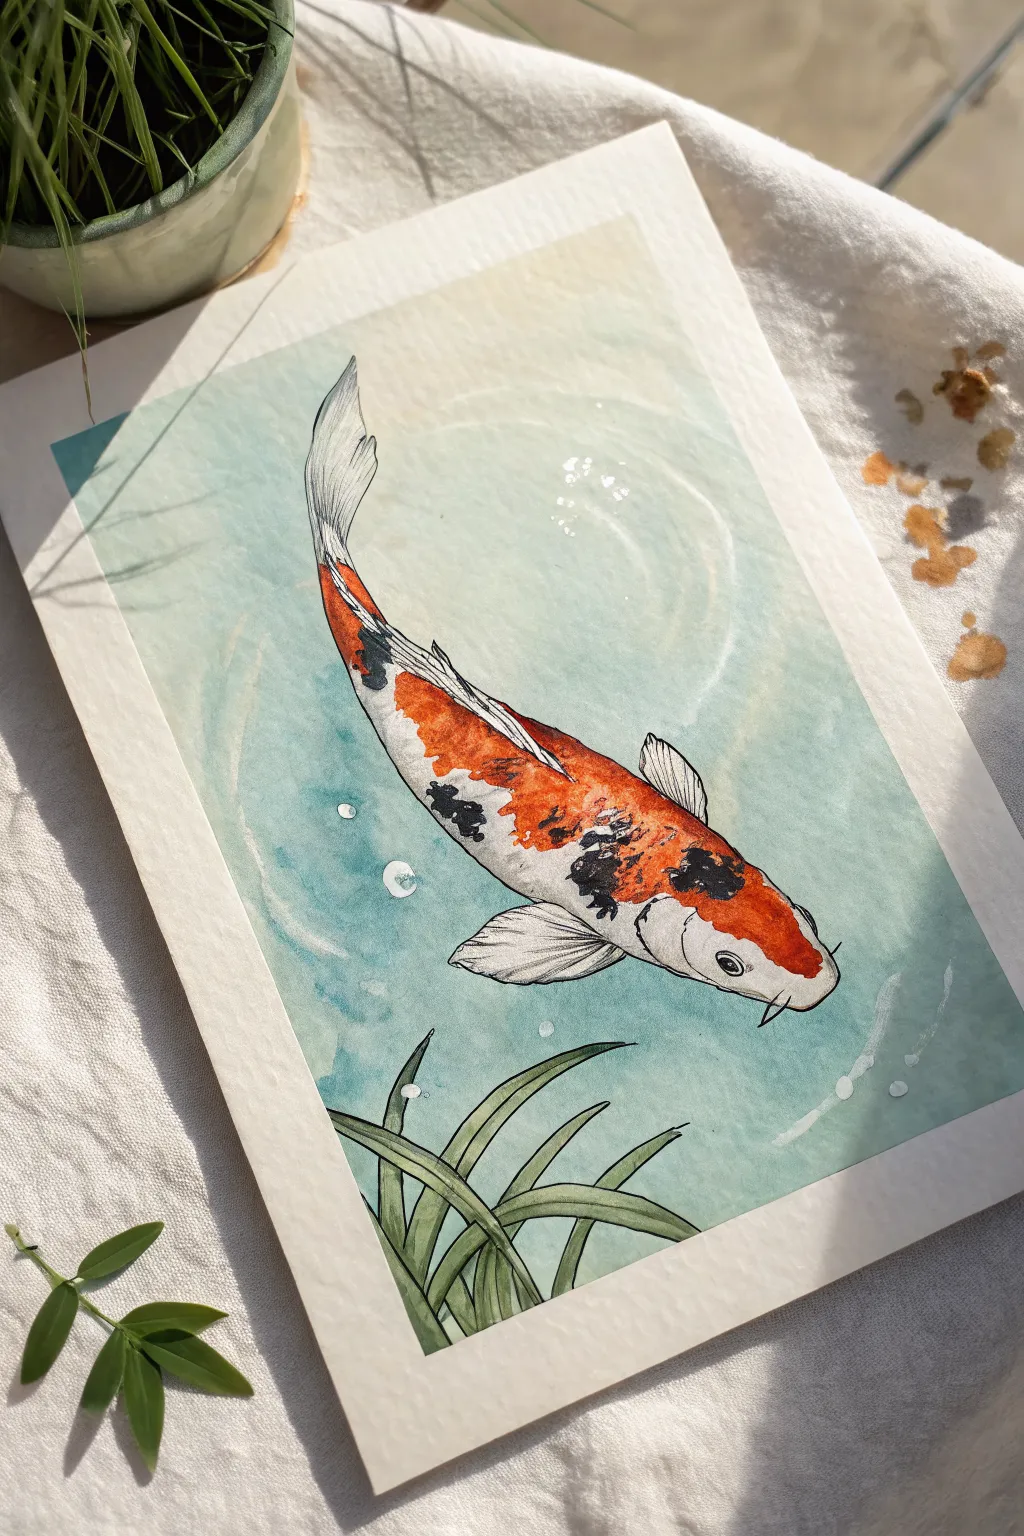
Capture the graceful movement of a koi fish with this mixed-media project that combines the fluidity of watercolor with the precision of fine liner ink. The result is a striking illustration featuring bold patterns set against a serene, sun-dappled pond.
Step-by-Step Tutorial
Materials
- Cold press watercolor paper (approx. 5×7 inches)
- Waterproof fine liner pens (0.1mm and 0.3mm)
- Watercolor paints (Vermilion, Lamp Black, Phthalo Blue, Sap Green)
- Small round watercolor brush (size 2 or 4)
- White gouache or white gel pen
- Pencil (HB or H)
- Kneaded eraser
- Masking tape
Step 1: Sketching the Composition
-
Prepare the workspace:
Begin by taping down all four edges of your watercolor paper to a board. This prevents warping when we add the water washes later. -
Draft the fish outline:
Using your pencil lightly, sketch a long, curved teardrop shape diagonally across the paper to represent the koi’s body. The head should point toward the bottom right. -
Define the fins and tail:
Add the sweeping tail fin at the top left, giving it a playful curve. Sketch the pectoral fins on the sides and the dorsal fin along the back spine. -
Mark the patterns:
Lightly outline the distinct patches where the orange and black colors will go. Leave generous areas blank for the white parts of the koi. -
Sketch the environment:
At the very bottom left corner, draw a few long, sweeping blades of grass curving upward into the scene. These help frame the subject.
Tip: Keep it Loose
Don’t ink every single pencil line perfectly. Broken lines on the fins and scales often look more organic and allow the painting to ‘breathe’.
Step 2: Applying Watercolor Washes
-
Paint the water background:
Mix a very diluted wash of Phthalo Blue with plenty of water. Paint around the fish, covering the background. While it’s wet, drop in hints of green near the bottom for depth. -
Base layer for the fish:
Once the background is dry, mix a bright Vermilion orange. Fill in the specific patches you marked earlier, varying the intensity by adding more water in some spots for a natural look. -
Adding the black spots:
Use Lamp Black to paint the dark patches on the fish. You can let some black touch the wet orange edges slightly for a soft bleed, or wait for the orange to dry for crisp lines. -
Painting the grass:
Mix Sap Green with a touch of blue. Carefully fill in the blades of grass at the bottom, using the tip of your brush to keep the ends sharp. -
Shadows and shading:
Mix a very faint grey wash. Add subtle shading to the white parts of the fish’s body, particularly under the belly and near the fins, to give it roundness and volume.
Troubleshooting: Bloom Marks
If water blossoms create unwanted cauliflower edges in your background, wait for it to fully dry, then gently scrub the edge with a damp stiff brush to soften it.
Step 3: Inking and Details
-
Outline the body:
Ensure the paint is completely dry. Use a 0.3mm waterproof pen to trace the main outline of the fish. Keep your line weight somewhat loose rather than rigid. -
Texture the fins:
Switch to a finer 0.1mm pen. Draw distinct lines radiating outward on the tail and pectoral fins to mimic their ribbed texture. -
Add scale details:
Using the fine pen, draw subtle ‘C’ shapes or broken lines along the upper back of the koi to suggest scales without overpowering the painting. -
Define the eye and whiskers:
Carefully ink the eye, leaving a tiny white dot for the highlight. Draw the two barbels (whiskers) near the mouth with confident, sweeping strokes. -
Enhance the grass:
Outline the blades of grass with the 0.3mm pen. Add a central vein line to the wider leaves for dimension. -
Create water movement:
Use white gouache or a white gel pen to add circular ripples around the fish and small bubbles in the water. This effect makes the fish look submerged. -
Final highlights:
Add a few tiny dots of white to the top of the wettest-looking scales or the black patches to make the fish look glistening and wet.
Peel off your tape carefully to reveal a crisp border around your serene aquatic scene

Underwater Side-Profile Fish Study
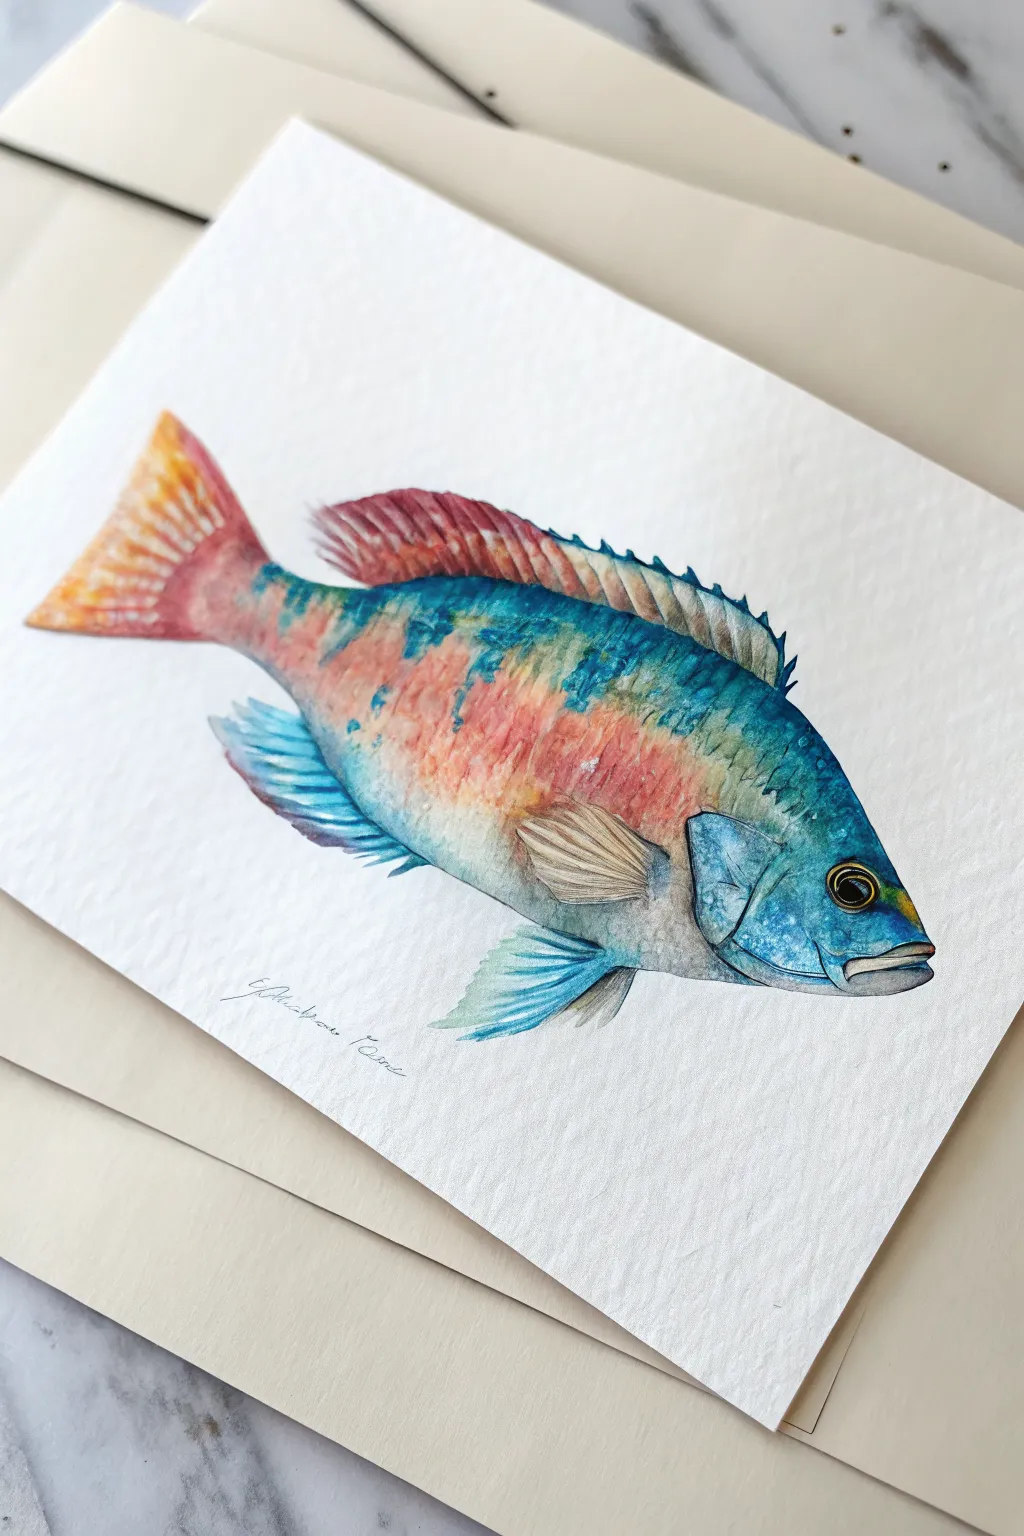
This project captures the iridescent beauty of a tropical fish using luminous watercolor washes on textured paper. You will learn to layer warm coral tones with cool ocean blues to create a stunning, realistic side-profile study.
Detailed Instructions
Materials
- Cold press watercolor paper (300 gsm/140 lb)
- Watercolor paints (Cerulean Blue, Prussian Blue, Cadmium Red, Yellow Ochre, Burnt Sienna, Payne’s Grey)
- Round watercolor brushes (Size 8 for washes, Size 2 for details)
- HB pencil for sketching
- Kneaded eraser
- Masking fluid (optional)
- Two jars of water
- Paper towels
Step 1: The Foundation Sketch
-
Outline the basic shape:
Start by drawing a gentle, elongated oval for the body. Add a triangle shape for the tail fin and mark the placement of the head. Keep your pencil pressure very light so the graphite won’t show through the transparent paint later. -
Refine the anatomy:
Carve out the specific details of the fish’s silhouette. Define the dorsal fin along the top with jagged, spiny edges, and sketch the pectoral and pelvic fins on the underside. Draw the gill cover curve and the eye placement near the front. -
Map color zones:
Very lightly sketch the internal boundaries where the colors shift—specifically the patches of orange on the mid-body and the blue sections on the head and back. Use a kneaded eraser to lift barely-there graphite lines until they are just visible enough to guide you.
Pro Tip: Texture Magic
Sprinkle a tiny pinch of salt onto the wet blue paint on the fish’s head. As it dries, the salt pushes the pigment away, creating a perfect natural texture for fish scales.
Step 2: Building the Colorful Underlayers
-
Wet-on-wet tail wash:
Wet the tail area with clean water. Drop in a mix of Cadmium Red and Yellow Ochre, letting the colors bleed naturally toward the body. While it’s damp, gently lift out stripes with a clean, thirsty brush to suggest fin rays. -
Create the warm body glow:
Moving to the center of the body, apply a wash of watered-down Cadmium Red mixed with a touch of Burnt Sienna. Keep the edges soft and irregular; this will be the warm underpainting that shines through the blue scales later. -
Lay in the cool tones:
Once the warm section is semi-dry, paint the head area with Cerulean Blue. Allow this blue to interact slightly with the edges of the orange section for a greenish transition, but try to keep the main colors distinct. -
Define the dorsal fin:
Paint the top dorsal fin with a gradient, starting with red at the base and moving to blue at the tips. Use the tip of your brush to drag the paint outward into sharp points.
Step 3: Adding Texture and Depth
-
Deepen the blues:
Mix a stronger Prussian Blue. Using a slightly dryer brush (damp, not dripping), dab this darker color onto the upper back and head to create a mottled, scale-like texture. Leave small gaps of the lighter blue showing through. -
Layering the scales:
On the mid-body where the blue meets the orange, use a stippling motion with your blue mix. This simulates the irregular pattern of scales transitioning over the warm underbelly color. -
Pectoral fin details:
Paint the side fin (pectoral fin) with a translucent wash of Yellow Ochre, then line the edges with blue. I like to keep this fin quite transparent to show it sits on top of the body scales. -
Shadowing the underbelly:
Run a wash of cool blue along the very bottom edge of the fish to create volume and roundness. This shadow should be soft and blend upward into the lighter belly color.
Level Up: Metallic Accent
Once the painting is completely dry, use a iridescent medium or metallic watercolor to glaze over the scales. This mimics the shimmering slime coat of a real fish.
Step 4: Fine Details and Definition
-
Paint the eye:
Using your smallest brush, paint the iris with a bright yellow or gold. Once dry, fill the pupil with solid black or concentrated Payne’s Grey, leaving a tiny spot of white paper for the highlight. -
Detail the mouth and gills:
Use a mix of Blue and Payne’s Grey to outline the separation of the gill cover and the line of the mouth. Keep these lines crisp to act as focal points. -
Enhance the fins:
Return to the tail and bottom fins with your rigger or size 2 brush. Paint thin, decisive lines following the direction of the bones to give the fins structure and movement. -
Final contrast check:
Look for areas that need more punch. Add concentrated Prussian Blue to the very top edge of the back and behind the dorsal fin spines to make the silhouette pop against the white paper.
Sign your work lightly in pencil near the bottom fin to complete your marine study

Tropical Fish Color Pop
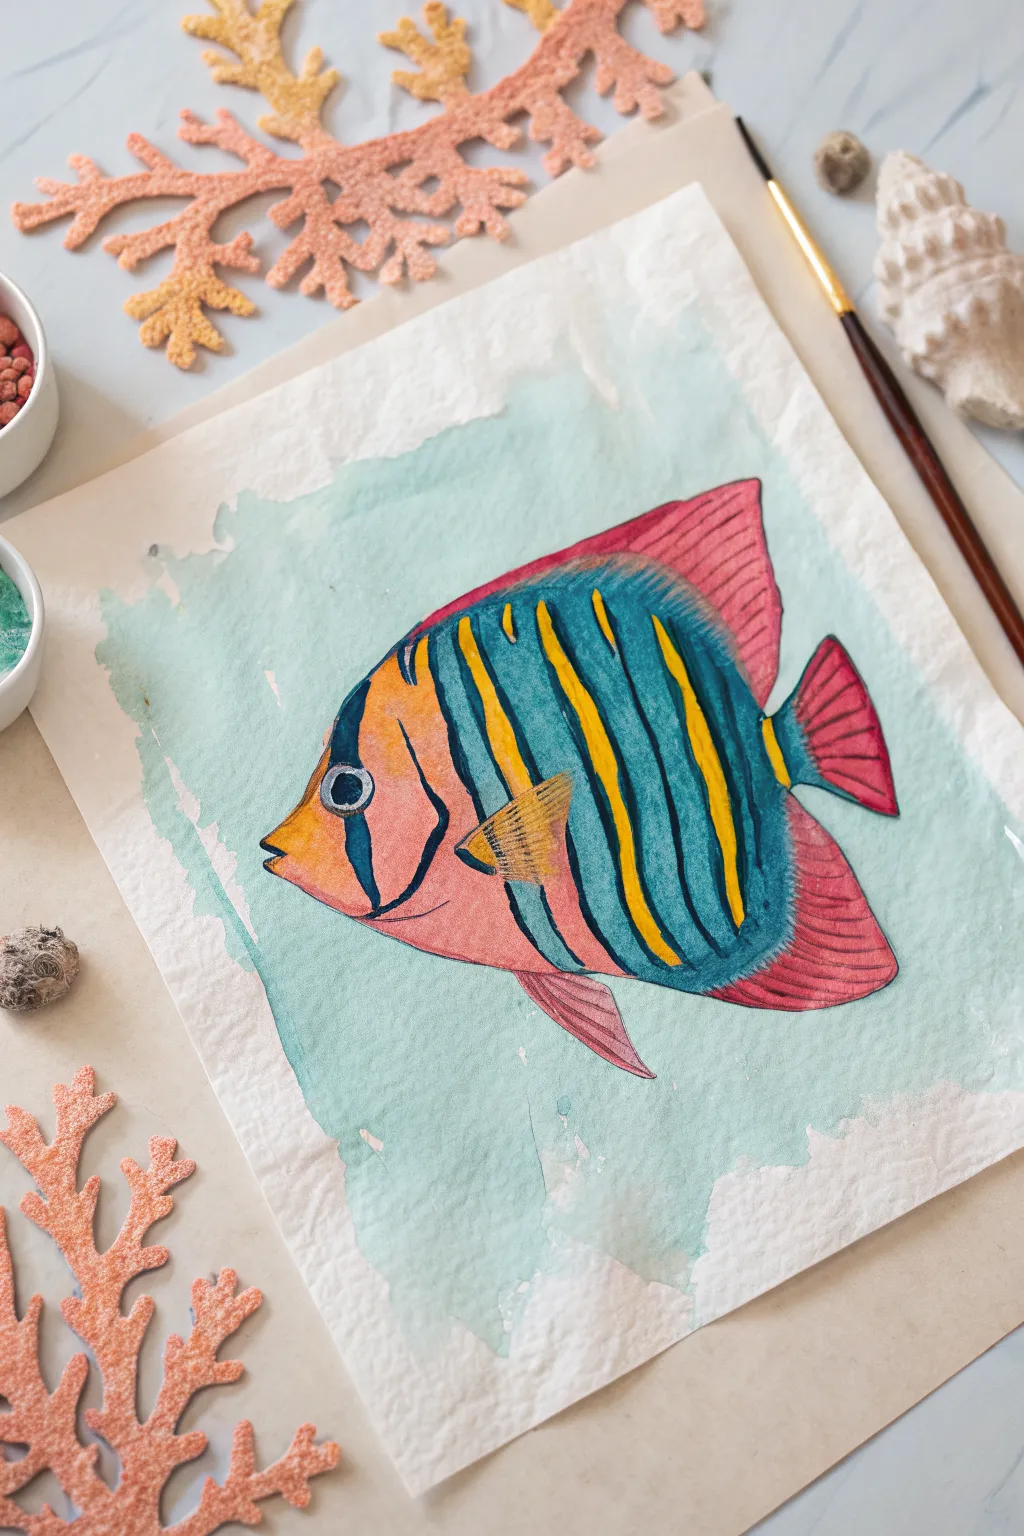
Capture the vibrant beauty of a coral reef with this striking watercolor project featuring a bold Regal Angelfish. The combination of a soft, textured teal wash background and the fish’s crisp, saturated stripes creates a stunning contrast that really makes the subject pop.
Step-by-Step Guide
Materials
- Cold press watercolor paper (300 gsm)
- Watercolor paints (teal, cadmium yellow, coral/salmon, magenta, payne’s gray)
- Round brushes (size 8 for washes, size 2 for details)
- Pencil (HB) and kneaded eraser
- Clean water and paper towels
- Masking tape (optional, to secure paper)
Step 1: Sketching and Background
-
Outline the fish shape:
Start by lightly sketching the oval body of the angelfish in the center of your paper. Add the triangular dorsal and anal fins extending from the top and bottom, and draft the smaller pectoral fin on the side. -
Detail the stripes:
Draw the signature vertical stripes along the body. Notice how they curve slightly with the fish’s form. Sketch the eye near the front and the small mouth. -
Lighten the pencil lines:
I like to gently roll a kneaded eraser over the entire sketch. This lifts excess graphite so your final painting looks clean and professional without heavy outlines showing through. -
Paint the background wash:
Mix a watery light teal or turquoise. Using your size 8 brush, paint a loose, uneven rectangle around the fish sketch, leaving the fish itself completely white. Don’t worry about straight edges; the jagged, watercolor edge adds character. -
Dry completely:
Let this background layer dry fully before moving on. If you paint the fish too soon, the colors will bleed into the damp background.
Step 2: Layering the Base Colors
-
Paint the yellow stripes:
Mix a bright cadmium yellow. Carefully fill in the specific stripes on the body that will remain yellow. Keep the paint fluid but controlled. -
Add the coral tones:
Mix a soft coral or salmon pink. Paint the face area (around the eye and mouth) and the lower belly area. Let this blend slightly into the areas where the blue stripes will go, or keep them separate for a crisp look. -
Fill the fins:
Using a magenta or deep pink wash, paint the dorsal (top) fin, anal (bottom) fin, and tail fin. Keep the wash fairly transparent so we can add details later. -
First teal layer:
Take a stronger mix of the teal used for the background and fill in the wide stripes on the body. Be very careful to paint around the yellow stripes you already placed.
Bleeding Colors?
If your stripes are running into each other, your paper is too wet. Wait for the yellow stripes to be bone-dry before painting the neighboring blue stripes.
Step 3: Adding Depth and Detail
-
Darken the body stripes:
Once the teal base is simple dry, go back over the blue body stripes with a more saturated teal or mix in a touch of blue to deepen it. This creates that rich ‘color pop’ effect. -
Add fin texture:
Switch to your size 2 detail brush. Using a slightly darker pink or red, paint thin, hair-like lines within the fins to simulate the spines and texture. -
Paint the pectoral fin:
Paint the small side fin with a translucent yellow-orange wash. Once dry, add tiny brown or black striations for detail. -
Define the eye:
Paint the pupil black, leaving a tiny speck of white paper for the highlight. Rim the eye with a dark grey or blue loop to make it stand out against the orange face. -
Add the dark outlines:
Use a dark Payne’s gray or a mix of blue and brown to paint the precise dark lines that separate the orange face from the body, and the stripes around the eye. -
Outline the body (optional):
If you want a more illustrative look, use the very tip of your small brush and a dark mix to add a very thin outline to the bottom belly curve of the fish. -
Final touches:
Assess the painting for contrast. If the yellow stripes look dull, add a second glaze of yellow. Ensure the background wash hasn’t encroached on your crisp edges.
Make it Shimmer
Once the painting is dry, use a metallic watercolor pan or a gold gel pen to add tiny highlights to the scales or fins for a magical underwater effect.
Step back and admire your colorful underwater creation once the paper is completely dry
BRUSH GUIDE
The Right Brush for Every Stroke
From clean lines to bold texture — master brush choice, stroke control, and essential techniques.
Explore the Full Guide
Betta Fish Flowing Fins
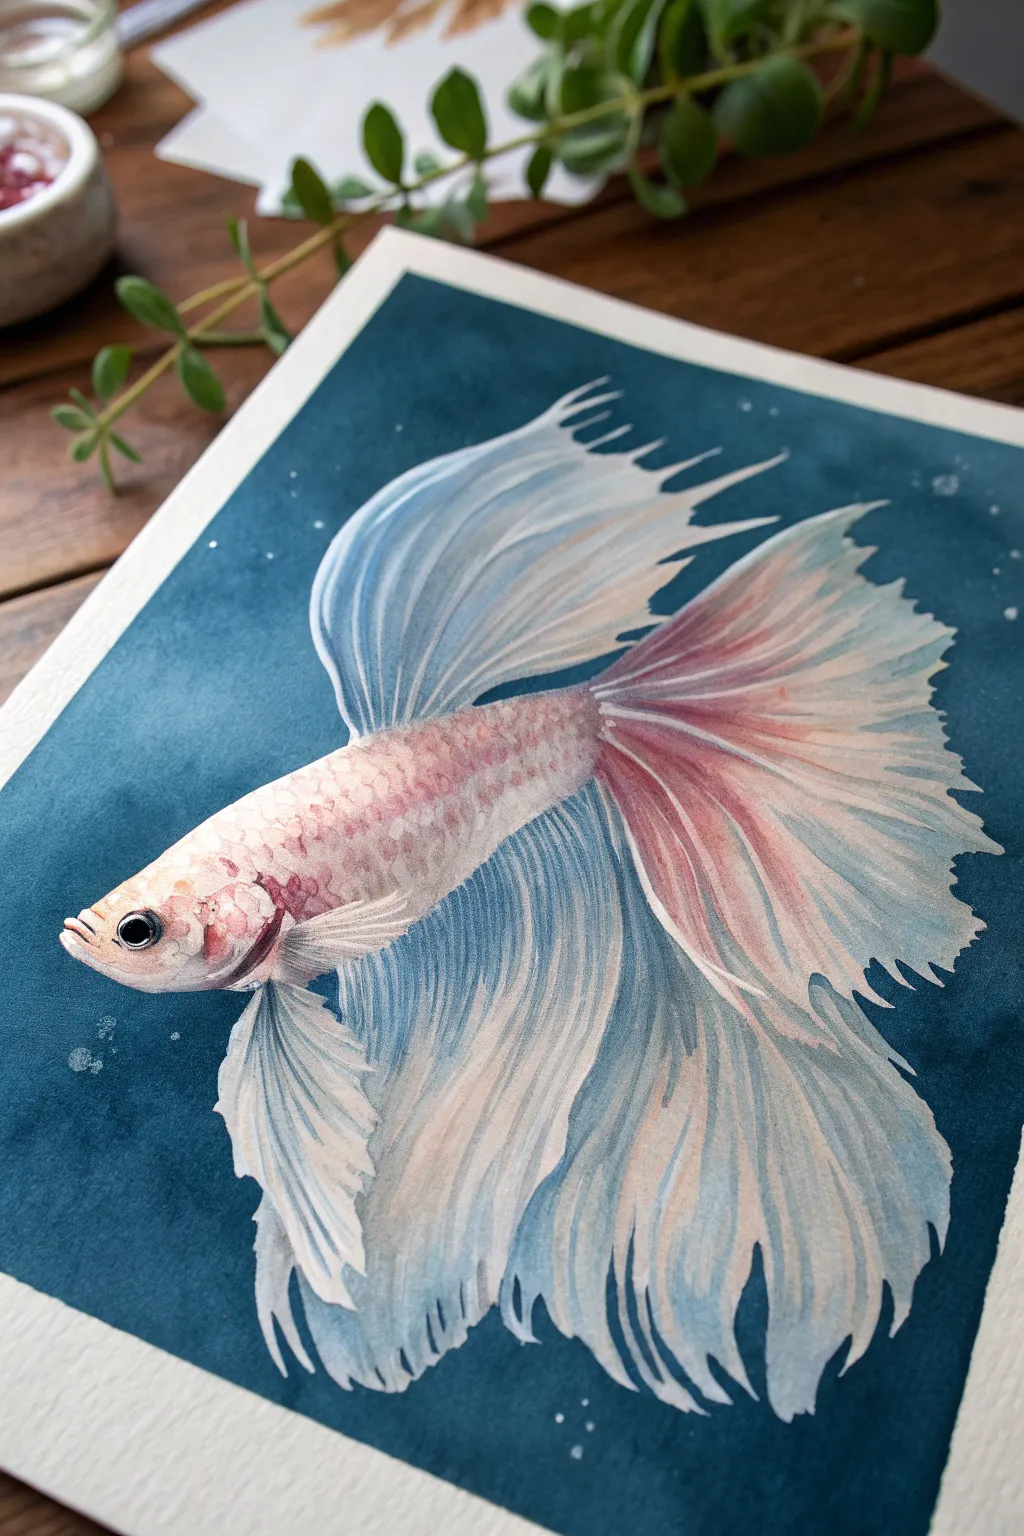
Capture the graceful movement of a white Betta fish with this elegant watercolor tutorial. The vibrant dark teal background makes the delicate, translucent fins pop, creating a stunning contrast filled with movement and light.
How-To Guide
Materials
- Cold-pressed watercolor paper (140lb/300gsm), taped down
- Watercolor paints: Indigo, Phthalo Blue, Alizarin Crimson, Burnt Sienna, Payne’s Grey
- White Gouache (for highlights)
- Masking fluid
- Round brushes: sizes 2, 6, and 10
- Pencil and eraser
- Two jars of water
- Paper towels
Step 1: Sketching and Masking
-
Draft the outline:
Lightly sketch the torpedo shape of the Betta’s body in the center of the paper using an HB pencil. Keep the lines faint so they don’t show through later. -
Add fin details:
Draw the sweeping curves of the dorsal, caudal, and anal fins. Focus on the flow; the fins should look like billowing fabric, spreading wide towards the edges. -
Define the face:
Sketch in the eye, mouth, and gill covers with precision, as these small details give the fish its character. -
Apply masking fluid:
Use an old brush or applicator tools to cover the entire fish shape with masking fluid. This is crucial for keeping the fish bright white while we paint the dark background. -
Let it dry:
Wait until the masking fluid is completely dry and rubbery to the touch before proceeding.
Keep It Clean
Coat your brush with bar soap before dipping it into masking fluid. This creates a barrier that makes cleaning the rubbery fluid off the bristles much easier.
Step 2: The Deep Background
-
Mix the background color:
Create a rich, deep teal by mixing Indigo with a touch of Phthalo Blue. You want a very saturated, dark wash. -
Wet-on-dry application:
Using your largest brush, apply the paint around the masked fish. Work quickly to avoid hard edges, keeping the wash consistent. -
Add texture:
While the background is still slightly damp, drop in concentrated touches of Indigo near the corners to create a vignette effect. -
Create speckles:
Flick clean water or faint white gouache onto the wet background for subtle ‘floating debris’ texture. -
Remove the mask:
Once the background is bone dry, gently rub away the masking fluid to reveal the pristine white paper shape underneath.
Add Metallic Flair
Mix iridescent medium or pearl watercolor into your final white highlights on the scales to mimic the natural shimmer of fish scales.
Step 3: Painting the Body and Scales
-
Base wash:
Wet the body area with clean water. Drop in very faint washes of Burnt Sienna mixed with Alizarin Crimson near the head and spine. -
Build scale texture:
Using a size 2 brush and a slightly darker mix of the pinkish-brown tone, paint small ‘U’ shapes to suggest scales along the top of the body. -
Detail the head:
Paint the gill area with a more concentrated red-brown mix, leaving small highlights. Fill in the eye with black, leaving a tiny white reflection dot.
Step 4: Flowing Fins
-
Base fin streaks:
With a damp size 6 brush, paint long, sweeping strokes of very pale blue-grey (watered down Payne’s Grey) following the curve of the fins. -
Add color gradients:
While the fins are damp, touch the base of the tail with your Alizarin Crimson mix, letting it bleed outward into the pale fins. -
Define the rays:
Switch to your smallest brush. Paint thin, delicate lines radiating from the body to the fin tips to represent the fin rays/spines. -
Create translucency:
I like to lift a little pigment between the rays using a thirsty, clean brush to make the fins look thinner and more transparent. -
Refine the edges:
Use a darker blue-grey mix to outline separate sections of the fins, giving them a layered look where they overlap. -
Final highlights:
Use white gouache on the very tips of the fins and scales to add sharpness and counteract any areas that got too dark.
Step back and admire the stark contrast between your deep ocean background and the delicate fish
School of Fish in Motion

Capture the fluid movement of marine life with this mesmerizing watercolor spiral featuring a gradient school of fish. Using a simple repetitive motif, you’ll build a dynamic composition that shifts beautifully from warm coral reds to deep ocean blues.
Step-by-Step
Materials
- High-quality watercolor paper (cold press, 300gsm)
- Watercolor or gouache paints (Deep Red, Salmon/Coral, Payne’s Grey, Prussian Blue)
- Round watercolor brushes (sizes 2 and 4)
- Pencil and eraser
- Compass
- Palette for mixing gradients
- Jar of clean water
- Paper towels
Step 1: Planning the Spiral
-
Find the center:
Begin by lightly marking the exact center of your watercolor paper with a pencil. This will be the anchor point for your entire spiral composition. -
Draw guide circles:
Using a compass, draw a very small circle in the center (about 1 inch diameter). Then, draw concentric circles moving outward, spacing them about 1.5 to 2 inches apart. These won’t be visible in the end but will help you maintain the spiral shape. -
Sketch the spiral path:
Lightly sketch a continuous spiral line connecting your circles, moving from the center outward. This line will act as the ‘spine’ that your fish will follow.
Step 2: Painting the Core
-
Mix your warm tones:
Prepare a palette with a gradient of warm colors. Start with a pale salmon or coral pink for the very center fish. -
Paint the central cluster:
Using your size 2 brush, paint the smallest fish in the dead center. These should be tiny, simple almond shapes, tightly packed and following the tightest curve of your spiral. -
Expand the spiral:
As you move slightly outward, darken your color to a richer coral. Paint the next loop of fish, making them marginally larger than the center ones. -
Refine the shape:
For each fish, use a simple two-stroke method: press the brush down to create the belly and lift as you pull back to create the tail. This keeps the shapes uniform.
Stamp It Out
Make a simple fish stamp from a carved eraser or cut potato. Use this to stamp the base shapes for perfect uniformity, then add tails with a brush later.
Step 3: Transitioning Colors
-
Introduce the blues:
As you reach the third loop of the spiral, mix a small amount of grey-blue into your coral paint. You want a muddy, transitional purple-grey for just a few fish to bridge the gap between warm and cool tones. -
Shift to light blue:
Clean your brush thoroughly. Mix a watery, pale blue-grey. Continue the spiral pattern, painting fish that drift alongside the red ones, creating an interlocking effect. -
Create the interlock:
Notice how the red and blue schools overlap in the artwork. Paint a few blue fish ‘swimming’ into the red zone, and a few red fish trailing into the blue zone for a natural blend. -
Deepen the blue:
As you move further out, switch to a pure Prussian Blue. These fish should be larger now (about 1 inch long) and more defined.
Metallic Magic
Mix a tiny bit of gold gouache or iridescent medium into your accent color. The fish will shimmer subtly when caught in the light.
Step 4: Refining the Outer School
-
Add deep red accents:
On the outer edge of the spiral, re-introduce your deep red. Paint a focused school of red fish on the left side of the composition to balance the warm center. -
Complete the circle:
Fill the rest of the outer spiral with your darkest navy blue. Ensure the fish at the very edge are pointing inwards or along the curve to keep the viewer’s eye moving in a circle. -
Add details:
Once the base shapes are dry, use the very tip of your size 2 brush or a fine liner to add tiny details. A small dot for an eye or a faint line for a fin brings them to life. -
Erase guides:
Wait until the painting is completely bone-dry. Gently erase your pencil spiral and circle guides so only the paint remains.
Now you have a dynamic seascape that draws the eye straight to the center of the storm

PENCIL GUIDE
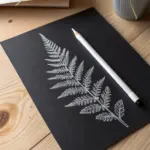
Understanding Pencil Grades from H to B
From first sketch to finished drawing — learn pencil grades, line control, and shading techniques.
Explore the Full Guide
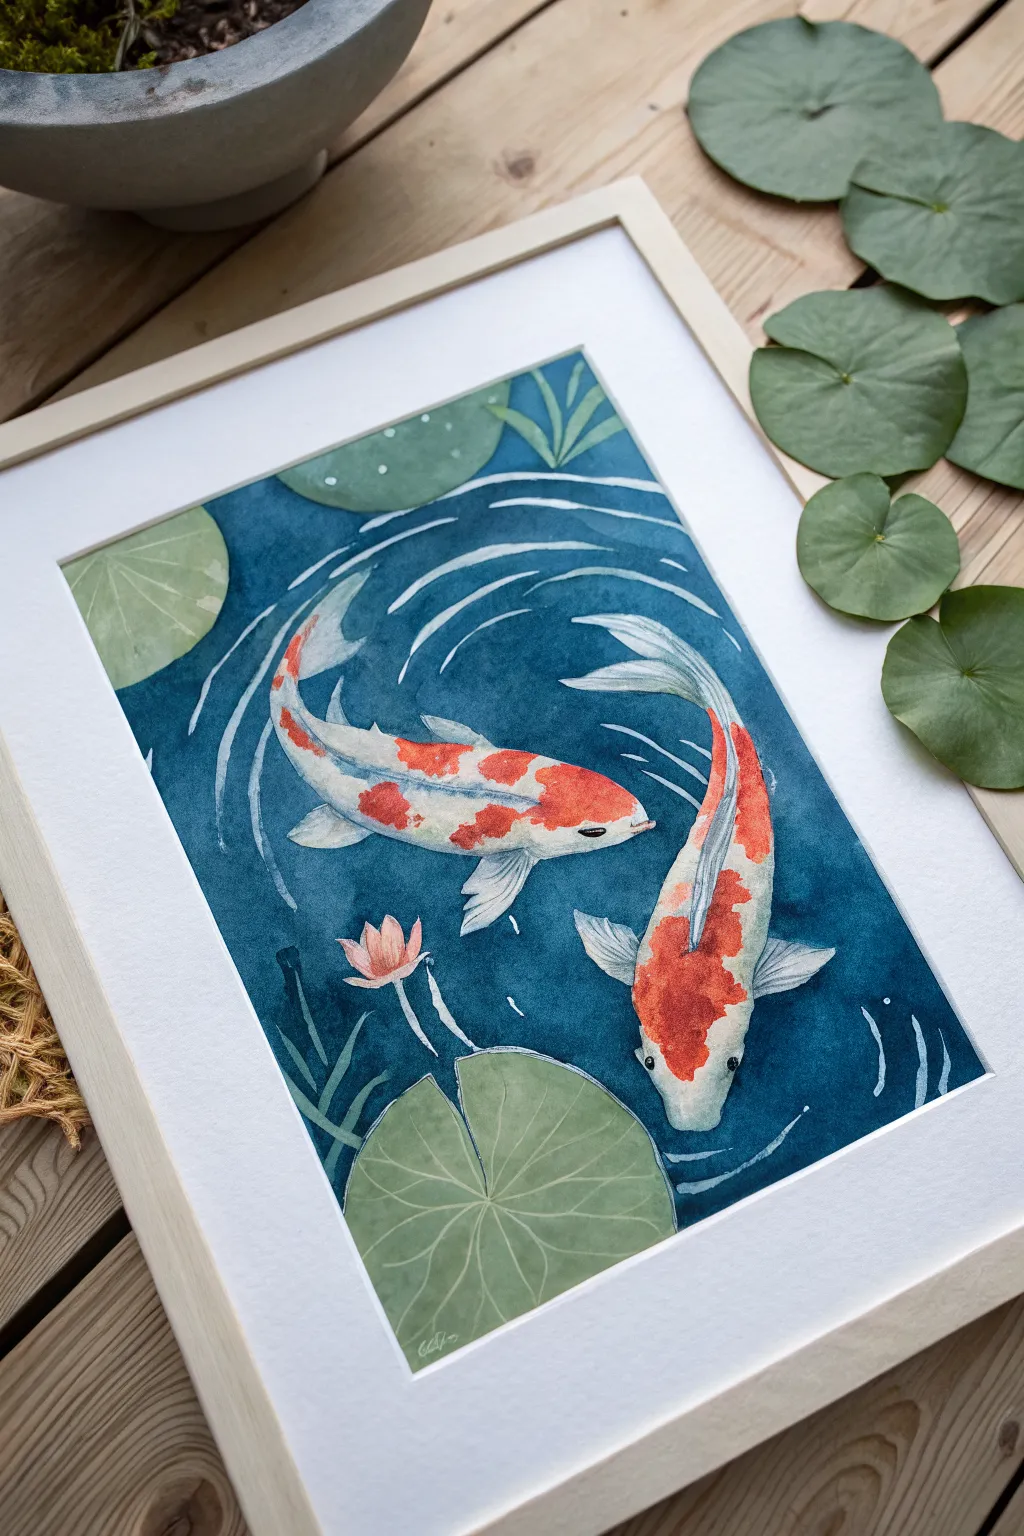
Koi and Lily Pads Composition
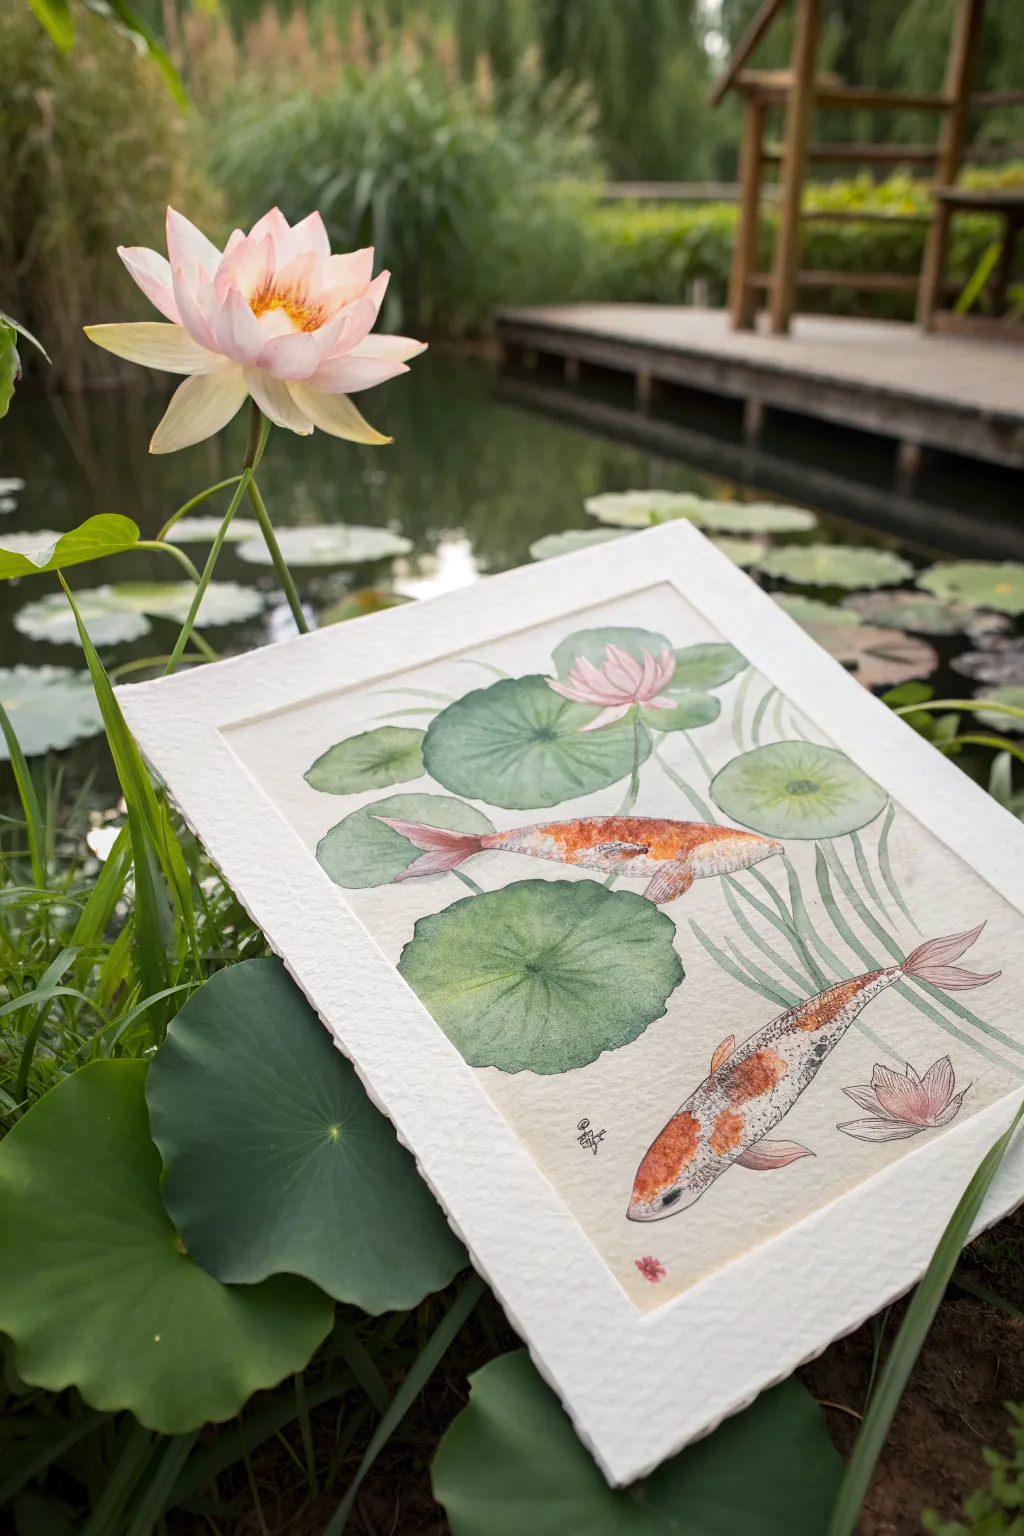
Capture the serenity of a garden pond with this delicate watercolor composition featuring graceful koi swimming amongst floating lily pads. This project combines soft washes for the botanical elements with finer, textured details for the fish scales, creating a balanced and peaceful scene.
Step-by-Step Guide
Materials
- Cold press watercolor paper (300 gsm)
- Watercolor paints (Sap Green, Hooker’s Green, Cadmium Orange, Burnt Sienna, Alizarin Crimson, Payne’s Grey)
- Round watercolor brushes (Size 8 for washes, Size 2 for details)
- Pencil (HB) and kneaded eraser
- Masking fluid (optional)
- Two jars of water
- Paper towels
- Palette for mixing
Step 1: Sketching and Preparation
-
Plan the composition:
Begin by lightly sketching the placement of your main elements. Draw two koi fish swimming in opposite directions to create a sense of movement. Position three to five large circular lily pads around them, leaving space for stems and lotus blooms. -
Refine the outlines:
Go back over your sketch to define the shapes. Add the delicate fins to the koi and slightly scallop the edges of the lily pads. Sketch in a few vertical stems rising from the bottom right to suggest underwater reeds. -
Lighten the lines:
Before painting, take your kneaded eraser and gently roll it over the entire drawing. You want the graphite lines to be barely visible so they don’t show through the transparent watercolor layers later.
Clean Edges Pro-Tip
Wait for sections to be bone-dry before painting adjacent areas. If a lily pad touches a fish, patience prevents colors from bleeding into a muddy mess.
Step 2: Painting the Flora
-
Base wash for lily pads:
Mix a watery Sap Green. Using your size 8 brush, fill in the lily pads with a wet-on-dry technique. Keep the wash uneven to suggest light and texture. -
Add depth to the leaves:
While the first layer is still slightly damp, drop in touches of Hooker’s Green or a mix of green and blue into the centers of the pads where the stem would attach. This creates a natural gradient. -
Detail the veins:
Once the green pads are fully dry, switch to your size 2 brush. Mix a slightly darker green and paint thin, radiating lines from the center of each pad to the outer edges to represent the veins. -
Paint the lotus flowers:
For the blooms, dilute Alizarin Crimson to a very pale pink. Paint the petals with quick, loose strokes, concentrating the color at the tips and leaving the base of the petals nearly white. -
Paint the reeds:
Using a mix of Sap Green and a touch of brown, paint the vertical reed lines in the background. Keep these strokes fluid and slightly translucent to push them visually behind the fish.
Level Up: Metallic Shimmer
Mix a tiny amount of gold watercolor or mica powder into your final orange layer on the koi scales. It catches the light just like real fish scales do.
Step 3: Bringing the Koi to Life
-
Underpainting the fish:
Wet the body of the first fish with clean water. Drop in a very dilute wash of Cadmium Orange for the colored patches and a warm, pale grey for the white areas to give them form. -
Build the orange tones:
Once the underpainting is tacky but not soaking wet, add more saturated Cadmium Orange and Burnt Sienna to the patterned areas. Let these colors bleed slightly for a soft, organic look. -
Define the fins:
Paint the tail and side fins with a translucent wash of pinkish-orange. I like to use the very tip of the brush to drag lines outward, mimicking the delicate spines of the fins. -
Add scale texture:
This is a key step for realism. Once the fish body is completely dry, mix a watery grey or brown. Use your smallest brush to paint tiny ‘U’ shapes or cross-hatching to suggest scales, focusing on the darker, shadowed areas. -
Paint the second fish:
Repeat the process for the second koi. Vary the pattern by making this one more spotted or giving it a different ratio of white to orange to distinguish it from the first. -
Add the eyes:
Use Payne’s Grey or a dark brown to paint the eyes. Leave a tiny speck of white unpainted paper (or add white gouache later) for a highlight, which instantly makes the fish look alive.
Step 4: Final Touches
-
Enhance contrast:
Evaluate your painting. If the lily pads look too flat, glaze a thin layer of blue-green over the shaded sides to deepen the color. -
Connect the elements:
Add very faint, horizontal washes of blue-grey around the fish and under the pads to suggest the water’s surface, but keep this minimal to maintain the airy feel. -
Sign your work:
Add your signature or a small red seal mark in the corner to complete the traditional aesthetic.
Now you have a serene aquatic scene that captures the gentle movement of garden life.
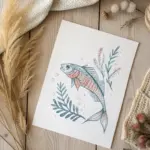
Minimal Fish Line Art With Wash
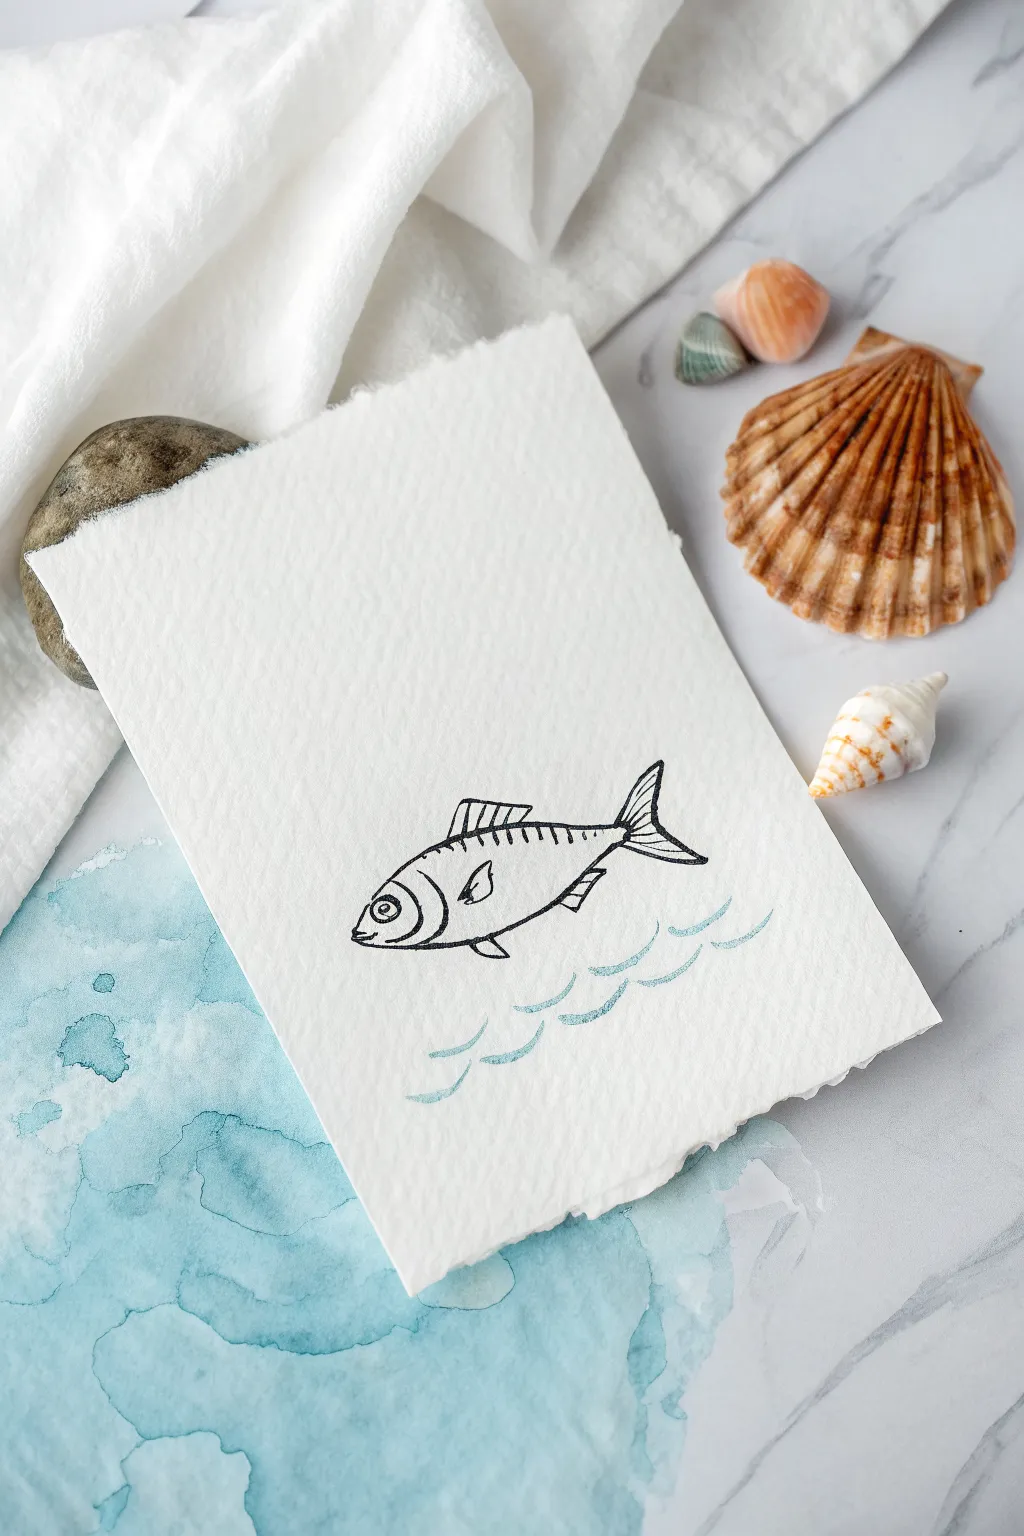
Capture the essence of the ocean with this charmingly simple mixed-media project. By combining crisp ink lines with soft watercolor accents on textured paper, you’ll create a piece that feels both artisanal and effortlessly coastal.
Step-by-Step
Materials
- Heavyweight cold-press watercolor paper (approx. 300gsm)
- Black waterproof fineliner pen (0.3mm or 0.5mm)
- Pencil (HB)
- Soft eraser
- Watercolor paints (Turquoise or Sea Blue)
- Small round watercolor brush (size 4 or 6)
- Deckle-edge ruler or straight edge (for tearing)
- Water cup and paper towel
Step 1: Preparing the Paper
-
Measure your size:
Begin by deciding on the size of your card. A standard 5×7 inch or A6 size works beautifully for this delicate design. -
Create the deckle edge:
Instead of cutting with scissors, place a ruler firmly against your cut line. Gently tear the watercolor paper upward against the ruler’s edge to create a soft, fibrous ‘deckle’ look. -
Flatten the paper:
If tearing the paper caused any curling, place it under a heavy book for a few minutes to ensure you have a perfectly flat surface for drawing.
Step 2: Drawing the Fish
-
Sketch the body shape:
Using your HB pencil strictly for guidelines, lightly sketch an elongated oval shape in the lower center of the paper. This will be the main body of the fish. -
Add the tail foundation:
At the right end of your oval, lightly sketch a triangle pointing outward to mark where the tail fin will go. -
Ink the outline:
Switch to your black waterproof fineliner. Start tracing the bottom curve of the fish, moving from the mouth area back toward the tail. -
Detail the head:
Draw a curved vertical line to separate the head from the body. Add a small circle for the eye with a tiny dot in the center for the pupil. -
Draw the mouth:
Create a small ‘V’ shape at the very front of the face for the mouth, giving the fish a slight, friendly expression. -
Add dorsal and pectoral fins:
Draw a spiky dorsal fin on the top of the back. Then, add a smaller, leaf-shaped pectoral fin on the side of the body. -
Create the tail fin:
Ink the tail using sharp, angular lines. Make sure the top point of the tail sweeps upward slightly. -
Refine the details:
Add vertical hatch lines inside the main body and the fins to suggest texture and scales. Keep these loose and sketchy rather than geometrically perfect. -
Erase pencil marks:
Wait at least five minutes to ensure the ink is totally dry, then gently erase your initial pencil guidelines.
Tip: Deckle Edge Trick
To get a softer torn edge, paint a line of clean water along your fold before tearing. The wet fibers separate much more easily and create a fuzzier, more vintage look.
Step 3: Adding the Ocean
-
Mix the wash:
Dilute a small amount of turquoise or sea blue watercolor paint with plenty of water. You want a very transparent, light tint. -
Paint the first wave:
Using the very tip of your round brush, paint a fragmented, wavy line just below the fish’s belly. -
Add lower waves:
Paint two more rows of wavy lines below the first one. Stagger the curves so they look organic, like ripples on the water’s surface. -
Check opacity:
If the blue looks too dark, quickly dab it with a clean paper towel to lift some pigment while it’s still wet. -
Dry completely:
Let the paint dry fully. The contrast between the sharp black ink and the soft blue wash is what gives this piece its character.
Troubleshooting: Smudged Ink
If your ink bleeds when you paint the waves near it, your pen isn’t waterproof. Test your pen on a scrap piece of paper with water first, or let the ink dry for 24 hours.
Display your finished artwork on a simple stand or frame it to bring a breath of fresh sea air to your space


Inky Fish Silhouettes Underwater
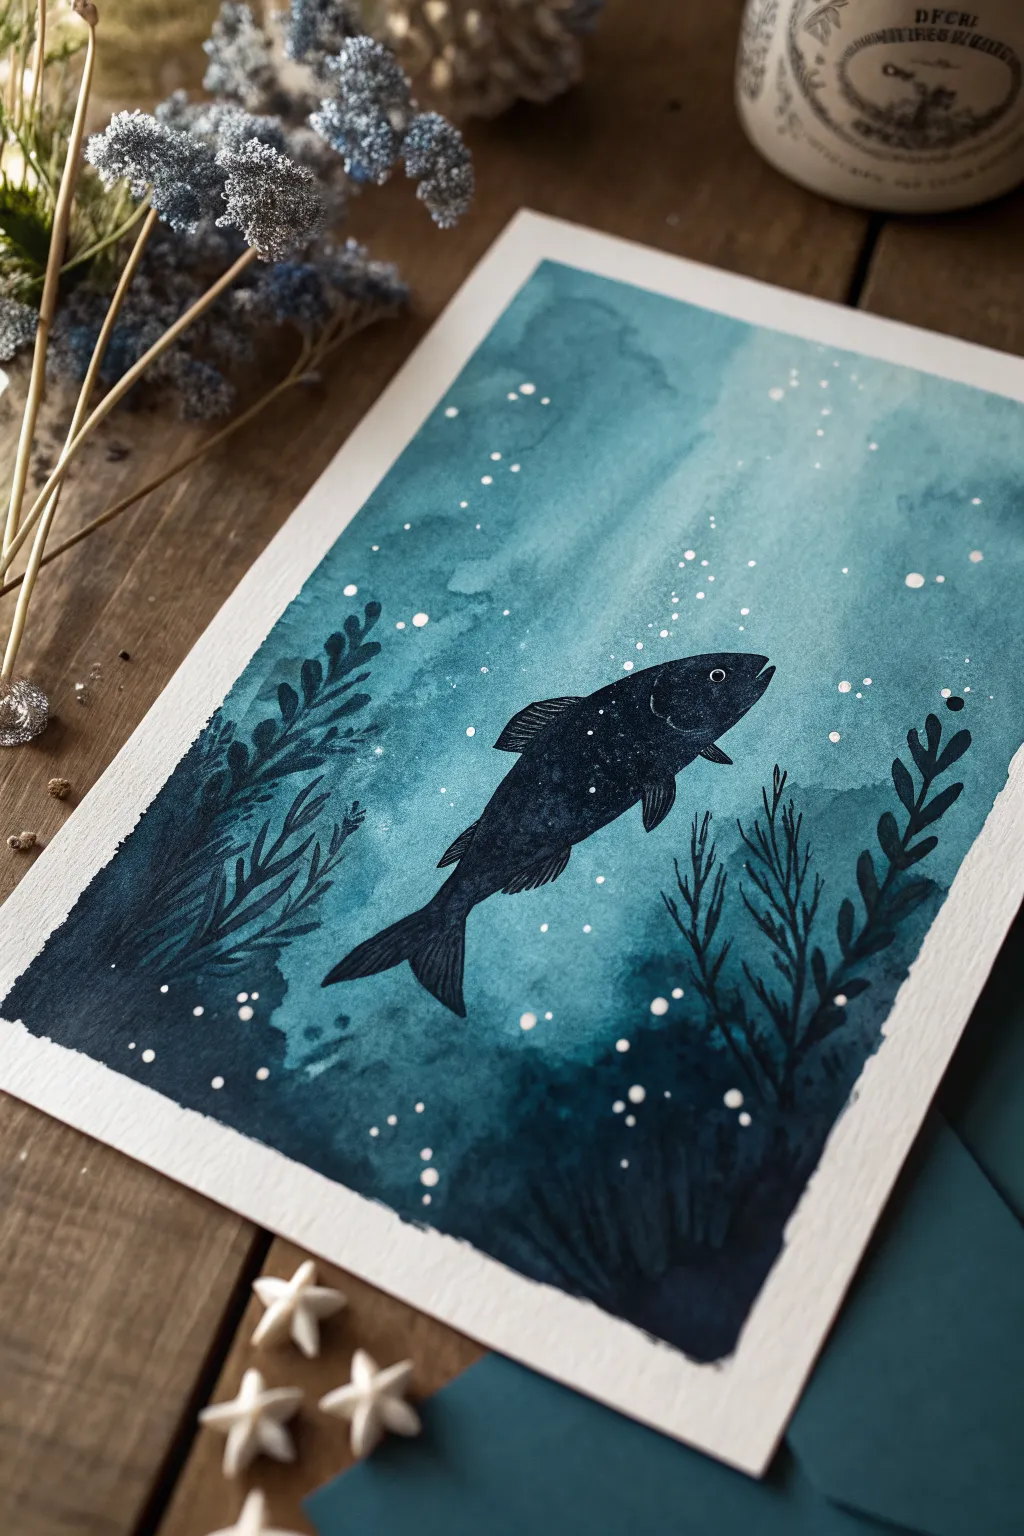
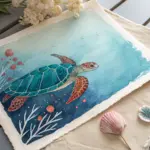
Capture the serene beauty of the ocean depths with this striking watercolor and ink project. By combining loose, watery washes with a crisp, dark silhouette, you’ll create a piece that feels both tranquil and dramatic.
How-To Guide
Materials
- Cold press watercolor paper (300 gsm)
- Masking tape
- Watercolor paints (Turquoise, Prussian Blue, Indigo)
- White gouache or white gel pen
- Black waterproof ink or black gouache
- Large flat wash brush
- Medium round brush (size 6 or 8)
- Fine liner brush (size 0 or 1)
- Pencil and eraser
- Paper towels
- Clean water jars
Step 1: Setting the Scene
-
Prep your surface:
Tape down all four edges of your watercolor paper to a sturdy board using masking tape. This prevents the paper from buckling under heavy washes and creates that clean white border shown in the final piece. -
Light sketch:
Very lightly sketch the outline of the fish in the center of the paper. You don’t need details like scales, just the overall shape and position of the fins. Add faint guidelines for where the seaweed will go on the sides. -
Wet-on-wet base:
Using your large flat brush, wet the entire paper with clean water. The paper should be glisten but not have puddles sitting on top. -
First gradient layer:
Load your brush with a watery mix of Turquoise. Start at the top of the paper and bring the color down, allowing it to fade slightly as you reach the bottom third of the page. -
Deepening the blues:
While the paper is still damp, drop in concentrated Prussian Blue into the top corners and along the bottom edge. Let these darker colors bloom naturally into the lighter turquoise center. -
Creating texture:
To get that mottled, underwater effect, dab a few spots of Indigo into the wet wash near the bottom. I sometimes tilt the board slightly to encourage organic drips and flows. -
Initial dry time:
Let this background layer dry completely. This is crucial—if the paper is cool to the touch, it’s still wet. Use a hairdryer on a low setting if you need to speed things up.
Bleeding Lines?
If your black silhouette bleeds into the blue, the background wasn’t dry enough. Let it dry longer next time, or use a hairdryer. Fix small bleeds with white gouache.
Step 2: The Dark Silhouette
-
Defining the outline:
Switch to your black ink or black gouache and a medium round brush. Carefully trace the outline of your fish sketch. Since the background is dry, you should get a crisp, sharp edge. -
Filling the form:
Fill in the entire body of the fish with solid black. Ensure the coverage is opaque; you may need a second coat if your ink looks streaky. -
Adding fins:
Use the fine liner brush to taper the ends of the fins and tail. Swift, confident strokes work best here to keep the tips sharp. -
Inking the flora:
Using a dark Indigo mixed with black (or pure black ink for high contrast), start painting the seaweed shapes on the left and right sides. Start from the bottom and stroke upward with a wavy motion. -
Varying the opacity:
For the seaweed in the background, dilute your dark mix slightly so it appears softer and further away. Keep the foreground plants bold and opaque. -
Leaf details:
Add small, rhythmic leaves to your seaweed stems using the tip of your medium brush. Press down slightly to widen the leaf, then lift up to create a point.
Add Glow
For a magical touch, use a metallic silver or pearlescent watercolor for the bubbles or the fish’s eye to catch the light.
Step 3: Magical Details
-
The eye:
Once the black fish silhouette is 100% dry, use a white gel pen or a tiny dot of white gouache to add the eye. A small ring with a black center gives it life. -
Subtle texture:
Create faint texture on the fish body by spattering incredibly fine white gouache droplets, or using a dry brush to lightly scuff a bit of white over the ‘spine’ area. -
Rising bubbles:
Dip your fine brush or a dotting tool into thick white gouache. Place random dots rising from the seaweed and above the fish to mimic floating bubbles. -
Varied bubble sizes:
Make sure your bubbles aren’t all uniform. Mix tiny pin-prick dots with slightly larger circles to create depth and realism. -
The reveal:
Once everything is bone dry, carefully peel away the masking tape at a 45-degree angle to reveal your crisp white border.
Now you have a serene underwater scene that looks complicated but is built on simple layers
Negative Space Fish Shapes
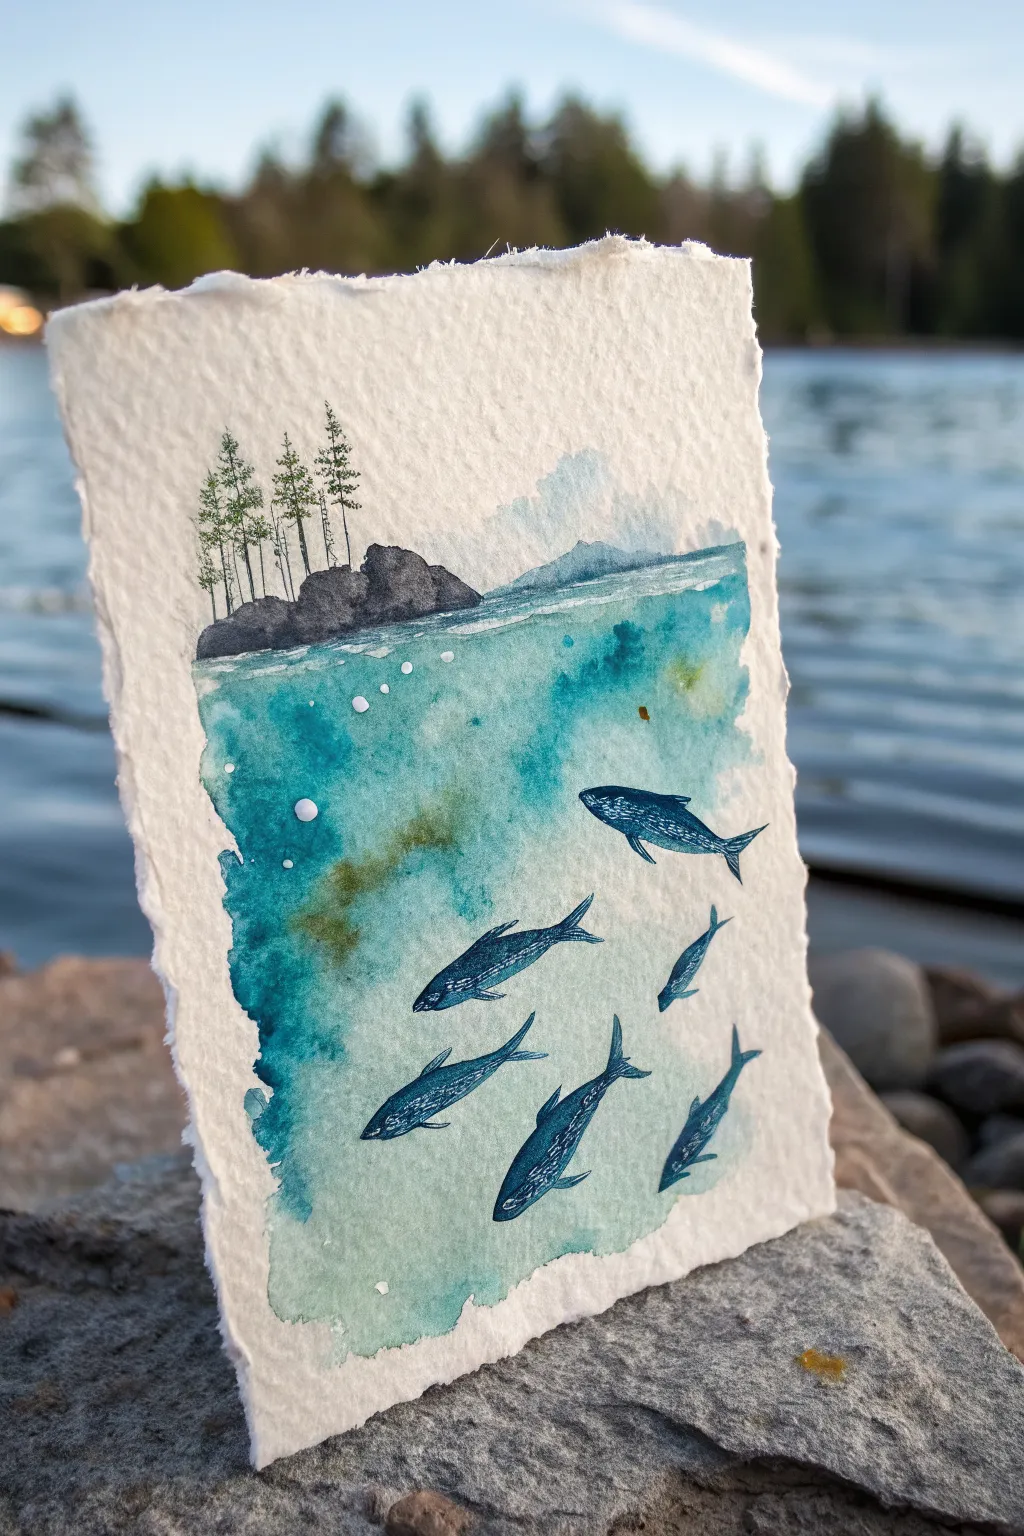
Capture the magic of an aquatic world both above and below the surface with this delightful watercolor and ink illustration. Using heavy, cold-press paper with a beautiful deckle edge, you will create a serene underwater gradient teeming with life.
Step-by-Step Tutorial
Materials
- Heavyweight watercolor paper (300lb is great) with deckle edges
- Watercolor paints (Turquoise, Ultramarine Blue, Hooker’s Green, Burnt Umber, Payne’s Gray)
- White gouache or white gel pen
- Fine liner pigment pens (Black, 0.1mm and 0.3mm)
- Round watercolor brushes (Size 4 and Size 8)
- Washi tape or masking tape
- Pencil and eraser
- Jar of clean water
- Paper towels
Step 1: Preparation and Sketching
-
Paper Selection:
Choose a high-quality, heavyweight cotton paper with a torn or ‘deckle’ edge to give the piece its rustic, organic feel. -
Horizon Line:
Lightly pencil a horizon line about one-third of the way down from the top edge of your paper. Keep it slightly uneven to represent gentle waves. -
Island Sketching:
Draft a small, rocky island silhouette sitting just on top of that horizon line on the left side. -
Fish Placement:
Very lightly sketch the outlines of six or seven fish swimming in a loose formation below the water. Vary their angles slightly to create movement. -
Masking (Optional):
If you’re worried about painting over the fish, apply a thin layer of masking fluid to their shapes now and let it dry completely. Otherwise, just paint carefully around them.
Uneven Washes?
If your ocean wash dries with hard lines (backruns), don’t panic. These accidental textures actually mimic currents perfectly. Embrace the ‘mistakes’ as water movement.
Step 2: Watercolor Wash
-
Wet-on-Wet Technique:
With a clean size 8 brush, wet the entire area below your horizon line with clean water until the paper glistens. -
Base Teal Layer:
Load your brush with a watery mix of Turquoise and drop it into the wet paper. Start near the top water line and let it flow downwards. -
Deepening the Blue:
While the paper is still wet, add Ultramarine Blue to the deeper sections and sides to create depth. -
Adding Organic Greens:
Drop small hints of diluted Hooker’s Green or a muddy yellow-green into the middle section to simulate algae or sunlight filtering down. -
Texture Blooms:
While the wash is drying but still damp, flick a few drops of clean water onto the blue to create ‘blooms’ that look like bubbles or light refraction. -
Dry Time:
Let this underwater section dry completely. It must be bone-dry before you add defined details.
Step 3: Island and Sky Details
-
Painting the Rocks:
Mix Payne’s Gray with a touch of Burnt Umber. Paint the rocky island shape solid, keeping the bottom edge distinct against the water line. -
Distant Mountains:
dilute that same rocky grey heavily with water to create a faint, ghostly mountain range in the background on the right. This atmospheric perspective adds depth. -
Sky Hints:
Add a very faint, watery wash of blue just above the horizon line behind the island, letting it fade to white quickly as it goes up. -
Pine Trees:
Once the rock is dry, use your 0.1mm fine liner pen to draw tiny, vertical pine trees on the island. Use jagged, horizontal scribbles for the branches to suggest needle texture.
Scale Shimmer
Mix a tiny bit of iridescent medium into your blue paint for the fish bodies or the water surface. It catches the light just like real scales.
Step 4: Defining the Fish
-
Fish Bodies:
If you used masking fluid, rub it off now. Using a fine brush or a blue-ink pen, fill in the fish shapes. Keep the bellies slightly lighter than the backs. -
Scale Details:
Using a white gel pen or fine white gouache, stipple small dots along the sides of the fish to mimic shimmering scales. -
Outlining:
Use the 0.1mm black pen to very delicately outline the fish and add fins. Don’t make the line continuous; broken lines look more natural underwater. -
Bubbles:
Paint or draw tiny white circles rising from the depths. Add a few solid white dots for variety. -
Surface Tension:
Add a thin white line along the water’s surface, breaking it occasionally where the rock meets the water, to show the separation between air and sea.
Prop your mini-masterpiece on a nice rock or frame it to bring a breath of fresh lakeside air into your home
Abstract Fish With Color Blocks
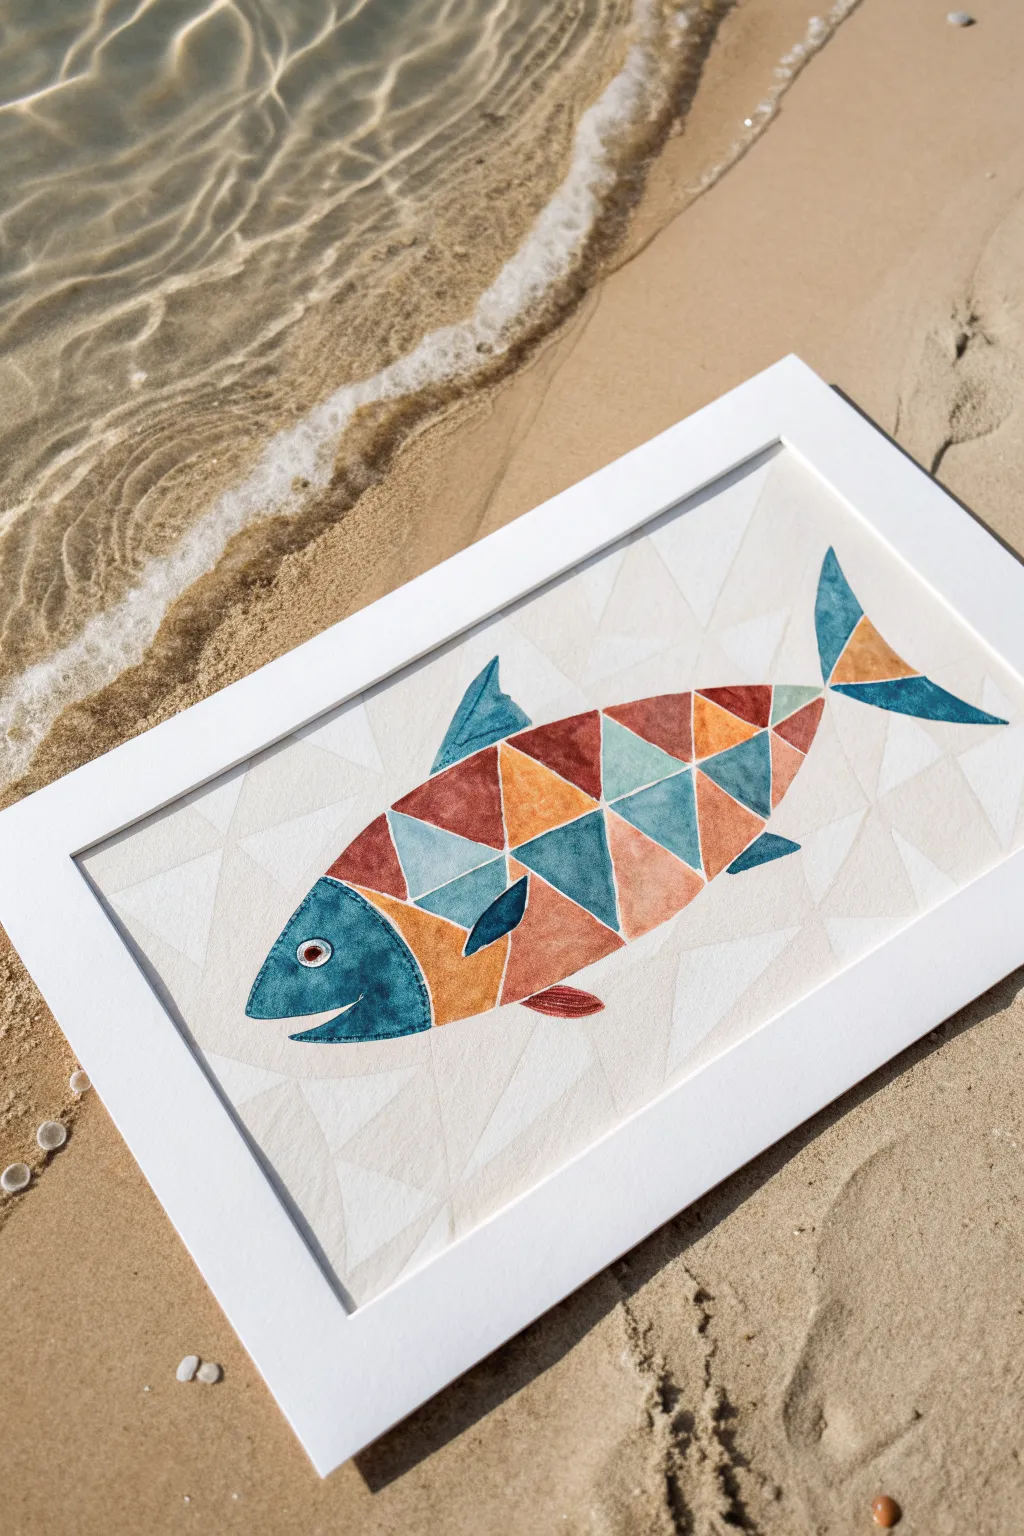
Capture the shimmer of aquatic life with this modern, abstract watercolor piece featuring a fish composed of vibrant triangular color blocks. The structured geometric design contrasts beautifully with the fluid nature of watercolor paints for a clean, stylized look.
Step-by-Step Guide
Materials
- Cold press watercolor paper (140lb/300gsm)
- Watercolor paints (Indigo Blue, Burnt Sienna, Venetian Red, Turquoise)
- Ruler or straight edge
- HB pencil
- White eraser
- Synthetic watercolor brushes (Size 4 round, Size 2 detail)
- Masking tape or painter’s tape
- Jar of clean water
- Paper towels
Step 1: Preparation and Sketching
-
Paper setup:
Begin by taping down all four edges of your watercolor paper to a board or table to prevent buckling as you paint. -
Establish the background grid:
Using a ruler and a very light pencil touch, draw a grid of intersecting diagonal lines across the entire page to create a network of diamonds or triangles. These can be somewhat irregular to feel organic. -
Outline the fish shape:
Lightly sketch the main contour of the fish in the center of the paper, incorporating a pointed nose, a long oval body that tapers toward the tail, and triangular fins. -
Subdivide the body:
Inside the fish’s body outline, emphasize the geometric pattern by darkening the specific triangle lines that will become the scales, ensuring they interlock perfectly. -
Refine the details:
Sketch the dorsal fin on top, two smaller pectoral fins below, and a forked tail. Add a small circle for the eye near the nose.
Bleeding edges?
If colors are blurring between triangles, you are painting adjacent sections too soon. Work in a checkerboard pattern, letting each shape dry fully before painting its neighbor.
Step 2: Painting the Fish
-
Paint the head:
Mix a diluted Indigo Blue and fill in the head shape, carefully painting around the eye circle to leave it white. While damp, drop in slightly more pigment near the bottom edge for shading. -
First color pass – Blues:
Select scattered triangles throughout the body to paint with a mix of Teal or Turquoise. Keep the edges crisp and avoid painting two adjacent shapes while wet to prevent bleeding. -
Second color pass – Rust Reds:
Once the blue sections are dry, mix Venetian Red or a rusty brown. Fill in adjacent triangles, creating a warm contrast against the cool blue tones. -
Third color pass – Oranges:
Use Burnt Sienna or a muted orange for the remaining triangles, completing the mosaic effect of the body. -
Paint the fins and tail:
Fill the dorsal fin and tail with the same Turquoise mix used on the body scales. For the small lower fin, use the Venetian Red to balance the colors. -
Adding the lower fin detail:
Paint the pectoral fin (the one overlapping the body) using a dark Indigo Blue so it stands out against the lighter body scales.
White space magic
Leave a hairline gap of dry white paper between every colored triangle. This ‘grout line’ makes the geometric shapes pop and prevents muddying colors.
Step 3: Finishing Touches
-
Define the eye:
Paint a small red or orange dot in the center of the white eye circle for the pupil. Outline the white circle with a very fine line of Indigo using your smallest brush. -
Enhance the separations:
Once the main colors are completely dry, use a very thin brush with slightly diluted white gouache or simply leave the paper gaps visible to ensure each triangle remains distinct. -
Background wash:
Mix an extremely pale, watery wash of beige or warm gray. Carefully paint alternating triangles in the background area outside the fish to create a subtle, phantom geometric pattern. -
Add texture:
While the head section is dry, you can use a dry brush with dark blue pigment to dab tiny stippling texture near the nose and gill line. -
Clean up:
Wait until the painting is bone dry, then gently erase any visible pencil lines that weren’t covered by paint, particularly around the fins.
Peel off your tape carefully to reveal the crisp white border that frames your geometric catch
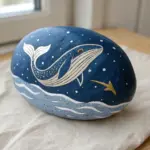
Galaxy Water Fish Fantasy
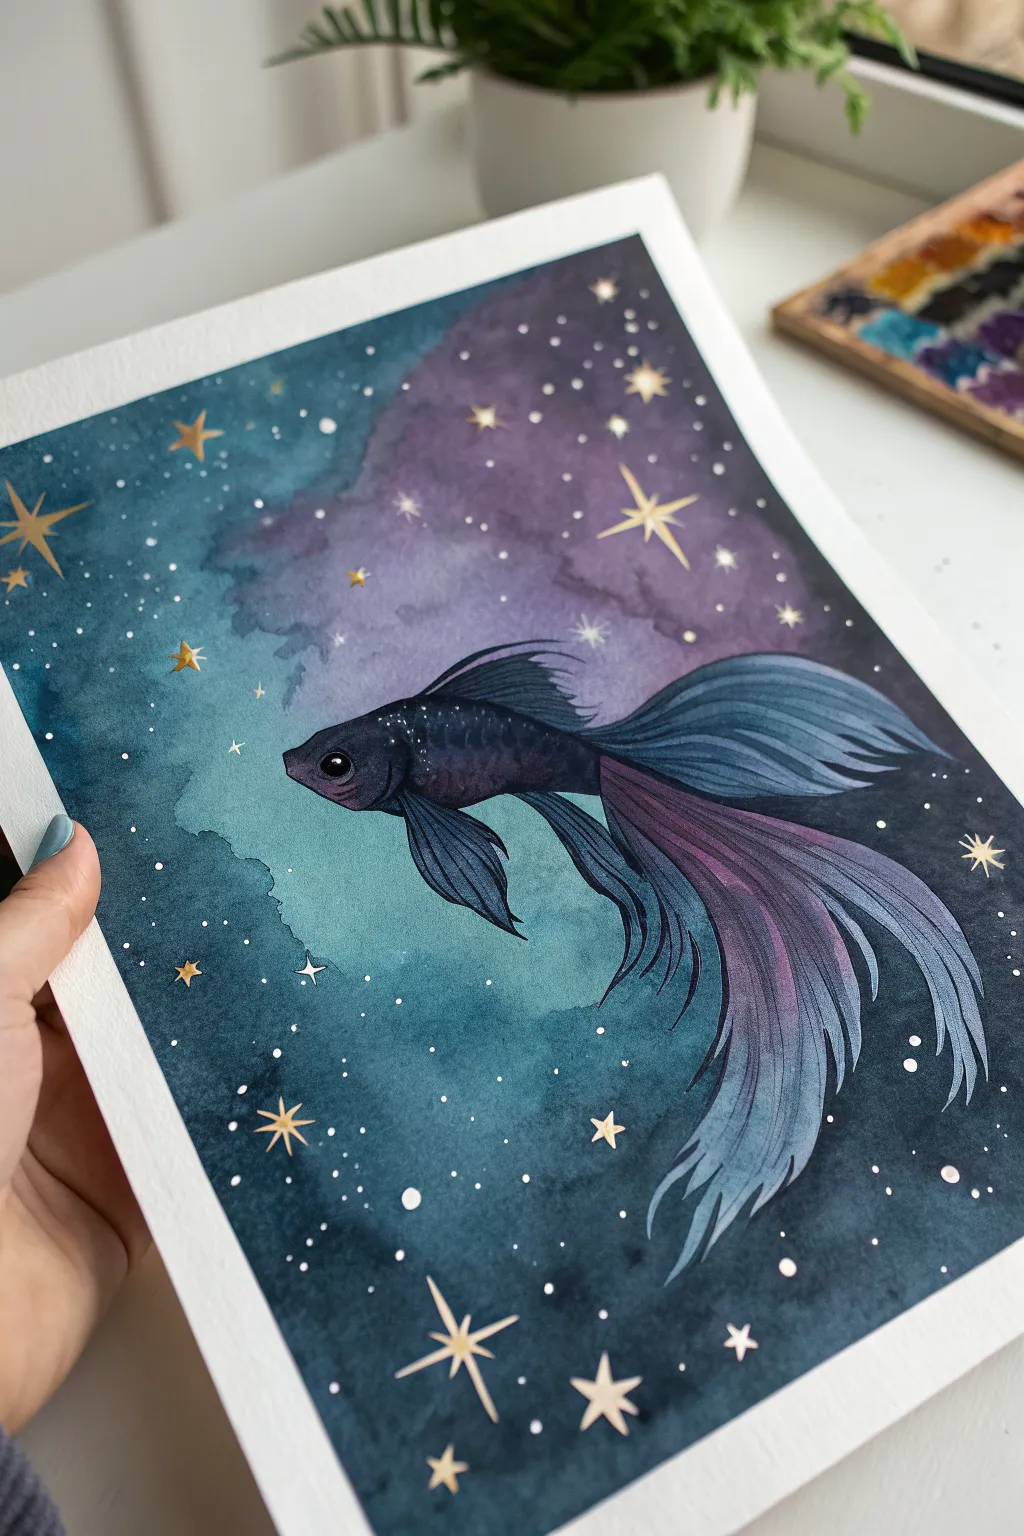
Dive into a cosmic ocean with this ethereal watercolor painting featuring a graceful betta fish swimming through a star-studded galaxy. The blend of deep teals, moody purples, and shimmering gold accents creates a magical, dreamlike atmosphere perfect for fantasy art lovers.
Step-by-Step Tutorial
Materials
- Cold press watercolor paper (300 gsm)
- Watercolor paints (Indigo, Prussian Blue, Teal, Dioxazine Purple, Black)
- White gouache or white ink
- Gold metallic watercolor or gold ink
- Masking tape
- Round brushes (sizes 2, 6, and 10)
- Fine liner brush (size 0 or 00)
- Pencil and eraser
- Paper towels
- Two jars of water
Step 1: Sketching and Preparation
-
Secure your paper:
Tape your watercolor paper down to a flat board using masking tape on all four sides. This prevents the paper from buckling when we add heavy washes and creates that crisp white border at the end. -
Draft the outline:
Lightly sketch the betta fish in the center of the paper with a pencil. Keep lines faint so they don’t show through the paint later. Focus on the sweeping curves of the tail and fins to capture movement. -
Mark the galaxy flow:
Very lightly sketch irregular shapes around the fish where you want your purple nebula clouds to be. This helps guide your painting process so you don’t accidentally cover the brightest areas with dark blue.
Cosmic Bloom Tip
Add a pinch of salt to the wet background wash before it dries. The salt pushes the pigment away, creating stunning, star-like textures naturally.
Step 2: Painting the Galaxy Background
-
Wet-on-wet base:
Using your size 10 brush, apply clean water to the background area, carefully painting around the fish shape. You want the paper damp but not puddling. -
Lay in the teal:
While the paper is wet, drop in your Teal watercolor. Concentrate it on the left side of the composition, letting it bloom and soften into the white of the paper towards the center. -
Add the purple nebula:
While the paper is still damp, introduce Dioxazine Purple into the upper right section. Allow it to touch the teal slightly but try to keep a distinct purple zone to represent the nebula cloud. -
Deepen the cosmos:
Mix Indigo with a touch of drawing Black to get a very deep, space-like navy. Apply this to the outer edges and corners of the painting to create a vignette effect, drawing the eye toward the center. -
Refine edges:
Use a clean, damp brush to soften any hard edges where the colors meet, creating that smoky, cloud-like galaxy texture. Let this layer dry completely before moving on.
Level Up: Constellations
Instead of random stars, connect your gold stars with super fine lines to form real constellations like Pisces or Cetus hidden in the background.
Step 3: Painting the Fish
-
Base layer for the body:
Paint the fish’s body using a diluted mix of Indigo and Purple. I usually start lighter here; you can always go darker, but it’s hard to lift color once it’s down. -
Flowing fins:
For the fins and tail, use a gradient. Start with Prussian Blue near the body and drag the color out, blending it into Dioxazine Purple at the tips. Keep your brush strokes loose and following the curve of the fins. -
Deepen shadows:
Once the base layer is dry, mix a concentrated dark purple-black. Use a size 2 brush to paint the shadows between the fin folds and define the scales on the upper back of the fish. -
Define the face:
Carefully paint the eye black, leaving a tiny white speck for the highlight (or add it later with white gouache). Darken the area around the gills and mouth to give the head dimension. -
Fin details:
Use your liner brush with a dark Indigo mix to paint thin, sweeping lines along the length of the fins. These lines represent the spines and give the fins their delicate, ribbed texture.
Step 4: Celestial Details
-
Star splatter:
Cover your fish with a scrap piece of paper to protect it. Load a brush with white gouache or ink, tap it against another brush handle to splatter tiny white stars across the dark galaxy background. -
Larger stars:
Use a liner brush and white gouache to manually paint a few slightly larger, deliberate dots for brighter stars. Place some near the fish to connect it to the environment. -
Gold accents:
Switch to your gold metallic paint. Paint classic four-pointed star shapes scattered throughout the background. Vary the sizes—some large, some tiny. -
Gilded scales:
Add tiny dots of gold along the fish’s back and on the tips of the fins. This ties the subject to the background and makes the fish look magical. -
Final reveal:
Wait until the painting is 100% bone dry. Gently peel off the masking tape at a 45-degree angle to reveal your clean edges.
Hang your celestial masterpiece in a well-lit spot to watch the metallic accents shimmer.
Fish Mandala Pattern Fill
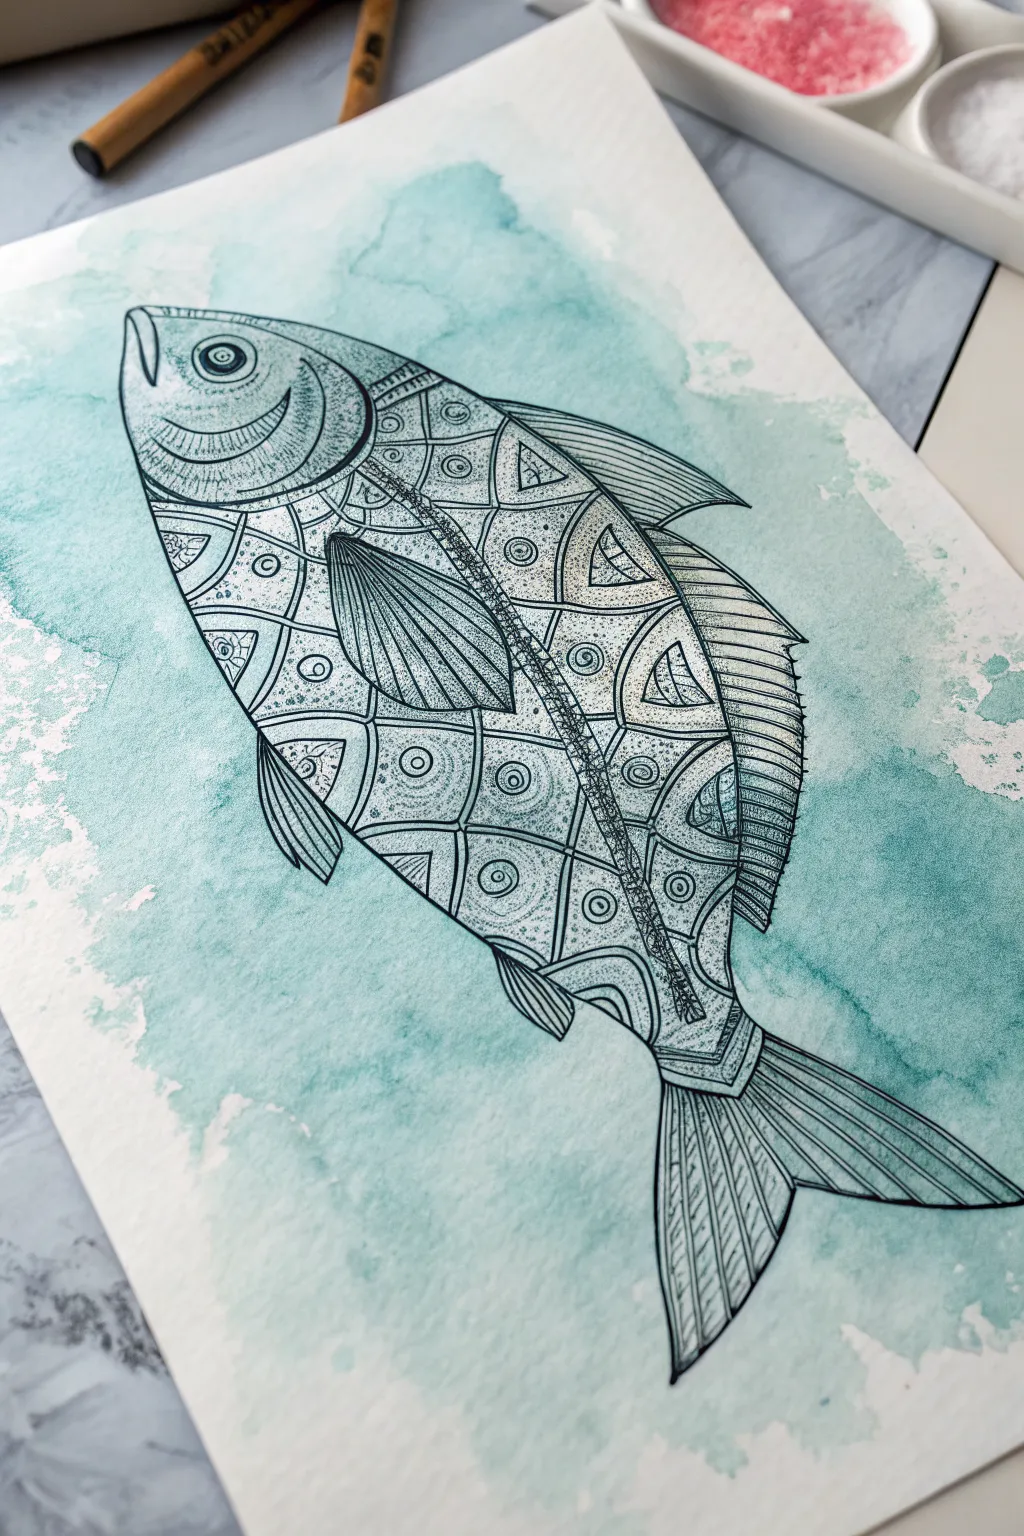
This project combines the loose, unpredictable beauty of watercolor with the sharp precision of ink illustration. You’ll create a serene teal background wash, then overlay a graphically patterned fish that pops with striking detail.
Step-by-Step
Materials
- Heavyweight cold press watercolor paper (300gsm)
- Black waterproof fine-liner pens (0.1, 0.3, and 0.5 sizes)
- Teal or turquoise watercolor paint
- Large round watercolor brush (size 10 or 12)
- Pencil (HB) and eraser
- Paper towel
- Clean water jar
- Salt (optional, for texture)
Step 1: Creating the Atmosphere
-
Prepare the wash:
Mix a generous amount of teal watercolor with water. You want a consistency that flows easily but isn’t too pale. I find a puddle about the size of a cookie works well. -
Apply the background:
Wet the center area of your paper with clean water first using your large round brush. While it’s damp, drop in your teal paint, letting it bloom outward. -
Shape the stain:
Guide the paint loosely into a rough oblong shape that will eventually house the fish. Keep the edges ragged and organic rather than painting a perfect rectangle. -
Add texture (optional):
While the paint is still wet, you can sprinkle a tiny pinch of salt or splash clean water droplets onto the teal to create interesting blooms and textures. -
Let it dry completely:
This is crucial. The paper must be bone-dry before you start drawing, or your ink will bleed. Use a hairdryer on low heat if you’re impatient.
Ink Smudge SOS
If you accidentally smudge ink, don’t scrub! Turn the smudge into a deliberate shadow with stippling or add a new pattern element over it to hide the mistake.
Step 2: Drawing the Fish Outline
-
Sketch the silhouette:
Lightly sketch the basic outline of a fish using your pencil. Ensure the body fits comfortably within your teal painted area, though it’s fine if fins poke out slightly. -
Define the sections:
Use your pencil to divide the fish body into large geometric segments. Draw a lateral line down the center, then add curved vertical lines to create the scale sections. -
Ink the main lines:
Using a 0.5 pen, trace over your pencil outline. Draw the eye, the mouth, and the main segmentation lines of the body with confident, smooth strokes. -
Erase pencil guides:
Wait a moment for the ink to set, then gently erase all visible pencil marks so you have a clean slate for the patterns.
Step 3: Adding the Mandala Patterns
-
Start the dorsal fin:
Switch to your 0.3 pen. Draw lines radiating from the fish’s back into the dorsal fin, keeping them close together for a structured look. -
Fill the body segments:
Begin filling the geometric body sections. Use a mix of concentric circles, triangles, and parallel curves. Alternating between curvy and straight lines creates visual interest. -
Detail the lateral line:
For the spine line running down the center, use stippling (tiny dots) or dense cross-hatching to make it look darker and more distinct than the surrounding scales. -
Add texture with dots:
Grab your finest 0.1 pen. Use stippling to add shading inside the circles and triangles. Focus the dots near the edges of shapes to create a sense of volume. -
Draw the side fin:
Illustrate the pectoral fin (the side fin) with a leaf-like shape. Fill it with veins similar to a leaf, using thinner lines near the center and thicker contours on the outside. -
Complete the tail:
Use long, sweeping lines to detail the tail fin. Mimic the style of the dorsal fin but fan the lines out wider towards the ends. -
Intensify contrast:
Go back in with the 0.5 pen and re-line the outermost silhouette of the fish to make it pop against the background wash. -
Final shading pass:
Look for areas that feel too empty. Add tiny circles or simple hatching in the negative spaces of your patterns to balance the visual weight across the whole fish.
Go Golden
Once the black ink is dry, use a metallic gold gel pen to trace just the inner circles of the mandala pattern for a shimmering, high-end finish.
Now you have a striking aquatic illustration that perfectly balances fluid color with structured design


Have a question or want to share your own experience? I'd love to hear from you in the comments below!